

Page 1
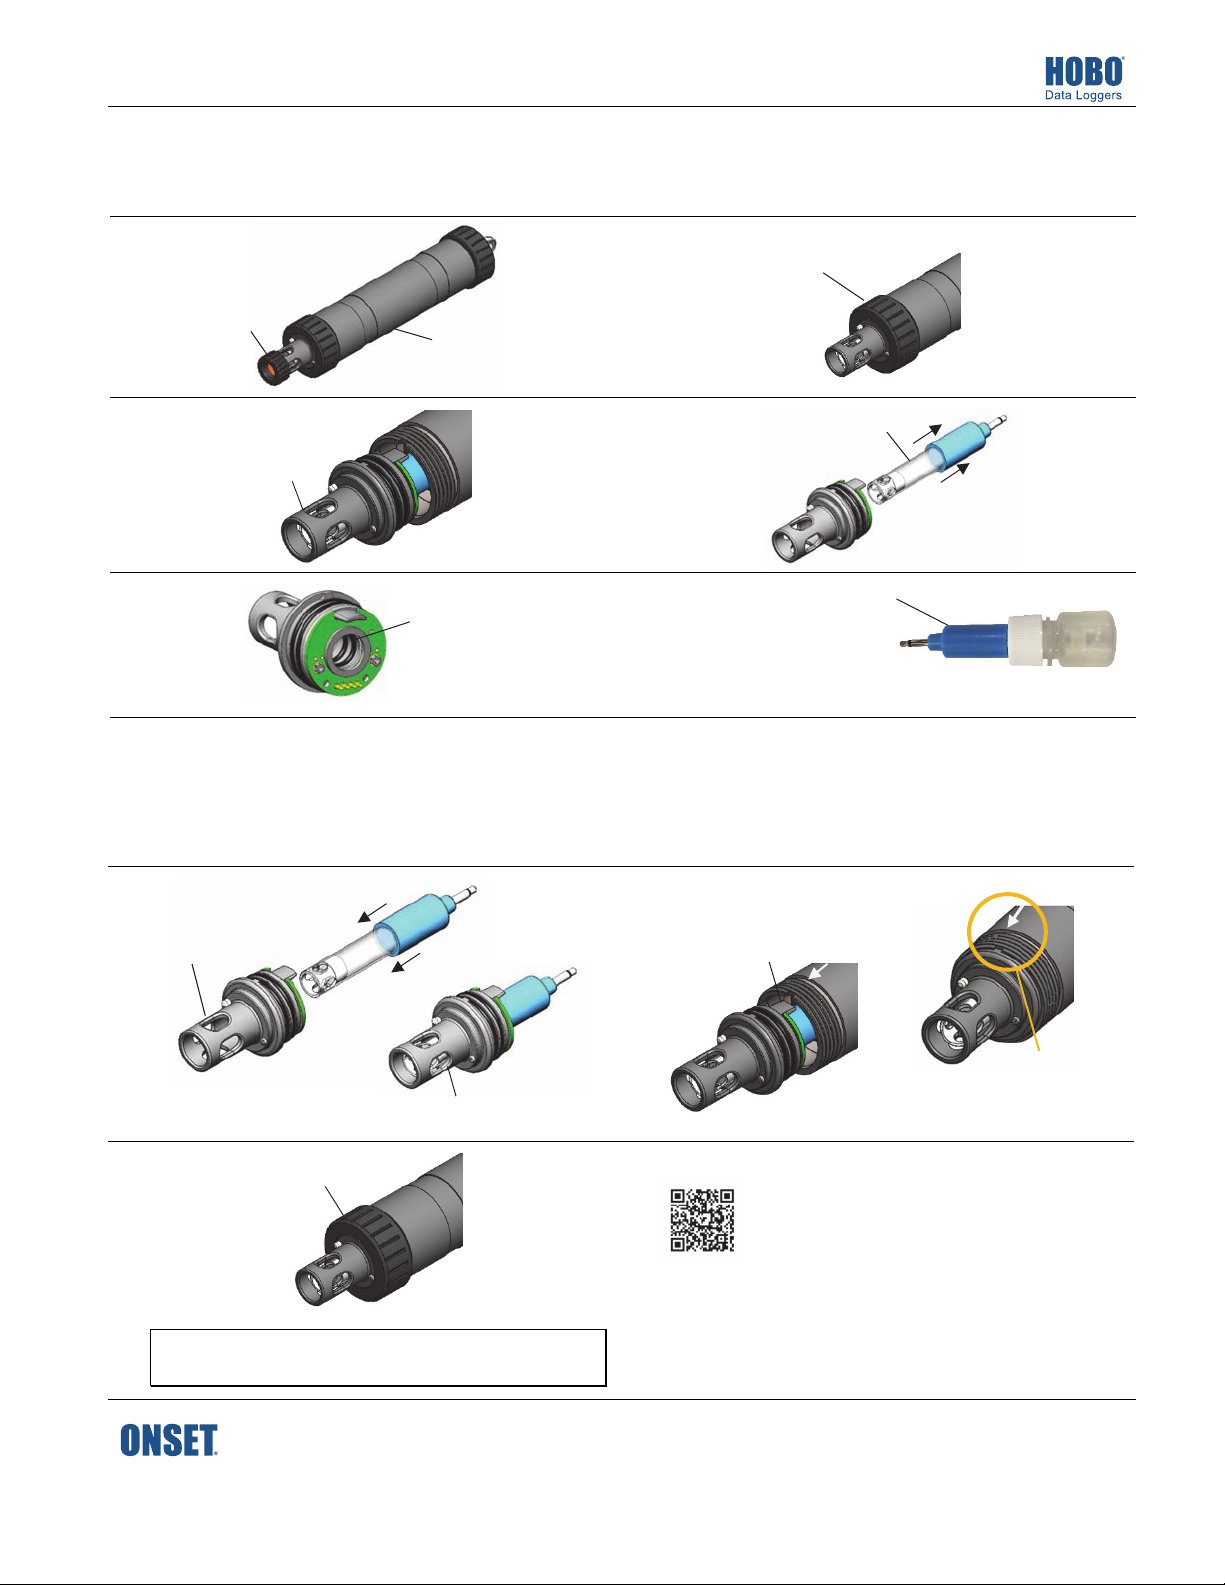
MX2500 Replacement Electrode (MX2500-ELECTRODE) Installation Instructions
g
IMPORTANT: The electrode is shipped with the junction and glass bulb in storage solution. The junction and the glass bulb must be kept
in storage solution when not being calibrated or deployed in water.
IMPORTANT: This new pH electrode is uncalibrated. Once installed, it must be calibrated before configuring and deploying the logger.
1
Remove the copper
guard if installed.
3
Pull the sensor end
cap straight out from
the logger without
twisting it.
5
22671-B MAN-MX2500-ELECTRODE
Wipe the logger clean
and dry it completely.
Use a foam swab dipped in
water to clean the internal
O-rings. Use a foam swab
to spread a dot of siliconebased grease on the
internal O-rin
s.
2
4
6
Unscrew this closure cap.
Pull the electrode out of the
sensor end cap gently and
slowly.
Remove the electrode from the
bottle and wipe the outer plastic
body dry with a soft paper or
cloth towel. Do not touch the
glass bulb inside the clear plastic
end of the electrode.
Note: Removing the electrode
too quickly could result in
unseating the internal O-rings.
Gently and slowly push the
7
pH electrode into the end
cap, making sure the internal
O-rings are still in place.
Note: If done too quickly,
this process can unseat
the internal O-rings.
9
Screw the closure cap back on.
IMPORTANT: Keep the electrode in storage solution until you are
ready to calibrate and to deploy the logger.
Gently twist the electrode so the holes in the
sensor align with the holes in the end cap
Push the sensor end cap straight back
8
into the logger, without twisting it.
Use the large tab and the arrow on
the logger housing for alignment.
© 2018 Onset Computer Corporation. All rights reserved. Onset, HOBO, and HOBOmobile are registered trademarks of
Onset Computer Corporation. All other trademarks are the property of their respective companies.
22671-B MAN-MX2500-ELECTRODE
Make sure the small tab
in the end cap fits in the
small groove in the
logger housing.
Find Quality Products Online at: [email protected]
www.GlobalTestSupply.com
 Loading...