

Onset HOBO, UX120-006M User Manual
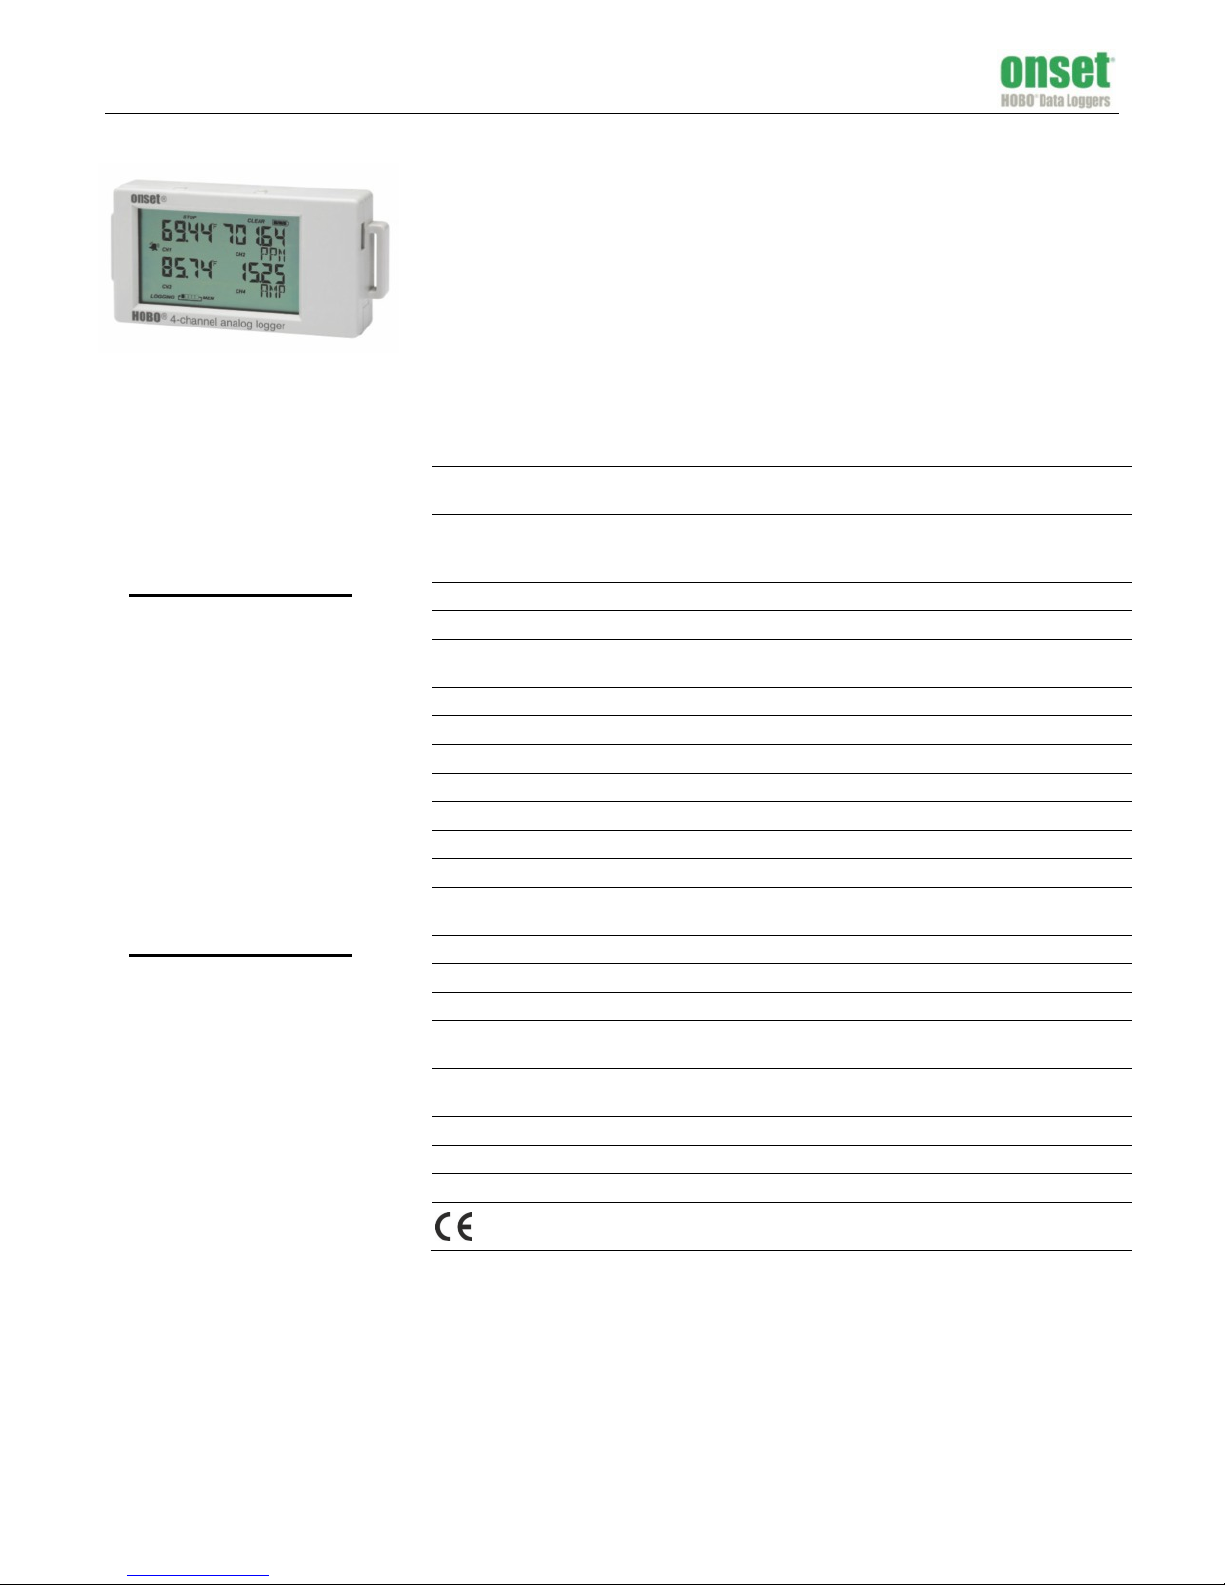
HOBO® 4-Channel Analog Data Logger (UX120-006M) Manual
The HOBO 4-Channel Analog data logger has 16-bit resolution and can record up to 1.9 million
measurements or events. The four external channels accept a variety of sensors, including
temperature and split-core AC current sensors as well as 4-20 mA and voltage input cables (sold
separately). Using HOBOware®, you can easily configure an alarm to trip when the sensor
reading rises above or falls below a measurement that you specify. Or, you can set up burst
logging in which the logger records data at a different interval during certain conditions. The
logger can also calculate minimum, maximum, average, and standard deviation statistics. This
easy-to-use data logger has a built-in LCD screen to check current readings and to monitor
logging status, battery use, and memory consumption in between readouts.
Specifications
HOBO 4-Channel Analog
Data Logger
UX120-006M
Included Items:
Command™ strip
Double-sided tape
Hook & loop strap
Two AAA 1.5 V alkaline
batteries
Required Items:
HOBOware 3.6 or later
USB cable (included with
software)
Sensors and cables available at
www.onsetcomp.com.
Logger with
Cable Type
Measurement
Range
Accuracy ±0.001 mA
Resolution 0.3 µA 40 µV 80 µV 160 µV 384 µV
Logger
Operating Range Logging: -20° to 70°C (-4° to 158°F); 0 to 95% RH (non-condensing);
Logging Rate 1 second to 18 hours, 12 minutes, 15 seconds
Logging Modes Normal, burst, or statistics
Memory Modes Wrap when full or stop when full
Start Modes Immediate, push button, date & time, or next interval
Stop Modes When memory full, push button, or date & time
Restart Mode Push button
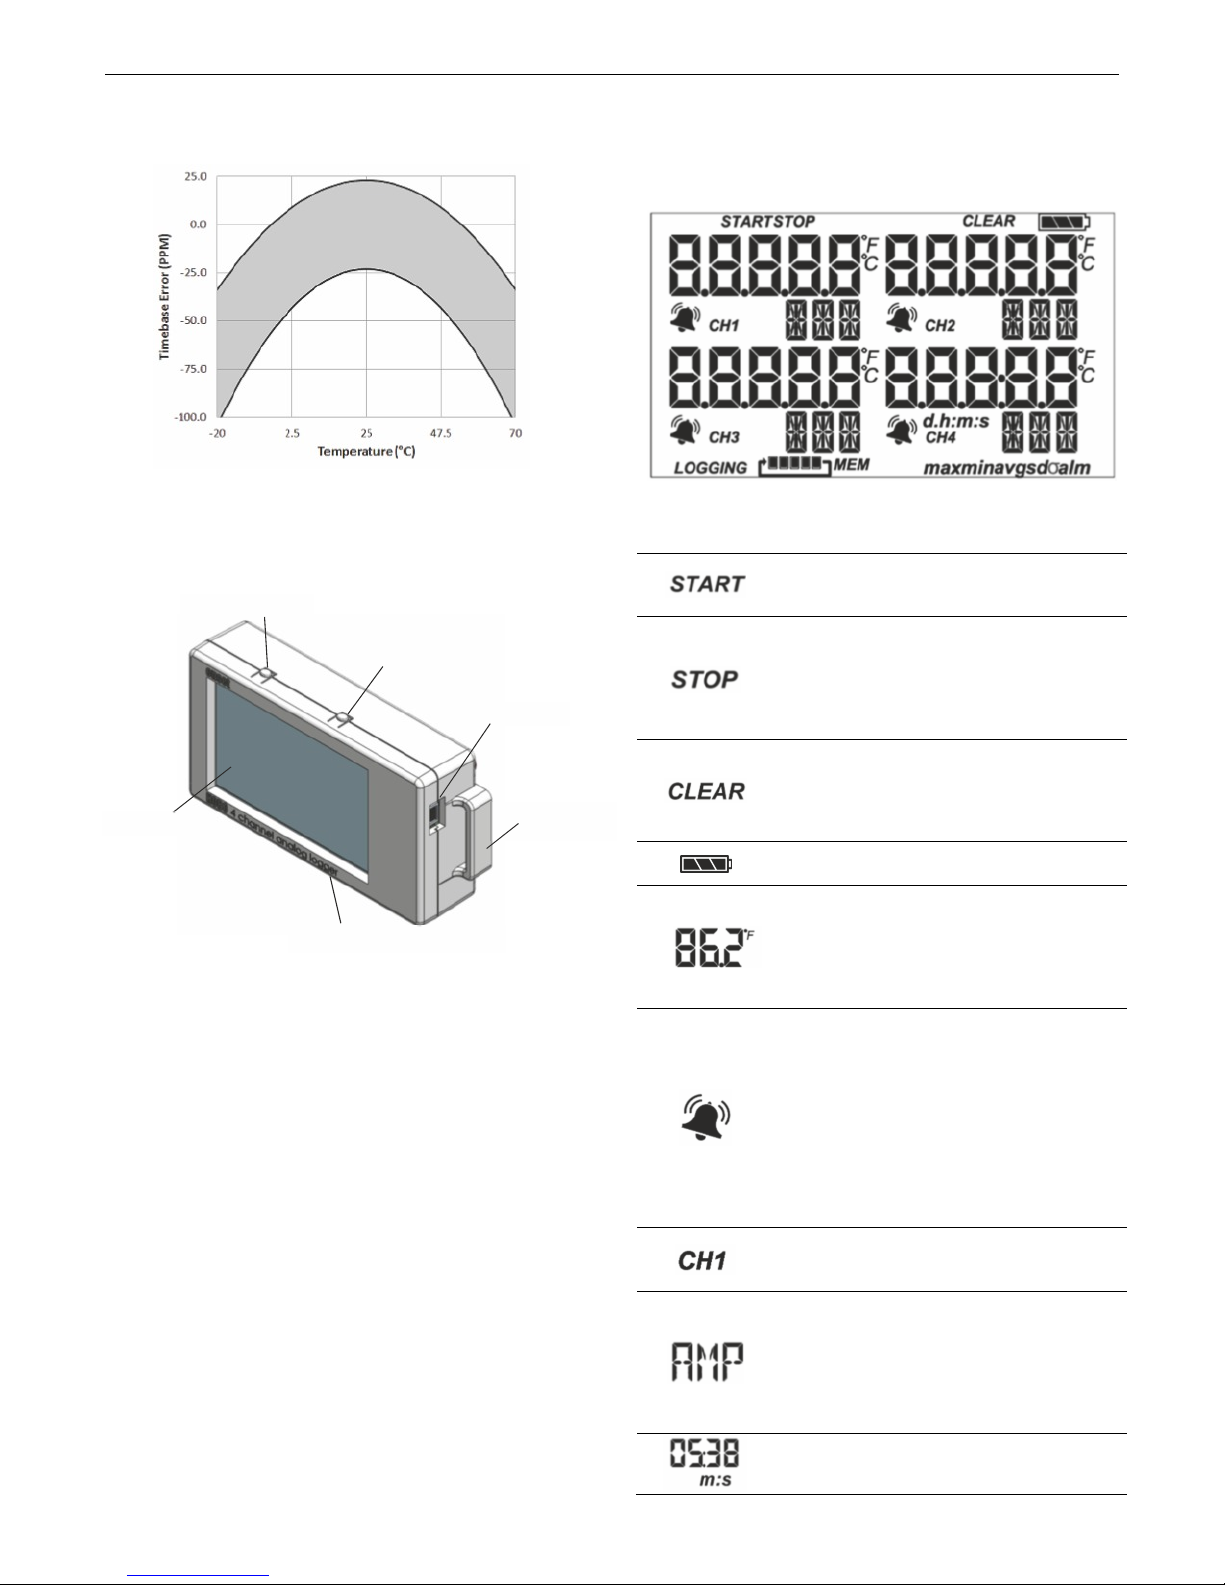
Time Accuracy ±1 minute per month at 25°C (77°F), see Plot A
Battery Life 1 year, typical with logging rate of 1 minute and sampling interval of 15
Battery Type Two AAA 1.5 V alkaline batteries, user replaceable
Memory 4 MB (1.9 million measurements, maximum)
Download Type USB 2.0 interface
Full Memory Download
Time
LCD LCD is visible from 0° to 50°C (32° to 122°F); the LCD may react slowly or
Size 10.8 x 5.41 x 2.54 cm (4.25 x 2.13 x 1 in.)
Weight 107.5 g (3.79 oz)
Environmental Rating IP50
CABLE4-20mA
0 to 20.1 mA 0 to 2.5 V 0 to 5.0 V 0 to 10 V 0 to 24 V
±0.2% of
reading
CABLE-2.5STEREO
±0.1 mV
±0.1% of
reading
Launch/Readout: 0° to 50°C (32° to 122°F) per USB specification
seconds or greater
Approximately 1.5 minutes
go blank in temperatures outside this range
The CE Marking identifies this product as complying with all relevant
directives in the European Union (EU).
CABLEADAP5
±0.2 mV
±0.3% of
reading
CABLEADAP10
±0.4 mV
±0.3% of
reading
CABLEADAP24
±1.0 mV
±0.3% of
reading
HOBO 4-Channel Analog Data Logger (UX120-006M) Manual
Specifications (continued)
Plot A: Time Accuracy
Logger Components and Operation
Start/Stop Button
Alarm/Stats Button
USB Port
LCD Screen
External Inputs
Start/Stop Button: Press this button for 3 seconds to start or
stop logging data, or to resume logging. This requires
configuring the logger in HOBOware with a push button start or
stop, and with “Resume logging on next button push” selected
(see Setting up the Logger). You can also press this button for
1 second to record an internal event (see Recording Internal
Logger Events) or to turn the LCD screen on if the option to turn
off the LCD has been enabled (see Setting up the Logger).
Alarm/Stats Button: Use this button to clear a tripped alarm
(see Setting up Alarms) or to switch between statistics, alarm
readings, and the current sensor reading.
Mounting Loops: Use the two mounting loops (only one visible
in the diagram) to mount the logger with the hook-and-loop
strap (see Mounting the Logger).
External Inputs: Use these 2.5 mm jacks (not visible in the
diagram) to connect up to 4 sensors (see Connecting External
Sensors).
USB Port: Use this port to connect the logger to the computer
or the HOBO U-Shuttle via USB cable (see Setting up the Logger
and Reading Out the Logger).
Mounting Loop
LCD Screen: This logger is equipped with an LCD screen that
displays details about the current status. This example shows all
symbols illuminated on the LCD screen followed by definitions
of each symbol in the table.
LCD Symbol Description
The logger is waiting to be launched. Press and
hold the Start/Stop button for 3 seconds to launch
the logger.
The logger has been launched with push button
stop enabled; press and hold the Start/Stop
button for 3 seconds to stop the logger.
you also launched the logger with a push button
start, this symbol will not appear on the display for
30 seconds.
An alarm is ready to be cleared. This will only
appear if “Cleared with button press” was selected
in the HOBOware alarm settings. Press the
Alarm/Stats button for 3 seconds to clear the
alarm.
The battery indicator shows the approximate
battery power remaining.
This is an example of a temperature reading from
a temperature sensor. Temperature units are
determined by the settings in HOBOware. To
switch between Celsius and Fahrenheit, change
the Display Preferences in HOBOware before
launching the logger.
A sensor reading is above or below the high or low
alarm that you configured. Press and release the
Alarm/Stats button until the “alm” symbol
(described later in this chart) is displayed on the
screen. This symbol at left will clear depending on
how alarms were configured in HOBOware. If the
alarm was configured to clear when the logger is
relaunched, this symbol will remain on the LCD.
Otherwise, it will clear when the sensor reading is
back within the alarm limits or by pressing the
Alarm/Stats button for 3 seconds.
This is the channel number associated with the
sensor reading (channel 1 for this example). Up to
four channels are visible at one time.
This is an example of the units entered for the
sensor, which appears to the right of the channel
number. The unit type is determined by what was
entered in the LCD Units field for that sensor in
HOBOware. See Setting up the Logger for more
details. Note that units for temperature sensors
are displayed as °F or °C only.
The logger has been configured to start logging on
a particular date/time. The display will count down
in days, hours, minutes, and seconds until logging
Note
: If

HOBO 4-Channel Analog Data Logger (UX120-006M) Manual
LCD Symbol Description
begins. In this example, 5 minutes and 38 seconds
remain until logging will begin.
The logger is currently logging.
The logger has been configured to stop logging
when memory fills. The memory bar indicates the
approximate space remaining in the logger to
record data. When first launched, all five segments
in the bar will be empty. In this example, the
logger memory is almost full (only one segment in
the memory bar is empty).
The logger has been configured to never stop
logging (wrapping). The logger will continue
recording data indefinitely, with newest data
overwriting the oldest data. When first launched,
all five segments in the memory bar will be empty.
In this example, the memory is full (all five
segments are filled in) and new data is now
overwriting the oldest data. This will continue until
the logger is stopped or the battery runs out.
These symbols show the maximum, minimum,
average, and standard deviation values most
recently calculated by the logger (if the logging
mode has been set to Statistics in HOBOware).
Press the Alarm/Stats button for 1 second to cycle
through each of the available statistics, any alarm
readings, and back to the current sensor reading.
This is the sensor reading that tripped the alarm.
Press the Alarm/Stats button to view this reading.
Press the Alarm/Stats button again to cycle
through any statistics and return to the current
readings.
The launch settings are being loaded onto the
logger from HOBOware. Do not disconnect the
USB cable during this process.
An error occurred while loading the launch
configurations onto the logger from HOBOware.
Make sure the USB cable is connected to both the
logger and the computer and try launching again.
The logger has been stopped with HOBOware or
because the memory is full.
automatically after 2 hours. The LCD will turn back on the
next time the logger is connected to the computer.
Setting up the Logger
Use HOBOware to set up the logger, including setting alarms,
selecting the options to start and stop logging, and choosing a
logging mode.
1. Install the batteries. See Battery Information for details.
2. Connect the logger and open the Launch Logger window.
To connect the logger to a computer, use the USB cable
provided. Click the Launch icon on the HOBOware toolbar
or select Launch from the Device menu.
Important: USB 2.0 specifications do not guarantee
operation outside the range of 0°C (32°F) to 50°C (122°F).
3. Configure a sensor. Under Configure Sensors to Log, click
the checkbox for sensor 1. Select the type of sensor or cable
that will be connected to channel 1 on the logger. Type a
label for the sensor if desired. Be sure to connect the sensor
before logging begins.
4. Set up scaling (optional). You can configure some sensors
to scale logged data into different values and units than the
default. If the sensor supports scaling, click the Scaling
button and type in the appropriate values and units (consult
the sensor user manual for recommended scaling factors).
Click Save and return to the Launch Logger window.
5. Set the LCD units (optional). Each sensor has its own
default units that will appear on the logger LCD. Type in up
to 3 characters if you want a different unit name to appear
on the LCD than the default. (Units for temperature sensors
are F or C and cannot be changed.) Note that if you have
configured Scaling for the sensor, then the scaled units
name will appear in the Launch Logger window for the
sensor instead of its default unit. You can still override this
by entering a new name in the LCD units field.
Notes:
You can disable the LCD screen when logging. Select
“Turn LCD off” when setting up the logger as described in
the next section. When this option is enabled, you can
still temporarily view the LCD screen by pushing the
Start/Stop button for 1 second. The LCD will then remain
on for 10 minutes.
The LCD screen refreshes every 15 seconds while logging
regardless of the logging interval selected in HOBOware.
If you choose a logging interval less than 15 seconds, the
data will be recorded at the faster interval, but the sensor
readings will only be updated on the screen every 15
seconds.
If a sensor is disconnected during logging, erroneous
values will display for that sensor on the LCD and return
to normal readings once reconnected. See Connecting
External Sensors for more details.
When the logger has stopped logging, the LCD screen will
remain on until the logger is offloaded to a computer or
HOBO U-Shuttle (unless launched with the “Turn LCD off”
option). Once the logger has been offloaded and
disconnected from the computer, the LCD will turn off
6. Set up alarms (optional). Click the Alarms button if you
want to configure an alarm to trip when the sensor reading
is above or below a value you specify. See Setting up Alarms
for details.
 Loading...