

Page 1
Quick Start for the HOBO® U20L Water Level Logger
Before you begin: Barometric pressure data at the site where the logger is being deployed is required for accurate water level data. Using a HOBO logger
for recording barometric pressure data is recommended.
If using a HOBO Waterproof Shuttle (U-DTW-1) with this logger, the shuttle must have firmware version 3.2.0 or later installed. See the Onset website or
contact Onset Technical Support if your shuttle needs this upgrade.
1
2
17150-B MAN-QSG-U20L
Open HOBOware® Pro software. (Install first if necessary.)
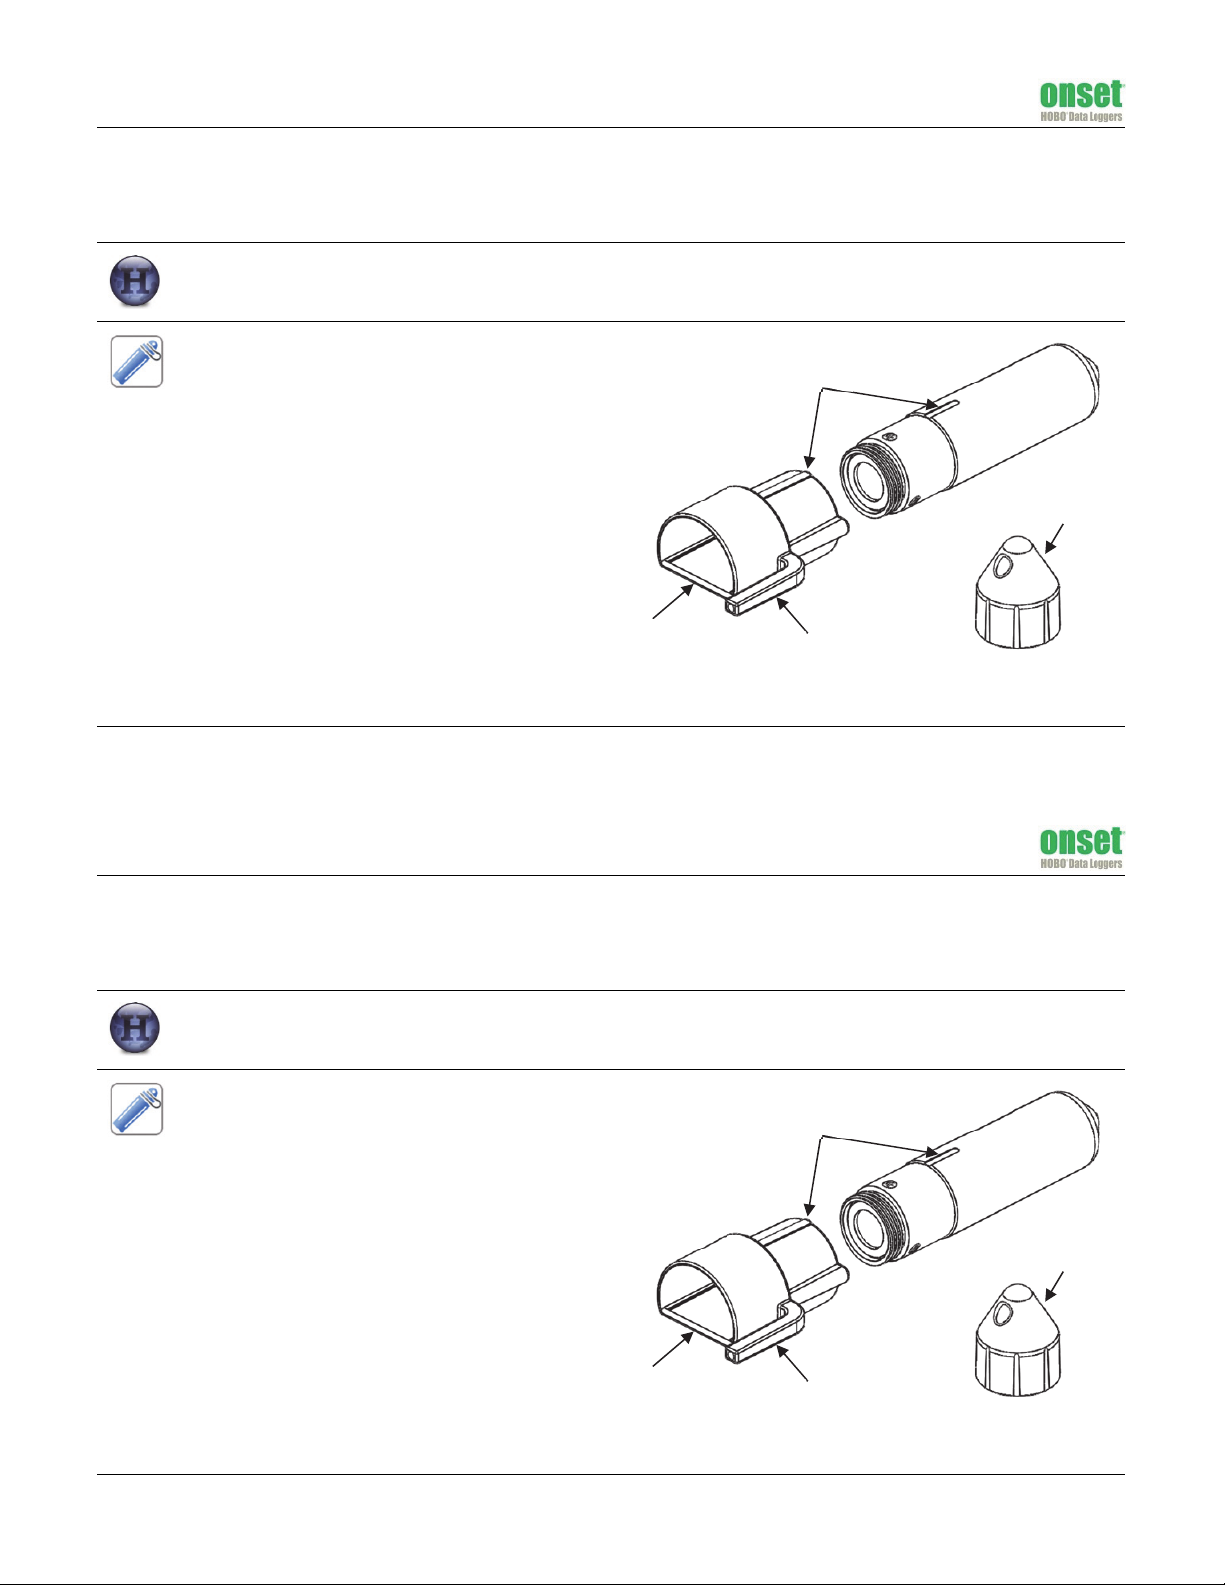
The HOBO Water Level Logger requires a coupler
(COUPLER2-C) and USB Optic Base Station (BASE-U-4) or
HOBO Waterproof Shuttle (U-DTW-1) to connect to the
computer. Follow the instructions that came with your
base station or shuttle to attach the base station or
shuttle to a USB port on the computer.
1. Unscrew the black plastic end cap from the logger
by turning it counter-clockwise.
2. Attach the coupler to the base station or shuttle.
3. Insert the logger into the coupler, aligning the
bump on the coupler with the groove on the logger.
Be sure it is properly seated in the coupler. It may
take a few seconds for the new hardware to be
detected by the computer.
Note: If you are using the HOBO Waterproof Shuttle,
briefly press the coupler lever to put the shuttle into
base station mode.
Align bump on the coupler
with the groove on the logger
Coupler
To base station
or shuttle
Logger
Coupler lever (for use with
HOBO Waterproof Shuttle
End cap
Quick Start for the HOBO® U20L Water Level Logger
Before you begin: Barometric pressure data at the site where the logger is being deployed is required for accurate water level data. Using a HOBO logger
for recording barometric pressure data is recommended.
If using a HOBO Waterproof Shuttle (U-DTW-1) with this logger, the shuttle must have firmware version 3.2.0 or later installed. See the Onset website or
contact Onset Technical Support if your shuttle needs this upgrade.
Open HOBOware® Pro software. (Install first if necessary.)
1
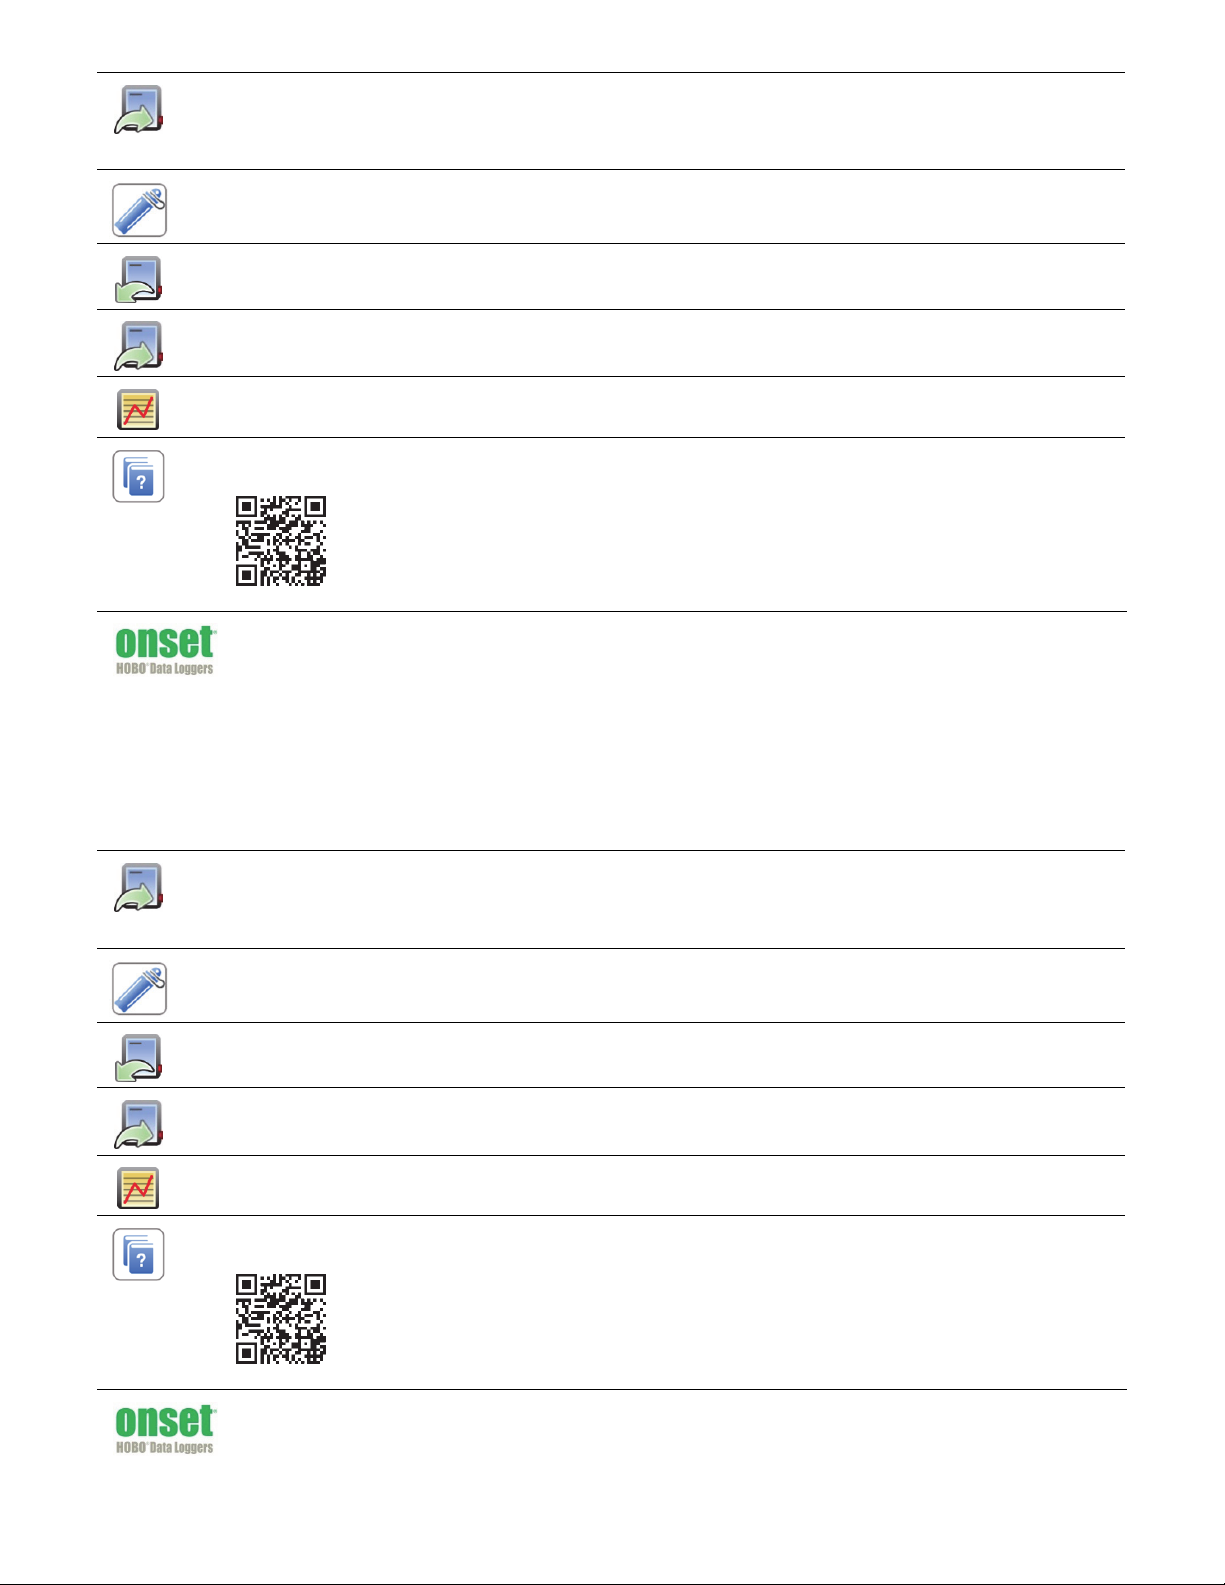
The HOBO Water Level Logger requires a coupler
2
17150-B MAN-QSG-U20L
(COUPLER2-C) and USB Optic Base Station (BASE-U-4) or
HOBO Waterproof Shuttle (U-DTW-1) to connect to the
computer. Follow the instructions that came with your
base station or shuttle to attach the base station or
shuttle to a USB port on the computer.
1. Unscrew the black plastic end cap from the logger
by turning it counter-clockwise.
2. Attach the coupler to the base station or shuttle.
3. Insert the logger into the coupler, aligning the
bump on the coupler with the groove on the logger.
Be sure it is properly seated in the coupler. It may
take a few seconds for the new hardware to be
detected by the computer.
Note: If you are using the HOBO Waterproof Shuttle,
briefly press the coupler lever to put the shuttle into
base station mode.
Align bump on the coupler
with the groove on the logger
Coupler
To base station
or shuttle
Logger
End cap
Coupler lever (for use with
HOBO Waterproof Shuttle
Page 2
From the Device menu in HOBOware, select Launch and configure the launch settings. Make sure both the Abs. Pressure and
3
Temperature sensors are selected (temperature is required for temperature compensation of pressure) and click the Start button in
the lower right corner to send the launch settings to the logger. Note that the Start button text changes based on your Start Logging
selection.
Deploy the logger, making sure the end cap is in place. Take water level reference readings at the beginning and end of each
4
deployment.
Use the HOBO Waterproof Shuttle or base station to read out the logger.
5
Relaunch and redeploy logger as needed.
6
Plot data from logger. Print the plot, export data, save it as a project file, and more.
7
For detailed specifications and information about this logger, refer to the complete product manual. Go to
http://www.onsetcomp.com/support/manuals/u20l_17153 or scan the code below.
1-800-LOGGERS (564-4377) • 508-759-9500
www.onsetcomp.com • loggerhelp@onsetcomp.com
From the Device menu in HOBOware, select Launch and configure the launch settings. Make sure both the Abs. Pressure and
3
Temperature sensors are selected (temperature is required for temperature compensation of pressure) and click the Start button in
the lower right corner to send the launch settings to the logger. Note that the Start button text changes based on your Start Logging
selection.
© 2014 Onset Computer Corporation. All rights reserved. Onset, HOBO, and HOBOware are
trademarks or registered trademarks of Onset Computer Corporation. All other trademarks are the
property of their respective companies.
17150-B MAN-QSG-U20L
Deploy the logger, making sure the end cap is in place. Take water level reference readings at the beginning and end of each
4
deployment.
Use the HOBO Waterproof Shuttle or base station to read out the logger.
5
Relaunch and redeploy logger as needed.
6
Plot data from logger. Print the plot, export data, save it as a project file, and more.
7
For detailed specifications and information about this logger, refer to the complete product manual. Go to
http://www.onsetcomp.com/support/manuals/u20l_17153 or scan the code below.
1-800-LOGGERS (564-4377) • 508-759-9500
www.onsetcomp.com • loggerhelp@onsetcomp.com
© 2014 Onset Computer Corporation. All rights reserved. Onset, HOBO, and HOBOware are
trademarks or registered trademarks of Onset Computer Corporation. All other trademarks are the
property of their respective companies.
17150-B MAN-QSG-U20L
 Loading...