

Page 1
Test Equipment Depot - 800.517.8431 - 99 Washington Street Melrose, MA 02176 - TestEquipmentDepot.com
Quick Start for the HOBO® MX Water Level Logger (MX2001)
Before you begin: After completing steps 1–4, it is recommended that you perform a trial run of steps 5 through 11 before deploying the
logger.
IMPORTANT: When assembling the logger or attaching the cable, make sure the O-rings and mating housing surfaces are clear of any
debris. Any contamination of these surfaces can cause leaks that will lead to logger failure.
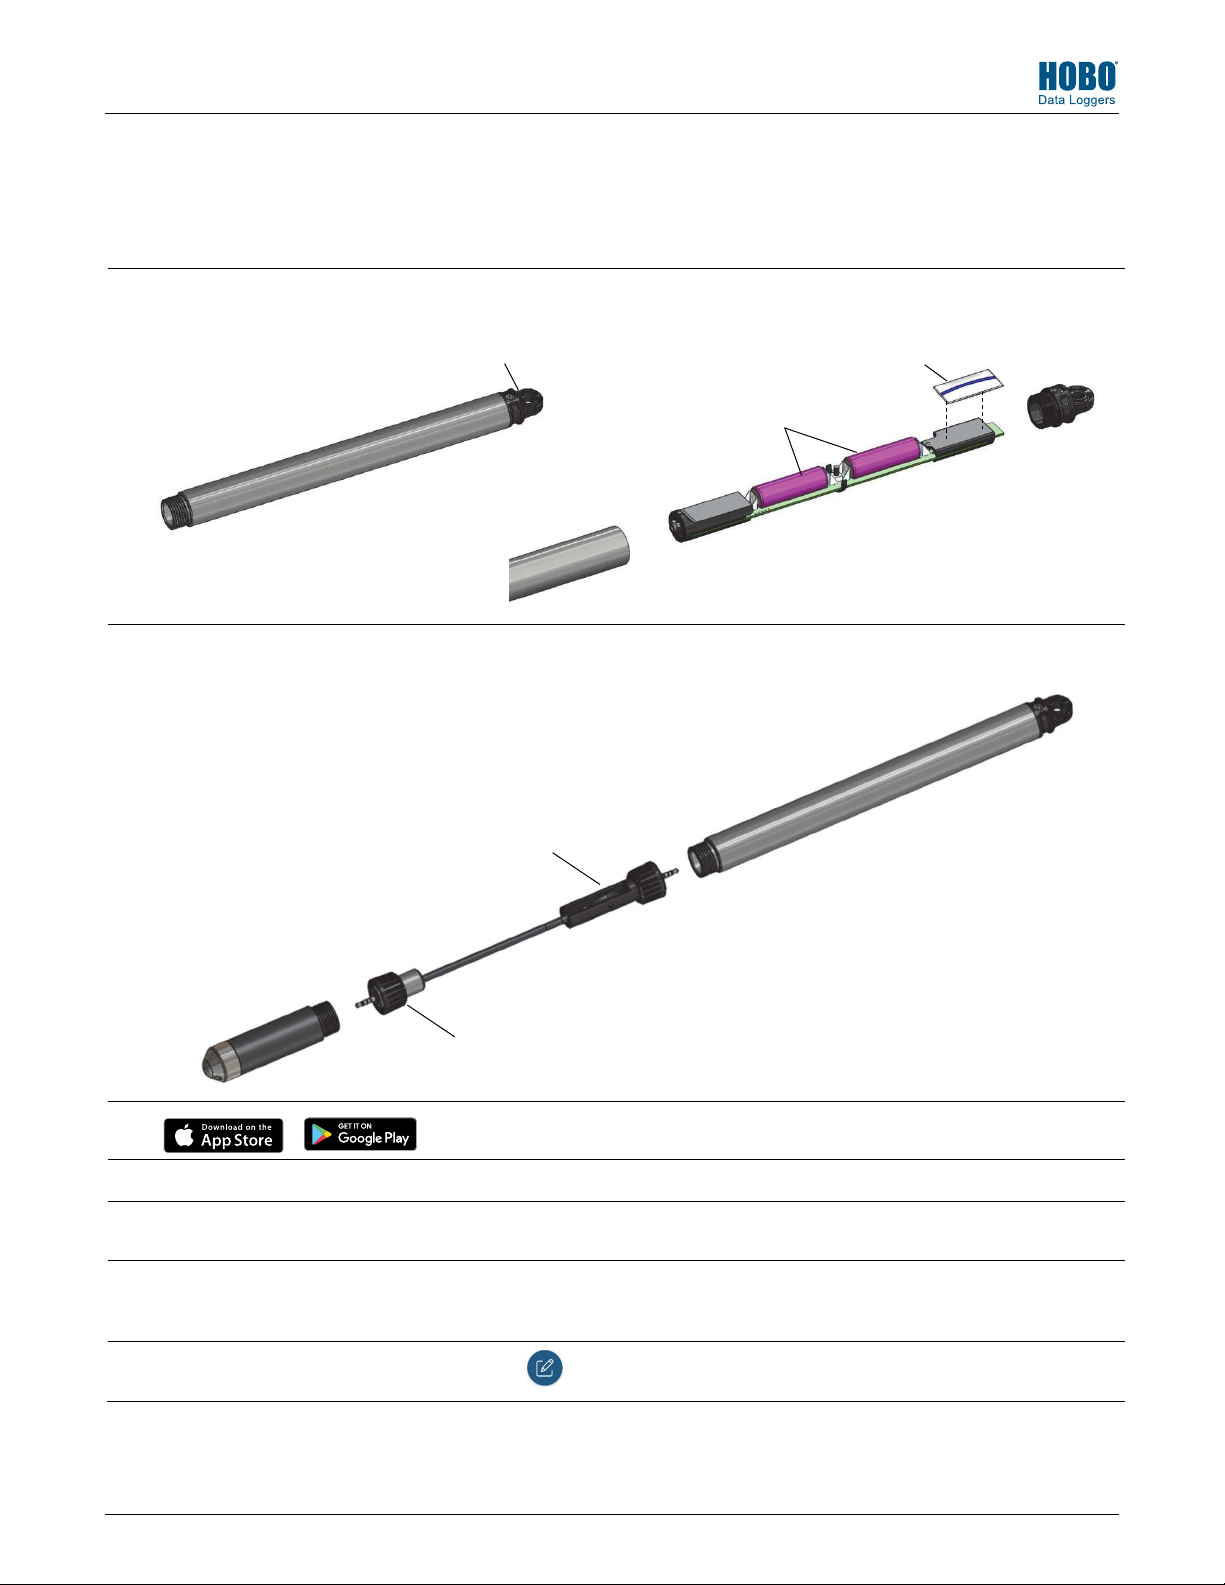
Install the batteries in the top end. Unscrew the end cap and pull out the board. Insert the included two AA batteries observing
1
polarity as shown on the board. Reinsert the board and place the desiccant back on the end of the board as shown. Screw the cap
back on until hand tight.
Unscrew end cap
Remove board and
install batteries
Top end
Place desiccant on
this end of board
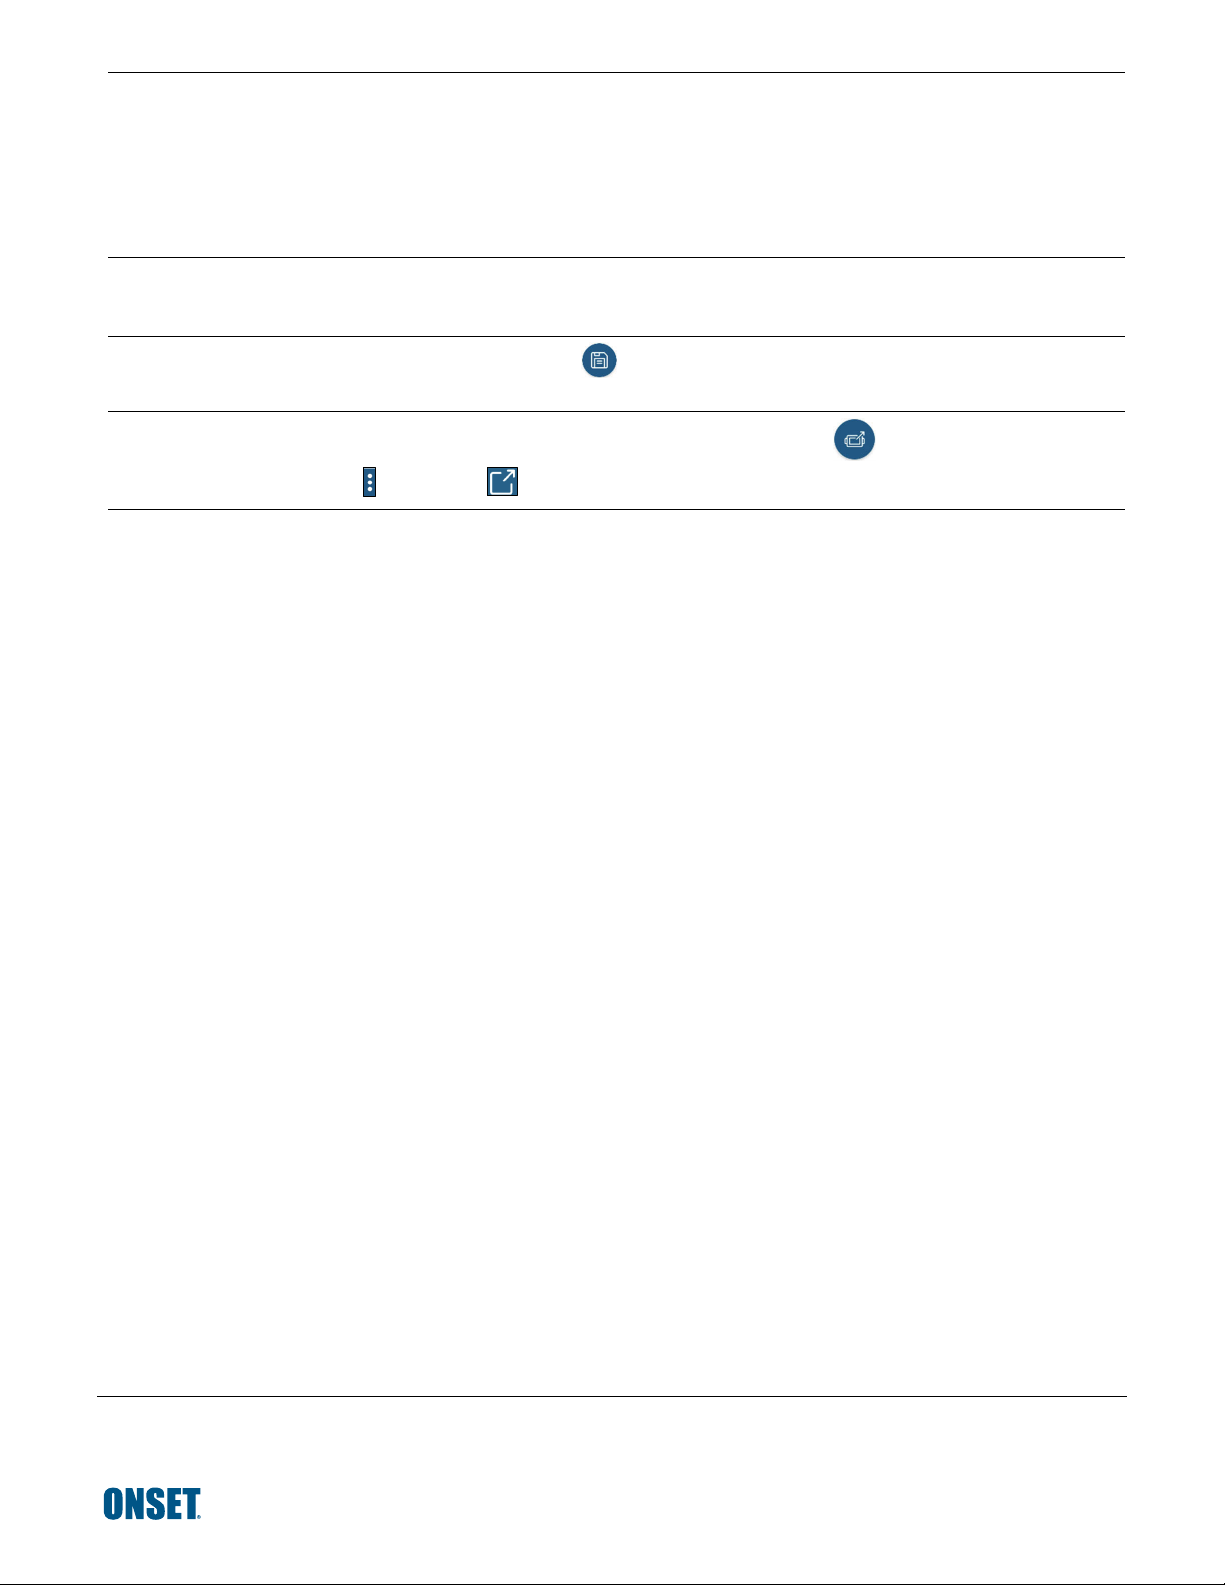
Connect the top end to the sensor end with the water level logger cable as shown here. The end of the cable with the longer
2
housing connects to the top end as shown below.
Plug this portion of the cable with
the longer housing into the top end
and screw to tighten (hand tight)
Plug this portion of the cable with the shorter housing
Sensor end
3
Open the app. Enable Bluetooth® in your device settings if prompted.
4
Tap Devices in the app. The logger should appear in the list of devices. If it does not appear, make sure it is within range of your
5
mobile device. (Note that the serial number shown in the app is for the top end of the logger).
into the sensor end and screw to tighten (hand tight)
Download HOBOconnect™ to your phone or tablet.
Top end
If you are ready to deploy the logger, place it in the deployment location.
6
Tap the logger in the app to connect to it and tap to set up the logger.
7
19388-J MAN-QSG-MX2001
Page 2
Under Deployment Information:
8
9
a. Tap Reference Water Level and enter the current water level as the reference level in meters or feet. Water levels that
are below the reference point should be entered as negative values. The reference water level entered will be
associated with the first data point once logging begins to determine the correction factor to be used for water level
data.
b. Tap Water Density and select one from the list for the deployment or enter your own value under Manual Input.
c.
Tap Save to return to the Configuration screen.
Scroll down in the Configuration screen to select the measurement parameters to be logged. Differential pressure must be
enabled to calculate water level. Temperature must be enabled to log absolute pressure. Temperature is also required if you
selected the water density option “Fresh Water adjusted for Temp.”
10
11
Select any other logger settings as desired and then tap to save the settings to the logger. The logger will begin logging
data based on the settings you selected.
To offload data from the logger to your device, tap Devices. Connect to the logger and tap . To view, export, and share the
data, tap HOBO Files, tap , and then tap .
© 2015–2020 Onset Computer Corporation. All rights reserved. Onset, HOBO, and HOBOconnect are trade,marks or
registered trademarks of Onset Computer Corporation. App Store is a service mark of Apple Inc. Google Play are is a
trademark of Google LLC. Bluetooth is a registered trademark of Bluetooth SIG, Inc. All other trademarks are the property
of their respective companies.
This product has been manufactured by Onset Computer Corporation and in compliance with Onset’s ISO 9001:2015
Quality Management System.
Patent #: 8,860,569 19388-J MAN-QSG-MX2001
 Loading...