

Page 1
En
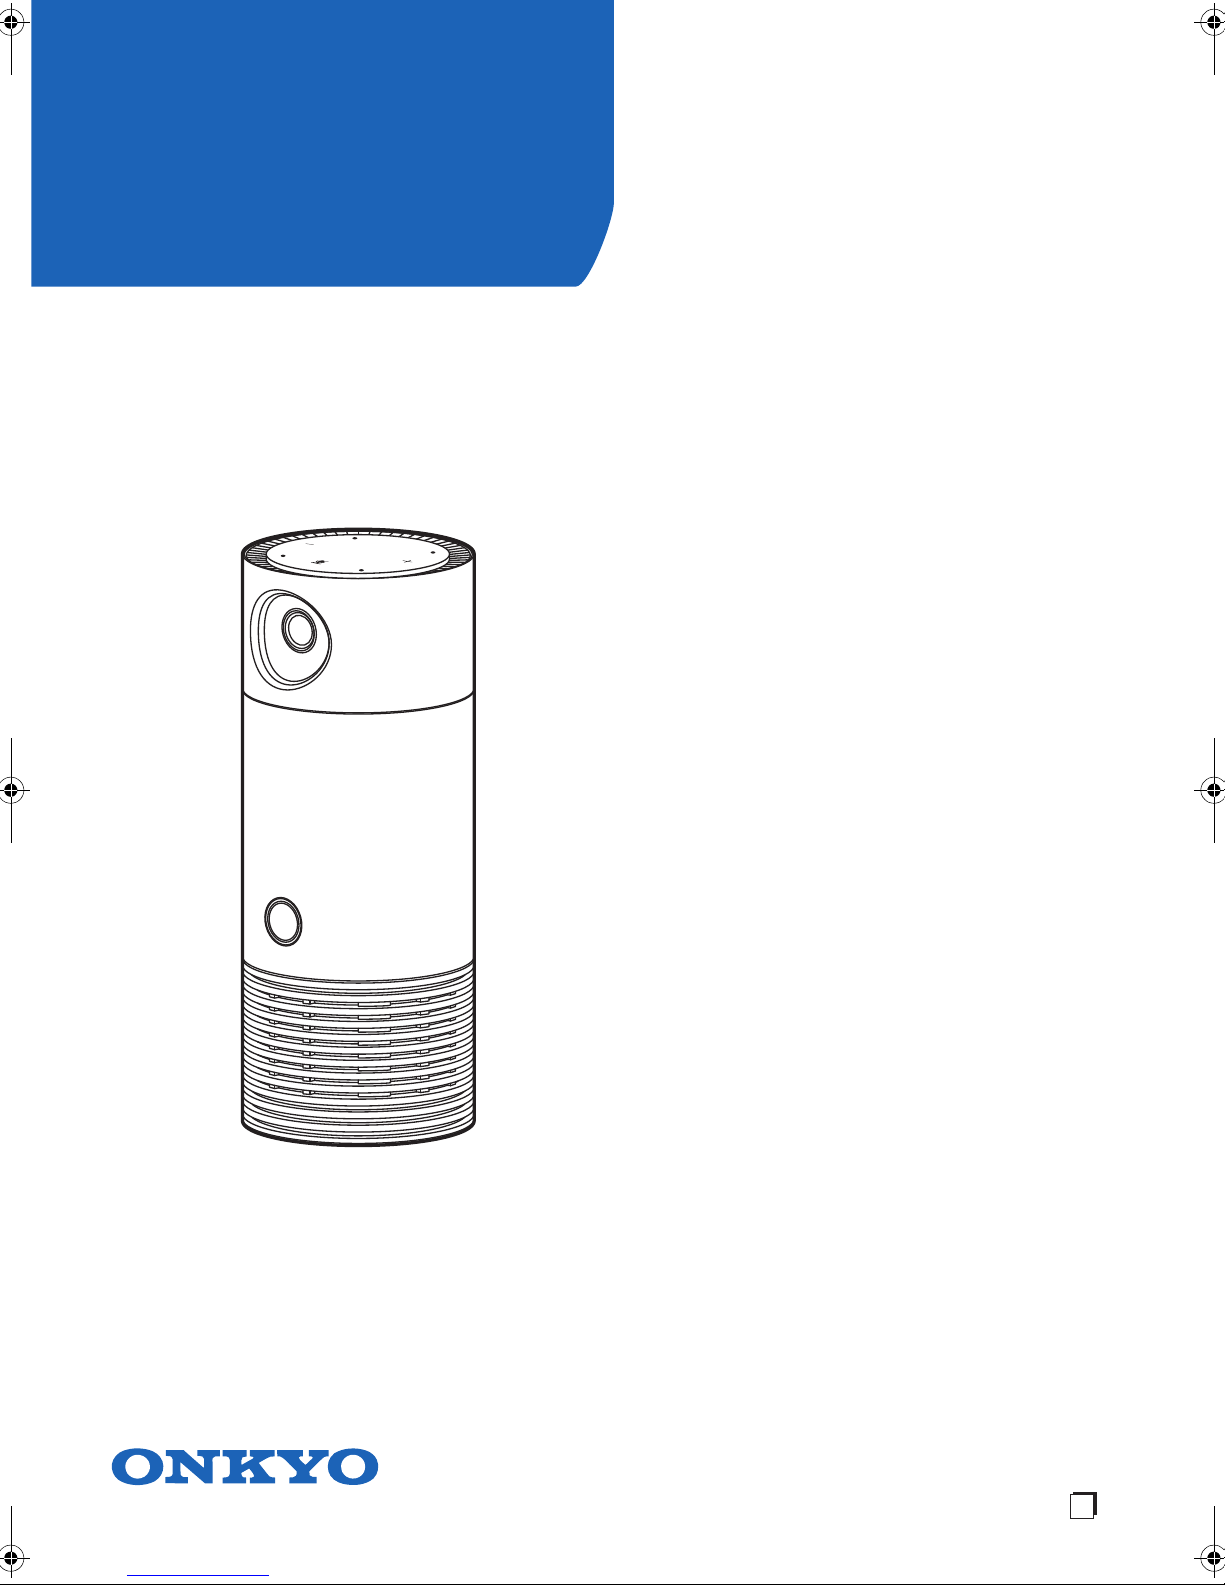
Voice Control Speaker with Camera
VC-FLX
Instruction Manual
Cautions and Disclaimers .......................................2
Safety Precautions .....................................................2
Disclaimers, Trademarks, etc. ...................................4
Parts Name ...............................................................6
Light Ring Status .......................................................8
Preparation and Setup ............................................9
Initial Setup and Pairing ........................................10
Items on Home Screen ..........................................13
Setting Manager Screen ..........................................14
Sensors Manager screen .........................................15
Rules Manager Screen ............................................18
History Screen .........................................................19
Using the unit .........................................................20
Enjoying Audio Source ............................................20
Live Video ................................................................21
Amazon Alexa ..........................................................22
Sensors on the unit ..................................................22
Troubleshooting ....................................................23
Specifications ........................................................24
Page 2

Cautions and Disclaimers
Safety Precautions
The rating plate is on the bottom of the product.
WARNING:
TO REDUCE THE RISK OF ELECTRIC SHOCK, DO NOT
REMOVE COVER. NO USER SERVICEABLE PARTS
INSIDE. REFER SERVICING TO QUALIFIED SERVICE
PERSONNEL.
TO PREVENT ELECTRIC SHOCK, MATCH WIDE BLADE
OF PLUG TO WIDE SLOT OF AC POWER OUTLET, THEN
FULLY INSERT.
Warnings:
Handling the cord on this product will expose you to lead, a
chemical known to the State of California to cause cancer
and birth defects or other reproductive harm. Wash hands
after handling.
Do not expose the product to liquids. Do not place items
containing liquid on top of the product, such as glasses or
vases.
Keep the product away from direct sunlight, extreme cold, or
heat sources. Exposure to extreme temperatures may
damage or reduce the life of the product.
IMPORTANT SAFETY INSTRUCTIONS
1. Do not use this product near water.
2. Clean only with a dry cloth.
3. Do not block any of the ventilation openings.
4. Do not install near any heat sources such as radiators,
heat registers, stoves, or other devices that produce heat.
5. Protect the AC adapter and cord from being on damaged
or pinched.
6. Only use approved attachments/ and accessories.
7. Unplug this product during lightning storms.
8. Refer all servicing to qualified service personnel.
Servicing is required when the product has been damaged
in any way, including when the power cord or plug is
damaged, liquid has been spilled or objects have fallen
into the product, the product has been exposed to rain or
moisture, the product does not operate normally, or the
product has been dropped.
9. Never pull on a power cord/cable to remove a plug from a
socket. Always grasp the plug directly. Failure to follow this
instruction may damage the cord/cable, and/or result in a
fire or electric shock, possibly resulting in serious injury.
Always confirm that the power plug (and extension cable
plug if used) has been fully inserted into the socket, to
ensure a secure electrical connection. Failure to do so
may result in a fire or electric shock, possibly resulting in
serious injury. Be careful if you use a multiple connector.
An overload on one socket could cause a fire or electric
shock, possibly resulting in serious injury.
Critical Applications
This product is not designed for any "critical applications."
"Critical applications" means life support systems, medical
applications, connections to implanted medical devices,
commercial transportation, nuclear facilities or systems or
any other applications where product failure could lead to
injury to persons or loss of life or catastrophic property
damage.
ACCORDINGLY, ONKYO Corporation, ITS AFFILIATES
AND SUPPLIERS DISCLAIM ANY AND ALL LIABILITY
ARISING OUT OF THE USE OF THE PRODUCT IN ANY
CRITICAL APPLICATIONS. IF YOU USE THE PRODUCT
IN A CRITICAL APPLICATION, YOU, AND NOT ONKYO
Corporation, ASSUME FULL RESPONSIBILITY FOR
SUCH USE.
ADDITIONAL SAFETY INSTRUCTIONS
1. If the product should emit smoke or an unusual odor,
immediately disconnect the AC adapter from the wall
outlet and obtain service from an authorized service
provider.
USA
Federal Communications Commission Statement
FCC Compliance Statement
This device complies with Part 15 of the FCC Rules.
Operation is subject to the following two conditions:
(1) This device may not cause harmful interference, and (2)
This device must accept any interference received, including
interference that may cause undesired operation
Interference
This equipment has been tested and found to comply with
the limits for a Class B digital device, pursuant to Part 15 of
the FCC Rules. These limits are designed to provide
reasonable protection against harmful interference in a
residential installation. This equipment generates, uses, and
can radiate radio frequency energy and, if not installed and
used in accordance with the instructions, may cause harmful
interference to radio communications. However, there is no
guarantee that interference will not occur in a particular
installation. If this equipment does cause harmful
interference to radio or television reception, which can be
determined by turning the equipment off and on, the user is
encouraged to try to correct the interference by one of the
following measures:
0 Reorient or relocate the receiving antenna.
0 Increase the separation between the equipment and
receiver.
0 Connect the equipment into an outlet on a circuit different
from that to which the receiver is connected.
0 Consult the dealer or an experienced radio/TV technician
for help.
0 Bluetooth
same radio frequency range and may interfere with one
another. If you use Bluetooth and Wireless LAN devices
simultaneously, you may occasionally experience a less
than optimal network performance or even lose your
network connection. If you should experience any such
problem, immediately turn off your Bluetooth or Wireless
LAN device.
Wireless Radio
Radio Frequency Interference Requirements
This device is restricted to indoor use due to its operation in
the 5.15 GHz to 5.25 GHz frequency range. FCC requires
this product to be used indoors for frequency range 5.15 GHz
to 5.25 GHz to reduce the potential for harmful interference
to co-channel Mobile Satellite systems.
High power radars are allocated as primary users of the 5.25
GHz to 5.35 GHz and 5.65 GHz to 5.85 GHz bands. These
radar stations can cause interference with and/or damage
®
and Wireless LAN devices operate within the
2
Page 3
this device.
Important: Any changes or modifications not expressly
approved by the party responsible for compliance could void
the user’s authority to operate this equipment. This device
and its antenna(s) must not be co-located or operating in
conjunction with any other antenna or transmitter.
FCC Notice "Declaration of Conformity Information"
This equipment has been tested and found to comply with
the limits for a Class B digital device, pursuant to Part 15 of
the FCC rules. These limits are designed to provide
reasonable protection against harmful interference in a
residential installation.
This equipment generates, uses and can radiate radio
frequency energy and, if not installed and used in
accordance with the instructions, it may cause harmful
interference to radio communications.
However, there is no guarantee that interference will not
occur in a particular installation. If this equipment does cause
harmful interference to radio or television reception, which
can be determined by turning the equipment off and on, the
user is encouraged to try to correct the interference by one or
more of the following measures:
0 Reorient or relocate the receiving antenna.
0 Increase the separation between the equipment and
receiver.
0 Connect the equipment to an outlet on a circuit different
from that to which the receiver is connected.
0 Consult the dealer or an experienced radio/TV technician
for help.
Changes or modifications made to this equipment not
expressly approved by ONKYO Corporation or parties
authorized by ONKYO Corporation could void the user's
authority to operate the equipment.
FCC Radiation Exposure Statement
This equipment complies with FCC radiation exposure limits
set forth for an uncontrolled environment.
This equipment should be installed and operated with
minimum distance 20cm between the radiator & your body.
Wireless LAN and Your Health
Wireless LAN products, like other radio devices, emit radio
frequency electromagnetic energy. The level of energy
emitted by Wireless LAN devices however is far much less
than the electromagnetic energy emitted by wireless devices
such as mobile phones.
Because Wireless LAN products operate within the
guidelines found in radio frequency safety standards and
recommendations, ONKYO Corporation believes Wireless
LAN is safe for use by consumers. These standards and
recommendations reflect the consensus of the scientific
community and result from deliberations of panels and
committees of scientists who continually review and interpret
the extensive research literature.
In some situations or environments, the use of Wireless LAN
may be restricted by the proprietor of the building or
responsible representatives of the organization if the risk of
interference to other devices or services is perceived or
identified as harmful.
If you are uncertain of the policy that applies on the use of
wireless devices in a specific organization or environment,
you are encouraged to ask for authorization to use the
Wireless LAN device prior to turning on the equipment.
Bluetooth® Wireless Technology and Your Health
Products with Bluetooth
devices, emit radio frequency electromagnetic energy. The
level of energy emitted by devices with Bluetooth wireless
technology however is much less than the electromagnetic
energy emitted by wireless devices such as mobile phones.
Because products with Bluetooth wireless technology
operate within the guidelines found in radio frequency safety
standards and recommendations, ONKYO Corporation
believes Bluetooth wireless technology is safe for use by
consumers.
These standards and recommendations reflect the
consensus of the scientific community and result from
deliberations of panels and committees of scientists who
continually review and interpret the extensive research
literature.
In some situations or environments, the use of Bluetooth
wireless technology may be restricted by the proprietor of the
building or responsible representatives of the organization if
the risk of interference to other devices or services is
perceived or identified as harmful.
If you are uncertain of the policy that applies on the use of
wireless devices in a specific organization or environment,
you are encouraged to ask for authorization to use the device
with Bluetooth wireless technology prior to turning on the
equipment.
®
wireless technology, like other radio
PRECAUTIONS
Notes on handling
0 When shipping the product, the original shipping carton
and packing materials come in handy. For maximum
protection, repack the product as it was originally packed
at the factory. Take care not to give it a shock or shake
when carrying.
0 Do not use volatile liquids, such as insect spray, near the
product. Do not leave rubber or plastic products in contact
with this product for a long time. They will leave marks on
the finish.
0 The product may become warm after a long period of use.
This is not a malfunction.
0 When the product is not in use for a long period,
disconnect the power.
0 If you do not use the product for a long period, the product
may not function properly. Turn on and use the product
occasionally.
Notes on locating
0 Place the product on a level surface. Do not use it on a
shaky or unstable surface such as a wobbling table or
inclined stand.
0 When you place this product near a TV, radio, or VCR, the
playback picture may become poor and the sound may be
distorted. In this case, place the product away from the TV,
radio, or VCR.
0 Do not use this product in places which are extremely hot,
cold, dusty or humid.
0 Do not restrict the air flow of this product by placing
somewhere with poor air flow, by covering it with a cloth, or
En
3
Page 4
by placing it on bedding or carpeting.
Disclaimers, Trademarks, etc.
Notes on cleaning
Use a soft, dry cloth for cleaning.
0 For stubborn dirt, soak the cloth in a weak detergent
solution, wring well and wipe. Use a dry cloth to wipe it dry.
Do not use any type of solvent, such as thinners and
benzene, as they may damage the surface of the product.
0 If you use a chemical saturated cloth to clean the product,
follow that product’s instructions.
Notes on moisture condensation
Moisture condensation damages the product.
Moisture condensation may occur:
0 When you bring the product directly from a cold place to a
warm place.
0 When you use the product in a room where you just turned
on the heater, or a place where the cold wind from the air
conditioner directly hits the product.
About "disposal" and "transfer" of this product
When you dispose of this product, abide by local ordinance
or regulation.
We recommend removing personal information by initializing
all settings when disposing or transferring this product. Press
the Reset button to initialize all settings.
Parts Name (ÄP6)
On Recycling
This product's packaging materials are recyclable and can be
reused.
Please dispose of any materials in accordance with your
local recycling regulations.
PRODUCT DISCLAIMERS AND LEGAL
INFORMATION
Important Legal Disclaimers. Please note that some Legal
Disclaimers are product or feature specific and may not be
applicable to you.
GENERAL DISCLAIMER
1. Product specifications
This product requires you to use both Toshiba Smart
Home Services (www.TSB-SmartHome.com) and Toshiba
Smart Home App.
To set up and use this product you will need your own
active Wi-Fi connection to the Internet via your own
wireless LAN router and your own mobile device.
You will be required to connect to the Toshiba Smart Home
Services (a cloud based service) and use the Toshiba
Smart Home App.
As part of the setup, you will be required to agree to the
applicable "Terms of Service" and "Privacy Policy" of
Toshiba Visual Solutions Corporation and register an
account with the Amazon Alexa voice service and agree
with the Amazon Alexa Terms of Service and Privacy
Policy.
Internet service provider equipment, usage fees and other
fees and taxes may apply.
Toshiba is solely responsible for the To s h i b a Sm a r t H ome
Service and Toshiba Smart home App and for providing
such service.
To access third party content, you may need your own
subscriber account with the content provider or to register
or subscribe to the content with the applicable content
provider.
Onkyo is not responsible for, and Toshiba and Amazon
may change their services, their Terms of Service and their
respective Privacy Policies from time to time, and may limit
or discontinue providing their services in their sole
discretion.
Product design and specification are subject to change or
modification without notice. All product specifications
mentioned depending on model and configuration and
local availability.
4
2. Warranty
ONKYO Corporation does not give any additional
warranties beyond those contained in ONKYO
Corporation’s description of the individual product or as
provided by law.
3. Internet Capability
Some features may require an always-on broadband
internet connection, firmware update and/or additional
bandwidth. Internet services may not be available to you in
your region.
Third party internet services are not provided by ONKYO
Corporation, may change or be discontinued at any time
and may be subject to third party restrictions.
ONKYO Corporation makes no representations or
warranties about these services, which may require the
creation of a user account through a computer with
internet access and one-time and/or recurring charges.
4. Third party internet services
Page 5
Third party internet services are not provided by ONKYO
Corporation, may change or be discontinued at any time
and may be subject to internet service provider
restrictions. ONKYO Corporation makes no warranties,
representations, or assurances about the content,
accuracy, availability or functionality of third- party content
or services. Use of third party internet services may
require the creation of a separate account through a
computer with internet access and/or payment of one-time
and/or recurring charges and membership. Not all third
party services may be available on or compatible with this
product. In order to experience the full capabilities of this
product, fullycompatible devices may be required.
5. Third party trademarks, service marks and trade
names
All the trademarks, service marks and trade names belong
to their respective owners. ONKYO Corporation disclaims
any proprietary interest in the trademarks and names of
other parties and their publication does not grant third
parties any right or license with respect to them.
Disclaimer
Home IoT cloud service may be temporarily shut down
without prior notice due to maintenance or for security
reasons. During such shutdowns, certain functions of the
product may not work properly or may be restricted, including
interoperability with your smartphone and video recording.
The Wi-Fi CERTIFIED Logo is a certification mark of Wi-Fi
Alliance
This ZigBee
Home Automation
®
.
®
Certified product works with other ZigBee
TM
version 1.2.1 (or prior versions)
products.
This device works with :
- ZigBee Gateway
Global 2.4 GHz wireless use
®
ZigBee
Certified is a registered trademark of the ZigBee
Alliance.
Amazon cloud service may be temporarily shut down without
prior notice due to maintenance, security reasons or other
server issues. During such a time, the Alexa function of the
product may not function properly or may be restricted.
Trademarks
The Spotify software is subject to third party licenses found
here: https://developer.spotify.com/esdk-third-party-licenses/
App Store is a service mark of Apple Inc., registered in the
U.S. and other countries.
Google Play
Google Inc.
The BLUETOOTH
trademarks owned by Bluetooth SIG, Inc.
Z-Wave and Z-Wave Plus are registered trademarks of
Sigma Designs and its subsidiaries in the United States and
other countries.
TM
and the Google Play logo are trademarks of
®
word mark and logos are registered
PANDORA, the PANDORA logo, and the Pandora trade
dress are trademarks or registered trademarks of Pandora
Media, Inc. Used with permission.
All other trademarks are the property of their respective
owners.
Copyright
©2017 Onkyo & Pioneer Innovations. All rights reserved.
Need Help?
Most problems are easy to correct. Save time with one of
these simple solutions.
Consult the electronic User’s Guide
To access the electronic User’s Guide please visit
http://www.TSB-SmartHome.com.
For solutions to the most common problems, refer to the
Troubleshooting section of the User’s Guide.
Visit Toshiba’s Support Web site
http://www.TSB-SmartHome.com
Amazon, Alexa and all related logos are trademarks of
Amazon.com,Inc. or its affiliates.
En
5
Page 6

Parts Name
Note
9
10
11
1
2
3
4
5
6
7
8
1
2
3
Front
Back
1. Network/Pairing button
Press briefly to activate Bluetooth
Press and hold for about 5 seconds to activate Wi-Fi
pairing mode.
0 Each pairing mode is activated for 60 seconds.
2. USB terminal
The USB terminal is for service use only.
3. Power input
Connect the supplied AC adapter.
Bottom
®
pairing mode.
1. Lens cover
Can be rotated to cover and turn off the video camera.
2. Volume down button
Press to decrease the volume.
3. Volume indicator
Dots lights up as the volume is increased.
4. Microphone mute/Talk button
Press to turn off the microphones. The icon will turn red
when the microphones are off. Press again to turn them
back on.
Press and hold this button for 2 seconds to wake up Alexa,
then talk directly.
5. Volume up button
Press to increase the volume.
6. Microphone holes
Used for voice operations.
7. Camera
Used for monitoring.
8. Night vision LED
Infrared LED for night vision.
9. Light ring
Lights up in different colors to let you know what this unit is
doing.
Light Ring Status (ÄP8)
10.
Camera indicator
Lights up when the camera is on.
11.
Speaker
Emits sound when playing back an audio source.
1. Reset button
Press and hold the button using a pen tip or like for 5
seconds or more.
Pressing and holding the button makes the all Volume
indicators and Microphone mute indicators starts blinking.
After blinking stops, release button. After that, the settings
have been reverted back to the default.
If this controller is the primary controller of Z-Wave for your
network, resetting it will result in the nodes in your network
being orphaned and it will be necessary after the reset to
exclude and re-include all of the nodes in the network.
If this controller is being used as a secondary controller of
Z-Wave in the network, use this procedure to reset this
controller only in the event that the network primary
controller is missing or otherwise inoperable.
6
Page 7
Accessory
AC adapter
En
7
Page 8
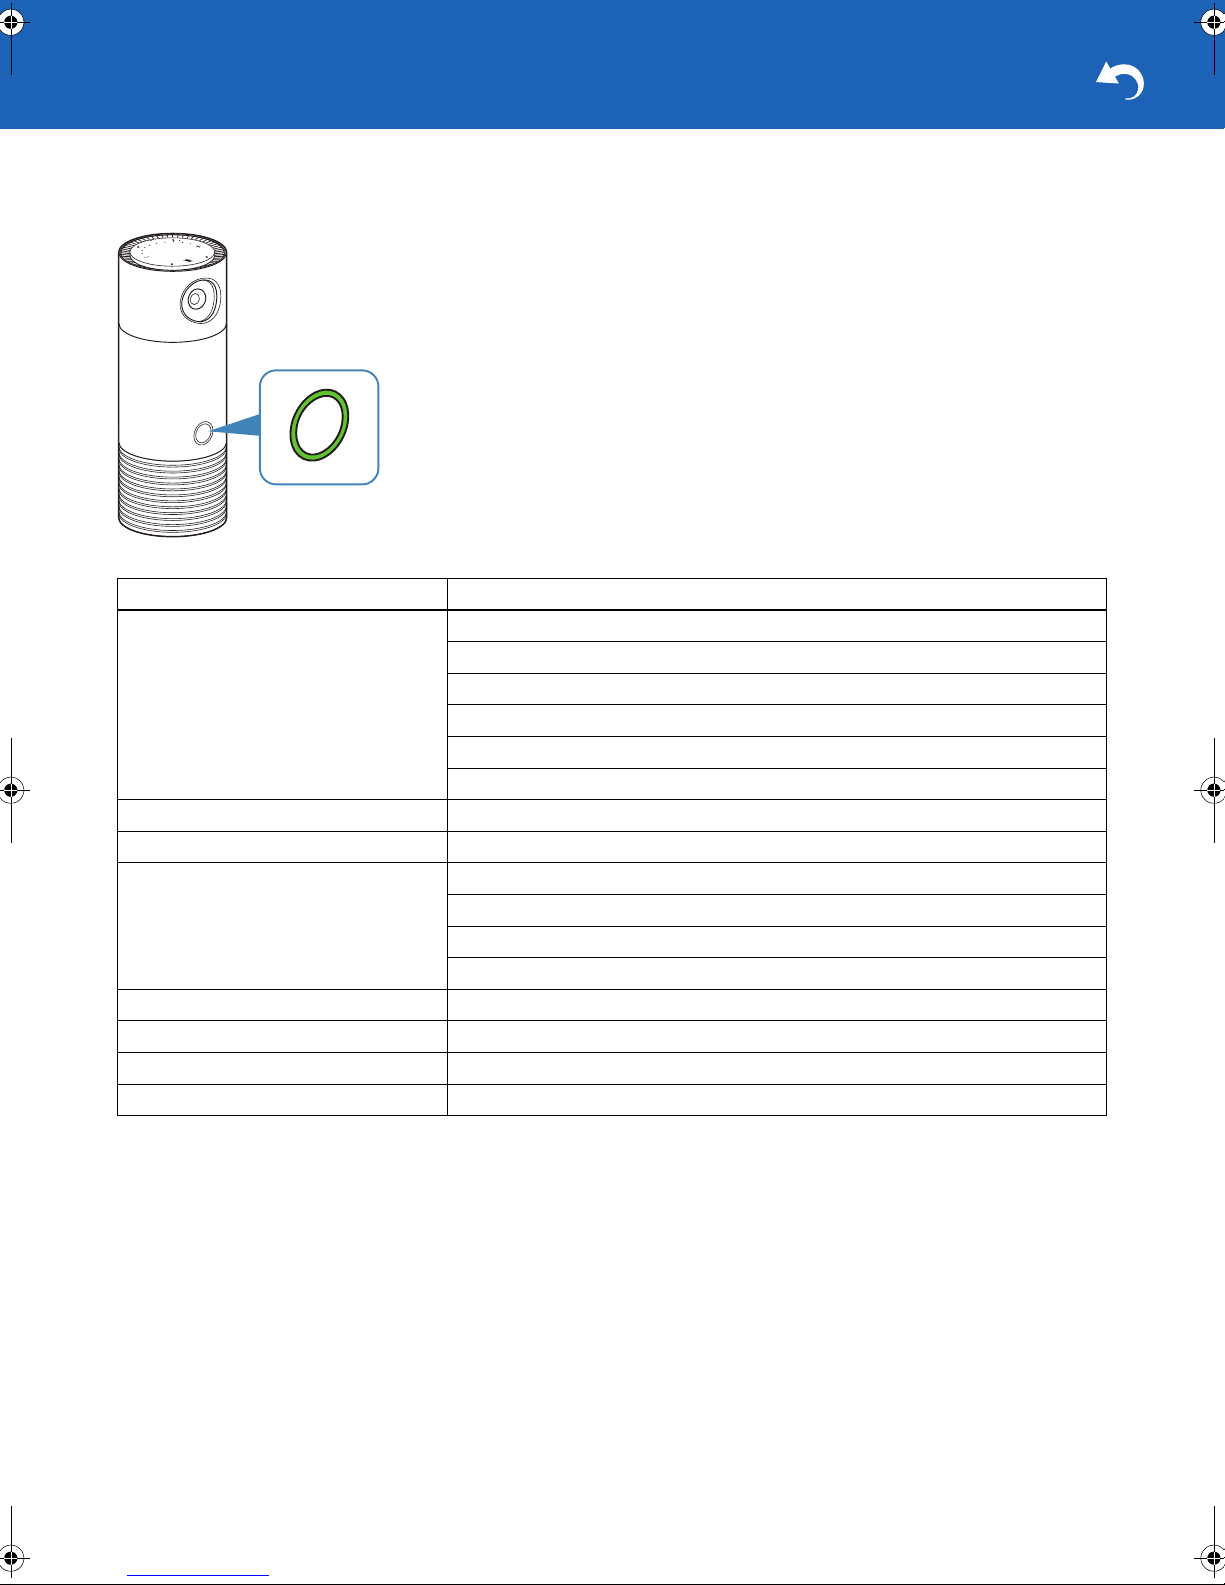
Light Ring Status
This unit’s light ring lights up/flashes in different colors to indicate its status.
Ring LED color and status Status of unit
Lights up white. This unit has been turned on.
Ready for initial setup.
Successful Wi-Fi setup.
This unit is requesting the invitation code.
This unit is checking the Admin app.
Initial setting is completed when the Admin app is found.
Lights up green. This unit is in its normal status.
Flashes blue slowly. This unit is searching for a nearby wireless router.
Flashes red slowly. This unit is unable to find a wireless router.
This unit is unable to update its firmware.
This unit is unable to in connect to Internet.
A network connection error has occurred.
Flashes white slowly. This unit is updating its firmware.
Flashes white rapidly. This unit has entered Wi-Fi pairing mode (AP mode).
Flashes blue rapidly. This unit has entered Bluetooth pairing mode.
Flashes red rapidly. This unit is sounding a siren.
8
Page 9

Preparation and Setup
Follow the steps below to use the unit.
1. Placement of your unit.
Because this unit includes a home monitoring camera, you
should place it where the camera can see what you want
to monitor. On a shelf or on the kitchen counter are great
options.
2. Plug in your unit.
Plug the included AC adapter into your unit and connect to
an AC outlet. When you first plug in, the light ring will be
white. When this unit is ready for the next step, the light
ring will start blinking blue.
3. Download the Toshiba Smart Home app.
Download the Toshiba Smart Home app to your
smartphone or tablet from the App Store or Google Play.
The app is where you will control most of the features and
settings of the unit.
4. Start the Toshiba Smart Home app and set it up.
The setup process will start automatically when you open
the app. During setup, you will be connecting this unit to
the internet.
You will need:
0 Your Wi-Fi password
0 An Amazon account sign-in
See Initial Setup and Pairing (ÄP10) for details.
Important
0 You must agree to Terms of use and Privacy Policy
when you use the Toshiba Smart Home app. Please
read these terms and policy carefully. Regarding Terms
of use and privacy policy, you will be deemed to agree if
you use the Toshiba Smart Home app.
En
9
Page 10

Initial Setup and Pairing
Follow the steps below to perform initial setup and pairing the
unit with Toshiba Smart Home app.
Before performing initial setup, check the OS version of your
smartphone. You can use Toshiba Smart Home app on the
following OS.
0 iOS: iOS 10.0 or later
0 Android: Android 5.0 or later
1. Plug in your unit.
Plug the included AC adapter into your unit and connect to
an AC outlet. When you first plug in, the light ring will be
white. When this unit is ready for the next step, the light
ring will start blinking blue.
2. Open Toshiba Smart Home app.
The screen below appears.
3. Tap Initial Setup.
4. Tap Connect Device on the displayed screen.
10
5. Tap "THINGS_XXXXXX" on the displayed screen.
If you are using an iOS smartphone, tap on the upper left
to back to "Toshiba Smart Home".
6. Tap Next on the displayed screen.
Page 11

7. When the screen below appears, tap the wireless router to
connect from the list.
Enter the password for the selected wireless router and
tap Done.
8. When the screen below appears, confirm the message
and tap Go to Pairing to pair with this unit.
11.
Log in to Amazon Alexa.
12.
Select a zone which the paired this unit covers.
9. Tap OK on the displayed screen.
Pairing with this unit is now completed.
10.
Log in to Toshiba Cloud.
You need your Amazon ID to log in.
En
11
Page 12

Note
Important
0 When you select a zone where water may splash (e.g.
kitchen), do not place your unit at a place subject to
water.
13.
Tap Done on the Zone Select screen.
Initial setup is now complete.
Adding another smartphone to this unit
Follow the steps below to add another smartphone to this
unit.
1. Perform operations below on your smartphone you have
already connected to this unit.
1. Open Toshiba Smart Home app.
2. Tap on the Home screen.
Account.
3. Tap
Add User.
4. Tap
5. Enter the e-mail address to which you send an invitation
code.
Done.
6. Tap
2. Perform operations below on your smartphone you want to
connect to this unit.
1. Open Toshiba Smart Home app.
Add User.
2. Tap
3. Enter the invitation code you received.
Done.
4. Tap
5. Tap on the Home screen.
Account.
6. Tap
Login.
7. Tap
8. Enter the ID and password used for your smartphone
already connected to this unit.
0 We recommend you perform the adding procedure soon
after you have received the invitation code; otherwise, the
code will be invalid.
Deleting a smartphone from this unit
Follow the steps below to delete a smartphone from this unit.
1. Open Toshiba Smart Home app.
2. Tap on the Home screen.
Account.
3. Tap
4. Select the smartphone you want to delete, and then swipe
it left.
12
Page 13

Items on Home Screen
device in the Central Static Controller Role type.
0 When receiving Basic Command, this product ignores it
and do nothing, since it is not supported or mapped to any
commands.
0 Regarding the Z-Wave Web UI with Z-Wave detailed
function, refer to the Z-Wave Web UI User Guide.
8. Live Video button
Tap to view the real-time image this unit is monitoring.
Live Video (ÄP21)
9. History button
Tap to display the History screen.
History Screen (ÄP19)
* The screen appearance is subject to change without notice.
1. Setting button
Tap to display the Setting Manager screen.
Setting Manager Screen (ÄP14)
2. Current mode and device name
3. Mode icons
Displays the mode icons currently registered.
"Home", "Sleep", and "Away" icons are displayed by
default.
You can register up to six modes.
4. Zone view
Displays registered zones and all sensor icons currently
connected to the unit.
Tap an icon to display the pop-up menu and change
settings.
Swipe left and right to switch the display.
5. Notification
Displays notification when received.
Tap to display the notification history.
6. Rules button
Tap to display the Rules Manager screen.
Rules Manager Screen (ÄP18)
7. Sensors button
Tap to check/control the status of Z-Wave/ZigBee/Internal
sensors, or to display the screen to add/remove sensors
to/from this unit.
Important
0 This product does not guarantee connection/function
operation with all sensors.
Notes on Z-Wave
0 This product is a Z-Wave Plus Security Enabled Gateway
En
13
Page 14

Setting Manager Screen
Note
Note
* The screen appearance is subject to change without notice.
1. Device
Tap to perform following operations.
0 Select the unit to control or changing the name
0 Display information on this unit(s) currently connected
0 Update firmware of this unit(s) currently connected
0 Select whether to activate Talkback function on Live Video
while the lens cover is closed
0 Display information on the Wi-Fi network to which this unit
is connected
0 Set the time zone for this unit
0 Set the unit of temperature displayed on the app
2. Account
Tap to perform following operations.
0 Change your mobile device name
0 Display the log-in screen
0 Display the screen to add a user*
0
Display the screen to change permissions for other devices*
* Available only for the administrator.
3. Service
Tap to move to the screen to buy an account service.
Important
0 When you are buying a service, your personal
information will be transferred to a website of the service
supplier. Please note that ONKYO Corporation bears no
responsibility for issues regarding your personal
information.
4. Modes
Tap to perform following operations.
0 Enable/Disable a mode or change the mode name
0 Change the color or icon for each mode
5. Zones
Displays the registered zone list.
Tap the zone name to change the name or photo applied
for the zone as a background.
0
Select a photo for the background from that registered to app.
6. Sensors
Displays the sensors manager.
Sensors Manager screen (ÄP15)
7. Camera
Tap to perform following operations.
0 Change the camera resolution
0 Specify the area for motion detection
0 Specify the time length for one-touch recording
8. Audio
Tap to display the screen to adjust the volume levels.
0 You can select the length you sound a siren by tapping
Siren Length on the screen.
0 Tapping
Bluetooth on the screen moves to the screen for
Bluetooth pairing.
9. Amazon Alexa
Tap to login to/logout from Amazon Alexa.
10.
Alexa Skills Setup
Tap to display the login page to Toshiba skill.
11.
Loud Noise Detection
Tap to adjust the noise detection level.
12.
Help
Tap to access the help page.
13.Terms of Use
Tap to display the Terms of Use information.
14.
App Version
The version of app is displayed.
15.
Initialize App
Tap to initialize the storage of the App. Information on this
unit connected to the App will be deleted.
14
Page 15

Sensors Manager screen
Note
Tapping Sensors on the Setting Manager screen displays the Sensors screen below.
Sensors registered by default are shown on the screen. In addition, you can add/remove/delete/edit sensors. Up to 40 sensors
can be registered.
Regarding the sensor, it corresponds to standard products of ZigBee and Z-Wave for US market.
Important
0 Do not use a sensor of countries other than that of the US market.
The sensor may not operate correctly if you use other countries' one.
* The screen appearance is subject to change without notice.
0 Tap Sort By Type to sort sensors categorized by a sensor
type.
Sort By Zone to sort sensors categorized by a place
0 Tap
where sensors are located.
The sensors below are available.
Visit http://www.TSB-SmartHome.com for the latest
information.
0 Turning on/off electric appliances
You can turn on/off the electric appliances such as a lamp.
0 Increasing/decreasing levels
You can dim or brighten a room lamp, for example.
0 Binary sensor
You can see whether the door is open or closed, whether
something moves within the camera range of this unit, or
whether there has been water leakage. In addition, this
sensor detects smoke or carbon monoxide (CO).
0 Alarm
This sensor sounds an alarm.
0 Detecting temperature/humidity/brightness
You can see the room temperature, humidity, or brightness.
0 Estimation
You can see an estimation of power consumption.
0 Locking/unlocking a door
You can lock/unlock the door.
0 Thermostat
You can change the room temperature.
En
15
Page 16

Adding a sensor
Follow the steps below to add a sensor.
Sensors on the Home screen.
1. Tap
Add Sensor.
2. Tap
Done.
5. Tap
The sensor has been added to the app.
Removing a sensor
Add Sensor on the displayed screen.
3. Tap
The app starts searching for a sensor and the screen
below appears.
4. Operate the sensor you are adding so that the app can
find it.
Refer to the instruction manual supplied for the sensor for
details.
When the app finds a sensor, the screen below appears.
Follow the steps below to remove a sensor.
Sensors on the Home screen.
1. Tap
Add Sensor.
2. Tap
Remove Sensor on the displayed screen.
3. Tap
16
Page 17

The screen below appears and the app starts removing
the sensor.
OK on the displayed screen.
4. Tap
The sensor has been removed.
Deleting a sensor
Follow the steps below to delete a failed sensor.
Sensors on the Home screen.
1. Tap
The sensor has been deleted.
Editing a sensor
On the Edit Sensor screen, you can edit following items.
0 Product name of the sensor
0 Zone where the sensor is placed
0 Name of each sensor class to control
0 Design of icon to display on the Home screen
To display the
to edit on the Home screen.
Edit Sensor screen, tap a sensor icon you want
2. Tap a sensor you want to delete.
3. Tap
Edit on the displayed screen.
4. Confirm the message on the bottom, and then tap on the
message.
Delete sensor on the displayed screen.
5. Tap
OK on the displayed screen.
6. Tap
En
17
Page 18

Rules Manager Screen
Add New Rules.
2. Tap
Follow the instructions on the displayed screen.
Editing Rules
1. Tap an item to edit on the Rules Manager screen.
The
Edit Rule screen appears.
2. Tap an item to edit on the
Edit Rule screen.
* The screen appearance is subject to change without notice.
You can add/edit rules on each sensor following the
procedure below. Up to 100 rules can be registered.
Adding Rules (ÄP18)
Editing Rules (ÄP18)
Adding Rules
1. Tap My Rules on the Rules Manager screen.
The screen below appears.
1. Tap to edit the name of the rule.
2. Tap to display the condition list.
Select the condition from the list and tap
to the previous screen.
3. Tap to display the action list.
Select the action from the list and tap
the previous screen.
Done.
3. Tap
Rule editing is completed.
Back to return
Back to return to
18
Page 19

History Screen
Recording history on the cloud is displayed on the History
screen. Up to 64 Notification History will be stored.
In addition, you can change order of the list according to the
cause of recording.
* The screen appearance is subject to change without notice.
Important
0 Cloud recording is executed only for users who
purchase account services.
0 If you do not buy the services, the history of temperature
and humidity is displayed.
0 The history retention period varies depending on the
account service you bought.
En
19
Page 20

Using the unit
Enjoying Audio Source
Connect your smartphone to the unit via wireless connection
(Bluetooth or Wi-Fi) to enjoy audio source on your
smartphone.
Follow the steps below to enjoy audio source by the unit.
When You Use the unit via Bluetooth: (ÄP20)
When You Use the unit via Wi-Fi (Station mode): (ÄP20)
When You Use the unit via Wi-Fi (AP mode): (ÄP20)
When You Use the unit via Bluetooth:
1. Make sure this unit is plugged in.
2. Press the Network/Pairing button once to activate
Bluetooth pairing mode on your unit.
The Light ring LED flashes rapidly blue.
3. Make sure Bluetooth is activated on your smartphone to
connect.
4. Open the Bluetooth menu on your smartphone.
5. Tap the device name specified for your unit from the
device list.
Your smartphone has been connected to this unit.
6. Play an audio source on your smartphone.
2. Press the Network/Pairing button once to activate Wi-Fi
pairing mode (AP mode) on your unit.
The Light ring LED flashes in white fast.
3. Make sure Wi-Fi is activated on your smartphone to
connect.
4. Open the Wi-Fi menu on your smartphone.
5. Tap the device name specified for your unit from the
device list.
Your smartphone has been connected to this unit.
6. Play an audio source on your smartphone.
Important
0 Be sure to decrease the volume both on your
smartphone and the unit before you start playing an
audio source.
Important
0 Be sure to decrease the volume both on your
smartphone and the unit before you start playing an
audio source.
When You Use the unit via Wi-Fi (Station mode):
Before using this unit via Wi-Fi, make sure initial setup is
completed.
Initial Setup and Pairing (ÄP10)
1. Make sure this unit is plugged in.
2. Make sure Wi-Fi is activated on your smartphone to
connect.
3. Play an audio source on your smartphone.
Important
0 Be sure to decrease the volume both on your
smartphone and the unit before you start playing an
audio source.
When You Use the unit via Wi-Fi (AP mode):
In the AP (Access Point) mode, your smartphone and this
unit are connected directly without a wireless router.
1. Make sure this unit is plugged in.
20
Page 21

Live Video
Follow the steps below to use live video function of this unit.
1. Open the Toshiba Smart Home app.
The home screen appears.
2. Select a this unit to use from
Manager screen.
Setting Manager Screen (ÄP14)
Live Video button.
3. Tap
Device on the Setting
* The screen appearance is subject to change without notice.
The Live Video screen appears and you can view the live
image from this unit.
Important
0 Be sure to open the lens cover of this unit fully when you
use the Live Video function. If the lens cover is closed,
you will be unable to view the image.
1. Tap to return to previous screen.
Alexa button
2.
Tap to activate AVS (Alexa Voice Service).
Amazon Alexa (ÄP22)
3. Tap to take a snapshot on the current view on the screen.
4. Slide to increase/decrease the speaker volume of this unit.
Siren button
5.
Tap to sound a siren-like sound.
When you want to start, tap this button and then tap OK on
the next screen.
Tap this button again to stop the sound.
Video Rec button
6.
Tap to record/stop Video Rec of this unit.
Important
0 To use this function, you need to purchase an account
service from
screen.
Setting Manager Screen (ÄP14)
Talkback button
7.
Tap to activate/deactivate talking between the app and the
unit.
History button
8.
Tap to display the history of image recording.
9. Appears when the talkback function is deactivated.
Service option on the Setting Manager
En
21
Page 22

Amazon Alexa
Sensors on the unit
This unit is compatible with Amazon Alexa, which allows you
to control this unit by talking to it.
Before using Amazon Alexa, make sure initial setup is
completed and you are signing in to Amazon Alexa.
Initial Setup and Pairing (ÄP10)
Before using Amazon Alexa, make sure initial setup is
completed and you are signing in to Amazon Alexa.
1. Make sure this unit is plugged in.
2. Say "Alexa" to this unit or press and hold the Microphone
mute/Talk button to start up Amazon Alexa.
Amazon Alexa starts up and this unit is ready for your
command.
3. Talk to this unit to ask it for an operation.
This unit is equipped with the sensors below.
Temperature sensor
You can monitor the room temperature using the Toshiba
Smart Home app.
Humidity sensor
You can monitor the room humidity using the Toshiba Smart
Home app.
Brightness sensor
You can monitor the room brightness using the To sh ib a
Smart Home app.
Motion sensor
The camera on this unit detects motion within the camera’s
view.
Sound sensor
This unit will detect loud sounds.
22
Page 23

Troubleshooting
Problems with Pairing
Check1: Make sure this unit is plugged in.
Check2: Make sure this unit is in the pairing mode.
Check3: Place your wireless router or device closer to this
unit.
Check4: Make your smartphone’s battery is sufficiently
charged.
No Sound
Check1: Make sure this unit is plugged in.
Check2: Make sure Bluetooth or Wi-Fi is activated on your
smartphone.
Check3: Check the pairing status between the unit and your
smartphone.
Check4: Check the volume level of this unit and the
application on your smartphone.
Cannot View Image from Live Video
Check1: Make sure this unit is plugged in.
Check2: Make sure this unit’s lens cover is fully open.
Check3: Make sure Wi-Fi is activated on your smartphone.
Check4: Check the connection between the unit and the app.
Amazon Alexa Does Not Function Properly
Check1: Make sure this unit is plugged in.
Check2: Make sure Wi-Fi is activated on your smartphone.
Check3: Check the connection between the unit and the app.
Check4: Make sure Alexa Voice Service (AVS) is activated.
Check5: Try talking to this unit or the app more slowly or
clearly.
En
23
Page 24

Specifications
Feature Description
Appearance Cylindrical 88 mm (dia) x 220 mm (H)
AC adapter IN: 100 - 240 V
OUT: 12 V / 3 A
Length of cable: 1.8 m
Unit: Wall mount
Power consumption 19 W (Live camera + BT Speaker (150 Hz Play))
8.5 W (Standby: Wi-Fi + Live camera)
30 W (Maximum: Wi-Fi + Live camera + IR + USB + Siren)
Operating environment Temperature 0 - 40 degree
Humidity 10 - 90 %
External Connetors DC input (Voltage distributions) x 1
USB 2.0 TypeA connecter x 1
Manual operation buttons Volume UP/DOWN (Top)
Mic mute (Top)
Network setting (Back)
Reset (Bottom)
Indicators Volume indicator (9 White LED, Top)
Mic mute indicator (2 Red LED, Top)
Mode indicator (7 colors LED, Front)
Recoding indicator (1 Red LED, Front)
Internal camera Maximum resolution 1080p
Angle horizontal: 114 degree, vertical: 78 degree (diagonal: 135 degree)
Infrared irradiation LED for night vision
Functionary motion detet (Soft)
Rotary camera cover
Communication interfaces Wireless LAN (802.11a/b/g/n/ac 2x2)
Bluetooth 3.0
Z-Wave controller (US: 908.42 MHz)
ZigBee controller (2.4 GHz)
Internal sensors Temperature sensor (range: 0 - 40 degree, resolution: d0.4 degree)
Humidity sensor (range: 10 - 80 %, resolution: d4%)
Illuminance sensor (range: 0 - 3,000 lux, resolution: 0.4lux)
Internal mics 2 mics (Top)
Acoustic echo canceller
Beamforming
Sound detection
Internal speaker 5 W (5 ohm) x 1 ONKYO system speaker (enclosure), Siren
24
Page 25

<U.S.A.>
18 Park Way, Upper Saddle River, N.J. 07458, U.S.A.
For Dealer, Service, Order and all other Business Inquiries:
Tel: 201-785-2600 Fax: 201-785-2650
http://www.us.onkyo.com/
<Germany>
Gutenbergstrasse 3, 82178 Puchheim, Germany
Tel: +49-8142-4401-0 Fax: +49-8142-4208-213
http://www.eu.onkyo.com/
<UK>
Anteros Building, Odyssey Business Park, West End Road, South Ruislip, Middlesex,
HA4 6QQ United Kingdom
Tel: +44 (0)871-200-1996 Fax: +44 (0)871-200-1995
For Product Support only: +44 (0)208-836-3510
http://www.uk.onkyo.com/en/
<France>
6, Avenue de Marais F - 95816 Argenteuil Cedex FRANCE
For Product Support only: +33 969 368 138
http://www.fr.onkyo.com/fr/
For Product Support Team Only:
1-800-229-1687
http://www.us.onkyo.com/
2-3-12 Yaesu, Chuo-ku, Tokyo 104-0028 JAPAN
http://www.onkyo.com/
<Hong Kong>
Unit 1033, 10/F, Star House, No 3, Salisbury Road, Tsim Sha Tsui Kowloon, Hong Kong.
Tel: +852-2429-3118 Fax: +852-2428-9039
http://www.hk.onkyo.com/
<PRC>
302, Building 1, 20 North Chaling Rd., Xuhui District, Shanghai, China 200032,
Tel: +86-21-52131366 Fax: +86-21-52130396
http://www.cn.onkyo.com/
<Asia, Oceania, Middle East, Africa>
Please contact an Onkyo distributor referring to Onkyo SUPPORT site.
http://www.intl.onkyo.com/support/
Корпорация О энд Пи
2-3-12, Яэсу, Чуо-ку, г. Токио, 104-0028, ЯПОНИЯ
The above-mentioned information is subject to change without prior notice.
Visit the Onkyo web site for the latest update.
SN29403199
*29403199*
F1708-0
(C) Copyright 2017 Onkyo & Pioneer Corporation Japan. All rights reserved.
http://www.onkyo.com/privacy/
 Loading...