

Onkyo TX-SR500 User Manual 2
TX-SR500
Basic Operation Guide
Introduction
• This Guide describes basic operation of this receiver and connected devices (CD, DVD etc.). For further information about the advanced
functions of this receiver, please refer to the main instruction manual.
• This Guide does not explain connection details for the unit’s rear panel. Please refer to pages 10-16 of the main instruction manual for
correct connection information. Otherwise, the entire A/V system may not work properly.
• A remote controller is used in the examples described here. For more information on the remote controller, refer to the main instruction
manual.
Enjoying audio and visual sources
Important notes
• If MUTING function is activated, the sound will be muted. Make sure MUTING is set to OFF.
• If the headphones are connected, no sound will be heard from the speakers. Do not connect headphones if you wish to listen
to the sound from the speakers.
SUBWOOFER
PRE OUT
ANTENNA
DIGITAL INPUT
OPTICAL
IN
CD
Front right
speakers
REMOTE
CONTROL
L
R
VIDEO 2
IN
IN
VIDEO 2
FM
75
VIDEO 1
DVD MONITOR
OUT
IN
IN
OUT
OUT
VIDEO 1
IN
FRONT
VIDEO
S VIDEO
SURR
CENTER
L
R
SUB
WOOFER
DVD
AM
COAXIAL
12
IN
OUT
TAPE
L
R
FRONT
SPEAKERS A
Front left
speakers
FRONT
SPEAKERS B
L
R
1. 2. 3.
SURROUND
SPEAKERS
L
R
CENTER
SPEAKER
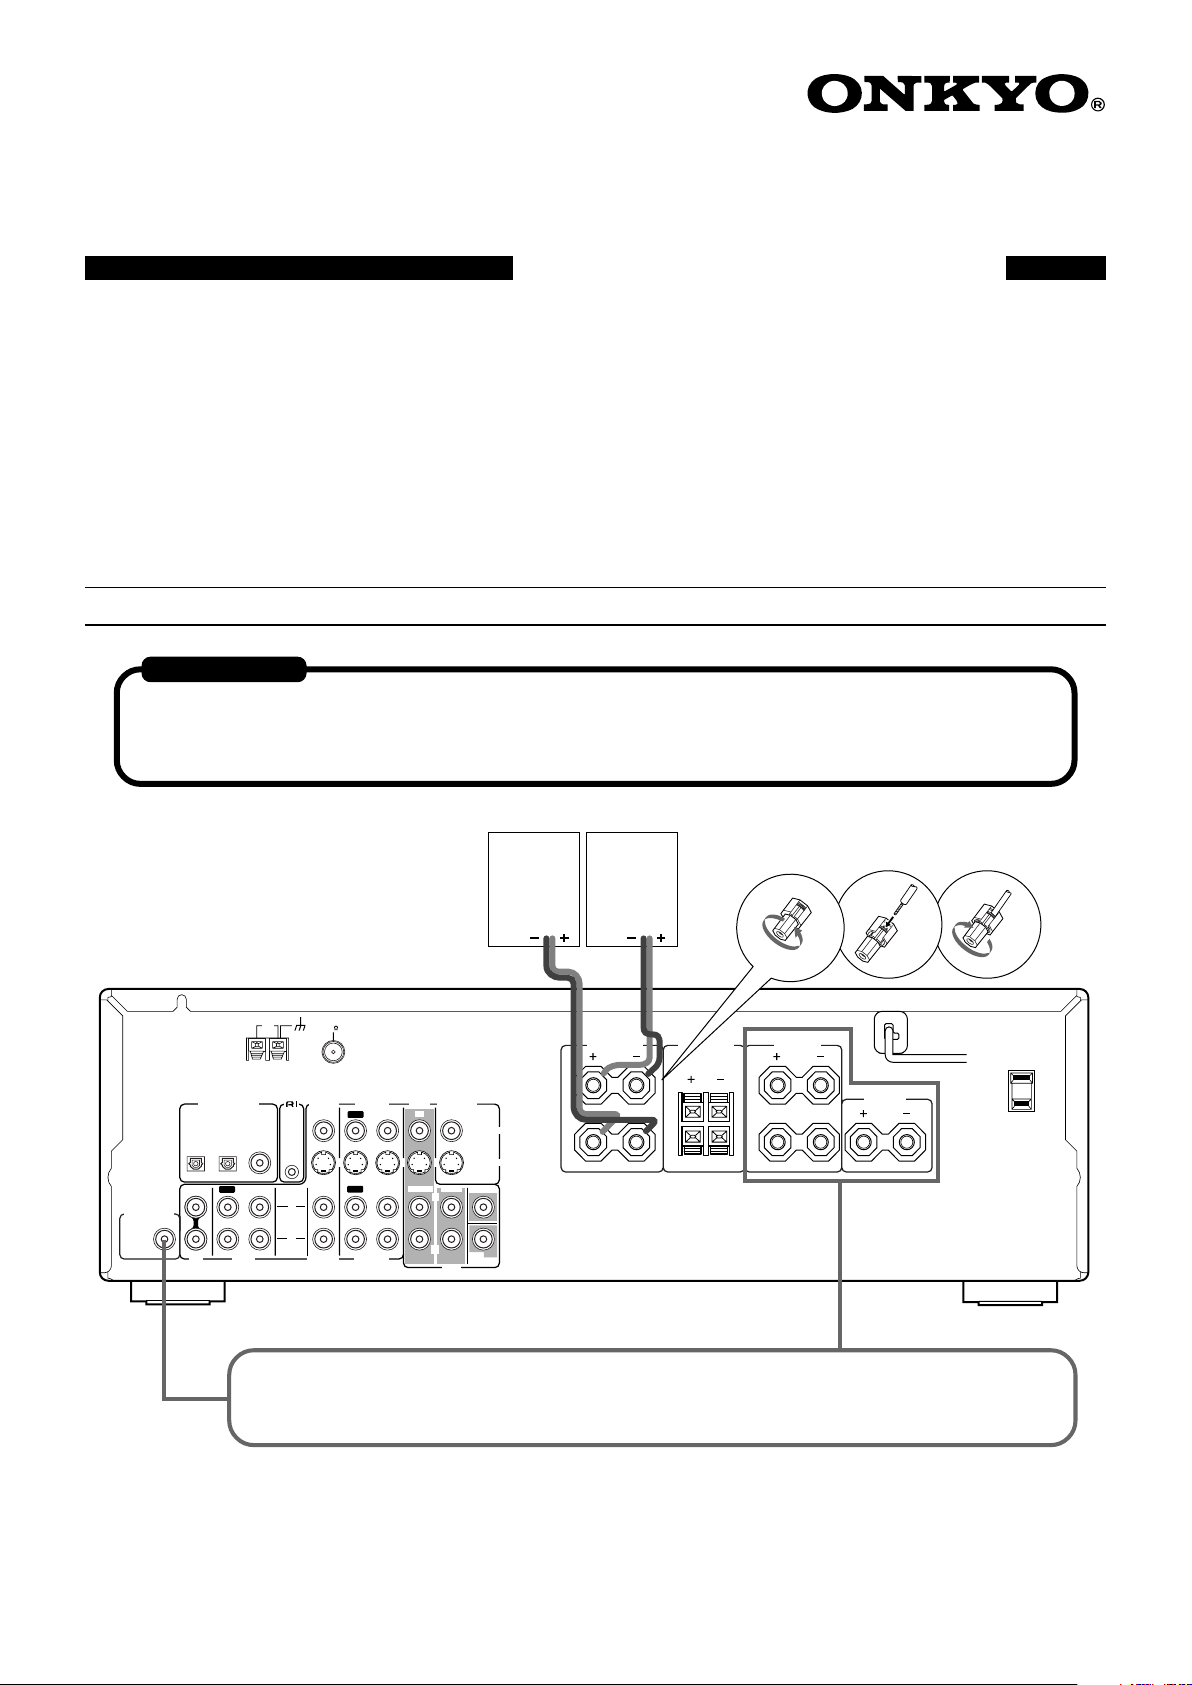
To enjoy surround sound, place the speakers properly as described in “Positioning speakers/
Connecting speakers” on pages 12-13, and make necessary settings as described in “Speaker setup” on
pages 18-20.
AC OUTLET
/
Enjoying DVD
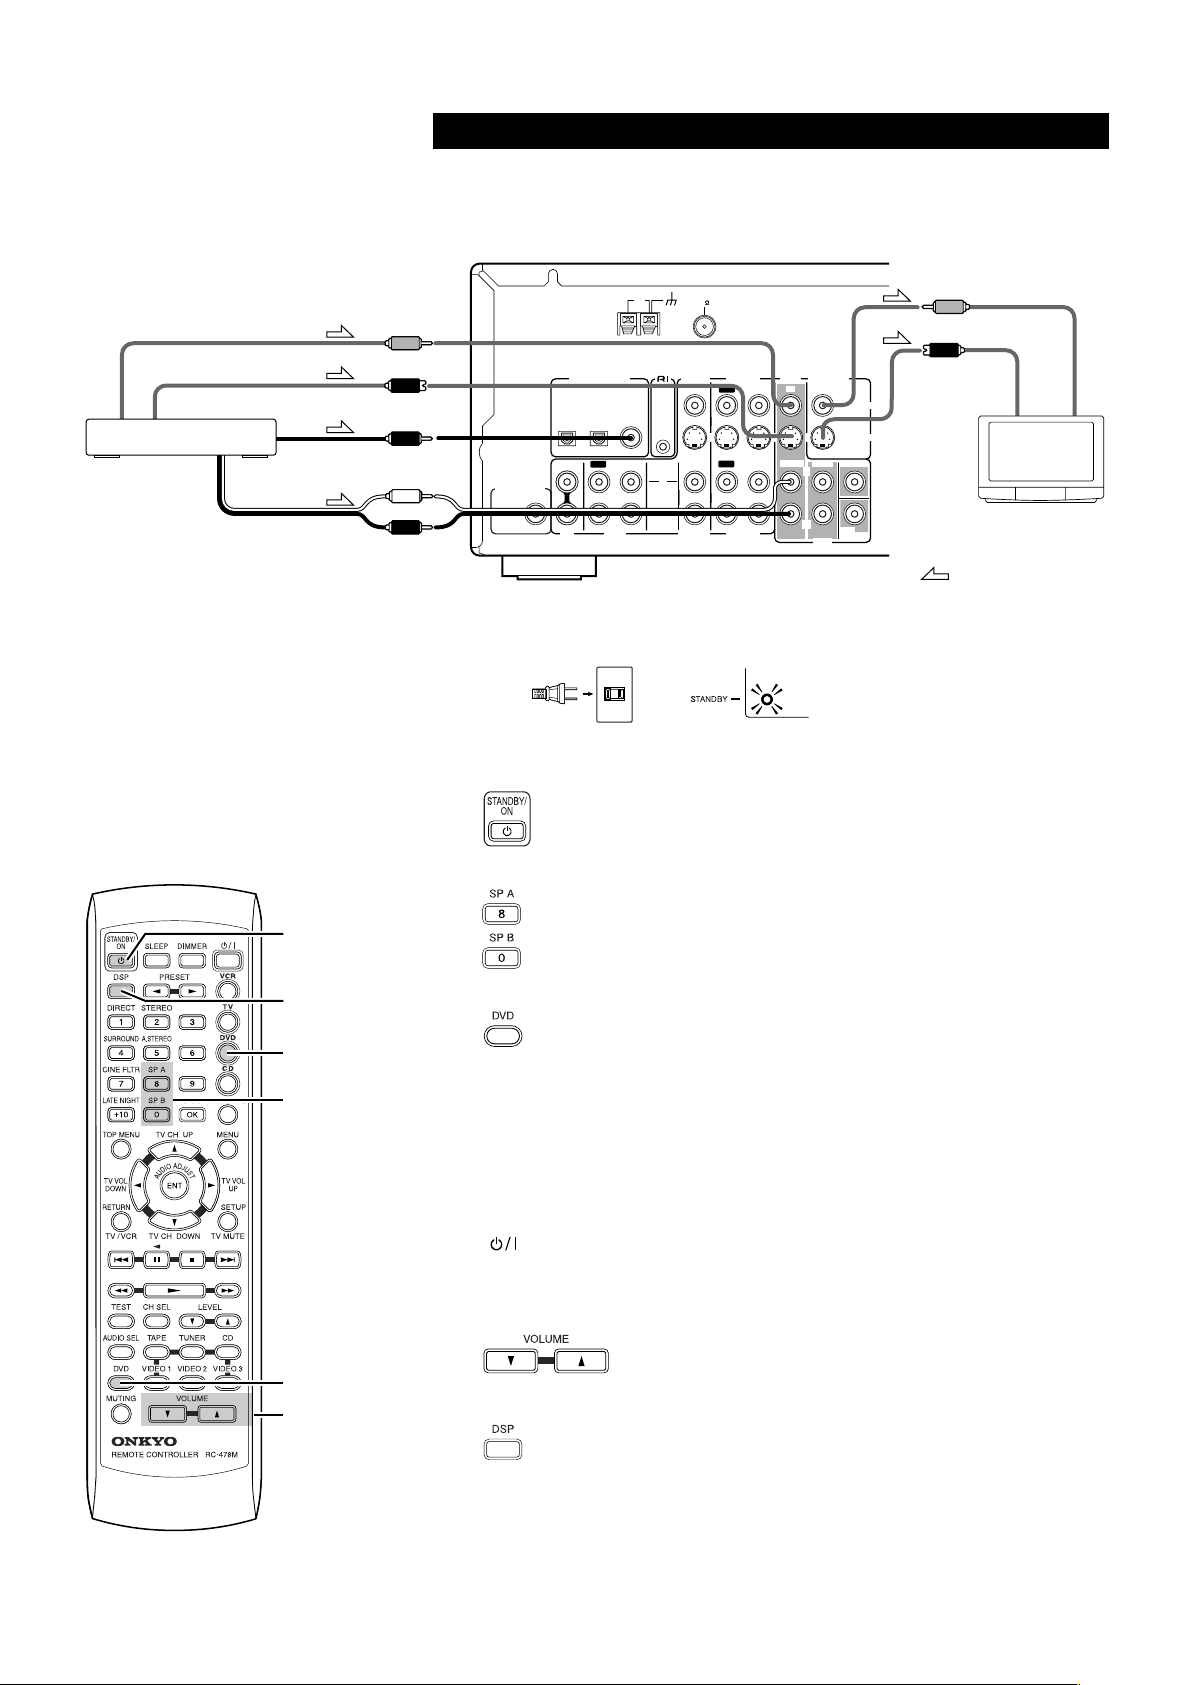
1.
Make sure that connections have been made correctly for the monitor TV and the
DVD Player.
Here, only the typical connections are shown. For details, see pages 10 and 11 of the main
manual.
Video output
S Video output
DVD player (DVD)
Analog audio
output
Digital audio output
(coaxial)
REMOTE
CONTROL
L
R
VIDEO 2
IN
IN
VIDEO 2
FM
75
ANTENNA
DIGITAL INPUT
OPTICAL
IN
SUBWOOFER
PRE OUT
CD
2.
Connect the power cord to a wall outlet.
AM
COAXIAL
12
IN
OUT
TAPE
Wall outlet
3.
Turn on the power.
The STANDBY indicator turns off, and the display area lights up.
VIDEO 1
OUT
OUT
VIDEO 1
IN
IN
Video input
CENTER
SUB
WOOFER
VIDEO
S VIDEO
S Video input
DVD MONITOR
OUT
IN
SURR
FRONT
L
R
DVD
:Signal flow
The STANDBY indicator lights up.
TV
3.
STANDBY
ON
8.
DSP
6.-2.
DVD
4.
SP A/
SP B
5.
DVD
7.
VOLUME
5/∞
4.
Select the speaker system(s) to be used.
5.
Set the Input Select to DVD.
When the digital output from the DVD player is connected to the OPTICAL
1 or 2 input jack of this unit, change the assignment of digital inputs to input
sources by referring to “Setting the digital inputs” on page 22.
6.
Play a DVD.
The video appears on the monitor TV.
To control an Onkyo DVD player
1 Make z connection (see page 16 of the main manual).
2 Press DVD, then press the desired operation button (see page 34 of the main manual).
, £, 7, ¡, 1, 2/8, 4, ¢, DISC, TOP MENU, MENU, RETURN,
SETUP, 5, ∞, 2, 3, ENT and numeric buttons can be used.
7.
Adjust the volume.
8.
Select the listening mode.
For details, see pages 30-32 of the main manual.
• To enjoy multi channel input, see page 23 of the main manual.
 Loading...