

Page 1
Updating the Firmware (TX-NR1000/5000E)
Before Updating the Firmware
The Net-Tune Firmware Updater makes use of the operation environment of the Net-Tune network, as
well as RS232 for controlling update.
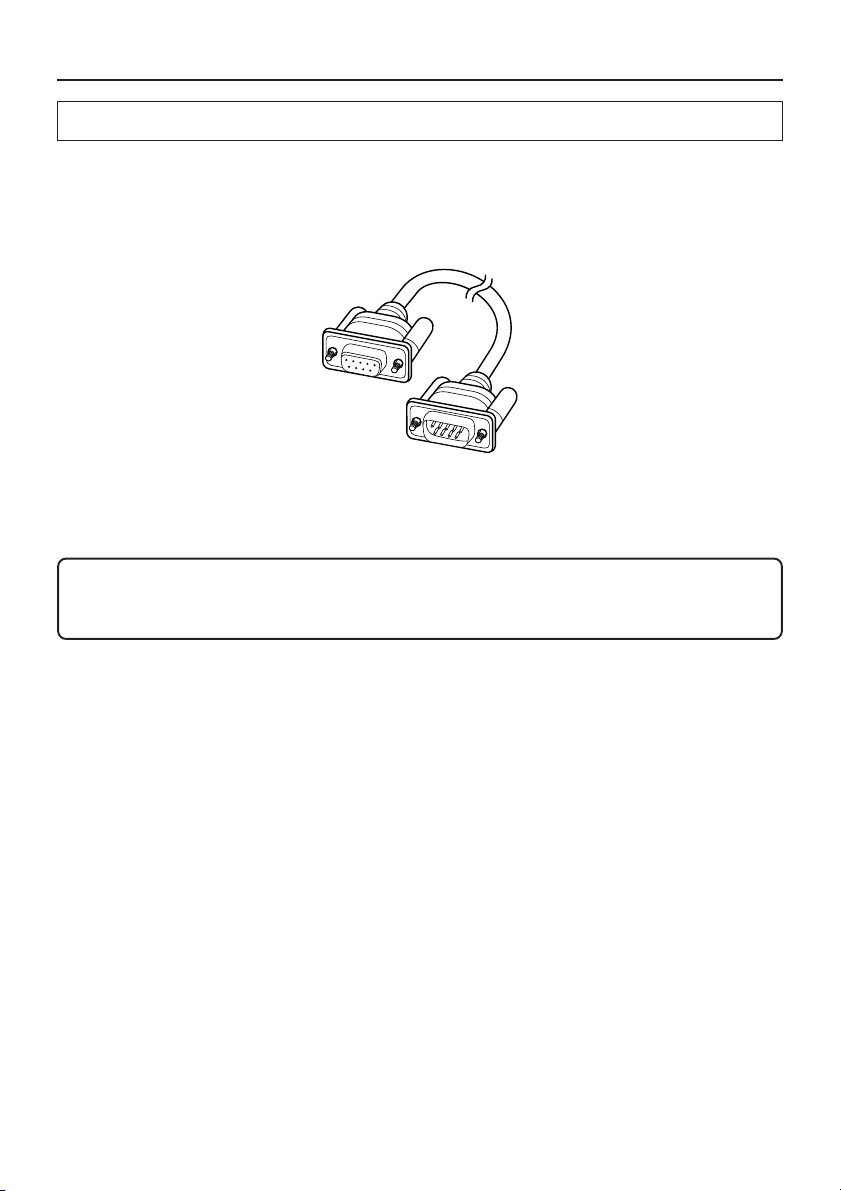
You should therefore provide the network environment for the Net-Tune operation and a personal
computer equipped with an RS232 interface (serial port) along with an RS232 straight-through cable,
DB9 male to DB9 female, with male screws at both ends. See the illustration below.
You can perform an update operation using your Net-Tune server if it has an RS232 interface, without
needing any additional computer.
For information about network environment, etc., please also refer to the instruction manual for the
AV Receiver.
Remember that version updating operations for the Net-Tune firmware should be carried
out on the user’s authority.
Read carefully instructions in this manual before updating the firmware.
Other Information
1
Page 2

Workflow for Firmware Updating
1. Connect the server PC as well as the AV Receiver to your network environment using LAN
cables.
2. Connect an RS232 cable between the control PC and the AV Receiver. (The server PC may also
be used as the control PC.)
3. Install the Net-Tune Update Tool (NetUpdate) on the control PC.
4. Prepare the firmware files on the server PC, and then start the Firmware Updater.
* The Firmware Updater is a program to support firmware updating. Please keep it run until the
firmware update operation completes.
5. Start the Net-Tune Update Tool (NetUpdate) on the control PC to initiate an update operation.
6. Once the update operation is completed, exit the Net-Tune Update Tool (NetUpdate) on the
control PC.
7. Exit the Firmware Updater on the server PC.
Notes:
• If you have never used the Net-Tune Central before, please disable the Windows firewall
on the server PC.
• Do not turn off the AV Receiver or the PC while an update operation is in progress. Pay
close attention to circuit breaker tripping, power failure, battery run-out or other causes of
power interruption, which may cause damage.
• During an update operation, do not operate the AV Receiver or any external devices such
as DVD player connected to the AV Receiver.
• During an update operation, do not perform any operation that may put loads on the
network.
Other Information
2
Page 3
Connecting PC and AV Receiver
If you usually use a Net-Tune Central (server PC) in your operational environment, you do not have to
make any change to your network connection. For detailed information on network connection, refer
to the instruction manual for the AV Receiver.
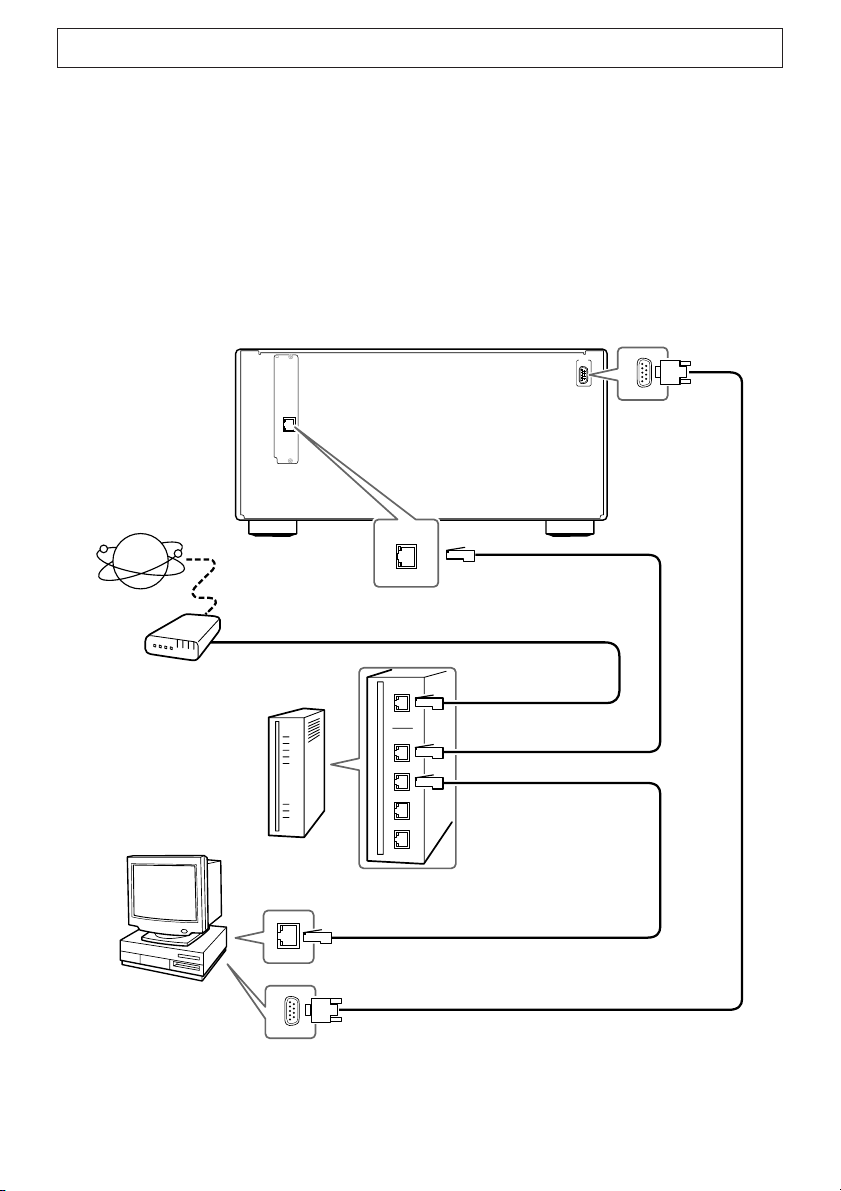
Connect a straight-through cable between an RS232 (serial) port on the server PC and the RS232 port
on the upper right corner on the back of the AV Receiver: The connection is required to control the
update operation.
If you use a personal computer for control purposes aside from the server PC, connect a straightthrough cable between an RS232 (serial) port on the personal computer and the RS232 port on the
upper right corner on the back of the AV Receiver.
Using a Server for Update Control Purpose
Internet
Modem
Server/Control PC
AV Receiver
B
“Net-Tune”
is a trademark of
Onkyo Corporation.
ETHERNET
(
)
Net-Tune
Router
LAN Port
ETHERNET
(
)
Net-Tune
ETHERNET Port
To WAN
To LAN Port
To LAN Port
RS232 Port
RS
232
Other Information
Serial Port
3
Page 4
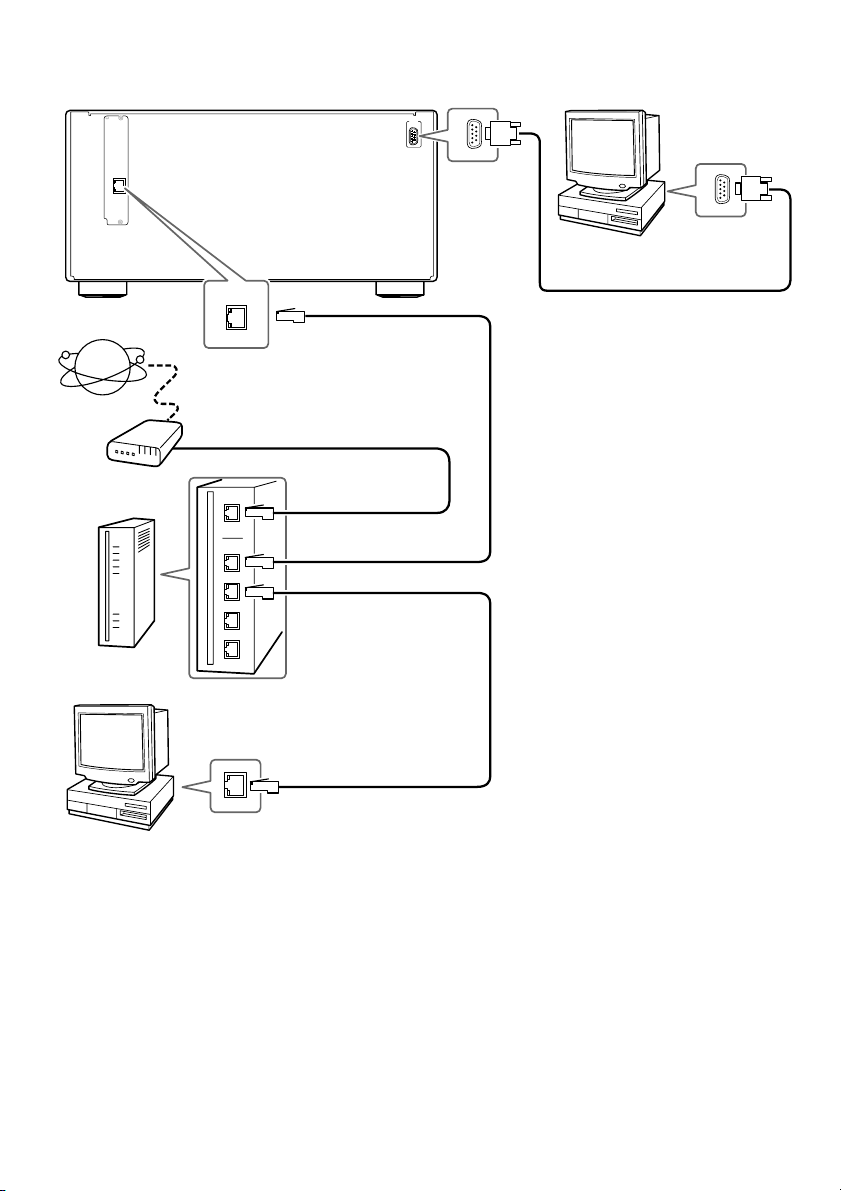
Using an Additional PC for Update Control Purpose
AV Receiver
B
“Net-Tune”
is a trademark of
Onkyo Corporation.
ETHERNET
(
)
Net-Tune
Internet
Modem
Router
ETHERNET
(
)
Net-Tune
ETHERNET Port
To WAN
To LAN Port
To LAN Port
RS232 Port
RS
232
Control PC
Serial Port
Server PC
LAN Port
Other Information
4
Page 5
Preparing PC
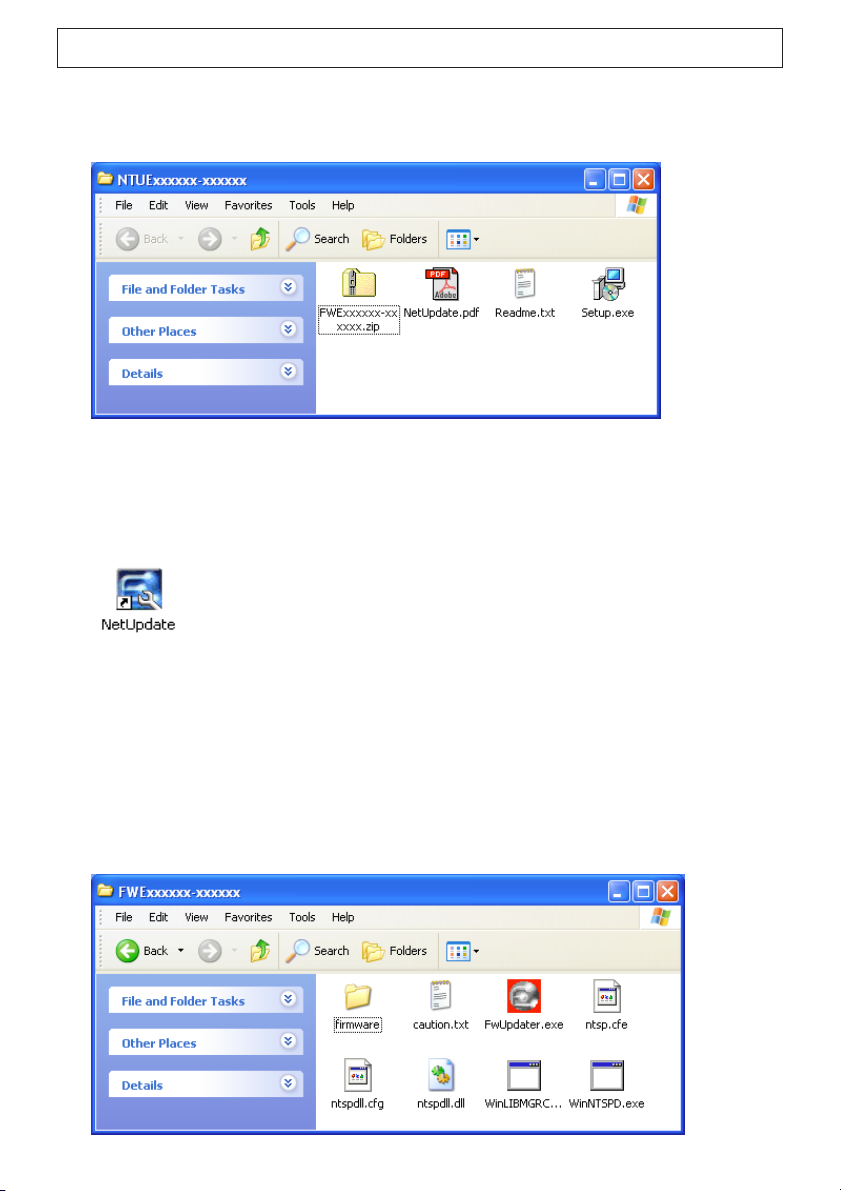
1. Unzip the downloaded file on the control PC, and then open the newly created
folder.
Read the “Readme.txt” first.
2. Run the “Setup.exe” file to install the Net-Tune Update Tool.
Double-click the “Setup.exe” icon, and follow the instruction that appears.
You will see a shortcut icon created on the desktop to the Net-Tune Update Tool “NetUpdate.”
* The Net-Tune Update Tool (NetUpdate) controls an updating operation.
3. Unzip the firmware on the server PC, and then open the newly created folder.
Find “FWExxxxxx-xxxxxx.zip,” a zipped file of the firmware, within the folder you have opened
at step 1 above (NTUExxxxxx-xxxxxx).
If you are using the server for controlling purposes, unzip the “FWExxxxxx-xxxxxx.zip” file on
the server.
If you use other PC as a server, copy the “FWExxxxxx-xxxxxx.zip” file to that PC and then unzip
it.
You will see the “FWExxxxxx-xxxxxx” folder created. Open the folder.
5
Other Information
Page 6

Updating the Firmware
Updating the firmware requires about 10 minutes to complete. Make sure that you have enough time
before starting the following procedure.
1. Turn on the AV Receiver.
Any source may be selected when starting an update operation, but do not operate the AV
Receiver using the front panel buttons or the remote controller while the update operation is in
progress. Furthermore, before updating, turn off any external devices such as DVD player
connected to the AV Receiver.
2. Launch the Net-Tune Firmware Updater on the server PC.
Double-click the “FwUpdater.exe” icon in the “FWExxxxxx-xxxxxx” folder.
Then exit all the applications running on the server PC including the Net-Tune Central and click [Yes]
button on the confirmation dialog box.
Now you do not have to do anything on the Net-Tune Firmware Updater until the firmware update
operation completes.
* The Firmware Updater is a program to support firmware updating. Please keep it run until the
firmware update operation completes.
Other Information
6
Page 7

3. Launch the Net-Tune Update Tool on the update control PC.
Double-click the “NetUpdate” icon on the desktop.
Exit all the applications running on the PC other than the “FwUpdater.exe” and click [OK] button
on the confirmation dialog box.
4. Configure the ComPort to start the Net-Tune Update Tool.
In the ComPort menu, specify the number of the COM port to which the PC is connected, and then
click the [Start] button.
A search starts for the firmware, with the progress indicated.
7
Other Information
Page 8

5. Start updating (overwriting the firmware).
Notes:
• Do not turn off the AV Receiver or the PC while an update operation is in progress. Pay
close attention to circuit breaker tripping, power failure, battery run-out or other causes of
power interruption, which may cause damage.
• During an update operation, do not operate the AV Receiver or any external devices such
as DVD player connected to the AV Receiver.
• During an update operation, do not perform any operation that may put loads on the
network.
Now you can start an update operation; remember the note above and click the [Update] button.
Preparing for overwriting.
Other Information
8
Page 9

Overwriting starts, with the progress bar indicated.
6. Exit updating.
Once the updating process is successfully completed, you will see the following dialog box, and
then click the [OK] button.
Click the [Exit] button to exit the Net-Tune Update Tool.
9
Other Information
Page 10
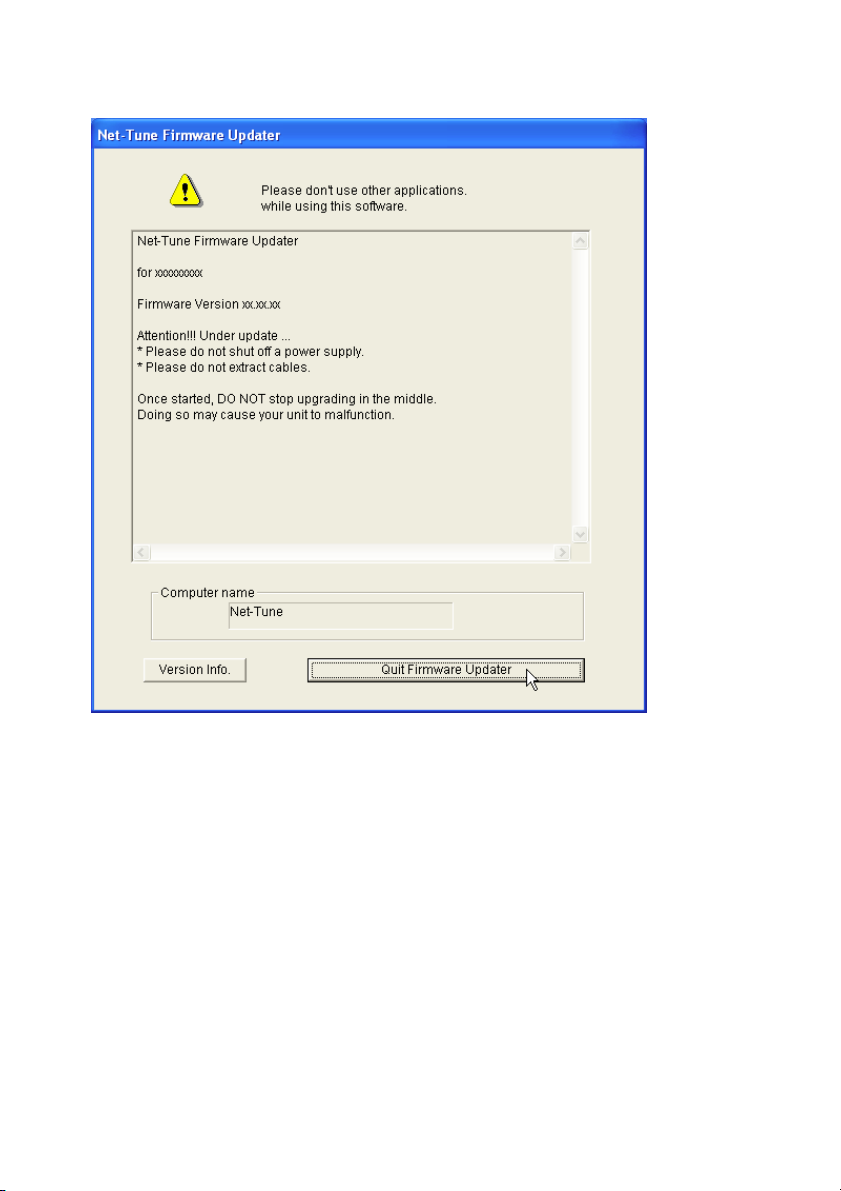
7. Also exit the Net-Tune Firmware Updater.
You should also exit the Net-Tune Firmware Updater on the server PC. Click the “Quit Firmware
Updater” button, and then click [Yes] button on the confirmation dialog box.
8. In conclusion
Now you have finished updating the Net-Tune firmware.
Turn off the main power on the AV Receiver, and also power off the control PC before removing
the RS232 cable.
Run the Net-Tune Central on the server PC and power on the AV Receiver to verify the music
server can be played.
* Once the firmware is updated, you will see “Net-Tune Version : -.--” displayed on the
Firmware Version in the Setup menu, which is normal.
10
Other Information
Page 11

Uninstalling Tool
You can uninstall the Net-Tune Update Tool by removing the “Net-Tune Update Tool” from “Add/
Remove Programs” in “Control Panel.”
You can also remove the Net-Tune Firmware Updater by deleting the “FWExxxxxx-xxxxxx” folder
containing the internal files.
Copyright Information
• The “Net-Tune” name and logo are registered trademarks of Onkyo Corporation.
• Pentium is a trademark of Intel Corporation in the United States.
• Microsoft, Windows, and Windows NT are registered trademarks of Microsoft Corporation in the
United States and/or other countries.
• Adobe and Acrobat are trademarks of Adobe Systems Incorporated.
• All other company and product names described herein are either registered trademarks or
trademarks of their respective holders.
D0607-1
© Copyright 2006 ONKYO CORPORATION Japan. All rights reserved.
Other Information
 Loading...