

Page 1
Assembly Instructions
RS 750 / RS 550
Rocket Riser
©™
Tools you will need:
Large Philips Screwdriver
Small Philips Screwdriver
(6) 2” Wood Screws (included)
(6) 1.25” Machine Screws (included)
STEP 1: Remove all packing material from included (4) Riser platforms.
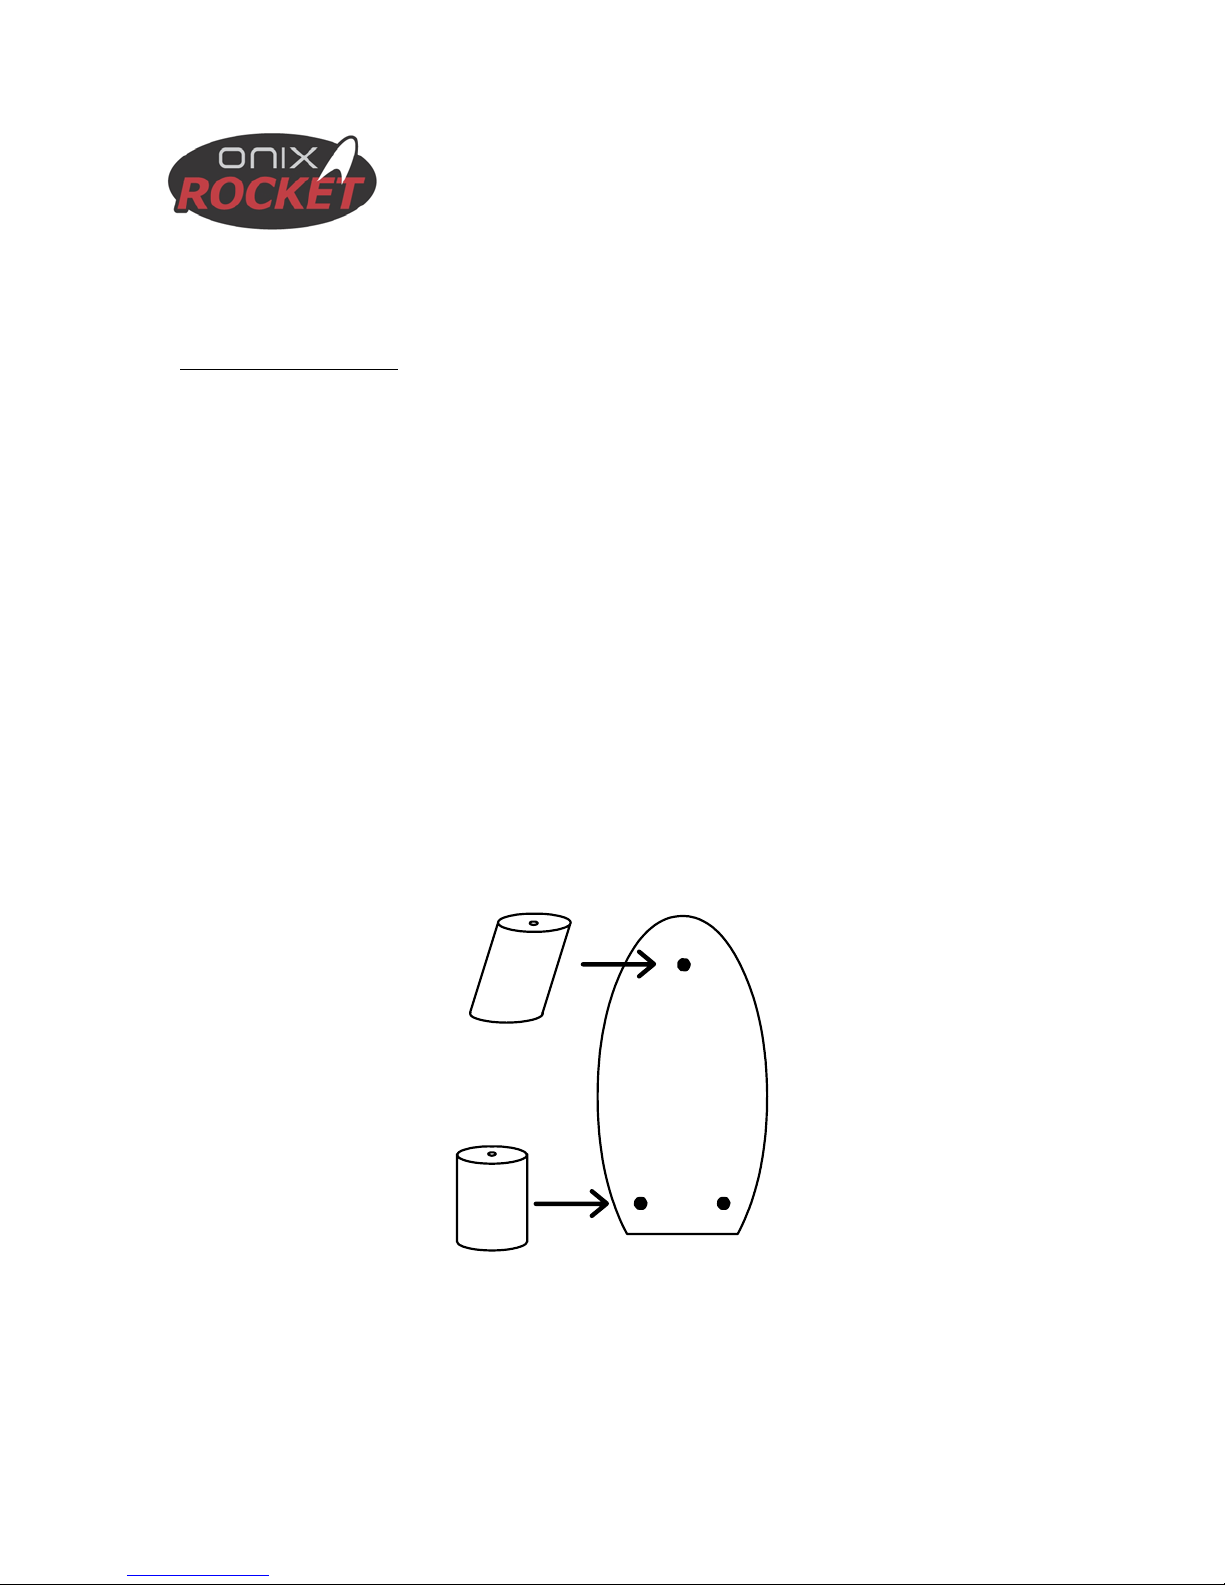
STEP 2: With small Philips head screwdriver, attach the included 2” dowels to
small Riser (top) platforms using (3) 2” wood screws. Angled dowel forms the
front Riser support, straight dowels form rear Riser supports. See Figure 1.1.
NOTE: Angled dowel should “point” forward when right-side up. See Figure
1.2.
Figure 1.1
Page 1
Page 2

Figure 1.2
Back
Front
**Remove spiked feet from RS 550/750 base before proceeding.
STEP 3: Using large Philips head screw driver, attach small Riser platform to
base of RS 750 using included 1.25” machine screws. Machine screws will
drill directly into threaded inserts on RS 550/750 bottom.
STEP 4: Using remaining wood screws, from the underside up, screw large
(bottom) Riser base into pre-drilled holes in base of 2” dowels.
STEP 5: Insert spiked feet into threaded inserts on underside of large Riser
base, and stand speaker upright. NOTE: Spikes are to be used ONLY in
traffic areas where speakers will not be touched. Using spiked feet will
significantly reduce the stability of your speakers. If placed in high traffic
areas, or if in danger of being inadvertently bumped (pets, small children,
etc.), use included rubber feet on large base instead of spikes. See Figure 1.3.
Figure 1.3
low
STEP 6: Sit down and listen!
**Should you need any further technical assistance, please contact our
support department at
support@av123.com or 1-877-543-7500 option 2.
Page 2
Page 3

 Loading...