

Page 1
user s manualuser s manual
DIGITAL AUDIO
COMPACT DISC PLAYER COMPACT DISC PLAYER
ONIX AUDIO,LLCONIX AUDIO,LLC
368 S.McCaslin Blvd # 189
Louisville,CO 80027 USA
TEL: (303) 543-7500
email: support@av123.com
368 S.McCaslin Blvd # 189
Louisville,CO 80027 USA
TEL: (303) 543-7500
email: support@av123.com
XCD-99XCD-99
POWERPOWER
PLAYPLAY
STOPSTOPOPEN / CLOSEOPEN / CLOSE
PREVPREV NEXTNEXT
XCD-99 COMPACT DISC PLAYER XCD-99 COMPACT DISC PLAYER
Page 2

2 2
1 1
Congratulations On Your Purchase Congratulations On Your Purchase
Safety Guidelines Safety Guidelines
1. Take heed of warnings and instructions1. Take heed of warnings and instructions
2. Water and Moisture2. Water and Moisture
3. Object or liquid entry3. Object or liquid entry
4. Ventilation4. Ventilation
5. Heat5. Heat
6. Climate6. Climate
7. Rack and Stands7. Rack and Stands
8. Cleaning8. Cleaning
9. Power Sources9. Power Sources
10. Power-cord protection10. Power-cord protection
11. Non-use periods11. Non-use periods
You have selected a state-of-the-art CD Player. Each component chosen for
assembly in the construction of the XCD-99 CD player was selected to provide
you with superior performance and the highest level of sound reproduction
available today. We know of no CD player that costs as much to produce that
sells for so little. Please take a few moments to read over the operating
instructions to ensure that you get the best performance from your unit and
years of trouble-free service.
This product is designed and manufactured to meet strict quality and safety
standards. However, you should be aware of the following installation and
operation precautions:
Read all the instructions before connecting or operating the component.
Keep this manual so you can refer to these safety instructions. Heed all warnings
and safety information in these instructions and on the CD player. Follow all
operating instructions.
To reduce the risk of fire or electric shock, do not expose the unit to moisture or
water. If the unit is exposed to moisture, immediately disconnect the power cord
from the wall. Take the unit to an authorized ONIX service person for inspection
and necessary repairs. Do not touch the unit, power cord, or plug with wet hands.
Do not allow foreign objects or liquids into the enclosure through any openings.
If liquid enters the unit, or a foreign object gets into the enclosure, immediately
disconnect the power cord from the wall and take the unit to an authorized ONIX
service person for inspection and necessary repairs.
You must allow 50 mm or 2 inches of unobstructed clearance around the unit.
Do not place the unit on a bed, sofa, rug, or similar surface that could block the
ventilation slots. If the component is placed in a bookcase or cabinet, there must
be ventilation of the cabinet to allow proper cooling.
Keep the component away from naked flames, radiators, heat registers, stoves, or
any other appliance (including amplifiers) that produce heat.
The CD player has been designed for use in moderate climates. Do not attempt to
use below 41 degrees Fahrenheit (5 degrees Celsius) or above 95 degrees
Fahrenheit (35 degrees Celsius).
Place the unit on a fixed, level surface strong enough to support its weight. Do not
place it on a moveable cart that could tip over. We recommend using only racks or
stands approved for use with audio equipment.
Unplug the unit from the mains supply before cleaning. The case should normally
require only a wipe with a soft lint-free cloth.
Only connect the unit to a power supply of the type and voltage described in the
operating instructions or specified on the rear panel of the unit.
Connect the component to the power outlet only with the supplied power supply
cord or an exact equivalent. Do not modify the supplied cable in any way. Do not
attempt to defeat grounding and/or polarization provisions.
Do not use extension cords.
Do not route the power cord where it will be crushed, pinched, bent at severe
angles, exposed to heat, or damaged in any way.
The power cord should be unplugged from the wall outlet if the unit is to be left
unused for a long period of time.
Page 3
CAUTION CAUTION
12. Abnormal Smell12. Abnormal Smell
13. Servicing13. Servicing
14. Damage Requiring Service14. Damage Requiring Service
WARNING! WARNING!
Getting Started Getting Started
A Few Precautions A Few Precautions
PlacementPlacement
If abnormal smell or smoke is detected from the unit, turn the power off immediately
and unplug the CD player from the wall outlet. Stop using the component
immediately and have it inspected and/or serviced by an authorized ONIX service
agency.
There are no user serviceable parts inside. To reduce the risk of electric shock, do
not remove the cover. Refer all servicing to an authorized ONIX service agency.
Immediately stop using the component and have it inspected and/or serviced by an
authorized ONIX service agency if:
The power supply cord or plug has been damaged.
Objects have fallen or liquid has been spilled into the unit.
The unit has been exposed to rain.
The unit shows signs of improper operation
The unit has been dropped or damaged in any way
IMPORTANT FOR LASER PRODUCTS
1. CLASS 1 LASER PRODUCT
2. DANGER: Visible laser radiation when open and interlock failed or bypassed.
Avoid direct exposure to beam.
3. CAUTION: Do not open the top cover. There are no user serviceable parts inside
the player, leave all servicing to qualified service personnel.
To reduce the risk of electrical shock, fires, etc.:
1. Do not remove screws, covers or cabinet.
2. Do not expose the unit to rain or moisture.
3. Do not touch the power cord or plug with wet hands.
WARNING
TO PREVENT FIRE OR SHOCK HAZARD
DO NOT EXPOSE THIS UNIT TO RAIN OR MOISTURE
WARNING
TO PREVENT FIRE OR SHOCK HAZARD
DO NOT EXPOSE THIS UNIT TO RAIN OR MOISTURE
CLASS 1 LASER PRODUCT
APPAREIL LASER DE CLASSE 1
PRODUCTO LASER CLASE 1
CLASS 1 LASER PRODUCT
APPAREIL LASER DE CLASSE 1
PRODUCTO LASER CLASE 1
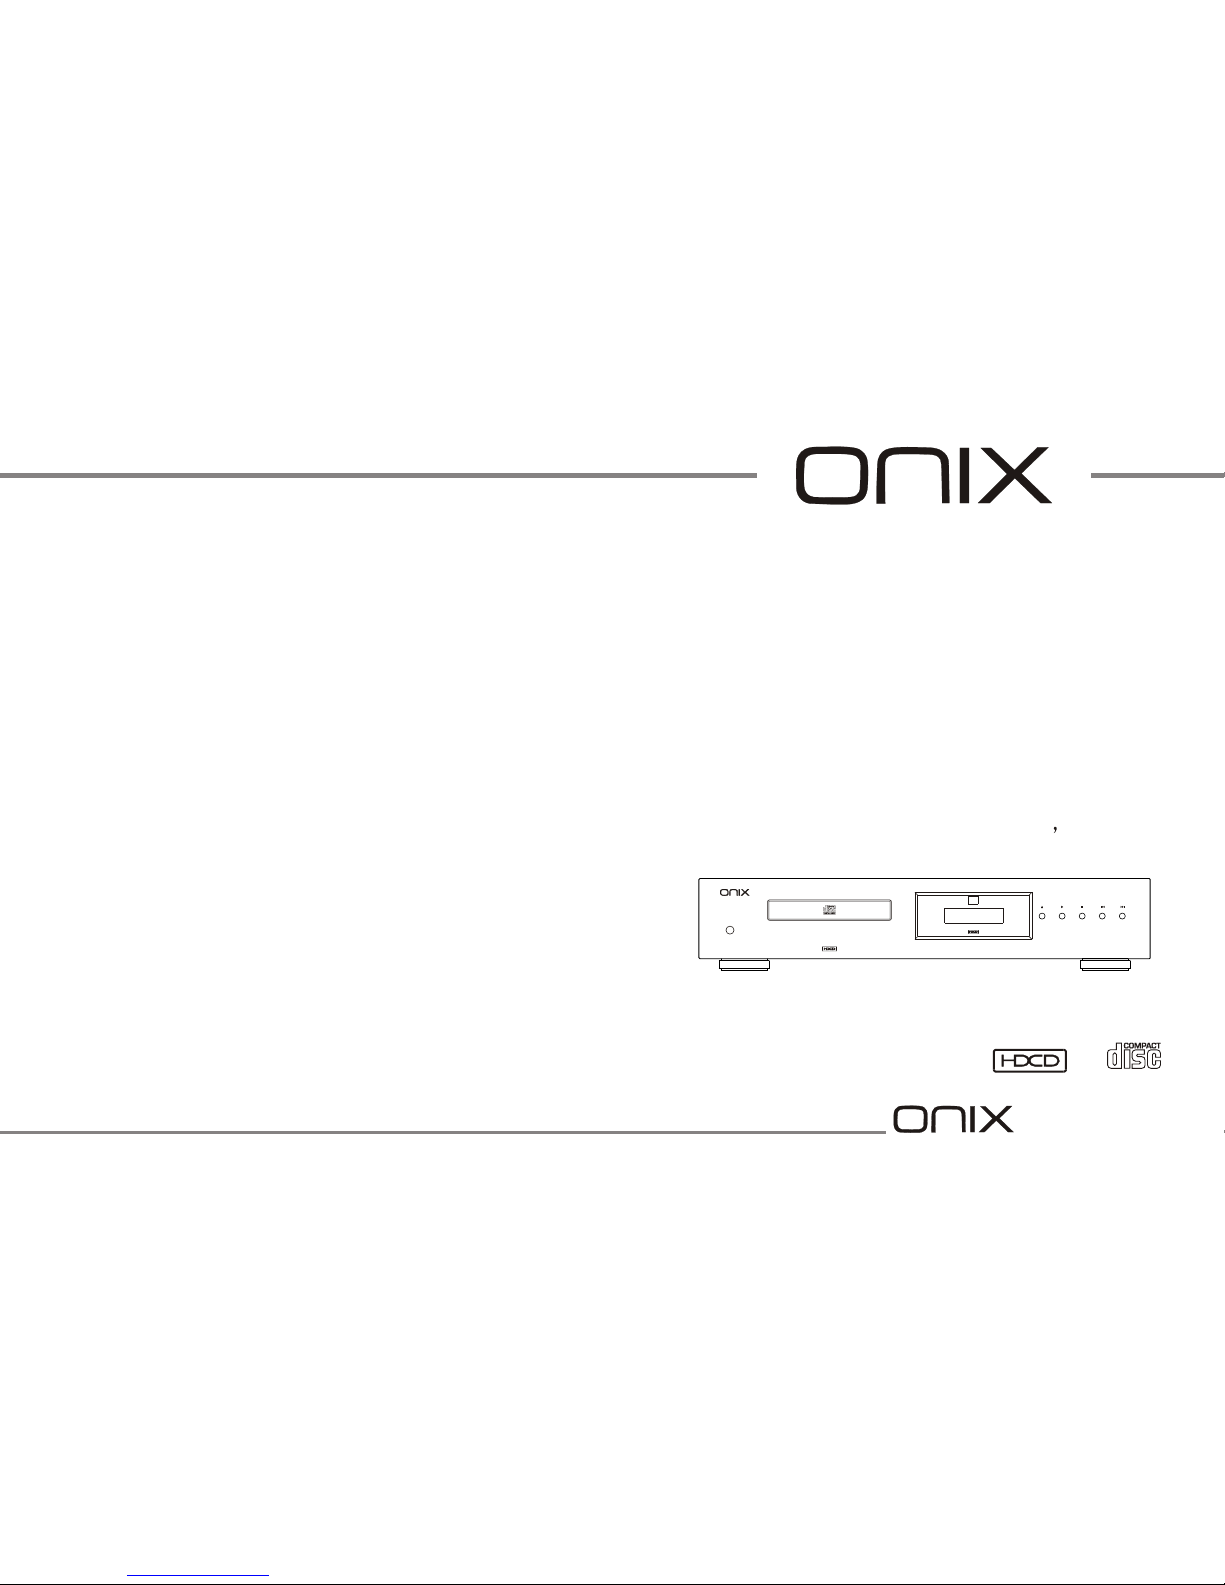
Thank you for purchasing the ONIX XCD-99 Stereo Compact Disc Player. It uses a
precision Philips CDM-12.10 transport controlled by a CD-7 servo system. A Burr
Brown 24bit/96Khz D/A chip is used for digital to analog conversion plus HDCD
(High Definition Compatible Digital) decoding of suitably encoded CD's. These
features combined ensure that the XCD-99 will deliver the highest level of audio
performance. When used in a high-quality audio system, your ONIX CD player will
provide years of enjoyment.
Please read this manual carefully. In addition to installation and operating
instructions, it provides valuable information that will help you get optimum
performance from your system. For users live in the USA, please contact our
exclusive distributor - AV123.COM for the answers. For the users in the other
countries, you may contact your nearby authorized ONIX dealer for any inquiry.
In addition, all of us at ONIX welcome your questions and comments. Save the
ONIX XCD-99 shipping carton and all enclosed packing material for future use.
Shipping or moving the XCD-99 in anything other than the original packing material
may result in severe damage that is not covered by the warranty. Be sure to keep
the original sales receipt. It is your best record of the date of purchase, which you
will need in the event warranty service is required.
Use common sense when placing the XCD-99. Always place the CD player on
a level, firm surface. Make sure that the shelf or cabinet can support its weight. Do
not stack heavy components on top of the XCD-99. Avoid placing the unit where it
may be subject to excessive heat, such as on top of a large power amplifier or near
a heat register. For best performance, avoid placing the unit where it may be
subject to vibration, such as near a speaker.
4 4
3 3
Page 4
Using Your CD Player Using Your CD Player
Connecting To Other Equipment Connecting To Other Equipment
Interconnect Cables Interconnect Cables
Audio OutAudio Out
Coaxial Digital OutCoaxial Digital Out
Open/CloseOpen/Close
StopStop
Play/PausePlay/Pause
A basic interconnect cable is supplied with the XCD-99. This cable will provide
good performance. You may choose to upgrade this cable to one of higher quality.
This may or may not improve the sound quality of the XCD-99.
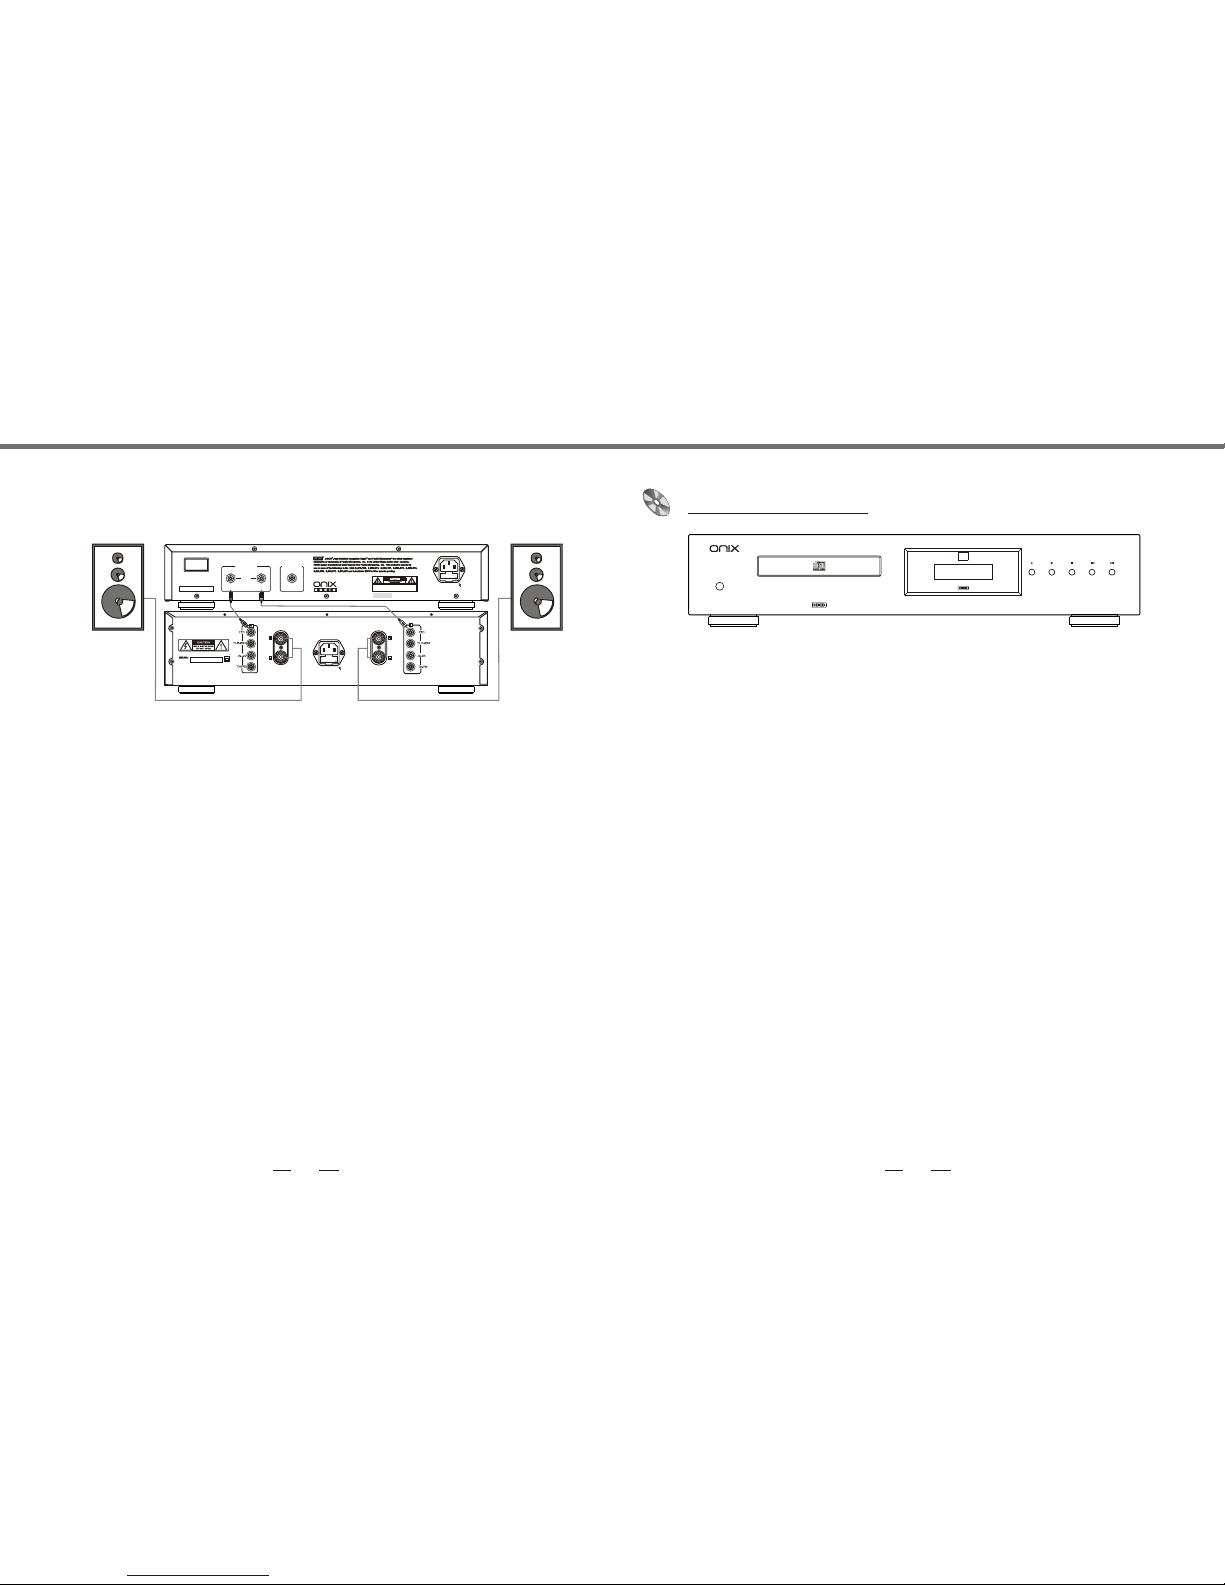
These outputs are located on the back of your XCD-99 and are labeled Fixed
Analog Out. Connect these to outputs to your amplifier's CD or any other line-level
input using the supplied or a suitable interconnect cable. Match the Red inter
connect lead to the R-input and the Black interconnect lead to the L-input. Do the
same on your amplifier to ensure proper stereo reproduction.
Use this output if you are using a separate digital to analog converter(DAC) or
digital recorder. Connect to the DAC or recorder's digital input using a suitable
75 ohm screened cable. Never connect the digital output socket to a conventional
audio input.
Connecting To The MainsConnecting To The Mains
Plugging InPlugging In
Check that the Power button on the front of the unit is in the Off position. Push the
plug(IEC line socket) of the power cable supplied with the XCD-99 into the socket
(AC IN) on the back of the unit. Make sure it is pressed in firmly. Put the plug on
the other end of the cable into your wall outlet or power supply socket.
PowerPower
Press this button to turn the CD Player on and off. When first connecting the unit,
make sure this button is in the off position.
To install a CD, press the Open/Close button. The CD tray will open and the display
will show, Open. Place a CD in the tray, label facing up. Press the Open/Close
button again. The CD tray will close and the display will show, Close. In a few
seconds, the CD Player will read the disc and the display will show the total number
of tracks and total playing time. The disc is now ready to play.
Press to play the CD. Make sure your amplifier is set to the correct input. The
display window will show the track playing(number one) and the elapsed time of
the track being played.
To Pause(interrupt play) press the play button once while the disc is playing. The
display will show, Pause. To resume play from the same point, press the play
button again. Note: It is not good to leave CD players in pause mode for an
extended period of time as it decreases laser life.
Press Stop to stop the CD playing. The display window will show the total number
of tracks on the disc and the total playing time.
Skip(Double Arrow Left and Double Arrow Right Keys)Skip(Double Arrow Left and Double Arrow Right Keys)
To start a CD with a track other than the first, or to advance forward or backward to
different tracks on the disc, press the double arrow button in the direction of the
track you wish to hear. Pressing the button multiple times will advance through
previous or following tracks. There is no need to hit the play button. Once the
desired track is located(shown in the display window), remove your finger. The
player will automatically begin playing your selected track.
6 6
5 5
AC INAC IN
230Vac 50/60Hz,500mAT230Vac 50/60Hz,500mAT
115Vac 50/60Hz,1AT115Vac 50/60Hz,1AT
FIXEDFIXED
RR L L
ANALOG OUTANALOG OUT DIGITAL OUTDIGITAL OUT
COAXIALCOAXIAL
MODEL: ONIX XCD - 99
SERIAL NO.:
MODEL: ONIX XCD - 99
SERIAL NO.:
WARNING
TO PREVENT FIRE OR SHOCK HAZARD
DO NOT EXPOSE THIS UNIT TO RAIN OR MOISTURE
WARNING
TO PREVENT FIRE OR SHOCK HAZARD
DO NOT EXPOSE THIS UNIT TO RAIN OR MOISTURE
USE ONLY WITH A 250V FUSE
EMPLOYER UNIQUEMNT AVEC
UN FUSIBLE DE 250V
USE ONLY WITH A 250V FUSE
EMPLOYER UNIQUEMNT AVEC
UN FUSIBLE DE 250V
110-120110-120
220-240220-240
CLASS 1 LASER PRODUCT
APPAREIL LASER DE CLASSE 1
PRODUCTO LASER CLASE 1
CLASS 1 LASER PRODUCT
APPAREIL LASER DE CLASSE 1
PRODUCTO LASER CLASE 1
ONIX Audio,LLCONIX Audio,LLC
368 S.McCaslin Blvd # 189,
Louisville,CO 80027 USA
368 S.McCaslin Blvd # 189,
Louisville,CO 80027 USA
MADE IN P RCMADE IN P RC
230Vac 50/60Hz,500mAT230Vac 50/60Hz,500mAT
115Vac 50/60Hz,1AT115Vac 50/60Hz,1AT
USE ONLY WITH A 250V FUSE
EMPLOYER UNIQUEMNT AVEC
UN FUSIBLE DE 250V
USE ONLY WITH A 250V FUSE
EMPLOYER UNIQUEMNT AVEC
UN FUSIBLE DE 250V
110-120110-120
220-240220-240
POWERPOWER
PLAYPLAY
STOPSTOPOPEN / CLOSEOPEN / CLOSE
PREVPREV NEXTNEXT
XCD-99 COMPACT DISC PLAYER XCD-99 COMPACT DISC PLAYER
Page 5
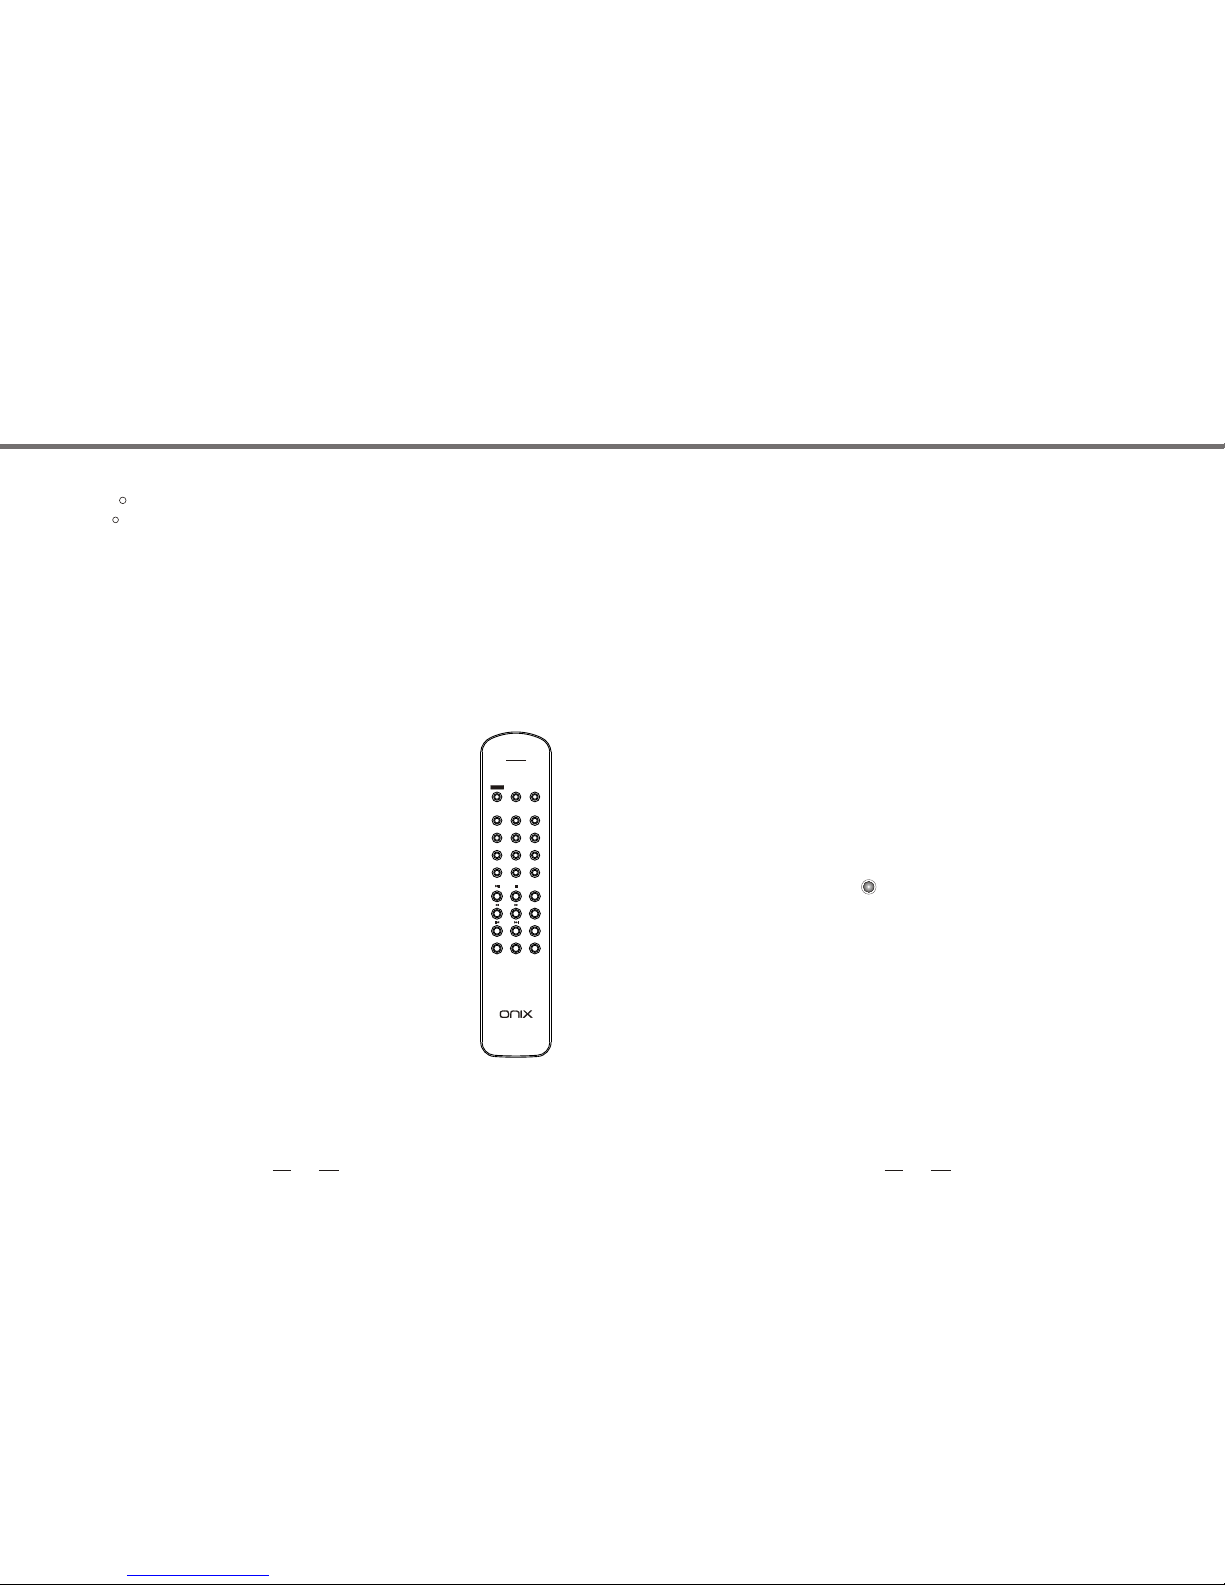
Using The Remote ControlUsing The Remote Control
Open/CloseOpen/Close
Buttons numbered 1-0Buttons numbered 1-0
Personal selection repeatPersonal selection repeat
RandomRandom
RepeatRepeat
Note: Install the two AA batteries supplied before trying to use your remote control.
Do not place anything in front of the display area on the CD player, or the remote
control may not work.
Press this button to open and close the CD drawer.
These buttons allow direct access to individual tracks on the disc.
To select a track, press the corresponding keypad button. The
player will move to the selected track and begin playing. There is
no need to hit the play button. For tracks greater than 9, enter the
digits in sequence. For example, to play track 13, press 1, then 3.
The display will show 13 and the CD will begin playing in a few
seconds.
Prog(Program)Prog(Program)
This button, labeled PROG, allows you to program as many as 16
tracks on the current disc for playback in a specific order. For
example, you could program the XCD-99 to play track 5, followed
by track 3, followed by track 13. To begin a program:
1. Insert a disc and press the OPEN/CLOSE button to close the
drawer. The XCD-99 will read the contents of the disc.
2. Press the PROG button on the remote control. The display will
show, P:00 00, indicating that the unit is waiting for the first track
to be programmed.
Once you have programmed your play list, simply press the Play button. The
XCD-99 will begin playing your selected tracks. The XCD-99 will remain in
PROGRAM mode until you open the disc drawer or press the Play button then Stop
button twice.
Whilst playing a programmed play list, most functions that would normally effect the
entire disc operate on just the memorized program. For example, the Skip button
(double-arrow previous and next buttons), advance to the next or previous track in
the memorized program.
3. Enter the first track number using the keypad buttons numbered 1-0. Your
selection will in a few seconds be memorized automatically and the display
will change to, P:01 05, indicating that one track(track 5) has been memorized.
Continue entering the rest of your selections using the numbered keypad
buttons only. Note: there is no need to press the PROG(Program) button again
as each selection is memorized as it is entered. If you make a mistake whilst
programming, you can delete the last track entered by pressing the Clear button
(see below).
This button allows you to repeat the current track or the entire disc continuously.
Press the Repeat button once(a "T" appears on the display) and the current track
will repeat. Press the Repeat button once more(an "A" appears on the display)
and entire disc will repeat. Press the Repeat button again and the repeat function
stops. Pressing the Open/Close button also stops the repeat function.
If you wish to hear a certain section of the disk which is not a discrete track,
assuming the section you wish to hear starts at point A and ends at point B, enter
commands as follows: At the desired starting point, press the REPEAT key on the
remote control three times consecutively. The unit will remember this point as the
starting point (point A) and the screen will display A-. When the recording has
reached the desired end point, press the REPEAT key on the remote controller
again. The unit will remember this point as the finishing point(point B) and the
screen will display A-B. The desired section will replay until the [REPEAT] key on
the remote control is pressed again.
Note: This function is not available when the player is stopped.
This instructs the CD player to play tracks from the entire disc in random order.
Once all of the tracks have been played, the disc will stop playing.
A-B
HDCDHDCD
RR
HDCD is an encoding technique that allows a CD to have greater effective dynamic
range, reduced distortion, and increased detail. HDCD discs are identified by an
HDCD logo on the package. No user action is required to play an HDCD recording.
The XCD-99 player automatically senses HDCD encoding and enables the circuitry.
The blue HDCD LED on the front panel will light to indicate that you are playing an
HDCD.
RR
OPEN/
CLOSE
OPEN/
CLOSE
1 1 2 2 3 3
4 4
5 5
6 6
7 7 8 8 99
00
SCANSCAN REPEATREPEAT
MUTINGMUTING
PROGPROG
RANDOMRANDOM
DISPLAYDISPLAY
POWERPOWER
XCD-99 XCD-99
8 8
7 7
Page 6
(Play/Pause)(Play/Pause)
/ /
(Stop)(Stop)
Radio InterferenceRadio Interference
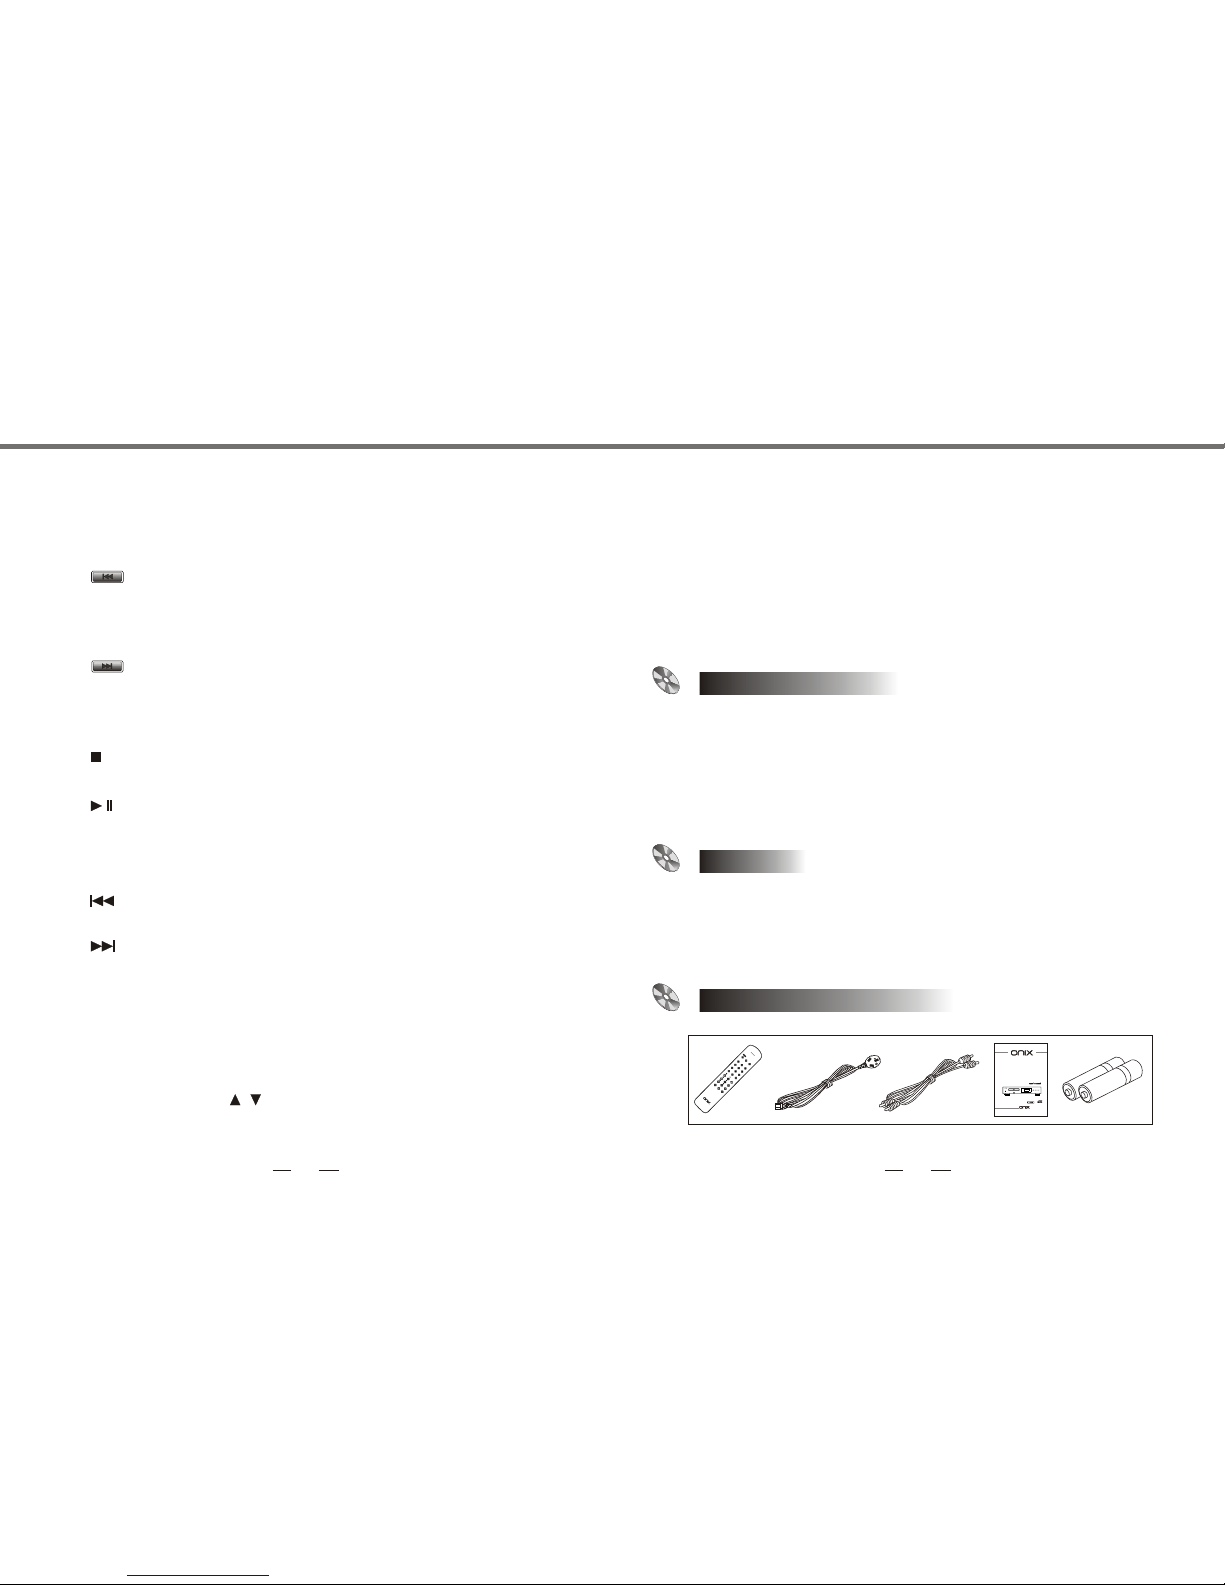
Supplied AccessoriesSupplied Accessories
Stops the disc from playing.
Allows you to start or pause disc playing. Pressing once, starts the disc playing.
Pressing again, pauses play. Pressing one more time, resumes play.
Note: It is not good to leave CD players in pause mode for an extended period of
time as it decreases laser life.
(D )ouble-arrow left(Double-arrow left)
The fast backward key. Allows you to scan the disc backwards whilst it is playing.
(D )ouble-arrow right(Double-arrow right)
The fast forward key. Allows you to scan the disc forwards whilst it is playing.
MutingMuting
Stops the audio output from the XCD-99.
DisplayDisplay
Dims the display. Three display settings are available. Pressing the Display
button repeatedly toggles through the settings. Turning the display down
generally improves the sound.
Provide no function on the XCD-99.
POWER, INPUT and (Volume)POWER, INPUT and (Volume)
/ /
Technical Specifications
Digital to Analog Conversion
Technical Specifications
Digital to Analog Conversion
24 bit/96Khz Burr Brown plus HDCD
HDCD, High Definition Compatible Digital and Pacific Microsonics are either
registered trademarks or trademarks of Pacific Microsonics, Inc. in the United
States and/or other countries. HDCD system manufactured under license from
Pacific Microsonics, Inc. This product is covered by one or more of the following:
In the USA: 5,479,168, 5,638,074, 5,640,161, 5,808,574, 5,838,274, 5,854,600,
5,872,531 and in Australia: 669114. Other patents pending.
The XCD-99 is a digital audio device that has been designed to very high
standards of electromagnetic compatibility.
CD players and DAC's generate and can radiate RF(Radio Frequency) energy.
In some cases this can cause interference with FM and AM radio reception. If
this is the case, keep the CD player and its connecting cables as far from the
tuner and its antenna. Connecting the XCD-99 and the tuner to different mains
sockets may also help to reduce interference.
USA - This product complies with FCC requirements.
PhysicalPhysical
Dimensions: W450 x D355 x H97mm
Net Weight: 6.8 KG
Digital Output Connection: 75 ohm co-axial.
Supplied Accessories: Mains Lead, Remote Control, 2 x AAA Batteries
Basic Interconnect Cable.
ScanScan
This feature automatically plays the first ten seconds of each track on the disc.
To stop scanning and resume normal operation, at the current track, press the
SCAN button again. To stop scanning, press Stop.
(Double-arrow left) (Double-arrow left)
Skips to previous track. Pressing it successively continues this function. Note:
There is no need to hit the play button. Once the desired track is located(shown
in the display window), remove your finger. The player will automatically begin
playing your selected track.
(Double-arrow right)(Double-arrow right)
Skips to the next track. Pressing it successively continues this function. Note:
There is no need to hit the play button. Once the desired track is located(shown
in the display window), remove your finger. The player will automatically begin
playing your selected track.
O
P
E
N
/
C
L
O
S
E
O
P
E
N
/
C
L
O
S
E
1
1
2
2
3
3
4
4
5
5
6
6
7
7
8
8
9
9
0
0
S
C
AN
S
C
AN
R
EPE
AT
R
EPE
AT
M
U
TIN
G
M
U
TIN
G
P
R
O
G
P
R
O
G
R
A
N
D
O
M
R
A
N
D
O
M
D
IS
PL
AY
D
IS
PL
AY
P
O
W
ER
P
O
W
ER
X
C
D
-9
9
X
C
D
-9
9
COMPACT DISC PLAYER COMPACT DISC PLAYER
XCD-99XCD-99
POWER
PLAY
STOPOPEN / CLOSE
PREVNEXT
XCD-99 COMPACT DISC PLAYER
DIGITAL AUDIO
10 10
9 9
 Loading...