

Page 1

DNA-50
ONIX
User Manual
Page 2

This product mains supply is 120V-240V dependent on country.
This is clearly marked on the back. Only appropriate voltage must
be used. Supplied with certified cable for country of its intended
use. The product is suitably fused inside and/or in its connection
lead. The product must not be subject to ingress of water, or used
in a damp or wet location. It is intended for use by people of a
suitable age to understand the amounts of electrical current and
electricity. Incorrect use will not result in satisfactory performance
and may lead to danger of life. If this product appears damaged in
any way, does not have its top cover or component parts attached,
or is incomplete in any way - it must not be used. All sockets are for
their intended use only. If anything is inserted into any socket that
is not designed to be inserted into that socket, the resulting effect
can lead to danger of life. If you are unsure of the products use,
connectivity systems or appropriate voltage ratings - do not use
and seek professional advice.
SAFETY ANNOUNCEMENT
WARNING
support@onixgb.com
England
Page 3

ONIX DNA
Contents
Introduction
11
4
In the box 5
Connections 6, 7
Launch 8
Operation 9
Remote 10
Finally
Page 4

Introduction
ONIX DNA
4
“Built by people that know how,
for those that know why”
Welcome to your DNA-50
ONIX has been a company producing quality sound through various products for
over 30 years now. The release of this product has undergone extensive
research and development so that an idea could become a reality. This product
carries the same DNA from every ONIX unit ever to be made since 1984 and
now 30 years on we are back with another standout amplifier.
The DNA-50 is the sleekest designed amplifier yet to be released by ONIX and
now that you’ve opened the box we hope you think so too. An amplifier of this
quality takes years to perfect and this year we are proud to announce that we
have done it.
Your welcome manual has been presented to you on a 64GB USB stick which is
then available for you to use as you wish once you have read through your
paper-less booklet.
We hope you can enjoy the sound of a quality British amplifier from ONIX once
more.
We made a choice, so you can too.
Page 5

In the box
ONIX DNA
5
DNA-50
Remote
USB Welcome Manual
Mains Lead
Page 6

As you will see, on the back of the DNA-50 there are 4 speakers
connection sockets that are shown below:
Your speaker cables will most likely have the same coloured ends so the
first step is simply to match your coloured speaker cables with the
speaker socket colours on the back of the amplifier which have been
clearly marked Left and Right.
Connections
ONIX DNA
6
It is important to follow the order given below when setting up your DNA-50 to avoid
any electrical problems or damage to external products. So we advise you follow the 3
quick, easy steps.
① Speakers
DO NOT SHORT
It is essential not to short the speaker
cables as the amplifier will suffer and
consequently require service. The two
diagrams on the left show you how to
either plug the speaker cables straight into
your speakers or if not, leave them apart so
they do not touch.
OPEN
SPEAKER
Page 7

Connections
ONIX DNA
7
② Inputs
Your input selections across the back of the amplifier, will look as shown
below:
Each of the letters along the top represent a colour, and this corresponds
with the LED’s along the front of the unit. So from left to right you have:
Orange, Green, White, Red, Yellow and Blue. ‘DSC/BDA’ is your input for a
Turntable (Record Player) should you own one and wish to use it with your
amplifier. ‘I/P’ stands for Input, and you have five of these that can be
used with any other products that you might choose to connect.
Finally you can now plug in the mains lead supplied with the DNA-50 into
the socket that looks like the one in the diagram below. Make sure you do
not turn the power on before plugging the lead into the amplifier as this
could cause a risk of electrical shock.
Ensure that you fully insert the mains cable into the socket before turning
on as a loose connection could cause safety issues as well as performance
ones.
③ Mains
Page 8
Launch
ONIX DNA
8
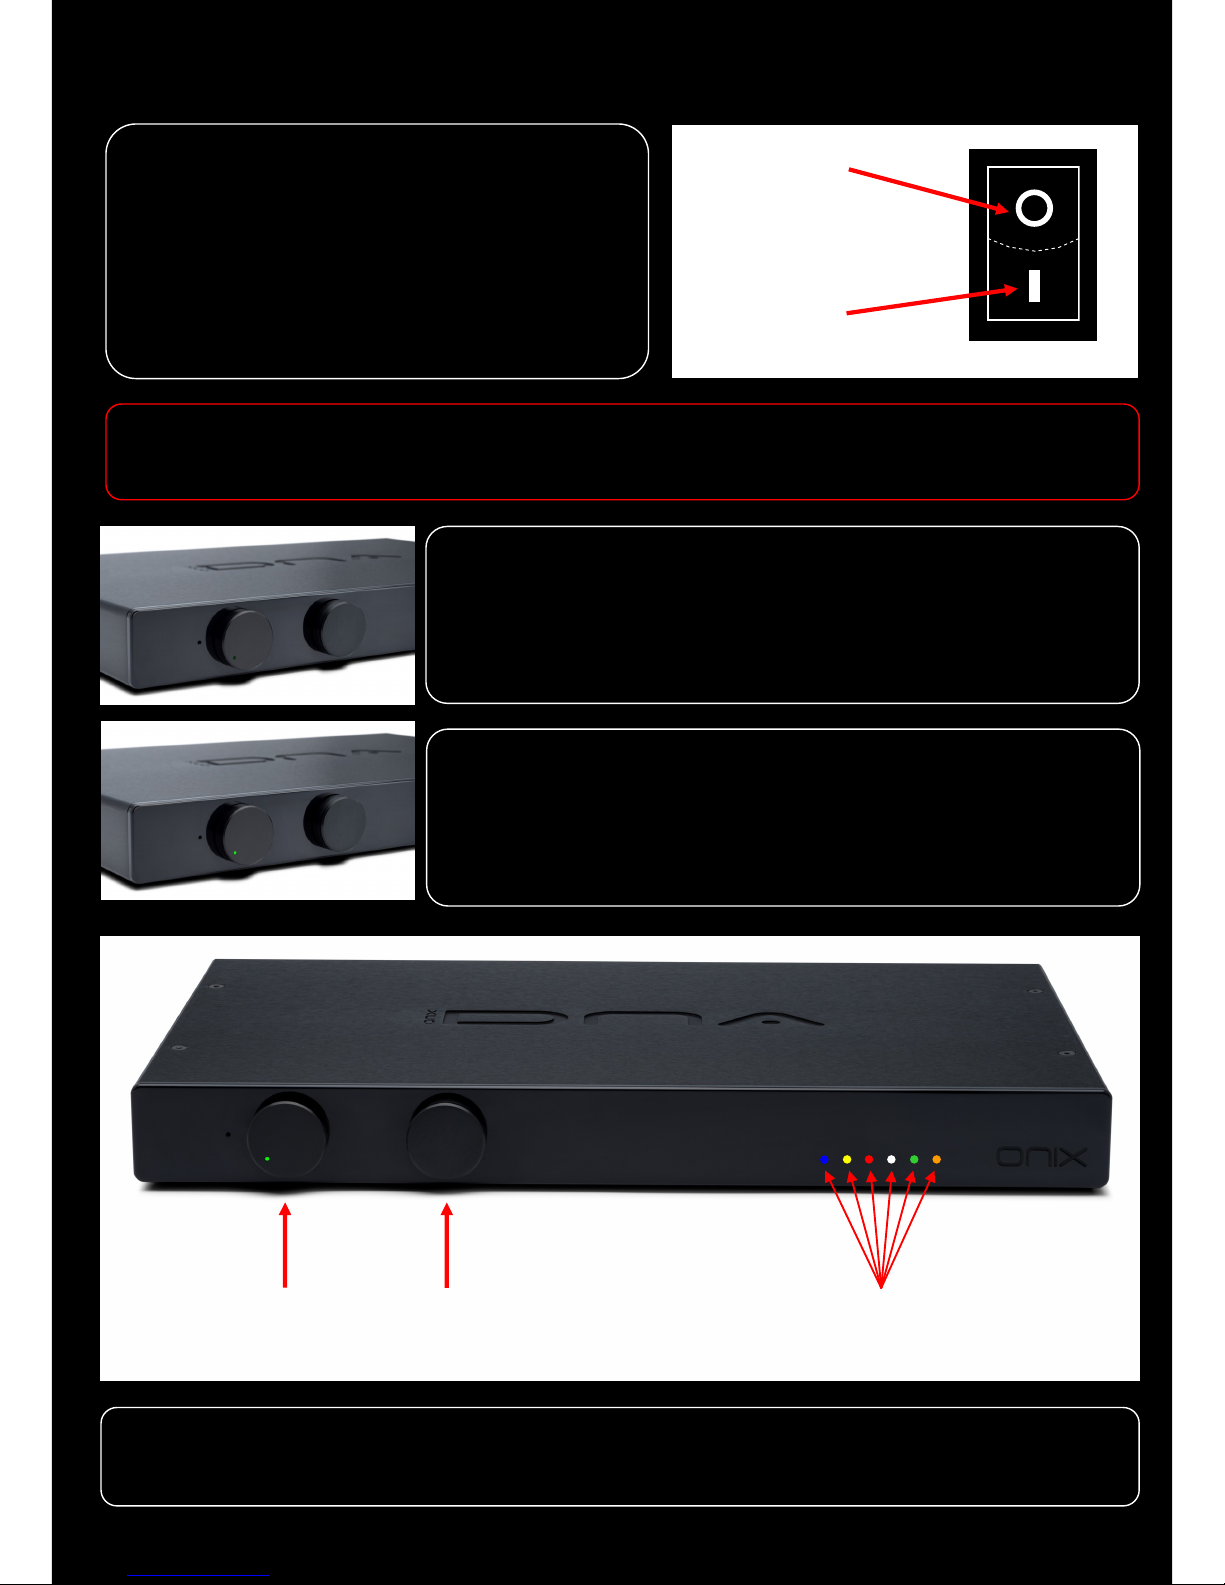
Power Off
Power On
Volume
Control
Source
Selection
Input Indication
It is now time for you to turn on your
DNA-50 for the first time. Now that you
have your mains lead connected to the
amplifier and a plug socket, you can
locate this switch on the back of your
amplifier and switch it on.
You will notice that the Volume Control dial on the left
has a smaller hole located on it that has now
illuminated a dim green. This means that your DNA-50 is
powered and operational, but in Standby mode.
Simply turn the source selection knob clockwise or
anticlockwise once and the green LED will brighten,
indicating your amplifier is now out of Standby mode
and ready for your choice of input.
Further to this, you will see that one of the 6 LED’s pointed out above has
illuminated. This is showing you which input is currently active.
It is highly recommended that the amplifier is left switched on at all times, as it will
sound better after two hours plus of being left on.
Page 9

ONIX DNA
9
Operation
Volume Control
Source Selection
Volume
Control
Source
Selection
DSC/BDA
I/P2 I/P3 I/P4 I/P5 I/P6
This is very simply operated, the small green LED on the volume control dial
shows you how loud the amplifier currently is. In the example shown above
there is no sound but its maximum volume would be a fully clockwise rotated
dial in a locked position.
This dial unlike the Volume Control will not rotate in one continuous motion,
this is because it is designed to lock on to each source as you rotate it.
You may notice that there are 6 small LED holes along the front of your unit
which have been pointed out in the diagram above. As stated on the
Connections Page, these correspond with the inputs on the back so it is very
easy to navigate your way through your inputs either with the Source
Selection dial or the remote. Only one LED will ever be lit at one time as you
can only ever use one input at one time, however for demonstrational
purposes we have shown you all the available inputs together. We felt that
the use of various colours would not only be visually more interesting, but
an efficient way to manage however many inputs you choose to use.
Page 10
Remote
ONIX DNA
10
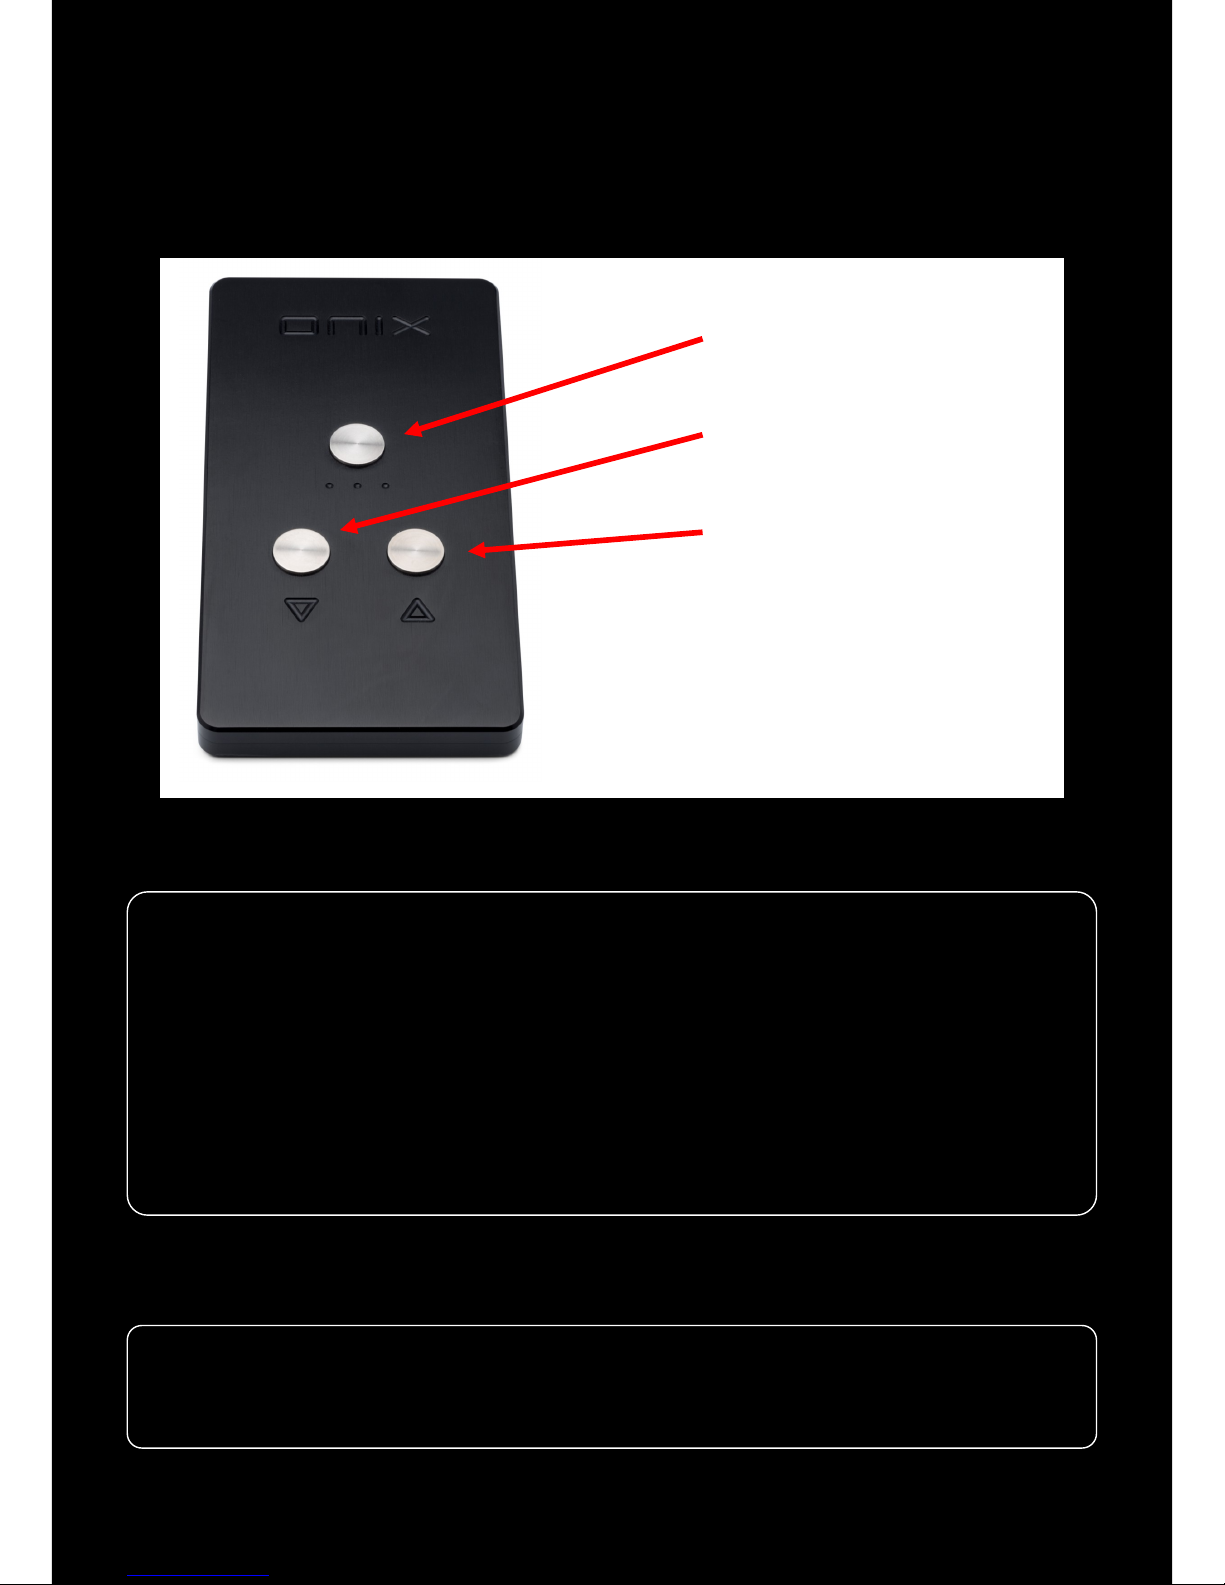
Source/Standby
Decrease Volume
Increase Volume
Your remote will look as shown below and there are just a couple of very useful
things to know about our simple yet extremely well designed remote.
This button will allow you to change your source (input) by the click of one button
instead of many, making all your inputs available to you by hand.
We have also added in the Standby feature. So by holding this button down for 4
seconds, you will send your DNA-50 into standby. To bring it out of standby, simply press
the same button once. There is of course the option to fully turn off your amplifier with
the switch on the back, but should you only want to use a standby feature, the remote is
the only way of achieving this unless you fully turn off your unit and then turn it back
on.
Source/Standby
As shown in the diagram, operating the volume level is very simple. When either turning
up or down the volume you will the volume knob physically turn as the green LED
rotates with it.
Volume Controls
Page 11

support@onixgb.com
www.onixdna.com
“Technology for music, not for glory”
It is no secret that this exquisite product took many years to
imagine, design, and manufacture. The research and
development that has gone into the DNA-50 is remarkable, and
that is what makes it a part of the ONIX family. Shortcuts and
compromises are non existent when our work is carried out and
we believe that this will be appreciated.
The relationship with our customers is as important to us as
designing outstanding products. Therefore should you require
any form of assistance, we are human and here.
We hope you enjoy the DNA-50 as much as we do.
11
© ONIX (GB) LTD 01/01/2017 REV: 4
 Loading...