

Page 1

COMPACT DISC PLAYER
LETTORE COMPACT DISK
LECTEUR DE DISQUE COMPACT
CD-SPIELER
REPRODUCTOR DE DISCOS COMPACTOS
Mod. DAC 25B
MANUALE D’USO
USER'S GUIDE
GUIDE DE L'UTILISATEUR
BEDIENUNGSANLEITUNG
GUÍA DEL USUARIO
P
O
W
E
R
P
H
O
N
E
O
N
O
F
F
F
U
S
E
1
0
0
V
-
1
2
0
V
:
T
1
A
L
2
2
0
V -
2
4
0
V:
T
5
0
0
m
A
L
A
C
I
N
U
S
B
O
P
T
-
C
O
A
-
S
E
R
I
A
L
N
O
.
:
i
Po
d
O
D
I
G
I
T
A
L
IN
U
SE
O
N
L
Y
W
I
T
H
A
2
5
0
V
F
U
S
E
~ /220V 50Hz
Page 2

INDEX
ENGLISH.......................3-23
ITALIANO...........................7
FRANÇAIS........................11
DEUTSCH.........................15
ESPAÑOL.........................19
Page 3
Thank you for purchasing ONIX Electronics. With sincere appreciation, we suggest that you should read this User’s
Manual thoroughly before operation and keep the Manual properly for further reference. .
USER'S GUIDE
INSTALLATION
CONNECTIONS
Install the unit in a well ventilated place and not
exposed to high temperatures or humidity, nor any heat
sources such as heaters or radiators. Be sure to leave
space around the unit for ventilation to improve heat
radiation (at least 30 cm at top, 10 cm at rear, and 20 cm
at each side). If not enough space is provided between the
unit and walls or other equipment, heat will build up inside, interfering with performance or causing malfunctions.
Before making or changing the connections, switch o the power switch to prevent damaging the product.
Connect the white plug 3 to the L (left) channel 1,
and the red plug 4 to the R (right) channel 2.
Be sure to push the plugs securely.
The DAC player is equipped with lters for the suppression of radio interference in accordance with EEC regulation
MAINTENANCE OF EXTERNAL SURFACES
Remove dust and dirt with a clean, dry cloth.
Never use solvents, gasoline, insecticide sprays and other
chemicals on or near the equipment because they can
corrode the surfaces.
Handle the power cord by the plug. Do not pull out the
plug by tugging the cord and never touch the power cord
when your hands are wet as this could cause a short circuit
or electric shock.
POWER-CORD CAUTION
3
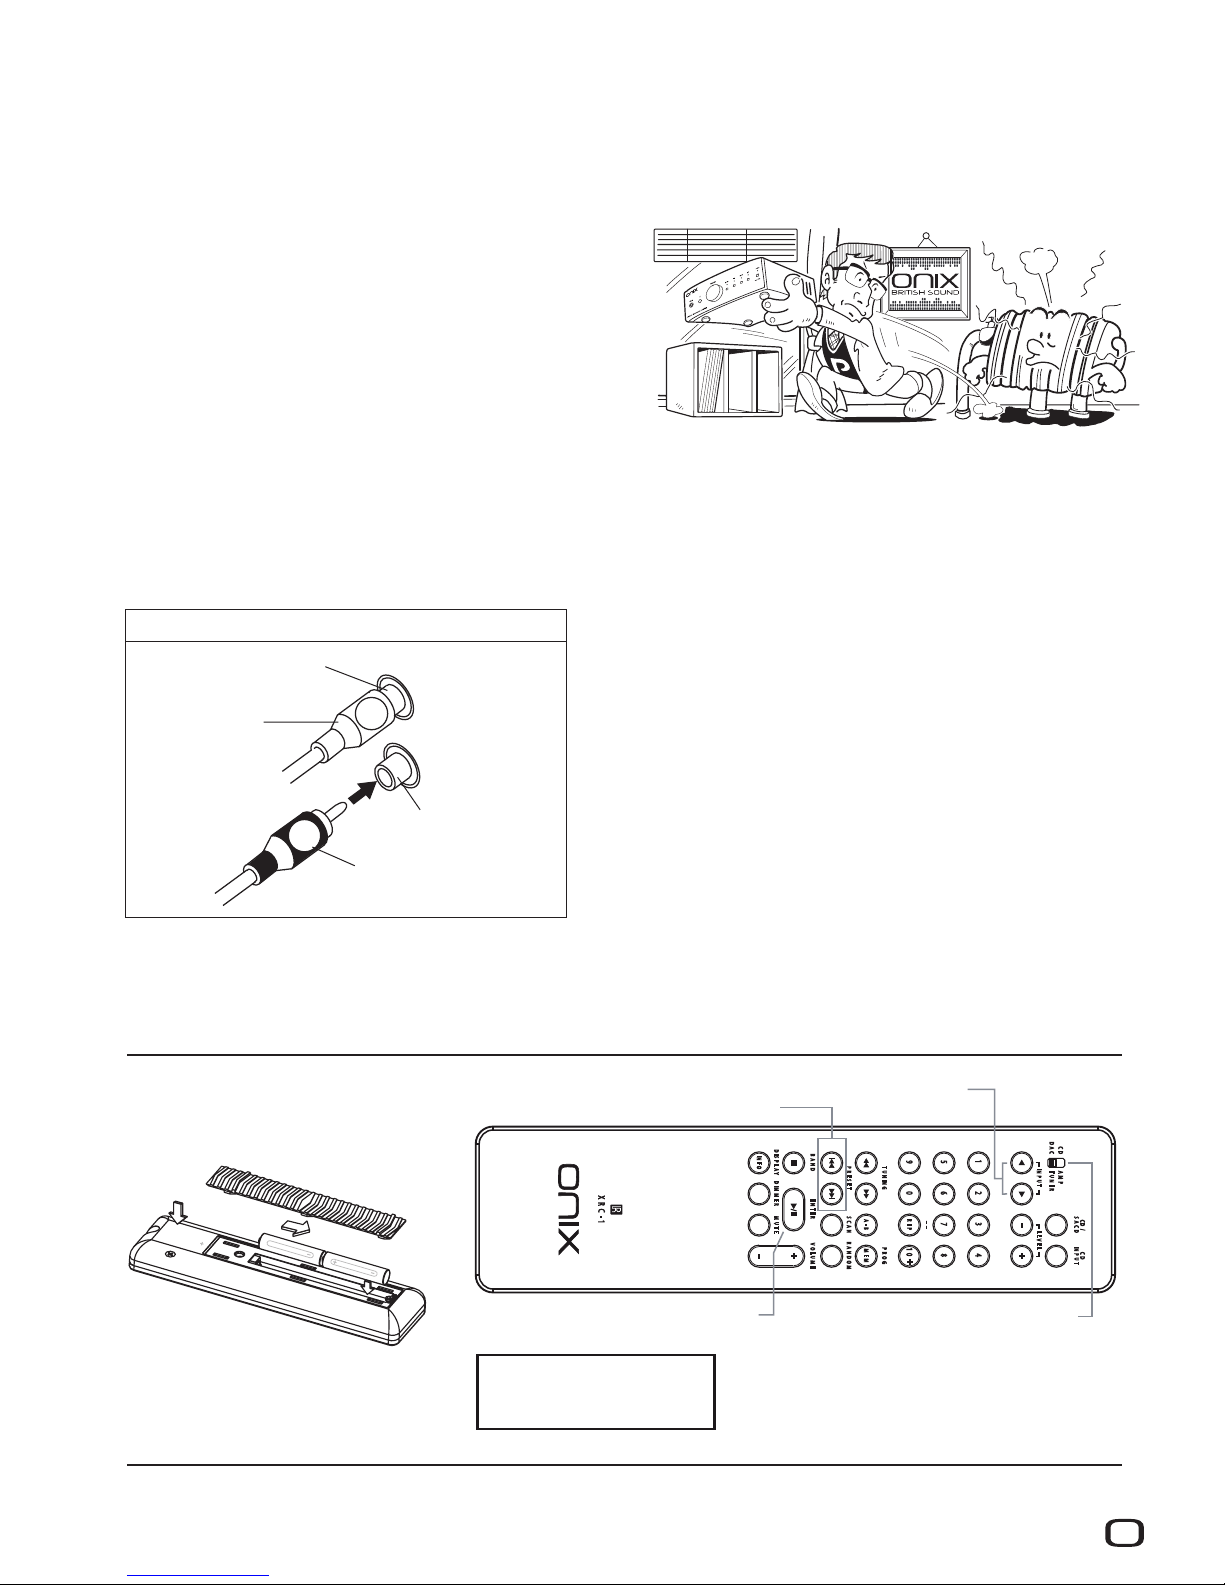
CONNECTING THE PIN-RCA CORDS
L
R
1 Left channel
2 Right channel
4 Red plug
3 White plug
Remote Control
Note: Keys not describe are not
intended for the machine. It is normal
if there is no respons pushing them.
To operate the remote
control requires two battery of
AAA 1.5 V, which are not included.
IN P U T
L E V E L
T U N IN G P R O G
P R E S E T R A N D O M
B A N D V O L U M E
D I S P L A Y
D I M M E R
M U T E
S C A N
E N T E R
C D
IN P U T
X R C - 1
A M P
T U N E R
CD /
S A C D
C D
D A C
R E P
A - B
1 2 3
5
6
7
4
8
9
0
IN F O
M E M
1 0
Switch (Set switch to DAC)
Input selector key
Previous/next keys
Play/pause key
The remote control
is an optional part.
V
O
L
U
M
E
P
H
O
N
O
T
U
N
E
R
A
U
X
P
O
W
E
R
O
N
O
FF
P
H
O
N
E
STEREOINTEGRATEDAMPLIFIER
C
D
Page 4
4
VO LU ME
POW ERPHO NE
ON OFF
SEL ECT SRC
USB COA - OPT- 96K 192 K
DIGITAL TO ANALOG CONVERTER
DAC25B
iPo d
1 3
6
5
4
2
MOD EL: DAC 25B
POW ER CONS UMPTI ON: 20W
DIG ITAL TO ANALO G CONVE RTER
FUS E 100V - 12 0V: T1AL
220 V - 240V: T5 00mAL
AC I N
USB
OPT- COA-
XLR - R RCA XLR - L
L
R
AU DI O OU T
SER IAL NO.:
iPo d
ON IX EN G LA ND ELE CTR ON ICS LTD
DI GI TAL IN
USE ONLY WI TH A2 50V FUS E
~ /220V 50Hz
1 2
6
4
3
67
5
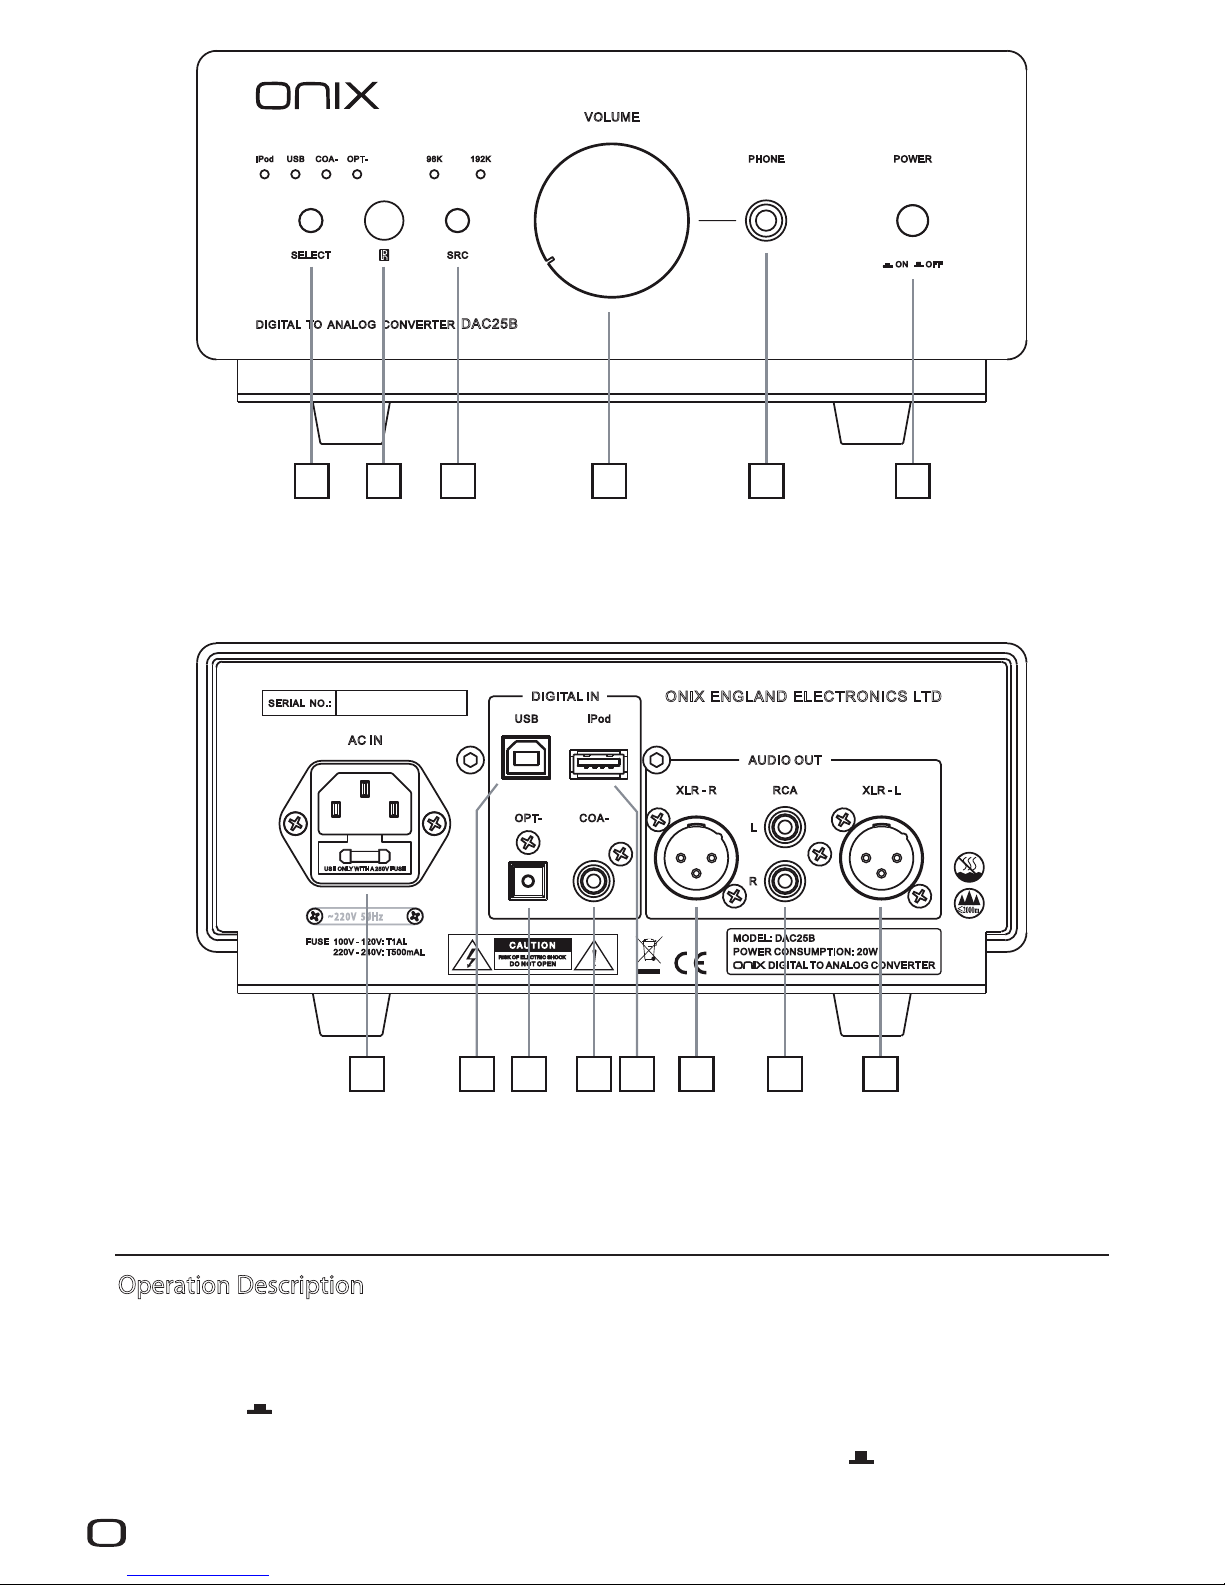
1. Input selector
2. Remote control receiving window
3. Upsampling selector
4. Earphone volume knob
5. Earphone jack
6. Power switch
1. Power input socket with fuse
2. USB signal input
3. Optical digital input
4. Coaxial digital input
5. iPod signal input
6. Balanced left/right analog output
7. Unbalanced left/right analog output
Operation Description
Turn On/O the Machine
1. Connect the power cord and signal cable of the machine. Press the power button on the front panel of the
machine to [ ON].
2. To turn off the power of the machine, Press the power button on the front panel to [ OFF]
Pull off the AC power cord from main outlet when the machine isnot usedfor long period of time.
.
Page 5

5
iPod USB COA- OPT-
Select Audio Source
1. Press the [SELECT] key on the front panel of the machine to select different input signals.
2. Display shows the input signal in circulation as shown below:
Upsampling off 96K 92K1
Note:
When you restart the machine, the upsampling light will keep same as the last position of power off.
USB Setup
1. Connect the USB cable from the PC to the main unit.
2. Click the sound setup on the “control panel” of PC, Please select the playback option to the
corresponding device as default(XMOSXS1-L1Audio).
Remote control
1. Select the function switch to DAC.
2. Press the [ ] key or the [ ] key can select audio source.
3. When youuse iPodinput, [ ] key,[ ] key and [ ] key can control youriPod play the previous
song, the following song, play or stop.
Troubleshooting
Incorrect operations are often mistaken for trouble and malfunctions. If you think that there is something wrong
with this component, check the points below. Sometimes the trouble may lie in another component. Investigate
the other components and electrical appliances being used.
If the trouble cannot be rectified even after exercising the checks listed below, ask your nearest ONIX authorized
service center or your dealer to carry out repair work.
Note:
When you restart the machine, the input signal light will keep same as the last position of power off.
Earphone Volume Control
Turn the [VOLUME] knob on the front panel of the machine to adjust earphone volume. Turn the
[VOLUME] knob clockwise to increase earphone volume. Turn the [VOLUME] knob
counterclockwise to reduce earphone volume.
Upsampling
1. Press [SRC] key on front panel to illumine the upsampling light, it can be change the different
upsampling status.
2. Display shows the upsampling indication in circulation as shown below:
Fault
No power
No sound
No remote control
Possible causes
Poor connection in socket or no utility.
Audio cable not connected.
Volume knob is at min.
Remote battery misplaced or depleted.
Treatment
Check power source and connect socket tightly.
Connect audio cable properly.
Adjust volume knob to proper position.
Reinstall battery or replace with new battery.
Page 6
Mechanical section: Transport SANYO HD850 super-linear mechanics, controlled by an CD- 12 servo, laser SANYO
DV34; D/A converter: DAC PCM 1796 24Bit/192 KHz Burr Brown, AD847 and OPA2604, Op Amps used for I/V
conversion; Power supply: R-CORE “high grade silicon steel core” transformer made to specications Onix.
Components:
Specications
Warranty
For warranty information, please contact your local ONIX distributor. Your purchase receipt is your permanent record
of a valuable purchase. It should be kept in a safe place to be referred to as necessary for insurance purposes or when
corresponding with ONIX. When seeking warranty service, it is responsibility of the consumer to establish proof and
date of purchase. Your purchase receipt or invoice is adequate for such proof.
RISK OF ELECTRIC SHOCK
DO NOT OPEN
CAUTION
CAUTION:
TO PREVENT THE RISK OF ELECTRIC SHOCK, DO
NOT REMOVE COVER (OR BACK).
NO USER-SERVICEABLE PARTS INSIDE. REFER
SERVICING TO QUALIFIED SERVICE PERSONNEL.
IMPORTANT
The lightning ash with arrowhead symbol,
within an equilateral triangle, is intended to alert
the user to the presence of uninsulated
"dangerous voltage" within the product's
enclosure that may be of sucient magnitude
to constitute a risk of electric shock to persons.
The exclamation point within an equilateral
triangle is intended to alert the user to the
presence of important operating and
maintenance (servicing) instructions in the
literature accompanying the appliance.
Every specication and design of the product is subject to change without prior notice
6
This product complies with the Low Voltage Directive
(73/23/EEC), EMC Directives (89/336/EEC, 92/31/EEC) and CE
Marking Directive (93/68/EEC).
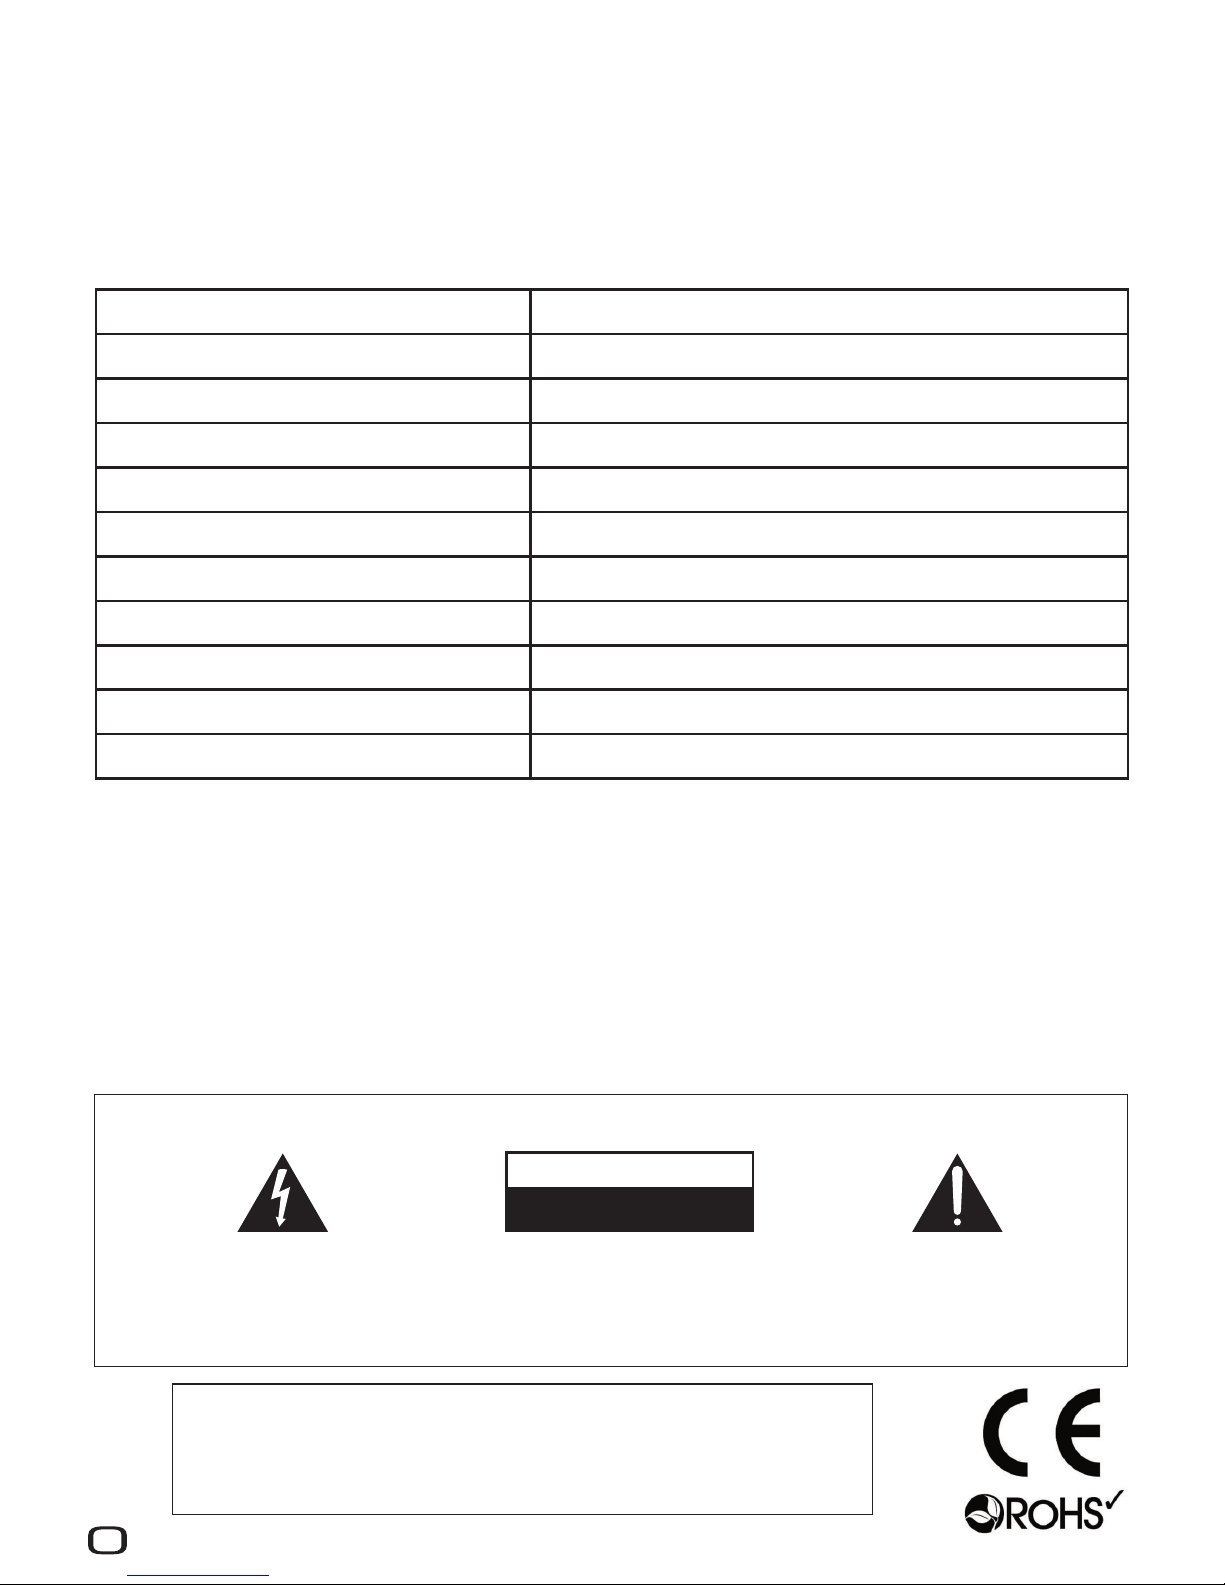
BALANCED OUTPUT LEVEL 4.0V
UNBALANCED OUTPUT LEVEL 2.0V
FREQUENCY RESPONSE
20Hz - 20KHz ( ± 0.2dB)
>115dB
SIGNAL/NOISE RATIO
<0.001%
>96dB (16 bit) / >120dB (24 bit)
DIMENSION
W 215 x D 382 x H 102 mm.
WEIGHT
4 Kg.
POWER SUPPLY 220V - 240V AC
THD
DYNAMIC RANGE
USB RECEIVER SPECS USB2.0, 24bit/192KHz (MAX)
MAX POWER CONSUMPTION 20 W
Page 7

Grazie per aver acquistato un prodotto della ONIX Electronics. Prima di collegare la presa elettrica del apparecchio si
prega di leggere attentamente questo manuale.
MANUALE D’USO
INSTALLAZIONE
COLLEGAMENTI
Installare l’apparecchio in un luogo ben ventilato e
non esposto ad alte temperature o umidità, ne a fonti
di calore quali stufe o radiatori. Assicuratevi di lasciare
uno spazio intorno al prodotto per ottenere una corretta
ventilazione (lasciate uno spazio minimo di 30 cm in alto,
di 10 cm dietro l’unità e di 20 cm ai lati). Se non si rispettano
queste distanze l’apparecchio si surriscalderà alterandoil suo normale funzionamento con un possibile guasto.
Prima di eettuare o modicare qualsiasi collegamento spegnere sempre prima l’apparecchio evitando
danneggiamenti del prodotto.
COLLEGAMENTO DEI CAVI PIN-RCA
L
R
1 Canale sinistro
2 Canale destro
4 Spinotto rosso
3 Spinotto bianco
Collegare la spina bianca 3 al canale L (sinistro) 1,
e la spina rossa 4 al canale R (destro) 2.
Le Spine devono essere inserite saldamente e ben
a fondo.
Il lettore DAC è dotato di ltri per la soppressione delle interferenze in radiofrequenza, secondo la normativa CEE
MANUTENZIONE DELLE SUPERFICI ESTERNE
Togliere la polvere e lo sporco con un panno pulito e
asciutto. Non usare mai solventi, benzina, insetticidi spray
ed altre sostanze chimiche su o vicino all’apparecchio
perché ne corrodono le superci.
Prendete sempre il lo di alimentazione per la spina.
Non tiratelo mai agendo per il lo stesso e non toccate mai
il lo con le mani bagnati, perchè questo potrebbe causare
cortocircuiti o scosse elettriche.
AVVERTIMENTO RIGUARDANTE IL FILO DI
ALIMENTAZIONE
7
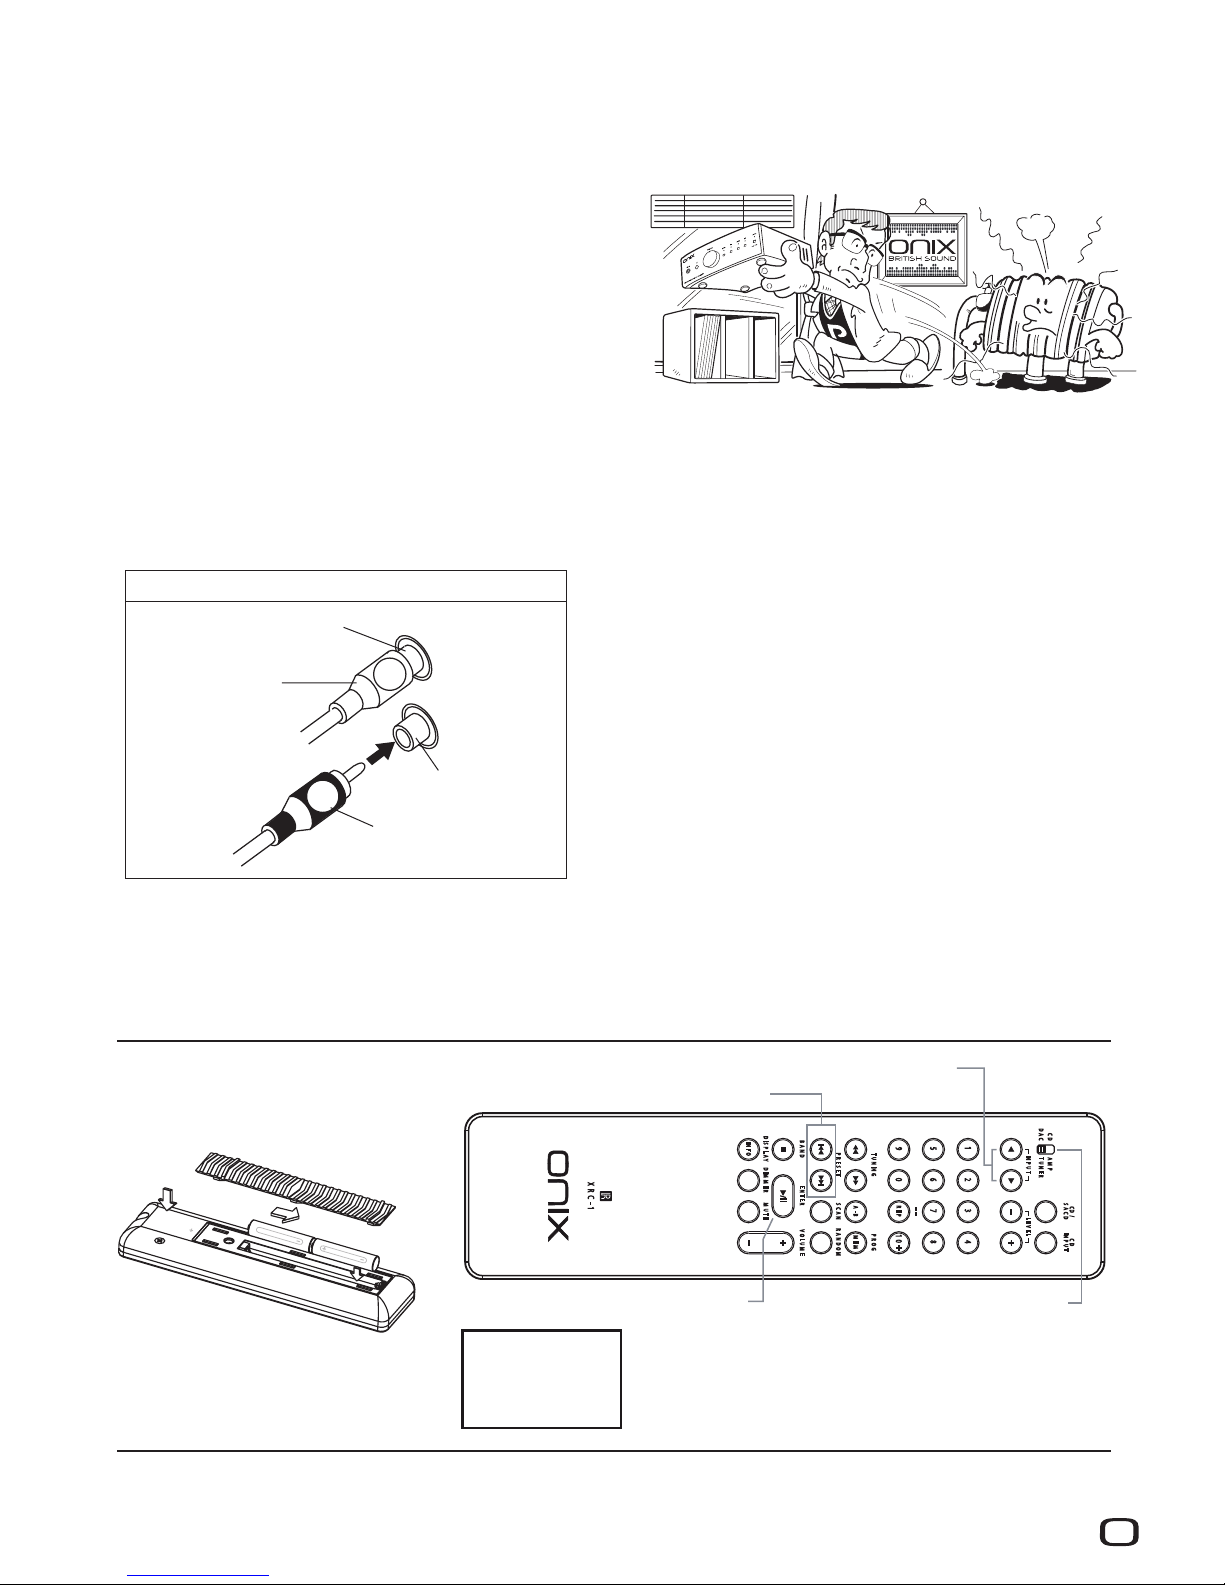
Telecomando
Note: I tasti non descritti
non hanno alcuna funzione
per questo apparecchio.
Per il suo funzionamento il
telecomando necessita di due
batterie mod. AAA 1,5V non incluse.
IN P U T
L E V E L
T U N IN G P R O G
P R E S E T R A N D O M
B A N D V O L U M E
D I S P L A Y
D I M M E R
M U T E
S C A N
E N T E R
C D
IN P U T
X R C - 1
A M P
T U N E R
CD /
S A C D
C D
D A C
R E P
A - B
1 2 3
5
6
7
4
8
9
0
IN F O
M E M
1 0
Switch (Impostare su DAC)
Tasto selezione ingresso
Traccia successiva/precedente
Tasto play/pause
Il telecomando
è opzionale.
V
O
L
U
M
E
P
H
O
N
O
T
U
N
E
R
A
U
X
P
O
W
E
R
O
N
O
F
F
P
H
O
N
E
STEREOINTEGRATEDAMPLIFIER
C
D
Page 8
8
VO LU ME
POW ERPHO NE
ON OFF
SEL ECT SRC
USB COA - OPT- 96K 192 K
DIGITAL TO ANALOG CONVERTER
DAC25B
iPo d
1 3
6
5
4
2
MOD EL: DAC 25B
POW ER CONS UMPTI ON: 20W
DIG ITAL TO ANALO G CONVE RTER
FUS E 100V - 12 0V: T1AL
220 V - 240V: T5 00mAL
AC I N
USB
OPT- COA-
XLR - R RCA XLR - L
L
R
AU DI O OU T
SER IAL NO.:
iPo d
ON IX EN G LA ND ELE CTR ON ICS LTD
DI GI TAL IN
USE ONLY WI TH A2 50V FUS E
~ /220V 50Hz
1 2
6
4
3
67
5
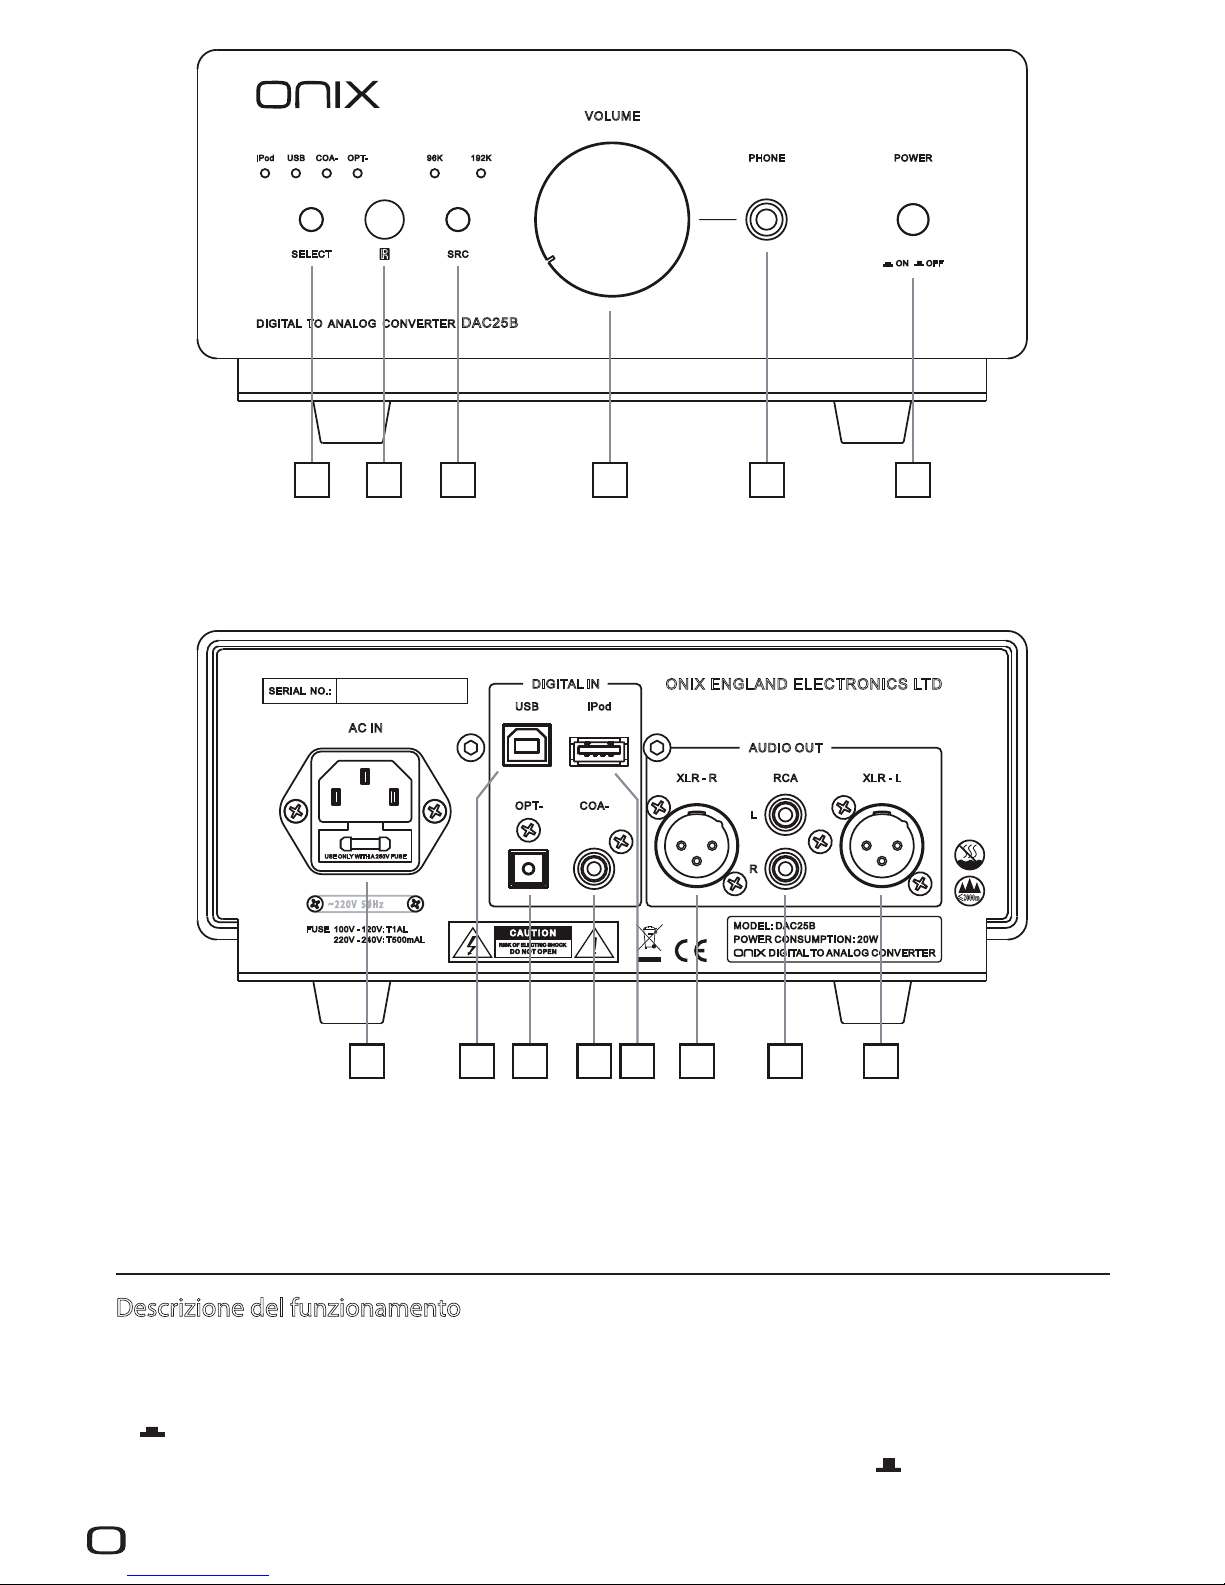
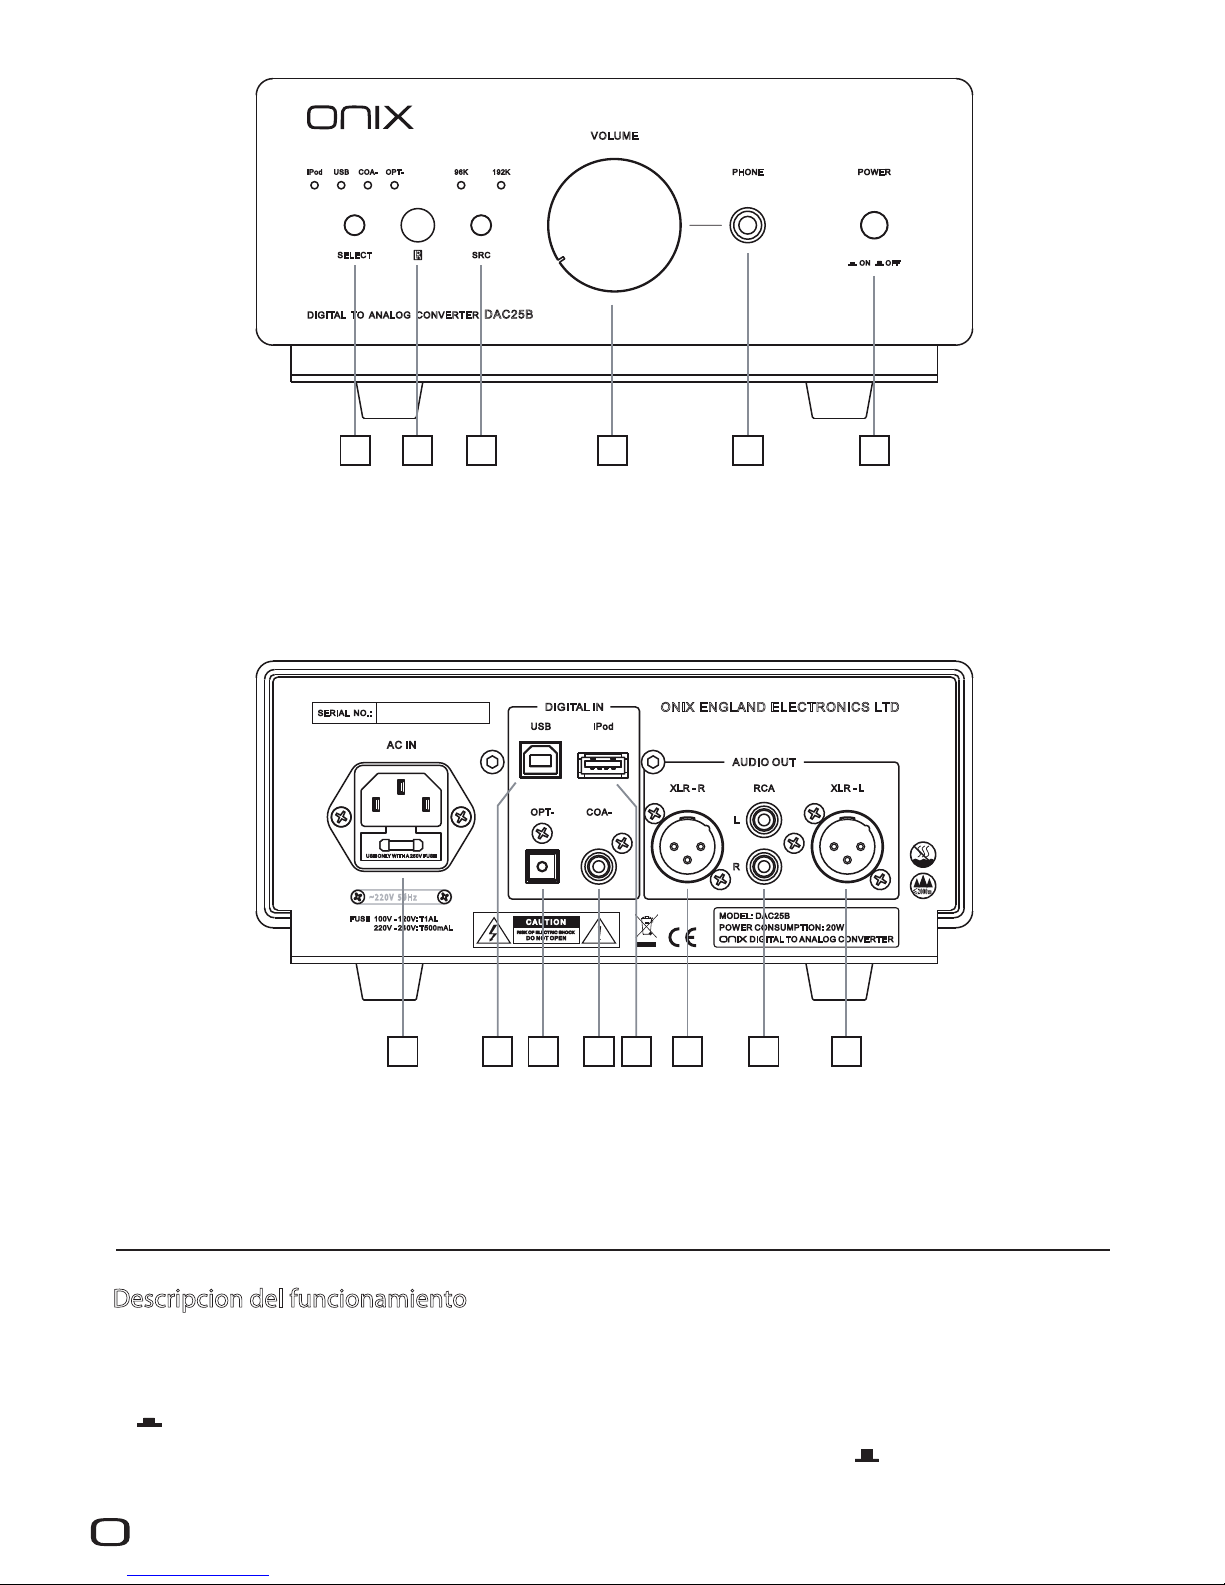
1. Tasto selettore ingresso
2. Sensore telecomando
3. Selettore del sovracampionamento
4. Manopola per la regolare il volume cue
5. Jack per le cue
6. Accensione/spegnimento
1. Ingresso di alimentazione con fusibile
2. Ingresso USB
3. Ingresso ottico digitale
4. Ingresso digitale coassiale
5. Ingresso per IPod
6. Uscita analogica bilanciata XLR
7. Uscita analogica RCA
Descrizione del funzionamento
Accensione/spegnimento
1. Collegare il cavo di alimentazione e il cavo di segnale. Premere il pulsante di accensione sul pannello frontale su
[ ON].
2. Per spegnere l'apparecchio, premere il pulsante di accensione sul pannello frontale su [ OFF].
Si consiglia di scollegare il cavo di alimentazione quando l’apparecchio non viene utilizzato per un lungo periodo.
Page 9
9
iPod USB COA- OPT-
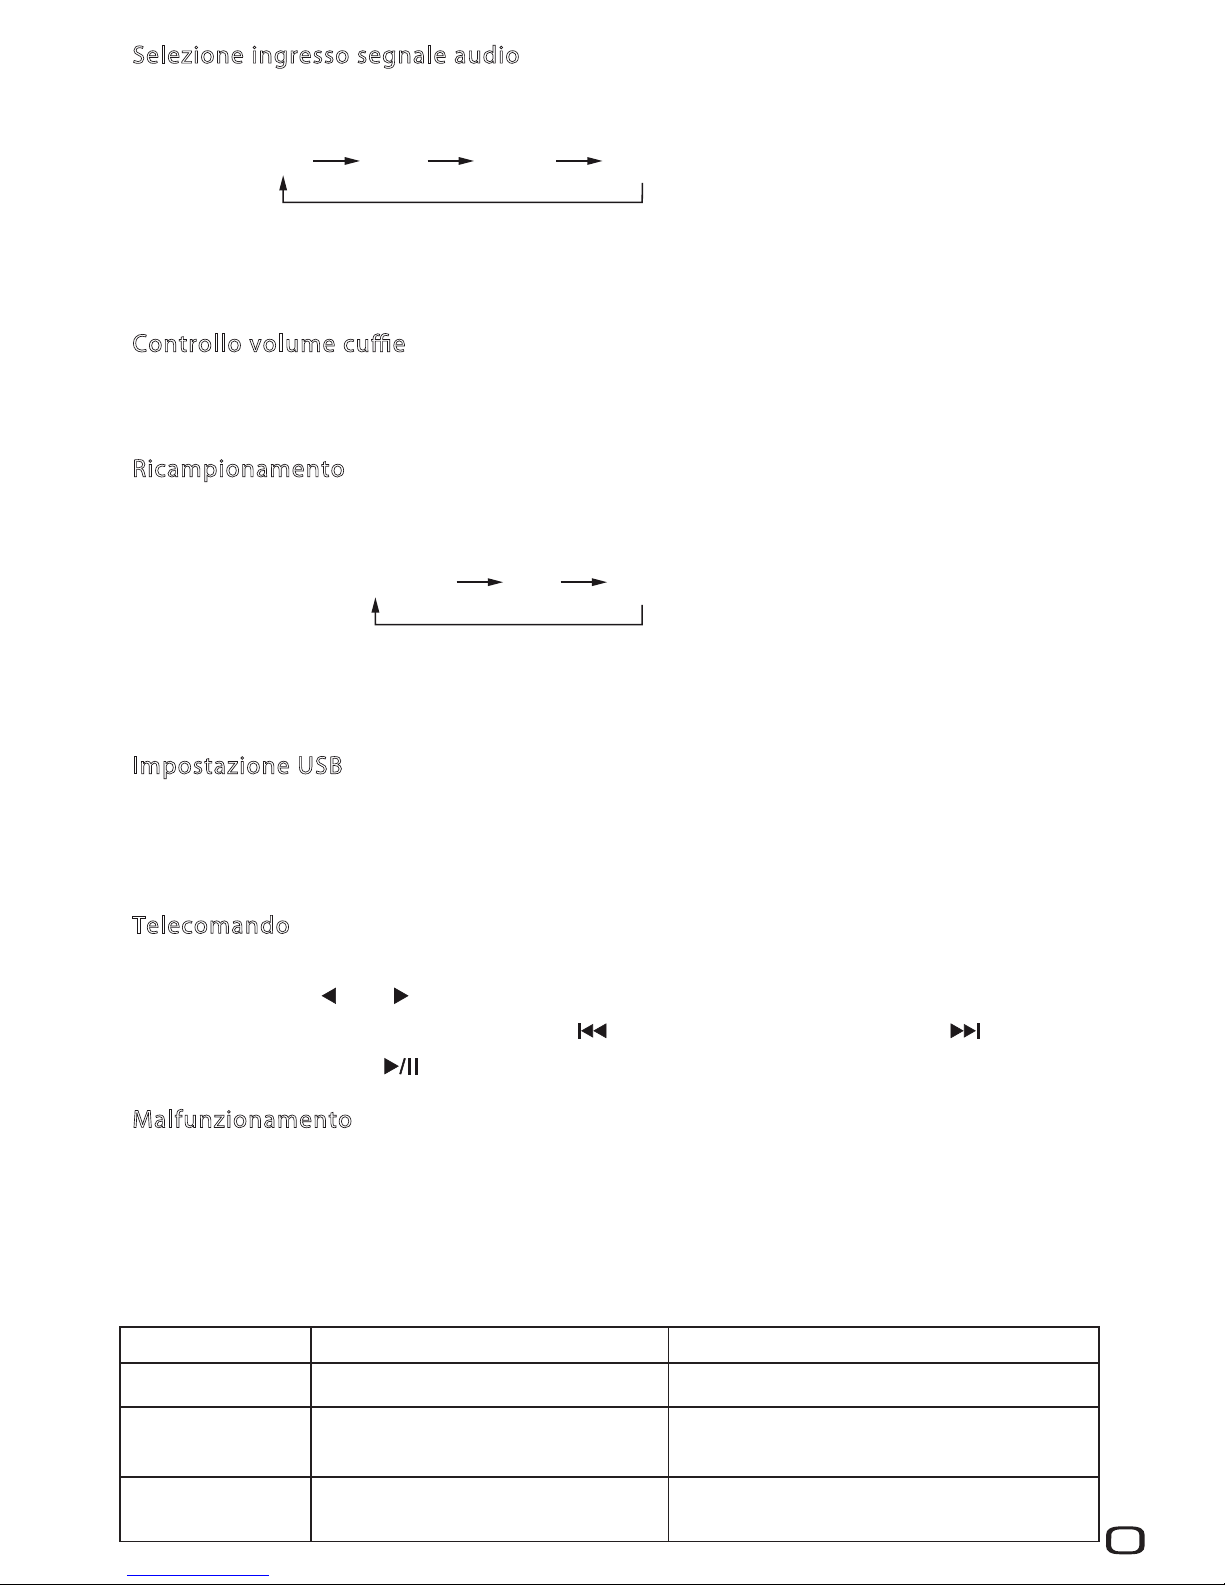
Selezione ingresso segnale audio
1. Premere il tasto [SELECT] sul pannello frontale per selezionare il segnale in ingresso.
2. Display mostra il segnale di ingresso in sequenza come mostrato di seguito:
Upsampling off 96K 92K1
Note:
Quando si riavvia l’apparecchio, la spia del ricampionamento rimane sulla stessa posizione di quando
si è spento.
Impostazione USB
1. Connettere l’apparecchio al PC tramite il cavo USB.
2. Andare sulla configurazione audio nel pannello di controllo e scegliere (XMOSXS1-L1Audio) come
periferica audio predefinita.
Telecomando
1. Impostare la funzione su DAC.
2. Premere i tasti [ ] o [ ] per scegliere la sorgente audio .
3. Quando si usa l’ingresso iPod usare i tasti [ ] per ascoltare il brano precedente [ ] per ascoltare
il bfrano successivo e [ ] per andare in play e in pausa.
Malfunzionamento
Una non corretta utilizzazione dell’apparecchio viene spesso scambiata per errori di funzionamento o per problemi
dovuti a guasti. Se si ritiene che vi siano dei problemi nel funzionamento dell’apparecchio verificare il funzionamento stesso in base alla tabella qui sotto riportata. Se il guasto non può essere riparato anche dopo aver eseguito
le procedure di rimedio sottodescritte, rivolgersi al centro assistenza tecnica autorizzato ONIX che potete trovare
direttamente sul sito del distributore www.pacetech.it affinché la riparazione venga effettuata da esperti.
Note:
Quando si riavvia l’apparecchio, la spia del segnale in ingresso rimane sulla stessa posizione di quando
si è spento.
Controllo volume cue
Per regolare il volume delle cuffie usare la manopola [VOLUME] sul pannello frontale, ruotare in senso orario
per aumentare il volume e in senso antiorario per diminuire il volume.
Ricampionamento
1. Questo tasto serve per regolare la frequenza di ricampionamento.
2. Il display mostra in sequenza come segue:
Difetto
Non si accende
Non si sente
Il telecomando
non funziona
Possibile causa
Presa alimentazione collegata male.
Cavi di segnale scollegati.
Manopola volume al minimo.
Batterie scariche o non presenti nel
telecomando.
Soluzione
Controllare il collegamento dell'alimentazione.
Connettere bene i cavi di segnale.
Aumentare il volume tramite la manopola.
Inserire o sostituire le pile.
Page 10

Caratteristiche Tecniche
Garanzia
Tutti i prodotti ONIX possiedono la garanzia uciale italiana di 24 mesi (DL 24/02). Pacetech aggiunge 1 anno ulteriore
di garanzia, portandola a 36 mesi, per usufruire dell’anno aggiuntivo, bisognerà far recapitare presso la nostra sede
tutti i dati anagraci del acquirente con regolare scontrino scale entro ed non oltre un mese dall’ acquisto del prodotto,
in caso contrario la garanzia sara di 24 mesi.
Questa garanzia viene riconosciuta se l’apparecchio non viene manipolato o aperto. Pacetech provvederà alla riparazione in garanzia presso i suoi laboratori. Per far valere la propria garanzia bisognerà conservare lo scontrino scale o
fattura avuta al momento del acquisto. Questa in originale dovrà accompagnare l’apparecchio in riparazione.
Per avvalersi della garanzia bisognerà contattare Pacetech e far pervenire il prodotto, in imballo originale (conservare
l’imballo originale del prodotto). Le spese di trasporto sono a carico del mittente.
Il prodotto può essere soggetto a modiche senza alcun preavviso
10
Meccanica: SANYO HD850 meccanismo super lineare, controllato da CD-12 servo, laser SANYO DV 34.
Convertitore D/A: DAC PCM 1796 24Bit/192 KHz Burr Brown, AD847 e OPA2604, Op Amps usati per I/V conversione.
Alimentazione: R-CORE “high grade silicon steel core” trasformatore realizzato sotto speciche Onix.
Componenti Utilizzati:
Questo prodotto è conforme alla direttiva sul basso voltaggio
(73/23/CEE), alle direttive EMC (89/336/CEE, 92/31/CEE) e alla
direttiva sul marchio CE (93/68/CEE).
RISK OF ELECTRIC SHOCK
DO NOT OPEN
CAUTION
CAUTION:
TO PREVENT THE RISK OF ELECTRIC SHOCK, DO
NOT REMOVE COVER (OR BACK).
NO USER-SERVICEABLE PARTS INSIDE. REFER
SERVICING TO QUALIFIED SERVICE PERSONNEL.
IMPORTANT
The lightning ash with arrowhead symbol,
within an equilateral triangle, is intended to alert
the user to the presence of uninsulated
"dangerous voltage" within the product's
enclosure that may be of sucient magnitude
to constitute a risk of electric shock to persons.
The exclamation point within an equilateral
triangle is intended to alert the user to the
presence of important operating and
maintenance (servicing) instructions in the
literature accompanying the appliance.
LIVELLO USCITA BILANCIATA 4.0V
LIVELLO USCITA SBILANCIATA 2.0V
RISPOSTA IN FREQUENZA
20Hz - 20KHz ( ± 0.2dB)
>115dB
RAPPORTO SEGNALE/RUMORE
<0.001%
>96dB (16 bit) / >120dB (24 bit)
DIMENSIONI
W 215 x D 382 x H 102 mm.
PESO
4 Kg.
ALIMENTAZIONE 220V - 240V AC
DISTORSIONE ARMONICA TOTALE
GAMMA DINAMICA
RICEVITORE USB USB2.0, 24bit/192KHz (MAX)
CONSUMO 20 W
Page 11

Nous vous remercions d'avoir acheté un produit de ONIX Electronics. Avant de relier l'alimentation à l'unité s'il vous
plaît lisez attentivement ce manuel.
GUIDE DE L'UTILISATEUR
INSTALLATION
CONNEXIONS
Installez l'appareil dans un endroit bien ventilé exposée à des
températures élevées ou à l'humidité, elles sources de chaleur
poêles de type ou un radiateur. Assurez-vous de laisser un
espace autour du produit an d'obtenir une ventilation correcte
(Laisser un espace d'au moins 30 cm de haut, 10 cm derrière
appareil et 20 cm sur les côtés). Si vous ne remplissez pas ces
distances l'appareil va surchauer altérer son fonctionnement normal avec une éventuelle panne ou un risque d'incendie.
Avant d'eectuer ou de modier les raccordements, mettez l'appareil hors tension sans avoir d'abord détériorer le
produit.
CONNEXION DES CORDONS PIN-RCA
L
R
1 Canal gauche
2 Canal droit
4 Fiche rouge
3 Fiche blanche
Connectez la che blanche au canal L 3 (à gauche) 1,
et le canal rouge 4 à R (droite) 2.
Bouchons doivent être bien en place et bien
à fond.
Le lecteur DAC est équipé de ltres pour la suppression des parasites radioélectriques conformément à la
réglementation ECE
ENTRETIEN DES SURFACES EXTERIEURES
Enlever la poussière et la saleté avec un chion propre et
sec. Ne jamais utiliser de diluants, de benzine, d'insecticide
et autres produits chimiques sur ou à proximité de l'appareil
car il corroder les surfaces.
Toujours saisir le cordon par la che. Ne jamais tirer tirant
sur le cordon et ne touchez jamais le pouvoir cordon si vos
mains sont mouillées car cela pourrait provoquer un courtcircuit ou un choc électrique.
NOTE IMPORTANTE SUR LE CABLE
D’ALIMENTATION
11
Télécommande
La télécommande fournie est utilisé
pour tous les dispositifs la série Classic,
de sorte que certains les touches peuvent
avoir aucun fonction de cet appareil.
Pour faire fonctionner le
télécommande fonctionne avec deux
batteries mod. Piles AAA 1.5V non inclus.
IN P U T
L E V E L
T U N IN G P R O G
P R E S E T R A N D O M
B A N D V O L U M E
D I S P L A Y
D I M M E R
M U T E
S C A N
E N T E R
C D
IN P U T
X R C - 1
A M P
T U N E R
CD /
S A C D
C D
D A C
R E P
A - B
1 2 3
5
6
7
4
8
9
0
IN F O
M E M
1 0
Changer (
Situé sur CD)
Entrée Touche de sélection
Piste précédente/suivante
Fonction de lecture/pause
la commande
à distance est
optionnelle.
V
O
L
U
M
E
P
H
O
N
O
T
U
N
E
R
A
U
X
P
O
W
E
R
O
N
O
FF
P
H
O
N
E
STEREOINTEGRATEDAMPLIFIER
C
D
Page 12

12
Description du fonctionnement
On / o
1. Connecter le cable d'alimentation et le cable du signal . Presser la clé d'allumage sur le panneau frontal en position
[ ON].
2. Pour éteindre le dispositif, presser la clé sur le panneau frontal en position [ OFF].
On recommande que le cable d'alimentation soit déconnecté pendant que le dispositif n'est pas utilisée longtemps.
VOL UME
POW ERPHO NE
ON OFF
SEL ECT SRC
USB COA- OP T- 96K 192K
DIGITAL TO ANALOG CONVER TER
DAC25B
iPod
1 3
6
5
4
2
MOD EL: DAC 25B
POW ER CONS UMPTI ON: 20W
DIG ITAL TO ANALO G CONVE RTER
FUSE 1 00V - 120 V: T1AL
220V - 2 40V: T50 0mAL
AC IN
USB
OPT- COA -
XLR - R RCA XLR - L
L
R
AUD IO OUT
SER IAL N O.:
iPo d
ON IX ENG LA ND ELE CT RO NI C S LT D
DIG ITAL IN
USE ONLY WI TH A2 50V FUS E
~ /220V 50Hz
1 2
6
4
3
67
5
1. Entrée Touche de sélection
2. Récepteur de télécommande
3. Sélecteur Upsampling
4. bouton de volume du écouteurs
5. Jack pour les écouteurs
6. Interrupteur d'alimentation
1.
P
rise d'entrée d'alimentation avec fusible
2. Entrée numérique USB
3. Entrée numérique optique
4. Entrée numérique coaxiale
5.
Entrée iPod
6. Sortie analogique équilibrée XLR
7. Sortie analogique RCA
Page 13

13
iPod USB COA- OPT-
Sélection entrée audio signal
1. Presser la clé [SELECT] sur le panneau frontal pour sélectionner le signal d'entrée.
2. Le display montre le signal d'entrée en séquence comme suit:
Upsampling off 96K 92K1
Note:
Si on redémarre le dispositif, l'indicateur du rééchantillonage est toujors dans la meme position que le
dispositif a quand il est éteint.
Réglage USB
1. Connecter le dispositif au PC au moyen du cable USB.
2. Sélectionner la configuration audio dans le panneau de commande et choisir (XMOSXS1-L1Audio)
comme périphérique audio de défault.
Télécomande
1. Régler la fonction sur DAC.
2. Presser les clés [ ] ou [ ] pour choisir la source audio.
3. Quand on utilise l'entrée iPod, il faut utiliser les clés [ ] pour écouter la dernière pièce jouée [ ]
pour écouter la pièce suivante [ ] et pour jouer en play et pour mettre en pause.
Mauvais fonctionnement
Une utilisation incorrecte de l'appareil est souvent confondu avec des dysfonctionnements ou des problèmes en
raison de défaillances. Si vous croyez qu'il ya des problèmes dans le fonctionnement de l'essai, le même selon le
tableau ci-dessous. Si le défaut ne peut pas être corrigée même après avoir effectué procédures correctives décrites
ci-dessous, contactez votre service d'ONIX vous pouvez trouver www.pacetech.it directement sur le site du
distributeur de sorte que la réparation est effectuée par des experts.
Note:
Si on redémarre le dispositif, l'indicateur du signal d'entrée est toujors dans la meme position que le
dispositif a quand il est éteint..
Control volume des écouteurs
Pour régler le volume des écouteurs utilizer le bouton [VOLUME] sur le panneau frontal, tourner-la dans le sens
horaire pour augmenter le volume et dans le sens antihoraire pour le diminuer.
Rééchantillonage
1. Cette clè sert à régler la fréquence de rééchantillonage.
2. Le display montre en séquence comme suit:
Symptôme
L'unité ne démarre pas
Pas de son
Le télécomande
ne fonctionne pas
Cause probable
Prise mal connectée.
Cables de signals pas connectés.
Manche du volume au minimum.
batteries faibles ou absentes dans le
télécomande.
Remède
Controler le lien d'alimentation.
Bien connecter les cables de signal.
Monter le volume.
Insérer ou replacer les batteries.
Page 14

14
Caractéristiques techniques
Garantie
Pour informations sur la garantie, s'il vous plaît contacter votre distributeur local ONIX. Votre ticket de caisse est votre
dossier permanent d'un achat précieux. Il doit être conservé dans un endroit sûr pour être appelé si nécessaire à des
ns d'assurance ou lorsque correspondant à ONIX. Lorsque l'on cherche un service de garantie, il est de la
responsabilité du consommateur pour établir la preuve et date d'achat. Votre ticket de caisse ou de la facture est
susante pour une telle preuve.
Le produit peut faire l'objet de modications sans préavis
Mécanique: SANYO HD850 super mécanisme linéaire, contrôlées par CD-12 servo laser SANYO DV 34.
Convertisseur D/A: DAC Burr Brown PCM 1796 kHz 24Bit/192, AD847 et OPA2604, Op Amps utilisé pour la
conversion I/V. Alimentation: R-CORE "high grade silicon steel core" transformateur en vertu spécique Onix.
Composants utilisés:
RISK OF ELECTRIC SHOCK
DO NOT OPEN
CAUTION
CAUTION:
TO PREVENT THE RISK OF ELECTRIC SHOCK, DO
NOT REMOVE COVER (OR BACK).
NO USER-SERVICEABLE PARTS INSIDE. REFER
SERVICING TO QUALIFIED SERVICE PERSONNEL.
IMPORTANT
The lightning ash with arrowhead symbol,
within an equilateral triangle, is intended to alert
the user to the presence of uninsulated
"dangerous voltage" within the product's
enclosure that may be of sucient magnitude
to constitute a risk of electric shock to persons.
The exclamation point within an equilateral
triangle is intended to alert the user to the
presence of important operating and
maintenance (servicing) instructions in the
literature accompanying the appliance.
LEVEL DE SORTIE SYMÉTRIQUE 4.0V
LEVEL DE SORTIE ASYMÉTRIQUE 2.0V
RÉPONSE EN FRÉQUENCE
20Hz - 20KHz ( ± 0.2dB)
>115dB
RAPPORT SIGNAL / BRUIT
<0.001%
>96dB (16 bit) / >120dB (24 bit)
DIMENSION
L 215 x P 382 x H 102 mm.
POIDS
4 Kg.
ALIMENTATION 220V - 240V AC
THD
GAMME DYNAMIQUE
USB RECEIVER USB2.0, 24bit/192KHz (MAX)
CONSOMMATION D'ÉNERGIE 20 W
This product complies with the Low Voltage Directive
(73/23/EEC), EMC Directives (89/336/EEC, 92/31/EEC) and CE
Marking Directive (93/68/EEC).
Page 15

BEDIENUNGSANLEITUNG
15
Vielen dank für den kauf eines produktes von ONIX Electronics. Vor dem einschalten der energieversorgung an die
einheit bitte lesen sie diese bedienungsanleitung sorgfältig durch.
INSTALLATION
CONNECTIONS
Installieren sie das gerät in einem gut belüfteten die hohen
temperaturen ausgesetzt, feuchtigkeit, hitze typ heizkörpern.
Achten sie darauf, einen raum zu verlassen rund um das
produkt zu erhalten, eine korrekte belüftung (einen abstand
von mindestens 30 cm hoch, 10 cm hinter einheit und 20 cm
an den seiten). Wenn sie nicht erfüllen diese distanzen das
gerät überhitzt veränderung seiner normalen betrieb mit einem möglichen ausfall oder brandgefahr.
Vor dem Herstellen oder Ändern von Verbindungen, schalten Sie das Gerät zunächst ohne das Produkt zu beschädigen.
KABELVERBINDUNGEN PIN-RCA
L
R
1 Linker Kanal
2 Rechter kanal
4 Roter stecker
3 Weißer Stecker
Verbinden Sie den weißen Stecker an die L-Kanal 3
(links) 1, und die roten Kanal 4 bis R (rechts) 2.
Stecker müssen fest sitzen und gut
gründlich.
Die DAC-Player ist mit Filtern zur Unterdrückung von Funkstörungen nach ECE-Regelung ausgestattet
REINIGEN DES GEHÄUSES
Entfernen Sie Staub und Schmutz mit einem sauberen,
trockenen Tuch. Verwenden Sie niemals Verdünner, Benzin,
Insektizide und andere Chemikalien auf oder neben das
Gerät für Sie korrodieren die Oberächen.
Nehmen sie das netzkabel immer am stecker. Ziehen sie
niemals am netzkabel und berühren die netzkabel mit
nassen händen, da dies sind, könnte einen kurzschluss
verursachen oder einen elektrischen schlag.
WARNUNG FÜR DIE WIRE FEED
Fernsteuerung
Die mitgelieferte Fernbedienung ist
verwendet für alle Geräte die Classic
Serie, so dass einige Tasten können
nicht Funktion für dieses Gerät.
Um die Bedienung Fernbedienung
benötigt zwei Batterien mod. AAA 1,5 V
Batterien nicht im Lieferumfang enthalten.
IN P U T
L E V E L
T U N IN G P R O G
P R E S E T R A N D O M
B A N D V O L U M E
D I S P L A Y
D I M M E R
M U T E
S C A N
E N T E R
C D
IN P U T
X R C - 1
A M P
T U N E R
CD /
S A C D
C D
D A C
R E P
A - B
1 2 3
5
6
7
4
8
9
0
IN F O
M E M
1 0
Switch (Set auf CD)
Entrée Touche de sélection
Piste précédente/suivante
Funktion play/pause
Die Fernbedienung
ist ein optionaler
Bestandteil
V
O
L
U
M
E
P
H
O
N
O
T
U
N
E
R
A
U
X
P
O
W
E
R
O
N
O
FF
P
H
O
N
E
STEREOINTEGRATEDAMPLIFIER
C
D
Page 16

16
Beschreibung der Operation
Ein / Aus
1. Verbinden Sie das Stromkabel und Signalkabel . Drücken Sie den Power-Taste auf der Frontplatte des [ ON].
2. Zum Ausschalten drücken Sie die Power-Taste auf der Frontplatte, um [ OFF].
Wir empfehlen , wenn das Gerät bei Nichtgebrauch für eine lange Zeit, schalten Sie die Stromkabel.
VOL UME
POW ERPHO NE
ON OFF
SEL ECT SRC
USB COA- OP T- 96K 192K
DIGITAL TO ANALOG CONVER TER
DAC25B
iPod
1 3
6
5
4
2
MOD EL: DAC 25B
POW ER CONS UMPTI ON: 20W
DIG ITAL TO ANALO G CONVE RTER
FUSE 1 00V - 120 V: T1AL
220V - 2 40V: T50 0mAL
AC IN
USB
OPT- COA -
XLR - R RCA XLR - L
L
R
AUD IO OUT
SER IAL N O.:
iPo d
ON IX ENG LA ND ELE CT RO NI C S LT D
DIG ITAL IN
USE ONLY WI TH A2 50V FUS E
~ /220V 50Hz
1 2
6
4
3
67
5
1. Input select-taste
2. Fernempfang fenster
3. Upsampling selektor
4. Kopfhörer-Lautstärkeregler
5. Jack für den Kopfhörerausgang
6. Netzschalter
1. Netzbuchse mit sicherung
2. Digital-Eingang USB
3. Optischen Digital-Eingang
4. Koaxialen Digital-Eingang
5.
IPod-Eingang
6. Balanced Analogausgang XLR
7. Analogausgang RCA
Page 17

17
iPod USB COA- OPT-
Audio signal Auswahleintrag
1. Drucken Sie den [SELECT] Taste auf der Frontplatte fur Auswahleintrag.
2. Das display zeit das Einstiegssigna ins Sequency wie nach:
Upsampling off 96K 92K1
Aufzeichnungen:
wenn das Gerät neu starten Sie, Resampling-Anzeige bleibt auf Position wie im ausgeschalteten ist.
Einstellen des USB
1. Verbinden Sie das Gerät mit dem PC über das USB-Kabel.
2. Gehen Sie auf die Audiokonfiguration in der Systemsteuerung, und wählen Sie (XMOSXS1-L1Audio)
als Standard-Audiogerät.
Fernsteuerung
1. Einstellen Sie die Funktion uber DAC.
2. Drücken Sie die [ ] oder [ ] fur auszuwählen die Audioquelle.
3. Wenn verwenden Sie mit dem iPod-Eingang,die Taste [ ] um den vorherigen Titel horen [ ] um
den nachste Titel [ ] um zu gehen PLAY und Pause.
Funktionsstörung
Unsachgemässen gebrauch des gerätes wird oft für störungen oder probleme verwechselt aufgrund von ausfällen.
Enn sie glauben, dass es probleme im betrieb, überprüfen sie die bedienung gemäss der folgenden tabelle. Wenn
die störung nicht selbst nach ausführen behoben werden beschriebenen verfahren abhilfe, wenden sie sich an ihren
autorisierten servicetechniker onix finden sie direkt auf der website des verteilers www.pacetech.it, so kann die
reparatur von fachleuten durchgeführt werden.
Aufzeichnungen:
wenn das Gerät neu starten Sie, Einstiegssignal-Anzeige bleibt auf Position wie im ausgeschalteten ist.
Volume Control Kopfhörer
Zu einstellen die Kopfhörerlautstärke mit dem [VOLUME] Regler auf der Frontplatte, im Uhrzeigersinn drehen
Sie, um die Lautstärke zu erhöhen und gegen zu verringern die Lautstärke.
Resampling
1. Diese Taste um die Häufigkeit der Resampling einstellen ist.
2. Display zeigt ins sequency , wie nach:
Symptom
Kein strom versorgt
Kein ton
Die Fernsteuerung
funktioniert nicht
Wahrscheinliche Ursache
Steckdose angeschlossen ist.
Signalkabel angeschlossen ist.
Lautstärke-Regler auf Minimum.
Oder keine Batterien in der Fernsteuerung
Abhilfe
Überprüfen Sie den Powerkable.
Und verbinden Sie die Signalkabel.
Die Lautstärke zu erhöhen Sie
Einlegen Sie oder Ersetzen Sie der Batterien.
Page 18

Technische Daten
Garantie
Für Garantie-Informationen, kontaktieren Sie bitte Ihren lokalen Händler ONIX. Ihr Kaufbeleg ist Ihr permanente
Aufzeichnung einer wertvollen Kauf. Es sollte an einem sicheren Ort auf wie nötig für die Versicherung genannten
Zwecke werden Or When gehalten werden Entsprechende mit ONIX. Bei der Suche nach Garantie-Service, ist es die
Verantwortung des Verbrauchers, den Nachweis Einrichtung und Kaufdatum. Ihr Kaufbeleg oder Rechnung ist für
einen solchen Nachweis ausreichend.
Das produkt kann jederzeit ohne vorherige ankündigung geändert werden
Mechanik: SANYO HD850 super linearen Mechanismus, gesteuert durch CD-12 Servo Laser SANYO DV 34.
Converter D/A: DAC Burr Brown PCM 1796 KHz 24Bit/192, AD847 und OPA2604, Op-Amps für I / V-Konvertierung
verwendet.
Stromversorgung: R-CORE "high grade silicon steel core" Transformator unter bestimmten Onix gemacht.
Eingesetzte Komponenten:
RISK OF ELECTRIC SHOCK
DO NOT OPEN
CAUTION
CAUTION:
TO PREVENT THE RISK OF ELECTRIC SHOCK, DO
NOT REMOVE COVER (OR BACK).
NO USER-SERVICEABLE PARTS INSIDE. REFER
SERVICING TO QUALIFIED SERVICE PERSONNEL.
IMPORTANT
The lightning ash with arrowhead symbol,
within an equilateral triangle, is intended to alert
the user to the presence of uninsulated
"dangerous voltage" within the product's
enclosure that may be of sucient magnitude
to constitute a risk of electric shock to persons.
The exclamation point within an equilateral
triangle is intended to alert the user to the
presence of important operating and
maintenance (servicing) instructions in the
literature accompanying the appliance.
18
EBENE SYMMETRISCHEN AUSGANG 4.0V
EBENE UNSYMMETRISCHEN AUSGANG 2.0V
FREQUENZGANG
20Hz - 20KHz ( ± 0.2dB)
>115dB
SIGNAL/RAUSCH VERHÄLTNIS
<0.001%
>96dB (16 bit) / >120dB (24 bit)
GRÖSSE
B 215 x L 382 x H 102 mm.
GEWICHT
4 Kg.
STROMVERSORGUNG 220V - 240V AC
THD
DYNAMIKBEREICH
USB-EMPFÄNGER USB2.0, 24bit/192KHz (MAX)
STROMVERBRAUCH 20 W
This product complies with the Low Voltage Directive
(73/23/EEC), EMC Directives (89/336/EEC, 92/31/EEC) and CE
Marking Directive (93/68/EEC).
Page 19
19
Gracias por comprar un producto de ONIX Electronics. Antes de conectar la fuente de alimentación a la unidad por
favor, lea atentamente este manual.
GUÍA DEL USUARIO
INSTALACION
CONEXIONES
Instale la unidad en un lugar bien ventilado expuesto a
altas temperaturas, humedad, calor calefactores o
radiadores tipo. Asegúrese de dejar un espacio alrededor
del producto para obtener una ventilación correcta (Deje
un espacio de al menos 30 cm de alto, 10 cm detrás unidad
y 20 cm en los laterales). Si usted no cumple con estas
distancias el aparato se sobrecalienta alterar su funcionamiento normal, con un posible fallo o riesgo de incendio.
Antes de efectuar o modicar las conexiones, apague el dispositivo por primera vez sin dañar el producto.
CONEXION DE CABLES PIN-RCA
L
R
1 Canal izquierdo
2 Canal derecho
4 Clavija roja
3 Clavija blanca
Conecte la clavija blanca al canal L 3 (izquierda) 1,
y el canal rojo de 4 a R (derecha) 2.
Los enchufes deben estar rmemente asentado y
bien a fondo.
El reproductor DAC está equipado con ltros para la supresión de interferencias de radio de acuerdo con la
regulación ECE
MANTENIMIENTO DE LAS SUPERFICIES EXTERNAS
Elimine el polvo y la suciedad con un paño limpio y seco.
Nunca utilice diluyente, benceno, insecticidas y otros
productos químicos sobre o cerca del aparato para usted
corrosión en las supercies.
Tome siempre el cable de alimentación por la clavija.
No tire nunca del cable y nunca toque el cable con las
manos mojadas, ya que esto podría causar un cortocircuito
o una descarga eléctrica.
PRECAUCIONES CONCERNIENTES A LA
MANIPULACION DEL CABLE DE ALIMENTACION
Mando a distancia
El mando a distancia suministrado es para todos los
dispositivos las series Classic, por lo que algunos
teclas pueden no tener función para esta unidad.
Para operar el control remoto
requiere dos baterías mod.
Pilas AAA de 1,5 V no incluidos.
IN P U T
L E V E L
T U N IN G P R O G
P R E S E T R A N D O M
B A N D V O L U M E
D I S P L A Y
D I M M E R
M U T E
S C A N
E N T E R
C D
IN P U T
X R C - 1
A M P
T U N E R
CD /
S A C D
C D
D A C
R E P
A - B
1 2 3
5
6
7
4
8
9
0
IN F O
M E M
1 0
Switch (Impostare su DAC)
Tasto selezione ingresso
Traccia successiva/precedente
Tasto play/pause
el mando
a distancia
es opcional
V
O
L
U
M
E
P
H
O
N
O
T
U
N
E
R
A
U
X
P
O
W
E
R
O
N
O
FF
P
H
O
N
E
STEREOINTEGRATEDAMPLIFIER
C
D
Page 20
20
Descripcion del funcionamiento
Encender/Apagar
1. Conectar el cable de alimentacion y el cable de signal. Pulsar la clave de comienzo sur el panel frontal en posicion
[ ON].
2. Para apagar el aparato, pulsar la clave de comienzo sur el panel frontal en posicion [ OFF].
Aconsejamos desconectar el cable de alimentacion cuando no se utilizarà el aparato durante mucho tiempo.
VOL UME
POW ERPHO NE
ON OFF
SEL ECT SRC
USB COA- OP T- 96K 192K
DIGITAL TO ANALOG CONVER TER
DAC25B
iPod
1 3
6
5
4
2
MOD EL: DAC 25B
POW ER CONS UMPTI ON: 20W
DIG ITAL TO ANALO G CONVE RTER
FUSE 1 00V - 120 V: T1AL
220V - 2 40V: T50 0mAL
AC IN
USB
OPT- COA -
XLR - R RCA XLR - L
L
R
AUD IO OUT
SER IAL N O.:
iPo d
ON IX ENG LA ND ELE CT RO NI C S LT D
DIG ITAL IN
USE ONLY WI TH A2 50V FUS E
~ /220V 50Hz
1 2
6
4
3
67
5
1. Botón de selección de entrada
2. Ventana de recepción remota
3. Selector upsampling
4. Perilla para el volumen de los auriculares
5. Jack para los auriculares
6. Interruptor de encendido
1. Toma de corriente de entrada con fusibles
2. Entrada digital USB
3. Entrada digital óptica
4. Entrada digital coaxial
5. Señal de entrada de IPod
6. Salida analógica balanceada XLR
7. Salida analógica RCA
Page 21

21
iPod USB COA- OPT-
Seleccion entrada signal audio
1. Pulsar la clave [SELECT] en el panel frontal para seleccionar el signal de entrada.
2. El display muestra el signal de entrada en secuencia como ilustrado bajo aquì:
Upsampling off 96K 92K1
Notas:
Cuando se conecta nuevamente el aparato, la luz del sampleado se queda en la misma posicion de que
està apagado.
Ajuste USB
1. Conectar el aparato al ordenador por medio del cable USB.
2. Seleccionar la configuraccion audio en el panel de comando y seleccionar (XMOSXS1-L1Audio)
como dispositivo periferico audio por defecto.
Mando a distancia
1. Ajustar la funcion en DAC.
2. Pulsar las claves [ ] o [ ] para seleccionar la fuente audio.
3. Cuando se utiliza la entrada iPod utilizar las clavesi [ ] para escuchar la pieza anterior [ ] para
ecuchar la pieza siguiente y [ ] para ir en play y en pausa.
Funcionamiento defectuoso
El uso inadecuado de la unidad se confunde a menudo con un mal funcionamiento o problemas debido a las fallas.
Si usted cree que hay problemas en la operación, comprobar el funcionamiento de acuerdo con la siguiente tabla.
Si la avería no se puede solucionar después de realizar procedimientos descritos remedio, póngase en contacto con
su Distribuidor Autorizado ONIX servicio que puede encontrar directamente en el sitio de la www.pacetech.it
distribuidor, por lo que la reparación puede llevarse a cabo por expertos.
Notas:
Cuando se conecta nuevamente el aparato, la luz del signal de entrada se queda en la misma posicion de
que està apagado.
Control de volumen para los auriculares
Para reglar el volumen de los auriculares utilizar la clave [VOLUME] en el panel frontal , girarla en sentido horario
para aumentar el volumen y en sentido antihorario para bajarlo.
Sampleado
1. Esta clave sirve parareglar la frecuencia de sampleado.
2. Il display muestra en secuencia como sigue:
Síntoma
No se enciende
No hay sonido
Mando a distancia
non funciona
Causa probable
Salida mal conectada.
Cables de signal desconectados.
Pomo volumen al minimo.
Baterias debiles o absentes en el mando.
Remedio
Comprobar la conexion del alimentacion.
Conectar corectamente los cables de signal.
Aumentar el volumen.
Insertar o cambiar las baterias.
Page 22
22
Especicaciones
Garantía
Para obtener información sobre la garantía, póngase en contacto con su distribuidor local de ONIX. Su recibo de
compra es su registro permanente de una compra valioso. Se debe tener en un lugar seguro para ser referido como
necesario para nes de seguros o cuando en correspondencia con ONIX. Al solicitar el servicio de garantía, es
responsabilidad del consumidor para establecer la prueba y fecha de compra. El recibo de compra o factura es
suciente para dicha prueba.
El producto puede estar sujeto a cambios sin previo aviso
Mecánica: SANYO HD850 mecanismo súper lineal, controlada por servo CD-12 láser SANYO DV 34.
Convertidor D/A: DAC Burr Brown PCM 1796 KHz 24Bit/192, AD847 y OPA2604, Op Amps que se utiliza para la
conversión I/V.
alimentación: R-CORE "high grade silicon steel core" presentada en virtud del transformador especíco Onix.
Los componentes utilizados:
RISK OF ELECTRIC SHOCK
DO NOT OPEN
CAUTION
CAUTION:
TO PREVENT THE RISK OF ELECTRIC SHOCK, DO
NOT REMOVE COVER (OR BACK).
NO USER-SERVICEABLE PARTS INSIDE. REFER
SERVICING TO QUALIFIED SERVICE PERSONNEL.
IMPORTANT
The lightning ash with arrowhead symbol,
within an equilateral triangle, is intended to alert
the user to the presence of uninsulated
"dangerous voltage" within the product's
enclosure that may be of sucient magnitude
to constitute a risk of electric shock to persons.
The exclamation point within an equilateral
triangle is intended to alert the user to the
presence of important operating and
maintenance (servicing) instructions in the
literature accompanying the appliance.
NIVEL DE SALIDA BALANCEADA 4.0V
NIVEL DE SALIDA NO BALANCEADA 2.0V
RESPUESTA DE FRECUENCIA
20Hz - 20KHz ( ± 0.2dB)
>115dB
RELACIÓN SEÑAL/RUIDO
<0.001%
>96dB (16 bit) / >120dB (24 bit)
TAMAÑO
A 215 x L 382 x A 102 mm.
PESO
4 Kg.
ALIMENTACIÓN 220V - 240V AC
THD
RANGO DINÁMICO
USB RECEPTOR USB2.0, 24bit/192KHz (MAX)
CONSUMO DE CORRIENTE 20 W
This product complies with the Low Voltage Directive
(73/23/EEC), EMC Directives (89/336/EEC, 92/31/EEC) and CE
Marking Directive (93/68/EEC).
Page 23

FOR USE IN THE UNITED KINGDOM
The wires in this mains lead are coloured in accordance with the following code : Blue : Neutral
Brown : Live
If the plug provided is unsuitable for your socket outlets, the plug must be cut o and a suitable plug
tted.
The cut-o plug should be disposed of and must not be inserted into any 13 amp socket as this can result in
electric shock. The plug or adapter or the distribution panel should be provided with a 5 amp fuse. As the colours
of the wires in the mains lead of this appliance may not correspond with the coloured markings identifying the
terminals in your plug, proceed as follows : The wire which is coloured blue must be connected to the terminal
which is marked with the letter N or coloured black. The wire which is coloured brown must be connected to the
terminal which is marked with the letter L or coloured red. Do not connect either wire to the earth terminal of a
three-pin plug.
NOTE
After replacing or changing a fuse, the fuse cover in the plug must be replaced with a fuse cover which
corresponds to the colour of the insert in the base of the plug or the word that is embossed on the base of the plug,
and the appliance must not be used without a fuse cover. If lost, replacement fuse covers can be obtained from
your dealer.
Only 5 A fuses approved by B.S.I. or A.S.T.A to B.S. - 1362 should be used.
Page 24
ONIX ELECTRONICS LTD. ENGLAND
PACETEcH
exclusive european distr ibuto r
www.onix-hi.com
V
O
L
U
M
E
U
S
B
C
O
A
-
O
PT
-
9
6
K
1
9
2
K
i
Po
d
S
E
L
E
C
T
S
R
C
DIGITAL TO ANALOG CONVERTER
DAC25B
M
O
D
E
L
:
DA
C
2
5
B
P
O
W
E
R
C
O
N
S
U
M
P
T
I
O
N
:
2
0
W
D
I
G
I
T
A
L
T
O
A
N
A
L
O
G
C
O
N
V
E
R
T
E
R
X
L
R
-
R
R
C
A
X
L
R
-
L
L
R
A
U
D
I
O
O
U
T
O
N
I
X
E
N
G
L
A
N
D
E
L
E
C
T
R
O
N
I
C
S
L
T
D
 Loading...