

Page 1
-s*
Warranty
you
a warranty
product.
the
for any
Should
for
with
Product
you
encounter
lf
toperform
oui
returning
Atter
to
Salei
to the store
it
returns
reason
claim,
does
problems
your
expectations,
Support
make
not
for a
need
sure
work?
with
Centre
to return
to include
this
make
on
refund.
this
all
product, or
sure
886
1 300
product
accessories
fails
if it
contact
to
before
649
Page 2
.1
/
I
Welcor:
CongE:JaiG
By dorE
=
ffi
mE
.c
ft
rbm
:
agr
**a
e d
:5rr
===::*--*
llg-rf
r.t
a
llrEE
mr,E
!r
!.!Fy
rDilt
i@
q
-a
=
e !-rrAspn
J
O|.(
sE
E as
J Oq
arc
m d:f! l*E
t
OaX
E Buiactured
rcrtrts
p(rcha*
,qr
fodct.
p€c€
-d
manufacturers-
orow
re U"cf,"O
Ior
many years
of
mind
to the hiahaer
pn,ro"opr,V
OV
a
"o,i,piet
to
that
comes
&"r"tor",
come.
"n"iu"'l
with
Contents
Welcome
Waranty Details
General Sateiy lnstructions
Z
Parts Overview
lnstallation
Connecting to Power
lnslructions
Specilications
Repair
Relurbished Goods or Parts Notice
and
't5
msffi
Ae
rr-E
M:ACsm13tuucth:t&6&a
! wn.hF,q
AftTSLTSSUP?OT
rm6re
8@
*w.mpq
kttr33s3Pdudkr ffiMl3
E
Page 3
product
penod
refunded at
goods
failure
failure.
major
rmffiro
rs
of
penod.
to all
the Compet
laws-
come
ancl to compenslon
You are also entLtled
lail to be of
The
lor a
this warraniy
or
addition
has under
tetrrtory
Our
Australian Consumer
malor
or damage.
goods
IIIER5ATESSUPPONI
8@
4
oNlx
Black Box
Car
Warranff
:6&,.4dud
guaraiteed
ic
i:am
12 months
u.der
olr d scre: cl
nghts aid refred es
tron
anC Consumer
g!arant*s
wdh
You are ertIled
Law-
acceptable
t!n!.
ire
lrom defects
be
of
lre date
ncma! use and
Tle
benefrts
rn respect of the
that cannot
lor any other
to have the
quairty
and the
m:@&13rudk:ffi@ru13
Recorder
Details
workmanship
in
purchase.
Defects
be repaired,
care, wlll
this warranty
by
conferred
product
be excluded
reasonably
goods
repaired
failure does
!
similar
lw.bmFqs
Act 2010 and
to a replacement
pans
and
that occur
replaced
are in
that the consumer
state and
the
under
for
refund
or
foreseeable loss
replaced if
or
to a
not amount
tll
L**J
within
a
General
Bead
p.ecautons enclosed
io ow all
This
A The
&\
When
potenlial
.
ihe
CAUTION: Secure
does not
ffTMSATESSUPMRT
A
Safety
thorouqh
this manual
prcduct
WhenrnstallinstheunnrnavehEe,placetseclrelvsolhatltdoesnot
operating
biocksthedriveasierdolvison
an a rbaq feld
Do not
andpemanentdamaqetothe4urpmeni
Use
result in ire, electc
lhis
Do
rn
come
Danger ol
Use only ihe
Beiore
Ths devce
or mental capabiltes,
sion or nstuction
Young children
When charcing
coud cause
@
indrucnons and
complies
BCM s
regL drory
prcducl,
using lhrs
h;zardous
conirc
drsassemble
prcduci
this
produci
pu1,
not
dfstsunllght.
stong
h;i, expTode
expiosron
turn ng on
p
Oo not
ug
you
experience
li
try1o disassembelhe
Do not
blockyourdriving
rm&ss
herein reducelhe
ariargame.ls.
situatons
oi dePloyment.
uses
slore
supp ed charger
not nlended
is
should be
the device, do
overheat
the
the
lnstructions
y
take
with
a vrs ble
thesesleiv
s or obstucl
orate.the
onty as
shock
a lith um
or leave
qnite
or
il banery
the unt,
or
concern
ng and
power
probems with the equlpment,
suction_cup
and keep
lfst use
before
rlsk oi
oI a warnings
notice
Safervsbndad
Auskalian
ot a
ino,calol
irc'Jdinq
pr*auiions musl
rcsut in
cou d
that
the driveas
orplaceIunseurdontrevehicledash,o'molntilinfrontor
Do.q so
un[.
for anlthlnq olherthan
Use
sp€rid.
r.lury.
or other
Do not lse
baflery.
product
your
ln or
to lollow these
Failure
nl!ry and/or damage.
cause
and
is incorectlv
tor charging
adaptor
the lemperature
be sure
persons
bv
lor use
experence
lack oi
use ofthe
ng
to ensure
supervsed
not oveiload
rn a lne
resull
n wtrh wet
adaplor
product you6eLi
bracket
Do not atrix
vision.
p]ace
it in a sale
lo reduce
and injury
the risk
i re eetc shock
AS/NZS@Sto
prooJcr<
a ' technrcal
vlew of the
livouhaveproblems,conlacttheAfterSalesSuppod
replaced.
appliance
hands, asthis
carefully
Lomp
and
beiollowd
propedv
inlury,
rcad. For example,
rn
may resull
it in a hum d,
rear a heat source
guidelines
mav cause
Replace onLy
the batery'
ns
the vehicle
de
(nclud
ng children)
and knowledge,
person rcspons
bv a
not
thevdo
power
supplv
vour
could
contactthe
Ensure
where airbags
Mdel,
ance
record_keepirq
damage
an
plav
reference
foriulure
when corectv
oli re oreectc
ensure the
lt
w
all apDh'able
roqutremenl'
prevent
accldents
to
ordeath
nlederewihvehicle
do
fie orelectic
accident,
iis designated
wet and/orcotrosrve
gh
temperalure
rn a h
the batteryto
pierce, open or disassemble
not
Do
the same orequrvalent
wlth
rs between
reducd
with
have beer
!nessthev
ble Iorther
the de!
wnh
or stessthe
lead to eectic
Suppon centefor
After Sales
Black Box
the Car
located'
are
PdDl Code:
AC33S13
shock'
safetvof
orto avod
tovoursell
not mount
applcaton
envtonment'
leak
0'C and
phvsica sensory
9ven
ce'
power
cord,
shock'
Recorder
q
*B.hd
ffi M13
aCMA
saietv
The saretv
adhered
orolhers
t where
shock
mav
locauon or
acid' be'
40'C'
superu'
which
oB
io
tho
I
advce'
Page 4

Ovelrl,evv
Parts
Connections
and
Parts
Unit
+rte
1 Camera
2 Status
3
4 USB
5 Bracket
6
7 Reset
lens
indicators
Display Screen
port
slot
Microphone
button
8
I
10
Up button
8
OKbutton
I
'10
Down
11 Power/Menu
12 Mode button
MicroSD
13
fr=ii
button
button
slot
Card
Overview
Parts
Accessories
.
lnstruction
.
Suction
.
to Mini
USB
.
Car
USB
I'Ianual
Cup
Charqer
Bracket
USB
Cable
(with
(Cont.)
'1
V
2-24
DC input
5V output
to
voltage
converter)
AfTTRSAIESSUPPORI
rmffine
a @
Afi[I'ATEsSUPPOIT
1mffiils
I
@
Page 5
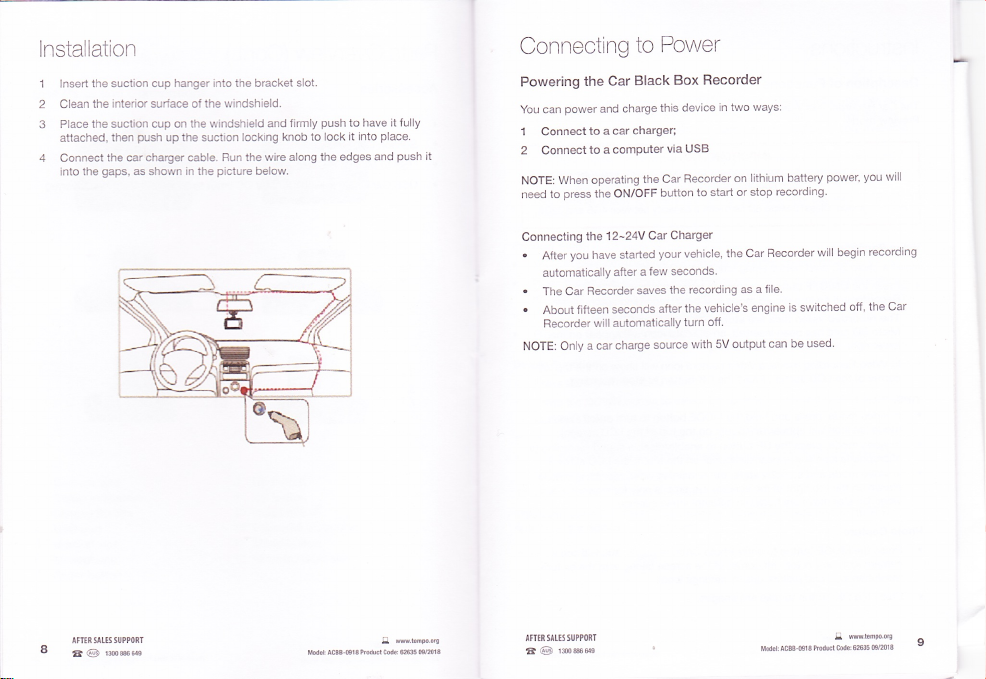
lnstallation
'1
lnsert the suction
interior
the
2 Clean
Place the suction cup on
3
4 Connect
then
attached,
the car charger cable. Run
gaps,
into the
cup hanger into the bracket
the windshield.
surlace of
the windshield and
push
up the suction
as shown in the
picture
slot.
firmly
locking knob to
the wire along
below.
push
have it lully
to
lock it into
the edges and
place.
push
Connecting
Powering
power
You can
1 Connect
il
2 Connect
When operating
NOTE:
press
1o
need
Connecting
.
After
automatically
.
The Car
.
About fifteen
Recorder
Only a
NOTE:
you
to Power
Black
the Car
charge
and
car charger;
to a
comPuter
to a
the Car
the ON/OFF
'l
2-24V
the
have started
after a
saves
Recorder
seconds
will automatically
car charge
Box Recorder
device
this
via USB
Recorder
button
Cat Cha(ger
your
vehicle, the Car
few seconds.
the recording
the vehicle's
after
turn
with
source
in two ways:
on lithium
start or stop
to
off.
5V outpui can
as a lile
engine
battery
recording.
Recorder
is switched
be used
power, you
will begin
off,
wiil
recording
the Car
IFTIISIUSSUPPORI
1msils
I
@
ITTIR9E55UPPORT
1il6ile
I @
Md.rr
Ac33 Gl3
q
Prdud Cod.: ffi
tw.tmForc
w2013
Page 6

Instructions
Functions
Description
The
Preview
Recommended:
Video Recording
lnsert a l\,4icro SD card before using
.
.
.
TIPS:
.
.
.
Photo
.
.
of
Car Recorder
Before
Press the ON/oFF button, or connect
Recorder will
The
Micro SD card
lower
ln Video
corner
In video mode,
mode
ln video mode,
microphone
ln video
shown
video file size
Press
camera
resolution
Press
has Vide R&ording mode, Photo Capture
mode.
IMPOTTANT NOTE
prcduct, you
using this
recorded video liles are storcd on the Micro
right corner ol the LCD scren.)
Recording mode,
of lhe LCD screen. Press the OK button
(an
icon will appear/disappear on the top of
mode and
on lhe top right of the scren;
(card
Classl0 Mrcro SD card with a capacity
go
into rsord mode and begin
has
press
press
icon will
may vary
is not included)
inserted,
ben
vids camera icon
a
and hold the
lhe UP button to enable/disable
appear/disappear
standby state,
betwen different
Capture
the MODE button to enter Photo Capture
icon
the top-left
on
icon and
the OK button to take still images.
picture
corner of
quality
will n@d to insert
(card
not
to the car chargef,
card icon will appear
an SD
MODE button to turn on/oif
on the top of
the remaining
'this
the screen
settings icon).
a MicrosD
between
included).
recording automatically.
SD card.
will
show
to stop recording.
the LCD screen).
sound
the LCD screen).
video recording time
time is only for
video scenes.
mode. You
(along
mode and
4GB and 32GB.
The Car
(When
on the
on the top left
Parking
recording
reference, as
will see a
picture
the
with
card
mode,
the buttons
mode).
mode,
is shown
update according
preview
corner of
button
to enter
select'delete
to
confirm.
POWER/MENU
freezes,
bottom of
(Cont.)
the UP/DOWN
use
lo zoom
the screen;
of
the number
on
lor rererence,
videos
all
to enter Preview
the LCD screen.
buttons
'Play/Pause'.
to
to select the
one'or'delete
buttons
hard-reset
the camera.
buttons
continuously
the digital zoom
photos you
of
the
upperright
to different image
iile size may vary between
as
photos
and
to
lhe desired
select
button.
lo make
button
'Delete'
all'.
your
to exit.
the camera by
to zoom inlout.
(the
zoom
function
can take with
of the screen.
corner
resolution settings.
recorded on this
mode. A'play'
file for
menu and
then
selstion,
pressing
You can also
ratio will display
is
available
only
the remaining
This
different
device
icon will show
preview.
press
the OK
press
the OK
the RESET
on
lnstructions
TIPS:
.
picture
ln
hold
down
on the lowetrright
picture
in
.
picture
ln
SD card space
number will
number is only
This
images.
mode
Preview
.
You can
.
Press the MODE butlon
the top left
i
.
a
(a
is
Use the UP/DOWN
.
Press the OK
Delete Function
.
Press the POWER/MENIJ
.
Press the DOWN button
button
.
You can
.
the UP/DOWN
Use
button
.
Press the
TIP: lf the camera
button on the
10
rttrR$tEssuPmnl
1mmru
I
@
wmp.otg
M.l ACBBSIS ?duct &, 6&
!
ffi a
lEEtsattssuPPont
rm&m
I
@
fi*IrcBB m18tuulm:ffi$mm13
Page 7
lnstructions
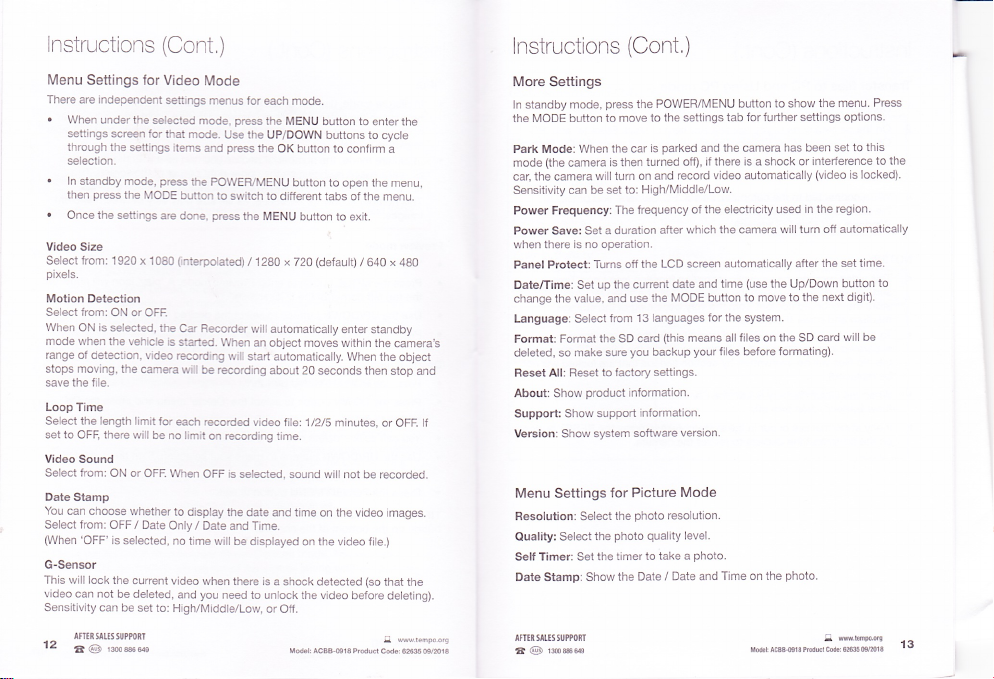
Menu Settings for
There are independent
.
When under the
settings screen for
through the
selection.
.
ln
standby mode,
then
.
Once the settings
Video
Size
Select from: 1920
pixe,s.
Moiion Detection
Select Jrom:
When
ON is selected,
mode when
range of detection,
stops moving, the camera
save the file.
Loop
Time
Select the length
sei lo OFF, there will
Video Sound
Select rrom:
Date Stamp
You can choose whether
Select fromt
'OFF'
When
G-sensor
This will lock the
video can not
Sensitivity can be set
ATTTXSAESsUPPONT
12
a@
press
the
ON or OFE
the vehicle is
ON or OFE
OFF / Date
is selected,
be deleted,
lmses
selmted
settings items
MODE
x 1080
vid@ rsording
limit for
be no limit
current video
to: High/Middle/Low,
(Cont.)
Video
settings
mode,
that mode.
pres
the
button to
are done,
(interpotated),/
the
Rsorder
Car
started.
will
be reording
each rtrorded
When
OFF
to
display the
Only / Date
no time
when there is
you
and
Mode
menus for
each mode.
press
the MENU button to
Use the UP/DOWN
press
and
the OK button to confirm
POWER/MENU
switch to different
press
When an
will
on rsording
is
and Time.
will be displayed
need to unlock the video
button to open the
the MENU
i2BO x 720
will automatically
object moves within the
start automatically.
about 20 seconds then
video file:
time.
selected. sound
date and time on the video
a shock detected
or Off.
Modolr ACSB'@13 Prducl
buttons to
tabs of the menu.
button to exit.
(defautt)
/ 640
enter standby
When lhe object
l/2/S minutes. or
will not be recorded.
on the video Iile.)
(so
before deleting).
enter the
cycle
a
menu,
x
480
camera,s
stop and
OFF.
jmages.
that
q
wwwtempo.org
Cdc: 6&@/ml3
lnstructions
(Cont,)
More Settings
press
POWEB/lVlENU
ln standby mode,
the MODE button
Park Mode: When
(the
mode
camera
car, the camera
Sensitivity can
Power Frequency:
Power Save: Set a
when there
Panel Protect:
change
is no operation.
Date/Time: Set up
the value, and use
Select
Language:
Formati Format
deleted, so make sure
Reset All: Fleset to
About: Show
lf
Support Show
Vereion: Show
Menu Settings
Resolution: Select
Select
Quality:
Self Timer: Set lhe
the
Date Stamp: Show
I[TER5AtrS5UPP0RI
1m6ils
E @
the
the seltings lab for further
to move to
parked
is
the car
turned off),
is then
will turn on and
be set tor High/[.4iddle/Low.
The trequency
duration after
Turns ofl the
the current
from 13 languages
the SD card
factory settings.
product
support inlormation.
system software
record video automatically
LCD screen automatlcally
date and time
MODE button to move to the
the
(this
you
backup
inlormalion.
for Picture
photo
resolution.
the
photo quality
the
timer to take
Date / Date and
the
button to show
and the camera
ii there is a shock or
of the electricity used
which the camera
(use
forlhe system.
all files on the SD card
means
your
files berore
version.
Mode
level.
photo.
a
Time on the
ilodclAcss4lsPrdudcodeffiM0ls
the menu Press
settings options.
interference
(video
region.
in the
after the set
button
next digit).
will be
g
aw.bmp.o,s
to this
is
time.
locked).
has been set
will turn off automatically
the
Up/Down
formating).
photo.
to the
to
13
Page 8

Instructions
Transfer files to PC and
1
Connect
2
the camera scrtrn,
On
Camera'. Select
3 Open the folder'DCIM/10oMED|A
computer
4 While connected to the computer,
the camera can now
Windows and Mac OS system).
NOTESi
.
This video recorder has
settings
store the recorded content lrom
medium and cover the old file.
.
prevent
To
separated into strtions
the
old
replaced).
be
.
When the
'Low
Battery', then
.
lf any abnormalities occur in the
the bottom ot the
on
(Cont,)
your
computer
'Ma$
page
on
12).
old llles
files
will be oveNritten
lithium
battery is low,
Using PC mode
to the
Car
you
will see two items:
Storage' for
be used as a PC
a cyclic reording function
When the
being deleted immediately, the
1/2/5
by
by strtion
turn otf.
camera to restart the camera.
Rfforder with a
file
transfer and
and download the file
select'PC Camera' and
camera
is full,
storage
the very beginning of the storage
minutes. When the lvlicro SD card is full,
(videos
the Car Recorder's screen
please press
system,
cable.
USB
'Mlass
Storage' and
press
to
for video chat
(see
Loop Time
video recorder will
the
files are
saved
that
are
the RESET
'PC
the
OK button.
your
press
OK;
(supports
locked will not
will
display
bulton
Specifications
Technical Specif
Video Resolution
File Format
Saved
Power Supply
Built-in Battery
Suooort Micro
Output
Display
Lrnit Dimensions
Weight
ications
SD card
1920 x 1 080
ldefault)
Built-in
'11omAh
32 GB
USB
45mm
36.59
60q
(interpolaled)
640 x 480
/
Iithium battery/car chargel
(lvax.)
(H)
x 35mm
(unit
only)
(unit
including suction bracket)
pixels
(D)
/ 1280
x 65mm
x
720
(L)
14
AMN$$SUProNI
issils
,!
@
AITEN5ALt5'UPMBI
imffire
a 6E
ww.hF.o,0
Moderr lcBB.mlsPmducrM,6&mtu13
E
15
Page 9

trNrx
Car Black
Box Recorder
Repair
Goods
lJnlortunately, from time
returned
to the supp,ier for
Please be aware that if
(such
as files stored
mobjle
telephone, songs
console
files
or
stored
your
all of
stored data may
priorto
sending
You
with refurbished
Please
they m@t ALDI's
lf at any time
your
Tempo
PO Box 6056. Frenchs
Tempo Help
(Operating
Email: info@tempo.org
IITIiSItrSSUPP0RT
I
@
l6
the
should also be aware
goods
be assured though,
stringent
you
fel
complalnt. Please
(Aust)
Pty Ltd
Desk: 1300
Hours: l\.4on-Fri
rm6es
and Refurbished
or Parts
to tme,
your p.oduct
on a computs
stored on
on a USB mmory
prcduct
that rathg
of the
your
telephone
ABN 70 106
Forest.
886 649
products
faulty
reparr
is
capable
hard drive, lelephone
portable
a
lost.
be
We
@ommend
td repair.
lhd repairing
*me type
Efurbished
quality
specifications.
repair
is t€ing handled
us on 1300 886 649
100 252
NSW 2086. Aust.atia
(Aust)
8r30am to
6:00pm AEST)
Mddac8BfisrtMm
are manufactured which
of retaining usetrgenerated
media
stick)during the
goods,
or use refurbished
parts
or replacements
unsatisfactorily,
i
Notice
numbers stored on a
playef
games
process
you
save this data
we
may
parts
are
write
or
to us at:
m.w.om
ffim1s
need to be
saved on a
repail
of
elsewhere
replace
in the repair
only
used wheE
you
may
data
games
some or
them
process
escalate
ATTH5ALT5SUPPORI
rmsm
a@
Blank
page
Modd ACss cl3 P,dudCode:ffi
g
Mbnp,o,q
m2fi s
 Loading...