

Onfloor 498408 User Manual
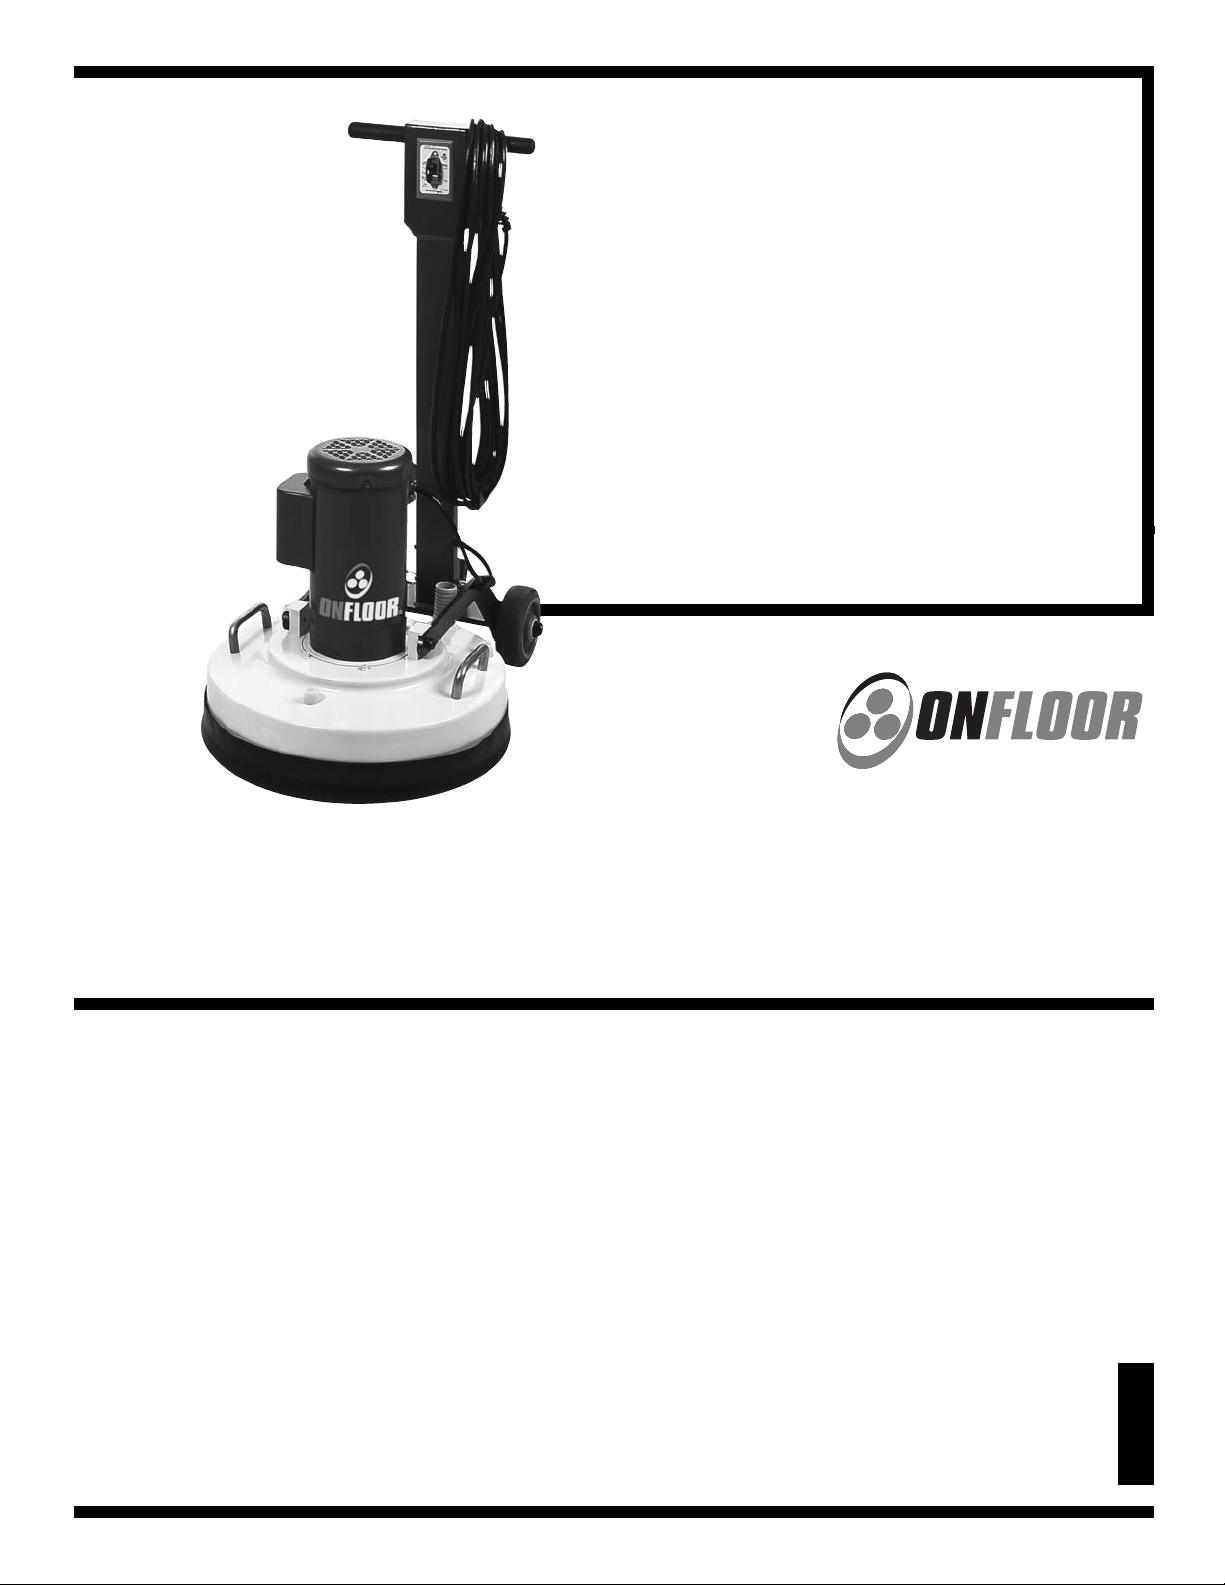
OF-2023
ULTI-PURPOSE
M
FLOOR MACHINE
AFETY AND
S
MAINTENANCE
MANUAL W/PARTS LIST
This unit is intended for commercial use.
®
READ & FOLLOW ALL INSTRUCTIONS,
ARNINGS & CAUTIONS
W
BEFORE USING THIS FLOOR MACHINE
This floor machine will afford you many years of
trouble free operating satisfaction if it is given
proper care. All parts have passed rigid quality
control standards before being assembled to produce the finished product. Prior to packaging, the
units are again inspected for assurance of flawless
operation.
This floor machine was protectively packed to prevent damage in shipment. We recommend that
upon delivery, remove the unit from its carton and
carefully inspect it for any possible damage in transit. A warranty card is affixed to the handle. It is
your responsibility to fill it out and send it to our
office to register your purchase and start your warranty. Failure to send us this card in one week upon
receipt of the machine may void the warranty.
If damage is discovered, immediately notify the
transportation company that delivered your floor
machine. As a shipper, we are unable to act upon
any claim for concealed damage. You must originate any claim within 5 days of delivery.
These instructions are for your protection and
information. PLEASE READ CAREFULLY! Failure to
follow these precautions could result in injury or
discomfort.
Treat this floor machine as you would any other
high grade precision made product. Throwing,
dropping, unreasonable bumping across thresholds and other misuse may result in a damaged
unit and invalidate the warranty.
AAddddrreessss
Parts and Service Center
777 South Street
Newburgh NY 12550-0606
PPhhoonnee::
845/565/6623
FFaaxx::
845/565/8894
PLEASE READ
CAREFULLY
BEFORE
OPERATING
Page 1
SAVE THESE INSTRUCTIONS
PN 493503 - OF-2023 Floor Machine- Printed in USA 09/08/08
IMPORTANT
WARNING
SAFETY
INSTRUCTIONS
To reduce the risk of fire, electric shock or injury;
Read all instructions before using this floor machine.
1) DO NOT leave the floor machine plugged in
when not in use. Unplug from the outlet when not
in use and/or before servicing.
2) Electric shock could occur if exposed to rain.
Store indoors.
3) This is NOT a toy. Close attention is necessary
when used around or near children.
4) Use only as described in this manual. Use only
manufacturer's recommended attachments.
5) DO NOT use with damaged cord plug. If the
floor machine is not working as it should because
it has been dropped, damaged, left outdoors, or
dropped into water, contact the manufacturer or
authorized service center.
6) DO NOT pull or carry by cord, use power cord
as a handle, close a door on cord, or pull cord
around sharp edges or corners. DO NOT run floor
machine over the cord. Keep cord away from
heated surfaces.
7) DO NOT handle the plug or operate with wet
hands.
8) DO NOT put any object into motor openings.
9) DO NOT unplug by pulling on cord. To
unplug, grasp plug, not the power cord.
10) Keep hair, loose clothing, fingers and all parts
of body away from moving parts.
11) DO NOT use an optional vacuum without
the manufacturer’s filters in place.
12) DO NOT operate where anesthetics and oxygen are used.
13) DO NOT use around flammable or combustible liquids such as gasoline or use in areas
where they may be present.
14) DO NOT use an extension cord.
15) Replace damaged or worn parts immediately
with genuine Grind ’N Go equipment parts to maintain safety and protect your limited warranty.
16) Floor sanding can result in an explosive
mixture of fine dust and air. Use a floor sanding machine only in a well ventilated area.
17) DO NOT to leave sawdust in the filter bag
when sander is not in use, this is a fire hazard.
This floor machine must be connected to a
properly grounded outlet only. (See grounding method below.)
GROUNDING
INSTRUCTIONS
Page 2
DANGER:
Improper use of the grounding plug can result in a risk of electrical shock.
This floor machine must be grounded. If it should
malfunction or breakdown, grounding provides a
path of least resistance for electrical current to
reduce the risk of electric shock. This machine is
equipped with a cord having an equipmentgrounded plug. The plug must be inserted into an
appropriate outlet that is properly installed and
grounded in accordance with all local codes and
ordinances
If repair or replacement of the cord or plug is necessary, DO NOT connect the grounding wire to
either flat blade terminal. The wire with insulation
having an outer surface that is green with or without
yellow stripes is the grounding wire.
WARNING:
Improper connection of the equipment-grounding conductor can result in a risk of electrical
shock. Check with a qualified electrician or service person if you are in doubt as to whether the
outlet is properly grounded. DO NOT modify the plug provided with the machine. If it will not
fit the outlet, have a proper outlet installed by a qualified electrician.
NOTE: In Canada, the use of a temporary adaptor is not permitted by
the Canadian Electrical Code.
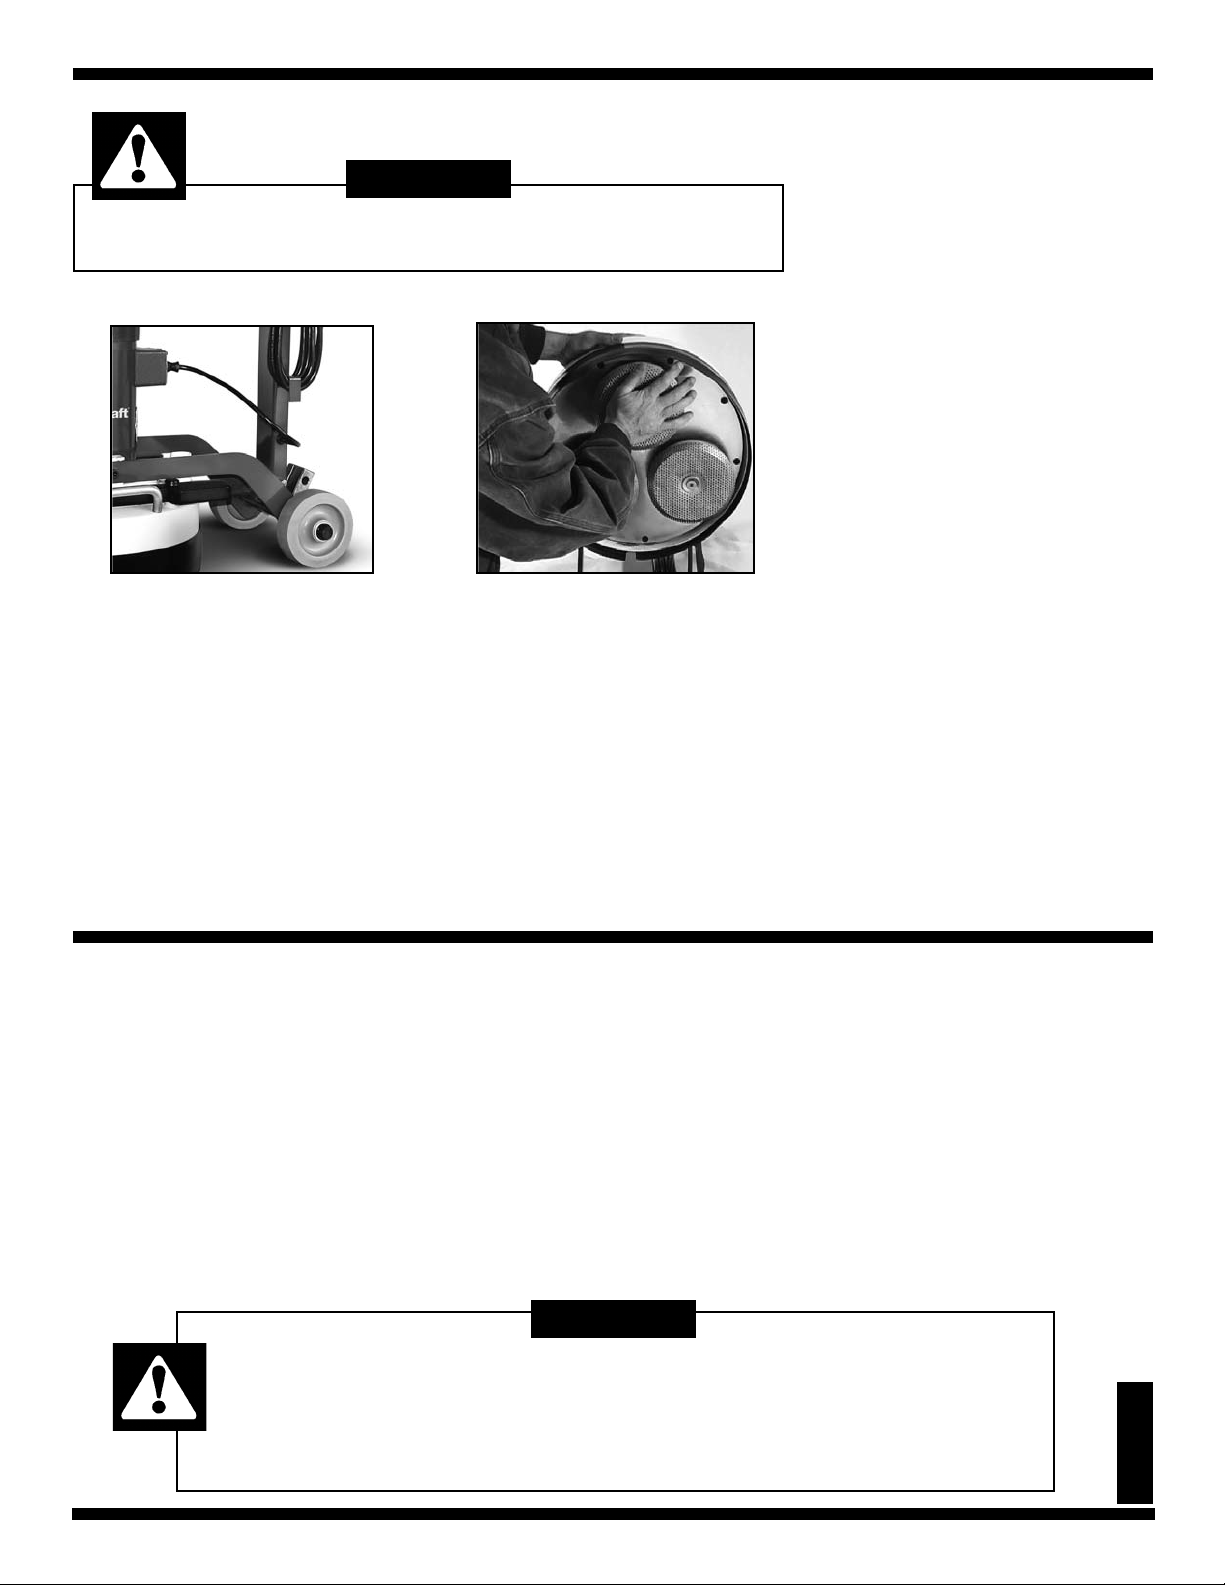
CAUTION:
ATTACHMENTS
When installing or changing the accessories, turn OFF the sander
and disconnect the power cord from the electrical outlet.
When installing or removing attachments, always wear protective gloves and start at the 12 o’clock position.
4) Push the attachments on by hand and if necessary, carefully tap it into place with a rubber
mallet.
5) Repeat steps 1 thru 4 with the remaining 2
attachments.
6) Carefully raise the handle, supporting the
Before Installation or Changing of
Attachments:
1) Unplug the sander from the wall outlet.
2) Ensure handle is in the storage position
(straight up) and locked in place with the quick
release pin.
3) Tilt machine back by bracing it with your
foot until the handle is laying on the floor and
the three heads are fully exposed.
Note: It is recommended that a towel or pad is
placed under the machine to protect the floor.
Changing and Installation the
Attachments
1) Position the first attachment head at 12
o’clock.
2) Using both hands, reach beneath the bottom side the attachment and pull up towards
yourself to free it from the sander.
3) Select the attachment required for the job,
and line up the holes on the attachment with
the four metal pins protruding from each of the
three heads.
axle with your foot to control the head of the
machine as it is placed on the floor.
7) Since the attachments are different heights
you may need to adjust the dust skirt to make
sure it is level with the attachments. This will
ensure clean and virtually dust-free operation.
9) To adjust skirt, align the skirt with the center
of the machine and wrap it around.
10) Move the handle back to the operating
position and lock in place with the quick
release pin.
INSTALLATION
& CHANGING
1) Clear the floor of any materials or objects.
2) Ensure handle is in the storage position
(straight up) and locked in place with the
quick release pin.
3) Tilt the machine back until the handle is
laying on the floor and the three heads are
fully exposed.
DO NOT attempt to operate this unit if the machine is not fully assembled.
When servicing or replacing an accessories turn OFF the machine and
Prior to operating the machine, tilt machine back on transport wheels,
ON the machine and carefully lower the machine onto the working surface.
turn
OPERATING INSTRUCTIONS
4) Select the accessory set required for the
job.
5) Snap the accessory set onto the four metal
pins protruding from each of the three heads.
6) To replace, pull off the current accessory set
and replace with the new accessory set.
CAUTION:
disconnect from the power source.
FLOOR MACHINE
7) Carefully raise the handle, supporting the
axle with your foot to control the machine
head as it is placed on the floor.
8) Shift handle to the operating position and
lock in place with the quick release pin.
Page 3
 Loading...