

OneTouch Vario Flex Owner's Manual
Blood Glucose Monitoring System
Instructions
for Use
Owner's
Booklet


1
Owner's Booklet
Blood Glucose Monitoring System

2
Thank you for choosing OneTouch
Verio Flex™!
The OneTouch Verio Flex™ Blood Glucose Monitoring
System is one of the latest product innovations from
OneTouch®.
Your OneTouch Verio Flex™ Meter is designed to connect
(sync) with a variety of devices running software
applications that let you review and graph your results,
and help identify patterns. Meter results are sent to the
compatible devices either through BLUETOOTH® Smart
(wireless) or USB cable connection.
Every OneTouch® Meter is designed to help you test your
blood glucose and manage your diabetes.
This Owner's Booklet offers a complete explanation of how
to use your new meter and testing supplies. It reviews the
do's and don'ts of testing your blood glucose level. Please
keep your Owner's Booklet in a safe place; you may want
to refer to it in the future.
We hope OneTouch® products and services will continue to
be a part of your life.
3
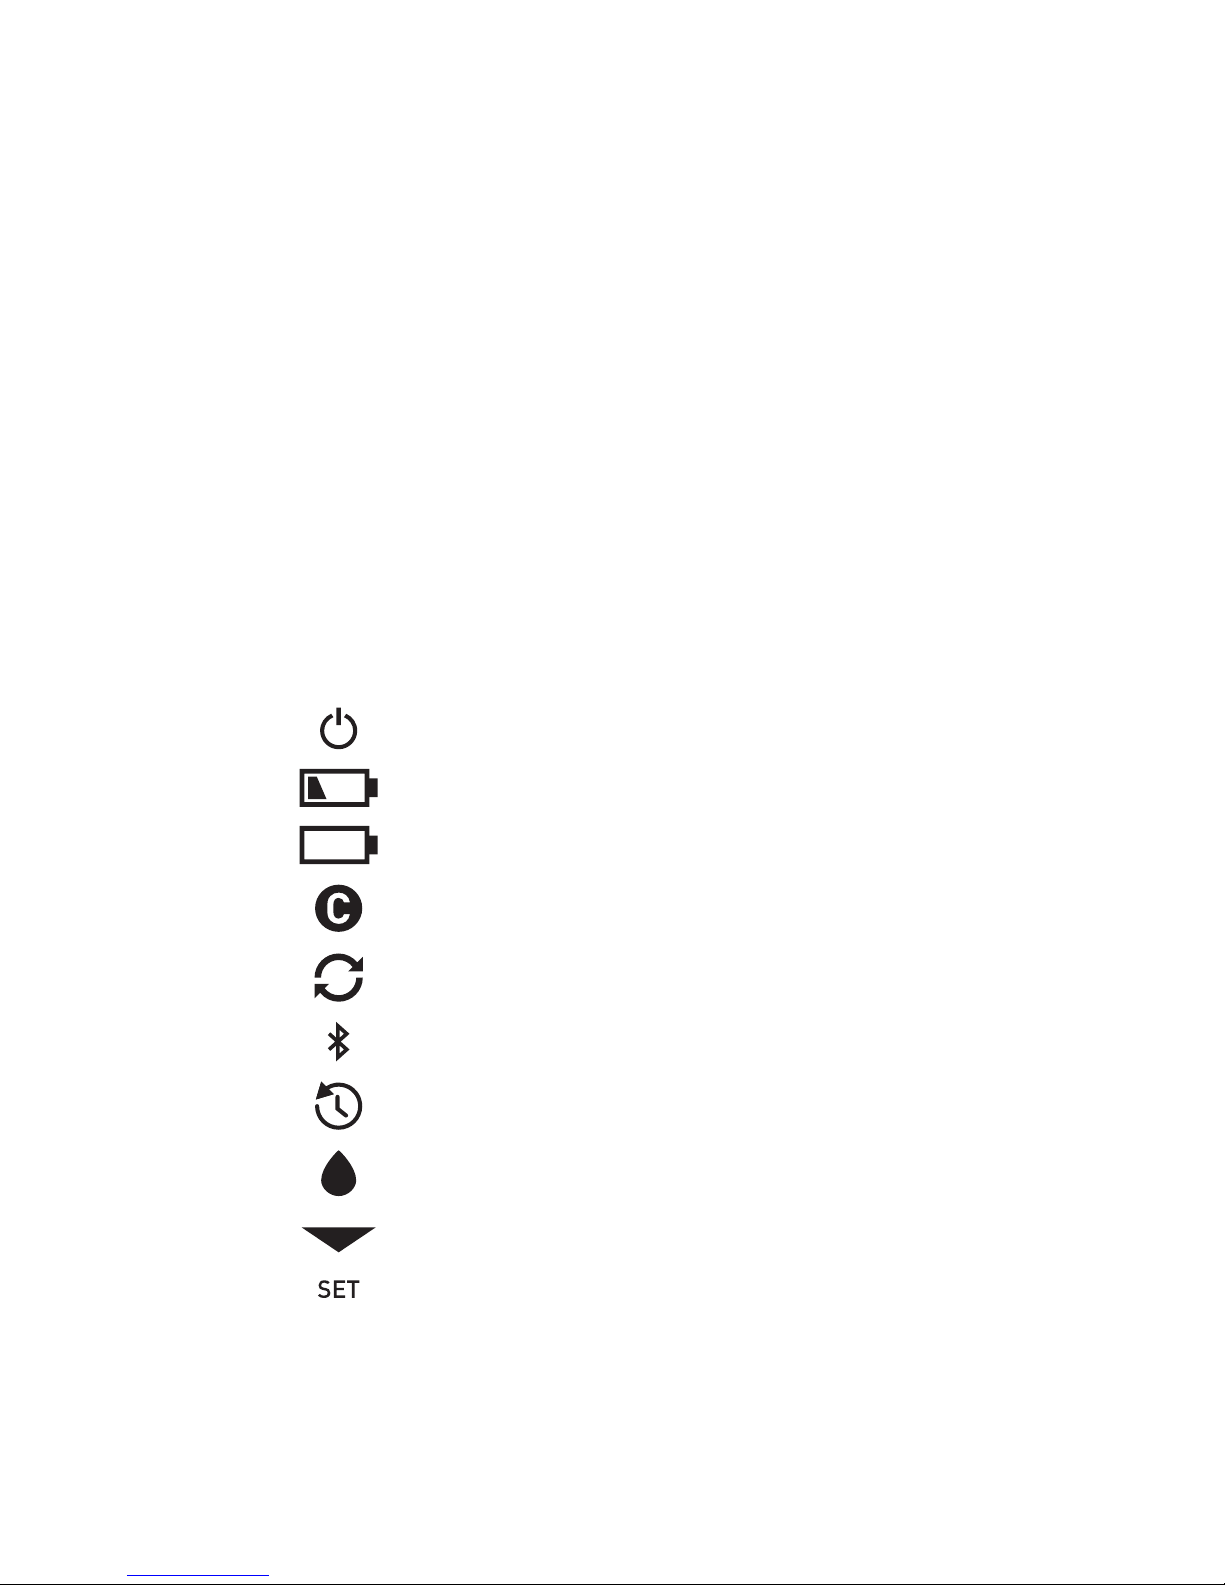
Meter symbols and icons
Meter Power
Low Battery
Battery Empty
Control Solution
Syncing
BLUETOOTH® Smart Feature On
History Mode (Past results)
Apply Sample
Range Indicator Arrow
Setting Mode
Compatible Wireless Devices
Visit www.OneTouch.ca for information on which wireless
devices are compatible with your OneTouch Verio
Flex™ Meter, and where/how to download the software
application on your compatible wireless device.

4
Other symbols and icons
Cautions and Warnings: Refer to the
Owner's Booklet and inserts that came with
your system for safety-related information.
Direct current

5
Before you begin
Before using this product to test your blood
glucose, carefully read this Owner's Booklet, and
the inserts that come with the OneTouchVerio® Test
Strips, OneTouchVerio® Control Solution and the
OneTouch®Delica® Lancing Device.
IMPORTANT SAFETY INSTRUCTIONS:
• This meter and lancing device are for single patient use
only. Do Not share them with anyone else, including
family members! Do Not use on multiple patients!
• After use and exposure to blood, all parts of this kit are
considered biohazardous. A used kit may potentially
transmit infectious diseases even after you have
performed cleaning and disinfection.

6
Intended use
The OneTouch Verio Flex™ Blood Glucose Monitoring
System is intended to be used for the quantitative
measurement of glucose (sugar) in fresh capillary whole
blood samples drawn from the fingertip. The system is
intended to be used by a single patient and should not be
shared.
The OneTouch Verio Flex™ Blood Glucose Monitoring
System is intended for self-testing outside the body
(in vitro diagnostic use) by people with diabetes at home
and with their healthcare professionals in a clinical setting
as an aid to monitor the effectiveness of diabetes control.
The OneTouch Verio Flex™ Blood Glucose Monitoring
System is not to be used for the diagnosis of or screening
of diabetes or for neonatal use.

7
Test principle
Glucose in the blood sample mixes with the enzyme
FAD-GDH (see page99) in the test strip and a small
electric current is produced. The strength of this current
calculates your blood glucose level. It then displays the
blood glucose result and stores it in the meter memory.
Use only OneTouchVerio® Control Solution and
OneTouch Verio® Test Strips with the OneTouch Verio
Flex™ Meter.
BLUETOOTH® Smart wireless
technology
BLUETOOTH® Smart wireless technology is used by some
smartphones and many other devices. Your OneTouch
Verio Flex™ Meter uses BLUETOOTH® Smart wireless
technology to pair and to send your glucose results to
compatible wireless devices.
The OneTouch Verio Flex™ Meter is designed to work with
the OneTouchReveal® Mobile App.
NOTE: Some diabetes management apps, including the
OneTouchReveal® Mobile App, may not be available
in your country. Visit www.OneTouch.ca to learn if the
OneTouchReveal® Mobile App is available in your country.

8
Visit www.OneTouch.ca for information on which wireless
devices are compatible with your OneTouch Verio
Flex™ Meter, and where/how to download the software
application on your compatible wireless device.
When using the OneTouch Verio Flex™ System, we
suggest you pair your OneTouch Verio Flex™ Meter with
a compatible wireless device and track your results. See
page29 for pairing instructions.
This device complies with Industry Canada license-exempt
RSS standard(s). Operation is subject to the following two
conditions: (1) this device may not cause interference, and
(2) this device must accept any interference, including
interference that may cause undesired operation of the
device.
If you experience meter interference problems, try moving
your meter away from the source of the interference.
You can also move the electronic device or its antenna to
another location to solve the problem.
These guidelines help ensure that your meter will not
affect the operation of other nearby electronic devices.
Additionally, other electronic devices should not affect the
use of your meter.

9
WARNING: The BLUETOOTH® Smart feature on your
meter sends test results to your compatible wireless device.
To prevent other people's results from being sent to your
compatible wireless device, Do Not let anyone else use your
meter to test their blood glucose. This meter is for single
patient use only.
WARNING: In locations where cell phone use is not
permitted, such as hospitals, some healthcare professional
oces and airplanes, you should turn the BLUETOOTH®
Smart feature o. See page27 for more information.
BLUETOOTH® Smart trademark
The BLUETOOTH® word mark and logos are registered
trademarks owned by Bluetooth SIG, Inc. and any use of
such marks by LifeScan Scotland Ltd. is under license.
Other trademarks and trade names are those of their
respective owners.

10
Table of Contents
1 Getting to know your system ...................................12
2 Setting up your system ............................................22
Setting up your meter ..................................................... 22
Connecting to a compatible wireless device ............... 27
Turning the meter off ...................................................... 33
3 Taking a test ..............................................................34
Testing your blood glucose ............................................ 34
Testing with control solution..........................................58
4 Reviewing past results ............................................68

11
5 Editing Your Settings ............................................... 74
Editing time and date ..................................................... 74
Editing your range limits ................................................ 75
6 Caring for your system ............................................78
7 Battery .......................................................................82
8 Troubleshooting your system ................................. 86
9 Detailed information about your system .............96
10 Index ........................................................................ 108
12
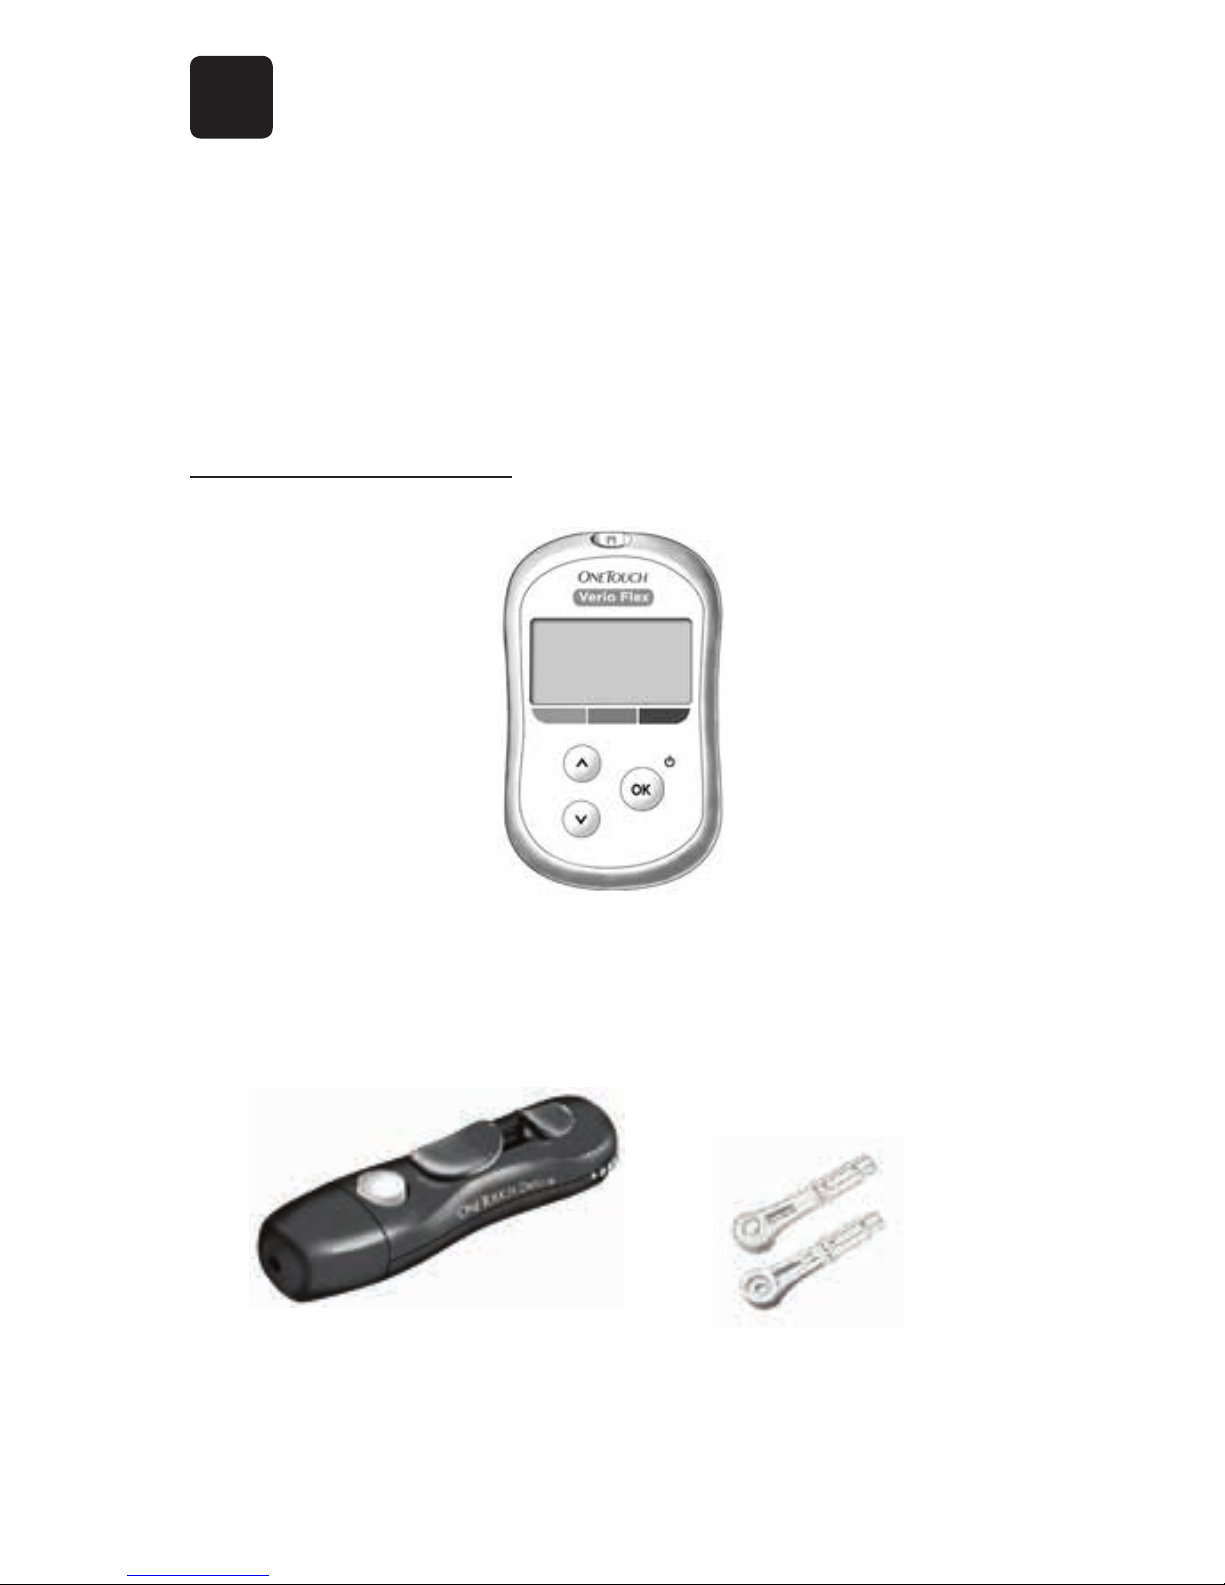
1 Getting to know your
system
Your OneTouch Verio Flex™ Blood
Glucose Monitoring System
Included with your kit:
OneTouch Verio Flex™ Meter
(CR2032 lithium coin cell
battery included)
OneTouch® Delica®
Lancing Device
OneTouch® Delica®
Lancets

13
1
Getting to know your system
NOTE: If any item is missing or defective in your kit,
contact the OneTouch® Customer Care Line at
1800 663-5521, Monday-Friday, 9am – 8pm Eastern,
6am – 5pm Pacific, or visit www.OneTouch.ca.
NOTE: If another type of lancing device was included,
see the separate instructions for that lancing device.
14
1
Getting to know your system
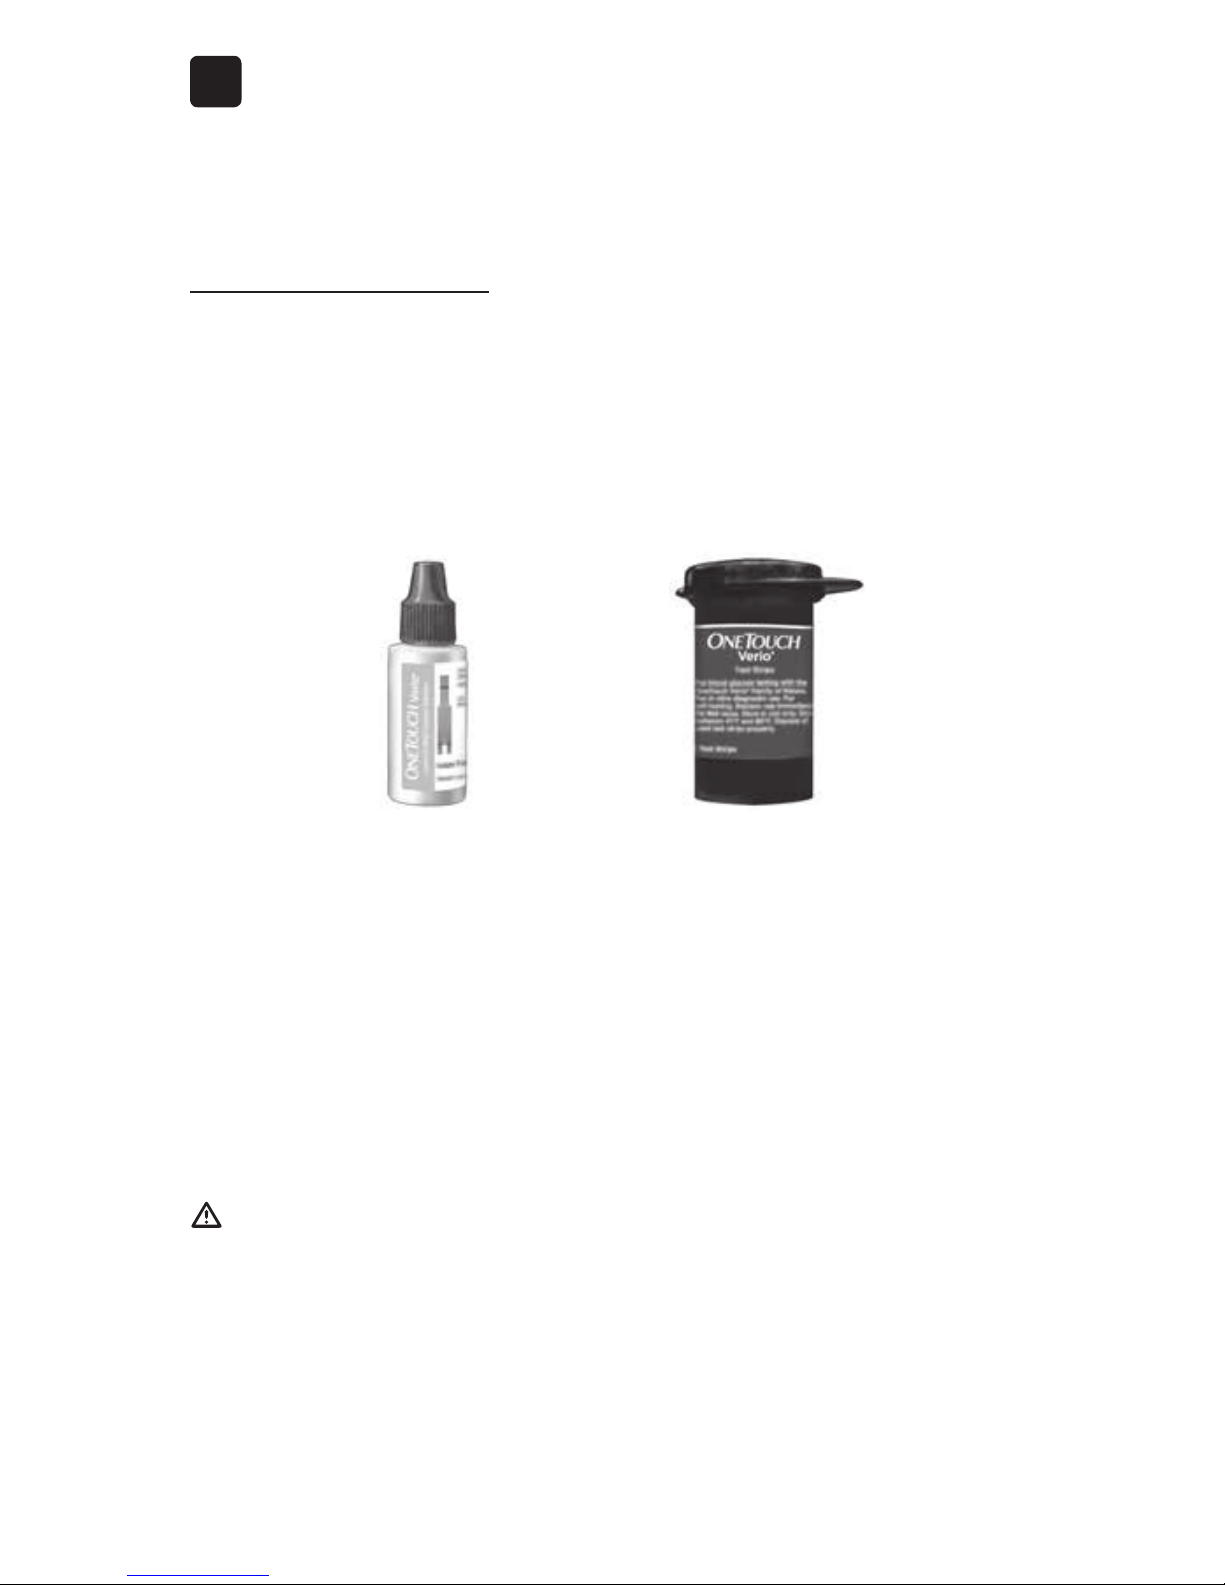
Available separately:
Items pictured below are required, but may not be
included in your kit:
They are sold separately. Refer to your meter carton for a
list of included items.
OneTouchVerio®
Mid Control
Solution*
OneTouchVerio®
Test Strips*
*OneTouchVerio® Control Solution and OneTouch Verio®
Test Strips are available separately. For availability of
test strips and control solution, contact Customer Service
or ask your pharmacist or healthcare professional.
WARNING: Keep the meter and testing supplies away
from young children. Small items such as the battery door,
batteries, test strips, lancets, protective covers on the
lancets, and control solution vial cap are choking hazards.
Do Not ingest or swallow any items.

15
1
Getting to know your system
This page left blank intentionally.
16
1
Getting to know your system
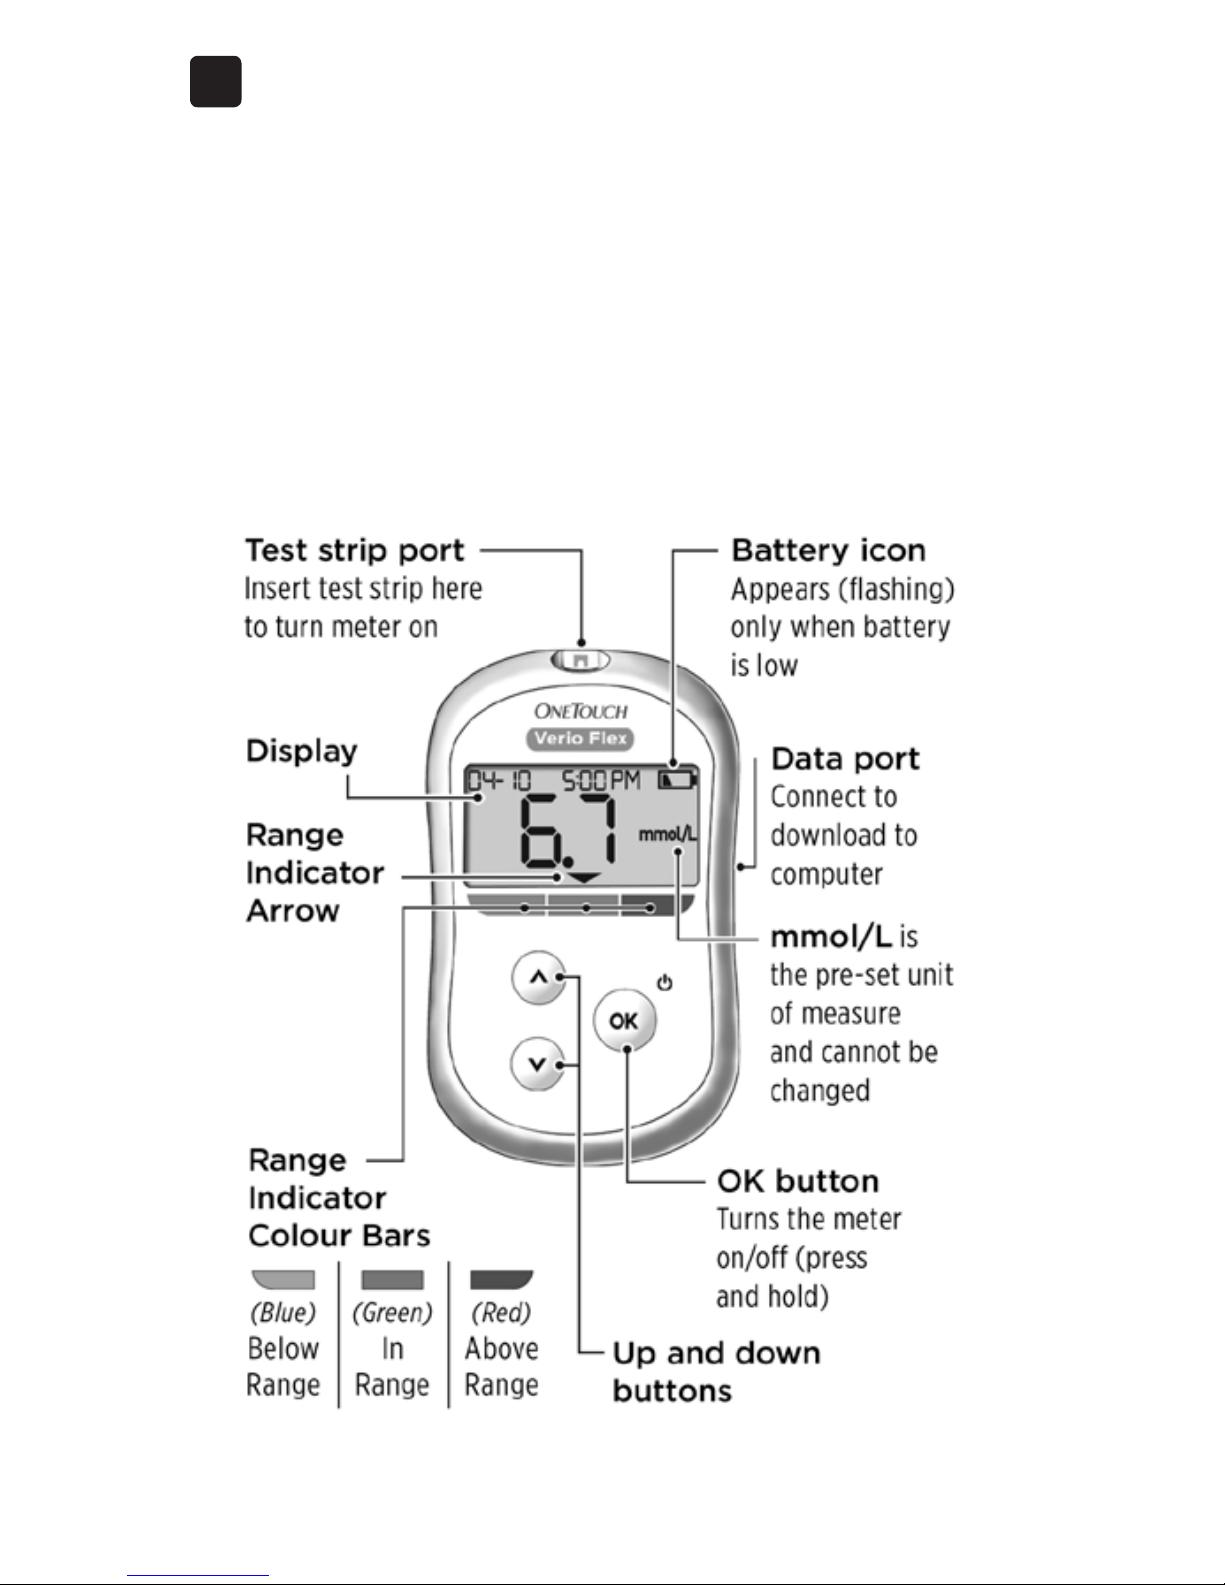
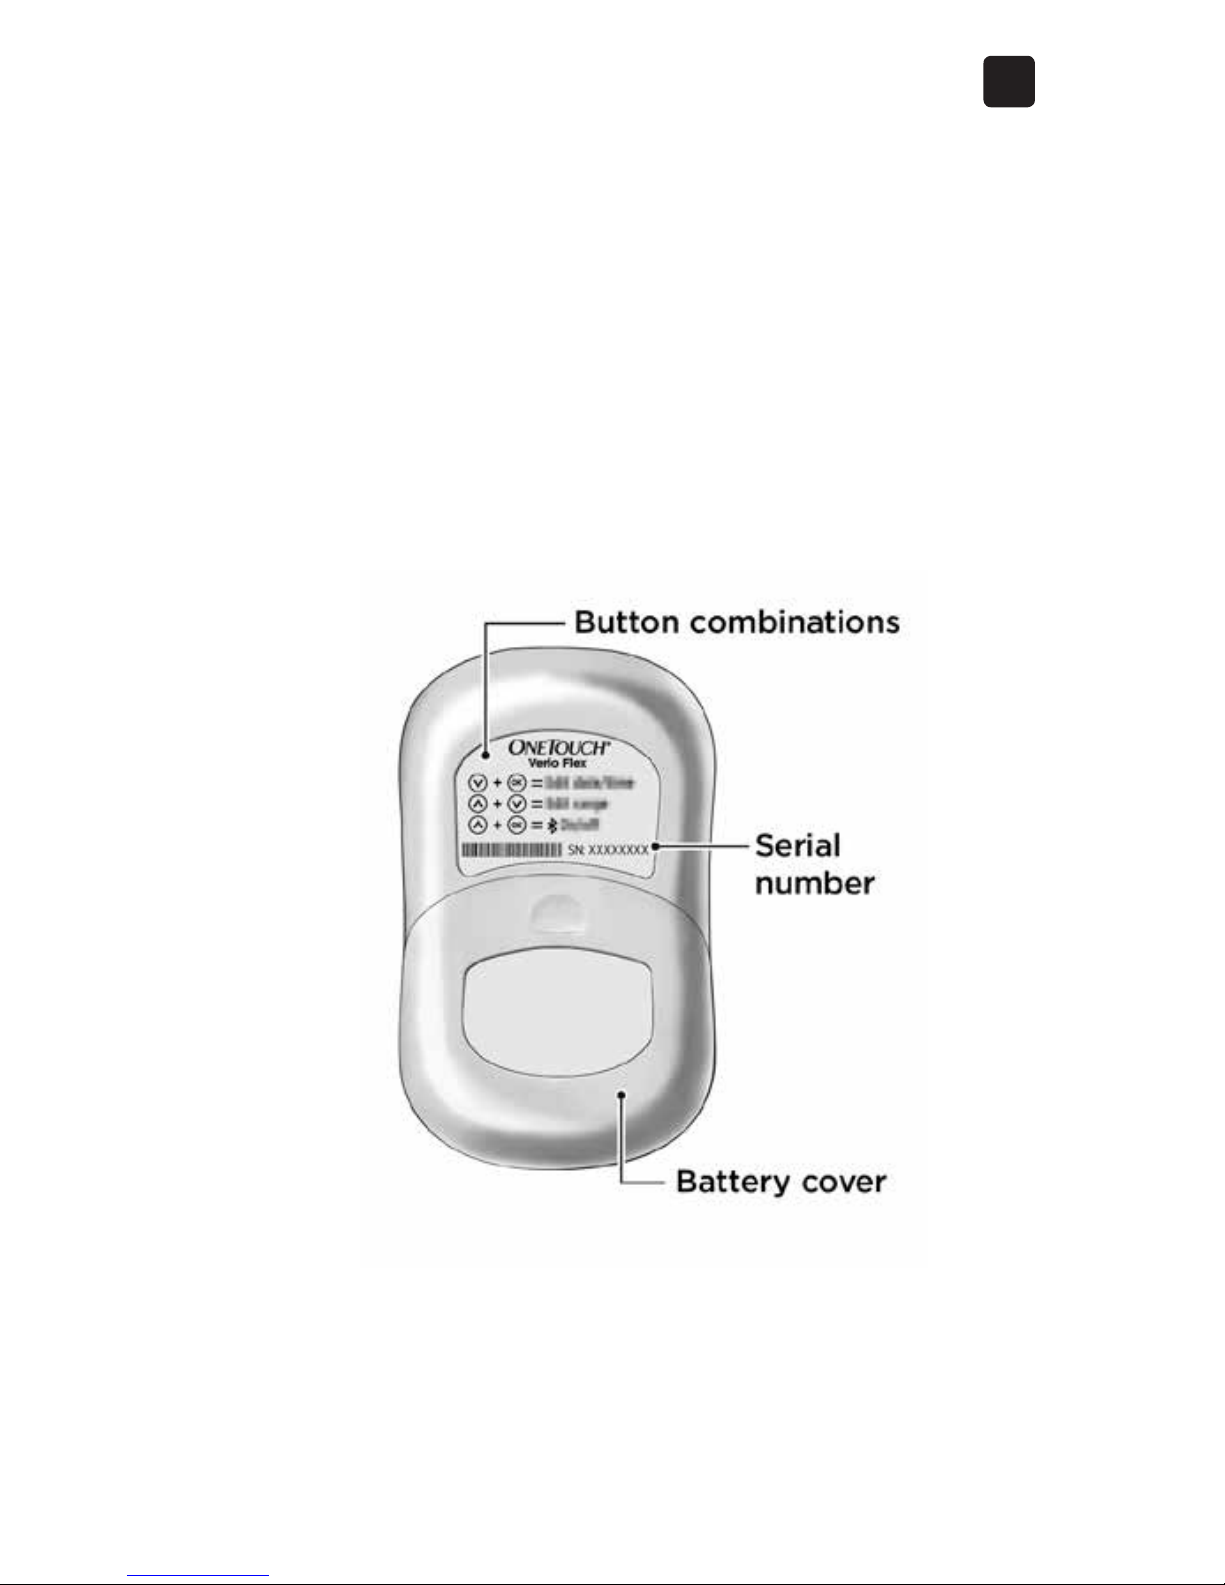
Meter
Getting to know your OneTouch Verio
Flex™ Blood Glucose Monitoring
System
17
1
Getting to know your system
18
1
Getting to know your system
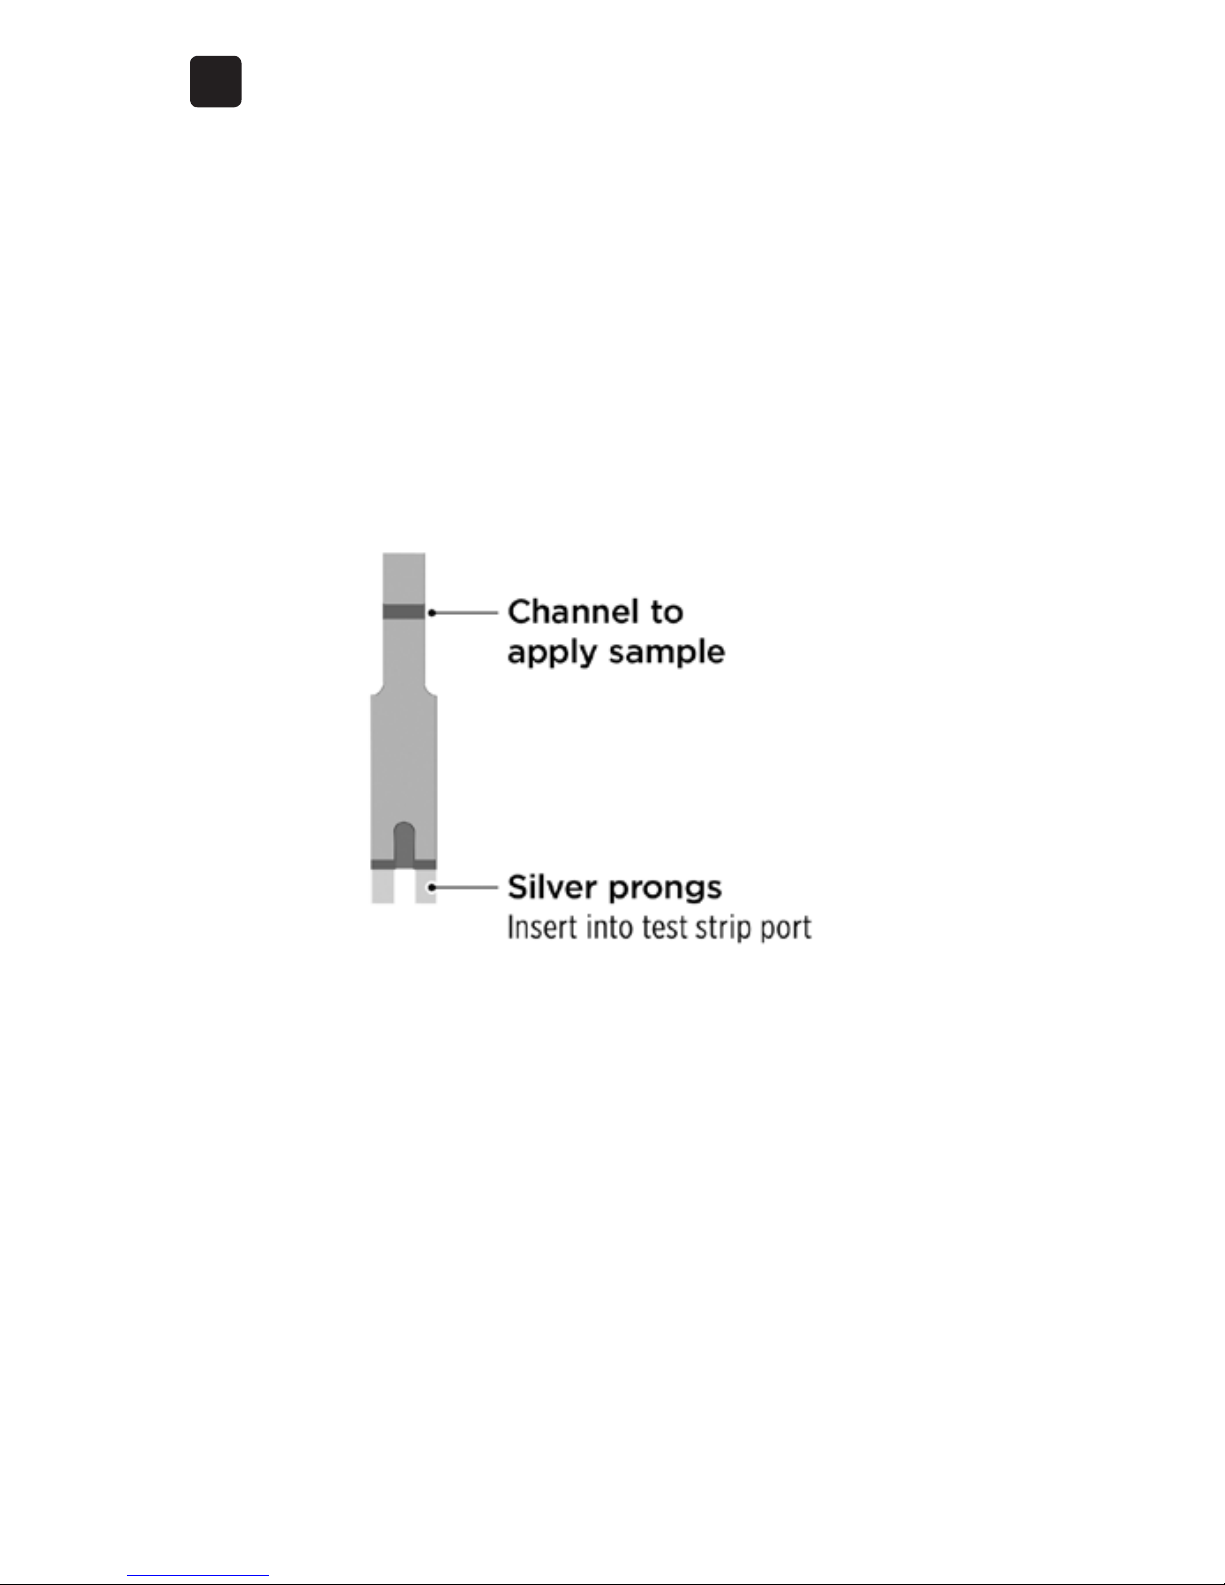
Test strip
Getting to know your OneTouchVerio®
Test Strip
19
1
Getting to know your system
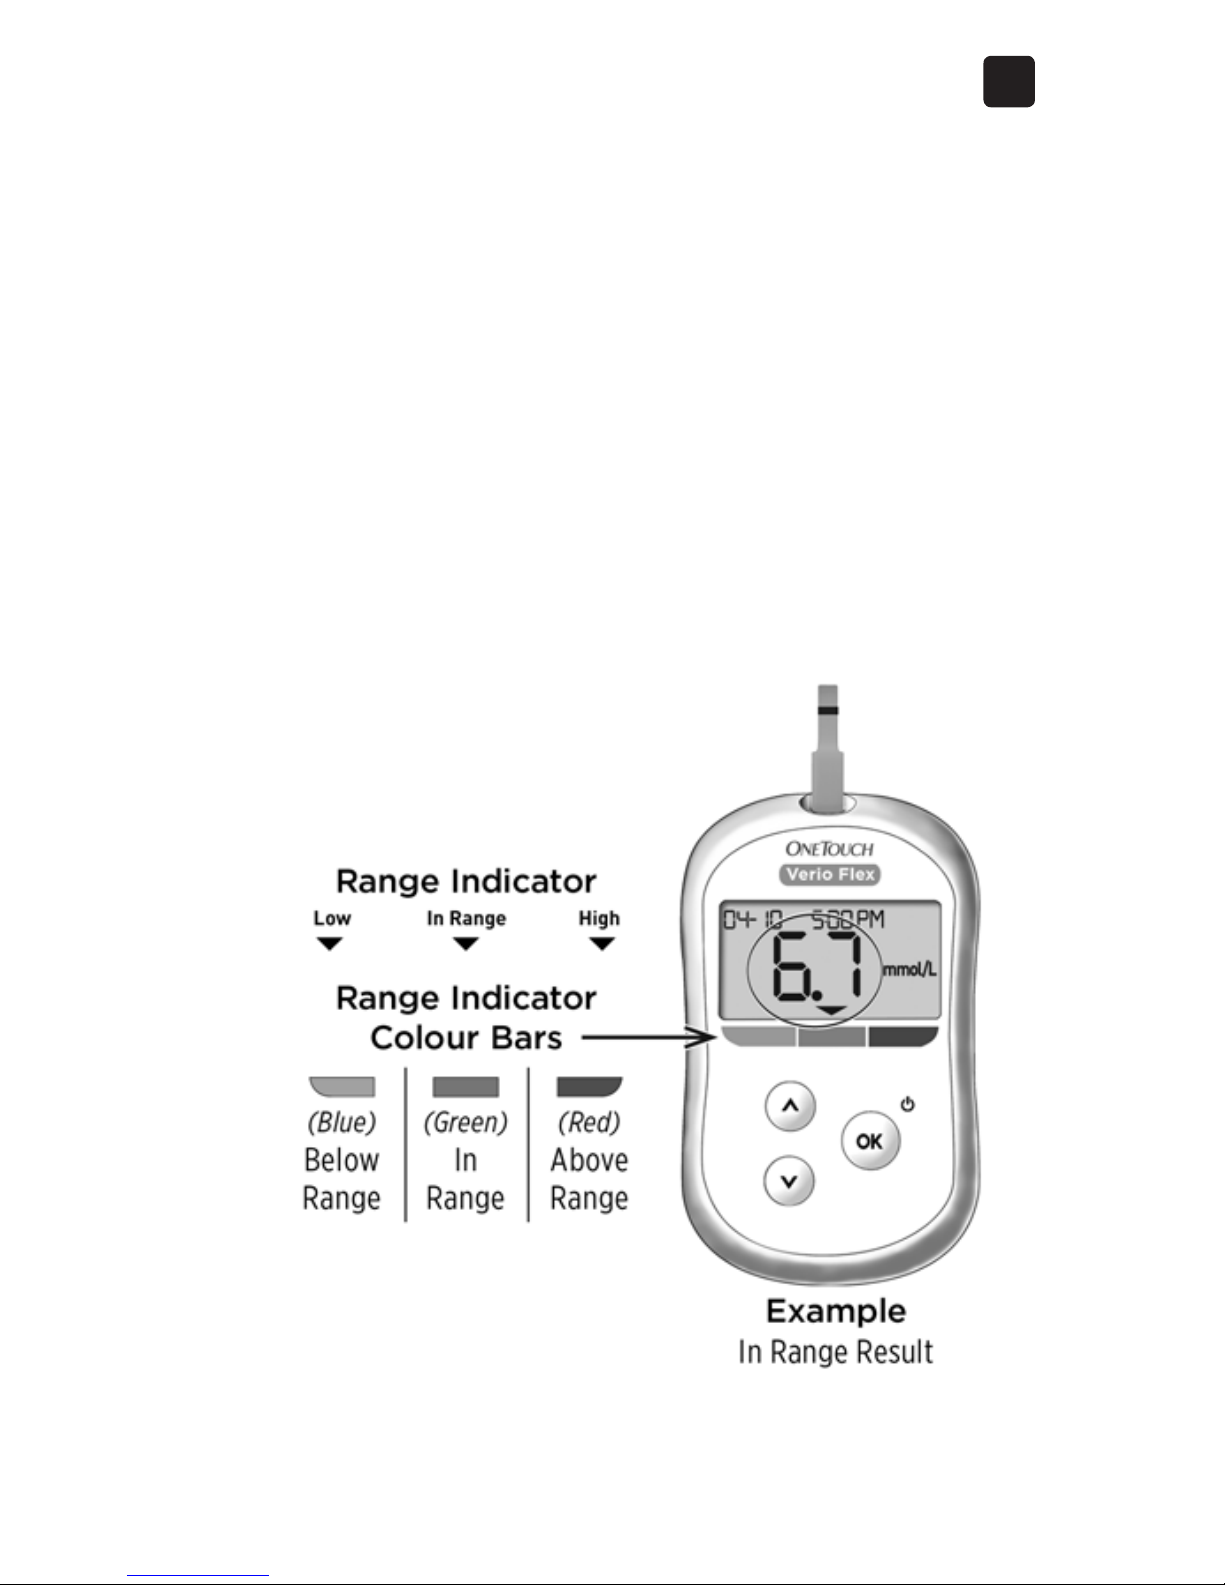
The Range Indicator feature
The OneTouch Verio Flex™ Meter automatically lets you
know if your current result is below, above or within your
range limits. It does this by displaying your current result
with a Range Indicator Arrow, pointing to a corresponding
Range Indicator Colour Bar below the meter display. Use
the Range Indicator Arrow and Colour Bar together to
interpret your results.
20
1
Getting to know your system
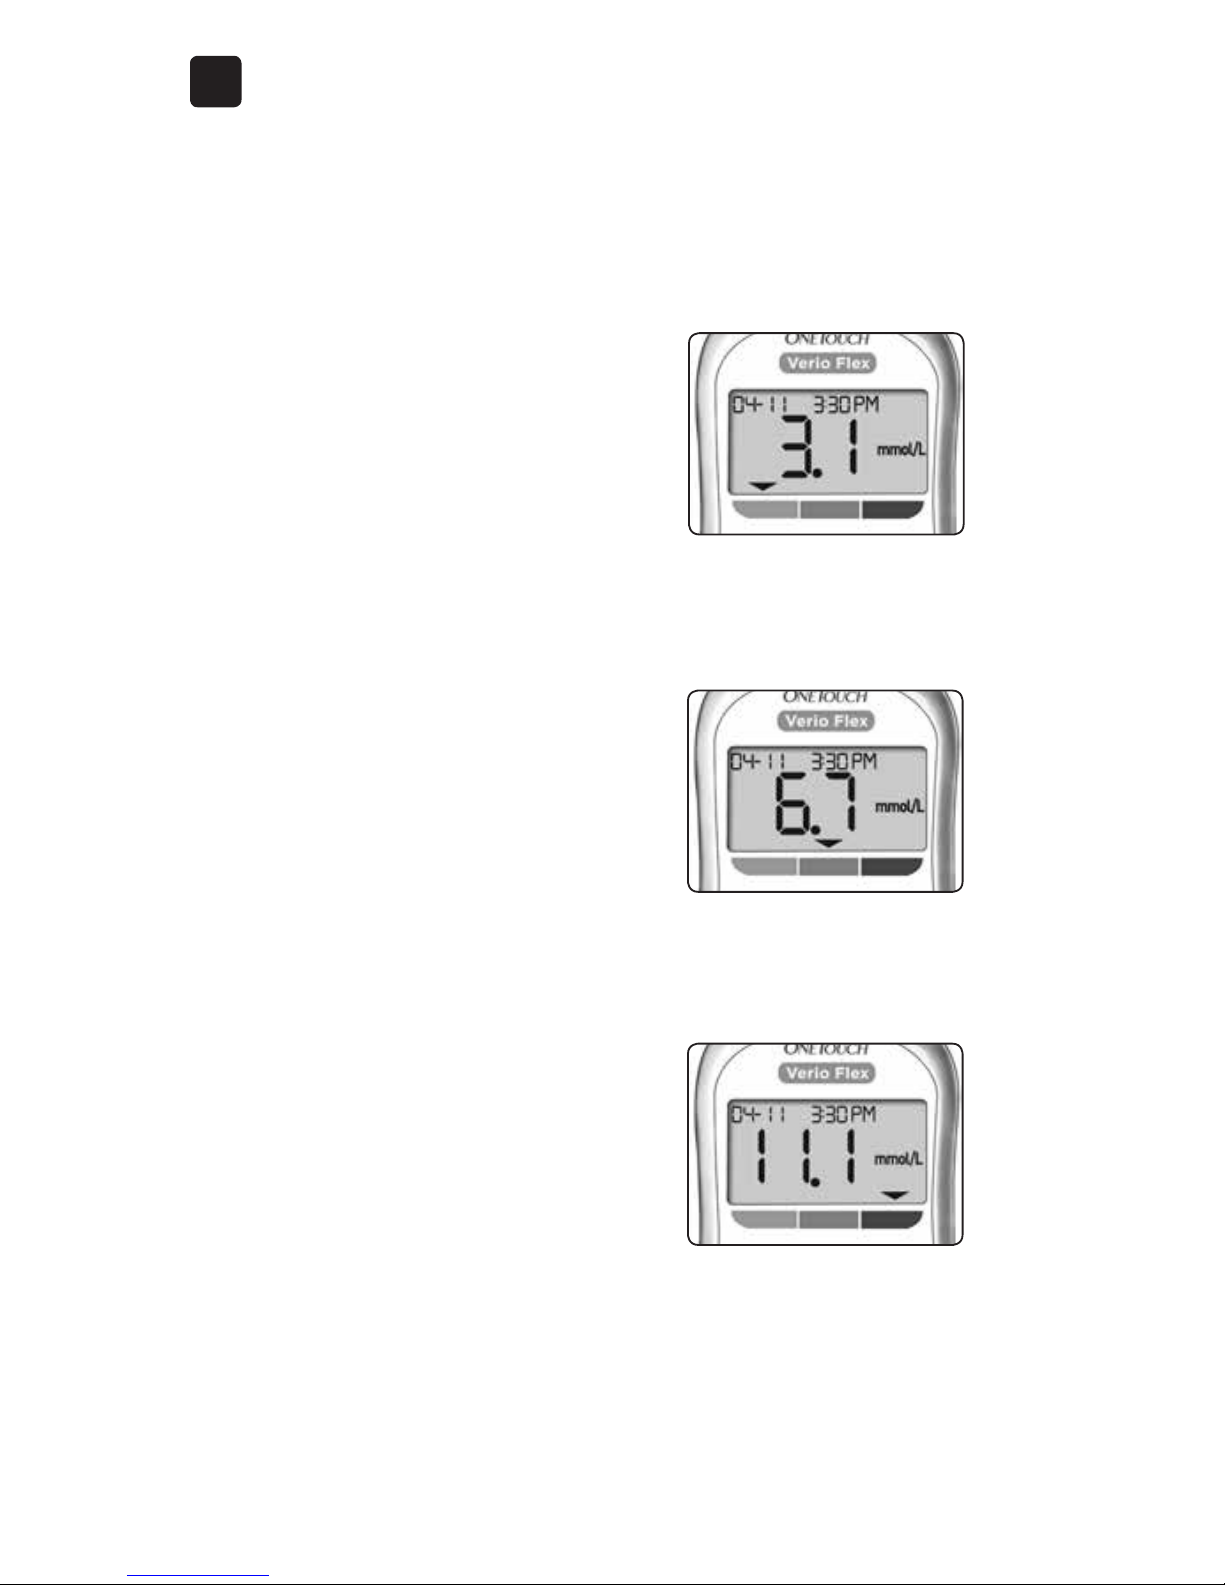
3 Possible Range Indicator Displays
A Range Indicator Arrow will
appear just below your result
after each test depending upon
how you set your low and high
range limits in the meter.
Things you should know before
using the Range Indicator feature:
• The meter comes with pre-set
range limits. The pre-set low
range limit is 4.0mmol/L and
the pre-set high range limit is
10.0mmol/L. You can change
these limits as needed to meet
your needs. See page75 for
details on the pre-set range
limits and on editing your
range limits.
• If you decide to change
your range limits, the Range
Indicator Arrows stored with
previous results in meter
memory will not change.
However, any new tests will
display Range Indicator Arrows
which reflect your changes.
Example
Below Range Result
Example
In Range Result
Example
Above Range Result

21
1
Getting to know your system
This page left blank intentionally.
22
2 Setting up your system
Setting up your meter
Turn your meter on
To turn your meter on, press
and hold until the start-up
test screen appears. Once the
device is on, release . You
can also turn the meter on by
inserting a test strip.
CAUTION:
If you see any missing segments within the start-up
screen, there may be a problem with the meter. Contact
the OneTouch® Customer Care Line at 1800 663-5521.
NOTE: If you turned the meter on for the first time by
inserting a test strip instead of pressing
, you will not
be able to perform a glucose test until you complete the
first time setup.
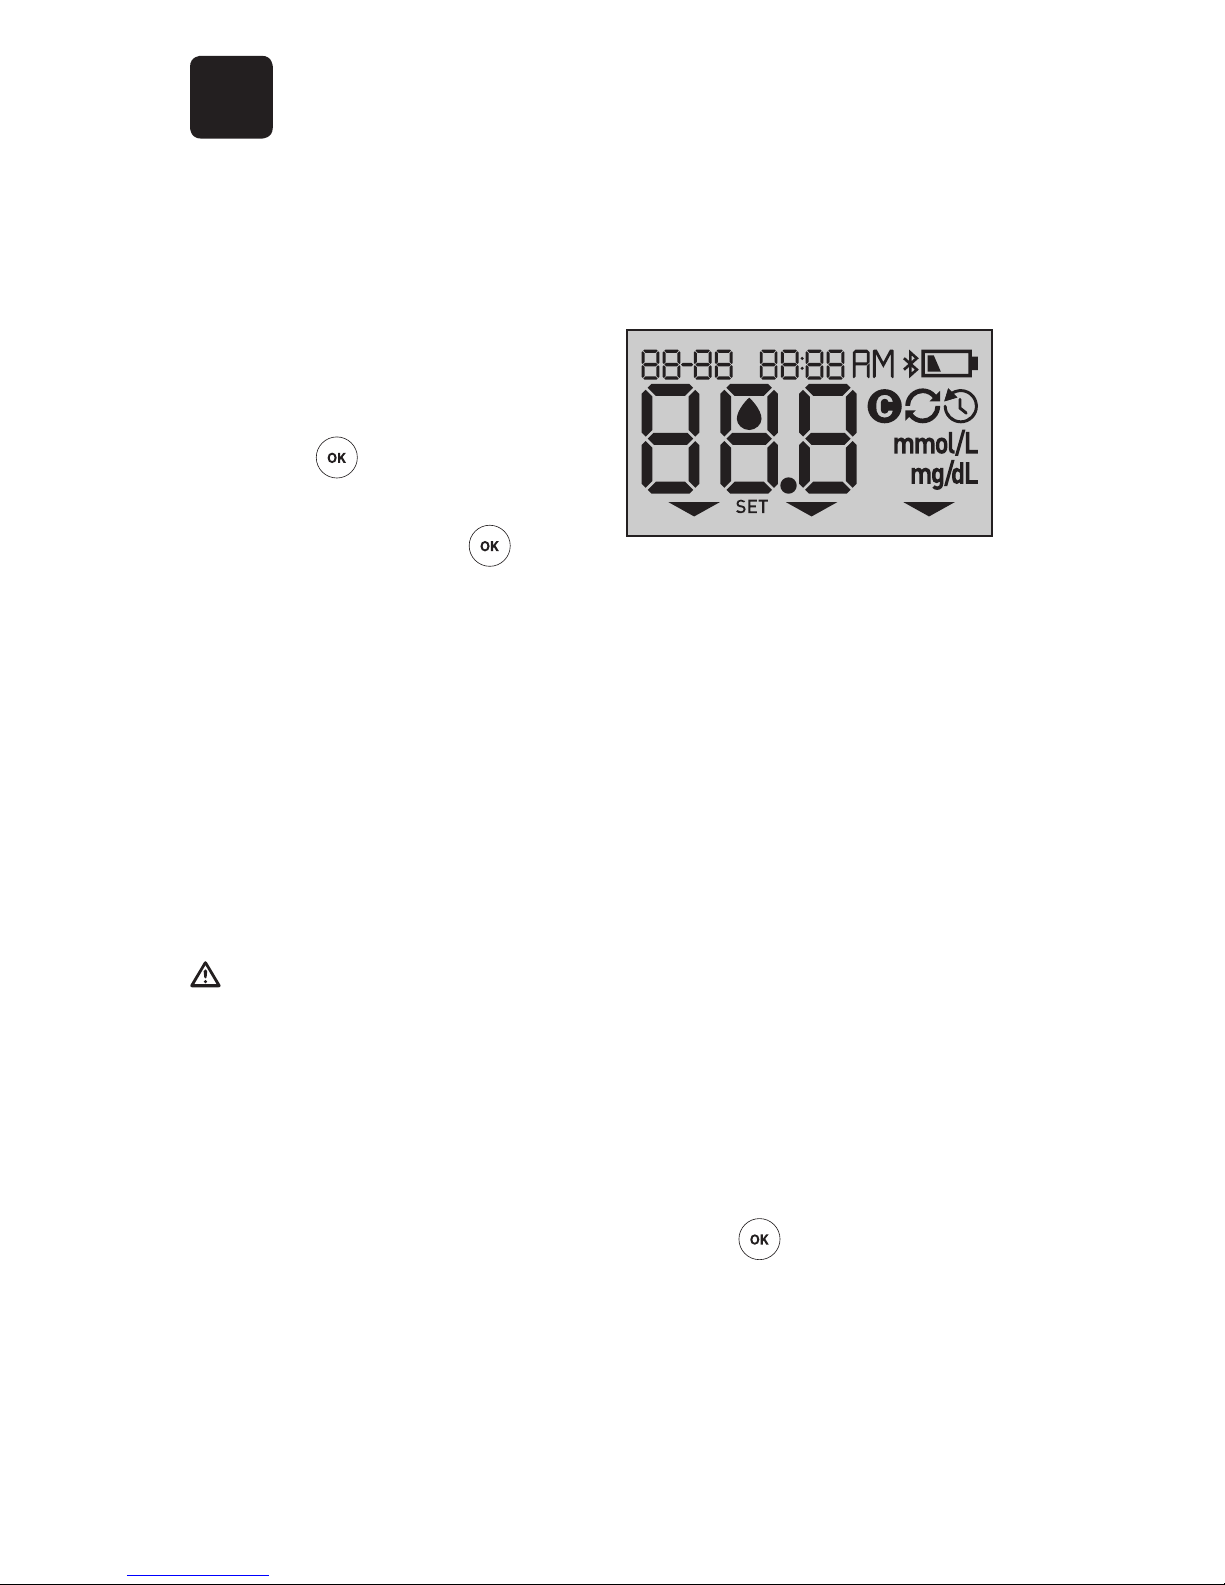
Every time you turn your meter on, a start-up screen will
appear for a few seconds. All segments of the display
should appear briefly, indicating your meter is working
properly. If the meter does not power on, check the
battery.
23
2
Setting up your system
First time setup
To turn your meter on, press and hold
until the startup screen appears. Once the device is on, release .
The meter will now automatically prompt you to set the
time and date. The SET icon will appear on the screen to
indicate that the meter has entered setup mode.
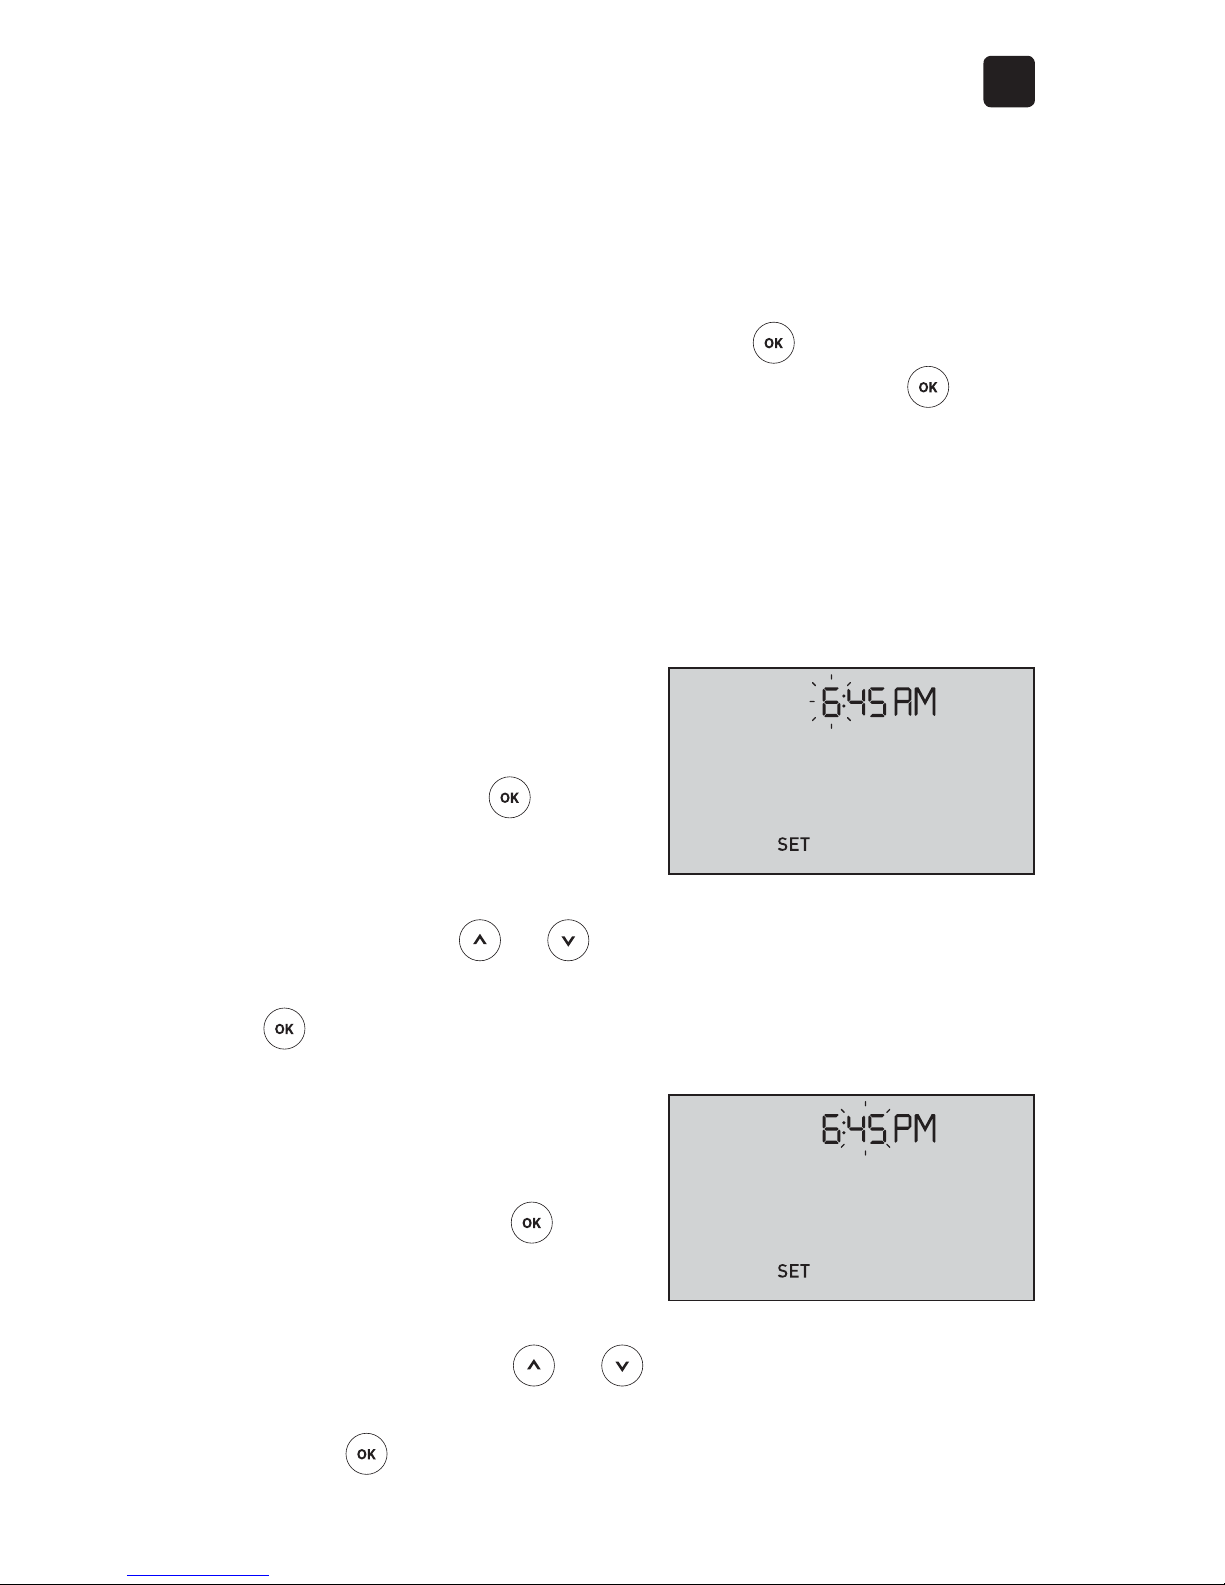
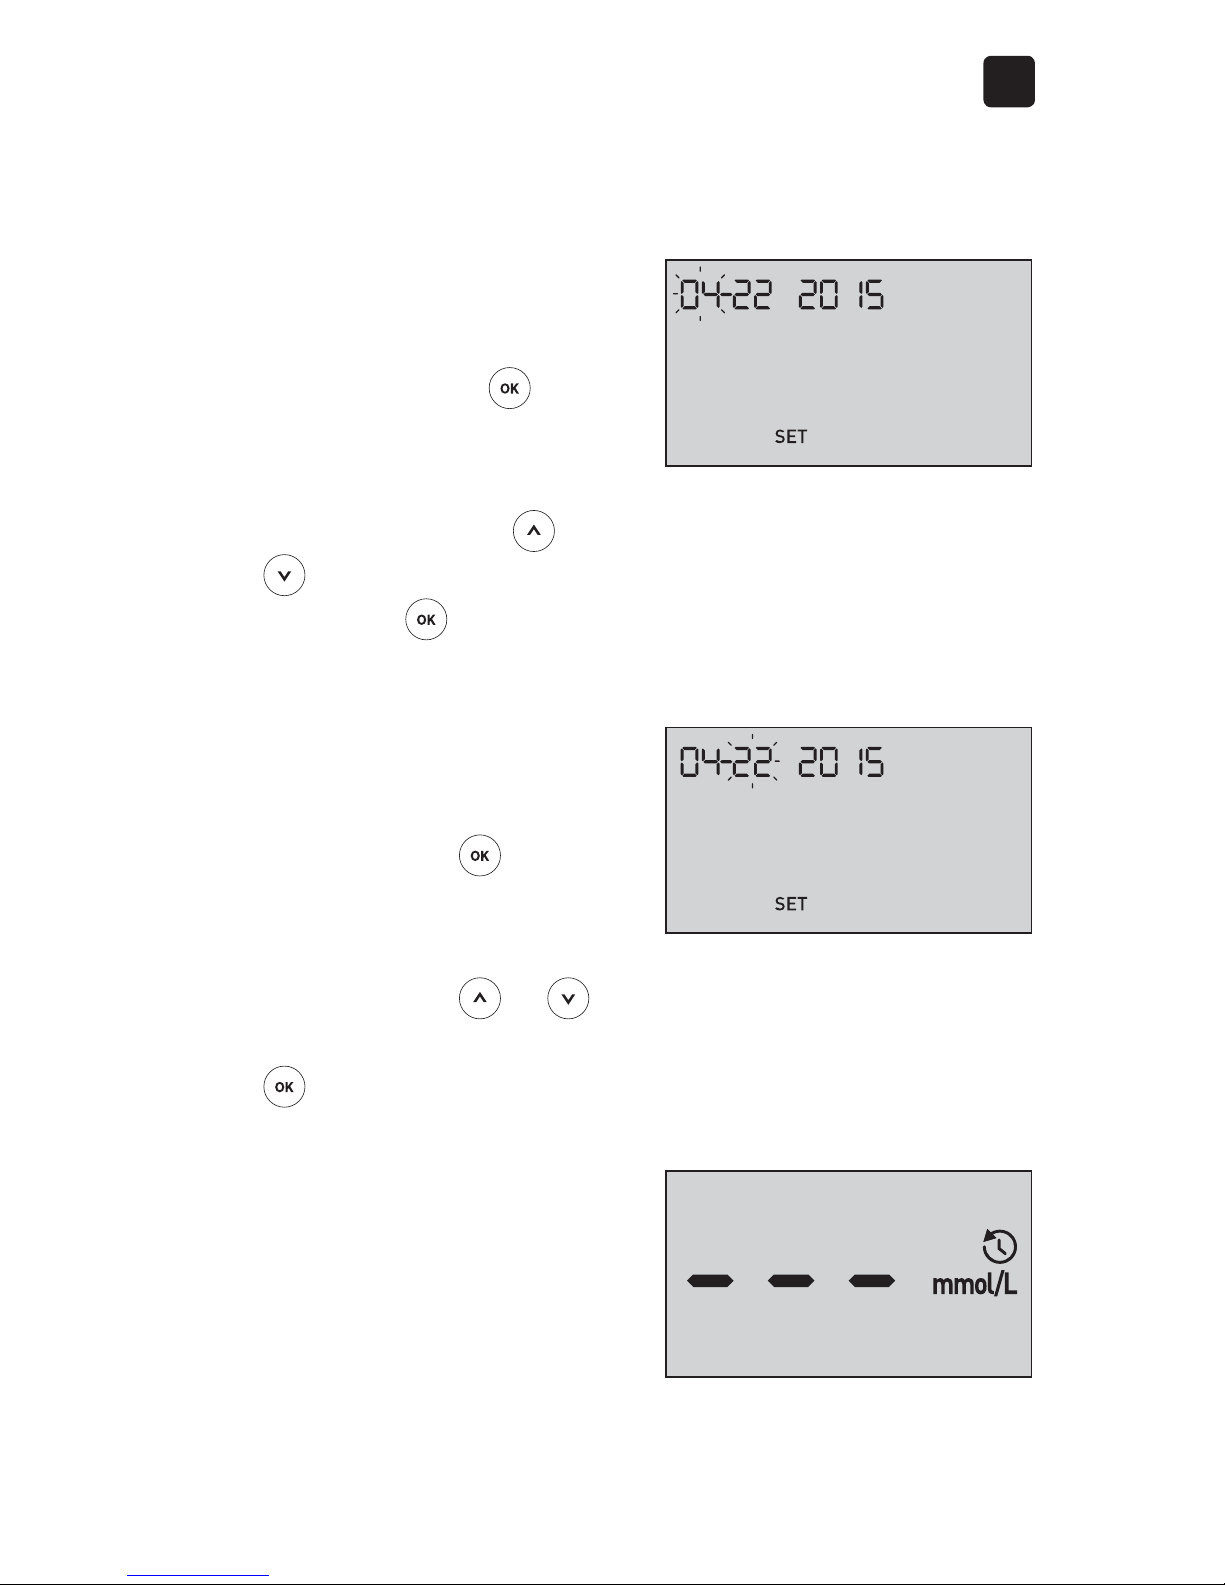
Setting the time
Hour will flash
• If the hour displayed
is correct, press
to
confirm.
• If the hour displayed is not
correct, press
or to
change the hour and press
to confirm.
Minutes will flash
• If the minutes displayed
are correct, press
to
confirm.
• If the minutes displayed are
not correct, press
or
to change the minutes and
press to confirm.
24
2
Setting up your system
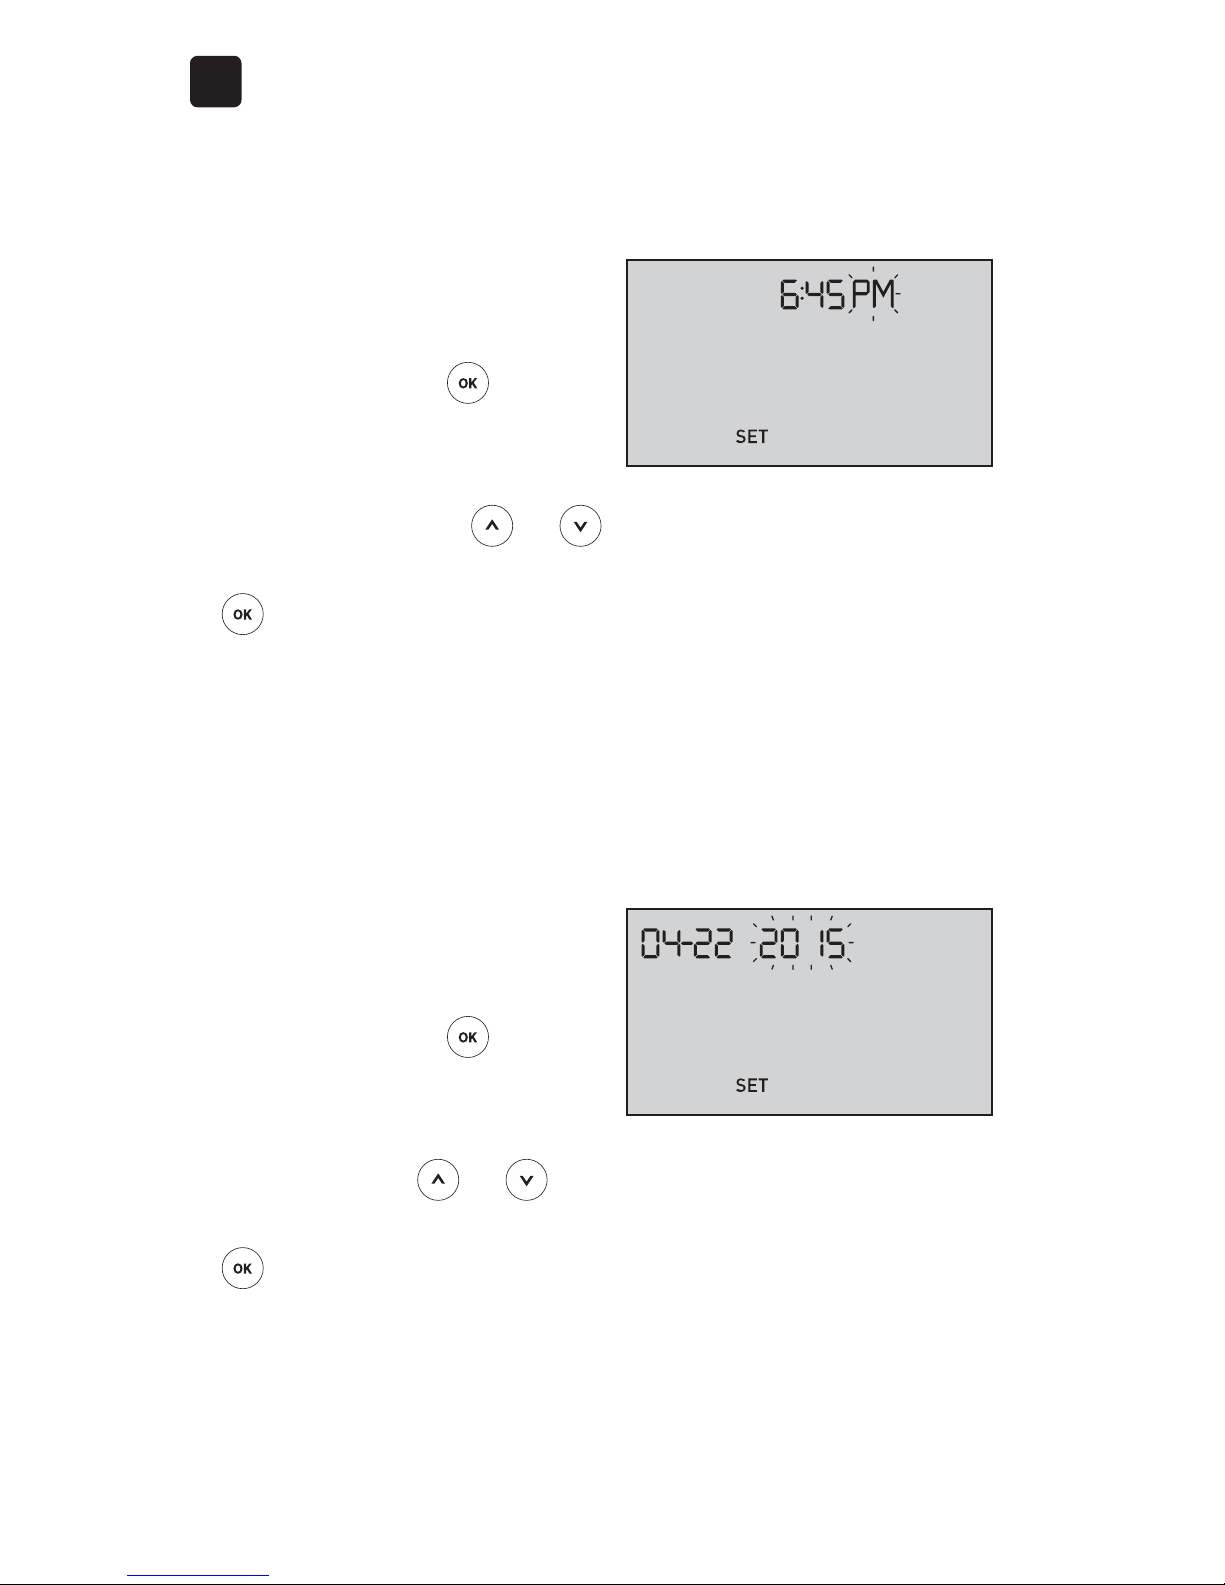
Setting the date
After completing the time setup, the meter will
automatically move to date setup.
Year will flash
• If the year displayed
is correct, press
to
confirm.
• If the year displayed is not
correct, press
or to
change the year and press
to confirm.
AM/PM will flash
• If the AM/PM displayed
is correct, press
to
confirm.
• If the AM/PM displayed is
not correct, press
or
to change AM/PM and press
to confirm.
25
2
Setting up your system
Month will flash
• If the month displayed
is correct, press
to
confirm.
• If the month displayed is
not correct, press
or
to change the month
and press to confirm.
Day will flash
• If the day displayed is
correct, press
to
confirm.
• If the day displayed is not
correct, press
or to
change the day and press
to confirm.
You are now ready to take
a test. See the section
Testing your blood glucose
in Chapter 3.
26
2
Setting up your system
Adjusting the time and date settings after
first time setup
You can adjust the meter's time and date settings after
first time setup. Press and hold
to turn the meter on,
then press and hold and at the same time. The SET
screen will appear. See page74.
After adjusting the settings, your meter will exit settings
mode and your last result screen will appear.
NOTE: After completing first time setup, a screen with
three dashes will appear. Once you begin testing, your last
result will appear in place of the three dashes, along with
the date and time the test was taken.
27
2
Setting up your system
Connecting to a compatible wireless
device
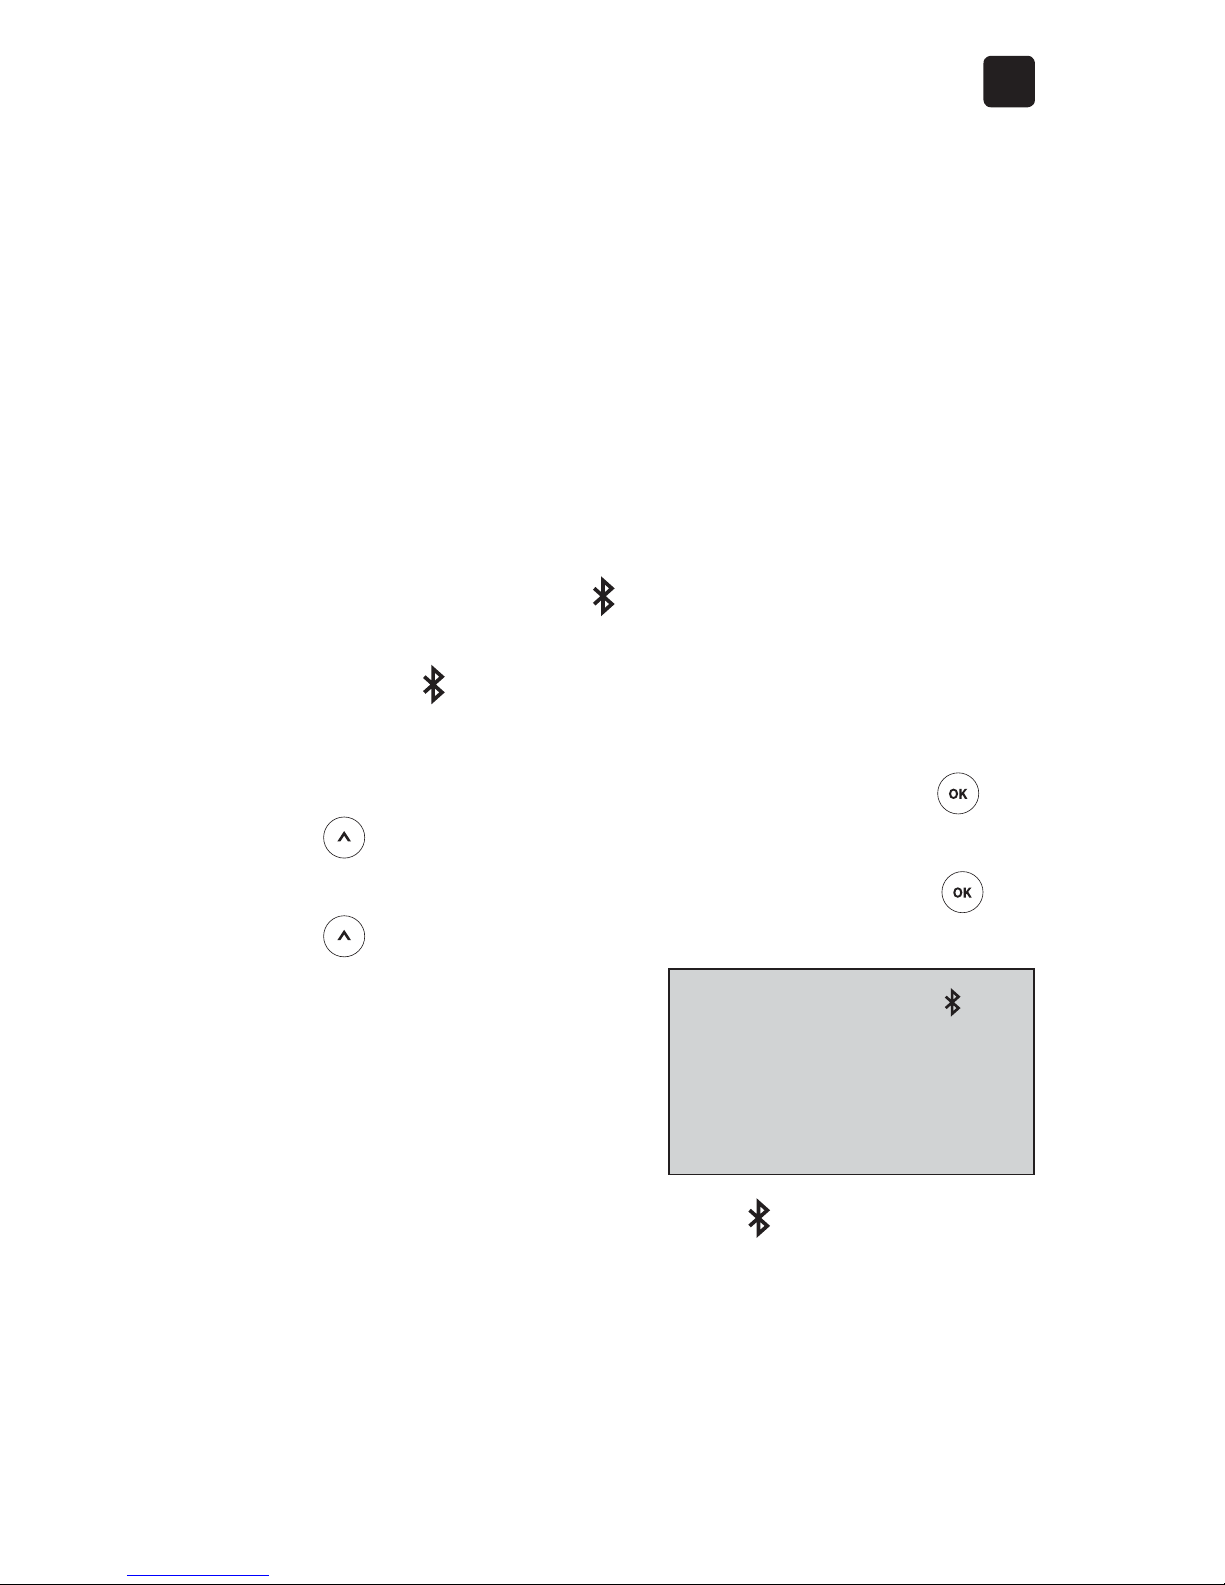
Turning the BLUETOOTH® Smart feature on
or o
In order to connect your meter with your compatible
wireless device, the BLUETOOTH® Smart feature will
need to be turned on. The
symbol will appear on the
meter screen when the BLUETOOTH® Smart feature is
on. When the symbol is not present on the screen the
BLUETOOTH® Smart feature is off.
• To turn the BLUETOOTH® Smart feature on press
and at the same time.
• To turn the BLUETOOTH® Smart feature off press
and at the same time.
The
symbol indicates
the BLUETOOTH® Smart
feature is on
NOTE: The BLUETOOTH® Smart feature will turn OFF
during a blood glucose test.

28
2
Setting up your system
Pairing Overview
Pairing allows your OneTouch Verio Flex™ Meter to
communicate with compatible wireless devices. The
devices must be within 8meters of each other to pair and
sync. Download the OneTouchReveal® Mobile App from
the appropriate app store before pairing your meter and
compatible wireless device.
NOTE: Some diabetes management apps, including the
OneTouchReveal® Mobile App, may not be available
in your country. Visit www.OneTouch.ca to learn if the
OneTouchReveal® Mobile App is available in your country.
Multiple OneTouch Verio Flex™ Meters can be paired
with your compatible wireless device. For example, your
compatible wireless device can be paired with a meter at
home and another at work. To pair multiple meters, repeat
the pairing instructions for each meter. See page29 for
pairing instructions.
Your OneTouch Verio Flex™ Meter can be paired with
multiple compatible wireless devices. To pair multiple
compatible wireless devices, repeat the pairing
instructions for each compatible wireless device.
 Loading...