

Page 1
Quick Reference Guide
Look inside for step-by-step instructions on how to:
>> Transfer readings from your OneTouch®Meter
>> View and share any of the 11 available reports
>> Add information to a patient record
>> Add or edit information related to a glucose reading
For a complete description of program functions, please consult the
Program Help or User Manual (available at www.LifeScan.com).
Page 2
OneTouch™Diabetes Management Software v2.2 2
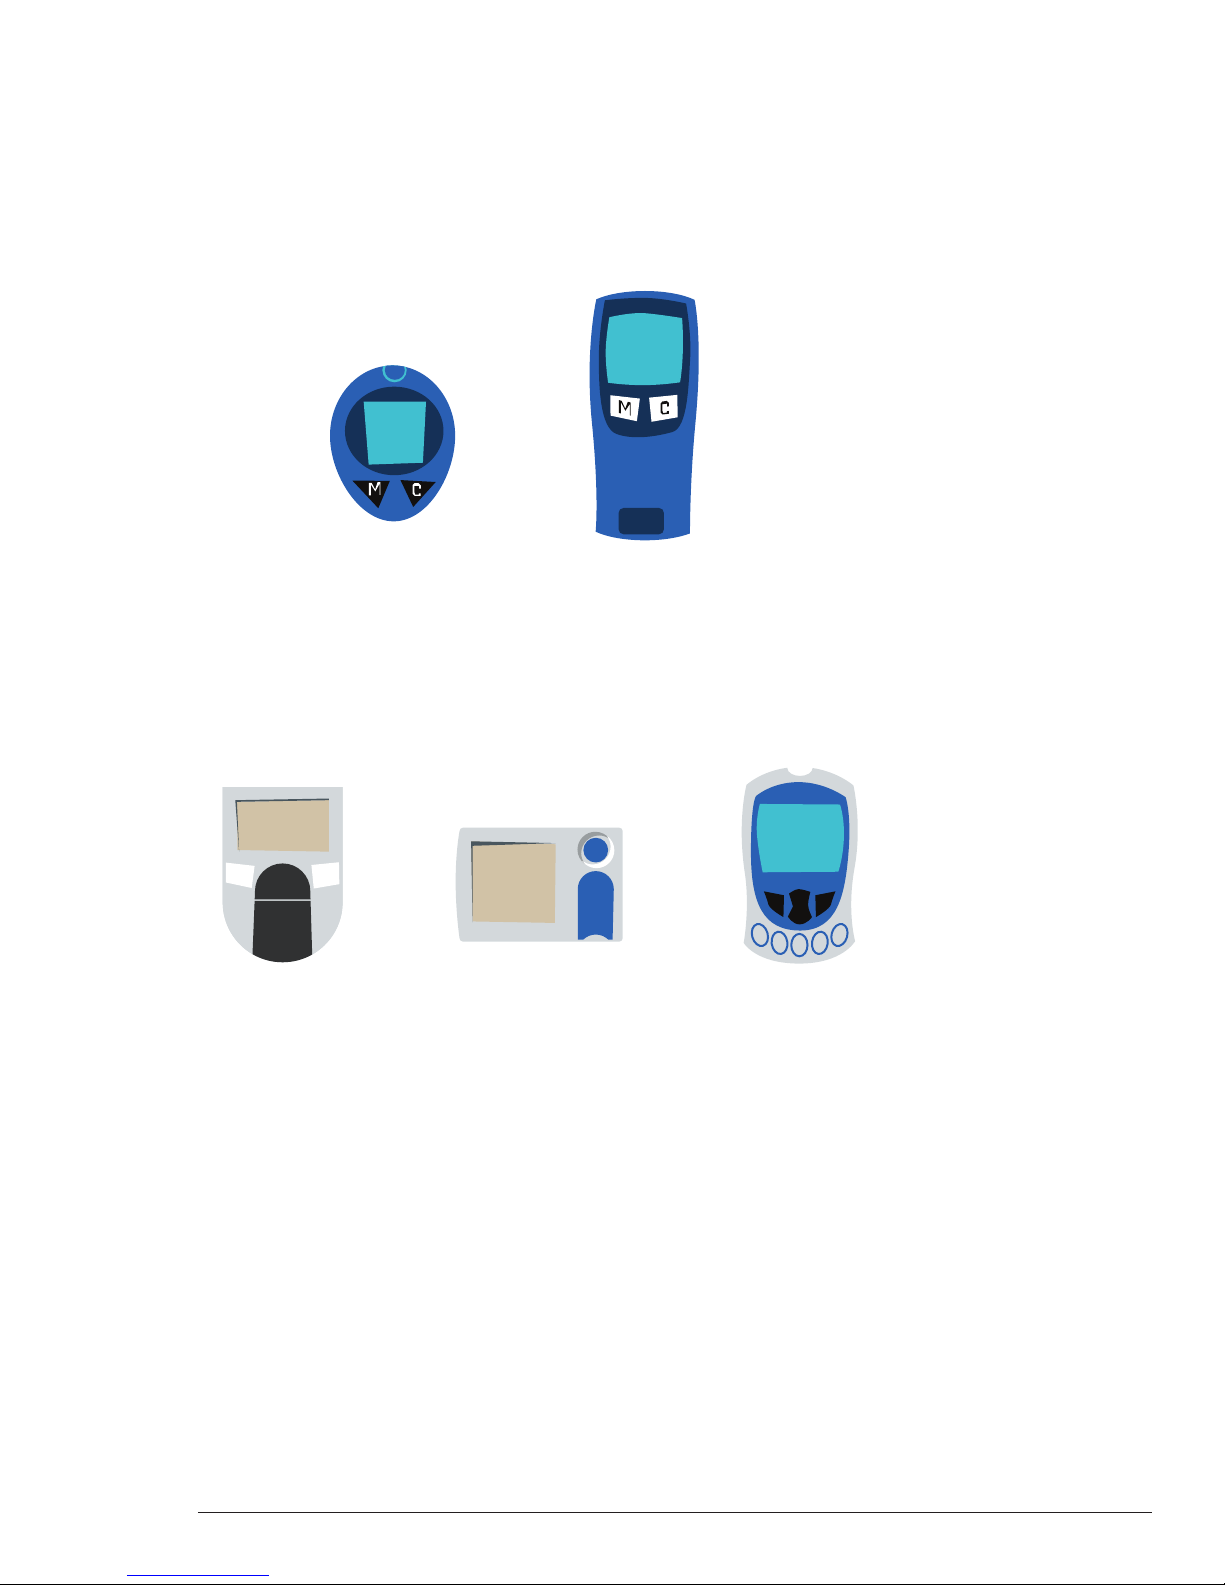
OneTouch™Diabetes Management Software (DMS)
works with the entire family of OneTouch
®
Meters.
OneTouch®Basic
®
OneTouch®Basic
®
Plus
OneTouch®II
OneTouch
®
Profile
®
OneTouch®SureStep
®
OneTouch®SureStep
®
Plus
OneTouch®GlucoTouch
®
OneTouch®GlucoTouch
®
Plus
OneTouch®UltraSmart
™
OneTouch®Ultra
®
OneTouch®FastTake
®
OneTouch®Smart
Scan
™
OneTouch®Euro
Flash
®
OneTouch®Pocket
Scan
®
InDuo
®
If you don't see your meter listed, refer to the Owner’s Booklet for that meter
to check if it is supported by this version of OneTouch
™
DMS.
Page 3
>> Track glucose levels along with health-related data that can impact readings. This
report lets you easily spot trends relative to a particular meal slot.
>> Identify patterns in glucose readings by time of day.
>> Rank patients by key measures to flag those who need closer management.
>> View a summary of key reports (Logbook Report, Pie Chart Report, and Glucose Trend
Report) for a given 14-day date range.
>> View all data in the sofware database (glucose, medications, food, exercise) in
sequential format.
>> Analyze the relationship between glucose readings, insulin dosing, and carb intake.
Standard Day
Exception
Data List
OneTouch™Diabetes Management Software v2.2 3
OneTouch
™
DMS has 11 reports to manage the
information that can help you improve your
glycemic control.
Logbook
Summary
Insulin
Page 4

OneTouch™Diabetes Management Software v2.2 4
OneTouch
™
DMS has 11 reports to manage the
information that can help you improve your
glycemic control
(continued).
>> Display the percentage of glucose readings that fall above, below and within target
range for each meal slot.
>> Easily monitor how other health factors (blood pressure, weight, doctor visits,
and HbA1c) are impacted by diabetes.
>> Track changes in glucose readings from day to day.
>> Identify before and after meal patterns across a distribution of glucose ranges.
>> Monitor how glucose readings are impacted by meals,exercise, and daily activities.
Pie Chart
Health Checks
Glucose Trend
Histogram
Average Reading
Page 5

>> To begin data transfer, the meter you are connecting may need to be turned ON or OFF
depending on the meter type. Find your meter on one of the lists below and follow the
ON or OFF instructions.
>> These meters should be turned
OFF before downloading:
- OneTouch
®
Ultra®Meter
- OneTouch
®
FastTake®Meter
- InDuo
®
Meter
- OneTouch
®
Pocket
Scan
®
Meter
- OneTouch
®
Euro
Flash
®
Meter
- OneTouch
®
Smart
Scan
™
Meter
>> These meters should be turned
ON before downloading:
- OneTouch
®
Basic®Meter
- OneTouch
®
Basic®Plus Meter
- One Touch
®
II Meter
- OneTouch
®
Profile®Meter
- OneTouch
®
SureStep®Meter
- OneTouch
®
SureStep®Plus Meter
- OneTouch
®
GlucoTouch®Meter
- OneTouch
®
GlucoTouch
®
Plus
Meter
- OneTouch
®
UltraSmart™Meter
If you don’t see your meter listed, refer to the Owner’s Booklet for that meter for
instructions on whether to turn the device ON or OFF before communicating.
Note: Meters that need to be turned ON for data transfers may turn off if there is a
delay in connecting the meter. If this happens, just turn the meter back ON.
Get your OneTouch®Meter ready
to transfer readings.
OneTouch™Diabetes Management Software v2.2 5
Page 6

OneTouch™DMS makes it easy to transfer OneTouch®Meter readings for viewing.
Step 1
Double-click on the desktop icon to open the Software.
Step 2
Click on the Download Meter Readings icon on the Home Screen.
Step 3
Connect the meter to the PC.
>> Plug the OneTouch
™
Interface Cable into the COM or USB port on your PC.
>> Plug the other end of the OneTouch
™
Interface Cable into your meter.
>> If you are using the OneTouch
®
FastTake®/Pocket
Scan
®
/Euro
Flash
®
/Smart
Scan
™
Meter,
you must plug the OneTouch
™
Interface Cable into the meter adapter. Then insert the
adapter strip into the meter test strip port.
OneTouch™Diabetes Management Software v2.2 6
Transfer OneTouch®Meter readings
for viewing.
Download
Meter Readings
Page 7

Step 4
To begin data transfer, make sure the meter you are connecting is turned ON or OFF,
depending on the meter type. See Get your OneTouch
®
Meter ready to transfer readings.
OneTouch™Diabetes Management Software v2.2 7
Transfer OneTouch®Meter readings
for viewing
(continued).
Step 5
Click on the Download Meter Readings button.
Step 6
Your Favorite Report will automatically open.
>> Customize your Favorite Report by selecting Preferences/Report Options from the
Menu bar.
gs
ownload Meter Readin
Page 8

OneTouch™Diabetes Management Software v2.2 8
View and share reports.
View and share reports with just a few clicks.
Step 1
Double-click on the desktop icon to open the Software.
Step 2
Click on the View Reports icon on the Home Screen.
Step 3
Click on the report you would like to view.
Step 4
Share the report with another person.
Click on the print, e-mail, or fax icon in the tool bar, and follow the directions.
View Reports
Page 9

Customize your personal diabetes profile.
>> General information
>> Schedules
>> Medications
>> Insulin regimens
>> Complications
Step 1
Double-click on the desktop icon to open the Software.
Step 2
Click on the Set-Up icon on the Home Screen.
Step 3
Click on the Patient Setup icon on the Setup Screen.
OneTouch™Diabetes Management Software v2.2 9
Add information
to a patient record.
Set-Up
Patient Setup
Page 10

Step 4
Choose the correct patient from the drop-down menu.
Step 5
Use the blue tabs to add relevant information.
Step 6
Click on the Done button to save changes.
OneTouch™Diabetes Management Software v2.2 10
Add information
to a patient record
(continued).
Patient Doe, John M.
Done
Page 11

Choose Your Report
Patient
Smith, John M.
View Favorite Report
Print Favorite Report
Logbook Summary Pie Chart
Add or edit information related to
glucose readings.
Add comments to a glucose reading or change its assigned meal slot.
Step 1
Double-click on the desktop icon to open the Software.
Step 2
Click on the View Reports icon on the Home Screen.
View Reports
Step 3
Click on the Logbook button on Choose Your Report.
Step 4
Click on the report reading you would like to change.
OneT
Di
™
h
ouc
s Management Software v
e
abet
2.2
11
Page 12

Step 5
Add or edit data as needed in the blue charts.
Use the tabs to move from section to section.
Step 6
Click the Done button to save the changes.
OneTouch™Diabetes Management Software v2.2 12
Add or edit information related to
glucose readings
(continued).
Done
Page 13

General Troubleshooting.
If you experience other problems with OneTouch™DMS, please refer to
Appendix C: Troubleshooting in the Program User Manual. The manual can be found
at www.LifeScan.com.
Alternatively, you can call your regional LifeScan office for technical support:
>> United States CustomerService@LifeScan.com 1-800-382-7226
>> Canada CustomerService@LifeScanCanada.com 1-800-663-5521
>> UK & Ireland CustomerService@LifeScan.co.uk 0800 121 200 (UK)
1800 535 676 (Ireland)
For all other countries, contact your local LifeScan office for the Technical Support
telephone number in your area. Or visit the Around the World section of the LifeScan
Web site at www.LifeScan.com.
Use in Partnership with
Your Healthcare Professional.
OneTouch™DMS is designed to help individuals and healthcare professionals track,
review, and monitor key data related to managing diabetes. OneTouch
intended to provide medical advice. If you have diabetes, consult with your healthcare
professional before making any changes to your lifestyle, medication, diet, or exercise
am.
progr
© 2005 LifeScan, Inc. Milpitas, CA 95035 Rev. 03/2005 AW 063-675-01B
OneT
ouc
™
h
Di
s Management Software v
e
abet
2.2
™
DMS is not
13
 Loading...