

Page 1
© 2016 oneTesla LLC
tinyTesla User Manual
Version 1.6
IUser ManUal v1.6
Page 2

Running list of errata
You are currently reading version 1.6 of the tinyTesla User Manual. Before continuing, go to onetesla.com/downloads and check
that v1.6 is the most up-to-date version. If not, download the errata or the latest version of the manual. This page will be continuously
updated with corrections.
February 2015
March 2015
April 2015
May 2015
Early kits may have the following extra parts, which are erroneous and may be omitted:
n female molex connector
n one surplus large ring terminal
n one surplus 6mm screw
In v1.0 of the manual, on page 3, the color code for the 68Ω resistors R2 and R3 was
incorrect. The correct color code is blue gray black.
In Step 6-J, regarding the ber optic receiver, kit builders have noticed that soldering this
component at too high a temperature can damage it. We are not exactly sure of the
proper temperature range, but we recommend soldering at no higher than 400°C.
An extra IGBT testing procedure has been added to Step 15.
Some kits have stability issues with the USB interrupter. There are several xes for this
problem, which relates to the Zener diodes. The rst option is to use a USB 3.0 port and
omit the Zener diodes. The second option is to replace the 3.3V Zener diodes with 3.6V
Zener diodes. Contact us at nikola@onetesla.com if you need them sent to you.
If you receive extra parts outside of the kit in your shipping box, they are for use in place
of the parts in the kit. In particular, some shipments have replacement Zener diodes for
the interrupter.
June 2015
September 2015
May 2016
Note added to glue down the bolt in the endcap during assembly.
In Step 15, multimeter check of IGBTs section, sentence changed from “Meter between
pins 1 and 3 of X1, the large 3-pin connector. You should read open.” to “You should not
read a dead short.“
Properly sized heat sink template added.
Removed references to the tinyTesla interrupter chassis as it is purely cosmetic and will
no longer be included in the kit.
References to heat shrink removed, please use eletrical tape instead.
The secondary should read approximately 450Ω, not 600.
15V should be on pin 6, not 8 of the UCC27425.
Primary wire is no longer Teflon.
Fuses are now 4A instead of 2A.
Please check IC5, the LM7815 15V voltage regulator. Some kits may have an LM7915
instead, which will not work. Please contact us for a replacement at nikola@onetesla.com.
IIUser ManUal v1.6
Page 3
Welcome!
With tinyTesla you’ll learn about electronics, ex your soldering
muscles, shoot lightning, and play music using electricity!
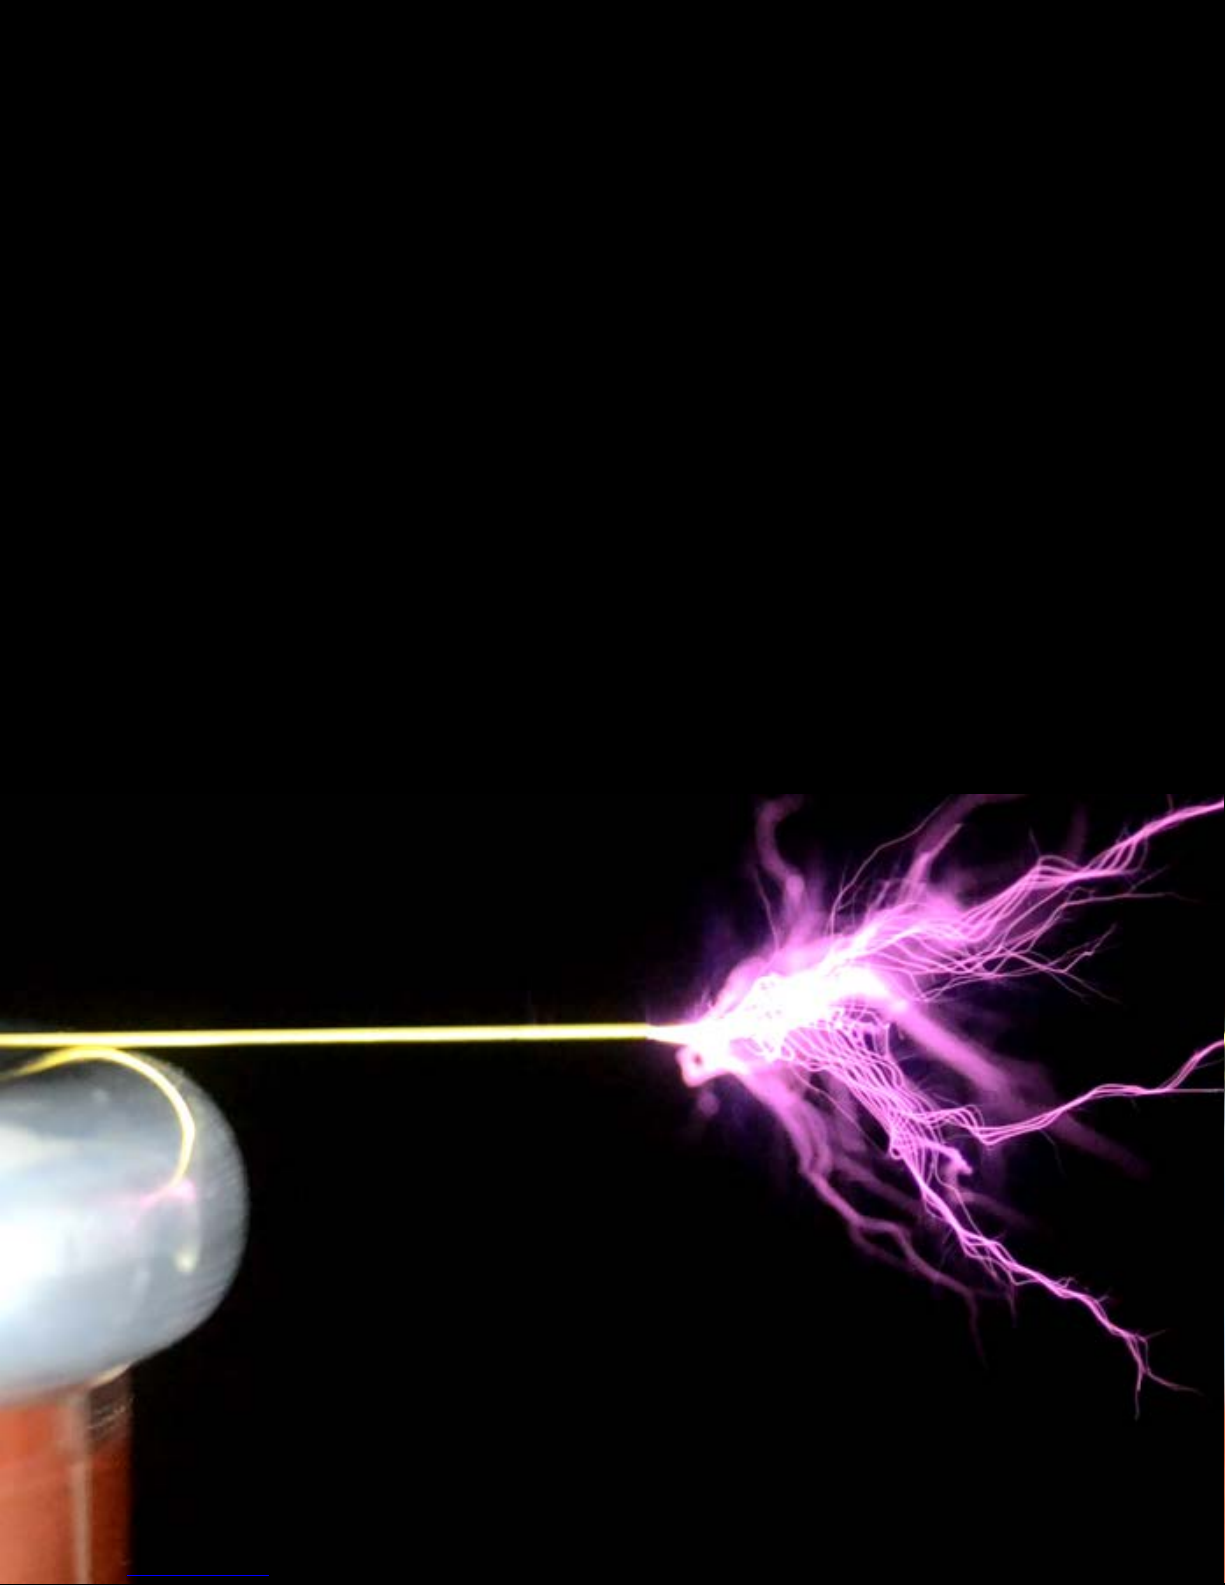
A Tesla coil is a device that uses resonant circuits and alternating
current to produce extremely high voltages. Originally invented by
Nikola Tesla in the late 1800s, Tesla coils have progressed from
spark-gap circuits to designs involving modern solid-state
switching devices such as MOSFETs and IGBTs. While there are
many types of Tesla coils, what they all have in common are
air-cored induction coils. Using a Tesla coil is the best way to
produce a continuous high-voltage streamer.
We’ve designed a Tesla coil kit that’s both easy to build and
beautiful. tinyTesla is an SSTC, or “solid state Tesla coil,” which
balances performance, musical ability, and reliability.
But be careful! Building hardware can be tricky if you’re
inexperienced or don’t have the proper equipment. Work with
good tools, pay close attention, and ask for help when you
need it.
Most of all, have fun!
Need help?
Go to our support forum at
onetesla.com/forum
Need replacement parts? Contact us at
replacements@onetesla.com
Check out all of our educational tutorials at
onetesla.com/tutorials
Check out our other kits at
www.onetesla.com!
Note: We try our best to keep all images and
instructions consistent with the latest revision
of the tinyTesla hardware, but the photos in
this manual and on our website are not always
identical to the components you receive in
your kit. They will, however, maintain the
same functionality.
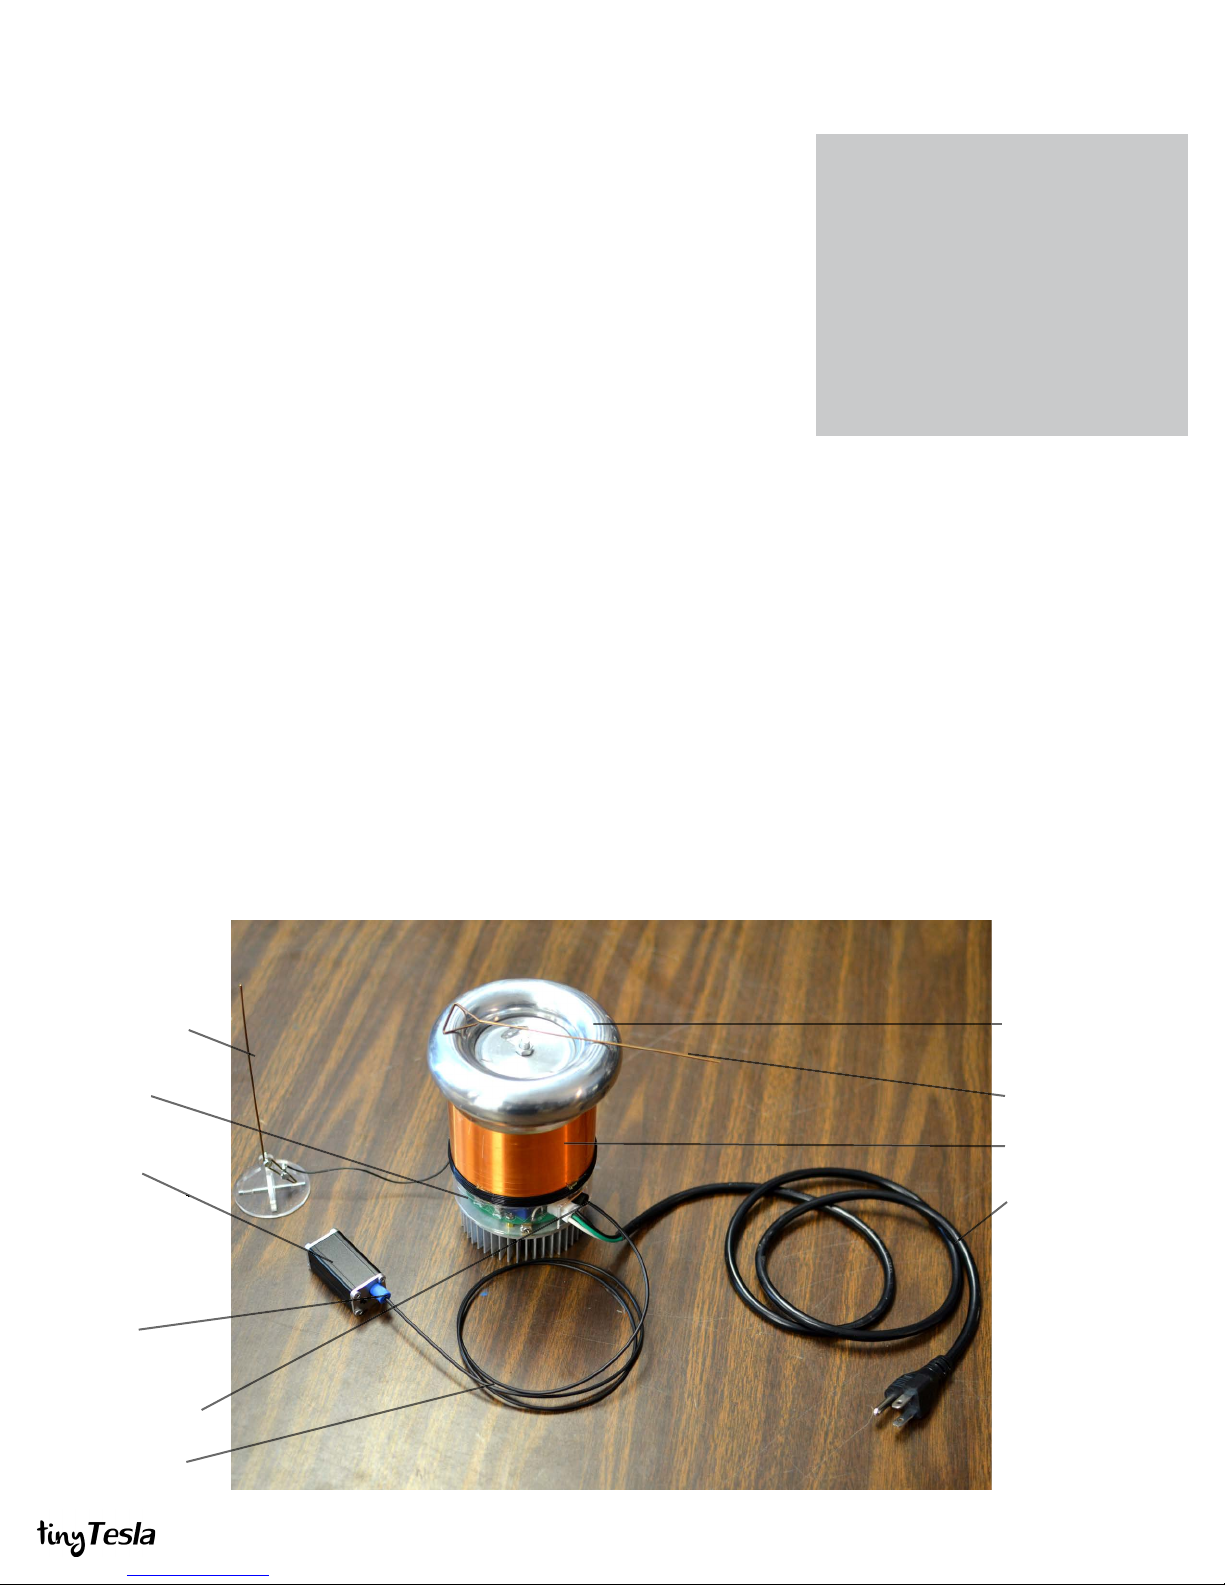
What’s in the tinyTesla kit?
Feedback antenna
Primary coil
USB-MIDI
interrupter (shown
here with chassis
that is no longer
included in the kit)
Fiber optic
transmitter
Fiber optic receiver
Spun aluminum
toroid
Breakout point
Secondary coil
AC power cable
Fiber optic cable
1User ManUal v1.6 1
Page 4
Safety Warnings Adult Supervision Required
ADULT
SUPERVISION
REQUIRED
ADULT
SUPERVISION
REQUIRED
Users under 18 should only use this kit under the supervision of
an experienced adult.
Pacemaker Warning
Persons with electronic medical implants such as pacemakers
should not be near the Tesla coil during operation. EMI from the
coil may interfere with the pacemaker’s function.
Ozone Warning
The high temperature of the Tesla coil streamers causes the
gases that make up air to form other compounds, including ozone
(which can often be smelled when the coil is in operation) and
nitrogen oxides. Keep the Tesla coil work area well-ventilated to
prevent the buildup of irritating gases such as ozone and nitrogen
oxides, which become toxic if concentrated.
Fire Hazard
The arcs from the Tesla coil can set ammable objects on re.
Keep all ammable objects away from the Tesla coil while it is in
operation.
Ear Protection Recommended
The Tesla coil output is loud! Ear protection is recommended.
Eye Glasses Required
Always wear eye protection while soldering. Power
semiconductors may overheat and fail violently, causing a
shrapnel hazard. Wear safety glasses when working on the board
while it is energized. Only power up the board when it is fully
enclosed inside the chassis.
RF Warning
Keep sensitive electronics away from the Tesla coil at all times.
Use the entire length of the included ber optic cable to distance
your computer from the Tesla coil.
2User ManUal v1.6
Page 5
Before you begin
Be up-to-date
Ensure you have the latest version of the manual, and
if not, download the errata sheet or the newest version at
onetesla.com/downloads.
Read the tutorials
All of our tutorials can be found at onetesla.com/tutorials
n Soldering tutorial
n De-soldering tutorial
n How a Tesla coil works
n Heat sink hardware installation
n Main board’s logic component installation
n Low voltage driver board test
n Main board’s power component installation
n IGBT installation
Observe good workspace practices
n Keep your workspace neat and orderly.
n Always obey common sense.
n Do not continue work if at any point you feel
uncomfortable with the hazards a challenging electronics
project poses.
n Use caution when soldering! Lead is hazardous, and
the iron is extremely hot.
Use the right equipment
Having the proper tools for electronic assembly, particularly a
powerful enough soldering iron, will make your life much easier!
Here are the tools you need to assemble your Tesla coil:
n temperature-controlled soldering iron, 40W minimum
n rosin-core solder of an appropriate thickness
n safety glasses
n small pliers
n ush cutters
n wire strippers
n small screwdriver
n hot glue gun
n multimeter
Optional but useful:
n packing tape
n masking tape
n solder wick or other desoldering tools
You will also need....
n spray-on or paint-on polyurethane varnish
n a mini USB cable to connect to the tinyTesla interrupter
n a laptop running 1T Panel or other MIDI control software
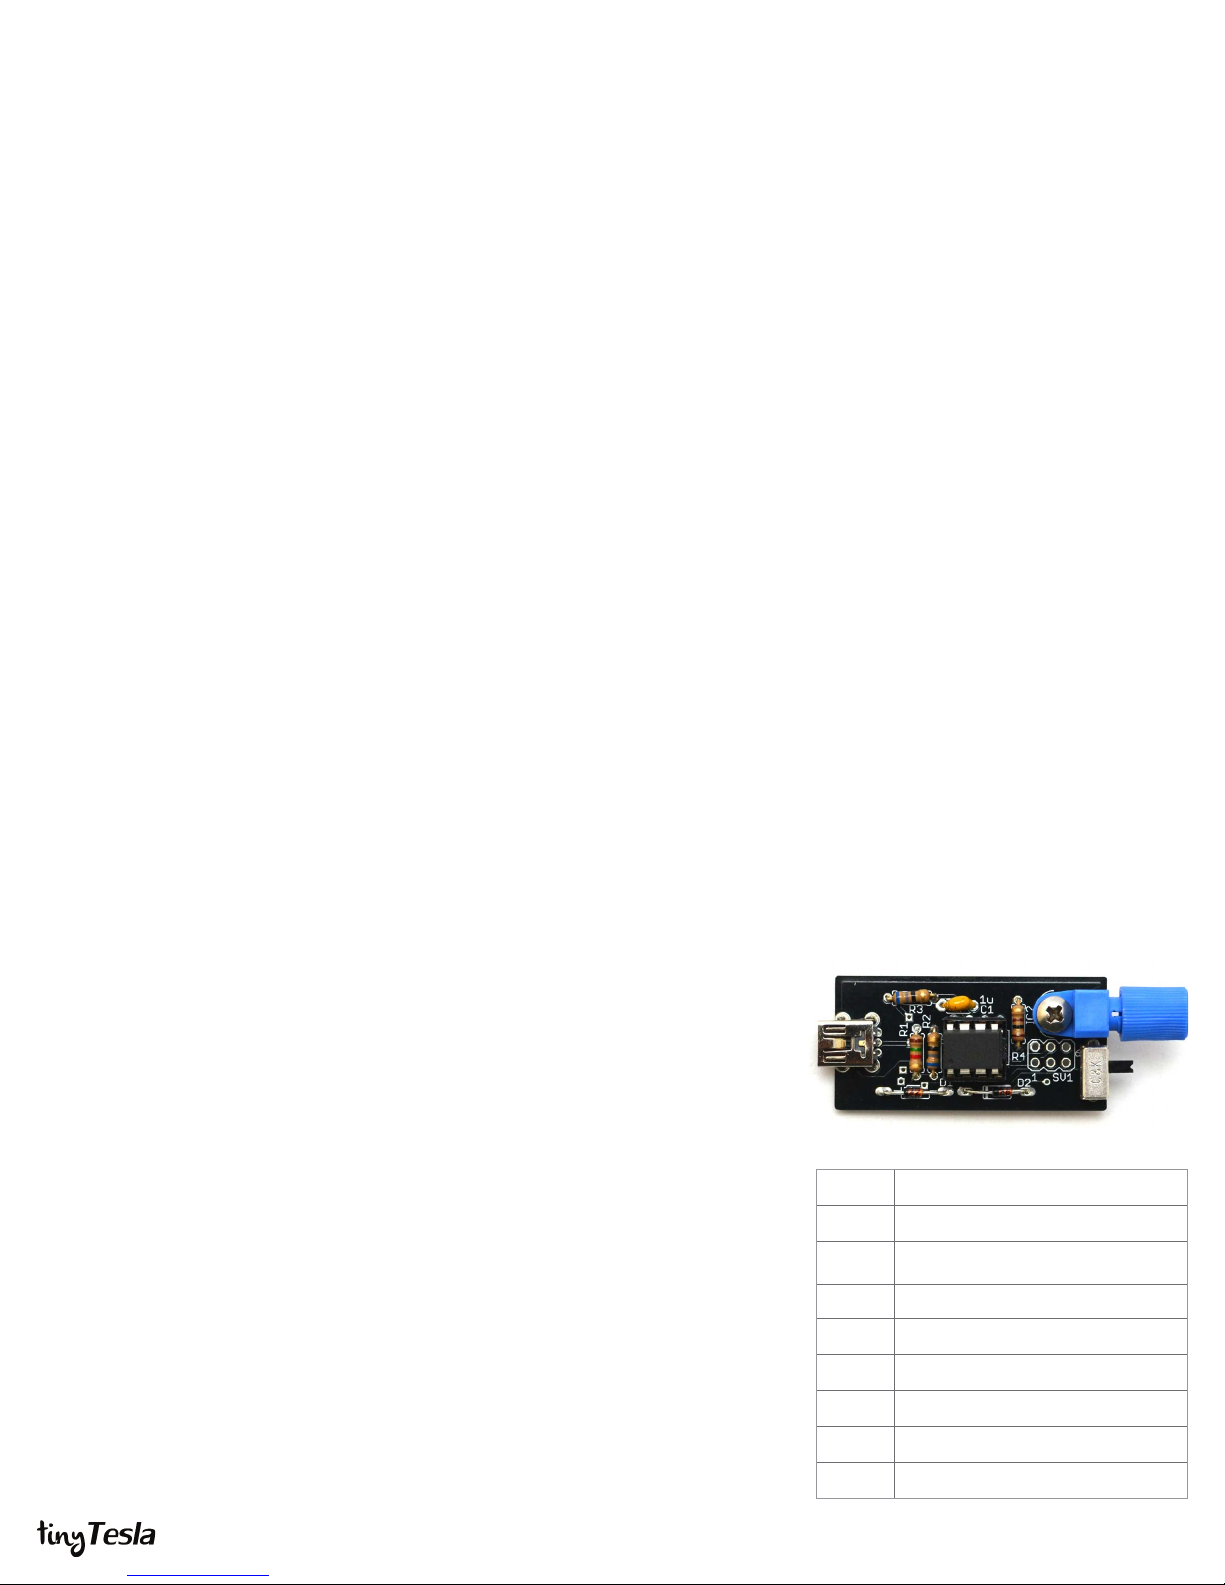
STEP 1: Assemble the interrupter
The interrupter is the Tesla coil’s music controller. It connects via a mini USB cable to a
computer, and appears as a MIDI device. Assemble it rst because you will need to use
it to ensure the low-voltage side of the main driver board is working. The interrupter is
also a small board with few parts, which—if soldered correctly—should work right away.
A. Install R1 through R4.
B. Install C1.
C. Install CN1, the mini USB connector.
D. Install zener diodes D1 and D2. Note that they are directional! Match the band
on the diode to the band on the board. Don’t confuse them with the 1N4148
signal diodes, which look the same except for their part number.
E. Install the socket of IC1. Do not solder the ATtiny directly to the board! Make
sure that the notch on the socket matches the notch on the board. Do not
solder the socket with the ATtiny inserted!
F. Insert the ATtiny into its socket, making sure that the dot on the chip is on the
same side as the notch on the socket.
G. Install IC2, the optical transmitter. Be careful! This component is delicate.
Secure it with a bolt and nut before soldering it in.
H. Install the slide switch.
Don’t worry, the ATtiny microcontroller in your kit is already programmed. If you ever
need to re-program your ATtiny, install a 6-pin header. Since your ATtiny comes
programmed, we didn’t include one.
R1
R2, R3
R4
C1 1uF (labeled 105)
CN1 mini USB connector
D1, D2 3.3V Zener Diodes
IC1 ATtiny and socket
IC2 optical transmitter
1.5kΩ (brown green red)
68Ω (blue grey black)
100Ω (brown black brown)
slide switch
3User ManUal v1.6
Page 6
STEP 2: Troubleshoot the interrupter
The interrupter is powered over USB and can be controlled using our 1T Panel software
available for download at onetesla.com/downloads. You will need a mini USB cable to
connect to the interrupter. It behaves like a MIDI device and can also be controlled via
other MIDI software. See Appendix A for a description of 1T Panel.
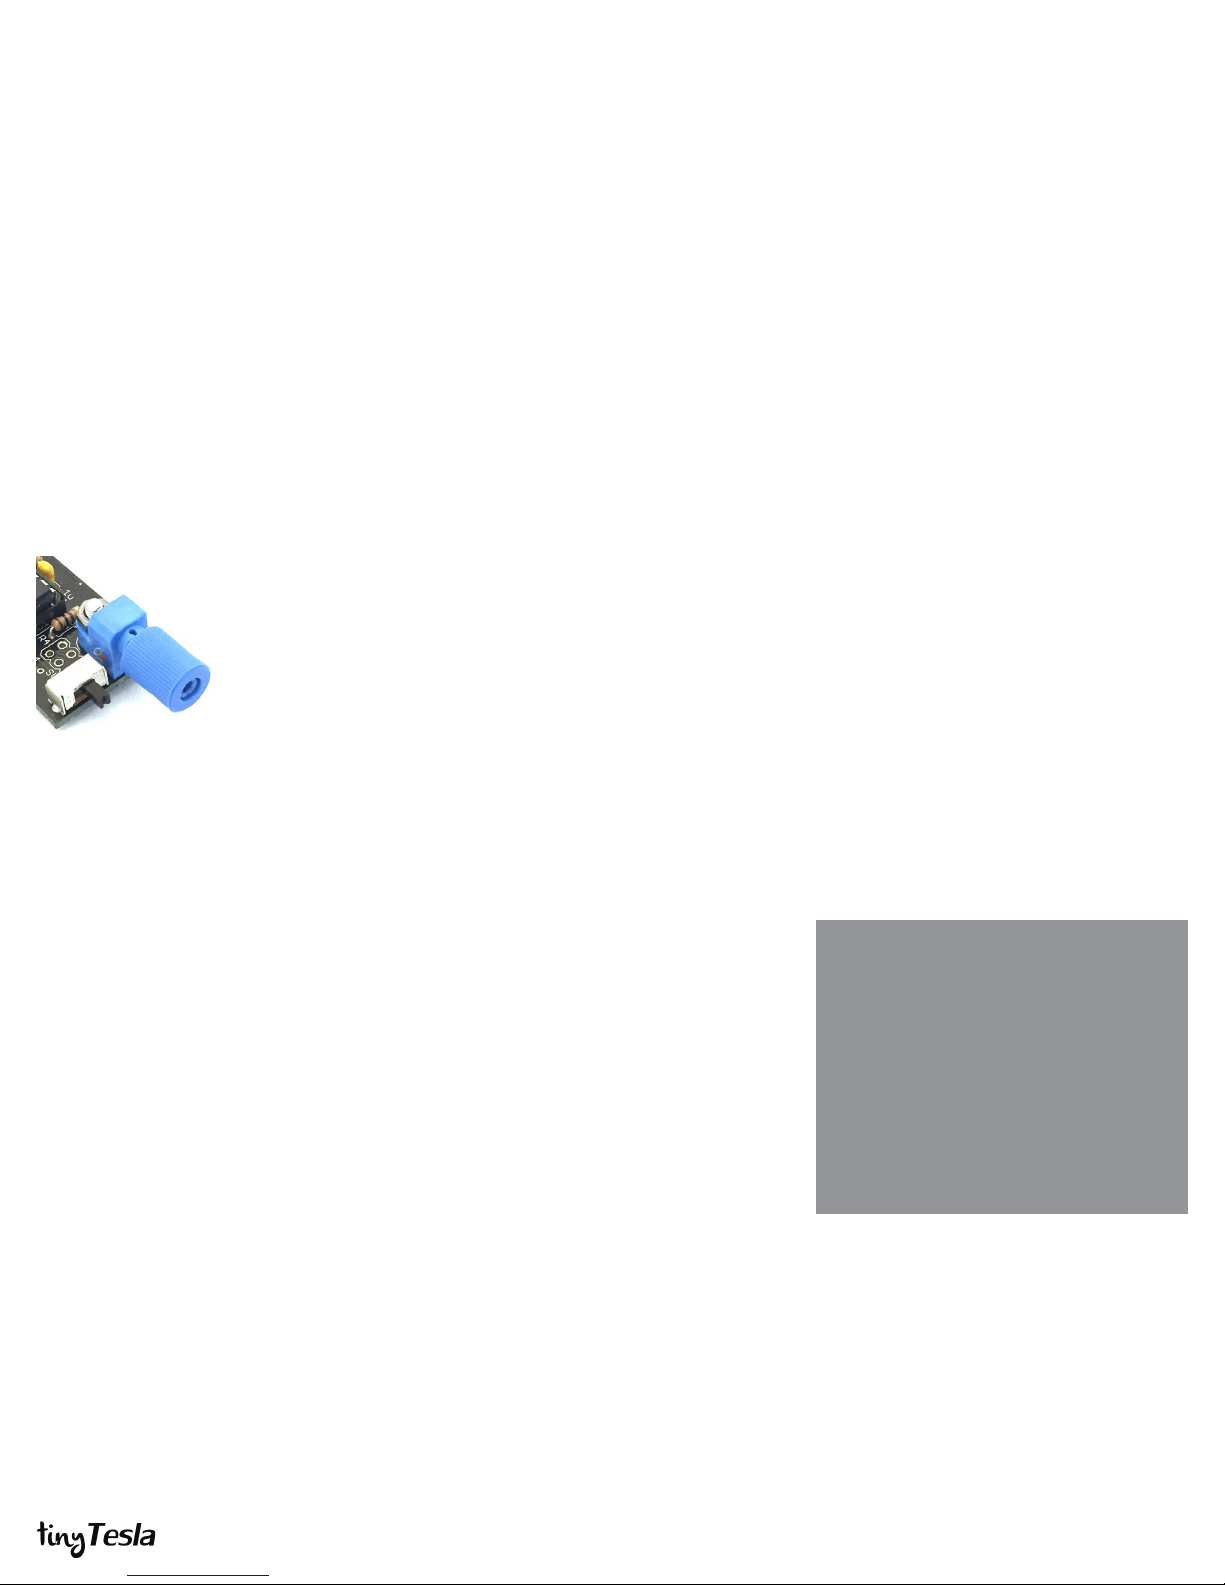
The interrupter has two modes: Live mode (switch to the right) and Fixed mode (switch
to the left). Note: every time you want to switch modes, you need to power cycle (unplug
and plug back in) the interrupter.
Place the switch in the Live mode position (right-hand side). This places the interrupter
into MIDI mode. Using a mini USB cable, connect the interrupter to a computer. Conrm
that the USB device is recognized and does not throw an error. Use 1T Panel to raise and
lower the power and conrm that the LED in the ber optic transmitter raises and lowers
in brightness accordingly.
The interrupter set to
Live mode. Flip the
switch to the left for
Fixed mode.
If it doesn’t work
USB device is not
recognized or
drops out...
Interrupter doesn’t
respond to
software...
n Conrm the ATtiny is installed in the correct orientation.
n Check all parts carefully for correct values and orientations.
n Check your soldering for bridges and/or cold joints.
n Unplug all other USB devices.
n If the interrupter drops out when you handle the USB cable,
check your soldering of the USB connector.
n Try a dierent computer to compare results.
n (early kits) Replace your 3.3V Zener diodes with 3.6V Zener
diodes. If using a USB 3.0 port, you can omit the Zeners
altogether.
n Ensure that the software you’re using is transmitting on MIDI
channel 0.
n Ensure that the software you’re using is outputting to the
appropriate USB port.
Need help?
If you encounter a problem that isn’t covered
here, take a look at our online help forum at
onetesla.com/forum. Someone else may
have had the same problem and gured out
a solution.
Please post on the forum rather than emailing
us for support, so that everyone can learn from
how you resolved your problem!
4User ManUal v1.6
Page 7
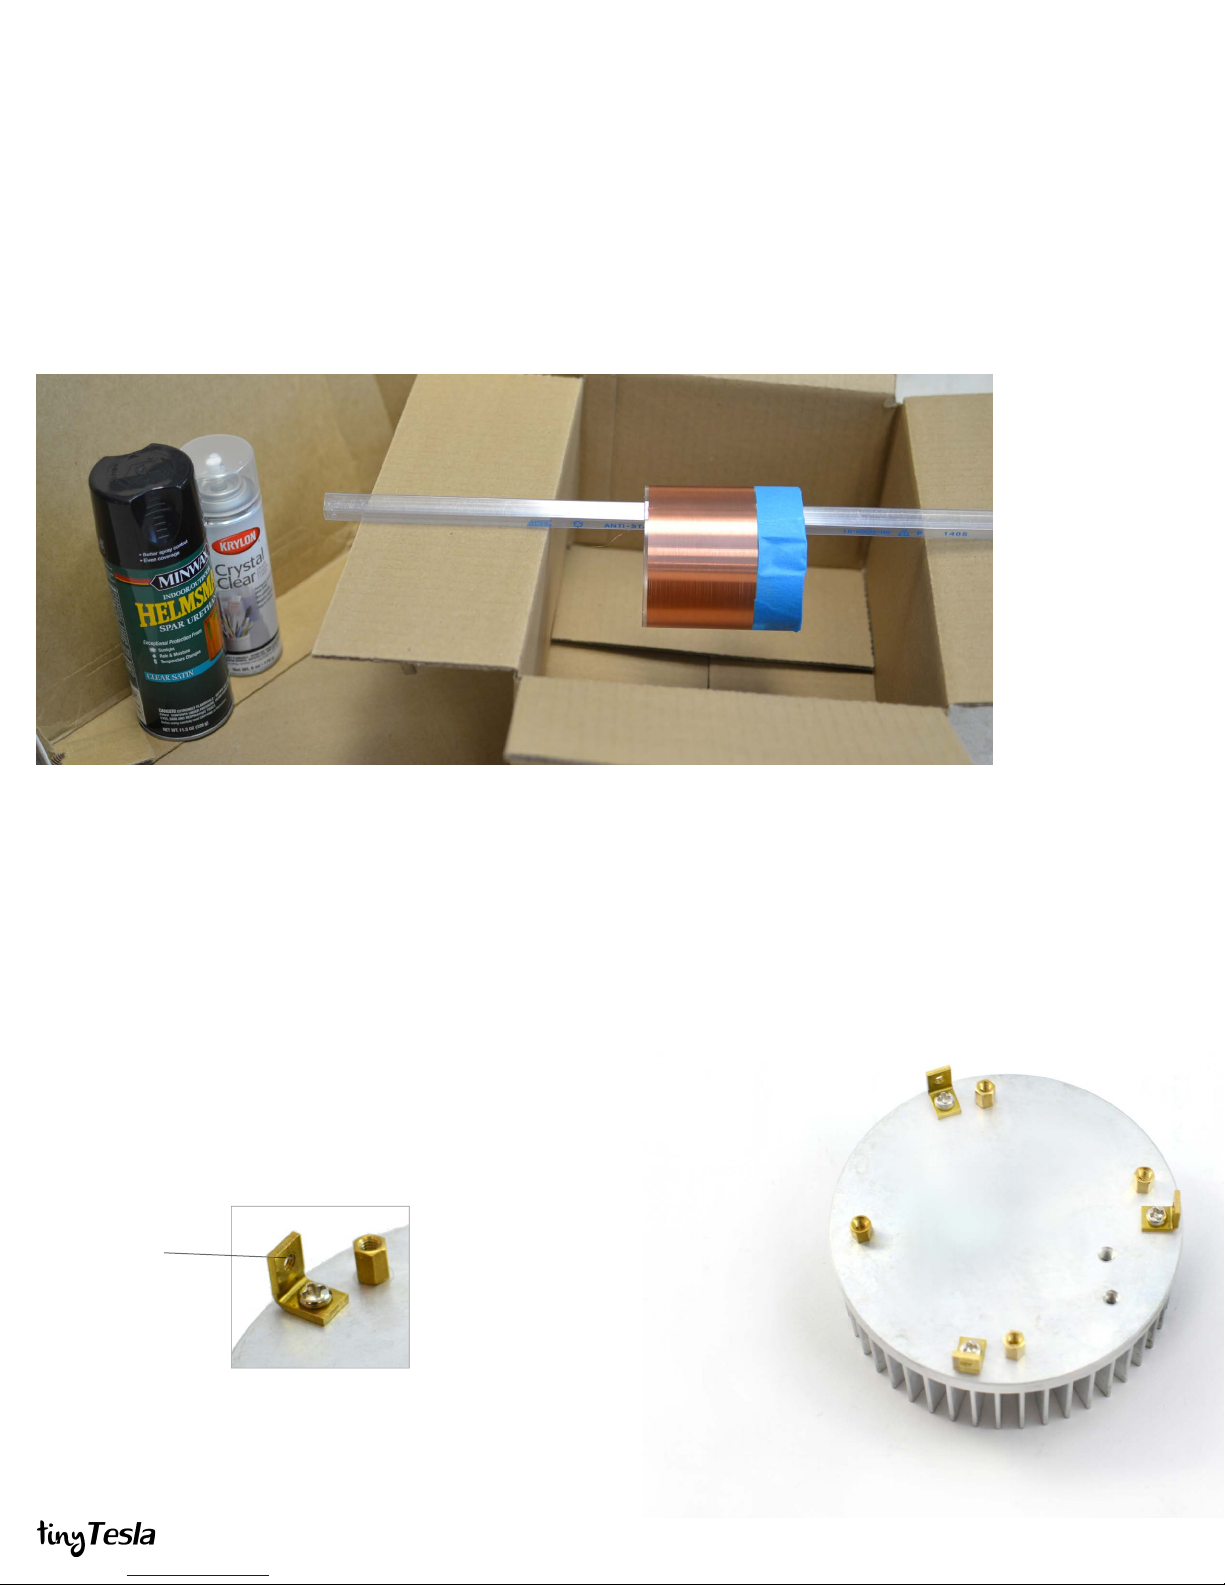
STEP 3: Varnish the Secondary
Your secondary coil needs a few thick insulating layers to keep it safe. A polyurethane paint-on or spray-on
varnish works great. Coat your coil in at least three layers of varnish. It’s better to start this process early to
allow enough time for the varnish to dry (typically one night per coat). Don’t skip this step! An unvarnished
secondary will arc over immediately, even at low power.
If you want a quick way to increase your insulating layer thickness, add some packing tape to your coil. Be very
careful to remove all the air bubbles under the tape! To increase the eectiveness of the tape, cut the edge at a
steep angle. The seam of the tape is the most likely place to have arcing, and cutting at a shallow angle
increases the seam length, increasing the distance the sparks have to jump.
STEP 4: Install hardware on the heat sink
We will take a brief interlude from soldering to attach some hardware on the heat sink.
Since the IGBTs are mounted on the underside of the board, once we install them we
can’t easily remove the circuit board to get access to the heat sink. To view a tutorial
showing exactly how to do this, visit http://onetesla.com/tutorials.
A. Install four 6mm standos into the holes near the edge of the heat sink.
B. Fasten the right-angle brackets to the heat sink using a 6mm M3 screw through
the unthreaded hole in the bracket. The threaded holes should be on the side
perpendicular to the surface of the heat sink!
Threaded hole
Need a diagram?
Go to Appendix B.
5User ManUal v1.6
Page 8
STEP 5: Install the Main Board’s
Logic Components
Step A: installation of
resistor R1.
We’re splitting up the main board assembly process into two steps so that you can
clearly see which components are related to the main board’s logic vs. its power. If
you wish, you can troubleshoot the main board’s logic after this step to ensure that
your construction is correct so far, but you can also install it all at once and
troubleshoot the whole system all together later. To view a tutorial showing exactly
how to do this, visit http://onetesla.com/tutorials.
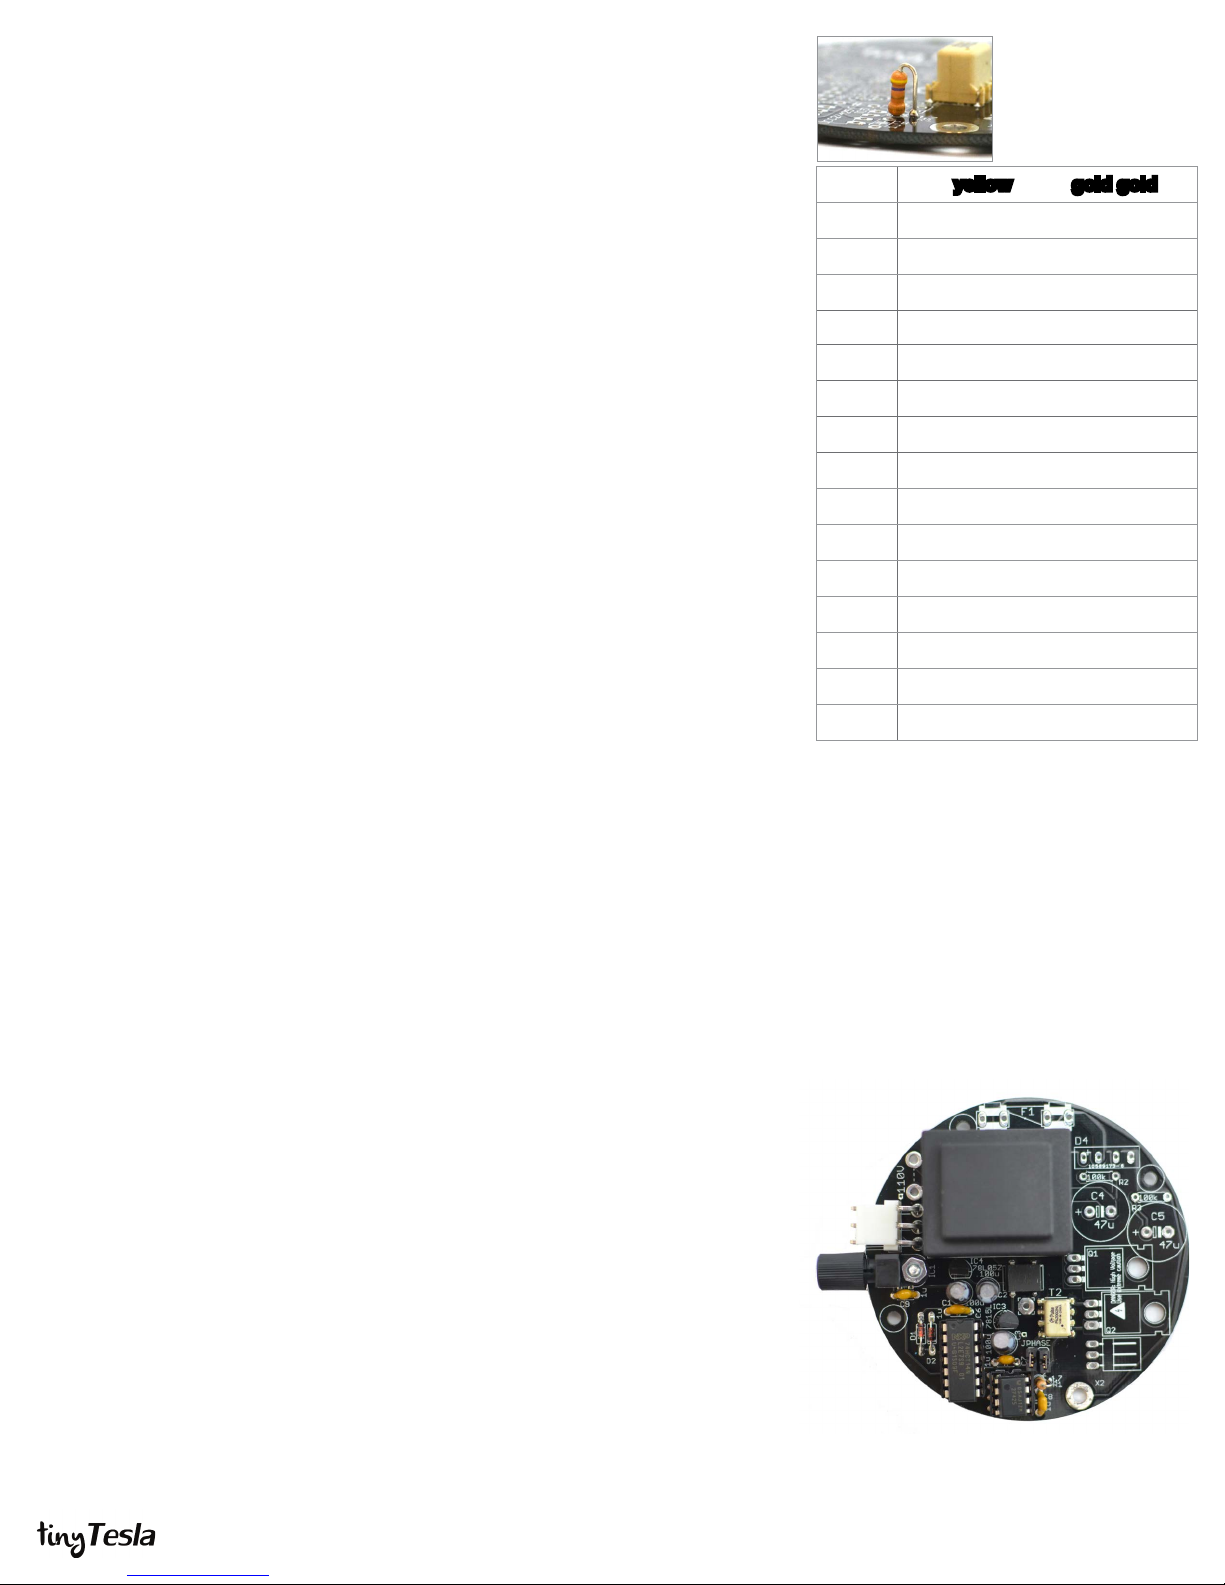
A. Install R1. Note that it stands on its end (see image on right).
B. Install C1—C3, 100uF electrolytic capacitors. You may need to straighten
the leads to have them t properly. Note the direction! There’s a white band
on the negative side, and positive is marked on the board.
C. Install capacitors C6—C9. They are all 1uF ceramic capacitors labeled 105
whose installation direction do not matter.
D. Install D1 and D2, the 1N4148 signal diodes. Note that they are directional,
and the band on the diode needs to match the band on the board.
E. Install D3, the logic-side bridge rectier.
F. Install sockets for IC2 and IC5. Match the notch on the socket to the notch
on the board. Remember, don’t solder the ICs directly to the board!
G. Insert the ICs into their respective sockets. Remember to match the spot
on the IC to the notch on the socket and the board!
H. Install IC3 and IC4, the 15V and 5V voltage regulators. Don’t confuse the
two! They look the same except for the part number.
R1 4.7Ω (yellow violet gold gold)
C1–C3
C6–C9
D1, D2
D3
IC2
IC3
IC4
IC5
T1
X1
100uF electrolytic capacitor
1uF ceramic capacitor (105)
1N4148 signal diode
Logic-side bridge rectier
14-pin socket
8-pin socket
Schmitt trigger inverter 74HCT14
LM7815 15V voltage regulator
LM7805 5V voltage regulator
Dual Gate Driver UCC27425PE4
Phase jumpers and 2-pin header
110V jumper
Optical receiver
Line transformer (110V or 220V)
3.96mm 3-pin header
I. Install the 2-pin headers labeled JPHASE on the board and slide on the
jumpers. The direction of the jumpers doesn’t matter for now.
J. Install the optical ber receiver. Be careful! This component is delicate.
Soldering this component at too high a temperature can damage it. We
recommend soldering at no higher than 400°C. Secure it with a 10mm bolt
and M3 nut before soldering it in.
K. Verify that T1, the line transformer, is rated for the appropriate voltage for
your country (110V or 220V). Then solder it in. Please note that the top
middle hole is a via that connects the top and the bottom sides of the
board, not a hole for a T1 pin.
L. Install X1, the AC power connector.
Optional Logic Troubleshooting
At this point, you can follow the troubleshooting procedure in step 15 to verify that
your work so far is correct. You should rst mount your board onto the heat sink.
If you’re condent in your soldering abilities, you can just continue and troubleshoot
later if necessary.
Why the pre-soldered component?
The pre-soldered part on your board is a surface
mount gate drive transformer (GDT). It’s tricky
to solder this component by hand with a regular
soldering iron so we did it for you using a heat gun.
Through-hole gate drive transformers are bulky, and
using this little surface-mount one was the only way
we could keep your driver board tiny!
At the end of the step, your board should look
like this.
6User ManUal v1.6
Page 9

STEP 6: Install the Main Board’s
Power Components
Before you begin this step, you should add another layer of varnish to
the secondary!
In this step, install all the power components except for the IGBTs, which have a special
mounting procedure. To view a tutorial showing exactly how to do this, visit
http://onetesla.com/tutorials.
A. Install R2 and R3. It’s very important that you install these resistors! They are
bleeder resistors for the bus capacitors which drain their charge when you
power o the unit. Failure to install these will result in capacitors that can’t
drain their stored energy, and a board which is unsafe to service.
B. Install C4 and C5, the bus capacitors. Note the direction! There’s a white band
on the negative side, and positive is marked on the board.
C. Install X2, the .1” 3-pin right-angle header for the primary and antenna.
D. Install D4, the 400V bridge rectier.
E. If you are using a 110V kit you will need to install the 110V jumper next to the
line transformer. Take the 3-inch piece of solid-core AWG 22 wire and cut it to
size. Strip the ends and solder it in. If you are using a 220V kit DO NOT install
this jumper.
F. Install F1, the fuse clips and fuse. Clip the fuse into the clips to help them stay
in place while soldering.
R2, R3 100kΩ (brown black yellow)
C4, C5
X2
D4
F1
47uF electrolytic capacitors
.1” right-angle header
400V bridge rectier
110V jumper
4A 250V fuse and clips
Step A
Step E
STEP 7: Install the IGBTs
The IGBTs have a special mounting procedure. They are mounted ush against
the heat sink and soldered to the top of the board, not the bottom like the rest of
the components. To view a tutorial showing exactly how to do this, visit
http://onetesla.com/tutorials.
A. Ensure that the surface of the heat sink is clean. If there is any grease or
grime, clean it away using rubbing alcohol.
B. Using the outline in Appendix B as a guide, place the sil-pad on the heat sink.
Place the IGBTs on the sil-pad and use nylon screws to hold them in place.
C. Using pliers or your ngers, carefully bend the IGBTs 90 degrees at the point
where the legs become thinner.
D. Place the board over the IGBTs and position it so that the leads pass through
the holes in the board. This should be easy if you have the IGBTs rotated at the
correct angle, but can be tricky if they are not properly aligned.
E. Screw down the board into the standos, so that it is mechanically secure.
You may need to force the leads to bend a little bit to get the board to align to
the standos. You want everything mechanically secure before soldering, so
that you don’t put stress on the soldered joints.
F. Double-check that that your IGBTs are not touching each other, and that they
are not touching the heat sink. Tighten the nylon screws if needed.
G. Solder in the IGBTs on the top of the board. You may nd it easier to remove
the IGBTs later if you leave the leads long. In the case of a problem, the IGBTs
are usually the rst part to fail, so if you stress your coil it’s likely that you will be
replacing them!
Step B Step C
Step D
The completed board
7User ManUal v1.6
Page 10

STEP 8: Wind the Primary
If you haven’t already, nish varnishing your secondary before you proceed.
The primary coil is 6 turns of wire that’s wound on top of the secondary turns, slightly
above the bottom of the secondary coil. We strongly recommend putting an additional
layer of electrical tape or kapton tape underneath the primary, on top of the secondary’s
varnish, to add to the resiliency of your coil.
A. Tape down the end of the primary to hold it in place. Wind 6 turns without
overlapping the wire.
B. Twist together the ends of the wire to hold the coil in place.
C. Tighten the twist with a pair of pliers to remove any slack in the windings.
If you coil the wire suciently tightly it will stay in place by itself. If you want it to be
slip-proof, use a small amount of hot glue or tape to hold it in place. Just remember that
if you need to add more varnish to your coil later, you will need to remove the primary!
STEP 9: Attach the Primary Connector
A. Cut the red and yellow wires of your primary connector so that they are about
half an inch long. Using wire strippers, remove about a quarter inch of
insulation from the end. Leave the middle wire long.
B. Cut about half an inch o the end of the primary wire to shorten it, and strip
about a quarter inch of insulation. When you are nished with mounting the
primary connector, it should reach just into the notch in the secondary tube to
the connector on the main board. Excess wire is more likely to be arced to. Be
careful not to strain the wire, however.
C. Solder the wires together.
D. Insulate the connection with some electrical tape.
Primary
Antenna
Primary
8User ManUal v1.6
Page 11

STEP 10: Assemble and Attach the Antenna
The antenna picks up the coil’s electric eld and provides
a feedback signal necessary for the Tesla coil’s control loop.
The antenna is connected to the coil through the same header
as the primary.
A. Peel the protective paper o of the acrylic pieces that
comprise the antenna base.
B. Assemble the base of the antenna. The parts should
press t together, but you can use a little bit of glue if
you want the base to be sturdier.
C. Use two 10mm screws and nuts to fasten the antenna
brass rod to the base. Strip the free end of the antenna
wire and wrap it around one of the screws. Tighten the
nut rmly to hold the rod and wire in place.
D. Connect the long middle wire of the primary connector
to the antenna’s brass rod in one of two ways: either
solder it directly to the brass rod, or clamp it between
the rod and a nut. Check with a multimeter to ensure
continuity between the wire and the brass rod.
STEP 11: Solder the Ring Terminals
A. Solder a large ring terminal to the loose wire at the top of the secondary (see
picture). Burn away the enamel using a ame from a lighter, or use some ne-
grit sandpaper. You may even be able to use the heat of your soldering iron to
burn through it. Be careful handling the delicate, hair-thin wire of the secondary!
Use a multimeter to verify that you have around 450Ω across the secondary.
Any more resistance indicates a poor connection that you need to re-solder.
B. Glue the small ring terminal over the nearest slot at the base of the secondary
(see picture). Later on, you will place a screw through the terminal to fasten it to
an angle bracket on the heat sink, in order to ground your secondary.
Step A.
Step B.
9User ManUal v1.6
Page 12

STEP 12: Assemble the End Cap
A. Build the end cap for the secondary according to the diagram. Don’t worry
if it’s not pretty—remember that with the toroid mounted, you don’t see the
end cap! DO NOT glue down the bolt in the cap. The bolt should be a little
loose because when you mount the toroid, the bolt will be pulled up against the
ring terminal, creating a secure connection.
Which glue do I use?
Hot glue is great because it’s sturdy enough to hold
the coil together, but if you make an error you can
still force apart the pieces. If you prefer your coil
more drop-proof, use super glue or epoxy. Note
that super glue clouds acrylic, so use it sparingly!
B. Glue the end cap in place on top of the secondary tube. Rotate your tube so
that the secondary wire is taut and does not sag into the tube! Sagging wire
acts like a breakout point inside the secondary and will cause internal arcing. If
you want to be extra safe, you can insulate your exposed bit of wire with some
hot glue.
C. Check for continuity between the bolt and the bottom ring terminal to verify that
the wire is still intact.
D. Thoroughly remove any stray strings of hot glue inside the tube. Any stray bits
inside the tube can result in internal arcing when you power up your coil
later.
Place a small amount of
glue between each layer
to hold the end cap
assembly together.
Broken wire?
If the wire breaks, simply peel o more wire from
the top of the coil. Use a razor blade to separate
out the top turn of wire.
Place a small amount of glue
on the rim to keep the cap
in place.
10User ManUal v1.6
10
Page 13

STEP 13: Mount the Secondary, Toroid
and Breakout Point
A. Place the secondary tube over the main board, orienting the notches
appropriately. Use M3 screws to mount the tube. Don’t over-tighten!
B. Plug in the primary coil connector.
Step A.
C. Mount the toroid onto the secondary tube and fasten it using an M6 nut.
D. Place the breakout point straight across the toroid. It should stick out about
3 inches. The breakout point should simply lay across the top, but if you want
to hold it in place you can use some aluminum tape.
Step C.
Step D.
11User ManUal v1.6
Page 14

STEP 14: Full-system troubleshooting
Do a Thorough Check
First do a visual inspection of your board. The vast majority of
problems are caused by faulty component installation, which can
be caught before you apply power to the coil. Thoroughly check
the following:
n Signal diodes (1N4148s) and bridge rectiers are
oriented correctly.
n Electrolytic capacitors are oriented correctly.
n 5V and 15V regulators are in their correct locations and
have not been swapped.
n Correct chips are in each socket, and chips are installed
in the proper direction.
n Soldering looks neat and clean.
Next, let’s do a multimeter check of the IGBTs. If something
doesn’t check out here, DO NOT power up the board. Something
is wrong with your IGBTs or their installation.
n Meter between pins 1 and 3 of each IGBT and verify that
you read a short.
n Conrm that with the + probe of your multimeter on the
middle pin of Q1 and the - probe of multimeter on the
middle pin of Q2, you read open.
n Meter between pins 1 and 3 of X1, the large 3-pin
connector. You should not read a dead short.
Finally, check a few important mechanical things:
n There are about 450 ohms between the toroid and the
ground prong of the power plug.
n The breakout point is mounted properly and is pointing in
a direction away from the antenna. You should never arc
to the antenna.
n The wire at the top of the secondary is taut and not
sagging into the secondary tube. Likewise, there are no
drips of glue or stray bits inside the secondary tube.
n The antenna and primary connector are plugged in. You’re
using the full length of the optical ber to distance
yourself and the interrupter from your Tesla coil.
n Your USB cable is short and/or coiled tightly to avoid
picking up noise. The control laptop is unplugged from
its charger.
You can now attempt to turn on the coil, as most failure modes
result in the coil doing nothing or underperforming, rather than
damaging the board. If you want to be more conservative, follow
the complete troubleshooting procedure in Step 15.
Before you follow the startup procedure, read through all of the
procedures and failure modes described in the next pages to
know what to expect!
Startup and Shutdown Procedure
A. Start with no cables connected to your tinyTesla coil, and AC power
cable UNPLUGGED.
B. First, conrm that your interrupter is working by connecting it to a laptop and
verifying that it responds normally by observing the output of the ber optic
transmitter. As you raise and lower the power, the output should become
brighter and dimmer accordingly. Set whatever computer program you’re
using to only slightly above its lowest power setting and pause output to
the interrupter.
C. Connect the ber to the coil and the interrupter, and space the interrupter
the full length of the ber from the coil.
D. FIRST plug the power cable into the coil, THEN plug it into AC power. Caution! The board is now energized.
Proceed with extreme caution. Note that the coil can be loud when it turns on. This procedure ensures that you’re
not handling the coil at the moment you power it up, in case it behaves unexpectedly. If the fuse blows or you notice
something else unusual happen, UNPLUG THE COIL IMMEDIATELY and proceed to the troubleshooting steps ahead.
E. Use your laptop to send a MIDI signal to the interrupter at low power. You should see and hear a small, clean-sounding spark
coming from the breakout point. If it looks OK, slowly increase the power while watching for any problems such as ashover
on the secondary, arcing to the antenna, arcing inside the coil, or any other strange behavior.
F. To stop operation, use your control software to stop sending MIDI signals to the interrupter. Always stop your coil using the
interrupter rather than cutting AC power!
G. WAIT 5 MINUTES AFTER TURNING OFF THE COIL TO ALLOW CAPACITORS TO DISCHARGE.
Every time you turn on the coil
Reference this startup procedure every time you
turn on the coil!
Every time you turn off the coil
To turn o the coil, FIRST cut the interrupter
signal rst, THEN cut AC power. Cutting o the
coil from AC power while the interrupter is still
sending a signal can cause indeterminate states
in the logic circuitry as the voltage rails sag, and
can blow your IGBT bridge!
12User ManUal v1.6
Page 15

Common Problems and Solutions
If it just works…
If nothing
happens…
Hooray! Good job following the directions. Share your success on
our forum, and if you take great pictures or video we’ll showcase
your build on our website and social media!
If you paid no attention to the direction of your primary
winding, 50% of the time, your coil will do nothing! The
phasing on the board needs to match the direction in which
your primary is wound. Simply rotate the phasing jumpers and
try again.
If switching the phasing doesn’t help, don’t panic! The majority of
issues are caused by poor soldering or an obvious mistake during
assembly. Check the following:
n Is your primary plugged in?
n Is your interrupter actually outputting a signal?
n Is the antenna positioned too far away?
n Have you tried both phasing directions?
n Is your coil plugged in and AC power working?
n Is the fuse installed?
If you don’t nd any obvious errors, continue to the
troubleshooting guide in step 15.
Coils do nothing half the time!
50% of the time, your board’s phasing will not
match the direction of your primary. Simply
rotate your phasing jumpers and try again.
Rotate the
phasing jumpers
90°
If you see an arc
down the coil...
If you hear an arc
but don’t see it...
Stop! Your driver is working (hooray!), but it’s outperforming your
secondary. If you run the coil for any longer when you see arcs
down the secondary, you’re going to degrade the wire’s enamel,
and in the worst case, burn through the ne wire of the secondary.
Fortunately there’s an easy solution, and that’s to add more
varnish. Add varnish until you think there’s enough, and then add
one more coat. There’s no such thing as too much varnish.
If you need to patch just one spot, you can use some hot glue,
electrical tape or kapton tape. Put packing tape on top of the
varnish to add extra insulation.
Stop! Do not turn up the power! Increasing power on a coil that’s
misbehaving never ends well. Always stop and x the problem
before turning it up.
Several things could be happening when there’s a weak output.
The coil could be arcing on the inside rather than from the breakout point, which is caused by stray drips of glue or sagging wire
on the inside of the secondary tube.
Problems with the logic or gate drive signal could be causing the
coil to perform very weakly. Check your 15V rail carefully using
the procedure in Step 15. Check that nothing is shorting on the
underside of the board.
DO NOT CONTINUE OPERATING A COIL
THAT’S ARCING OVER
Taking good care of your secondary is
essential to a long-lasting Tesla coil. As soon
as there is an arc on the secondary, the
insulation and wire enamel are compromised.
The problem will only get worse with time
unless you treat it right away. Stop operating
immediately and patch the burned spot with a
dab of hot glue, epoxy, varnish, or even tape.
It’s possible to get a completely arc-free
secondary that lasts a long time if you take
care of it properly.
13User ManUal v1.6
Page 16

If the spark sounds
hissy or crackly…
n Try moving the antenna around. Bringing it closer to the
coil often improves performance, but remember not to
bring it too close, or you will get arcing to it.
n Check your grounding. The top of the secondary to
the ground pin of the power cord should read ~600Ω.
If it reads signicantly higher you have a break
somewhere which you need to hunt down and x.
n Consistent poor performance despite hearing gate drive
buzz (see Step 15) can indicate an issue with gate drive
signals. Check your 15V rail carefully.
n You may have a bad solder joint which is picking up noise
and aecting your driver’s logic signals. Inspect your
soldering on both the interrupter and the driver board. It
never hurts to re-ow your joints with a good iron to x
potential cold joints that are near-impossible to see.
n Your USB cable may be poorly shielded and may be
picking up noise.
Keep in mind that a little bit of hissing or crackling is inherent to
the operation of the coil, and that audio quality will not be perfect.
If it makes a
loud bang upon
plugging into AC
power...
See, this is why we tell you to plug your AC cord into your coil
rst, then into an outlet! Fortunately this failure mode really isn’t
likely to occur if you inspected your board properly and did a
multimeter check of your IGBTs.
Probable causes of this failure mode include the following:
n IGBTs not properly isolated from the heat sink with
sil-pad. Or, you used a metal screw instead of a nylon
screw to fasten your IGBTs.
n You installed an electrolytic capacitor backwards,
resulting in the capacitor blowing.
n A catastrophic solder bridge caused a short that made
your fuse blow instantly.
n You plugged in your coil while the interrupter was
latched up at 100% duty cycle.
n You plugged in your coil without the interrupter’s cable
installed, resulting in continuous light entering the optical
receiver, latching up the coil.
Unplug your coil from AC power immediately, wait 5 minutes
for the capacitors to discharge, and then examine your board
carefully for errors. If you’ve made a catastrophic assembly
mistake you should probably get help from somebody with
more experience.
14User ManUal v1.6
Page 17

The fuse blows
during operation...
There are a few possible causes of spontaneous failure during
operation.
Interrupter latch-up happens when the microcontroller
crashes, leaving the transmitter outputting high. A momentary
large, loud spark from the coil and green ash from the fuse
blowing is likely to be the interrupter latching up to 100% duty
cycle rather than it’s typical <10% duty cycle. You can conrm the
interrupter latched up by observing a continuous light from the
optical transmitter. Next time you power up your coil, take care to
coil your USB cable and unplug your control laptop from its AC
charger.
IGBT overload can occur if you draw too much current from the
coil. If you run the coil at full power and draw an arc from it using
a grounded metal object for example, you may stress the IGBTs
too much.
Other causes of failure during operation include overloading the
coil by drawing too much current from it (particularly if you’re
drawing an arc), or running it for too long, causing overheating.
You may also cause a failure if you operate the coil at full power
while there’s a serious issue with your coil, such as if the spark is
very crackly or weak.
How to Check your IGBTs
Use a multimeter to check that your IGBTs
behave like a diode between pins 2 and 3. On
a resistance measurement setting, the pins
should read open in one direction and a near
short in the other direction. Some multimeters
have a diode test feature which shows you
the diode voltage drop, which is a better test.
A complete open or short in both directions
indicates dead IGBTs.
Help, I don’t see my problem here!
We can’t predict every single failure mode that
may happen. If you encounter a problem that
isn’t covered here, take a look at our online
help forum at onetesla.com/forum. Someone
else may have had the same problem and
gured out a solution.
Please post on the forum rather than emailing
us for support, so that everyone can learn from
how you resolved your issue!
Unplug your coil from AC power and wait 5 minutes for the
capacitors to discharge. Check your IGBTs to check whether they
have blown. Unplug and re-plug-in your interrupter to verify it
functions normally when you restart your control software.
If your fuse blows, DO NOT simply replace the fuse and try again.
Meter your IGBTs.
15User ManUal v1.6
Page 18

STEP 15: In-Depth Troubleshooting
If your coil is under-performing or not turning on and you want to do some detailed
troubleshooting, read on. You can also perform these steps if you want to verify that your
coil is constructed properly before powering it up fully, such as when you’re waiting for
your secondary’s varnish to dry.
A. Check for GDT Buzz
Verifying whether you can hear the gate drive transformer vibrate at the interrupter
frequency will help you narrow down your problem to the board’s logic vs. the board’s
power components or the resonator. To view a tutorial showing exactly how to do this,
visit http://onetesla.com/tutorials.
i. REMOVE THE FUSE and cover the left fuse holder with electrical tape.
Removing the fuse de-energizes the power side of the board. This fuse clip
becomes electrically hot when you plug in the board to AC power, so you want
to cover it with tape to prevent yourself from accidentally touching it.
ii. Start up the coil following the startup and shutdown procedure in step 15.
Verify correct operation of your interrupter, then connect your interrupter to the
coil, then connect your AC adapter to your coil, then plug in the AC adapter.
iii. Play a tone or song using the interrupter and listen closely to the board. You
should hear the tone playing faintly from the GDT. Note that it’s a faint sound,
so you need to be in a quiet environment!
If the GDT is buzzing then your board’s logic half is most likely working. The problem lies
in the power components, the antenna connection, or the resonator.
Remove the Fuse to Separate Logic and Power
When debugging, you want to separate your
board’s logic from its power components. Always
remove the fuse and cover the fuse clips in
electrical tape!
Every problem has a cause!
Remember that every problem has a cause.
Components are very rarely dead upon arrival.
Blindly replacing chips can lead to a whole lot more
dead chips if you don’t nd the root cause!
B. Check for Warm Spots
You can learn a lot without even pulling out your multimeter from checking whether
components on the board get hot.
Once your board is unplugged and you have waited for 5 minutes to allow the bus
capacitors to discharge, check whether the ICs or regulators are hot. If an IC is hot, it
could be damaged. If the 5V regulator is hot, then you know that a component that is
powered o of 5V has failed short, or there’s a solder bridge that’s causing a short along
the 5V rail. The same thing goes for the 15V regulator. If you remove the suspected IC
and the regulator is still hot, you know that either the regulator is damaged or you have a
solder joint. It’s possible that the IC was damaged as well.
If an electrolytic capacitor is hot, it’s installed backwards. Don’t touch the tops of the bus
capacitors (47 uF) if their tops are metal! If you didn’t install your 100kΩ bleeder resistors
properly or didn’t wait long enough, they may still be energized!
C. Troubleshooting with a Multimeter
Disassemble the coil down to just a driver board mounted on a heatsink. REMOVE THE
FUSE and cover the left fuse holder with electrical tape. Removing the fuse de-energizes
the power side of the board. This fuse clip becomes electrically hot when you plug in the
What’s a “voltage rail?”
The 5V and 15V rails are all the points on the circuit
board that should be at 5V and 15V, respectively.
They’re commonly called “rails” because these
points are connected to each other, they all carry
the same voltage and they all supply power to
components that need 5V or 15V.
16User ManUal v1.6
Page 19

board to AC power, so you want to cover it with tape to prevent yourself from
accidentally touching it.
You will need to have your board plugged in. Use extreme caution when working on an
energized board! Wear safety glasses.
Using a multimeter, you will measure the logic rails to conrm that they are working. For
the next few tests, ground the black probe of your multimeter to the (-) pin of the low
voltage rectier (D3) and use the red probe to measure the pins in question.
n Rectied input, ~22V: (+) pin of D3
n 5V rail: Pin 14 of the 74HCT14
n 15V rail: Pin 8 of UCC27425
If there is no AC input, D3 is suspect and may need replacement. If AC input is low, there
is probably something wrong downstream—chances are one or both of the logic rails will
also be low or absent.
If either logic rail is incorrect, remove the ICs and check again. If this results in all
rails working, you either have a dead IC, or a damaged regulator that is incapable of
supplying current. You should replace the IC of which removal caused the rails to r
eappear, or, if you want to be safe, all the ICs.
If removing the ICs doesn’t restore the rails, check for solder bridges on the board. If
there are no solder bridges, try replacing the corresponding voltage regulator.
If the rails are all present but the coil doesn’t buzz (and your soldering checks out), you
probably have a damaged IC. If you have an oscilloscope, you can use the next section
to determine which ICs need to be replaced. Otherwise, we recommend replacing both
ICs for simplicity’s sake. There is also a chance that the optical receiver is damaged.
C. Debugging with an oscilloscope, function generator, and power supply
Start by soldering a (preferably black, to indicate ground) wire to the (-) pin of D3. This
will act as your ground for all subsequent tests. Solder a wire of a dierent color to the
(+) pin of D3. These wires act as your power inputs for testing. Set your power supply to
~18V and connect the supply to the wires you just soldered in.
As before, remove the fuse and cover the left fuse clip in electrical tape. Plug in the
board. Set the interrupter for Fixed mode, max frequency, and max power, and connect it
to the coil.
Test for startup pulses
The signal pathway is:
Antenna pin 13 of IC2 pin 12 of IC2 pin 11 of IC2 pin 10 of IC2 pins 2 and 4 of IC5
and
Center pin of IC1 pins 1 and 6 of IC5
Download the Schematics
Schematics and pictures of the board are available
at onetesla.com/downloads
The outputs of the gate drive IC (pins 5 and 7) are the AND’ed results of pin 1 and pins
2 and 4, respectively—this should be a 15V signal as shown in the images below. If it is,
you can proceed to the next step. Otherwise check the following:
n If there is nothing on pin 6 of IC5, check your soldering for shorts and/or replace
the ber receiver.
n Check the signals on the gate driver. Pin 6 should be 15V, and the inputs and
outputs should match the gures below. If there is input and voltage but no
17User ManUal v1.6
Page 20

output, replace the IC.
n Check pin 14 of the 74HCT14 ICs for power. If none is present refer to the steps
in the previous section for absent 5V rail.
n Pins 11 and 13 of IC1 are the inputs of inverter gates, and pins 10 and 12 are
their outputs, respectively. If the outputs are not correct, check all
components downstream from it for soldering errors and other faults. In
particular, there should be a signal on the gate driver inputs if the gate driver is
removed. You can use this to check the state of the upstream electronics.
n If the gate driver’s output voltage measure between pins 1 and 3 of each IGBT.
The waveform should be as below. If it is not, make sure you soldered T2
properly and didn’t forget R1 or C8. If that is the case you have dead IGBT
gates and you should replace Q1 and Q2.
Gate driver pin 1 Gate driver pin 2, 4 IGBT Gate *oscillation*
Gate driver output
Once you have proper startup pulses at the gates of Q1 and Q2, connect your signal
generator to ground and the top of the antenna, and set it for a 0-5V 300KHz 50% duty
cycle square wave. You should hear the buzzing stop. Scoping the gates of the
transistors should give you the following waveform:
IGBT Gate
In the unlikely case that doesn’t happen, check your 15V rail—if it is not 15V you have
a damaged regulator incapable of outputting current. In addition, check D1 and D2 for
orientation, and IC2 for proper installation.
18User ManUal v1.6
Page 21

STEP 16: Operation
Rules
The Tesla coil is a dangerous high voltage device. Used properly, it is an
educational and fun electronics project that displays beautiful electrical
arcs and lets you play with a unique form of sound creation. Used
improperly, it can lead to serious injury. Always follow the directions!
Treat your energized Tesla coil the same way as you would treat an open ame. You
wouldn’t let burning stove unattended, nor let a child access matches and kerosene,
would you? Don’t leave your Tesla coil unattended or in a situation where a child or
unqualied operator can access it.
n Keep away from the coil while operating! Keep yourself, other people, and
sensitive electronics a minimum distance of the length of the ber optic cable
apart from the Tesla coil. Persons with pacemakers or other medical implants
should not be in the area.
n Never touch the output of the Tesla coil! The sparks will burn you if you come in
contact with them.
n Always follow the startup and shutdown procedures when turning on and o
your Tesla coil detailed in Step 15.
Tips
The biggest issue to watch for is ashover on the secondary, or any arcing in places
you don’t want it. Upon seeing unwanted arcing, stop operating immediately and x the
problem, whether it’s moving a stray object or patching the secondary with a dab of glue.
Your control laptop should be running o of its battery, and be unplugged from
its charger.
The best environment in which to run a Tesla coil is on a clear table away from other
objects that the coil could potentially arc to. Unlike DRSSTCs, tinyTesla does not have
stringent tuning requirements and is not highly sensitive to its environment.
You should generally keep your Tesla coil away from other electronics, particularly
sensitive devices like unshielded computers.
It’s not a good idea to draw arcs from the coil using metal objects or a uorescent gas
tube, particularly at high power. Arcs draw a lot of current and can stress the IGBTs. A
uorescent tube put next to the Tesla coil will light up!
To avoid failures due to overheating, don’t run your coil for more than a few minutes at a
time. If doing an extended run, use your coil on half power or less. It will prolong its run
time and spare you from a headache!
To make your life a little easier, use a power strip with an on/o switch rather than using
the cord to plug in and unplug your Tesla coil.
19User ManUal v1.6
Page 22

APPENDIX A: GUIDE TO 1T PANEL
1T Panel is a Windows program that sends MIDI commands, and is designed for ease of
controlling any oneTesla interrupter, particularly tinyTesla’s interrupter which is controlled
over USB.
Download 1TPanel at onetesla.com/downloads.
1T Panel Features:
n Fixed frequency (single-tone) and MIDI modes of control
n Volume control
n Pitch control in xed frequency mode
n MIDI song playlist
n MIDI analysis tools
Overview
Non-Windows Users
If you’re a Mac or Linux user unable to install
1TPanel, you can control your Tesla coil interrupter
with any MIDI playback software that supports
output to USB devices. Ensure that the software
lets you send Master Volume commands in order to
set the overall coil power level. The tinyTesla
interrupter accepts commands on MIDI channel 0.
Controls
When you open the software, the status bar at the bottom of the window should show
Found oneTesla USB controller on port X. If no controller is plugged in, or if your
controller isn’t working, it should show Error: no controller found. Furthermore, if your
controller is malfunctioning, chances are Windows will throw an error when it tries to
initialize the device.
Menus
{
Playback Controls
{
Always check your software for correct behavior
by looking into the output of the optical transmitter
before connecting your interrupter to the coil! This
is especially important if using software other than
1T Panel.
Fixed Mode Selector
Volume Control
Status Bar
Song Queue
20User ManUal v1.6
Page 23

Volume
Drag the Volume slider up or down to change the master volume for all modes. If you’re
starting your coil for the rst time or doing a test after changes, you should drag it all the
way down before pressing play. Always start on low power and gradually increase the
power, watching your coil for problems.
Fixed Mode
If you click Fixed Mode the following dialog pops up. Dragging the sliders changes the frequency and power (note that
adjusting xed mode power does not adjust master volume). In
xed mode, the status bar displays the frequency and the duty
cycle. Duty cycle is given in percent.
Playing a Song
To open a song, use the File menu. Open replaces the entire
queue with a single song. Add adds a song to the end of
the queue.
Click a song in the queue and click the Play arrow to start it. The
slider is an indicator and does not seek.
21User ManUal v1.6
Page 24

The Tools Menu
The Tools menu provides a few useful features to analyze the selected song.
Spectrum
Spectrum provides a chart of note count versus MIDI note number. This is useful for
determining how a song will make the coil perform. The coil produces longer sparks
with less power draw when playing high notes. Songs in a higher register also tend to
sound better.
Nyan Cat Flight of the Bumblebee Satisfaction
View Notes
View Notes shows a plot of notes playing versus time:
Nyan Cat Flight of the Bumblebee Satisfaction
22User ManUal v1.6
Page 25

Duty Cycles
Duty Cycles plots duty cycle versus time. This is useful for determining how much power
the coil will draw while playing a given song. The more white in the dialog, the hotter the
coil will run.
Nyan Cat Flight of the Bumblebee Satisfaction
Options
Finally, Options contains a few useful playback utilities.
Play notes on channel lets you change the MIDI channel that is played back. This is
useful if the primary track in your le is not on channel zero.
Shift low notes up adds an octave to low notes. Setting a limit of 127 shifts the entire
song up an octave. Limits other than 127 will possibly cause the song to sound o-key,
but may be useful for coils which cannot tolerate low notes (fortunately not ours!).
Finally, Custom velocity curve allows you to load a lookup table (LUT) for actual
velocity versus le velocity. The software expects this as a space or tab-delimited text le
containing 128 numbers between 0 and 127 (127 being 100% power), corresponding to
the playback duty cycles for MIDI velocity 0 to 127. This is useful for applications such as
linearizing the output of the coil.
Need help?
Go to the sub-forum on 1T Panel at onetesla.com/forum.
23User ManUal v1.6
Page 26

APPENDIX B: DIAGRAMS
Heat sink outline. To use as a template when building your kit, be sure
to print this at 100% (do not shrink/Fit to Page).
tinyTesla interrupter
tinyTesla PCB
APPENDIX C: FURTHER RESOURCES
Schematics and Board Images
Download schematics and board layout images at onetesla.com/downloads.
Part Data Sheets
Don’t be afraid to look at the documentation of individual parts if you want to understand
more about how they work. Read the descriptions in the data sheets and take a look at
the part pinouts, especially if you are doing detailed troubleshooting on your driver.
Hex Schmitt-Trigger Inverter 7414: http://www.ti.com/lit/ds/symlink/sn5414.pdf
Dual 4-A High Speed Low-Side MOSFET Driver UCC27425PE4:
http://www.ti.com/lit/ds/symlink/ucc27424.pdf
IRGB4620DPBF: http://www.irf.com/product-info/datasheets/data/irgs4620dpbf.pdf
oneTesla Resources
As you’ve probably already noticed, replacement parts are available on our website
onetesla.com, and help is available at onetesla.com/forum.
24User ManUal v1.6
 Loading...