

Page 1

ColorOS 12 User Manual
Welcome to ColorOS 12
This user manual provides you with everything you need to know about ColorOS 12.
ColorOS 12 uses smart technologies to deliver an easy and smooth experience. A new
streamlined design makes every scenario simple while ensuring your security.
(Features vary slightly depending on the model and country. Please refer to the actual features
of your device.)
Get started
Set up your SIM cards
You can insert two SIM cards into your OPPO phone if it supports dual SIM dual standby
(DSDS).
You can set the default number to be used for making calls or choose a number when making
a call. Similarly, you can choose which SIM card is to be used for mobile data.
Page 2

Use the secondary data SIM for mobile data during calls
If you use the primary SIM card for Internet access, this feature lets you use your secondary
SIM card's data temporarily while you are on a VoLTE call using your secondary SIM card.
This ensures an uninterrupted network connection during the call. When the call ends, it will
switch back to the primary SIM card.
Path: Settings - Mobile network - Advanced settings - Use mobile data during calls.
Page 3

Manage mobile data
Allow your apps to use Wi-Fi, mobile data, or both for Internet access, or do not allow apps to
connect to a network. You can also check the total mobile data usage of your system and apps.
Path: Settings - Mobile network - Data usage - Network access.
Quickly connect to a Wi-Fi network
Set up Wi-Fi network connections
• Connect to a Wi-Fi network without a password:
Simply tap the Wi-Fi network.
• Connect to a Wi-Fi network with a password:
Tap the Wi-Fi network and enter the password.
• Connect to a Wi-Fi network with authentication:
Tap the Wi-Fi network and sign in or complete the authentication steps.
• Add a network:
If you do not find the network you want to connect to in the network list, tap "Add network"
and enter the network name and password.
Once your device successfully connects to a Wi-Fi network, it will automatically connect to the
Wi-Fi network whenever the network is available, without needing you to enter the password
again. If you do not want to connect to a Wi-Fi network automatically, tap the icon to the right
of the Wi-Fi network and remove it. Check and manage saved networks in "Advanced settings".
Page 4

Share a Wi-Fi password
To share a Wi-Fi account and password with another phone, open the Wi-Fi details page and
tap "Scan QR code" to display a QR code. On the other phone, go to the "Wi-Fi" page and tap
the button in the upper right corner to scan the QR code. The phone will automatically connect
to the Wi-Fi network.
Use Wi-Fi Assistant
Use Wi-Fi Assistant when your Wi-Fi signal is unstable.
Turn on "Auto connect to the best Wi-Fi". Your phone will monitor the quality of the Wi-Fi
networks and automatically connect to the best network.
You can also turn on "Auto switch to mobile network". When all current Wi-Fi networks are
slow and your mobile data is enabled, your phone will automatically switch to the mobile
network.
Path: Settings - Wi-Fi - Wi-Fi Assistant - Auto connect to the best Wi-Fi.
Page 5

Use dual channel acceleration
Dual channel acceleration uses both mobile data and Wi-Fi for smoother and faster Internet
access.
Apps that support dual channel acceleration are displayed on the page.
Path: Settings - Wi-Fi - Wi-Fi Assistant - Dual channel acceleration.
Use dual Wi-Fi acceleration
Dual Wi-Fi acceleration allows your phone to switch between two Wi-Fi channels seamlessly
for faster Internet access.
Path: Settings - Wi-Fi - Wi-Fi Assistant - Dual Wi-Fi acceleration.
Note:
There are two Wi-Fi hotspots: a 2.4 GHz hotspot and a 5 GHz hotspot, which can send and
receive data independently without interfering with each other.
The two hotspots can have the same or different names. They can share the same router or
connect to different routers.
Passpoint Wi-Fi Direct
ColorOS comes preinstalled with a Passpoint certificate, which allows direct connections with
hundreds of branded Wi-Fi networks. Discovering and connecting to networks are automatic
and do not require a password. Wi-Fi encryption and two-way authentication between your
phone and the server also ensure connection security and prevent information leakage.
Path: Settings - Wi-Fi - Advanced settings - Passpoint.
Page 6

Connection & sharing
Tethering
There are three tethering methods:
• Personal hotspot
Go to "Settings - Connection & sharing - Personal hotspot", and turn on "Personal hotspot".
Nearby devices can then discover your personal hotspot. Note: Sharing a personal hotspot may
consume more data and battery. Your personal hotspot will be turned off automatically when
it is not connected to any device for 10 minutes.
Tap "Personal hotspot" to set a name and password to improve security.
In "Connection management", you can block devices, set the maximum number of connections,
and limit the mobile data usage.
• USB tethering
Connect your phone to a PC with a data cable and go to "Settings - Connection & sharing".
Turn on "USB tethering". The PC will automatically identify and use your phone's mobile data.
• Bluetooth tethering
You can share your network with other devices via Bluetooth.
For example, to share your OPPO Reno's network connection with an "OPPO" phone, pair the
devices via Bluetooth.
Turn on Bluetooth in "Settings" and pair with the target device.
Then go to "Settings - Connection & sharing" and turn on "Bluetooth tethering".
On the "OPPO" phone, open the "Bluetooth" page and tap the paired device name. The "OPPO"
phone can then use the OPPO Reno's network connection.
Page 7

To stop sharing, go to "Settings - Connection & sharing" and turn off "Bluetooth tethering".
Alternatively, go to "Settings - Bluetooth", tap the paired device, and turn off "Internet Access".
NFC
Near-field communication (NFC) enables contactless exchange of data over short distances.
Go to "Settings - Connection & sharing - NFC" and turn on "NFC".
You can then use contactless payment and Android Beam to pay or transfer data.
Wireless transmission
• Screencast
Go to "Settings - Connection & sharing" and turn on "Screencast".
You can then display your phone's content on a large screen. Make sure your phone and the
large screen device are connected to the same network or the wireless display feature is enabled
on the large screen device.
• Screen sharing
Go to "Settings - Connection & sharing - Screen sharing".
• Printing
Go to "Settings - Connection & sharing - Print".
Choose a printing service in the pop-up window, for example, printing documents, images,
emails, or web pages on your phone.
VPN
A virtual private network (VPN) creates a private network over a public network. It allows you
to access intranet resources easily, securely, and remotely over the Internet, whether you are
away on a business trip or working at home.
Page 8

Set a VPN
To add a VPN, go to "Settings - Connection & sharing - VPN", tap "+", and enter information
such as the VPN name, type, and server address.
Easily wake up your phone
Multiple methods are available for you to wake up your phone.
Press the power button
Simply press the power button to wake up your phone.
Raise to wake
With "Raise to wake" turned on, the screen will turn on automatically when you pick up your
phone.
Path: Settings - System settings - Gestures & motions - Raise to wake.
Double-tap to wake or turn off screen
You can double-tap the screen to turn it on or off when "Double-tap to wake or turn off screen"
is turned on.
Path: Settings - System settings - Gestures & motions - Screen-off gestures - Double-tap to
wake or turn off screen.
Page 9

Quickly unlock your phone
For security purposes, ColorOS provides multiple phone unlock methods such as password
unlock, fingerprint unlock, and face unlock. You can enable one or more methods to suit your
needs in different scenarios.
Password unlock
You can use a pattern, 4 to 16 digits, or 4 to 16 digits and letters as your lock screen password.
When face unlock is disabled, wake up your phone, swipe up on the lock screen, and enter your
password to unlock it.
Path: Settings - Safety & emergency - Lock screen password.
If you forgot your password, please contact an OPPO after-sales service center for help.
Fingerprint unlock
You can unlock your phone quickly with your fingerprint. You can enroll up to five fingerprints
as prompted. To unlock your phone, wake it up and press the fingerprint sensor.
Path: Go to "Settings - Safety & emergency - Fingerprint", enter your lock screen password,
and enroll one or more fingerprints. You can use an enrolled fingerprint for phone unlock, app
lock, Private Safe, app installation, and SMS payment verification.
Face unlock
Face recognition lets you unlock your phone even more easily and faster.
Path: Settings - Safety & emergency - Face.
* For accurate face recognition, keep the phone 20–50 cm away from your face. Do not enroll
your face in an environment that is too bright or dark.
Omoji, your virtual you
Omoji is a new virtual image feature of ColorOS 12. It automatically recognizes facial features
and expressions and provides numerous fashion accessories and emoji icons, so that you can
create a unique virtual you.
Scope of application: This feature will be updated along with ColorOS 12. Further details will
be posted in the OPPO Community.
Create and edit an Omoji
Create your Omoji just how you like it. Go to the "Edit Omoji" page, and choose your skin,
head, hair, eyebrows, eyes, nose, mouth, ears, hat, and glasses. The colors can be adjusted. You
can create multiple Omojis for different moods and situations.
Path: Settings - OPPO account - Omoji.
Page 10

Omoji camera
After creating an Omoji, tap "Use Omoji", and choose "Omoji camera" to enter Omoji camera
mode.
Point your phone's camera at your face, make different expressions, and preview the
corresponding real-time Omoji. Choose a background color and tap the shutter button. The
Omoji will be saved to Photos. You can also tap and hold the shutter button to record a video
of up to 30 seconds in length.
Page 11

Use an Omoji as your OPPO account's profile picture and cover
Tap "Use Omoji" and choose "Set as profile photo" or "Set as profile cover" to enter Omoji
camera mode. Take an Omoji photo, which will be automatically saved and used as your OPPO
account's profile picture or cover.
Use an Omoji as your Always-On Display wallpaper
You can use an Omoji as your Always-On Display wallpaper.
Path: Settings - Personalizations - Always-On Display - Personalized - Omoji.
Infinite Always-On Display, your one-of-a-kind screen
ColorOS offers a wide range of Always-On Display styles such as text-only signatures, images,
analog clocks, Omojis, and art albums. You can also draw your own personalized Always-On
Display patterns, or turn a photo of your parent, child, or friend into a portrait silhouette and
use it as your Always-On Display wallpaper.
Path: Settings - Personalizations - Always-On Display.
Scope of application: Omoji and art albums will be updated along with ColorOS 12. Further
details will be posted in the OPPO Community.
Page 12

Draw a pattern
A variety of drawing styles, effects, and patterns are available for you to draw your desired
Always-On Display pattern.
Portrait silhouette
Page 13

The system can turn a color portrait into an exclusive portrait silhouette. You can use a portrait
silhouette of your favorite person as your Always-On Display wallpaper.
Path: Settings - Personalizations - Always-On Display - Personalized - Portrait silhouette.
Personalized signature
You can display your favorite motto on your Always-On Display and edit the text, color, font
size, and layout as you like.
Custom image
In addition to text, you can use a photo of your loved one, family, pet, or favorite celebrity as
your Always-On Display wallpaper, so that you can see them every time you glance at your
phone. You can add text below the image and adjust the text color, size, and alignment.
Personalize your icons
You can choose to use material style icons, pebble style icons, custom ART+ icons, or a thirdparty icon package, and resize the icons as you like. You can also resize the text underneath the
icons or even hide the text to make your home screen simpler. Are you ready to create your
own home screen style? Start with the icons!
Path: Tap and hold a blank space on the home screen (or zoom in on the home screen with two
fingers) and tap an icon.
Page 14

The system is compatible with third-party icon packages. After you install a third-party icon
package, the icon style will be displayed to the right of the default style.
Path: Tap and hold a blank space on the home screen (or zoom in on the home screen with two
fingers) and tap an icon.
Organize your home screen with one tap
In ColorOS, you can easily organize your home screen by swiping down or up, without needing
to drag icons one by one.
Path: Tap and hold a blank space on the home screen to enter edit mode, and swipe up (or
down). All icons on the home screen will be automatically moved to the top (or bottom) of the
screen.
Page 15

Manage folders
Dismiss or merge folders efficiently with just one tap.
To dismiss a folder on the home screen, tap and hold it and tap "Remove folder". To merge two
folders, simply drag one folder into the other.
Page 16

Real-time icon layout preview
In home screen edit mode, you can set and preview in real time the home screen layout and
icon style.
Path: Tap and hold a blank space on the home screen and tap "Layout".
You can also preview the home screen wallpaper and flip page effects in real time in Settings.
Sort apps
In ColorOS Drawer mode, apps can be sorted by name, installation time, and usage frequency,
batch uninstalled, and batch added to the home screen.
To set Drawer mode, tap and hold a blank space on the home screen and tap "More - Home
screen mode - Drawer mode".
Path: Swipe up on the home screen, tap "Manage - Sort", and choose "Install time" (or "Most
used").
Page 17

Set your preferred sound mode
ColorOS offers more user-friendly sound adjustment options for more scenarios. You won't get
disturbed by notifications during meetings, and music can now be adjusted separately.
Press the volume buttons to adjust the volume
Press a volume button. A volume bar will be displayed on the left of the screen. Drag the slider
to increase or decrease the volume.
To change the default adjusted volume type, go to "Settings - Sound & vibration - Advanced
settings - Volume button function" and choose "Media volume" or "Ringtone volume".
Tap under the volume bar to adjust the volume separately for media, ringtones, and alarms.
For example, before going to bed, you can turn off media and ringtones, turn on an alarm, and
set an appropriate alarm volume to have a comfortable night's sleep.
Page 18

Ask Breeno Assistant to adjust the volume
You can ask Breeno Assistant to change the volume. Just say "Breeno, increase the volume" or
"Breeno, decrease the volume."
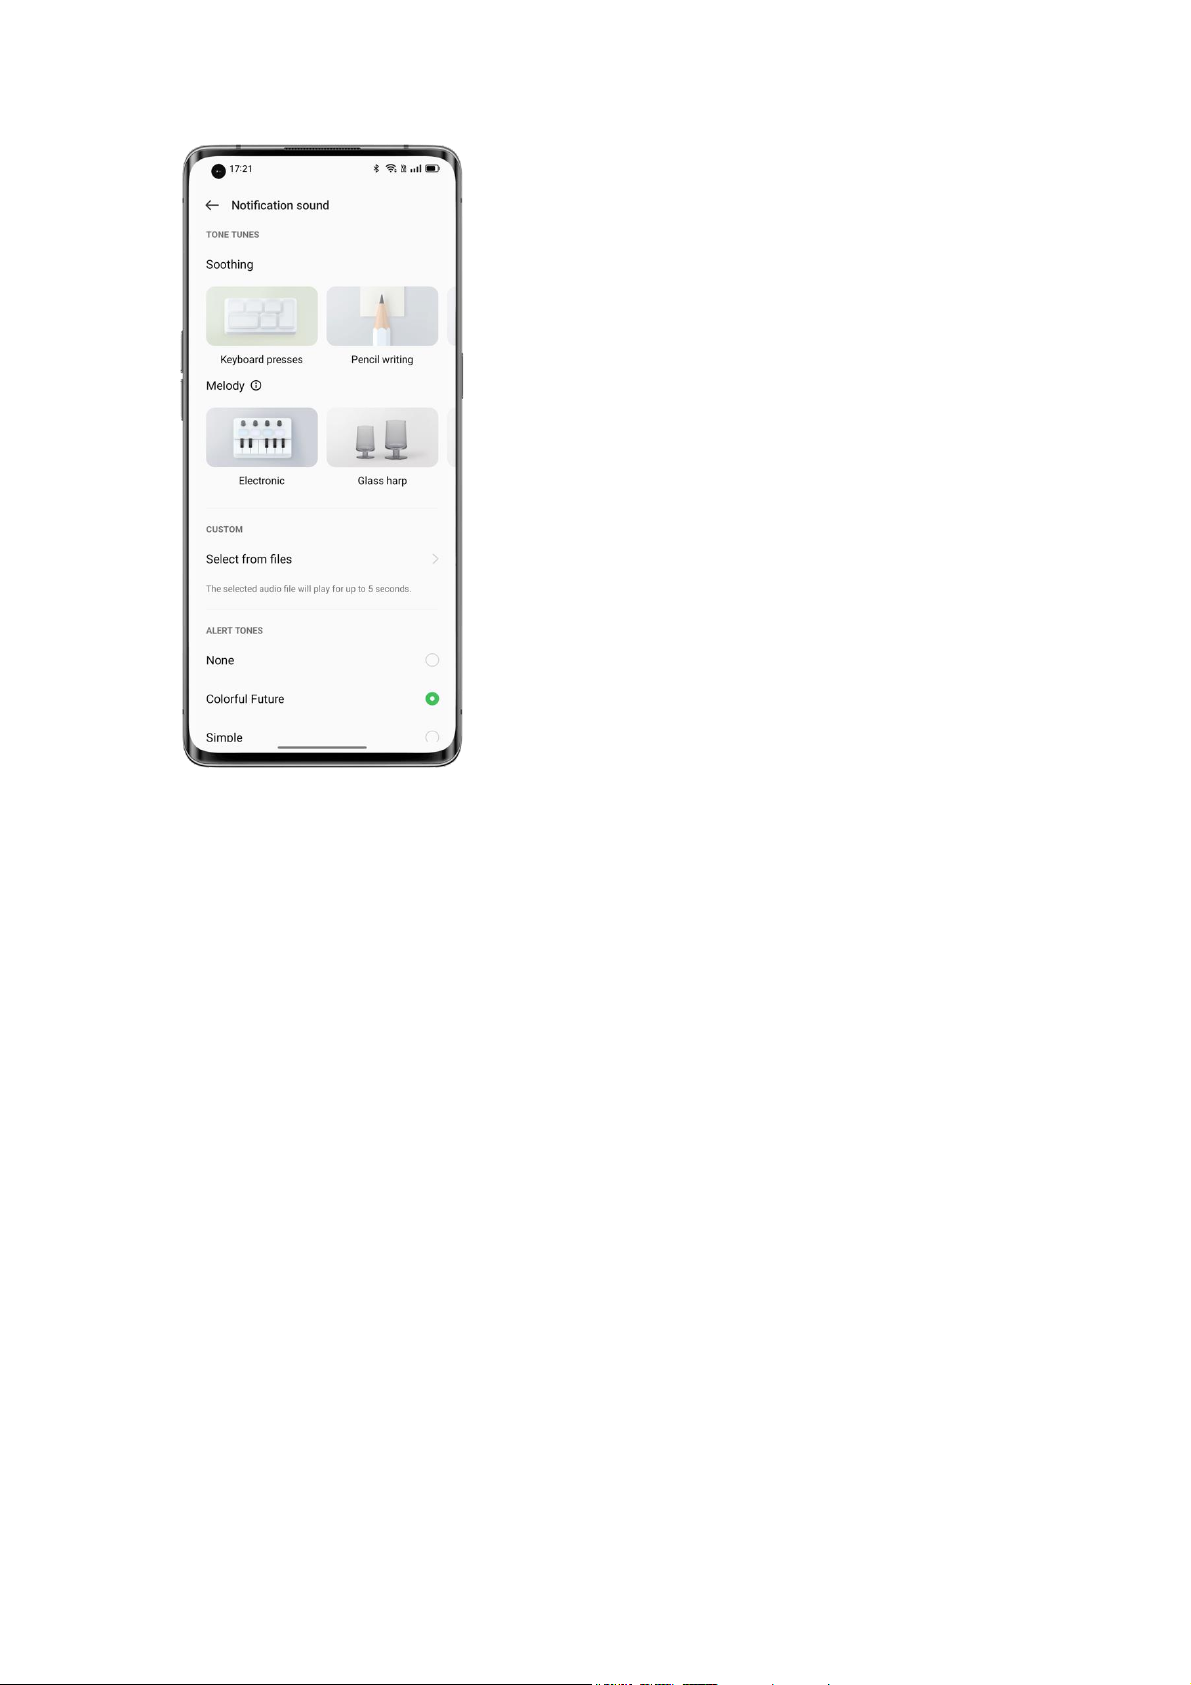
Tone tunes
If you are tired of hearing the same notification sound again and again, try tone tunes. ColorOS
will turn the notification sound into a melody when you receive multiple notifications in quick
succession.
Path: Settings - Sound & vibration - Notification sound - Tone tunes.
Page 19
Reduce notification feedback in full screen
When you're playing games or watching videos in full screen, ColorOS will soften notification
sounds and reduce the vibration intensity to not interrupt your immersive experience.
Path: Settings - Notifications & status bar - Manage notifications - More - Reduce notification
feedback on full screen.
Page 20

Weather Adaptive 2.0
ColorOS 12 comes with Weather Adaptive 2.0, which provides three to four more ringtones for
each weather scenario to make your alarms more interesting.
Path: Clock - Add alarm - Ringtone - Weather adaptive.
Page 21

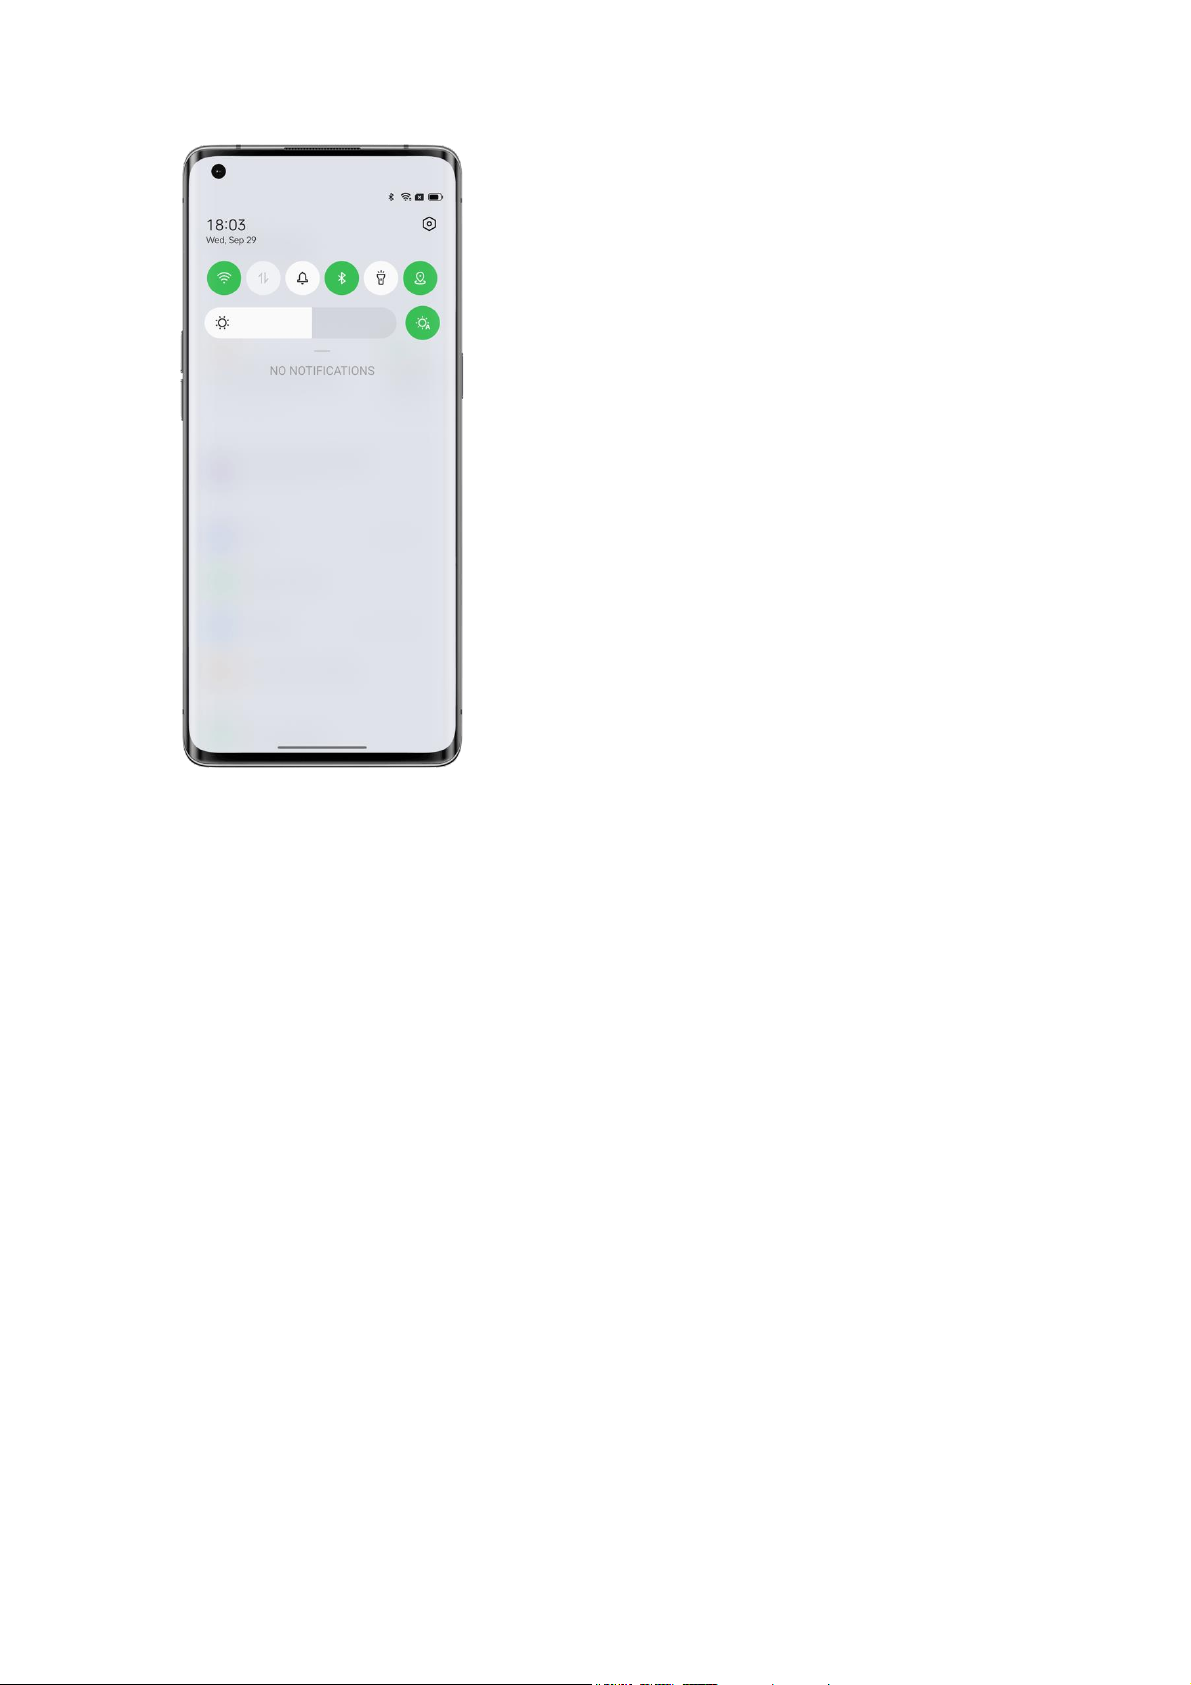
Turn Silent mode on to enjoy some quiet time
In Silent mode, your phone calls and app notifications will be silenced, so that you can rest
without disturbance.
Path: Swipe down from the top of the screen to open Quick Settings, and tap "Silent mode".
Immersive Dolby Atmos®
Dolby Atmos® is enabled by default in Speaker mode, and you can choose to disable it while
using earphones.
The new Dolby Atmos® features ambient sounds and scene sounds. Ambient sounds can be
switched to suit your environment, and scene sounds are adapted to fit three scenes: theater,
games, and music. You can enable the sound effects based on your needs.
Path: Settings - Sound & vibration - Dolby Atmos®.
Easy-to-use navigation gestures
As phone screens get bigger and bigger, to make the phone easier to use, ColorOS offers a
navigation bar and gestures for you to choose from based on your preferences.
Path: Settings - System settings - System navigation.
Navigation bar
When this feature is enabled, a navigation bar is displayed at the bottom of the screen. You can
set the button layout based on your usage habits.
Gestures
Navigation gestures make a phone in full-screen display even easier to use. Simply swipe up
from the bottom of the screen to control your phone and enjoy an immersive experience.
• Go back to the previous page:
Swipe in from the lower left or right side of the screen.
• Go back to the home screen:
Swipe up from the bottom of the screen.
• View recent tasks:
Swipe up from the bottom of the screen and hold.
• Switch to the previous app:
Swipe in from the lower left or right side of the screen and hold.
You can enable mistouch prevention in landscape mode. You will then need to perform a
gesture twice in landscape mode to make the gesture take effect.
Assistive Ball
Assistive Ball lets you complete different tasks quickly by using gestures or through the menu
options.
Path: Settings - System settings - Convenience tools - Assistive Ball.
Page 22

Gesture controls
• Tap the Assistive Ball to go back to the previous page.
• Double-tap the Assistive Ball to enter multitask mode.
• Tap and hold the Assistive Ball to go back to the home screen.
You can customize gestures to suit your needs and preferences.
Menu control
In menu mode, tapping the Assistive Ball will display five buttons, which correspond to the
following actions:
• Go back to the previous page
• Take a screenshot
• Multitask
• Lock the screen
• Go back to the home screen
To personalize your Assistive Ball:
• Drag it to your preferred position on the screen.
• Adjust its visibility.
• Automatically hide it in full screen mode.
Glare-free screen
Adjust the screen brightness to make the screen easier to read in different light conditions,
whether at night or in the bright sunshine.
Manual brightness
• Swipe down from the top of the screen to open Quick Settings, and drag the slider to adjust
the brightness.
• Go to "Settings - Display & brightness" and drag the slider to adjust the brightness.
Page 23
Auto brightness
With auto brightness turned on, the screen brightness changes automatically based on the
ambient light conditions to help relieve eye strain and save power.
Paths:
• Swipe down from the top of the screen to open Quick Settings, and tap the button to the right
of the brightness bar.
• Go to "Settings - Display & brightness" and turn on "Auto brightness".
Eye comfort modes
ColorOS offers two eye comfort modes to make it easier for you to use your phone during
nighttime or in dim environments and to relieve your eye discomfort due to prolonged screen
time.
Page 24

Eye comfort
Eye comfort reduces blue light from the screen and alleviates eye strain.
Path: Settings - Display & brightness - Eye comfort.
Low-brightness flicker-free eye comfort
Low-brightness flicker-free eye comfort reduces screen flickering to help reduce eye strain
when the screen brightness is low, but the screen noise may increase slightly.
Path: Settings - Display & brightness - More - Low-brightness flicker-free eye comfort.
* Low-brightness flicker-free eye comfort is only available on some OPPO phones.
Dark mode for all-day eye care
ColorOS Dark mode is auto backlit so you can always comfortably look at the screen, no matter
the time of day. In addition, with an upgraded color scheme and improved dark color contrast,
colors are clearer and key information is more prominent. In Dark mode, your phone uses less
battery power and lasts longer.
Turn Dark mode on
To turn on Dark mode:
Go to "Settings - Display & brightness" and turn on "Dark mode".
Open Quick Settings and tap "Dark mode".
Set a Dark mode schedule
Page 25

Dark mode can remain on at all times or you can set a schedule.
Go to "Settings - Display & brightness - Auto switch" and choose "Sunset to sunrise". Dark
mode will then automatically turn on at sunset and off at sunrise. If you choose "Custom", you
can specify the Dark mode on and off times.
Multiple Dark mode styles
ColorOS provides three Dark mode styles for you to choose from: Gentle, Medium, and
Enhanced, which support an adaptive contrast ratio.
Path: Settings - Display & brightness - Dark mode - Dark mode settings.
Easy-to-change wallpapers
Your wallpaper, your choice. ColorOS provides a wide range of beautifully designed static and
live wallpapers, including interactive live wallpapers. You can also use your photos as
wallpapers to make your OPPO phone beautiful and unique.
Change the wallpaper
1. Go to "Settings - Personalizations - Wallpapers".
2. Choose a desired static or live wallpaper, and zoom in or move the wallpaper to adjust it.
3. If you choose a static wallpaper, you can use it as your home screen wallpaper, lock screen
wallpaper, or both. If you choose a live wallpaper, you can use it as your home screen wallpaper
or home screen and lock screen wallpaper.
Use a photo from Photos as a wallpaper
Page 26

1. Go to "Settings - Personalizations - Wallpapers" and tap "Album".
2. Choose a photo, and zoom in or move the photo to adjust it.
3. Set the photo as your home screen wallpaper, lock screen wallpaper, or both.
Create your own wallpaper
In addition to the preset beautiful static and live wallpapers, ColorOS supports custom
wallpapers. Choose an image from Photos, tap "Set as wallpaper", and tap "Inventive
wallpapers". The system will then extract the main colors of the image and use algorithms to
generate creative wallpapers in a variety of styles such as simple, abstract, complex, and
Chinese style.
Path: Settings - Personalizations - Wallpapers - Inventive wallpapers.
Change theme colors with a single tap
ColorOS offers 6 to 12 different theme colors. Change your desired theme colors with a single
tap to make the UI more in tune with your personality and preferences.
Quick Settings, switch buttons, radio controls, and page icons will all switch to your chosen
color.
Path: Settings - Personalizations - Colors.
Page 27

Custom fonts
Change the font
You can change the default font of your phone to your preferred font downloaded from Theme
Store.
Path: Settings - Personalizations - Font & display size - More.
Page 28

Adjust the font size
You can adjust the font size on this page. The OPPOSans font can adaptively change size based
on the scenario.
Path: Settings - Personalizations - Font & display size.
Auto screen off
When your phone is not used, the screen will automatically turn off to save power and protect
your privacy and security. Set the auto screen-off time based on your usage habits.
Path: Settings - Display & brightness - Auto screen off.
Page 29

Auto screen rotation
Auto screen rotation rotates the screen automatically when you rotate your phone between
portrait and landscape, for example, to send messages and watch videos.
Paths:
Swipe down from the top of the screen to open Quick Settings, and turn on .
Go to "Settings - Display & brightness" and turn on "Auto rotate".
Manage data usage effortlessly
Mobile data usage
Check your mobile data usage in "Settings - Mobile network - Data management", and set a
time to start monitoring your mobile data usage as needed.
To keep track of your daily mobile data usage, set a mobile data usage limit. When your mobile
data usage reaches the limit, your phone will send you a notification.
Data saving
When data saving mode is turned on, apps in the background will not be able to use mobile
data, whereas apps in the foreground will decide which data-saving measures to take, for
Page 30

example, reducing the image resolution. In addition, network tethering will be unavailable and
the status bar will display the data-saving icon.
You can also set specific apps to be excluded from mobile data usage restrictions.
Path:
Settings - Mobile network - Data usage - Data saving.
Manage your contacts
Create a contact
• Tap in the lower right corner.
• Enter contact information such as the profile picture, name, company, email address, and
birthday.
• Tap "Show more" to add the contact's other names, instant messaging details, address, display
name, and website.
Page 31

Batch import contacts
• Importing from a storage device: You can import contacts directly from a SIM card. If your
old phone has an SD card, you can export the contacts as a VCF file, then import the file to
your new phone, and open it to import the contacts.
• Import from another phone: You can import contacts from your old Android phone or iPhone
to your new phone via Bluetooth or OPPO's Clone Phone feature.
Page 32

Scan cards to add contacts
Just scan the contact cards you receive with your phone. The system will automatically identify
and quickly save the contact card information to Contacts. Tap the 3-dot icon in the upper right
corner and tap "Scan card". Place a contact card in the scanning area and tap the shutter button.
The system will identify the contact card. Confirm the information and tap "Save".
Manage contacts
Manage your contacts to make them easier to find. Tap the 3-dot icon in the upper right corner
and tap "Manage contacts".
Contacts to display: Choose contacts in the Contacts app or only the contacts with numbers.
Merge duplicate contacts: Merge the contacts that share the same number or name.
Delete contacts: Clean up and delete the contacts that have no name or number, or remove
special characters, IP prefixes, and numbers containing more than 25 digits.
Page 33

VIP contacts
Adding contacts to the VIP Contacts Group means your phone will ring and vibrate as normal
when receiving calls from these contacts even if the phone is in Silent mode, Do Not Disturb,
or their number is in Block & filter.
Export contacts
To export your contacts to another phone, tap "Import/export contacts - Export to storage
devices" and select a storage path, or send contacts via Bluetooth.
My groups
Group your contacts and contact them in bulk.
Create a group
Tap "My groups", tap in the upper right corner, enter the group name, and add contacts.
• Open Contacts, tap "Contacts - My groups", select a group, and tap in the upper right
corner to add group members.
• Tap and hold a contact to remove it from the VIP Contacts Group.
• Choose one or more contacts in the group to send them a message or email. Set a group
ringtone for the VIP Contacts Group or a custom group.
Smart groups
Page 34

ColorOS automatically identifies the company or city of a contact in the Contacts app and
classifies them based on three preset smart groups: "Coworkers", "Family", and "Friends". You
can send messages and emails to contacts in smart groups.
Use Do Not Disturb
If you don't want to be disturbed at a certain time (for example, during a meeting or while
sleeping), turn on Do Not Disturb to silence calls, reminders, and notifications that you receive.
Turn Do Not Disturb on
Path: Settings - Sound & vibration - Do Not Disturb.
In Do Not Disturb mode, incoming calls, reminders, and notifications will be silenced, except
for calls from certain people, alarms, and timers. A crescent moon icon will appear in the status
bar.
You can turn on Do Not Disturb manually or set a schedule. You can also set exceptions. Tap
"Schedules" to specify the time to turn on Do Not Disturb and to set exceptions.
Set a schedule
For example, you can schedule Do Not Disturb to automatically turn on at 23:00 every night
from Monday to Friday and off at 8:00 the next morning.
Set exceptions
Page 35

Allow certain messages, incoming calls, and notifications in Do Not Disturb mode. If you turn
on "Ring for repeated calls", a second call from the same number within 3 minutes will not be
silenced.
Turn on Airplane mode
You can turn Airplane mode on and off. In Airplane mode, your phone's Bluetooth, Wi-Fi, and
mobile data connections will be disconnected.
Paths:
• Go to "Settings - Connection & sharing" and turn "Airplane mode" on and off.
• Swipe down from the top of the screen to open Quick Settings, and tap .
Restart and power off
To restart your phone:
⚫ Press and hold the power button for at least 3 seconds, and then drag the white circle
slider up.
⚫ Press and hold the power button and volume up button simultaneously for at least 10
seconds.
Page 36

Convenience features
PC Connect
PC Connect is a cross-device solution provided by ColorOS 12, with which you can connect
your phone to a PC to mirror the phone screen to the PC, control the phone from the PC, and
quickly transfer files and data between the devices.
Connect: Connect your phone to a PC via Bluetooth or by placing them close together.
Screencast: After the devices are connected, a phone clone will be automatically generated on
the PC, which allows you to control your phone from the PC.
Cross-screen file editing: Open and edit a phone file directly with PC software. The edited file
will be automatically saved to your phone.
File transfer: Drag and drop files to transfer, or quickly share files in a sharing box.
Data sync:
• Clipboard sync: Copy text from your phone and paste it onto your PC with one click.
• Notification sync: Notifications received on your phone will be synchronously displayed
on your PC.
• Input method sync: Reply to phone messages directly from your PC.
• Photo sync: Photos or screenshots taken with your phone will be synced instantly to your
PC, so that you can save them.
How to connect:
Page 37

⚫ On your PC, go to https://pc.heytap.com to download and install PC Connect.
⚫ On your phone, go to "Settings - Connection & sharing - PC Connect". Place your phone
near the PC or scan the QR code on the PC to connect the devices.
PC minimum requirements:
⚫ Operating system: Windows 10 64-bit v1903 (18362) or later.
⚫ CPU: Intel Core i3 (2.4 GHz) or above.
⚫ Memory: 8 GB or more.
⚫ Network adapter: See the following list of applicable network adapters (Wi-Fi Direct is
required; driver version October 2018 or later).
⚫ PC needs to support Bluetooth 4.1 or later (to enable a short distance connection).
Applicable network adapters:
Intel® Dual Band Wireless-AC 7265;
Intel® Dual Band Wireless-AC 8260;
Intel® Dual Band Wireless-AC 8265;
Intel® Dual Band Wireless-AC 3168;
Intel® Wireless-AC 9260;
Intel® Wireless-AC 9461;
Intel® Wireless-AC 9462;
Intel® Wireless-AC 9560;
Intel® Wireless-AC AC3165;
Intel® Wi-Fi 6E AX210 (Gig+);
Intel® Wi-Fi 6 AX200 (Gig+);
Intel® Wi-Fi 6 AX201 (Gig+);
Intel® Wi-Fi 6 AX1650;
Realtek RTL8821AE;
Realtek RTL8821CE;
Realtek RTL8822CE;
Realtek RTL8822BE;
Realtek RTL8188EE;
Realtek RTL8192ee;
Realtek RTL8723BE;
Realtek RTL8723DE;
Qualcomm QCA9377-5 SoC.
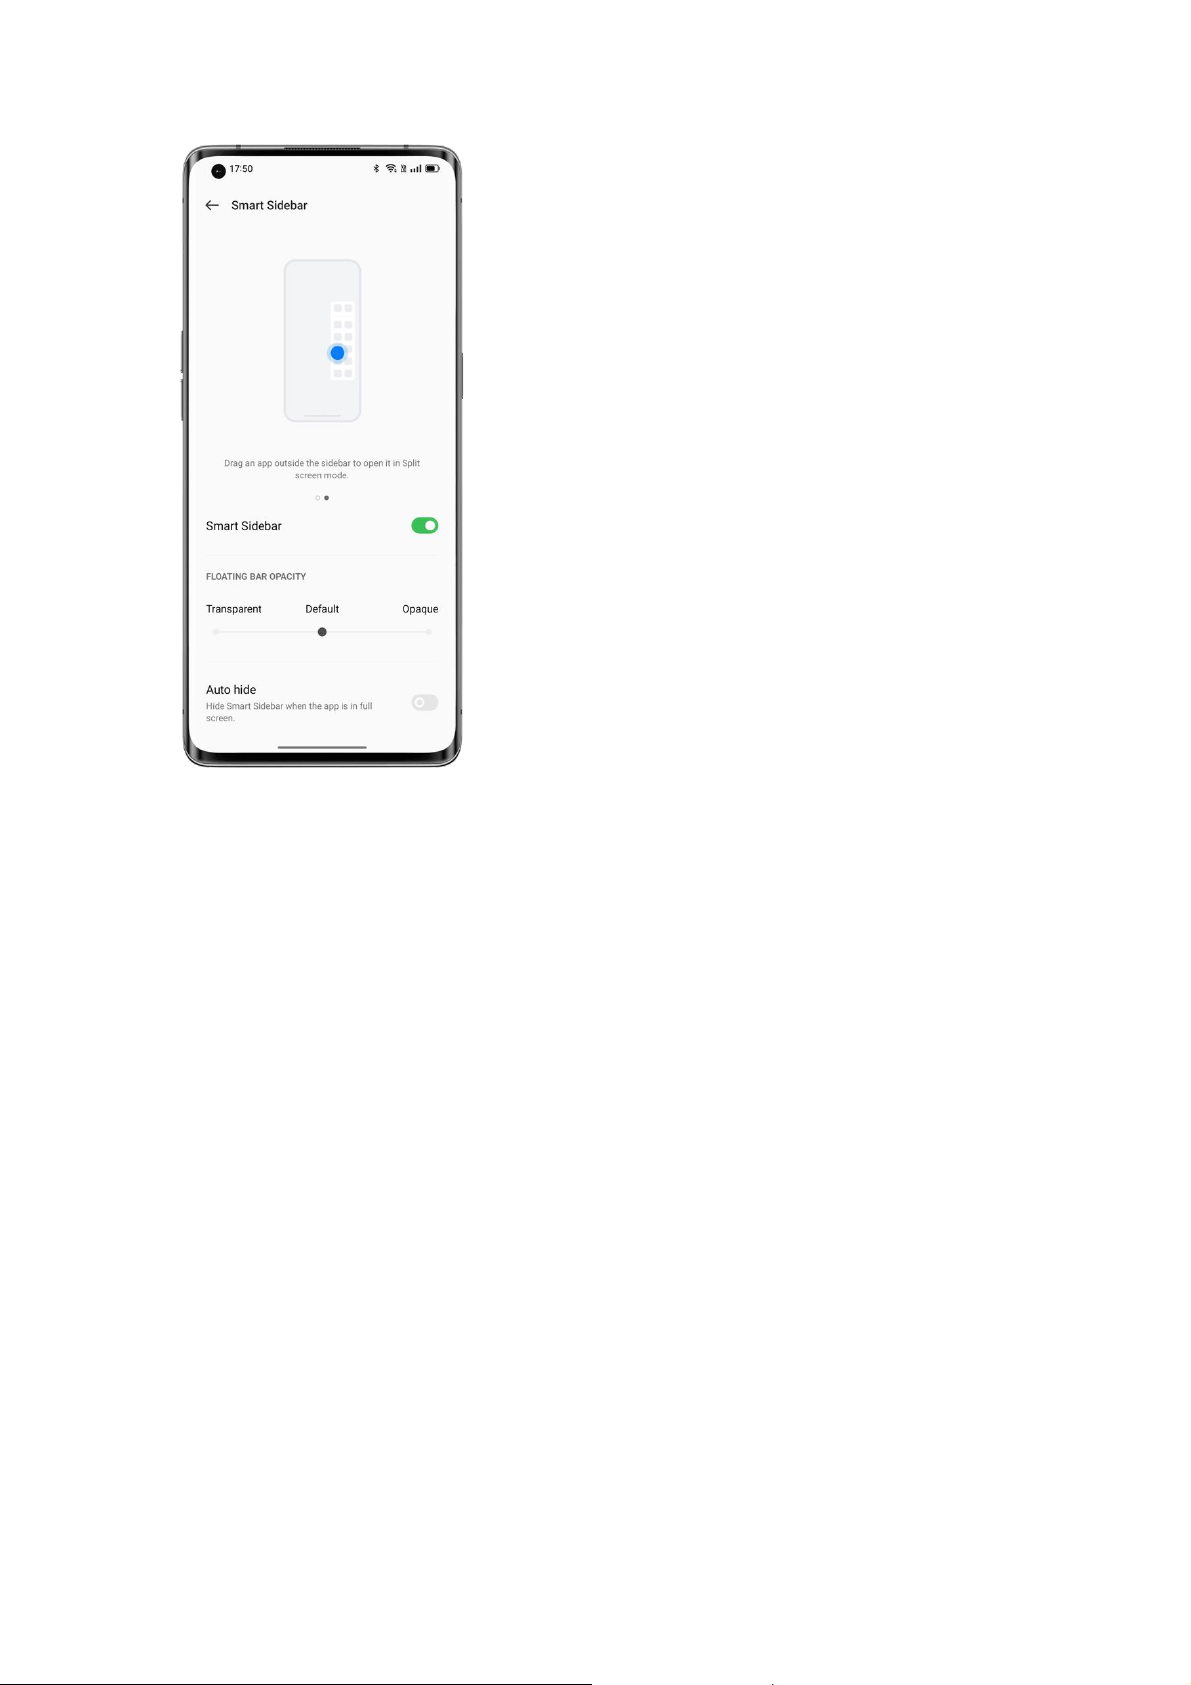
Smart Sidebar, the smartest and most convenient tool
Smart Sidebar is a convenience tool that is opened by swiping from the side of the screen. You
can perform quick actions in different scenarios, for example, you can chat in a floating window,
record the screen, take screenshots, send images, or switch between apps, all in an easy and
smooth manner.
Turn Smart Sidebar on
Go to "Settings - Special features - Smart Sidebar", and turn on "Smart Sidebar".
Page 38
When you are not playing a game, Smart Sidebar is collapsed and displayed as a floating bar.
Swiping in on the floating bar opens Smart Sidebar, which contains shortcuts such as Screen
translate, Breeno Touch, Screenshot, Screen recording, and Notes. You can add other apps to
Smart Sidebar if desired.
To adjust the position of Smart Sidebar, swipe in on the floating bar and hold until Smart
Sidebar shows up, and then drag it to your preferred position.
Tap "+" at the bottom of Smart Sidebar. Available tools and apps will be displayed on the
screen. Apps will be listed in alphabetical order so you can quickly find them and add them. In
Smart Sidebar, you can reorder the tools and apps. You can also tap the Settings icon in the
upper right corner of the screen to quickly access the Smart Sidebar settings.
Page 39

Tap an app in Smart Sidebar to open it in a floating window, or drag an app that supports split
screen out of Smart Sidebar to open it in a split screen.
RAM expansion for super smoothness
RAM expansion uses some idle storage space as virtual RAM to increase the amount of RAM,
so that the system runs more smoothly, apps open faster, and more apps can run in the
background.
It adds an extra 1–3 GB of RAM for 4 GB RAM phones, 2–5 GB of RAM for 6 GB or 8 GB
RAM phones, and 3–7 GB of RAM for 12 GB RAM phones.
Path: Settings - About phone - RAM - RAM expansion.
Page 40

Search for setting options
Open Settings and enter keywords in the top search box to search for relevant feature settings.
Tap a search result to open the corresponding settings page. For example, if you search for
"Bluetooth", Bluetooth related settings will be displayed on the screen.
Page 41

Use screen-off gestures to control your phone without unlocking
it
About screen-off gestures
You can use screen-off gestures to control your phone while the screen is off. The system's
screen-off gestures work even when the phone is locked, but custom screen-off gestures do not.
Path: Settings - System settings - Gestures & motions - Screen-off gestures.
Page 42

Gesture options
Use the following screen-off gestures based on your needs.
⚫ Double-tap to wake or turn off screen.
⚫ Draw an O to open the camera.
⚫ Draw a V to turn the flashlight on or off.
⚫ Music control: When the screen is off, use two fingers to draw "||" on the screen to pause
or resume music playback, or draw "<" or ">" to play the previous or next song.
Add a custom screen-off gesture
ColorOS supports custom screen-off gestures. Tap "Add gesture", select a gesture, and then
select an action.
Page 43

Motion-based smart calls
You can turn on "Lift to ear to answer calls", "Auto switch to receiver", or "Flip to mute
incoming calls" based on your usage habits.
Path: Settings - System settings - Gestures & motions.
Quick Return Bubble
When you are waiting in a long queue for a taxi after work, waiting to be respawned in a game,
or using a navigation app on a familiar route, you may want to switch to another app but worry
about missing out on something important.
Quick Return Bubble lets you multitask with multiple apps. With just one tap, you can quickly
switch back to your ride-hailing service, game, or navigation app. Quick Return Bubble makes
life easier and more efficient.
Turn Quick Return Bubble on
Go to "Settings - System settings - Convenience tools - Quick Return Bubble", and turn the
switch on. You can also enable Quick Return Bubble for a single app. Quick Return Bubble is
now available for apps such as Baidu Maps, DiDi Rider, PUBG Mobile, Arena of Valor, and
Pinduoduo. More will be supported soon.
Page 44

Switch between apps with one tap
When there is still 500 meters until your next right turn, you can switch to other apps to check
your messages, social media, or online order status. Quick Return Bubble will be displayed as
a floating bar on the screen with a countdown timer. When approaching the intersection, tap
Quick Return Bubble to quickly return to the navigation page, so you will not miss your turn.
In addition, you can activate multiple Quick Return Bubbles. To merge them, tap and hold any
Quick Return Bubble.
Quick screenshots
You can use the system's screenshot tool to take screenshots, save the screenshots to Photos,
and share them to social media. Use the following methods to take a screenshot.
3-finger screenshot
Go to "Settings - System settings - Convenience tools - Screenshot", and turn on "3-finger swipe
down". Then swipe down with three fingers on any screen to take a quick screenshot.
Page 45

A preview floating window will be displayed on the left of the screen. To share the screenshot,
swipe up on the floating window. To take a scrolling screenshot, drag the thumbnail down to
cover the content you want to screenshot.
Tap the preview floating window to display the screenshot in full screen. You can crop, send,
mark up, edit, or delete the screenshot and use it as a wallpaper or a contact's profile picture.
Partial screenshot
Turn on "3-finger touch and hold", and tap and hold with three fingers on the screen to take a
partial or scrolling screenshot. There are five buttons in the bottom navigation bar:
⚫ Cancel: Cancel the screenshot.
⚫ Send: Send the screenshot.
⚫ Edit: Edit the screenshot.
⚫ Scroll: Take a scrolling screenshot.
⚫ Save: Save the screenshot.
If you swipe down with three fingers out of the screen, the system will automatically capture a
scrolling screenshot. During this process, you can manually scroll the screen to capture what
you need.
Press buttons to take a screenshot
Press and hold the power button and volume down button to take a quick screenshot.
Use Smart Sidebar to take a screenshot
Page 46

1. Go to "Settings - Special features - Smart Sidebar", and turn on "Smart Sidebar".
2. Open Smart Sidebar and tap "Screenshot".
Use Assistive Ball to take a screenshot
1. Go to "Settings - System settings - Convenience tools - Assistive Ball", and turn on "Assistive
Ball".
2. Choose "Tap menu".
3. Tap the Assistive Ball and tap the Screenshot icon.
Take a scrolling screenshot
Use the system's scrolling screenshot tool to take a scrolling screenshot.
Take a screenshot, drag the preview floating window down to cover the content you want to
screenshot, and tap "Done" to save the screenshot as a scrolling screenshot.
Edit a screenshot
After you take a screenshot or scrolling screenshot, tap "Edit" to mark up, crop, rotate, or add
filters or text, or make a mosaic out of the screenshot.
Share a screenshot
After you capture a screenshot, drag the preview floating window up to quickly share the
screenshot with your friends via OPPO Share, Weibo, or WeChat.
Split screen for doubled efficiency
Split screen lets you use two apps easily at the same time. For example, you can chat with your
friends while watching videos.
Path: Settings - System settings - Convenience tools - Split screen.
Page 47

To open a supported app in a split-screen window:
• Swipe up with three fingers to enter split screen mode.
• In gesture navigation mode, tap and hold the multitask button.
• In multitask mode, tap the Settings button in the upper right corner of the app.
Resize the split-screen windows
Drag the separating line to adjust the size of the split-screen windows.
Swap the views
You can swap the split-screen apps' positions.
Tap the button in the middle of the separating line, and tap .
Exit split screen mode
To exit split screen mode:
• Drag the separating line to the top of the screen to close the app in the upper window or to
the bottom to close the app in the lower window.
• Tap the button in the middle of the separating line, and tap .
Use App cloner to separate your business and personal accounts
App cloner enables you to effortlessly clone apps for several accounts on your phone. The
cloned apps run independently from their original apps and will not interfere with each other.
Page 48

App cloner is only available for some apps and phones. If it does not work, the app or phone
does not support this feature. Data cannot be transferred between a cloned app and a PC. Up to
two apps can be cloned at the same time.
Path: Go to "Settings - Apps - App cloner" and choose an app to clone. Apps such as WhatsApp,
Facebook Messenger, LINE, Facebook, imo, Instagram, Skype, Telegram, and WeChat can be
cloned.
Multitask with Flexible windows
Flexible windows (formerly called FlexDrop) of ColorOS 12 has been optimized to allow you
to open multiple app windows on your phone through simple gestures, so you can make full
use of the large screen to multitask for work and entertainment easily and efficiently.
To open an app in a floating window, swipe up in the app and hold at the top of the screen.
Page 49

You can tap menu options in the floating window to switch the app to full screen or to close
the window. You can also drag an edge of the floating window to change its size. When
minimized, the floating window turns into a mini window, where the elements are not tappable.
When maximized, the floating window is displayed in full screen. You can drag files from the
floating window into another full-screen app to easily transfer the files.
Page 50

For example, to record the story behind a photo in Photos, you can display the photo in a
floating window, create a note, and then directly drag the photo into the note. The whole process
can be done in one go and is more direct and smoother than adding the photo into a note in
Notes.
A mini window displays app content in real time. A single tap on the center of the mini window
will turn it into a floating window, and a double tap will switch it to full screen.
If you switch a video in landscape mode to a floating window, the video will continue to play
in landscape mode.
Flexible windows help you multitask more efficiently. For example, you can chat while
watching a show, or check documents while having an online meeting. In addition, you can
find the last two apps that you opened in a floating window in Smart Sidebar so you can quickly
switch to the apps when needed.
Smart power saving for a longer battery life
ColorOS offers various power-saving strategies for different usage scenarios.
One-tap power saving
ColorOS automatically detects power usage issues on your phone. One-tap power saving can
help address the issues quickly and optimize the system to extend battery life.
Path: Settings - Battery - One-tap power saving.
Battery usage
Page 51
Go to "Settings - Battery - Phone Battery Usage" to view the details of your apps' power usage
for today, yesterday, and the day before, how long an app has run in the foreground and
background, and how much power it consumes.
Sleep standby optimization
Go to "Settings - Battery - Advanced settings" and turn on "Sleep standby optimization".
When you are sleeping, your phone will enter a low-power state, which uses less power and
pushes notifications less frequently.
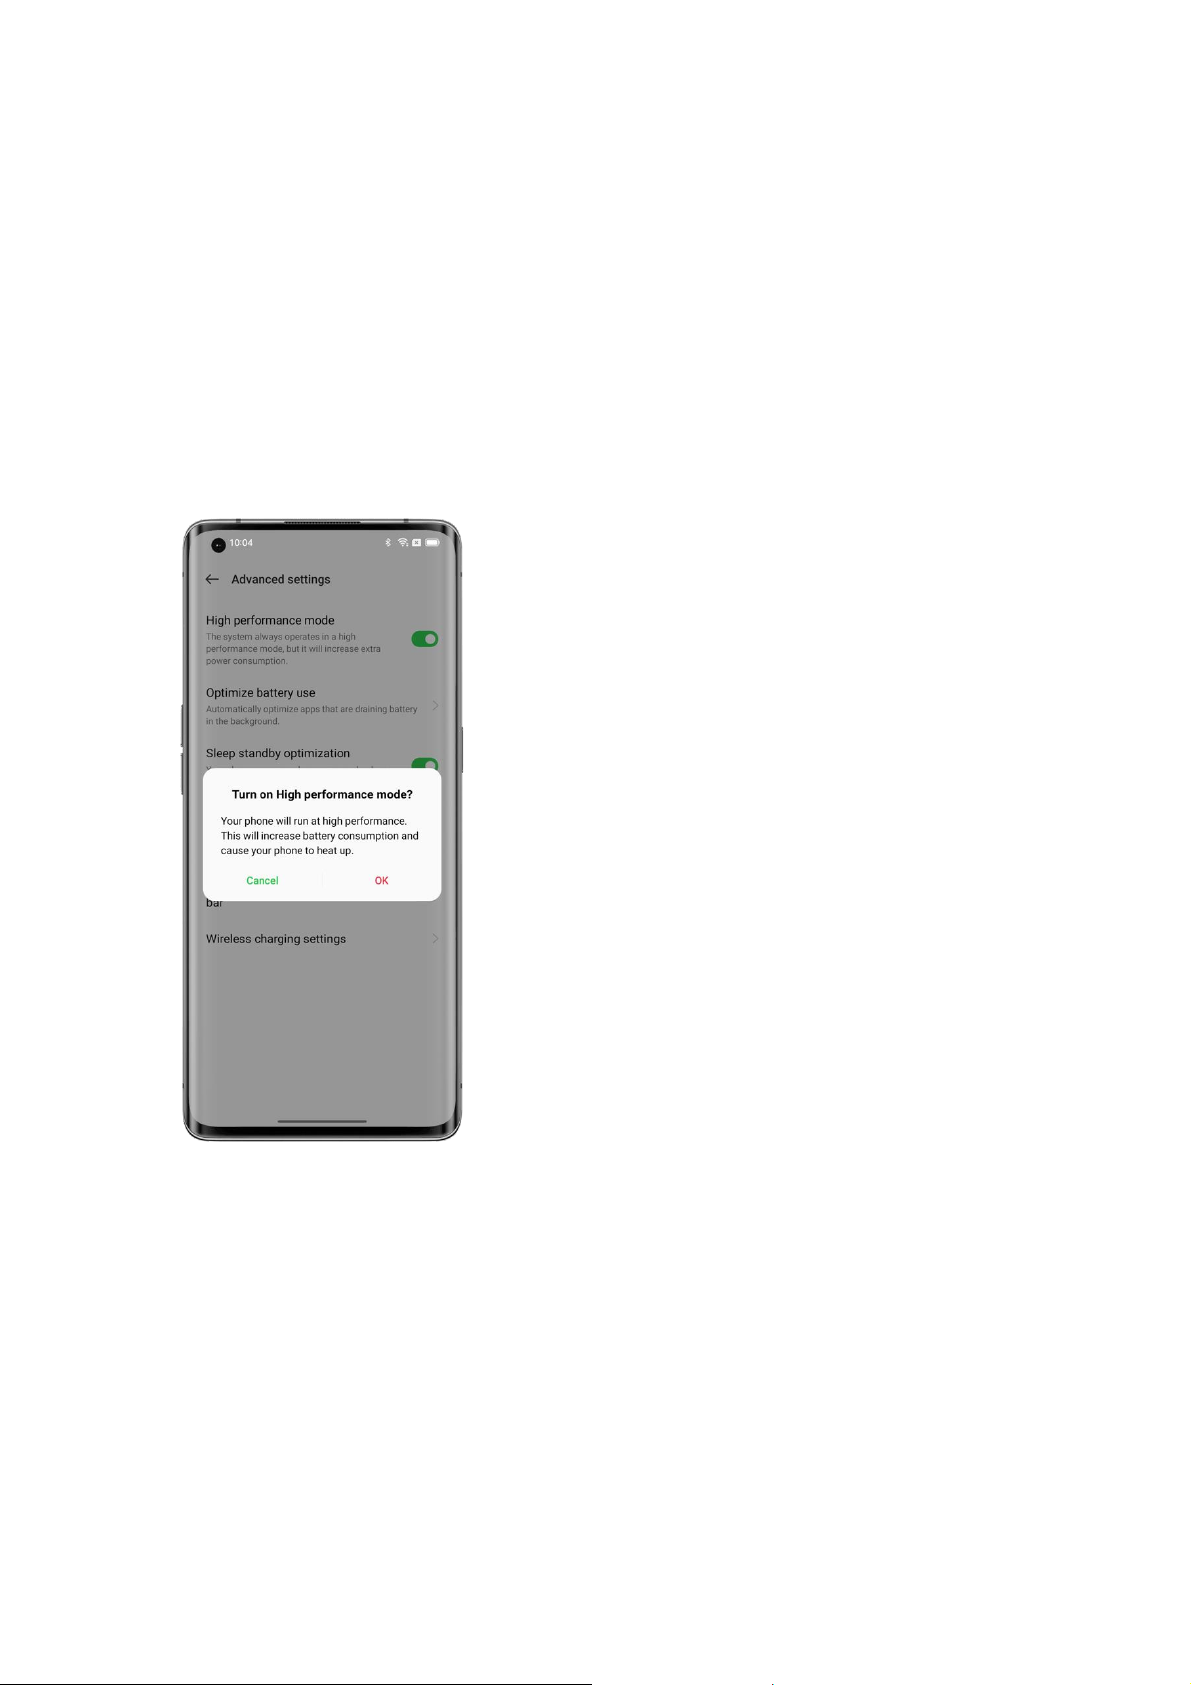
High performance mode
Go to "Settings - Battery - Advanced settings" and turn on "High performance mode".
Your phone will run in a high performance state but consume more power.
Super power saving mode
When your phone runs low on battery, Super power saving mode extends its battery life through
strict power-saving strategies such as limiting the number of running apps and clearing
background apps to give you peace of mind.
Path: Settings - Battery - Super power saving mode.
Page 52

Lab data shows that Super power saving mode allows you to text chat on WeChat for 90
minutes with only 5% of the battery left.
* The test data for the Super power saving mode comes from reports provided by the TÜV
Rheinland laboratory. The battery life was tested using WeChat text chat while keeping the
Super power saving mode on. The device was exposed to a constant temperature of 25°C, with
Wi-Fi activated and 135 nit screen brightness. The actual time may vary due to the specific
conditions of the WeChat text chat function.
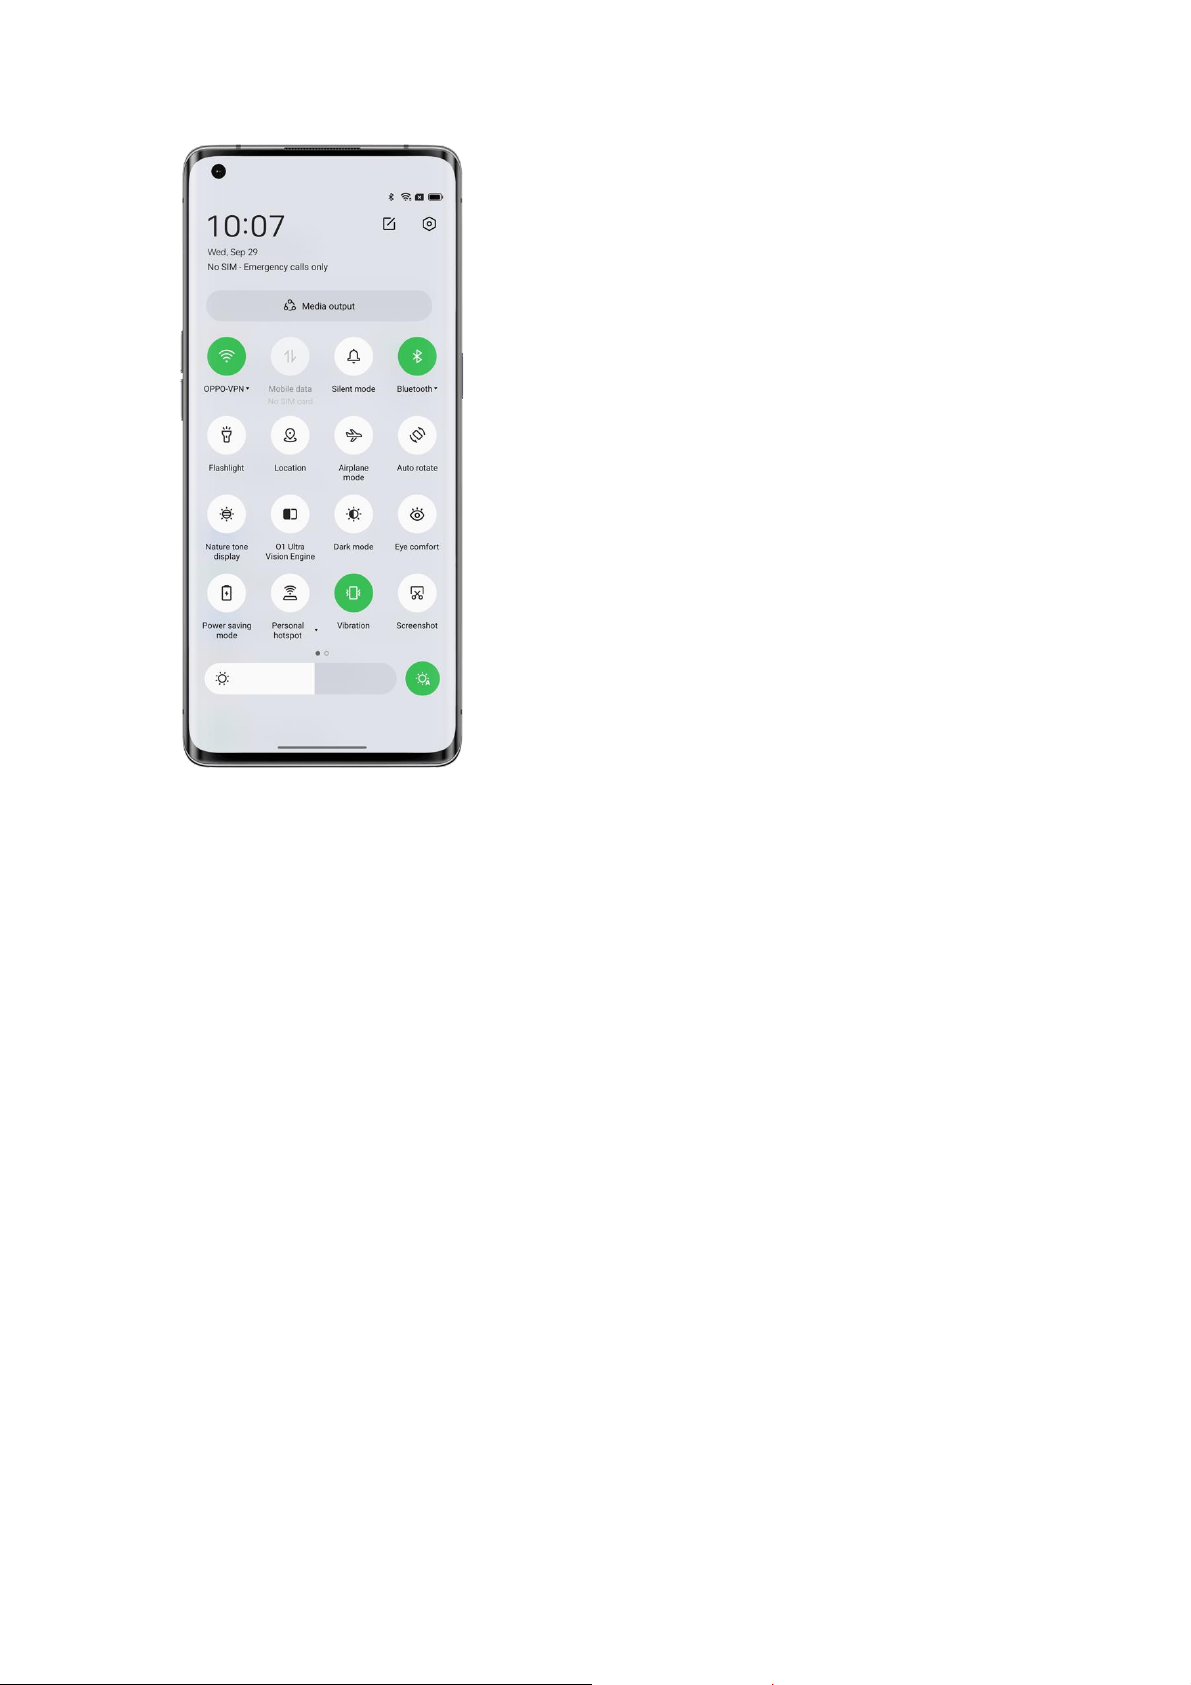
Quick Settings, instant access
Use Quick Settings to quickly turn the flashlight, Wi-Fi, and NFC on and off, use the calculator,
and more. To open Quick Settings, swipe down from the top of the screen.
To access settings of a feature, tap and hold its icon. For example, tap and hold the Eye comfort
icon to go to the Eye comfort settings page, where you can adjust the screen color temperature
and set a schedule.
Manage icons
Add the features you use the most to Quick Settings. Swipe down from the top of the screen to
open Quick Settings, tap in the upper right corner to enter edit mode, and then tap and hold
and drag an icon to edit or add it.
Page 53
Shortcuts
• Airplane mode: In Airplane mode, mobile data is turned off.
• Mobile data: Allow or do not allow apps/services to use the mobile network for Internet
access.
• Wi-Fi: Turn on Wi-Fi to browse webpages, download movies, and more.
• Bluetooth: Turn on Bluetooth to pair your phone with other Bluetooth devices such as
earphones and car kits.
• Personal hotspot: Turn on your personal hotspot to share your phone's network connection
with other devices such as your PC.
• OPPO Share: Use OPPO Share to share your photos, videos, location, and more with other
OPPO devices nearby.
• NFC: Turn on NFC to enable contactless payment and data transfer.
• Location: Allow apps and system services to access your location.
Sound control
• Silent mode: Quickly silence the calls and notifications that you receive.
• Do Not Disturb: Silence incoming calls and notifications. You can also set a Do Not
Disturb schedule.
Assistive tools
• Assistive Ball: Enable Assistive Ball to make your phone easier to use.
• One-handed mode: In One-handed mode, the screen shrinks, so that you can use your
phone with one hand.
• Auto rotate: The screen will automatically rotate when you rotate your phone.
Page 54

• Screen Lock: Lock the screen with a single tap.
• Breeno Assistant: Ask Breeno Assistant to control your phone, search for information,
obtain services, etc.
More shortcuts
• Flashlight: Quickly and easily turn on the flashlight next to the rear cameras.
• Calculator: Open Calculator to convert live exchange rates or perform other calculations.
• Pay with Alipay: Tap to pay with Alipay.
• Scan with Alipay: Tap to scan with Alipay.
• Input method: Tap to change the input method.
• Search: Tap to open OPPO Browser and search for information.
• Clean up & accelerate: Clean your phone's storage with one tap.
• Power saving mode: Turn on Power saving mode.
• Camera: Quickly open the camera to take photos, selfies, or videos.
• Clock: Open Clock to set an alarm, stopwatch, or timer.
• Red Packet Assistant: Automatically detects red packets in WeChat and sends you sound
notifications.
• My favorites: Tap to view your favorites.
• Record screen: Tap to record your screen.
• Night Shield: Adjust the screen color temperature to make the screen light warmer and
softer for eye protection during nighttime or in dim environments.
• Multi-Screen Interaction: Mirror your phone's screen to a TV, TV box, and other large
screen devices via Wi-Fi Display technology.
Use Notification Center to manage notifications
Notification Center shows notifications from apps that are allowed to push notifications,
allowing you to scroll back and see what you're interested in. To open the Notification Center,
unlock your phone and swipe down from the top of the screen.
View a notification
Tap a notification to view its details.
Remind me later
Swipe left on a notification, tap , and set a time. The system will push the notification again
at the set time.
Manage the notification permission for an app
Swipe left on a notification and tap - to enter the settings page of the app that sends the
notification, where you can turn off the notification permission for the app. You can also
manage the notification permission for all your apps in "Manage notifications".
Path: Settings - Notifications & status bar - Manage notifications.
Page 55

Tap an app to specify which notifications you want to receive and set the badge style based on
your preferences and usage habits. Tap "Default channel" to adjust more detailed settings.
• If you choose "Number", the number of unread notifications will be displayed on the top
right of the app icon. If you choose "Dot", a red dot will be displayed to indicate unread
notifications. You can also choose to not show a badge to keep the home screen simple
and clean.
• To receive notifications from the app on the lock screen, choose "Lock screen".
• To receive banner notifications from the app, choose "Banner".
• To set a special ringtone for the app, tap "Ringtone" and choose your preferred ringtone.
• You may also allow the app's notifications even if your phone is in Do Not Disturb mode,
so you will not miss any important notification from the app.
Status bar
The status bar is displayed at the top of the screen. The status icons on the left side indicate the
time, carrier, and network connectivity, and those on the right side indicate the battery level
and some features.
For a visual presentation of the battery percentage and network speed, turn on the switches.
To show app notifications in the status bar, tap "Notification icons" and choose to show an icon
or number.
Path: Settings - Notifications & status bar.
Clock
If you need your phone to ring or vibrate at a particular time, you can set an alarm in the Clock
app.
Create an alarm
• Open Clock and tap "Alarm" at the bottom.
• Tap "+" to add an alarm.
• Tap "Ringtone" to set a ringtone for the alarm. If you turn on "Weather adaptive", the
alarm will sound adaptively based on the weather scenario.
• If you turn on "Snooze", the alarm will sound again in 5 minutes after you snooze it by
pressing the power button or a volume button or the alarm sounds continuously without
being turned off.
• Tap "Save" after you complete the settings.
Edit or delete an alarm
• To edit an alarm, tap it in the alarm list.
• To enable or disable an alarm, turn the switch for the alarm on or off.
Page 56

• To delete an alarm, tap "Edit" in the upper right corner, select the alarm, and delete it, or
tap and hold the alarm in the alarm list and delete it.
World clock
Use the Clock app to check the local time in different time zones.
1. Open Clock and tap "World clock".
2. Tap "+" and enter a city, country, or municipality in the search box.
3. Add the local time of that location to your world clock list.
4. To delete a world clock from the list, tap "Edit" in the upper right corner, select the world
clock, and tap "Delete", or tap and hold the world clock in list and tap "Delete".
5. To add a world clock to your home screen, tap and hold on the home screen, tap "Widgets",
and drag the world clock to a preferred position on the home screen.
Time display settings
Set the 24-hour or 12-hour clock format.
1. Open Clock.
2. Tap the Settings icon in the upper right corner and tap "Date & time".
3. Your phone shows the time in 24-hour format by default. To enable the 12-hour clock, turn
off the 24-hour format.
Use network-provided time
1. Open Clock.
2. Tap the Settings icon in the upper right corner, tap "Date & time", and turn on "Set
automatically". Your phone will automatically calibrate the time when it is connected to a
network.
Page 57
Custom time & time zone
1. Open Clock.
2. Tap the Settings icon in the upper right corner and tap "Date & time".
3. Turn off "Set automatically", and manually change the time zone and time.
Set Dual clock
1. Open Clock and tap the Settings icon in the upper right corner.
2. Tap "Date & time" and turn on "Dual clock".
3. When you are away from your home, the lock screen or clock widget will display the time
in two different areas.
Where to find Dual clock
1. Open Clock and tap the Settings icon in the upper right corner.
2. Tap "Date & time - Dual clock - Display Dual Clock On", and choose the lock screen and
clock widget.
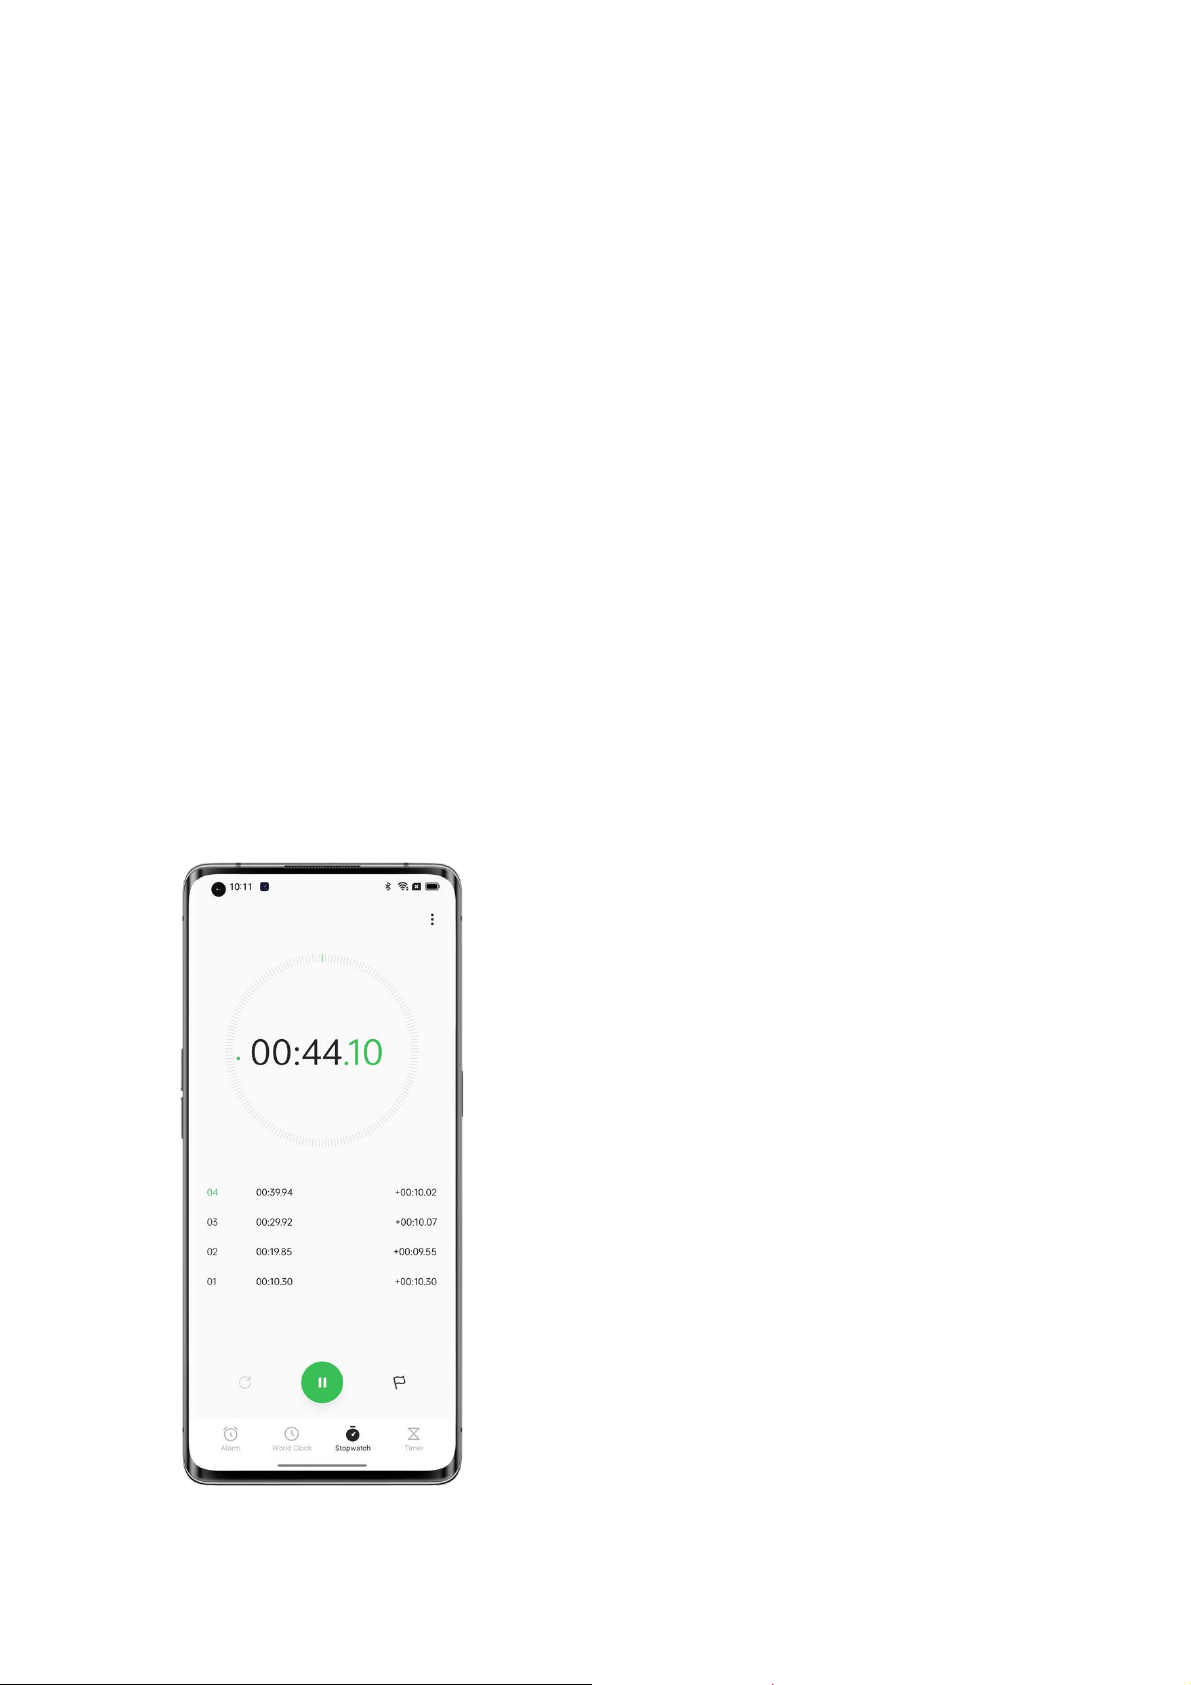
Use Stopwatch
1. Open Clock and tap "Stopwatch". Tap the Start button at the bottom to start a stopwatch.
You can open other apps at the same time, and the stopwatch will continue to run.
2. To record laps or split time, tap the flag icon in the lower right corner.
3. To stop the stopwatch, tap the Stop button. To clear records, tap the Reset icon in the lower
left corner.
Use Timer
Page 58

Use Timer in the Clock app to set a countdown for multiple events, making it easier to better
manage the time.
1. Set a countdown time and tap the Start button.
2. To pause the countdown, tap the Pause button. To exit the countdown, tap the Reset icon.
Preset timers
• System preset timers
The system has three preset timers: Brush teeth, Face mask, and Steam eggs. Select and tap a
timer to start it.
• Personalized timers
You can set up a personalized countdown timer as needed. Tap the Add button, for example,
add a timer labeled "Study" with a 20-minute countdown, and then tap "Save".
To delete an unwanted timer, tap "Edit" in the upper right corner or tap and hold the timer to
enter edit mode.
Ask Breeno Assistant to set a timer
You can ask Breeno Assistant to set a timer.
Press and hold the power button for 0.5 seconds to activate Breeno Assistant, and say something
like "Set a timer for 30 seconds."
Start your day comfortably with Weather adaptive
Weather adaptive is a user-friendly ColorOS sound feature that OPPO has carefully designed.
It changes your alarm sound dynamically based on the weather condition, so that you can wake
up every day in a good mood, ready for the day ahead.
Path: Open an alarm, tap "Ringtone", and choose "Weather adaptive".
Page 59

Check the weather
Use the Weather app to check the weather in different cities in real time.
Allow Weather to access your location
Weather requires access to your location to provide you with accurate weather services.
• Go to "Settings - Privacy permissions - Permission manager".
• Tap "Location", select the Weather app, and choose "While using".
Check the current weather and forecast
Use Weather to check the current weather and weather forecast for your current location or in
the other cities.
• When you open the Weather app, the weather details for your current location are available.
• To check the current day's hourly forecast, scroll down and then swipe left or right.
• To view the air quality, visibility, UV index, humidity, and more, scroll down to the bottom
of the screen.
• Tap "15-day weather forecast" to view more weather information on a webpage.
Page 60

Check the weather in other cities
Check the weather in other cities to better manage your trip.
• Open Weather and tap the building icon in the upper right corner to enter the "Manage
cities" page.
• Enter the name of the city you want to add, and tap the city.
• Swipe left or right on the Weather screen to check the weather in another city.
• To delete a city from your weather list, go to "Manage cities", tap "Edit" in the upper right
corner, select the city, and tap "Delete".
Use Calculator to perform calculations
Use Calculator to perform calculations
In the Calculator app, you can add, subtract, multiply, and divide. You can also use it for
exponential, logarithmic, and trigonometric functions, as well as conversions of the live
exchange rate, length, area, volume, speed, weight, temperature, power, pressure, and other
units.
Basic calculations
• Open Calculator to perform basic calculations such as addition, subtraction, multiplication,
and division.
• To clear the display, tap the Clear (C) key.
• To view the calculation history, tap the clock icon in the upper right corner.
Page 61

Use the scientific calculator
Tap "Scientific calculator" in the upper right corner.
Calculate live exchange rates
Use the currency conversion feature to easily convert between multiple currencies based on the
latest exchange rate data from Webull.
You can tap and hold the conversion result to copy it to the clipboard.
Page 62

More unit conversions
You can also convert units such as length, area, volume, speed, weight, temperature, power,
and pressure.
Enter small window mode
Page 63

In small window mode, you can use calculated values in another app (such as WeChat) without
needing to switch between the apps. Tap in the upper left corner. Calculator will be
displayed in a small floating window. You can adjust the visibility as you like.
Use Compass to find your way
The Compass app shows your current location, the direction your phone is pointing, latitude,
and longitude.
Allow Compass to access your location
Compass requires access to your location to work properly.
• Go to "Settings - Privacy permissions - Permission manager - Location".
• Select the Compass app and choose "While using".
Calibrate Compass
Calibrate Compass before you use it for the first time. Move away from interference sources
and swing your phone.
Find your bearings
Use Compass to help navigate the direction.
• Hold your phone flat.
• The direction your phone is pointing is shown below the compass.
• Your latitude and longitude coordinates are shown at the bottom of the screen.
Page 64

Use Phone features
To start a call in the Phone app, dial the number on the keypad, tap a favorite or recent call, or
choose a contact in your Contacts list.
Dial a number
Dial a number on the dial pad to make a call.
• Open Phone and enter the number using the dial pad.
• If you make a mistake, tap the Delete key.
• Tap the input bar above the keypad, tap "Paste" to paste a number, and tap to call that
number.
• If you're using dual SIM cards, tap for the number you want to use.
Return a recent call
To view recent calls and return a recent call:
• Open Phone and tap a number to call back.
• Tap next to a number to view more details about the call.
Ask Breeno Assistant to make a call
Do the following:
• Activate Breeno Assistant and say "dial" or "call" followed by the number you want to
call.
Page 65

• To call a contact in your Contacts list, say "dial" or "call" followed by the contact's name.
You can also ask Breeno Assistant to call the contact's business number, mobile number,
or landline number.
Make an emergency call
In case of emergency, use your phone to quickly call for help. With Emergency SOS, you can
quickly call for help and alert your emergency contacts.
Dial the emergency number when the phone is locked
You can make an emergency call when your phone is locked.
• On the lock screen, tap "SOS call".
• Dial the emergency number and then tap the Call button.
Use Emergency SOS
In case of emergency, Emergency SOS helps you make emergency calls and send help
messages more easily.
Turn on Emergency SOS
• Go to "Settings - Safety & emergency - Emergency SOS", carefully read the terms and
conditions, and tap "Agree".
• Turn on "Emergency call quick access". Press the power button five times in succession
to initiate an emergency call.
Set emergency numbers
• Go to "Settings - Safety & emergency - Emergency SOS - Emergency contact".
• Tap "Add" and choose a number from your recent calls, groups, or Contacts list.
Change Emergency SOS settings
• Auto call emergency services: If you turn on the switch, your phone will automatically call
the default number you set 3 seconds after you press the power button five times in
succession.
• Send SOS message: You can send a help message, photo of your environment, and a 5-
second recording to your emergency contact.
Favorite a contact
Add frequently used contacts to your favorites, so that you can find them easily.
Add a favorite
Open Phone, tap "Contacts", tap and hold a contact in the list, and tap "Add to Favorites".
Delete a favorite
Open Phone, tap "Contacts", tap and hold a contact in the list, and tap "Remove from Favorites".
Manage incoming calls
Page 66

You can answer, silence, or decline an incoming call or respond with text.
Answer a call
You can answer a call manually or automatically.
• Tap , or if you're on the lock screen, swipe up.
• You can also enable auto call answer when Bluetooth devices such as earphones are
connected. Open the dialer, tap , choose "Settings - Answer/End calls", turn on "Auto
answer calls when connected to external audio device", and set a duration of time to wait
until a call is auto-answered.
Silence a call
If you don't want to be disturbed by an incoming call, press the volume down button to silence
it.
Block calls
• Open Phone, tap and hold a contact, and add it to the blocklist.
• Calls, video calls, and SMS messages from the contact will be blocked.
• To set block & filter conditions, tap and choose "Settings - Block & filter". You can
block all calls from unknown numbers and one-ring calls.
• Identification of unknown numbers: Tap , choose "Settings", and turn "Identification of
unknown numbers" on or off.
Reply with a message
When you decline a call, you can reply with a message. Open the dialer, tap , choose
"Settings - Reject with SMS", and tap a quick reply or enter your own reply.
Page 67

Set up call forwarding
When you are unable to answer a call, you can forward it to another number.
• Open the dialer, tap , choose "Settings - Advanced settings - Call forwarding".
• Choose a call forwarding condition, for example, when busy or when unanswered, enter
the number to forward your calls to, and turn on the switch.
• Call forwarding is subject to your carrier's service.
Set up call waiting
If you're on a call and call waiting is turned on, you will get a sound notification for another
incoming call.
Open the dialer, tap , choose "Settings - Advanced settings - Additional settings", and turn
on "Call waiting".
While on a call
Adjust the audio
Do any of the following:
• Adjust the volume: Press the side volume buttons to increase or decrease the volume.
• Mute: Tap .
• Put the call on hold: Tap .
• Talk hands-free: Tap to switch to Speaker mode.
Start a conference call
You can initiate a conference call with multiple contacts (depending on your carrier).
Page 68

• While on a call, tap , call another number, and tap "Merge calls". Repeat to add more
people to the conference.
• During the conference call, you can talk privately with a person or disconnect a person.
Use another app while on a call
Do the following:
• Go to the home screen and open the app you want to use.
• To return to the call, tap at the top of the screen.
Set ringtones and vibrations
Adjust the ringtone volume, or use vibrations and turn the ringer off based on your needs. You
can also set the default ringtone and assign distinctive ringtones to certain contacts.
Turn the ringer on or off
You can adjust the ringtone volume or turn the ringer off.
Press any side volume button. A volume bar will be displayed on the left of the home screen.
Tap the ringer icon to turn it off and use vibrations.
Change the reminder ringtones and vibrations
Change the reminder ringtones and vibrations as needed.
• Go to "Settings - Sound & vibration".
• Turn "Vibrate on ring" and "Vibrate on silent" on or off.
• Tap "Ringtone" to set the default ringtone. You can choose from the system's ringtones,
online ringtones, or your audio files.
Call settings
Vibrate on answer/hang up: When this feature is enabled, your phone will vibrate when the
other party answers your call or hangs up.
Press the power button to hang up: Turning on this feature means that you can press the power
button to hang up while the screen is on.
Use Messages
Send and receive text messages
Start a conversation
In the Messages app, you can talk to one or more contacts.
• Open Messages and tap "+" in the lower right corner.
• Enter one or more phone numbers in the recipient bar, or tap and choose one or more
numbers from your recent calls, groups, or Contacts list.
• Tap the text field, type your message, and tap to send.
• If the message is sent successfully, "Sent" will appear below the message bubble.
• Double tapping a message bubble will make the text larger.
Page 69

Search for a message
Sent and received messages will be automatically saved to your Messages list for you to search
for at any time.
• In the Messages list, tap the name of a contact to view your conversation history.
• If there are too many messages in the list, you can enter keywords (such as a contact name
or message content) in the search box to search for a specific message.
Send photos, videos, and audio messages
In the Messages app , you can send photos, videos, and audio messages using the SMS and
MMS services.
Send a photo
1. Tap to the left of the input box, tap , and choose a photo from Photos.
2. Tap , take a photo, and edit it.
3. Tap the photo in the input box to view or delete it.
4. Tap to send the photo.
Send a video
1. Tap to the left of the input box and tap .
2. Choose a video stored on the phone or use the camera to record a video.
3. Tap the video in the input box to play or delete it.
4. Tap to send the video.
Send an audio message
1. Tap to the left of the input box and tap .
2. Tap "Record".
3. Tap the red Start button to start recording, and tap ✔ to stop recording.
4. Tap the audio icon in the input box to play or delete it.
5. Tap to send the audio message.
Check photos, videos, and audio messages
• Videos can be watched directly in Messages, whereas photos and audio messages will be
displayed as URLs.
• To view a photo or listen to an audio message, tap the URL in the message to go to the
linked webpage.
• You can tap to download the photo or audio file.
Send a contact card
Use Messages to share contact cards with others.
• Tap to the left of the input box and tap .
• To only share a contact's name and number, tap "Text", choose the contact from your
recent calls, groups, or Contacts list, tap "Add", and then tap .
• To send the full version of a contact card, tap "vCard", choose the contact from your
Contacts list, add it to the input box, and tap .
Page 70

• The contact cards that you receive will be displayed as URLs. You can view and download
them in your browser.
Delete and block messages
Delete messages
In the Messages app, you can delete messages one by one or in batches.
• To delete a single message in a conversation, tap and hold the message bubble and tap
"Delete".
• To delete messages in a batch, tap and hold a message, tap "More", and choose the
messages you want to delete.
Delete a conversation
To delete the conversation with a contact:
• Find the conversation in your Messages list.
• Tap and hold the conversation and tap "Delete".
Block messages
Adjust the system settings to block and filter unwanted messages.
• Open Messages and tap " - Block & filter - - Block & filter - Block messages".
• Turn on "Block MMS messages", tap "Keywords for spam messages", and add keywords
to block.
• Turn on "Block messages from unknown numbers" to block all messages from unknown
numbers.
Use OPPO Browser
View websites
You can easily navigate a webpage using OPPO Browser with a few taps.
• Open a webpage: Enter a URL or search term in the search box, or open a bookmark or
recently visited page.
• Refresh the page: Tap the Refresh icon next to the search box.
• Swipe to navigate back or forward: Turn on "Swipe Left/Right to Navigate Pages". You
can then swipe left to go back to the previous page or right to move forward to the next
page.
Share links
In addition to copying the URL, you can also use the browser's sharing function to share a
webpage.
• Tap "More" in the upper right corner and tap "Share".
• Copy the URL to the clipboard, or share the link to Twitter, Mail, Snapchat, etc.
Use text-only mode
Page 71

Browsing images via a mobile network may result in large data usage. You can use the textonly mode to save data.
• Tap "More" in the upper right corner and turn on "Text-only mode".
• In text-only mode, the browser only shows images when connected to a Wi-Fi network.
Use tabs
Use tabs to help you navigate between multiple webpages.
Open a new tab
To open a webpage in a new tab, scroll down to the bottom menu and tap "Multi-window New".
Browse open tabs
• Scroll down to the bottom menu and tap "Multi-window" to view all open tabs, which are
displayed as cards.
• To view a single tab, tap the tab.
• To go back to the current tab, tap "Back".
Close tabs
• To close a single tab, tap "Multi-window", and tap in the upper right corner of the tab
or swipe the tab left or right.
• To close all tabs, tap "Close all" in the lower left corner.
Search for websites
In OPPO Browser, enter a URL or a search term to search for websites or specific information.
Search the web
• Enter a URL or keyword in the top search box.
• Search suggestions that match your search term will be displayed. You can tap a search
suggestion.
• Or tap "Search" next to the search box or "Go" on the keyboard to search for exactly what
you typed.
Quickly access copied content
• Go to the bottom menu, tap "Settings", and turn on "Quick Access to/Search of Copied
Content".
• Copy a URL or search term. The browser will show the latest content in the clipboard. Tap
"Search" and go.
Search within websites
• Tap and hold a blank space on a webpage.
• Tap "Find in the Page" and enter search keywords. Relevant content on the page will be
highlighted in blue.
Page 72

Add and manage bookmarks
Bookmark frequently visited websites to easily revisit them later.
Add a bookmark
To bookmark the current page, tap "More" in the upper right corner and tap "Add to
Bookmarks".
Manage bookmarks
• Go to the bottom menu and tap "Bookmarks" to view all your bookmarks.
• To delete a bookmark, tap "Edit", choose the bookmark, and tap "Clear".
Sync bookmarks
Turn on HeyTap Cloud to sync your bookmarks. Make sure you have registered a HeyTap
account.
Go to the bottom menu, tap "Bookmarks - Turn on HeyTap Cloud to sync your bookmarks",
and sign in to your HeyTap account. Your bookmarks will be synced to the cloud.
Block ads
You can block ads through the browser settings.
Go to the bottom menu, tap "Settings - Website ad blocking", and turn on "Website ad blocking"
and "Blocking Reminder".
Clear browsing data
Go to the bottom menu and tap "Settings - Clear data".
Select input data, history, caches, cookies, location authorization, or other data, and tap "Clear"
to erase the data.
Browse privately
Adjust settings in OPPO Browser to keep your browsing activities private.
• Go to the bottom menu and turn on "Private". Your visited sites will not appear in history.
• The browser will show a watermark at the bottom to remind you that you're browsing in
private mode.
Fraudulent website warning
ColorOS can identify unencrypted and fake websites, and provide prominent warnings about
fraudulent, malicious, or potentially harmful websites.
Use File Manager to manage files
With File Manager, you can efficiently and easily find the files you need on your phone.
Quickly sort and view files
Page 73
File Manager automatically detects and sorts files into categories such as audio files, videos,
photos, documents, APK files, cloud drive files, QQ files, and WeChat files.
You can quickly access the categories from the home page to manage files in a simple and easy
manner. For example, all images are displayed in the same way as the Photos app. The
"Recents" tab shows the files added in the last 30 days in chronological order.
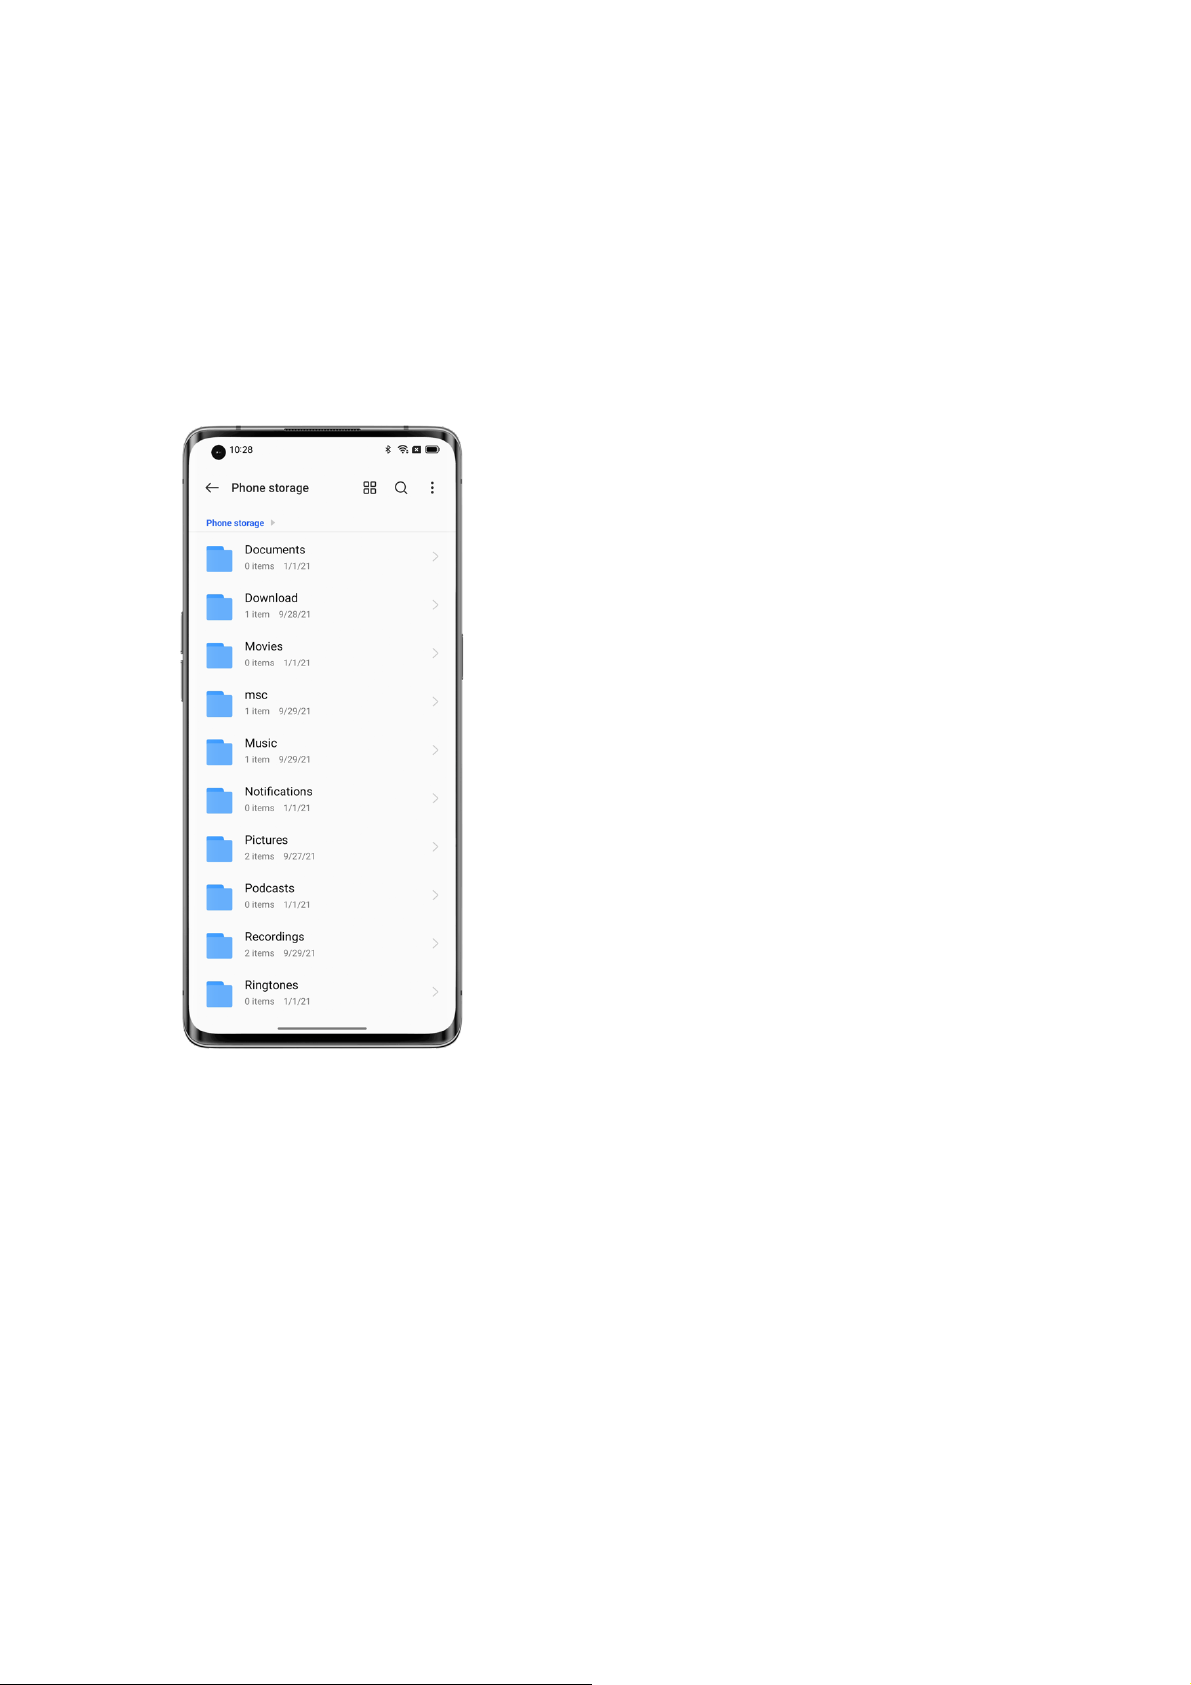
Manage folders
Open File Manager and tap "Phone storage" to manage files in hierarchical folders.
Set a file as private
Private files will not be displayed in File Manager and can only be viewed in Private Safe.
To set a file as private, tap and hold the file, tap "More", and choose "Set as private" or "Add
to Private Safe".
To access Private Safe, tap and hold the "Recents" or "Categories" tab on the home page. You
can add a Private Safe shortcut to the home screen to easily re-access it later.
Before using Private Safe, you need to set a privacy password.
Go to "Settings - Safety & emergency - Privacy password", and set up a privacy password and
security questions.
Print files from your phone
Is it possible to print photos and documents without a computer? Yes. You can use your phone.
Page 74

With the ColorOS wireless printing service, you can connect your phone to a printer and print
spreadsheets, to-do lists, and personal photos easily.
1. Print a document
• Make sure the printer is Mopria certified and connected to the same LAN as your phone.
• Open File Manager, open the document you want to print, tap "Share" in the upper right
corner, and choose "Print".
• Select and connect to the printer, preview the document, and set the printing parameters.
• Tap "Print" to print the document.
Page 75

2. Print a photo
• Make sure the printer is Mopria certified and connected to the same LAN as your phone.
• Open Photos, open the photo you want to print, tap "Send", and choose "Print".
• Preview the photo and set the printing parameters.
Page 76

• Tap "Print" to print the photo.
Note: Only photos and PDF files can be printed.
Keep your phone safe with Phone Manager
Phone Manager is a security and optimization center that provides useful tools such as Virus
scan, Clean up storage, and Privacy permissions.
Scan and optimize your system
When you open Phone Manager, it automatically detects and scores the system's overall
performance. Factors such as junk files, security risks, and power saving optimization being
disabled will result in a low score.
Tap "Optimize" to quickly optimize the system.
Page 77

Clean up storage
Tap "Clean up storage" to quickly access the storage cleanup page. You can also access the
page through "Settings - About phone - Storage - Clean up".
On the page, you can tap to clean app caches, ad caches, unnecessary APK files, and
uninstallation residual files with confidence. The system classifies these files as "junk files safe
to clean" through automatic file type analysis.
Page 78

Virus scan
Tap "Virus scan". The system will automatically scan for viruses and malware on your phone.
If any virus or malware is detected, tap the button on the page to remove it.
To change the virus scan engine, open Phone Manager, tap the Settings icon in the upper right
corner, and tap "Virus scan engine".
Page 79

Payment protection
Tap "Tools - Payment protection". The system will automatically scan the current payment
environment to check whether the system has been updated with the latest security patches,
whether the current network connection is reliable, and whether any malicious apps exist. Make
sure you pay or manage your personal property in a secure payment environment.
Manage protected apps
To enable payment protection for a payment, banking, or finance app, go to "Payment
protection" and turn the switch for the app on. The system will prevent third-party apps from
detecting the app status to keep your payment process private and your personal property safe.
Diagnostics
The Diagnostics tool functions as your phone's safety center to detect potential security risks
as well as software and hardware faults.
Start a diagnosis
• Tap "Diagnostics", select items, and tap "Run diagnostics".
• During the diagnosis, you can choose to skip some items.
• When the diagnosis is complete, a diagnostic report will be generated on the current
functionality of the phone's hardware and software.
Page 80

View historical diagnostic reports
Tap "Records" to view previous diagnostic reports.
Security events
This page shows security events such as recently received fraudulent calls and scam SMS
messages, detected viruses and risky apps, and financial security events, as well as solutions to
various security events.
Use Theme Store to personalize your phone
In the Theme Store app, you can download and change themes, wallpapers, ringtones, fonts,
and more to personalize your phone.
Download resources
Enter a resource name in the top search box to search for the resource, or tap the "Themes",
"Fonts", "Wallpapers", or "Ringtones" tab to view and download resources in that category.
Page 81

Change the theme
Open Theme Store and tap "Me - My resources" to view your themes.
Themes include the system's themes and themes downloaded from Theme Store.
A theme contains multiple elements such as the lock screen, UIs, home screen wallpaper, and
icons. Applying a new theme changes all these elements by default.
Change the wallpaper
Open Theme Store and tap "Me - My resources" to view your wallpapers.
Wallpapers include the system's wallpapers and wallpapers downloaded from Theme Store.
Tap "Apply" to use a wallpaper.
You can use it as your home screen wallpaper, lock screen wallpaper, or both.
You can also use a photo from Photos as a wallpaper.
Open Photos or File Manager, open the photo, and tap "More - Set as wallpaper".
Page 82
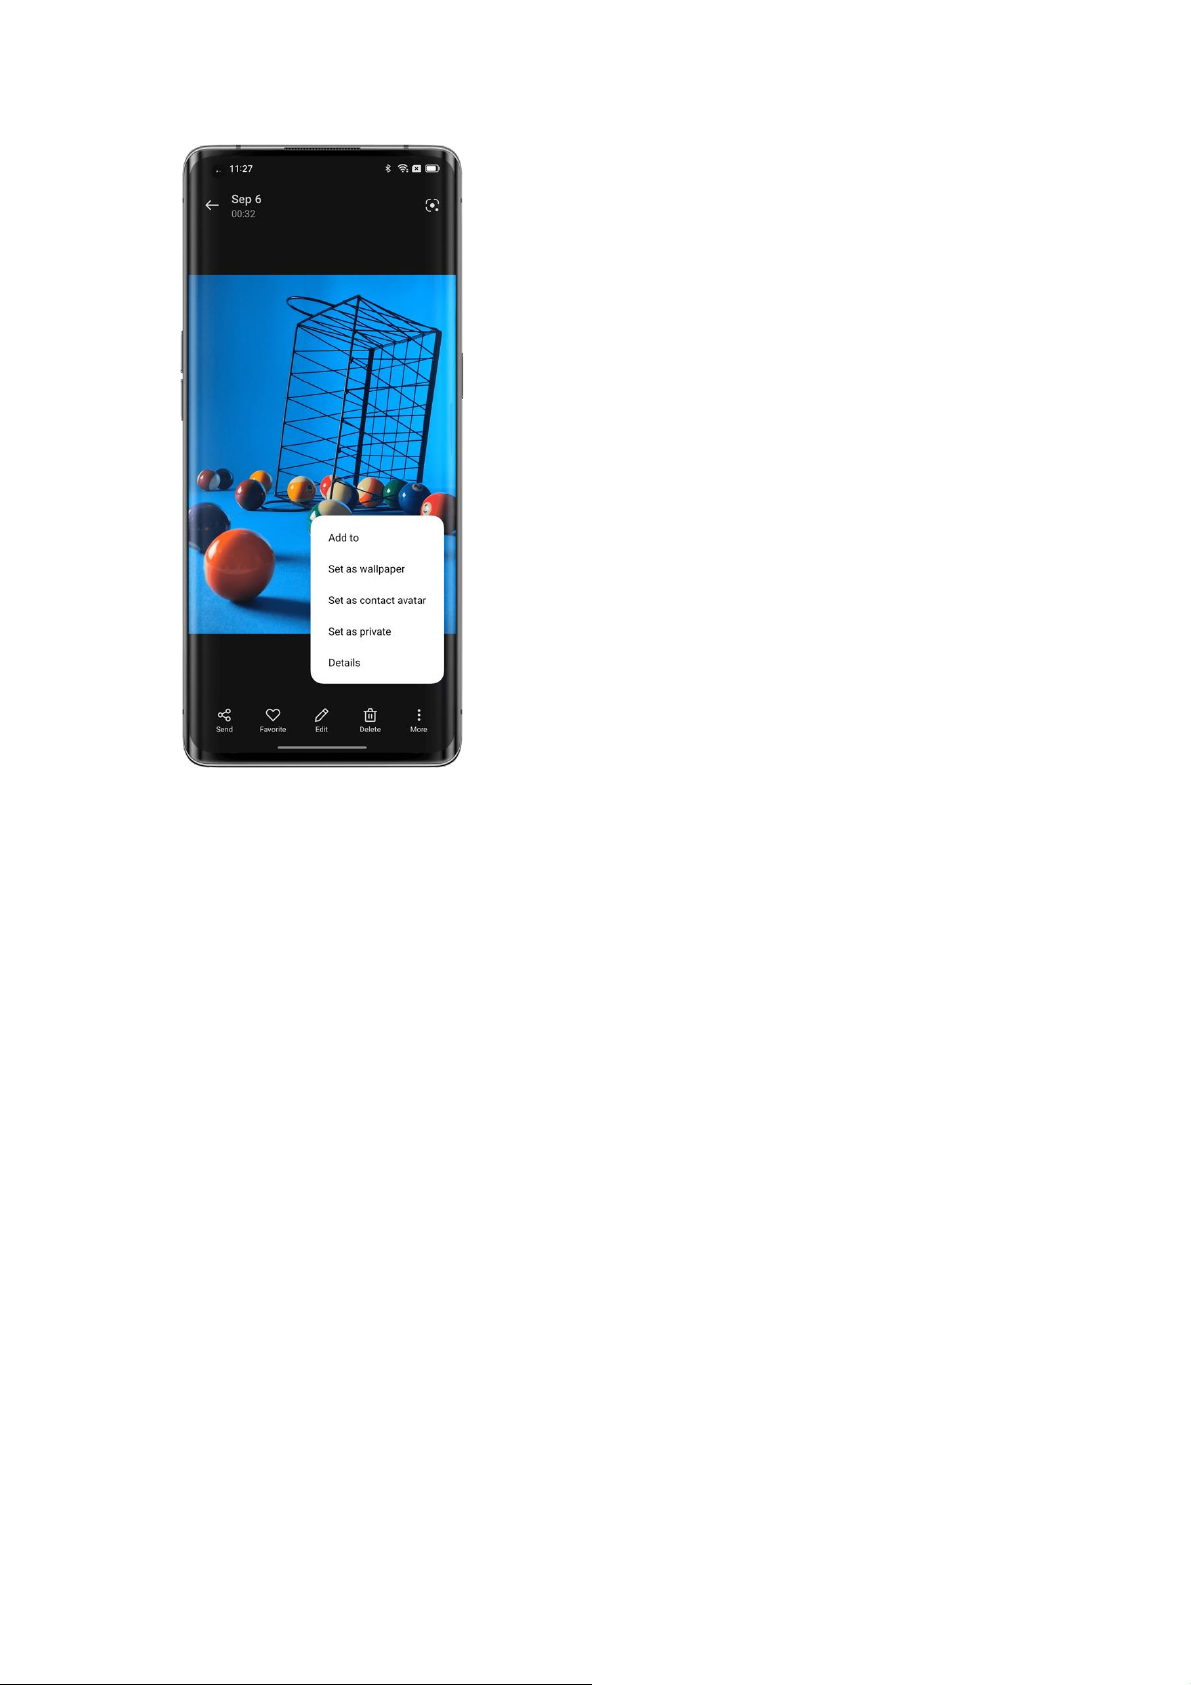
Change the font
Open Theme Store and tap "Me - My resources" to view your fonts.
ColorOS provides two default fonts. You can also download other fonts from the "Fonts" page.
Tap "Categories" and search for a font by type, color, format, style, or language.
Download the font you like, go to "My resources", and tap "Apply" to use the font.
Change the ringtone
Open Theme Store and tap "Ringtones". Download your desired ringtone and set it as your call
ringtone, message ringtone, calendar alert sound, or notification sound.
Manage resources
To delete resources:
• Go to "My resources" and tap the edit icon in the upper right corner.
• Select the resources you want to delete (the system's resources cannot be deleted).
• Tap "Delete".
Download apps from App Market
App Market is OPPO's official platform for downloading and managing apps and games. A
wide range of apps are available. All resources in App Market have been rigorously tested for
security. You can search for and download the apps you need in App Market.
Downloading apps from App Market is free of charge. However, some apps may include paid
features, which are charged by the app developers.
Page 83

When you open App Market, app recommendations for you are available on the home page.
You can enter keywords in the top search box to search for specific apps.
Games
Selections
View, pre-order, or download featured games.
Categories
Search for games by category, for example, puzzle games, role-play games, shooting games,
solitaire & chess games, simulation games, or action & adventure games.
Apps
Selections
View, pre-order, or download featured apps.
Categories
Search for apps by category, for example, video & photo editing apps, social media &
communication apps, music & radio station apps, and convenience tools.
Education
Get apps related to education and childcare.
Rankings
Page 84

Tap the "Top" tab to view various rankings of games and apps, for example, new products,
most popular standalone games, most popular online games, and trending products.
Personal information
Tap the "Me" tab to manage your personal information, contact customer service, or update
your apps.
Manage personal information: Tap your profile picture or display name to enter your personal
details page, and set or edit your profile picture, display name, name, gender, birthday, etc.
Update apps: Check for app updates and manage installed apps.
Have fun with Game Center
Game Center provides personalized quality game recommendations, game information, and
bonuses. You can download games and add special settings to your games in Game Center.
Download games
Search for games by name through the top search box, or check daily recommended games on
the "Selections" page. Tap "Top" to view popular games.
To download a game you like, tap "Install". The game will be automatically downloaded and
installed on your device. You will be notified if updates and bonuses for this game become
available.
Uninstall games
Uninstall games in the same way you uninstall other apps.
Tap and hold the icon of the game you want to uninstall on the home screen, and tap "Uninstall"
in the pop-up window.
Get bonuses
Tap the "Goodies" tab to collect various game gift packs, participate in events, enjoy privileges,
and complete rewards tasks to earn points.
Manage personal information
Tap the "Me" tab to manage your personal information, games, and platform assets, sign in to
your HOPO membership account, and contact customer service.
Manage personal information: Tap your profile picture or display name to enter your personal
details page, and set or edit your profile picture, display name, name, gender, birthday, etc.
Manage platform assets: Check and manage your points, KoKo Coin coupons, and gift packs.
Page 85

Use Recorder to make your work and life easier
The ColorOS system's Recorder app (in the "Tools" folder on the home screen by default) lets
you use the phone's built-in microphones to record daily conversations, lectures, musical ideas,
calls, and more. In ColorOS 12, the speech-to-text algorithm is improved to support faster audio
transcription.
Make a standard recording
Open Recorder and tap the red button to start recording. You can use another app while
recording, and the recording will continue in the background. To go back to Recorder, tap
at the top of the screen, or swipe down to open the Notification Center and tap the ongoing
recording task.
Record a conference/interview
Use the Conference recording or Interview recording mode to record a conference or interview.
These modes have been optimized based on the usage scenarios for better recording results.
• Conference recording: Suitable for recording multi-person conferences, with enhanced vocal
recording for clearer speech.
• Interview recording: Suitable for recording two-person dialogs. To use this mode, point the
top and bottom of the phone at the interviewer and interviewee respectively. The microphones
at both ends will be used to record the conversation.
Manage recordings
• Recording files are listed on Recorder's home page, named by default as "Mode + number".
• Tap and hold a recording file to share, rename, or set it as a ringtone.
Page 86

Mark a recording
• Tap the name of a recording file to enter the playback page which includes a progress bar and
waveform.
• Tap the flag icon to mark an important time point.
• Marks are named by default as "Mark + number". To rename a mark, tap the icon to the right
of the mark.
Use screen recording to capture wonderful moments
With the screen recording feature, you can record screen activities and exciting game moments
to share on social media. You can pause or resume a screen recording at any time.
Start screen recording from Quick Settings
1. Swipe down from the top of the screen to open Quick Settings.
2. Tap "Screen recording" and then tap the red button to start recording.
Start screen recording from Smart Sidebar
The screen recording feature is also available in Smart Sidebar.
1. Go to "Settings - Special features - Smart Sidebar", and turn on "Smart Sidebar".
2. Swipe on the screen to open Smart Sidebar, and tap "Screen recording" to start recording.
Change your screen recording settings
Adjust the screen recording settings to suit your needs through the following path.
Page 87

Path: Settings - System settings - Convenience tools - Screen recording.
Capture the microphone sound while screen recording
ColorOS allows you to capture sound while recording the screen. If you want to add your voice
commentary to a screen recording video, turn on "Record microphone sound" before recording.
Your voice will be recorded in the screen recording video.
Path: Settings - System settings - Convenience tools - Screen recording - Record microphone
sound.
Set the screen recording resolution
Before recording, change the screen recording resolution as needed.
The higher the resolution, the clearer the image and the larger the file size. A lower resolution
results in a lower image quality, but the video file will take up less storage space and a longer
period of time can be recorded. It will be easier to post-process.
Three resolution options are available:
• High (1080p at 16 Mbps)
• Medium (720p at 8 Mbps)
• Low (480p at 4 Mbps)
You can also customize the screen recording resolution and bitrate based on your needs.
Path: Settings - System settings - Convenience tools - Screen recording - Definition.
* The highest resolution may vary between phones.
Use the front camera while screen recording
If you want to capture a video using the front camera while screen recording, go to the screen
recording settings and turn on "Front camera recording".
Path: Screen recording - Front camera.
Record screen taps
To record your actions on the screen, go to the screen recording settings and turn on "Show
screen touches".
Path: Settings - System settings - Convenience tools - Screen recording - Show screen touches.
Use Clone Phone to transfer data easily
When replacing your phone, use Clone Phone to easily transfer all data (including settings,
photos, contacts, and apps) from your old phone to your new phone, so that you can have the
same experience on your new phone without going through the tedious configuration process.
ColorOS 12 introduces a new exclusive Always-On Display for Clone Phone, which shows the
transfer progress and remaining time in real time.
Transfer data from an Android phone
Install OPPO Clone Phone on both devices and make sure the phones have sufficient battery
power. You can download OPPO Clone Phone at https://i.clonephone.coloros.com/download.
Page 88

• Tap "This is the new phone" on the new phone and "This is the old phone" on the old
phone. Use the old phone to scan the QR code on the new phone to connect the phones.
• Select the data to transfer and wait until the transfer is complete.
Transfer data from an iPhone
Open Clone Phone on your new OPPO phone, tap "iPhone", and then sign in to your iCloud
account to transfer the data you want.
Set the input method
Text plays an important role in information recording and exchange. An easy-to-use input
method can help you type more efficiently.
Select a keyboard and input method
Change the default input method
Go to "Settings - System settings - Keyboard & input method" to change the default input
method.
Use the secure keyboard for passwords
Turn on "Secure keyboard for passwords". When you type a password, the security keyboard
will be activated automatically to protect your data security.
Use the keyboard to type text
In any app that allows text input, tap the text field to open the keyboard to type.
Use OPPO Share to transfer files quickly without using data
OPPO Share offers a hassle-free way to transfer phone files. You can use it to share files quickly
with other nearby OPPO phones without using mobile data.
• On the target phone, tap in Quick Settings to turn OPPO Share on.
• Open the file you want to share, and tap the recipient's profile picture in "OPPO Share".
To use OPPO Share, you need to turn on both Wi-Fi and Bluetooth on your phone; otherwise,
your phone will automatically turn them on when OPPO Share is turned on.
Use Accessibility mode
Accessibility features are provided to help all our users enjoy using their OPPO phone.
Path: Settings - System settings - Accessibility.
Page 89

TalkBack
TalkBack reads out what is on the screen, so that you can use the phone even if you can't see
the screen.
Turn TalkBack on
Go to "Settings - System settings - Accessibility - Vision - TalkBack", and turn the switch on.
Set up TalkBack
Go to "Settings - System settings - Accessibility - Vision - TalkBack", and tap the Settings icon
in the upper right corner to enter the settings page.
Adjust the settings such as the voice, other feedback, navigation, gestures, and shortcuts to suit
your needs.
Use TalkBack
Do the following:
• Swipe right or left to switch between items.
• Double-tap an item to activate it.
• Swipe with two fingers to scroll.
Turn TalkBack off
To turn TalkBack off:
Go to "Settings - System settings - Accessibility - Vision - TalkBack".
Tap to select the switch and then double-tap the switch. Tap "Close" in the dialog box, and
double-tap "Close".
Page 90

Accessibility Menu
Accessibility Menu provides a large on-screen menu for phone control, so that you can easily
and quickly find the UIs or features you want to access.
Turn Accessibility Menu on
Go to "Settings - System settings - Accessibility - General - Accessibility Menu", and turn the
switch on.
To open the Accessibility Menu, tap the icon in the lower right corner.
Turn Accessibility Menu off
Go to "Settings - System settings - Accessibility - General - Accessibility Menu", and turn the
switch off.
Note: You can tap and hold the icon in the lower right corner to switch between the
Accessibility Menu and Select to Speak.
Select to Speak
Select to Speak lets you tap on specific content on the screen to hear it read out.
Turn Select to Speak on
Go to "Settings - System settings - Accessibility - Vision - Select to Speak", and turn the switch
on.
To use Select to Speak, tap the icon in the lower right corner.
Set up Select to Speak
Go to "Settings - System settings - Accessibility - Vision - Select to Speak", and tap the Settings
icon in the upper right corner to enter the Settings page.
Adjust the settings such as read in background and read image text to suit your needs.
Use Select to Speak
Page 91

Do the following:
⚫ Tap on a single text paragraph.
⚫ Tap and drag to select multiple paragraphs.
⚫ Tap the play button to hear all content on the screen.
Turn Select to Speak off
Go to "Settings - System settings - Accessibility - Vision - Select to Speak", and turn the switch
off.
Note: You can tap and hold the icon in the lower right corner to switch between the
Accessibility Menu and Select to Speak.
Switch Access
Switch Access helps you control your phone and tablet if you have difficulty touching the
screen or pressing the buttons. With Switch Access, you can use one or more switches to select
content, scroll through pages, enter text, and more.
Turn Switch Access on
Go to "Settings - System settings - Accessibility - Interaction - Switch Access", and turn the
switch on.
Set up Switch Access
Go to "Settings - System settings - Accessibility - Interaction - Switch Access", and tap the
Settings icon in the upper right corner to enter the Settings page.
Adjust the settings such as custom switches, custom scanning, display & sound, and switch
accommodation to suit your needs.
Turn Switch Access off
Go to "Settings - System settings - Accessibility - Interaction - Switch Access", and turn the
switch off.
Personalized settings
Adjust the settings of features such as Click when pointer stops, Press power button to end calls,
and Touch & hold delay to suit your usage habits.
Path: Settings - System settings - Accessibility.
Text to speech (TTS) output
To customize TTS output:
Go to "Settings - System settings - Accessibility - Vision - Text-to-speech settings".
Tap to the right of "Preferred engine" to download and install your preferred voice.
You can also change the language (Chinese or English), speech rate, and pitch based on your
habits.
Subtitles and audio
You can adjust the audio and on-screen text settings for a better user experience.
Path: Settings - System settings - Accessibility - Hearing.
Sound amplifier
Page 92

Sound amplifier amplifies ambient sounds, so that you can hear them more clearly and
communicate with others more smoothly.
Path: Settings - System settings - Accessibility - Hearing - Sound amplifier.
To quickly activate Sound amplifier, do either of the following:
1. Swipe up with two fingers from the bottom of the screen.
2. Press and hold the two volume buttons simultaneously.
To use Sound amplifier, you need to connect wired or Bluetooth earphones to your phone.
You can choose to amplify the sound around you or the sound from your phone to hear it more
clearly.
Sound: You can adjust the sound volume captured by the phone and the volume for the left and
right ears separately.
Noise reduction: ColorOS provides three default noise reduction levels: high, medium, and low.
You can choose a level based on the current environment for the best hearing experience.
Use Focus mode to stay focused
Immerse yourself in your work or studies with Focus mode. In Focus mode, your phone plays
soothing nature sounds and blocks calls and notifications to help you concentrate.
Access Focus mode
Open Quick Settings and tap "Modes - Focus mode".
Page 93

Set a focus period
At the center of the screen, set a focus period of 5 minutes to 180 minutes. During this period,
all apps will be disabled and hidden, and all messages and notifications will be blocked.
Choose an ambient sound
There are four ambient sound options available: Silent, Wheat field, Waves, and Summer night.
Choose one to help you stay in the moment.
Customize your focus scheme
You can customize a focus scheme at the top of the screen to encourage yourself to stay focused.
Allow incoming call alerts
If you don't want to miss important calls in Focus mode, tap the menu icon in the upper right
corner, choose "Settings", and turn on "Incoming call alerts".
Turn Screen-off timer on
With the Screen-off timer, you don't need to press the power button to check the focus timer
during study or work. Tap the menu icon in the upper right corner, choose "Settings", and turn
on "Screen-off timer". The focus timer will be displayed when the screen is off (but not when
the battery level is low).
Turn Intense focus on
Intense focus mode cannot be stopped midway. To try Intense focus, tap the menu icon in the
upper right corner, choose "Settings", and turn on "Intense focus".
Use Simple mode to make your phone simpler
ColorOS Simple mode means a more concise home screen layout, larger icons and fonts, and
easier use.
In Simple mode, you can access the Accessibility Menu directly from the home screen to
quickly adjust system settings and accessibility settings.
Path: Settings - Special features - Simple mode.
Page 94

Use Multiple users mode to share your phone safely
Got your personal information mixed up on a shared device? Need an easier way to separate
your work and personal life? Want to maintain your privacy when lending out your phone?
Multiple users mode allows you to create multiple accounts. Each account has an independent
password, and data from different accounts is kept separate to maintain everyone's privacy.
1. Go to "Settings - Users & accounts - Multiple users".
2. Tap "+" in the upper right corner and tap "Add" to set up a private space. Install apps and set
wallpapers which are unique for the space.
3. Tap "Owner" or "Guest" to quickly switch to the corresponding space.
Back up your phone data and keep your data safe
When replacing your phone, phone backups can help you quickly set up your new phone. There
are three ways to back up your phone data.
Cloud backup
Use ColorOS Cloud backup to back up the following data:
• Call logs
• SMS messages
• Settings
Page 95

Path: Settings - HeyTap Cloud - Cloud backup.
Local backup
Go to "Settings - System settings - Back up & migrate - Local backup", and select the data you
want to back up, including:
1. Contacts
2. Messages
3. Call logs
4. System data
5. Apps (excluding app data)
Tap "Start backing up". The data that you select will be backed up in your phone storage (path:
storage/Backup). The process will take some time. During the process, do not restart or turn
your phone off to prevent data loss.
Note: All local backup data will be cleared if you wipe data and cache the partition, erase all
data, or restore your phone to its factory settings. You are advised to back up files and data on
an external storage device or PC in advance.
Backup on a PC
Connect your phone to a PC with a data cable. Tap "Transfer files" on the phone. On the PC,
open "Internal shared storage" and copy the "Backup" folder to the PC.
Page 96

Charge your phone
You can view the battery level in the status bar. When your phone is low on power, charge the
battery.
Connect your phone to a power outlet using the charging cable and power adapter included
with the phone. Look for the charging icon next to the battery icon to make sure your phone is
charging. Tap on the lock screen to view the charging progress in real time.
If your phone is extremely low on power, the display may be blank and you won't be able to
turn the phone on. In this case, you need to charge the phone for some time before you can use
it.
Photos and videos
Camera basics
Adjust the brightness
Open Camera and tap on the screen to focus manually. Then tap and hold on the screen, and
swipe up or down to adjust the brightness.
Zoom in or out
• Tap to zoom in, and tap it again to zoom out.
• Tap and hold to reveal the zoom slider, and drag the slider to zoom in or out.
• Pinch the screen to zoom in or out.
• Go to the camera settings page and set the volume buttons as zoom buttons. Then press the
volume up button to zoom in and volume down button to zoom out.
• You cannot zoom in or out in Portrait mode.
Lock the focus and exposure
Simply tap and hold the subject for which you want to lock the focus and exposure.
Use the flash
Tap the flash icon to adjust the flash mode to Off, On, Auto, or Fill light. In Auto mode, the
camera will automatically use the flash based on the ambient light conditions. In Fill light mode,
the flash will be kept on to improve the lighting. It is recommended to turn the flash on for
photo taking at night or in dimly lit environments.
Adjust camera modes
You can change the display and order of your camera modes and add other commonly used
camera modes to the mode bar to make your camera easier to use.
Path: Camera - More - Edit.
Page 97
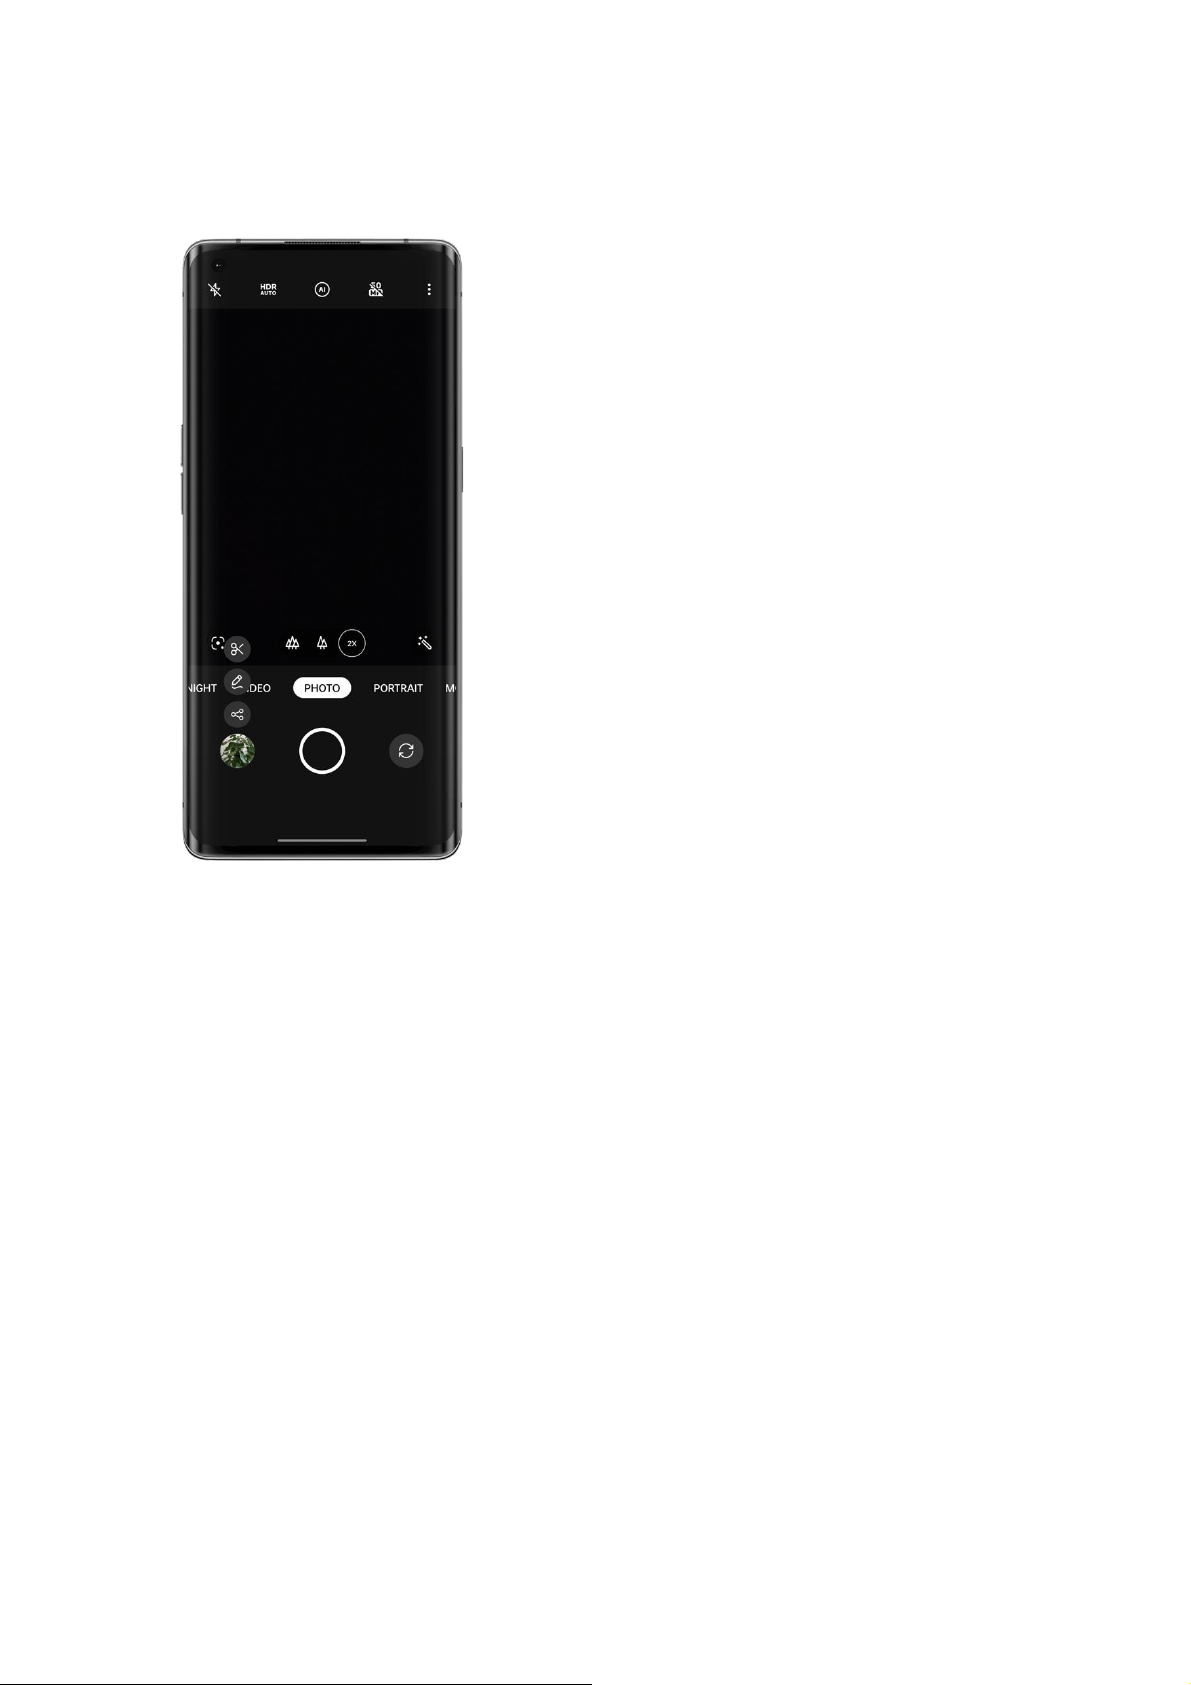
Edit or share a photo/video
After you take a photo or video, you can edit or share it directly from Camera without having
to open Photos.
Swipe up on the thumbnail in the lower left corner and tap the edit or share icon.
Tap the edit icon to enter the markup page, where you can annotate the photo using different
drawing tools (such as brushes, pencils, straight lines, rectangles, circles, and arrows of
different thicknesses) and colors.
Page 98

Tap the share icon to share the photo with friends via OPPO Share, Twitter, Snapchat, TikTok,
or email or to print it.
Take Portrait mode photos
With Portrait mode, you can easily shoot natural and high-quality portraits using the front or
rear cameras. You can also adjust the level of bokeh.
To take a selfie in Portrait mode, open Camera, choose Portrait mode, switch to the front camera,
and tap the shutter button. In the Portrait mode selfie, the background will be blurred to keep
you in sharp focus.
Bokeh Flare Portrait
Use Bokeh Flare Portrait to take beautiful portraits with DSLR bokeh effects and bokeh night
city scenes with a single tap.
Path: Camera - Portrait - Styles (in the upper left corner) - Bokeh Flare Portrait.
* Bokeh Flare Portrait is only available on some OPPO phones.
Page 99

AI beauty for beautiful you
ColorOS Camera comes with an upgraded portrait beauty feature, so you no longer need a thirdparty photo app. With just one tap, you can retouch portraits with touch-ups that match the skin
tones, scenes, and light conditions. The camera also adjusts the beauty intensity to make the
skin tones natural and in line with beauty aesthetics.
AI beautify
Portrait beauty is available for photos and videos. Tap to use AI beauty for beautiful portraits.
When you use the front camera:
Eight AI beauty options are available: Skin texture, Cheeks, Eye size, Nose, Chin, Head, Touch
up, and 3D.
When you take a video or use the rear cameras:
You can drag the AI beautify slider to adjust the intensity within a 0% to 100% range.
Text scanner
Use Text scanner to take a photo
• Open Camera, tap "More - Text scanner", and take a photo.
• Text scanner will automatically correct distortion of the photo and sharpen the text.
Optimize a photo
• Open a photo and tap "T" in the upper right corner.
Page 100

• Tap "Adjust" and stretch the photo to make the text easier to read.
• Tap "Enhance" and apply effects such as Color, Black & white, and Outline to sharpen the
text.
 Loading...