

ON
ON BALANCE
MYCO
™
USER GUIDE
MM SERIES
Thanks for purchasing the MM Series Digital Mini Scale! This
User Guide is designed to get you up and running quickly
with your scale. Scales are precision instruments and
require proper care and skill to get the best results.
If you have questions or need support, visit us at
http://www.obscales.com/support or scan the QR Code
on the back of this manual using your smartphone.
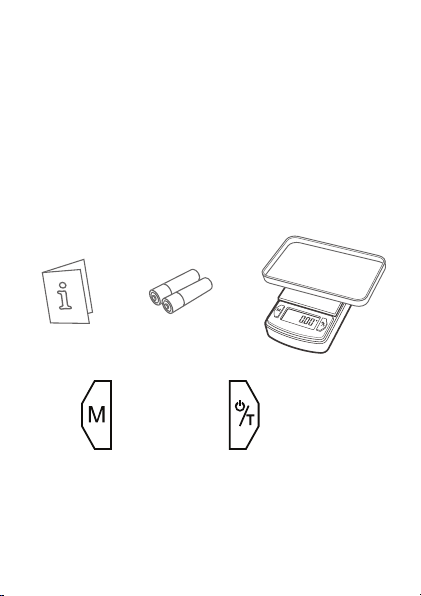
What’s In The Box
User Guide
Two AAA
Batteries
MM Series Digital
Mini Scale with
Cover/Tray
Key Descriptions
MODE
ON/OFF
TARE
ON/OFF / TARE - Turns the scale ON and OFF.
Zeroes the scale. Also subtracts
the weight of an empty container
(see Tare Function).
MODE - Changes the weighing unit.
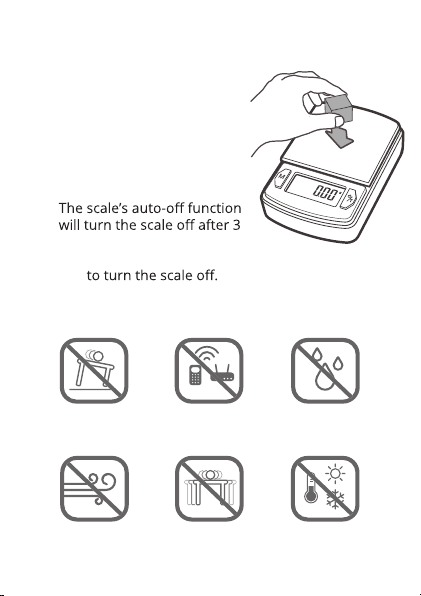
Weighing Your First Item
1. Press the ON/OFF key to
turn the scale on.
2. Place the item on the centre
of the weighing platform.
3. Take your reading from
the display. You can press
the MODE key to convert
between weighing units.
4.
minutes of inactivity or you
can hold down the ON/OFF
key
Things To Avoid
Unlevel Surfaces
Air Currents
Radio Frequency
Interference
Vibration
High Humidity
Extreme Temps
Tare Function
The Tare function allows you to subtract the weight of a
container so that the display only shows the weight of the
contents.
Place an empty tray
or container on the
platform.
Press the TARE
key to subtract the
container’s weight.
Add items to the
container to see their
weight on the display.
NOTE: The weight of the container will subtract from
the available capacity and will leave a negative value
on the display once the weight is removed. Press
TARE again to return the display to zero.
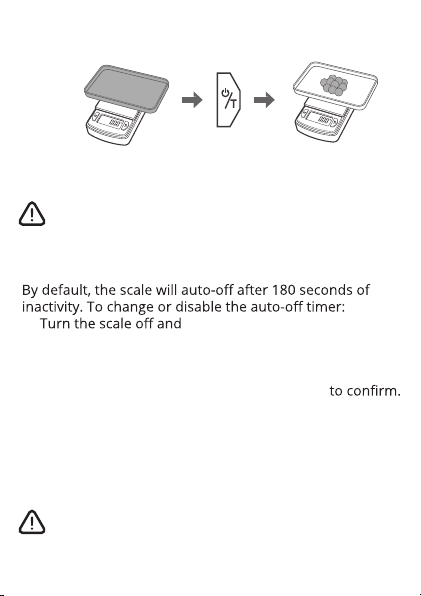
Auto - Off
1.
hold down the MODE key, at the
same time quickly press ON/OFF key 4/5 times until
180 is displayed, release the buttons.
2.
Press the MODE key to cycle through your choices of
0/60/120/180 seconds. Then press ON/OFF
The display shows “PASS”. 3.
Accuracy
Your scale comes calibrated from the factory and most
users won’t need to calibrate their scale for a long time.
You should check your scale’s accuracy periodically using
calibration weights and perform calibration if necessary.
NOTE: Only use trusted calibration weights.
Household items such as bottles and cans with
weights printed on the side are not suitable for
checking accuracy as these values are approximate
and don’t include the container weight (Net Weight).

Calibration
Calibration adjustment is permanent and
should only be performed using accurate
calibration weights that match the
requirements for your scale (see the chart on
back). Do not use coins or other household
items to calibrate.
1. Prepare the required weight for your scale (see
chart on back).
2.
and let the scale adjust to room temperature.
3. Press ON/OFF to turn the scale on and wait for the
scale to stabilise.
4. Press and hold the MODE key until the display
shows ‘CAL’.
5. Make sure nothing is on the platform then press
MODE
6. The display will then
calibration weight.
7. Place the required
calibration weight on the
centre of the platform.
8. The display will show
‘PASS’ then return to
normal weighing mode.
You may now turn the
weighing.

MM-100 MM-600
100.00 g / 3.527 oz /
Max Capacity
Readability
Weighing
Units
Dimensions
Calibration
Weight
Power 2 x AAA Batteries (Included)
Warranty 10 Year Limited Warranty
For more information, including
weighing tips and support, scan
this code with your smartphone
Or visit us online at
www.obscales.com/support/
3.215 ozt / 64.30 dwt /
500.00 ct / 1543.2 gn
0.01 g / 0.001 oz /
0.001 ozt / 0.01 dwt /
0.05 ct / 0.1 gn
g, oz, ozt, dwt, ct, gn
Overall: 89 mm x 60 mm x 20 mm
Platform: 55 mm x 55 mm
Display: 32 mm x 13 mm
100g (Sold Separately) 500g (Sold Separately)
600.0 g / 21.16 oz /
19.29 ozt / 385.8 dwt
3000.0 ct / 9259 gn
0.1 g / 0.01 oz /
0.01 ozt / 0.1 dwt /
0.5 ct / 1 gn
g, oz, ozt, dwt, ct, gn

Gracias por comprar la balanza digital MM. Esta Guía del usuario se ha
diseñado para que pueda empezar a utilizar la balanza rápidamente. Las balanzas son
instrumentos de precisión que requieren buena técnica y un mantenimiento adecuado
para conseguir los mejores resultados. Si tiene alguna pregunta o si necesita ayuda
visítenos en http://www.obscales.com/support o utilice su teléfono inteligente para
escanear el código QR que aparece al dorso de este manual.
Descripción de las teclas
MODE (MODO): cambia la unidad de peso.
POWER/TARE (ENCENDER/TARA): para encender o apagar la balanza. Pulse esta opción
para poner a cero y establecer el peso de tara durante la pesada.
Pesar el primer objeto
1. Pulse la tecla ON/OFF para encender la balanza.
2. Coloque el objeto en el centro de la plataforma de pesado.
3. Lea el resultado en la pantalla. Puede pulsar la tecla MODE para pasar de una unidad de
medida a otra.
4. La función de apagado automático de la balanza se acciona tras 3 minutos sin actividad;
también puede pulsar y mantenga pulsada la tecla ON/OFF para apagar la balanza usted
mismo.
Factores que se deben evitar
Interferencias de radiofrecuencia / Superficies desniveladas / Humedad elevada /
Corrientes de aire / Vibración / Temperaturas extremas
Función de tara
La función de tara le permite restar el peso de un recipiente para mostrar solo el peso del
contenido. Coloque una bandeja vacía o recipiente en la plataforma. Pulse la tecla ON/OFF
para restar el peso del recipiente. Añada objetos al recipiente para ver su peso en la
pantalla.
NOTA: El peso del recipiente se restará de la capacidad disponible y se mostrará un valor
negativo en pantalla cuando el peso se retire. Pulse ON/OFF otra vez para que la pantalla
vuelva a mostrar un cero.
Función de apagado automático seleccionable
La balanza se desconecta automáticamente y de forma predeterminada tras 180 segundos
sin actividad. Para cambiar el tiempo tras el cual la balanza se apaga automáticamente:
1. Apague la balanza y mantenga pulsada la tecla MODE y pulse al mismo tiempo y
rápidamente la tecla ON/OFF 4 o 5 veces hasta que el número 180 se muestre en pantalla.
Deje de pulsar las teclas.
2. Pulse la tecla MODE para desplazarse por las opciones de tiempo: 0/60/120/180
segundos. A continuación, pulse ON/OFF para confirmar.
3. En la pantalla se mostrará la palabra ‘PASS’.
Si ha seleccionado 0 en el paso 2, la función de apagado automático se desactivará. La
balanza permanecerá encendida hasta que se apague manualmente.
Precisión
Su balanza viene con calibración de fábrica y la mayoría de los usuarios no necesitan volver
a recalibrarla durante bastante tiempo. Debe comprobar la precisión de su balanza
periódicamente utilizando las pesas de calibración y recalibrando si fuera necesario.
NOTA: Solo utilice pesas de calibración de confianza. Los objetos caseros como recipientes
o botes con pesos impresos en el lateral no son adecuados para comprobar la precisión ya
que estos valores son aproximados y no incluyen el peso del recipiente (peso neto).
Calibración
El ajuste de la calibración es permanente y solo debe realizarse utilizando pesas de
calibración precisas que se ajusten a los requisitos de su balanza (vea la tabla
siguiente). No utilice monedas u otros objetos caseros para calibrar.
1. Prepare el peso requerido para su balanza (vea la tabla siguiente).
2. Coloque la balanza en una superficie plana y nivelada para realizar la calibración y deje
que el aparato se ajuste a la temperatura ambiente.
3. Pulse ON/OFF para encender la balanza y espere a que se estabilice.
4. Pulse y mantenga pulsada la tecla MODE hasta que se muestren las letras ‘CAL’ en la
pantalla.
5. Asegúrese de que la plataforma está vacía y pulse MODE para confirmar el ajuste a cero
del aparato.
6. A continuación se indicará en la pantalla, de forma intermitente, la pesa de calibración
necesaria.
7. Coloque la pesa de calibración en el centro de la plataforma.
8. En la pantalla se mostrará la palabra ‘PASS’ y luego volverá al modo de pesado normal.
Ahora puede apagar la balanza o seguir pesando.
ES

Nous vous remercions d’avoir acheté la balance digitale MM ! Ce guide
d’utilisation est conçu pour vous permettre de commencer à utiliser rapidement votre balance.
Les balances étant des appareils de haute précision, une attention et un savoir-faire particuliers sont
nécessaires pour en tirer le meilleur parti. Si vous avez des questions ou souhaitez effectuer une
demande d’assistance, visitez le site http://www.obscales.com/support ou scannez le code QR qui se
trouve au dos de ce manuel à l’aide de votre smartphone.
Description des touches
MODE - Permet de changer l’unité de pesage.
POWER/TARE (ALIMENTATION/TARE) – Permet d’allumer (ON) et d’éteindre (OFF) la balance.
Appuyer sur la touche pour mettre à zéro/tarer la balance pendant le pesage.
Peser votre premier article
1. Appuyez sur la touche ON/OFF pour allumer la balance.
2. Placez l’article au centre dela plateforme de pesage.
3. Le poids mesuré s’affiche. Vous pouvez appuyer sur la touche MODE pour convertir le poids dans
d’autres unités de pesage.
4. La fonction d’arrêt automatique de la balance éteindra la balance après 3 minutes d’inactivité.
Vous pouvez, si vous le préférez, appuyer sur la touche ON/OFF et maintenez-la enfoncée pour
éteindre la balance.
Éviter
Les interférences radioélectriques / Les surfaces inégales / Une forte humidité / Les courants d’air /
Des vibrations / Les températures extrêmes
Fonction de tarage
La fonction de tarage vous permet de soustraire le poids d’un récipient de telle sorte que seul le
poids du contenu s’affiche. Placez un récipient ou plateau vide sur la plateforme. Appuyez sur la
touche ON/OFF pour soustraire le poids du récipient. Ajouter des articles dans le récipient afin de
voir leur poids s’afficher.
REMARQUE : Le poids du récipient sera soustrait de la capacité disponible et entraînera l’indication
d’une valeur négative sur l’écran une fois le poids retiré. Appuyez à nouveau sur ON/OFF pour
remettre l’écran à zéro.
Fonction d’arrêt automatique réglable
La balance s’éteindra automatiquement, par défaut, après 180 secondes d’inactivité. Afin de modifier
ou de désactiver la minuterie d’arrêt automatique:
1. Éteignez la balance et maintenez la touche MODE enfoncée tout en effectuant 4 à 5 pressions
brèves sur la touche ON/OFF, jusqu’à ce que le chiffre 180 s’affiche. Relâchez les touches.
2. Appuyez sur la touche MODE pour passer en revue les options de 0/60/120/180 secondes.
Appuyez alors sur ON/OFF pour confirmer votre choix.
3. ‘PASS’ s’affiche.
Si vous avez choisi l’option 0 à l’étape nº 2, la fonction d’arrêt automatique est désactivée. La balance
reste allumée jusqu’à ce que vous l’éteigniez manuellement.
Précision
Votre balance ayant été calibrée en usine, la plupart des utilisateurs n’auront pas besoin de la
recalibrer avant longtemps. Nous vous conseillons de vérifier périodiquement la précision de votre
balance à l’aide de poids de calibrage et de procéder à une opération de calibrage si nécessaire.
REMARQUE : Utilisez uniquement des poids de calibrage fiables. Les articles ménagers tels que des
bouteilles et boîtes de conserve sur lesquelles est imprimé le poids ne permettent pas de vérifier la
précision d’une balance dans la mesure où le poids indiqué sur ces articles est approximatif et ne
tient pas compte du poids du contenant (Poids net).
Calibrage
Le réglage du calibrage est un processus permanent qui ne doit être réalisé qu’au moyen de
poids de calibrage précis et adaptés aux spécificités de votre balance (voir le graphique
ci-dessous). Nous vous conseillons vivement de ne pas utiliser de pièces de monnaie ni
d’autres articles ménagers pour calibrer votre balance.
1. Préparez le poids adapté à votre balance (voir le graphique ci-dessous).
2. Trouvez une surface plane et de niveau sur laquelle effectuer le calibrage et laissez la balance
s’adapter à la température ambiante.
3. Appuyez sur ON/OFF pour allumer la balance et attendez qu’elle se stabilise.
4. Appuyez sur la touche MODE et maintenez-la enfoncée jusqu’à ce que «CAL» s’affiche.
5. Assurez-vous qu’il n’y ait rien sur la plateforme, puis appuyez sur MODE pour confirmer le point
zéro.
6. Le poids de calibrage approprié clignotera sur l’écran.
7. Placez le poids de calibrage approprié au centre de la plateforme.
8.«PASS» s’affichera sur l’écran avant que celui-ci ne retourne au mode de pesage normal. Vous
pouvez alors éteindre la balance ou poursuivre le pesage.
FR

Bedankt voor de aankoop van de MM Digitale Weegschaal! Deze handleiding
is bedoeld om u snel aan de slag te helpen met uw weegschaal. Weegschalen zijn
precisie-instrumenten en vereisen de juiste zorg en vaardigheid om optimale resultaten te
verkrijgen. Als u vragen hebt of ondersteuning nodig hebt, ga dan naar http://www.obscales.com/support of scan de QR-code op de achterkant van deze handleiding met uw
smartphone.
Beschrijving van de toetsen
MODE (MODUS) – Wijzigt de weegeenheid.
POWER/TARE (AAN-UIT/TARRA) – Schakelt de weegschaal AAN of UIT. Druk op deze toets
om de weegschaal tijdens het wegen op nul/tarra te stellen.
Uw eerste artikel wegen
1. Druk op de ON/OFF-toets om de weegschaal aan te zetten.
2. Plaats het artikel in het midden van het weegplateau.
3. Lees de meting af van de display. U kunt op de MODE-toets drukken om de weegeenheid
te wijzigen.
4. De automatische uitschakelfunctie zet de weegschaal na 3 minuten inactiviteit uit of u
kunt op de ON/OFF- toets en houd deze ingedrukt om de weegschaal uit te zetten.
Te vermijden
Radiofrequentie-interferentie / Oneffen oppervlakken / Hoge luchtvochtigheid /
Luchtstromen / Vibratie / Extreme temperaturen
Tarrafunctie
Met de tarrafunctie kunt u het gewicht van een houder aftrekken, zodat de display alleen
het gewicht van de inhoud weergeeft. Plaats een lege schaal of houder op het plateau. Druk
op de ON/OFF-toets om het gewicht van de houder af te trekken. Doe artikelen in de
houder om hun gewicht op de display te zien.
OPMERKING: Het gewicht van de houder wordt afgetrokken van de beschikbare capaciteit
en zorgt voor een negatieve waarde op de display zodra het gewicht is verwijderd. Druk
opnieuw op ON/OFF om de display terug op nul te zetten.
Selecteerbare automatische uitschakelfunctie
Standaard wordt de weegschaal automatisch uitgeschakeld na 180 seconden inactiviteit.
Indien u de timer voor automatisch uitschakelen wilt wijzigen of uitschakelen:
1. Zet de weegschaal uit en houd de MODE-toets ingedrukt, druk tegelijkertijd snel op de
ON/OFF-toets, 4-5 keer totdat 180 wordt weergegeven. Laat de toetsen los.
2. Druk op de MODE-toets om door uw keuzes van 0/60/120/180 seconden te scrollen.
Druk daarna op ON/OFF om te bevestigen.
3. Op de display verschijnt ‘PASS‘.
Als u 0 hebt geselecteerd in stap 2, is de automatische uitschakelfunctie uitgeschakeld. De
weegschaal zal aan blijven totdat deze handmatig wordt uitgeschakeld.
Nauwkeurigheid
Uw weegschaal wordt gekalibreerd geleverd vanuit de fabriek en de meeste gebruikers
hoeven hun weegschaal gedurende lange tijd niet te kalibreren.
U dient de nauwkeurigheid van uw weegschaal regelmatig te controleren met behulp van
kalibratiegewichten en, indien nodig, een kalibratie uit te voeren.
OPMERKING: Gebruik alleen voor dit doel bestemde kalibratiegewichten. Huishoudelijke
artikelen zoals flessen en blikjes met op de zijkant afgedrukte gewichten zijn niet geschikt
voor het controleren van de nauwkeurigheid, aangezien deze waarden slechts bij
benadering zijn en het gewicht van de houder niet inbegrepen is (nettogewicht).
Kalibratie
Kalibratie-aanpassing is permanent en mag alleen worden uitgevoerd met behulp
van nauwkeurige kalibratiegewichten die overeenkomen met de vereisten voor uw
weegschaal (zie de onderstaande tabel). Gebruik geen munten of andere
huishoudelijke artikelen om te kalibreren.
1. Kies het gewenste gewicht voor uw weegschaal (zie onderstaande tabel).
2. Zoek een effen en horizontaal oppervlak om de kalibratie uit te voeren en de weegschaal
aan te passen aan kamertemperatuur.
3. Druk op ON/OFF om de weegschaal aan te zetten en wacht tot de weegschaal is
gestabiliseerd.
4. Druk op de MODE-toets en houd deze ingedrukt tot de display ‘CAL’ weergeeft.
5. Zorg ervoor dat er niets op het weegplateau staat en druk vervolgens op MODE om het
nulpunt te bevestigen.
6. Het vereiste kalibratiegewicht wordt dan knipperend weergegeven op de display.
7. Plaats het vereiste kalibratiegewicht in het midden van het weegplateau.
8. Op de display verschijnt ‘PASS’ en vervolgens keert de weegschaal terug naar de normale
weegmodus. U kunt de weegschaal nu uitzetten of doorgaan met wegen.
NL

Wir danken Ihnen für den Erwerb der MM-Digitalwaage! Die vorliegende Anleitung soll
Ihnen dabei helfen Ihre Waage rasch in Betrieb zu nehmen. Waagen sind Präzisionsinstrumente und liefern nur dann optimale Ergebnisse, wenn Sie sorgsam und mit Geschick genutzt
werden. Sollten Sie irgendwelche Fragen haben oder weitere Unterstützung benötigen, so
besuchen Sie uns bitte bei http://www.obscales.com/support oder scannen Sie mit Ihrem
Smartphone den auf der Rückseite dieser Anleitung befindlichen QR-Code.
Beschreibung der Tasten
MODE (MODUS) – Ändern der Wägeeinheit.
POWER/TARE (EIN-AUS/TARA) – Ein- oder Ausschalten der Wage. Drücken, um auf Null zu
stellen / oder mit Tara-Funktion beim Wiegen Behältergewicht abzuziehen.
Wiegen Ihres ersten Gegenstands
1. Zum Einschalten der Waage die Taste ON/OFF drücken.
2. Den Gegenstand in die Mitte der Wiegeplatte legen.
3. Auf dem Display das Gewicht ablesen. Durch Drücken auf MODE kann die Wägeeinheit
umgeschaltet werden.
4. Die Auto-Off-Funktion schaltet die Waage nach 3 Minuten ohne Bedienung automatisch ab.
Zum Abschalten Solange auf ON/OFF drücken gedrückt werden.
Folgendes vermeiden
Elektromagnetische Störungen / Unebene Abstellflächen / Hohe Feuchtigkeit / Luftzug /
Vibrationen / Extreme Temperaturen
Tara-Funktion
Mit der Tara-Funktion kann das Gewicht eines Behälters abgezogen werden, so dass auf dem
Display nur das Gewicht seines Inhalts zur Anzeige kommt. Eine leere Schale oder einen
anderen Behälter auf die Wiegeplatte geben. Die Taste ON/OFF drücken, um das Gewicht
des Behälters abziehen zu lassen. Zutaten in den Behälter geben und ihr Gewicht auf der
Anzeige ablesen.
HINWEIS: Die erlaubte Höchstlast wird um das Gewicht des Behälters reduziert. Nach
Wegnahme des Behälters wird deshalb ein negatives Gewicht angezeigt. Erneut auf ON/OFF
drücken, um die Anzeige auf 0 zurückzusetzen.
Verstellbare Abschaltautomatik
Standardmäßig schaltet die Waage nach 180 Sekunden Nichtbenutzung automatisch ab. Um
die Abschaltautomatik zu verändern oder abzustellen ist folgendermaßen vorzugehen:
1. Die Waage abschalten und dann die MODE-Taste niederdrücken und gleichzeitig 4 bis 5
mal kurz die Taste ON/OFF drücken, bis der Wert 180 zur Anzeige kommt. Die Tasten
freigeben.
2. Durch Drücken von MODE kann zwischen den Werten 0/60/120/180 Sekunden
weitergeschaltet werden. Bei Anzeige des gewünschten Werts durch Drücken auf ON/OFF
bestätigen.
3. Auf dem Display kommt ‘PASS‘ zur Anzeige.
Bei Wahl von 0 unter Schritt 2 ist die automatische Abschaltung außer Kraft gesetzt. Die
Waage bleibt dann solange eingeschaltet, bis sie per Hand abgeschaltet wird.
Genauigkeit
Die Waage wird vom Werk kalibriert geliefert und die meisten Benutzer müssen ihre Waage
lange Zeit nicht kalibrieren.
Kalibriergewichten und kalibrieren Sie, wenn nötig, neu.
HINWEIS: Nur zuverlässige Kalibriergewichte verwenden. Volle Flaschen oder Dosen mit
seitlichem Gewichtsaufdruck eigenen sich nicht zur Überprüfung der Genauigkeit, da die
Gewichtsangaben nicht präzis sind und das Gewicht des Behälters nicht enthalten
(Nettogewicht).
Kalibrierung
Die Kalibrierung ist permanent eingestellt und darf nur mit präzisen, den
Anforderungen der vorliegenden Waage entsprechenden Kalibriergewichten erneut
vorgenommen werden (siehe nachstehende Aufstellung). Keine Münzen oder andere
Gegenstände zum Kalibrieren verwenden.
1. Das für die Waage benötigte Gewicht vorbereiten (siehe nachstehende Aufstellung).
2. Die Kalibrierung auf einer waagrechten ebenen Fläche vornehmen und zuvor die
Temperatur der Waage der Raumtemperatur angleichen.
3. Zum Einschalten der Waage auf ON/OFF drücken und die Stabilisierung der Waage
abwarten.
4. Solange auf MODE drücken bis „CAL“ zur Anzeige kommt.
5. Sicherstellen, dass die Wiegeplatte leer ist und zur Bestätigung der Nullpunkteinstellung
auf MODE drücken.
6.
Auf dem Display kommt dann das benötigte Kalibriergewicht blinkend zur Anzeige.
7. Das benötigte Kalibriergewicht in der Mitte der Wiegeplatte ablegen.
8. Die Meldung PASS wird angezeigt, wonach die Waage zu normalem Wägebetrieb
zurückkehrt. Die Waage kann nun abgeschaltet oder zum Wiegen benutzt werden.
Prüfen Sie bitte regelmäßig die Genauigkeit Ihrer Wage mit
DE

Grazie per aver acquistato la Bilancia Digitale MM! Questo Manuale Utente è
studiato per permettervi di iniziare rapidamente ad utilizzare la bilancia. Le bilance
sono strumenti di precisione che richiedono cura e competenze adeguate per offrire i
migliori risultati. Per ottenere risposte e assistenza, visitare il sito http://www.obscales.com/support oppure leggere il QR Code presente sul retro del presente Manuale
con uno smartphone.
Descrizione dei tasti
MODE (MODALITÀ) – Modifica l’unità di pesatura.
POWER/TARE (ALIMENTAZIONE/TARA) – Accende/spegne la bilancia. Premere il tasto
per azzerare/calcolare la tara durante la pesatura.
Pesatura del primo articolo
1. Premere il tasto ON/OFF per accendere la bilancia.
2. Collocare l’articolo al centro della piattaforma di pesatura.
3. Viene visualizzato il peso misurato. È possibile premere il tasto MODE per convertire
il peso in altre unità di pesatura.
4. La funzione Auto-Off spegnerà la bilancia dopo 3 min. di inattività; in alternativa,
premere e mantenere premuto il tasto ON/OFF per spegnere la bilancia.
Cose da evitare
Interferenze da radiofrequenza / Superfici non livellate / Forte umidità /
Correnti d’aria / Vibrazioni / Temperature estreme
Funzione Tara
La funzione Tara permette di sottrarre il peso di un contenitore, affinché il display
indichi solo il peso del contenuto. Collocare il vassoio o il contenitore vuoto sulla
piattaforma. Premere il taso TARE per sottrarre il peso del contenitore.
Aggiungere gli articoli nel contenitore per visualizzare il loro peso sul display.
NOTA: Il peso del contenitore verrà sottratto dalla capacità disponibile e, una volta
rimosso, il display indicherà un valore negativo. Premere nuovamente TARE per
azzerare il display.
Funzione Auto-Off selezionabile
La bilancia si spegne automaticamente dopo 180 s di inattività (impostazione
predefinita). Per modificare o disattivare il timer Auto-Off:
1. Spegnere la bilancia e mantenere premuto il tasto MODE; contemporaneamente,
premere rapidamente 4/5 volte il tasto ON/OFF fino a visualizzare 180. Rilasciare i tasti.
2. Premere il tasto MODE per passare in rassegna le opzioni di 0/60/120/180 s. Quindi,
premere ON/OFF per confermare.
3. Il display visualizza ‘PASS’.
Se è stata selezionata l’opzione 0 nella fase 2, la funzione Auto-off viene disattivata. La
bilancia resterà accesa fino al suo spegnimento manuale.
Precisione
La bilancia è stata tarata in fabbrica e, nella maggior parte dei casi, non occorrerà
procedere alla sua taratura, se non dopo molto tempo.
È necessario verificare periodicamente la precisione della bilancia con l’ausilio die pesi
di taratura; se occorre, procedere alla taratura.
NOTA: Utilizzare solo pesi di taratura affidabili. Gli oggetti di uso domestico, come
bottiglie e lattine con sopra impresso il peso, non sono adatti per verificare la
precisione, in quanto questi valori sono approssimativi e non includono il peso del
contenitore (peso netto).
Taratura
La regolazione della taratura è permanente e deve essere ripetuta solo con l’ausilio di
appositi pesi, conformi ai requisiti della (cf. schema qui sotto). Non utilizzare monete o
altri oggetti di uso domestico per la taratura della bilancia.
1. Predisporre il peso richiesto per la bilancia (cf. schema qui sotto)
2. Scegliere una superficie piana e livellata per eseguire a taratura e lasciare che la
bilancia si adatti alla temperatura ambiente.
3. Premere ON/OFF per accendere la bilancia e attendere che si stabilizzi.
4. Premere e mantenere premuto il tasto MODE finché il display indica ‘CAL’.
5. Dopo avere verificato l’assenza di oggetti sulla piattaforma, premere MODE per
confermare il punto zero.
6. Il peso di taratura richiesto lampeggerà sul display.
7. Collocare il peso di taratura richiesto al centro della piattaforma.
8. Il display indicherà ‘PASS’, quindi ritornerà alla modalità di pesatura normale. A
questo punto, sarà possibile spegnere la bilancia oppure proseguire con la pesatura.
IT

Capacidad máxima
Capacité maximale
Maximumcapaciteit
Max. Belastbarkeit
Capacità max.
Legibilidad
Lisibilité
Leesbaarheid
Lesbarkeit
Leggibilità
Unidades de peso
Unités de pesage
Weegeenheden
Wägeeinheiten
Unità di peso
Dimensiones
Dimensions
Afmetingen
Abmessungen
Dimensioni
Pesas de calibración
Poids de calibrage
Kalibratiegewicht
Kalibriergewicht
Peso di taratura
Potencia
Alimentation
Stroomvoorziening
Versorgung
Alimentazione
Garantía
Garantie
Garantie
Garantie
Garanzia
Especificaciones ∙ Spécifications ∙ Specificaties ∙ Technische Daten ∙ Specifiche
MM-100 MM-600
100.00 g / 3.527 oz
3.215 ozt / 64.30 dwt
500.00 ct / 1543.2 gn
0.01 g / 0.001 oz
0.001 ozt / 0.0
0.05 ct / 0.2 gn
1 dwt
600.0 g / 21.16 oz
19.29 ozt / 385.8 dwt
3000.0 ct / 9259 gn
0.1 g / 0.01 oz
0.01 ozt / 0.1 dwt
0.5 ct / 2 gn
g, oz, ozt, dwt, ct, gn
89 mm x 60 mm x 20 mm
55 mm x 55 mm
32 mm x 13 mm
(Se venden por separado)
(Vendu séparément)
(Los verkrijgbaar)
100g 500g
(Getrennt verkauft)
(Venduto separatamente)
2 pilas AAA – (Incluidas)
2 piles AAA – (Inclus)
2 AAA-batterijen – (Meegeleverd)
2 AAA-Batterien – (Mitgeliefert)
2 batterie AAA – (Incluso)
Garantía limitada de 10 años
Garantie limitée à 10 ans
10 jaar beperkte garantie
10 Jahre beschränkte Garantie
10 anni di garanzia limitata
 Loading...