

Running programs
Automatic Mode
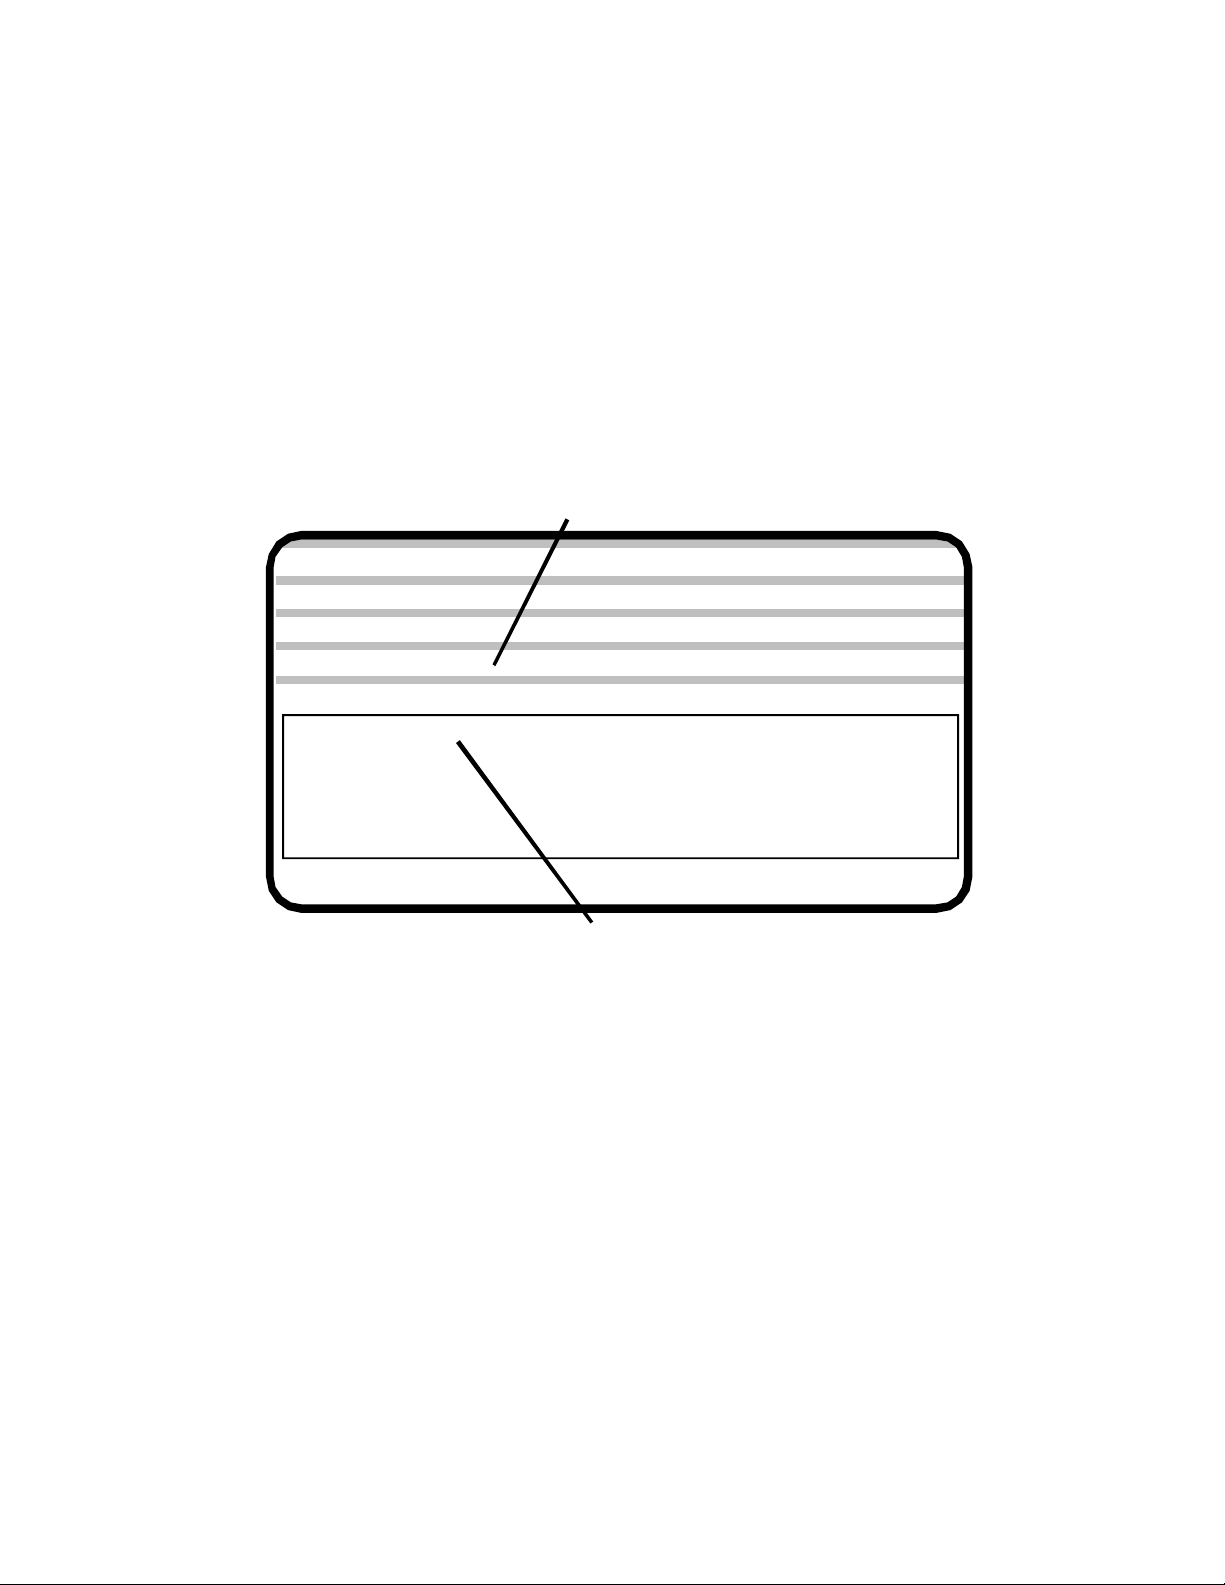
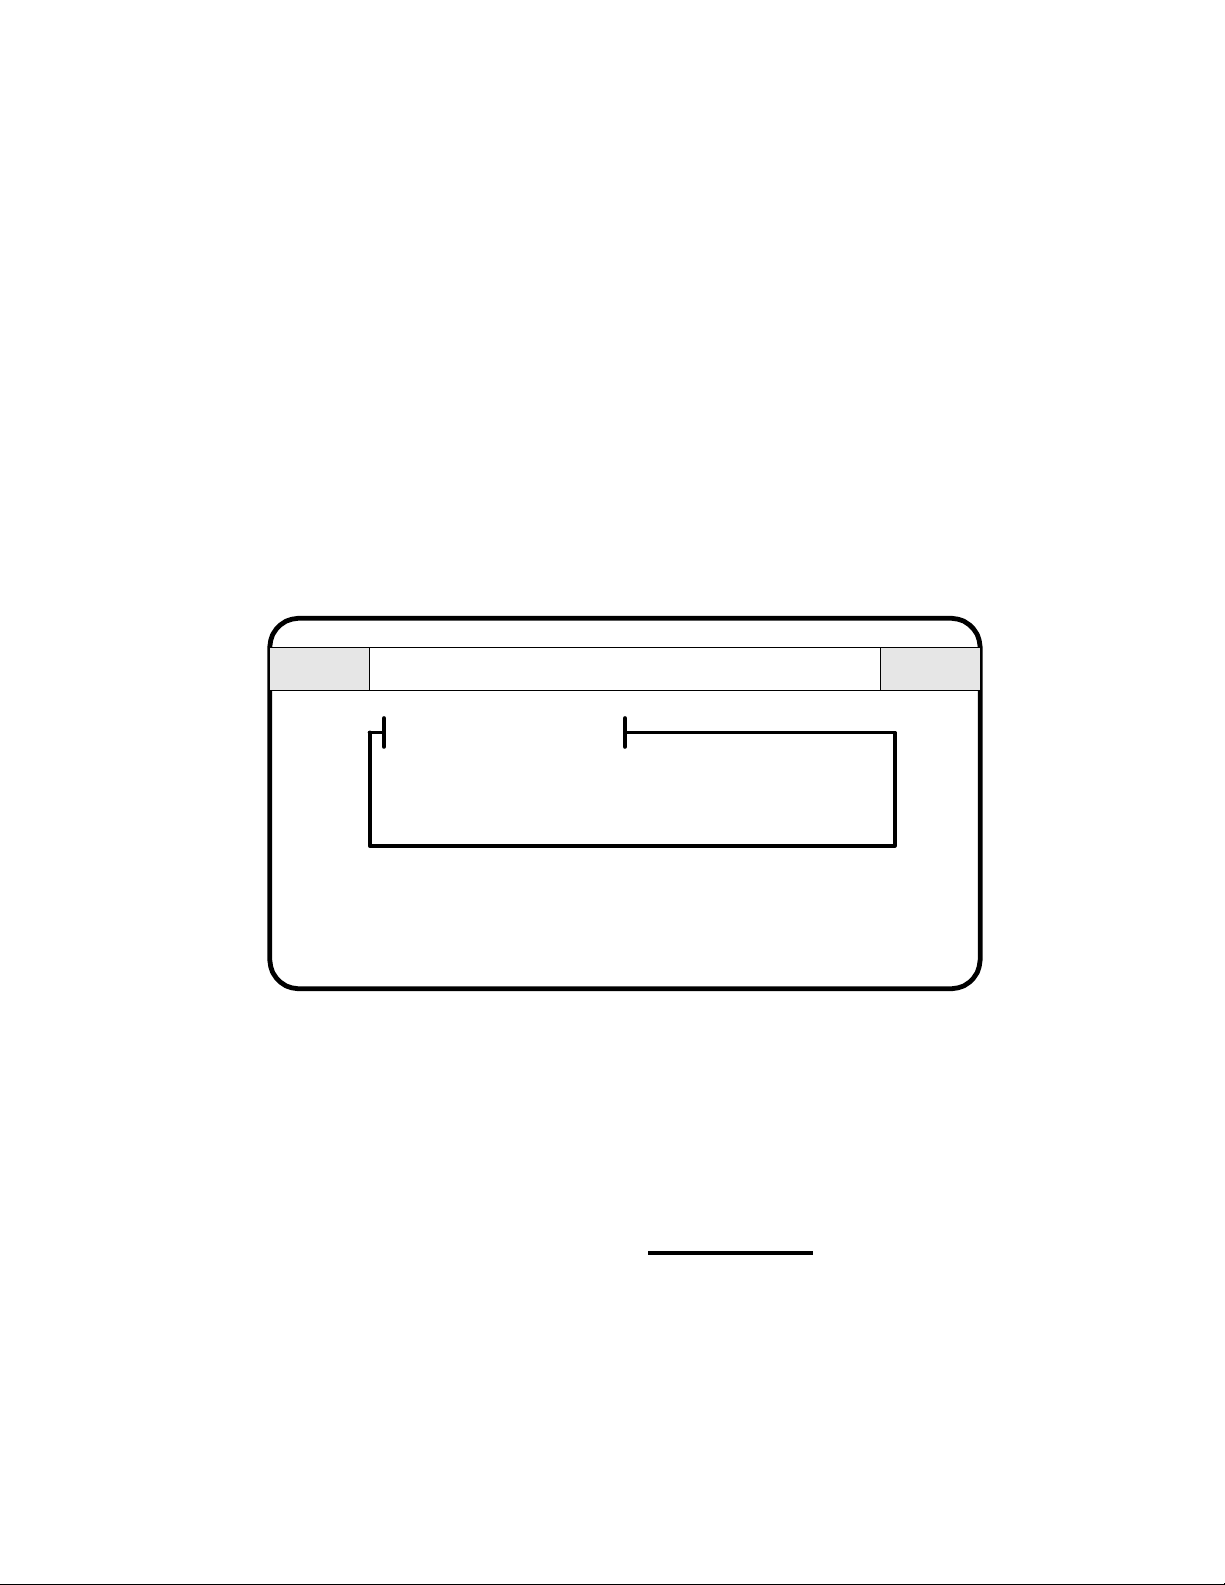
In the Automatic mode the control displays the program that it is currently running. When the control is
turned on there is no program selected to run and this space is blank.
Be sure that the tool offsets are correct for the program to be run. If this program is the same as when the
control was last shut down, the offsets should still be the same and the program will run without resetting
the tools. For example, if you are running a program and shut the control down for the night. When you
start up the control the next morning all you have to do is enter the program name in the file to be run
once you enter the Automatic mode the next morning. See below. To recall tool offsets from memory
refer to F10 in this section.
Enter program name to be run and return
POSITION : X +0.00000 Z +0.00000
COMMAND : X +0.00000 Z +0.00000
FILE TO BE PROCESSED:
Jog Automatic Single Block Manual Data Input
F1-F10 FEED 10-100%
FILE IN MEMORY:
‘0’ FOR OPTIONAL
STOP
‘/’ FOR BLOCK DELETE‘C’ FOR CYCLE REPEAT
PRESS ‘S’ FOR SINGLE BLOCK
1QUIT 2OFFSET 3EDIT 4DIR 5NEWPROG 6SEARCHTO 7PROG 8DISKOP 9SECCMP 0
There is no file in memory,
one needs to be entered
FEED 10.0 IPM
PERCENT FEED: 100
1. Running an existing program
If you have a program saved on the program disk it’s name can be entered now and the screen will
show that this is the file now in memory. When the cycle start button is pressed the program will be
executed.
2. Running a different existing program (F5)
Once a program has been selected it stays in memory until it is changed. In the Automatic mode, F5 will
delete the currently running program and ask for a new program name. You will notice that after F5 has
been pressed the file in memory is blank. If you forget the exact name of the program that you want to
run you can press F4 (directory) after F5 has been pressed. This F4 command will list all of your programs on the A: drive, 5-1/4”, this is where your programs are stored.
5.1
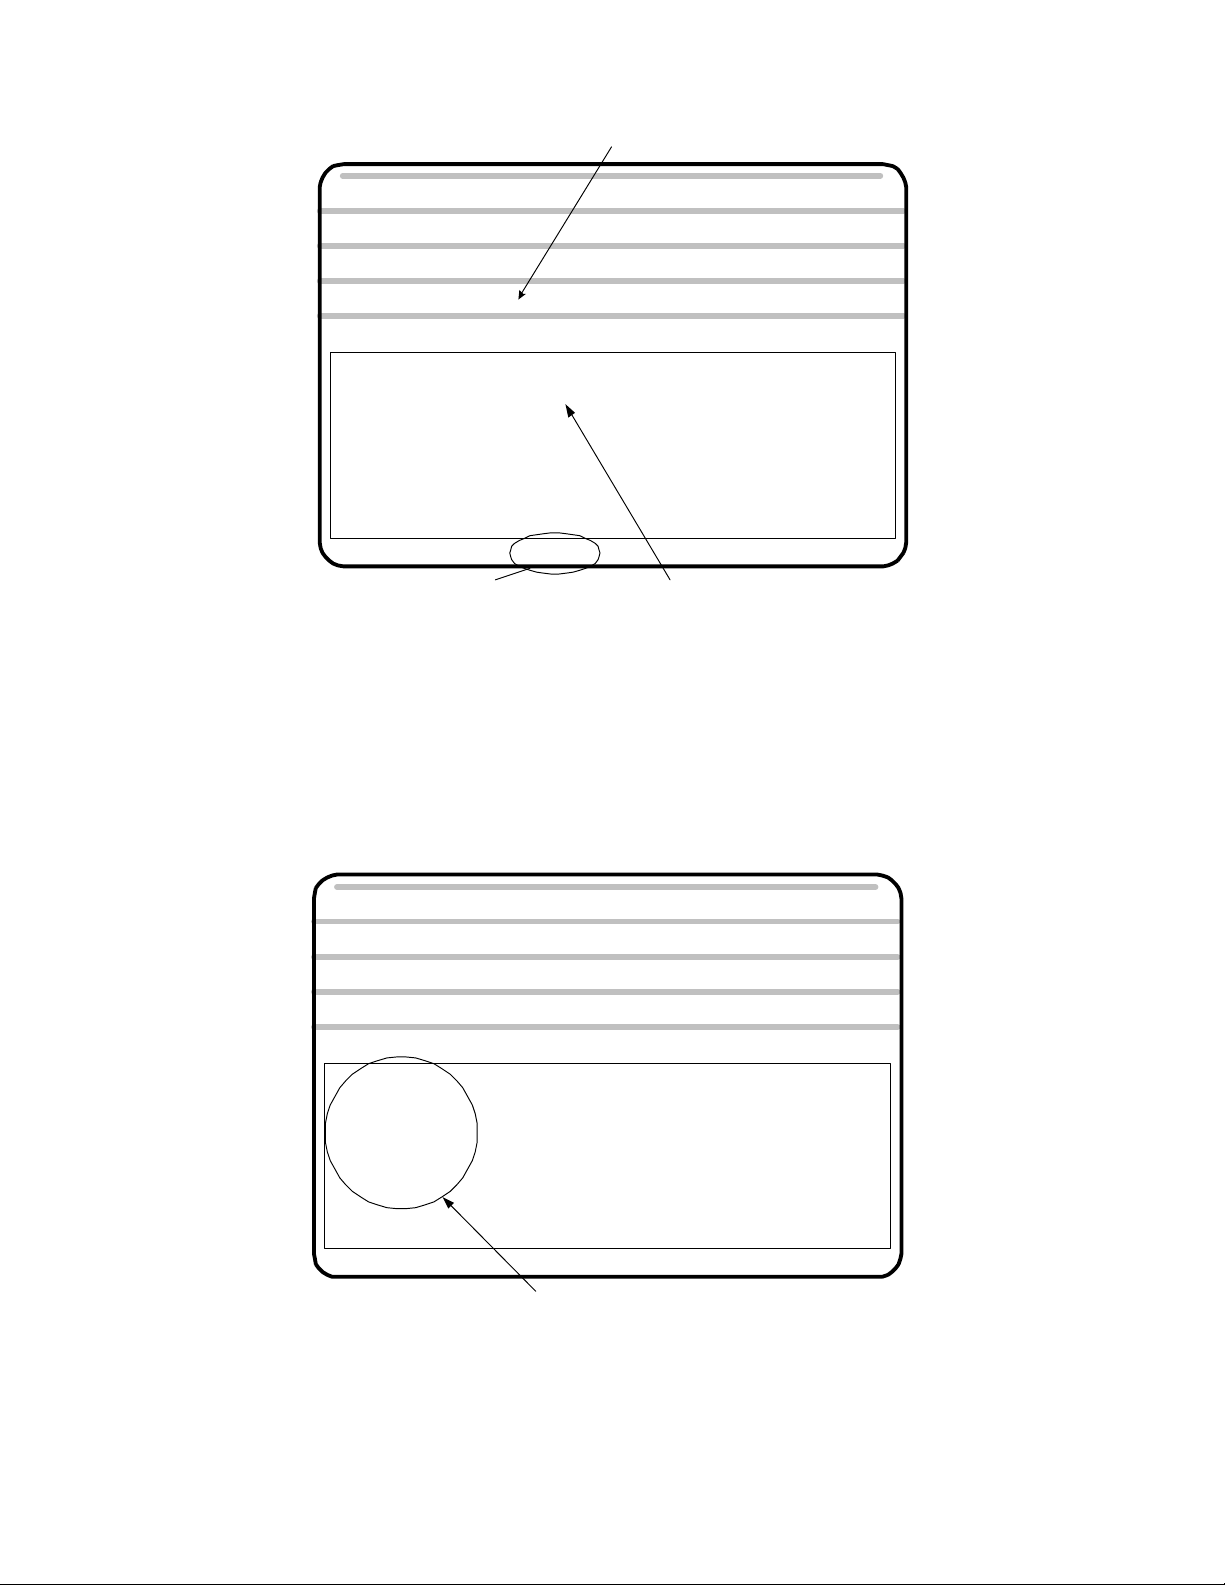
Automatic Mode
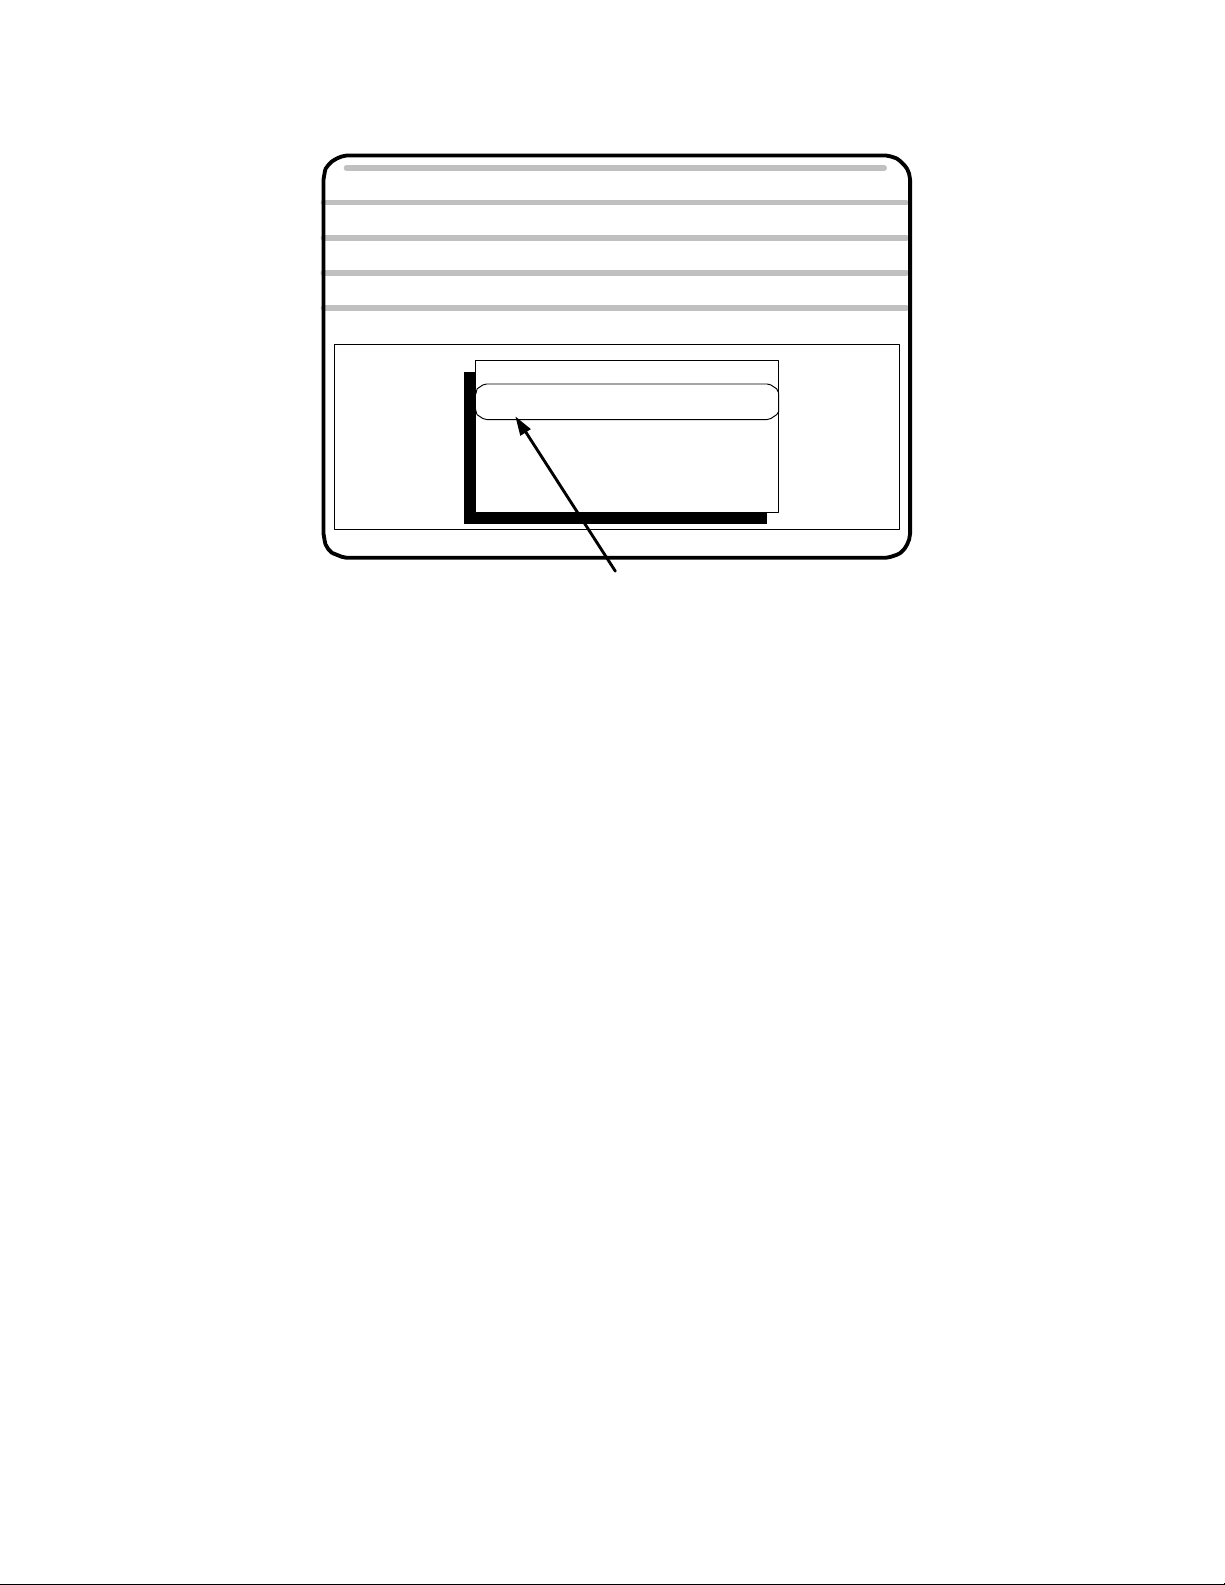
There is a program in memory ready to run
POSITION
COMMAND : X +0.00000 Z +0.00000
PRESS CYCLE START
Jog Automatic Single Block Manual Data Input
F1-F10 FEED 10-100%
FILE IN MEMORY: DEMOPR
'0' FOR OPTIONAL STOP
'/ ' FOR BLOCK DELETE
'C' FOR CYCLE REPEAT
PRESS 'S' FOR SINGLE BLOCK
1QUIT 2OFFSET 3EDIT 4DIR 5NEWPROG 6SEARCHTO 7PROG 8DISKOP 9SECCMP 0
Press F5 to select new program
: X +0.00000 Z +0.00000 FEED 10.0 IPM
PERCENT FEED: 100
Program "DEMOPR" is being run
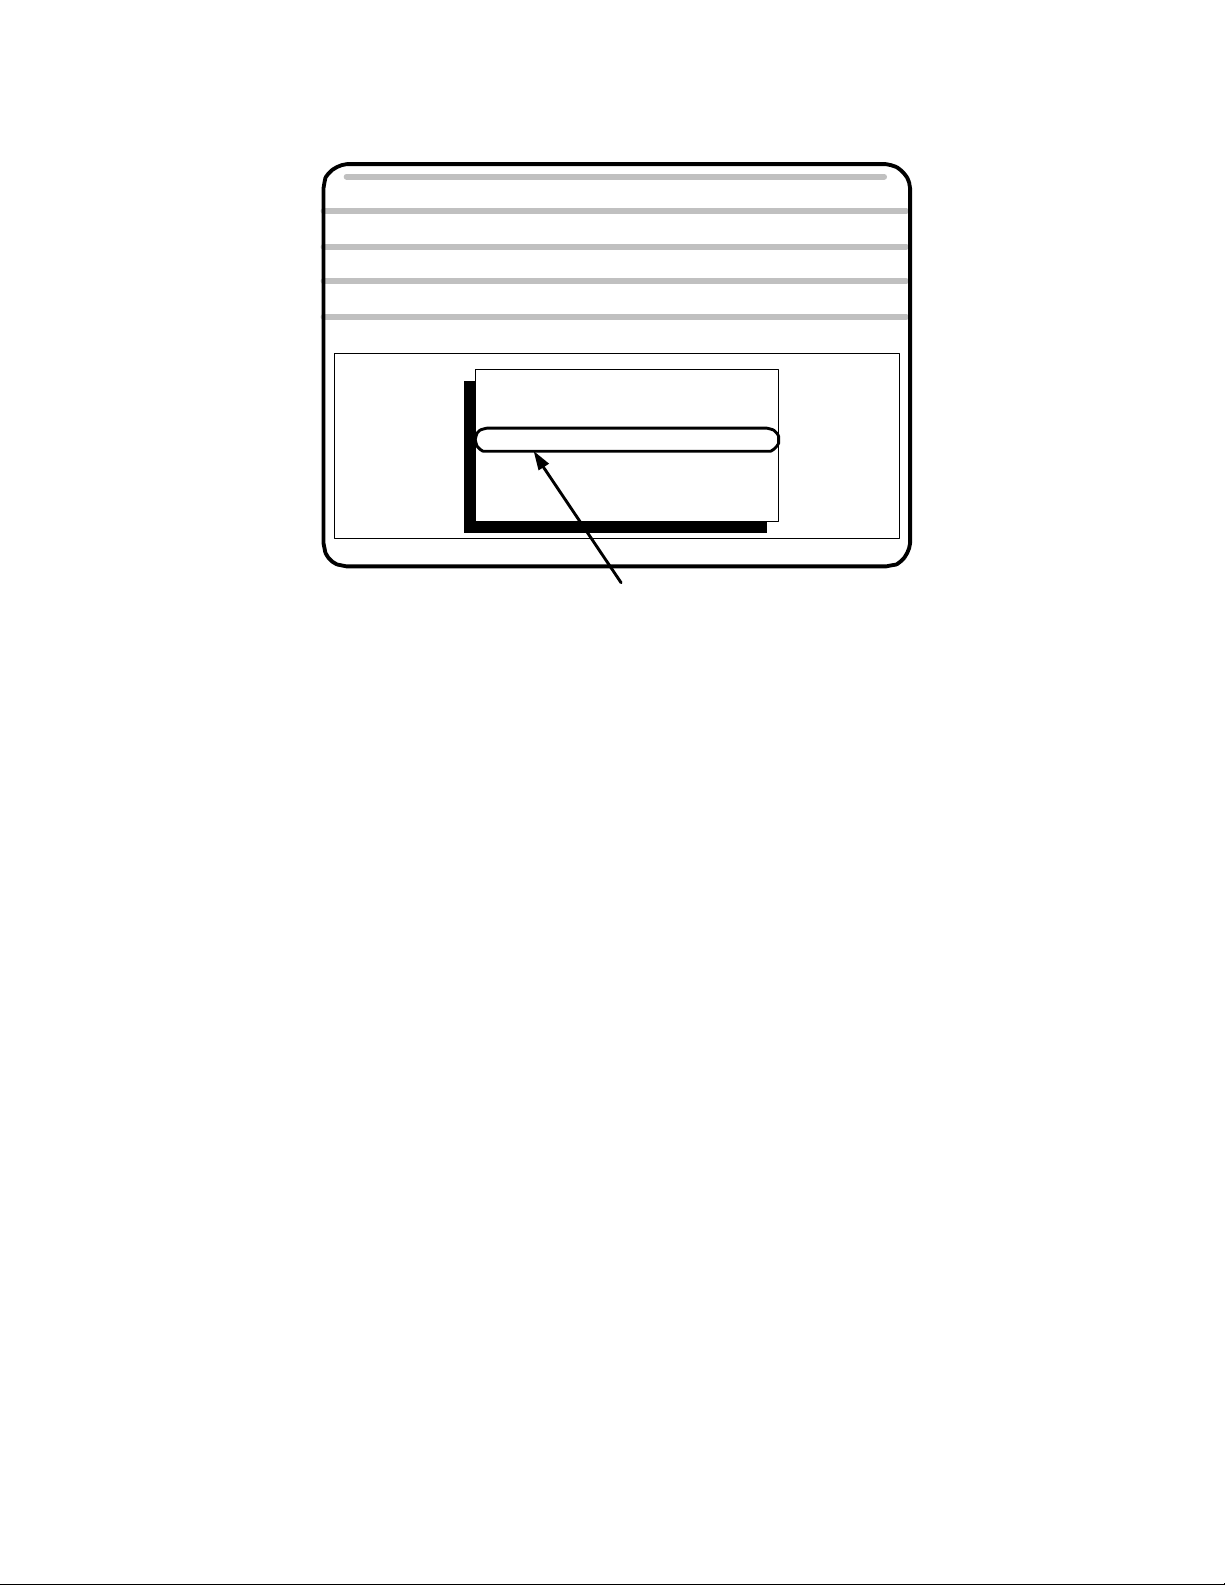
Program Run - Single step -”S”
It is possible to run the program one line at a time. This is useful when running a new program for the
first time. The control displays the next command to be executed before it is run. You can look to see
what is going to happen before a mistake is made. To accomplish this get the control into the Automatic
mode & input the file to be run. At this point do not push the cycle start yet. Press ”S” to activate the
single block mode.
POSITION
COMMAND : X +0.00000 Z +0.00000
PRESS CYCLE START
Jog Automatic Single Block
F1-F10 FEED 10-100%
FILE IN MEMORY: DEMOPR
'0' FOR OPTIONAL STOP
'/ ' FOR BLOCK DELETE
'C' FOR CYCLE REPEAT
PRESS 'S' FOR SINGLE BLOCK
1QUIT 2OFFSET 3EDIT 4DIR 5NEWPROG 6SEARCHTO 7PROG 8DISKOP 9SECCMP 0
: X +0.00000 Z +0.00000 FEED 10.0 IPM
PERCENT FEED: 100
Manual Data Input
Options used in automatic mode
To toggle back to the regular automatic cycle press ”A” to turn off the single block mode.
5.2

Automatic Mode
The ”F” keys have the following functions:
F 1 Quit Go back to the Main menus
F 2 Offset Adjust tool offsets, correct part size
F 3 Edit Input and correct programs
F 4 DIR When no file is in memory this will list all the programs on the user disk
VER With a program in memory it will verify and plot the program
F 5 Newprog This will remove the program from active memory and allow a new one to
be entered
F 6 Searchto This enables the program to be started some place other than the start
F 7 Prog Runs Calcaid programming system
F 8 Diskop Disk Operations
Erase programs
Make a new System disk
Make a copy of the user program disk
Down and Up load programs from another computer over RS232
Set communication parameters
F 9 Seccmp Adjust values of secondary tool offsets and TNR compensation values
F10 Sp.fun Special functions
Parts Counter
Set value of countdown counter for Continuous cycle
Preset feed rate override before starting a program
Store tool offset values with program in memory
Load tool offset values from memory
Set max spindle speed of machine
HOT keys on the keyboard while in the automatic mode
C Continuous The program will run continuously -This toggles on / off
O Optional stop This makes the M0l act as a stop program command -This toggles on / off
/ Block delete With this active the control will skip over program lines starting with ”/”
A Automatic The program will run from start to finish with one cycle start
S Single block The program will run one line at a time with each press of the cycle start
F1 -F10 Feed rate overrides. The function keys will adjust feed rates
(only while program is in motion)
Pg Up Coolant on/off (M08/09)
Pg Dn Parts catcher Out/In (M25/26)
5.3
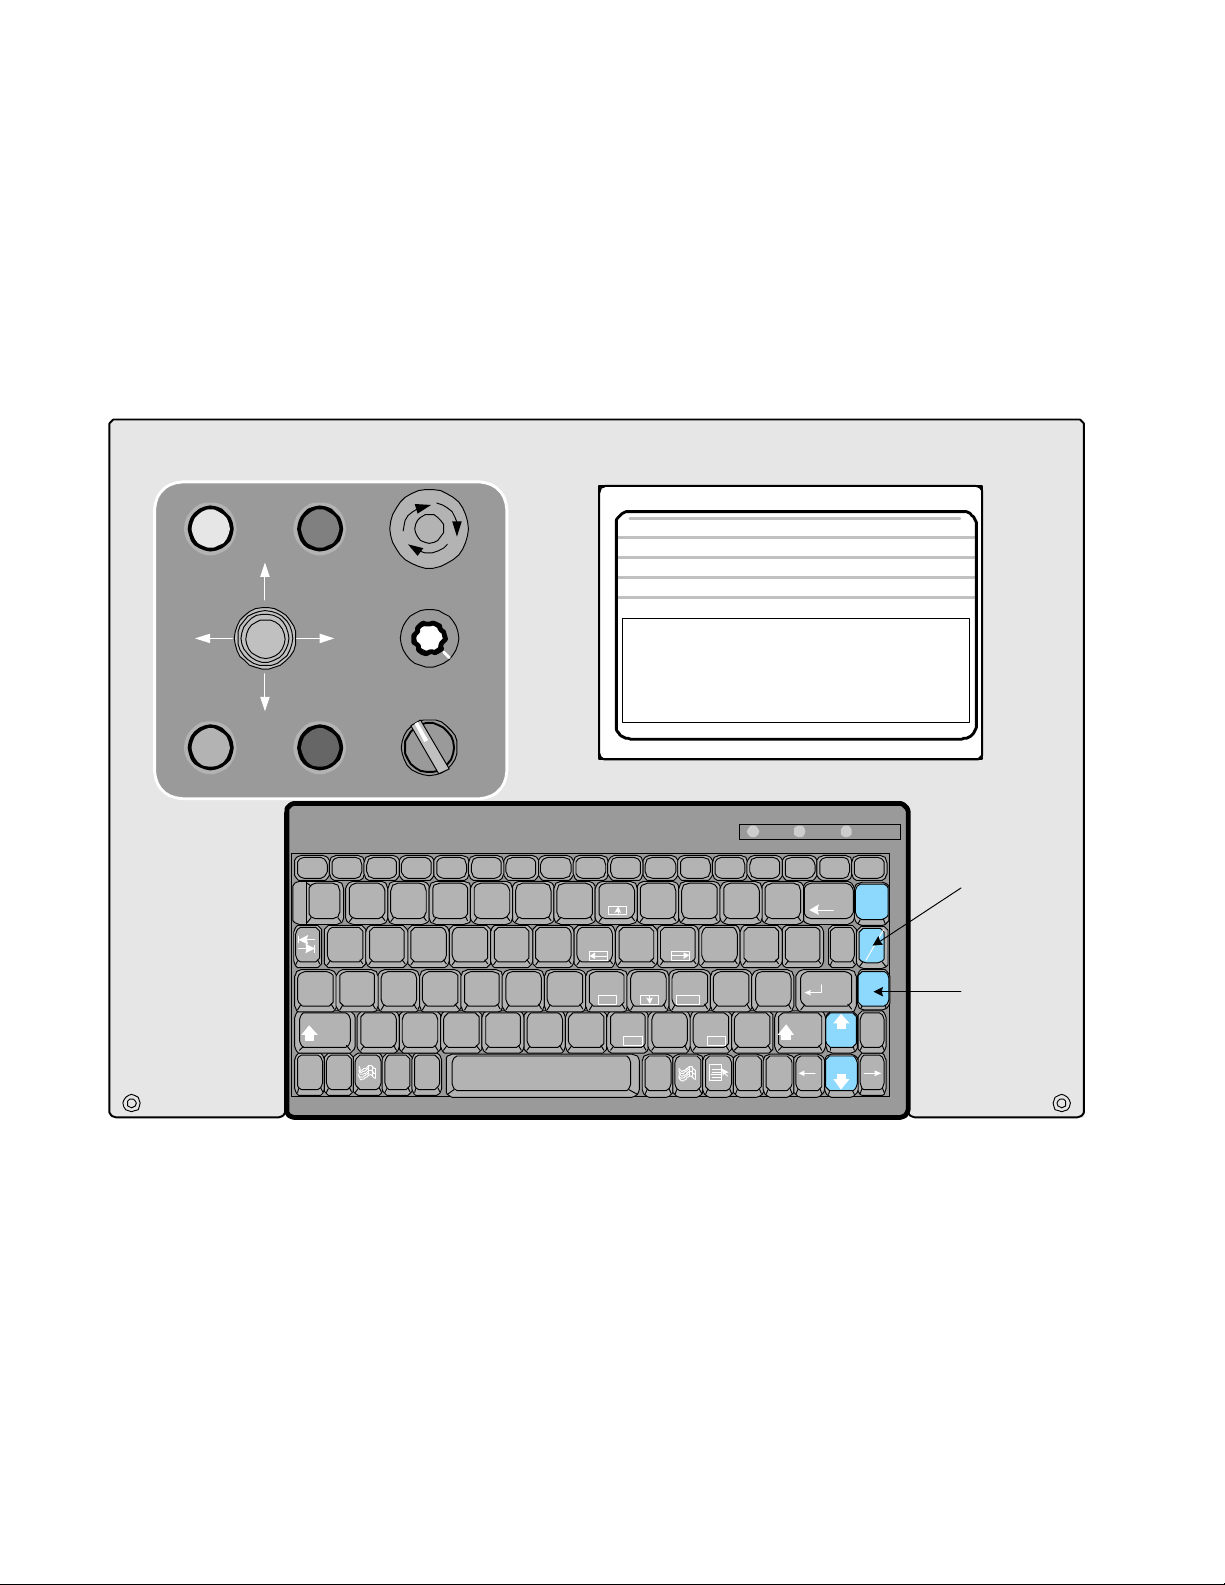
M function keyboard controls
Toggle M functions on and off with keyboard controls.
-Press the key once to turn the function on, Press again to turn it off
-Works only in Jog or Automatic mode
CONTROL
ON
JOG JOG
CYCLE
START
POSITION
SERVOS
ON
X -
Z +Z -
X +
MOTION
STOP
EMERGENCY
STOP
SPINDLE
OVERRIDE
SPINDLE
1000
OFFAUTO
COMMAND : X +0.00000 Z +0.00000
PRESS CYCLE START
Jog Automatic Single Block Manual Data Input
F1-F10 FEED 10-100%
FILE IN MEMORY:
'0' FOR OPTIONAL STOP
'/ ' FOR BLOCK DELETE
'C' FOR CYCLE REPEAT
PRESS 'S' FOR SINGLE BLOCK
1QUIT 2OFFSET 3EDIT 4DIR 5NEWPROG 6SEARCHTO 7PROG 8DISKOP 9SECCMP 0
Esc F1 F10F9F8F7F6F5F4F3F2 F11 F12
!1@2#
3
4
6
5
^
%
$
*
&
8
7
Home PgUp
(
9)0
Q W
Caps
Lock
Ctrl
Shift
Fn
A
GFDS
H
Z
~
Alt
`
End
KJ
MNBVCX
Ins
Alt
OMNI
: X +0.00000 Z +0.00000 FEED 10.0 IPM
DEMOPR
P
OIUYTRE
:
L
;
PgUp
<
>
,
.
Del
Num
Lock
Num
Lock
+
_
=
{
[
"
'
?
/
Del
Ins
TURN
Parts counter 3
Caps
Scroll
Lock
Lock
PrtSc
Scroll
Backspace
Shift
Lock
|
\
Enter
Spindle
Spindle
Pause
Break
Spindle
100%
Parts
Catcher
End
SysRq
}
]
PERCENT FEED: 100
PgUp Key
coolant On/Off
Coolant
Pg Dn Key
Parts catcher
In/Out
OmniTurn front panel Keyboard
5.4

Parts counter - P
Automatic Mode
POSITION
COMMAND : X +0.00000 Z +0.00000
PRESS CYCLE START
Jog Automatic Single Block
F1-F10 FEED 10-100%
FILE IN MEMORY: DEMOPR
'0' FOR OPTIONAL STOP
'/ ' FOR BLOCK DELETE
'C' FOR CYCLE REPEAT
PRESS 'S' FOR SINGLE BLOCK
1QUIT 2OFFSET 3EDIT 4DIR 5NEWPROG 6SEARCHTO 7PROG 8DISKOP 9SECCMP 0
: X +0.00000 Z +0.00000 FEED 10.0 IPM
PERCENT FEED: 100
Manual Data Input
Parts counter 3
The parts counter is turned on in F10
To turn on a PARTS COUNTER first press F10, then Press P while you have this screen open. There
will be no effect here. When you go to the Automatic mode main screen there will be a counter on the
screen. The counter will count up each time a M30 or M02 is executed. To clear the counter come back into
the F10 screen and press P again. See notes at the end of this chapter on Function keys, F10.
Program run -Optional stop activation - M01 -”O”
Optional stops can be put into the program, M01 This stop command is one that can be skipped over.
To turn the optional stops on go to Automatic mode, once the program is selected and before the
program is run, press ”O”. This will cause the program to stop like a M00. To get past the stop, press
”cycle start”. To turn the optional stop off, press ”O” again. Uses for the optional stop:
Insert an MO1 after a G92 statement for a new tool. This will help when running a new program to be sure
that the tool offsets have been entered correctly. Once the program is tested you can turn off the stop and let
the program run automatically.
Have an MOl at the beginning of a program that is going to use an automatic bar feed or parts loader. This
way, you can have the optional stop activated when you are setting up the machine. Once the cycle and
program are proven correct, you can turn off the stop and let the machine run automatically.
Program run - Cycle repeat -”C”
This is useful for automatic bar feeder or automatic loader operations. When this is activated the program will automatically go back to the beginning of the program after a M30 is encountered and run the
program again. The program will continue to run until it is stopped or the continuous counter is set.
(see F10 in automatic mode). To turn it off, press ”C” again.
5.5

Automatic Mode
/ - Block Delete
POSITION
COMMAND : X +0.00000 Z +0.00000
PRESS CYCLE START
Jog Automatic Single Block Manual Data Input
F1-F10 FEED 10-100%
FILE IN MEMORY:DEMOPR
'0' FOR OPTIONAL STOP
'/ ' FOR BLOCK DELETE
'C' FOR CYCLE REPEAT
PRESS 'S' FOR SINGLE BLOCK
1QUIT 2OFFSET 3EDIT 4DIR 5NEWPROG 6SEARCHTO 7PROG 8DISKOP 9SECCMP 0
: X +0.00000 Z +0.00000 FEED 10.0 IPM
PERCENT FEED: 100
BLOCK DELETE ACTIVE
The block delete is used to by pass lines of the program. Put the forward slash ’P’ at the beginning of a line.
When you want to skip the line just press the “P”’ key in the automatic mode. Then the Block Delete
Active text will show up on the screen. This is commonly put on the line with the coolant on command.
This way you can turn the coolant off (skip over the coolant on line) by activating the Block Delete.
Creating a new program
There are a number of ways to create a new program. Here are a few:
-Use the text edit in OmniTurn. First a new program name has to be created. This is done by going
into the Automatic mode and typing in the new name when the control asks ”FILE TO BE PROCESSED”.
After the RETURN key is hit the control will answer ”FILE NOT FOUND, PRESS ANY KEY TO CONTINUE”. By doing this you have accomplished two things.
1. If there was already a program with the name you just entered, the control would now be ready to
run it. If this is the case, then you would have to select a new name or change the program of the existing one already there.
2. If there was no other program that had the new name then there was one created and loaded into the
text editor. Once the new name is entered into the text editor, press F3 to enter the editor. The text editor
will ask ”PRESS F1 TO CREATE A NEW FILE, ESC TO ABORT”. After pushing F1 the editor will
provide a new blank screen to enter your program.
-CAM system off line, transfer a file via floppy or RS-232. Once they are on the OmniTurn program
disk they can be run like any other existing program. Please refer to the section in DOS notes on the
format.
-RS-232 or Disk transfer. Manually enter a program in a text editor on another computer, transfer as
above. Once they are on the OmniTurn program disk, they can be run like any other existing program.
Please refer to the section in DOS notes on the format. -Use Calcaid in OmniTurn. See the section on
using Calcaid.
5.6

Function Keys
Automatic Mode
On the top of the keyboard is a group of ”F” keys. These are used differently throughout the control software. Notations are made on the screen to help the operator remember how the keys are being used with
the different sections of software. Care should be taken to remember that these keys change depending on
the ”Mode” the control is in. Following will be the description of how the Function keys are used in the
Automatic mode.
Function Keys - Automatic Mode - Program not in process
Following are the definitions of the function keys when the control is in the automatic mode and the
program is not in motion.
F1 Exit Automatic mode, go to main screen
Pressing the F1 key will exit you from the Automatic mode. This is necessary to get to any of the other
modes, ie. Jog or MDI.
F1 Tool offset screen, used to modify tool offsets
This function key brings up the screen to adjust the tool offsets. Tool offsets are used to correct the
starting location of the tools, and they will effect the finished part dimensions. These values are created
when the tools are setup in the jog mode. When the F2 key is pressed the screen will then ask what tool
number you want to adjust. The distances shown are the amount needed to travel from the Home
position to the offset location. See below:
1
2
3
4
5
6
7
8
9
10
11
12
13
14
15
16
X: +0.86480 Z: -1.25340
X: +1.65025 Z: -1.99200
X: +2.91130 Z: -0.93885
X: +0.00000 Z: +0.00000
X: +0.00000 Z: +0.00000
X: +0.00000 Z: +0.00000
X: +0.00000 Z: +0.00000
X: +0.00000 Z: +0.00000
X: +0.00000 Z: +0.00000
X: +0.00000 Z: +0.00000
X: +0.00000 Z: +0.00000
X: +0.00000 Z: +0.00000
X: +0.00000 Z: +0.00000
X: +0.00000 Z: +0.00000
X: +0.00000 Z: +0.00000
X: +0.00000 Z: +0.00000
OFFSET NUMBER:
Press Esc to exit offset adjustment screen
17
18
19
20
21
22
23
24
25
26
27
28
29
30
31
32
X: +0.00000 Z: +0.00000
X: +0.00000 Z: +0.00000
X: +0.00000 Z: +0.00000
X: +0.00000 Z: +0.00000
X: +0.00000 Z: +0.00000
X: +0.00000 Z: +0.00000
X: +0.00000 Z: +0.00000
X: +0.00000 Z: +0.00000
X: +0.00000 Z: +0.00000
X: +0.00000 Z: +0.00000
X: +0.00000 Z: +0.00000
X: +0.00000 Z: +0.00000
X: +0.00000 Z: +0.00000
X: +0.00000 Z: +0.00000
X: +0.00000 Z: +0.00000
X: +0.00000 Z: +0.00000
In the example above you see the offset screen with three tools being used. When it is necessary to correct
a tool offset, enter the amount of change that is required. As an example, we will assume that tool 2 in the
above example is a turning tool and is cutting apart .001” too large. So enter the offset change of -.001” for
the X Diameter offset. When this value is entered you will notice that the total value of X has changed. This
addition does not have to be done by the operator.
5.7
After selecting a number and pressing Return the screen will ask
Automatic Mode
1
2
3
4
5
6
7
8
9
10
11
12
13
14
15
16
X: +0.86480 Z: -1.25340
X: +1.65025 Z: -1.99200
X: +2.91130 Z: -0.93885
X: +0.00000 Z: +0.00000
X: +0.00000 Z: +0.00000
X: +0.00000 Z: +0.00000
X: +0.00000 Z: +0.00000
X: +0.00000 Z: +0.00000
X: +0.00000 Z: +0.00000
X: +0.00000 Z: +0.00000
X: +0.00000 Z: +0.00000
X: +0.00000 Z: +0.00000
X: +0.00000 Z: +0.00000
X: +0.00000 Z: +0.00000
X: +0.00000 Z: +0.00000
X: +0.00000 Z: +0.00000
X DIAMETER ADJUSTMENT:
Press Esc to exit offset adjustment screen
17
18
19
20
21
22
23
24
25
26
27
28
29
30
31
32
X: +0.00000 Z: +0.00000
X: +0.00000 Z: +0.00000
X: +0.00000 Z: +0.00000
X: +0.00000 Z: +0.00000
X: +0.00000 Z: +0.00000
X: +0.00000 Z: +0.00000
X: +0.00000 Z: +0.00000
X: +0.00000 Z: +0.00000
X: +0.00000 Z: +0.00000
X: +0.00000 Z: +0.00000
X: +0.00000 Z: +0.00000
X: +0.00000 Z: +0.00000
X: +0.00000 Z: +0.00000
X: +0.00000 Z: +0.00000
X: +0.00000 Z: +0.00000
X: +0.00000 Z: +0.00000
Now enter the value of change-(ie: -.001) and press Return. The value of X will update and then ask you
about Z.
1
2
3
4
5
6
7
8
9
10
11
12
13
14
15
16
X: +0.86480 Z: -1.25340
X: +1.64975 Z: -1.99200
X: +2.91130 Z: -0.93885
X: +0.00000 Z: +0.00000
X: +0.00000 Z: +0.00000
X: +0.00000 Z: +0.00000
X: +0.00000 Z: +0.00000
X: +0.00000 Z: +0.00000
X: +0.00000 Z: +0.00000
X: +0.00000 Z: +0.00000
X: +0.00000 Z: +0.00000
X: +0.00000 Z: +0.00000
X: +0.00000 Z: +0.00000
X: +0.00000 Z: +0.00000
X: +0.00000 Z: +0.00000
X: +0.00000 Z: +0.00000
Z ADJUSTMENT:
Press Esc to exit offset adjustment screen
17
18
19
20
21
22
23
24
25
26
27
28
29
30
31
32
X: +0.00000 Z: +0.00000
X: +0.00000 Z: +0.00000
X: +0.00000 Z: +0.00000
X: +0.00000 Z: +0.00000
X: +0.00000 Z: +0.00000
X: +0.00000 Z: +0.00000
X: +0.00000 Z: +0.00000
X: +0.00000 Z: +0.00000
X: +0.00000 Z: +0.00000
X: +0.00000 Z: +0.00000
X: +0.00000 Z: +0.00000
X: +0.00000 Z: +0.00000
X: +0.00000 Z: +0.00000
X: +0.00000 Z: +0.00000
X: +0.00000 Z: +0.00000
X: +0.00000 Z: +0.00000
Enter the amount of change in Z and then press Return.
To correct another tool, enter the tool number now and press Return. To exit the tool offset correction
screen press ESC and press return. This will tell the control that you are done and bring you back to the
Automatic mode.
5.8

Notes:
Automatic Mode
1. The control will allow you to clear the offsets by pressing C (for clear). Please only do this
when you have had experience with the control and understand what you are doing.
Clearing offsets can cause you to crash tools if it is done incorrectly!
2. The smallest offset changes are:
.00005” in Z
.0001” in X, (this is equal to .00005” on the radius)
3. For Tool Offset changes of more than .02” the control will ask the operator if this is correct.
If not it will ask you to re-enter the correction This is a safety feature to ensure that you do
not put in a large correction in error, ie 1” instead of .001”
4. If you have no change to a offset value just press Return without inputting a value.
The control assumes that you want Zero change.
5.9

Program Editing -F3
Automatic Mode
F3 Edit, On screen text editor, used to change existing programs, or enter new ones
The editor is a full function text editor. In the OmniTurn you will be using only a small part of the capability of the editor. In the following description the most basic functions. If you want to learn more follow
the instructions given in the HELP screens. (F1 while in the editor is active)
Starting the editor:
The editor is accessed from the Automatic mode by pressing F3 at any time. The program listed as
”FILE IN MEMORY” will be activated. If you want to work on a program you have to make it the active
program. When you enter the Automatic mode it asks ”FILE TO BE PROCESSED”, type the file name
that you want to edit and press RETURN. When the file name appears as the file in memory press F3. If
you have to correct the program that is currently running just press F3.
• It will ask if you want to make a Backup copy. Making these backup copies is not required. If you are
new to PC’s and DOS it is suggested that you make the backup copy so that if you loose the work that
you have created it can be brought back.
• Either press ”ESC” for no backup or F1 to create the backup file
The editor can also be used to enter new programs.
• Get to the Automatic mode
• If there is a program in file memory press F5
• Enter the new program name when prompted: ”FILE TO BE PROCESSED”
• If the control does not tell the program is not found then you are using a name that already exists.
Either pick a new name or plan on erasing the program that already exists with that name.
• Press any key to continue
• Press F3 to enter the editor
• The editor will ask if you really intend to create a new program, press F1 if you do, if not press ”ESC”
Exiting the editor and saving corrections made
• Press F1 -this is for HELP
• Press F2 -this will exit the editor and save the corrections that have been made
Exiting the editor and NOT saving the corrections made
• Press F1 -this is for HELP
• Press ”ESC” -this will halt the automatic saving function of the exit routine
• Press F2 -this will exit the editor without saving the corrections
5.10

Automatic Mode
The Keyboard
OMNITURN
CONTROL
ON
JOG JOG
CYCLE
START
SERVOS
ON
X -
Z +Z -
X +
MOTION
STOP
Esc F1 F10F9F8F7F6F5F4F3F2 F11 F12
!1@2#
Q W
Caps
Lock
Shift
Ctrl
Fn
EMERGENCY
STOP
1000
SPINDLE
OVERRIDE
OFFAUTO
SPINDLE
*
&
^
%
$
3
A
Z
~
Alt
5
4
`
6
GFDS
7
Home PgUp
H
(
8
9
KJ
End
MNBVCX
Alt
OmniTurn front panel Keyboard
Function
Keys
Caps
Num
Lock
Num
PrtSc
Lock
SysRq
)
0
P
OIUYTRE
L
PgUp
<
>
,
.
DelIns
+
_
=
{
[
"
':;
?
/
Del
Ins
Lock
Backspace
}
]
Shift
Scroll
Lock
Enter
Spindle
Spindle
Scroll
Lock
Pause
Break
Spindle
100%
|
\
Coolant
Parts
Catcher
End
Number keys: Use the number keys across the top of the keyboard. The number keys on the right side are
not active as numbers unless set with the number lock key. (located above the #7 key)
Cursor keys: These are the number keys on the right side of the keyboard. They will move the cursor
around the screen as required.
Pgup: will move the cursor one screen back per hit
Pgdn: will move the cursor one screen forward per hit
End: will move the cursor to the end of the line it is on
Ins: will add spaces in front of the cursor location
Del: will delete the character at the cursor
Back Space: will erase the character to the left of the cursor
If you want to add lines to a program:
• Move the cursor to where you need to add the line.
• Type the new text and enter a RETURN if needed
Correcting existing text:
• move the cursor to the text to be corrected
• type the new text in
• delete the text being removed
5.11

The text editor can help you manipulate and modify your programs. The editing functions are:
Automatic Mode -Notes on the Editor
F4 -Block delete
This function is used to erase sections of the program. To use this function:
• move the cursor to the beginning of the code that you want to erase
• press F4 to start the text marking
• move the cursor to the end of the text that you want to erase. The text that you are going to erase is
now being marked.
• if you want to
the code and cancel the delete command press F5
• to complete the erase press F4 again
F3 -Block copy
This function is used to copy sections of the program.
• move the cursor to the beginning of the code that you want to copy
• press F3 to start the text marking
• move the cursor to the end of the text that you want to copy. The text that you are going to copy is
now being marked.
• if you want to unmark the code and cancel the copy command press F5
• to end the marking of the code to be copied press F3 again.
• then move the cursor to the location that you want the code copied to, then press F3
• you can copy the code more than once, move the cursor again and press F3 again
• to end the marking press F5
F9 -Find, F10 -Replace
This function is used to find text in the program and then replace it with new text. An example for using
this is to change the rapid travel feed rates. Sometimes it is advantageous to lower the rapid feed rates
when you are working with a new program and expensive tooling. Before running the program for the
first time you could change the F300 moves to F100. Run the program and prove it out, then change
the F100’s back to F300 for production
• go to the text editing screen
• move the cursor to the beginning of the program
• press F9, at the top of the screen you will see FIND ”.” type the text that you want to replace. In the
case of the example you could type F300
• press F10, at the top of the screen you will see REPLACE ”. ” type the text that you want to put in place
of the found text. In the case of the example you could type F100
• press RETURN get back to the edit mode
• press F10 to find and replace, repeat pressing the F10 key until you have gone through the entire
program
Renaming programs
In the editor you can duplicate a program and give it a new name. This is very useful! IE: if you want to
make changes to an existing program and still have the original to fall back to if the changes don’t work
the way you want, or if you have a family of parts that use the same basic program with only minor
changes. With renaming you could make a custom program for each part without having to type the
entire program again.
• make the program active in the automatic mode
• press F3 to go to the editor
• press ESC to bring the text to the screen, then press F1 to get to the HELP screen
• at the HELP screen press F5 for RENAME. You will see the original file name at the top of the screen
with B: in front of the name. An example of this would be ”B: FILENAME”. Use the arrow keys to move
the cursor to the right of the B:. Then type the new name of the file and delate the old one. The new
name could be ”B:NEWFILE”.
• after the name has been typed press RETURN. This will take you back to your program.
• when you are done working with the program, save and exit the editor as you normally
would, press Fl, then F2. Now you will still have the old program, and a new one.
5.12
Verification (F4)
Verification -F4
This function will check the current program. The verification does a few things automatically:
1. Check syntax and look for possible errors, then allow corrections
2. List all the tools used
List all secondary offsets used and their current values
3. Show estimated cycle time
4. Show graphically the tool path created by the G code program
Running Verification
To use the verification software you must first make your program active in the Automatic mode. Once
the program is active you will notice that the F4 indication on the bottom of the screen changes to VER.
Press F4 and the verification software will be called up.
1. Syntax and program check.
Omniturn Verification Software
Program name
G94F200Z1
M30
No errors found.
press any key to continue...
The first operation performed by this section is the checking of syntax (is the program grammatically
correct) and a screen for possible gross errors (like trying to move Z -50). If there are no errors or comments then the screen will appear as above.
Error comments and corrections
The error comments are just that, comments.
There are times that the ”errors” it finds are moves that you intended to do. Use the verification software
as a guide, not a rule. When the software was developed it was intended to try and screen out all sorts
of possible errors, so this causes it to catch more good lines. Make corrections to your program with care.
If the verification finds lines of your program that it does not like it will show the line of code in the
upper box, highlighted. In the lower box is a description of the possible problem.
5.13

Verification -F4
Omniturn Verification Software
Line of code
in question
Cursor
Comment about
line in question
line (2) : bad code found
line (2) : feedrate mode must be specified, need G94 or G95
Program name
G90M03S2000
G93F200T1
G92X0Z2
Use Arrow keys to move to error and correct. ESC>Exit
Errors
Making corrections:
If you find an error in your program it is possible to correct it now. Use the left / right arrow keys to move
the cursor to the point in question. In the above example the G93 should be G94. Arrow over to the 3
and then type a 4. When you are done with the correction you can go on to the next comment. When
you are done with all the corrections the checker will go back and run the check one more time.
Going to the next comment:
If there are more than a few comments about the program you can use the up and down arrows to
move to new comments.
Missing spindle speeds:
If the program does not have a spindle speed the OmniTurn will comment. This is because a spindle
speed is needed to estimate the cycle time. If you do not want to add a spindle speed to the program
you can force a cycle time estimate in the verification when it asks for a spindle speed.
Omniturn Verification Software
Program name
M30
Use Arrow keys to move to error and correct. ESC>Exit
Errors
Line (20) : spindle speed has not been set
Exiting Syntax checking: Press ESC.
2. Listing tools and offsets
The next screen is a list of the tools used and some information about them:
5.14

Verification - F4
Omniturn Verification Software
Program name
Tool Description G92 G92Z
T1 (LH Turning tool 008 radius) 0.10800 0.20800
T2 (LH Threading tool) 0.00000 0.20000
Use Arrow keys to move to error and correct. ESC>Exit
Secondary offsets use
Offset X Z Offsets X Z
No Secondary offsets specified.
This screen shows a lot of information:
• It lists the tools to be used with their G92 starting points. This makes setting up a program easier. No
longer do you have to look through long programs to find the tools and their starting values.
• There is also a description of the tool. The verification software will show any comment that appears
on the same line with the tool call in the program. In the above program the are comments on the line:
T1 (LH Turning tool 008 radius)
G92X.108Z.208
It is good practice to show the type of tool, the size of the radius used, and which direction it points
• The secondary offsets are also shown. The current value of these offsets are listed. To make changes to
these offsets you have to go back to the automatic mode and then F9.
3. Estimating cycle time
Now the cycle time is estimated.
Omniturn Verification Software
Cycle time
Estimated cycle time for this part is 30 seconds.
Press any key to continue...
5.15

If the program does not have a spindle speed you are now given a chance to input a single speed for
Verification -F4
estimating the cycle time:
Omniturn Verification Software
Program name
M30
No spindle speed set. Unable to exstimate cycle time.
Please enter spindle speed - then press Enter.
4. Tool path graphics
Before you show the graphics you have to chose to show them with or without the tool offset locations.
If you are running this software on your OmniTurn and the tools have all been set, then enter yes. If they
have not been set or you are running the software off-line, then say no. Use the Up / Down arrow keys to
highlight your selection. Then press Enter.
Running the graphics with tool offset locations helps pickup possible coalition conditions between tool
paths and the work piece.
Omniturn Verification Software
Use tool offsets in plots?: No
Yes
Use Cursor Keys; Press Enter to make a selection. ESC>Exit
5.16

Verification -F4
Then select the tool that you want to see. Or all. Use the Up / Down arrow keys again. Then press Enter.
Omniturn Verification Software
Select tool for verification: T1
T2
All
Use Cursor Keys; Press Enter to make a selection. ESC>Exit
Select the speed of the graphics display. If you choose single step you can advance through the program
using the Enter to go to the next move.
Omniturn Verification Software
Select speed of tool plot: Single step
Slow motion
Full Speed
Use Cursor Keys; Press Enter to make a selection. ESC>Exit
Then the graphics are shown:
Window size: X = 0.550 Z = 1.364 (Z)oom (F)ull view ESC>Exit
Tool number: 1 ; 2
Zooming You can look closer at a section of the graphics by zooming in. Press the Z key. A window
locator will appear. If you want to get much closer than one zoom, press it more than once, the window
will get smaller and smaller.
Move the window over the area of the screen you want to zoom. Use the arrow keys to move it around.
5.17

Verification -F4
Window size: X = 0.550 Z = 1.364 (Z)oom (F)ull view ESC>Exit
Tool number: 1 ; 2
Window size: X = 0.550 Z = 1.364 (Z)oom (F)ull view ESC>Exit
Tool number: 1 ; 2
Notes about the graphics:
The graphics will show the path created by the G code in the program. If you have tool nose compensations created in Calcaid the graphics will be showing the path of the center of the tool nose radius. So
the location of paths from tool to tool may overlap incorrectly since the tool nose radiuses will be different for each tool.
5.18

Automatic Mode
F4 Directory, list all of the programs on the disk -in use when a program is not active
This function key is not always active. Once you have selected a program to run and there is an active
file in memory this function is deactivated. In you have yet to select a current program this key will bring
up a list of programs available on the program disk. This will list all of the programs you have stored on
the A: disk, (the 3 1/2” floppy). Once you have reviewed the programs available press ”Esc” to return to the
Automatic mode screen.
F 5 Different file, used to change the running program to a new one
This function key is used to change the program that is in the current file and allow the operator to enter
in a new program name to be run. After F5 is pressed the control will ask ”FILE TO BE PROCESSED”.
Type the new name in and Return. Then press the cycle start and the new program will run. Be sure that
the tool offsets are set before running the new program. This key is not always active. If there is no active
file in memory F5 does not appear.
F 6 Search to, used to start the program at another location other than the beginning
This function key will allow you to start the program at a point other than the beginning. This is very
useful for running new programs and skipping over sections of program that you do not have to check.
It is intended for skipping to a tool change, this is an easily noted beginning section of code. F6 can also
be used with programs that have line numbers.
After the F6 command is pushed (while in the Automatic mode) the screen will ask ”SEARCH TO?”
POSITION
COMMAND : X +0.00000 Z +0.00000
SEARCH TO ?
Jog Automatic Single Block
F1-F10 FEED 10-100%
FILE IN MEMORY:DEMOPR
'0' FOR OPTIONAL STOP
'/ ' FOR BLOCK DELETE
'C' FOR CYCLE REPEAT
PRESS 'S' FOR SINGLE BLOCK
1QUIT 2OFFSET 3EDIT 4DIR 5NEWPROG 6SEARCHTO 7PROG 8DISKOP 9SECCMP 0
: X +0.00000 Z +0.00000 FEED 10.0 IPM
PERCENT FEED: 100
Manual Data Input
After typing in the text to search to press the Return key. Then press the cycle start button to start the slide.
As an example, if you are want to skip to Tool #2 type in T2. The control will skip the code before this
line and start the program with the T2 command. If you are using an OmniTurn with spindle control be
sure that after your tool changes you have a spindle on (M03 or M04) and an S command. The F6 Search to does not read the previous commands and you will have to be sure that the spindle is running. If you use line numbers in your program, it is possible to skip to these instead of the tool changes.
5.19

F7 Programming system, Calls up the Calcaid programming system See the section on Calcaid.
Automatic Mode
Chapters 9 and 10 in this manual.
F 8 Diskop, Calls up a list of Disk operations
The F8 key will call up the following screen:
File Handler
Would you like to:
1. Make a new boot/program disk
2. Erase a file from the boot/program disk
3. See a directory of files on the boot/program disk
4. Download a program from another computer
5. Upload a program to another computer
6. Make a backup copy of the boot/program disk
7. Set communications parameters
8. Exit file handler
By entering a number you will be prompted through the requested task. Listed below is a
description of each option.
1. This will help make a new boot/program disk, the larger of the two disks. It stores all of your
programs.
2. This will prompt you through erasing programs that you no longer need.
3. This will list all of your programs on the larger disk.
4. This will prompt you through downloading programs from another computer. This is used if
you write programs on another computer and want to transfer it to the OmniTum. You will have to
run a cable between the RS-232 ports on both computers. (See Section 7 for cable configuration)
The communications parameters are set by option 7 on this screen.
5 . This will send programs from the OmniTum to another computer via the RS-232 port. (See Section
7 for cable configuration)
6. This will copy the boot/program disk completely. All of your programs will be duplicated. Take
this disk away from the machine and store it in a safe place that is dry, dark (no direct sunlight),
cool (room temp.), and no magnets near by. This should be done after you have written and tested
a program. If there is a problem with the disk in the OmniTum you can replace it with your backup
and continue uninterrupted operation.
7. This will display the communications parameters and allow you to change them.
The communications parameter options are:
Baud rate (2400, 1200, 300)
Parity (o,e,n)
Data bits (7,8)
Stop bits (1,2)
5.20

Automatic Mode
8 . This will exit the file handling screen and bring you back to the Automatic mode
screen.
F 9 Secondary tool offset screen, used to modify secondary tool offsets
This function will call up the secondary offset table. There are 32 offsets available and 32 tool nose
radius compensation offsets. Please refer to the section on secondary offsets for their use. Notice that this
differs from the offset table screen in that almost all of the offset values are set to 0.00000. Secondary
offsets are corrected like offsets.
X: +0.00000 Z: +0.00000
1
X: +0.00000 Z: +0.00000
2
X: +0.00000 Z: +0.00000
3
X: +0.00000 Z: +0.00000
4
X: +0.00000 Z: +0.00000
5
X: +0.00000 Z: +0.00000
6
X: +0.00000 Z: +0.00000
7
X: +0.00000 Z: +0.00000
8
X: +0.00000 Z: +0.00000
9
X: +0.00000 Z: +0.00000
10
X: +0.00000 Z: +0.00000
11
X: +0.00000 Z: +0.00000
12
X: +0.00000 Z: +0.00000
13
X: +0.00000 Z: +0.00000
14
X: +0.00000 Z: +0.00000
15
X: +0.00000 Z: +0.00000
16
Secondary offset number:
Press C to clear all offsets:
Press Esc to exit offset adjustment screen
R: 0.00000
R: 0.00000
R: 0.00000
R: 0.00000
R: 0.00000
R: 0.00000
R: 0.00000
R: 0.00000
R: 0.00000
R: 0.00000
R: 0.00000
R: 0.00000
R: 0.00000
R: 0.00000
R: 0.00000
R: 0.00000
X: +0.00000 Z: +0.00000
17
18
X: +0.00000 Z: +0.00000
19
X: +0.00000 Z: +0.00000
20
X: +0.00000 Z: +0.00000
21
X: +0.00000 Z: +0.00000
22
X: +0.00000 Z: +0.00000
23
X: +0.00000 Z: +0.00000
24
X: +0.00000 Z: +0.00000
25
X: +0.00000 Z: +0.00000
26
X: +0.00000 Z: +0.00000
27
X: +0.00000 Z: +0.00000
28
X: +0.00000 Z: +0.00000
29
X: +0.00000 Z: +0.00000
30
X: +0.00000 Z: +0.00000
31
X: +0.00000 Z: +0.00000
32
X: +0.00000 Z: +0.00000
First: Select a secondary offset number
Next: Use the return key to enter past the X and Z inputs.
Then: Enter the value of tool nose compensation, IE .007 and then press ESC
R: 0.00000
R: 0.00000
R: 0.00000
R: 0.00000
R: 0.00000
R: 0.00000
R: 0.00000
R: 0.00000
R: 0.00000
R: 0.00000
R: 0.00000
R: 0.00000
R: 0.00000
R: 0.00000
R: 0.00000
R: 0.00000
Changing a TNR compensation value:
When you put a value in the R offset table it writes over the old value. So if you have a number already
in the register that you want to use and it is not the value needed, all you have to do is enter the correct
value. As an example if you have a value of .032 in the offset and you want to change it to .008, just
enter the new value. You do not have to clear the register first. If you want to correct a value slightly, you
must enter in the final value needed. ie: if you have .007 and want to increase it by .001 you must enter
.008. Do not enter -.001
Clearing secondary offsets to Zero.
It is possible to clear all of the secondary offsets by pressing C when asked for a secondary offset number.
This will set the entire table to zeros.
Individual offsets can be set to zero by pressing C when asked to enter a correction amount.
5.21
Automatic Mode
F 10 Special Function, used to call up a list of special functions.
POSITION
COMMAND : X +0.00000 Z +0.00000
FILE TO BE PROCESSED:
Jog Automatic Single Block Manual Data Input
F1-F10 FEED 10-100%
FILE IN MEMORY: TEST
'0' FOR OPTIONAL STOP
'/ ' FOR BLOCK DELETE
'C' FOR CYCLE REPEAT
PRESS 'S' FOR SINGLE BLOCK
1QUIT 2OFFSET 3EDIT 4DIR 5NEWPROG 6SEARCHTO 7PROG 8DISKOP 9SECCMP 0
: X +0.00000 Z +0.00000 FEED 10.0 IPM
PERCENT FEED: 100
Preset feedrate override using F1 - F10
A part program must be active before
its offsets can be saved or restored
Press P to activate parts counter
Press R to set max. spindle speed
Press C to set Cycle Repeat counter
Press Esc to return normal operation
If a program is active the promt will be:
PRESS L TO LOAD OFFSETS
PRESS S TO SAVE OFFSETS
This screen will allow you to:
• Save and recall tool offset tables.
If you are using a tooling system that allows you to remove and replace tooling exactly this function is
useful to you. Also if you use the same tool set for a number of different programs. When you save your
program it is possible to save the tool offsets as well. The saved offsets are put on the A: disk with the
programs.
The screen above is shown if you do not have a part program active. Offsets can not be saved or recalled. If you have a part program active the control will allow you to save and load the offsets from
memory:
L -press L to load the offsets from memory
S -press S to save the offsets to the disk
• Modify the feedrate :
To be used in a program before you start running it. This eliminates the need to race to the function keys
after you press the cycle start. When you are running a program for the first time you might want to
lower the feedrate to only 20% by pressing F2 so that you can watch the motion of the tool before you
cut material.
• Set the number of:
Cycles the Automatic mode will run before stopping when you set the cycle repeat to ”C”. This is good
for use with a barfeed. As an example you could set the machine up and tell it you need 20 pieces. The
OmniTurn will make the required amount and then stop.
• If you have the infinitely variable spindle speed control this will let you tell the control what spindle
speed the machine is set at. That way the control will output the speed requested in your program
without having to figure any ratios out. This is covered in greater detail with the documentation on the
option.
5.22
Automatic Mode
POSITION
: X +0.00000 Z +0.00000 FEED 10.0 IPM
COMMAND : X +0.00000 Z +0.00000
FILE TO BE PROCESSED:
Jog Automatic Single Block
F1-F10 FEED 10-100%
FILE IN MEMORY: TEST
'0' FOR OPTIONAL STOP
'/ ' FOR BLOCK DELETE
'C' FOR CYCLE REPEAT
PRESS 'S' FOR SINGLE BLOCK
1QUIT 2OFFSET 3EDIT 4DIR 5NEWPROG 6SEARCHTO 7PROG 8DISKOP 9SECCMP 0
Preset feedrate override using F1 - F10
A part program must be active before
its offsets can be saved or restored
Press P to activate parts counter
Press R to set max. spindle speed
Press C to set Cycle Repeat counter
Press Esc to return normal operation
Press P now, it will turn the counter on
in the Automatic mode
PERCENT FEED: 100
Manual Data Input
• Turn on a PARTS COUNTER: Press P while you have this screen open. There will be no effect here.
When you go to the Automatic mode main screen there will be a counter on the screen. The counter will
count up each time a M30 or M02 is executed. To clear the counter come back into the F10 screen and
press P again.
5.23

Automatic Mode
Feedrate override
Function Keys - Automatic Mode - Program in process
When the program is running it is possible to change the feed rates. The function keys will select a
percentage of the original feedrate. F1 = 10%, F2 = 20%, ......... F10 = 100%. IE if you push F1 while the
program is running the feedrate will drop to 10% of what ever you have set in the program. The feedrate
and what percentage of that feedrate is being run is displayed on the automatic mode screen on the
upper right corner of the screen.
Feedrate and percentage
POSITION
COMMAND
PRESS CYCLE START
Jog Automatic Single Block
F1-F10 FEED 10-100%
FILE IN MEMORY
'0' FOR OPTIONAL STOP
'/ ' FOR BLOCK DELETE
'C' FOR CYCLE REPEAT
PRESS 'S' FOR SINGLE BLOCK
1QUIT 2OFFSET 3EDIT 4DIR 5NEWPROG 6SEARCHTO 7PROG 8DISKOP 9SECCMP 0
: X +0.00000 Z +0.00000 FEED 10.0 IPM
: X +0.00000 Z +0.00000
: DEMOPR
PERCENT FEED: 100
Manual Data Input
If you want to change the feedrate before you press cycle start select F10. This will allow you to preload a
percentage before the program is started.
5.24
 Loading...