


Direction for product use
1

Operating environment
Operation temperature
-20°C to +40°C
Waterproof
IP67.
Battery life
Up to 5 days.
2
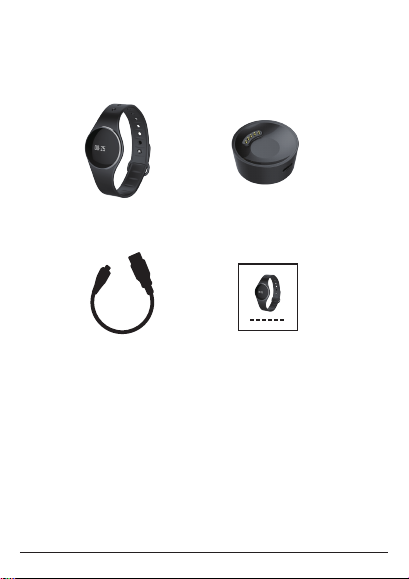
Articles in the box
A B
C D
A:Wristband
B:Charger
C:Micro-USB connection line
D:Manual
3

Overview of the device
1. Charging
2. APP setup
3. Device operation
4. Screen operation
5. Device function
6. Setup
7. Service and support
4
Charging
Please charge the watch for two hours before the initial use.
Plug the USB connection line into the power.
Please connect the charger with your wristband.
5
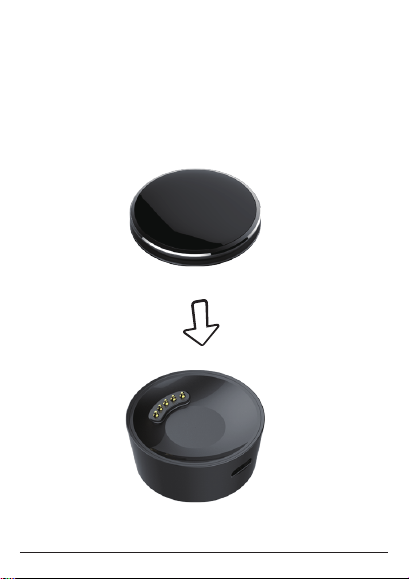
Charging
Connect the USB connection line with the charger.
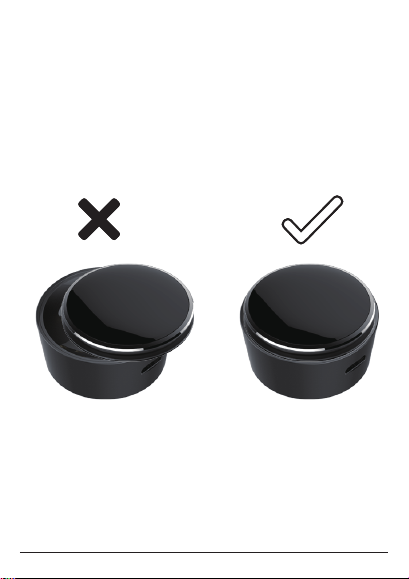
The charger is well-matched with the wristband back, place
and fit it together.
6
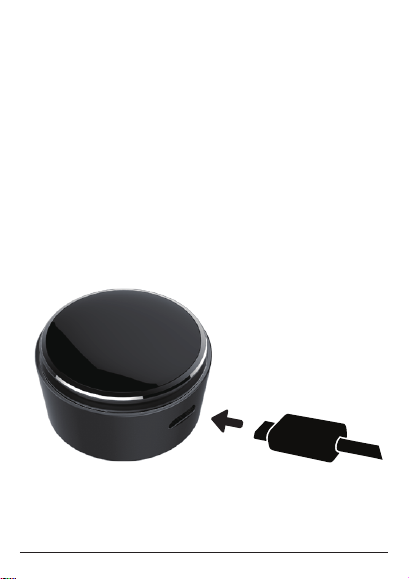
Charging
Plug the Micro-USB connection line to the wristband
charger.
Plug the USB connection line into the power.
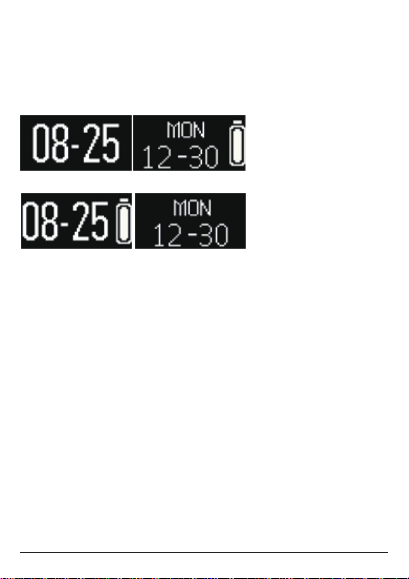
The screen will show the charging icon. When the power is
full, the full charge icon will be shown on the screen.
It takes two hours for full chargeing. The screen will display
the low-power icon if the power is less than 10%.
7

Download the APP
Download the watch APP:
Please search for “Wristfit” in the App store and Android
application store at first, then download and install the App
in your mobile device.
Mobile device compatibility:
iOS 7+,Bluetooth 4.0 BLE,iPhone 4s+,iPad3+,
iPad Mini+,iPod touch5+
Android 4.3 + ,Bluetooth 4.0 BLE
8

Device Initialization
The device will display when you first use it.
Please press the button for more than 3 seconds until
time displays on the screen, that means the initialization
is completed.
3s
9

Connect the APP
1. Open your mobile device’s Bluetooth;
2. Open the Wristfit App on your mobile device;
If you are a new member, please register, or log on an existing
account. After finishing your personal information setting,
please click the setup;
3. Please confirm the wirstband is around your mobile device,
and select Wristfit from the App Bluetooth list;
4. The pairing demand will be displayed on the wristband.
Touch the wristband screen to accept the pairing;
5. After pairing successfully, your wristband and mobile
device will receive a notice.
If the pairing fails, please repeat the same step and try again.
The wristband can not pair with different accounts at the
same time. So if you want to pair with the writband with other
accounts, please unpair the wristband on the APP, and cancel
the existing pairing.
10

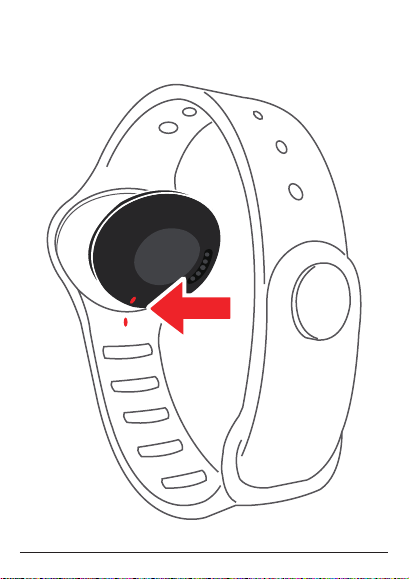
Awakening device
Click the touch area of the display screen to activate the
device.
The wristband touch screen only makes response when
pointing at the designated touch area.
The wristband screen will be turned off when it is not in use.
Please click the touch area to awaken the device.
Please use the fingertip rather than the nail for pointing, so
that the wristband can make the correct response.
x1
11

Screen operation
All screen operations are completed by using your fingertip to
touch the screen surface.
Switch the interface by clicking the touch area.
sleep mode.
Click on the App Preset sleep to enter your desired sleeping
time and wake up time automatically. Close it, the wristband
will not enter the sleep mode.
12

Main menu
Time, date
Step
Distance
Calorie
Click the screen touch area to switch the interface.
13
Clock interface
Time, date, power level
The time and date of the wristband will synchronize with your
paired mobile device automatically.
You may manually set the time and date you like via the
setting of Wristfit App.
Please confirm your wristband is fully charged to avoid time
reset.
14

Step, calorie, distance
Step
Distance
Calorie
The whole-day walking steps, distance and burnt calorie of
yours can be monitored by the wristband, and you can click
the touch screen display area and check the data displayed
on the wristband, or you can monitor your activity data and
historic records via the Wristfit App. You can check your daily
target completion process through the main activity picture,
and also the detailed figures of your daily, weekly and
monthly performance. The activity monitor will reset every
day at midnight. If you need to upload the latest activity data
of yours, please remember to click the upper right
synchronization icon of the App.
15

Sleep mode
Click on the App Preset sleep to enter your desired sleeping
time and wake up time automatically. Close it, the wristband
will not enter the sleep mode.
Time
Sleep icon
Touch the screen to switch the interface.
16

Power level
Check the electric quantity of the battery on the main interface
To achieve the optimal use effect, the electric quantity of the
battery should not be lower than 20%.
17

Notifications
Social contact message reminding Email reminding
Message reminding
Missed call reminding Bluetooth disconnection reminding
The wristband supports calls, missed calls, messages,
emails, social contact media activities, calendar matters and
anti-loss notifications. Open Wristfit App, click “setup>
notifications”, and select the notification you want to receive.
If you want to stop using some notifications, please slide the
radio button to the left and click the wristband screen to
neglect the notifications. Otherwise, the notifications will
show up again when the screen is activated next time.
18
Calendar matter reminding

Caller identification
The caller identification only supports Chinese and English.
19

Reminders
Sport Sleep
MedicineWake up
Eat
Click the “reminders” option of Wristfit App to add daily
reminding. You can set 6 kinds of daily reminding for the
most, and you may select the provision type, preference time
and date. Your wristband will vibrate slightly and display the
corresponding reminding icon to remind you. Click the
wristband to neglect the reminding. If not, the reminding will
appear two minutes later.
20
User-defined

Target
Click the “target” option of the Wristfit App to set the target of
daily walking step, walking distance, burnt calorie and sleep
hours. Click the synchronization button on the upper right to
save your target setting. When the target is reached, your
wristband will vibrate slightly and display the target
completion icon.
21

Troubleshooting
Data synchronization failure by the APP
1. Please check if the network and Bluetooth of your mobile
phone have been opened. The network and Bluetooth of
your mobile phone need to be opened at the same time for
data synchronization.
2. Please check if the wristband is around your mobile phone
and please confirm the connection distance is within 5 meters.
3. Please confirm the binding with your wristband is
successful.
Failure of wristband binding with the APP
1. Please check if the network and Bluetooth of your mobile
phone have been turned on. The network and Bluetooth of
your mobile phone need to be turned on at the same time
for wristband binding.
2. Please check if the wristband is around the mobile phone
and please confirm the connection distance is within 5 meters.
3. Please check the wristband has not bound with other
accounts.
22

FCC Statement
1. This device complies with Part 15 of the FCC Rules. Operation is subject to the following two conditions:
(1) This device may not cause harmful interference.
(2) This device must accept any interference received, including interference that may cause undesired operation.
2. Changes or modifications not expressly approved by the party responsible for compliance could void the user's authority to operate
the equipment.
NOTE:
This equipment has been tested and found to comply with the limits for a Class B digital device, pursuant to Part 15 of the FCC Rules.
These limits are designed to provide reasonable protection against harmful interference in a residential installation.
This equipment generates uses and can radiate radio frequency energy and, if not installed and used in accordance with the
instructions, may cause harmful interference to radio communications. However, there is no guarantee that interference will not occur
in a particular installation. If this equipment does cause harmful interference to radio or television reception, which can be determined
by turning the equipment off and on, the user is encouraged to try to correct the interference by one or more of the following measures:
Reorient or relocate the receiving antenna.
Increase the separation between the equipment and receiver.
Connect the equipment into an outlet on a circuit different from that to which the receiver is connected.
Consult the dealer or an experienced radio/TV technician for help.
 Loading...