

HERCULES® RETRODRAIN
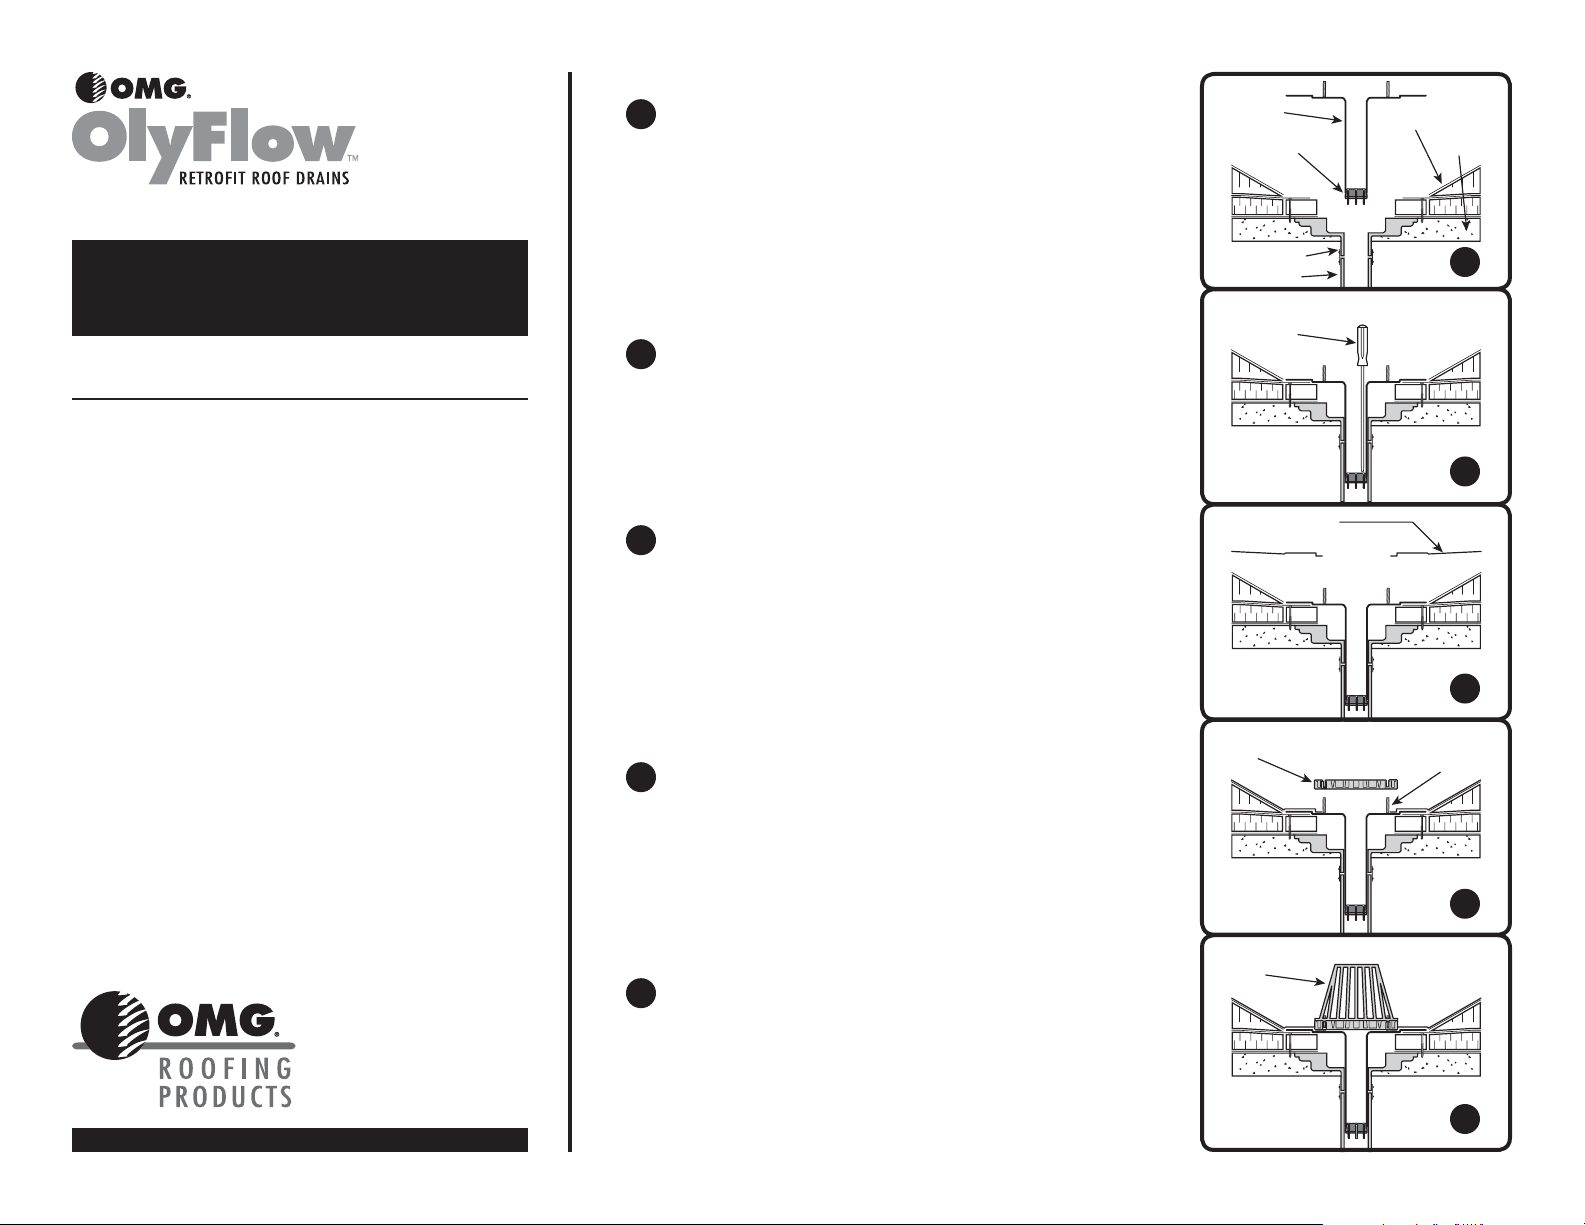
Hercules
Drain Body
Roof Membrane
Deck
U-Flow Seal
Existing Drain
Existing Pipe
Strainer
Dome
Clamping
Ring
Metal Stud
Flashing Membrane
(Refer to project specifications)
U-Flow
Screwdriver
STEP
1
Examine the existing water leader to make sure there are
no elbows that prevent the drain stem from being fully
inserted into the pipe. (If an elbow is present, follow
directions on reverse for shortening drain stem.) Insert
U-Flow® Seal into end of drain stem and tighten screws
enough to hold the seal in place during installation. Insert
assembled drain into existing leader pipe until flange lies
flush on roof membrane.
1
INSTALLATION INSTRUCTIONS
MEETS ANSI/SPRI RD-1 STANDARD
For Use With: All types of roof covers.
Job Preparation: Remove existing strainer dome and
clamping ring. Remove other existing drain components
as required to enable Hercules Drain flange to lie flush
on roof membrane. Remove any debris or constricting
materials in the existing drain pipe that interferes with
proper installation.
For technical assistance
contact OMG at 800.633.3800.
STEP
2
STEP
3
STEP
4
Alternately tighten seal compression ring screws with
U-Flow Screw driver until hand tight. Hercules Drain body
is correctly installed when pressure placed on drain body
results in no vertical movement. Do not overtighten
the screws.
Secure the drain flange to the roof deck/nailer using
a minimum of three pan-head fasteners, evenly spaced
around the flange. The flash ing membrane must cover and
extend past the fastener head. Flash ing membrane must
be installed per roof membrane manufacturer’s detail.
Place clamping ring over metal studs. Install stainless
steel nut and lock washers tightening clamping ring
against membrane flashing until secure.
2
3
153 BOWLES ROAD
AGAWAM, MA 01001
800.633.3800
WWW.OLYFAST.COM
STEP
5
OlyFlow™, U-Flow®, Hercules® and RetroDrain® are trademarks of OMG, Inc.
Copyright © 2011 OMG, Inc.
Install strainer dome by aligning screw holes with the
holes in the clamping ring. Secure with screws provided.
4
5
RP11057-30M-OP
HOW TO SHORTEN AN
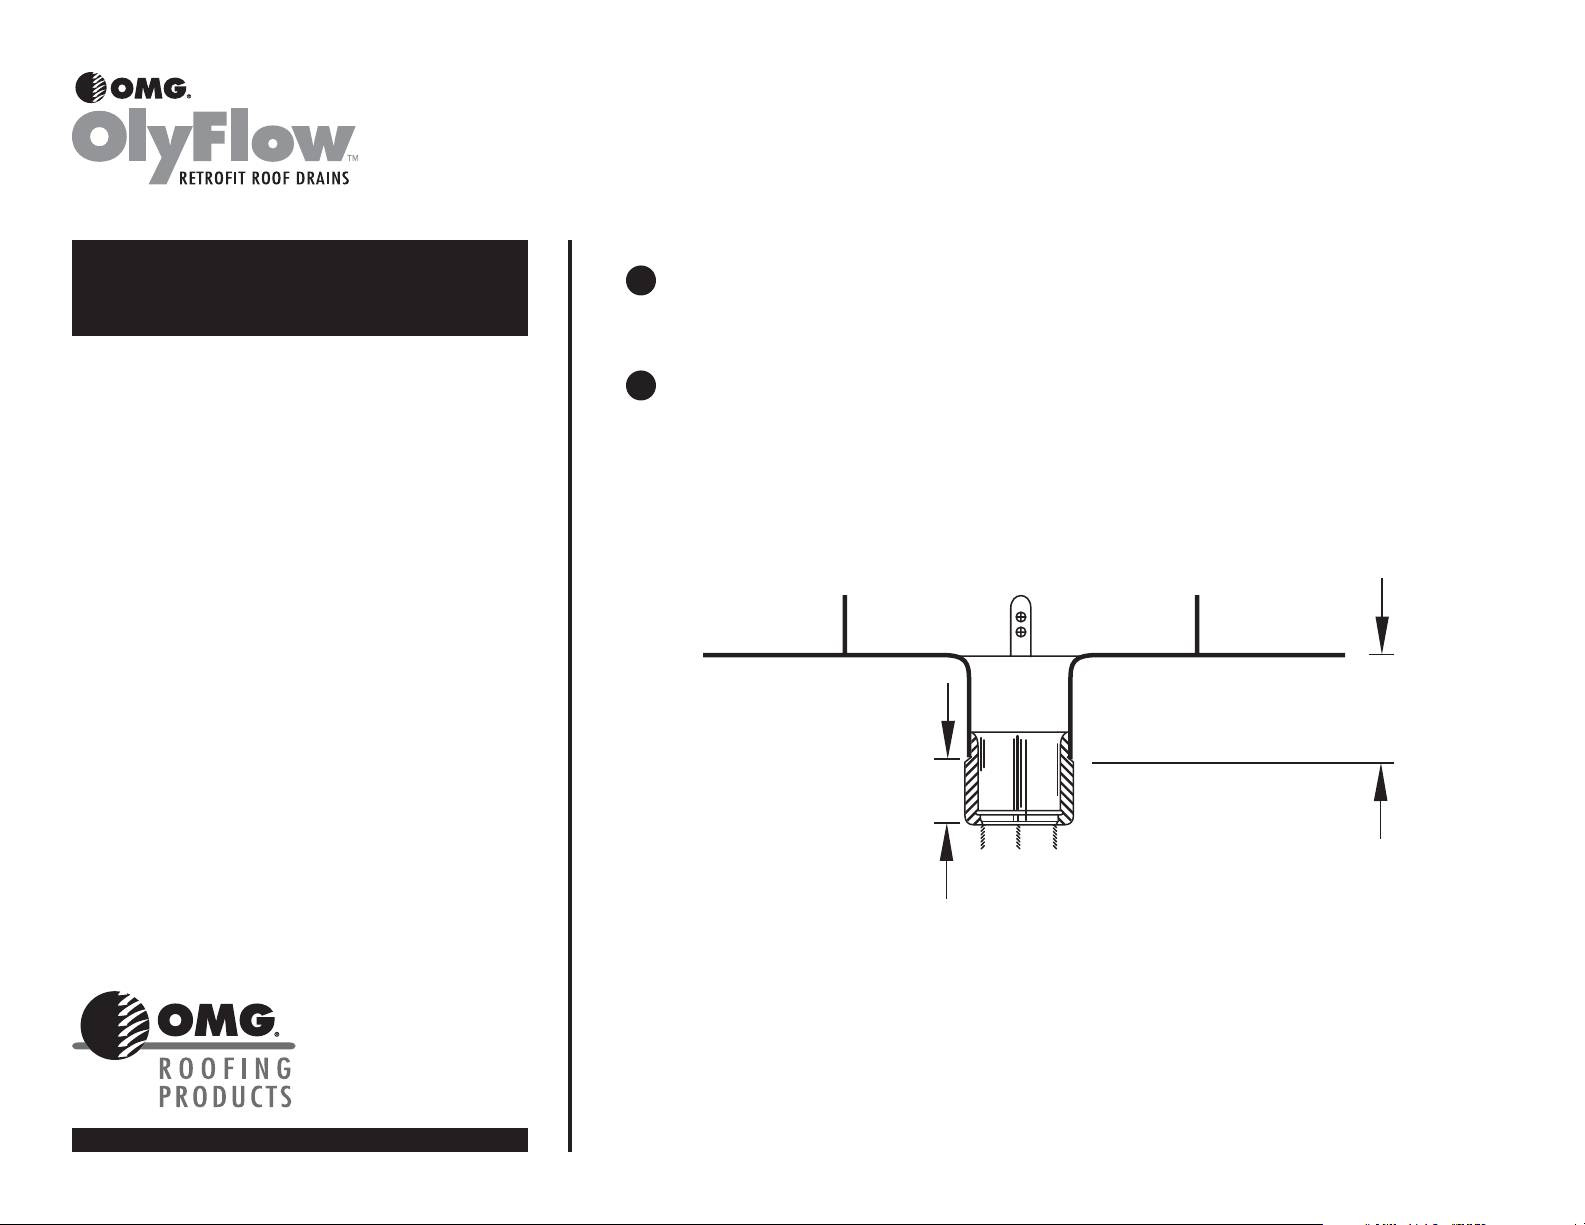
Figure 1: The minimum length of the metal retrofit drain stem
with a U-Flow Seal Assembly.
Max. length 50 mm (2")
Min. length 63.5 mm (2½")
OLYFLOW METAL RETROFIT DRAIN
STEP
1
Make sure there is at least 4-inches of clear vertical distance in the existing pipe to accommodate
the drain. Cut drain stem to desired length and insert U-Flow Seal. Note: Leave at least 2.5-inches of
the drain stem to accommodate the seal. See Figure 1.
In some applications it may be necessary to shorten the
drain’s stem length if the existing vertical distance is too
shallow to accommodate the retrofit drain stem as
manufactured.
For technical assistance
contact OMG at 800.633.3800.
STEP
2
Insert the U-Flow Seal in the cut drain stem and tighten the seal screws. Once the drain and seal
have been assembled, insert it into the existing water leader and complete the assembly following
installation steps 2 thru 5 (see reverse).
153 BOWLES ROAD
AGAWAM, MA 01001
800.633.3800
WWW.OLYFAST.COM
 Loading...