

Page 1
Operating Instructions
& Parts Manual
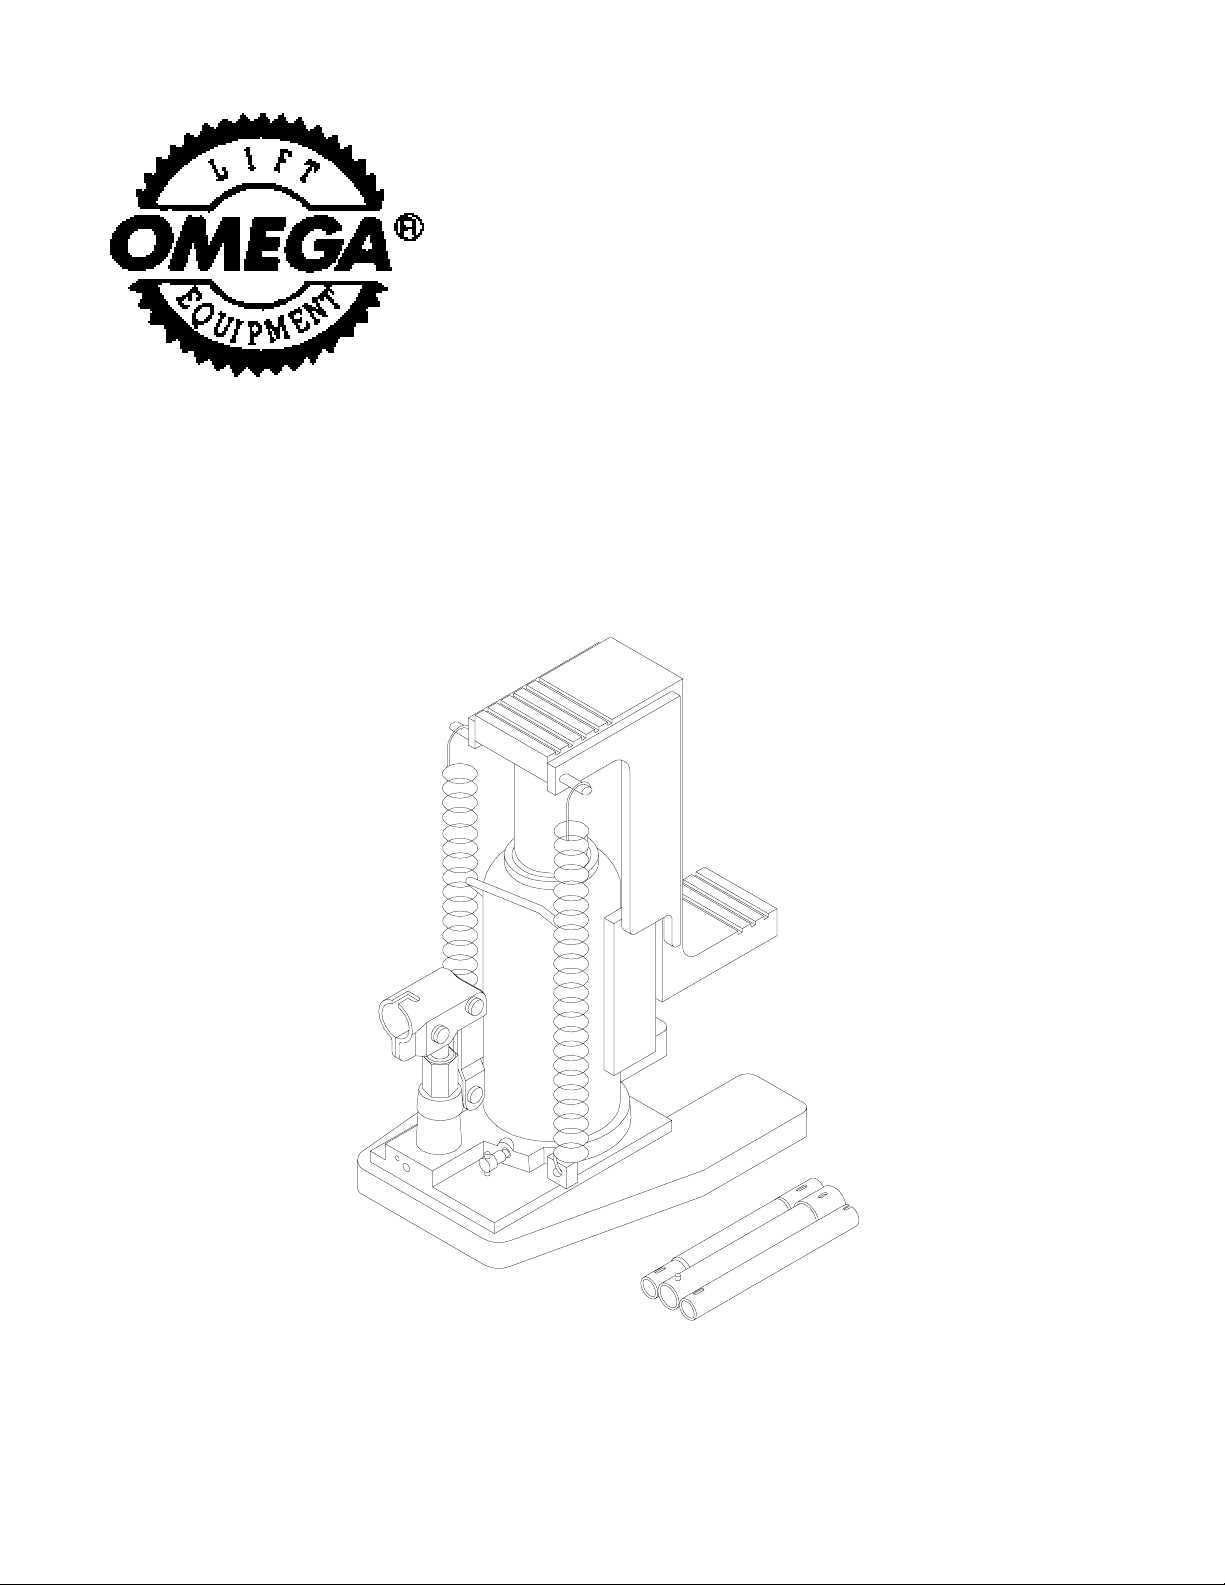
Hydraulic Toe Jacks
Model Number
13120
13200
Capacity
6 Ton
10 Ton
Shinn Fu Co. of America, Inc. ©2002
10939 N. Pomona Avenue
Kansas City , MO 64153
OIPM # 13120-TJ2
Printed in T aiwan
Page 2
Save these instructions. For your safety , read, understand, and follow the information provided with and on this
jack. The owner and operator of this equipment shall have an understanding of this jack and safe operating
procedures before attempting to use. The owner and operator shall be aware that use and repair of this product
may require special skills and knowledge. Instructions and safety information shall be conveyed in the operator's
native language before use of this jack is authorized. If any doubt exists as to the safe and proper use of this jack,
remove from service immediately . Inspect before each use. Do not use if broken, bent, cracked or damaged parts
are noted. Any jack that appears damaged in any way , or operates abnormally shall be removed from service
immediately . If the jack has been or suspected to have been subjected to a shock load (a load dropped suddenly ,
unexpectedly upon it), immediately discontinue use until jack has been checked by an Omega authorized service
center. It is recommended that an annual inspection be done by qualified personnel. Labels and Operator’s
Manuals are available from manufacturer (see Replacement Parts, page 6).
PRODUCT DESCRIPTION
Omega Hydraulic T oe Jacks are designed for lifting, but not sustaining, loads ranging from 6 tons thru 10 tons
depending on the rated capacity of the jack. They are designed to be used vertically . After lifting, loads must be
immediately supported by appropriate means. Each model is suitable for use in an appropriately rated and
designed vertical or bench press structure. These jacks are not recommended for use in lifting or positioning
construction trailers, houses and/or other building structures.
SPECIFICATIONS
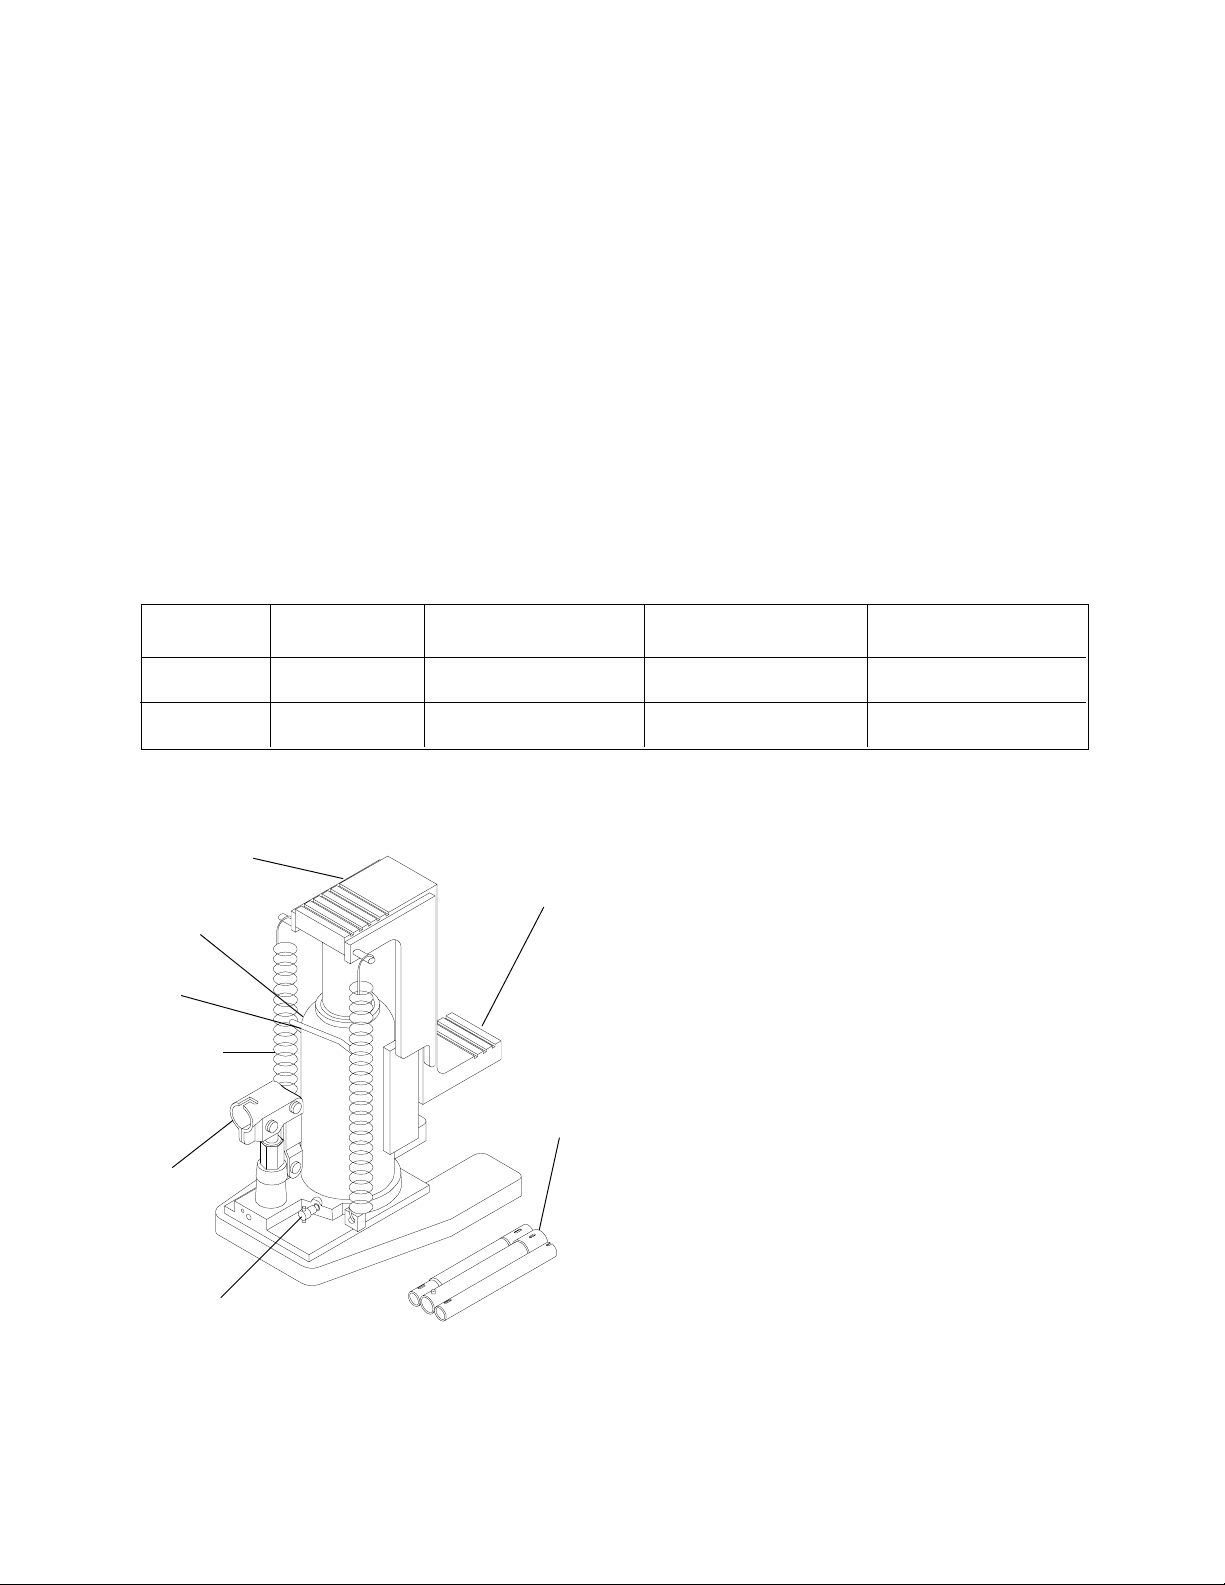
Base Size (L x W)Model Capacity Lifting Range - Toe Lifting Range - Head
6 Ton 7 1/2" X 4 5/8" 10 1/2" ~ 15 5/8"13120 7/8" ~ 6"
10 Ton 7 1/2" X 5 3/8" 1 1" ~ 16 1/8"13200 1 1/8" ~ 6 1/4"
head saddle
oil filler plug / screw*
(not shown)
carry handle
return spring
handle sleeve
release valve
* oil filler screw for 13200
Figure 1 - Model 13120 & 13200 Nomenclature
OIPM#13120-TJ2
toe saddle
handle
BEFORE USE
1. Verify that the product and the application are
compatible, if in doubt call Omega T echnical
Service (888)332-6419.
2. Before using this product, read the operator's
manual completely and familiarize yourself
thoroughly with the product and the hazards
associated with its improper use.
3. Assemble handle sections by lining up spring clip of
smaller diameter handle section with slot of larger
handle section. Press down the spring clip and slide
smaller diameter section until clip is secure in slot.
4. With the notched end of the provided handle,
engage and open the release valve
(counterclockwise no more than 1/2 full turn).
5. With ram fully retracted, locate and remove the oil
filler plug/screw. Insert the handle into the handle
sleeve, then pump 6 to 8 strokes. This will help
release any pressurized air which may be trapped
within the reservoir. Ensure the oil level is just below
the oil filler plug/screw hole. Reinstall the oil filler
plug/screw.
6. Check to ensure that the pump operates smoothly
before putting into service. Replace worn or
damaged parts and assemblies with Omega
Authorized Replacement Parts only .
7. Inspect before each use. Do not use if bent, broken
or cracked components are noted.
2
Page 3
!
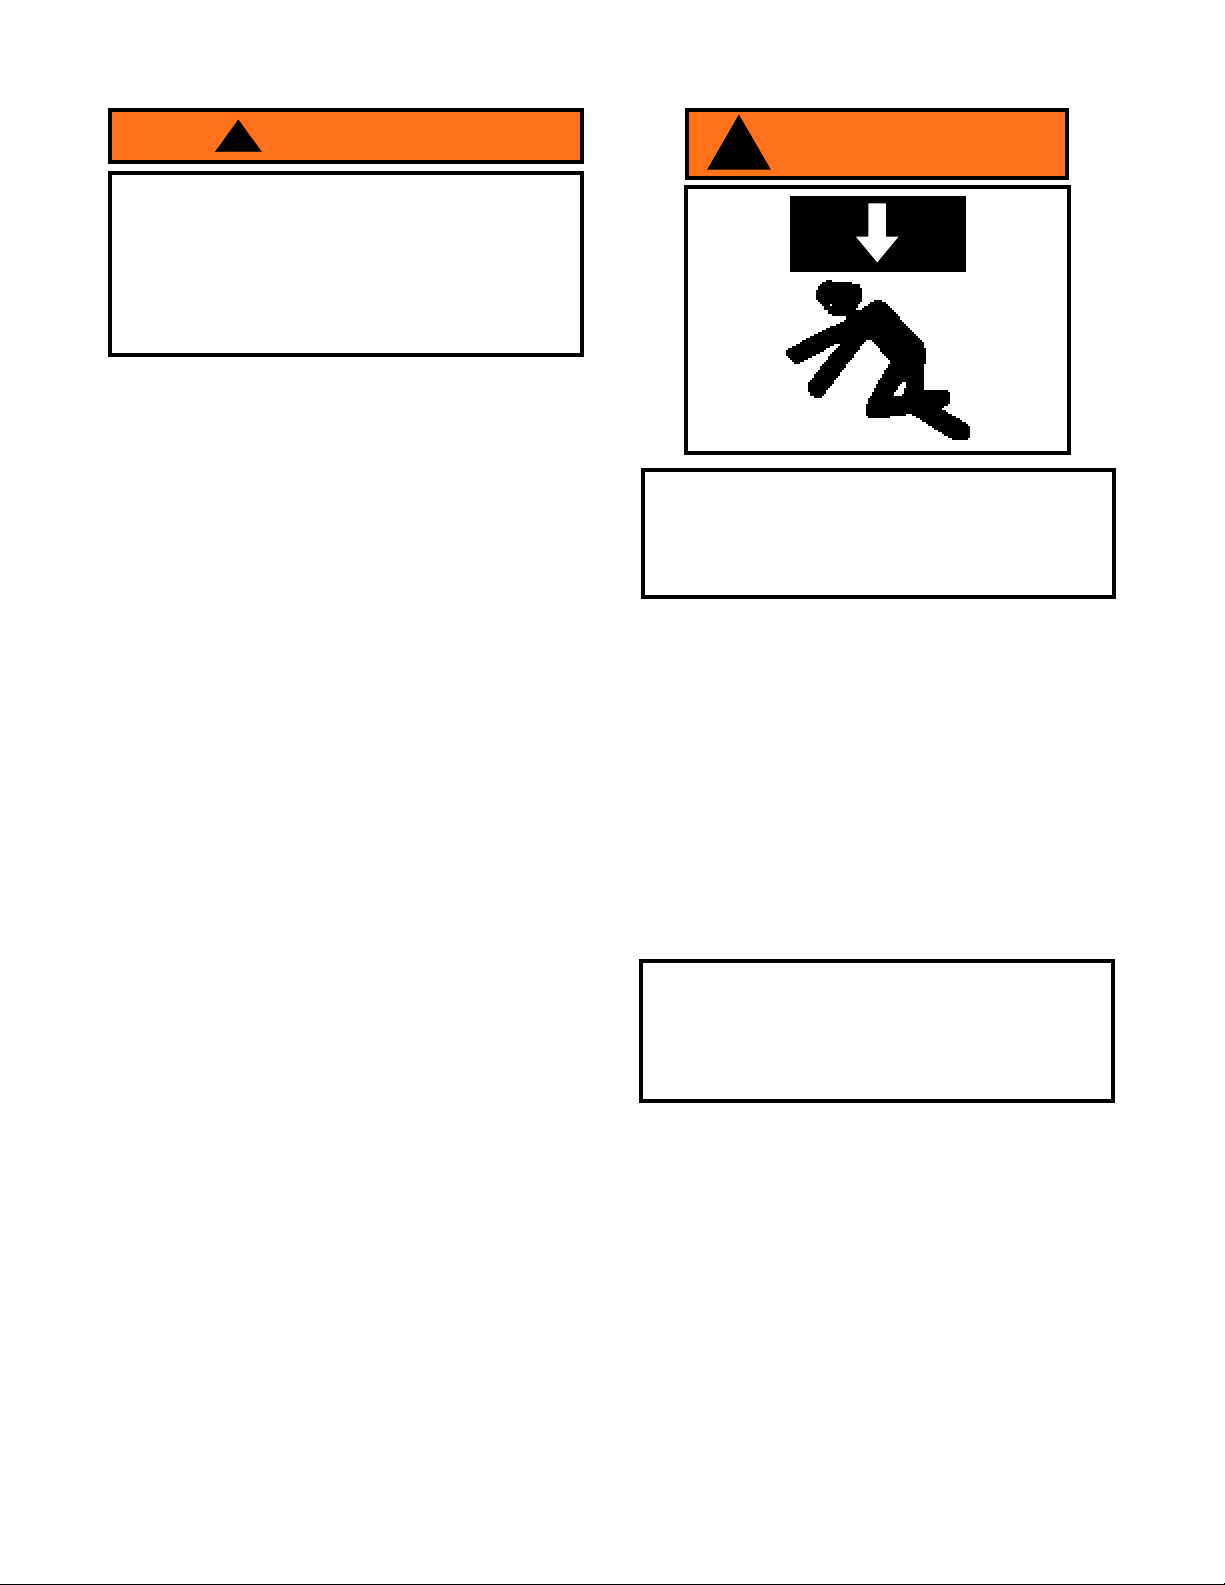
WARNING
Study , understand, and follow all instructions before
operating this device. Do not exceed rated capacity .
Use only on hard, level surfaces. Lifting device only .
Immediately after lifting, support the vehicle with
appropriate means. Failure to heed these markings
may result in personal injury and/or property
damage.
OPERATION
Lifting
1. Assemble 3 pc. handle, ensure that spring clips
align with slots.
2. Secure the load to prevent inadvertent shifting and
movement.
3. Position the jack near desired lift point.
4. Close the release valve by turning it clockwise until
it is firmly closed.
WARNING
!
T o avoid crushing and related injuries:
NEVER work on, under or around a load supported
only by a jack. AL WAYS use adequately rated jack
stands.
Note: Use the handle provided with this product or an
authorized replacement handle to ensure proper
release valve operation. When using to lift vehicle, lift
only on the manufacturer’s recommended lift points
and in accordance with the published guidelines in
your vehicle owners manual. Always use jack stands
to support the load immediately after lifting.
5. Insert and secure handle into handle sleeve. Pump
handle until saddle contacts load.
6. Raise load to desired height, then immediately
transfer the load to appropriately rated support
devices such as jack stands.
OPERA TION (continued)
Lowering
1. Raise load enough to carefully remove jack stands.
2. Insert handle onto release valve and slowly turn
handle counterclockwise, but no more than 1/2
turn.
3. If load fails to lower:
a. Carefully transfer the load to another lifting
device and jack stands.
b. Carefully remove affected jack, and then the
jack stands. Lower the load, again by slowly
turning the release valve no more than 1/2 turn.
! SAFETY MESSAGE !
Be sure all tools and personnel are clear before
lowering load. No alterations shall be made to this
device. Only attachments and/or adapters supplied
by the manufacturer shall be used.
4. After removing jack from under the load, push ram
and handle sleeve down to reduce exposure to rust
and contamination.
3
OIPM#13120-TJ2
Page 4
MAINTENANCE
Important: Use only a good grade hydraulic jack oil.
Avoid mixing different types of fluid and NEVER use
brake fluid, turbine oil, transmission fluid, motor oil or
glycerin. Improper fluid can cause premature failure
of the jack and the potential for sudden and immediate
loss of load. We recommend Mobil DTE 13M.
Adding oil
1. With saddle fully lowered and pump piston fully
depressed, set jack in its upright, level position.
Remove oil filler plug/screw.
2. Fill until oil is level with the filler plug/screw hole,
reinstall oil filler plug/screw.
MAINTENANCE (continued)
Note: Dispose of hydraulic fluid in accordance with
local regulations.
3. Fill with good quality jack oil. Reinstall oil filler plug/
screw.
Lubrication
1. A coating of light lubricating oil to pivot points, axles
and hinges will help to prevent rust and assure that
assemblies move freely .
2. Periodically check the pump piston and ram for
signs of rust or corrosion. Clean as needed and
wipe with a clean, oil soaked rag.
Changing oil
For best performance and longest life, replace the
complete fluid supply at least once per year.
1. With saddle fully lowered and pump piston fully
depressed, remove the oil filler plug/screw.
2. Lay the jack on its side and drain the fluid into a
suitable container.
TROUBLESHOOTING
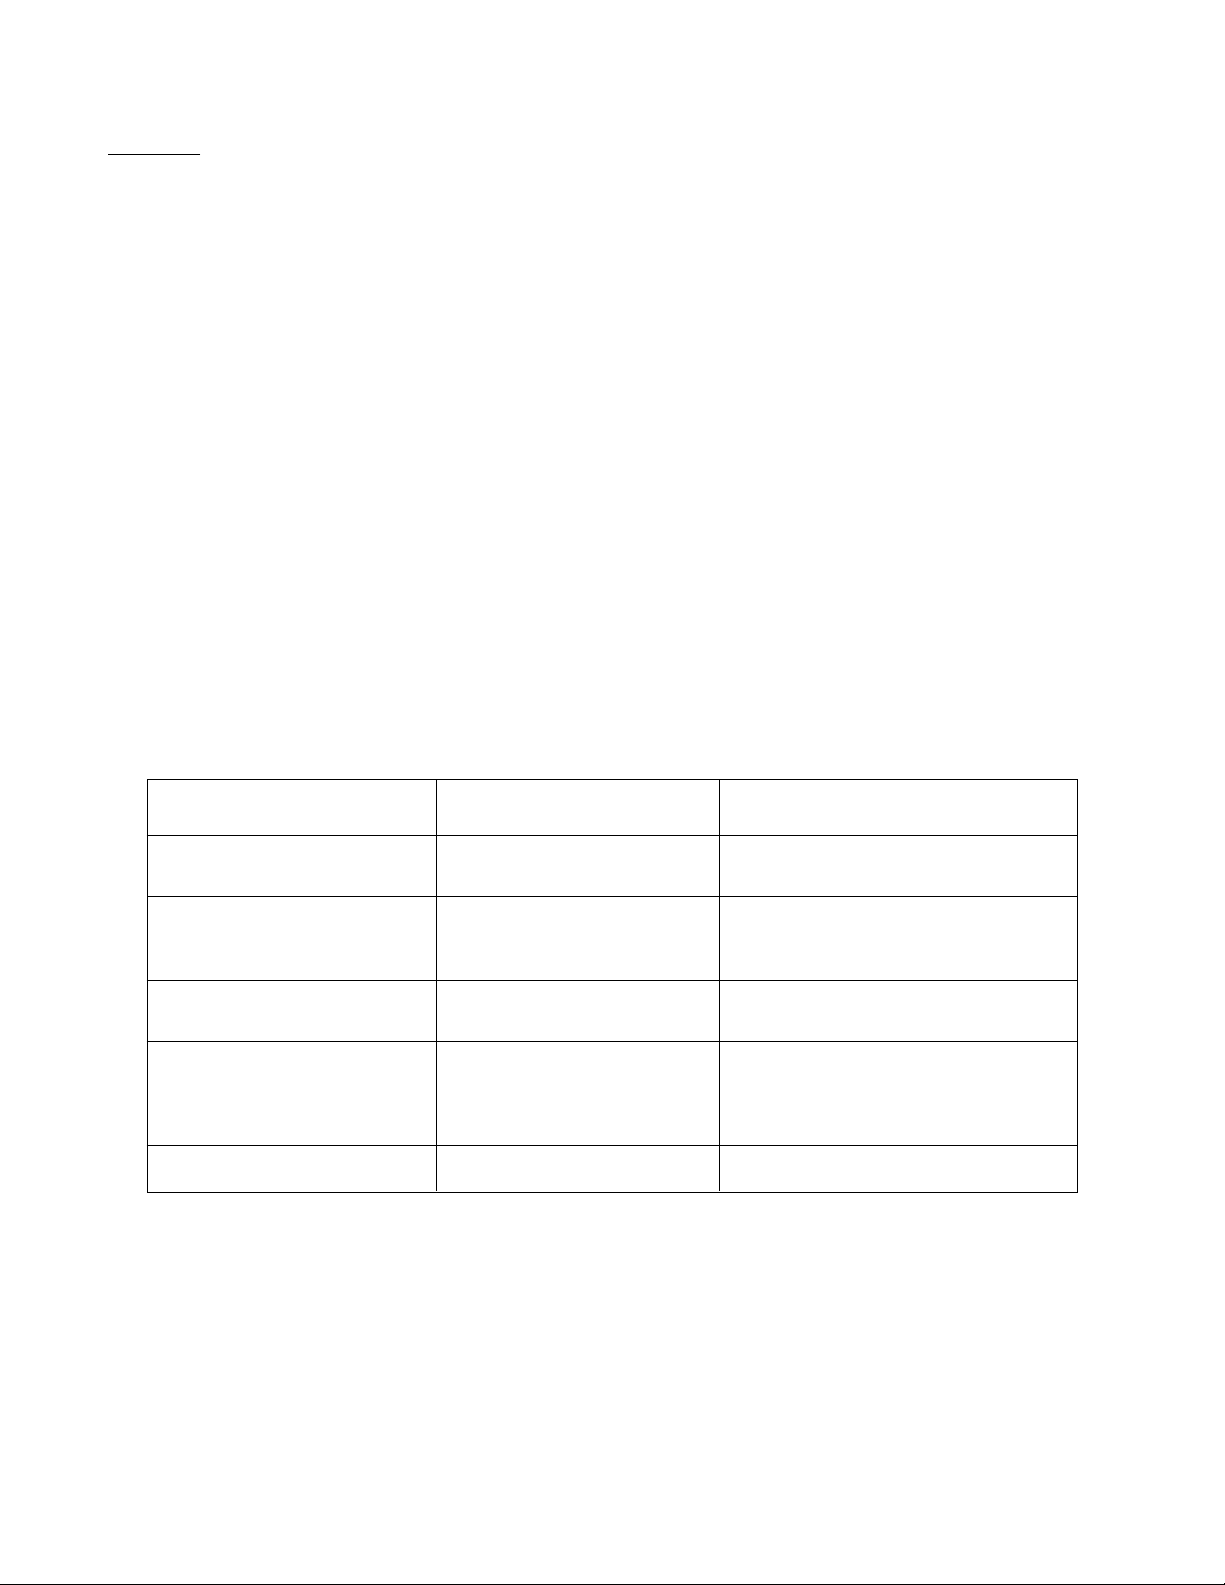
Symptom
Jack will not lift load
Jack bleeds off after lift
Jack will not lower after unloading
Poor lift performance
Possible Causes
• Release valve not tightly closed
• Overload condition
• Release valve not tightly closed
• Overload condition
• Hydraulic unit malfunction
• Reservoir overfilled
• Linkages binding
• Fluid level low
• Air trapped in system
Never use sandpaper or abrasive material on
these surfaces !
Storage
When not in use, store the jack with pump piston and
ram fully retracted.
Corrective Action
• Ensure release valve tightly closed
• Remedy overload condition
• Ensure release valve tightly closed
• Remedy overload condition
• Contact Omega T ech. Service
• Drain fluid to proper level
• Clean and lubricate moving parts
• Ensure proper fluid level
• With ram fully retracted, remove oil filler
plug to let pressurized air escape, then
reinstall oil filler plug
Will not lift to full extension
OIPM#13120-TJ2
• Fluid level low
• Ensure proper fluid level
4
Page 5

ONE YEAR LIMITED W ARRANTY
For a period of one (1) year from date of purchase, Shinn Fu Co. of America, Inc. will repair or replace,
at its option, without charge, any of its products which fails due to a defect in material or workmanship, or which
fails to conform to any implied warranty not excluded hereby .
Performance of any obligation under this warranty may be obtained by returning the warranted product,
freight prepaid, to Shinn Fu Co. of America, Inc. Warranty Service Department, 10939 N. Pomona Ave., Kansas
City, MO 64153.
Except where such limitations and exclusions are specifically prohibited by applicable law, (1) the
CONSUMER'S SOLE AND EXCLUSIVE REMEDY SHALL BE THE REP AIR OR REPLACEMENT OF DEFECTIVE
PRODUCTS AS DESCRIBED ABOVE, and (2) Shinn Fu Co. of America, Inc. SHALL NOT BE LIABLE FOR ANY
CONSEQUENTIAL OR INCIDENT AL DAMAGE OR LOSS WHA TSOEVER, and (3) THE DURA TION OF ANY AND
ALL EXPRESSED AND IMPLIED WARRANTIES, INCLUDING WITHOUT LIMIT A TION, ANY W ARRANTIES OF
MERCHANT ABILITY AND FITNESS FOR A P ARTICULAR PURPOSE, IS LIMITED TO A PERIOD OF ONE (1)
YEAR FROM DA TE OF PURCHASE.
Some states do not allow limitations on how long an implied warranty lasts, so the above limitation may not
apply to you. Some states do not allow the exclusion or limitation of incidental or consequential damages, so the
above limitation or exclusion may not apply to you. This warranty gives you specific legal rights, and you may also
have other rights which vary from state to state.
5
OIPM#13120-TJ2
Page 6
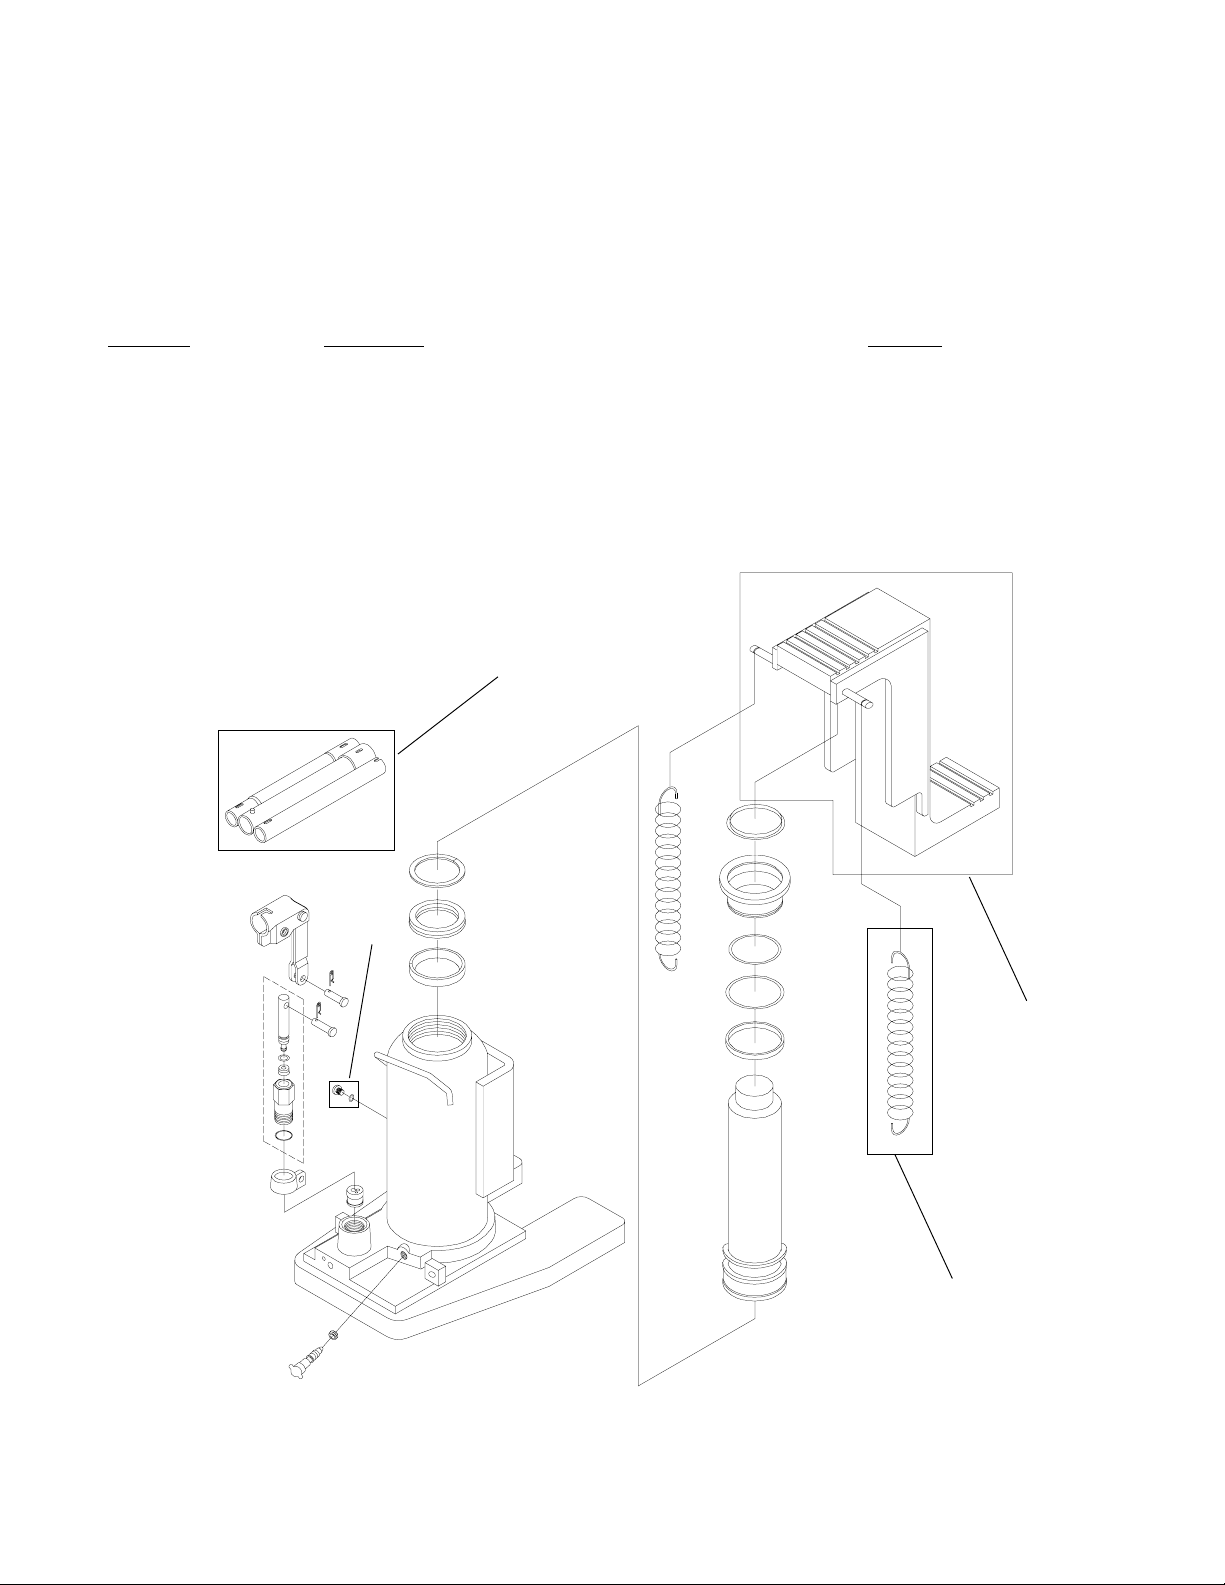
REPLACEMENT P ARTS
Available Parts: Please refer to the Parts drawing when ordering parts. Not all components of the jack are
replacement items, but are illustrated as a convenient reference of location and position in the assembly sequence.
When ordering parts, give Model number, serial number and description below . Call or write for current pricing:
Shinn Fu Company of America, Inc. 10939 N. Pomona Ave. Kansas City, MO 64153, U.S.A. Tel:(888)332-6419
Fax:(816)891-6599 E-Mail:[email protected] Omega Website: http://www .omegalift.com
Model # 13120 & 13200
Parts No. Description Quantity
1 oil filler plug / screw* 1
2 handle assembly 1
3 return spring 2
4 saddle bracket 1
-- label(s) (not shown) 1
-- manual (OIPM # 13120-TJ2) 1
* oil filler screw for 13200
2
OIPM#13120-TJ2
1
4
3
Figure 2 - Model 13120 & 13200 Replacement Parts Illustration
6
Page 7

Notes
Shinn Fu Company of America, Inc.
10939 N. Pomona Ave. Kansas City , MO 64153, U.S.A.
T el:(888)332-6419 Fax:(816)891-6599 E-Mail:[email protected] Omega Website: http://www .omegalift.com
Page 8

Notes
Shinn Fu Company of America, Inc.
10939 N. Pomona Ave. Kansas City , MO 64153, U.S.A.
T el:(888)332-6419 Fax:(816)891-6599 E-Mail:[email protected] Omega Website: http://www .omegalift.com
 Loading...