

OMEGA ALTISE
OPERATION, MAINTENANCE
AND SAFETY INSTRUCTIONS
FOR OMEGA ALTISE AIR CONDITIONER
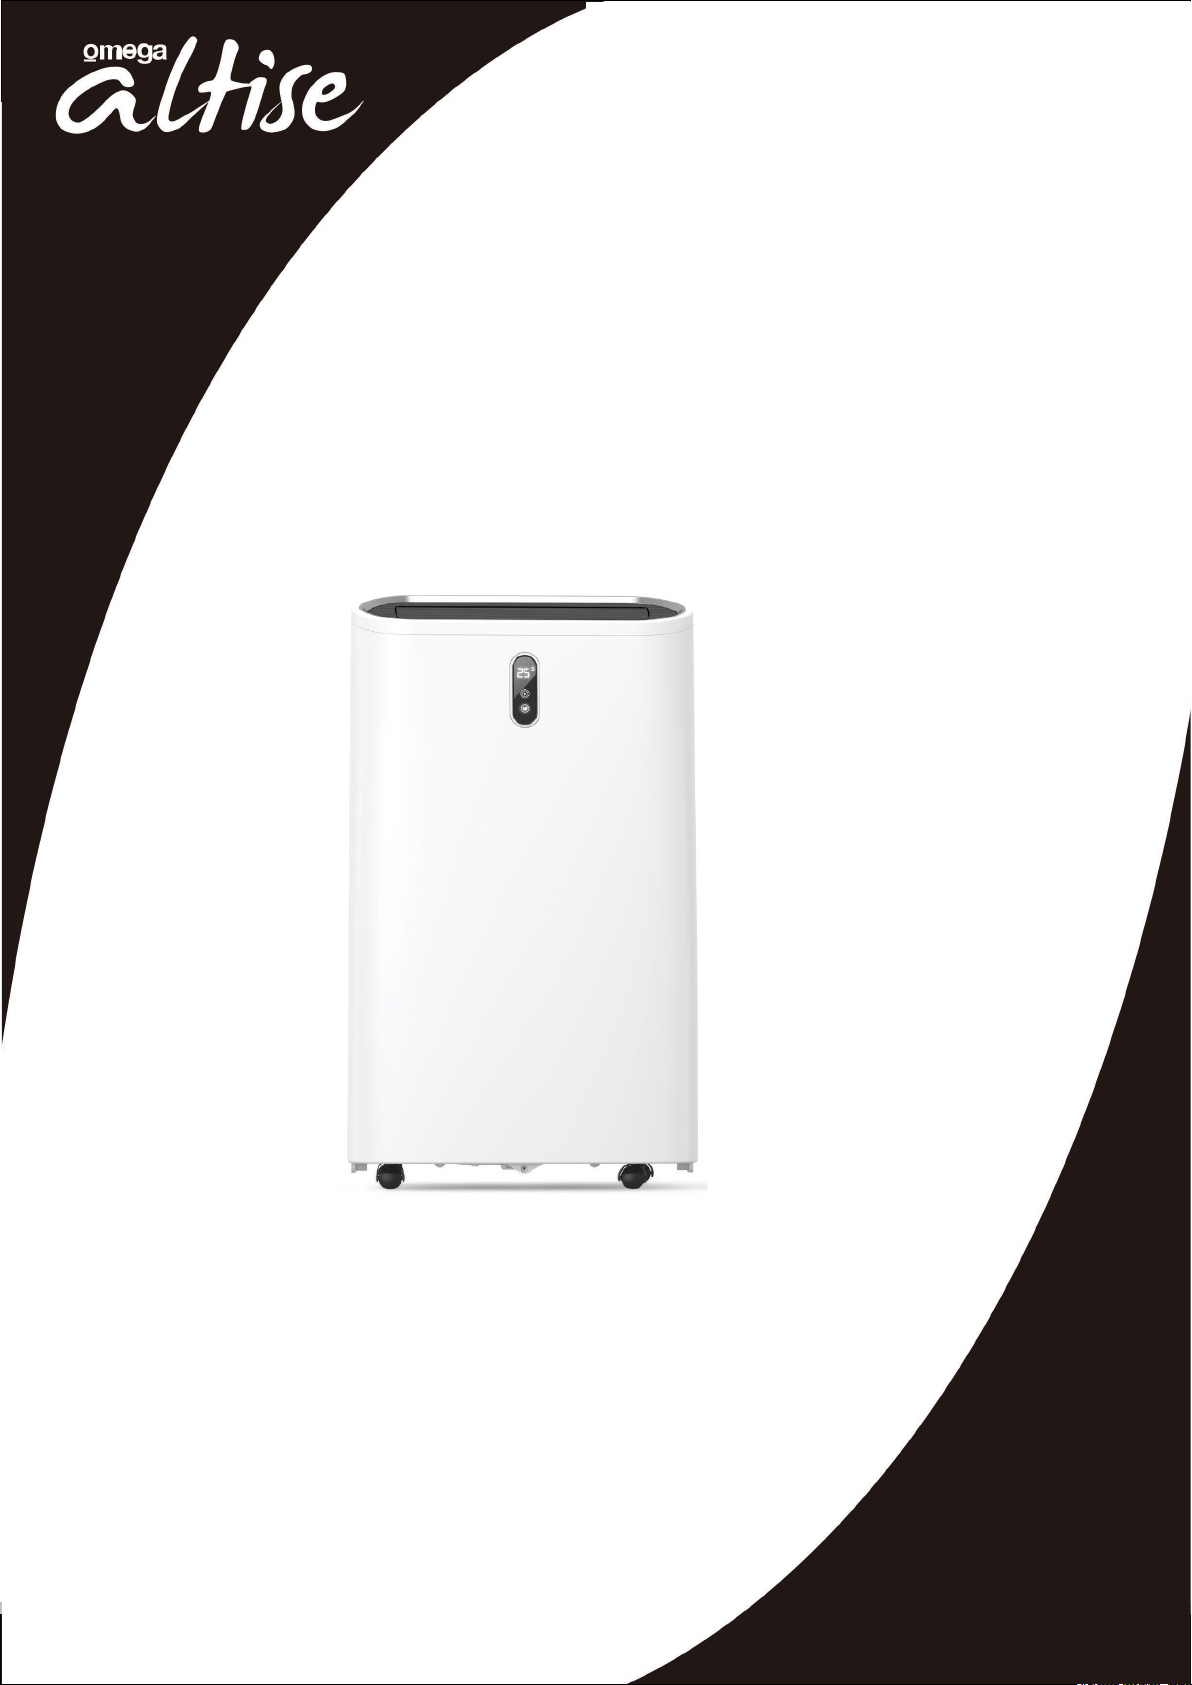
Model : OAPC14W

OMEGA ALTISE
Contents
IMPORTANT SAFETY INSTRUCTIONS ........................................................................................................... 3
TECHNICAL DETAILS ...................................................................................................................................... 8
FEATURES ....................................................................................................................................................... 9
PRODUCT OVERVIEW .................................................................................................................................... 9
INSTALLATION INSTRUCTIONS ................................................................................................................... 10
OPERATING INSTRUCTIONS ....................................................................................................................... 14
CLEANING ..................................................................................................................................................... 18
SERVICING .................................................................................................................................................... 20
TROUBLESHOOTING .................................................................................................................................... 22
WARRANTY ................................................................................................................................................... 23
OMEGA ALTISE
WARNING:
The Function Switch should not be used as the sole means of disconnecting
WARINNG:
To avoid danger of electric shock, unplug from outlet when not in use and before cleaning. If the supply cord is damaged, it
3
IMPORTANT SAFETY INSTRUCTIONS
IMPORTANT: Read the safety precautions of this booklet carefully before attempting to assemble, install, operate or
maintain the product described. Protect yourself and others by observing all safety information. Failure
to comply with instructions could result in personal injury and/or property damage. If you are unsure
about anything regarding your fan or these instructions, please contact Omega Altise on 1300 795 572 in
Australia or (09) 415 6000 in New Zealand before operating your appliance.
• This unit is not intended for use by children or infirm person without supervision.
power. Always unplug the power cord before servicing or moving the appliance.
• The A-weighted sound pressure level is below 51 db.
• The appliance shall be disconnected from its power source during service.
• Always operate the unit from a power source of equal voltage, frequency and rating as indicated on
the product identification plate.
• Always use a power outlet that is grounded.
• The unit is designed only for use with R-290(propane) gas as the designated refrigerant.
• The refrigerant loop is sealed. Only a qualified technician should attempt to service.
• R-290 (propane) is flammable and heavier than air.
• Do not operate with wet hands. Prevent water from spilling onto the unit.
• Do not immerse or expose the unit to rain, moisture or any other liquid.
• Do not leave the unit running unattended. Do not tilt or turn over the unit.
• Do not unplug while the unit is operating.
• Do not use an extension cord or an adapter plug.
• Do not put objects on the unit.
• Do not climb or sit on the unit.
• Do not insert fingers or other objects into the air outlet.
• Do not touch the air inlet or the aluminum fins of the unit.
• Do not operate the unit if it is dropped, damaged or showing signs of product malfunction.
• Do not clean the appliance with any chemicals.
• Ensure the unit is far away from fire, inflammable, or explosive objects.
• The unit shall be installed in accordance with national wiring regulations.
• The appliance shall be stored in a room without continuously operation sources (for example: open
flames, an operating gas appliance or an operating electric heater).
• The appliance shall be stored so as to prevent mechanical damage from occurring.
• Do not piece or burn, even after use.
• Be aware that refrigerants may not contain an odour.
• Pipework shall be protected from physical damage and shall not be installed in an unventilated space, if
that space is smaller than 12 m².
• Keep any required ventilation openings clear of obstruction.
• Any person who is involved with working on or breaking into a refrigerant circuit should hold a current
valid certificate from an industry-accredited assessment authority, which authorizes their competence
to handle refrigerants safely in accordance with an industry, recognized assessment specification.
• Servicing shall only be performed as recommended by the equipment manufacturer. Maintenance and
repair requiring the assistance of other skilled personnel shall be carried out under the supervision of
the person competent in the use of flammable refrigerants.
• The appliance shall be stored in a well-ventilated area where the room size corresponds to the room
area as specified for operation.
must be replaced by the manufacturer, its Service Agent or similarly qualified persons in order to avoid a hazard. In order to
avoid overheating, do not cover the appliance. Do not use the appliance in the immediate surrounding of a bath, shower or
swimming pool.
OMEGA ALTISE
4
IMPORTANT SAFETY INSTRUCTIONS
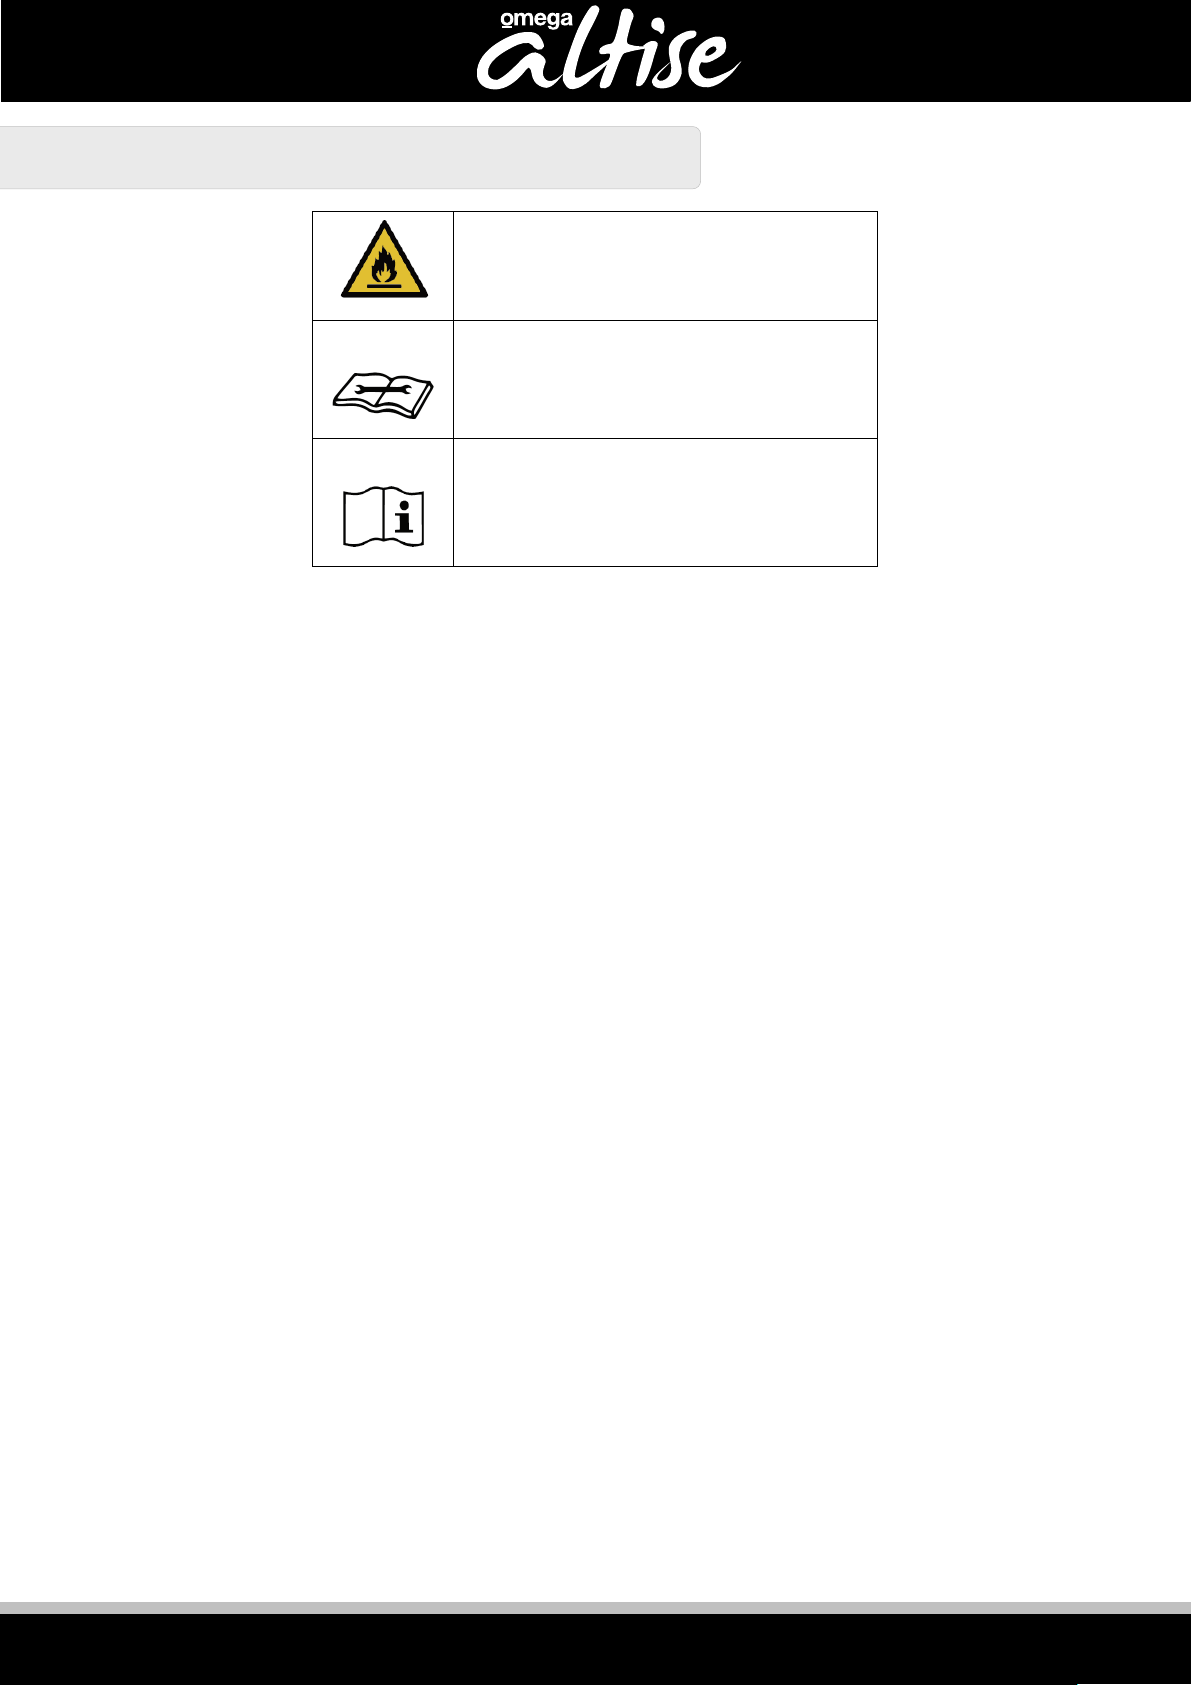
WARNING: flammable materials
Service indicator, read technical manual
Operator’s manual; operating instructions
• This unit is not intended for use by children (including children) with reduced physical, sensory or
metal capabilities, or lack of experience and knowledge, unless they been given supervision or
instruction. Children being supervised not to play with the appliance.
• Pipework shall be protected from physical damage and shall not be installed in an unventilated
space, if that space is smaller than 13 m².
• WARNING: Do not pierce or burn. Be aware that refrigerants may not contain an odour.
• WANRING: Any person who is involved with working on or breaking into a refrigerant circuit should
hold a current valid certificate from an industry-accredited assessment authority, which authorizes
their competence to handle refrigerants safely in accordance with an industry, recognized
assessment specification.
• WANRING: Servicing shall only be performed as recommended by the equipment manufacturer.
Maintenance and repair requiring the assistance of other skilled personnel shall be carried out under
the supervision of the person competent in the use of flammable refrigerants.
• The appliance shall be stored in a well-ventilated area where the room size corresponds to the
room area as specified for operation.
• WARNING: Do not use means to accelerate the defrosting process or to clean, other than those
recommended by the manufacture.
• Do not place the appliance less than 50cm of free space around it to allow for proper air
circulation.
• The installation of pipework shall be kept to a minimum. The pipework shall be protected from
physical damage. In case of field charge, the effect on refrigerant charge caused by the different
pipe length has to be quantified.
• The compliance with national gas regulations shall be observed.
• The refrigerant shall only be charged at the manufacturing location or charged on site.
• WARNING: Maximum refrigerant charge 270g of R290.
• Dusts connected to the appliance shall not contain a potential ignition source.
• WARNING: unventilated area where the appliance using flammable refrigerants is installed shall
be so constructed that should any refrigerant leak, it will no stagnate so as to create a fire or explosion
hazard.
• WARNING: The appliance shall be stored in a well-ventilated area where the room size
corresponds to the room area as specified for operation.
• WARNING: The appliance shall be stored in a room without continuously operating open flames
(for example an operating gas appliance) and or other potential ignition sources (for example an
operating electric heater, hot surfaces).

OMEGA ALTISE
5
IMPORTANT SAFETY INSTRUCTIONS
Repair to sealed components
• During repairs to sealed components, all electrical supplies shall be disconnected from the
equipment being worked upon prior to any removal of sealed covers, etc. If it is absolutely necessary
to have an electrical supply to equipment during servicing, then a permanently operating form of
leak detection shall be located at the most critical point to warn of a potentially hazardous situation.
• Particular attention shall be paid to the following to ensure that by working on electrical
components, the casing is not altered in such a way that the level of protection is affected. This shall
include damage to cables, excessive number of connections, terminals not made to original
specification, damage to seals, incorrect fitting of glands, etc.
• Ensure that seals or sealing materials have not degraded to the point that they no longer serve
the purpose of preventing the ingress of flammable atmospheres. Replacement parts shall be in
accordance with the manufacturer’s specifications.
Repair to intrinsically safe components
• Do not apply any permanent inductive or capacitance loads to the circuit without ensuring that
this will not exceed the permissible voltage and current permitted for the equipment in use.
• Intrinsically safe components are the only types that can be worked on while live in the presence
of a flammable atmosphere. The test apparatus shall be at the correct rating.
• Replace components only with parts specified by the manufacturer. Other parts may result in the
ignition of refrigerant in the atmosphere from a leak.
Cabling
• Check that cabling will not be subject to wear, corrosion, excessive pressure, vibration, sharp
edges or any other adverse environmental effects.
• The check shall also take into account the effects of aging or continual vibration from sources
such as compressors or fans.
Detection of flammable refrigerants
• Under no circumstances shall potential sources of ignition be used in the searching for or
detection of refrigerant leaks. A halide torch (or any other detector using a naked flame) shall not be
used.
• Electronic leak detectors may be used to detect refrigerant leaks but, in the case of flammable
refrigerants, the sensitivity may not be adequate, or may need re-calibration.
• Ensure that the detector is not a potential source of ignition and is suitable for the refrigerant used.
Leak detection equipment shall be set at a percentage of the LFL of the refrigerant and shall be
calibrated to the refrigerant employed, and the appropriate percentage of gas (25 % maximum) is
confirmed.
• Leak detection fluids are also suitable for use with most refrigerants but the use of detergents
containing chlorine shall be avoided as the chlorine may react with the refrigerant and corrode the
copper pipework.
• If a leak is suspected, all naked flames shall be removed/extinguished.
• If a leakage of refrigerant is found which requires brazing, all of the refrigerants shall be recovered
from the system, or isolated (by means of shut off valves) in a part of the system remote from the leak.
Removal and evacuation
• When breaking into the refrigerant circuit to make repairs – or for any other purpose –
conventional procedures shall be used. However, for flammable refrigerants it is important that best
practice is followed since flammability is a consideration. The following procedure shall be adhered
to:

OMEGA ALTISE
6
IMPORTANT SAFETY INSTRUCTIONS
• Remove refrigerant.
• Purge the circuit with inert gas (optional for a2l).
• Evacuate (optional for a2l).
• Purge with inert gas (optional for a2l).
• Open the circuit by cutting or brazing.
• The refrigerant charge shall be recovered into the correct recovery cylinders. For appliances
containing flammable refrigerants other than A2L refrigerants, the system shall be purged with
oxygen-free nitrogen to render the appliance safe for flammable refrigerants. This process may need
to be repeated several times. Compressed air or oxygen shall not be used for purging refrigerant
systems.
• For appliances containing flammable refrigerants, other than A2L refrigerants, refrigerants purging
shall be achieved by breaking the vacuum in the system with oxygen-free nitrogen and continuing to
fill until the working pressure is achieved, then venting to atmosphere, and finally pulling down to a
vacuum. This process shall be repeated until no refrigerant is within the system. When the final
oxygen-free nitrogen charge is used, the system shall be vented down to atmospheric pressure to
enable work to take place. This operation is absolutely vital if brazing operations on the pipework are
to take place.
• Ensure that the outlet for the vacuum pump is not close to any potential ignition sources and that
ventilation is available.
Charging procedures
• In addition to conventional charging procedures, the following requirements shall be followed:
• Ensure that contamination of different refrigerants does not occur when using charging
equipment. Hoses or lines shall be as short as possible to minimize the amount of refrigerant contained
in them.
• Cylinders shall be kept in an appropriate position according to the instructions.
• Ensure that the refrigerating system is earthed prior to charging the system with refrigerant.
• Label the system when charging is complete (if not already).
• Extreme care shall be taken not to overfill the refrigerating system.
• Prior to recharging the system, it shall be pressure-tested with the appropriate purging gas. The
system shall be leak-tested on completion of charging but prior to commissioning. A follow up leak test
shall be carried out prior to leaving the site.
Decommissioning
• Before carrying out this procedure, it is essential that the technician is completely familiar with the
equipment and all its detail. It is recommended good practice that all refrigerants are recovered
safely. Prior to the task being carried out, an oil and refrigerant sample shall be taken in case analysis is
required prior to re-use of recovered refrigerant. It is essential that electrical power is available before
the task is commenced.
(a) Become familiar with the equipment and its operation.
(b) Isolate system electrically.
(c) Before attempting the procedure, ensure that:
• Mechanical handling equipment is available, if required, for handling refrigerant cylinders.
• All personal protective equipment is available and being used correctly.
• The recovery process is supervised at all times by a competent person.
• Recovery equipment and cylinders conform to the appropriate standards.

OMEGA ALTISE
7
IMPORTANT SAFETY INSTRUCTIONS
(d) Pump down refrigerant system, if possible.
(e) If a vacuum is not possible, make a manifold so that refrigerant can be removed from various
parts of the system.
(f) Make sure that cylinder is situated on the scales before recovery takes place.
(g) Start the recovery machine and operate in accordance with instructions.
(h) Do not overfill cylinders (no more than 80 % volume liquid charge).
(i) Do not exceed the maximum working pressure of the cylinder, even temporarily.
(j) When the cylinders have been filled correctly and the process completed, make sure that the
cylinders and the equipment are removed from site promptly and all isolation valves on the
equipment are closed off.
(k) Recovered refrigerant shall not be charged into another refrigerating system unless it has been
cleaned and checked.
Labelling
• Equipment shall be labelled stating that it has been de-commissioned and emptied of refrigerant.
The label shall be dated and signed. For appliances containing flammable refrigerants, ensure that
there are labels on the equipment stating the equipment contain flammable refrigerant.
• When removing refrigerant from a system, either for servicing or decommissioning, it is
recommended good practice that all refrigerants are removed safely.
Recovery
• When transferring refrigerant into cylinders, ensure that only appropriate refrigerant recovery
cylinders are employed. Ensure that the correct number of cylinders for holding the total system
charge is available. All cylinders to be used are designated for the recovered refrigerant and labelled
for that refrigerant (i.e., special cylinders for the recovery of refrigerant). Cylinders shall be complete
with pressure-relief valve and associated shut-off valves in good working order. Empty recovery
cylinders are evacuated and, if possible, cooled before recovery occurs.
• The recovery equipment shall be in good working order with a set of instructions concerning the
equipment that is at hand and shall be suitable for the recovery of all appropriate refrigerants
including, when applicable, flammable refrigerants. In addition, a set of calibrated weighing scales
shall be available and in good working order. Hoses shall be complete with leak-free disconnect
couplings and in good condition. Before using the recovery machine, check that it is in satisfactory
working order, has been properly maintained and that any associated electrical components are
sealed to prevent ignition in the event of a refrigerant release. Consult manufacturer if in doubt.
• The recovered refrigerant shall be returned to the refrigerant supplier in the correct recovery
cylinder, and the relevant waste transfer note arranged. Do not mix refrigerants in recovery units and
especially not in cylinders.
• If compressors or compressor oils are to be removed, ensure that they have been evacuated to
an acceptable level to make certain that flammable refrigerant does not remain within the lubricant.
The evacuation process shall be carried out prior to returning the compressor to the suppliers. Only
electric heating to the compressor body shall be employed to accelerate this process. When oil is
drained from a system, it shall be carried out safely.
Warnings for Disposal
Refrigerant used for the air-conditioner are flammable. Therefore when the air-conditioner is scraped,
it shall be kept away from any fire source and be recovered by a special recovering company with
corresponding qualification other than be disposed by combustion, so as to prevent damage to the
environment or any other harm.
OMEGA ALTISE
MAXIMUM SUCTION/EXHAUST
SIDE WORKING PRESSURE
Maximum permissible
pressure side
Heat exchanger maximum
allowable pressure
8
IMPORTANT SAFETY INSTRUCTIONS
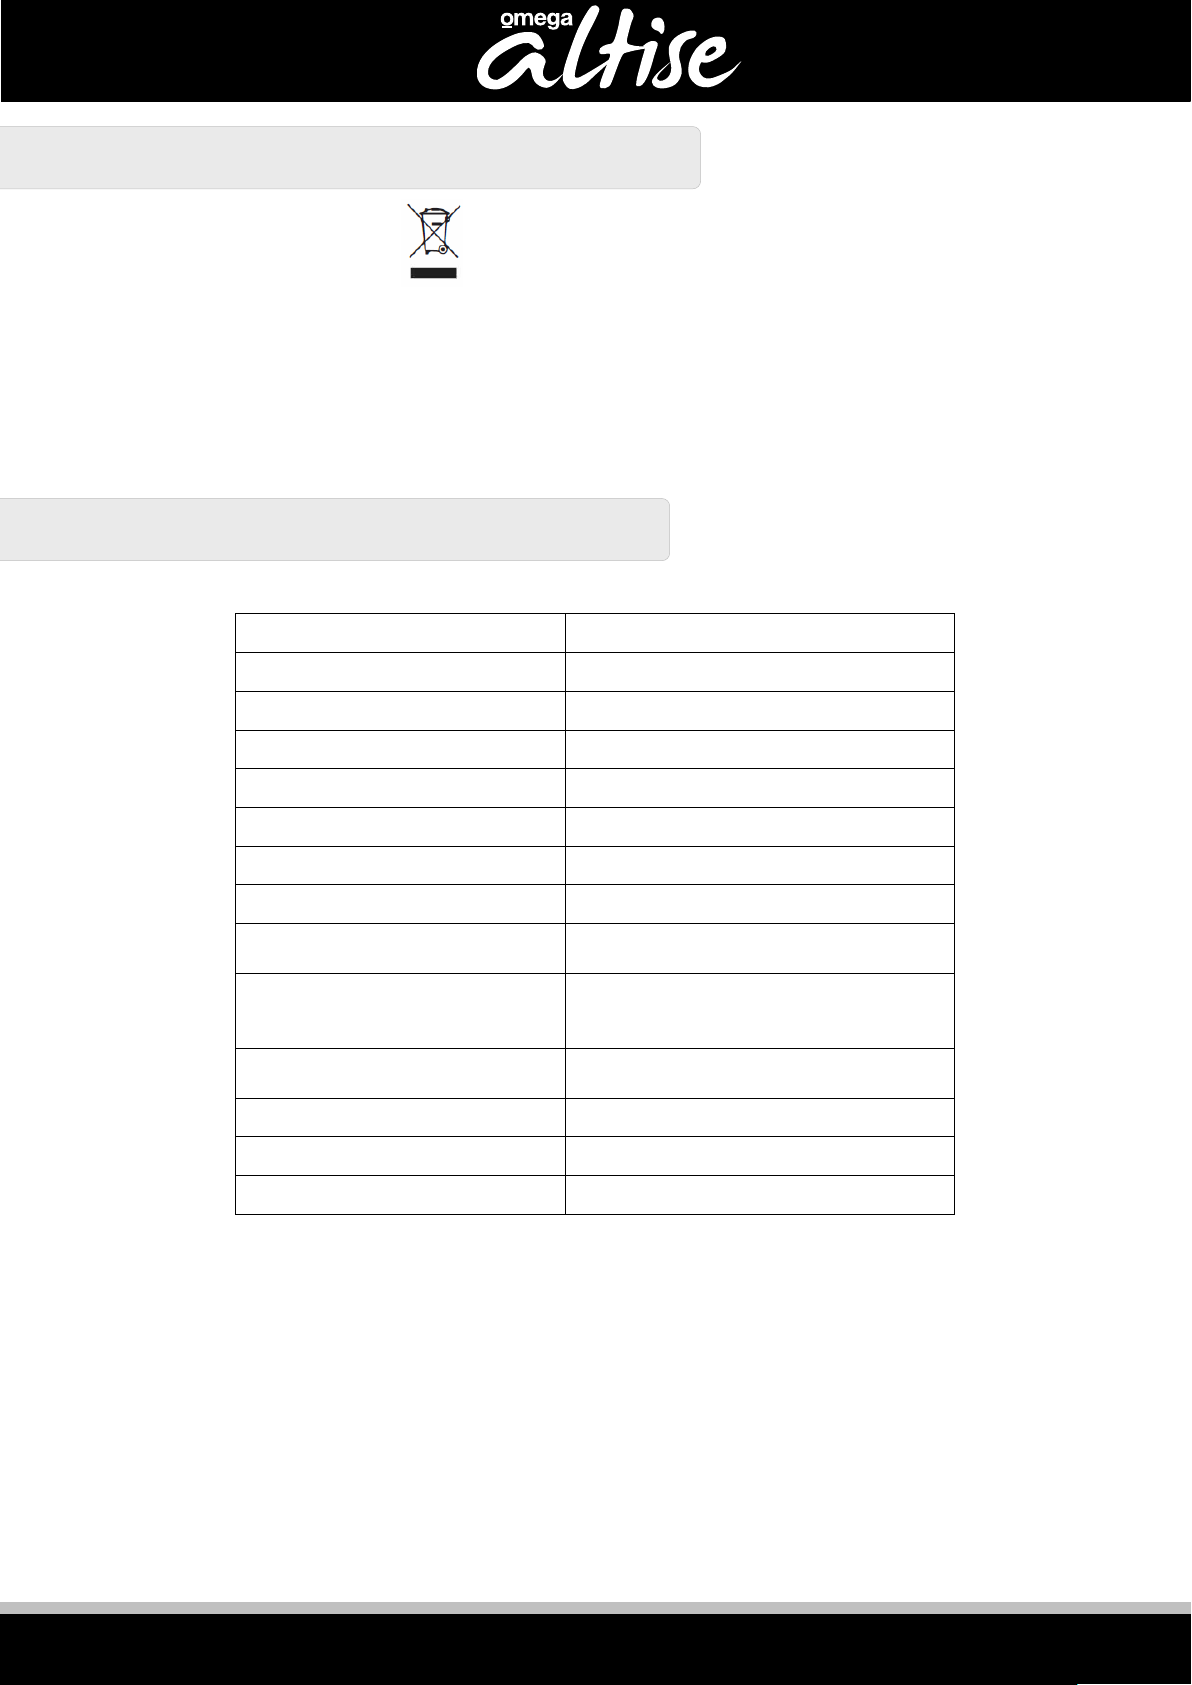
Correct Disposal of this product
This marking indicates that this product should not be disposed with other household wastes. To
prevent possible harm to the environment or human health from uncontrolled waste disposal, recycle
it responsibly to promote the sustainable reuse of material resources. To return your used device,
please use the return and collection systems or contact the retailer where the product was
purchased. They can take this product for environmentally safe recycling.
TECHNICAL DETAILS
Model OAPC14W
Fan Speeds 3 settings
Cooling Capacity 14000 Btu/h (4.10 KW)
Cooling Rated Input Power 1.560KW
Cooling Rated Input Current 6.9A
Power Supply 220-240V/50Hz-60Hz
Refrigerant R290 , 0.27Kg
IP Code IPX1
0.7MPa/3.2MPa
pressure on the high/low
Sound Power Level
Net Weight 31Kg
Dimensions 470x353x762mm
3.2Mpa
3.2Mpa
≤65dB(A)

OMEGA ALTISE
9
FEATURES
• High Capacity in a compact size with cooling, dehumidifying and ventilating function
• Temperature setting and display
• LED Digital display
• Electronic control with built-in timer, sleep mode
• Self-evaporating system for better efficient
• Auto shut off when tank full
• Automatic restart in the event of power outage
• Auto defrosting function at low ambient temperatures
• Remote control
• 3- speed fan
• Casters for easy mobility
PRODUCT OVERVIEW
1. Control Panel
2. Air outlet with adjustable louver
3. Front view
4. Air filter
5. Recessed handle
6. Air exhaust
7. Drain opening with sealing plug
8. Wheels
Note: The appearance is only for reference. Please see the real product for detailed information.

OMEGA ALTISE
10
INSTALLATION INSTRUCTIONS
Unpacking
• Unpack the carton and take the appliance and accessories out.
• Check the device after unpacking for any damage or scratches on it.
Accessories:
1. Exhaust hose
2. Hose connector
3. Window kit adapter
4. Remote control
5. Window kit

OMEGA ALTISE
11
INSTALLATION INSTRUCTIONS
Choose your location
• If tipped more than 45°, allow the unit to set upright for at least 24 hours before starting up.
• Place the unit on a firm, level surface in an area with at least 50cm of free space around it to allow for
proper air circulation.
• Do not operate in close proximity to walls, curtains, or other objects that may
block air inlet and outlet. Keep the air inlet and outlet free of obstacles.
• Never install the unit where it could be subject to:
I. Heat sources such as radiators, heat registers, stoves or other products that
produce heat.
II. Direct sunlight
III. Mechanical vibration or shock
IV. Excessive dust
V. Lack of ventilation, such as cabinet or bookcase
VI. Uneven surface
WARNING!
• Install the unit in rooms which exceed 4 m².
• Do not install the unit in a place where inflammable gas may leak.
ATTACH THE EXHAUST HOSE
The air conditioner requires being vented outside so that the exhaust air can escape the room which coming
from the appliance contains waste heat and moisture.
Do not replace or extend exhaust hose which will result in decreased efficiency, even worse shut down the unit
due to low backpressure.
Step 1: Connect the hose connector to one end of the exhaust hose.

OMEGA ALTISE
12
INSTALLATION INSTRUCTIONS
Step 2: Connect the windows kit adapter to the other end of the exhaust hose.
Step 3: Extend the adjustable window kit the length of your window. Connect the exhaust hose to the window
kit.
Step 4: Close your window to secure the kit in place. It needs to hold the windows kit firmly in place, secure the
window kit with duct tape if required. It is recommended that the gap between the adapter and the sides of the
window should be sealed off for maximum efficiency.

OMEGA ALTISE
13
INSTALLATION INSTRUCTIONS
Step 5: Attach the hose connector to the exhaust air outlet of unit.
Step 6: Adjusting the length of the flexible exhaust hose and avoid bends in the hose. Then place AC near an
electrical outlet.
Step 7: Adjust the louver at the air outlet, and then switch on the unit.

OMEGA ALTISE
These LED s indicate the selected fan speed
9
14
OPERATING INSTRUCTIONS
CONTROL PANEL AND DISPLAY
1.
2.
POWER
MODE
Press this button to turn the device on or off
Press this button to switch between the cooler,
dehumidifier, and fan mode
MODE INDICATOR
3.
4.
5.
6.
7.
8.
10.
SLEEP MODE
DOWN
SWING
SPPED
FAN SPEED
TIMER
UP
This display displays the selected operating mode
settings (cooling / dehumidifier / fan)
Press this button to turn the night mode on or
off
Press this button to reduce the temperature or
timer settings to the desired value
Set the vertical air flow direction
Press this button to switch between high, medium,
low fan speeds
(High / Medium / Low)
Sets a time for the unit to automatically start or stop
Press this button to increase the temperature or
timer settings to the desired value

OMEGA ALTISE
15
OPERATING INSTRUCTIONS
REMOTE CONTROL
START-UP AND SHUTDOWN
• Press POWER button to turn the unit on.
• The unit runs in a FAN mode as default.
• Press MODE button to select the desired operation mode.
• Press POWER button again to turn off the power.
OPERATION MODE
The unit has four operation modes: Cool, fan, dry and sleep (Sleep mode is only optional on the remote control
)
COOLING MODE
• Select the cool mode to lower the temperature in your room.
• Press MODE button repeatedly until the LED of COOL operation lights up.
• Press ADD/MINUS button to adjust the temperature which is displayed on the screen. The temperature
can be set between 16℃ and 32℃.
• Press SPEED button repeatedly until the desired fan speed indicator lights up.
• To control the direction of the air flow horizontally, press the SWING button.
Note: The air conditioner stops if the room temperature is lower than selected temperature.

OMEGA ALTISE
16
OPERATING INSTRUCTIONS
VENTILATION MODE
• Press MODE button repeatedly until the LED of FAN operation lights up.
• In ventilation mode the room air is circulated, but not cooled.
• Press SPEED button repeatedly to select the fan speed as desired.
DRY MODE
• Press MODE button on the control panel or remote control, the LED of DRY operation lights up.
• The fan speed is unable to select. User should connect the hose to the drain outlet at the bottom of the
unit.
Note: In this mode, the fan speed switches over to low speed and the temperature cannot be selected.
SLEEP MODE
The sleep mode can be activated when in cool mode.
In cool mode :
After 1 hour the pre-set temperature is increased by 1 ℃, after another hour the pre-set temperature will again
be increased by 1 ℃.
TIMER SETTING
The timer has two ways of operation:

OMEGA ALTISE
To avoid water spillage:
Continuous drain hose
Remove the rubber
sealing plug.
17
OPERATING INSTRUCTIONS
AUTOMATIC DEFROST
At low room temperatures, frost may build-up at the evaporator during operation. The unit will automatically
start defrosting and the POWER LED blinking. The defrost control sequence is as follows:
• When the unit operates in the cooling operation, drying operation, the ambient temperature sensor
senses the evaporator coil temperature is below -1°C, after the compressor will stop operating for 10
minutes or the coil temperature up to 7 °C, the unit restart to cool operating mode.
• When the unit operates in the drying operation, once the coil temperature sensor senses the
temperature of the evaporator is below 40°C and the differential temperature between coil
temperature and room temperature is below 19°C after the compressor operation for 20 minutes, the
unit start defrosting for 5 minutes and the power indicator blinking.
OVERLOAD PROTECTION
In the event of a power loss, to protect the compressor there is a 3-minute delay until the compressor restarting.
DRAINAGE (Self- evaporating system)
The self-evaporating system uses the collected water to cool the condenser coils for better efficient
performance. There is no need to empty the drainage tank in cooling operation except in drying operation and
high humidity conditions. The condensate water evaporates at the condenser and evacuated through the
exhaust hose.
For continuous operation or unattended operating in drying, please connect the attached drain hose to the
unit. Condensate water can be automatically flow into a bucket or drain by gravity.
Switch off the unit before
operating.
Remove the plug of the water
outlet opening and keep it in safe
area.
Securely and properly connect
the drain hose and make sure it is
not kinked and clear of
obstruction.
Place the outlet of hose over a
drain or bucket and ensure that
water could freely flow out of the
unit.
Do not submerge the end of hose
into water; otherwise, it can
cause "Air Lock" in the hose.
As the negative pressure of condensate drain pan is large, tilt the drain
hose downward toward the floor. It is appropriate that the degree of
inclination should exceed 20 degrees.
(Inner diameter=16mm)
• Straighten the hose to avoid a trap existing in the hose.

OMEGA ALTISE
remove the two air filters.
running water.
18
CLEANING
WARNING: ALWAYS UNPLUG THE CORD BEFORE MOVING OR SERVICING, DO NOT
IMMERSE APPLIANCE IN WATER!
• Cleaning and maintenance shall not be made by children without supervision.
• Cleaning of this appliance should be done every two weeks.
• Always make sure that the appliance is completely dry before connecting back to the mains
supply.
• Make sure no water enters the control panel or fan motor.
• Store the appliance in a cool dry place.
Dust collects on the filter and restricts the airflow. The restricted airflow reduces the efficiency of the system and
if it becomes blocked it can cause damage to the unit.
The air filter requires regular cleaning. The air filter is removable for easy cleaning. Do not operate the unit
without an air filter, or the evaporator may be contaminated.
1. Press POWER button to switch off the unit and unplug the power cord.
2. Remove the filter mesh from the unit.
3. Use a vacuum cleaner to suck dust from the filter.
4. Turn the filter over and rinse the air filter under running water. Let the water run through the filter in the
opposite direction of air flow. Set aside and allow the filter to air dry completely before reinstalling.
Pic1. Switch off the unit and
Pic2. Rinse the air filter under
CAUTION: Do not use gasoline, benzene, thinner, harsh cleaners, etc. as they will damage the appliance.
NEVER use ALCOHOL OR SOLVENTS.
Warning!!!
Do not touch the evaporator surface with bare-hand or could
cause injury of your fingers.

OMEGA ALTISE
19
CLEANING
CLEANING UP OF REFRIGERANT
1. Gas/vapor heavier than air. May accumulate in confined spaces, particularly at or below ground
level.
2. Eliminate every possible source of ignition.
3. Use appropriate personal protection equipment (PPE).
4. Evacuate unnecessary personnel, isolate, and ventilate area.
5. Do not get in eyes, on skin, or on clothing. Do not breathe vapours or gas.
6. Prevent entry to sewers and public waters.
7. Stop the source of the release, if safe to do so. Consider the use of water spray to disperse vapours.
8. Isolate the area until gas has dispersed. Ventilate and gas test area before entering. Contact
competent authorities after a spill.

OMEGA ALTISE
20
SERVICING
Please follow these warnings when to undertake the following when servicing an appliance with R290.
Checks to the area
Prior to beginning work on systems containing flammable refrigerants, safety checks are necessary to ensure
that the risk of ignition is minimized. For repair to the refrigerating system, the following precautions shall be
complied with prior to conducting work on the system.
Work procedure
Work shall be undertaken under a controlled procedure so as to minimize the risk of a flammable gas or vapor
being present while the work is being performed.
General work area
All maintenance staff and others working in the local area shall be instructed on the nature of work being
carried out. Work in confined spaces shall be avoided. The area around the work space shall be sectioned off.
Ensure that the conditions within the area have been made safe by control of flammable material.
Checking for presence of refrigerant
The area shall be checked with an appropriate refrigerant detector prior to and during work, to ensure the
technician is aware of potentially flammable atmospheres. Ensure that the leak detection equipment being
used is suitable for use with flammable refrigerants, i.e. no sparking, adequately sealed or intrinsically safe.
Presence of fire extinguisher
If any hot work is to be conducted on the refrigeration equipment or any associated parts, appropriate fire
extinguishing equipment shall be available to hand. Have a dry powder or CO2 fire extinguisher adjacent to the
charging area.
No ignition sources
No person carrying out work in relation to a refrigeration system which involves exposing any pipe work that
contains or has contained flammable refrigerant shall use any sources of ignition in such a manner that it may
lead to the risk of fire or explosion. All possible ignition sources, including cigarette smoking, should be kept
sufficiently far away from the site of installation, repairing, removing and disposal, during which flammable
refrigerant can possibly be released to the surrounding space. Prior to work taking place, the area around the
equipment is to be surveyed to make sure that there are no flammable hazards or ignition risks. “No Smoking”
signs shall be displayed.
Ventilated area
Ensure that the area is in the open or that it is adequately ventilated before breaking into the system or
conducting any hot work. A degree of ventilation shall continue during the period that the work is carried out.
The ventilation should safely disperse any released refrigerant and preferably expel it externally into the
atmosphere.
Checks to the refrigeration equipment
Where electrical components are being changed, they shall be fit for the purpose and to the correct
specification. At all times the manufacturer’s maintenance and service guidelines shall be followed. If in doubt
consult the manufacturer’s technical department for assistance.
The following checks shall be applied to installations using flammable refrigerants:
• The charge size is in accordance with the room size within which the refrigerant containing parts are
installed.
• The ventilation machinery and outlets are operating adequately and are not obstructed.
• If an indirect refrigerating circuit is being used, the secondary circuit shall be checked for the presence
of refrigerant.
• Marking to the equipment continues to be visible and legible. Markings and signs that are illegible shall
be corrected.

OMEGA ALTISE
21
SERVICING
• Refrigeration pipe or components are installed in a position where they are unlikely to be exposed to any
substance which may corrode refrigerant containing components, unless the components are
constructed of materials which are inherently resistant to being corroded or are suitably protected
against being so corroded.
Checks to electrical devices
Repair and maintenance to electrical components shall include initial safety checks and component inspection
procedures. If a fault exists that could compromise safety, then no electrical supply shall be connected to the
circuit until it is satisfactorily dealt with. If the fault cannot be corrected immediately but it is necessary to
continue operation, an adequate temporary solution shall be used. This shall be reported to the owner of the
equipment so all parties are advised.
Initial safety checks shall include:
• Those capacitors are discharged: this shall be done in a safe manner to avoid possibility of sparking.
• That there no live electrical components and wiring are exposed while charging, recovering or purging
the system.
• That there is continuity of earth bonding.
WARNING!
• Install the unit in rooms which exceed 12 m².
• Do not install the unit in a place where inflammable gas may leak.

OMEGA ALTISE
securely.
wall outlet.
lights up?
rubber plug.
5-35℃.
Check the air filter for dirt.
Clean the air filter as necessary.
Check if the air duct is blocked.
To clear the obstacle.
open.
temperature is properly set.
manual.
securely attached.
transport.
bends.
existing.
positioned.
ground.
Check if any loose, vibrating parts.
Secure and tight the parts.
This is normal.
main PCB and display PCB.
PCB for damage.
sensor.
sensor.
rubber plug.
22
TROUBLESHOOTING
Do not repair or disassemble the unit by yourself, unauthorized repair attempts will invalidate the warranty
and may cause bodily harm.
Symptom Inspection Solution
The unit is not
operating.
The unit works
with reduced
capacity.
Water
Leakage
Check the power connection in
Check if the water level indicator
Check the room temperature.
Check if the room door or window is
Check if the desired operating
mode is selected and the
The exhaust hose is detached.
Overflow while moving the unit.
Check if the drain hose is kinked or
Insert the power cord securely into the
Empty the drain pan by remove the
The range of operating temperature is
Keep the door and windows closed.
Set the mode and temperature at
proper set-point according to the
Make sure the exhaust hose is
Empty the water tank before
Straighten the hose to avoid a trap
Check if the unit is securely
Excessive
Noise
Noise sounds like water flowing.
E0
E1
Error
Code
E2
Ft
If the above solutions do not resolve the problem please contact the service centre.
It is important that you retain these instructions, proof of purchase as well as other important documents about
this product for future reference. Due to continual product development, Omega Altise reserves the right to
alter specifications or appearances without notice. Dispose of packaging responsibly – recycle where
facilities are available.
Communication faults between
Ambient temperature sensor failure
Coil temperature sensor failures.
Condensate water high level alarm.
Place the unit on horizontal and firm
Noise comes from flowing refrigerant.
Check the wire harness of the display
Check connection or replace it. To
clean or replace the temperature
Check connection or replace it. To
clean or replace the temperature
Empty the drain pan by removal the

OMEGA ALTISE
IN AUSTRALIA
Web: www.omegaaltise.com.au
IN NEW ZEALAND
Web: www.omegaaltise.com.au
23
WARRANTY
AUSTRALIAN CUSTOMERS
Our goods come with guarantees that cannot be excluded under the Australian Consumer Law. You are entitled to a replacement or
refund for a major failure and for compensation for any other reasonably foreseeable loss or damage. You are also entitled to have the
goods repaired or replaced if the goods fail to be of acceptable quality and the failure does not amount to a major failure.
NEW ZEALAND CUSTOMERS
Nothing herein contained shall be construed in any way as excluding or limiting your rights under the
Consumer Guarantee Act 1993.
Our Warranty
This product is also covered by the manufacturer's warranty set out in this document (Our Warranty). Our Warranty is for a period of thirty
six (36) months from the date of purchase. This is in addition to (and does not exclude, restrict or modify) any rights or remedies to which
you may already be entitled under the Australian Consumer Law or the New Zealand Consumer Guarantee Act 1993 relating to this
product.
Our Warranty (which is subject to the conditions below) covers rectification free of charge of any fault arising from defective materials or
components, or faulty workmanship. The product will be repaired or replaced at the option of Omega Altise.
OUR WARRANTY is subject to the following conditions:
1. That the purchaser contact Omega Altise prior to any product repair.
2. That the purchaser carefully follows all instructions provided with the product and complies with all relevant electrical & plumbing
regulations in their State when installing the product.
3. That the purchaser carefully follows the instructions provided in the owner’s handbook relating to the proper use and care of the
product and does not use the product for any purpose other than the DOMESTIC use for which it has been designed. If the appliance is
used in commercial applications or for rental purposes, Our Warranty is limited to a warranty of Twelve (12) months covering all parts with
Three (3) months on any labour cost of service or repair.
WHAT IS COVERED: By Our Warranty:
During the warranty period, Omega Altise or its authorised Service Centre will at no extra charge, if your
appliance is readily accessible without the need of special equipment and subject to the terms and conditions of this warranty, repair or
replace any parts which it considers defective.
WHAT IS NOT COVERED: By Our Warranty:
1. Products installed damaged or incomplete or not in compliance with the relevant electrical & plumbing
regulations in their State.
2. Normal wear and tear e.g. cleaning, filters etc.
3. Failure resulting from power surges and electrical storms.
4. Insect or vermin infestation.
5. Unauthorised repairs or use of non-genuine parts.
6. Any failure caused by the product not being used in accordance with the instruction and the installation
manual provided with the product.
7. Misuse or abuse, including failure to properly maintain or service.
8. The clearing of lint, hair or dirt from within the appliance.
9. Damage which occurs during delivery or installation.
10. Claims to product surface coating due to liquid or solid spill-overs, accidental damage or damage
caused from cleaning products not recommended by Omega Altise.
HOW TO CLAIM OUR WARRANTY
Please refer to our website address below for Shriro Australia in Australia or Monaco Corp in New Zealand to
register your warranty online. If you are contacting us regarding any warranty claims and spare part enquiries, please make sure you
have the following information on hand:
1. Product Name/Model Number
2. Serial Number
3. Purchase Date (as per invoice, or proof of purchase)
4. Purchased from
5. Warranty Registration Number
Omega Altise is a division of Shriro Australia Pty Limited
ABN 28 002 386 129
Customer care: 1300 739 033
Email: customercare@shriro.com.au
Omega Altise is a division of Monaco Corporation Ltd
(Member of Shriro Australia PTY LTD)
Phone (09) 415 6000
Email: customercare@monacocorp.co.nz

OMEGA ALTISE
A division of Shriro Australia Pty Ltd
24
2-34 Davidson Street Chullora NSW 2190
In Australia: 1300 795 572
In New Zealand: (09) 415 6000
www.omegaaltise.com
IM Ref: OAPC14W 2021/09/02
 Loading...