

Page 1
Page 2
I. SAFETY INFORMATION
Read the following safety information carefully before
attempting to operate or service the meter.
Use the meter only as specified in this manual; otherwise, the
protection provided by the meter may be impaired.
Caution when working with voltages above 60VDC or 24VAC
RMS. Such voltages pose a shock hazard.
Environment conditions
Altitude up to 2000 meters
Indoor use only
Relatively humidity 95% max.
Operation Temperature 0 ~ 50℃ (32
Maintenance & Clearing
Repairs or servicing not covered in this manual should only
be performed by qualified personnel.
Periodically wipe the case with a dry cloth. Do not use
abrasives or solvents on this instrument.
Safety symbols
Comply with EMC
-1-
℉℉℉℉
~
122
℉℉℉℉
II. SPECIFICATIONS
2-1 General Information
Display
:
Over Range Indication : -
Low Battery Indication
Sampling Rate
Power Requirement
)
Battery Life
Printing Interval
:
:
:
:
Operating Temperature
and Humidity
:
Storage Temperature
and Humidity
:
Dimensions (Meter):193 (L) × 74 (W) × 37(H) mm
(Probe) : 160 (L) × 13 (D) mm /1m cable
:
Weight
Accessories
Printer
:
:
Triple 4 digit LCD.
-
appears.
:
shows up when the battery’s
voltage is below the operating voltage.
about 1 time per second
6pcs 1.5V size AAA alkaline batteries or
9V AC Adaptor /500mA minimum.
Approx. 90 hours. ( interval printing = 60
minutes, excluding beeper).
100 hours ( without printing & beeper).
6 sec to 59 min 59 sec
0℃ to 50℃ (32℉ to 122℉) below 95% RH
-10℃ to 60℃ (14℉ to 140℉) below 70% RH
Approx. 430g with batteries & thermo-paper.
Carrying case, Instruction manual, Batteries,
2 Rolls of thermo-paper, type K probe.
Thermo-printing type with 16 characters per
line using 38mm width plain thermo-paper.
-2-
Page 3
2-2 Electrical Specifications
Humidity :
Range : 10%RH to 95%RH
Resolution : 0.1%RH
Accuracy : ±3%RH from 30%RH to 95%RH
±5%RH from 10%RH to 30%RH
Temperature (T1) :
Range : -20℃ to +60℃ (-4℉ to +140℉)
Resolution : 0.1℃ / 0.1
Accuracy : ±0.8℃ , ±1.5
Dew Point :
Range : -44.0℃ ~ 58.5℃ (-47.2℉ ~ 137.3℉)
Accuracy : 1.0℃/1.8
Temperature (T2) :
Range : -200℃ to +1333℃ (-328℉ to +2431℉)
Resolution : 0.1℃ form -200℃ to 999
0.1℉ from -328℉ to 999.9℉, other is 1℃ , 1
Accuracy : -50℃ ~ -200℃: ±(0.2%rdg + 1.8℃)
-50℃ ~ 500℃: ±(0.1%rdg + 0.8℃)
500℃ ~ 1333℃: ±(0.2%rdg + 1.8℃)
-58℉ ~ -328℉: ±(0.2%rdg + 3℉)
-58℉ ~ 1000℉: ±(0.1%rdg + 1.6℉)
1000℉ ~ 2431℉: ±(0.2%rdg + 3℉)
Temperature Coefficient :
0.1 times the applicable accuracy specification per ℃ from 0
to 18℃ and 28℃ to 50℃ ( 32℉ to 64℉ and 82℉ to 122℉ )
℉
℉
℉
℃
-3-
℉
℃
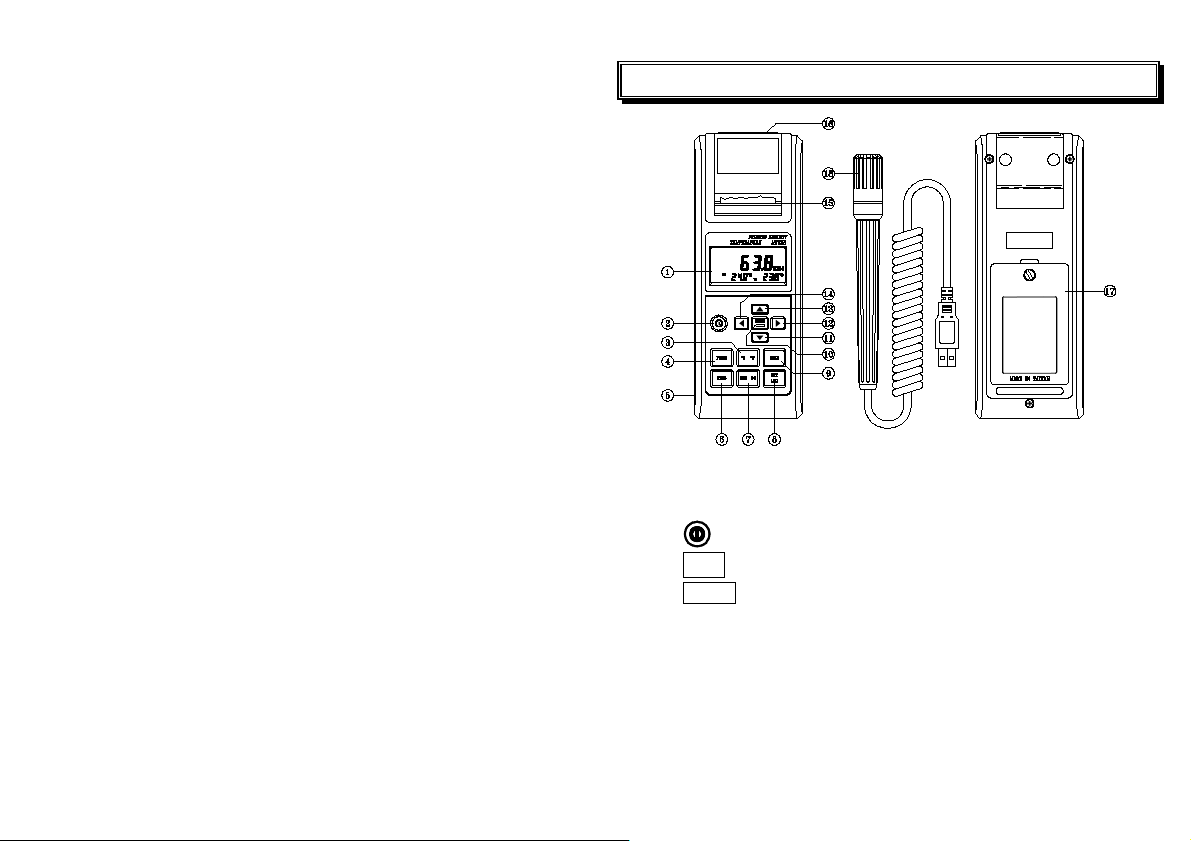
III. NAME OF PARTS AND POSITION
Fig-1
1. LCD:Measured values, unit ,symbols, and decimal points
are displayed.
:
2.
3. ℃ ℉:Key for exchanging temperature unit ℃and ℉.
4. PRINT
Key for power on/off
:
Key for start printing current data. The format as below:
LINE 1 20:12:01 02 - 21
LINE 2 58.9 % RH
LINE 3 td 15. 7
LINE 4 T1 24. 3
LINE 5 T2 24. 8
-4-
℃
℃
℃
Page 4
Line 1 : printing time hour: minute: second, month- day.
Line 2 : printing humidity value.
Line 3 : printing Dew point value.
Line 4 : printing T1 temperature value.
Line 5 : printing T2 temperature value (K-Type).
Press this button for 2 seconds, the printer will enter interval
printing status, and won’t stop unless this button is pressed
again or FEED button is pressed.
5. DC 9V AC adaptor input jack.
6. FEED PAPER (Fig-2) :
Key for moving forward thermo-paper one line.
Perform force stop printing, and skip any printing data.
7. DEW-POINT:Key for changing humidity to dew-point display.
8. MAX / MIN: Fig-2
Press this key one time to enter maximum /minimum
→
record mode, the “REC” symbol is displayed.
Press this key to display the maximum reading (“MAX REC” symbol
displayed), the minimum reading (“MIN REC” symbol displayed)
and the current reading (“REC” symbol displayed) in cycle.
Press this key 2 seconds to exit this mode.
9. HOLD : Key for holding the display reading and press again to
exit.
MENU
10.
:
Key for start/stop set-up parameters mode.
Parameters (in sequence):
ON/OFF (interval printing enable or disable).
TIME INTV (printing interval ranging from 00m:06s to 59m:59s).
INTV (Interval printing start time ranging from 00h:00m to 23h:59m).
INTV g (Interval printing stop time ranging from 00h:00m to 23h:59m).
TIME (Calendar setting year, month, day, hour, minute).
-5-
11.
DOWN:Key for decreasing the value of parameters.
12. RIGHT:Key for moving to the desired next parameter setting.
13.
UP:Key for increasing the value of parameters setting.
14. LEFT: Key for moving to the desired forward parameter setting.
15. Way out for thermo-paper.
16. Type K temperature probe jack.
17. Battery cabinet and cover
:
6 pcs 1.5V size AAA alkaline batteries.
18. Humidity (including temperature) probe.
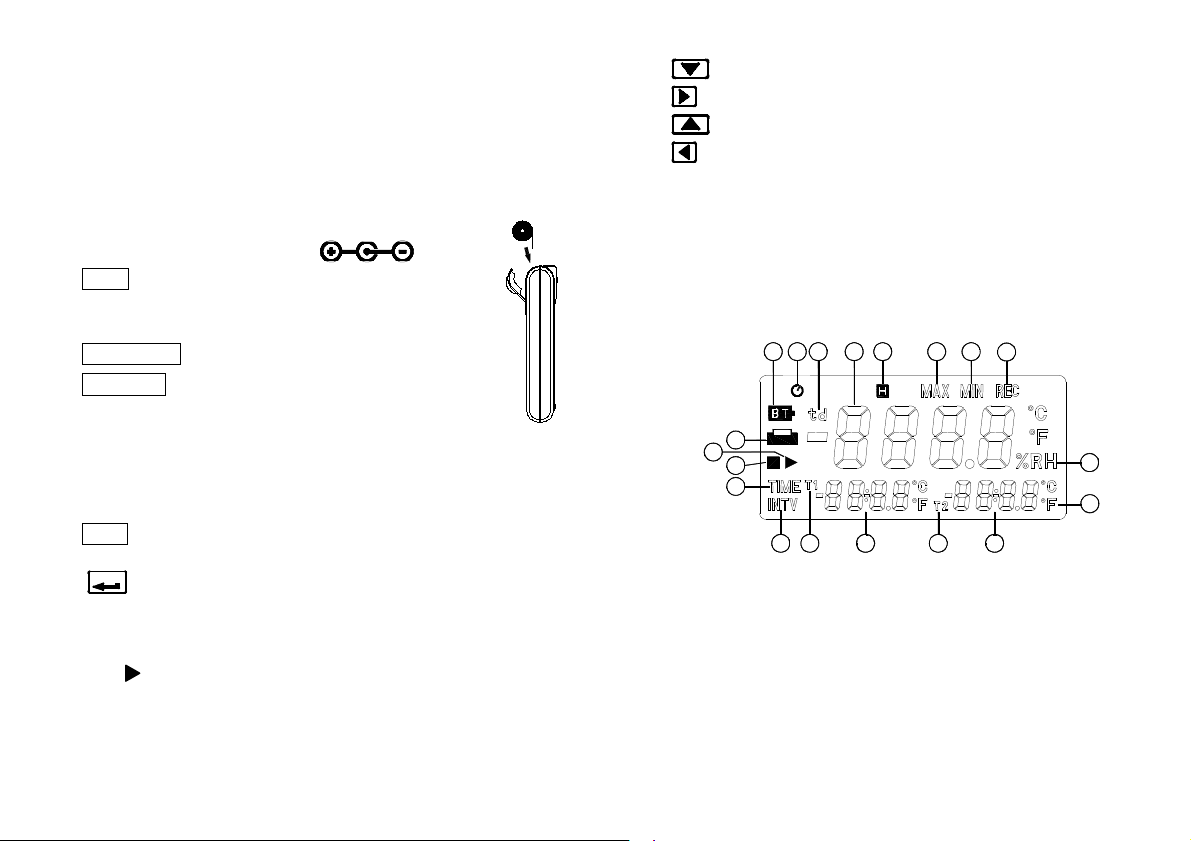
LCD DISPLAY :
3 2 1 19 18
4
5
6
7
8 9 10
17 16
11 12
15
14
13
Fig-3
1. Dew point measurement indicator.
2. Preset interval printing function ON indicator.
3. Low battery indicator
4. Printing indicator.
5. Interval printing start time setting indicator.
6. Interval printing stop time setting indicator.
7. Calendar time indicator.
-6-
Page 5
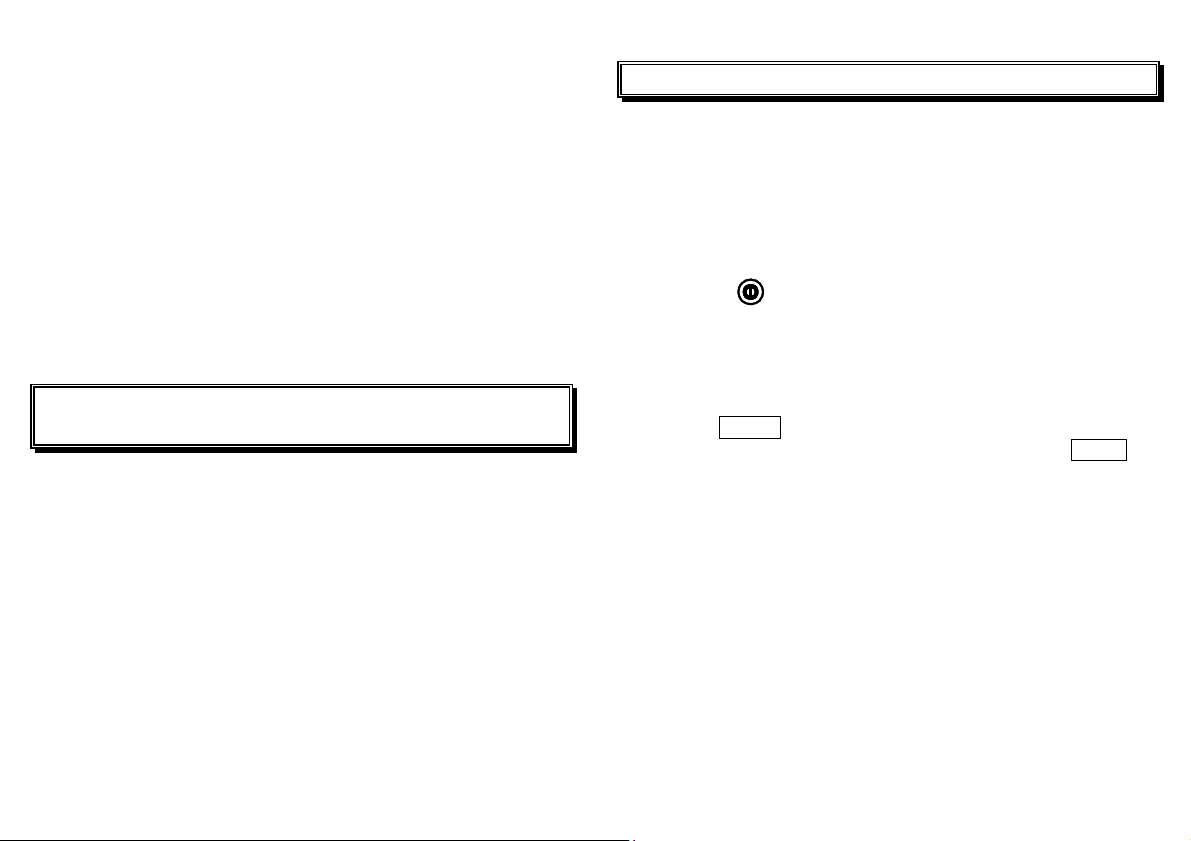
8. Interval printing time indicator.
9. T1 measurement indicator.
10. T1 measured value (NTC).
11. T2 measurement indicator.
12. T2 measured value (Type K).
13. Temperature measurement units.
14. Humidity measurement unit.
15. Recording indicator.
16. Minimum measurement value indicator.
17. Maximum measurement value indicator.
18. Data hold indicator.
19. Humidity and dew point temperature measured value.
IV. PRECAUTIONS AND PREPARATIONS FOR
MEASUREMENT
1. Before operating this instrument, please examine it to make
sure no shipping damage occurred.
2. Save all packing materials until you are sure that this unit can
normally operate.
3. Be sure the batteries are correctly placed in the case or the 9V
adaptor is in correct connection.
4. An unsecured battery cover will cause error measuring.
5. To avoid battery leakage problem, remove batteries if this meter
will not be used for a long time.
6. Do not use or store this meter outside the operating / storage
environment.
-7-
V. OPERATING PROCEDURE
1. This meter can be supplied with batteries or DC 9V AC adaptor.
If using batteries :
Remove the rear cover, and install batteries. Pay attention to the
polarity of battery socket. If using 9V adaptor, make sure there is a
good connection to the adaptor socket of the meter. Choose the Ktype temperature probe for your application and insert it into T2 the
temperature probe socket. Insert Humidity/Temperature (T1) probe
into T1 the meter socket.
2. Press the button to power on the meter, the current date and
time will be displayed in about 3 seconds. If “- - -” appears, it
indicates no probe or the probe is broken.
3. T1 indicates room temperature, T2 indicates K-type thermocouple test
value.
4. Printing data :
Press PRINT one time to print one set data.
If continuous printing is required, press and hold down PRINT
button, until LCD display “INTV” mark and enter continuous interval
printing mode, the printer will print data, as follows :
INTV 00 : 06
10:55:19 08-16
62.7 %RH
td 19.8
T1 27.6
T2 26.5
10:55:25 08-16
62.7 %RH
td 19.8
T1 27.6
T2 26.5
℃
℃
℃
→ Interval printing time, minute : second.
→ Printing time, hour:minute:second, month:day
→ Humidity test value and unit.
℃
→ Dew point and unit.
℃
→ Room temperature test value and unit.
℃
-8-
Page 6
10:55:31 08-16
62.7 %RH
td 19.8
T1 27.6
T2 26.5
10:55:37 08-16
td 19.8
T1 27.6
T2 26.5
Press PRINT or FEED key to exit printing mode.
When the meter is powered on, if the printing function setting is
“ON”, and now time is interval printing start time, the meter will
enter to continuous interval printing mode and start printing.
※
Press PRINT or FEED key to exit printing mode.
※
The interval printing function works only when the start
printing time is earlier than the stop printing time, and interval
print time can not be longer than 24 hours.
Caution : Before printing, please check thermo-paper is not clipped by
thermo-paper cover, if anything interrupts the printer, the
meter will shut off the printer power, and “
flickers.
℃
℃
℃
62.7 %RH
℃
℃
℃
” symbol
VI. SETTING MODE
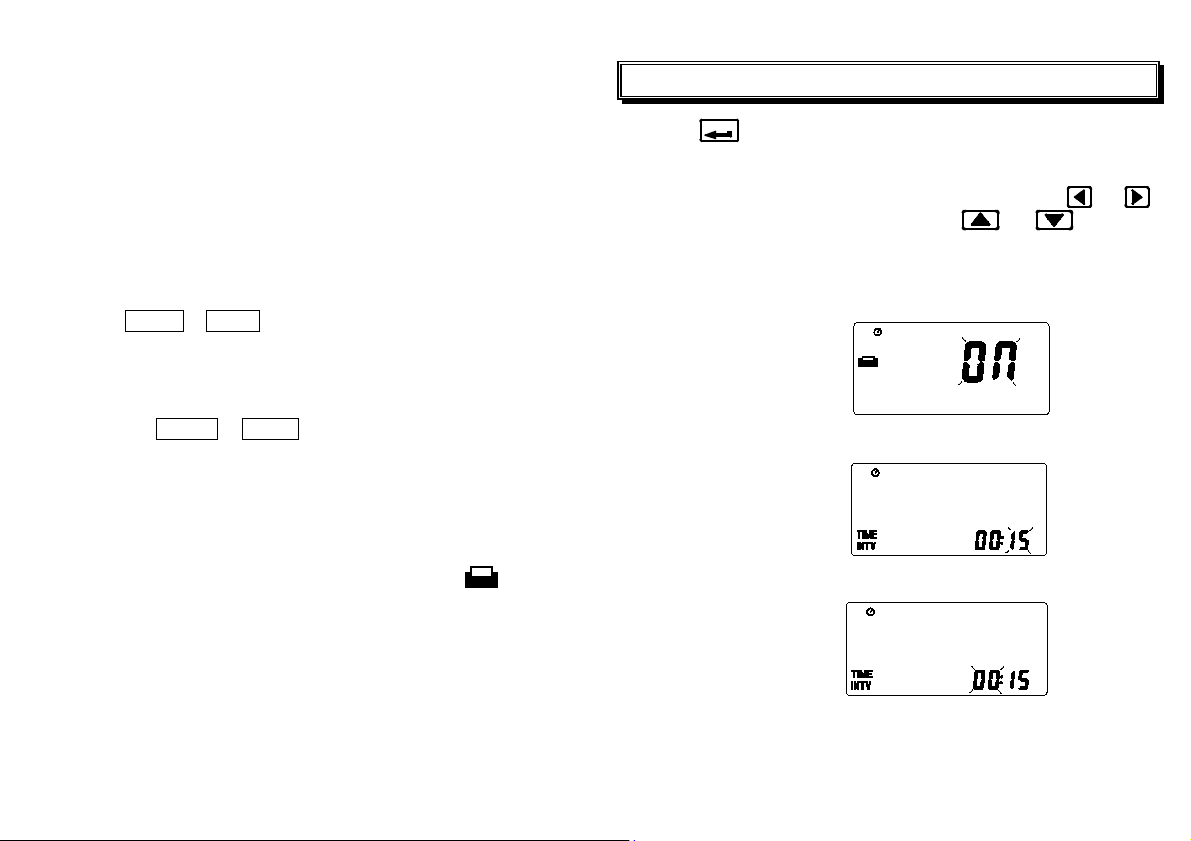
Press “
select setting parameters in circle (printer on or off, interval printing time,
start printing time, stop printing time and calendar setting). The modifier
parameter will flicker until the setting is finished. Press or
button to select parameter setting, press or
increase or decrease the parameter.
Parameter setting in sequence and LCD display as follows :
1. Printing function ON or OFF select.
2. Interval printing “second” parameter setting.
3. Interval printing “minute” parameter setting.
MENU
” button to enter setting function, re-press this button will
fig-4
fig-5
button to
-9-
fig-6
-10-
Page 7
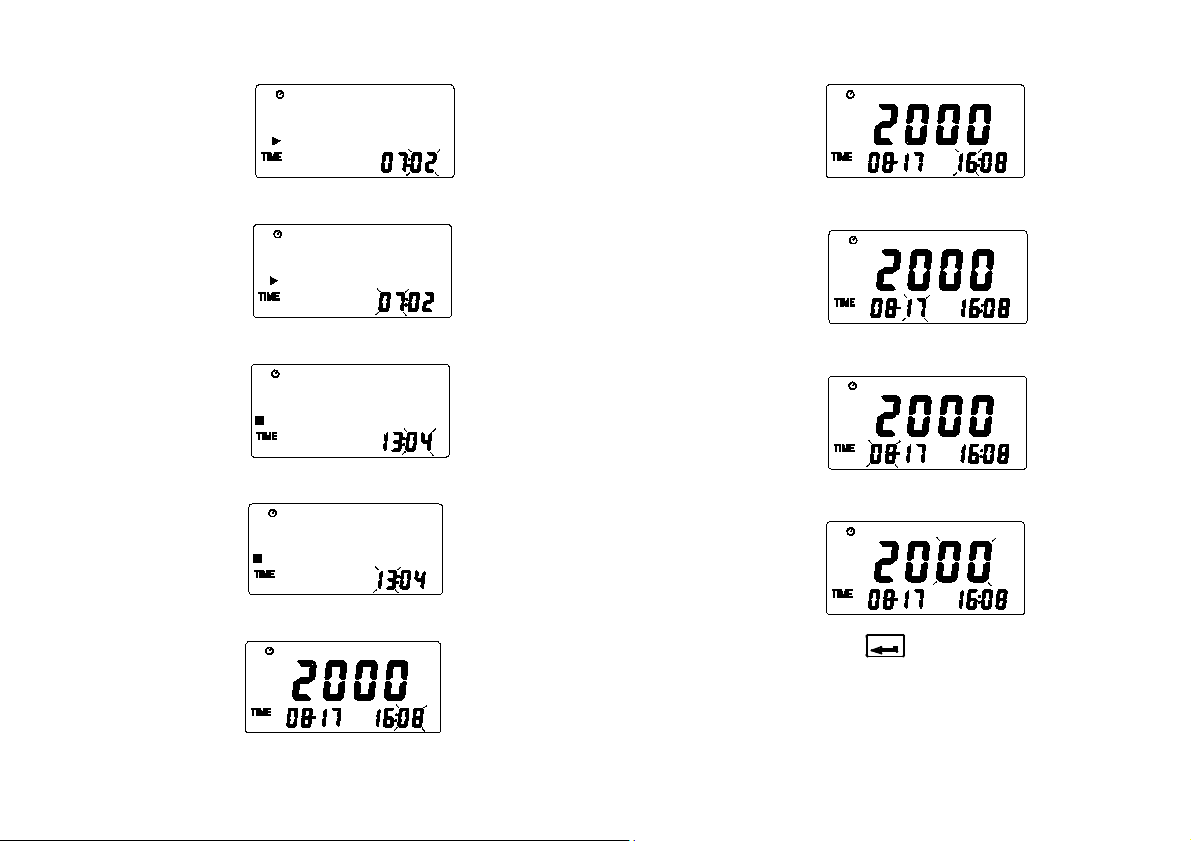
4. Printing start time “minute” parameter setting.
9. Calendar “hour” parameter setting.
5. Printing start time “hour” parameter setting.
6. Printing stop time “minute” parameter setting.
7. Printing stop time “hour” parameter setting.
8. Calendar “minute” parameter setting.
-11-
fig-7
fig-8
fig-9
fig-10
fig-11
10. Calendar “day” parameter setting.
fig –13
11. Calendar “month” parameter setting.
12. Calendar year last two digit parameter setting.
When you finish the setting, press “
measurement mode.
MENU
” key to get back to the
-12-
fig -12
fig -14
fig –15
Page 8
VII. HOW TO SETUP INTERVAL PRINT
Setup interval print with 24 hours limitation.
1. Press
MENU
key to enter setting mode, setting print operation is
ON.
2. Select interval printing time setting mode, set “second”, “minute”
(from 00 : 06 to 59 : 59).
3. Select start printing time setting mode, set “minute”, “hour” (from
00 : 00 to 23 : 59).
4. Select stop printing time setting mode, set “minute”, “hour” (from
00 : 00 to 23 : 59).
5. When you finish the setting, press
MENU
key to exit the setting
mode, LCD will display “ ” mark at left upper corner.
Note : The start time must be earlier than the stop time, otherwise
the buzzer will beep warning that the setting is in error and
did not accept the setting. If this occurs, press
MENU
key.
VIII. USER FRIENDLY CALIBRATION PROCEDURE
IX. BATTERY REPLACEMENT
1. When battery power is not sufficient, will be shown on
LCD. Replace with 6 pcs new of 1.5V size AAA batteries.
2. After the temperature probe is disconnected and the meter is
powered off, remove the battery cover.
3. Remove batteries from the holder and replace them with 6 pcs
of new 1.5V size AAA alkaline batteries.
4. Secure the battery cover.
Use standard humidity meter to verify the reading.
1. Press and hold down “
MENU
” key, the press “ ” key turn on
the meter until the LCD show the “SET %RH” symbol.
2. Press “
” and “
” keys until the LCD value is same as
the standard humidity meter.
3. Press “
MENU
” key to store the calibrated value.
-13-
-14-
Page 9
 Loading...