

Page 1
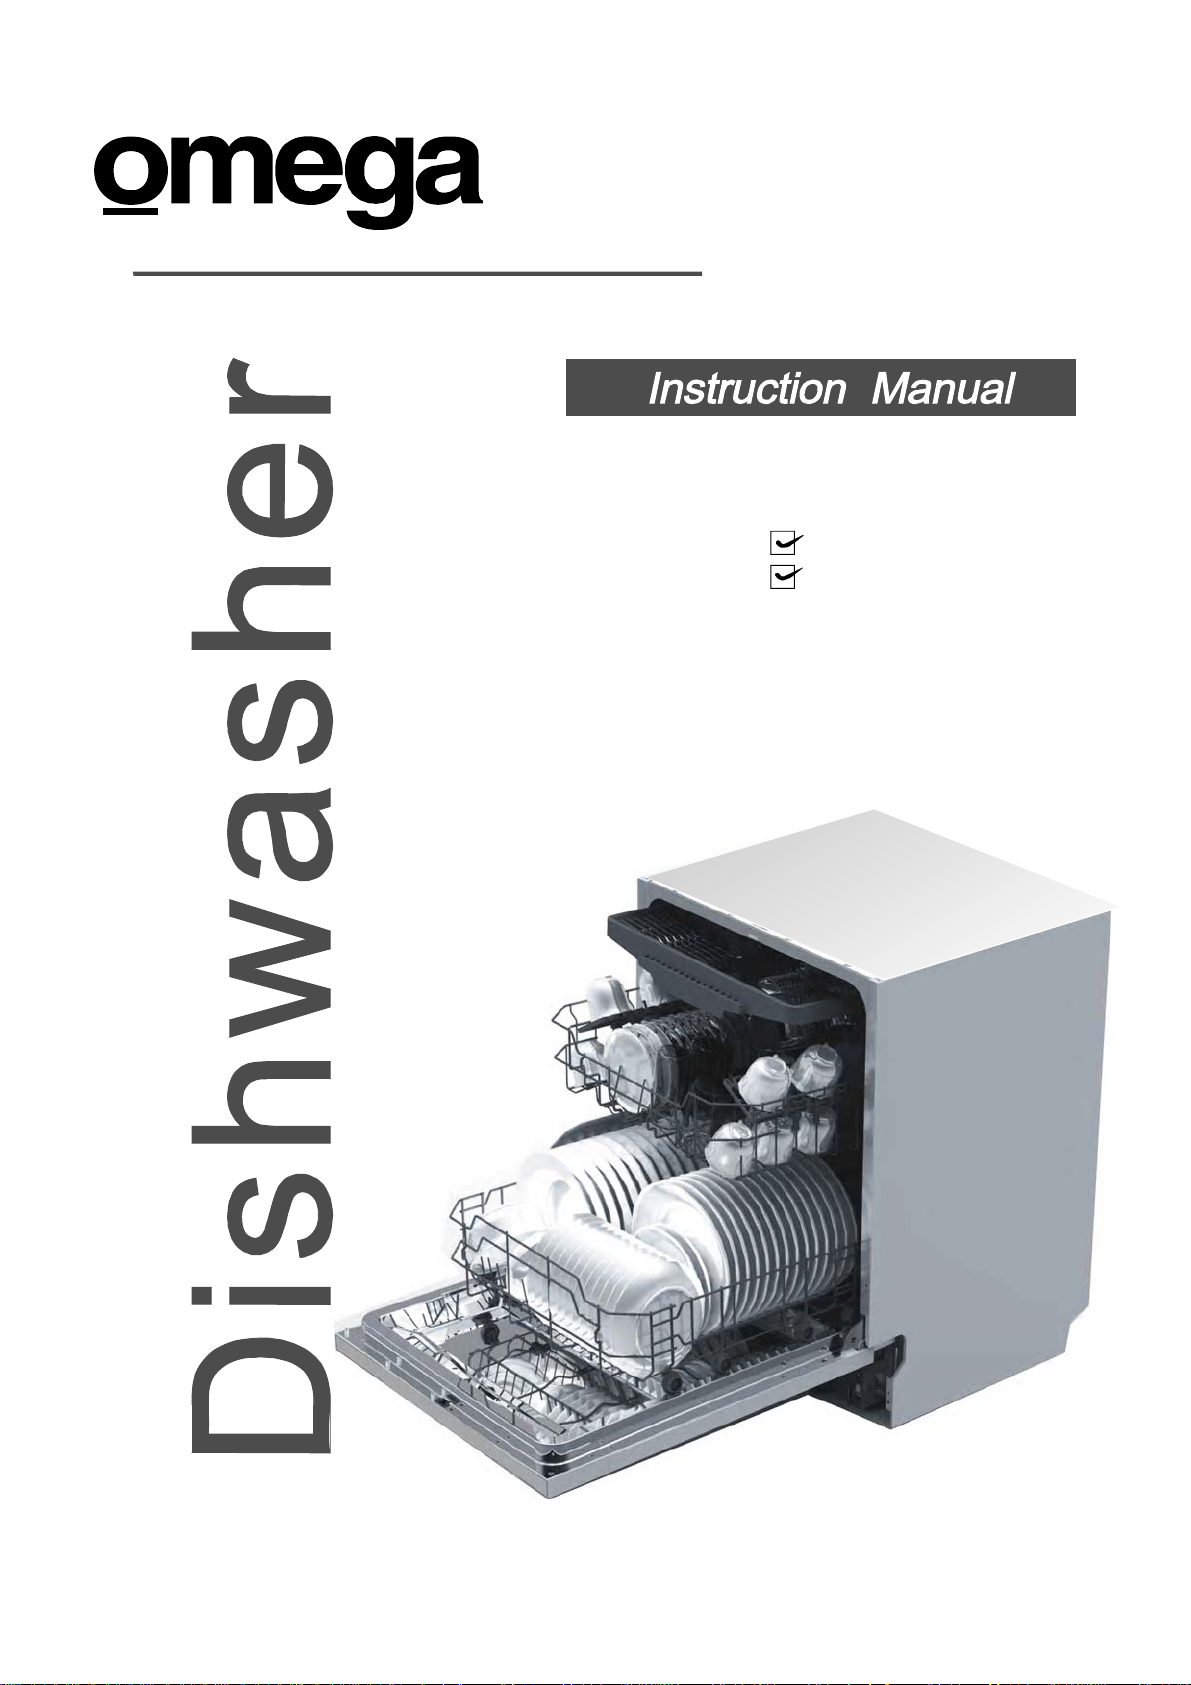
PL403A
14 place settings
half-load function
Page 2
Fordetailed operating method readthe corresponding contenton theinstructionmanual.
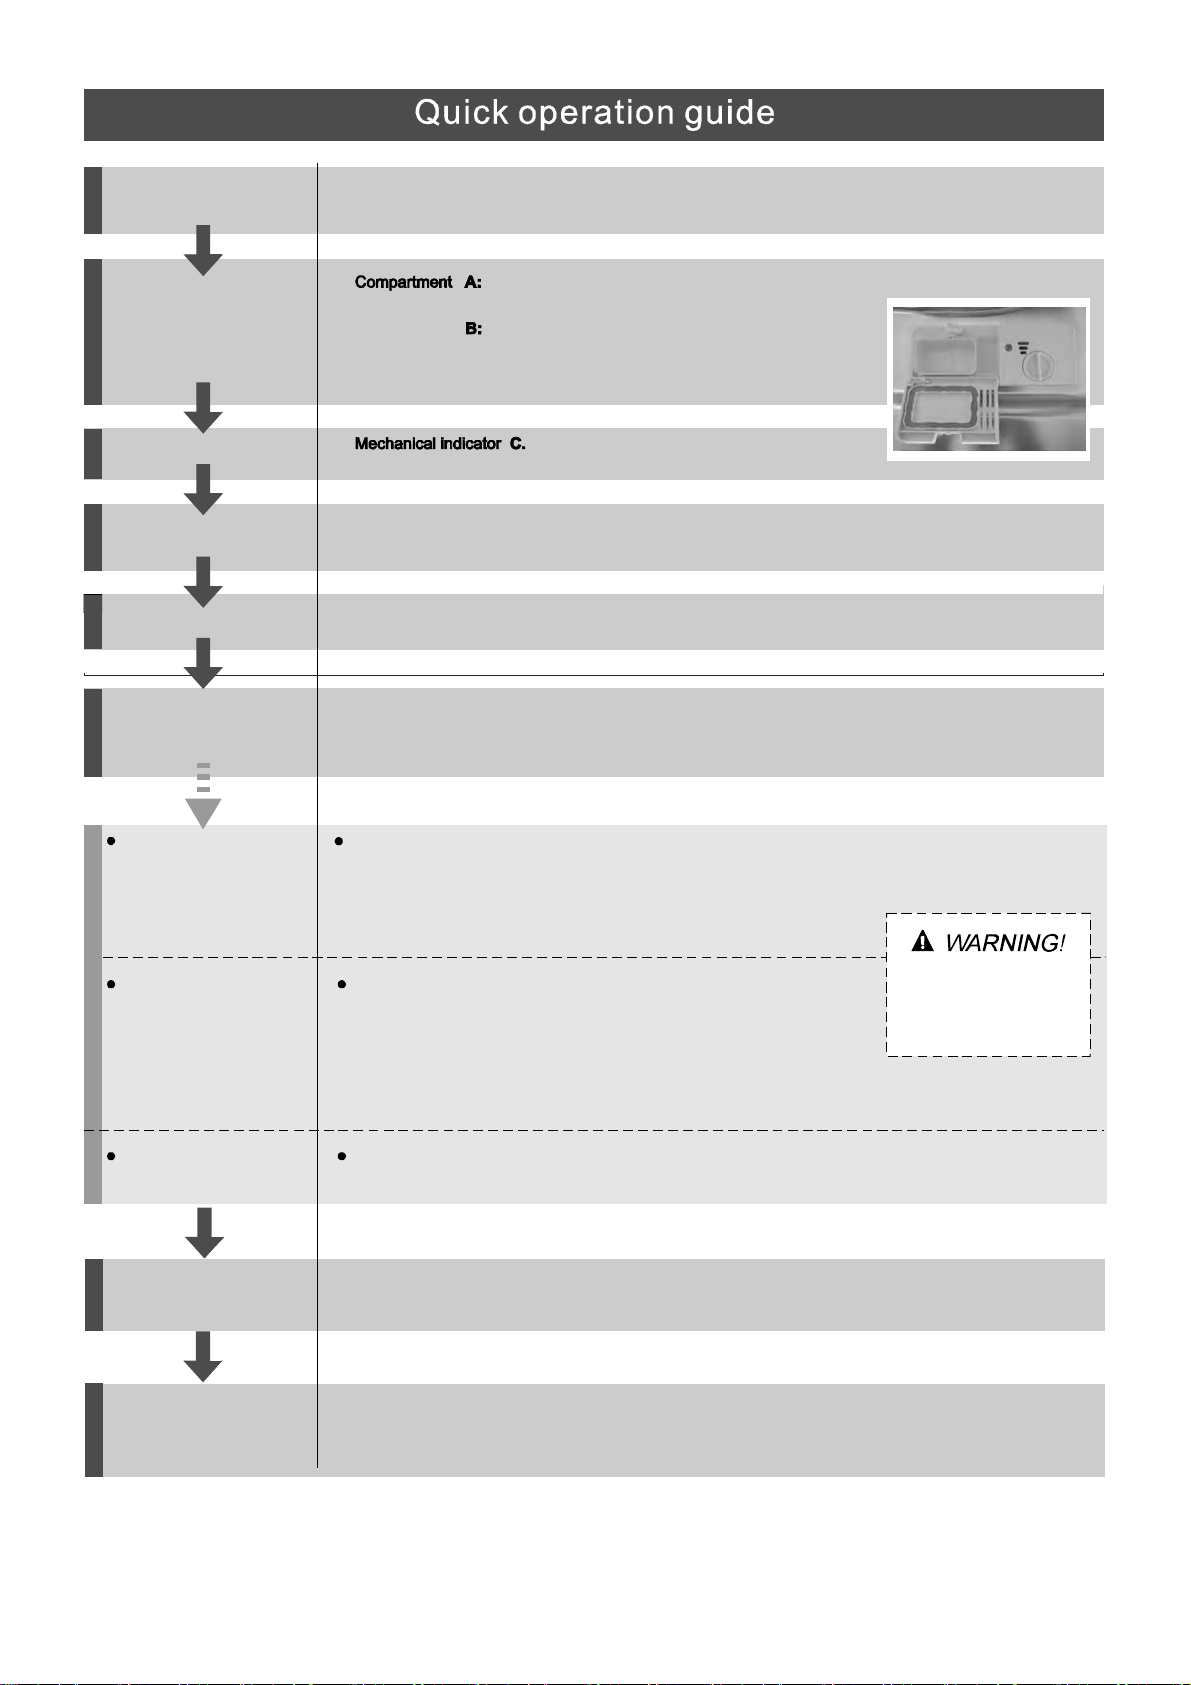
Switchon the appliance
Fill the detergent dispenser
Check the rinse aid level
Load the baskets
Select aprogramme
Runnin g the dishwas her
Press the On/Off button to switch on the appliance, Open the door.
Witheach wash cycle.
Compartment
Forprogrammes with pre-wash only.
(Follow the user instructions!)
Electricindicator on controlpanel(if provided).
Scrape off any la rge a mount of leftover food. Soften remnants of burnt food in pans,
then load the baskets. Refer to the dishwasher loading instructions.
Close the door,turn the Washing Program Selector to select a desired programme.
( See the section entitled Operating instruction )“”
Turn on the water tap and press the Start/Pause Button .The machine will start working
after about 10 seconds.
A
C
B
Changingthe programme
Add forgottendishes in the
dishwasher.
If the appliance is switched
off during a wash cycle.
Switch off the appliance
Turn off the water tap,
unload the baskets
1. A running cycle can only be modified if it has been running for a short time. Otherwise the detergent
may have alr eady been released and the water already drained. If this is the case, the detergent
dispenser must be refilled.
2. Press the On/Off button to stop washing , Then press this button to reset .
3. Turn the selector to select a new programme.
4. Restart the dishwasher.
1.Press the Start/Pause Button to stop thewashing.
2.Open the door a little .
3.After the spray arms stop w orking,you can open the door
completely.
4.Add forgottendishes.
5.Close the door
6.Press the Start/Pause Button, the dishwasher will run
after 10seconds.
If the appliance is switched off during a wash cycle, when switched
on again, please re-select the washing cycle and operate the dishwasher
according to the original Power-on state ..
When the working cycle has finished, the buzzerof the
dishwasher will sound 8 times, then stop.
Turn off the appliance usingthe On/ Off Button.
Warning: wait a few minutes (about 15 minutes) before unloading the dishwasher to avoid handling
the dishes and utensils while they are still hot andmoresusceptible to break.
They will also dry better.Unload the appliance, starting from the lowerbasket.
Open th e door carefully.
Hot steammay escape
when the door is ope n ed!
Page 3

Dear Custom er,
This appliance isintended to b e used in household
andsimilarapplications suchas:
-staff kitchen a reas ins hops, offices andother
workin g environme nts;
-farm houses;
-by clients inhotels, motels andothe r residential
ty pe e nviro nments ;
-bed andbreakfasttypeenvironments.
Pleasecarefully read this m anualbeforeusingthe
dishwasher, it will h elpyouto use and maintainthe
dishwasher properly.
Keep it as are f er in the later days .
Passit ontoany subsequentowner of the appliance.
Thismanualcontains sectionson safety Instructions,
Operating Instr uctions, InstallationI nstructions an d
Trouble sho o tin g Tips, etc.
ControlPanel........................................ ...........2
Dishwasher Features... ................................. ...2
A FilltheRinse A idDispenser............. .. ..3、 ..... ...
B F unct ion of D e te rg en t .... ... .. .. .. . ... . ... ....4、 ........
Attention beforeor after loading theDishwasher
Baskets..........................................................6
TheM ethod Loading Normal Dishware
............ ..7
Max. Dishes . ...... ..... ....... ...... ......... ...... ...... .....8
WashCycleTable...........................................9
Turning on theAppl ian ce. ... .... .. ... ..... . .. ......... ..9
ChangetheProgramme.............. ................10....
Atthe Endof the Wash Cycle........................... 10
To review thesection on troubleshooting Tips
will help youto solvesomecommonproblems
byyourse lf .
Ifyo u cannot solve t he problems b y yourself ,
please ask for the helpof professional technicians.
The manufacturer, following apolicy ofc onstant
development andu pdating of theproduct, may
make modifications w ithout giving priornotice .
FilteringSystem. ............................................11
Caringfort he Dis hwasher.. ................... .........12.
..................................13Insta llation prepar ation
...14Aesthetic panel'sdim ensions andinstallation
..............16Tension adjustment ofth e door spring
..............................16Conne ction of drain hoses
......................... 17Dishwasherinstal lation s teps
AboutElectricityConnecting...........................18
Cold Water Connection.................................. 19
Startof dishwasher................................ ......19..
Beforecalling f or service........................... .....20.
Errorcodes.................................... ..............21.
Technical information.............................. .. ...22..
Page 4
When using your dishwas he r, follow the precautions li s t ed bel ow:
This appliance must be grounded. In the event of a
malfunction or breakdown, grounding will reduce
the risk of anelectric shock by providing a path of
least resistance of electric current. This appliance
is equipped with a cord having an equipmentgrounding conductor and a grounding plug.
The plug must be plugged into an appropriate outlet
that is installed and grounded in accordance with
all local codes and ordinances.
Donotabuse,siton,orstandonthedoorordish
rack of the dishwasher.
Do not operate your dishwasher unless all
enclosure panels are properly in place. Open
the door very carefully if the dishwasher is
operating, there is a risk of water squirting out.
Do not place any heavy objects the
door when it is open. The appliance could tip
forward.
When loading ite ms tobe washed:
1) L ocate sharp itemsso that they are not likely
to damagethe door seal;
2 Warning: Knives andother utensils with
)
sharp points must be loadedin the basket
with their point s downor placed i n a
horizontal position.
Check thatthe detergent comparment ise mpty
after completion ofthe washcycle.
Do not wash plastic items unless they are marked
dishwasher safe or the equivalent. For plastic items
n
ot so marked, check the manufacturer's
recommendations.
Use onlydeterge nt andri nse additives
designed for anautomatic dishwasher.
Never useso ap, laundrydete rgent, orh and
washing detergent inyou r di shwasher. Keep
these products o ut ofthe reach of chil dren.
Keep children away from detergent and rinse aid,
keep child away from the open door of the
dishwasher, there could still be some detergent
left inside.
ren
on or stand on
Improper connection of the equipment-grounding
conductor can result in the risk of an electric shock.
Check with a qualified electrician or service
representative if you are in doubt whether the
appliance is properly grounded. Do not modify the
plug provided with the appliance; If it does not fit
the outlet. Have a proper outlet installed by a
qualified electrician.
This appliance is not intended for use by persons
(including children with reduced physical, sensory or
mental capabilities, or lack of experience and
knowledge ,unless they have been given supervision
or instruction concerning use of the appliance by a
person responsible for their safety.
Children should be supervised to ensure that they do
not play with the appliance.
Dishwasher detergents arestrongl y alkaline, th ey
can beextremely dangerous ifswall owed.Avoid
contact withskin and e yes andkee p children aw ay
from the dishwasher when t he door is open.
The doorshoul d notbe left o pen,
since thiscould increase theris k oftripping.
Ifthe s upplycordis damaged, it mustbereplaced
bythemanufactureroritsserviceagentora
similar ly qualifi ed person in orde r to avoid a
hazar d .
Remove the door to the washing compartment when
removing an old dishwasher from service or discarding it.
Pleased ispose ofpack ing materials properly.
Use the dishwasher only for its intended function.
During installation, thepower supply m ust not
be excessively o r dangerously bentor flattened.
Do not tamper with controls.
The applianceis to beconnec ted tothe water
mains usingnew hose setsand that oldhose-sets
should notbe reused.
The maximumnu mber of place settings t o be
washed is 14.
The maximumpe rmissible inlet waterpressure is
1Mpa.
The minimum perm issible inlet waterpress ure is
0.04Mpa.
)
Page 5
To getthe best performancefromyourdi shwasher, read all operatinginstructions
beforeusing itfo rthe first time.
Option
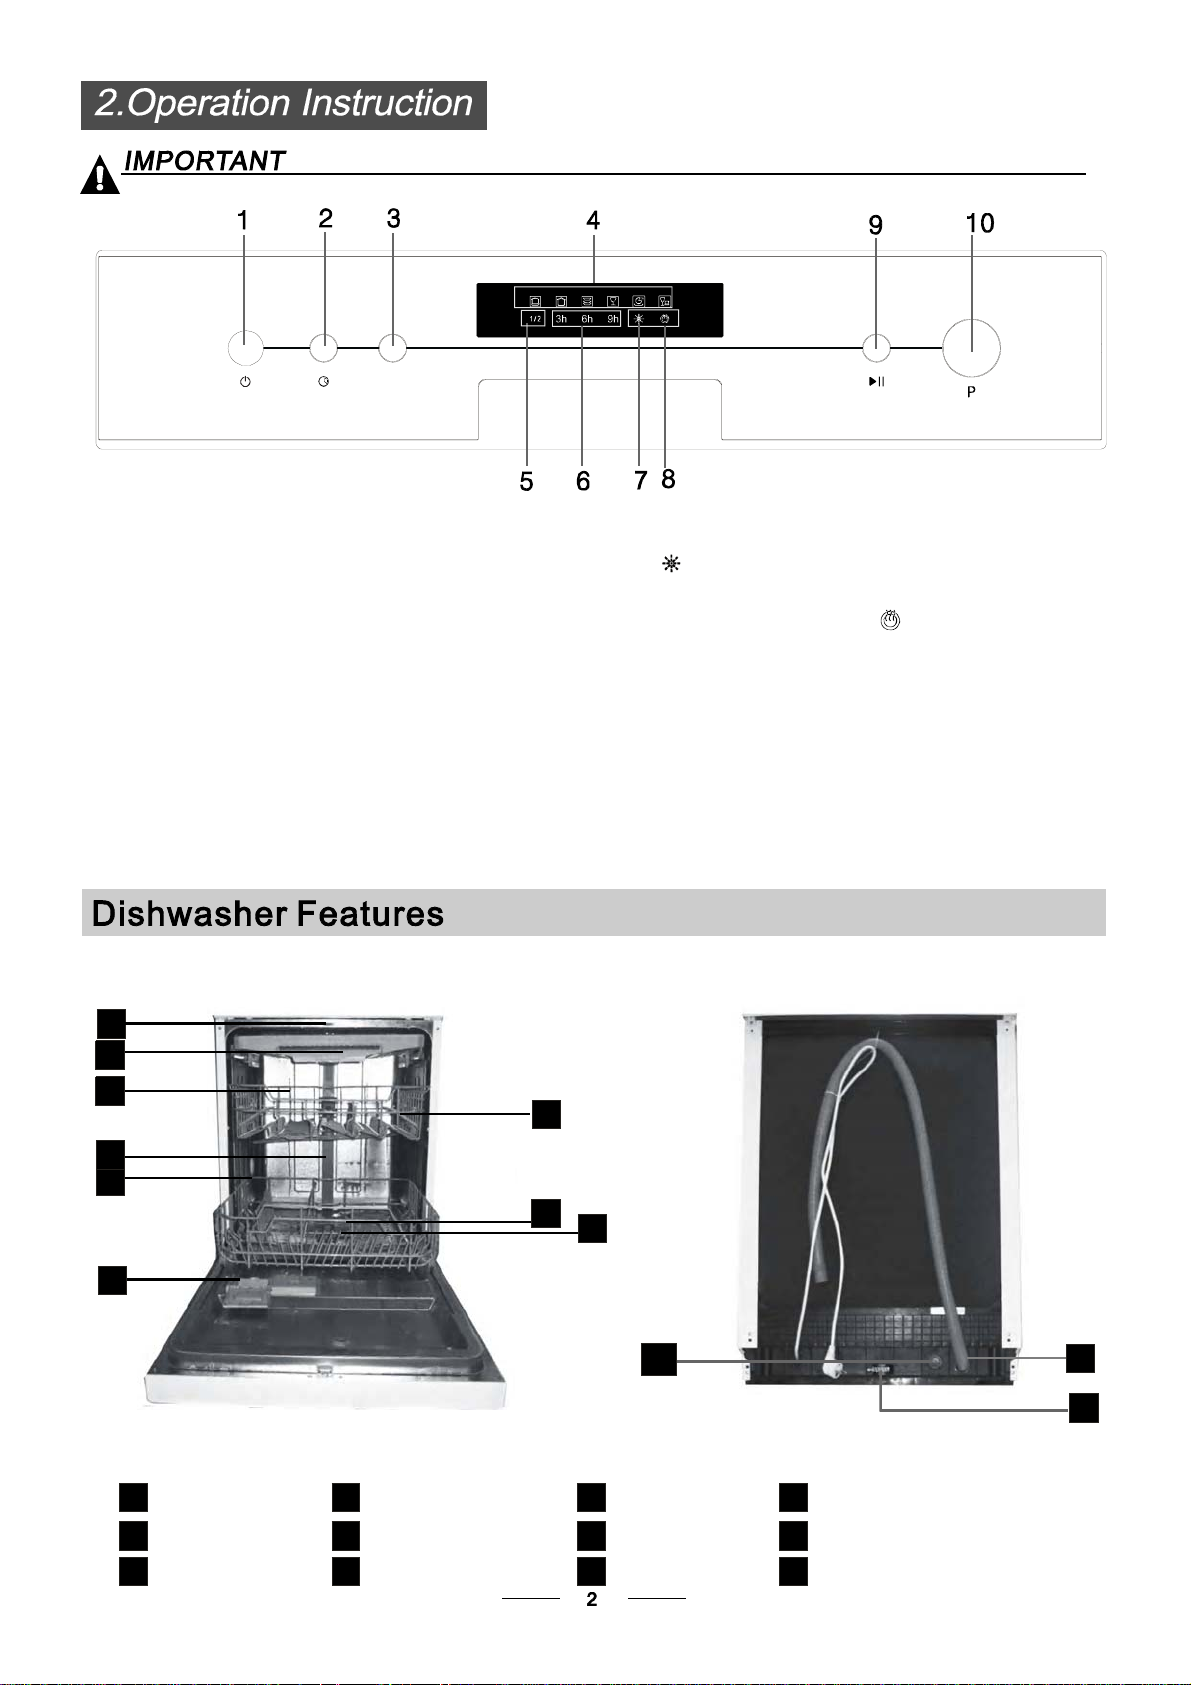
1. On/OffButton: To turn on/offthe powersupply.
2. D elay Button :To Press the b ut ton todelay the washing tim e.
3.
OptionButton: ToselectHalfloadandExtradry functions,
these functions canonly be used w ith pr ogrammes
Intensive, Heavy, Normal, Glassand 1 Ho ur.
4. Program indicators: toshow whichp rogram you havechosen ;
5.Half load indi cat or : To showwh en yousel ect the
half loadfunction. If you have onlyabout orle ss thanhalf
of f ull loaddishes ofthe dishwasher,you can select the
half loadfunction and yourdesired program accordingto
the dishes contaminated degree.A program select th e
half l oad function, itcan savetime, energy, and water
compare tothe program hasn’tselect the h alf loadfuncti on.
Afterthehalf load functionisselected,all the spray arms
are running, youc an load allth e baskets.
Fro nt view
1
2
3
7
6. Del ay indicato rs : to show t he d ela y time (3 h/ 6h/ 9 h )
7. Rinse aid w arning lights:Toshow
when the dispenser needto be ref illed.
8:
.Extra Dryingindicator
Extra drying: A n increa sed tempera ture durin g the fi nal
rinsetoincreasedryingwell.Thereisaslightincrease
in the energ y c o nsu mption.
9Start/PauseButton:Tostarttheselected
washingprogramorpausethewashingprogram
when the machineis working.
10 Washing Program Selector: To Turnthe Selector
to se lect appropriate Program.
Back View
4
5
6
1
2
3
Cutlery rack
Top spray arm
Upper basket
Inner pipe
4
Lower basket
5
Dispenser
6
8
9
10
11
12
Cup shelf
7
Spray a rm s
8
Filter assembly
9
Inlet pipeconne ctor
10
Drain pipe
11
Adjuste r
12
Page 6
Before usingy our dishwasher for th e firstti me:
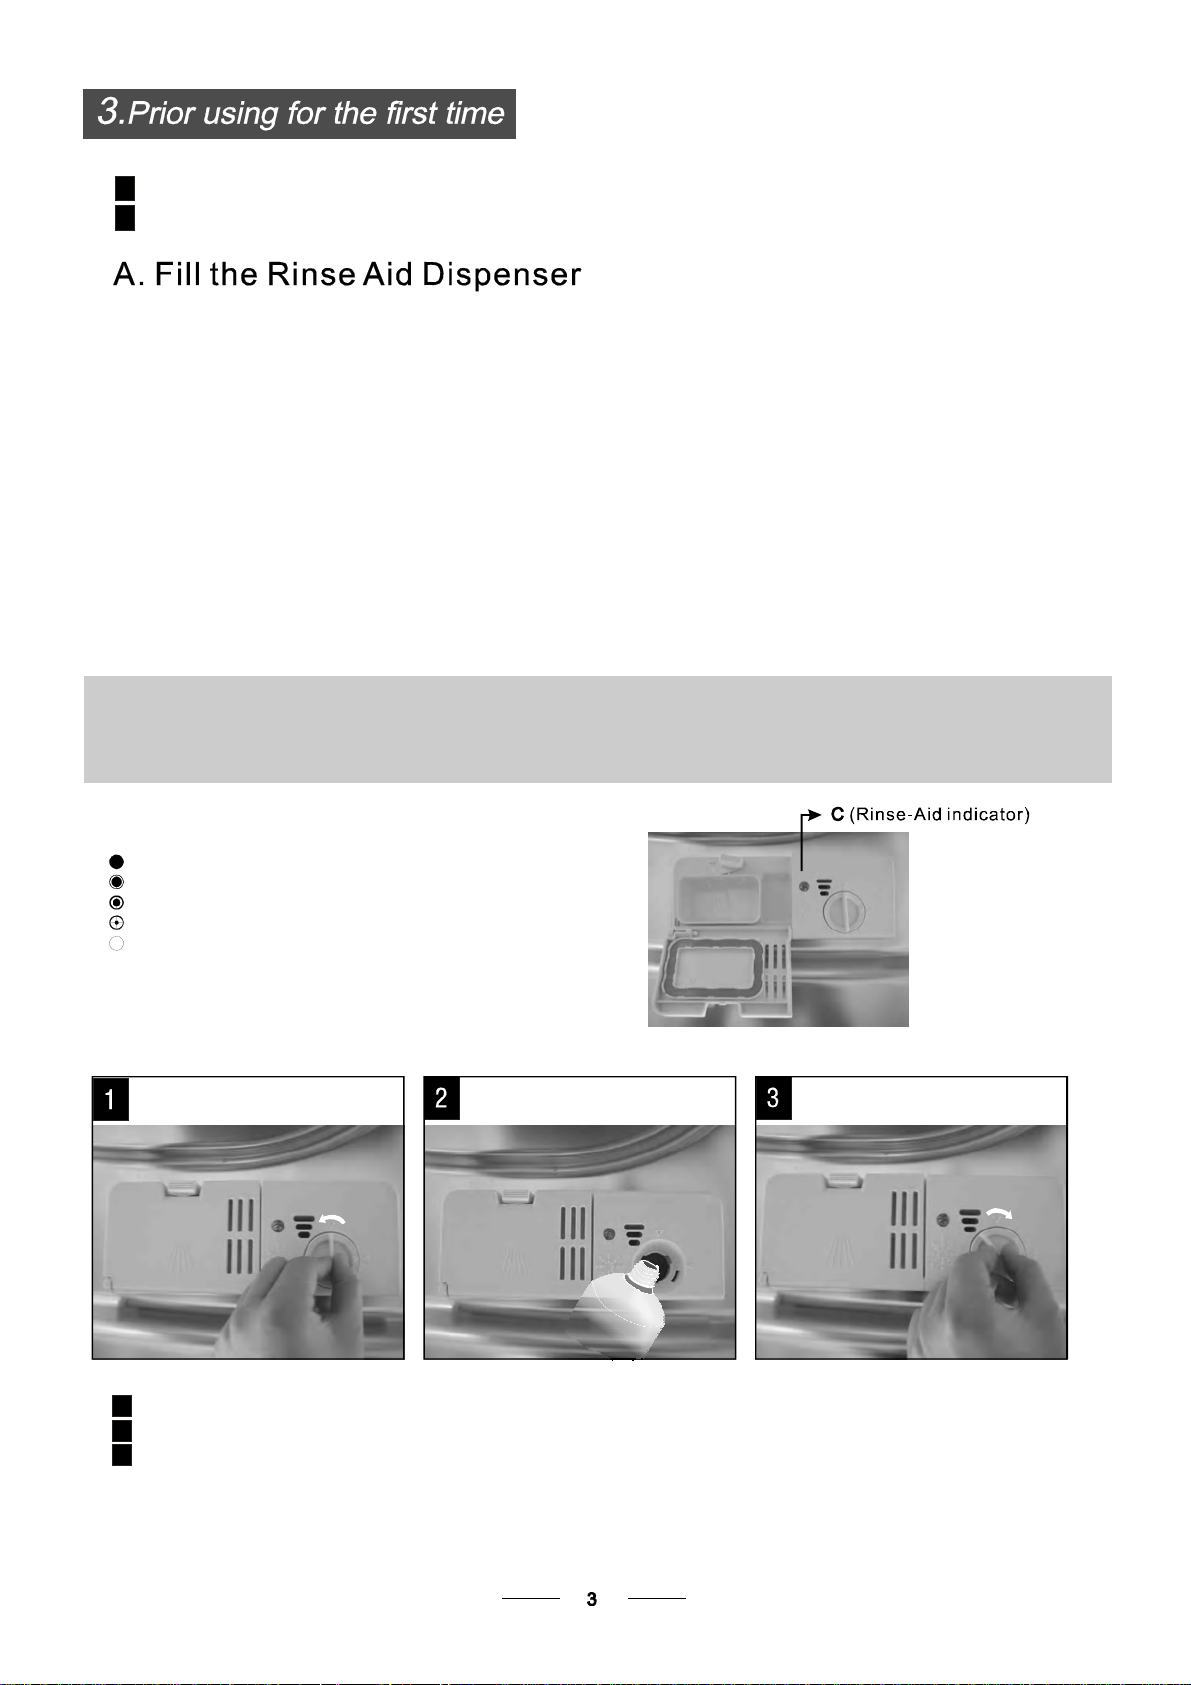
A. Fill the rinsea iddispenser
B. Fill in deterge nt
Rin seAi d Di spen se r
The r inseaidisreleased du ring the finalrinseto prevent w ater from forming droplets on your dishes,which can
leave spotsandstreaks.It also improves dryingby allowingwaterto roll off the dishes.Your dishwasher is
designedto use liquidrinseaids. The rinseaid dispenser is locatedinside the door next to the detergentdispenser.
To fill t he dispenser,open the capand pour therin se aidinto the dispenser untilthe leveli ndica tor t urns completely
black.Thevolumeofthe rinseaid container is about 110ml.
Functi on of RinseAid
Rinse aid isautom ati cally added during the l ast rinse, ensuring thoroug h rinsing, and s po t andst reak free drying.
Attenti on!
Only use branded rinseaidfor dishwasher. Neverfilltherinse aid dispenser with any othersubstances
(e.g. Dishwasher cleaning agent, liquid detergen t). This w ould damage the appliance.
When to Refil l the RinseAid Disp ense r
If t here is norinse -aid warning light in the control p ane l, you canjudge the amo unt of rin se-aid by the color of t he
opticallevel
indicator "C" locate d next to the cap.When the rinse-aid container isfull, the whole i ndica tor will be dark .As th e
rinse-aid
diminishes, the size o f the dark dot decreases. You should never l et the r inse aid getbelow 1 / 4 full.
As the rins e aiddim inishes, the size of thebl ack dot
on the rinse aid level i ndicat or changes, asillust rated below.
Full
3/4full
1/2full
1/4full-Shouldrefilltoeliminatespotting
Empty
RINSEAIDDISPENSER
To open the di spenser, t urn the cap to the "open" (left) ar row and lift it out .
1
Pour the rinse aid intothe disp ense r, being careful not to o verf ill.
2
Replacethe cap by inserting it alignedwith "open" arrow and turningit to the closed (right)arrow.
3
Be ca reful not tooverfi ll th e dispenser,bec ause this c ould cause oversudsin g. Wipeaway any spills
witha dampcloth.Don'tforget toreplace the c ap before youclosedishwasherdoor.
Attention!
Clean upany rinse aid spilt during filling w ith an ab sorbent cloth toavoi d excessfo aming
during thenext wash.
Page 7

Clean upany rinse aidspilled while duringfill ing withan absorbent cloth t o avoid excess ive foaming
duringthenextwash.
Don't forgett o replacethe cap beforeyou close d ishwasher door.
Adjust ing RinseAid Dispens er
The rinse a id dispenser hassix or foursetti ngs.A lways start withth e dispenser
set on"4" . Ifspot s andpoor drying area problem, increase theam ount of r inse
aid dispensed by removing the dispenserlid androtatingthedialto "5".Ifthe
dishes still arenot drying properlyor are show sp ots, adjust t he dial to the next
higher lever u ntil your dishesare spot-free. The recom mended setting is "4 ".
(Factoryvalue is"4".)
Increase the doseif there are drops of w ater or limespot s onthe dishes after wa shing.
Reduce itif there arestick y whitish stainson your disheso r abluish film onglassw are or
knifeblades.
Detergents with its chemical ingredients are ne cessary to removedirt, crush dirt andtransport it outof the dishwasher.
Most o f the commercial qu alit y detergentsa re suitable forthi s purpose.
Detergen ts
There are3 sorts of detergents
1.Withphosphat e and wit h c hlori ne
2.Withphosphat e andwithout chlorine
3.Withoutpho sphate and w ithout chlorine
Normally new pulverisedd etergent iswi thout phosphate.T hus thew ater softener fun ction of
phosphate is notgiven. In this case we recommend tofill salt inthe saltconta iner evenw hen
the hardness ofwater ison ly 6 dH. Ifdeterg ents without phosphate are used in the c ase ofha rd water
often white sp ots appearo n dishes and glasses. In thiscase please add more detergentto reach
better results. Detergents without chlorine doonl y b leach a little. Strong andcoloure d spots will not
beremovedcompletely.In this case pleasechoose a program witha higher temperature.
°
ConcentratedDetergent
Based on theirchemicalcomposition,detergents canbe splitintwobasictypes:
conventi onal, alkalinede tergents with causticcompon ents
low alkalinec oncentr ated detergents withnatural enzymes
Detergent Tablet s
Detergent tablets ofdifferent brands disso lve atdiffe rent speeds. For this reasonsome
detergent tablets cannotdis solve anddevel op theirf ull cleaning powerduring short
programs. Therefore pleaseuse long programs whenusing detergent tablets, to
ensurethe completeremovalof detergent residuals.
DetergentDispenser
Thedispensermust berefilledbeforethe start ofeachwash cycle follow ingthe instructions
provided in the wash cyclet able .Your dishwasher u ses less detergentan d ri nse aidth an
Conventional dishwasher. Gene rally,on ly o ne tablespoon of detergent is neededfor
a normal w ash load. Moreheavily soileditemsneedmoredetergent. Alwaysaddthe
detergent just beforest arting thed ishwashe r,otherw ise itcould get dampand will not
dissolve properly.
Page 8
Amountof DetergenttoUse
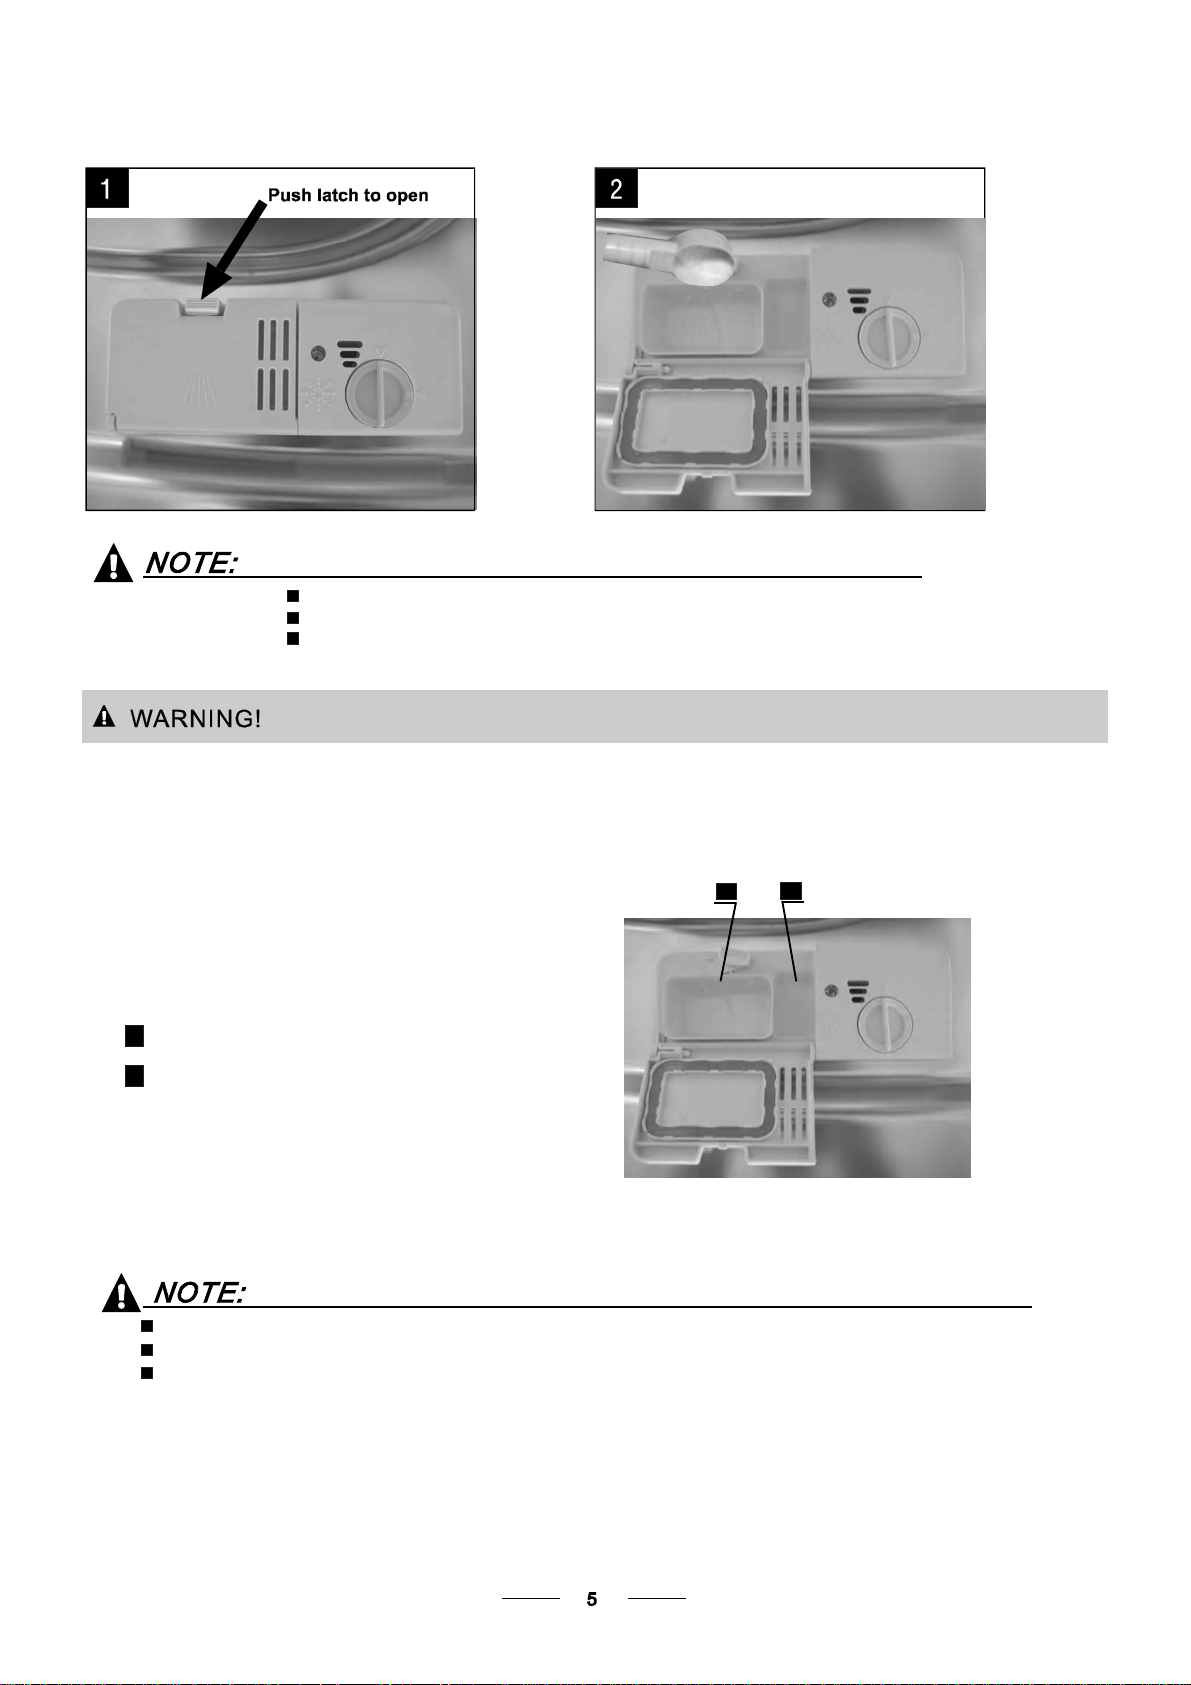
If th e lid is closed: press re l eas e bu tt on. The li d will sp ri n g open.
Always addthe detergent j ust before starting each wash c ycle.
Only us e branded de tergent aidf or dishwasher.
Dishwasherdetergentis corr osive!Takecare tokeepitout of reachofchildren.
Proper Use of Detergent
Use onlydeterge nt specifically madefor the usein dishwashers. Keep your detergent fresh anddry.
Don't putpowdere d d et ergent into the dispenser untilyou'r e ready towash dishes.
A
B
Fill in Detergent
Fill thedetergent dispenser with detergent.
Themarkingindicates the dosing levels , as
illustratedo ntheright:
The placeof main wa sh cycledete rgent placed.
A
The placeof pre-wash cycledeterge nt placed.
B
Please observe the manufacturers dosingan d storage
Rec omme nda t ion s as s tate d on t he d eterge nt pac k a gin g .
Close the lid and pressuntil it locksin place.
Ifthe dishesareheavily soiled,placean additional
detergent dosein thepr e-wash detergent ch amber.This detergent willtak e effect duri ng thepre-w ash phase.
You find information aboutthe amount ofd etergent for the single programme on the las t page.
Pleasea ware, that according to thele vel soilingan d thespecif ic hardness of water differences are possible.
Pleaseo bserve theman ufact urer's recommendations onthe detergent packaging.
Page 9
Considerbuyingutensilswhichareidentifiedas dishwasher-proof.
Use a mild detergent thatis describedas 'kindtodishes'.Ifnecessary, seek further
informationfromthedetergent manufacturers.
Forparticularitems, selectaprogram withaslow a temperature as possible.
To prevent damage, do nott ake glass andc utl ery out of thedis hwash er immed iatel y
after the programme has ended.
Are n ot s uitable
Cutlerywith wooden, hornchinaor
mother-of-pearl handles
Plastic items thatare not h eat resistant
Older cutlery w ith glued parts that arenot
temperatureresistant
Bonded c utl ery items or dishes
Pewter orcoop er items
Crystal glass
Steel itemssu bject torust ing
Wooden p latters
Items made fromsynthetic fibres
(For bestperformance of thedi shwasher,fol low theseload ing guidelines.
Features andappeara nce ofbaske ts andcutler y basketsmay vary from your model.)
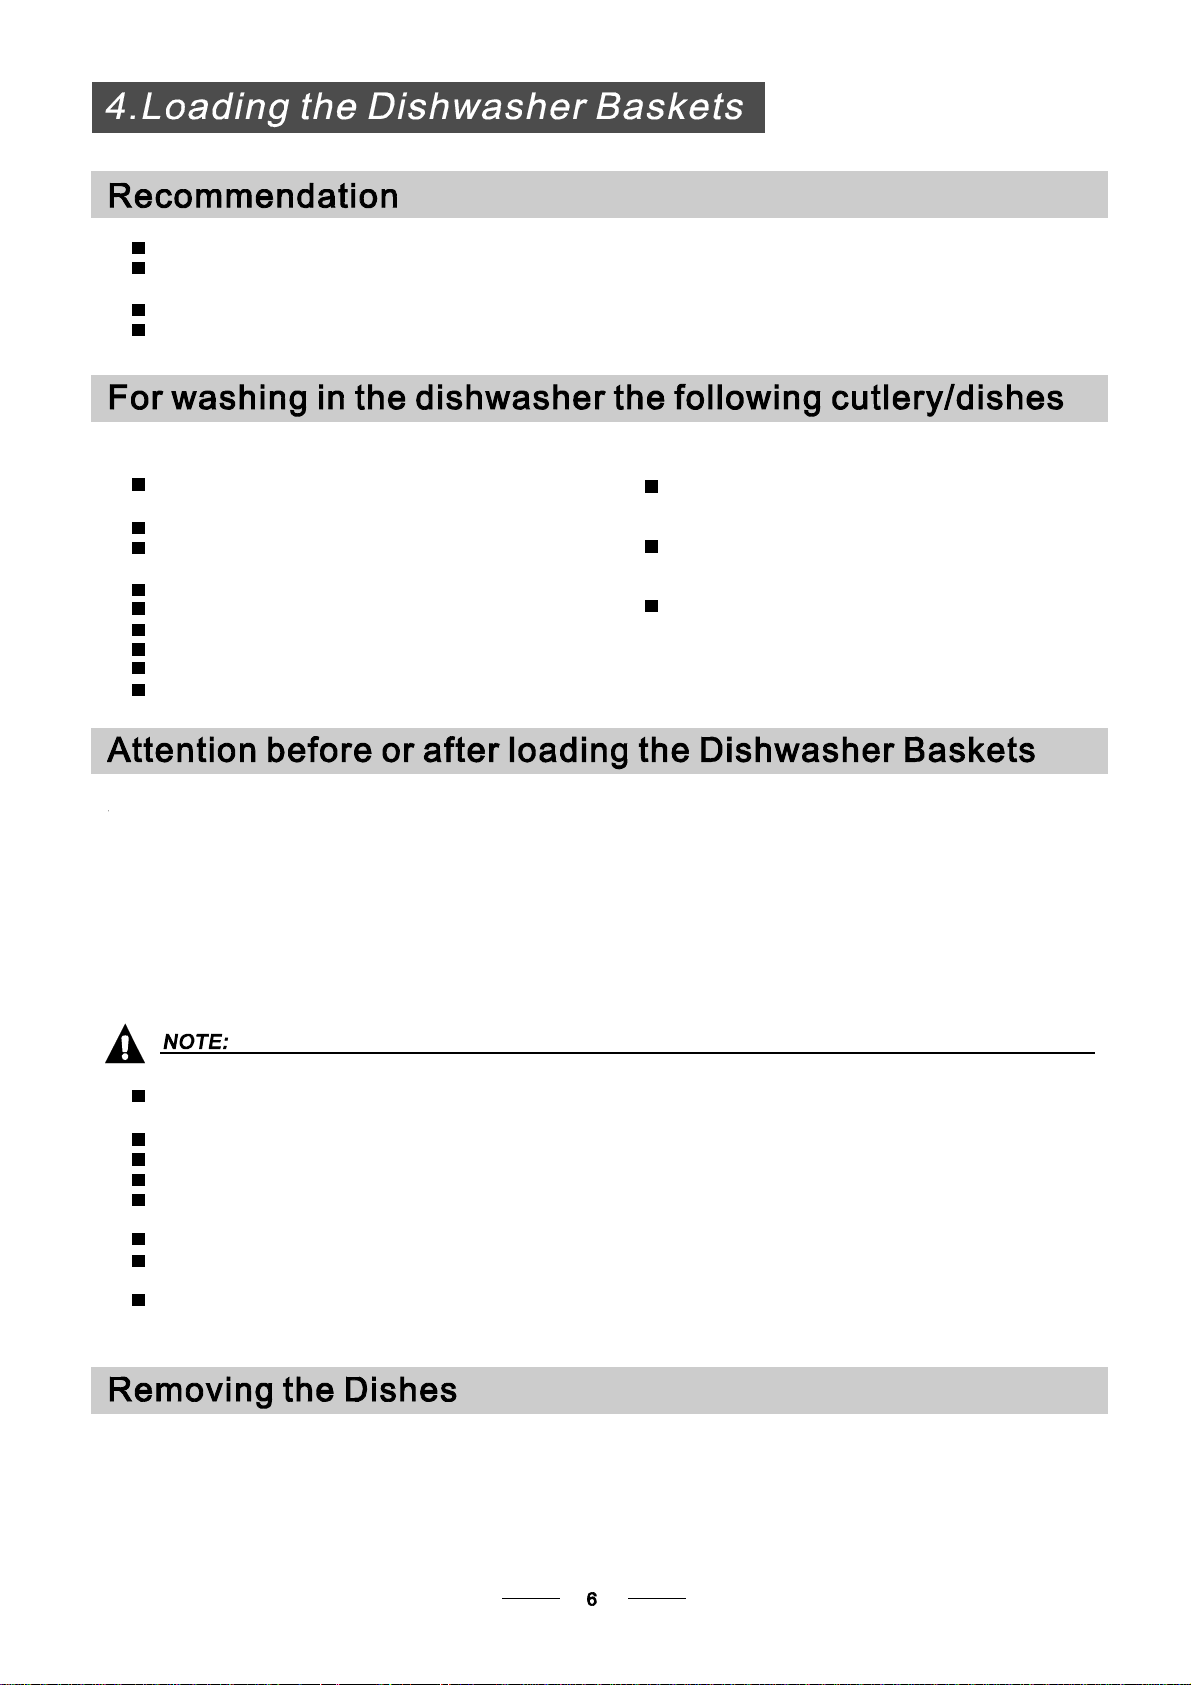
Scrape offany large a mounts of le ftover food. Softenremnan ts ofburnt food inpans.
It isnot necessary torinse the d ishes under running water.
Place objects i n thedishwa sher in foll owing way:
1.Itemssuch as cups, glasses, pots/pans, e tc. arefa ced downwards.
2.Curveditems, or oneswith recesses, shouldbe loaded aslants o thatwater can runoff.
3.Allutensils are stackedsecu rely and can not tipov er.
4.Allutens ils areplaced in theway that t he spray ar ms canrotat e freely duringwashin g.
Very small it ems shouldnot be washedin the dishwasheras they c ould easily f all outof the basket.
Are of limited suitability
Some ty pes ofg lasses can b ecome
dull aftera large numberof washes
Silver and aluminum parts have a
tendency to discolourduringwashing
Glazedpatternsmayfadeifmachine
washed frequently
Load hollowitems such as cups, glasses,pans etc. Withthe opening facing dow nwards so t hat
wat e r cann o t co lle c t in the c ont a i n e r or a deep base.
Dishes and items of cutlery mustnot lie inside oneanother, or covereachother.
To avoiddama ge toglasse s, theym ust not t ouch.
Load large i tems which ar e mostdifficul t toclea n intothe lower basket.
The upperbas ket isdesig ned tohold more d elicate and lighterdishwa re suchas glasses, coffee
andteacups
Long bladed k nives stored inan upright position are a potential haza rd!
Long and/or sharp items of cutlery such as carving knives must bepositi oned
horizon tally in t he upperb asket.
Please do n ot overload yourdi shwasher. This isimp ortant forg ood results andfor
reasonab le consumption o f energy.
To prevent water drippingfr om theuppe r basketinto the lower ba sket, we rec ommend that you
empty the lower basket first an d thenthe upper basket.
Page 10

The upper bas ket isdesign ed toho ld more delicate
and l ighter dishware s uch asgl asses, coffee and
teacups andsaucers, as well as plates, smallbowls
andshallowpans(aslongasthey are not too dirty).
Positionthedishes andco okwareso t hatthey will
notgetmovedbythesprayofwater.
Please bereminded that:
Pots,servingbowls,etc,mustalwaysbeplacedtopdown.
D eep po ts should be s l a nt ed to al low water to flow o ut.
The Bottom Basket feature s folding spikes so thatl arge r or more pots and pans can be loade d.
We su g gest that you place large items a nd the most difficult
toclean itemsinto the lowerbasket: suchas pots,pans,lids,
serving dishes and bowls, as shown inthe figure below.
Itispreferable to placeservingdishesandlidsonthe sideof
the racks in order to avoid blocking therotat ion o f the top
sprayarm.
Adju sting the Upper Baske t
The heightof theup per basketc an bead justed inord er t o
create moresp ace forlarge utensils both for the upper
/lower basket.The heighto f the upper b asket canb e
adjusted by placing the wheels ondifferentheight of the
rails . Lo ng i tem s , servi ng cutle ry,s al ad s er ve rs a nd k niv e s
should be placed on the shelfsothatthey do not obstruct
therotation of the sprayarms..
Foldin g back the cu p sh elves
For betterstacking of po ts andpans ,
the spik es can be folded down as
showninthepictureright.
Foldin g Spi kes of Lower Bask et
For betterstacki ng ofpots and pans,
the spikescan be f olded down as
shown inthe picture right.
Page 11

Cutlery should beplaced in t he cutlery racksepar atel y
from eachothe r in the a ppro priate positions, and do
makesure theutensilsd onot nesttogether,t his may
cause badperfo rmance.
Max. Dishes
LowerP ositionm ax.Φ
Upp er P o si t io n m a x.Φ
Max. Dishes
To p baske t
19cm
14cm
Bottom bask et
25cm
30cm
Page 12

5.Starting a washing program5.Starting a washing program
Wash Cycle TableWash Cycle Table
( )
NOTE:NOTE:
ProgramProgram
Intensive
Heavy
Normal
(*AS/NZS 2007.1)
Glass
1 Hour
Quick
For the heaviest soiled
loads, such as pots, pans,
casserole dishes and dishes
that have been sitting with
dried food on them for a
while.
For heavily soiled loads,
such as pots, plates, glasses
and lightly soiled pans.
For normally soiled loads,
such as pots, plates,glasses
and lightly soiled pans.
standard daily cycle.
Daily wash in only 1 hour.
For lightly and normally
soiled plates and pans
for everyday.
A shorter wash for lightly
soiled loads that do not
need drying.
Means: need to fill rinse into the Rinse-Aid Dispenser.
Description
Cycle Selection
Cycle Selection
Information
Information
For lightly soiled loads,
such as glasses,
crystal and fine china.
Description
of Cycle
of Cycle
Pre-wash(50 )
Wash (65 )
Rinse
Rinse
Rinse(65 )
Drying
Pre-wash(45 )
Wash (55 )
Rinse
Rinse (60 )
Drying
Pre-wash
Wash (50 )
Rinse
Rinse(50 )
Drying
Pre-wash
wash(40 )
Rinse
Rinse(60 )
Drying
Pre-wash(50 )
Wash(60 )
Rinse (55 )
Drying
Wash (40 )
Rinse
Rinse (45 )
Detergent
Detergent
pre/main
pre/main
5/27.5g
(Or All in1)
5/27.5g
(Or All in1)
5/27.5g
(Or All in1)
20g
5/27.5g
20g
Running
Running
time(min)
time(min)
135
165
160
115
60
40
Energy
Energy
(Kwh)
(Kwh)
1.4
1.15
0.87
0.8
0.9
0.5
Water
Water
(L)
(L)
18
14.5
13.6
14.5
10
10.5
Rinse
Rinse
Aid
Aid
NOTE:NOTE:
* : This program is the test cycle. The information for comparability test
in accordance with , as follows:
Capacity: 14 setting
Position Upper basket: upper wheels on rails
Rinse aid setting: 6
Open the door slightly 50mm to assist in drying of the dishes after every wash
Turning On the ApplianceTurning On the Appliance
Starting a cycle wash
1
Draw out the lower and upper basket, load the dishes and push them back.
It is commended to load the lower basket first, then the upper one (see the section entitled
Loading the Dishwasher ).
2
Pour in the detergent (see the section entitled Detergent and Rinse Aid ).
3
Insert the plug into the socket. The power supply is 220-240 VAC /50 HZ, the specification
of the socket is 10A 250VAC. Make sure that the water supply is turned on to full pressure.
4
Close the door, press the ON/OFF Button, and the ON/OFF light will turn on.
5
Turn the program Selector clockwise , the wash program will be changed as follows direction:
Intensive->Heavy->Normal->Glass->1Hour->Quick;
If a program is selected, the response light will light. Press the Start/Pause button, the dishwasher
begins to start.
99
Page 13

Whe n you pr ess th e St ar t /Pa us e bu tt on to pau s e duri n g was hi ng, t he will
runningindicator
stopblinking and thed ishwasher willmooingev erymi nuteunless youpressthe
Start/Pausebuttonto start.
Premise:
Acycle that is underway can onlybe modified ifit has onlybeen running fo r as hort time.Other wise, the
1
detergent may havealread y been released,a nd theapplian ce may have alrea dy drained the wash water.
If thisis the case,the detergent dispenser must be refil led ( see the sectio n entitled "Loading the
Detergent " ).
Press theOn/ Off button to stopwashi ng , pressthis button to reset ,T hen you can change the pr ogra m to
2
the desired cyclesetting (see t he section entitled " Startinga wash cycle. .. " ).
Then
Ifyou openthe door ,themachine willpause. The programlight will
duringa washcycle
stopblinking andthe buzzerw ill sound everyminuteu nlessyou closethe door. After
you close the door ,the machin e will keep on workin g after 10 seconds.
Aforgotten dish can be added any time before the detergent cup opens.
Press the Start/Pause Button to stopthe washing.
1
Open the door a little .
2
After the spray arms stop working, you can open the door
3
completely.
When the worki n g cy cle h as fini s hed, the buzz er of th e di s hwa she r wi l l so u nd fo r 8 sec on d s, then sto p . Turn o ff
the appliance usi ng theO N/OFF button, sh ut offth e watersupp ly andopen the door of the di shw asher.
Wait for a f ew minutes b ef ore unloading th e dishwasher t o avoidha ndling the di shes andute nsils while th ey
are stillh ot a nd more susceptible tobr eakage. Theyw ill alsodr y better.
Add forgotten dishes.
4
Close the door
5
Press the , the dishwasher will run
6
after 10 seconds.
Start/Pause Button
SwitchOfftheDishwasher
The p rogram light ison butis not blinking, onl y inthis case theprogramm e hasended .
1.Switchoff the di shwasher by pressingthe ON/OFF button.
2.Turnoffthe watertap!
Openthedoor carefully.
Hot dishesare sensitive toknocks. The di shes should thereforebe allowed tocool down ar ound 15 minut es
beforeremovingfromthe appliance.
Open t he dishwasher's door,leave it ajarand wait a few minutes beforeremoving the dishes.In this waythey
will becooler and t he drying willbe improved.
Unloading thedishwasher
Itis normal thatthe dishwasher is wetinside.
Empty thelower basket firstand then theupper one.T his will avoi d water drippingfrom the upperBasket onto
the dishesin the l ower one.
Washth earm s in soa py andwar m water a nd usea soft brusht o
cleanthejets. Replace themafter rinsing themthoroughly.
When following this procedure from step1 to step 3, the filter system will be removed;
when foll owing it from Step3 to Step 1, the filter system will beinstalled.
It is dangerou s to open the door when washi ng , becaus e the hot water may scald you .
Page 14

The filter pre vents larger remnants of food orot her objects f rom getting insidethe pump.
Theresiduesmayblock thefilter, in thiscasetheymustberemoved.
The fi lter systemconsi sts ofa coarse fi lter,aflat (Main filter)
An d a microfi lter( F i ne fil ter).
1
2
3
2
1
3
Main filter
Foodandsoilparticles trapped in thisfilterare pulverizedby a
special jet ont he lower spray arm a nd washedd own todrain.
Coarse filter
Larger items, s uc h as p i e c es of bon es or gla s s, t ha t cou l d bl o ck
thedrain aretrapped in thecoarsefilter. To removethe items
caught by t he filter,gently squeeze thetap onth e to p of t his
filterandliftout.
Fine filter
This filterholds soil and foodresiduesin the sump a rea and
prevents i tfrombeing r edeposit on the dishes duringwash cycle.
Filterassembly
Thefilter efficiently
For bestp erformance and res ults, the f ilter mustbe cleaned regularly. this reason, i t isa good i dea to
remove thela rger food pa rticl estr app ed inthe filter aftere ach washcyc le byrinsing the semicircular filteran d
cup underrunnin g water.Tore move thefil ter device, p ull thecu p handle in the upwardd irection.
removes f ood particles fromth e washwate r,allowin g itto be rec ycled during thecycle.
For
Th e d is h washer m us t n e ver b e us ed wi t ho ut the filter s.
Improper replacement of the filter mayreduce the performancelevel of the applian ce
anddamage dishesandutensils.
1
2
Step 1 Turn the filterin anti-clockwise direction,:
Step 2 lift the filter assy up:
When following this procedure from step1 to step 2, the filter system will be removed;
when foll owing it from Step2 to Step 1, the filter system will beinstalled.
Page 15
Remarks:
- Ins pect the filters for blo ckin ga fter every timethe dishwasher hasbeen used.
- By unscrewing the c oarse filter,you can remove the filter system . Re move a ny foodre mna nts and
cleanthefilters under running water.
Theentirefilter assemblyshould be cleanedonce a week.
Cleaning the Filter
To cle an t h e co a rs e fi l t er and the f i n e fi lter , use a clean i n g b rus h . Re as se mbl e th e filt er parts as shown in the f i gur es
on t he last page andr eins ert the entire assembly in the dishwasher, positioning it in i ts seat and pressing downwards .
Whencleaning thefilters,don't knock onthem. Otherwise, thefiltersco uldbe
contortedandtheperform ance of thedishwasher couldbedecreased.
The cont rol panelcan be cleaned by using a lightly dampened cloth.
After cl eaning, make sureto dryit thoroughly.
For the e xteri or, use a go od a pp lianc e po lis h w ax .
Neveru se sharp object s, scouring pa ds orhar sh cleaners ona ny part o f thedis hwasher.
CleaningThe Door
To clean theedge around thedoor, youshould use o nly a sof t warm,dam p cloth.
To avoid penetrationo f waterin to thedoor lock andelectrica l components,d o not
usea spray cleaner ofany kind.
Never u se aspr ay cleanert o cl ean the doorpanel asit may damage thedoor lock
and electrical components.
Abrasive ag ent so r somepaper towels shouldnot be u sed because o f theris k o f
scra tching or leavin g spots on the stai nles s st eel su rface.
Protec tAga inst Freezing
please take frostprotection measures onthe dishwasher in wint er.Ev ery fter washingcycle s,
please operate asfollows
1.Cutofftheelectrical powertothe dishwasher.
2.Turnoff thewater supply anddisco nnect the w ater inlet pi pe from thewater valve.
3.Drain thewater from t he inletpipe and waterva lve. (Use a pan togather the w ater)
4.Reconnect thewater inlet pipeto the wa ter valve.
5.Remove t he filter at the bottomof the tuband use a sponge tosoak up waterin the s ump.
:
If your dis hwasher cannot workbecause of theice,
please contact professional servicepersons.
timea
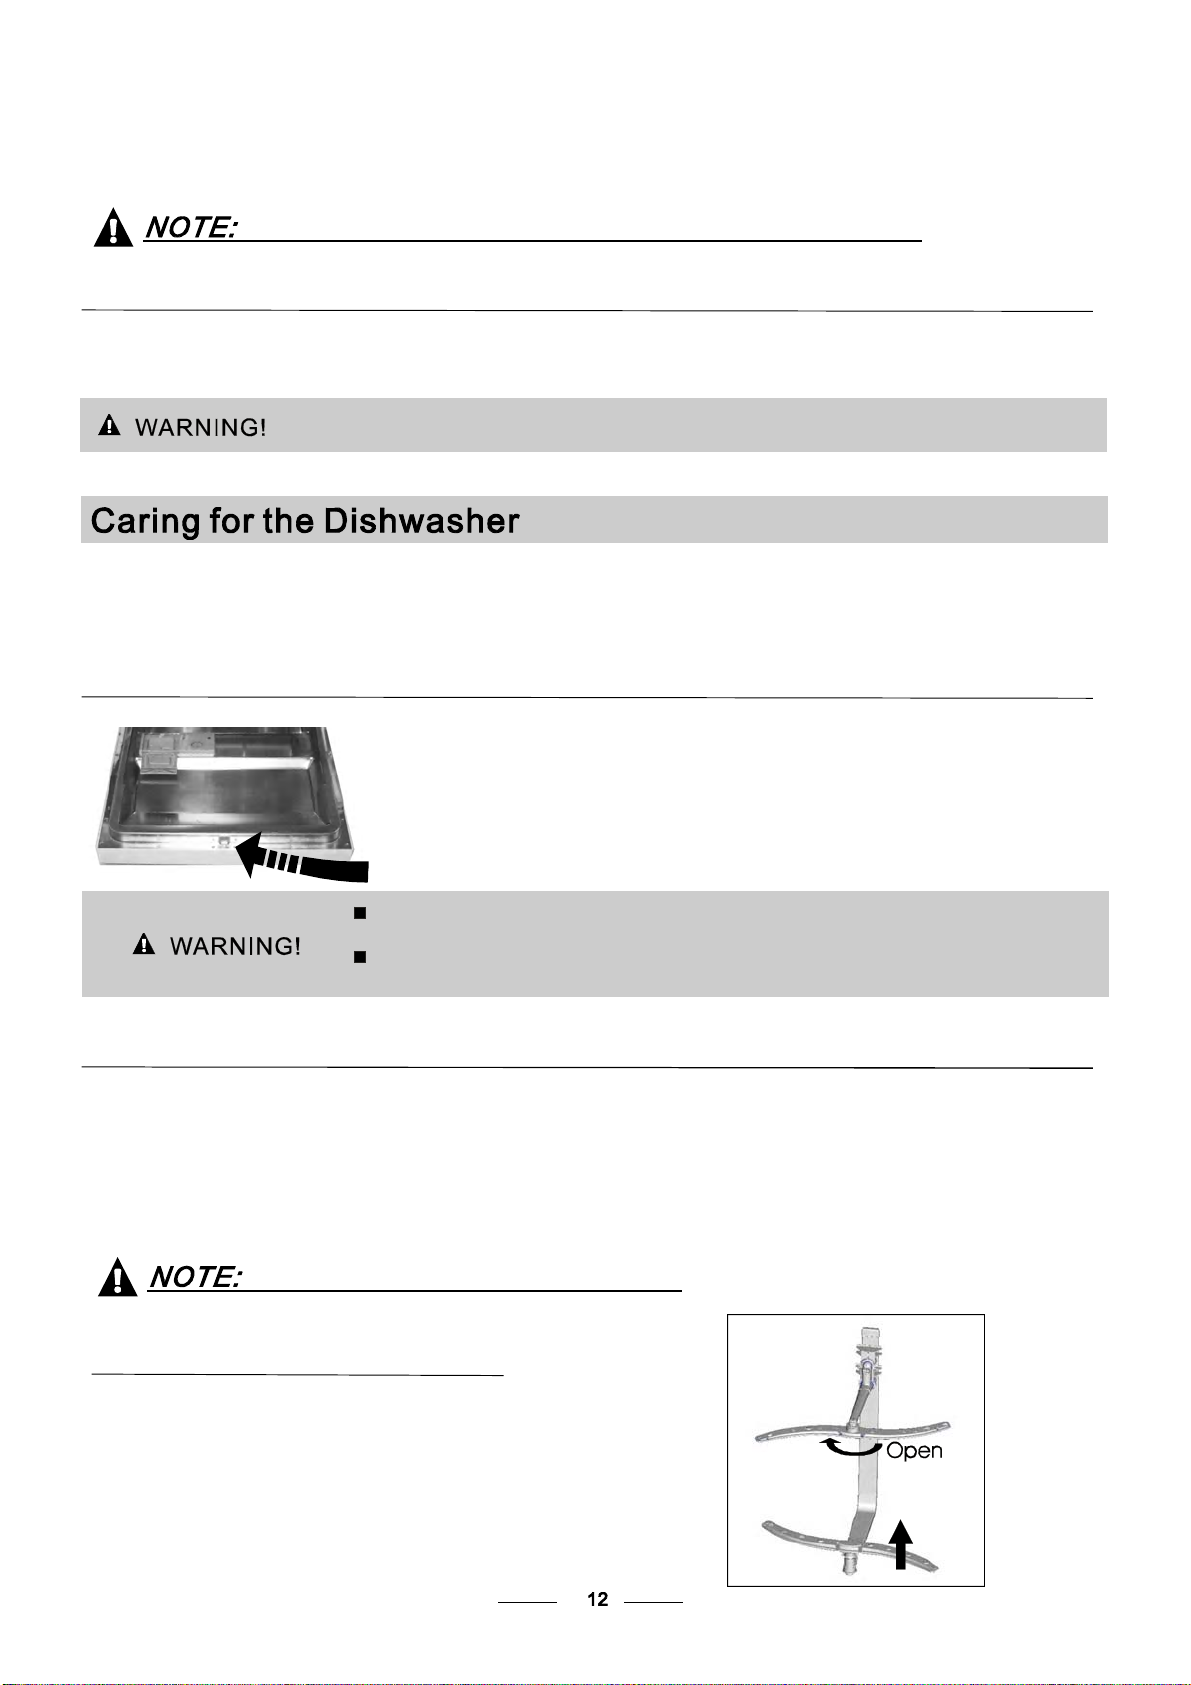
Cleani ng the Sp rayArms
It is ne ce ss ar y t o clean th e spray arm s regul arl y for har d
water chemicals w ill clog the sp ray arm jetsand bearings.
Torem ov e the upper sp ray arm, hold the nut, rot ate the arm
clockwiseto remove i t.
To removethe lowerspray arm,pulloutthespray armu pward.
Washthe arms insoapy andwar m water an d usea soft brus h to
clean thejets. Replace themafter rinsing them th oroughly.
Page 16

AfterEveryWash
After every wa sh, turn off thewa ter supplyto the
appliance and leavethe door s lightly open sot ha t
moisture and odoursare not tra pped inside.
RemovethePlug
Before cleaning orperforming maintenance, always
remove theplug fromthe socket.
No Sol vent s or Abras ive Cleani ng
Toclean the exteriorand rubberparts of the dishwasher,
donot use solventsor abrasivecleaningproducts.
Only use a cloth with warm soapy water.
Tor em ove spots or stains from the sur f ace of the
interi or, u se a cloth dampe ned with water an a l ittle
vinegar,o r acleaning product madesp ecifically for
dishwashers.
WhennotinUsefor a LongTime
It isrecommendthatyourunawash cycle with the
dishwasher emptyan dthe n remove th e plugfro m t he
socket, turnoff thewa ter supplyand leave the door of
the app li a n c e sl ig ht ly open. Thi s w ill hel p t h e d oo r
sealstolastlonger and prevent odours fromforming
withinth e appliance.
Moving theApplia nce
If theappliance must bemove d, t ry to keepit inthe
verticalposition. If absolutelynecessary, it canbe
positioned on its back.
Seals
Oneofthefactorsthatcauseodourstoforminthe
dishwasher isfood that r emains trapped i n the s eals.
Periodic cleaning with a damp spongewill prevent this
fro m occurri ng.
Electrical Shock Haz ard
The installation oft he pipes
an d electrical equ i pments
should bedone by p rofessionals .
●
Installationpreparation
The installation positionof dishwasher should b e neart he existingin let anddrain hoses and
power cord.
One sid e of thecabinetsinksh ouldbe chosen tofacilitate th e connection ofd rainhoses o f
the dishwasher.
Note: pleasecheck the acco mpanying installation accessories(hook foraesth etic panel,screw)
Disconnect electrical power before
installingdishwasher.
Failure to do so can re s ult in deat h or
electrical sh oc k .
Page 17

Please carefully read the installation instruction.
● Illustrations of cabinet dimensionsand installation position of the dishwasher
Preparations should be made before moving the dishwasher to the installation place.
Choose a place near the sink to facilitate the installation of inlet and drain hoses
1
(see figure 1).
2
If dishwasher is installed at the corner of the cabinet, there should be som espace
(illustrated in figure 2) when the door is opened.
【Figur e
1】
Cabinet dimensions
Less than 5mm
between the top
of dishwasher and
cabinet and the
outer door aligned
to cabinet.
【Figure
2】
Minimum space when
the door is opened
820mm
580mm
90 °
Electrical, drai n a nd
water supply line
entran ces
Space betweencabinet
bottom an d floor
600 mm
90 °
80
100
Dishwasher
Door of
dishwasher
Minimum space o f 50mm
Cabinet
●
Aesthetic panel's dimensions and installation
The aesthetic wooden panel could be processed according to the Figure 3.
1
【Figure
3】
The aesthetic panel should
be processed in accordance
with the illustrated dimensions
(Unit: mm)
Page 18

2
magical paster A and magical paster B bedisjoinedon,magical paster A on theaestheticwoodenpaneland
feltedmagical paster B of the o uterdoor of dishwasher(see f igure4a).Afterpositioning ofthe panel ,fix the panel
onto the outer door by screw s and bolts(S e e figu re 4b)
【】Figure 4a
Installationofaesthetic panel
【】Figure4b
Installationofaesthetic
woodenpanel
.takeaway the four
1
sh ort screws
2
.pinupthefourlong
scre ws
Page 19

●
Tensionadjustment of the doorspring
Thedoorspringsareset at the factoryto the propertension fortheouterdoor.
If ae sth etic woode n pa nel are ins tal led, you will have to ad just the doo r spr ing ten sion .
Rotatethe adjustingscrew todrivethe adjustortostrain or relaxthesteelcable
(seefigure 5).
Doo r spri ng tensi on is c o rre ct when
the doorremainshoriz ontal in the
fullyopenedp osition yet rises
toaclosewiththeslightliftofa
finger.
,
【】Figure5
Tensionadjustment
ofthedoorspring
●
Connectionof drainhoses
Insert t he drainh ose into ad rain pipe witha minimum di ameter of 4 0mm, orl et i t run into the sink , making sure to
avoid bendingor crimping it.Thetopof the hosemustbelessthan1000mm.
Front
Counter
NOTE
The top of the hose
must be less than
A
1000mm.
Drain pipe
B
φ 40m m
Page 20

●
.
Dishwasher installation steps
1
Install the furniture door to the outer door of the dishwasher using the brackets provided. Refer
to the template for positioning of the brackets.
2
Adjust the tension of the door springs by using an Allen key turning in a clockwise motion to
tighten the left and right door springs. Failure to do this could cause damage to your dishwasher
(Illustration 2)
Connect the inlet hose to the cold water supply
3.
4.
Connect the drain hose. Refer to diagram (Figure 6)
5.
Connect the power cord
Affix the condensation strip under the work surface of cabinet. Please ensure the condensation
6
strip is flush with edge of work surface.
7
Place the dishwasher into position.(Illustration 4)
8
Level the dishwasher. The rear foot can be adjusted from the front of the dishwasher by turning
the Allen screw in the middle of the base of dishwasher use an Allen key (Illustration 5A). To adjust
the front feet, use a flat screw driver and turnthe front feet until the dishwasheris level (Illustration 5B).
9 The dishwasher must be secured in place. There are two ways to do this:
A. Normal work surface:Put the right(left) installation hook into the slotoftheright(left)sideplaneand
secure it to the work surface with two woodscrews (Illustration 6).
B. Marble or granite work top:Bend the right(left) installation hook into right-angle,and put it into the
slot of the right(left) side plane and secure it to the work surface with two woodscrews s (Illustration 7)
.
【Figure
7】
Page 21

Dishw ash er m ust be lev el for pr oper dish rac k oper ati on a nd w ash perfo rman ce.
Placeaspirit levelondoorand racktrackinside the tub asshowntocheck that the
1
dishwasherislevel.
levelthedishwasherb y adjustingthethreelevelling legs individually.
2
3
Whenlevelthe dishwasher, please pay attentionnotto let the dishwashertip over.
【】Figur e 8
Illustra tion o f feet ad justment
Check leve l Front to B ack
NOTE:
Themaximum adjustment
heightof the feet is50mm.
For personal safety:
DO NOTUS EAN EXTENSIONCORD ORA NADAPTER PLUG WITHTHISAPPLIANCE.
DO NOT, UNDERANY CIRCUMSTANCES, CUT OR REMOVET HE EARTHING
CONNECTION FROM THEPOWER CORD.
Please look at the rating lab el to know the rat ing voltage andc onnect the dishwasher tothe appropr iate power s upp ly.
Use therequ ired fuse 10amp, time delay f use orcircui t breaker r ecommen ded and prov ide separate ci rcuit serving
only this appliance.
Spirit le ve l
Check level side to side
Ensure thevoltage and frequencyof thepowerbeing correspondsto
thoseon therating plate. Onlyinsertthe pluginto anelectricalsocket which isearthed
properly. Ifthe electrical socket towhich the appliance mustb e connected is not
appropriate forthe plug , replacethesocket, rather thanusinga adaptorsorthe l ike a s
they couldca use overheating and bu rns.
This appliance mustbe earthed. In t he event
of amalfunc tion or br eakdown, earthing will
reduce therisk of electricsho ck by provi ding a
path of leastresistance forthe electric current.
This appliance iseq uipped with acord having an
equipment-ea rthin g co nductor and anearthi ng
plug. Theplug must beplu gged into anappropri ate
outlet that i s installed andeart hed in acco rdanc e
with allloc al standards and r equiremen ts.
Impr oper connecti on of the equ ipme ntgrou nding conduc tor can result inth e risk
of anelectric shock. Check wi th aqualifi ed
electricianor service r epresentativeifyou
are in d oubt whet her the appliance is properly
grou nded. Do notmo di fy the plugp rovi ded with
theappliance;Ifitisnotfit fortheoutlet.
Have a proper outlet installed bya qualified
electrician.
Page 22

Connectthe coldwatersupply hoseto athreaded3/4(inch) connectorand makesure
thatit is fastenedtightly in p lace.
If thewater pipesare newor havenot been usedfor anextendedperiod oftime,le t the
water runto makesure that the water isclear.This precautionis needed toavoid the
riskof thewater inlet tobe blockedand damagethe appliance.
please closethe hydrant afterusing.
Positioning theApplian ce
Position theapp liance in the desired location.The back shouldrest against thewall behind it,and thesid es,
along theadjacent cabinets or wa lls. The dish washer is eq uipped with wate r supply anddrai n h oses that can
bepositioned ei therto the rightor theleft sides tofacilitatep roperinstallation.
How to Dr ain Exces s WaterFrom Hoses
If thesink is 100 0mm hi gher from the floor,the excess wateri n hoses cannot be draineddi rectly
intothe sink. Itwillbe necessary to drainexcesswater fromhoses intoa bowl orsuitable
container that i s heldoutside and lowerthan the sink.
Water Outlet
Connect the water d rain hose.Thedrainhosemustbecorrectlyfitted toavoidwater leaks.
Ensure that the waterin let hose isn ot kinked ors quashed.
Exte nsio n Hos e
Ify ou need adr ain hose extension, makesure to usea similar drainho se.
Itm ust ben o longer than4 metres; o ther wise the cleanin g e ffect of thedis hwasher could b e reduced.
SyphonConnection
Insert t he drain hoseinto ad rain pipewith a m inimum diameter of 40m m, orlet itru n intoth esin k, making su re to
avoid ben din g o r crimpin g it . The to p of the ho se must be less than 1000m m.
Thefollowingthings shouldbecheckedbefore startingthedishwasher.
1 Thedishwasher is levelandfixed properly
2 Theinletvalve is open
3 Thereisaleakage at the connectionsofthe conducts
4 Thewiresaretightly connected
5 Thepowerisswitched on
6 Theinletanddrain hoses are knotted
7 Allpacking materialsandprintingsshouldbetaken out fromthedishwasher
Afterinstallation, pleasemakesure to keep this manual.
Thecontentof thismanualisvery helpfultotheusers.
Page 23

Fuse blown, or the
circuit breaker
been triggered
has
Replace fuse or reset circuit breaker. Remove any other
appliances sharing the same circuit with the dishwasher
Power supply is not
turnedon
Water pressure is low
Door of dishwasher
not properly closed.
Kink in drain hose
Filter clog ged
Kitchen sinkclogged
Improper detergent
Spilled rinse-aid
Make sure the dishwasher is turned on and the door is
closed securely.
Make sure the power cord is properly plugg ed into the
wall socket.
Check that thewater supply is connected properly and
the water is turned on.
Make sure to close the door properly and latch it.
Check drain hose.
Check coarse the filter
(see section titled )" CleaningThe Filter "
Check thekitchen sink to make sure it is draining well.
If the problem is the kitchen sink not draining ,you may
need a plumber rather thana serviceman for dishwashers.
Use only the special dishwasher detergent to avoid suds.
If this occurs,open thedishwasher and let suds evaporate.
Add 1 gallon of cold wa ter to the tub. Close and latch the
dishwasher, then select anycycle. Dishwasherwilldrain
outthe water at the first step.Open the door after draining
is stop and checkif the suds has disappeared.
Repeat if necessary.
Always wipe up rinse-aid spills immediately.
Detergent with
colourant wasused
Hard water minerals To clean the interior, use a damp sponge with
The affected items are
notcorrosion resistant.
Aspayarmis
r
knockingagainst
an item ina basket
Items of crockery
areloosein the
wash cabinet
Thism ay becaused
by on-site installation
or the cross-section of
the piping.
Make sure that the detergent is the one without
colourant.
dishwasher detergent and wearrubber gloves.
Never use any other cleaner than dishwasher
detergent for the risk of foaming or suds.
The items should be corrosionresistant.
Interrupt the programme, and rearrange the items
whichare obstructing the sp ay arm.r
Interrupt the programme,
and rearrange the items of crockery.
This has no influence on the dishwasher function.
if in doubt, contact a suitably qualified plumber.
Page 24

The dishes were not
loaded correctly.
See notes in" Loading the Dishwasher Baskets ".
Theprogramme was
notpowerful enough.
Not enough detergent
wasdispensed.
Items are blocking
the path of sp ay arms.r
The filter combination
inthebaseofwash
cabinet is not clean or
is not correctly fitted.
This may cause
the sp ay arm jets
r
to get blocked.
Combination of soft
water and toomuch
detergent.
Aluminum utensils
have rubbed against
dishes.
Dishes block
detergent cups.
Improper loading
Too little rinse-aid
Select a mor e intensive progra mme.
See" Wash Cycle Table ."
Use more detergent, or change your detergent.
Rearrange the items so that the sp ay can rotate freely.r
Clean and/or fit the filter combination co rr ectly.
Clean the sp ay arm jets. See "Cleaning the Spray
Arms".
Use less detergent if you have soft water and select
a shortest cycle to wash the glassware and to get
them clean.
Use a mild abrasive cleaner to eliminate those marks.
Re-loadin g the dishes properly.
Load the dis hwasher as suggested in the directions.
Increase the amount of rinse-aid/refill the rinse-aid
dispenser.
r
Dishes are removed
too soon
Wrong pr ogram
has been selected
Useof cutlerywith
a low-quality coating
Do not empty your dishwasher immediately after
washing. Open the door slightly sothat the steam can
escape. Begin unloading the dishwasher only oncet
he dishes are barely warm to the touch.Empty the low
basket first. This prevents water form dropping off
dishes in the upper basket.
In short program the washing temperature islower.
This alsolowerscleaning performance. Choose
a program with a long washingtime.
Water drainage is more difficult with these items.
Cutlery or dishes of this type are not suitable for
washing in the dishwasher.
When some malfunctions come on, the appliance will display error codes to warn you:
The Rapid light flicke r fleetl y
The Glass light flicke r fleet ly
Longer inlet time.
Overflow.
Faucets is not opened, or water intake is
restricted,or water pressure is too low.
Some element of dishwasher leaks .
Page 25

If overflow occurs, turn off the main water supply before calling a service.
If there is water in the base pan because of an overfill or small leak,
the water should be removed before restarting the dishwasher.
Height : 815mm
Width : 598mm
Depth : 550mm
()
with the door closed
Waterpressure: 0.04-1.0MPa
Power supply: see rating label
Capacity: 14placesettings
Page 26

 Loading...