

Page 1
USER MANUAL
GUIDE DE L’UTILISATEUR
MANUAL DEL USUARIO
OM6560 OM6160
OM6560, OM6160 Blender Series
MODEL
HIGH/LOW CONTROLS & VARIABLE SPEEDS
111716
Mélangeur des séries OM6560, OM6160
MODÈLE
COMMANDES HAUTE/FAIBLE ET VITESSES VARIABLES
Licuadoras de las series OM6560, OM6160
MODELO
CONTROLES ALTO Y BAJO Y VELOCIDADES VARIABLES
www.OmegaJuicers.com
Page 2

Congratulations!
CONGRATULATIONS on the purchase of your new Omega product.
At Omega, we strive to develop technologically advanced machines that help deliver
nutrition and avor of the highest kind and closest to nature’s purest form. We are
driven by you, our brand supporters. Your enthusiasm helps us continue to reinvent
and renew our line of juicers, high speed blenders and beverage equipment. Our
team at Omega thanks you for supporting us for over 50 years!
Join us on Twitter @OmegaAppliances &/or on Facebook @OmegaJuicers
PRODUCT REGISTRATION, VISIT:
www.omegajuicers.com/omega-warranty-registration
RECIPES, VISIT: www.omegajuicers.com/recipes
CUSTOMER SERVICE: Call 1-800-633-3401 or
visit: www.omegajuicers.com/contact-omega-juicers
After using your Omega, we kindly ask you to rate the machine on
www.OmegaJuicers.com
Page 3

TABLE OF CONTENTS
02 Safety First
03 Know Your Omega
04 Operating Instructions
05 Using your Omega Blender
06 Easy Cleaning & Caring Tips
07 Additional Uses
07 Maintenance
08 Control Panel
08 Blade Agitator Assembly
09 Troubleshooting
10 Product Specications
11-14 Recipes/Notes
16 French
32 Spanish
Page 4

SAFETY FIRST
When using electrical appliances, basic safety precautions should always be followed
including the following.
READ ALL INSTRUCTIONS BEFORE USING.
1. To protect against electrical shock, do not immerse cord, plug or motor base in water or
any other liquid.
2. Always use the appliance on a dry, level surface.
3. The use of attachments not sold or recommended by the manufacturer may cause re,
electric shock or injury.
4. Do not remove the container from the motor base while blender is in operation.
5. Do not place hands in container unless the unit is disconnected from the power outlet.
A scraper may be used but must be used only when the blender is not running.
6. Disconnect the blender from the power outlet before removing container from base.
Blades are sharp - handle carefully.
7. To reduce risk of injury, never place blade assembly on base without jar properly attached.
8. Always operate the blender with cover in place.
9. Do not use this blender for any purpose other than food or beverage preparation.
10. Do not blend a dry, thick or heavy mixture for more than 10 seconds without turning the
blender off. Then, stir ingredients before continuing to blend.
11. Do not process boiling liquids. Let cool before placing in pitcher.
12. Do not leave the appliance unattended when in use. Young children should be
supervised when near the appliance.
13. Do not place appliance on or near a hot gas or electric burner, or where it could touch
any other source of heat.
14. Unplug appliance from the power outlet when not is use, before putting on or taking off
parts, and before cleaning.
15. This appliance is for household use only. Do not use this appliance for anything other
than its intended use. Do not use outdoors.
16. Fully unwind the cord before use.
17. To protect against electric shock, do not immerse the cord, plug or motor base in water
or any other liquid.
18. Do not allow the cord to hang over the edge of a table or counter, touch hot surfaces
or become knotted.
19. This appliance is not intended for use by young children or inrm persons unless they
have been adequately supervised by a responsible person to ensure they can use the
appliance safely.
20. It is recommended to regularly inspect the appliance. Do not use the appliance if the
power supply cord, plug or appliance becomes damaged in any way. Return the entire
appliance to the nearest authorized Omega Service Center for examination and/or repair.
21. Any maintenance other than cleaning should be performed at an authorized
Omega Service Center.
22. Do not use this appliance for anything other than its intended use. Do not use in moving
vehicles or boats. Do not use outdoors.
SAVE THESE INSTRUCTIONS
2
Page 5
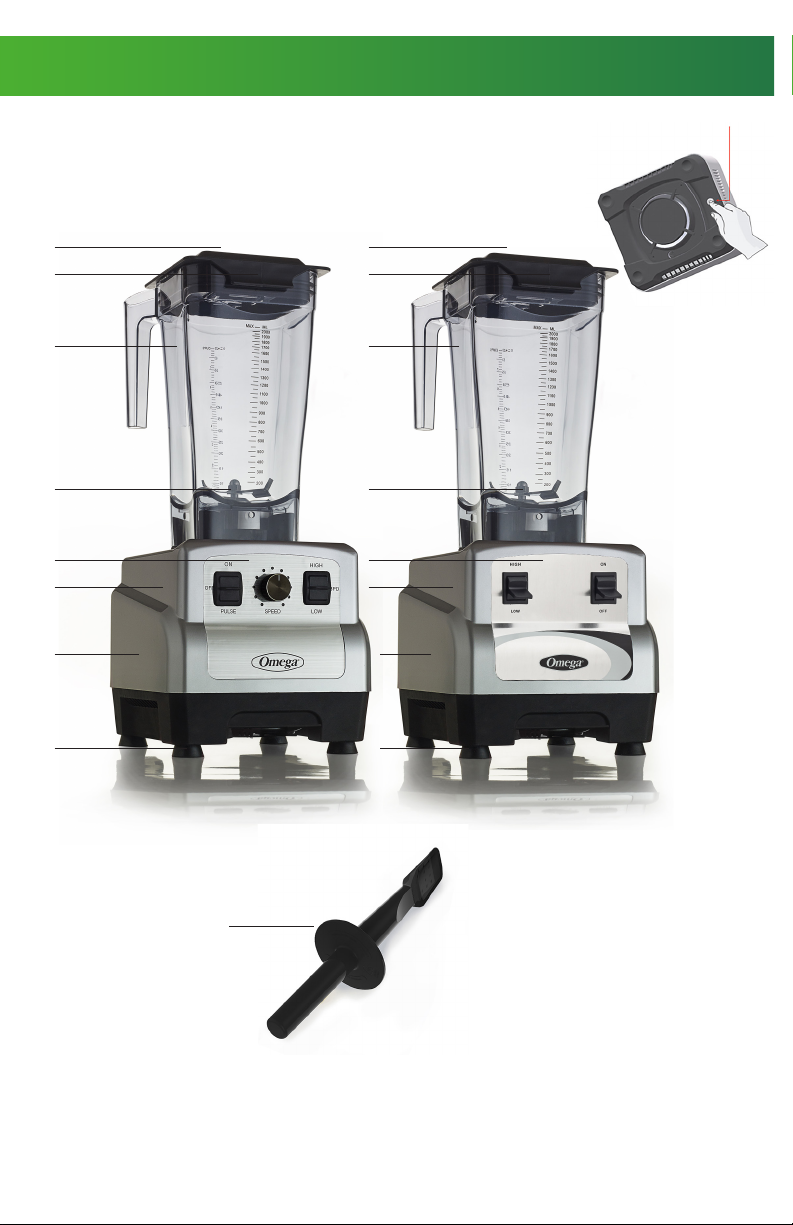
KNOW YOUR OMEGA
This product uses a reset switch and thermal cutoff to protect the motor.
If the unit stops running during operation, press the reset switch on the bottom of the unit.
If the unit will still not operate, unplug, wait for 30 minutes, and try again.
Reset Switch
A
B
C
D
E
F
G
H
OM6560 / OM6562
I
A Feeder Cap
B Lid
C BPA-Free Eastman Tritan™ Copolyester Container
D Blade Assembly
E Control Panel
OM6160 / OM6162
F Blender Base
G High Performance Motor
H Sturdy Nonslip Feet
I Plunger/Spatula
3
Page 6

OPERATING INSTRUCTIONS
BEFORE FIRST USE
Before using your Omega Blender for the rst time, remove any packaging material
and promotional labels. Ensure the appliance is switched off at the power outlet and
the power cord is unplugged. Wash the lid, inner lid, Eastman Tritan™ Container and
blade assembly in warm, soapy water with a soft cloth. Rinse and dry thoroughly. Do
not place parts in the dishwasher (with the exception of the container, lid and inner
lid). The container lid and inner lid may be washed in the dishwasher. Ensure the blade
assembly has been removed from the container before placing the blender into the
dishwasher. The motor base can be wiped with a damp cloth. Dry thoroughly.
ASSEMBLING THE BLENDER
1. To assemble the container, place the silicon seal onto the blade assembly.
2. Insert the blade assembly into the container base.
3. Place the motor base on a at, dry surface. Ensure that the motor base is switched
off and the power cord is unplugged. Turn the blender container upright and insert
on to the motor base.
4. Plug the power cord into a power outlet. The handle of the container can be
positioned to the left or right hand side of the appliance.
DISASSEMBLING THE BLENDER
1. Always ensure your Omega Blender is switched off. Then unplug the power cord.
2. Remove the container from the motor base by grasping the handle and lifting the
container in an upward direction. Remove the blade assembly by upturning the
container and twisting the blade removal clockwise, then lift upwards and away
from the base of the blender.
3. Remove the silicon seal from the blade assembly.
AUTOMATIC OVERLOAD PROTECTION
Your Omega motor is designed to protect itself from overheating. If the motor shuts OFF,
turn OFF the power switch for up to 45 minutes to reset. To reduce reset time unplug the
machine, remove the container and blow air into the center section. Press the reset button
on bottom of blender.
POWERCORD
Your machine is equipped with a long power cord.
Store the unused portion neatly underneath.
BOTTOM VIEW/CORD WRAP
Plastic cord retainers hold the cord securely. There is no
need to unscrew the cord retainers to let out more cord.
They are exible and return to position after the cord lifted out.
4
Page 7

USING YOUR OMEGA BLENDER
1. To turn the Omega blender on, switch to ON position.
NOTE: When using your Omega Blender for the rst time, you may notice an odor
coming from the motor. This is normal and will dissipate with use.
2. Add food or liquid into the container ensuring not to exceed the ‘MAX’ mark.
3. Place the blender lid rmly into position on the top of the container. If not already
in place, insert the clear inner lid into the blender lid and turn clockwise or
counterclockwise to lock into position.
4. Turn your blender ON, or select a speed, depending on model. The blender will start
to operate. The speed can be changed at any time during the blending process.
5. To stop blending at any time, turn switch to OFF position or switch ‘OFF’.
6. At the end of use, always ensure your Omega Blender is turned off by pressing or
switching ‘OFF’. Then unplug the cord. Ensure the motor and blades have completely
stopped before attempting to move. Disassemble, clean, and store the appliance.
NOTE: During the blending process, ingredients may stick to the sides of the container.
To push the food back onto the blades, switch ‘OFF’ and remove the power cord.
Remove the lid and use a rubber spatula to scrape down the sides of the container.
Replace the lid before blending.
NOTE: If any moisture or liquid appears on top of the motor base during blending,
switch ‘OFF’. Remove the container. Wipe the motor base immediately with a dry cloth
or paper towelling. Check that the container is correctly assembled.
HOW TO USE THE PLUNGER/SPATULA
The Plunger/Spatula helps mix very thick mixtures. While the machine is running, and
only through the lid plug opening, use the Plunger/Spatula to push ingredients into the
blades. We suggest using when making frozen ice creams and nut butters, or to purée
fruits and vegetables.
• The round disk (near the top of the Plunger/Spatula) and lid prevents the Plunger/
Spatula from hitting the blades when the lid is secured properly in the locked position.
• The container should not be more than two-thirds full when the Plunger/Spatula is
used during blending.
• Do not use the Plunger / Spatula for more than 30 consecutive seconds
(to avoid overheating).
• If the food does not circulate, the blender may have a trapped air bubble.
Carefully remove the inner lid while making sure the main lid stays rmly in place
Release the air bubble by inserting the Plunger / Spatula through the inner lid opening.
• Hold the Plunger/Spatula straight down. If this does not help the ingredients
circulate, point the Plunger / Spatula toward the side or corner of the container.
5
Page 8

EASY CLEANING & CARING TIPS
CLEANING
Do not put the container assembly & blender base assembly in the dishwasher.
1. Before rst use and after every use, separate container parts from the base.
2. Add cleaning solution to the container. Use water (less than 115°F/46°C) and a
non-sudsing detergent.
3. Scrub and ush out the container interior lid and feeder cap to remove food residue.
4. Empty container.
5. Fill container 1/4 full with fresh washing solution and place it on the base.
6. Replace the lid on the container and run the blender on high speed for 2 minutes.
7. Repeat step 5 using clean rinse water.
8. Wipe down the container, feeder cap, and lid with a soft cloth or sponge.
9. Wipe the exterior of the base with a damp cloth or sponge then dry thoroughly.
The base contains electrical components: do not immerse, use a high-pressure
washer, or use a dishwasher to clean the base.
10. Wipe any excess food particles from the power cord.
CARING TIPS
To care for your blender, please read the tips as follows:
1. Periodically check all parts before reassembly, as use of damaged or
non-recommended parts could result in a severe personal injury and/or damage to
the blender.
2. Blades: If the processing blades are stuck or difcult to turn, DO NOT USE BLENDER.
Unplug the blender. Check the blades by carefully turning in a counterclockwise
direction, where the opposite edges are sharp. Blades should turn freely.
3. Container: If the Eastman Tritan™ Container is cracked, DO NOT USE BLENDER, further
use could result in the container breakage during use.
4. Blender Base: Never immerse the blender base in water. Unplug unit. The housing
can be cleaned with a damp cloth.
5. Motor: The motor is permanently lubricated and does not require any additional
lubrication.
ADAPTERS
1
2
6
On most models, the power cord comes
equipped with a three-prong (grounding)
plug which connects to a standard
three-prong wall outlet (Figure 1).
Please use approved 2 prong adapters
(Figure 2) when a ground is not available.
Do not cut or remove the round grounding
prong from the power cord.
Page 9

ADDITIONAL USES
• Use for drinks or cocktail making, emulsions such as mayonnaise, dressings, marinades
and foods that require mixing until just combined, such as batters, also for pureeing
soups and aerating liquids.
• Use to blend fruits, ice cream and yogurts into thick smoothies, whips and milkshakes.
• Use the Pulse function for foods that only require short bursts of power such as
chopping nuts and crushing ice.
• Use the Pulse function with short bursts of power, when blending drinks containing ice
cubes or frozen fruit.
• Ensure all foods are cut into cubes (approx. 1 inch square) where appropriate to
achieve an even result.
• Do not put more than 2 cups of warm ingredients into the Omega Blender before
blending commences. After the blending process has begun and the blades are
turning you may slowly add another 1½ cups of ingredients through the opening in
the lid if desired.
• Thick mixtures puree more efciently if the Omega Blender is ¼ to ½ full.
•
When using several ingredients, place liquid ingredients in the container before solid
ingredients, unless specied in the recipe. When blending thick or dry mixtures it may be
necessary to use the plunger/spatula to scrape down the sides of the container. Do not
use metal utensils as they may damage the blades or blender.
MAINTENANCE
Inspect the blender and its various parts and replace as follows:
DAILY
1. Unplug the blender and remove the container from the base.
2. Inspect the container blades for wear, nicks, and broken or loose blades.
Replace if necessary.
WEEKLY
1. Unplug the blender.
2. Inspect the power cord insulation and power plug for cracks.
QUARTERLY
1. Review the condition of the container assembly at least every 90 days.
2. Replace if necessary.
REPLACEMENT PARTS
For replacement parts call Customer Service: 1-800-633-3401
7
Page 10

CONTROL PANELS
OFF
LOW
HIGH
OFF
ON
PULSE
SPD
ON
PULSE
HIGH
LOW
BL420
1
3
TIME
0
1
2
3
5
BL440
OFF
LOW
HIGH
ON/OFF Switch – Variable Speed Knob – Pulse Switch
MODELS: OM6560
ON
OFF
PULSE
5
4
6
3
1
0
10
SPEED
HIGH
7
8
9
SPD
LOW
MODELS: OM6160
ON/OFF Switch – High/Low and Pulse Switch
ON
PULSE
HIGH
LOW
BLADE AGITATOR ASSEMBLY
Use caution when handling the blade; it is sharp. Use a soft cloth to grab the blade when
inserting the blade assembly through the container.
1
The retainer nut is easily removed using
the disassembling tool (DT), sold seperatly.
Turn container upside down and insert the
disassembling tool on the holes of the nut.
Push the tool counterclockwise to loosen nut
(Step 1). Once loosened, remove by hand.
To release the blade use the other end of
2
8
the DT while grabbing the gear backup
pliers and turn counterclockwise (Step 2).
Page 11

TROUBLESHOOTING
LOUD NOISE FROM THE CONTAINER
PROBLEM: Container blades do not spin.
SOLUTION: Broken or worn drive socket. Replace dive socket.
PROBLEM: Increased Vibration.
SOLUTION: Check blade assembly for damaged components and replace.
PROBLEM: Leaking from bottom of container.
SOLUTION: Tighten retainer nut on the bottom of the container.
MACHINE STARTS THEN SHUTS OFF
PROBLEM: Motor
SOLUTION: Depress reset button.
PROBLEM: Reset button.
SOLUTION: Call Customer Service: 1-800-633-3401
PROBLEM: Power Failure.
SOLUTION: Check to make sure there is power to the machine.
PROBLEM: Power supply cord damage.
SOLUTION: Check the power supply cord and the connection to the power outlet.
POSSIBLE PROBLEMS AND EASY SOLUTIONS
POSSIBLE PROBLEM: Motor doesn’t start or blade doesn’t rotate.
EASY SOLUTION:
• Check that the container and lid are securely locked into position.
• Check that the blade assembly is correctly attached to the base of the container.
• Check that the ‘Power’ switch and selected function or speed setting is ‘ON’.
• Check that the power plug is securely inserted into the power outlet.
POSSIBLE PROBLEM: Food is unevenly chopped
EASY SOLUTION: Either too much food is being blended at one time or the pieces
are too large. Try cutting food into smaller pieces of even size and
processing a smaller amount per batch. For best results, the food
should be chopped into pieces no larger than ¾ inch.
POSSIBLE PROBLEM: Food is chopped too ne or is watery.
EASY SOLUTION: The food is over processed. Try using the Pulse function or process
for a shorter time.
POSSIBLE PROBLEM: Food sticks to blades and container.
EASY SOLUTION: The mixture may be too thick. Try adding more liquid to the mixture
and/or use another function.
CONTACT US:
Customer Service: 1-800-633-3401
Online: www.OmegaJuicers.com/contact-omega-juicers
9
Page 12
PRODUCT SPECIFICATIONS
Product Name OM6560, OM6160 Series
Rated Voltage 120 V
Rated Frequency 50-60 Hz
Amps 11.5
Motor 3 Peak Horsepower
Weight 15 lb. (6.8kg)
Product Dimension 8.25” Width (210 mm)
9” Depth (230 mm)
19.75” Height (500 mm)
Also Available International 240 V / 50 Hz
OM6562/OM6162
10
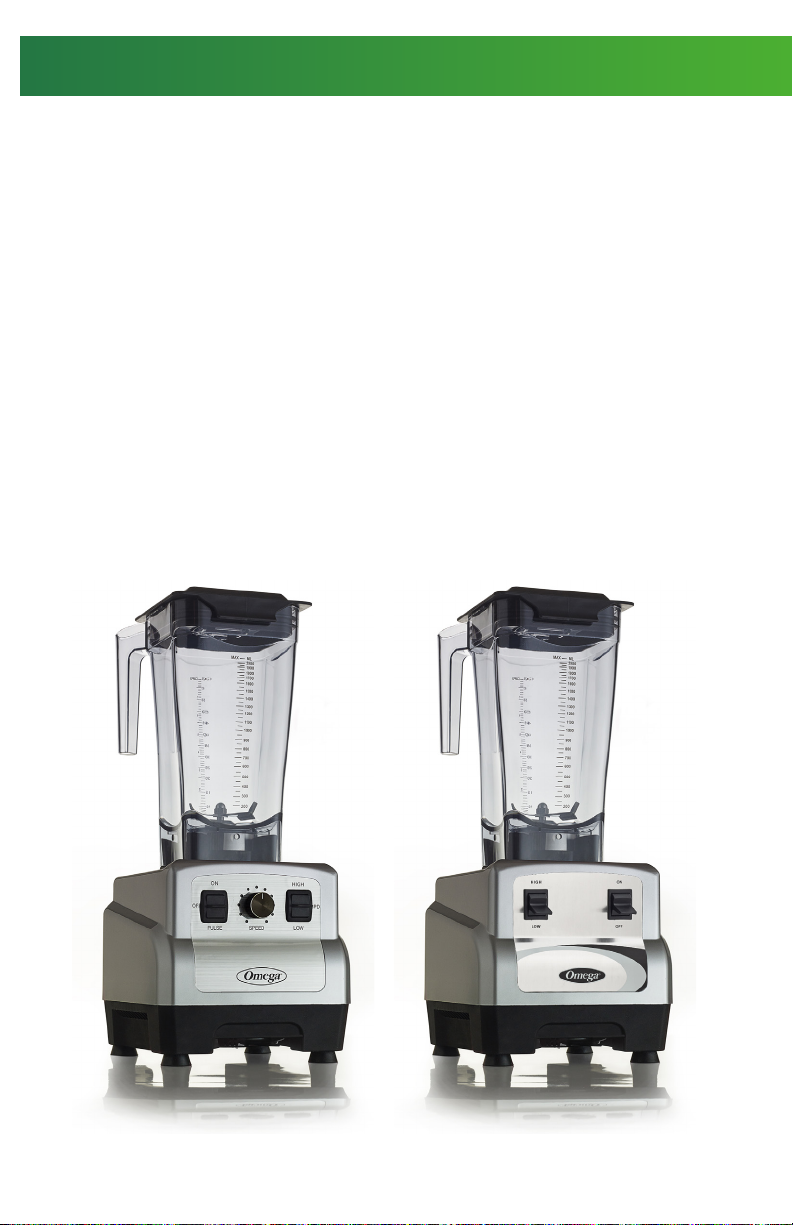
OM6560 / OM6562 OM6160 / OM6162
Page 13
RECIPES
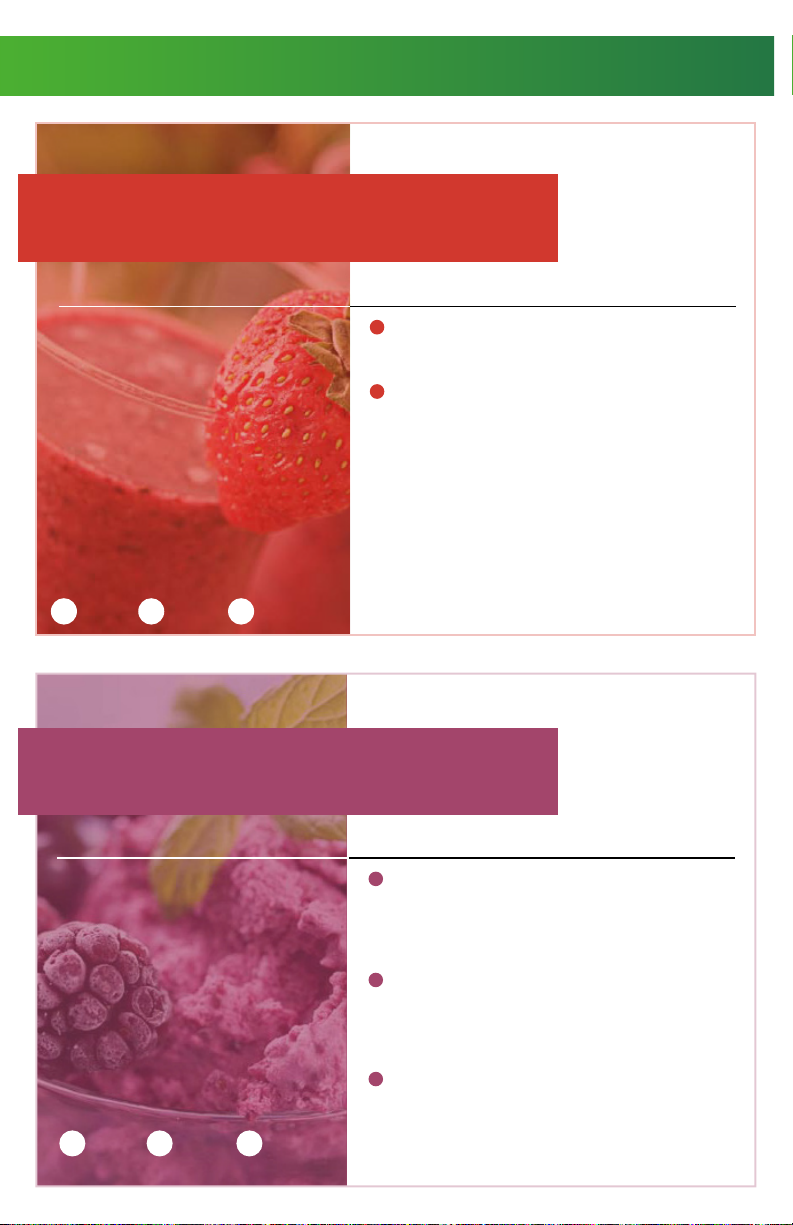
Strawberry Daiquiri
What You’ll Need:
How To Prepare:
:
5-10 strawberries (to taste)
2 oz light rum
1/2 oz triple sec
1 oz lime juice
1/2 tsp sugar
BLEND
2 minutes 2 minutes 2 minutes
PREP
CHILL
1 cup ice
1
Blend all ingredients in Omega Blender at
speed 9, setting the timer for 2 minutes.
2
Pour into a chilled glass. Serve.
Fruity Ice Cream
What You’ll Need:
How To Prepare:
2 cups frozen fruit
(bananas, strawberries,
blueberries, etc.)
1/2 cup of sugar
1 cup heavy cream
BLEND
5 minutes 5 minutes 30 minutesPREP
CHILL
1
Start by adding the fruit to the blender.
Add the sugar and 1/4 cup of the cream.
Blend all ingredients at speed 7, setting
the timer for 4 to 5 minutes
2
While blending, slowly add more of the
cream through the removable cap on
the lid. Add more cream if the mixture
doesn’t meet your desired consistency.
3
Freeze the mixture for at least 30 minutes.
HINT: For banana ice cream, use overripe bananas
that are about to go bad, slice them, put them in the
freezer and use them for banana ice cream!
11
Page 14

RECIPES
Coco-Nilla Ice “Cream”
What You’ll Need:
2 cups Coconut Milk (canned or fresh)
2 tbsp maple syrup, honey or agave
How To Prepare:
1
Blend all ingredients at speed 7,
setting the timer for 4 to 6 minutes.
2 tsp vanilla extract
2
Fruit (optional)
Freeze the mixture for at least 2 hours,
stirring every 20 to 30 minutes.
Dairy-free recipe!
BLEND
3 minutes 6 minutesPREP
FREEZE
2 hours
Cinnamon Apple Sauce
What You’ll Need:
How To Prepare:
6 apples, cored, peeled, quartered
2 tbsp lemon juice
2 tbsp cinnamon
BLEND
5 minutes 3 minutes
PREP
12
1
Blend all ingredients in the Omega
blender until it meets your desired
consistency.
2
Omega recommends setting the blender
at speed 7 for 3 minutes.
Page 15

RECIPES
Pumpkin Spice Soup
What You’ll Need:
4 tbsp olive oil
2 medium yellow onions,
(sliced in quarters)
2 tsp garlic
6 cups of sliced roasted pumpkin
5 cups chicken stock
2 cups milk
1/2 cup heavy (35%) cream
1/4 tsp cayenne pepper to taste
2 tsp curry powder
1/2 tsp ground coriander
salt (if desired)
brown sugar (if desired for sweetness)
BLEND COOK
20 minutes 8-10 minutes 15 minutesPREP
How To Prepare:
1
Add oil, onions, garlic and salt to the Omega
blender. Set the blender on speed 6 and the
timer for 2 to 3 minutes, until they are nely
chopped. Transfer to stovetop and cook on
low until onions are soft.
2
In the meantime, blend pumpkin and chicken
stock. Pour into pot with oil, onions, garlic and
salt. Bring to a low boil. Simmer for 10 minutes.
3
Pour the mixture into the blender while warm.
Set the blender on speed 7 for 5 minutes.
Add the remaining ingredients through the
removable cap on the lid. The mixture should
be close to a puree texture.
4
Pour the mixture into the stovetop pot. Heat
and allow to simmer for 5 minutes as avors mix.
Serve hot or cold.
Chocolate Mousse
What You’ll Need:
How To Prepare:
1/2 cup milk
1 cup heavy cream
2 tps butter
1/2 tsp instant coffee
2 eggs
6 oz chocolate chips
2 tps rum, cognac or brandy
1 tsp powdered sugar
BLEND
10 minutes 5 minutesPREP
1
Beat 1/2 cup milk and 1/2 cup
cream on stove top until it bubbles.
Do not let it burn.
2
In your Omega blender add butter, eggs,
coffee, chocolate chips, and liquor.
Blend until creamy. While blending,
slowly add hot milk and cream.
Blend until smooth, setting the timer at
3
1 to 2 minutes and the speed at 4.
Pour into a pan. Chill for at least an hour.
Beat remaining cream and powdered
4
sugar into smooth mixture and chill.
Serve on top.
13
Page 16

RECIPES
Chili Salsa
What You’ll Need:
1 (14.5 oz can) whole canned tomatoes
4 tsp jalapeños (diced, not pickled)
2 chili peppers
1/4 cup yellow onions (diced)
1/2-3/4 tsp garlic salt
1/2 tsp cumin
1/4 tsp sugar
How To Prepare:
1
In the Omega blender, place jalapeños,
chili peppers and onions. Remember, the
heat of chili peppers comes from the seeds,
the veins where the seeds are attached,
as well as, the parts nearest the veins.
For milder dishes, the veins and seeds should
be removed and discarded.
2
Blend for a few seconds on speed 6.
Add both cans of tomatoes, salt, sugar,
and cumin.
3
Blend all ingredients on speed 4 or 5, setting
the timer for 1 to 2 minutes. Do not pure.
4
Place in covered container and chill
BLEND
2 minutes 4 minutes 60 minutesPREP
CHILL
for 1 hour and serve.
Honey Wheat Pancakes
What You’ll Need:
How To Prepare:
1-1/3 cups buttermilk (low-fat)
2 tbsp honey
1-1/2 cups buttermilk baking mix
1/2 cup whole-wheat our
1/4 cup honey-crunch wheat gem
1 tsp baking powder
butter and syrup for serving
BLEND COOK
3 minutes 6 minutes 4 minutesPREP
14
2 eggs
1
Place the buttermilk, eggs and honey
in the Omega blender. Set the speed
to 6, and the timer to 6 minutes. Then
begin adding the remaining ingredients
into the Omega blender in the order
given through the removable cap on
the container lid.
2
Once the mixture is blended to your
desired consistency, shut off the
blender.
3
For each pancake, pour about 1/4 cup
batter onto a skillet.
Page 17

NOTES
15
Page 18

Félicitations!
FÉLICITATIONS pour l’achat de votre nouveau produit OMEGA.
Omega s’efforce de développer des appareils technologiquement avancés qui aident
à livrer une nutrition et une saveur de la plus haute qualité et aussi proches de
leur forme naturelle pure que possible. C’est vous, les amis de notre marque, qui
nous guident. Votre enthousiasme nous aide à continuer à réinventer et à renouveler
notre ligne d’extracteurs de jus, mélangeurs à haute vitesse et équipement pour les
boissons. L’équipe d’Omega vous remercie de votre délité depuis plus de 50ans!
Rejoignez-nous sur Twitter @OmegaAppliances et/ou sur Facebook @OmegaJuicers
POUR ENREGISTRER VOTRE PRODUIT, VEUILLEZ VISITER:
www.omegajuicers.com/omega-warranty-registration
POUR LES RECETTES, VEUILLEZ VISITER: www.omegajuicers.com/recipes
SERVICE À LA CLIENTÈLE: Composez le 1800633-3401 ou
visitez: www.omegajuicers.com/contact-omega-juicers
16
Une fois que vous avez utilisé votre Omega, nous vous prions de bien vouloir
évaluer l’appareil sur
www.OmegaJuicers.com
Page 19

TABLE DES MATIÈRES
18 La sécurité avant tout
19 Composition de votre Omega
20 Mode d’emploi
21 Utilisation de votre mélangeur Omega
22 Conseils pratiques de nettoyage et
d’entretien faciles
23 Autres usages
23 Entretien
24 Panneau de commande
24 Agitateur à lame
25 Dépannage
26 Caractéristiques du produit
27-31 Recettes/Remarques
16 Français
32 Espagnol
17
Page 20

LA SÉCURITÉ AVANT TOUT
Lorsque vous utilisez un appareil électroménager, il faut toujours prendre des
précautions de base, y compris les suivantes.
LISEZ TOUTES LES INSTRUCTIONS AVANT L’UTILISATION.
1. Pour vous protéger des chocs électriques, n’immergez pas le cordon d’alimentation, la
che ou la base à moteur dans de l’eau ou tout autre liquide.
2. Placez toujours l’appareil sur une surface sèche et plane.
3. L’utilisation d’accessoires non recommandés ou non vendus par le fabricant risque de
causer un incendie, un choc électrique ou des blessures.
4. Ne retirez pas le conteneur de la base à moteur pendant que le mélangeur est en marche.
5. Ne placez pas les mains dans le conteneur à moins que l’appareil soit débranché de la
prise de courant. Vous pouvez utiliser un racloir mais uniquement lorsque le mélangeur
n’est pas en marche.
6. Débranchez le mélangeur de la prise de courant avant de retirer le conteneur de la
base. Les lames sont tranchantes - manipulez avec soin.
7. Pour réduire le risque de blessure, ne placez jamais la lame sur la base sans que le bocal
soit correctement xé.
8. Utilisez toujours le mélangeur avec le couvercle en place.
9. N’utilisez pas ce mélangeur à des ns autres que la préparation des aliments ou boissons.
10. Ne mélangez pas de mélange sec, épais ou lourd pendant plus de 10 secondes sans
éteindre le mélangeur. Ensuite, remuez les ingrédients avant de continuer à mélanger.
11. Ne traitez pas les liquides bouillants. Laissez refroidir avant de placer dans une carafe.
12. Ne laissez pas l’appareil sans surveillance lorsqu’il est utilisé. Il faut surveiller les jeunes
enfants lorsqu’ils se trouvent à proximité de l’appareil.
13. Ne placez pas l’appareil sur ou à proximité d’un brûleur à gaz ou électrique chaud ou là
où il pourrait toucher une autre source de chaleur.
14. Débranchez l’appareil de la prise de courant lorsqu’il n’est pas utilisé, avant d’ajouter ou
de retirer des pièces et avant le nettoyage.
15. Cet appareil est conçu pour un usage domestique seulement. N’utilisez pas cet appareil
à des ns autres que celles pour lesquelles il est conçu. N’utilisez pas l’appareil à l’extérieur.
16. Déroulez complètement le cordon d’alimentation avant l’utilisation.
17. Pour vous protéger des chocs électriques, n’immergez pas le cordon d’alimentation, la
che ou la base à moteur dans de l’eau ou tout autre liquide.
18. Ne laissez pas le cordon pendre par-dessus le bord d’une table ou d’un comptoir ou
toucher des surfaces chaudes ou s’emmêler.
19. Cet appareil n’est pas conçu pour une utilisation par de jeunes enfants ou personnes
décientes, à moins qu’ils/elles soient surveillé(e)s de manière appropriée par une
personne responsable s’assurant qu’ils peuvent utiliser l’appareil en toute sécurité.
20. Une inspection régulière de l’appareil est recommandée. N’utilisez pas l’appareil si le
cordon d’alimentation électrique, la che ou l’appareil devient endommagé(e) de
quelque façon que ce soit. Veuillez retourner l’appareil au centre de service Omega
autorisé le plus proche pour une vérication et/ou réparation.
21. Tout entretien autre que le nettoyage doit être réalisé dans un centre de
service Omega autorisé.
22. N’utilisez pas cet appareil à des ns autres que celles pour lesquelles il est conçu.
N’utilisez pas l’appareil dans des véhicules ou bateaux en déplacement. N’utilisez pas
l’appareil à l’extérieur.
CONSERVEZ CES INSTRUCTIONS
18
Page 21

COMPOSITION DE VOTRE OMEGA
Ce produit utilise un interrupteur de réinitialisation et un blocage thermique pour protéger le moteur.
Si l’appareil arrête de fonctionner pendant l’utilisation, appuyez sur l’interrupteur de réinitialisation en bas de l’appareil.
Si l’appareil ne fonctionne toujours pas, débranchez-le, attendez 30minutes et essayez à nouveau.
Interrupteur de réinitialisation
A
B
C
D
E
F
G
H
OM6560 / OM6562 OM6160 / OM6162
I
A Capuchon d’alimentation
B Couvercle
C Conteneur en copolyester Eastman Tritan™
sans BPA
D Lames
E Panneau de commande
F Base du mélangeur
G Moteur à rendement élevé
H Pieds robustes antidérapants
I Piston / spatule
19
Page 22

MODE D’EMPLOI
AVANT LA PREMIÈRE UTILISATION
Avant d’utiliser votre mélangeur Omega pour la première fois, retirez tout le matériau
d’emballage et les étiquettes promotionnelles. Assurez-vous que l’appareil est éteint à
la prise de courant et que le cordon d’alimentation est débranché. Lavez le couvercle,
le couvercle interne, le conteneur Eastman Tritan™ et la lame à l’eau chaude
savonneuse, avec un linge doux. Rincez et séchez soigneusement. Ne placez pas
les pièces dans le lave-vaisselle (à l’exception du conteneur, couvercle et couvercle
interne). Le couvercle et couvercle interne du conteneur peuvent être lavés dans le
lave-vaisselle. Assurez-vous que la lame a été retirée du conteneur avant de placer
le mélangeur dans le lave-vaisselle. La base à moteur doit être essuyée avec un linge
humide. Séchez minutieusement.
ASSEMBLAGE DU MÉLANGEUR
1. Pour assembler le conteneur, placez le joint de silicone sur la lame.
2. Insérez la lame dans la base du conteneur.
3. Placez la base à moteur sur une surface plane et sèche. Assurez-vous que la base
à moteur est éteinte et que le cordon d’alimentation est débranché. Mettez le
conteneur du mélangeur à l’endroit à la verticale et insérez-le dans la base à moteur.
4. Branchez le cordon d’alimentation dans une prise de courant. La poignée du
conteneur peut être positionnée du côté à main gauche ou droite de l’appareil.
DÉMONTAGE DU MÉLANGEUR
1. Assurez-vous toujours que votre mélangeur Omega est éteint. Débranchez ensuite
le cordon d’alimentation.
2. Retirez le conteneur de la base à moteur en saisissant la poignée et en soulevant le
conteneur vers le haut. Retirez la lame en redressant le conteneur et en tournant le
dispositif de retrait de lame dans le sens des aiguilles d’une montre, puis levez vers le
haut en éloignant de la base du mélangeur.
3. Retirez le joint de silicone de la lame.
PROTECTION AUTOMATIQUE EN CAS DE SURCHARGE
Votre moteur Omega est conçu de manière à ce qu’il s’auto-protège contre la
surchauffe. Si le moteur S’ARRÊTE, mettez l’interrupteur à l’ARRÊT pendant au plus
45 minutes pour le réinitialiser. Pour réduire le temps de réinitialisation, débranchez
l’appareil, retirez le conteneur et soufez de l’air dans la section centrale.
bouton de réinitialisation en bas du mélangeur.
Appuyez sur le
CORDON D’ALIMENTATION
Votre appareil est équipé d’un long cordon d’alimentation.
Rangez la portion non utilisée avec soin en dessous.
VUE DU DESSOUS/ENROULEUR
DE CORDON ÉLECTRIQUE
Des attaches de cordon d’alimentation en plastique le tiennent bien
en place. Il n’est pas nécessaire de dévisser les attaches du cordon
d’alimentation pour libérer davantage de cordon. Elles sont exibles
et se remettent en place une fois que le cordon d’alimentation est tiré.
20
Page 23

UTILISATION DE VOTRE MÉLANGEUR OMEGA
1. Pour allumer le mélangeur Omega, mettez l’interrupteur en position MARCHE.
REMARQUE : Lorsque vous utilisez votre mélangeur Omega pour la première fois, il se
peut que vous remarquiez une odeur provenant du moteur. C’est tout à fait normal;
l’odeur se dissipera au fur et à mesure de l’utilisation.
2. Ajoutez des aliments ou liquides dans le conteneur en veillant à ne pas dépasser la
marque « MAX. ».
3. Placez le couvercle du mélangeur fermement en place sur le dessus du conteneur.
S’il n’est pas déjà en place, insérez le couvercle interne transparent dans le
couvercle du conteneur et tournez-le dans le sens horaire ou antihoraire pour le
verrouiller en place.
4. Mettez votre mélangeur en MARCHE ou choisissez une vitesse, selon le modèle.
Le mélangeur commencera à fonctionner. La vitesse peut être changée à tout
moment pendant le processus de mélange.
5. Pour arrêter le mélange à un moment quelconque, mettez l’interrupteur en position
ARRÊT ou éteignez.
6. À la n de l’utilisation, assurez-vous toujours que votre mélangeur Omega est éteint
en appuyant sur le bouton « ARRÊT » ou en l’éteignant. Débranchez ensuite le
cordon d’alimentation. Assurez-vous que le moteur et les lames sont complètement
arrêtés avant de tenter de les déplacer. Démontez, nettoyez et rangez l’appareil.
REMARQUE : Pendant le processus de mélange, il se peut que les ingrédients collent
aux parois du conteneur. Pour ramener les aliments sur les lames, « ÉTEIGNEZ » et retirez
le cordon d’alimentation électrique. Retirez le couvercle et utilisez une spatule en
caoutchouc pour racler les parois du conteneur. Remettez le couvercle en place
avant de mélanger.
REMARQUE : Si une humidité ou un liquide apparaît sur le dessus de la base à moteur
pendant le mélange, « ÉTEIGNEZ ». Retirez le conteneur. Essuyez immédiatement la
base à moteur avec un linge sec ou une serviette en papier. Vériez que le conteneur
est assemblé correctement.
MODE D’EMPLOI DU PISTON/SPATULE
Le piston/spatule aide à mélanger les mélanges très épais. Pendant que l’appareil
est en marche et uniquement par l’ouverture du couvercle, utilisez le piston / spatule
pour pousser les ingrédients sur les lames. Nous suggérons de l’utiliser lorsque vous
préparez des crèmes glacées et beurres de noix ou pour réduire les fruits et légumes
en purée.
• Le disque rond (près du haut du piston/spatule) et le couvercle empêchent le
piston / spatule de cogner les lames lorsque le couvercle est bien xé en position
verrouillée.
• Le conteneur ne doit pas être rempli à plus des deux tiers lorsque le piston/spatule est
utilisé pendant le mélange.
• N’utilisez pas le piston/spatule pendant plus de 30 secondes consécutives
(pour éviter la surchauffe).
• Si les aliments ne circulent pas, il se peut que le mélangeur contienne une bulle d’air
emprisonnée. Retirez le couvercle interne avec précaution tout en veillant à ce que
le couvercle principal reste fermement en place. Libérez la bulle d’air en insérant le
piston/spatule dans l’ouverture du couvercle interne.
• Tenez le piston/spatule droit vers le bas. Si cela n’aide pas les ingrédients à circuler,
orientez le piston/spatule vers la paroi ou le coin du conteneur.
21
Page 24

CONSEILS PRATIQUES DE NETTOYAGE ET D’ENTRETIEN FACILES
NETTOYAGE
Ne placez pas le conteneur et la base du mélangeur dans le lave-vaisselle.
1.
Avant la première et après chaque utilisation, séparez les pièces du conteneur de la base.
2. Ajoutez une solution nettoyante au conteneur. Utilisez de l’eau (à moins de 46 °C/115 °F) et
un détergent non moussant.
3. Récurez et rincez le couvercle intérieur du conteneur et le capuchon d’alimentation pour
retirer les résidus d’aliments.
4. Videz le conteneur.
5. Remplissez le quart du conteneur d’une solution aqueuse nettoyante fraîche et placez-le
sur la base.
6. Remettez le couvercle sur le conteneur et faites marcher le mélangeur à haute vitesse
pendant 2 minutes.
7. Répétez l’étape 5 à l’aide d’eau propre pour rincer.
8. Essuyez le conteneur, le capuchon d’alimentation et le couvercle avec un linge ou une
éponge doux(ce).
9. Essuyez l’extérieur de la base avec un linge ou une éponge humide, puis séchez
soigneusement. La base contient des composants électriques : ne plongez pas, n’utilisez
pas de laveuse à haute pression ou un lave-vaisselle pour nettoyer la base.
10. Essuyez tout excès de particules d’aliments du cordon d’alimentation électrique.
CONSEILS PRATIQUES D’ENTRETIEN
Pour prendre soin de votre mélangeur, veuillez lire les conseils pratiques suivants :
1. Vériez régulièrement toutes les pièces avant d’assembler à nouveau, puisque
l’utilisation de pièces endommagées ou non recommandées peut entraîner des
blessures graves et/ou endommager le mélangeur.
2. Lames : Si les lames mélangeuses sont coincées ou ont des difcultés à tourner,
N’UTILISEZ PAS LE MÉLANGEUR. Débranchez le mélangeur. Vériez les lames en les
tournant avec précaution dans le sens antihoraire, là où les bords opposés sont
tranchants. Les lames devraient tourner librement.
3. Conteneur : Si le conteneur Eastman Tritan™ est fendu, N’UTILISEZ PAS LE MÉLANGEUR,
toute une utilisation suivante pourrait briser le conteneur pendant qu’il est en marche.
4. Base du mélangeur : Ne plongez jamais la base du mélangeur dans l’eau.
Débranchez l’appareil. Le boîtier peut être nettoyé avec un linge humide.
5.
Moteur : Le moteur est lubrié en permanence et ne nécessite aucune lubrication supplémentaire.
ADAPTEURS
1
2
22
Sur la plupart des modèles, le cordon d’alimentation
électrique est doté d’une che à trois broches (de
mise à la terre) qui se branche sur une prise de courant
murale standard pour trois broches (Figure 1).
Veuillez utiliser des adaptateurs à 2 broches
approuvés (Figure 2) lorsqu’une mise à la terre n’est
pas disponible. Ne coupez ou retirez pas la broche
ronde de mise à la terre du cordon d’alimentation
électrique.
Page 25

AUTRES USAGES
• Utilisez pour la préparation de boissons ou apéritifs, les émulsions telles que
mayonnaise, sauces, marinades et aliments qui nécessitent un mélange jusqu’à ce
qu’ils soient tout juste combinés, tels que les pâtes à frire, ainsi que pour réduire les
soupes en purées et l’aération des liquides.
• Utilisez pour mélanger les fruits, crèmes glacées et yogourts en boissons fouettées et
laits frappés épais.
• Utilisez la fonction Impulsion pour les aliments qui ne requièrent que de brefs coups
d’alimentation, telles que le broyage de noix et de glace.
• Utilisez la fonction Impulsion avec de brefs coups d’alimentation, lorsque vous
mélangez les boissons contenant des glaçons ou des fruits congelés.
• Assurez-vous que tous les aliments sont coupés en petits dés (carré d’environ 2,54 cm
[1 po]) si possible pour obtenir un résultat uniforme.
• Ne placez pas plus de 2 tasses d’ingrédients chauds dans le mélangeur Omega
avant de commencer le mélange. Une fois que le processus de mélange est lancé
et que les lames tournent, vous pouvez ajouter lentement 1½ tasse d’ingrédients par
l’ouverture du couvercle, si vous le souhaitez.
• Les mélanges épais sont réduits en purée de façon plus efcace si le mélangeur
Omega est rempli à ¼ ou ½.
• Lorsque vous utilisez plusieurs ingrédients, placez les ingrédients liquides dans le
conteneur avant les ingrédients solides, sauf indication contraire dans la recette.
Lorsque vous mélangez des mélanges épais ou secs, il peut s’avérer nécessaire
d’utiliser le piston/spatule pour racler les parois du conteneur. N’utilisez pas
d’ustensiles en métal, puisqu’ils pourraient endommager les lames ou le mélangeur.
ENTRETIEN
Examinez le mélangeur et ses pièces diverses et remplacez-les comme suit :
CHAQUE JOUR
1. Débranchez le mélangeur et retirez le conteneur de la base.
2. Inspectez les lames du conteneur pour vérier l’usure, les entailles et les lames cassées
ou lâches. Remplacez au besoin.
CHAQUE SEMAINE
1. Débranchez le mélangeur.
2. Inspectez l’isolation du cordon d’alimentation électrique et la che d’alimentation
à la recherche des ssures.
CHAQUE TRIMESTRE
1. Passez en revue l’état du conteneur au moins une fois tous les 90 jours.
2. Remplacez au besoin.
PIÈCES DE RECHANGE
Pour les pièces de rechange, veuillez communiquer avec le
1 800 633-3401
Service à la clientèle au :
23
Page 26

OFF
LOW
HIGH
OFF
ON
PULSE
SPD
ON
PULSE
HIGH
LOW
BL420
1
3
TIME
0
1
2
3
5
BL440
OFF
LOW
HIGH
PANNEAUX DE COMMANDES
MODÈLES: OM6560
Interrupteur MARCHE/ARRÊT – Bouton de vitesse variable – Interrupteur d’impulsion
5
6
10
(HAUTE PUISSANCE)
HIGH
7
8
9
LOW
(FAIBLE PUISSANCE)
SPD
(VITESSE)
(ARRÊT)
OFF
(IMPULSION)
(MARCHE)
ON
PULSE
4
3
1
0
SPEED
(VITESSE)
MODÈLES: OM6160
Interrupteur MARCHE/ARRÊT – Interrupteur élevé/faible et d’impulsion
(MARCHE)
ON
(ARRÊT)
PULSE
AGITATEUR À LAME
(IMPULSION)
Faites preuve de prudence lorsque vous manipulez la lame; elle est tranchante. Utilisez
un linge doux pour saisir la lame lorsque vous l’insérez dans le conteneur.
(HAUTE PUISSANCE)
HIGH
LOW
(FAIBLE PUISSANCE)
(VITESSE)
24
L’écrou de retenue est facilement retiré
1
à l’aide de l’outil de démontage (OD)
vendu séparément. Mettez le conteneur
à l’envers et insérez l’outil de démontage
sur les trous de l’écrou. Poussez l’outil
dans le sens antihoraire pour desserrer
l’écrou (Étape 1). Une fois qu’il est
desserré, retirez-le manuellement.
2
Pour libérer la lame, servez-vous de l’autre
extrémité de l’outil OD an de saisir les
pinces supplémentaires de l’engrenage et
tournez dans le sens antihoraire (Étape 2).
Page 27

DÉPANNAGE
UN BRUIT FORT PROVENANT DU CONTENEUR
PROBLÈME : Les lames du conteneur ne tournent pas.
SOLUTION : Prise d’entraînement cassée ou usée. Remplacez la prise d’entraînement.
PROBLÈME : Vibration accrue.
SOLUTION : Vériez la lame pour rechercher les composants endommagés et
remplacez-les.
PROBLÈME : Fuite du fond du conteneur.
SOLUTION : Serrez l’écrou de retenue au fond du conteneur.
L’APPAREIL DÉMARRE, PUIS S’ÉTEINT
PROBLÈME : Moteur
SOLUTION : Appuyez sur le bouton de réinitialisation.
PROBLÈME : Bouton de réinitialisation.
SOLUTION : Veuillez communiquer avec le Service à la clientèle au : 1 800 633-3401
PROBLÈME : Panne de courant.
SOLUTION: Vériez que l’appareil est bien alimenté en courant.
PROBLÈME : Cordon d’alimentation électrique endommagé.
SOLUTION : Vériez le cordon d’alimentation électrique et la connexion à la prise de courant.
PROBLÈMES POSSIBLES ET SOLUTIONS SIMPLES
PROBLÈME POSSIBLE : Le moteur ne démarre pas ou la lame ne tourne pas.
SOLUTION SIMPLE :
• Vériez que le conteneur et le couvercle sont bien verrouillés en place.
• Vériez que la lame est correctement xée à la base du conteneur.
• Vériez que l’interrupteur « d’alimentation électrique » et la fonction ou vitesse choisie
sont sur « MARCHE ».
• Vériez que la che d’alimentation est bien insérée dans la prise de courant.
PROBLÈME POSSIBLE : Les aliments ne sont pas hachés uniformément.
SOLUTION SIMPLE : Soit une trop grande quantité d’aliments est mélangée d’un seul
coup ou les morceaux sont trop gros. Essayez de couper les
aliments en morceaux plus petits ou de taille uniforme et de traiter
une quantité plus petite par lot. Pour obtenir les meilleurs résultats,
les aliments doivent être coupés en morceaux pas plus gros que 1,9 cm.
PROBLÈME POSSIBLE : Les aliments sont coupés en trop petits morceaux ou sont aqueux.
SOLUTION SIMPLE : Les aliments ont été trop malaxés. Essayez d’utiliser la fonction
Impulsion ou de malaxer les aliments moins longtemps.
PROBLÈME POSSIBLE : Les aliments collent aux lames et au conteneur.
SOLUTION SIMPLE : Il se peut que le mélange soit trop épais. Essayez d’ajouter
davantage de liquide au mélange et/ou utilisez une autre fonction.
CONTACTEZ-NOUS : Service à la clientèle : 1 800 633-3401
En ligne : www.OmegaJuicers.com/contact-omega-juicers
25
Page 28

CARACTÉRISTIQUES DU PRODUIT
Nom du produit Séries OM6560 et OM6160
Tension nominale 120 volts
Fréquence nominale 50 à 60 Hz
Ampères 11,5
Moteur Crête de 3 chevaux-puissance
Poids 6,8 kg (15 lb)
Dimensions du produit 210 mm (8,25 po) de large
230 mm (9 po) de profondeur
500 mm (19,75 po) de haut
Également proposé en tension internationale
OM6562/OM6162
240 volts/50 Hz
26
OM6560 / OM6562 OM6160 / OM6162
Page 29

RECETTES
Daiquiri aux fraises
Ce dont vous aurez besoin :
5 à 10 fraises (selon les goûts)
59 ml de rhum léger
14,8 ml de triple-sec
29,6 ml de jus de citron vert
1/2 cuillerée à thé de sucre
Comment préparer :
1
Mélangez tous les ingrédients dans le
mélangeur Omega à la vitesse 9 en réglant
la minuterie sur 2 minutes.
2
Versez dans un verre glacé. Servez.
1 tasse de glaçons
PRÉP
MÉLANGER
2 minutes 2 minutes 2 minutes
REFROIDIR
Crème glacé fruitée
Ce dont vous aurez besoin :
Comment préparer :
2 tasses de fruit congelé
(bananes, fraises
bleuets, etc.)
1/2 tasse de sucre
1 tasse de crème riche en
matière grasse
PRÉP
MÉLANGER
5 minutes 5 minutes 30 minutes
REFROIDIR
1
Commencez par ajouter le fruit dans le
mélangeur. Ajoutez le sucre et 1/4 tasse
de crème. Mélangez tous les ingrédients
dans le mélangeur Omega à la vitesse 7 en
réglant la minuterie sur 4 à 5 minutes.
2
Pendant que vous mélangez, ajoutez
lentement davantage de crème par le
capuchon amovible du couvercle. Ajoutez
davantage de crème si le mélange n’a pas
la consistance souhaitée.
3
Congelez le mélange pendant au moins
30 minutes.
CONSEIL : Pour la crème glacée aux bananes, utilisez des
bananes trop mûres qui sont sur le point d’être pourries, coupezles en tranches, placez-les dans le congélateur et utilisez-les pour
la crème glacée aux bananes!
27
Page 30

RECETTES
« Crème » glacée coco-nille
Ce dont vous aurez besoin :
2 tasses de lait de noix de coco (en
boîte ou frais)
2 cuillerées à table de sirop
d’érable, miel ou agave
2 cuillerées à thé d’extrait de vanille
Fruit (facultatif)
Comment préparer :
1
Mélangez tous les ingrédients à la vitesse 7
en réglant la minuterie sur 4 à 6 minutes.
2
Congelez le mélange pendant au moins
2 heures en tournant toutes les 20 à
30 minutes.
Recette sans lactose!
MÉLANGER
3 minutes 6 minutes
PRÉP
CONGELEZ 2 hours
Compote de pommes
à la cannelle
Ce dont vous aurez besoin :
Comment préparer :
6 pommes, étrognées, épluchées,
coupées en quarts
2 cuillerées à table de jus de citron
2 cuillerées à table de cannelle
MÉLANGER
BLEND
5 minutes 3 minutes
PRÉP
28
1
Mélangez tous les ingrédients dans le
mélangeur Omega jusqu’à ce qu’ils aient
la consistance souhaitée.
2
Omega recommande le réglage du
mélangeur à la vitesse 7 pendant 3 minutes.
Page 31

RECETTES
Soupe à la citrouille épicée
Ce dont vous aurez besoin :
4 cuillerées à table d’huile d’olive
2 oignons jaunes moyens,
(coupés en quarts)
6 tasses de citrouille rôtie coupée en tranches
1/2 tasse de crème riche en matière grasse (35 %)
1/4 cuillerée à thé de poivre de Cayenne
2 cuillerées à thé de poudre de curry
1/2 cuillerée à thé de coriandre moulu
sucre brun (si vous souhaitez ajouter une
20 minutes 8-10 minutes 15 minutes
PRÉP
MÉLANGER
2 cuillerées à thé d’ail
5 tasses de bouillon de poulet
2 tasses de lait
selon les goûts
sel (selon les goûts)
saveur sucrée)
CUIRE
Comment préparer :
1
Ajoutez l’huile, les oignons, l’ail et le sel au mélangeur
Omega. Réglez le mélangeur à la vitesse 6 et la minuterie
sur 2 à 3 minutes jusqu’à ce qu’ils soient nement hachés.
Transférez sur la cuisinière et faites cuire à feu doux
jusqu’à ce que les oignons soient tendres.
2
Entre-temps, mélangez la citrouille et le bouillon de
poulet. Versez dans le pot avec l’huile, les oignons, l’ail
et le sel. Portez à faible ébullition. Faites mijoter pendant
10 minutes.
3
Versez le mélange dans le mélangeur pendant qu’il est
chaud. Réglez le mélangeur sur la vitesse 7 pendant
5 minutes. Ajoutez le reste des ingrédients par le
capuchon amovible du couvercle. Le mélange doit
ressembler à une texture de purée.
4
Versez le mélange dans le pot sur la cuisinière. Faites
chauffer et laissez mijoter pendant 5 minutes pour que les
saveurs se mélangent. Servez chaud ou froid.
Mousse au chocolat
Ce dont vous aurez besoin :
Comment préparer :
1/2 tasse de lait
1 tasse de crème riche en matière
grasse
2 cuillerées à thé de beurre
1/2 cuillerée à thé
de café instantané
2 œufs
170 g de grains de chocolat
2 cuillerées à thé de rhum,
cognac ou brandy
1 cuillerée à thé de sucre en poudre
MÉLANGER
10 minutes 5 minutes
PRÉP
1
Battez 1/2 tasse de lait et 1/2 tasse de
crème sur la cuisinière jusqu’à ce que des bulles
se forment. Ne laissez pas brûler.
2
Dans votre mélangeur Omega, ajoutez le beurre,
les œufs, le café, les grains de chocolat et une
liqueur. Remuez jusqu’à ce que vous formiez une
crème. Pendant que vous mélangez, ajoutez
lentement le lait chaud et la crème.
3
Mélangez jusqu’à ce que les ingrédients soient
lisses, en réglant la minuterie sur 1 à 2 minutes et
la vitesse à 4. Versez dans un moule. Refroidissez
pendant au moins une heure.
4
Battez le reste de la crème et du sucre en poudre
en un mélange lisse et refroidissez. Servez dessus.
29
Page 32

RECETTES
Sauce chili
Ce dont vous aurez besoin :
1 (boîte de 410 g) de tomates
entières en boîte
4 cuillerées à thé de piments
jalapeño (coupés en dés, non
saumurés)
2 piments chili
1/4 tasse d’oignons jaunes
(coupés en dés)
1/2 à 3/4 cuillerée à thé de sel à l’ail
1/2 cuillerée à thé de cumin
1/4 cuillerée à thé de sucre
Comment préparer :
1
Dans le mélangeur Omega, placez les
piments jalapeño, les piments chili et les
oignons. N’oubliez pas que le piquant des
piments chili provient des gaines, des veines
auxquelles les graines sont attachées
ainsi que de toutes les parties les plus proches
des veines. Pour les plats moins épicés, il faut
retirer les veines et les graines et les jeter.
2
Mélangez pendant quelques secondes à la
vitesse 6. Ajoutez les deux boîtes de tomates,
le sel, le sucre et le cumin.
3
Mélangez tous les ingrédients à la vitesse 4
ou 5. en réglant la minuterie sur 1 à 2 minutes.
Ne mélangez pas en purée.
4
PRÉP
MÉLANGER REFROIDIR
2 minutes 4 minutes 60 minutes
Placez dans un conteneur couvert et
refroidissez pendant 1 heure et servez.
Crêpes de froment au miel
Ce dont vous aurez besoin :
Comment préparer :
1-1/3 tasse de babeurre (à faible
teneur en matière grasse)
2 cuillerées à table de miel
1-1/2 tasse de mélange de
babeurre à cuire au four
1/2 tasse de farine de blé entier
1/4 tasse de germes de blé
croquants au miel
1 cuillerée à thé de poudre levante
beurre et sirop pour servir
PRÉP
MÉLANGER
3 minutes 6 minutes 4 minutes
CUIRE
30
2 œufs
1
Placez le babeurre, les œufs et le miel
dans le mélangeur Omega. Réglez la
vitesse à 6 et la minuterie sur 6 minutes.
Ensuite, commencez à ajouter le reste des
ingrédients dans le mélangeur Omega
dans l’ordre indiqué en vous servant du
capuchon amovible du couvercle du
conteneur.
2
Une fois que les ingrédients sont mélangés
à la consistance souhaitée, éteignez le
mélangeur.
3
Pour chaque crêpe, versez environ
1/4 tasse de pâte dans une poêle.
Page 33

REMARQUES
31
Page 34

¡Felicitaciones!
FELICITACIONES por comprar tu nuevo producto Omega.
En Omega, nos esforzamos por desarrollar máquinas tecnológicamente avanzadas
que brindan el mejor valor nutricional y el mejor sabor y lo ofrece de la manera
más orgánica. Nos motivan ustedes, que son los que respaldan nuestra marca. Su
entusiasmo nos ayuda a continuar reinventando y renovando nuestra línea de
extractores de jugo, licuadoras de alta velocidad y equipos para bebidas. ¡Nuestro
equipo en Omega agradece el respaldo que nos han dado por más de 50 años!
Síguenos en Twitter por @OmegaAppliances y en Facebook @OmegaJuicers
PARA REGISTRAR EL PRODUCTO, VISITA:
www.omegajuicers.com/omega-warranty-registration
PARA OBTENER RECETAS, VISITA: www.omegajuicers.com/recipes
SERVICIO AL CLIENTE: Llama al 1-800-633-3401 o
visita: www.omegajuicers.com/contact-omega-juicers
32
Después de usar tu Omega, te pedimos que por favor escribas tu evaluación de la
máquina en www.OmegaJuicers.com
Page 35

TABLA DE CONTENIDO
34 La seguridad primero
35 Conoce tu Omega
36 Instrucciones de funcionamiento
37 Cómo usar tu licuadora Omega
38 Consejos para facilitar la limpieza y el cuidado
39 Usos adicionales
39 Mantenimiento
40 Panel de control
40 Ensamblaje de cuchillas del agitador
41 Solución de problemas
42 Especicaciones del producto
43-49 Receta/Nota
16 Francés
32 Español
33
Page 36

LA SEGURIDAD PRIMERO
Al usar el electrodoméstico deben seguirse siempre las precauciones básicas de seguridad,
incluyendo las siguientes
LEE TODAS LAS INSTRUCCIONES ANTES DE USAR.
1. Para evitar descargas eléctricas, no sumerjas el cable, el enchufe ni la base del motor
en agua ni otro líquido.
2. Usa siempre el electrodoméstico sobre una supercie seca y nivelada.
3. El uso de accesorios no vendidos o recomendados por el fabricante puede causar
incendios, descarga eléctrica o lesiones.
4. No retires el envase de la base del motor mientras la licuadora esté en funcionamiento.
5. No coloques las manos en el envase a menos que la unidad esté desconectada del
tomacorriente. Se puede usar un raspador, pero únicamente cuando la licuadora no
esté en funcionamiento.
6. Desconecta la licuadora del tomacorriente antes de sacar el envase de la base.
Las cuchillas están aladas - manipula con cuidado.
7. Para reducir el riesgo de lesión, jamás coloques el ensamblaje de cuchillas sobre la base
sin la jarra adecuadamente sujetada.
8. Siempre opera la licuadora con la cubierta en su lugar.
9. No uses esta licuadora para nes diferentes a la preparación de alimentos o bebidas.
10. No licúes una mezcla seca, espesa o pesada por más de 10 segundos sin apagar la
licuadora. Luego revuelve los ingredientes antes de continuar licuando.
11. No proceses líquidos hirvientes. Deja enfriar antes de colocar en la jarra.
12. No dejes el electrodoméstico sin supervisión cuando esté en uso. Los niños pequeños
deben ser supervisados cuando estén cerca del electrodoméstico.
13. No coloques el electrodoméstico en ni sobre un quemador caliente, eléctrico o de gas,
ni donde pueda entrar en contacto con cualquier otra fuente de calor.
14. Desenchufa el electrodoméstico del tomacorriente cuando no esté en uso, antes de
colocar o retirar piezas y antes de limpiar.
15. Este electrodoméstico es únicamente para uso doméstico. No uses este
electrodoméstico para nes diferentes a aquellos previstos. No usar en exteriores.
16. Desenreda completamente el cable antes de usarlo.
17. Para evitar descargas eléctricas, no sumerjas el cable, el enchufe ni la base del motor
en agua ni otro líquido.
18. No dejes que el cable cuelgue del borde de una mesa o mostrador ni que entre en
contacto con supercies calientes o se enrede.
19. Este aparato no fue diseñado para ser usado por niños pequeños ni personas débiles,
a menos que reciban supervisión adecuada por parte de una persona responsable de
garantizar que puedan usar el electrodoméstico de manera segura.
20. Se recomienda inspeccionar regularmente el electrodoméstico. No uses el
electrodoméstico si el cable principal, el enchufe, o el aparato, están dañados de
cualquier manera. Devuelve el electrodoméstico completo al Centro de Servicio
Autorizado de Omega más cercano para que lo revisen y/o reparen.
21. Cualquier mantenimiento que no sea la limpieza debe ser realizado por un
Centro de Servicio Autorizado de Omega.
22. No uses este electrodoméstico para nes diferentes a aquellos previstos. No usar en
vehículos en movimiento o botes. No usar en exteriores
34
GUARDA ESTAS INSTRUCCIONES
Page 37

CONOCE TU OMEGA
Este producto usa un interruptor de reinicio y un apagado térmico para proteger el motor.
Si la unidad deja de funcionar durante la operación, presiona el interruptor de reinicio en la base de la unidad.
Si la unidad sigue sin funcionar, desconéctala, espera 30 minutos e inténtalo de nuevo.
Interruptor de reinicio
A
B
C
D
E
F
G
H
OM6560 / OM6562 OM6160 / OM6162
I
A Tapa del alimentador
B Tapa
C Envase de copoliéster Eastman Tritan™ sin BPA
D Ensamblaje de cuchillas
E Panel de contro
F Base de la licuadora
G Motor de alto desempeño
H Patas rmes antirresbalantes
I Émbolo/Espátula
35
Page 38

INSTRUCCIONES DE OPERACIÓN
ANTES DE USAR POR PRIMERA VEZ
Antes de usar por primera vez tu licuadora Omega, retira todo el material de empaque
y las etiquetas promocionales. Asegúrate de que el electrodoméstico esté apagado en
el tomacorrientes y que el cable esté desenchufado. Lava la tapa, la cubierta interna,
el envase Eastman Tritan™ y el ensamblaje de cuchillas, usando un paño suave y agua
caliente y jabonosa. Enjuaga y seca completamente. No coloques piezas en el lavaplatos
(a excepción del envase, la tapa y la cubierta interna). El envase, la tapa y la cubierta
interna pueden lavarse en el lavaplatos. Asegúrate de que el ensamblaje de cuchillas se
haya retirado del envase antes de colocar la licuadora en el lavaplatos. La base del motor
puede limpiarse con un paño húmedo. Seca completamente.
CÓMO ENSAMBLAR LA LICUADORA
1. Para ensamblar el envase, coloca el sello de silicona sobre el ensamblaje de cuchillas.
2. Inserta el ensamblaje de cuchillas en la base del recipiente.
3. Coloca la base del motor sobre una supercie plana y seca. Asegúrate de que la base
del motor esté apagada y que el cable esté desenchufado. Endereza el envase de la
licuadora e insértalo en la base del motor.
4. Enchufa el cable eléctrico en un tomacorrientes. El asa del envase puede ubicarse a la
izquierda o a la derecha del electrodoméstico.
CÓMO DESARMAR LA LICUADORA
1. Siempre asegúrate de que tu licuadora Omega esté apagada. Luego desconecta el
cable eléctrico.
2. Retira el envase de la base del motor tomándolo por el asa y levantándolo. Retira el
ensamblaje de cuchillas dando vuelta al envase y girando el soporte de cuchillas en
dirección de las manecillas del reloj, luego separándola de la base de la licuadora.
3. Retira el sello de silicona del ensamblaje de cuchillas.
PROTECCIÓN AUTOMÁTICA CONTRA SOBRECARGAS
Tu motor Omega está diseñado para protegerse de sobrecalentamientos. Si el motor se apaga,
coloca en OFF (apagado) el interruptor eléctrico hasta por 45 minutos para que reinicie. Para
reducir el tiempo de reinicio, desconecta la máquina, retira el envase y sopla aire en la sección
central. Presiona el botón de reinicio en la parte inferior de la licuadora.
CABLE ELÉCTRICO
Tu máquina está equipada con un cable largo.
Almacena abajo ordenadamente la porción que no se usa.
VISTA INFERIOR/AMARRE DEL CABLE
Retenedores plásticos soportan el cable de manera segura.
No hay necesidad de desenroscar los retenedores para
sacar el cable. Son exibles y regresan a su posición una
vez sacado el cable.
36
Page 39

CÓMO USAR TU LICUADORA OMEGA
1. Para encender la licuadora Omega, enciende en la posición ON.
NOTA: Al usar por primera vez tu licuadora Omega, puedes notar que el motor
despide un olor. Esto es normal y se disipará con el uso.
2. Agrega alimentos o líquidos en el envase, asegurándote de no superar la marca de
‘MAX’.
3. Coloca rme la tapa de la licuadora en su sitio, en la parte superior del envase. Si
no está ya en su lugar, inserta la cubierta interna en la tapa de la licuadora y gira
en dirección de las manecillas del reloj, o en el sentido contrario, para bloquear en
posición.
4. Enciende la licuadora (ON) o selecciona una velocidad, dependiendo del modelo.
La licuadora empezará a funcionar. La velocidad puede cambiarse en cualquier
momento durante el proceso de licuado.
5. Para detener el licuado en cualquier momento, apaga el interruptor en la posición
(OFF).
6. Al terminar de usar, asegúrate siempre de que tu licuadora Omega esté apagada,
presionando o girando a ‘OFF’. Luego desconecta el cable. Asegúrate de que el
motor y las cuchillas se hayan detenido completamente antes de intentar moverlos.
Desarma, limpia y guarda el electrodoméstico.
NOTA: Durante el proceso de licuado, los ingredientes pueden pegarse a los lados del
envase. Para empujar los alimentos nuevamente hacia las cuchillas, coloca el interruptor en
‘OFF’ (Apagado) y retira el cable eléctrico. Quita la tapa y usa una espátula de goma para
raspar los lados del envase. Vuelve a colocar la tapa antes de licuar.
NOTA: Si aparece humedad o líquido sobre la base del motor durante el licuado,
coloca el interruptor en ‘OFF’. Retira el envase. Limpia la base del motor
inmediatamente con un paño seco o toalla de papel. Verica que el envase esté
ensamblado correctamente.
CÓMO USAR EL ÉMBOLO/ESPÁTULA
El émbolo/espátula ayuda a mezclar combinaciones muy espesas. Mientras la
máquina está en funcionamiento, y únicamente a través de la abertura del tapón
de la tapa, usa el émbolo/espátula para empujar los ingredientes hacia las cuchillas.
Sugerimos su uso al hacer helados o mantequillas de nueces, o para hacer purés de
frutas o vegetales.
• El disco (cerca de la parte superior del émbolo/espátula) y la tapa evitan que el
émbolo/espátula golpee las cuchillas cuando la tapa está asegurada adecuadamente
en posición bloqueada.
• El envase no debe estar lleno a más de dos tercios cuando se use el
émbolo/espátula durante el licuado.
• No uses el émbolo/espátula por más de 30 segundos consecutivos (para evitar
sobrecalentar).
• Si los alimentos no circulan, la licuadora puede tener una burbuja de aire atrapada.
Retira cuidadosamente la cubierta interna mientras te aseguras de que la tapa
principal se mantiene rme en su sitio. Libera la burbuja de aire insertando el
émbolo/espátula a través de la abertura de la cubierta interna.
• Sostén recta hacia abajo el émbolo/espátula. Si esto no ayuda a que los
ingredientes circulen, apunta el émbolo/espátula hacia el lado o la esquina
del envase.
37
Page 40

CONSEJOS PARA FACILITAR LA LIMPIEZA Y EL CUIDADO
LIMPIEZA
No laves el ensamblaje del envase ni el de la base de la licuadora en el lavaplatos.
1. Antes de usar por primera vez y tras cada uso, separa las piezas del envase de la base.
2. Agrega solución de limpieza al envase. Usa agua (a menos de 115°F/46°C) y un
detergente que no haga espuma.
3. Friega y enjuaga el interior del envase, la cubierta interior y la tapa del alimentador
para eliminar los residuos de alimentos.
4. Vacía el envase.
5. Llena 1/4 del envase con solución de lavado fresca y colócalo sobre la base.
6. Vuelve a colocar la tapa en el envase y haz funcionar la licuadora en velocidad
rápida por 2 minutos.
7. Repite el paso 5 usando agua de enjuague limpia.
8. Limpia el envase, la tapa de alimentación, y la tapa con un paño suave o esponja.
9. Limpia completamente con un paño húmedo o esponja el exterior de la base
electrodoméstico. La base contiene componentes eléctricos: no sumerjas, ni uses una
lavadora a presión o un lavaplatos para limpiar la base.
10. Limpia con un paño cualquier partícula excedente de alimento o del cable eléctrico.
CONSEJOS DE CUIDADO:
Para cuidar de tu licuadora, por favor lee los consejos como sigue:
1. Revisa periódicamente todas las piezas antes de reensamblar, ya que el uso de
piezas dañadas o no recomendadas puede resultar en lesiones personales graves y
o daños a la licuadora.
2. Cuchillas: Si las cuchillas de procesamiento están atascadas o es difícil hacerlas
girar, NO USES LA LICUADORA. Desconecta la licuadora. Revisa las cuchillas
girándolas cuidadosamente en sentido de las manecillas del reloj, dejando los
bordes alados en el lado contrario. Las cuchillas deben girar libremente.
3. Envase: Si el recipiente Eastman Tritan™ está rajado, NO USES LA LICUADORA, el
continuar usándola puede resultar en la rotura del recipiente durante el uso.
4. Base de la licuadora: Jamás sumerjas la base del la licuadora en agua. Desenchufa
la unidad. La carcasa puede limpiarse con un paño húmedo.
5. Motor: El motor está permanentemente lubricado y no requiere de lubricación
adicional.
ADAPTADORES
1
2
38
En la mayoría de los modelos, el cable eléctrico
viene equipado con un enchufe de tres clavijas
(con conexión a tierra) que se conecta a un
tomacorriente estándar para tres clavijas (Figura 1).
Por favor, usa adaptadores aprobados a dos
clavijas (Figura 2) cuando no esté disponible una
conexión a tierra. No cortes ni retires del cable de
energía la clavija redondeada de conexión a tierra.
Page 41

USOS ADICIONALES
• Se usa para hacer bebidas o cócteles, emulsiones como mayonesa, aderezos, marinados
y alimentos que requieren mezclar hasta que simplemente se combinen, como mezclas
de harina; también para hacer purés o sopas y airear líquidos.
• Se usa para licuar frutas, helados y yogurts y crear smoothies, batidos y merengadas
espesos.
• Usa la función de pulso para alimentos que solo requieren golpes cortos de potencia,
como triturar nueces o hielo.
• Usa la función de pulso con golpes cortos de potencia al licuar bebidas que contengan
cubos de hielo o frutas congeladas.
• Asegúrate de que todos los alimentos estén cortados en cubos (con cuadrados de
aproximadamente una pulgada), cuando corresponda, para lograr resultados uniformes.
• No coloques más de 2 tazas de ingredientes calientes en la licuadora Omega antes de
comenzar a licuar. Después de haber comenzado el proceso de licuado y las cuchillas
giren, puedes agregar lentamente otra 1½ tazas de ingredientes a través de la abertura
de la tapa, si lo deseas.
• Las mezclas espesas se hacen puré más ecientemente si la licuadora Omega solo está
llena entre ¼ y ½.
• Al usar varios ingredientes en el envase, coloca primero los líquidos y después los sólidos, a
menos que la receta lo especique. Al licuar mezclas espesas o secas puede ser necesario
usar el émbolo/espátula para raspar los lados del envase. No uses utensilios de metal, ya
que pueden dañar las cuchillas o la licuadora.
MANTENIMIENTO
Inspecciona la licuadora y sus piezas variadas y reemplaza como sigue:
DIARIAMENTE
1. Desconecta la licuadora y retira el envase de la base.
2. Inspecciona las cuchillas del recipiente para conrmar si están desgastadas,
golpeadas, rotas o ojas. Reemplázalas si es necesario.
SEMANALMENTE
1. Desconecta la licuadora.
2. Inspecciona el aislamiento del cable eléctrico y el enchufe para conrmar que no
hayan grietas.
TRIMESTRALMENTE
1. Repasa las condiciones del ensamblaje del envase al menos cada 90 días.
2. Reemplázalo si es necesario.
PIEZAS DE REPUESTO
Para obtener piezas de repuesto, llama a servicio al cliente: 1-800-633-3401
39
Page 42

OFF
LOW
HIGH
OFF
ON
PULSE
SPD
ON
PULSE
HIGH
LOW
BL420
1
3
TIME
0
1
2
3
5
BL440
OFF
LOW
HIGH
PANEL DE CONTROL
MODELOS: OM6560
Interruptor ON/OFF (encendido/apagado) – Perilla de velocidad variable – Interruptor de pulso
(ALTA)
HIGH
7
8
9
SPD
LOW
(BAJA)
(APAGADO)
(ENCENDIDO)
ON
(ALTA)
3
OFF
1
PULSE
(PULSO) (VELOCIDAD)
4
0
SPEED
5
6
10
MODELOS: OM6160
Interruptor ON/OFF (encendido/apagado) – Velocidad High/Low (Alta/Baja) e interruptor de pulso
(ENCENDIDO) (ALTA)
ON
(APAGADO)
PULSE
ENSAMBLAJE DE CUCHILLAS DEL AGITADOR
(PULSO)
Ten cuidado al manejar las cuchillas, están aladas. Usa un paño suave para agarrar el
ensamblaje de cuchillas a través del envase.
HIGH
LOW
(BAJA)
(VELOCIDAD)
40
La tuerca de retención se retira fácilmente
1
usando la herramienta desarmadora (DT)
que se vende por separado. Voltea el
envase de cabeza e inserta la herramienta
desarmadora en los oricios de la tuerca.
Empuja la herramienta en sentido contrario
a las manecillas del reloj para aojar las
tuercas (Paso 1). Una vez aojada, retírala
con la mano.
2
Para liberar la cuchilla, y el otro extremo de
la DT mientras sujetas las pinzas de respaldo
de engranajes y las giras en sentido contrario
a las manecillas del reloj (Paso 2).
Page 43

RESOLUCIÓN DE PROBLEMAS
EL ENVASE EMITE RUIDOS FUERTES
PROBLEMA: Las cuchillas del envase no giran.
SOLUCIÓN: Socket de transmisión roto o desgastado. Remplaza el socket de
transmisión.
PROBLEMA: Vibración incrementada.
SOLUCIÓN: Revisa el ensamblaje de cuchillas para conrmar que no haya
componentes dañados y reemplázalos.
PROBLEMA: Filtraciones de la parte inferior del envase.
SOLUCIÓN: Aprieta la tuerca de retención en la parte inferior del envase.
LA MÁQUINA ARRANCA Y SE APAGA
PROBLEMA: Motor
SOLUCIÓN: Presiona el botón de reinicio.
PROBLEMA: Botón de reinicio.
SOLUCIÓN: Llama a Servicio al Cliente: 1-800-633-3401
PROBLEMA: Falla de energía.
SOLUCIÓN: Revisa para asegurarte de que la máquina tenga energía.
PROBLEMA: Daños al cable de la fuente de energía.
SOLUCIÓN: Revisa el cable de la fuente de energía y la conexión al tomacorrientes.
PROBLEMAS POSIBLES Y SOLUCIONES FÁCILES
PROBLEMA POSIBLE: El motor no arranca o las cuchillas no rotan.
SOLUCIÓN FÁCIL:
• Revisa que el envase y la tapa estén bloqueados de manera segura en su sitio.
• Revisa que el ensamblaje de las cuchillas esté asegurado correctamente a la base
del envase.
• Revisa que el interruptor de ‘Power’ y la función seleccionada o la conguración de
velocidad estén en ‘ON’ (Encendido).
• Revisa que el enchufe esté insertado de manera segura en el tomacorriente.
PROBLEMA POSIBLE: Los alimentos fueron triturados de manera irregular.
SOLUCIÓN FÁCIL: Puede ser que se esté licuando demasiados alimentos de una
sola vez o que los pedazos sean muy grandes. Intenta cortar
los alimentos en piezas más pequeñas de tamaños similares y
procesar una cantidad menor cada vez. Para obtener mejores
resultados, los alimentos deben cortarse en piezas no mayores
a ¾ de pulgada.
PROBLEMA POSIBLE: Los alimentos fueron triturados demasiado nos o están aguados.
SOLUCIÓN FÁCIL: Los alimentos se procesaron demasiado. Intenta usar la función
Pulse (pulso) o procesar por un tiempo más corto.
PROBLEMA POSIBLE: Los alimentos se pegan a las cuchillas o al envase.
SOLUCIÓN FÁCIL: La mezcla puede estar demasiado espesa. Intenta agregar más
líquido a la mezcla y/o usa otra función.
CONTÁCTANOS:
Servicio al Cliente: 1-800-633-3401
Por Internet: www.OmegaJuicers.com/contact-omega-juicers
41
Page 44

ESPECIFICACIONES DEL PRODUCTO
Nombre del producto Series OM6560, OM6160
Voltaje nominal 120 V
Clasicación de frecuencia 50-60 Hz
Amps 11.5
Motor 3 HP máximos
Peso 15 lb. (6.8 kg)
Dimensiones del producto 8.25” de ancho (210 mm)
9” de profundidad (230 mm)
19.75” (500 mm) de alto
También disponible modelo internacional 240 V / 50 Hz
OM6562/OM6162
42
OM6560 / OM6562 OM6160 / OM6162
Page 45

RECETAS
Daiquirí de Fresa
Lo que necesitarás:
:
5 a 10 fresas (al gusto)
2 oz de ron claro
1/2 oz de triple seco
1 oz de zumo de lima
1/2 cucharadita de azúcar
1 taza de hielo
PREP 5 minutos
LICUE 2 minutos
ENFRÍE 2
minutos
Helado de Frutas
Lo que necesitarás:
Cómo preparar:
1
Mezcla todos los ingredientes en la
licuadora Omega a velocidad 9,
colocando el temporizador en 2 minutos.
2
Vierte en un vaso helado. Sírvelo.
Cómo preparar:
2 tazas de frutas congeladas
(bananas, fresas,
arándanos azules, etc.)
1/2 taza de azúcar
1 taza de crema espesa
PREP 5 minutos
LICUE 5 minutos
ENFRÍE 30
minutos
1
Comienza por agregar la fruta a la
licuadora. Agrega el azúcar y 1/4 de taza
de crema. Mezcla todos los ingredientes a
velocidad 7, colocando el temporizador de
4 a 5 minutos.
2
Al licuar, agrega lentamente más crema a
través de la cubierta extraíble de la tapa.
Agrega más crema si la mezcla no tiene la
consistencia que deseas.
Congela la mezcla por al menos 30 minutos.
3
SUGERENCIA: Para helado de banana, usa unas que
estén tan maduras que estén a punto de dañarse,
rebánalas, congélalas ¡y úsalas para helado de
banana!
43
Page 46

RECETAS
Helado de Coco-nilla
Lo que necesitarás:
2 tazas de leche de coco
(enlatada o fresca)
2 cucharadas de sirope de arce,
miel o agave
2 cucharaditas de extracto
de vainilla Frutas (opcional)
PREP 3 minutos
LICUE 6 minutos
CONGELE
2
horas
Cómo preparar:
1
2
Salsa de manzana
con canela
Lo que necesitarás:
Cómo preparar:
Mezcla todos los ingredientes a
velocidad 7, colocando el temporizador
de 4 a 6 minutos.
Congela la mezcla por al menos 2 horas,
revolviendo cada 20 a 30 minutos.
¡Receta sin lácteos!
6 manzanas, sin núcleo, peladas,
cortadas en cuartos
2 cucharadas de zumo de limón
2 cucharaditas de canela
PREP 5 minutos
44
LICUE 3 minutos
1
Licúa todos los ingredientes en la
licuadora Omega hasta que alcance la
consistencia deseada.
2
Omega recomienda colocar la
licuadora en velocidad 7 por 3 minutos.
Page 47

RECETAS
Sopa de especias de
calabaza
Lo que necesitarás:
4 cucharadas de aceite de oliva
2 cebollas amarillas medianas,
6 tazas de calabaza rostizada rebanada
1/2 taza de crema espesa (35%)
1/4 de cucharadita de pimienta roja
2 cucharaditas de polvo de curry
1/2 cucharadita de cilantro molido
PREP 20 minutos
(cortadas en cuartos)
2 cucharaditas de ajo
5 tazas de caldo de pollo
(si se desea para endulzar)
LICUE 8-10 minutos
2 tazas de leche
al gusto
sal (si se desea)
azúcar morena
COCINE
15
minutos
Cómo preparar:
1
Agrega cebollas, ajo y sal a la licuadora
Omega. Coloca la licuadora en velocidad 6 y el
temporizador de 2 a 3 minutos hasta que quede
molido no. Transere a la estufa y cuece en llama
baja hasta que las cebollas queden suaves.
Mientras tanto, combina la calabaza y el caldo de
2
pollo. Vierte en una olla con aceite, cebolla, ajo y
sal. Espera a que empiece a hervir. Deja a fuego
lento por 10 minutos.
Vierte la mezcla en la licuadora mientras aún está
3
tibia. Colocar la licuadora en velocidad 7 por 5
minutos. Agrega los ingredientes restantes a través
de la cubierta extraíble de la tapa. La textura de la
mezcla debe acercarse a la de un puré.
Vierte la mezcla en una olla sobre la estufa.
4
Calienta y deja 5 minutos para que se combinen
los sabores. Se sirve caliente o frío.
Mousse de chocolate
Lo que necesitarás:
1/2 de taza de leche
1 taza de crema espesa
2 cucharaditas de mantequilla
1/2 cucharadita de café
instantáneo
2 huevos
6 oz de chispas de chocolate
2 cucharadas de ron,
coñac o brandy
1 cucharadita de azúcar
pulverizada
PREP 10 minutos
LICUE 5 minutos
Cómo preparar:
1
Mezcla 1/2 de taza de leche y 1/2 taza
de crema sobre la estufa hasta llegar a
punto de ebullición. No dejes que se queme.
Agrega a la licuadora Omega mantequilla,
2
huevos, café, chispas de chocolate y licor.
Licúa hasta que quede cremoso. Al licuar,
agrega lentamente leche caliente y crema.
3
Licúa hasta que quede suave, colocando
el temporizador
en 1 o 2 minutos y la velocidad en 4.
Vierte sobre una bandeja. Enfría por al
menos una hora
4
Bate la crema restante y el azúcar
pulverizada en una mezcla suave y enfría.
Sirve arriba.
45
Page 48

RECETAS
Salsa de Chili
Lo que necesitarás:
1 lata de 14.5 oz de tomates enteros
4 cucharadas de jalapeños
(en cubos, no encurtidos)
2 chiles
1/4 taza de cebollas amarillas (en
cuadritos)
1/2 a 3/4 cucharaditas de ajo
1/2 cucharadita de comino
1/4 cucharadita de azúcar
PREP 2 minutos
LICUE 4 minutos
ENFRÍE 60
minutos
Cómo preparar:
1
En la licuadora Omega, coloca los
jalapeños, los chiles y las cebollas. Recuerda
que el picante de los chiles proviene de las
semillas, las venas en las que éstas se aferran
y las partes más cercanas a estas últimas.
Para platos más suaves deben retirarse y
desecharse las semillas y las venas.
Licúa por algunos segundos en velocidad 6.
2
Agrega ambas latas de tomates, sal, azúcar
y comino.
3
Mezcla todos los ingredientes a velocidad 4
o 5, colocando el temporizador de
1 a 2 minutos. No hagas puré.
4
Coloca en un envase cubierto y enfría por
1 hora antes de servir.
Panqueques de trigo
con miel
Lo que necesitarás:
Cómo preparar:
1-1/3 tazas de suero de leche
(bajo en grasa)
2 cucharadas de miel
1-1/2 tazas de mezcla para
hornear de suero de leche
1/2 taza de harina de trigo entero
1/4 de taza de germen de trigo
con miel crujiente
1 cucharadita de levadura
mantequilla y sirope para servir
PREP 3 minutos
46
LICUE 6 minutos
COCINE
2 huevos
4
minutos
1
Coloca el suero de leche, los huevos y
la miel en la licuadora Omega. Coloca
la velocidad en 6 y el temporizador en
6 minutos. Luego comienza a agregar
los ingredientes restantes a la licuadora
Omega en el orden dado, a través de la
cubierta extraíble de la tapa del envase.
2
Una vez que la mezcla alcance la
consistencia deseada, apaga la
licuadora.
Para cada panqueque, vierte alrededor
3
de 1/4 de taza de la mezcla de harina en
una sartén.
Page 49

NOTAS
47
Page 50

NOTES
48
Page 51

NOTES
49
Page 52

Nourish Your Body
Enrich Your Soul
Alimentez votre corps
Enrichissez votre âme
NUTRA SU CUERPO
Enriquezca su alma
Discover the complete line of Omega brand professional products at:
Découvrez la ligne complète de produits professionnels de la marque Omega sur :
Descubra la línea completa de productos profesionales de la marca Omega en:
www.OmegaJuicers.com
6291 Lyters Lane • Harrisburg, PA 17111, USA • T: 1.800.633.3401 • F: 717.561.1298
 Loading...