

Page 1
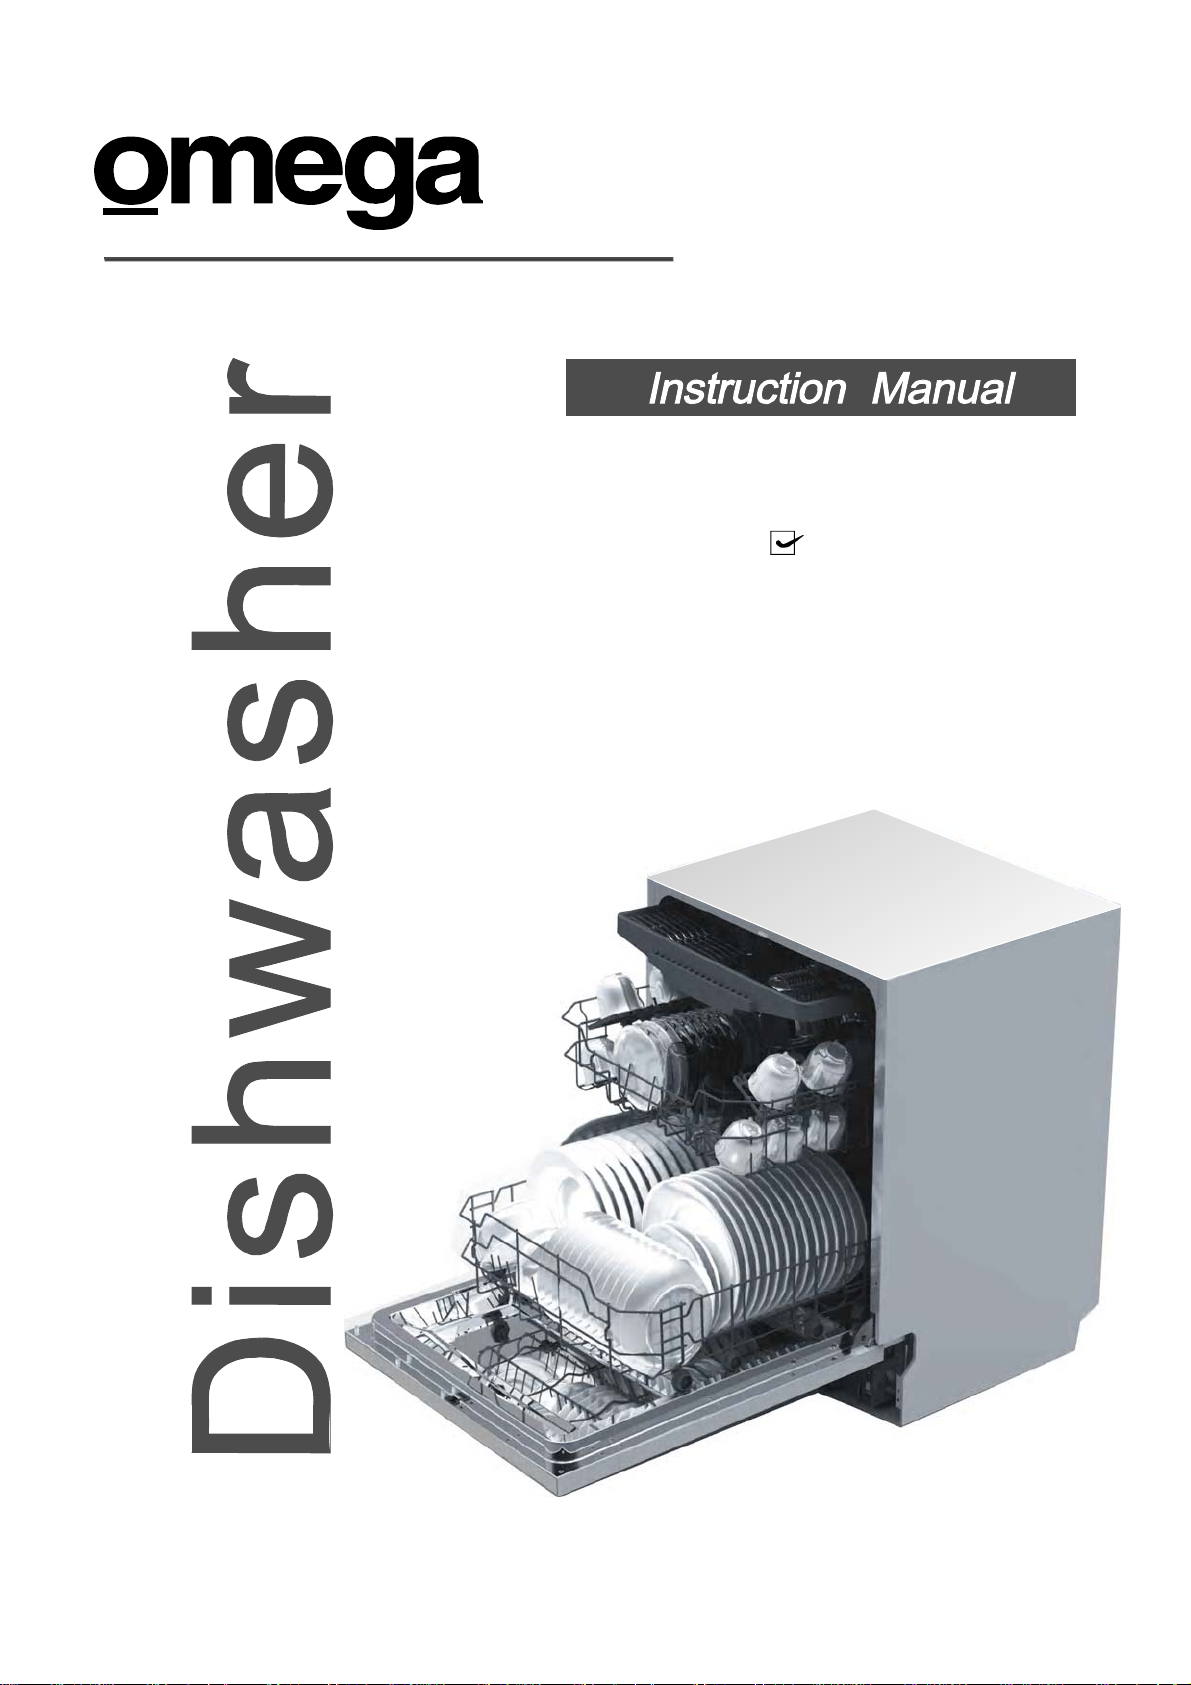
OFI604A
14 place settings
Page 2

Fordetailedoperatingmethodread thecorresponding content on t he instructionmanual.
Switch on the appliance Open the door,press the On/Off button to switch on the appliance .
Witheachwashcycle.
Fill the detergent dispenser
Compartment
For programmes with pre-wash only.
(Follow the user instructions!)
Check the rinse aid level
Load the baskets
Select a programme
Running the dishwasher
Changing theprogramme
Add forgottendishes in the
dishwasher.
Electric indicatoroncontrolpanel(if provided).
Scrapeoff any large amount of leftover food. Soften remnants of burnt foodinpans,
thenload the baskets. Refer to the dishwasher loading instructions.
Press the Programme Button until the selected programme lights up.
( See the section entitled Operationinstruction )“”
Turnonthewatertap,closethedoor.Themachinewillstartworkingafterabout10seconds.
1. A running cycle can only be modified if it has been running for a short time. Otherwise the detergent
may have already been released and the water already drained. If this is the case, the detergent
dispenser must be refilled.
2. Openthe door and press the Programme Button for morethan 3 seconds
to cancel the runingprogarmme
3.Select a new programme.
4.Close the door ,the machine will restart after about 10 seconds.
1.Open the door a little to stop the dishwasher.
2.After the spray arms stop working, you can open the door completely.
3.Add the forgotten dishes.
4.Close the door, the dishwasher will start running again after 10 seconds.
Open th e doo r care fu l l y.
Hotsteam may esc ape
when thedooris opened!
If the appliance is switched
off during a wash cycle.
Switch offthe appliance
Turn off the water tap,
unload the baskets
If the appliance is switched off during a wash cycle, when switched
on again, please re-select the washing cycle and operate the dishwasher
according to the original Power-on state.
When the working cycle has finished, the buzzer of the
dishwasher will sound 8 times, then stop.
Turn off the appliance using the On/Off Button.
Warning: wait a few minutes (about 15 minutes) before unloading the dishwasher to avoid handling
the dishes and utensils while they are still hot and more susceptible to break.
They will alsodry better.Unload theappliance, starting from the lower basket .
Page 3

Dear Cus to m er ,
This a ppliance isintended t o be used in household and similar appli cations such as:
-staff kitch en a reas inshops, off ices andother wo rking en viron ments;
-farm houses;
-by cli ents inhotels, m otels and othe r residen tial type environm ents;
-bed andbreakfast typeenvironments.
Pleasecarefully readthismanual beforeusingthedishwasher, it will help you to use and maintainthe
dishwasherproperly.
Keep i t as a re f er enc e in the lat er days.
Passiton to any subsequentowneroftheappliance.
This manual contai ns sect ions on safety Instru c tio ns,O p era t ing Instr uct io ns, Inst al lat i on Instru cti o ns and
Troubles hooting Tips, et c .
The section ontroubleshooti ng Tips wi ll helpyou to s olve some common problems by you rse lf .
Ifyou can not solv e the problems by yo urself , please ask for th e he lp of professional technicians.
The manufa cturer, followi ng a policy of c onstant development and updating of the product, may make
modifications without giving prior notic e.
Page 4
CONTENTS
Contro l Panel....................................................... .................................................................................2
Dishwasher Features....................................................... ................................................................... ...2
A Fill the RinseAid Dispenser............. ........ ................................................ .............................. ..3、 ..... ....
B Function of Detergent ................................... ................................. .................................. .........4、 ........
Attentio n b efore or afte r lo ading the Dish was her
Baskets..............................................................................................................................................6
TheMetho d Lo a ding Normal Dish ware
Max. Dishe s....................................................................................................................................... .8
Wash CycleTable.. ........................ ..................................................... .................................. ..... . ... . .... . . .9
Turningon the A ppliance.............................. ........................................................................................9
ChangetheProgramme.............. .....................................................................................................10....
At theEneofthe WashCycle...... ................................ ....................... ................................ ...................10
............ .... ...... ........... ...... ......... ...... ...... ...... ...... ......... ......... .... .....7
Filtering System.... ........................ ..................................................... ....................................... .........11
Caringfo rthe Dishwasher..................... ......................... ........................ ........................................... .12.
.......................................... ......... ......................... ........................ ................. 1 3Installation p reparation
...,.............................. .................................. ............... ...14Aesthetic panel'sdimensions andinstallat ion
......... ..................................................... ................ ........ ........................... 15Connectionof drain hoses
......... ................ .......................................... ................................. ........1 6Dishwasher installation steps
AboutElectricity Connecting......................... ................................. ....................................................1 7
ColdWater C onnection.... ........................................... .................................. ................................. .. ..1 9
Startof dishwasher.. ........ ............. ......... ................................... ..................... .................................19..
Befo re callin g for service. ........ .. .. ... ... ..... ... .......... ... .. ... ... . ....... . ... ... . ... ... . . ... ... . ... ... . ...... .. ... . ... ... ...........20.
Error codes.................................... ............................ ................. ...................................................21.
Technicalinformation..... ......................... .22......................................... ........................... ....................
............ ................................. .................................. ............... ...15Tension adjustmentof the doorspring
Page 5

When u sin g your dishwasher, follow the p rec aut ions listed bel ow:
This appliance must be grounded. In the event of a
malfunction or breakdown, grounding will reduce
the risk of anelectric shock by providing a path of
least resistance of electric current. This appliance
is equipped with a cord having an equipmentgrounding conductor and a grounding plug.
The plug must be plugged into an appropriate outlet
that is installed and grounded in accordance with
all local c odes and ordinances.
Donotabuse,siton,orstandonthedoorordish
rack of the dishwasher.
Do not touch the heating element during or
immediately after use.
(This instruction is only applicable to machines
with a visual heating element.)
Do not operate your dishwasher unless all
enclosure panels are properly in place. Open
the door very carefully if the dishwasher is
operating, there is a risk of water squirting out.
Do not place any heavy objects the
door when it is open. The appliance could tip
forward.
When loadi ng ite ms tobe washed :
1) Locate sharp items sothat theyare not likely
to damage the door seal;
2 Warning:Knives andother u tensils with
)
sharp pointsmust be loaded in t he ba sket
with th eir poi nts do wn or placed in a
horizontal position.
When usi ng y our dishwasher,youshould
pr ev en t pl a stic items fro m comi n g in t o co ntac t
with t he he ating e lement.( This instruction is only
applicable to machines with a visual heatin g
element. )
Check that th e detergent comparm ent is e mpty
after compl etion o f the washcycle.
Do not wash plastic items unless they are marked
dishwasher safe or the equivalent. For plastic items
n
ot so marked, check the manufacturer's
recommendations.
Use only detergent and rinse addi tives
design ed for an automatic dishwa sher.
Never use soap, laundr y dete rgent, orhand
washing detergent in your dishwa sher. Keep
these pro d u cts out of the reach of chil dr en.
on or stand on
Improper connection of the equipment-grounding
conductor can result in the risk of an electric shock.
Check with a qualified electrician or service
representative if you are in doubt whether the
appliance is properly grounded. Do not modify the
plug provided with the appliance; If it does not fit
the outlet. Have a proper outlet installed by a
qualified electrician.
Keep children away from detergent and rinse aid, keep
child away from the open door of the dishwasher,
ren
there could still be some detergent left inside.
This appliance is not intended for use by persons
(including children with reduced physical, sensory or
mental capabilities, or lack of experience and
knowledge ,unless they have been given supervision
or instruction concerning use of the appliance by a
person responsible for their safety.
Children should be supervised to ensure that they do
not play with the appliance.
Dishwasher de tergent s are strongly alkal ine, th ey
can be extremely dangerou s if swallowed.Avoid
contact wit h skin andeyes andkeep ch ildren away
from the dishwasher when the door is open.
The door should n ot be left open,
since this could increa se the risk of tripping.
Ifthe supply cordisdamaged, itmust be replaced
bythemanufactureroritsserviceagentora
similar ly q uali fi ed person i n order t o av oid a
hazar d .
Remove the door to the washing compartment when
removing an old dishwasher from service or discarding it.
Pleasedispose ofpacking m aterials properly.
Use the dishwasher only for its intended function.
During inst allatio n, the powersupply m ust n ot
be exces sively ordangerously bent or f latten ed.
Do not tamper with controls.
The appl iance i s to be connec ted tothe water
mains us ing new hose sets and that old hose-sets
should not be reused.
The maxim um nu mber of place settings to be
washed is 14 .
The maxim um pe rmissible inlet water pressure is
1Mpa.
The minimum permissible i nlet water pressur e is
0.04Mpa.
)
Page 6
To getthe best performancefromyourdishwasher,readall operatinginstructions
beforeusing itfor the firsttime.
6h
3h
9h
1.Power indicator:
2.Rinse aid warning light :Toshow dispense r ne ed
to be refilled Rinse aid.
3.Ext r a Dry in g indic a t or
Extradrying: Anincreased temperatureduringthe final
rinse to i ncrease drying well. T here isa slight increase
in th e energy c ons umpti on .
4.Half load indicator : To s h ow wh en yo u sel ect the
half loadfunction. If you haveonly about or lessthan half
of full load dis hes of the dis hwa s h er, y o u can selec t the
half loa d func tion and yo ur desired pro g r am accordi ng to
thedishescontamin ateddegree.A programselectthe
half l oad fu nction, itcan save t ime, energy,and wat er
compare to the program hasn’t select thehalf l oad function .
After th e half load fu nct i on is se l ected, all the spra y arms
arerunning,youcanloadallthebaskets.
To showwhen thepower on .
:
Fro nt v iew
1
2
5.Program indicator s: To show which program you
havechosen;
6.Option Button: To s ele ct Ha lf load a nd E xt ra dry
functions,thesefunctionscan onlybeusedwith
programme s Int ensive,Hea vy,Normal, Glas s an d
1Hour.
7.DelayButton:
washingtime.
8.Program Button :
washProgram.
9.O n /Of f But ton:
10.Delayindicators:
(3h/6h/9h)
To Press t he button t o delay t he
To Press the button to select a
To turn on/off the power supply.
To s how the delay time.
Back View
3
4
5
6
1
2
3
Cutlery rack
Top spray arm
Upper ba sket
Inner pipe
4
Lower basket
5
Dispense r
6
7
8
9
10
11
12
Cup shelf
7
Spray arm s
8
Filter assembly
9
Inlet pipe connector
10
Drain pipe
11
Adjuste r
12
Page 7
Before usingyour dishwasher fo r the first ti me:
A. Fill therinsea iddispenser
B. F i ll in deterge nt
Rin seAid D ispe ns er
The r inseaid isreleased duringthefinalrinse to prev entwater fr omformingdropletsonyour dishes,whichcan
leave spotsandstreaks.Italsoimprovesdrying by allowing watertorolloff thedishes. Your dishwasheris
designed to use liquid rinse aids.Therinseaiddispenser is locatedinside the doornexttothe detergentdispenser.
To f ill t he dispenser,open the capand pourthe rinseaid into the di spenser until the levelindica tor turns completely
black.Thev olume oftherinse aid container is about 110ml.
Functi on of RinseAid
Rinse aid is automatical ly added dur ing the last rinse, e nsuri ng thorough r in sing, and spo t and strea k fre e drying.
Attenti on!
Only use branded rinseaid for dishwasher. Neverfill the rinseaiddispenser withanyothersubstances
(e.g. Di shwas her cleaning agent, li quid detergen t). T his w oul d d amage the ap plia nce.
When to R efill the RinseAid Disp enser
If there is no rinse-aid w arning light in the cont rol p anel, you can judge the amount o f r inse-aid by the color of the
optical level indica tor "C" loc ated next to t he ca p. W hen the rinse-a id c ontaine r i s ful l, the whole i ndicato r w ill be
dark .As the rin se-aid diminishes, the size ofthe d ark d ot decreases. Youshould never let the rinse aid get below
1/4full.
As the rinse aid diminishes, the size ofthe bl ack dot
on the rinse ai d lev el i ndicat or c hanges, as illust rated below.
Full
3/4full
1/2full
1/4full-Shouldrefilltoeliminatespotting
Empty
RINSEAID DISPENSER
C(Rinse-Aidindicator)
To open the dispenser,turn the cap to the "open" (lef t) arr ow a nd lif t i t out.
1
Pour t h e r inse aid into the dispen se r, being careful not to over fil l.
2
Replace the cap by insertingitalignedwith "open"arrow andturning itto the closed(right) arrow.
3
Be caref ul no t to overfill the dispenser,because this could cause over sudsing. Wi pe aw ay an y sp ills
witha damp cloth.Don'tforgettoreplacethecapbeforeyouclosethedishwasher door.
Attention!
Clean up any rinse aid spilt during filli ng w ith anabsorbent cloth to av oid e xcess foaming
during the nextwash .
Page 8
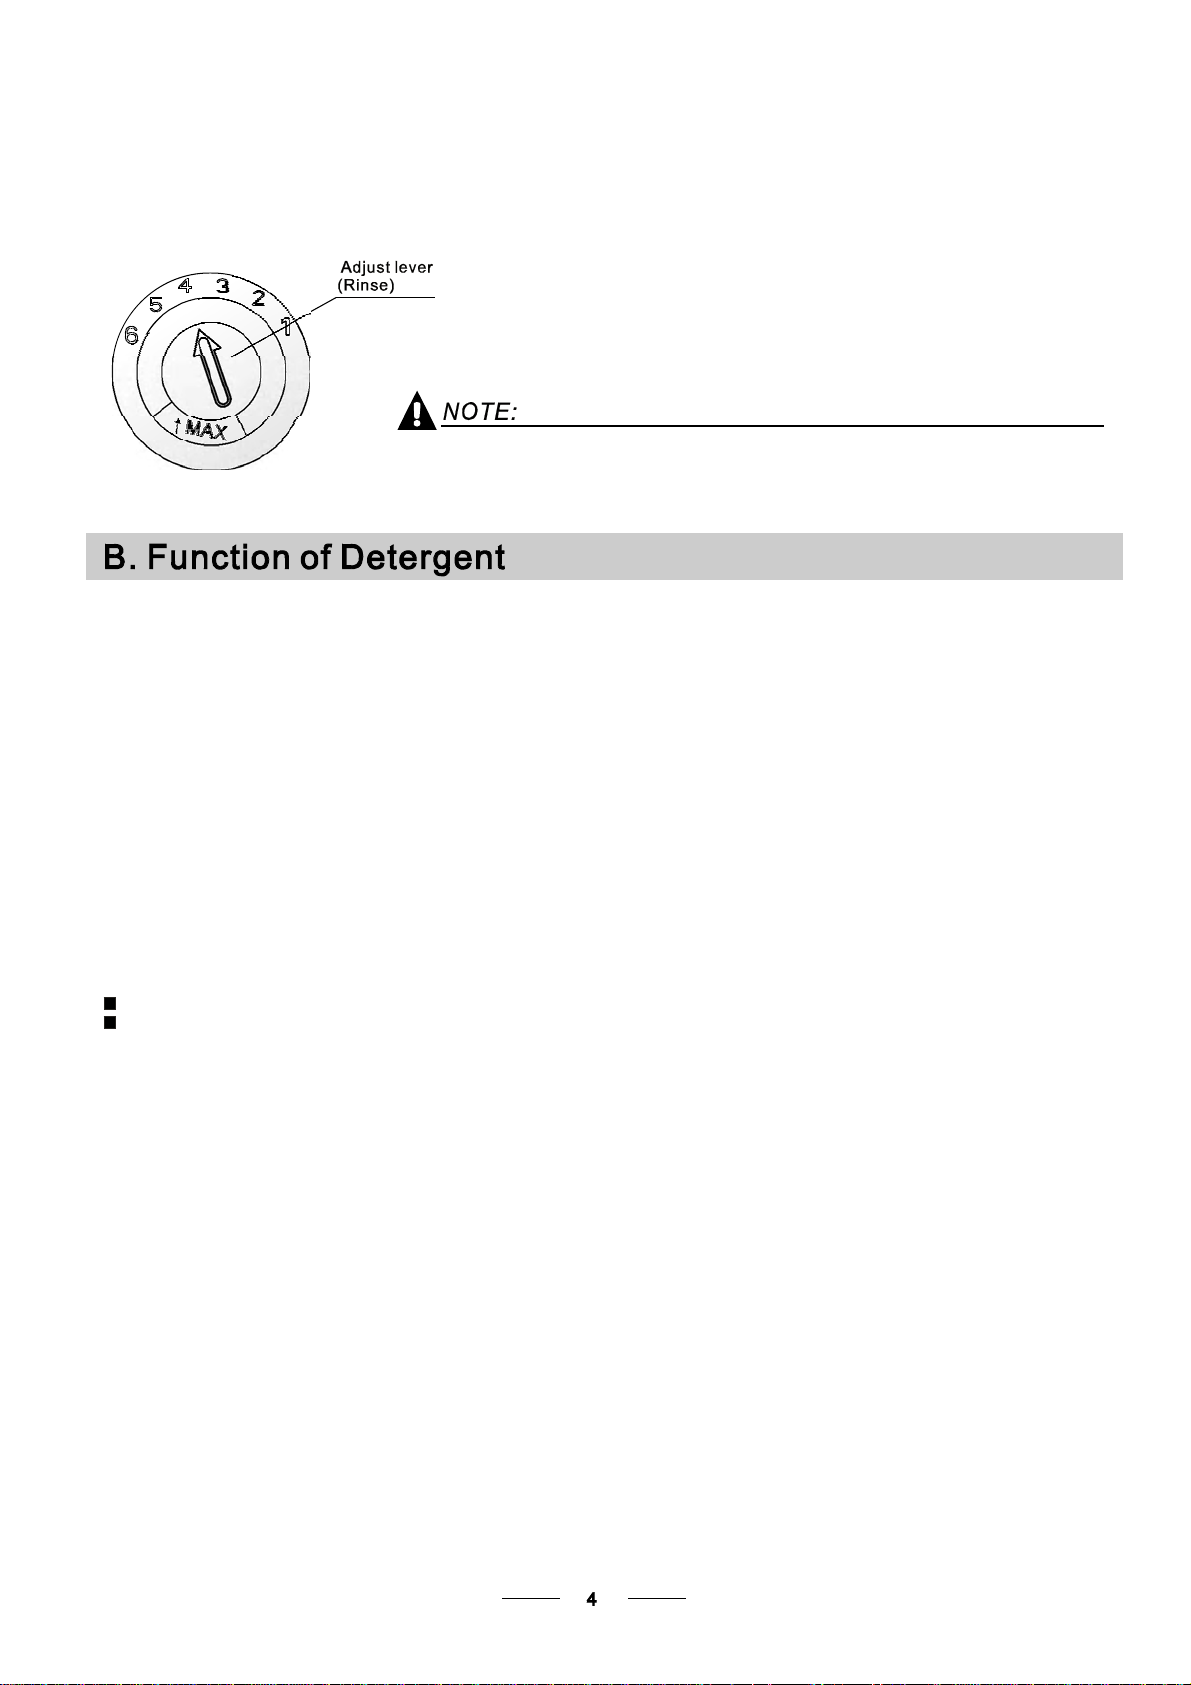
Adjust ing R inseAid D ispenser
The ri nse aiddispen ser has six or foursettin gs.Always start with the dispens er
set on "4". If spots and poor drying are a pro blem, i ncrease the amou nt ofrinse
aid dispensed by removi ngthe dispenserlidand rotating the dialto"5". I fthe
dishes still are not drying properly or are showing spots, ad just thedial t o the next
higher le ver u ntil your dishes arespot- free. T he recom mended setting is"4".
(Factoryvalueis "4".)
Increase the dose if there are drops of water o r li me sp ots onthe di shes a fter washing.
Reduce i t if there are sticky whit ish stains on yourdishes or a blu ish f ilm onglassware or
knifeblades.
Detergents with its c hemical ingredients arenecessary to remove dirt, cru sh d irt an d tr ansport it out ofthe di shwasher.
Most of the commerci al quality deterge nts a re suitable for this pur pose.
Detergen ts
There are 3 sorts ofdetergents
1.Withphosphate andwith ch lorine
2.Withphosphate andwithout c hlorine
3.Withoutphosphate and without chlorine
Normally new pulveris eddeter gent iswithout p hosphate. Th us t he w ater sof tener function of
phosphate is not g iven. In this case we recommend tofill sa lt in thesalt conta iner evenwhen
the ha rdness ofwater isonly 6 dH. Ifdeterg ents wit hout phosphate are used in t he c ase of hardwater
often whitespots appearon dishes and gla sses. In this case please add more detergent to reach
better results. Detergents without chlor ine doonly bleac h a little. Strong and coloured sp ots will not
beremovedcompletely. In thiscase please chooseaprogramwith a highertemperature.
°
ConcentratedDetergent
Based ontheir chemicalcomposition,detergents can be splitintwobasic types:
conventi onal, alk aline de tergents with caustic components
low a lkaline c oncentr ated det ergents with natural enzymes
The us e of normal washing programs in combina tion wi th concentrated de tergents
reduces pollution a ndis good for yourdishes; thesewashprograms are specif ically matched
to the dirt-dissolving pr operties ofthe enzym es of the co ncentrated d etergent . Fo r this reason
normal washprogra ms i nwhich concentrated det ergents areused can achieve the same
“”
results thatcan oth erwise onlybe achiev ed using intensive programs.
“”
“”
Detergent Ta blets
Detergent t ablets ofdifferent brand s disso lve at different spe eds. For this reason some
detergent t ablets cannot dissolv e an d devel op th eir f ull c leaning powerduring short
programs. The refore please use long progra ms when using d etergent tabl ets, to
ensurethecomplete removalofdetergentresiduals.
Deterg entDispenser
Thedispensermustbe refilledbefore the start of each wash c yclefollowing th e instructions
provided i n the wash cy cle t able . Your dishwasher u ses less detergent andrinse aidthan
Conventional dishwasher.Generally,only on e ta blespoon of detergent is needed for
a normal w ashload. More h eavi lysoiled items needmore detergent. Alwaysaddthe
detergent justbefore starting th e dis hwasher, otherw ise it could g et damp and will not
dissolve properly.
Page 9

AmountofDetergentto Use
If t he lid is clos ed:press re l eas e butt on . The lid will sprin g open.
Always add the detergen t just b efore starting eac h wash cycle.
Only use br anded detergent aid f or d ishwash er.
Dishwasherdetergent is corrosive!Takecareto keepitout of reach of c hildren.
Proper Use of Detergent
Use only detergent spe cifically made for t he us e in dishwashers. Keep your d etergent fresh and dry.
Don't put powdered d etergent into the di spenser untilyou'r e re ady to wash dishes.
Fill in Detergent
Fill the detergent dispen ser with detergent.
Themarkingindicatesthedosing levels ,as
illustra ted on theright:
The pla ce for main wash cycle deterge nt.
A
The place forpre -wa sh cycledetergent.
B
Please observe the manufac turers dosin g an d storag e
Rec omme ndations as st at ed on the deter gen t pac k a gin g .
Close the lidandpress untilitlocks inplace.
Ifthe dishes are heavily soiled,place an additional
detergent dose in the pr e-wash detergent chamber.This detergentwill ta ke ef fect duringthe pre-w ash phase.
A
B
You find infor mation abou t th e a mount o f d etergen t for the single programme on t he las t page.
Pleasebe aw are, t ha t accordi ng t o the levelsoiling andthe specific hardne ss of water differences are possible.
Pleaseobserve themanufact urer's re commen dations onthe deterg ent packaging.
Page 10

Consider buyingutensilswhich are identifiedasdishwasher-proof.
Use a mild detergent thatisdescribedas'kindtodishes'.Ifnecessary, seekfurther
information fromthe detergentmanufacturers.
Forparticular items, select a programwith as lowa temperatureas possible.
To prev ent damage, do no t t ake glass a nd cutler y out of the dis hwas her immediat ely
after the pr ogram me h a s e nde d.
Are not suitab le
Cutlerywithwooden,hornchina or
mother-of-pearl handles
Plastic i tems thatare n ot h eat r esistant
Older cutl ery w ith glued parts t hat a re not
temperature resistant
Bonded cut lery items or dishes
Pewter or cooper ite ms
Crystal gla ss
Steel item s su bject torusting
Wooden platte rs
Items madefrom synthetic fibres
(For best performance of the dishwasher, fol low the se load ing gu ide lines.
Features and appearance ofbaskets and cutlery ba skets may vary from yourmodel.)
Scrape off any large a mounts ofleftover food.Soften remnants of burnt food inpans.
It is not necess ary to ri nse thedishes u nder running water.
Place objectsin the dishwasher in the following way:
1.Itemssuch as cups,glasses, pots/pans,etc. a re fa ced downwards.
2.Curveditems, or ones with recesses, should beloaded a slant sothat w ater canrun off.
3.Allutensils a re stacked securely andcan not tipover.
4.Allutensils a re pl aced in the way that the sprayarms can rotate freel y duringwashing.
Very sm all it ems sho uld not bewashed i n the dishwasher asthey could easily fall outof thebasket.
Are of limited suitability
Some types ofglasses canbecome
dull after alarge number of w ashes
Silver a nd aluminum parts have a
tendencyto discolourduringwashing
Glazedpatterns may fade if machine
washed freq uently
Load hollow i tems such as cups, glasses, p ans etc.With t he openi ng f acing downwardsso t hat
wat e r cann o t col l ect in the containe r or a deep base.
Dishesanditemsofcutlery must not lie insideone another, orcover eachoth er.
Toavoid d amage to glasse s, th ey mus t nottouch.
Load largeitems w hich aremost difficul t to clean into the lower basket.
The uppe r bas ket i s des igned tohold more delicate and lighter dishwa re such as glasses , coffee
andteacups
Long bladedknives stored in a n upright positio n are apotential hazard!
Long and/or sharp itemsof cutlery such as carving knives must bepositioned
horizon tally in the upp er b asket.
Please donot ove rload your dishw asher. T his is importan t f or goo d resu lts a nd f or
reasonab le consu mption o f energy.
To prevent wat er drip ping fr om t he uppe r ba sket intothe lowerbasket, w e recommend that you
empty the lower bask et first and the n the upper bask et.
Page 11

The u pper bas ket isdesigned t o ho ld m ore delicate
and lighter d ishware such as g lasses, coffee a nd
teacups and saucers, as well as plates, smallbowls
andshallowpans(as long astheyare not toodirty).
Positionthedishesandcookwares o thatthey will
notget movedbythe spray ofwate r.
Please be r eminded that:
Pots,servingbowls,etc,mustalwaysbeplacedtopdown.
D eep po ts should be sl anted to allow water to fl ow out.
The B ottom B ask et f eatur es folding spikes so that larger or mor e po ts and p ans can be loaded.
We sug gest that yo u place l arge items and t he m o st difficult
tocleanitemsinto the lowerbasket: such as pots, pans,lids,
serving dishes andbowls, asshown inthe figure below.
Itispreferable toplace servingdishesandlidsonthesideof
the racks i n orderto avoi d block ing t he r otation of the top
sprayarm.
Adju sting the Up per B asket
The height ofthe up per basketcan be adjusted i n ord er t o
create mor e sp ace forlarge uten sils bot h forthe upp er
/lower basket. The height o f the upperbasket ca n be
adjusted by placing the wheels on different heightofthe
rails . Lo ng it ems , se r vin g cutlery, sal ad s er ver s and k niv e s
should be placed on the shelf so thattheydonotobstruct
therotationof the spray arms..
Foldin g bac k the cup shelves
For bett er stacki ng ofpots and p ans,
the spik es can b e folded do wn as
showninthepictureright.
Foldin g Spike s of Lower B asket
For bett er stacki ng ofpots and pans,
the spi kes can befolded down as
shown in the picture right.
Page 12

Cutlery s hould beplaced in the cutlery rack separate ly
from eachother in theappr opriate positions, and do
make sure theutensils donot nes t to gether, this may
cause bad performance.
For a top quality cle aning, p lace the silverware i n the basket
makin g sur e t h at:
They do notnesttogether.
Silve rwa re is placed with t he male face up.
Long utensil s inthemiddl e.
Max. Dishes
LowerPositionm ax.Φ
Upp er P o si ti o n m ax.Φ
Max. Dishes
To p basket
19cm
14cm
Bottom bask et
25cm
30cm
Page 13

()
Means:needto fill rinseintothe Rinse-AidDispenser.
Intensive
Heavy
Norma l
(*AS/NZS 2007.1)
Glass
1Hour
Quick
For the h eaviest soiled
loa ds, such as pots , pans,
casserole dishesand dishes
that have been sittingwith
dried food on themfor a
while.
For heavily soil ed loads,
such as pots, plate s, glasses
and l ightly soiled pans.
For nor ma l l y soil e d load s ,
suchas ,plates,glasses
pots
and lightly soiled pans.
standard dailycycle.
Forlightly s oiledloads,
such as glasse s,
crystalandfinechina.
Daily wash in only 1 hour.
Forlightlyandnorma lly
soiled plates and pans
foreveryday.
Ashorter wash for lightly
soiled load s tha t do not
need drying.
Pre-wash(50 )
Wash (65 )
℃
℃
Rinse
Rinse
Rinse(65 )
℃
Drying
Pre-wash(45 )
Wash (55 )
℃
℃
Rinse
Rinse(60 )
℃
Drying
Pre-wash
Wash (45 )
℃
Rinse
Rinse(50 )
℃
Drying
Pre-wash
wash(40 )
℃
Rinse
Rinse(60 )
℃
Drying
Pre-w ash(50 )
Wash(60 )
Rinse (50 )
℃
℃
℃
Drying
Wash (40 )
℃
Rinse
Rinse (45 )
℃
5/27.5g
(OrAll )in1
5
/27.5g
(OrAll )
in1
5/27.5g
(OrAll )in1
20g
5/2 7.5 g
20g
135
165
160
115
60
40
1.4
1.15
0.87
0.8 14.5
0.9
0.5
18
14. 5
13.6
10
10.5
AS/NZS 2007.1
* : This program is thetest cy cle. Theinformat ion for comparability t est
in acc ord a nce with , as follows:
AS/NZS 2007.1
Capacit y: 14 setting
PositionUpperbasket: upper wheels on rails
Rinse aid setting:6
Open the d oor s lightly 5 0mm to assist in dr ying ofthe di shes af ter every wash
Startingacycle wash
Draw out the lower and upper b asket, load the d ishes a nd push t hem back.
1
It is commended to loadthe lowerbasket fi rst, t hen t he upperone (see the section entitled
Loading the Dishwasher ).
“”
Pour inthe deter gent (se e t he sect ion e ntitle d Detergent and RinseAid ).
2
Insert theplug in to the socket. The powersupply is220-240 VAC /50 HZ,the sp ecificatio n
3
“”
of the socket is 1 0A 250VAC. Make sure that the w ater supply is tu rned on to full p ressure.
Open t he doo r,press the ON/OFF Button, and the Power indicator l ight willturn o n.
4
Press theprogram Button ,the w ash program will bechanged as follows dire ction:
5
Intensive->Heavy->Normal->Glass->1Hour->Quick;
If a progr am is selected, the response ligh t will light. Then closethe doo r,the dishwasher
begins to start.
Page 14

Premise:
Acycle that is underwa y c an on ly be modified ifit has only been running for a short time.Otherwise, the
1
detergent may have already been released, a nd theappliance may have already drained thewash wa ter.
If thi s i s the case, the detergent d ispens er mus t be refilled ( see the section entitl ed "Loading t he
Detergent" ).
Open t he doo r ,p ress the Program button , the machine w ill be in standb y st ate,
2
then yo u ca n ch ange t he pr ogram t o the desired c ycle setting (see the section entitled " Starting a
wash c ycle. . .").
more t han 3 sec ond s
Ifyou open thedoor , themachinewillpause. The program light w ill
duringawashcycle
stopblinkingand the buzzer will mooinge veryminute unless youclosethe door .After
you close t he door ,the machine will keep on wo rking after 10 seconds.
A forgotten dish can be added any time before the detergent cup opens.
Open the door a little.
1
After thespray arms stopworking,you can open the door
2
completely.
Add forgotten dishes.
3
Whe n th e wo rk i ng cycle has fi ni sh ed , the buzzer of the dis hwa sher will sou n d fo r 8 sec onds, then sto p . Turn off
the applianc e us ing the ON/OFF butto n, shut offthe w ater supplyand o pen the door of thedishwasher.
Waitfor a few minutes b efore unloading th e dishw asher to avoid ha ndling th e di shes an d ute nsils w hile t hey
are still hotand more suscept ible tobreakage. They will al sodry better.
Close the door
4
The dishwasher will run after 10 seconds.
5
SwitchOff the Dishwasher
The pro gram l ight is on but i s n ot bl inking, only in th is case the program me h as ended .
1.Switchoff the dishwasher by pressing the ON/OFF butto n.
2.Turn off thewater tap!
Openthedoor carefully.
Hot dishes are sensit ive to knocks. The dishesshould therefore be a llowed tocool d own arou nd 15minutes
before r emoving fr om theappliance .
Open the dishwasher's door, leave it ajar andwait afew minutes before remov ing thedishes. I n th is way they
will be coolerand the drying will be i mproved.
Unloadingthedishwasher
It is normal that the dishwasher is wet inside.
Empty th e low er ba sket f irst and then the upper on e. This will avoid water dripp ing fro m t he uppe r Basketonto
thedishesin thelower one.
Washthe armsinsoapy and warm wateranduseasoft brushto
clean the jet s. R ep l ace the m afte r rinsin g them thor o ugh l y.
When following this procedure from s tep1 to step 3, the filter system will be removed;
when following it from Step 3 to Step 1, the filter system will be installed.
Itis dangerousto openthedoor when washing, becausethe hot watermay scald you.
Page 15

The f ilter preventslarger remnants of food or o ther objects from getting insi de th e pu mp.
Theresiduesmayblock thefilter, inthiscase they mustbe removed.
The filter systemconsists ofa coarse filter,a flat (M ain f ilter)
An d a microfi lter( F i ne filt er).
1
2
3
2
1
3
Main filter
Foodand soil particles trappedin thisfilter are pulverizedbya
special jet on the lower spray armand w ashed d own todrain.
Coarse filter
Larger ite m s, s uc h as pie ce s of bones or gla ss, that c oul d blo ck
thedrain aretrappedinthe coarsefilter. To remove the items
caught bythe fi lter,gently s queeze the tap o n th e top of this
filterand l ift out.
Fine filter
This filterholds soilandfood residuesinthe sumparea and
prevents it frombeing redepositonthe dishes duringwash cycle.
Filterassembly
Thefiltereffi ciently
For b est p erformance and results, the filte r mus t be cleaned re gularly. this r eason, i t isa goo d idea to
remove t he la rger food particl es tr apped in the filte r aft er e ach washcycle b y rin sing thesemicirc ular f ilter an d
cup unde r ru nning w ater. Toremove thefilter d evice, pullthe c up ha ndle inthe upwa rd d irection.
removes f ood part icles fromthe wa sh w ater,allowing itto be recycled dur ing the cycle.
For
Th e di sh was her mus t ne ver be us ed wi tho ut the f ilters.
Improper replacement of thefilter may reduce the performanc e level of the appliance
anddama gedis hesandutensils.
1
2
Step 1 Turnthe fi lter in anti-clockwise direction,:
Step 2 lift the filter assy up:
When following this procedure from step1 to step 2, the filter system will be removed;
when following it fromStep 2 to Step 1, thefilter system willbe installed.
Page 16

Remarks:
- Inspect the filters forblocking a fter e ver y time t he dishwasher has been used .
- By uns crewing the coarse filter,you can remove the filter syst em. Re move an y foo d remna nts and
clean the filters under running water.
Theentirefilterassemblyshould becleaned once a week.
Cleaning the Filter
To cle an th e co a rse fi l ter and the fi n e fi lter, use a cl ean in g b ru sh. Re as se mbl e th e fi lter par t s as sho wn in the fi gures
on th e la st page a nd r eins ert the e nti re assembly in the dishwa sher, po sitio ning it in its s eat and pressing downwards .
Whencleaningthefilters, don't knock onthem.Otherwise,thefilterscould b e
contorted andthe performance ofthedishwashercould bedecreased.
The cont rol pane l can be cleaned by using a lightly dampenedcloth.
After cleaning, make sure t o dryit tho roughly.
For the ext e rior, use agood app liance po lis h wax.
Neveruse s harp objects, scouring pads or har sh cleaners on a ny p art o f the dishwasher.
CleaningThe Door
To clean the e dge around the d oor,you sho uld u se o nly a soft warm, damp cloth.
To avoid penetrati on o f wate r into thedoor l ock andelectrical components, do not
usea spray cleaner ofany ki nd.
Never use a spray c leaner toclean t he d oor panelas it m ay damage the doorlock
and electrical components.
Abrasive ag ents or some paper towels shou ld not b e use d b ecause of therisk o f
scra tching or le av in g spot s on th e st ai n les s stee l sur f a ce.
Protec tAgain st Freezing
please take frost protection measur es on t he dishwasher in winter.Every fter washi ng c ycles,
please operate as follows
1.Cut offtheelectrical powertothe dishwasher.
2.Turnoff the wat er su pply anddisconnec t the water inlet pipe from thewater val ve.
3.Drain the water from theinlet p ipe an d wat er va lve. (Usea pan togather thewater)
4.Reconnect the water inlet pipe to t he wa ter valve.
5.Remove the filter at the bottom of the tub anduse a sponge to soak up wate r in the sump.
:
If your dishwasher cannot work because of the ice,
please contact professi onal service persons.
timea
Cleani ng th e Spra yArms
It is nece ssary to cle an th e sp ray arms regula rly for hard
water chemicals willclog the spray armjetsand bearings.
Toremov e the u pper spra y arm, hold the n ut, rot ate the a rm
clockwiseto remove it.
To remove thelowerspray arm,pull out thesprayarm upward.
Washthe arms in soapy andwarm w ater an d u se a soft brush to
clean the jets. Replace them after rinsing them thoroughly.
Page 17

AfterEveryWash
After ever y wash,turn offthe water supply to the
appliance and leave th e doorslightly op en sothat
moisture a nd odours are n ot t rapped inside.
RemovethePlug
Before cl eaning orperforming maintenance, always
remove the plugfrom the socket.
No Solv ents orAb ras ive Cl eanin g
Toclean the exterior and rubber parts of the dishwasher,
donotuse solvents or abrasivecleaningproducts.
Only use aclo th with warm soapy water.
Tor em ove spots o r stains from the surf ace ofthe
interi or, use a clot h dampened with wa ter an a little
vinegar,or a cleaning pro duct mad e sp ecifically f or
dishw ashers.
Whennotin Use fora LongTime
It isrecommendthat yourun a wash cycle with the
dishwasher empt y an d the n remove the plug fr om the
socket, turn offthe wa ter supplyand le ave thedoor of
the app l ian c e sl i ght ly ope n. This wil l hel p t h e doo r
sealstolast l onger and prevent odoursfrom forming
withinth e appliance.
Moving theA ppli ance
If the appliance must be moved, tryto keepit in the
vertical position. Ifabsolutely necessary, it canbe
positioned onits back .
Seals
Oneofthefactorsthatcauseodourstoforminthe
dishwasher is food that remainstrappe d in the seals.
Periodic cleaning with adamp sponge will p reve nt this
fro m occu rr in g.
Electrical Sh ock Haz ard
The ins tallation of the pipes
an d ele ctrica l equ i pments
should bedone by p rofessionals .
●
Installationpreparation
The i nstallati on positi on of dishwasher shouldbe ne ar the existing in let and drain hoses and
power cord.
One side of the cabinet sinkshould be chosen to facilitatetheconnectionofdrainhosesof
the dishwasher.
Note: please check the accompanying ins tallation accessories(hook f or aes thetic panel,screw)
Disconnect electricalpower before
installing dishwasher.
Failure to d o so c an re s ult in dea th o r
electrical sh oc k .
Page 18

Please carefullyread theinstallation instruction.
Illustrationsofcabinet dimensionsand installationpositionof thedishwasher
Preparations should be madebefore moving the dishwasher to th e installation plac e.
Choosea placenearthesinktofacilita te the installation ofinletanddrainhoses
1
(s ee figu re 1).
2
If dis hwasher isinstall ed a t the corner o f the cabinet, the re sh ould be some sp ace
(illustrate d in figure 2) when the dooris o pened.
【】Figu re1
Cabinetdimensions
Less than 5mm
between t he top
ofdishwasher a nd
cabinetandthe
outerdooraligned
to cabinet.
820mm
580mm
90 °
Electrical, drain and
water supply line
entrances
Spacebetweencabinet
bottom and floor
600 mm
90 °
80
100
【】Figure2
Dishwasher
Minimumspacewhen
the door is opened
Door o f
dishwasher
Minimumspace of50mm
●
Aesthetic panel's dimensions and installation
1
The aesth etic wood en panel co uld be pro ces sed ac cor di ng to the Figur e 3.
【】Figure3
The aesthetic panelshould
be processed in accordance
with th e illustrated dimensions
Cabinet
(Unit : mm)
Page 19

2 Installthehookonthe aestheticwooden panelandput the hookinto the slot of the outer door of
dishw as her ( see fig ur e 4 a ). Af te r positi o nin g of th e panel , fix th e panel onto the o ut er door b y
screwsandbolts(Seefigure4b).
【】Figure 4a
Installation of aestheticpanel
【】Figure4b
Installation of aesthetic
woodenpanel
.take awaythe four
1
sho rt scre ws
2
. pin up the four long
scre ws
Page 20

●
Tension adjustment ofthe doorspring
Thedoor springsaresetat thefactory to thepropertension forthe outer door.
If aest het ic w oode n pane l are i nst alle d, you will ha ve t o adj ust t he do o r spri ng t ensi on.
Rotatethe adjustingscrewtodrive theadjustortostrain orrelax the steelcable
(seefigure 5).
Doo r sp ri ng tensio n i s c orr ect when
the doorremainshorizontal in the
fullyo penedposition yet rises
toaclosewiththeslightliftofa
finger.
,
【】Figure5
Tensionadjustment
ofthe door spring
●
Connectionof drain hoses
Insert the drainhose into a dra in pi pe witha minim um diam eter of 40mm, or letit run into the sink, making sureto
avoidbendingor crimping it.The topofthe hosemust beless than1000mm.
Front
Counter
NOTE
The top of the hose
must be less than
A
1000mm.
Drain pipe
B
φ 40mm
Page 21

●
Dishwasher installation steps
1
Install the furniture door to the outer door of the dishwasher using the brackets provided. Refer
to the template for positioning of the brackets.
2
Adjust the tension of the door springs by using an Allen key turning in a clockwise motion to
tighten the left and right door springs. Failure to do this could cause damage to your dishwasher
(Illustration 2)
Connectthe inlet hose to the cold water supply
3.
4.
Connectthe drain hose. Refer to diagram (Figure 6)
5.
Connect the power cord
Affix the condensation strip under the work surface of cabinet. Please ensure the condensation
6
strip is flush with edge of work surface.
7
Place the dishwasher into position.(Illustration 4)
8
Level the dishwasher. The rear foot can be adjusted from the front of the dishwasher by turning
the Allen screw in the middle of the base of dishwasher use an Allen key (Illustration 5A).Toadjust
the front feet, use a flat screw driver and turn the front feet until the dishwasher is level (Illustration 5B).
9 The dishwasher must be secured in place. There are two ways to do this:
A. Normal work surface:Put the right(left) installation hook into the slot of the right(left) side plane and
secure it to the work surfacewith two woodscrews (Illustration 6).
B. Marble or granite work top:Bend the right(left) installation hook into right-angle,and put it into the
slot of the right(left) side plane and secure it to the work surface with two woodscrews s (Illustration 7).
.
【Figure
7】
Page 22

Dishw ashe r mus t be l evel for prop er d ish ra ck op erat ion a nd wa sh p erform anc e.
Placea spiritlevelon doorandrack trackinside thetubas showntocheck thatthe
1
dishwasheris le vel.
levelthedishwasher by adjustingthe three levellinglegsindividually.
2
3
Whenlevelthe dishwasher,please pay attentionnot toletthe dishwasher tipover.
【】Figu re 8
Illustra tion of feet ad jus tment
Check leve l Front to Back
NOTE:
Themaximum adjustment
heightof thefeet is 50mm.
For personalsafety:
DO NOT USE AN EXTENSIONCORD ORANADAPTER PLUG WITH THIS APPLIANCE.
DO N OT, UNDERANY CIRCUMSTANCES, CUT ORREMOVE T HE EARTHING
CONNECTION FROM THE POWERCORD.
Please look at the rating lab el to know the rating volta ge a nd c onnect the dishw ash er to the app ropriate power s upply.
Use therequired fuse 10 amp,time de lay fuse or circuit breake r rec ommended and prov ide sepa rate circuit ser ving
only this applianc e.
Spirit le ve l
Check level si de to side
Ensure the voltage and frequency of thepower being corresponds to
thoseon the rating pl ate.Onlyinsert the plug into anelectrical socket which i searthed
properly. If t he el ectr ical socket to which the appliance m ust beconne cted is not
appropriatefor the plug, replace the socket, rather thanusingaadaptors orthelike as
they couldcause overheating and burns.
This ap pliance must be earthed. I n the event
of a malfunction orbreakdown, earthing will
reduce t he risk of electr ic sho ck by providing a
path of leastresistance forthe electriccurrent.
This appliance is equipped with a cord having an
equipment-ea rthin g condu ctor and an ea rthing
plug. The plug must be plugged into an appropriate
outlet thatis in stalled and earthe d i n acco rdanc e
with al l loc al s tanda rds a nd requirements.
Impr oper connection of the equipm ent grou nding conducto r can resul t i n the risk
of anelectric sho ck. Che ck wi th a q ualifi ed
electricianorservicer epresentativeifyou
are i n doubt wh ethe r the app lian ce is properl y
grou nded. Do not modify the pl ug p ro vided with
theappliance;Ifitisnotfit fortheoutlet.
Haveaproper outlet installed bya qualified
electrician.
Page 23

Connectthecoldwater supply hose toathreaded3/4(inch)connectora nd make sure
thatit isfastened tightly inplace.
If the water pipes arenewor have notbeenusedfor an ex tendedperiodof time,let the
water run to make sure thatthe wateris clear.Thisprecaution i s neededto avoid the
riskof the water inlettobe blocked and damagetheappliance.
pleaseclosethehyd rantafter using.
Positioning theAppliance
Position the appliance in the desired location. The back should restagainst th e wal l behindit, an d the sides,
along the adjacent c abinets o r walls. The dishwasher is equipped with water supply and drai n ho ses thatcan
bepositionedeithertotherightorthe left sides to facilitateproperinstallation.
How to Drain Exces s Water From Hos es
If the s ink is1000mm hi gher from the flo or,the ex cess wa ter in hoses cann ot b e draine d dir ectly
intothesink.It willbe necessarytodrain excesswaterfromhosesintoa bowl or suitable
container thatis hel d outsi de and lower than the sink.
Water Outlet
Connectthewater drainhose. The drainhose mustbecorrectlyfittedto avoidwate rleaks.
Ensure that the wat er in let h ose i s no t kin ked orsquashed.
Exte nsio n Hose
Ifyou n eed adrain h ose extension, m ake sureto use asimila r dra in ho se.
Itmust beno lo nger than4 m etres; o ther wise the cleanin g eff ect o f the dishwasher couldbe reduced.
SyphonConnection
Insert the drain hose intoa d rain pipewith a minimum diamete r of 40mm, or l et itrun int o th e sink, making sure to
avoid ben din g or cri m p ing it . The top of the ho s e must be less tha n 10 00mm.
Thefollowing thingsshould be checkedbefore startingthe dishwasher.
1 The dishwasher isleveland fixedproperly
2 The inletvalve isopen
3 Thereisa leakage attheconnections ofthe conducts
4 The wiresare tightlyconnected
5 The poweris switchedon
6 The inletand drain hosesare knotted
7 All packingmaterials andprintings should betakenout from thedishwasher
Afterinstallation,pleasemake sureto keep this manual.
Thecontent of thismanual is veryhelpful to theusers.
Page 24

Fuse blown, or the home
circuit breaker has been
triggered
Replace fuse or reset circuit breaker. Remove any other
appliance s sharing the same circuit with the dishwasher
Powersupply is not
turned on
Water pressure is low
Door of dishwasher
not properly closed.
Kink in drain hose
Filter clogged
Kitchen sink clogged
Improper detergent
Spilled rinse-aid
Make sure the dishwasheris turned on and the door is
closed securely.
Make sure the power cord is properly plugged into the
wall socket.
Check that the water supply is connected properly and
the water is turned on.
Make sure to close the door properly and latch it.
Check drainhose.
Check coarse the filter
(see section titled )" Cleaning The Filter "
Check thekitchen sink to make sure it is draining well.
If the problem is the kitchen sink not draining ,you may
need a plumber rather than a serviceman for dishwashers.
Use only the special dishwasher detergent to avoidsuds.
If this occur s,open the dishwasher and let suds evapor ate.
Add 1 gallon of cold water to the tub. Close and latch the
dishwasher, then select any cycle. Dishwasher will drain
out the water at the first step.Open the door after draining
has stop and check if the suds has disappeared.
Repeat if necessary.
Always wipe up rinse-aid spills immediately.
Detergent with
colourant was used
Hard water minerals
The affected items are
notcorrosion resistant.
Aspayarmis
r
knocking against
an itemin a basket
Items of crockery
are loose in the
wash cabinet
This may be caused
by on-site installation
or the cross-section of
the piping.
Make sure that the detergent is the one without
colourant.
To clean the interior, use a damp sponge with
dishwasher detergent and wear rubber gloves.
Never use any other cleaner than dishwasher
detergentfor the risk of foamingor suds.
The items should be corrosion resistant.
Interrupt the programme, and rearrange the items
which are obstructing the sp ay arm.r
Interrupt the programme,
and rearrange the items of crockery.
This has no influence on the dishwasher function.
if in doubt, contact a suitably qualified plumber.
Page 25

The dishes were not
loaded correctly.
See notes in " Loadi ng the Dishwasher Baskets ".
Theprogramme was
notpowerful enough.
Not enough detergent
wasdispensed.
Items are blocking
the path of sp ay arms.r
The filter combination
inthebaseofwash
cabinet is not clean or
is not correctly fitted.
This may cause
the sp ay arm jets
r
to get blocked.
Combination of soft
water and too much
detergent.
Aluminum utensils
have rubb ed against
dishes.
Dishes block
detergent cups.
Improper loading
Too little rinse-aid
Select a more intensive programme.
See" Wash Cycle Tab le ."
Use more detergent, or change your detergent.
Rearrange the items so that the sp ay can rotate freely.r
Clean and/or fit the filter combination correctly.
Clean the sp ay arm jets. See "Cleaning the Spray
Arms".
Use less detergent ifyou have soft water and select
a shortest cycle to wash the glassware and to get
them clean.
Use a mild abrasive cleaner to eliminate those marks.
Re-loadin g the dishes properly.
Load the dishwasher as suggested inthe direction s.
Increase the amount of rinse-aid/refill the rinse-aid
dispenser.
r
Dishes are removed
too soon
Wrong program
has been selected
Useof cutlery with
a low-quality coating
Do not empty your dishwasher immediately after
washing. Open the door slightly sothat the steamcan
escape. Begin unloadingthe dishwasher only once t
he dishes are barely warm to the touch. Empty the low
basket first. This prevents water form dropping off
dishes in the upper basket.
In shortprogram the washing temperature is lower.
This also lowers cleaning performance. Choose
a program with a long washing time.
Water drainage is more difficult with these items.
Cutlery or dishes of this type are not suitable for
washing in the dishwasher.
When some malfunctions come on, the appliance will display error codes to warn you:
The R a pid light flicke r fle et ly
The Glass light f lic ker fleet ly
Longer inlet time.
Overflow.
Faucets is not opened, or water intake is
restricted,or water pressure is too low.
Some element of dishwasher leaks .
Page 26

If overflow occurs, turn off the main water supply before calling a service.
If there is water in the base pan because of an overfill or small leak,
the water should be removed before restarting the dishwasher.
Height: 815mm
Width : 598mm
()
Depth: 550mm
with the door closed
Water press ur e: 0.04- 1.0M Pa
Pow er s upp l y: see rat i ng la b el
Capacity: 14p lace settings
Page 27

 Loading...