

Page 1

Series MTS300
Motorized Test St ands
Page 2
Series MTS300 Motorized Test Stands User’s Guide
2
Page 3

Series MTS300 Motorized Test Stands User’s Guide
Thank you…
Thank you for purchasing an Omega Series MTS300 Motorized Test Stand, designed for producing up to
300 lbF (1.5 kN) of tension or compression force. Three models are available within the series: MTS301,
MTS302, and MTS303. These stands are components of a force testing system, typically also comprising
a force gauge and grips.
With proper usage, we are confident that you will get many years of great service with this product.
Omega products are ruggedly built for many years of service in laboratory and industrial environments.
This User’s Guide provides setup, safety, and operation instructions. Dimensions and specifications are
also provided. For additional information or answers to your questions, please do not hesitate to contact
us. Our technical support and engineering teams are eager to assist you.
Before use, each person who is to use the test stand should be fully trained in appropriate
operation and safety procedures.
TABLE OF CONTENTS
OVERVIEW .......................................................................................... 4
MECHANICAL SETUP AND SAFETY ................................................ 5
OPERATION BASICS ......................................................................... 7
TEST PARAMETER SETUP ...................................... …………………8
OPERATING MODES ........................................................................ 18
FEATURE ACTIVATION ................................................................... 24
TROUBLESHOOTING ....................................................................... 25
MAINTENANCE AND SERVICE ....................................................... 26
SPECIFICATIONS ............................................................................. 27
DIMENSIONS .................................................................................... 27
3
Page 4
Series MTS300 Motorized Test Stands User’s Guide
y
)
1 OVERVIEW
1.1 List of included items
. Description
Qt
1 MTS301/MTS302/MTS303 test stand
4 Force gauge mounting thumbscrews
2 Limit switch thumbscrews (same as above, supplied in a separate package)
1 Power cord
1 Cable, controller to test frame, 12”
1 Cable, USB to RJ11
1 09-1162 multi-function cable (supplied with MTS302 / MTS303)
1 09-1056 serial cable (supplied with MTS303)
1 RSU100 USB converter (supplied with MTS303)
1 Accessories kit (small hook, medium hook, 2” diameter compression plate, 2” extension
rod, #10-32 coupler, tool kit
1.2 Overview
Series MTS300 has three functional modes:
1. OPERATING MODE
This is the operating mode in which testing sequences can be start ed and stopped.
2. TEST PARAMETER SETUP
In this mode, test parameters are configured, such as rate of speed, number of cycles, password
editing, and other parameters.
3. FEATURE ACTIVATION SETUP
This facility allows the user to enable features not originally purchased through a code activation
process, for example to upgrade from an MTS302 to MTS303.
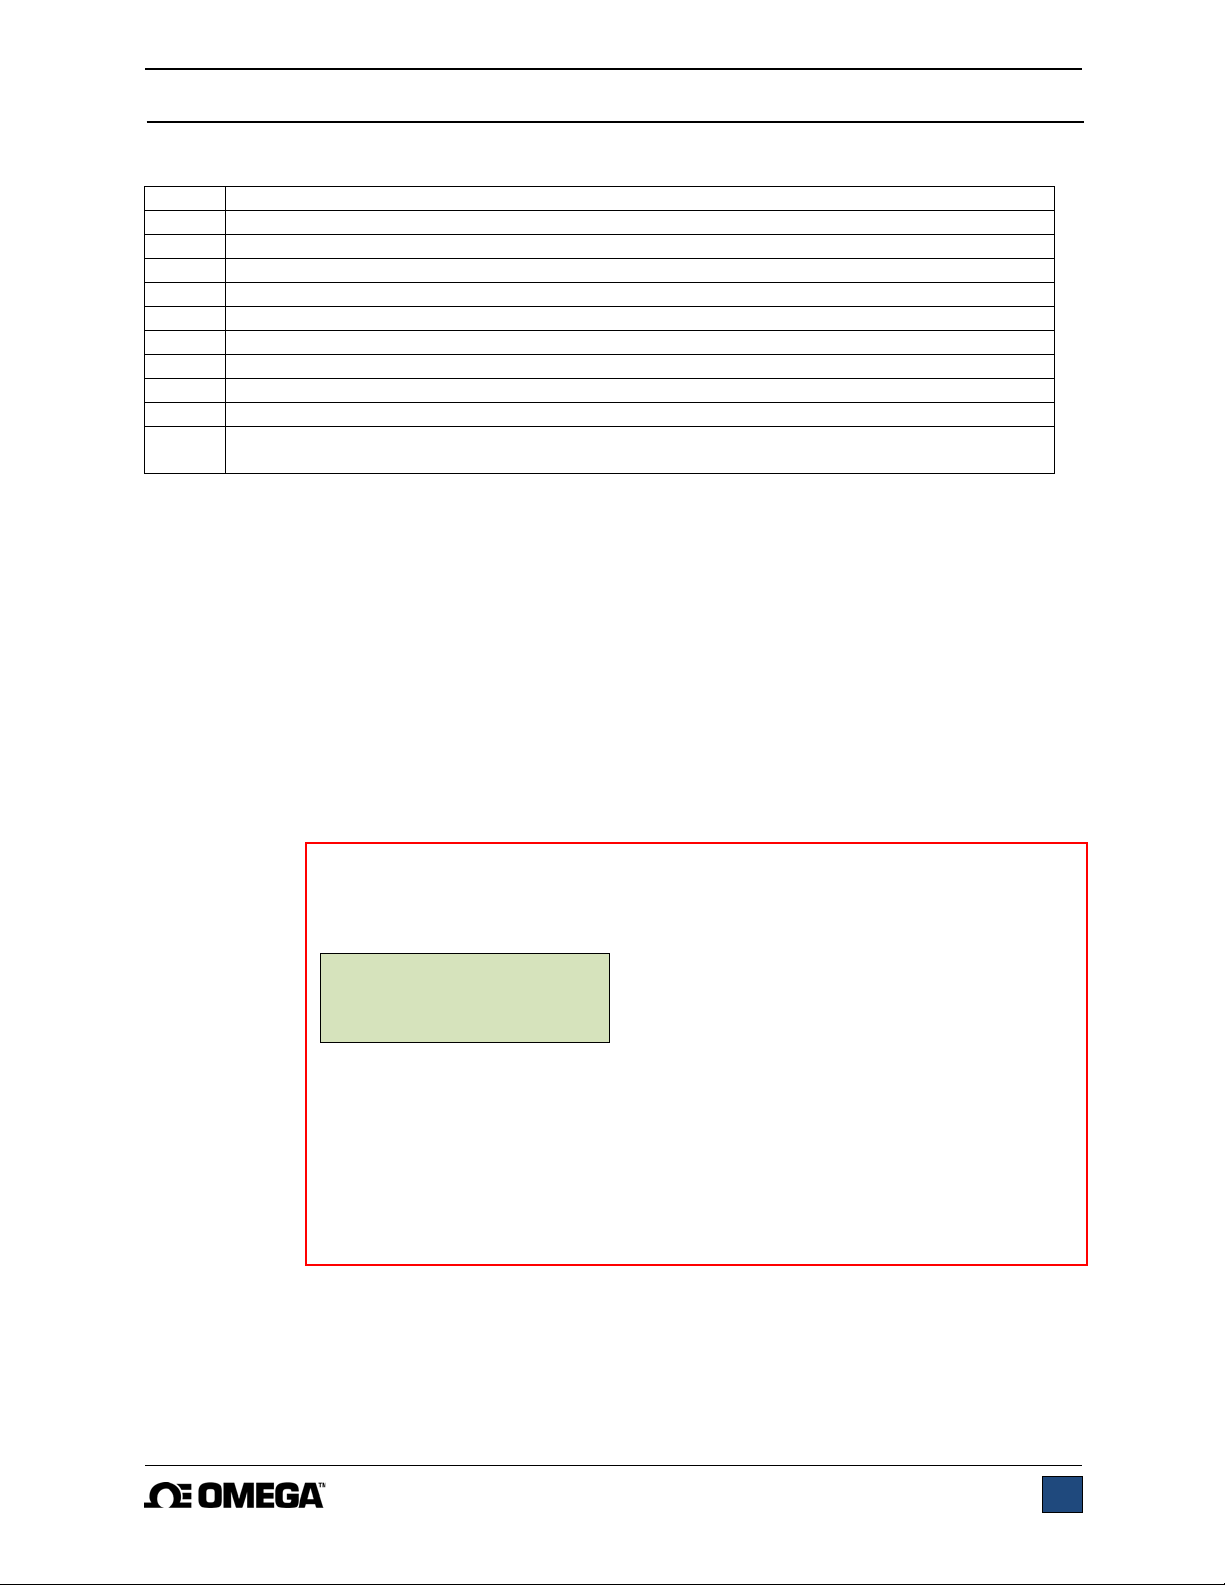
DEMO MODE
The MTS300 is shipped in Demo Mode, during which time all available features are
temporarily activated for 160 hours of operation. At power-up, a counter displays the
number of hours remaining, as follows:
R E MA I N I N G D E MO
T I ME : 1 6 0 H O U R S
Press the STOP button to continue.
At the end of this period, any features not originally purchased will be deactivated.
Demo Mode can be suspended at any time by pressing and holding STOP while
turning on power to the test stand. This mode can be re-enabled in the same
manner, and will be active for the remaining time period.
Refer to the Feature Activation Setup section for instructions for field activation.
4
Page 5
Series MTS300 Motorized Test Stands User’s Guide
2 MECHANICAL SETUP AND SAFETY
2.1 Safety / Proper Usage
Typical materials able to be tested by the MTS300 include many manufactured items, such as springs,
electronic components, fasteners, caps, films, mechanical assemblies, and many others. Items that
should not be used with the MTS300 include potentially flammable substances or products, items that can
shatter in an unsafe manner, and any other components that can present an exceedingly hazardous
situation when acted upon by a force.
1. Using Grips & Fixtures with the MTS300
Ensure that the grip or fixture is positioned to ensure axial load with respect to the loading shaft of
the force gauge.
When using a grip, ensure that it secures the sample in such a way that it is
prevented from slipping out during a test, preventing a potential safety risk to the operator and
others in the vicinity. If using a grip or fixture from a supplier other than Omega, ensure that it is
constructed of suitably rugged materials and components.
2. Mounting
Place the stand on a clean, flat and level work area free from vibration. If desired, the stand can
be secured to the work area with 1/4-20 screws fastened into the underside of the base. Failure
to properly mount the test stand may make it more vulnerable to tipping, causing a hazardous
situation.
IMPORTANT: Do not fasten any screws more than
0.25 in [6 mm] into the base of the test stand, or
damage to internal components can occur.
In general, the MTS300 can be mounted at any angle, although extra care should be taken during
installation and operation.
Once the test stand is in a stable and secure position, install a force
gauge with four thumb screws (provided). Omega Series DFG55 and
DFG35 gauges mount directly without adapters. Grips can be mounted
onto the force gauge and test stand base.
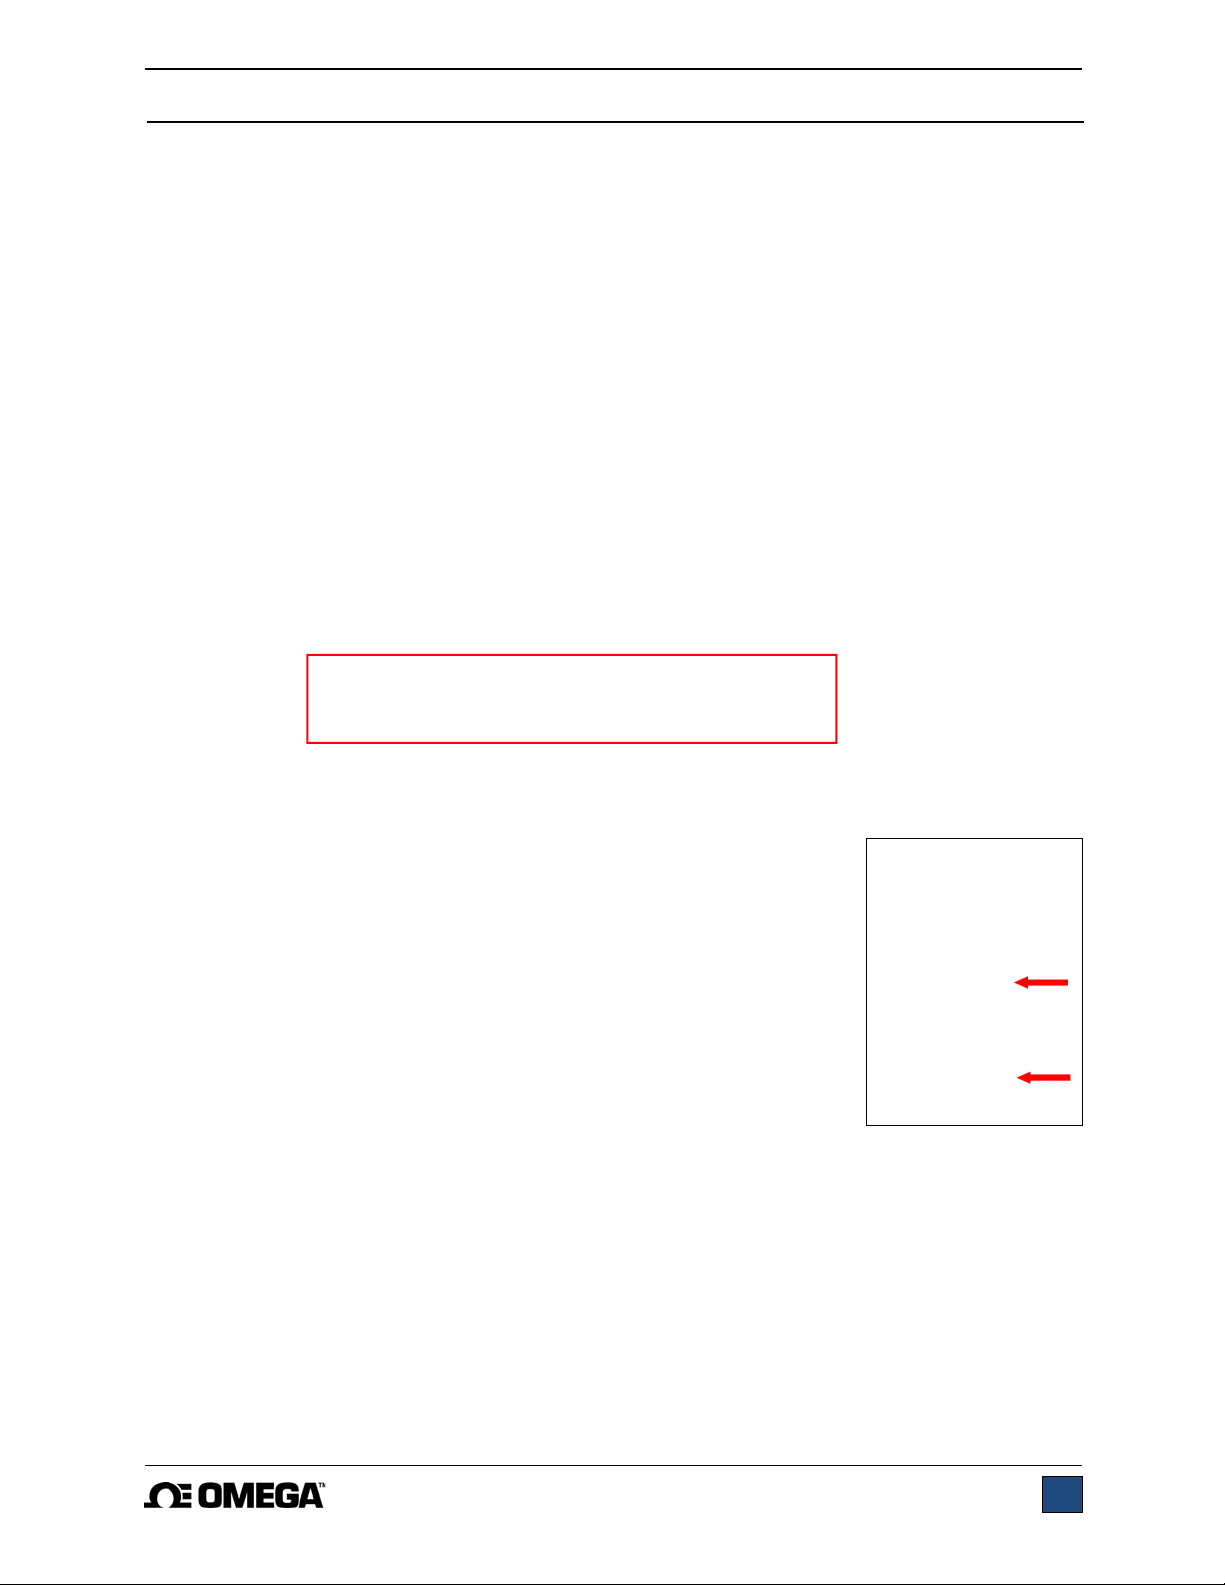
3. Installing the limit switches
Upper and lower limit switches are provided to stop crosshead travel at
user-designated positions. Each limit switch consists of an internal
block riding along a rail, and an external thumbscrew. The
thumbscrews are shipped in a separate bag to avoid damage in transit.
Refer to the illustration at right for proper installation:
5
Page 6
Series MTS300 Motorized Test Stands User’s Guide
2.2 Setting up the Controller
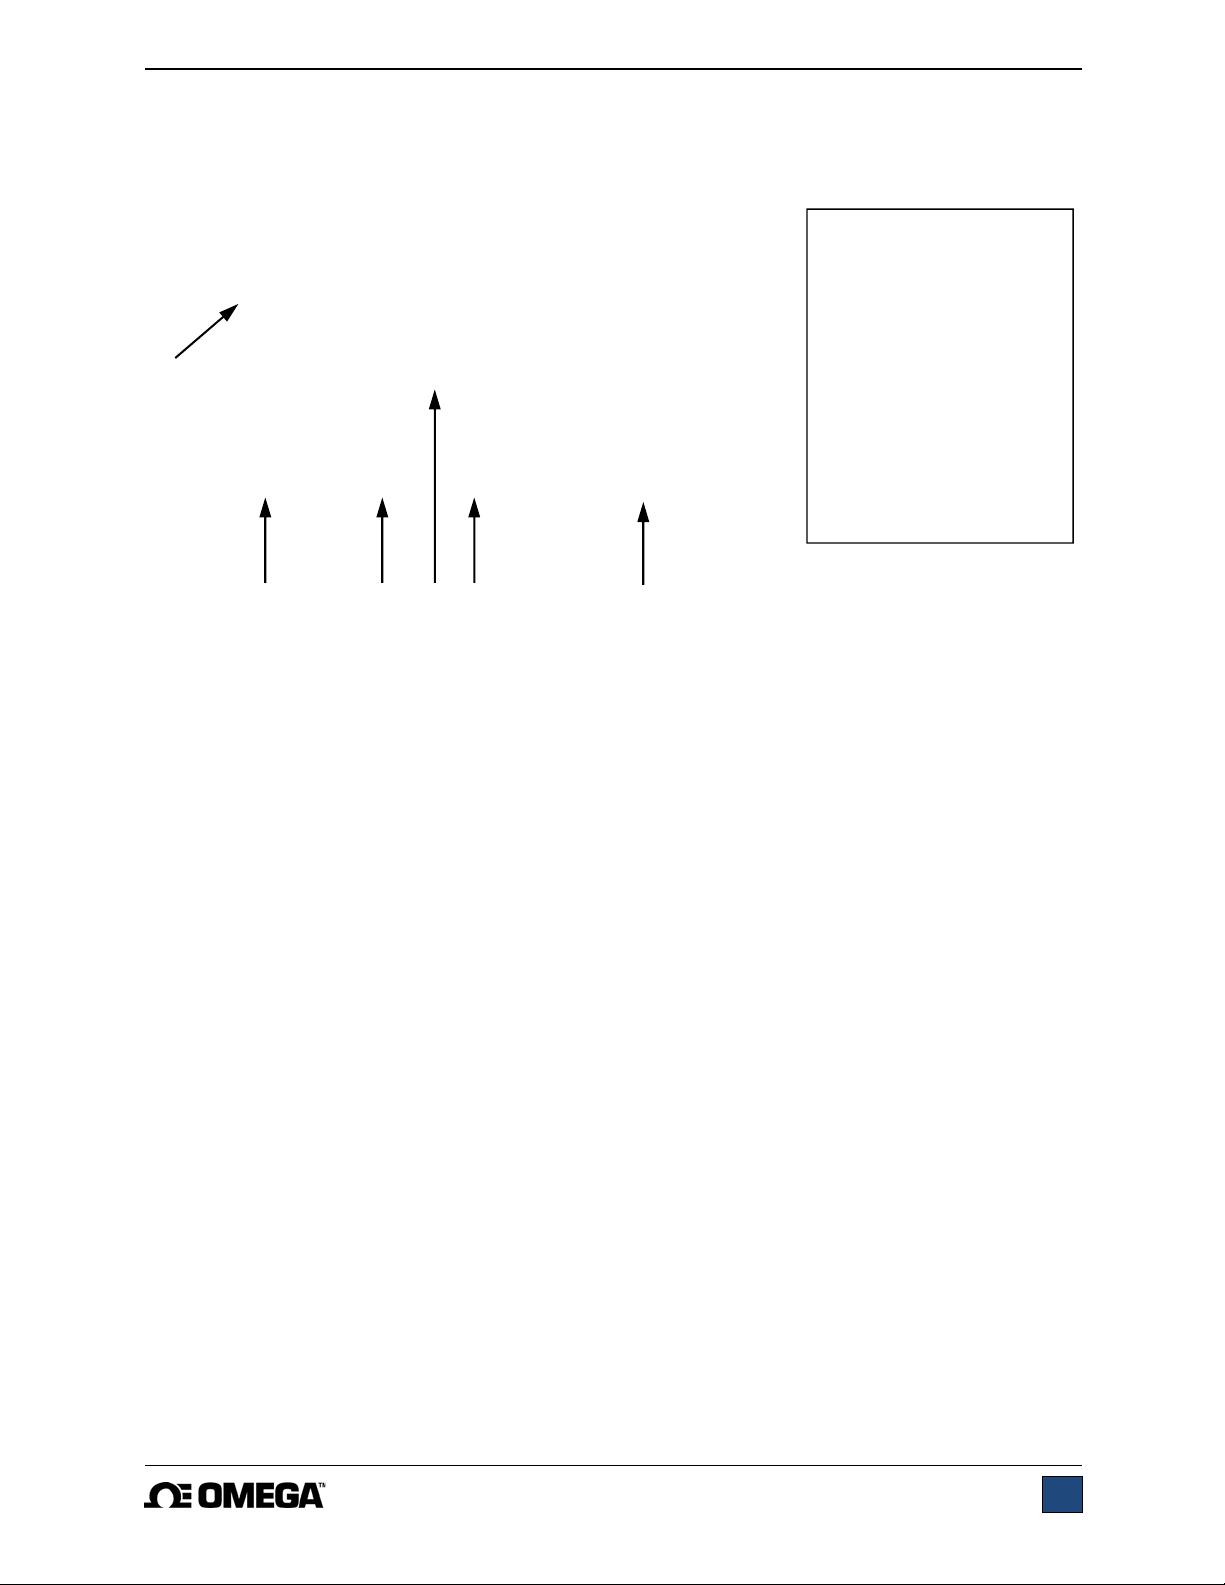
The power plug and controller cable must be connected to the rear of the controller, as shown in the
illustration below:
2
4 3 5
6
1. Fuse
2. Controller Cable Connector
Plug one end of the cable into this connector, and the other end into the connector as shown in
the illustration on the right.
3. PC Output Connector
Outputs force only or force and travel data via RS-232. Also allows for PC control (MTS303 only).
Plug one end of the 09-1056 serial cable into this connector, and the other end into a se rial
connector on a computer.
4. Power Plug Receptacle
Plug the power cord in here.
5. Travel Indication Connector
Plug one end of the USB/RJ11 cable into this connector, and the other end into the mini USB
connector in the rear of the crosshead.
6. Force Gauge Cable Connector
Interfaces with a Series DFG55 gauge. Plug one end of the 09-1162 cable into this connector,
and the other end into the gauge.
2.3 Connecting Power
Plug one end of the power cord into its receptacle at the rear of the controller and the other end into a
wall outlet with local earth ground (3-prong connector).
Before turning on power, the following safety checks and procedures should be performed:
1. Never operate the test stand if there is any visible damage to the power cord or the test stand
itself. The MTS300 is powered by 110V/220V. Any contact with this high voltage can cause
serious injury or even death.
2. Ensure that the test stand is kept away from water or any other electrically conductive liquids
at all times.
6
Page 7
Series MTS300 Motorized Test Stands User’s Guide
3. Make sure the electrical outlet powering the test stand has local earth ground (3-prong
connector).
4. The test stand should be serviced by a trained technician only. Power must be disconnected
before the controller is opened.
After the above safety checks and procedures have been performed, the test stand may be powered on
and is ready for operation.
3 OPERATION BASICS
3.1 Operational Safety
The following safety checks and procedures should be performed before and during o peration:
1. Always consider the characteristics of the sample being tested before initiating a test. A risk
assessment should be carried out beforehand to ensure that all safety measures have been
addressed and implemented.
2. Wear eye and face protection when testing, especially when testing brittle samples that have the
potential to shatter under force. Although the MTS300 has relatively slow moving mechanisms, be
aware of the dangers posed by potential energy that can accumulate in the sample during testing.
Extra bodily protection should be worn if a destructive failure of a test sample is possible.
3. Keep away from moving parts of the test stand. Loose articles of clothing should not be worn, and
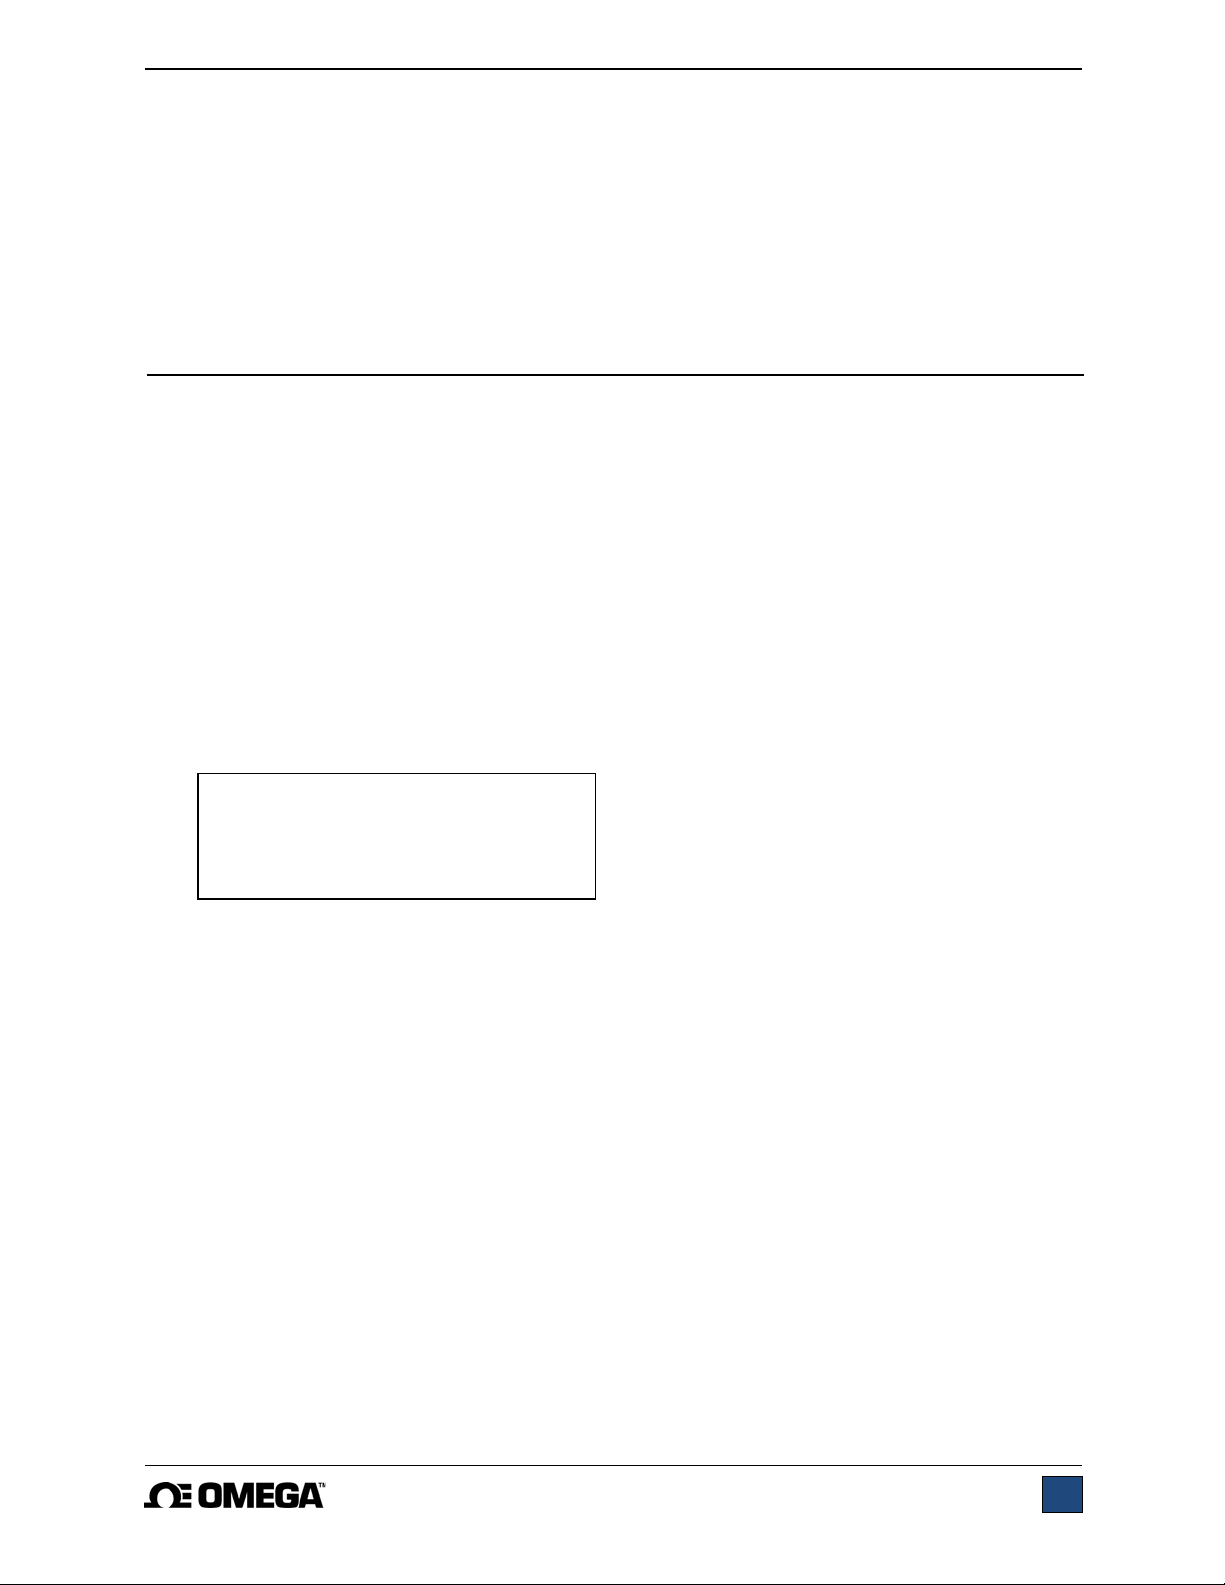
long hair should be covered to avoid being caught in any moving parts. A Crush Hazard warning
label is located on the base of the test stand. It appears as follows:
Definition: Keep any body parts and clothing clear of the area between the base of the test stand and the
moving crosshead.
4. In certain applications, such as the testing of brittle samples that can shatter, or other applications
that could lead to a hazardous situation, it is strongly recommended that a machine guarding
system be employed to protect the operator and others in the vicinity from shards or debris.
5. When the test stand is not in use, ensure that the power is turned off to prevent accidental
engagement of any of the controls.
7
Page 8
Series MTS300 Motorized Test Stands User’s Guide
A
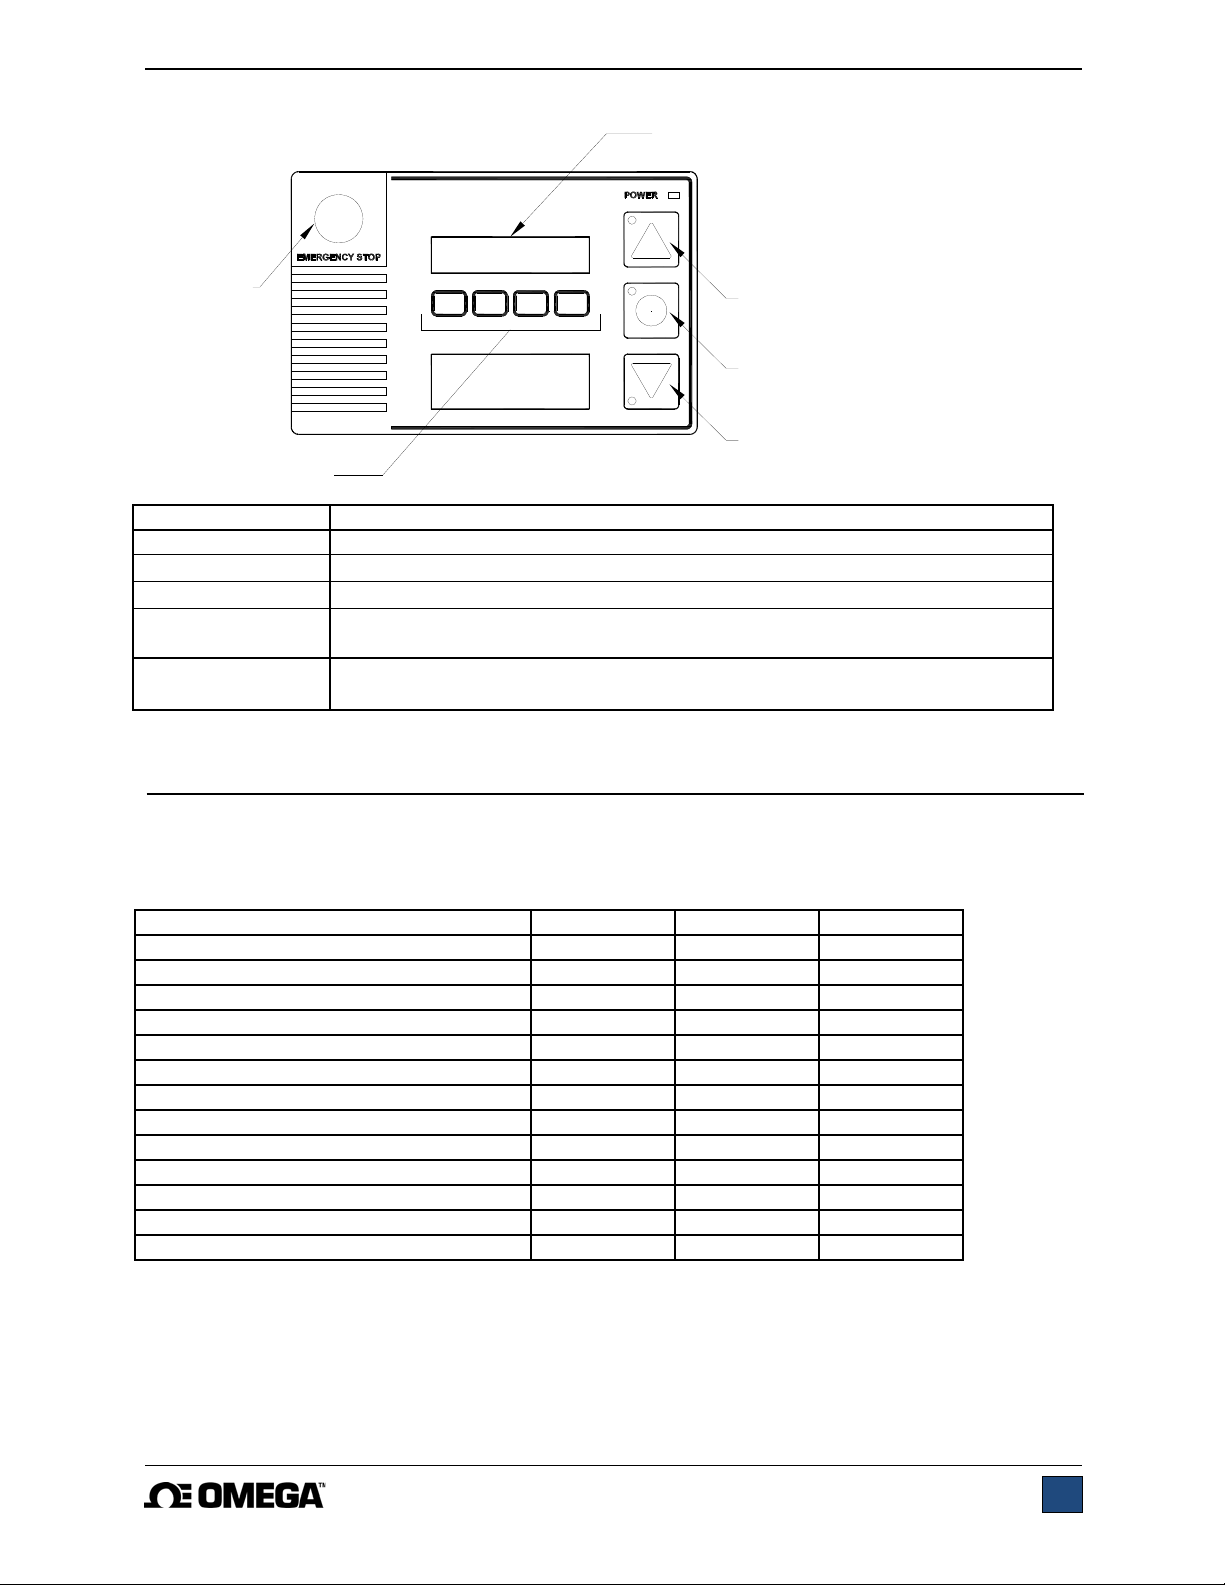
3.2 Controls
EMERGENCY
STOP
DISPLAY
UP
STOP /
ZERO TRAVEL DISPLAY
DOWN
SOFT KEYS
Key Primary Function
SOFT KEYS Functions are determined by the corresponding text on the display.
UP Commences movement in the up direction.
DOWN Commences movement in the down direction.
STOP / ZERO
TRAVEL DISPLAY
EMERGENCY
STOP
Stops crosshead movement / zeroes travel display (if travel indication is
enabled).
Stops crosshead movement and disables the test stand until reset.
4 TEST PARAMETER SETUP
This section provides configuration instructions for each test parameter. The following table ind i cates
which parameters are enabled for each Series MTS300 test stand (other param eters are common to all
stands):
Parameter MTS301 MTS302 MTS303
Standard speed range (0.5 – 13 in/min) x
Extended speed range (0.02 – 45 in/min) x x
Speed setting applies to both directions x
Independent up and down speeds x x
uto return x x
Cycling with dwell time x x
Travel indication via internal encoder x x x
Programmable travel limits x
Overload protection x x
Preload x
Load Holding x
Break Detection x
PC control x
All MTS300 test stands are shipped in Demo Mode, as explained in the Overview section. Aft er Demo
Mode expires, only installed features will be displayed in Test Parameter Setup. The initial Test
Parameter Setup screen appears as follows:
8
Page 9
Series MTS300 Motorized Test Stands User’s Guide
S P E E D : 1 0 . 0 0
E S C < − − > E N T R
Label Description
ESC Exits Test Parameter Setup, reverts to Operating Mode
< – Scrolls to the previous parameter
– > Scrolls to the next parameter
ENTR Selects the parameter, allowing it to be modified
When the parameters have been configured as desired and are ready to be saved, press ESC to exit
Test Parameter Setup. The screen will show SAVE CHANGES? Pressing YES will save the changes and
the display will revert to current status. Pressing NO will not save the changes and return to the Test
Parameter Setup menu.
Note: Changes can be made to an unlimited number of settings before saving.
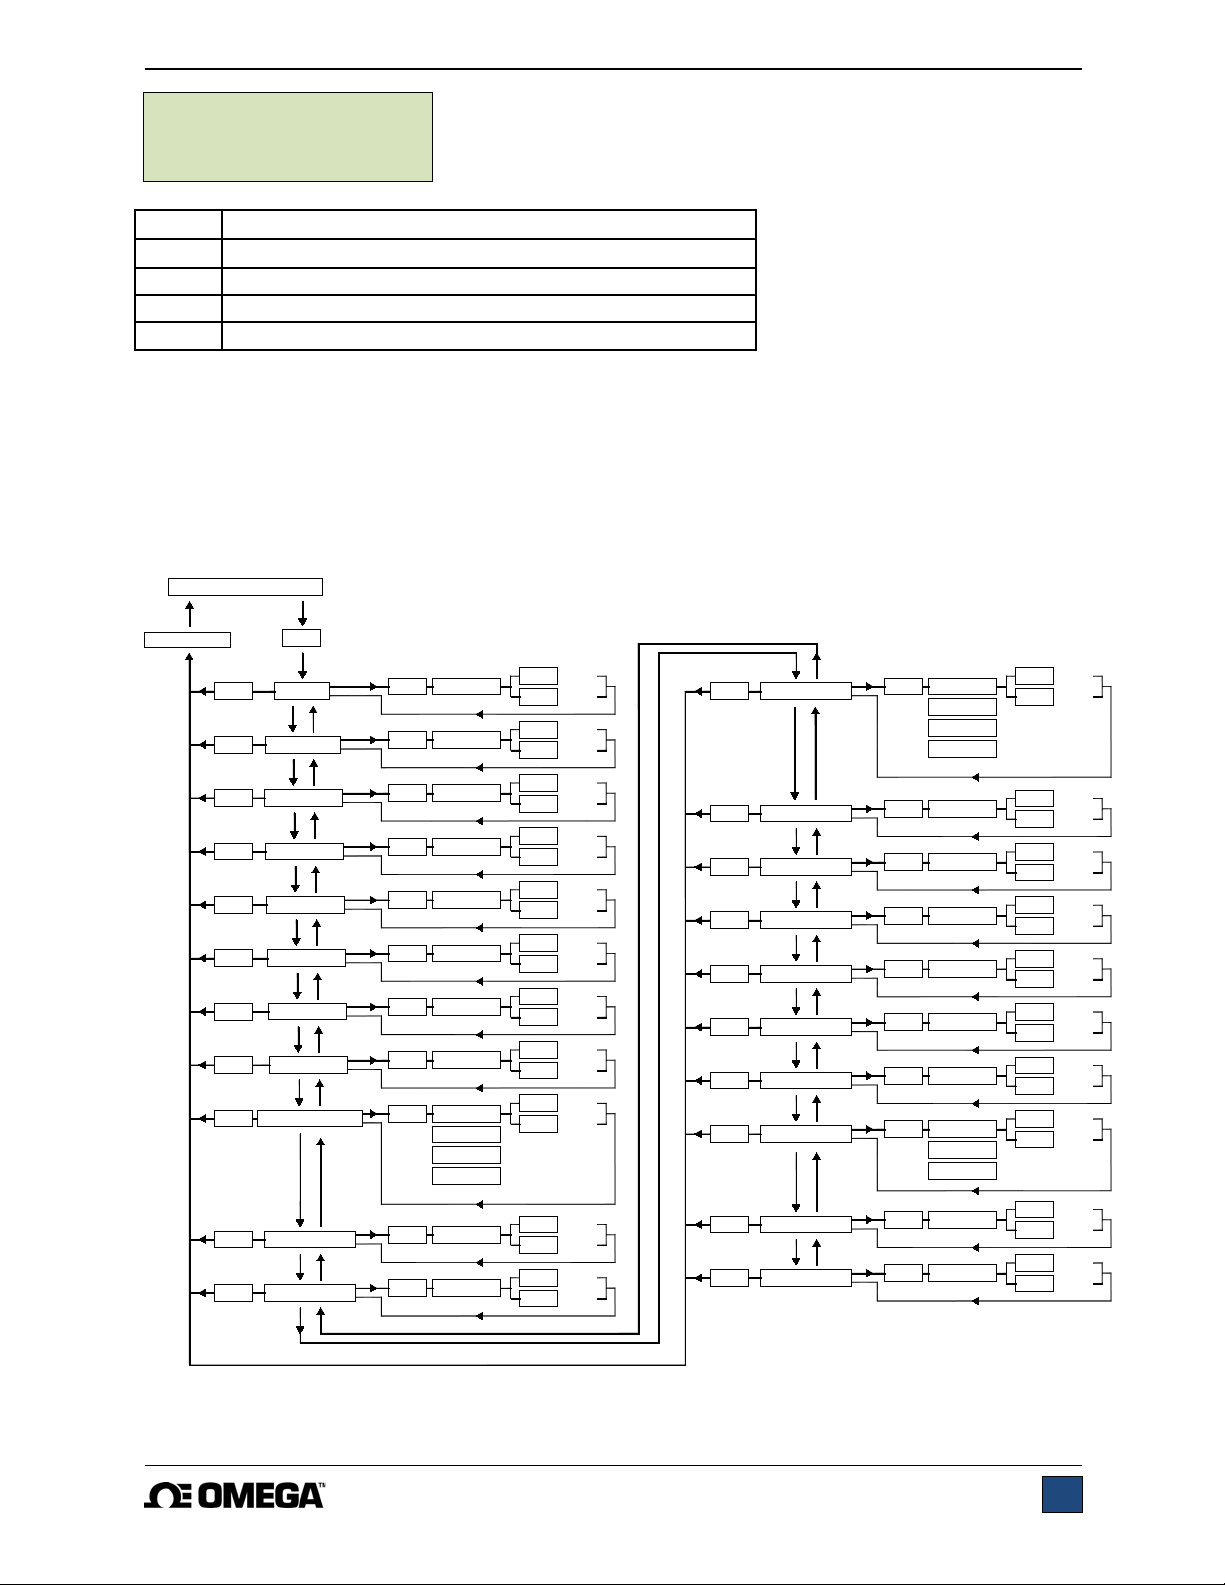
The following is a flow chart for the menu structure:
OPERATING MODE
SAVE CHANGES
ESC
ESC
ESC
ESC
ESC
ESC
ESC
ESC
ESC
ESC
ESC
MENU
UP SP.
DOWN SP.
AUTO RETURN
CYCLES
HI DWELL
LO DWELL
HI LIMIT
LO LIMIT
OVERLD
COMP OVERLD
TEN OVERLD
ENTR
ENTR
ENTR
ENTR
ENTR
ENTR
ENTR
ENTR
ENTR
ENTR
ENTR
+ (inc) - (dec)
+ (inc) - (dec)
+ (on) - (off)
+ (inc) - (dec)
+ (inc) - (dec)
+ (inc) - (dec)
+ (inc) - (dec)
+ (inc) - (dec)
OFF
MARK-10
OTHER 2V
OTHER 4V
+ (inc) - (dec)
+ (inc) - (dec)
ENTR
ESC
ENTR
ESC
ENTR
ESC
ENTR
ESC
ENTR
ESC
ENTR
ESC
ENTR
ESC
ENTR
ESC
ENTR
ESC
ENTR
ESC
ENTR
ESC
save
ignore
save
ignore
save
ignore
save
ignore
save
ignore
save
ignore
save
ignore
save
ignore
save
ignore
save
ignore
save
ignore
ESC
ESC
ESC
ESC
ESC
ESC
ESC
ESC
ESC
ESC
PRELOAD
LOAD HOLDING
BREAK DETECT
CONTROL
BAUD RATE
STOP & PAR
UNITS
KEYS
DEFAULT SETTINGS
NEW PASSWORD
ENTR
ENTR
ENTR
ENTR
ENTR
ENTR
ENTR
ENTR
ENTR
ENTR
OFF
STOP
STOP, ZERO
ZERO, GO
+ (on) - (off)
+ (on) - (off)
+ (PC) - (CONSOLE)
+ (inc) - (dec)
+ (inc) - (dec)
+ (in) - (mm)
MAINTAINED
MOMENTARY
AUTO
+ (inc) - (dec)
+ (inc) - (dec)
ENTR
ESC
ENTR
ESC
ENTR
ESC
ENTR
ESC
ENTR
ESC
ENTR
ESC
ENTR
ESC
ENTR
ESC
ENTR
ESC
ENTR
ESC
save
ignore
save
ignore
save
ignore
save
ignore
save
ignore
save
ignore
save
ignore
save
ignore
save
ignore
save
ignore
9
Page 10
Series MTS300 Motorized Test Stands User’s Guide
gly
–
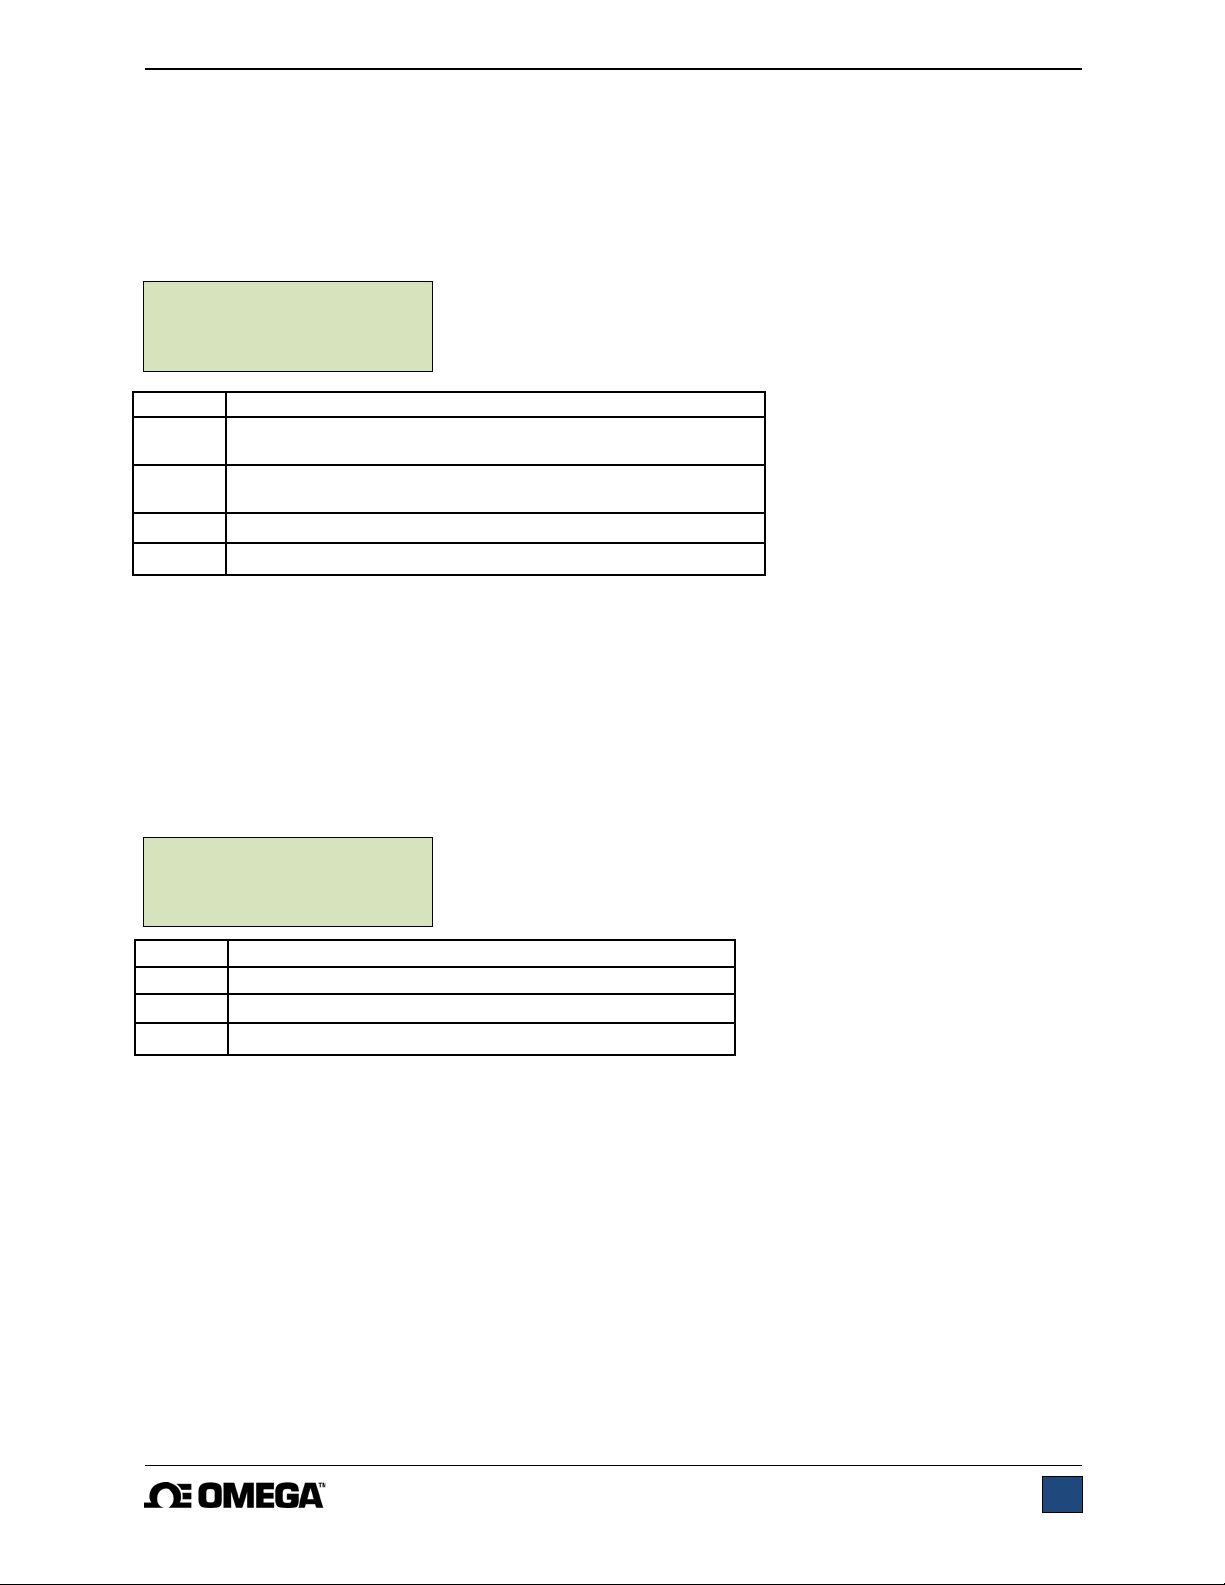
4.1 Speed, Up Speed, Down Speed (SPEED, UP SPEED, DOWN SP)
If the independent up and down speed option is not enabled, the up and down speeds will be the same,
and is programmed in the SPEED parameter. If independent up and down speeds are enabled, UP
SPEED and DN SPEED parameters will be present, and may be set individually.
Default setting: 10 in/min
Available settings: 0.02 – 45 in/min
U P S P E E D : 1 0 . 7 3
E S C − + E N T R
Label Description
+
–
ENTR Returns to the Test Parameter Setup menu
ESC Exits the parameter without saving changes
4.2 Auto Return (AUTO RETURN)
With this feature, the crosshead moves to a limit switch or soft limit (force set point, distance limit,
preload, or break detection), whichever occurs first, and stops. Then, the crosshead returns to the other
limit and stops. The test speed is dictated by the SPEED setting or the UP SPEED and DOWN SP
settings. The return speed is always maximum speed. The maximum speed depends on whether or not
the optional extended speed range has been enabled.
Default setting: off
Available settings: off, on
Increments the speed setting by .01 in or .5 mm. Holding
down + will increment at an increasin
Decrements the speed setting by .01 in or .5 mm. Holding
down
will decrement at an increasingly faster rate.
A U T O R E T U R N o f f
E S C − + E N T R
faster rate.
Label Description
+ or – Cycles through the available settings
ENTR Returns to the Test Parameter Setup menu
ESC Exits the parameter without saving changes
Note: If AUTO RETURN is turned on, CYCLING is automatically turned off and the KEYS parameter is
automatically set to MAINTAINED mode. See following pages for details on the CYCLING and KEYS
parameters.
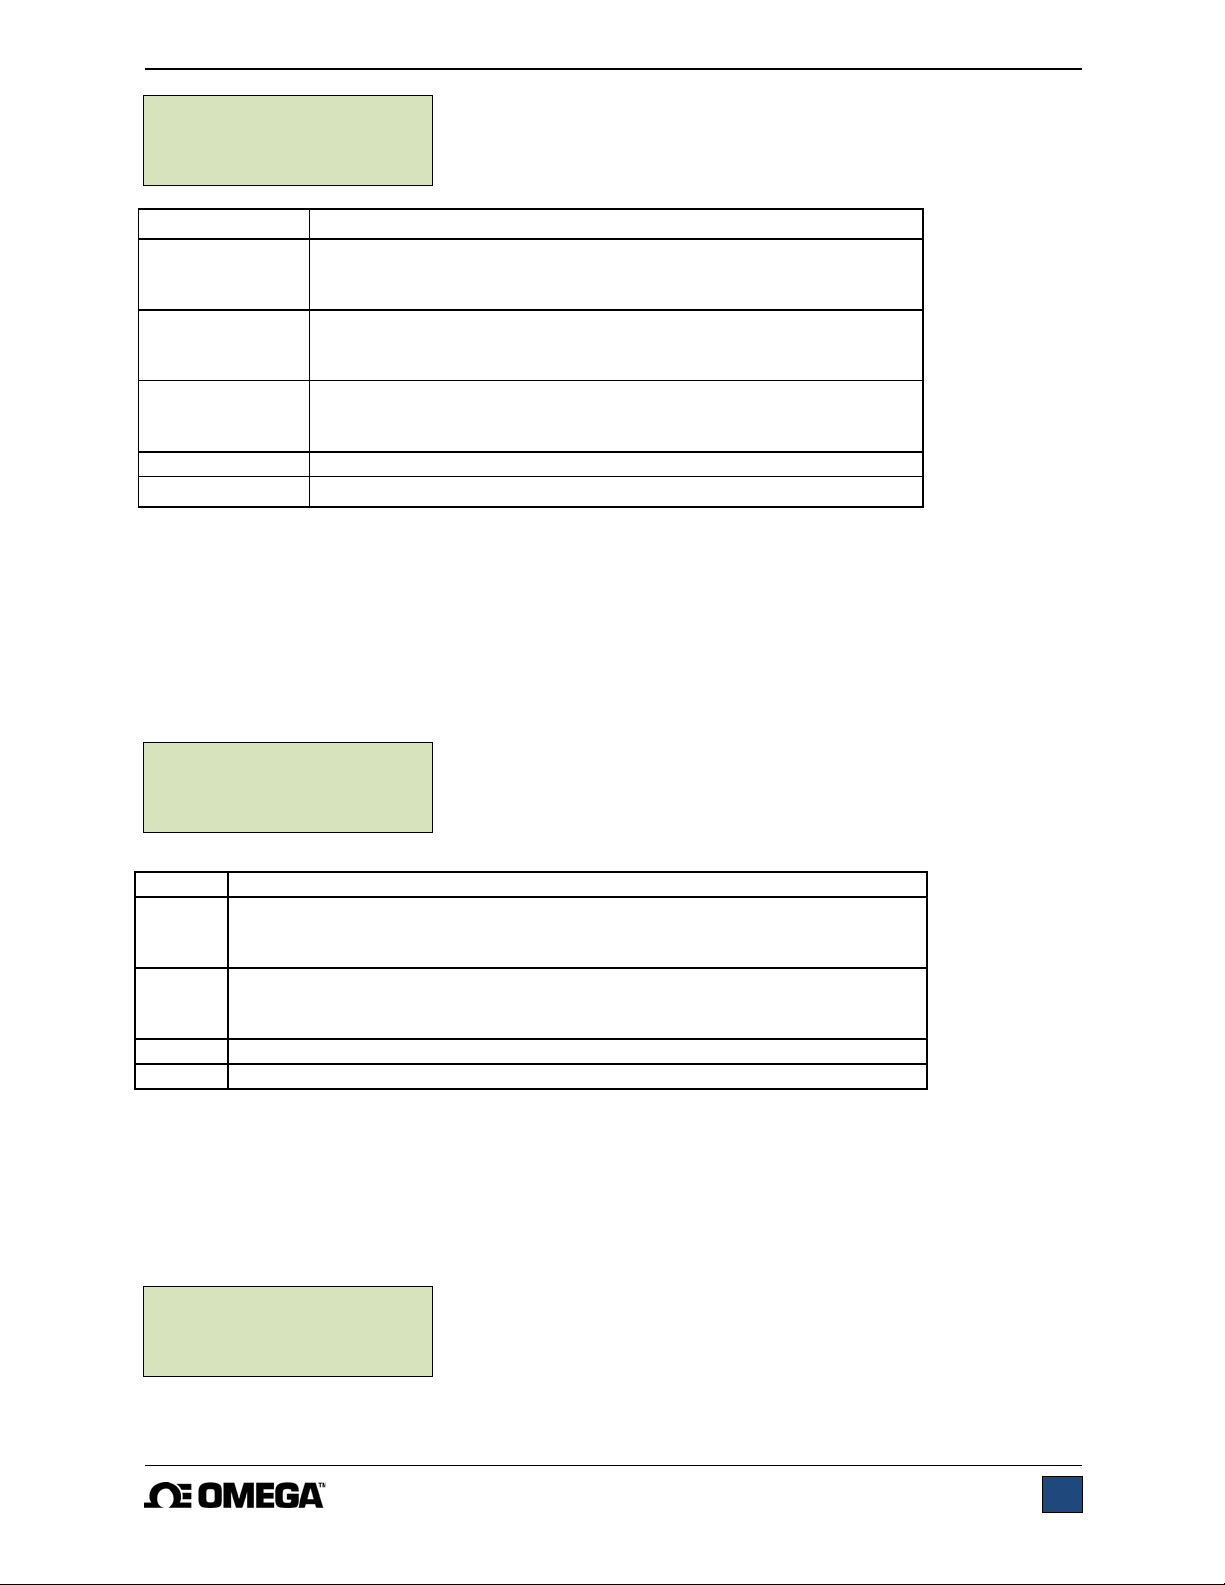
4.3 Cycling (CYCLES)
This setting allows the user to configure the number of up and down cycles through which the crosshe ad
will sequence. One cycle consists of the crosshead moving to a limit switch or soft limit, whichever occurs
first, at the specified speed, stopping for the specified amount of dwell time, and returning to the other
limit at the specified speed. If the independent up and down speed feature is not enabled, the speed will
be the same in both directions.
Default setting: 00000 (off)
Available settings: 00000 – 99999
10
Page 11
Series MTS300 Motorized Test Stands User’s Guide
g
g
g
g
y
C Y C L E S : 0 0 0 0 0
E S C − + E N T R
Label Description
+
–
Press and hold
+ and –
simultaneousl
ENTR Returns to the Test Parameter Setup menu
ESC Exits the parameter without saving changes
4.4 Upper Limit Dwell Time and Lower Limit Dwell Time (HI DWELL and LO DWELL)
This setting corresponds to the amount of time, in seconds, for which the crosshead stops at the limit
during a cycle sequence.
Note: The dwell time setting is unavailable for an auto return sequence.
Default setting: 0 (no dwell time)
Available settings: 0 – 9999.9
H I D WE L L : 0 0 0 0 . 0
E S C − + E N T R
Label Description
+
–
ENTR Returns to the Test Parameter Setup menu
ESC Exits the parameter without saving changes
4.5 Upper and Lower Travel Limits (UPPER LM and LOWER LM)
This setting corresponds to the travel distance the crosshead moves before stopping or cycling. Upper
and lower limits are programmed individually. The programmed distances are relative to the zero position
of the crosshead. The travel indicator can be zeroed by pressing and holding STOP for 3 second s.
Default settings: +12.000 in, -12.000 in
Available settings: From -19.000 to +19.000 in
Increases dwell time in increments of .1. Holding down + will increment at an
increasingly faster rate. If 9999.9 is reached the next number will be 0 and
continue incrementin
Decreases dwell time in increments of .1. Holding down – will decrement at
an increasingly faster rate. If 0 is reached the next number will be 9999.9
and continue decrementin
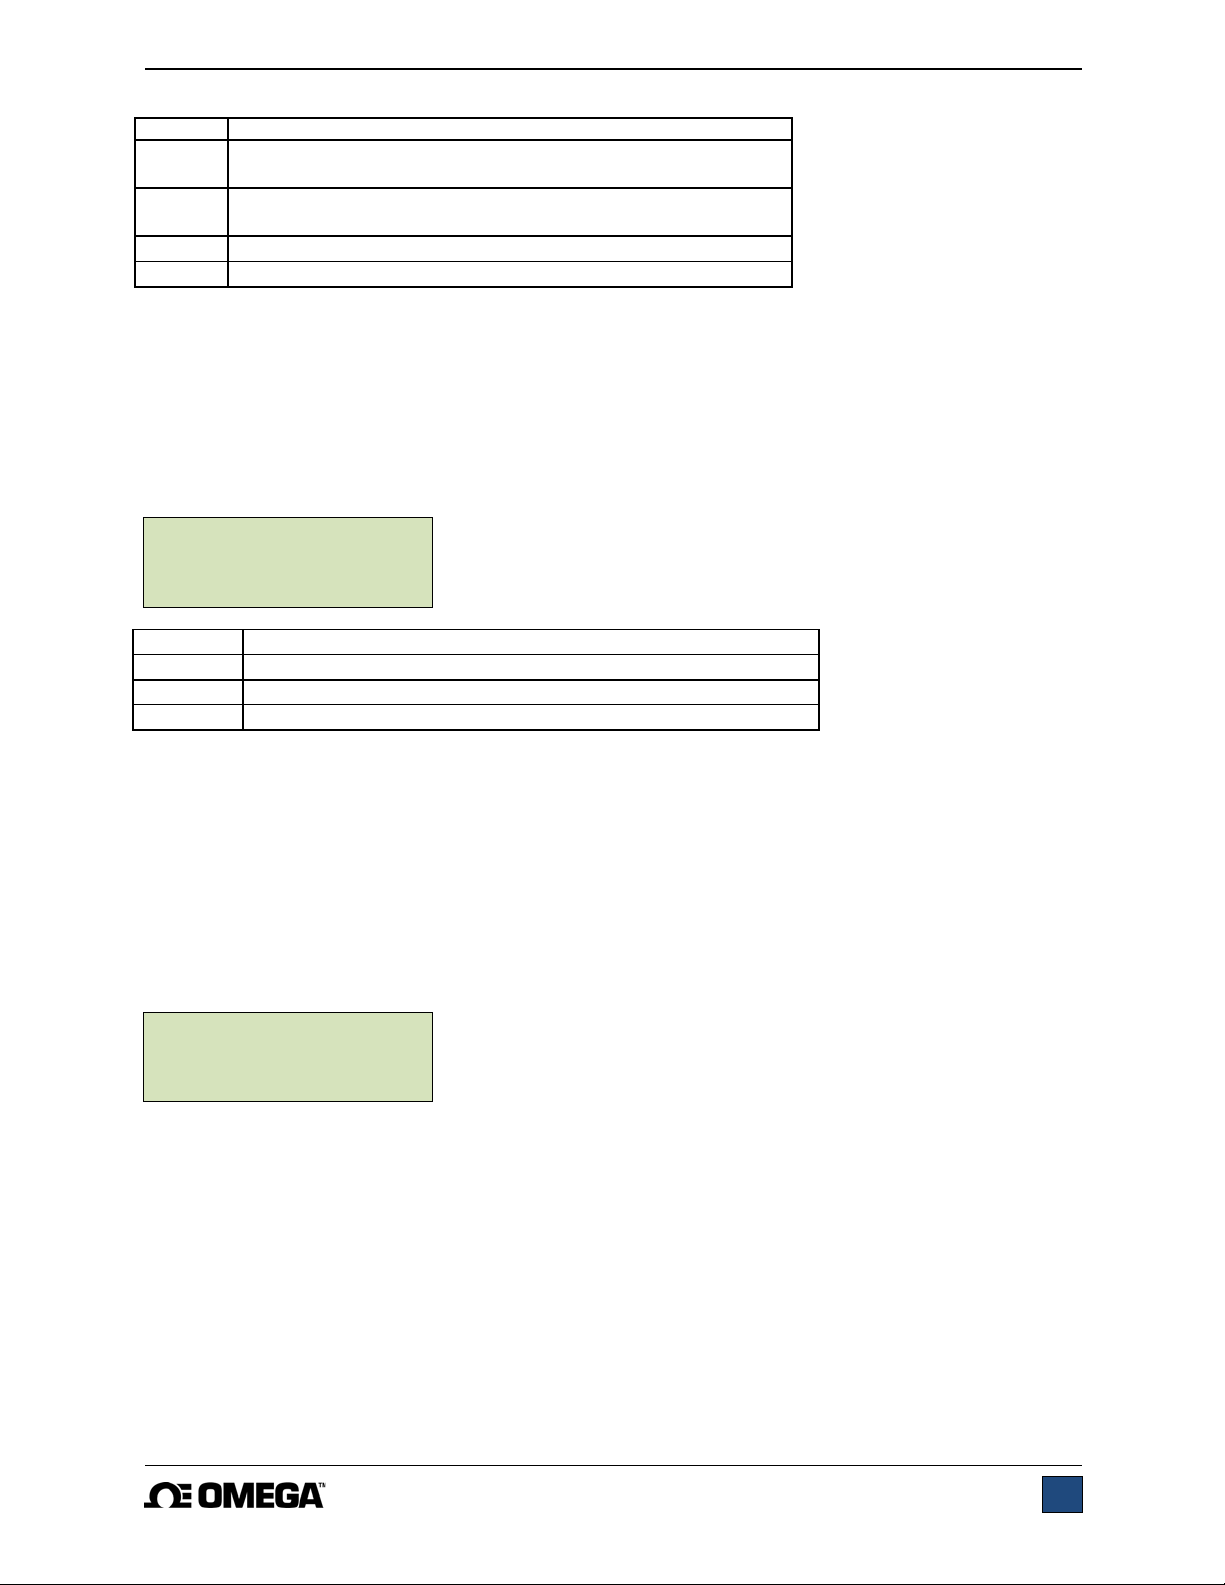
H I L I M I T : 2 . 0 5 8
Increases the number of cycles in increments of 1. Holding down +
will increment at an increasingly faster rate. If 99999 is reached
the next number will be 00000 and continue incrementin
Decreases the number of cycles in increments of 1. Holding down
– will decrement at an increasingly faster rate. If 00000 is reached
the next number will be 99999 and continue decrementin
If pressed and held for 2 seconds or longer the number of cycles
will change to 0.
.
.
.
.
E S C − + E N T R
11
Page 12
Series MTS300 Motorized Test Stands User’s Guide
g
g
y
%
Label Description
+ Increases the travel limit setting by .001 in or .02 mm.
Holdin
– Decreases the travel limit setting by .001 in or .02 mm.
Holdin
ENTR Returns to the Test Parameter Setup menu
ESC Exits the parameter without saving changes
down + will increment at an increasingly faster rate.
down – will increment at an increasingly faster rate.
4.6.1 Overload Protection (OVERLD)
The MTS300 protects a force gauge from overload by measuring incoming analog voltage and stopping
crosshead travel when the programmed percentage of full scale h as been reached (see next section).
The default setting is for Omega Series DFG55 force gauges (±1V), however, the setting may be changed
to ±2V or ±4V to accommodate other force gauges.
Default setting: OFF
Available settings: MARK-10 (Omega DFG55), OTHER 2V, OTHER 4V, OFF
O V E R L D : MA R K - 1 0
E S C − + E N T R
Label Description
+ or – C
ENTR Returns to the Test Parameter Setup menu
ESC Exits the parameter without saving changes
cles through the available settings.
4.6.2 Compression and Tension Overload Settings (COMP OVERLD and TEN OVERLD)
This setting corresponds to the percentage of force gauge full scale at which crosshead travel stops. For
example, a setting of 80% for a 50 lbF capacity force gauge would stop crosshead travel when
approximately 40 lbF is reached.
Note: When the crosshead is moving in the UP direction, only the tension overload setting applies. When
the crosshead is moving in the DOWN direction, only the compression overload setting applie s.
Default setting: 100%
Available settings: 20% - 100% (10% increments)
C O MP O V E R L D : 1 0 0
E S C − + E N T R
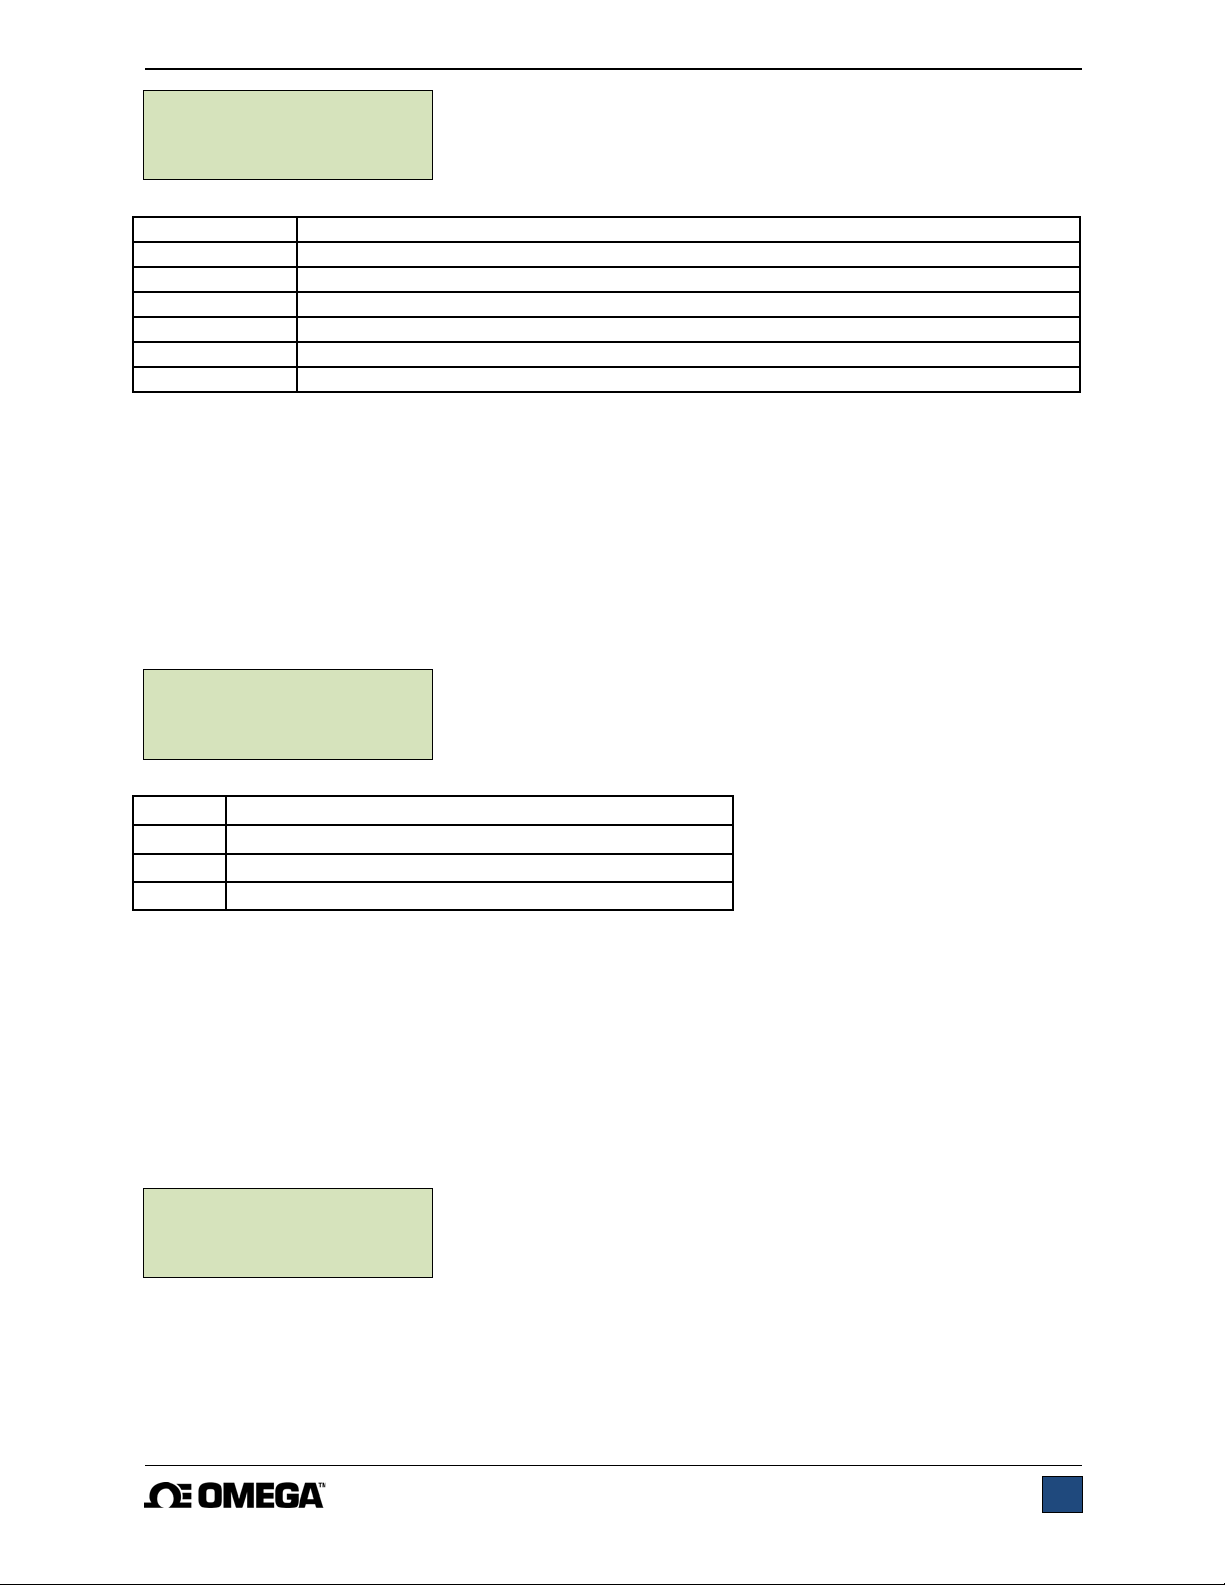
4.7.1 Preload (PRELOAD)
This setting corresponds to the test stand’s response to an initial load, referred to as a preload. The
crosshead can stop and/or zero the travel display when the preload has been reached. This function is
useful for applications such as spring testing, elongation testing, and tensile and compression testing of
various materials. For details about setting the preload value, refer to the next sub-section.
Note: Before the start of a preload sequence, the crosshead must be positioned at either the upper or
lower physical limit switch.
Default setting: OFF
Available settings: STOP, STOP/ZERO, ZERO/GO, OFF
12
Page 13
Series MTS300 Motorized Test Stands User’s Guide
y
P R E L O A D : Z E R O , G O
E S C − + E N T R
Label Description
+ or – C
STOP Crosshead stops when preload has bee n reached
STOP, ZERO Crosshead stops when preload has been rea che d, then zeroes the travel display
ZERO, GO Travel display is zeroed when preload has been reached, crosshead does not stop
ENTR Returns to the Test Parameter Setup menu
ESC Exits the parameter without saving changes
4.7.2 Preload Value (PRELD %FS)
This setting corresponds to preload value, defined as a percentage of the force gauge’s full scale in lbF
units. The test stand’s response, as described in the previous section, occurs when this value has been
reached.
Note: In low force applications, consider test stand vibration and crosshead acceleration, as they can be
prominent enough to produce a force exceeding the preload value.
Default setting: 1%
Available settings: 0 – 100%
P R E L D %F S : 0 1 . 0
E S C − + E N T R
cles through the available settings listed below:
Label Description
+ or – Increases or decreases the value.
ENTR Returns to the Test Parameter Setup menu
ESC Exits the parameter without saving changes
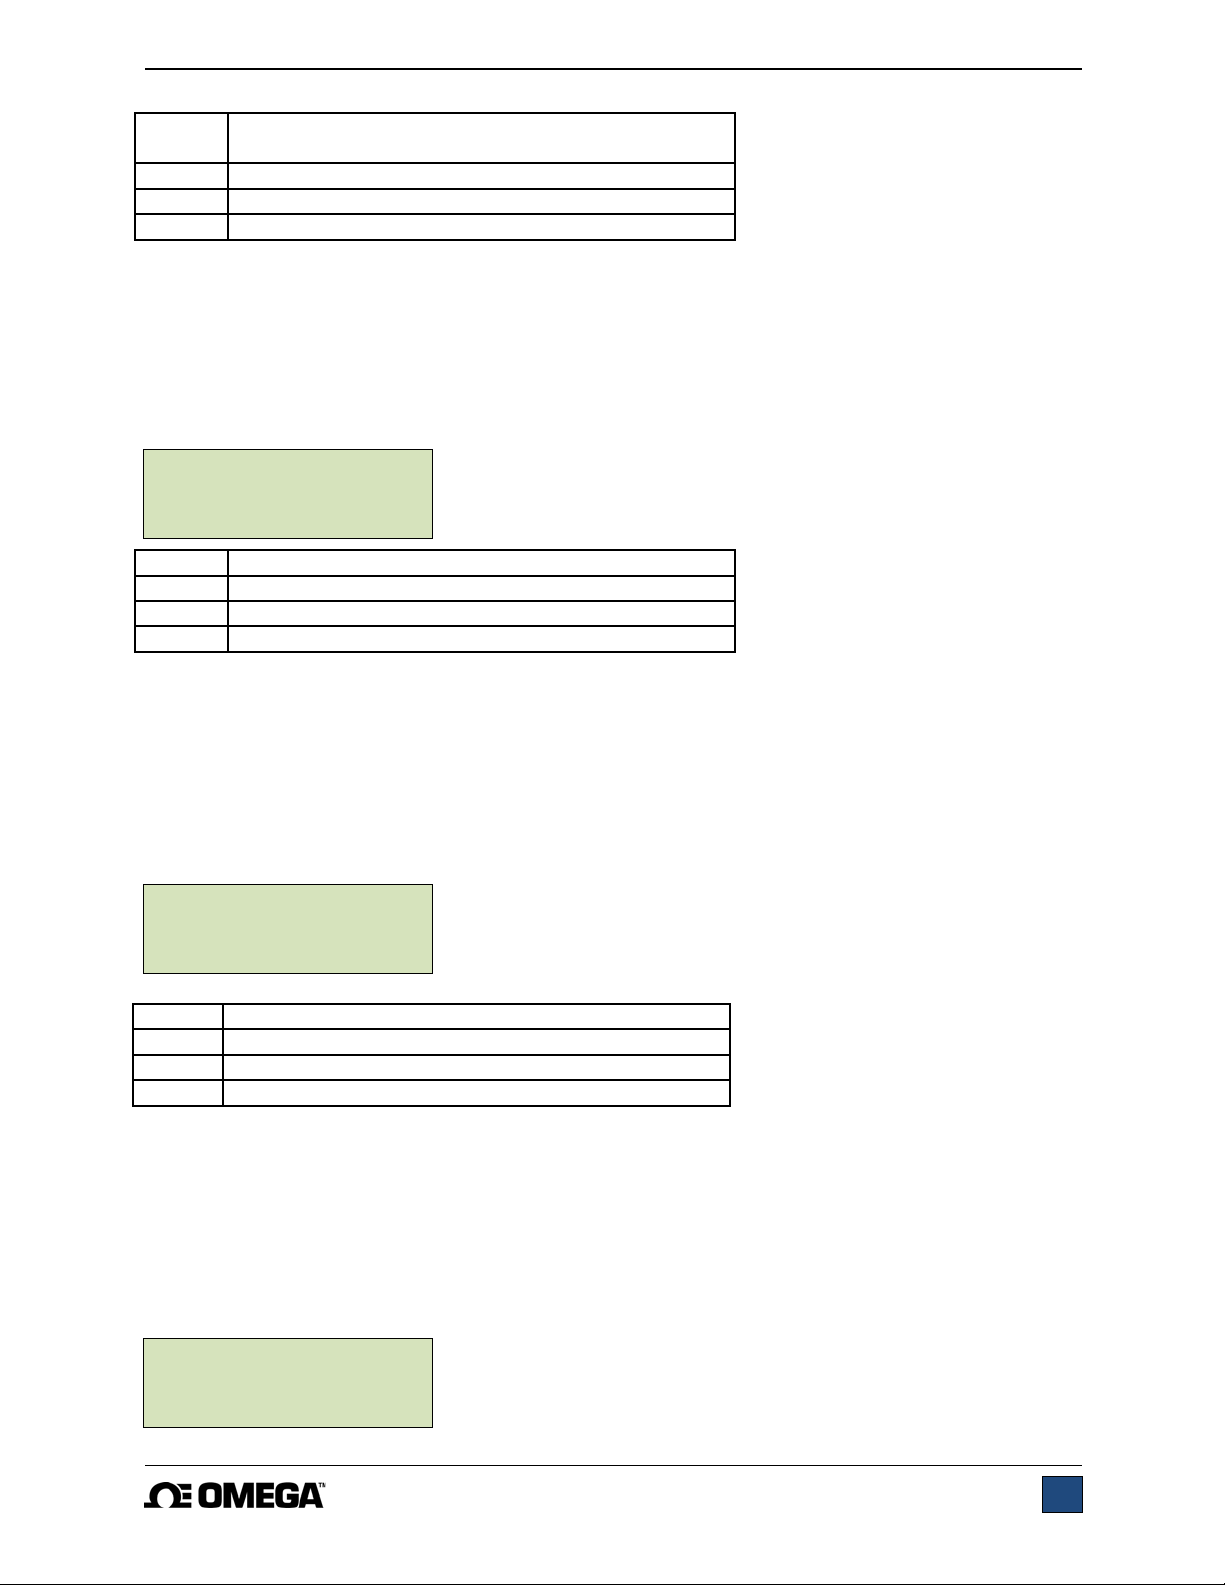
4.8 Load Holding
This setting directs the test stand to dynamically adjust the crosshead position to maintain a programmed
force. The force is programmed as a set point in a DFG55 force gauge (refer to the gauge’s user’s gui de
for details). If the CYCLING option has been enabled, load holding will be active for the period of time as
defined in the Upper Dwell and Lower Dwell settings. If CYCLING has not been enabled, load holding will
continue indefinitely.
Default setting: OFF
Available settings: ON, OFF
L O A D H O L D I N G : O N
E S C − + E N T R
13
Page 14
Series MTS300 Motorized Test Stands User’s Guide
%
Label
+ or – Cycles through the available settings
ENTR Returns to the Test Parameter Setup menu
ESC Exits the parameter without saving changes
4.9.1 Break Detection
This setting directs the test stand to stop when a sample break has occurred. The test stand stops when
the force has decreased to a specified percentage of peak. For details about programming the
percentage of peak, refer to the following sub-sections.
Default setting: OFF
Available settings: ON, OFF
B R E A K D E T E C T : O N
E S C − + E N T R
Description
Label Description
+ or – Cycles through the available settings
ENTR Returns to the Test Parameter Setup menu
ESC Exits the parameter without saving changes
4.9.2 Break Detection Activation Threshold
This setting corresponds to the force threshold after which the break detection function is active. The
threshold is provided to prevent false activation of the function during sample handling. The threshold is
defined as a percentage of full scale of the force gauge. For example, for a 50 lbF capacity force gauge, a
setting of 10% represents 5 lbF.
Default setting: 10%
Available settings: 1% - 95% (1% increments)
B R K T H R E S H : 8 0
E S C − + E N T R
Label Description
+ or – Increases or decreases the value.
ENTR Returns to the Test Parameter Setup menu
ESC Exits the parameter without saving changes
4.9.3 Break Detection Percentage Drop
This setting corresponds to the force trigger for break detection, defined as a percentage of peak force.
For example: A sample is pulled until 50 lbF, then breaks. The break detection percentage drop setting is
60%. After the sample breaks, the force rapidly decreases to 30 lbF (60% of peak), then triggers the test
stand to stop.
Default setting: 80%
Available settings: 1% - 95% (1% increments)
B R E A K % D R O P : 1 0
E S C − + E N T R
14
Page 15
Series MTS300 Motorized Test Stands User’s Guide
Label Description
+ or – Increases or decreases the value.
ENTR Returns to the Test Parameter Setup menu
ESC Exits the parameter without saving changes
4.10 Control Source (CONTROL)
This setting corresponds to the source of test stand control. The default value CONSOLE sets the test
stand to accept commands only from the console (front panel). Any external commands received throu gh
the serial port are ignored, except for the following: Request Load, Request Travel, Zero Gauge, Zero
Travel, Clear Peaks (refer to Operating Modes section for details).
PC refers to external control via serial communication. If any parameters are changed on the front panel,
these settings will be ignored, except for Auto Return or Cycling. If either of these parameters are turned
on, PC control will be turned off.
Default setting: CONSOLE
Available settings: CONSOLE, PC
C O N T R O L : C O N S O L E
E S C − + E N T R
Label Description
+ or – Cycles through the available settings
ENTR Returns to the Test Parameter Setup menu
ESC Exits the parameter without saving changes
4.11 Baud Rate (BAUD RATE)
This setting corresponds to the baud rate setting of the computer program controlling the test stand.
Default setting: 115200
Available settings: 1200, 2400, 4800, 9600, 19200, 38400, 57600, 115200
B A U D R A T E : 1 1 5 2 0 0
E S C − + E N T R
4.12 Stop Bits and Parity (STOP & PAR)
This corresponds to the stop bits and parity settings of the computer program controlling the stand.
Default setting: 8-1n
Available settings:
8-1E 8 stop bits, 1 stop bit, even parity
8-1o 8 stop bits, 1 stop bit, odd parity
8-1n 8 data bits, 1 stop bit, no parity
8-2n 8 data bits, 2 stop bits, no parity
7-1E 7 data bits, 1 stop bit, even parity
7-1o 7 data bits, 1 stop bit, odd parity
7-2E 7 data bits, 2 stop bits, even parity
7-2o 7 data bits, 2 stop bits, odd parity
7-2n 7 data bits, 2 stop bits, no parity
S T O P & P A R : 8 - 1 n
E S C − + E N T R
15
Page 16
Series MTS300 Motorized Test Stands User’s Guide
Label Description
+ or – Increases or decreases the value.
ENTR Returns to the Test Parameter Setup menu
ESC Exits the parameter without saving changes
4.13 Units of Speed (UNITS)
This setting corresponds to units of speed measurement.
Default setting: in/min
Available settings: in/min, mm/min
U N I T S : i n / mi n
E S C − + E N T R
Label Description
+ or – Cycles through the available settings
ENTR Returns to the Test Parameter Setup menu
ESC Exits the parameter without saving changes
4.14 Programmable Button Function (KEYS)
Three button function modes are available:
1. Maintained
The crosshead will move continuously once the button has been pressed and held.
Subsequently pressing the UP, DOWN, or STOP during a test will stop crosshead motion.
2. Momentary
The crosshead will move only if the button is held down. Releasing the button will stop
movement immediately.
3. Auto
Holding down the button for more than 0.5 seconds will enter momentary mode, at which time
an audible indicator will sound and the LED indicator on the button pushed will be illuminated.
A short tap on the button will operate the test stand in maintained mode. Pressing UP,
DOWN, or STOP during maintained mode will stop crosshead motion.
Default setting: maintained
Available settings: maintained, momentary, auto
K E Y S : M A I N T A I N E D
E S C − + E N T R
Label Description
+ or – Cycles through the available settings
ENTR Returns to the Test Parameter Setup menu
ESC Exits the parameter without saving changes
16
Page 17
Series MTS300 Motorized Test Stands User’s Guide
4.15 Return to Default Settings (DEFAULT SETTINGS)
This setting provides a quick return to factory settings, as follows:
SPEED: 10 in/min
UP SPEED: 10 in/min
DOWN SP: 10 in/min
AUTO RETURN: off
CYCLING: 00000 (off)
HI LIMIT: +12.000
LO LIMIT: -12.000
OVERLD: off
PRELOAD: off
LOAD HOLDING: off
BREAK DETECT: off
CONTROL: CONSOLE
BAUD RATE: 115200
STOP & PAR: 8-1n
UNITS: in/min
KEYS: maintained
PASSWORD: 0000 (off)
Default setting: off
Available settings: off, on
D E F A U L T ? : N O
E S C − + E N T R
Label Description
+ or – Cycles through the available settings
ENTR Returns to the Test Parameter Setup menu
ESC Exits the parameter without saving changes
4.16 Password (NEW PWORD)
If desired, a password can be set to prevent unwanted changes to test parameters. The password can be
set to any number between 0000 and 9999. The default setting of 0000 indicates that the pa ssword is
disabled, and that the user can freely enter the Test Parameter Setup menu. If misplaced or forgotten, the
password may be reset through a code activation process. Details on this may be found in Section 9.
Default setting: 0000 (off)
Available settings: 0000 – 9999
N E W P WO R D 0 0 0 0
E S C − + E N T R
Label Description
+ or – Increases or decreases the value.
ENTR Returns to the Test Parameter Setup menu
ESC Exits the parameter without saving changes
17
Page 18
Series MTS300 Motorized Test Stands User’s Guide
5 OPERATING MODES
5.1 Mode Overview
The MTS300 can be operated in several modes, including combinations of these modes:
1. Basic Mode
Manual control of crosshead motion.
2. Auto Return Mode
Crosshead moves to a limit switch or force set point, travel distance, preload, or sample
break (referred to as soft limits), whichever occurs first. Then, it reverses and moves at
maximum speed to the other limit, whichever occurs first.
3. Cycling Mode
Crosshead cycles between limits at the selected speed(s), and pauses at each limit or set
point for a selected period of time.
4. Preload Mode
Crosshead moves until the preload has been reached, and perform s the action programmed
in the setting. An auto-return, cycle/dwell time, or break detection sequence may follow.
5. Load Holding Mode
Crosshead moves to a force set point, stops, then dynamically adjusts position to maintain
the programmed force. An auto-return or cycle/dwell time sequence may follow.
6. Break Detection
Crosshead stops when a sample break has been detected. An aut o-return or cycle/dwell time
sequence may follow.
7. PC Mode
Test stand is controlled through a serial connection with a PC.
The Operating Mode home screen appears as follows:
S P E E D : 0 . 0 0
me n u m i n ma x S E T
If the travel indication option is enabled, the screen appears as follows:
TRAVEL
SPEED
1 . 2 7 5 0 . 0 0
me n u m i n ma x S E T
The item selected will be capitalized, as shown in the figure above. The set speed can be changed in
Test Parameter Setup. If enabled, the up and down speeds can be configured independently of each
other (UP SPEED and DN SPEED). Otherwise, the SPEED setting corresponds to crosshead speed in
both directions.
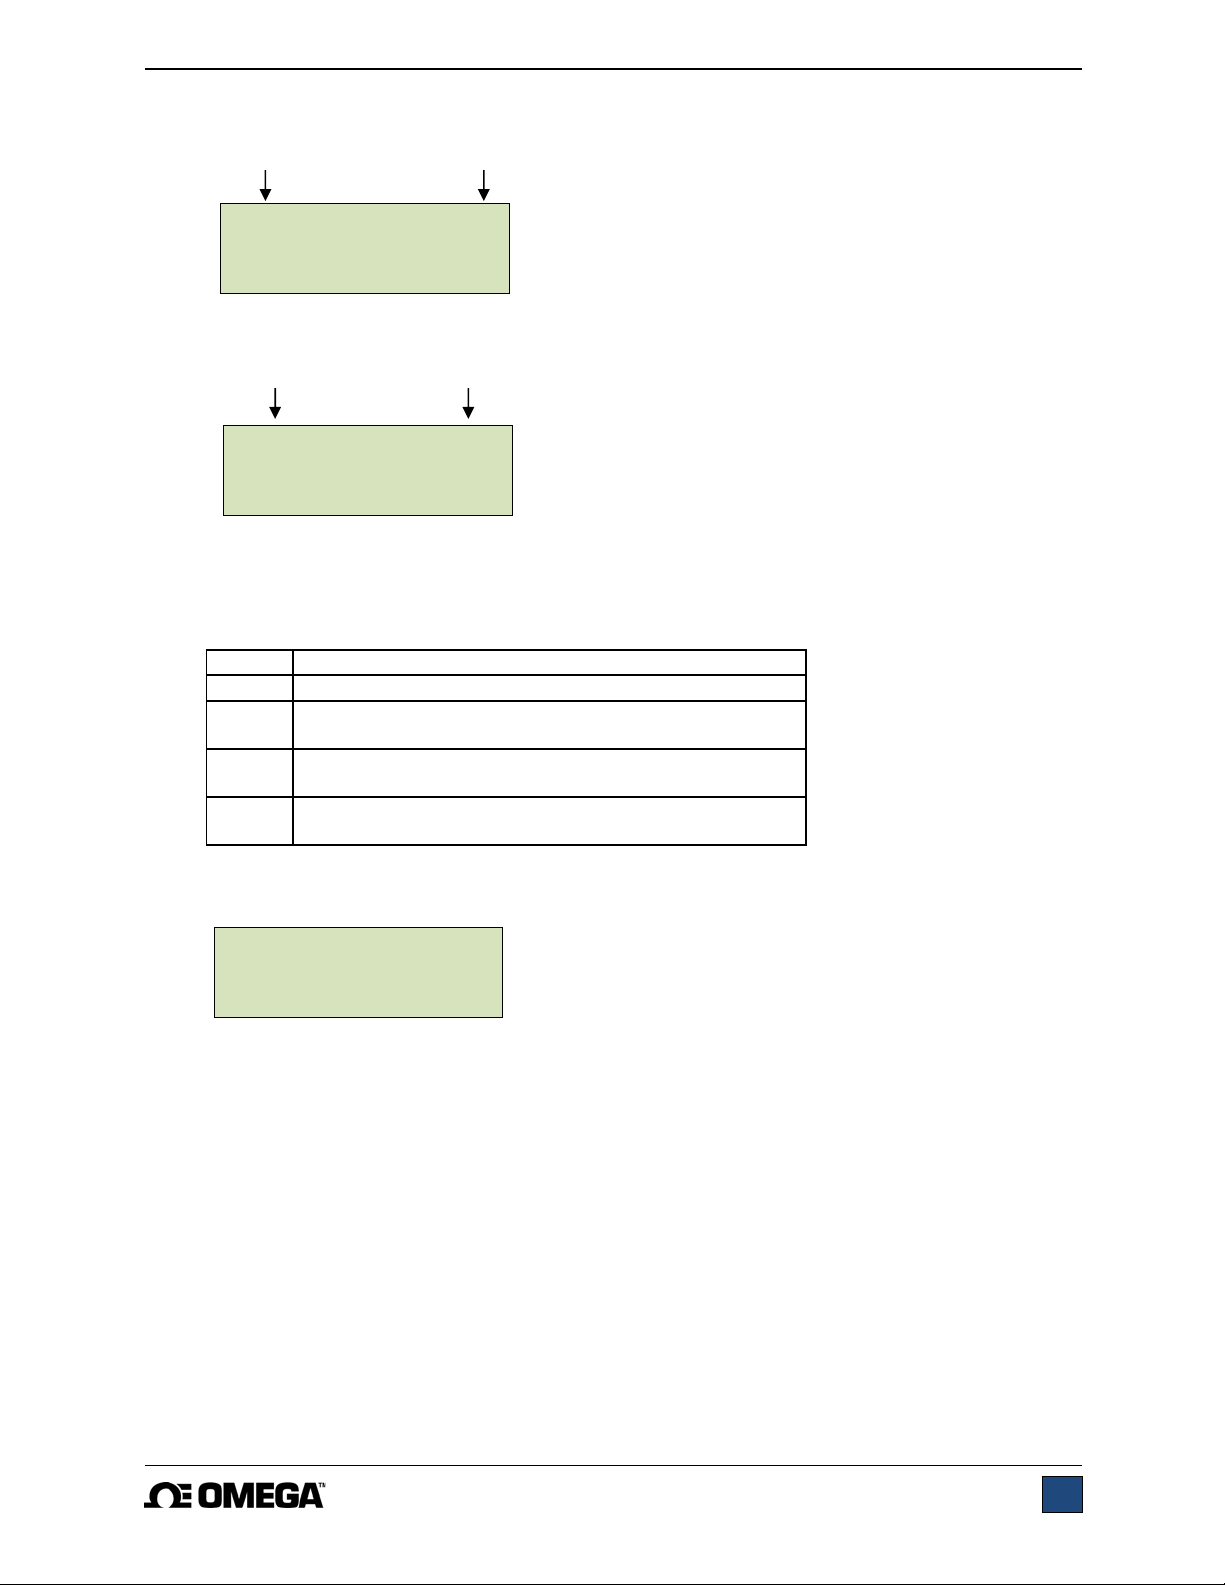
5.2 Menu Navigation
At power-up, the display will show the operation screen for whichever mode was used last. The display
will appear as one of the following:
18
Page 19
Series MTS300 Motorized Test Stands User’s Guide
g
m
1. Basic & Auto Return Modes:
TRAVEL
SPEED
1 . 2 7 5 0 . 0 0
me n u m i n ma x S E T
2. Cycling Mode:
TRAVEL
CYCLES REMAINING
1 . 2 7 5 0 0 0 2 4
5.3 Basic Mode
The crosshead moves upward when UP is pressed, and downward when DOWN is pre ssed. When the
crosshead is in motion, an LED indicator on the button pushed will be illuminated. The KEYS setting
controls how crosshead movement responds to the push of the UP and DOWN buttons. The three
settings are:
1. Maintained (default)
e n u mi n ma x S E T
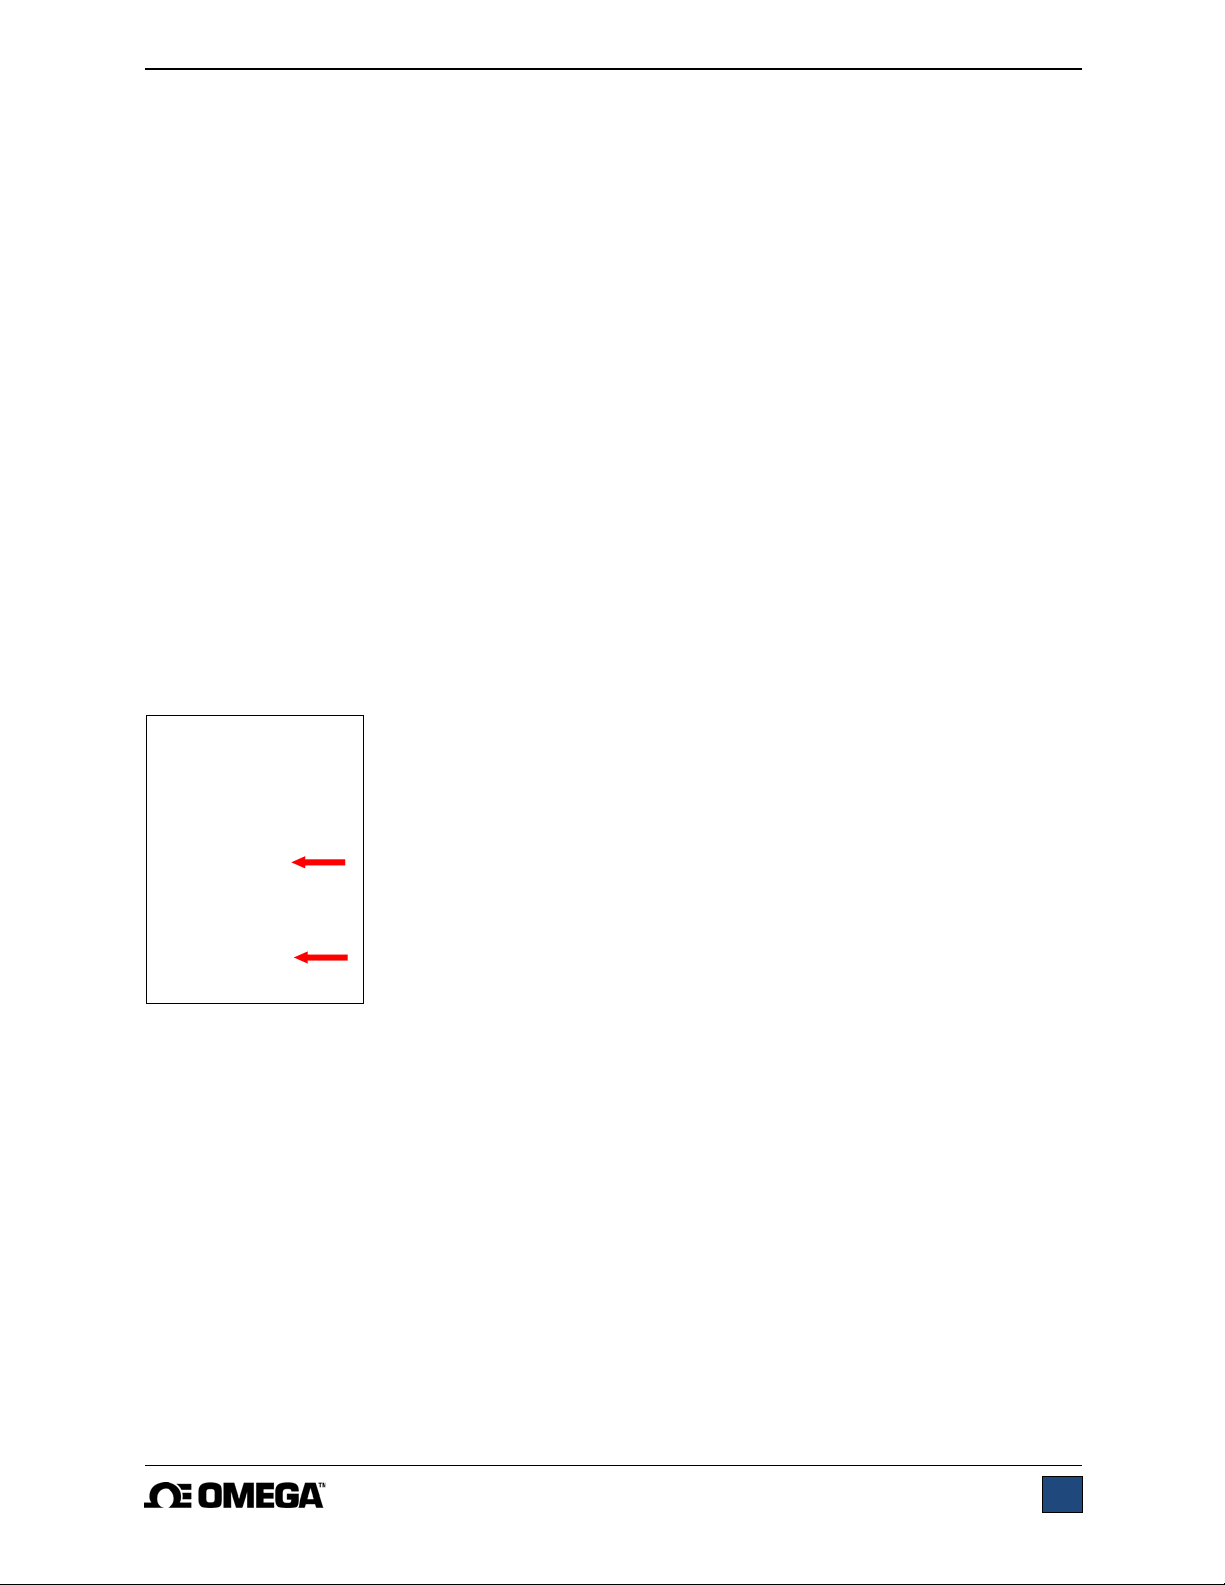
Note: The min and max keys will not appear when a password has been set.
3. PC Mode
Appears the same as in Basic and Auto Return modes.
Label Description
menu Enters Test Parameter Setup
min Sets speed to minimum speed. Will not appear when a
password has been set.
max Sets speed to maximum speed. Will not appear when a
password has been set.
set Sets speed to the programmed SPEED, UP SPEED, or
DN SPEED settin
Pressing menu will enter Test Parameter Setup. If a password has been programmed, the
display will prompt the following:
P A S S WO R D 0 0 0 0
E S C − + E N T R
The password is a four digit number. The first digit in the password will be flashing, signifying that
it is active and can be incremented by pressing +. To advance to the next digit, press –>. Change
subsequent digits in the same fashion. Once the complete password has been entered, press
ENTR. If correct, the display will enter Test Parameter Setup Mode. If the password is incorrect,
the words INCORRECT PASSWORD will flash, and the display will revert to Operating Mode.
The crosshead will move continuously once the button has been pressed. Subsequently
pressing STOP during a test will stop crosshead motion.
19
Page 20
Series MTS300 Motorized Test Stands User’s Guide
2. Momentary
The crosshead will move only if the button is pressed and held. Releasing the button will
stop movement immediately.
3. Auto
Holding down the button for more than 0.5 seconds will enter Momentary mode, at which
time an audible indicator will sound and the LED indicator on the button pushed will be
illuminated. A short tap on the button will operate the test stand in Maintained mode.
Pressing STOP during Maintained mode will stop crosshead motion. To resume the test,
press UP or DOWN again.
Pressing EMERGENCY STOP will immediately stop crosshead motion in any mode. To release, twist the
button counter-clockwise until it assumes its original position. To resume the test, press UP or DOWN.
Crosshead movement will take place until a limit has been reached. If the crosshead has stopp ed at a
soft limit, the limit condition may be overridden by pressing and holding UP or DOWN.
5.3.1 Travel Indication
If enabled, travel indication is displayed in the upper left corner of the display. The displayed units are the
same as programmed in the UNITS parameter. Indicated travel is a relative value. To zero out travel
distance, ensure that the crosshead is not moving, then press and hold STOP.
If the cable connecting the crosshead to the rear of the controller is unplugged, the position value will not
change when the crosshead moves.
5.3.2 Limit Switch Operation
Limit switches allow the operator to set a location along the column at which
point the crosshead will stop moving. Limit switches are located at the rear of
the test stand column, as shown in the image to the left. Adjust the switches’
positions by loosening, repositioning, and re-tightening the thumb screws. The
thumb screws must be installed after unpacking. They are shipped separately
to avoid damage in transit.
5.3.3 Overload Protection
The 09-1162 cable is required for overload protection of a Series DFG55 force gauge. If overload
protection is enabled, the crosshead will stop when the programmed percentage of full scale of the force
gauge has been reached.
When overload protection is enabled, if the 09-1162 cable is disconnected, and/or if the force gauge is
turned off, an error message will appear. Plug in the cable and/or turn on the force gauge to clear the
message.
Note: When the crosshead is moving in the UP direction, only the tension overload setting is active.
When the crosshead is moving in the DOWN direction, only the compression overload setting is active.
20
Page 21
Series MTS300 Motorized Test Stands User’s Guide
5.4 Auto Return Mode
In this mode the crosshead moves to whichever limit it encounters first and stops. Then, the crosshead
returns at maximum speed to the other limit, whichever occurs first, and stops. The speed at which the
crosshead travels is dictated by the SPEED setting or UP SPEED and DN SPEED settings (if
independent speeds are enabled). Press UP or DOWN to initiate an Auto Return sequence.
The crosshead can be stopped at any time during an Auto Return sequence by pressing STOP. To
resume the test, press UP or DOWN.
Note: If the crosshead has stopped at a soft limit, the limit condition may be overridden by pressing and
holding UP or DOWN for two seconds.
5.5 Cycling Mode
This mode cycles the crosshead between limits, whichever occurs first. One cycle consists of the
following steps:
1. Crosshead moves to a limit at the specified speed.
2. Crosshead stops for the specified amount of dwell time.
3. Crosshead reverses dire ction, returns to the other limit at the specified speed, and stops for
the specified amount of dwell time.
A cycling sequence can be initiated from any position and can start in either direction. If the crosshead is
at a limit, however, cycling can only be started in the direction of the other limit. To initiate a cycle
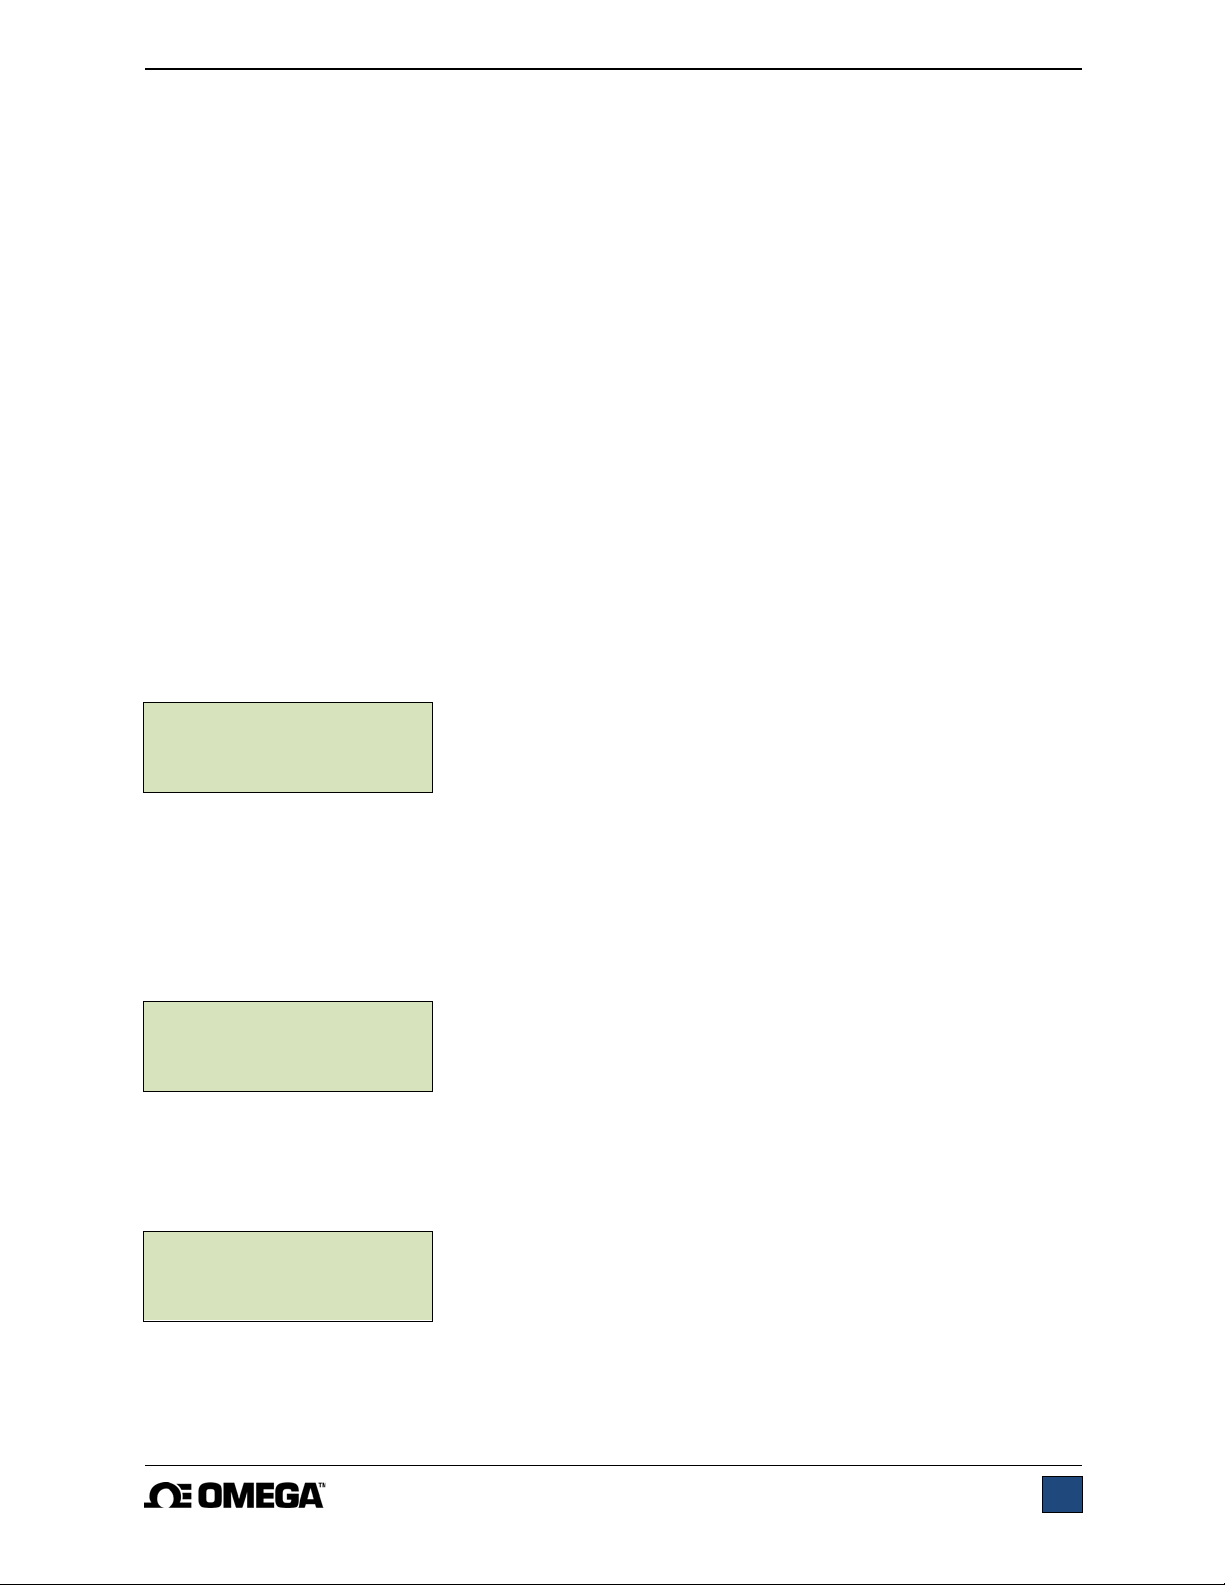
sequence, press UP or DOWN. During a cycle sequence, a counter will be displayed, indicating the
number of cycles remaining, as shown below:
C Y C L E S 0 0 0 2 4
me n u m i n ma x S E T
As in Basic Mode, the min, max, and set soft keys are active during crosshead movement.
When the cycling sequence and the crosshead has stopped at a soft limit, the limit condition may be
overridden by pressing and holding UP or DOWN.
5.5.1 Dwell time
Dwell time is the amount of time, in seconds, for which the crosshead stops at a limit during a cycle
sequence. When the crosshead has reached a limit, a counter will be displayed, shown as follows:
D WE L L : 0 0 0 1 . 5
me n u m i n ma x S E T
If the DWELL U and/or DWELL L settings are set to 0, the crosshead will immediately reverse direction
upon reaching the corresponding limit, and no counter will be displayed.
The cycle sequence may be interrupted before it has been completed by pressing STOP. A soft key
labeled RESET will appear as follows:
C Y C L E S : 0 0 0 2 4
R E S E T
At this point, there are two options:
21
Page 22

Series MTS300 Motorized Test Stands User’s Guide
1. Canceling the cycle sequence:
Press RESET to stop and reset the cycle sequence. The cycle counter will revert to the
number of cycles originally programmed.
2. Resuming the cycle sequence:
Press UP or DOWN to resume.
Once the sequence has been completed, the screen will revert to the number of cycles programmed
originally. To begin another cycle test, press UP or DOWN.
Travel indication and limit switch operation is the same as in Basic Mode.
5.5 Preload Mode
In this mode, the crosshead moves at the set speed (10 in/min [250 mm/min] maximum) until the
programmed preload value has been reached. If moving in the up direction, a tension preload is req uired.
If moving in the down direction, a compression preload is required. When the preload i s rea ched, the
sequence of events programmed in the Preload setting occurs (see the Test Parameter Setup section).
If the ZERO,GO setting is selected, and if the set speed is greater than 10 in/min, the crosshead speed
will revert to this setting after the travel indicator is zeroed.
Note 1: Before the start of a preload sequence, the crosshead must be positioned at either the upper or
lower physical limit switch.
Note 2: Preload and Load Holding cannot be enabled simultaneously.
5.6 Load Holding Mode
In this mode, the crosshead moves until the set point value programmed in the force gauge is reached.
The crosshead then dynamically adjusts its position to maintain a programmed force. The force gauge’s
capacity should be as close as possible to the intended load, for best performance.
In the force gauge, both set points must be set. The upper set point refers to a force limit in the up
(tension) direction. The lower set point refers to a force limit in the down (compression) direction. The
opposite set point must be set to any value in the opposite measuring direction. For example, for a test
requiring load holding at 10 lbF of compression force, set the upper set point to 30 lbF tension (as an
example), and the lower set point to 10 lbF compression.
If the CYCLING option has been enabled, load holding will be active for the period of time as defined in
the Dwell Time settings. If CYCLING has not been enabled, load holding will continue indefinitely.
Before the start of a load holding sequence, the crosshead must be positioned at either the upper limit
switch to begin compression load holding or at the lower limit switch to begin tension load holding.
The test speed should be adjusted according to the sample under test. Fine tuning may be necessary to
ensure optimal crosshead dynamic adjustment. Stiff samples require a lower test speed; softer samples
can be tested at higher speeds. If the speed of approach is too high for a given sample stiffness, the
crosshead may overshoot the set point value, requiring an adjustment sequen ce where the crosshead
reverses, then moves again in the original direction multiple times before settling at the set point value. A
high enough speed may cause this correction cycle to repeat indefinitely.
For softer samples the amplitude of oscillation will be smaller, but could still be present for the duration of
the load holding period. This is typical for samples which may relax, such as rubber, foam, etc. Lowering
the test speed will reduce the oscillation.
For non-relaxing materials such as metal springs, the oscillation should stop shortly after the holding force
is reached.
Note: Preload and Load Holding can
not be enabled simultaneously.
22
Page 23

Series MTS300 Motorized Test Stands User’s Guide
5.7 Break Detection Mode
In this mode, the crosshead will stop when a sample break has occurred. The test stan d is triggered when
the force has decreased to a specified percentage of peak.
For example: A sample is pulled until 50 lbF, then breaks. The break detection percentage drop setting is
programmed to 40%. After the sample breaks, the force rapidly decreases, reaches 20 lbF (40% of peak),
then triggers the test stand to stop. Break detection becomes active only after the programmed threshold
has been reached.
If enabled, an auto-return sequence or single-cycle sequence may follow break detection.
5.8 PC Mode
The MTS300 can be controlled by a PC via serial communication. A list of supported ASCII commands is
provided below. All commands must be lowercase.
a Request speed
b Set travel units to inches
c Enter cycle mode
d Move crosshead down
e Set speed (ex. e10.00 = 10.00 in/min)
f Set cycles (ex. f0500 = 500 cycles)
g Set lower travel limit (ex. g05.375 = 5.375 in)
h Set upper travel limit (ex. h10.250 = 10.250 in)
i Set travel units to millimeters
j Set crosshead speed to maximum speed
k Set crosshead speed to minimum speed
l Enter travel limit mode
m Enter manual mode
n Transmit travel and force readings
o Set crosshead speed to programmed speed
p Request stand status*
q Request number of cycles completed
r Request number of cycles set
s Stop crosshead
t Reset cycle counter to zero
u Move crosshead up
v Request upper travel limit
w Request lower travel limit
x Request travel value
z Reset travel to zero
*The transmission of ASCII “p” will return the stand status. The following are the return codes and their
definitions:
Crosshead status U = crosshead moving up
D = crosshead moving down
S = crosshead stopped
Operating mode C = cycle mode
L = limit mode
M = manual mode
Limit switch status UL = crosshead at upper limit
DL = crosshead at lower limit
Commands relating to Omega force gauges are not the same as indicated in their respective user’s
guides. A list of supported ASCII commands is provided below. All commands must be uppercase:
23
Page 24
Series MTS300 Motorized Test Stands User’s Guide
–
A Displays current unit
F Toggles between Normal and Data Collect modes
P Steps through Normal mode, Tension Peak mode, and Compression Peak mode
R Zeroes the force gauge (zeroes all modes)
S Sends current mode (Normal, Tension Peak, Compression Peak, or Data Collect)
U Steps through units
X or ? Sends currently displayed reading
Y Enables RS-232 output and sends continuous data stream when in Data Collect mode
Z Zeroes the peak values
The MTS300 is compatible with legacy Nexygen
commands. The 09-1162 cable is needed to communicate betwee n a Series DFG55 gauge and the test
stand.
The 09-1056 serial cable is needed to communicate between a PC and the test stand. Baud rate, stop
bits and parity must be programmed in the stand to correspond with the PC software’s settings.
While in PC control, if any parameters are changed on the front panel, these settings will be ignored,
except if Auto Return or Cycling are turned on. If so, PC control will be turned off automatically.
TM
TCD software, which also utilizes the above
6 FEATURE ACTIVATION
This menu displays the list of available features and indicates which ones are enabled and disabled.
Those that are disabled can be activated in the field. Features that are enabled are indicated by ON, and
those that are disabled are indicated by OFF.
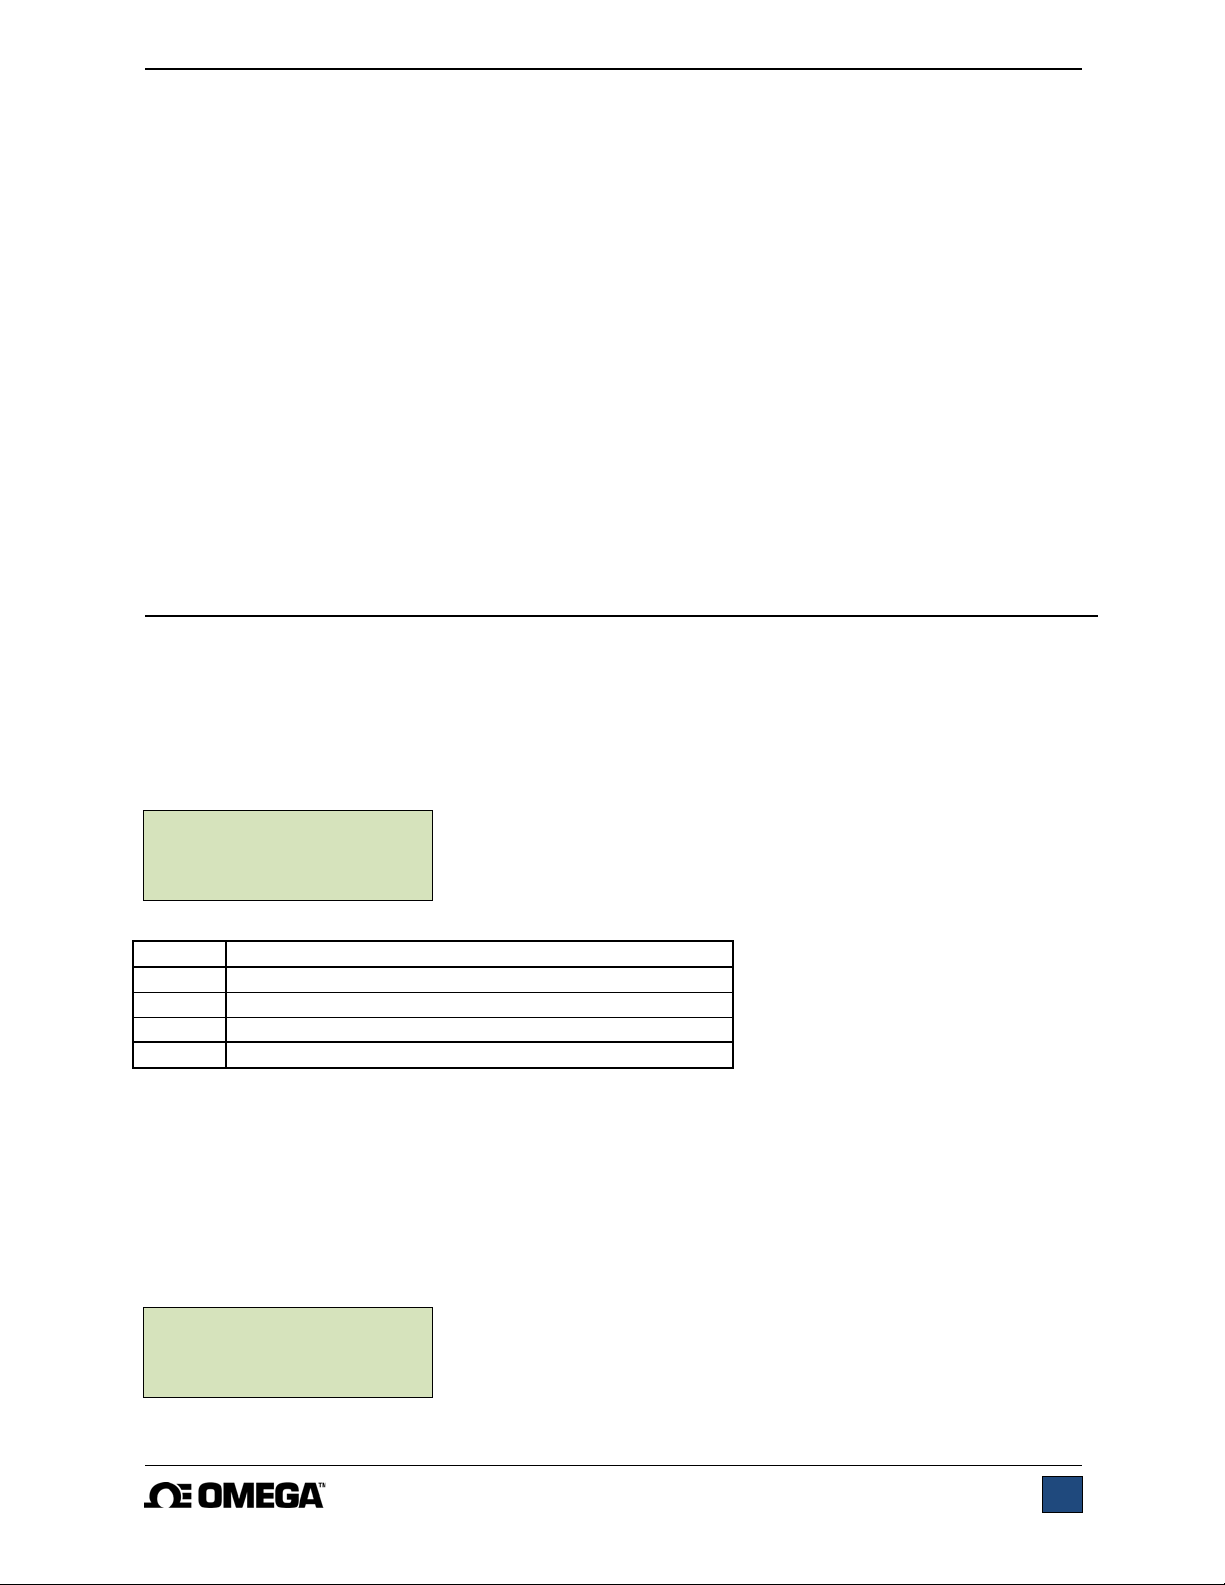
6.1 Accessing Feature Activation Menu
While in Operating Mode, press and hold STOP, then press menu simultaneously, and release both
buttons. The display will appear as follows:
K E Y S : O F F
E S C < − −> E N T R
Label Description
< – Scrolls to the previous feature
> Scrolls to the next feature
ENTR Selects the feature
ESC Exits Feature Activation Menu
6.2 Enabling Features
Features not originally purchased can be activated with an authorization code. To activate the feature,
scroll through the menu until the desired feature is displayed, then press ENTR. If the feature is already
enabled (indicated by on), pressing ENTR has no effect. If the feature is off, pressing ENTR will generate
a request code on the display.
An example is shown below:
K E Y S : 0 1 3 9 0 2 7
E S C + − E N T R
The request code must be supplied to Omega, who will then provide a corresponding authorization code
24
Page 25
Series MTS300 Motorized Test Stands User’s Guide
g
gaug
g
to activate the feature.
The process for entering the authorization code is as follows:
1. The first digit of the request code will be flashing. Press + to increm ent the digit. Pressing +
when the number 9 is displayed will return to 0.
2. Press –> to advance to subsequent digits, and change them in the same m anner.
4. Press ENTR when complete. If an incorrect code is entered, the controller will return to the
Feature Activation Setup menu, without enabling the feature. If this happens the above process
must be repeated.
The Feature Activation Menu also includes a utility with which to disable the password. Scroll through the
features until the following is displayed:
D I S A B L E P A S S WO R D
E S C < − − > E N T R
Press ENTR to generate the request code, then follow the authorization code procedure as indicated
above.
6.3 Demo Mode
All MTS300 test stands are shipped in Demo Mode, which provides full functionality of all available
features for an evaluation period of 160 operating hours. Demo Mode can be suspended by pressing
STOP while turning on power to the test stand. This mode can be re-enabled in the same manner, and
will be active for the remaining time period.
7 TROUBLESHOOTING
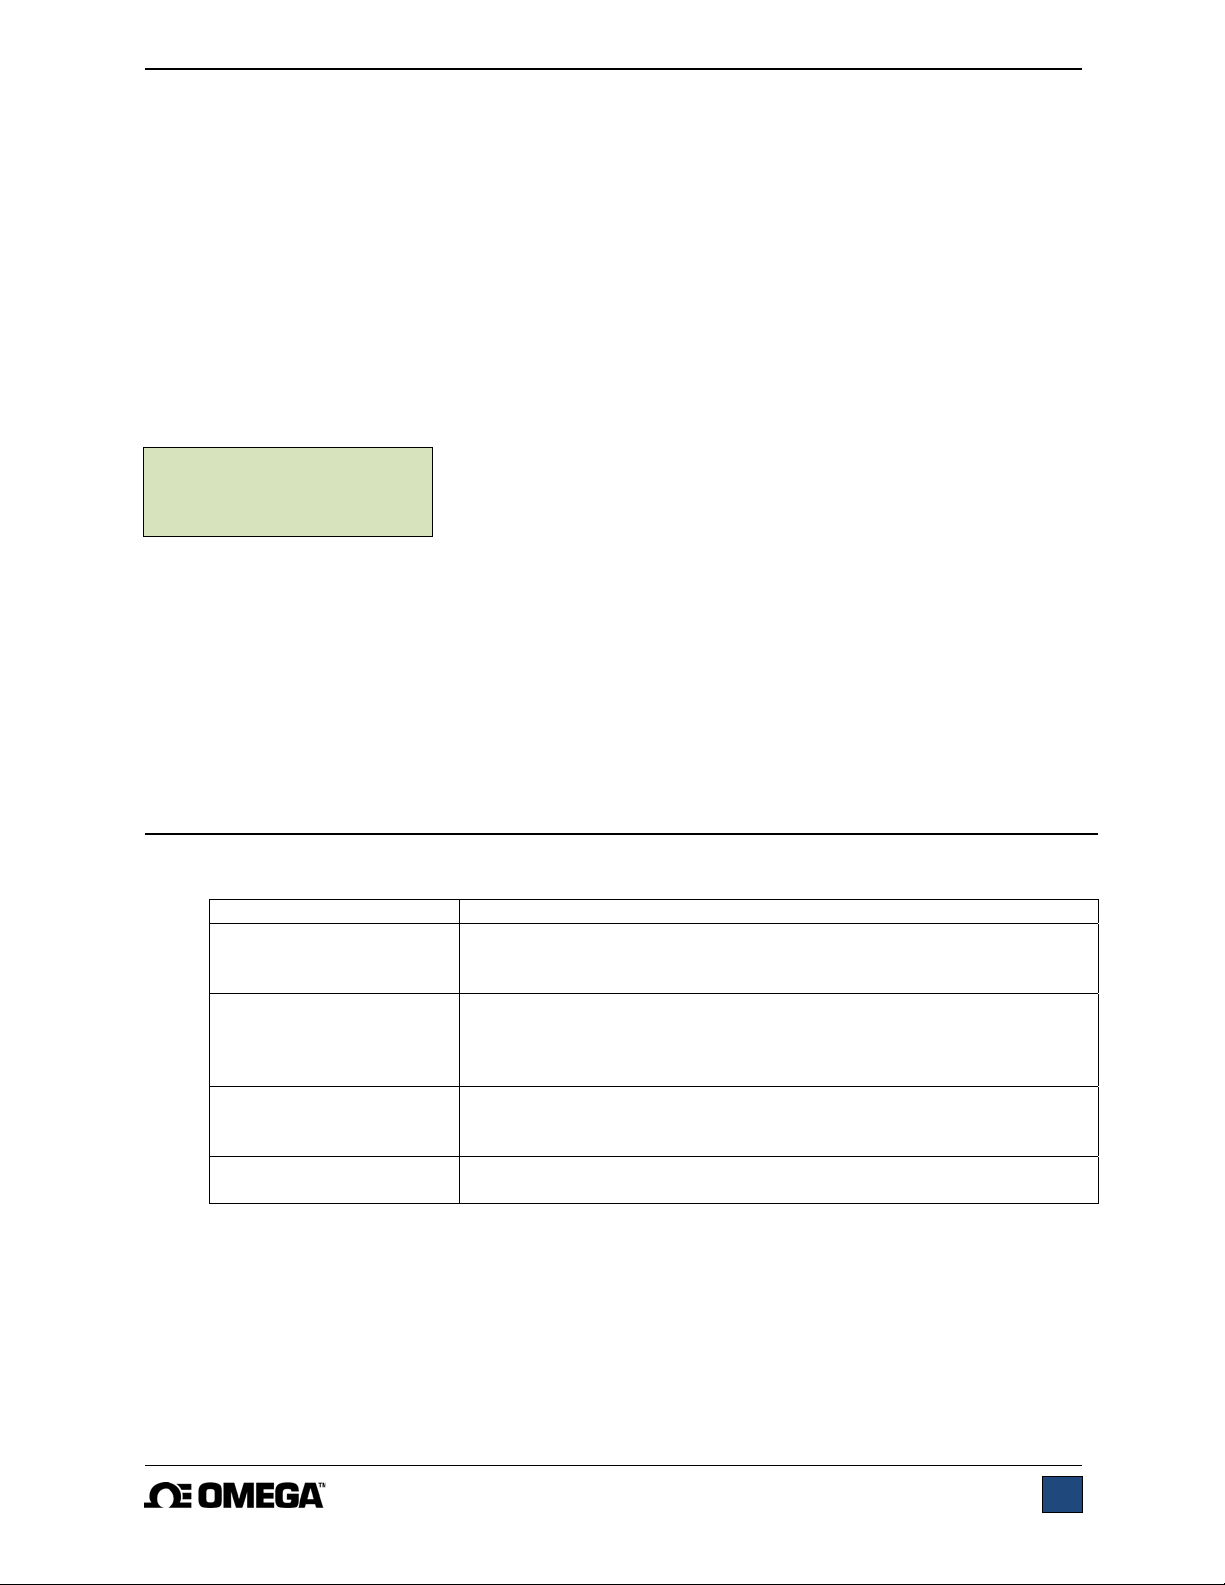
1. The MTS300 displays several error messages, as follows:
Error Messa
CHECK GAUGE
GAUGE COMM ERROR
GAUGE OVERLOAD
M5/M7 1.7+ REQD
To clear any of the above errors, press STOP. The amber light in the STOP button will be blinking
when the error message is displayed.
2. The crosshead will move only in one direction, or not at all.
Possible causes:.
1. Ensure all cables are plugged in properly, as described in the Mechanical Setup and Safety
section.
2. Ensure that the force value has not exceeded the overload limits configured in the stand.
e Description
The force gauge is powered off, in a menu, or not connected to the
stand controller. Message appears when overload protection is
turned on.
The stand is attempting to move the crosshead up or down, but it
cannot establish communication with the force gauge. The
communication settings in the force gauge are not correct or the
e is in a menu.
The programmed overload percentage of the force gauge’s full scale
has been reached. Immediately reduce the force or adjust the
overload settin
A Series DFG55 force gauge with firmware version 1.7 or later is
required for proper operation of the selected functions in the stand.
s.
25
Page 26

Series MTS300 Motorized Test Stands User’s Guide
3. Ensure that force gauge set points have been configured properly. Refer to Test Parameter
Setup section for details.
3. The travel display value does not change when the crosshead moves.
Check to make sure the encoder cable is plugged in properly.
4. Certain menu items are no longer displayed.
All test stand functions are temporarily enabled for 160 hours of operation in Demo Mode. When
demo mode has expired, any functions (and their associated menus) not originally purchased will
no longer be available.
8 MAINTENANCE AND SERVICE
The MTS300 should be operated in a dry and clean area. Under these circum stances only a few periodic
maintenance operations are required:
8.1 Acme screw lubrication – twice per year
1. Remove the right column cover by loosening the screws, as shown above.
2. Using a brush, apply a small amount of silicon-based grease to the lead screw.
3. Cycle the crosshead up and down several times until the newly applied grease has been spread
evenly over the length of the screw. Re-install the column cover.
8.2 Check for loosened grips and attachments - daily
Check to ensure that the grips attached to the force gauge and base plate are firmly secured. Looseness
could result in a potentially hazardous situation.
Check for loosened components – once per month
1. Remove the test sample from the test stand.
2. Turn off power to the test stand and disconnect the power cord. Attempt to loosen
subcomponents of the test stand (ex. fasteners, brackets, etc). All components should be firmly
attached. If any looseness is detected, stop using the test stand and contact Omega for
instructions.
26
Page 27
Series MTS300 Motorized Test Stands User’s Guide
9 SPECIFICATIONS
Load capacity:
300 lbF [1.5 kN] @ up to 24 in/min [610 mm/min]
200 lbF [1 kN] @ >24 in/min [>610 mm/min]
Standard speed range: 0.5-13 in/min [13-330 mm/min]
Maximum travel: 18.0 in [457 mm]
Speed setting accuracy: ±0.2%
Speed variation with load: ±0% [Stepper motor driven]
Limit switch repeatability: 0.001 in [0.03 mm]
Travel accuracy: ±0.002 in [0.05 mm]
Travel repeatability: 0.001 in [0.03 mm]
Travel resolution: 0.001 in / 0.02 mm
Power: Universal input 80-240 VAC, 50/60 Hz
Fuse type: 1.2 A, 250V, 3AG, SLO BLO
Weight (without options): 39.5 lb [23.7 kg]
Included accessories:
Environmental Conditions:
Extension rod, small hook, medium hook, #10-32 coupler,
compression plate, force gauge mounting hardware, tool kit
40 - 100°F [5 - 40°C], max. 96% humidity, non-condensating
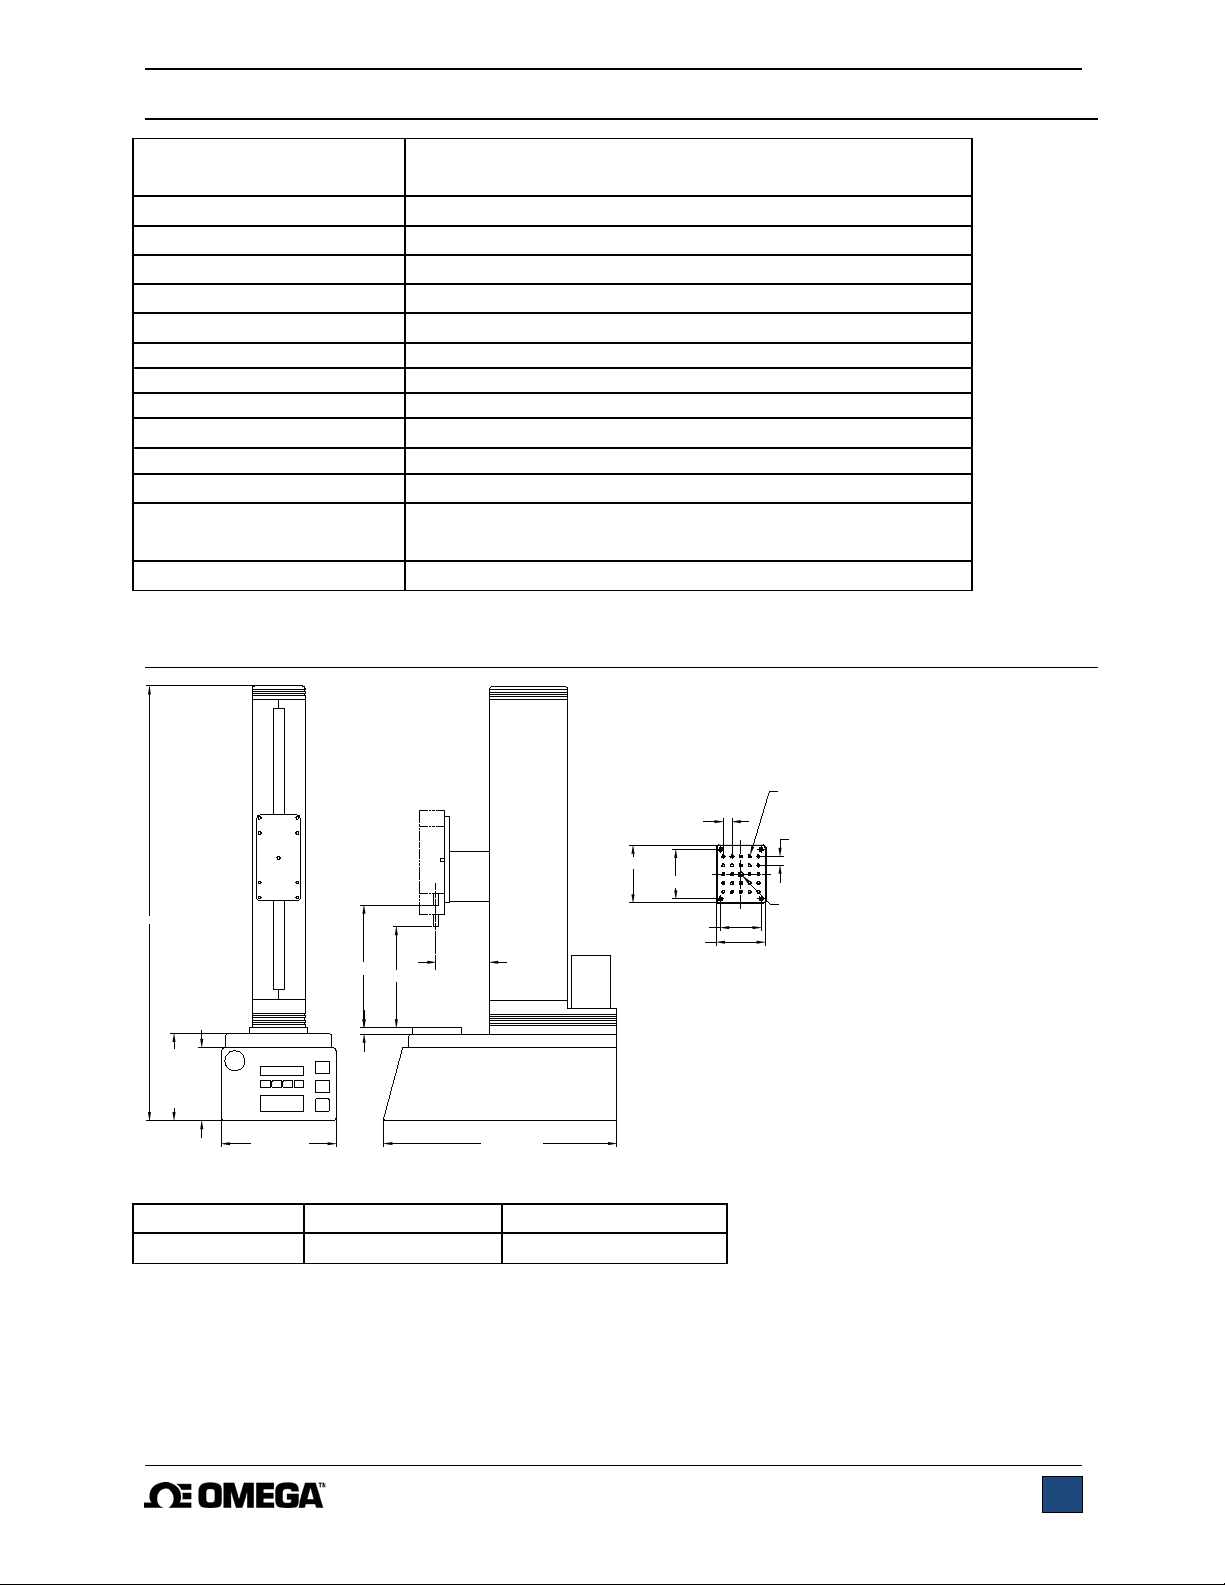
10 DIMENSIONS
3.26 [82.8]
A
3.00 [76.2]
C
13.20 [335.3]
4.90 [124.5]
4.20 [106.7]
B
0.35 [8.9]
6.50 [165.0]
A
B (Series DFG35) C (Series DFG55)
31.5 [800] 3.5 - 21.5 [89 - 546] 2.3 - 20.3 [58 - 516]
0.500 [12.7]
TYP
2.800 [71.1]
2.300 [58.4]
2.76 [70.1]
MOUNTING PLATE
TOP VIEW
#10-32 UNF-2B
X 0.350 DEEP
X24
0.500 [12.7]
TYP
5/16-18 UNC-2B
X 0.350 DEEP
27
Page 28

Series MTS300 Motorized Test Stands User’s Guide
NOTES:
28
Page 29
Series MTS300 Motorized Test Stands User’s Guide
29
Page 30

Series MTS300 Motorized Test Stands User’s Guide
M5249/1017
30
 Loading...