

Page 1
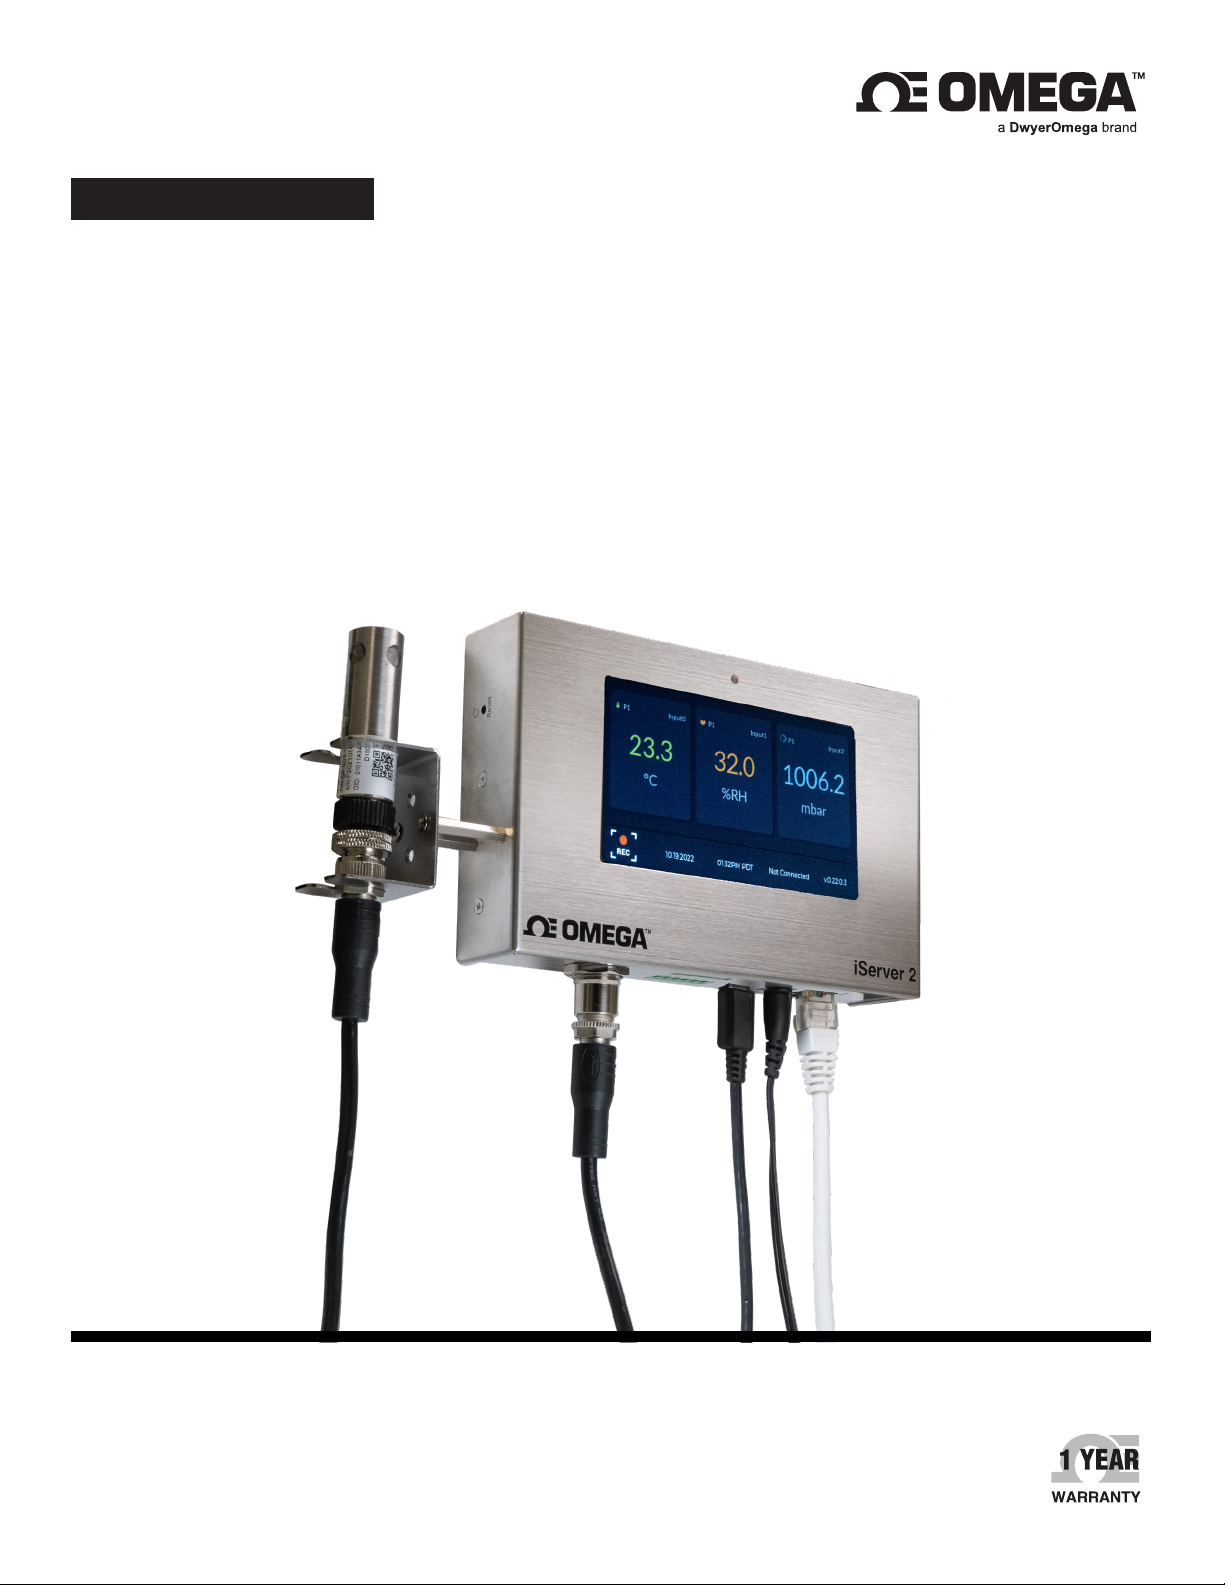
USER’S GUIDE
iServer 2
JSON Websocket Guide
omega.com | [email protected]
For latest product manuals:
omega.com/en-us/pdf-manuals
TM
Page 2

CONTACT
Omega Engineering, Inc.
omega.com/contact-us
Toll-Free:
1-800-826-6342 (USA & Canada only)
Customer Service:
1-800-622-2378 (USA & Canada only)
Engineering Service:
1-800-872-9436 (USA & Canada only)
Telephone:
(203) 359-1660
Fax:
(203) 359-7700
Email: [email protected]
For other locations visit:
omega.com/worldwide
The information contained in this document is believed to be correct,
but Omega accepts no liability for any errors it contains, and reserves
the right to alter specifications without notice.
Page 3

Table of Contents
1. Introduction........................................................................................................................................................................ 4
2. Connecting to the IServer2 ............................................................................................................................................ 4
3. JSON Commands ............................................................................................................................................................. 4
3.1. Login Command ................................................................................................................................................................. 4
3.1.1. Command Parameters .............................................................................................................................................. 4
3.1.2. Response Content ....................................................................................................................................................... 4
3.1.3. Example .......................................................................................................................................................................... 4
3.2. Probe List Command ........................................................................................................................................................ 5
3.2.1. Command Parameters .............................................................................................................................................. 5
3.2.2. Response Content ....................................................................................................................................................... 5
3.2.3. Example .......................................................................................................................................................................... 6
3.3. Sensor Data Command ................................................................................................................................................... 7
3.3.1. Command Parameters .............................................................................................................................................. 7
3.3.2. Response Content ....................................................................................................................................................... 8
3.3.3. Example .......................................................................................................................................................................... 8
3.4. Sensor Meta Command ................................................................................................................................................... 9
3.4.1. Command Parameters .............................................................................................................................................. 9
3.4.2. Response Content ....................................................................................................................................................... 9
3.4.3. Example .......................................................................................................................................................................... 10
3.5. Probe Meta Command ..................................................................................................................................................... 10
3.5.1. Command Parameters .............................................................................................................................................. 10
3.5.2. Response Content ....................................................................................................................................................... 11
3.5.3. Example .......................................................................................................................................................................... 11
3.6. System Meta Command .................................................................................................................................................. 12
3.6.1. Command Parameters .............................................................................................................................................. 12
3.6.2. Response Content ....................................................................................................................................................... 12
3.6.3. Example .......................................................................................................................................................................... 13
3.7. Adjust Info Command (Gain and Offset) .................................................................................................................. 14
3.7.1. Read Command Parameters .................................................................................................................................. 14
3.7.2 . Read Response Content ........................................................................................................................................... 14
3.7.3. Read Example .............................................................................................................................................................. 14
3.7.4. Write Command Parameters .................................................................................................................................. 15
3.7.5. Write Response Parameters ................................................................................................................................... 15
3.7.6. Write E xample .............................................................................................................................................................. 16
3.8. Alarm Info Command ....................................................................................................................................................... 16
3.8.1. Read Command Parameters .................................................................................................................................. 16
3.8.2. Read Response Content ........................................................................................................................................... 17
3.8.3. Read Example .............................................................................................................................................................. 17
3.8.4. Write Command Parameters .................................................................................................................................. 18
3.8.5. Write Response Parameters ................................................................................................................................... 19
3.8.6. Write Example .............................................................................................................................................................. 19
3.9. Alarm Status Command .................................................................................................................................................. 20
3.9.1 . Command Parameters .............................................................................................................................................. 20
3.9.2. Response Content ....................................................................................................................................................... 20
Table of Contents
3
Page 4

3.9.3. Example .......................................................................................................................................................................... 20
3.10. Log Config Command ...................................................................................................................................................... 21
3.10.1. Read Command Parameters .................................................................................................................................. 21
3.10.2. Read Response Content ........................................................................................................................................... 21
3.10.3. Read Example .............................................................................................................................................................. 21
3.10.4. Write Command Parameters .................................................................................................................................. 22
3.10.5. Write Response Parameters ................................................................................................................................... 22
3.10.6. Write Example .............................................................................................................................................................. 22
3.11. Probe Config Command ................................................................................................................................................. 23
3.11.1. Read Command Parameters .................................................................................................................................. 23
3.11.2. Read Response Content ........................................................................................................................................... 23
3.11.3. Read Example .............................................................................................................................................................. 24
3.11.4. Write Command Parameters .................................................................................................................................. 24
3.11.5. Write Response Parameters ................................................................................................................................... 24
3.11.6. Write Example .............................................................................................................................................................. 25
3.12. Alarm (Buzzer) Trigger Command ............................................................................................................................... 25
3.12.1. Read Command Parameters .................................................................................................................................. 25
3.12.2. Read Response Content ........................................................................................................................................... 25
3.12.3. Read Example .............................................................................................................................................................. 27
3.12.4. Write Command Parameters .................................................................................................................................. 29
3.12.5. Write Response Parameters ................................................................................................................................... 31
3.12.6. Write Example .............................................................................................................................................................. 31
3.13. Relay Trigger Command ................................................................................................................................................. 32
3.13.1. Read Command Parameters .................................................................................................................................. 32
3.13.2. Read Response Content ........................................................................................................................................... 32
3.13.3. Read Example .............................................................................................................................................................. 34
3.13.4. Write Command Parameters .................................................................................................................................. 36
3.13.5. Write Response Parameters ................................................................................................................................... 38
3.13.6. Write Example .............................................................................................................................................................. 38
3.14. Notification (e-mail) Trigger Command ..................................................................................................................... 39
3.14.1. Read Command Parameters .................................................................................................................................. 39
3.14.2. Read Response Content ........................................................................................................................................... 40
3.14.3. Read Example .............................................................................................................................................................. 41
3.14.4. Write Command Parameters .................................................................................................................................. 43
3.14.5. Write Response Parameters ................................................................................................................................... 45
3.14.6. Write Example .............................................................................................................................................................. 45
3.15. Contact Closure Config Command ............................................................................................................................ 46
3.15.1. Read Command Parameters .................................................................................................................................. 46
3.15.2. Read Response Content ........................................................................................................................................... 46
3.15.3. Read Example .............................................................................................................................................................. 48
3.15.4. Write Command Parameters .................................................................................................................................. 49
3.15.5. Write Response Parameters ................................................................................................................................... 50
3.15.6. Write Example .............................................................................................................................................................. 50
3.16. Relay Clear Latch Command ........................................................................................................................................ 51
3.16.1. Read Command Parameters .................................................................................................................................. 51
4 M-5807
Page 5

3.16.2. Read Response Content ........................................................................................................................................... 51
3.16.3. Example .......................................................................................................................................................................... 52
3.17. Contact Output Clear Latch Command .................................................................................................................... 52
3.17.1. Read Command Parameters .................................................................................................................................. 52
3.17.2 . Read Response Content ........................................................................................................................................... 53
3.17.3. Example .......................................................................................................................................................................... 53
4. CGI Commands ................................................................................................................................................................53
4.1. Extract Data ......................................................................................................................................................................... 53
4.1.1. Command Parameters .............................................................................................................................................. 53
4.1.2. Example .......................................................................................................................................................................... 53
Table of Contents
5
Page 6

1. Introduction
This document provides information regarding the JSON objects used in the iServer2.
2. Connecting to the IServer2
Open a WebSocket connection to http://<IServer2 IP address>:8081. Messages with JSON objects can then be
used to communicate with the iServer2.
3. JSON Commands
3.1. Login Command
The login command, logs into the iServer2, the return response contains a token that must be sent in other
commands.
3.1.1. Command Parameters
{
“login”: {
“username”: “string”,
“password”: “string”
}
}
Name Typ e Description
username
password
String The username is either “admin” or “user”.
string The password to login.
3.1.2. Response Content
{
“login”: {
“status”: “string”,
“token”: “string”
}
}
Name Typ e Description
status
token
String
string
3.1.3. Example
Command:
{
“login”: {
“username”: “admin”,
Returns success upon successful login, otherwise an authentication error
will return.
Security token. It will be required for other commands.
“password”: “00000000”
}
}
6 M-5807
Page 7

Response:
{
“login”: {
“status”: “success”,
“token”: “cb2fc968-5234-483c-8ded-8be8422abe6f”
}
}
3.2. Probe List Command
This command retrieves the list of probes and their status. Probe id 0 refers to thermocouples and is
meaningless in probe models of the iServer2.
3.2.1. Command Parameters
{
“probeList”: {
“token”: “string”
}
}
Name Typ e Description
token
String Security token from successful login.
3.2.2. Response Content
{
“probeList”: {
“status”: “string”,
“probes”: [
{
“probeId”: int,
“probe”: int,
“sensors”: [array],
“connected”: int,
“timestamp”: long,
“isLock”: int,
“isExtractIP”: int
},
{
…
},
]
7JSON Commands
Page 8

}
}
Name Typ e Description
status
probes
probeId
probe
sensors
connected
timestamp
isLock
isExtractIP
3.2.3. Example
Command:
{
String Returns success upon successful login, otherwise an authentication error
will return.
array Security token. It will be required for other commands.
int Probe number. 0 for thermocouples, 1 for probe 1, 2 for probe 2
int Probe number. 0 for thermocouples, 1 for probe 1, 2 for probe 2
array Object that contains sensor ids up to the number of sensors the probe
has.
int 0-probe is not connected, 1-probe is connected
Long UTC timestamp
int 0-probe is not locked by password, 1-probe is locked by password
int 0-iServer2 is not extracting log data from probe, 1-iServer2 is extracting
log data from probe
“probeList”: {
“token”: “ cb2fc968-5234-483c-8ded-8be8422abe6f “
}
}
Response:
{
“probeList”: {
“status”: “success”,
“probes”: [
{
“probeId”: 0,
“probe”: 0,
“sensors”: [],
“connected”: 0,
“timestamp”: 0,
“isLock”: 0,
“isExtractIP”: 0
},
{
“probeId”: 1,
“probe”: 1,
8 M-5807
Page 9

“sensors”: [
0,
1,
2
],
“connected”: 1,
“timestamp”: 1706144586,
“isLock”: 0,
“isExtractIP”: 0
},
{
“probeId”: 2,
“probe”: 2,
“sensors”: [],
“connected”: 0,
“timestamp”: 0,
“isLock”: 0,
“isExtractIP”: 0
}
]
}
}
3.3. Sensor Data Command
This command is used to read the current display data.
3.3.1. Command Parameters
{
“sensorData”: {
“probe”: int,
“channel”: int,
“token”: “string”
}
}
Name Typ e Description
probe
channel
token
Int Probe number. 0 for thermocouples, 1 for probe 1, 2 for probe 2
int Channel or sensor number, ranges from 0-3
String Security token from successful login.
9JSON Commands
Page 10

3.3.2. Response Content
{
“sensorData”: {
“probe”: int,
“channel”: int,
“time”: long,
“value”: oat,
“precision”: int
}
}
Name Typ e Description
probe
channel
Time
value
precision
Int Probe number. 0 for thermocouples, 1 for probe 1, 2 for probe 2
int Channel or sensor number, ranges from 0-3
Long UTC timestamp
oat Channel or sensor reading
Int Number of decimal places for the intended resolution
3.3.3. Example
Command:
{
“sensorData”: {
“probe”: 1,
“channel”: 1,
“token”: “ cb2fc968-5234-483c-8ded-8be8422abe6f “
}
}
Response:
{
“sensorData”: {
“probe”: 1,
“channel”: 1,
“time ”: 1706231919,
“value”: 52.900001525878906,
“precision”: 1
}
}
10 M-5807
Page 11

3.4. Sensor Meta Command
This command is used to read the units, the type and the name of sensor.
3.4.1. Command Parameters
{
“sensorMeta”: {
“probe”: int,
“channel”: int,
“token”: “string”
}
}
Name Typ e Description
probe
channel
token
Int Probe number. 0 for thermocouples, 1 for probe 1, 2 for probe 2
int Channel or sensor number, ranges from 0-3
String Security token from successful login.
3.4.2. Response Content
{
“sensorMeta”: {
“status”: “string”,
“probe”: int,
“channel”: int,
“type”: int,
“typestr”: “string”,
“unit”: “string”,
“subtype”: int,
“name”: “string”,
“precision”: int
}
}
Name Typ e Description
status
probe
channel
type
typestr
unit
subtype
name
precision
string Returns success if data exists otherwise an error will return
Int Probe number. 0 for thermocouples, 1 for probe 1, 2 for probe 2
int Channel or sensor number, ranges from 0-3
int Numeric representation of the sensor type, internal use.
string The string representation of the t ype of sensor
String The unit of the sensor
Int Internal use.
string The name of the sensor.
Int Number of decimal places for the intended resolution
11JSON Commands
Page 12

3.4.3. Example
Command:
{
“sensorMeta”: {
“probe”: 1,
“channel”: 0,
“token”: “ cb2fc968-5234-483c-8ded-8be8422abe6f “
}
}
Response:
{
“sensorMeta”: {
“status”: “success”,
“probe”: 1,
“channel”: 0,
“type”: 1,
“typestr”: “temperature”,
“unit”: “C”,
“subtype”: 0,
“name”: “Temperature”,
“precision”: 1
}
}
3.5. Probe Meta Command
This command is used to read information about the probe.
3.5.1. Command Parameters
{
“probeMeta”: {
“probe”: int,
“token”: “string”
}
}
Name Typ e Description
probe
token
Int Probe number. 0 for thermocouples, 1 for probe 1, 2 for probe 2
String Security token from successful login.
12 M-5807
Page 13

3.5.2. Response Content
{
“probeMeta”: {
“probe”: int,
“sensor”: int,
“output”: int,
“rmwareVer”: long,
“coreVer”: long,
“manufacturedDate”: long,
“calibratedDate”: long,
“status”: “string”,
“probeModel”: “string”
}
}
Name Typ e Description
probe
sensor
output
rmwareVer
coreVer
manufacturedDate
calibratedDate
status
probeModel
Int Probe number. 0 for thermocouples, 1 for probe 1, 2 for probe 2
int Number of sensors on the probe
int Number of outputs on the probe
Long Decimal representation of the rmware version, convert to hex to
get the version number (e.g. 2.6.4.0 is 0x02060400)
long Decimal representation of the smart sensor core version, covert to
hex to get version number (e.g. 2.6.4.0 is 0x02060400).
long Timestamp of the manufactured date. Requires adding 946684800
to the value to get the UTC timestamp.
long Timestamp of time of last calibration date. Requires adding
946684800 to the value to get the UTC timestamp.
string Returns success if data exists otherwise an error will return
string The model of the probe at tached.
3.5.3. Example
Command:
{
“probeMeta”: {
“probe”: 1,
“token”: “ cb2fc968-5234-483c-8ded-8be8422abe6f “
}
}
Response:
{
“probeMeta”: {
13JSON Commands
Page 14

“probe”: 1,
“sensor”: 3,
“output”: 2,
“rmwareVer”: 33948672,
“coreVer”: 54793475,
“manufacturedDate”: 84871141,
“calibratedDate”: 84871141,
“status”: “success”,
“probeModel”: “SP-003-1”
}
}
3.6. System Meta Command
This command is used to read information about the iServer2.
3.6.1. Command Parameters
{
“systemMeta”: {
“token”: “string”
}
}
Name Typ e Description
token
String Security token from successful login.
3.6.2. Response Content
{
“dbupdate”: {
“status”: “string”
},
“systemMeta”: {
“status”: “string”,
“rmwareStr”: “string”,
“hardware”: long,
“manufacturer”: “string”,
“model”: “string”,
“deviceName”: “string”,
“systemName”: “string”,
“id”: “string”,
“samplingTime”: int,
14 M-5807
Page 15

“probeMode”: int
}
}
Name Type Description
status
rmwareStr
hardware
manufacturer
model
deviceName
systemName
id
samplingTime
probeMode
3.6.3. Example
Command:
{
string Returns success if data exists otherwise an error will return
string iServer2 rmware version
long reserved
string Manufacturer of iServer2
string Model of the iServer2
string Name of the iServer2
long Name used for DNS discovery
string Serial number of the iServer2
int Sample time of the iServer2, it is xed to 1 sample per second
int 0 for single probe mode, 1 for dual probe mode
“systemMeta”: {
“token”: “ cb2fc968-5234-483c-8ded-8be8422abe6f “
}
}
Response:
{
“dbupdate”: {
“status”: “success”
},
“systemMeta”: {
“status”: “success”,
“rmwareStr”: “1.0.7.1”,
“hardware”: 16843266,
“manufacturer”: “Omega”,
“model”: “iS2-THB-DP”,
“deviceName”: “iServer2”,
“systemName”: “is2-omegad79d”,
“id”: “F2215i030123”,
“samplingTime”: 1,
“probeMode”: 0
}
}
15JSON Commands
Page 16

3.7. Adjust Info Command (Gain and Offset)
This command is used to read and write a sensor’s gain and offset.
3.7.1. Read Command Parameters
{
“ adjustInfo”: {
“probe”: int,
“channel”: int,
“token”: “string”
}
}
Name Typ e Description
probe
channel
token
Int Probe number. 0 for thermocouples, 1 for probe 1, 2 for probe 2
int Channel or sensor number, ranges from 0-3
String Security token from successful login.
3.7.2 . Read Response Content
{
“adjustInfo”: {
“status”: “string”,
“probe”: int,
“channel”: int,
“gain”: oat,
“offset”: oat
}
}
Name Typ e Description
status
probe
channel
gain
offset
3.7.3. Read Example
Command:
string Returns success if data exists otherwise an error will return
Int Probe number. 0 for thermocouples, 1 for probe 1, 2 for probe 2
int Channel or sensor number, ranges from 0-3
oat Gain of the sensor
oat Offset of the sensor
{
“ adjustInfo”: {
“probe”: 1,
“channel”: 1,
“token”: “ cb2fc968-5234-483c-8ded-8be8422abe6f “
16 M-5807
Page 17

}
}
Response:
{
“adjustInfo”: {
“status”: “success”,
“probe”: 1,
“channel”: 0,
“gain”: 1.0,
“offset”: 0.0
}
}
3.7.4. Write Command Parameters
The parameters listed as optional do not need to be included in the JSON object.
{
“adjustInfo”: {
“probe”: int,
“channel”: int,
“gain”: oat, (optional)
“offset”: oat, (optional)
“token”: “string”
}
}
Name Typ e Description
probe Int Probe number. 0 for thermocouples, 1 for probe 1, 2 for probe 2
channel int Channel or sensor number, ranges from 0-3
gain oat Gain of the sensor
offset oat Offset of the sensor
token String Security token from successful login
3.7.5. Write Response Parameters
{
“adjustInfo”: {
“status”: “string”,
“probe”: int,
“channel”: int
}
}
17JSON Commands
Page 18

Name Typ e Description
status
probe
channel
3.7.6. Write Example
Command:
{
“adjustInfo”: {
“probe”: 1,
“channel”: 0,
“gain”: 2.0,
“offset”: 1.0,
“token”: “ cb2fc968-5234-483c-8ded-8be8422abe6f “
}
}
Response:
string Returns success if data was successfully written, otherwise an error will
return
Int Probe number. 0 for thermocouples, 1 for probe 1, 2 for probe 2
int Channel or sensor number, ranges from 0-3
{
“adjustInfo”: {
“status”: “success”,
“probe”: 1,
“channel”: 0
}
}
3.8. Alarm Info Command
This command is used to read and write a sensor’s alarm settings.
3.8.1. Read Command Parameters
{
“ alarmInfo”: {
“probe”: int,
“channel”: int,
“token”: “string”
}
}
Name Typ e Description
probe
channel
token
Int Probe number. 0 for thermocouples, 1 for probe 1, 2 for probe 2
int Channel or sensor number, ranges from 0-3
String Security token from successful login.
18 M-5807
Page 19

3.8.2. Read Response Content
{
“alarmInfo”: {
“status”: “string”,
“probe”: int,
“channel”: int,
“alarmStatus”: int,
“type”: int,
“latch”: int,
“lowThreshold”: oat,
“highThreshold”: oat,
“deadband”: oat
}
}
Name Type Description
status
probe
channel
alarmStatus
type
latch
lowThreshold
highThreshold
deadband
string Returns success if data exists otherwise an error will return
Int Probe number. 0 for thermocouples, 1 for probe 1, 2 for probe 2
int Channel or sensor number, ranges from 0-3
int 0 for no alarm, 1 for alarm low triggered, 2 for alarm high triggered, 3
int Type of alarm, 0 for no alarm, 1 for alarm low, 2 for alarm high, 3 for
int 0 do not latch alarm, 1 latch alarm
oat Low threshold to trigger on for alarm low and alarm low high
Float High threshold to trigger on for alarm high and alarm low high
oat Value the sensor must rise or fall to clear the alarm.
for alarm high low triggered
alarm high low
3.8.3. Read Example
Command:
{
“ alarmInfo”: {
“probe”: 1,
“channel”: 1,
“token”: “ cb2fc968-5234-483c-8ded-8be8422abe6f “
}
}
Response:
{
“alarmInfo”: {
19JSON Commands
Page 20

“status”: “success”,
“probe”: 1,
“channel”: 0,
“alarmStatus”: 0,
“type”: 0,
“latch”: 0,
“lowThreshold”: 0.0,
“highThreshold”: 0.0,
“deadband”: 5.0
}
}
3.8.4. Write Command Parameters
The parameters listed as optional do not need to be included in the JSON object.
{
“alarmInfo”: {
“probe”: int,
“channel”: int,
“type”: int, (optional)
“lowThreshold”: oat, (optional)
“highThreshold”: oat, (optional)
“latch”: int, (optional)
“deadband”: oat, (optional)
“token”: “string”
}
}
Name Type Description
probe
channel
type
latch
lowThreshold
highThreshold
deadband
token
Int Probe number. 0 for thermocouples, 1 for probe 1, 2 for probe 2
int Channel or sensor number, ranges from 0-3
int Type of alarm, 0 for no alarm, 1 for alarm low, 2 for alarm high, 3 for
alarm high low
int 0 do not latch alarm, 1 latch alarm
oat Low threshold to trigger on for alarm low and alarm low high
Float High threshold to trigger on for alarm high and alarm low high
oat Value the sensor must rise or fall to clear the alarm.
String Security token from successful login.
20 M-5807
Page 21

3.8.5. Write Response Parameters
{
“alarmInfo”: {
“status”: “string”,
“probe”: int,
“channel”: int
}
}
Name Typ e Description
status
probe
channel
string Returns success if data was successfully written, otherwise an error will
Int Probe number. 0 for thermocouples, 1 for probe 1, 2 for probe 2
int Channel or sensor number, ranges from 0-3
3.8.6. Write Example
Command:
{
return
“alarmInfo”: {
“probe”: 1,
“channel”: 1,
“type”: 2,
“lowThreshold”: 0,
“highThreshold”: 60,
“latch”: 0,
“deadband”: 5,
“token”: “ cb2fc968-5234-483c-8ded-8be8422abe6f “
}
}
Response:
{
“alarmInfo”: {
“status”: “success”,
“probe”: 1,
“channel”: 1
}
}
21JSON Commands
Page 22

3.9. Alarm Status Command
This command is used to read a sensor’s alarm status.
3.9.1 . Command Parameters
{
“alarmStatus”: {
“probe”: int,
“channel”: int,
“token”: “string”
}
}
Name Typ e Description
probe
channel
token
Int Probe number. 0 for thermocouples, 1 for probe 1, 2 for probe 2
int Channel or sensor number, ranges from 0-3
String Security token from successful login.
3.9.2. Response Content
{
“alarmStatus”: {
“probe”: int,
“channel”: int,
“value”: int
}
}
Name Typ e Description
probe
channel
value
3.9.3. Example
Command:
{
“ alarmStatus”: {
“probe”: 1,
Int Probe number. 0 for thermocouples, 1 for probe 1, 2 for probe 2
int Channel or sensor number, ranges from 0-3
int 0 for no alarm, 1 for alarm low triggered, 2 for alarm high triggered, 3 for
alarm high low triggered
“channel”: 1,
“token”: “ cb2fc968-5234-483c-8ded-8be8422abe6f “
}
}
Response:
22 M-5807
Page 23

{
“alarmStatus”: {
“probe”: 1,
“channel”: 1,
“value”: 0
}
}
3.10. Log Config Command
This command is used to read and write the logging interval. This command is also used to enable or disable
logging.
3.10.1. Read Command Parameters
{
“logCong”: {
“token”: “string”
}
}
Name Typ e Description
token
String Security token from successful login
3.10.2. Read Response Content
{
“logCong”: {
“status”: “string”,
“interval”: int,
“enable”: int
}
}
Name Typ e Description
status
Interval
enable
string Returns success if data exists otherwise an error will return
Int Logging interval in seconds
int 0 disable logging, 1 enable logging
3.10.3. Read Example
Command:
{
“ logCong”: {
“token”: “ cb2fc968-5234-483c-8ded-8be8422abe6f “
}
}
23JSON Commands
Page 24

Response:
{
“logCong”: {
“status”: “success”,
“interval”: 5,
“enable”: 1
}
}
3.10.4. Write Command Parameters
The parameters listed as optional do not need to be included in the JSON object.
{
“logCong”: {
“interval”: int, (optional)
“enable”: int, (optional)
“token”: “string”
}
}
Name Typ e Description
interval
enable
token
Int Logging interval in seconds
int 0 disable logging, 1 enable logging
String Security token from successful login.
3.10.5. Write Response Parameters
{
“logCong”: {
“status”: “success”
}
}
Name Typ e Description
status
string Returns success if data was successfully written, otherwise an error will
return
3.10.6. Write Example
Command:
{
“logCong”: {
“interval”: 10,
“enable”: 0,
24 M-5807
Page 25

“token”: “ cb2fc968-5234-483c-8ded-8be8422abe6f “
}
}
Response:
{
“logCong”: {
“status”: “success”
}
}
3.11. Probe Config Command
This command is used to read and write the name of the probe.
3.11.1. Read Command Parameters
{
“probeCong”: {
“probe”: int,
“token”: “string”
}
}
Name Typ e Description
probe
token
int Probe number. 0 for thermocouples, 1 for probe 1, 2 for probe 2
String Security token from successful login.
3.11.2. Read Response Content
{
“probeCong”: {
“status”: “string”,
“probe”: int,
“samplingTime”: int,
“deviceName”: “string”
}
}
Name Type Description
status
probe
samplingTime
deviceName
string Returns success if data exists otherwise an error will return
Int Probe number. 0 for thermocouples, 1 for probe 1, 2 for probe 2
int Fixed at 1 sample per second
string Name of the probe
25JSON Commands
Page 26

3.11.3. Read Example
Command:
{
“probeCong”: {
“probe”: 1,
“token”: “ cb2fc968-5234-483c-8ded-8be8422abe6f “
}
}
Response:
{
“probeCong”: {
“status”: “success”,
“probe”: 1,
“samplingTime”: 1,
“deviceName”: “Device_06332FD1”
}
}
3.11.4. Write Command Parameters
{
“probeCong”: {
“probe”: int,
“deviceName”: “string”,
“token”: “string”
}
}
Name Typ e Description
probe
deviceName
token
Int Probe number. 0 for thermocouples, 1 for probe 1, 2 for probe 2
string Probe name, maximum 16 characters
String Security token from successful login.
3.11.5. Write Response Parameters
{
“probeCong”: {
“status”: “string”,
“probe”: int
}
}
26 M-5807
Page 27

Name Typ e Description
status
probe
3.11.6. Write Example
Command:
{
“probeCong”: {
“probe”: 1,
“deviceName”: “Device_06”,
“token”: “ cb2fc968-5234-483c-8ded-8be8422abe6f “
}
}
Response:
{
“probeCong”: {
string Returns success if data was successfully written, otherwise an error will
return
Int Probe number. 0 for thermocouples, 1 for probe 1, 2 for probe 2
“status”: “success”,
“probe”: 1
}
}
3.12. Alarm (Buzzer) Trigger Command
This command is used to read and write the triggers for the buzzer. The command is also used to enable
or disable the buzzer.
3.12.1. Read Command Parameters
{
“alarmTrigger”: {
“apiaction”: “string”,
“token”: “string”
}
}
Name Typ e Description
apiaction
token
string Action either “read” or “write”
String Security token from successful login.
3.12.2. Read Response Content
{
“alarmTrigger”: {
“status”: “string”,
27JSON Commands
Page 28

“alarm”: {
“isAlarmEnabled”: int,
“a”: reserved,
“b”: int,
“c”: reserved,
“d”: int,
“e”: reser ved,
“f”: int,
“g”: int
},
“probeEventList”: [
{
“probeInfo”: {
“probe”: int,
“channel”: int,
“buzzer”: int,
“channelname”: “string”,
“probename”: “string”
}
},
{
…
}
},
]
}
}
Name Typ e Description
status
isAlarmEnabled
a
b
c
d
e
f
g
probeEventList
string Returns success if data exists otherwise an error will return
int Enable buzzer, 0 for disable buzzer, 1 for enable buzzer
reserved reserved
int Trigger on any probe disconnecting. 0 for no trigger, 1 for trigger
reserved reserved
int Trigger on out of memory. 0 for no trigger, 1 for trigger
reserved reserved
Int Trigger on low battery. 0 for no trigger, 1 for trigger
int Trigger on TTL contact activation. 0 for no trigger , 1 for trigger
array Contains the list of probes and sensors and relay trigger information
28 M-5807
Page 29

probe
channel
buzzer
channelname
probename
3.12.3. Read Example
Command:
{
“alarmTrigger”: {
“apiaction”: “read”,
“token”: “ cb2fc968-5234-483c-8ded-8be8422abe6f “
}
}
Response:
{
Int Probe number. 0 for thermocouples, 1 for probe 1, 2 for probe 2
int Channel or sensor number, ranges from 0-3
int Sensor alarm triggers buzzer to turn on, 0 for no effect, 1 for trigger
buzzer to turn on
String Name of the sensor or channel
string Name of the probe
“alarmTrigger”: {
“status”: “success”,
“alarm”: {
“isAlarmEnabled”: 0,
“a”: 0,
“b”: 0,
“c”: 0,
“d”: 0,
“e”: 0,
“f”: 0,
“g”: 0
},
“probeEventList”: [
{
“probeInfo”: {
“probe”: 1,
“channel”: 0,
“buzzer”: 0,
“channelname”: “Temperature”,
“probename”: “Device_31312FD1”
29JSON Commands
Page 30

}
},
{
“probeInfo”: {
“probe”: 1,
“channel”: 1,
“buzzer”: 0,
“channelname”: “Humidity”,
“probename”: “Device_31312FD1”
}
},
{
“probeInfo”: {
“probe”: 1,
“channel”: 2,
“buzzer”: 0,
“channelname”: “Barometer”,
“probename”: “Device_31312FD1”
}
},
{
“probeInfo”: {
“probe”: 2,
“channel”: 0,
“buzzer”: 0,
“channelname”: “Humidex”,
“probename”: “Device_10342FD1”
}
},
{
“probeInfo”: {
“probe”: 2,
“channel”: 1,
“buzzer”: 0,
“channelname”: “Dewpoint”,
“probename”: “Device_10342FD1”
30 M-5807
Page 31

}
},
{
“probeInfo”: {
“probe”: 2,
“channel”: 2,
“buzzer”: 0,
“channelname”: “Temperature”,
“probename”: “Device_10342FD1”
}
},
{
“probeInfo”: {
“probe”: 2,
“channel”: 3,
“buzzer”: 0,
“channelname”: “Humidity”,
“probename”: “Device_10342FD1”
}
}
]
}
}
3.12.4. Write Command Parameters
{
“alarmTrigger”: {
“apiaction”: “string”,
“alarm”: {
“isAlarmEnabled”: int,
“a”: reserved,
“b”: int,
“c”: reserved,
“d”: int,
“e”: reser ved,
“f”: int,
“g”: int
31JSON Commands
Page 32

},
“probeEventList”: [
{
“probeInfo”: {
“probe”: int,
“channel”: int,
“buzzer”: int
}
},
{
…
}
],
“token”: “string”
}
}
Name Typ e Description
apiaction
isAlarmEnabled
a
b
c
d
e
f
g
probeEventList
probe
channel
buzzer
token
string Action either “read” or “write”
int Enable buzzer, 0 for disable buzzer, 1 for enable buzzer
reserved reserved
int Trigger on any probe disconnecting. 0 for no trigger, 1 for trigger
reserved reserved
int Trigger on out of memory. 0 for no trigger, 1 for trigger
reserved reserved
Int Trigger on low battery. 0 for no trigger, 1 for trigger
int Trigger on TTL contact activation. 0 for no trigger , 1 for trigger
array Contains the list of probes and sensors and relay trigger information
Int Probe number. 0 for thermocouples, 1 for probe 1, 2 for probe 2
int Channel or sensor number, ranges from 0-3
int Sensor alarm triggers buzzer to turn on, 0 for no effect, 1 for trigger
buzzer to turn on
String Security token from successful login.
32 M-5807
Page 33

3.12.5. Write Response Parameters
{
“dbupdate”: {
“status”: “success”
}
}
Name Typ e Description
status
string Returns success if data was successfully written, otherwise an error will
3.12.6. Write Example
Command:
{
“alarmTrigger”: {
“apiaction”: “write”,
“alarm”: {
“isAlarmEnabled”: 0,
return
“a”: 0,
“b”: 0,
“c”: 0,
“d”: 0,
“e”: 0,
“f”: 1,
“g”: 0
},
“probeEventList”: [
{
“probeInfo”: {
“probe”: 1,
“channel”: 0,
“buzzer”: 1
}
},
{
“probeInfo”: {
“probe”: 2,
“channel”: 0,
33JSON Commands
Page 34

“buzzer”: 1
}
}
],
“token”: “ cb2fc968-5234-483c-8ded-8be8422abe6f “
}
} Response:
{
“dbupdate”: {
“status”: “success”
}
}
3.13. Relay Trigger Command
This command is used to read and write the triggers for the relays. The command is also used to check the
state of the relay.
3.13.1. Read Command Parameters
{
“relayTrigger”: {
“apiaction”: “string”,
“relayId”: int,
“token”: “string”
}
}
Name Typ e Description
apiaction
relayId
token
string Action either “read” or “write”
int Relay ID to read, 1 for relay1 and 2 for relay2
String Security token from successful login.
3.13.2. Read Response Content
{
“relayTrigger”: {
“status”: “string”,
“relayInfo”: {
“relayId”: int,
“set ting”: {
“istate”: int,
“name”: “string”,
“isLog”: int,
34 M-5807
Page 35

“isDisplay”: int,
“isLatch”: int,
“relayStatus”: int,
“a”: reserved,
“b”: int,
“c”: reserved,
“d”: int,
“e”: reser ved,
“f”: int,
“g”: int
}
},
“probeEventList”: [
{
“probeInfo”: {
“probe”: int,
“channel”: int,
“relay”: int
}
},
{
…
}
},
]
}
}
Name Typ e Description
status
relayId
istate
name
isLog
isDisplay
isLatch
relayStatus
a
b
string Returns success if data exists otherwise an error will return
int Relay identier, 1 for relay1 and 2 for relay2
int Initial state of relay, 0 for normally closed, 1 for normally open
string Name of relay
int Log relay state changes. 0 for no log, 1 for log
int Display relay state on web GUI. 0 for no display, 1 for display
int Enable latching. 0 for disable latching, 1 for enable latching
int State of relay, 0 for closed, 1 for open
reserved reserved
int Trigger on any probe disconnecting. 0 for no trigger, 1 for trigger
35JSON Commands
Page 36

c
d
e
f
g
probeEventList
probe
channel
relay
3.13.3. Read Example
Command:
{
“relayTrigger”: {
“apiaction”: “read”,
“relayId”: 1,
“token”: “ cb2fc968-5234-483c-8ded-8be8422abe6f “
reserved reserved
int Trigger on out of memory. 0 for no trigger, 1 for trigger
reserved reserved
Int Trigger on low battery. 0 for no trigger, 1 for trigger
int Trigger on TTL contact activation. 0 for no trigger , 1 for trigger
array Contains the list of probes and sensors and relay trigger information
Int Probe number. 0 for thermocouples, 1 for probe 1, 2 for probe 2
int Channel or sensor number, ranges from 0-3
int Sensor alarm triggers a relay action for the current relayId, 0 for no
effect, 1 for trigger relay action
}
}
Response:
{
“relayTrigger”: {
“status”: “success”,
“relayInfo”: {
“relayId”: 1,
“set ting”: {
“istate”: 1,
“name”: “Relay1”,
“isLog”: 0,
“isDisplay”: 1,
“isLatch”: 0,
“relayStatus”: 0,
“a”: 0,
“b”: 0,
“c”: 0,
“d”: 0,
“e”: 0,
“f”: 0,
36 M-5807
Page 37

“g”: 0
}
},
“probeEventList”: [
{
“probeInfo”: {
“probe”: 1,
“channel”: 0,
“relay”: 1
}
},
{
“probeInfo”: {
“probe”: 1,
“channel”: 1,
“relay”: 1
}
},
{
“probeInfo”: {
“probe”: 1,
“channel”: 2,
“relay”: 1
}
},
{
“probeInfo”: {
“probe”: 2,
“channel”: 0,
“relay”: 0
}
},
{
“probeInfo”: {
“probe”: 2,
“channel”: 1,
37JSON Commands
Page 38

“relay”: 0
}
},
{
“probeInfo”: {
“probe”: 2,
“channel”: 2,
“relay”: 0
}
},
{
“probeInfo”: {
“probe”: 2,
“channel”: 3,
“relay”: 0
}
}
]
}
}
3.13.4. Write Command Parameters
{
“relayTrigger”: {
“apiaction”: “string”,
“relayInfo”: {
“relayId”: int,
“set ting”: {
“istate”: int,
“name”: “string”,
“isLog”: int,
“isDisplay”: int,
“isLatch”: int,
“a”: reserved,
“b”: int,
“c”: reserved,
“d”: int,
38 M-5807
Page 39

“e”: reser ved,
“f”: int,
“g”: int
}
},
“probeEventList”: [
{
“probeInfo”: {
“probe”: int,
“channel”: int,
“relay”: int
}
},
{
…
}
}
],
“token”: “ string “
}
}
Name Typ e Description
apiaction
relayId
istate
name
isLog
isDisplay
isLatch
a
b
c
d
e
f
g
probeEventList
probe
channel
string Action either “read” or “write”
int Relay identier, 1 for relay1 and 2 for relay2
int Initial state of relay, 0 for normally closed, 1 for normally open
string Name of relay
int Log relay state changes. 0 for no log, 1 for log
int Display relay state on web GUI. 0 for no display, 1 for display
int Enable latching. 0 for disable latching, 1 for enable latching
reserved reserved
int Trigger on any probe disconnecting. 0 for no trigger, 1 for trigger
reserved reserved
int Trigger on out of memory. 0 for no trigger, 1 for trigger
reserved reserved
Int Trigger on low battery. 0 for no trigger, 1 for trigger
int Trigger on TTL contact activation. 0 for no trigger , 1 for trigger
array Contains the list of probes and sensors and relay trigger information
Int Probe number. 0 for thermocouples, 1 for probe 1, 2 for probe 2
int Channel or sensor number, ranges from 0-3
39JSON Commands
Page 40

relay
token
int Sensor alarm triggers a relay action for the current relayId, 0 for no
String Security token from successful login.
3.13.5. Write Response Parameters
{
“dbupdate”: {
“status”: “success”
}
}
Name Typ e Description
status
string Returns success if data was successfully written, otherwise an error will
3.13.6. Write Example
Command:
{
“relayTrigger”: {
effect, 1 for trigger relay action
return
“apiaction”: “write”,
“relayInfo”: {
“relayId”: 1,
“set ting”: {
“istate”: 1,
“name”: “relay1”,
“isLog”: 0,
“isDisplay”: 1,
“isLatch”: 0,
“a”: 0,
“b”: 0,
“c”: 0,
“d”: 0,
“e”: 0,
“f”: 1,
“g”: 0
}
},
“probeEventList”: [
{
40 M-5807
Page 41

“probeInfo”: {
“probe”: 1,
“channel”: 0,
“relay”: 1
}
},
{
“probeInfo”: {
“probe”: 2,
“channel”: 0,
“relay”: 1
}
}
],
“token”: “ cb2fc968-5234-483c-8ded-8be8422abe6f “
}
}
Response:
{
“dbupdate”: {
“status”: “success”
}
}
3.14. Notification (e-mail) Trigger Command
This command is used to read and write the triggers for the relays. The command is also used to check the
state of the relay.
3.14.1. Read Command Parameters
{
“ notiTrigger”: {
“apiaction”: “string”,
“token”: “string”
}
}
Name Typ e Description
apiaction
token
string Action either “read” or “write”
String Security token from successful login.
41JSON Commands
Page 42

3.14.2. Read Response Content
{
“notiTrigger”: {
“status”: “string”,
“notiInfo”: {
“isEmailEnabled”: int,
“emailList”: “string”,
“heartbeatInterval”: int,
“nextAlarmInterval”: int
},
“trigger”: {
“a”: int,
“b”: int,
“c”: reserved,
“d”: int,
“e”: reser ved,
“f”: int,
“g”: int
},
“probeEventList”: [
{
“probeInfo”: {
“probe”: int,
“channel”: int,
“isSend”: int
}
},
{
…
}
}
]
}
}
42 M-5807
Page 43

Name Typ e Description
status
isEmailEnabled
emailList
heartbeatInterval
nextAlarmInterval
a
b
c
d
e
f
g
probeEventList
probe
channel
isSend
string Returns success if data exists otherwise an error will return
int Returns 1
int List of e-mails to send the notication to. Semicolons are used to
separate multiple e-mail addresses
int Send a heartbeat notication at a periodic interval. The interval is in
minutes.
int Resend an alarm notication at a periodic interval. The interval is in
minutes.
int Trigger on unit power up.
int Trigger on any probe disconnecting. 0 for no trigger, 1 for trigger
reserved reserved
int Trigger on out of memory. 0 for no trigger, 1 for trigger
reserved reserved
Int Trigger on low battery. 0 for no trigger, 1 for trigger
int Trigger on TTL contact activation. 0 for no trigger, 1 for trigger
array Contains the list of probes and sensors and relay trigger information
Int Probe number. 0 for thermocouples, 1 for probe 1, 2 for probe 2
int Channel or sensor number, ranges from 0-3
int Sensor alarm triggers an e-mail notication, 0 for do not send, 1 for
send
3.14.3. Read Example
Command:
{
“notiTrigger”: {
“apiaction”: “read”,
“token”: “ cb2fc968-5234-483c-8ded-8be8422abe6f “
}
}
Response:
{
“notiTrigger”: {
“status”: “success”,
“notiInfo”: {
“isEmailEnabled”: 1,
“emailList”: “[email protected]”,
“heartbeatInterval”: 0,
“nextAlarmInterval”: 0
},
“trigger”: {
“a”: 0,
43JSON Commands
Page 44

“b”: 0,
“c”: 0,
“d”: 0,
“e”: 0,
“f”: 1,
“g”: 0
},
“probeEventList”: [
{
“probeInfo”: {
“probe”: 1,
“channel”: 0,
“isSend”: 0
}
},
{
“probeInfo”: {
“probe”: 1,
“channel”: 1,
“isSend”: 0
}
},
{
“probeInfo”: {
“probe”: 1,
“channel”: 2,
“isSend”: 0
}
},
{
“probeInfo”: {
“probe”: 2,
“channel”: 0,
“isSend”: 0
}
},
44 M-5807
Page 45

{
“probeInfo”: {
“probe”: 2,
“channel”: 1,
“isSend”: 0
}
},
{
“probeInfo”: {
“probe”: 2,
“channel”: 2,
“isSend”: 0
}
},
{
“probeInfo”: {
“probe”: 2,
“channel”: 3,
“isSend”: 0
}
}
]
}
}
3.14.4. Write Command Parameters
{
“notiTrigger”: {
“apiaction”: “string”,
“notiInfo”: {
“emailList”: “string”,
“heartbeatInterval”: int,
“nextAlarmInterval”: int
},
“trigger”: {
“a”: int,
“b”: int,
45JSON Commands
Page 46

“c”: reserved,
“d”: int,
“e”: reser ved,
“f”: int,
“g”: int
},
“probeEventList”: [
{
“probeInfo”: {
“probe”: int,
“channel”: int,
“isSend”: int
}
},
{
…
}
],
“token”: “string”
}
}
Name Type Description
apiaction
emailList
heartbeatInterval
nextAlarmInterval
a
b
c
d
e
f
g
probeEventList
probe
channel
isSend
string Action either “read” or “write”
int List of e-mails to send the notication to. Semicolons are used to
separate multiple e-mail addresses
int Send a heartbeat notication at a periodic interval. The interval is in
minutes.
int Resend an alarm notication at a periodic interval. The interval is in
minutes.
int Trigger on unit power up.
int Trigger on any probe disconnecting. 0 for no trigger, 1 for trigger
reserved reserved
int Trigger on out of memory. 0 for no trigger, 1 for trigger
reserved reserved
Int Trigger on low battery. 0 for no trigger, 1 for trigger
int Trigger on TTL contact activation. 0 for no trigger, 1 for trigger
array Contains the list of probes and sensors and relay trigger information
Int Probe number. 0 for thermocouples, 1 for probe 1, 2 for probe 2
int Channel or sensor number, ranges from 0-3
int Sensor alarm triggers an e-mail notication, 0 for do not send, 1 for
send
46 M-5807
Page 47

token
String Security token from successful login.
3.14.5. Write Response Parameters
{
“dbupdate”: {
“status”: “success”
}
}
Name Typ e Description
status
string Returns success if data was successfully written, otherwise an error will
3.14.6. Write Example
Command:
{
“notiTrigger”: {
“apiaction”: “write”,
return
“notiInfo”: {
“emailList”: “[email protected]”,
“heartbeatInterval”: 30,
“nextAlarmInterval”: 30
},
“trigger”: {
“a”: 0,
“b”: 0,
“c”: 0,
“d”: 0,
“e”: 0,
“f”: 1,
“g”: 0
},
“probeEventList”: [
{
“probeInfo”: {
“probe”: 1,
“channel”: 0,
“isSend”: 1
47JSON Commands
Page 48

}
},
{
“probeInfo”: {
“probe”: 2,
“channel”: 0,
“isSend”: 1
}
}
],
“token”: “ cb2fc968-5234-483c-8ded-8be8422abe6f “
}
}
Response:
{
“dbupdate”: {
“status”: “success”
}
}
3.15. Contact Closure Config Command
This command is used to congure the digital I/O. The command is also used to check the status of the
inputs and the output.
3.15.1. Read Command Parameters
{
“ contactClosure”: {
“apiaction”: “string”,
“token”: “string”
}
}
Name Typ e Description
apiaction
token
string Action either “read” or “write”
String Security token from successful login.
3.15.2. Read Response Content
{
“contactClosure”: {
“status”: “string”,
48 M-5807
Page 49

“contact1”: {
“isContactEnabled”: int,
“initiateState”: int,
“contactName”: “string”,
“isDisplay”: int,
“isLog”: int,
“OpenStatus”: int
},
“contact2”: {
“isContactEnabled”: int,
“initiateState”: int,
“contactName”: “string”,
“isDisplay”: int,
“isLog”: int,
“OpenStatus”: int
},
“contactOutput”: {
“isDisplay”: int,
“isLog”: int,
“outputType”: int,
“relayStatus”: int,
“isLatch”: int
}
}
}
Name Ty pe Description
status
isContactEnabled
initiateState
contactName
isDisplay
isLog
OpenStatus
outputType
relayStatus
isLatch
string Returns success if data exists otherwise an error will return
int Enable or disable the contact, 0 for disable 1 for enable
int Initial state of contact, 0 for normally closed, 1 for normally open
string Name of the contact
int Display contact state on web GUI. 0 for no display, 1 for display
int Log contact state changes. 0 for no log, 1 for log
int Contact status. 0 for initial state, 1 for changed state
int Output changes based on input. 1 for Active low, 2 for Active high
int State of output, 0 for closed, 1 for open
int Enable latching. 0 for disable latching, 1 for enable latching
49JSON Commands
Page 50

3.15.3. Read Example
Command:
{
“ contactClosure”: {
“apiaction”: “read”,
“token”: “ cb2fc968-5234-483c-8ded-8be8422abe6f “
}
}
Response:
{
“contactClosure”: {
“status”: “success”,
“contact1”: {
“isContactEnabled”: 1,
“initiateState”: 0,
“contactName”: “Digital Input 1”,
“isDisplay”: 1,
“isLog”: 0,
“OpenStatus”: 0
},
“contact2”: {
“isContactEnabled”: 1,
“initiateState”: 0,
“contactName”: “Digital Input 2”,
“isDisplay”: 1,
“isLog”: 0,
“OpenStatus”: 0
},
“contactOutput”: {
“isDisplay”: 1,
“isLog”: 0,
“outputType”: 2,
“relayStatus”: 1,
“isLatch”: 0
}
}
}
50 M-5807
Page 51

3.15.4. Write Command Parameters
{
“contactClosure”: {
“apiaction”: “string”,
“contact1”: {
“isContactEnabled”: int,
“initiateState”: int,
“contactName”: “string”,
“isDisplay”: int,
“isLog”: int
},
“contact2”: {
“isContactEnabled”: int,
“initiateState”: int,
“contactName”: “string”,
“isDisplay”: int,
“isLog”: int
},
“contactOutput”: {
“isDisplay”: int,
“isLog”: int,
“outputType”: int,
“isLatch”: int
},
“token”: “string”
}
}
Name Typ e Description
apiaction
isContactEnabled
initiateState
contactName
isDisplay
isLog
outputType
relayStatus
isLatch
token
string Action either “read” or “write”
int Enable or disable the contact, 0 for disable 1 for enable
int Initial state of contact, 0 for normally closed, 1 for normally open
string Name of the contact
int Display contact state on web GUI. 0 for no display, 1 for display
int Log contact state changes. 0 for no log, 1 for log
int Output changes based on input. 1 for Active low, 2 for Active high
int State of output, 0 for closed, 1 for open
int Enable latching. 0 for disable latching, 1 for enable latching
String Security token from successful login.
51JSON Commands
Page 52

3.15.5. Write Response Parameters
{
“dbupdate”: {
“status”: “success”
}
}
Name Typ e Description
status
string Returns success if data was successfully written, otherwise an error will
3.15.6. Write Example
Command:
{
“contactClosure”: {
“apiaction”: “write”,
“contact1”: {
“isContactEnabled”: 1,
return
“initiateState”: 0,
“contactName”: “Digital1”,
“isDisplay”: 1,
“isLog”: 0
},
“contact2”: {
“isContactEnabled”: 1,
“initiateState”: 0,
“contactName”: “Digital2”,
“isDisplay”: 1,
“isLog”: 0
},
“contactOutput”: {
“isDisplay”: 1,
“isLog”: 0,
“outputType”: 2,
“isLatch”: 0
},
“token”: “ cb2fc968-5234-483c-8ded-8be8422abe6f “
}
52 M-5807
Page 53

}
Response:
{
“dbupdate”: {
“status”: “success”
}
}
3.16. Relay Clear Latch Command
This command is used to clear the latch on a relay.
3.16.1. Read Command Parameters
{
“relayInfo”: {
“relayId”: int,
“set ting”: {
“clearLatch”: int
},
“apiaction”: “string”,
“token”: “string”
}
}
Name Typ e Description
relayId
clearLatch
apiaction
token
int Relay ID to clear latch on, 1 for relay1 and 2 for relay2
int Clear latch on a relay, 1 to clear
string Action either “read” or “write”
String Security token from successful login.
3.16.2. Read Response Content
{
“dbupdate”: {
“status”: “string”
}
}
Name Typ e Description
Status
string Returns success if data exists otherwise an error will return
53JSON Commands
Page 54

3.16.3. Example
Command:
{
“relayInfo”: {
“relayId”: 1,
“set ting”: {
“clearLatch”: 1
},
“apiaction”: “write”,
“token”: “ cb2fc968-5234-483c-8ded-8be8422abe6f “
}
}
Response:
{
“dbupdate”: {
“status”: “success”
}
}
3.17. Contact Output Clear Latch Command
This command is used to clear the latch on the output of the contact closures.
3.17.1. Read Command Parameters
{
“contactOutput”: {
“apiaction”: “string”,
“clearLatch”: int,
“token”: “string”
}
}
Name Typ e Description
apiaction
clearLatch
token
string Action either “read” or “write”
int Clear latch on a relay, 1 to clear
String Security token from successful login.
54 M-5807
Page 55

3.17.2 . Read Response Content
{
“dbupdate”: {
“status”: “string”
}
}
Name Typ e Description
status
string Returns success if data exists otherwise an error will return
3.17.3. Example
Command:
{
“contactOutput”: {
“apiaction”: “write”,
“clearLatch”: 1,
“token”: “ cb2fc968-5234-483c-8ded-8be8422abe6f “
}
}
Response:
{
“dbupdate”: {
“status”: “success”
}
}
4. CGI Commands
4.1. Extract Data
This command extracts the stored data from the device.
4.1.1. Command Parameters
http://<ip address of iserver2>/cgi-bin/query?startTime=<UTC time>&endTime=<UTC time>&p0ch0=<desired
header name>&p0ch1=<desired header name>&p1ch0=<desired header name>&p1ch1=<desired header
name>&p1ch2=<desired header name>&p1ch3=<desired header name>&p2ch0=<desired header
name>&p2ch1=<desired header name>&p2ch2=<desired header name>&p2ch3=<desired header
name>&relay1=<desired header name>&relay2=<desired header name>&contact1=<desired header
name>&contact2=<desired header name>&contactoutput=<desired header name>
For TC inputs use p0ch0 and p0ch1 and other elds can be omitted.
For probe inputs use p1ch0-p1ch3 and p2ch0-p2ch3.
Fields relay1, relay2, contact1, contact2, contactout, can be omitted from the command if they are not
required.
4.1.2. Example
http://192.168.1.118/cgi-bin/query?startTime=1735847516&endTime=1736452316&p1ch0=Device_31
312FD1-Temperature&p1ch1=Device_31312FD1-Humidit y&p1ch2=Device_31312FD1-Barometer&p2ch0=Device_10342FD1-Humidex&p2ch1=Device_10342FD1-Dewpoint&p2ch2=Device_10342FD1Temperature&p2ch3=Device_10342FD1-Humidity&relay1=Relay1&relay2=Relay2&contact1=Digital%20
Input%201&contact2=Digital%20Input%202&contactout=Contact_Out
55CGI Commands
Page 56

WARRANTY/DISCLAIMER
OMEGA ENGINEERING, INC. warrants this unit to be free of defects in materials and workmanship for a period
of 13 months from date of purchase. OMEGA’s WARRANTY adds an additional one (1) month grace period to
the normal one (1) year product warranty to cover handling and shipping time. This ensures that OMEGA’s
customers receive maximum coverage on each product.
If the unit malfunctions, it must be returned to the factory for evaluation. OMEGA’s Customer Service
Department will issue an Authorized Return (AR) number immediately upon phone or written request.
Upon examination by OMEGA, if the unit is found to be defective, it will be repaired or replaced at no charge.
OMEGA’s WARRANTY does not apply to defects resulting from any action of the purchaser, including but not
limited to mishandling, improper interfacing, operation outside of design limits, improper repair, or unauthorized
modification. This WARRANTY is VOID if the unit shows evidence of having been tampered
with or shows evidence of having been damaged as a result of excessive corrosion; or current, heat,
moisture or vibration; improper specification; misapplication; misuse or other operating conditions outside
of OMEGA’s control. Components in which wear is not warranted, include but are not limited to contact
points, fuses, and triacs.
OMEGA is pleased to offer suggestions on the use of its various products. However, OMEGA neither assumes
responsibility for any omissions or errors nor assumes liability for any damages that result from the use of its
products in accordance with information provided by OMEGA, either verbal or written. OMEGA warrants only
that the parts manufactured by the company will be as specified and free of defects. OMEGA MAKES NO OTHER
WARRANTIES OR REPRESENTATIONS OF ANY KIND WHATSOEVER, EXPRESSED OR IMPLIED, EXCEPT THAT OF
TITLE, AND ALL IMPLIED WARRANTIES INCLUDING ANY WARRANTY OF MERCHANTABILITY AND FITNESS FOR
A PARTICULAR PURPOSE ARE HEREBY DISCLAIMED. LIMITATION OF LIABILITY: The remedies of purchaser set
forth herein are exclusive, and the total liability of OMEGA with respect to this order, whether based on contract,
warranty, negligence, indemnification, strict liability or otherwise, shall not exceed the purchase price of the
component upon which liability is based. In no event shall OMEGA be liable for consequential, incidental or
special damages.
CONDITIONS: Equipment sold by OMEGA is not intended to be used, nor shall it be used: (1) as a “Basic
Component” under 10 CFR 21 (NRC), used in or with any nuclear installation or activity; or (2) in medical
applications or used on humans. Should any Product(s) be used in or with any nuclear installation or activity,
medical application, used on humans, or misused in any way, OMEGA assumes no responsibility as set
forth in our basic WARRANTY/DISCLAIMER language, and, additionally, purchaser will indemnify OMEGA
and hold OMEGA harmless from any liability or damage whatsoever arising out of the use of the Product(s)
in such a manner.
RETURN REQUESTS/INQUIRIES
Direct all warranty and repair requests/inquiries to the OMEGA Customer Service Department. BEFORE
RETURNING ANY PRODUCT(S) TO OMEGA, PURCHASER MUST OBTAIN AN AUTHORIZED RETURN (AR)
NUMBER FROM OMEGA’S CUSTOMER SERVICE DEPARTMENT (IN ORDER TO AVOID PROCESSING
DELAYS). The assigned AR number should then be marked on the outside of the return package and on any
correspondence.
The purchaser is responsible for shipping charges, freight, insurance and proper packaging to prevent
breakage in transit.
FOR WARRANTY RETURNS, please have the
following information available BEFORE contacting
OMEGA:
1. Purchase Order number under which the product
was PURCHASED,
2. Model and serial number of the product under
warranty, and
3. Repair instructions and/or specific problems
FOR NON-WARRANTY REPAIRS,
for current repair charges. Have the following
information available BEFORE contacting OMEGA:
1. Purchase Order number to cover the COST
of the repair,
2. Model and serial number of the product, and
3. Repair instructions and/or specific problems
relative to the product.
relative to the product.
OMEGA’s policy is to make running changes, not model changes, whenever an improvement is possible. This affords our customers the latest
in technology and engineering.
OMEGA is a trademark of OMEGA ENGINEERING, INC. © Copyright OMEGA ENGINEERING, INC. All rights reserved. This document may not
be copied, photocopied, reproduced, translated, or reduced to any electronic medium or machine-readable form, in whole or in part, without
the prior written consent of OMEGA ENGINEERING, INC.
consult OMEGA
Page 57

®
omega.com
M-5807/0225
Improving the world, one measurement at a time.
TM
UNIVERSAL
FLOW MONITORS
Smart Probe Thermocouple
 Loading...