

Page 1
User’s Guide
Shop online at
omega.com
e-mail: [email protected]
For latest product manuals:
www.omegamanual.info
SM
HHWT-11
Handheld Chlorine Photometer
Page 2

U.S.A.
Headquarters:
omega.com [email protected]
Servicing North America:
Omega Engineering, Inc.
Toll-Free: 1-800-826-6342 (USA & Canada only)
Customer Service: 1-800-622-2378 (USA & Canada only)
Engineering Service: 1-800-872-9436 (USA & Canada only)
Tel: (203) 359-1660 Fax: (203) 359-7700
e-mail: [email protected]
For Other Locations Visit omega.com/worldwide
,
The information contained in this document is believed to be correct, but OMEGA accepts no liability for any errors it contains
and reserves the right to alter specifications without notice.
Page 3
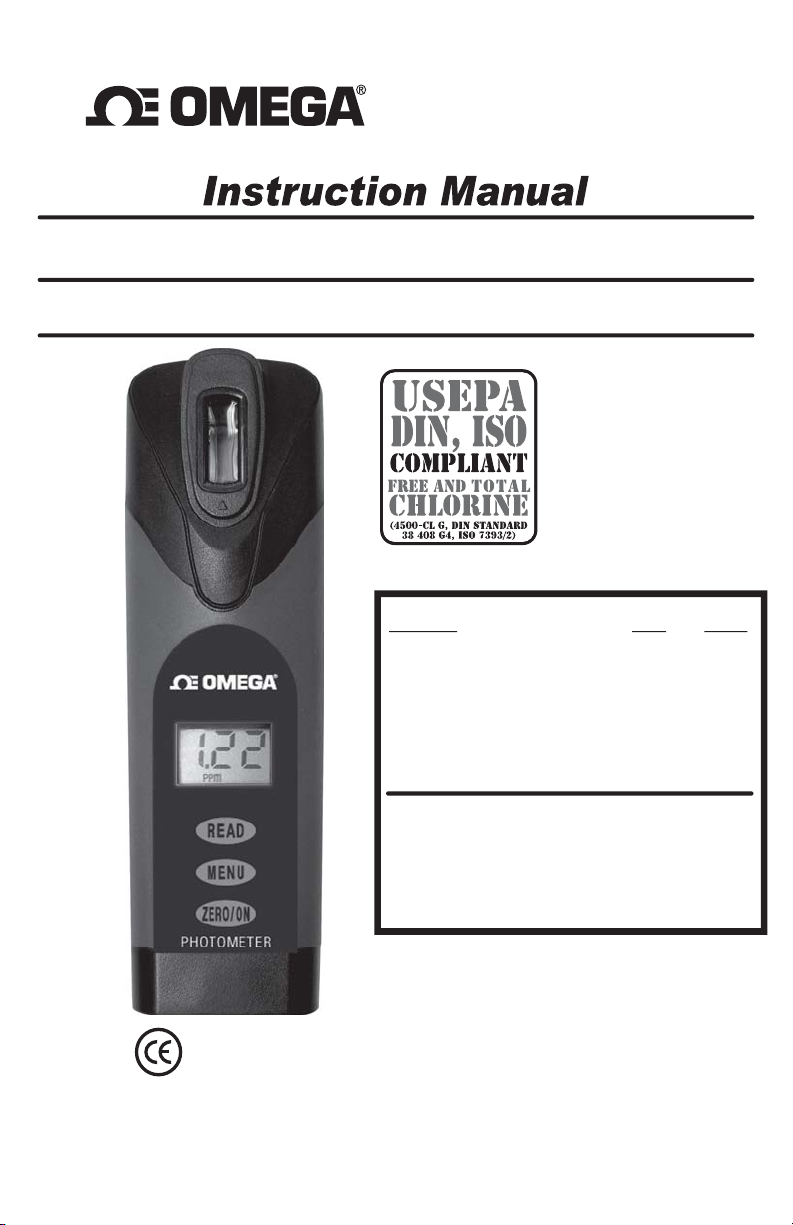
HHWT-11
Advanced Photometer System
IDEAL FOR DRINKING WATER, POOL & SPA,
ENVIRONMENTAL, FOOD & BEVERAGE TESTING
USEPA, DIN, & ISO Compliant for Free & Total Chlorine Testing
(4500-CL G, DIN Standard 38 408 G4, ISO 7393/2)
Index:
Parameter Page MENU
Free Chlorine (DPD-1) 6 CL1
Total Chlorine (DPD-3) 7 CL1
Total Chlorine (DPD-4) 8 CL1
Bromine (DPD-1) 8 bR2
Ozone (DPD-4) 9 O3
Chlorine Dioxide (DPD-1) 9 Cd4
Peracetic Acid (PAA) 10 PA5
Hydrogen Peroxide (as H
pH 11 PH7
High Range Chlorine (HRC) 11 HR8
6SHFL¿FDWLRQV
About Your Photometer 5
Tips for Best Accuracy 12
About the Built-In Cell 12
Meter Messages 13
Battery Installation 13
Reorder Information 13
USEPA Compliance 2, 14
) 10 HP6
2O2
Page 4
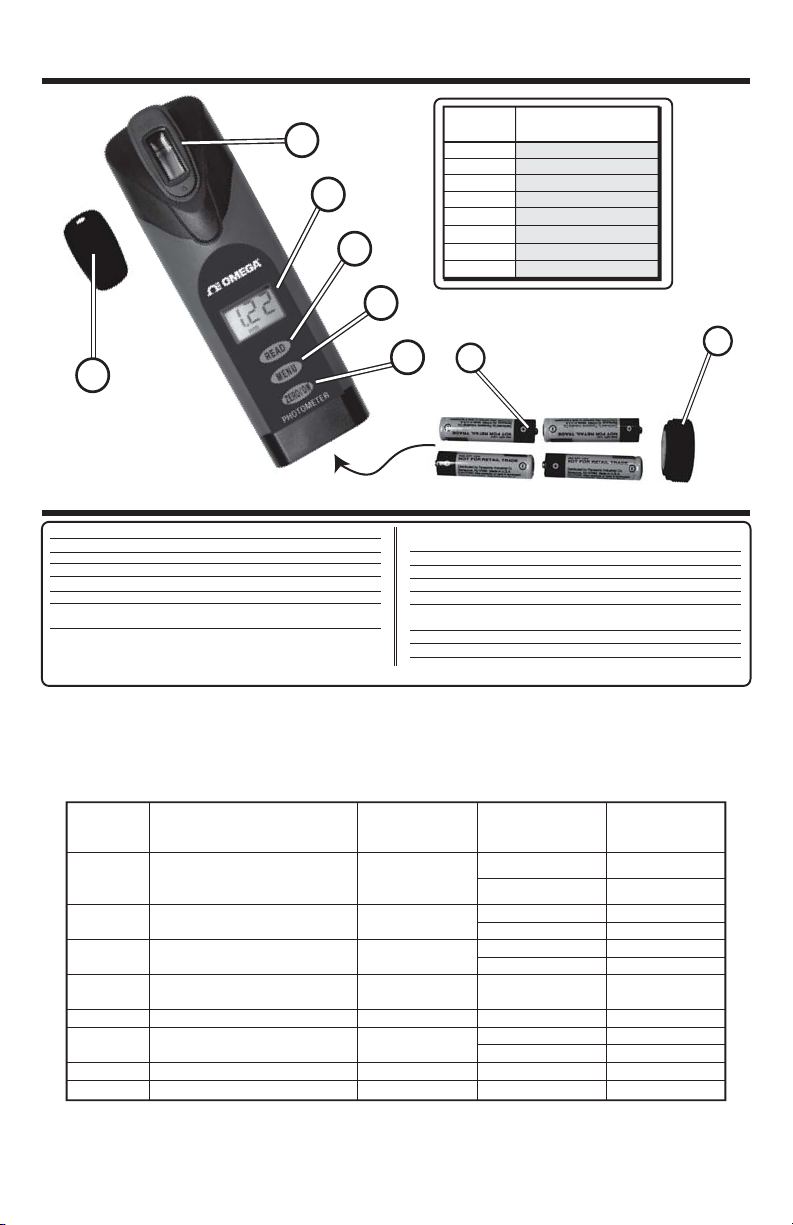
HHWT-11 Photometer
ITEM PICTURED
B
C
D
LETTER
A
B
C
D
E
F
G
H
COMPONENT
NAME
Mixing Cap
Cell (Built-in Plastic, 4 mL)
LCD Display
READ Button
MENU Button
ZERO/ON Button
Battery Cover with loop for lanyard
AAA Batteries (x4) (Included)
E
F
H
A
(Used for tests
performed in outdoor
light conditions)
+
–
++:70HWHU6SHFLÀFDWLRQV
Measurement Method: Photometric
Light Source: Light Emitting Diode (LED)
Wavelength: 525 nm
Transmission Range: 100 - 0.00 %T
Photometric Precision: +/- 0.1/0.01 %T
Automatic Range Selection: 6HH6SHFL¿FDWLRQVEHORZ
Display: 3-digit customized liquid crystal display
with annunciators
CELL Pathlength: 20mm
HHWT-11 KDVEHHQGHVLJQHGWRRIIHUWKHXVHUDPRUH³*UHHQ´DQGFRVWHIIHFWLYHDOWHUQDWLYHWRWHVWLQJ
:HRIIHUD´*UHHQµ$OWHUQDWLYH
,QVWHDGRIXVLQJDP/ZDWHUVDPSOHHHWT-11 XVHVDP/ZDWHUVDPSOHZKLFKXVHVXSWROHVV
FKHPLFDOSHUWHVW7KHDFFXUDF\RIWKHPHWHULVPDLQWDLQHGE\GHVLJQLQJWKHSKRWRFHOOZLWKDPPSDWKOHQJWK
Cell Chamber: Custom-molded, proprietary, PET plastic
IXVHGLQWRFKDPEHUQRQUHPRYDEOH
Sample Required: 4 mL (0.13 oz)
Operating Temperature Range: 0 - 50°C (32° - 122°F)
Power Supply: $$$DONDOLQHEDWWHULHV,QFOXGHG
Battery Life: !WHVWVZLWKDONDOLQHEDWWHULHV
Electromagnetic Compliance: (PLWWHG,QWHUIHUHQFH(1
(EMC) ,PPXQLW\WR,QWHUIHUHQFH(1
Waterproof Rating: ([FHHGV,3
Weight: ,QVWUXPHQWJR]
Dimensions: ,QVWUXPHQW:['[+FP
[[LQ
G
HHWT-11 Specifications
Menu Tests for* Range Resolution
SSP
CL1
bR2
O3
Cd4
PA5
HP6
PH7
HR8
Free Chlorine (DPD-1) &
Total Chlorine (DPD-3)
Bromine
Ozone
Chlorine Dioxide
Peracetic Acid
Hydrogen Peroxide
pH
High Range Chlorine
SSP
SSP
SSP
SSP
SSP
SSP
SSP
SSP
3HUIRUPDQFHYHUL¿HGZLWKYDULRXVZDWHUVDPSOHVZLWKRSWLPDOZDWHU
WHPSHUDWXUHVDW±&±)
2SWLPDOZDWHUWHPSHUDWXUHIRU+LJK5DQJH&KORULQHWHVWLVÛ&Û)
SSP
SSP
SSP
SSP
SSP
SSP
SSP
SSP
SSP
Typical
Accuracy
S+
4
SSP
SSP
SSP
SSP
SSP
SSP
SSP
SSP
SSP
R102016
Page 5

About Your HHWT-11 Instrument
In order to save power, the meter is designed to turn off after 3 minutes (timed from the last button pressed).
Should the meter turn off in the middle of a test, the last stored zero in the meter will remain valid when the
meter is turned on again. Also, the test result is stored in memory for easy retrieval.
The HHWT-11 meter is controlled by three buttons:
1. ZERO/ON:KHQ¿UVWSUHVVHGWKLVEXWWRQWXUQVWKHPHWHURQ:KHQWKHPHWHULVRQDQGWKLVEXWWRQLV
pressed, it zeroes the sample in the cell. Once the meter is zeroed, this zero value applies to all parameters
and is stored and retained even when meter turns off. However, it is recommended that each new water
sample analyzed is zeroed before testing, to maximize sensitivity and accuracy.
2. MENU: With each press, the MENU button advances through the tests in the following sequence: CL1,
bR2, O3, Cd4, PA5, HP6, PH7, HR8. Each test menu can store up to 20 results. To retrieve the stored
results, go to the desired test using the MENU key. When the desired test is displayed, press and hold
down the MENU key. Continue holding down the MENU key to scroll the stored results for that test, starting
with the most recent result. The meter will display, from memory, the last 20 readings in sequence beginning
ZLWKZKLFKLVWKHODWHVWUHVXOWIROORZHGE\ZKLFKLVWKHQGODWHVWUHVXOWHWFDQG¿QDOO\ZKLFKLV
the oldest result retained. Only the last 20 readings are stored in each menu. This meter is able to store 160
results in memory (20 in each menu).
3. READ: When pressed once, this button starts the timer for the parameter being tested. When pressed a
second time the meter exits the timer and immediately prepares to colorimetrically measure the sample, and
simultaneously stores the measurement in memory.
If the parameter being measured is below or above the detection range, the display will show “LO” (Under
Range) or “HI”2YHU5DQJHUHVSHFWLYHO\7KLVIHDWXUHLVPHQXVSHFL¿FDQGGRHVQRWDSSO\WRDOOSDUDPHWHUV
About The Accuracy / Calibration Of The Chlorine Plus System
$OOWHVWVKDYHEHHQFDOLEUDWHGXVLQJFHUWL¿HGUHIHUHQFHVWDQGDUGVDQGVWDQGDUGDQDO\WLFDO
spectrophotometric methods. The algorithm in the software of the HHWT-11 Systems mirrors the
AWWA, US EPA , DIN, and ISO reference test methods for chlorine. Studies show that the HHWT-11
System, with the HHWT-486637 (DPD-1), repeatedly agrees with an EPA Compliant reference method
greater than 99% (R2= 0.9989, 0 - 6.0 ppm - see page 14). The HHWT-11 Advanced Photometric
6\VWHPKDVEHHQIDFWRU\FDOLEUDWHGIRU\RXUFRQYHQLHQFH<RXFDQH[SHFWWKH¿[HGFDOLEUDWLRQVLQWKH
meter to be valid for the life of the meter because of the quality, Long-Life LED, the photo cell, and the
VRIWZDUHDVZULWWHQLQWRWKHPHWHU)RUYHUL¿FDWLRQRISKRWRPHWHUFDOLEUDWLRQWKHQPSSP
Reference Standard (part #HHWT-486602) is available for purchase (see page 13).
&RPSOLDQFH9HULÀFDWLRQIRU)UHHDQG7RWDO&KORULQH7HVWLQJ
This DPD test system is accepted by most health departments because this test is USEPA (DIN
Standard 38 408 G4, ISO 7393/2) accepted for testing requirements for Free and Total Chlorine. The
Chlorine Plus meter uses a wavelength of 525nm; and the compliance requirement is that the
colorimeter wavelength is between 490 and 530nm. The HHWT-486637 (DPD-1) uses the same
UHDJHQWVDQGSURSRUWLRQVDQGWKHUHVXOWLQJVROXWLRQS+LVPDLQWDLQHGEHWZHHQDQGDVVSHFL¿HG
by AWWA (American Water Works Association) method 4500-Cl G. It should be understood that the
USEPA does not "approve" commercial DPD delivery systems such as reagent powder pillows, tablets,
dispensers, or Strip DPD delivery devices. The HHWT-486637 (DPD-1) for Free Chlorine, and the
HHWT-486638 (DPD-3) or the HHWT-486670 (DPD-4) for Total Chlorine meet your reportable testing
requirements because the HHWT Strips deliver the same chemicals in identical proportions (see table
below); therefore, the system is compliant. Likewise, AWWA proportions are followed as required for
Total Chlorine measurements using Potassium Iodide.
Component
(Free Chlorine)
Anhydrous DPD sulfate
Anhydrous Na
Anhydrous KH2PO4Na
EDTA
HPO
2
4
4500-Cl G
2
5
AWWA
1.5%
33.4%
64.0%
1.1%
Strip
DPD-1
1.5%
33.4%
64.0%
1.1%
Page 6
CL1
1
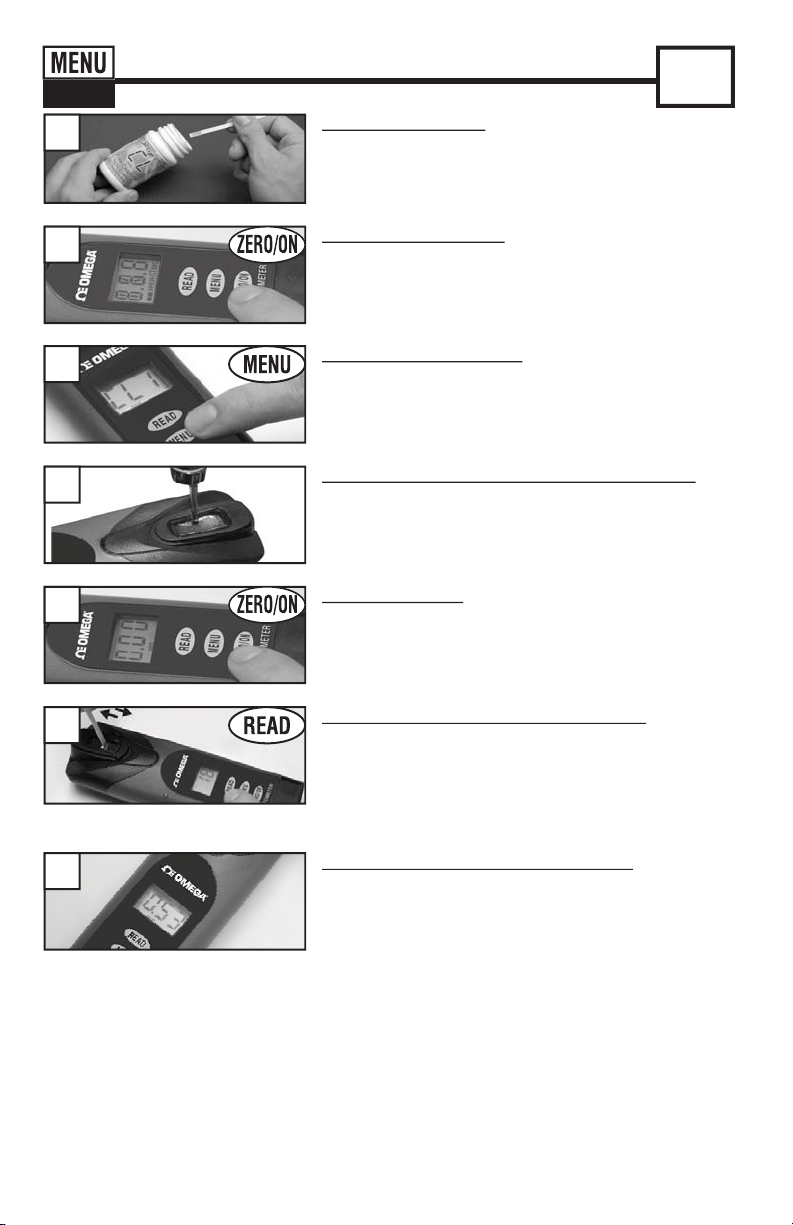
DPD-1 Free Chlorine Test Procedure
CL
REMOVE STRIP
Remove one (1) HHWT-486637 strip from the bottle before
beginning the test. Set the strip in a dry, convenient place
and recap the bottle immediately.
2
3
4
5
6
TURN METER ON
Press the ZERO/ON button to power the meter on; the display
will show all annunciators, then the current MENU selection,
followed by the last reading.
SELECT TEST: CL1
Press and re-press the MENU button until the display shows
the parameter CL1.
RINSE AND FILL CELL WITH SAMPLE
Rinse the CELL at least 3 times with the water sample you will
be testing - rinsing minimizes the potential for crosscontamination from a previous test. Finally, fill cell to capacity
(4mL) with the water sample.
ZERO METER*
Press the ZERO/ON button. The cursor will move across the
display followed by 0.00 PPM. Sample is ready for testing.
DIP STRIP AND PRESS “READ”
Dip the HHWT-486637 strip into the CELL and immediately
press READ. This starts the 20 SECOND countdown timer.
During this time move the strip in a gentle back and forth motion
(approx. 2 strokes/Sec). Remove and discard the strip after
“1” on the display disappears.*
7
DO NOT discard the sample from the Free Chlorine test if you are planning to run
HHWT-486638 (DPD-3) Total Chlorine Procedure. Move directly to steps 8-10 on page 7.
Otherwise, rinse the cell immediately.
NOTE: N,N-diethyl-p-phenylenediamine (DPD) also reacts to form a magenta color with Ozone, Total Chlorine,
Permanganate, Iodine, and other oxidizers.
*NOTE: When testing outdoors (sunlight), for best accuracy, use the Mixing Cap/Cell Cover when Zeroing and Reading the sample.
RECORD RESULT DISPLAYED
The cursor will move across the display
prepares to measure the sample. Record result displayed
(this result is automatically stored in CL1 Menu).
while the meter
6
Page 7
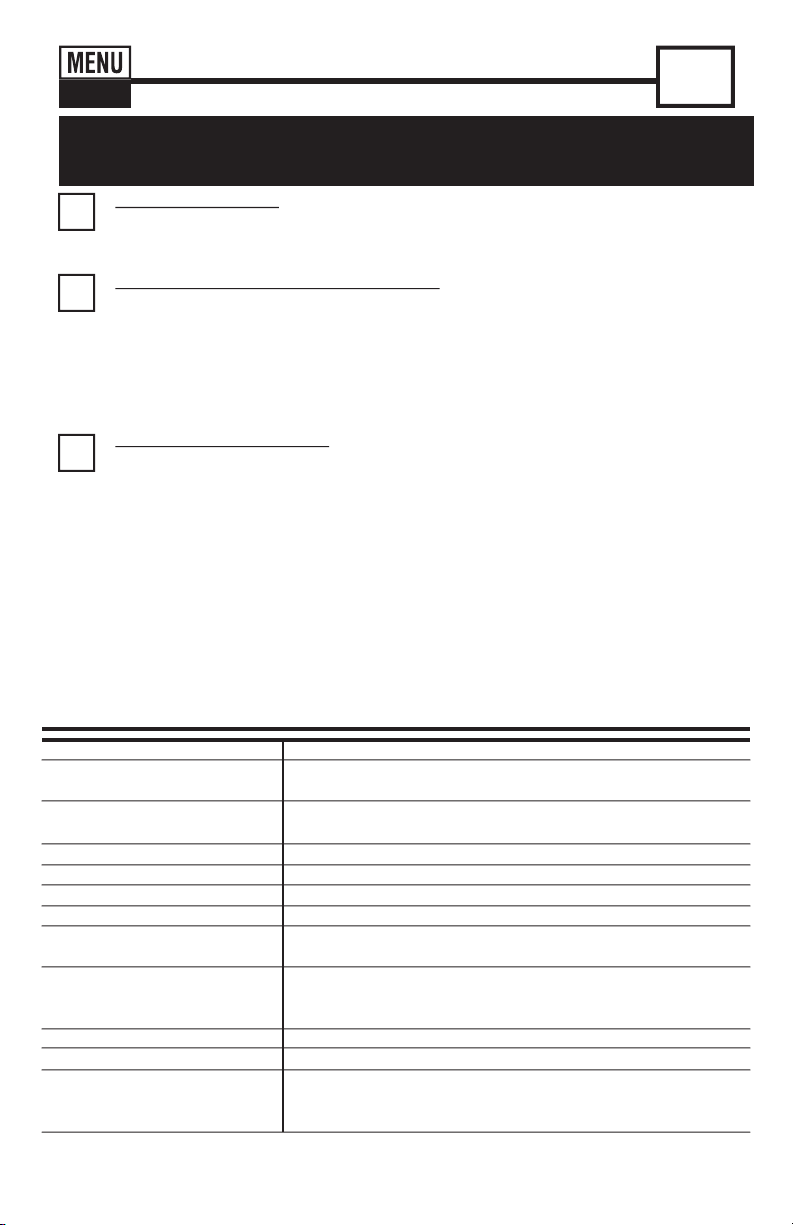
DPD-3 Total Chlorine Test Procedure
CL1
This procedure is only valid when run as a continuation of the
Strip Micro CL (DPD-1) Test Procedure on page 6.
REMOVE STRIP
8
Remove one (1) HHWT-486638 strip from the bottle before beginning the test. Set the strip
in a dry, convenient place and recap the bottle immediately.
DIP STRIP AND PRESS “READ”
9
Dip the HHWT-486638 strip into the CELL and immediately press READ. This starts the
20 SECOND countdown timer. During this time move the strip in a gentle back and forth
motion (approx. 2 strokes/sec). Remove and discard the strip when “1” on the display
disappears. The cursor will move across the display while the meter prepares to measure the
sample. This result is automatically stored in CL1 (NOTE: The Iodide added with DPD-3 will,
in the presence of Combined Chlorine or Chloramines, convert into Iodine).
PRESS READ AGAIN
10
Press READ again and the meter will count down and display the next reading. If this
reading matches the previous result, then record this as the Total Chlorine result.
is automatically stored in CL1.
Record the Total Chlorine as the highest value the meter displayed.
*NOTE: Standard Method (4500-Cl G, procedure for total chlorine) requires the reading to
be made after 2 minutes from the time the KI is added. For compliance testing, you must
time the two minutes and then make your measurement. NOTE: From testing in our lab,
water samples above 70°F (20°C), generally, reach a stabilized reading quicker then 2 minutes.
CL1: Chlorine and Iodine react with N,N-diethyl-p-phenylenediamine as it is released from the strip to
form a magenta color, directly proportional to the Chlorine concentration (Ozone, Bromine, and
Permanganate also form the same color).
After testing, rinse cell immediately and clean with brush.
CL
This value
HHWT-486637 (DPD-1), HHWT-486638 (DPD-3), and HHWT-486670 (DPD-4) Interferences
Interfering Substance
Acidity
Alkalinity
Bromine & Bromamines, Br
Chlorine Dioxide, ClO
Copper, Cu
Iodine, I
Manganese, oxidized (Mn+4, Mn+7)
or Chromium, oxidized (Cr
Monochloramines (NH
(applies to DPD-1 only)
Ozone, O
Peroxides
pH
+2
2
3
2
+6
Cl)
2
Interfering Levels & Treatments
If sample has acidity above 150mg/L CaCO
full color. Neutralize to pH 6.0 to 7.0 with 0.5N Sodium hydroxide.
If sample has alkalinity above 200mg/L CaCO
full color. Neutralize to pH 6.0 to 7.0 with 0.5N Sulfuric acid.
Color similar to free chlorine reaction at all levels.
2
Color similar to free chlorine reaction at all levels.
Color development is reduced above 10 ppm (mg/L).
Color similar to free chlorine reaction at all levels.
See AWWA procedure 4500-CL F, 1(d) for removal of interferences.
)
Monochloramine interferences are known to occur in free chlorine
DPD methods. This interference is dependent on temperature and
monochloramine concentration.
Color similar to free chlorine reaction at all levels.
Interference is possible.
Typical pH samples of potable water with a pH of 6.0 to 9.0 are
OK. If outside this range adjust to pH 6.0 to 7.0 using acid
(0.5N Sulfuric acid) or base (0.5N Sodium hydroxide).
test may not develop
3
test may not develop
3
7
Page 8
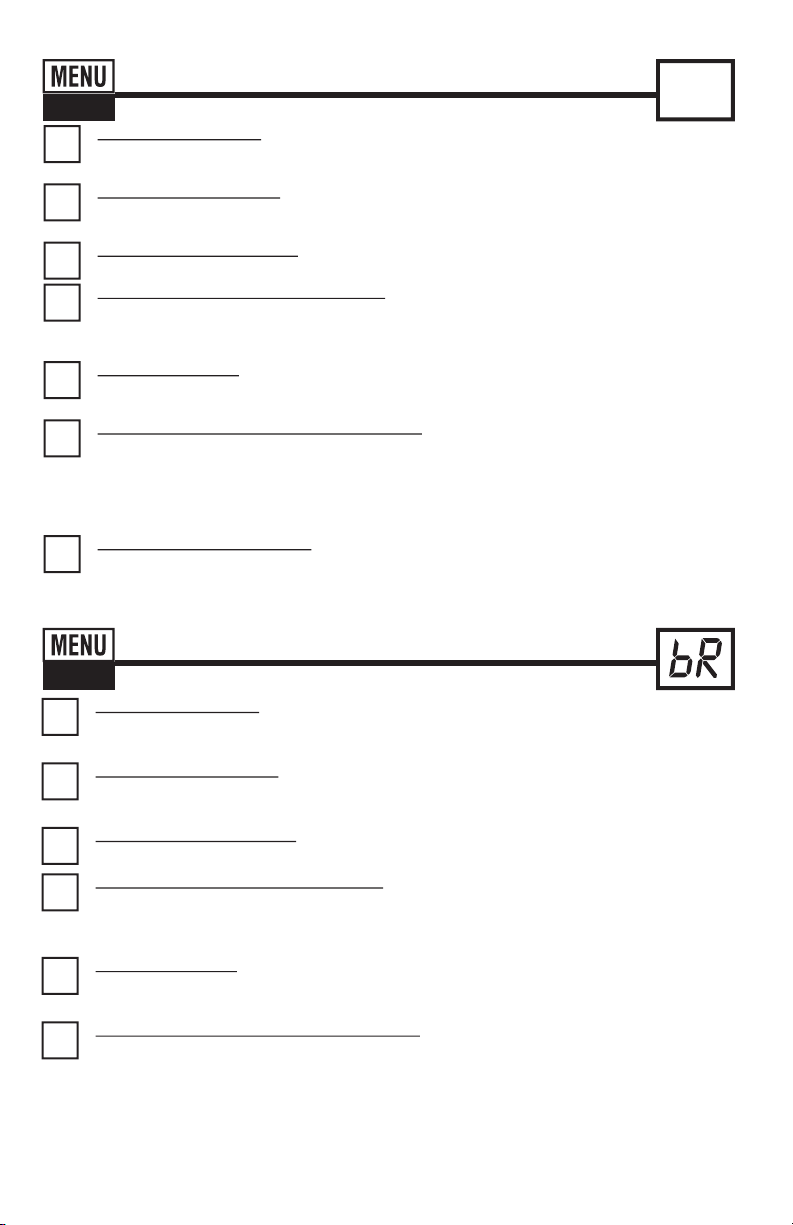
DPD-4
CL1
REMOVE STRIP
1
Remove one (1) HHWT-486670 strip from the bottle before beginning the test. Set the strip
in a dry, convenient place and recap the bottle immediately.
TURN METER ON
2
Press the ZERO/ON button to power the meter on; the display will show all annunciators,
then the current MENU selection, followed by the last reading.
SELECT TEST: CL1
3
Press and re-press the MENU button until the display shows the parameter CL1.
FILL METER WITH SAMPLE
4
Rinse the CELL at least 3 times with the water sample you will be testing - rinsing
PLQLPL]HVWKHSRWHQWLDOIRUFURVVFRQWDPLQDWLRQIURPDSUHYLRXVWHVW)LQDOO\¿OOFHOOWR
FDSDFLW\P/ZLWKWKHZDWHUVDPSOH
ZERO METER*
5
Press the ZERO/ON button.
Sample is ready for testing.
DIP STRIP AND PRESS “READ”
6
Dip the HHWT-486670 strip into the CELL and immediately press READ. This starts the 20 SECOND
countdown timer. During this time move the strip in a gentle back and forth motion (approx. 2 strokes/sec).
Remove and discard the strip after “1” on the display disappears*. The cursor will move across the
display while the meter prepares to measure the sample. Record result displayed (this result is
DXWRPDWLFDOO\VWRUHGLQ&/
PRESS READ AGAIN
7
Press READ again and the meter will count down and display the next Total Chlorine result. If this
reading matches the previous result, then record this as Total Chlorine value (this result is stored
LQ&/$IWHUWHVWLQJULQVHFHOOLPPHGLDWHO\DQGFOHDQZLWKEUXVK5HFRUGWKH7RWDO&KORULQHDVWKH
highest value the meter displayed.
(Total Chlorine)
The cursor will move across the display,
Test Procedure
CL
followed by 0.00 PPM.
Bromine DPD-1 Test Procedure
bR2
REMOVE STRIP
1
Remove one (1) HHWT-486636 strip from the bottle before beginning the test. Set the strip
in a dry, convenient place and recap the bottle immediately.
TURN METER ON
2
Press the ZERO/ON button to power the meter on; the display will show all annunciators, then
the current MENU selection, followed by the last reading.
SELECT TEST: bR2
3
Press and re-press the MENU button until the display shows the parameter bR2.
FILL METER WITH SAMPLE
4
Rinse the CELL at least 3 times with the water sample you will be testing - rinsing minimizes
WKHSRWHQWLDOIRUFURVVFRQWDPLQDWLRQIURPDSUHYLRXVWHVW)LQDOO\¿OOFHOOWRFDSDFLW\P/ZLWK
the water sample.
ZERO METER*
5
Press the ZERO/ON button. The cursor will move across the display, followed by 0.00 PPM.
The sample is ready for testing.
DIP STRIP AND PRESS “READ”
6
Dip the
HHWT-
SECOND countdown timer. During this time move the strip in a gentle back and forth motion
(approx. 2 strokes/sec). Remove and discard the strip after “1” on the display disappears*.
The cursor will move across the display while the meter prepares to measure the sample. Record
result displayed (this result is stored in bR2 memory). After testing, rinse cell immediately and clean
with brush. Press MENU to select next test.
*NOTE: When testing outdoors (sunlight), for best accuracy, use the Mixing Cap/Cell Cover when Zeroing and Reading the sample.
486636 strip into the CELL and immediately press READ. This starts the 20
8
Page 9
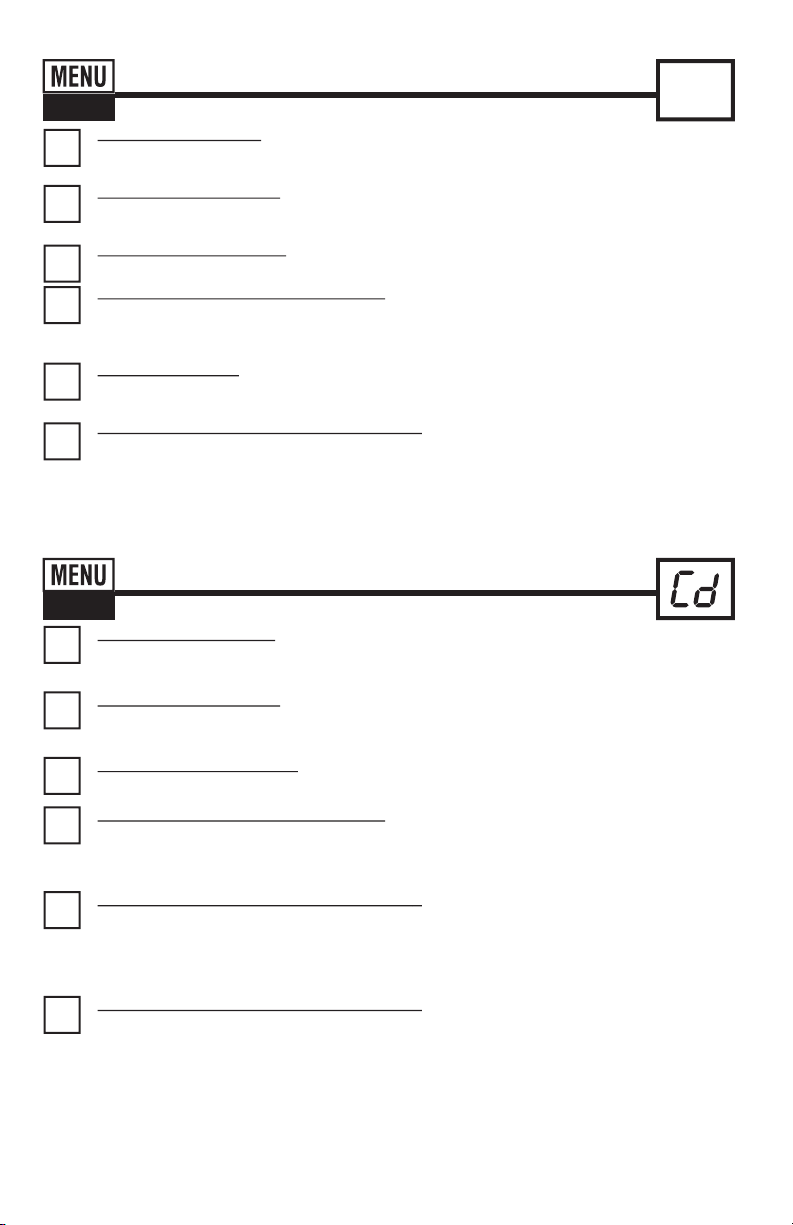
Ozone Test Procedure
O3
REMOVE STRIP
1
Remove one (1)
in a dry, convenient place and recap the bottle immediately.
TURN METER ON
2
Press the ZERO/ON button to power the meter on; the display will show all annunciators, then
the current MENU selection, followed by the last reading.
SELECT TEST: O3
3
Press and re-press the MENU button until the display shows the parameter O3.
FILL METER WITH SAMPLE
4
Rinse the CELL at least 3 times with the water sample you will be testing - rinsing minimizes
WKHSRWHQWLDOIRUFURVVFRQWDPLQDWLRQIURPDSUHYLRXVWHVW)LQDOO\¿OOFHOOWRFDSDFLW\P/ZLWK
the water sample.
ZERO METER*
5
Press the ZERO/ON button. The cursor will move across the display, followed by 0.00 PPM.
The sample is ready for testing.
DIP STRIP AND PRESS “READ”
6
Dip the
HHWT-
SECOND countdown timer. During this time move the strip in a gentle back and forth motion
(approx 2 strokes/sec). Remove and discard the strip after “1” on the display disappears*.
The cursor will move across the display while the meter prepares to measure the sample.
Record result displayed (this result is automatically stored in O3). After testing, rinse cell
immediately and clean with brush.
HHWT-
486634 strip from the bottle before beginning the test. Set the strip
486634 strip into the CELL and immediately press READ. This starts the 20
o
Chlorine Dioxide Test Procedure
Cd4
REMOVE STRIPS
1
Remove one (1) HHWT-486633 strip and one (1) HHWT-484014 strip from their bottles before
beginning the test. Set the strips in a dry, convenient place and recap the bottles immediately.
TURN METER ON
2
Press the ZERO/ON button to power the meter on; the display will show all annunciators,
then the current MENU selection, followed by the last reading.
SELECT TEST: Cd4
3
Press and re-press the MENU button until the display shows the parameter Cd4.
FILL METER WITH SAMPLE
4
Rinse the CELL at least 3 times with the water sample you will be testing - rinsing
PLQLPL]HVWKHSRWHQWLDOIRUFURVVFRQWDPLQDWLRQIURPDSUHYLRXVWHVW)LQDOO\¿OOFHOOWR
capacity (4mL) with the water sample.
DIP STRIP AND PRESS “READ”
5
Dip the HHWT-484014 Glycine strip into the CELL and immediately press READ. This starts the
20 SECOND countdown timer. During this time move the strip in a gentle back and forth motion
(approx 2 strokes/sec). Remove and discard the strip after “1” on the display disappears*.
he meter will auto-zero. Get ready to dip
T
DIP STRIP AND PRESS “READ”
6
About 4 seconds after the meter auto-zeroes, “20” will appear on the display. Immediately dip the
HHWT-486633 strip into the CELL. During this 20 SECOND countdown timer, move the strip in
a gentle back and forth motion (approx 2 strokes/sec). Remove and discard the strip after “1”
on the display disappears*. The meter will begin counting up for 100 seconds, at the end of
which
the cursor will move across the display
Record result displayed (this result is automatically stored in Cd4). After testing, rinse cell
immediately and clean with brush.
*NOTE: When testing outdoors (sunlight), for best accuracy, use the Mixing Cap/Cell Cover when Zeroing and Reading the sample.
HHWT-486633 strip.
while the meter prepares to measure the sample.
9
3
Page 10
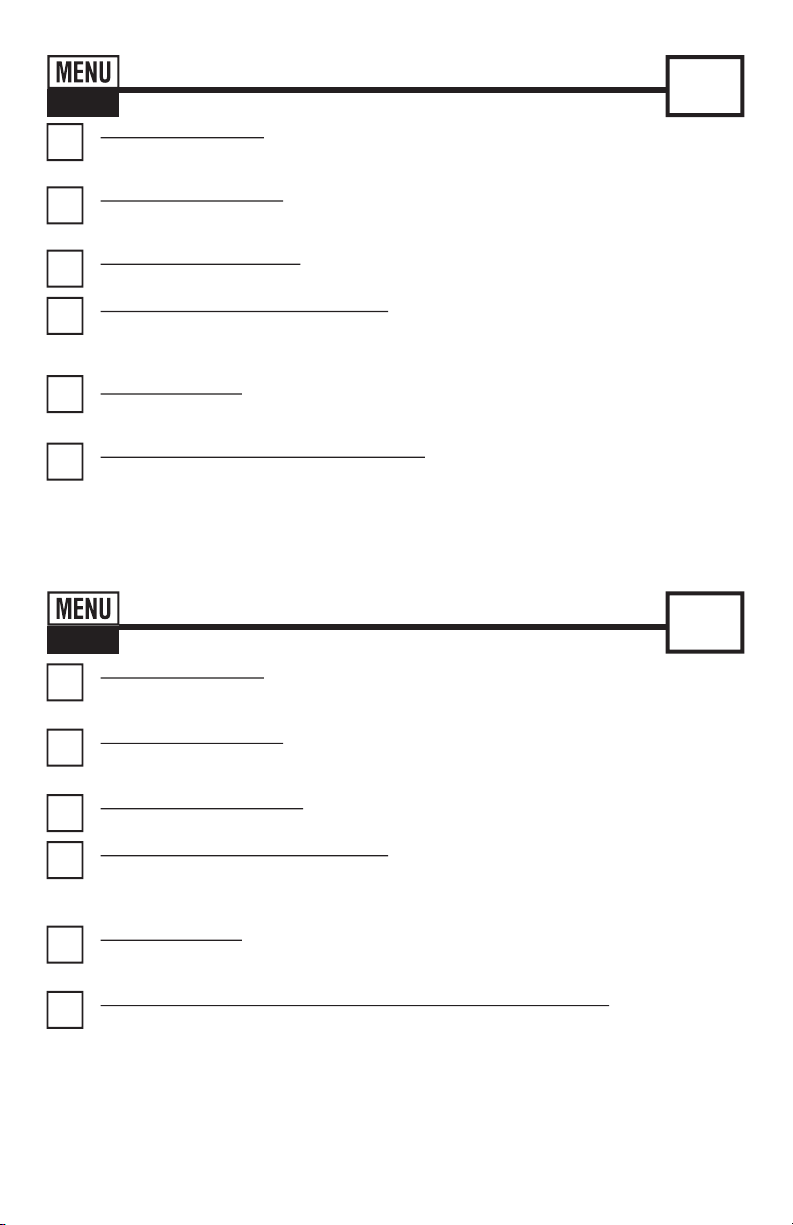
Peracetic Acid Test Procedure
PA5
REMOVE STRIP
1
Remove one (1) HHWT-486675 strip from the bottle before beginning the test. Set the strip
in a dry, convenient place and recap the bottle immediately.
TURN METER ON
2
Press the ZERO/ON button to power the meter on; the display will show all annunciators,
then the current MENU selection, followed by the last reading.
SELECT TEST: PA5
3
Press and re-press the MENU button until the display shows the parameter PA5.
FILL METER WITH SAMPLE
4
Rinse the CELL at least 3 times with the water sample you will be testing - rinsing minimizes
WKHSRWHQWLDOIRUFURVVFRQWDPLQDWLRQIURPDSUHYLRXVWHVW)LQDOO\¿OOFHOOWRFDSDFLW\P/ZLWK
the water sample.
ZERO METER
5
Press the ZERO/ON button.
Sample is ready for testing.
DIP STRIP AND PRESS “READ”
6
Dip the HHWT-486675 strip into the CELL and immediately press READ. This starts the 20
SECOND countdown timer. During this time move the strip in a gentle back and forth motion
(approx. 2 strokes/sec). Remove and discard the strip after “1” on the display disappears*.
The cursor will move across the display while the meter prepares to measure the sample. Record
result displayed (this result is automatically stored in PA5). After testing, rinse cell immediately and
clean with brush.
The cursor will move across the display,
followed by 0.00 PPM.
PA
Hydrogen Peroxide Test Procedure
HP6
REMOVE STRIP
1
Remove one (1) HHWT-486616 strip from the bottle before beginning the test. Set the strip
in a dry, convenient place and recap the bottle immediately.
TURN METER ON
2
Press the ZERO/ON button to power the meter on; the display will show all annunciators, then
the current MENU selection, followed by the last reading.
SELECT TEST: HP6
3
Press and re-press the MENU button until the display shows the parameter HP6.
FILL METER WITH SAMPLE
4
Rinse the CELL at least 3 times with the water sample you will be testing - rinsing minimizes
WKHSRWHQWLDOIRUFURVVFRQWDPLQDWLRQIURPDSUHYLRXVWHVW)LQDOO\¿OOFHOOWRFDSDFLW\P/ZLWK
the water sample.
ZERO METER
5
Press the ZERO/ON button. The cursor will move across the display, followed by 0.00 PPM.
The sample is ready for testing.
DIP STRIP - (read carefully and follow procedure closely)
6
Dip the
HHWT-486616
SECOND countdown timer. During this time move the strip in a gentle back and forth motion
(approx. 2 strokes/sec). Remove and discard the strip after “1” on the display disappears*.
The meter will begin counting up for 120 seconds, at the end of which, the cursor will move across
the display while the meter prepares to measure the sample. Record result displayed (this result
is automatically stored in HP6). After testing, rinse cell immediately and clean with brush.
strip into the CELL and immediately press READ. This starts the 20
HP
*NOTE: When testing outdoors (sunlight), for best accuracy, use the Mixing Cap/Cell Cover when Zeroing and Reading the sample.
10
Page 11
pH Test Procedure
PH7
REMOVE STRIP
1
Remove one (1) HHWT-486639 from the bottle before beginning the test. Set the strip in a dry,
convenient place and recap the bottle immediately.
TURN METER ON
2
Press the ZERO/ON button to power the meter on; the display will show all annunciators,
then the current MENU selection, followed by the last reading.
SELECT TEST: PH7
3
Press and re-press the MENU button until the display shows the parameter PH7.
FILL METER WITH SAMPLE
4
Rinse the CELL at least 3 times with the water sample you will be testing - rinsing minimizes
WKHSRWHQWLDOIRUFURVVFRQWDPLQDWLRQIURPDSUHYLRXVWHVW)LQDOO\¿OOFHOOWRFDSDFLW\P/ZLWK
the water sample.
ZERO METER*
5
Press the ZERO/ON button. When the display shows 0.0 PH, the sample is ready for testing.
DIP STRIP AND PRESS “READ”
6
Dip the HHWT-486639 into the CELL and immediately press READ. This starts the 20 SECOND
countdown timer. During this time move the strip in a gentle back and forth motion (approx. 2
strokes/Sec). Remove and discard the strip after “1” on the display disappears*. The cursor
will move across the display while the meter prepares to measure the sample. Record result
displayed (this result is automatically stored in PH7 Menu). After testing, rinse cell immediately.
127()RUEHVWUHVXOWV7RWDO$ONDOLQLW\RIWKHVDPSOHVKRXOGEHSSP
*NOTE: When testing outdoors (sunlight), for best accuracy, use the Mixing Cap/Cell Cover when Zeroing and Reading the sample.
PH
High Range Chlorine Test Procedure
HR8
REMOVE STRIP
1
Remove one (1) HHWT-486672 strip from the bottle before beginning the test. Set the strip
in a dry, convenient place and recap the bottle immediately.
TURN METER ON
2
Press the ZERO/ON button to power the meter on; the display will show all annunciators, then
the current MENU selection, followed by the last reading.
SELECT TEST: HR8
3
Press and re-press the MENU button until the display shows the parameter HR8.
FILL METER WITH SAMPLE
4
Rinse the CELL at least 3 times with the water sample you will be testing - rinsing minimizes
WKHSRWHQWLDOIRUFURVVFRQWDPLQDWLRQIURPDSUHYLRXVWHVW)LQDOO\¿OOFHOOWRFDSDFLW\P/
with the water sample.
ZERO METER*
5
Press the ZERO/ON button. The cursor will move across the display, followed by 0.00 PPM.
The sample is ready for testing.
DIP STRIP - (read carefully and follow procedure closely)
6
Dip the HHWT-486672 strip into the CELL and immediately press READ. This starts the 20
SECOND countdown timer. During this time move the strip in a gentle back and forth motion
(approx. 2 strokes/Sec).
The meter will begin counting up for 120 seconds, at the end of which, the cursor will move across
the display while the meter prepares to measure the sample. Record result displayed
is automatically stored in HR8).
*NOTE: 8VHDVHFRQGGLSWLPHLIZDWHUWHPSHUDWXUHLVDERYHÛ&
*NOTE: When testing outdoors (sunlight), for best accuracy, use the Mixing Cap/Cell Cover when Zeroing and Reading the sample.
Remove and discard the strip after “1” on the display
After testing, rinse cell immediately and clean with brush.
11
HR
disappears*.
(this result
Page 12

HHWT-11 Tips For Best Accuracy
1.
Become familiar with the meter and the different tests by reading the instructions carefully.
2.
The Free Chlorine, Combined Chlorine, and Total Chlorine reagents are compliant for meeting
USEPA (4500-Cl G); ISO 7393/2; and German DIN 38408 G4-2 requirements.
3.
Observe the dip time (as required for the test) for accurate results.
4.
7HVWLPPHGLDWHO\DIWHU¿OOLQJWKHCELL with water sample when testing for oxidizers.
5.
Be sure the CELL LV¿OOHGWRFDSDFLW\P/
6.
Rinse the CELL with clean water immediately after completing the test (some indicators will stain
the CELL wall if allowed to remain in the CELL).
7.
Just before testing, rinse the sample CELL with the sample water several times to get a
representative sample. (Use deionized or distilled water for rinsing if you have a limited amount of
sample).
8.
Store the meter and all test materials out of direct sunlight and away from chemical storage areas.
9.
Minimize exposure of meter and test reagents to heat above 32°C (90°F).
10.
Dry the outside of the meter when testing is complete or before storage of the meter.
11.
When running a DPD-1 Free Chlorine test AFTER a Total Chlorine DPD-3, a Total Chlorine DPD-4,
or a HR Free Chlorine test, rinsing is very important to remove residual KI, which may interfere.
12.
Each strip is valid for ONLY one test. Discard strip after single use in regular refuse that is
inaccessible to children and pets.
13.
Each bottle of strips contains, at minimum, the quantity of strips notated on the bottle. Due to the
VWULSVOLWWLQJSURFHVV\RXPD\¿QGRQHRUWZRH[WUDVWULSVWKDWDUHQRWLFHDEO\VPDOOHURUODUJHULQ
width than the normal strips in the bottle. These should be discarded. Using these strips may give
incorrect results.
14.
The HHWT-11 Photometer is not compatible for use with DPD-1, DPD-3, and DPD-4 powder
pillows, tablets, or liquids available from other manufacturers. Accurate results can only be
guaranteed by using genuine Micro strips or reagents (reorder information below).
15.
Our lab testing with the HHWT-11 meter has shown that zeroing and measuring of the sample
normally does not require any cell cover for accurate results, except in sunlight. To obtain optimal
accuracy when testing with the meter outdoors (sunlight), use the Mixing Cap/Cell Cover when
zeroing and reading the sample.
16.
Remove batteries when meter is not used for more than a month (Warranty Requirement).
17.
&(//FOHDQLQJLQVWUXFWLRQV)LOOFHOOZLWKFOHDQZDWHUDQGPRYHWKH&HOOFOHDQLQJEUXVKXSDQG
down and back-and-forth along the walls of the cell. Afterwards, rinse the cell and the meter is
ready for use again. Cleaning the cell regularly is especially recommended after you run a test that
is using turbidity or precipitation chemistry for analysis (contact technical support for details).
About The Built-In Cell
The built-in CELLLVWUDQVSDUHQWSODVWLFDQGZKHQ¿OOHGWRWKHWRSFRQWDLQVPO7KHVWXUG\CELL design
will last for over 20,000 readings. Scratches on the CELL will not interfere or compromise the accuracy of
WKHUHDGLQJVEHFDXVHRILWV¿[HGSRVLWLRQ)RUEHVWDFFXUDF\ULQVHFHOOZLWKFOHDQZDWHULPPHGLDWHO\DIWHU
a test is completed. Do not use solvents, such as acetone, to clean the cell. When the CELL becomes
stained or cloudy from repeated testing, or when the meter does not blank when you press the ZERO/ON
button, the cell needs to be cleaned.
12
Page 13
HHWT-11 Meter Messages
The following are some common messages that may be displayed, including error messages. If an
error message other than those listed below is displayed, please contact Omega technical support in
the USA at (800) 872-9436.
LCD Message
HI
LO
LO
ER
Description
In READ mode: test sample concentration is above
WKHPHDVXUHPHQWUDQJHWHVWVSHFL¿F
In READ mode: test sample concentration is below
WKHPHDVXUHPHQWUDQJHWHVWVSHFL¿F
In ZERO mode: sample absorbance (due to a
cloudy or colored sample or a dirty cell) is too high
to zero, the meter will read “LO”.
Excessive stray light detected. Normally this
does not occur, even when testing in sunlight.
Low battery indication.
Corrective Action
Dilute and retest. Dilution Kit available
(HHWT-487200).
Sample value is below measurement
range.
'LOXWHVDPSOH¿OWHUVDPSOHRUFOHDQFHOO2QHRI
these options should remedy the problem.
Place the LIGHT BLOCKING CAP over the CELL
for zeroing and for reading result. Moving
WRDVKDGHGDUHDFDQDOVR¿[WKLVSUREOHP
Replace the batteries.
To Install/Replace “AAA” Batteries:
1. Unscrew the O-ring sealed battery cover counter-clockwise. Use proper sized pliers if necessary.
Do not disturb the sealing O-ring. Batteries are not included.
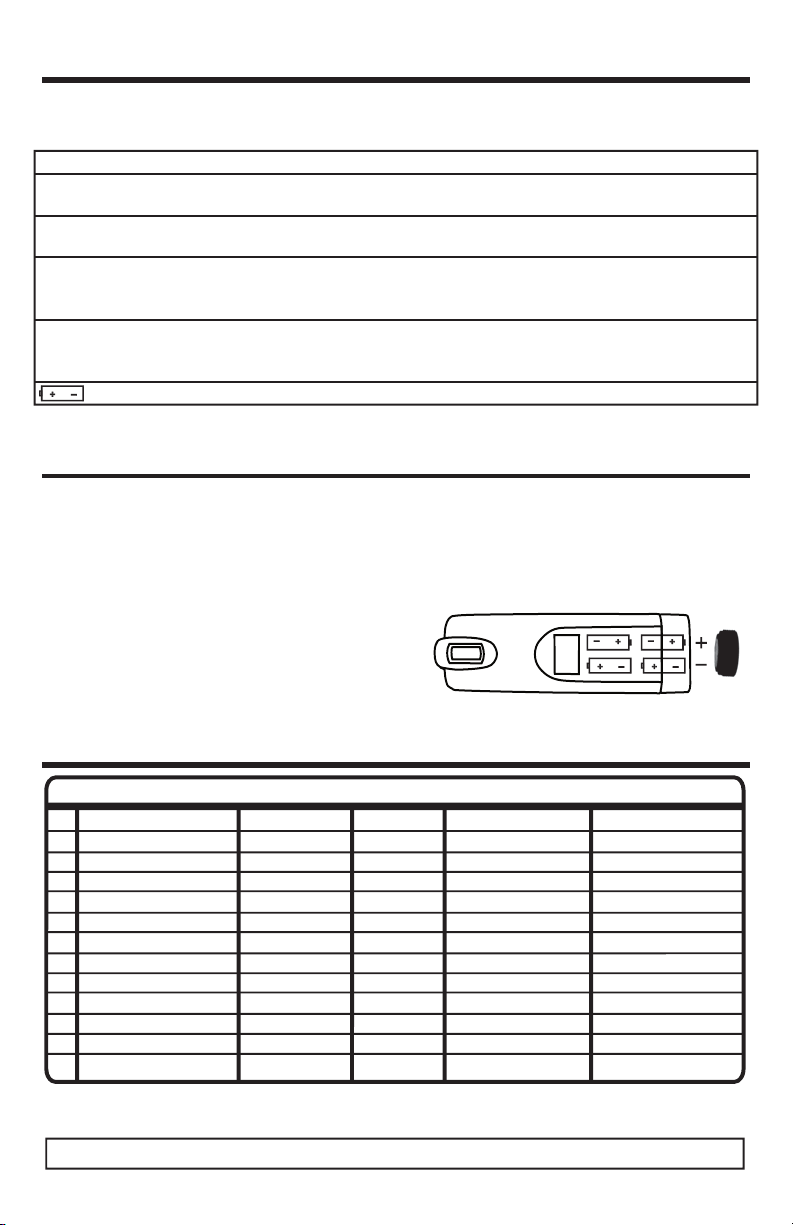
2. Remove the used batteries and install 4 new AAA batteries following the diagram for
correct polarity (see diagram). We recommend high quality AAA alkaline batteries be used.
4. Replace the battery cover. Be sure to tighten the cover securely. Do not over tighten. This is
necessary for meter to be waterproof.
5. Dispose of the used batteries in accordance with your
local regulations.
3UHVV=(5221EXWWRQWRFRQ¿UPWKHPHWHUWXUQVRQ
The meter is now ready for operation.
7. Meter will not work if battery orientation is incorrect.
TOP VIEW
HHWT-11 Reagent Reorder Information
P/5HDJHQW6SHFLÀFDWLRQV)RUXVHZLWK++:7
PARAMETER
No.
Reference Standard
Bromine (DPD-1)
1
Chlorine Dioxide (DPD-1)
2
Free Chlorine (DPD-1)
3
Total Chlorine (DPD-3)
4
Total Chlorine (DPD-4)
5
High Range Chlorine
6
Hydrogen Peroxide LR
7
Ozone (DPD-4)
8
Peracetic Acid (PAA)
9
pH
10
Glycine (used for Chlorine Dioxide)
11
NOTE: Because most of our products are test strips or use reagents that have little or no hazard in the quantity sold, MSDS sheets are not supplied with the test kit.
To ensure optimal performance, store your meter kit in a cool, dry place away from excess heat (below
90°F / 32°C), moisture, and oxidizers such as Chlorine and Bromine.
PART NO. # OF TESTS DETECTION RANGE CHEMISTRY
HHWT-486602
HHWT-486636
HHWT-486633
HHWT-486637
HHWT-486638
HHWT-486670
HHWT-486672
HHWT-486616
HHWT-486634
HHWT-486675
HHWT-486639
HHWT-484014
10
100
100
100
100
100
50
50
100
100
100
50
N/A
0 - 14 ppm
0 - 12 ppm
0 - 11 ppm
0 - 11 ppm
0 - 11 ppm
0 - 300 ppm
0 - 3 ppm
0 - 9 ppm
2 - 300 ppm
5.5 - 8.8 ppm
N/A
DPD + KI
KI + Buffer
DPD + PO
DPD + Kl
Phenol Red
Glycine
N/A
DPD
DPD
DPD
DPD
+ MoO
4
KI
13
+ Kl
4
Page 14
Strip DPD-1 Accuracy
p
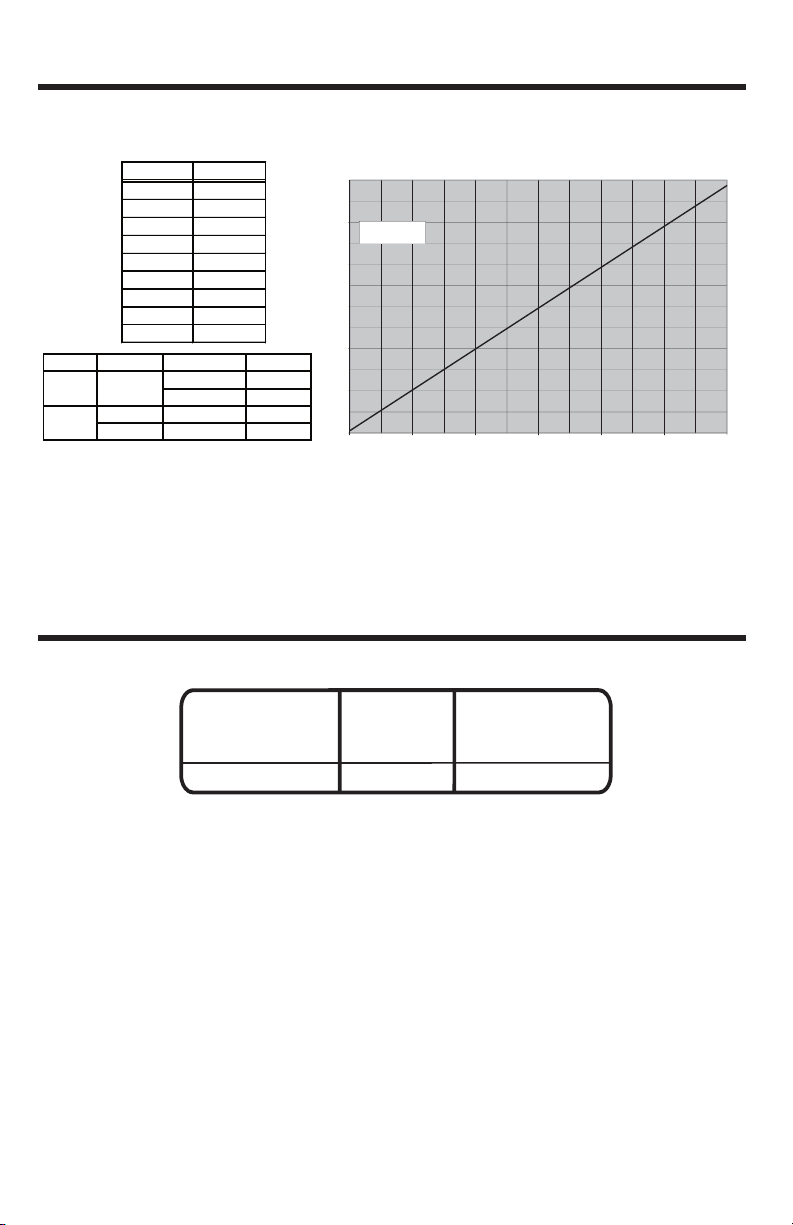
Free Chlorine results are compared using the HHWT-486637 (DPD-1) with the HHWT-11 Photometer in
Menu CL1 and Hach® DR890 Colorimeter in Program 9 and Program 12 using Hach® powder pillows.
DR890
HHWT-11
0.00 0.00
0.41 0.39
0.92 0.96
0.79 0.73
1.28 1.32
6.00
5.00
4.00
y = 0.9703x + 0.0561
R
Strip DPD-1 on Hach DR890 and HHWT-11
2
= 0.9912
2.70 2.73
3.20 3.22
4.45 4.75
5.30 5.53
Meter Menu Range (PPM) Resolution
HHWT-11
CL1
DR890
Program 9
Program 12
Hach® is a registered trademark of Danaher Corporation
0.00 to 5.99 0.01
6.0 to 11.0 0.1
0.00 to 2.20 0.01
0.0 to 11.0 0.1
3.00
HHWT-11
2.00
1.00
ppm (mg/L)
0.00
0.00 1.00 2.00 3.00 4.00 5.00 6.00
pm (mg/L)
Hach DR890 (ppm)
Reference Standard Ampoules
Assigned Value for HHWT-486602 (lot 505) Solution
Parameter Desired
Value
(ppm)
Free Chlorine 1.52 1.46 - 1.59
56;,!=HS\LZYLÅLJ[J\YYLU[JVUJLU[YH[PVUZHZ
MV\UKH[[PTLVMTHU\MHJ[\YLHUKTH`JOHUNL
^P[OJVUZLJ\[P]LSV[Z
Acceptable
Value
(ppm)
R020713
14
Page 15

WARRANTY/DISCLAIMER
OMEGA ENGINEERING, INC. warrants this unit to be free of defects in materials and
workmanship for a period of 13 months from date of purchase. OMEGA’s WARRANTY adds
an additional one (1) month grace period to the normal one (1) year product warranty to
cover handling and shipping time. This ensures that OMEGA’s customers receive maximum
coverage on each product.
If the unit malfunctions, it must be returned to the factory for evaluation. OMEGA’s Customer
Service Department will issue an Authorized Return (AR) number immediately upon phone
or written request. Upon examination by OMEGA, if the unit is found to be defective, it
will be repaired or replaced at no charge. OMEGA’s WARRANTY does not apply to defects
resulting from any action of the purchaser, including but not limited to mishandling, improper
interfacing, operation outside of design limits, improper repair, or unauthorized modification.
This WARRANTY is VOID if the unit shows evidence of having been tampered with or shows
evidence of having been damaged as a result of excessive corrosion; or current, heat, moisture
or vibration; improper specification; misapplication; misuse or other operating conditions
outside of OMEGA’s control. Components in which wear is not warranted, include but are not
limited to contact points, fuses, and triacs.
OMEGA is pleased to offer suggestions on the use of its various products. However,
OMEGA neither assumes responsibility for any omissions or errors nor assumes
liability for any damages that result from the use of its products in accordance
with information provided by OMEGA, either verbal or written. OMEGA warrants
only that the parts manufactured by the company will be as specified and free of
defects. OMEGA MAKES NO OTHER WARRANTIES OR REPRESENTATIONS OF ANY
KIND WHATSOEVER, EXPRESSED OR IMPLIED, EXCEPT THAT OF TITLE, AND ALL
IMPLIED WARRANTIES INCLUDING ANY WARRANTY OF MERCHANTABILITY AND
FITNESS FOR A PARTICULAR PURPOSE ARE HEREBY DISCLAIMED. LIMITATION
OF LIABILITY: The remedies of purchaser set forth herein are exclusive, and the
total liability of OMEGA with respect to this order, whether based on contract,
warranty, negligence, indemnification, strict liability or otherwise, shall not exceed
the purchase price of the component upon which liability is based. In no event shall
OMEGA be liable for consequential, incidental or special damages.
CONDITIONS: Equipment sold by OMEGA is not intended to be used, nor shall it be used: (1)
as a “Basic Component” under 10 CFR 21 (NRC), used in or with any nuclear installation or
activity; or (2) in medical applications or used on humans. Should
with any nuclear installation or activity, medical application, used on humans, or misused in
any way, OMEGA assumes no responsibility as set forth in our basic WARRANTY / DISCLAIMER
language, and, additionally, purchaser will indemnify OMEGA and hold OMEGA harmless from
any liability or damage whatsoever arising out of the use of the Product(s) in such a manner.
any Product(s) be used in or
Direct all warranty and repair requests/inquiries to the OMEGA Customer Service Department.
BEFORE RETURNING ANY PRODUCT(S) TO OMEGA, PURCHASER MUST OBTAIN AN
AUTHORIZED RETURN (AR) NUMBER FROM OMEGA’S CUSTOMER SERVICE DEPARTMENT
(IN ORDER TO AVOID PROCESSING DELAYS). The assigned AR number should then be
marked on the outside of the return package and on any correspondence.
The purchaser is responsible for shipping charges, freight, insurance and proper packaging to
prevent breakage in transit.
FOR WARRANTY RETURNS, please have
the following information available BEFORE
contacting OMEGA:
1. Purchase Order number under which
the product was PURCHASED,
2. Model and serial number of the product
under warranty, and
3. Repair instructions and/or specific
problems relative to the product.
OMEGA’s policy is to make running changes, not model changes, whenever an improvement is possible.
This affords our customers the latest in technology and engineering.
OMEGA is a registered trademark of OMEGA ENGINEERING, INC.
© Copyright 2016 OMEGA ENGINEERING, INC. All rights reserved. This document may not be copied, photocopied,
reproduced, translated, or reduced to any electronic medium or machine-readable form, in whole or in part, without
the prior written consent of OMEGA ENGINEERING, INC.
FOR NON-WARRANTY REPAIRS,
OMEGA for current repair charges. Have the
following information available BEFORE
contacting OMEGA:
1. Purchase Order number to cover the
COST of the repair,
2. Model and serial number of the product, and
3. Repair instructions and/or specific problems
relative to the product.
consult
15
RETURN REQUESTS/INQUIRIES
Page 16

Where Do I Find Everything I Need for
Process Measurement and Control?
OMEGA…Of Course!
Shop online at omega.com
TEMPERATURE
Thermocouple, RTD & Thermistor Probes, Connectors, Panels & Assemblies
Wire: Thermocouple, RTD & Thermistor
Calibrators & Ice Point References
Recorders, Controllers & Process Monitors
Infrared Pyrometers
PRESSURE, STRAIN AND FORCE
Transducers & Strain Gages
Load Cells & Pressure Gages
Displacement Transducers
Instrumentation & Accessories
FLOW/LEVEL
Rotameters, Gas Mass Flowmeters & Flow Computers
Air Velocity Indicators
Turbine/Paddlewheel Systems
Totalizers & Batch Controllers
pH/CONDUCTIVITY
pH Electrodes, Testers & Accessories
Benchtop/Laboratory Meters
Controllers, Calibrators, Simulators & Pumps
Industrial pH & Conductivity Equipment
SM
DATA ACQUISITION
Communications-Based Acquisition Systems
Data Logging Systems
Wireless Sensors, Transmitters, & Receivers
Signal Conditioners
Data Acquisition Software
HEATERS
Heating Cable
Cartridge & Strip Heaters
Immersion & Band Heaters
Flexible Heaters
Laboratory Heaters
ENVIRONMENTAL
MONITORING AND CONTROL
Metering & Control Instrumentation
Refractometers
Pumps & Tubing
Air, Soil & Water Monitors
Industrial Water & Wastewater Treatment
pH, Conductivity & Dissolved Oxygen Instruments
16
M-5098/1016
 Loading...