

Page 1
Page 2

M20007 REL-0000 (2103)
Contents
HHP400 SuiteCG Application ...........................................................................................................1
General Information ................................................................................................................................... 3
Notification Statements ...................................................................................................3
Glossary ...................................................................................................................................... 4
Tips for using HHP400 SuiteCG ...................................................................................................... 5
How does HHP400 SuiteCG benefit you? .........................................................5
USB cable and your computer ................................................................................... 5
Battery outline ........................................................................................................................ 5
Close HHP400 SuiteCG first, then turn o your device ...........................5
Watch for a yellow dot on a tab ................................................................................. 6
Year-Month-Date format .................................................................................................7
Hours:Minutes:Seconds format ................................................................................7
Connection status................................................................................................................8
Configuration button .............................................................................................................................. 10
Overview of the Configuration button ............................................................... 10
Notification about unsaved settings ................................................................... 10
Passwords .............................................................................................................................. 10
Request a recovery password ................................................................................. 11
Common features for devices and sensors ................................................... 12
Configuring devices ........................................................................................................ 12
Configuring sensors ........................................................................................................ 13
Damping .................................................................................................................................. 13
User Calibration button .......................................................................................................................14
User Calibration: For authorized personnel only ....................................... 14
Customer calibration ......................................................................................................15
Data Log button ..........................................................................................................................................16
Overview of Data Log buttons ................................................................................16
Data Log Lite ........................................................................................................................16
Upgrade tab .......................................................................................................................... 20
Data Log Pro ........................................................................................................................21
Order Data Log Pro or add it later ........................................................................22
Directory tab ......................................................................................................................... 23
Preview tab ............................................................................................................................ 24
Setup tab ................................................................................................................................. 27
Application button ....................................................................................................................................29
Overview ................................................................................................................................. 29
Update button .............................................................................................................................................. 30
Overview ................................................................................................................................. 30
Help ....................................................................................................................................................................... 31
Register your product .................................................................................................... 31
Find downloads and documents ...........................................................................31
Western Contact Information ......................................................................................................... 32
User Manual HHP400 Suite 2 of 28
Page 3

M20007 REL-0000 (2103)
General Information
Notification Statements
Disclaimer
Every precaution has been taken in the preparation of this
manual. Nevertheless, Omega assumes no responsibility for
errors or omissions or any damages resulting from the use of
the information contained in this publication, including, without
limitation, incidental, special, direct or consequential damages.
OMEGA MAKES NO REPRESENTATIONS OR WARRANTIES
WITH RESPECT TO THE ACCURACY OR COMPLETENESS OF
THE CONTENTS HEREOF AND SPECIFICALLY DISCLAIMS ANY
IMPLIED WARRANTIES OF MERCHANTABILITY OR FITNESS
FOR ANY PARTICULAR PURPOSE. Omega reserves the right to
revise this publication and to make changes from time to time in
the content hereof without obligation to notify any person of such
revision or changes.
In no event shall Omega be liable for any indirect, special,
incidental, consequential, or punitive damages or for any lost
profits arising out of or relating to any services provided by
Omega or its ailiates.
It is not possible for Omega to identify all foreseeable uses or
misuses, therefore all persons involved in commissioning, using,
or maintaining this product must satisfy their self that each
intended application is acceptable.
Copyright
This publication is proprietary to Omega and no ownership rights
are transferred. Neither this manual, nor any of the material
contained herein, may be reproduced without the prior written
consent of Omega.
Trademark information
All other trademarks are the property of their respective owners.
User Manual HHP400 Suite 3 of 28
Page 4

M20007 REL-0000 (2103)
Glossary
Words and phrases with their definitions.
Words &
phrases
Button or
key
Dashboard
Omega
Calibration
User
Calibration
Definitions or explanations
• A button always refers to an area on
the screen that you can click to select
functionality.
• A key always refers to hardware push buttons
on the keyboard that you can press.
• The dashboard is the initial window that
displays in HHP400 Suite application. The
dashboard gives you access to the dierent
functions in the application.
Omega calibration refers to any calibration
completed at Omega with Omega traceability.
Omega calibration includes:
• Oven calibration.
• Multipoint Omega adjustment.
User calibration refers to any calibration done
outside of Omega with non-Omega traceability.
User calibration includes:
• Multipoint user calibration or adjustment
User Manual HHP400 Suite 4 of 28
Page 5

M20007 REL-0000 (2103)
WARNING
NOTICE
NOTICE
Tips for using HHP400 Suite
How does HHP400 Suite benefit you?
▪ With HHP400 Suite, you can configure your device or sensor
to display information the way your company needs to use it.
▪ The HHP400 Suite application can configure data logging
requirements and Data Log Pro.
USB cable and your computer
!
For use only in non-hazardous locations (safe locations)
Connect the USB cable to your device and to your computer to
configure any sensors you wish to include.
Battery outline
Watch for the battery outline
Do not attempt to modify or update your device when only the
outline of the battery icon is visible.
Close HHP400 Suite first, then turn o your
device
Do not turn o the power on the device while it is communicating
with HHP400 Suite. The device displays dashes and the word USB
ACTIVE while HHP400 SuiteCG is communicating with a device
or sensor.
▪ Close HHP400 Suite first, disconnect the USB, and turn o
your device.
▪ As long as USB ACTIVE remains visible, Auto O is
suspended.
User Manual HHP400 Suite 5 of 28
Page 6
M20007 REL-0000 (2103)
Watch for a yellow dot on a tab
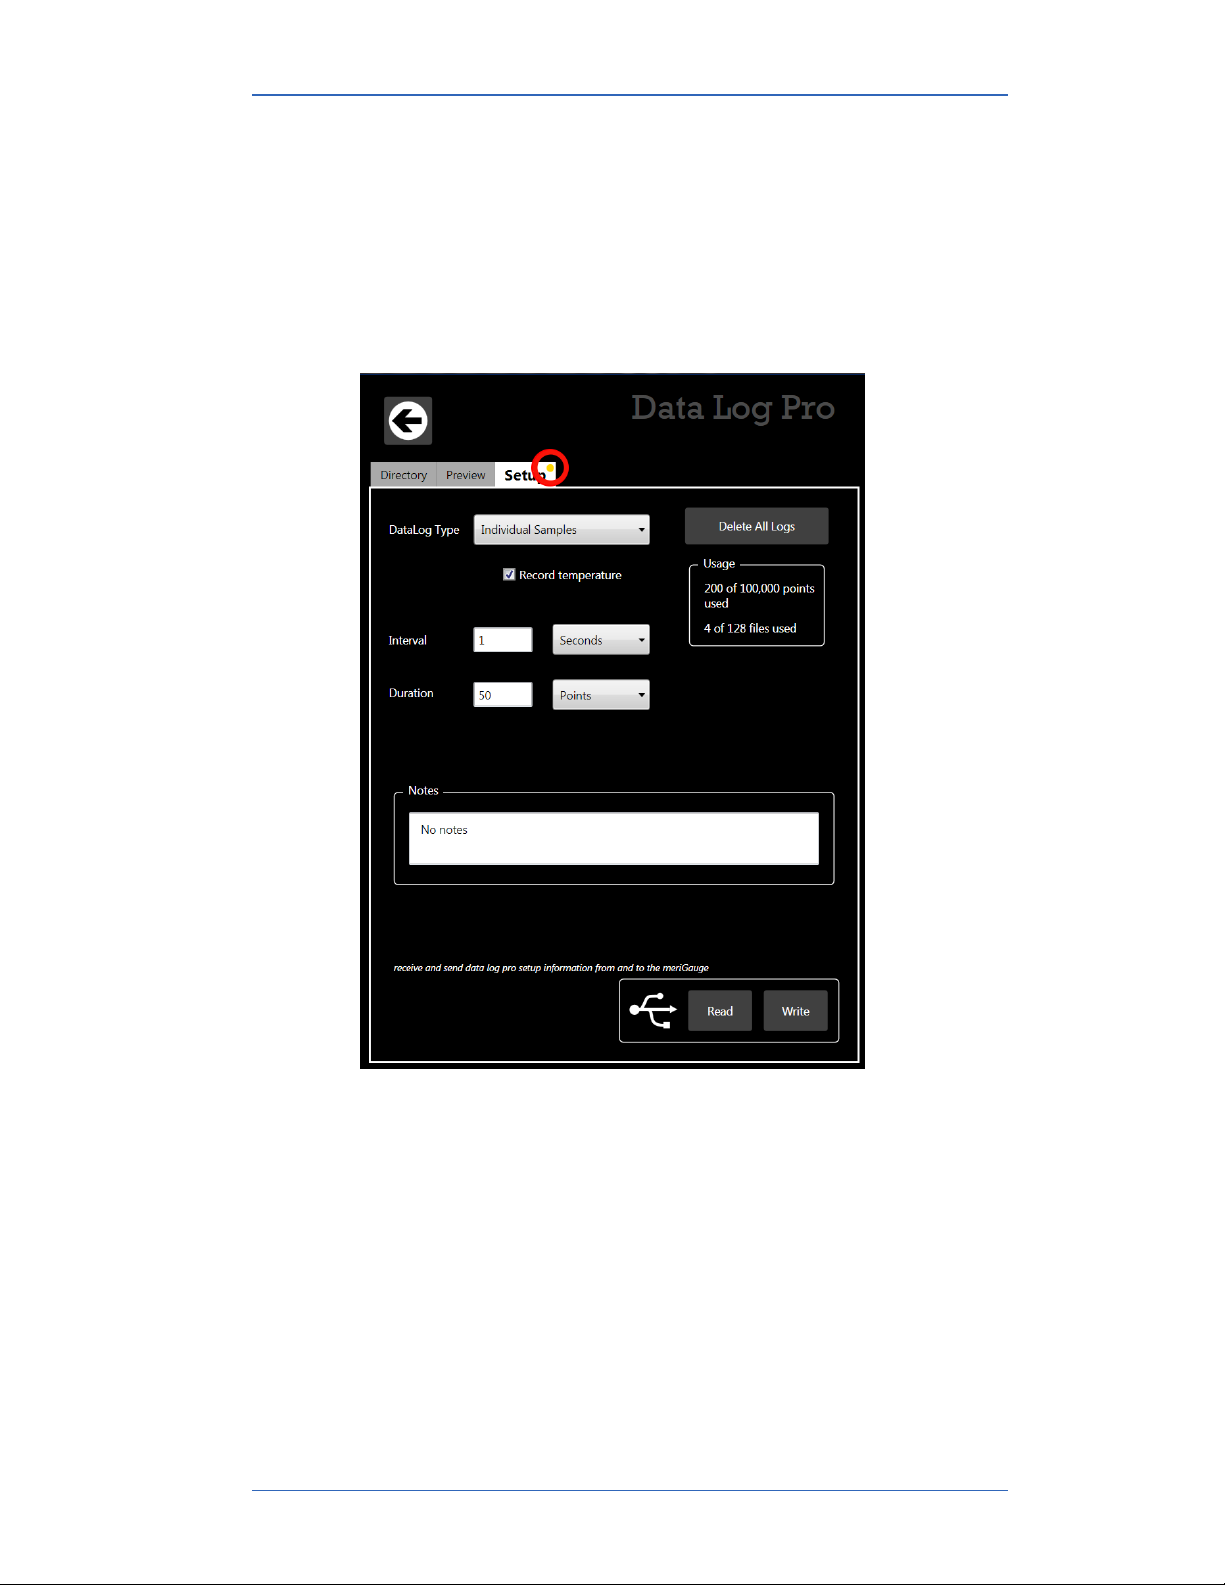
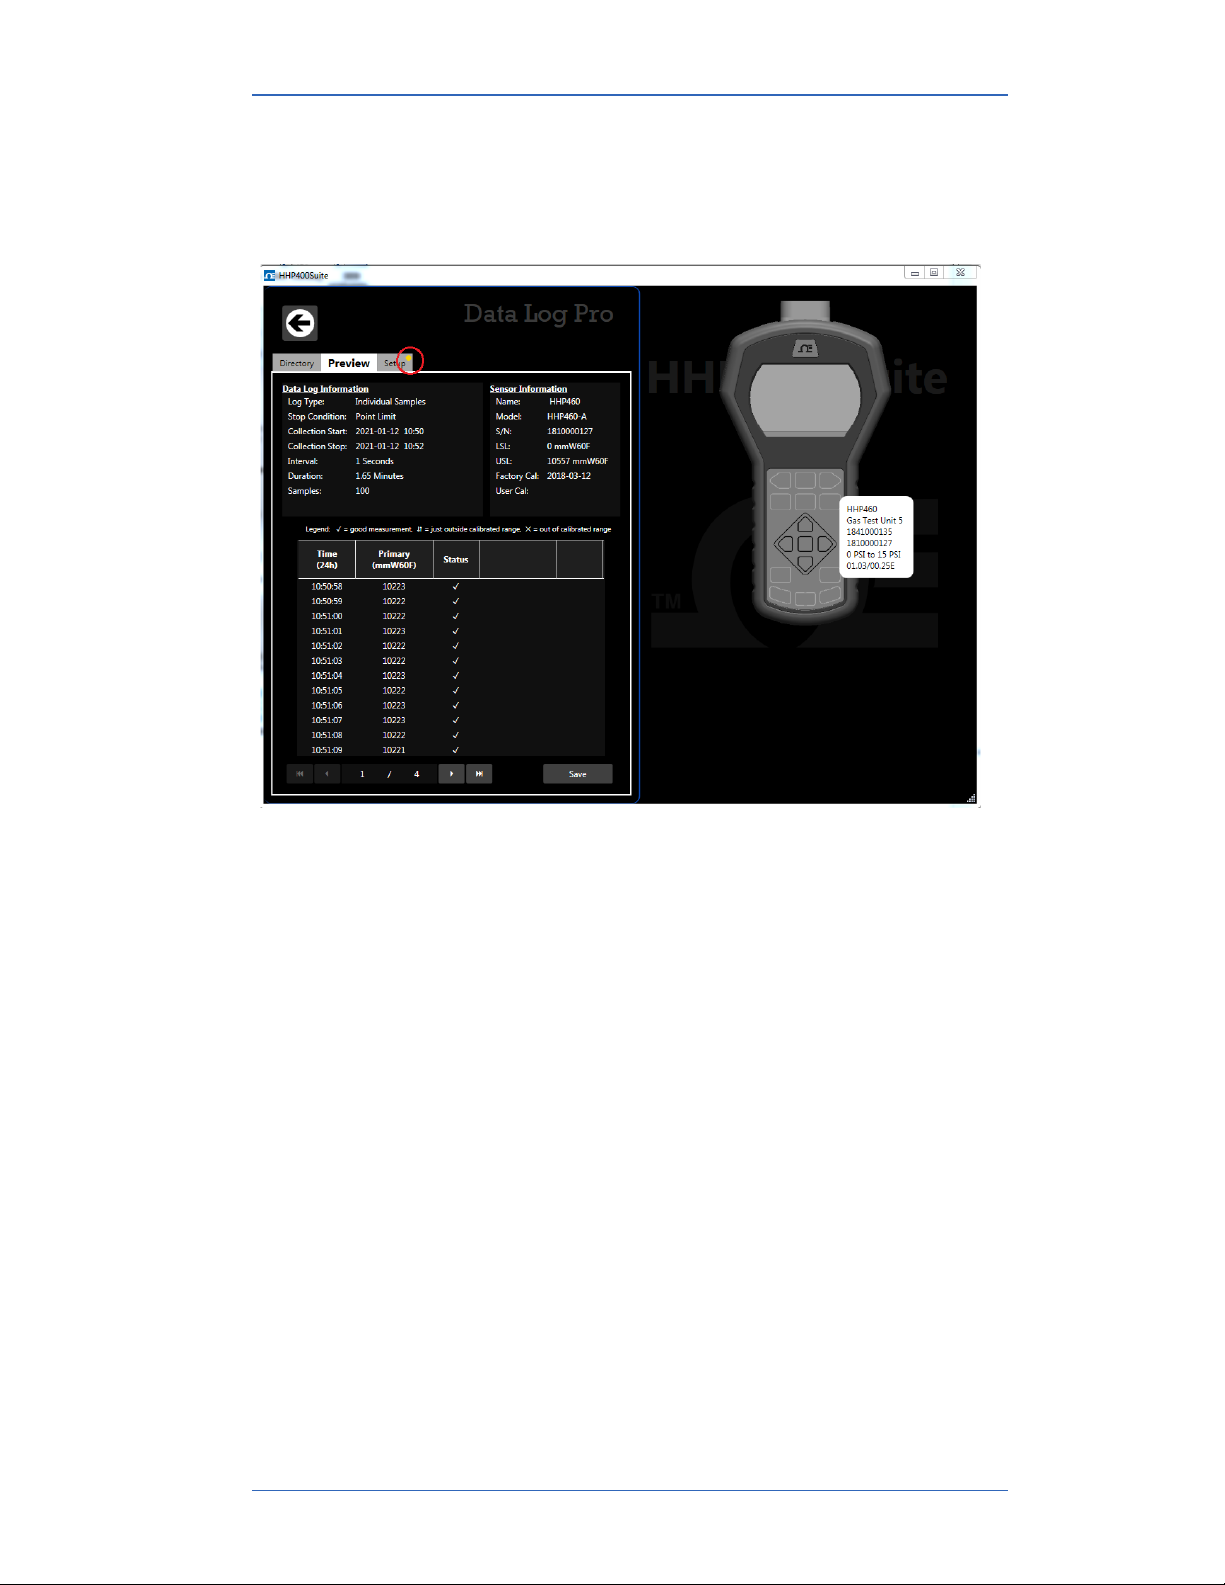
▪ A yellow dot appears on a tab in HHP400 Suite to indicate that
you have made changes to settings but you have not saved
them yet. See Figure 1 and Figure 2 below.
▪ You may click the Write button to save the changes you made.
Figure 1: Yellow dot on an active tab. See the red circle in the figure below.
User Manual HHP400 Suite 6 of 28
Page 7
M20007 REL-0000 (2103)
(Watch for a yellow dot on a tab continued)
Figure 2: Yellow dot on an inactive tab. See the red circle in the figure below.
Year-Month-Date format
▪ The HHP400 Suite application displays the date in year-
month-day format.
▪ For example: 2016-04-22 (YYYY-MM-DD).
Hours:Minutes:Seconds format
▪ The HHP400 Suite application displays the time in Universal
Coordinated Time (UTC) 24-hour format.
▪ For example: 15:05:45 UTC (hours:minutes:seconds).
User Manual HHP400 Suite 7 of 28
Page 8
M20007 REL-0000 (2103)
Connection status
Attached devices
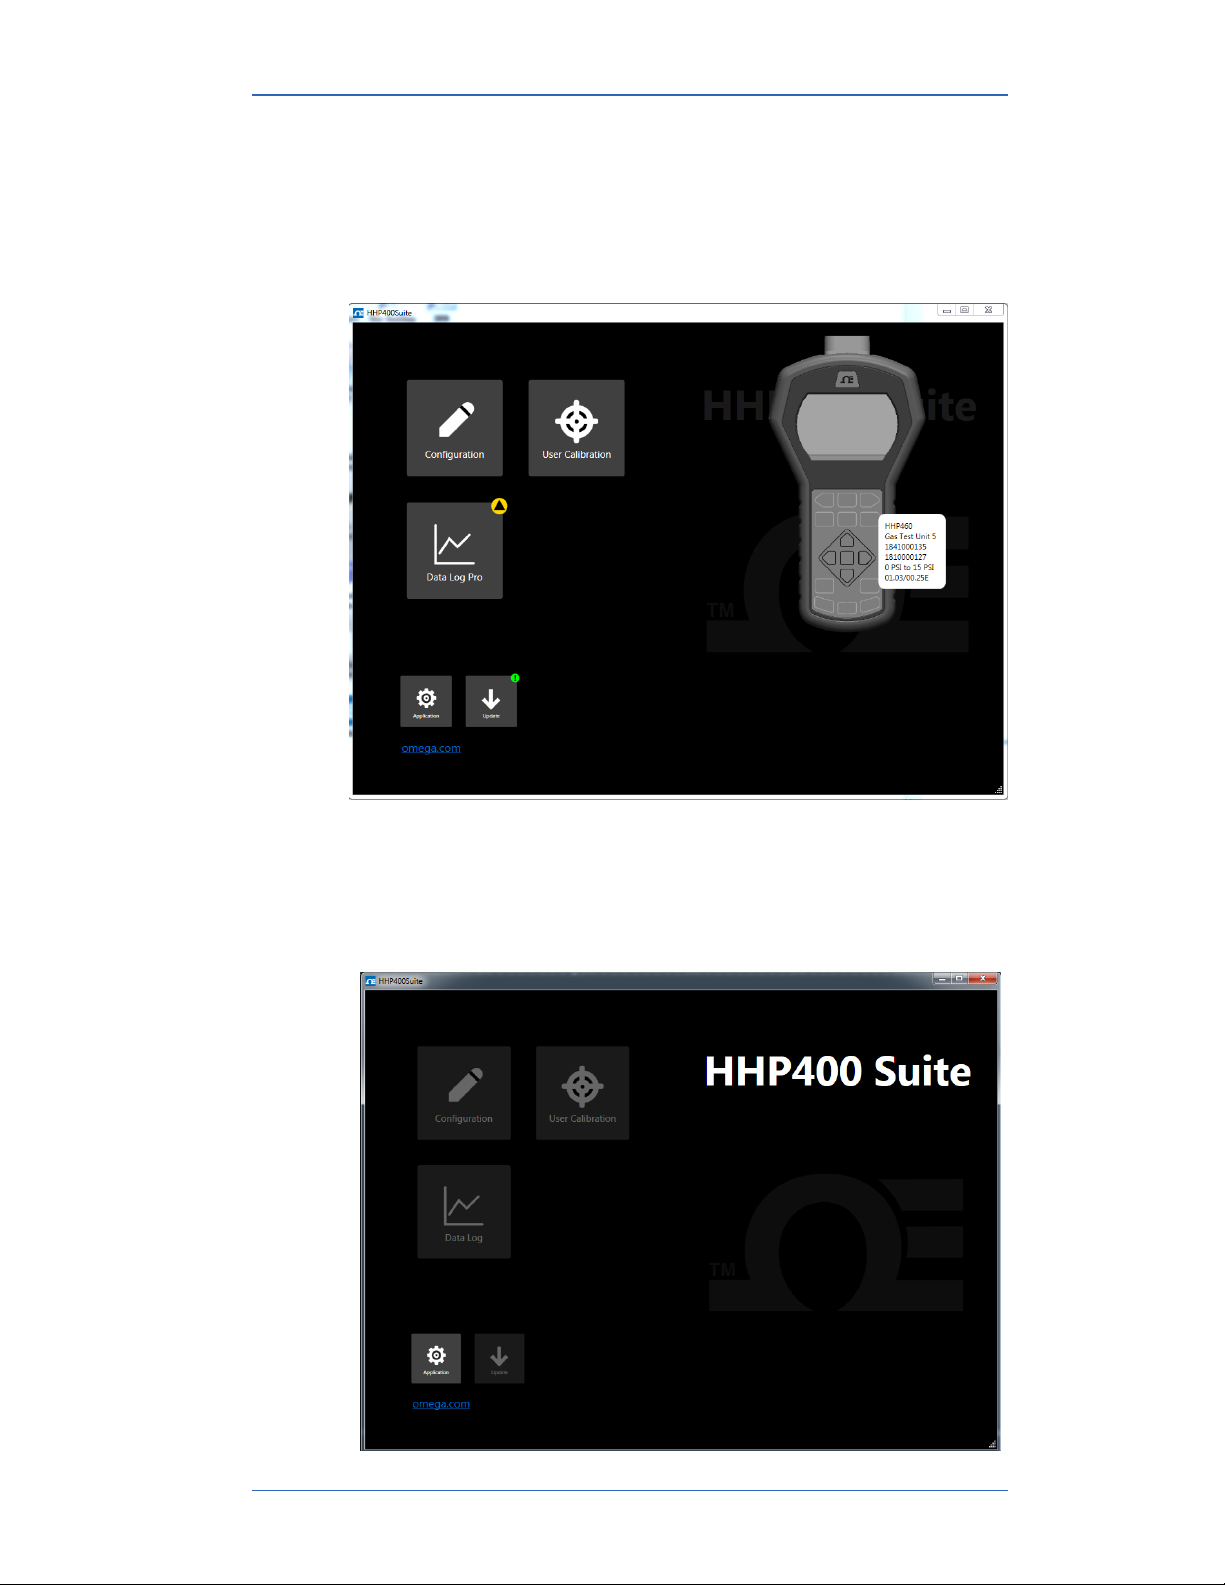
The HHP400 Suite application displays the outlines of attached
devices on the right with descriptions appearing alongside. See
the figure below.
No attached devices
The HHP400 Suite application displays no outlines of devices on
the right side. See the figure below.
User Manual HHP400 Suite 8 of 28
Page 9
M20007 REL-0000 (2103)
Conguration button
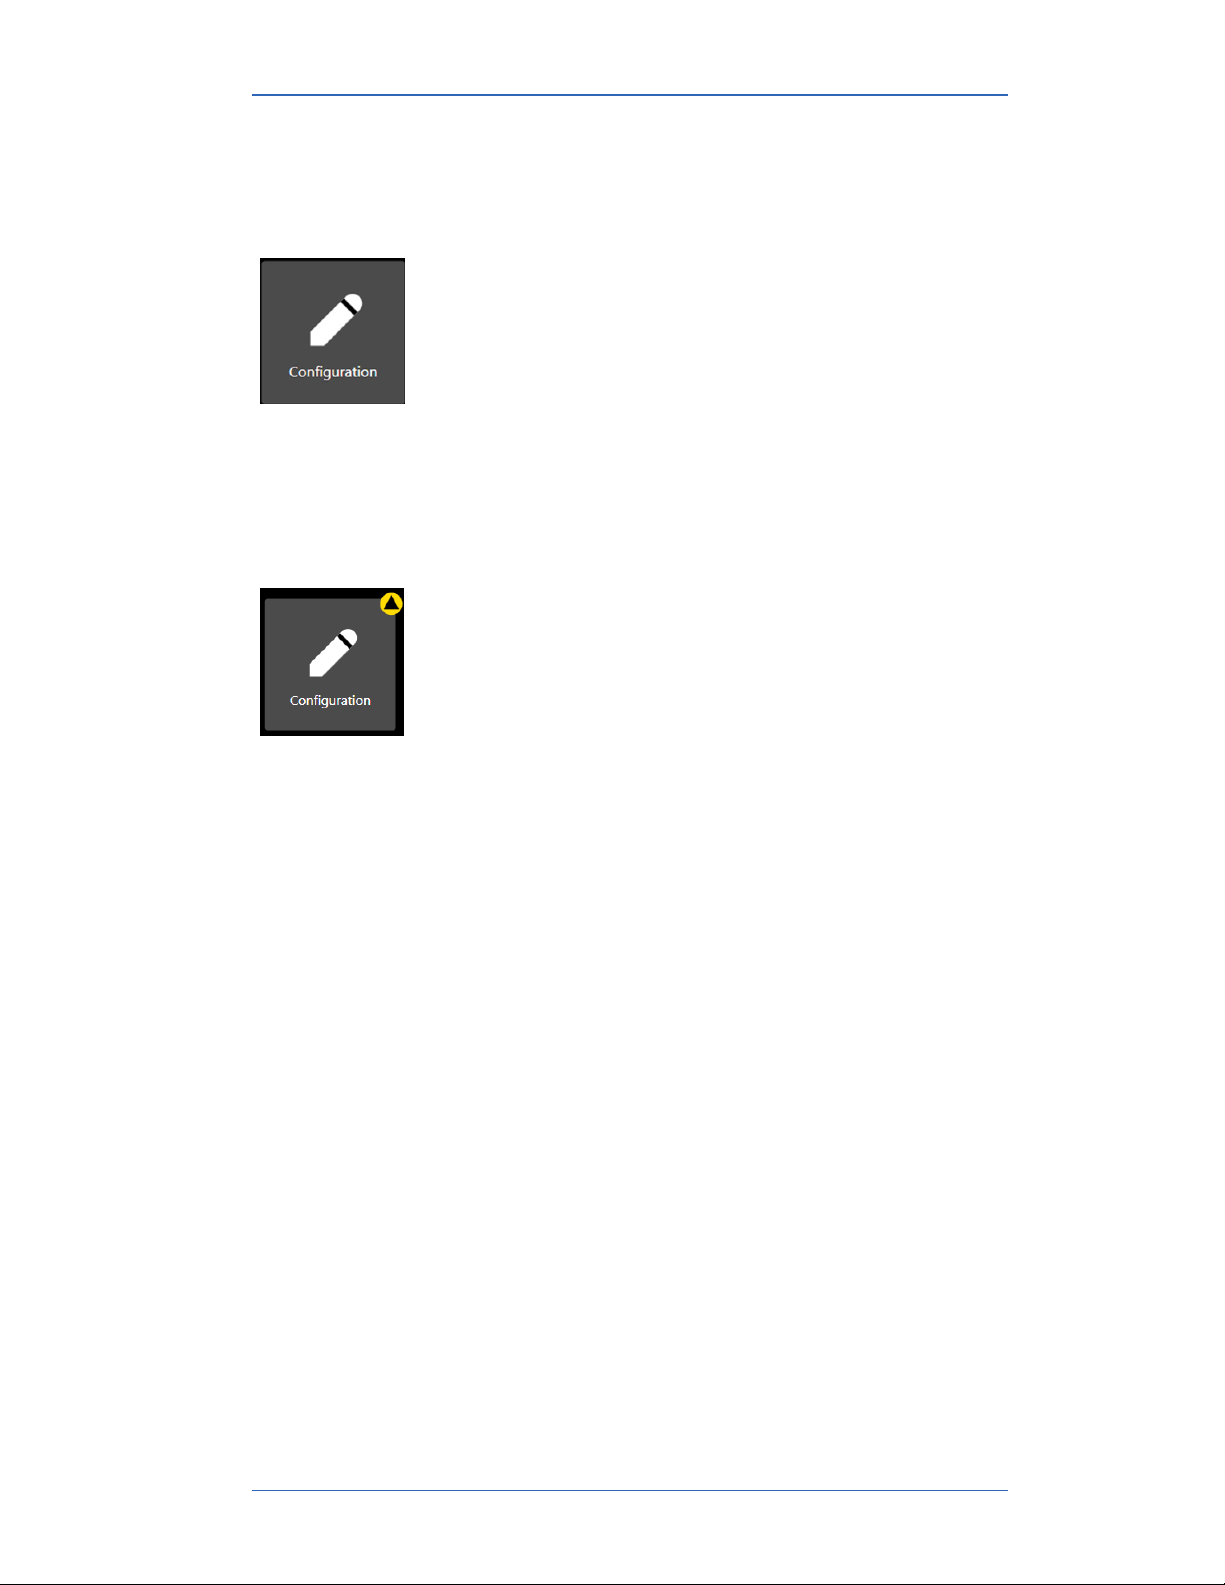
Overview of the Configuration button
The Configuration button displays a window with
multiple tabs:
• Device name or the name you assigned to it.
• Sensor type or the name you assigned to it, one for
each sensor.
Note: These tabs oer you various settings to configure
each attached device.
Notification about unsaved settings
It displays a yellow alert icon to indicate you have
changed a setting and you have not yet saved the setting
to the target element or to your computer.
Passwords
Overview of passwords
Passwords are never required to use a device or any sensor.
▪ The passwords are turned o when the devices are shipped.
▪ Each device can have its own unique 16-character password.
You may use from 1-16 characters: letters, numbers, or
symbols, and uppercase and lowercase.
▪ An internal sensor and a tethered sensor have separate
passwords.
▪ Each device can have its password turned on or turned o
independently from any other element.
▪ HHP400 Suite retrieves the passwords stored on the devices.
HHP400 SuiteCG uses the password
If you choose to select the Password Required For Future
Access, then HHP400 Suite requests a password for the following
actions:
▪ To modify a device or sensor’s configuration.
User Manual HHP400 Suite 9 of 28
Page 10

M20007 REL-0000 (2103)
Note: This action includes saving to or loading from a file.
▪ To update the firmware on a device or sensor.
▪ To access the Setup tab of Data Log Pro.
HHP400 SuiteCG requests a password
If you choose to select the Password Required For Future
Access, then HHP400 Suite requests a password whenever you
modify a configuration, update the application or firmware, or
calibrate a device.
▪ Once HHP400 Suite accepts a password for one of those
actions, the device remains unlocked until it is disconnected
from HHP400 Suite.
▪ If you enter the password on one window, HHP400 Suite
unlocks that device or sensor on its other windows as well.
Data Log Lite has no password
HHP400 Suite does not use a password for Data Log Lite since it
cannot make any changes to the device.
Request a recovery password
Forgot the password for a device or sensor?
▪ If you forget a password, contact Omega to generate a
recovery password for you to unlock the device.
▪ A recovery password disables the password until you create a
new password.
▪ You must have the serial number of the device or sensor to
request a recovery password.
▪ Call 1-800-826-6342 or send an e-mail to [email protected].
Recovery password valid for one date
When you call Omega to generate a recovery password, you may
select a date that is convenient for you. If you do not specify a
date, the request date is used.
Common features for devices and sensors
The Names field
You can assign your own company designations to each device or
sensor.
User Manual HHP400 Suite 10 of 28
Page 11

M20007 REL-0000 (2103)
NOTICE
As Left/As Found Configuration Report button
▪ You can review a summary of the configuration of the device
when it is first connected and the changes you made in the As
Found/As Left Report.
▪ The As Found/As Left Report cannot report changes made in
HHP400 Suiteunless you save those new configurations to the
device.
Read and Write Configurations
▪ Read and Write refer to reading configuration data from a
device or sensor or writing new data to them.
Save your configuration changes before you click the Read
button. After you click the Read button, all changes on-screen
are replaced with the configuration that is on the device.
Configuring devices
Sync PC time to Gauge
▪ Click to update the device time and date with your computer.
▪ The LCD display and data logging use this time and date.
Timeouts
▪ Backlight.
▪ Auto O (Automatic O).
Display Functions
▪ Min/Max.
▪ Accuracy.
▪ Tare .
▪ Average.
▪ Rate of Change.
▪ Time & Temp.
▪ Allow zero adjust (ø)
▪ Leak Test
User Manual HHP400 Suite 11 of 28
Page 12

M20007 REL-0000 (2103)
Configuring sensors
Enabled Units
Select or deselect measurement units to view them on the device
with a display.
▪ The All button selects all measurement units.
▪ The None button deselects all measurement units.
▪ You must select at least one unit before you can Write to the
device.
Two User Defined Units
You can define the text, multiplier, type, and zero oset for two
non-standard or unsupported display units.
Note: Flow type does not use oset.
Note: (multiplier × PSI) + Oset = the displayed value for linear
type.
Damping
Damping rate
Select a Time Constant: 1 second, 2 seconds, 4 seconds,
8seconds, or 16seconds.
▪ When set for 4 second time constant, it takes 4 seconds from
the time of the step change until the device displays the full
value of the new pressure.
Damping types
Select a type: Exponential, Smart Quick, Smart Normal, or
SmartSlow.
▫ Use adjustable Exponential type damping to steady the
▫ Exponential damping displays approximately 70% of a
display when you measure pulsating pressure or flow.
step change in pressure at the next display update.
User Manual HHP400 Suite 12 of 28
Page 13
M20007 REL-0000 (2103)
User Calibration button
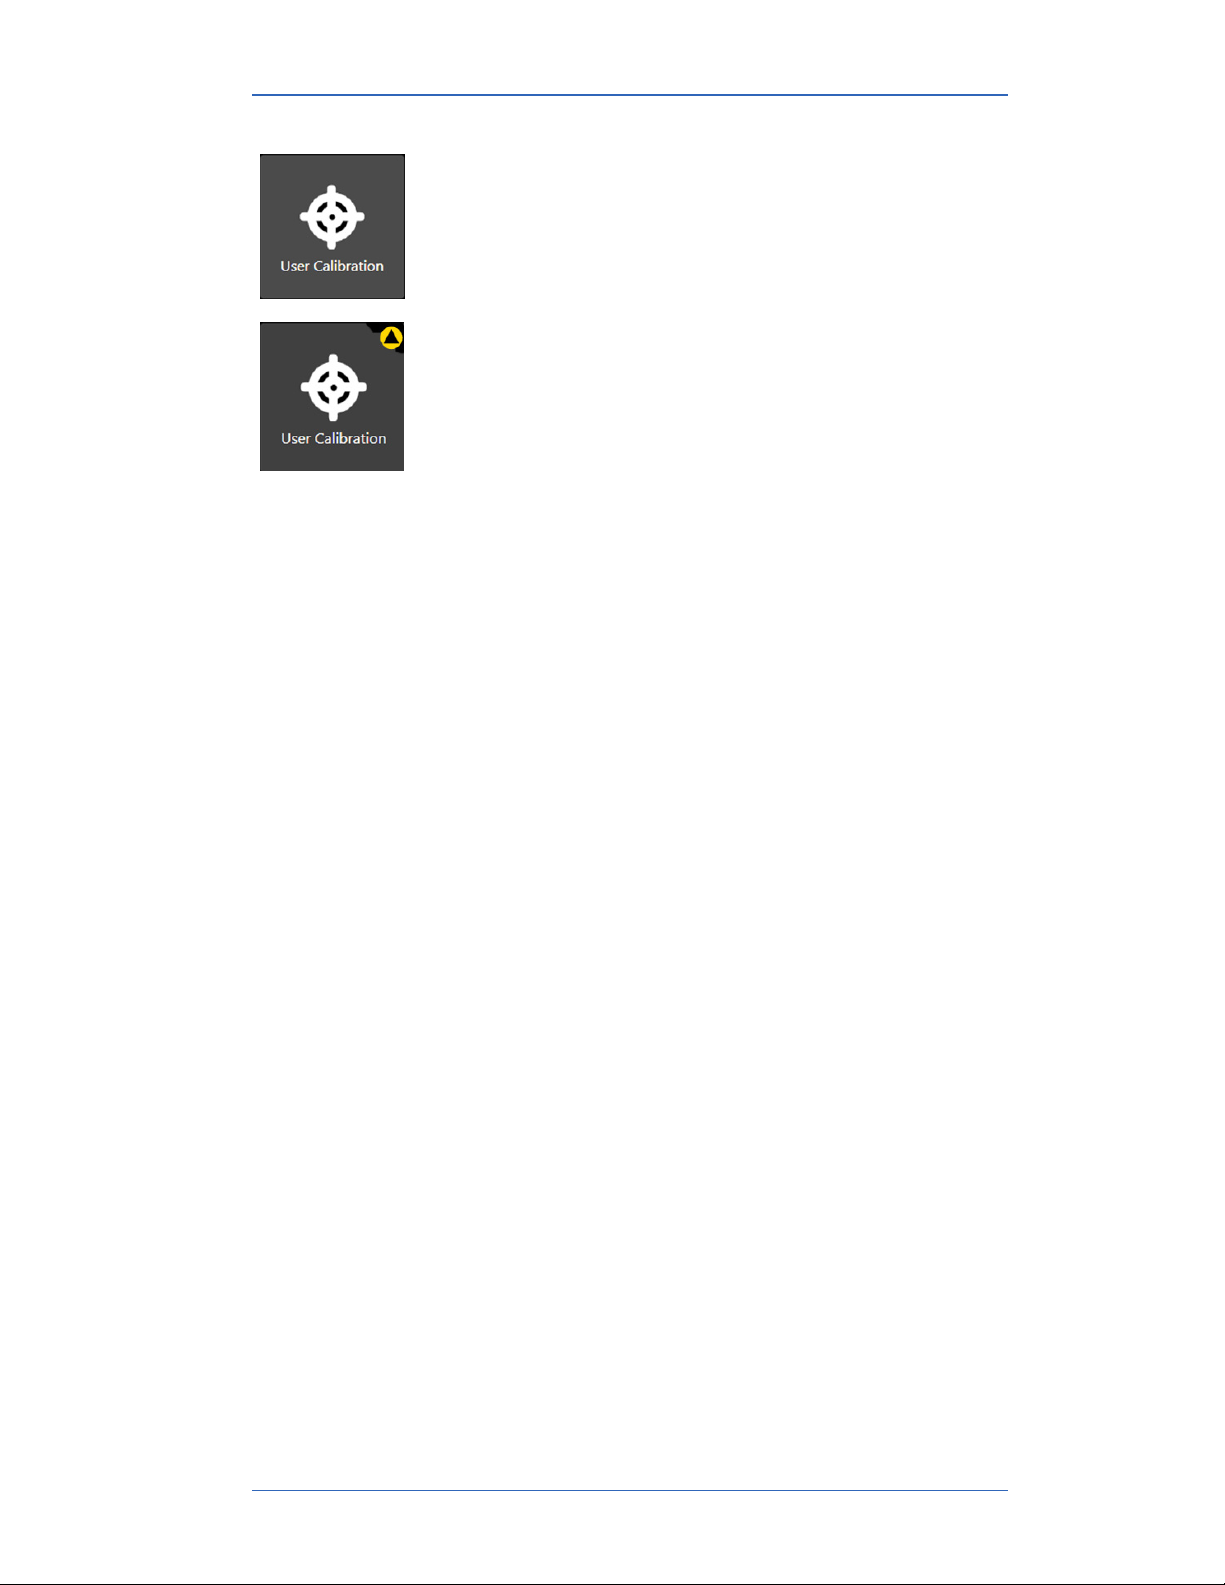
The User Calibration button displays options to calibrate
the sensor.
The User Calibration button displays a yellow alert icon
to indicate you have changed a setting and you have not
yet saved the setting to sensor.
User Calibration: For authorized personnel only
What does “Calibration Enabled” refer to?
▪ With a check in the box, Calibration Enabled displays the Live
Reading with your current user calibration applied.
▪ Without a check in the box, it displays Live Reading without
your user calibration.
Restore Factory Defaults
This button clears your user calibration from the sensor.
Choose Calibration Unit
▪ Select the calibration reference units.
▪ This does not aect or depend on the configuration units.
Begin button…Apply button
1. Click Begin.
2. Select the point.
3. Apply reference pressure within the range shown.
4. Enter the reference value.
5. Save the point.
6. Repeat steps 2-5 until you are done. (You have to change at
least one point.)
7. Click the Apply button.
User Manual HHP400 Suite 13 of 28
Page 14

M20007 REL-0000 (2103)
Customer calibration
You can calibrate the manometer in the field for
1. Zero.
2. Span.
3. Linearity.
User Manual HHP400 Suite 14 of 28
Page 15
M20007 REL-0000 (2103)
Data Log button
Overview of Data Log buttons
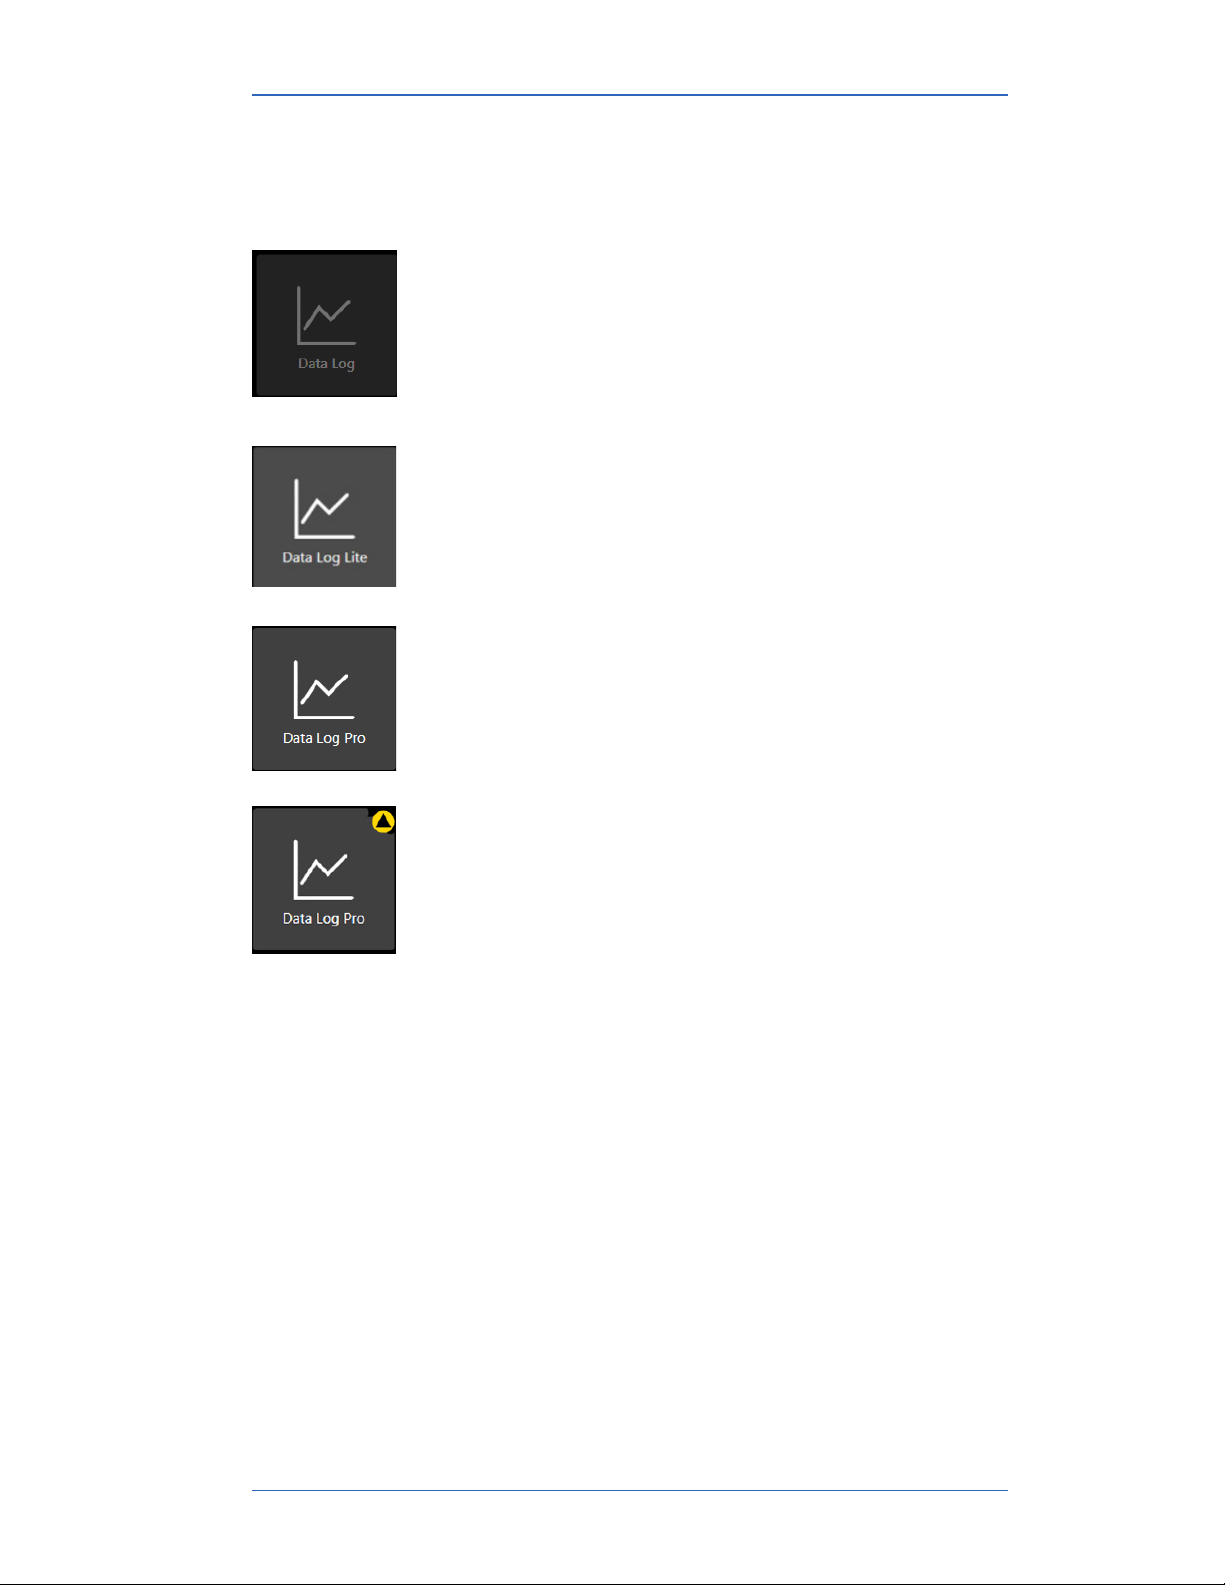
Data logging displays three dierent buttons depending
on what you order or on what you add-on at a later time.
The Data Log button is always unavailable when no
device is attached to HHP400 Suite.
Data Log Lite
• The Data Log Lite button displays when you attach
a device. Data Log Lite is the free version of data
logging. It has no options.
Data Log Pro
• The Data Log Pro button displays when Data Log Pro
is activated on the device that is attached to HHP400
SuiteCG.
Data Log Pro alert
• The button displays a yellow alert icon to indicate you
have changed a setting and you have not yet saved
the setting to the device.
Data Log Lite
Preview tab
Preview the data log
The Preview tab displays the first 10 samples so you can confirm
the data to save. If you have fewer than 10, it displays all of your
samples.
Status, pressure, and temperature for logs
The Status symbols for pressure and temperature.
Note: Recording the temperature is dependent on the device and
options selected in HHP400 SuiteCG.
User Manual HHP400 Suite 15 of 28
Page 16

M20007 REL-0000 (2103)
The ✓ symbol corresponds to readings that are within the
calibrated range.
▪ The ⇵ and ⨯ symbols indicate an abnormal condition.
▪ The ⇵ symbol indicates readable data.
▪ The ⨯ symbol indicates dashes and no readable data.
The Pressure
The pressure indicates the reading at each 15-second interval in
the data set.
The Temperature
If... then...
you have a
device
you have a
device
• The internal temperature of the sensor
displays the measured temperature for
each 15-second interval in the data set.
• Internal temperature logging on a
meriGauge is only available when the log
type is Individual Samples or On Demand.
• Internal temperature logging can be
turned o in HHP400 SuiteCG.
• Temperature displays only when the OTS
RTD PT100 is attached.
• The internal temperature is not displayed.
• The MTS displays when it is attached
(pressure or temperature).
Save a data log file as a TSV file—only option
The Save button in Data Log Lite saves the data to a Tab
Separated Values (*.TSV) file format.
Open a data log file as a TSV file
Double click a TSV file and if it opens in a spreadsheet application,
then you do not need to do anything additional.
Examples of spreadsheet applications: Microsoft Excel,
OpenOice Calc, and Google Sheets.
Associate the file type “TSV” with an application
If double clicking a TSV file failed to open it in a spreadsheet
application, then you have to follow these steps:
1. Open the Control Panel in Windows 10, 8 or 7.
2. In the Control Panel, open Default Programs.
3. Click the Associate file type or protocol with a program option.
User Manual HHP400 Suite 16 of 28
Page 17

M20007 REL-0000 (2103)
4. Scroll through the list of file extensions until you locate “.tsv”
and select it.
5. Click the Change program button.
6. Select the program you want to associate with it and click OK.
Note: If the program you want to select is not listed, click the
Browse button and find the program’s executable (.exe) file on the
computer. Select the file and click OK to select that program.
Drag and drop a TSV file into
Drag and drop TSV files to open them. The following steps are
similar for these spreadsheet applications: Microsoft Excel,
OpenOice Calc, and Google Sheets.
1. Open File Explorer (Windows 8 and 10). Keep File Explorer
small enough to see Excel in the background.
Note: Depending on which version of Windows you have, File
Explorer may be known as Windows Explorer, File Manager, or My
Computer.
2. Open Excel. It can have a blank spreadsheet or an existing
spreadsheet. Drag and drop creates a new spreadsheet.
3. Switch to File Explorer and navigate to the location where you
saved the TSV file.
4. Select the file and drag-and-drop it in the middle of the blank
spreadsheet.
5. Save it as an Excel file.
User Manual HHP400 Suite 17 of 28
Page 18

M20007 REL-0000 (2103)
Data Log Pro
An optional purchase
List of benets
You can:
▪ Log 100 000 data points.
▪ Set data logging intervals from 1 second to 24 hours.
▪ Set one of four data logging types.
▪ Select the duration: fixed time, fixed data points, or forever.
Note: Forever is limited by the remaining number of points on the
device. Look for these numbers on the Setup tab by clicking the
Data Log Pro button.
▪ Save logs to two file formats: TSV and PDF format.
How many licenses do I need to operate Data Log Pro?
Do I need a license for each computer (HHP400 SuiteCG)
▪ No.
Do I need a license for each sensor?
▪ No.
User Manual HHP400 Suite 18 of 28
Page 19

M20007 REL-0000 (2103)
Order Data Log Pro or add it later
Order it installed
You can order it so the device comes loaded and ready to use
when you receive it. The Data Log Pro button appears on the
HHP400 Suite dashboard when the device is connected.
Add it later
You may add Data Log Pro at any time by calling your distributor
or contact the Omega Sales Team.
▪ You must have the serial number from the device.
▪ You can find it on the back of the device or you can view it in
the HHP400 Suite application.
▪ After you purchase Data Log Pro, your distributor or the
Omega Sales Team will give you an Activation Key.
▫ Phone 1-800-826-6342
▫ Email [email protected]
Enter the activation key
▪ Click the Upgrade tab in Data Log Lite to enter the activation
ke y.
▪ After you click the Activate Device button, Data Log Pro
automatically replaces Data Log Lite in HHP400 Suite.
User Manual HHP400 Suite 19 of 28
Page 20
M20007 REL-0000 (2103)
Directory tab
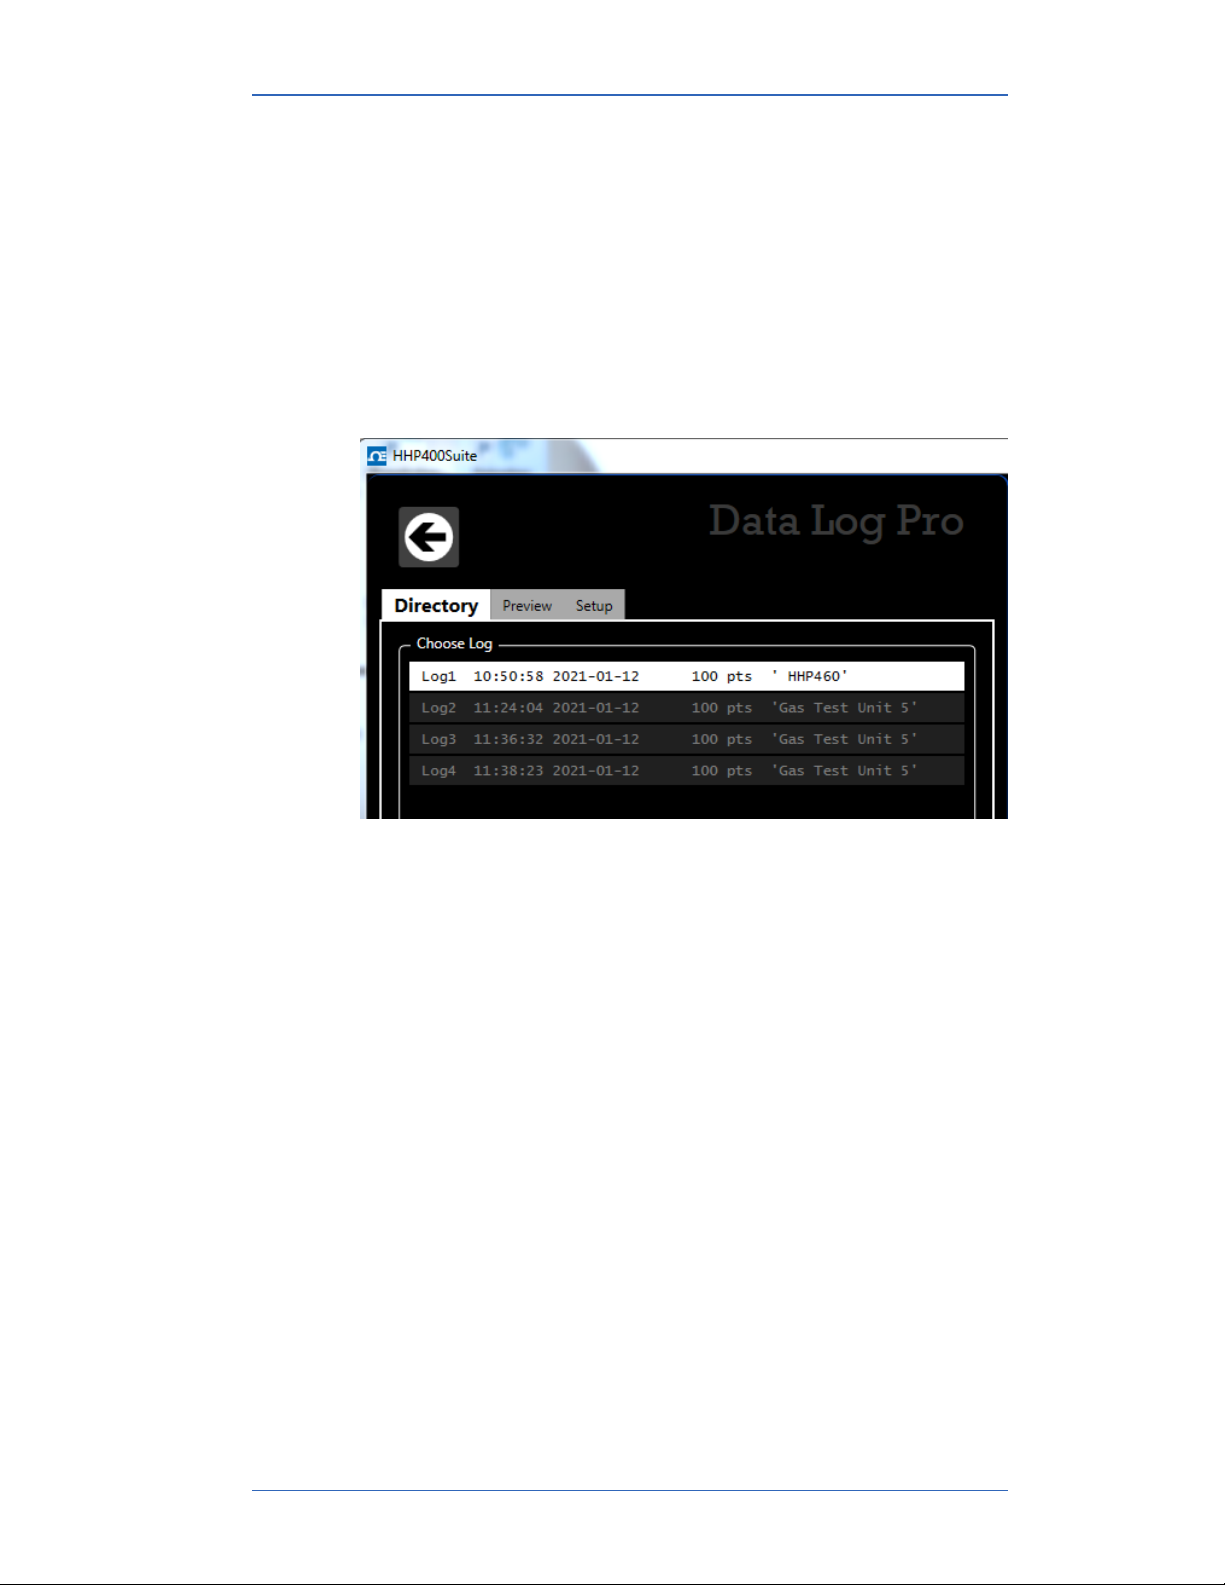
View the list of logs on the device in the Directory tab
The Directory tab displays all the logs in the memory of the
connected device. Two ways to open a log:
▪ First, double click a log to open it in the Preview tab.
▪ Second, you may click a log from the list to select it and click
the Preview tab to view it.
User Manual HHP400 Suite 20 of 28
Page 21
M20007 REL-0000 (2103)
Preview tab
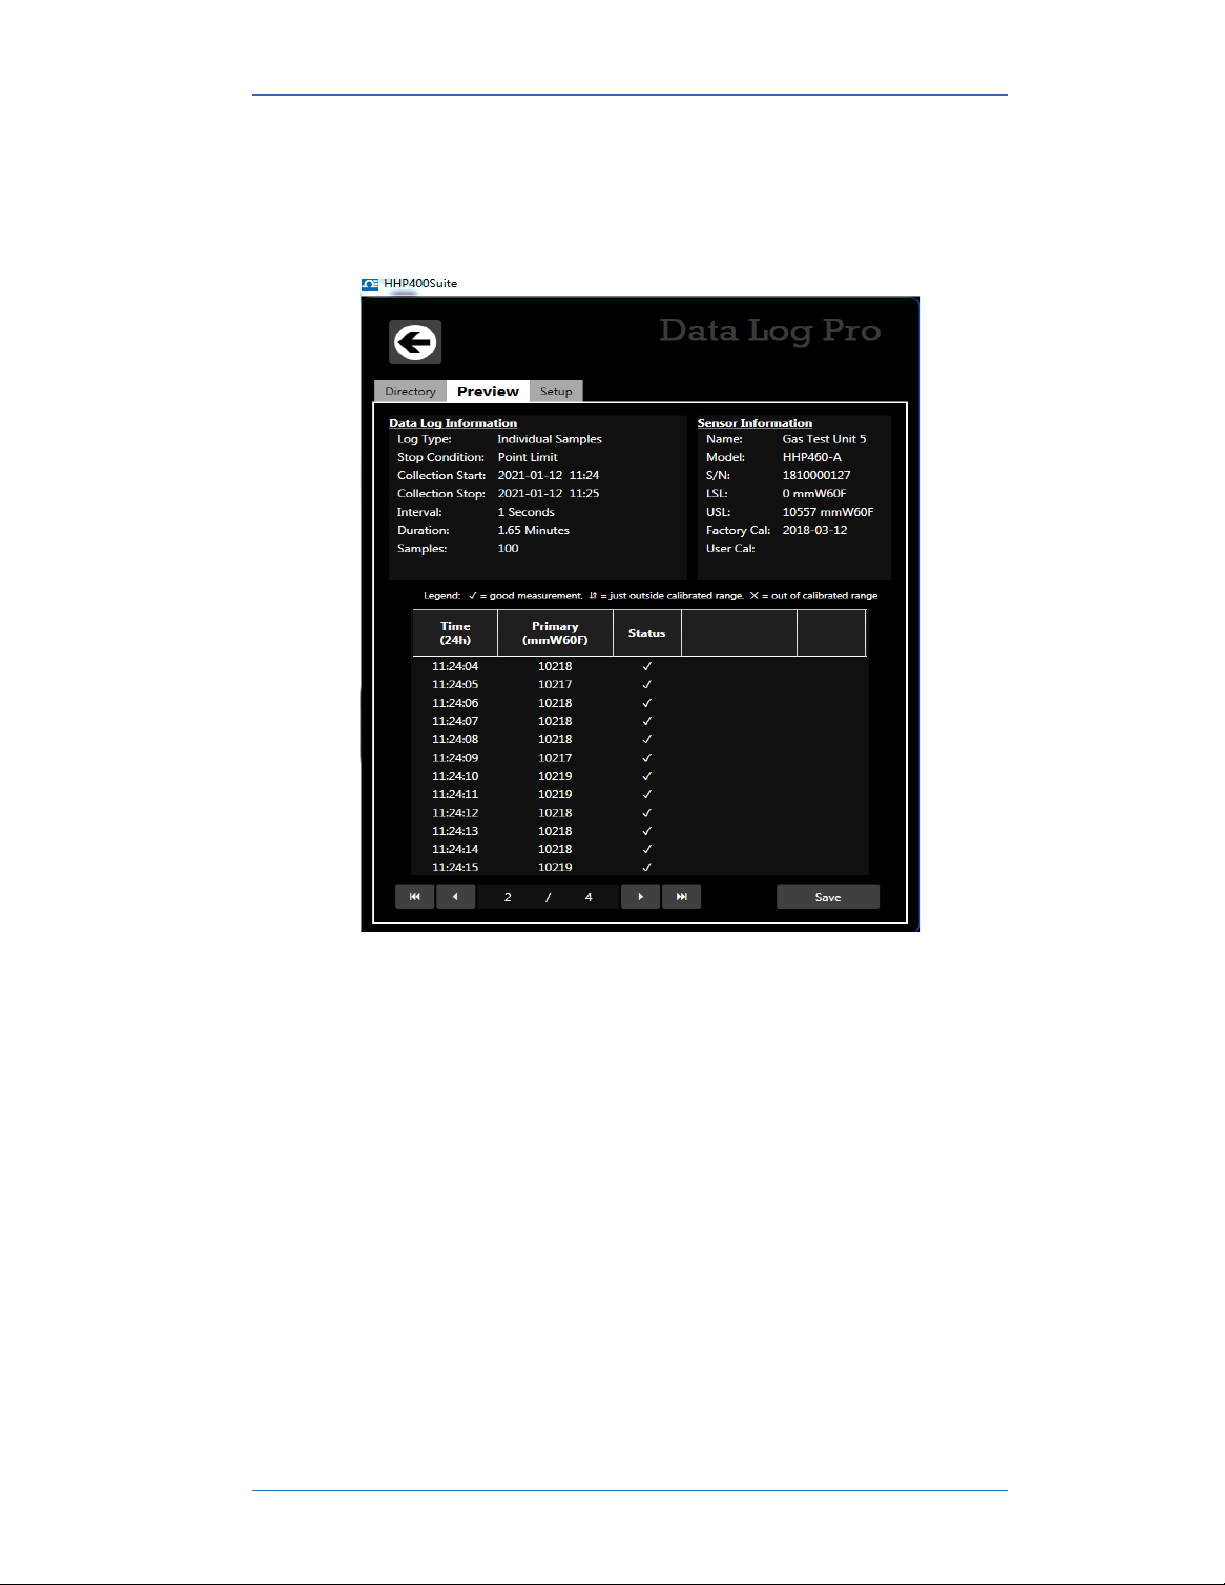
Overview of the Preview tab
When you double click a log in the Directory tab, the Preview tab
opens.
The Preview tab contains seven areas of information:
1. Data Log Information list.
2. Sensor Information list.
3. Notes.
4. Legend.
5. Samples table.
6. Navigation bar.
7. Save button.
User Manual HHP400 Suite 21 of 28
Page 22

M20007 REL-0000 (2103)
Details about the Preview tab
1. Data Log Information list
A description of items in this list:
1. Log type indicates the type that was selected in the Setup tab
when the log was created.
2. Stop condition indicates why the log stopped.
List of stop conditions: Manual Stop, Data Complete, Time
Limit, Point Limit, Storage Limit, Low Power, Sensor Removed,
PC Connection, or Sensor Error
3. Collection Start indicates the day and time the log began.
4. Collection Stop indicates the day and time the log ended.
5. Interval is how often data is saved but it does not display with
the On Demand option.
6. Duration displays how long the log actually recorded data.
This may or may not be the Duration you selected in the Setup
tab. Check the Stop condition.
7. Samples indicate the number of readings in the log. They
reflect how many data points were saved.
2. Sensor Information list
▪ All information in this list was retrieved from the internal
sensor (and from an MTS if one was attached) that was
attached at the time the device recorded this particular log.
3. Notes
▪ The information that displays here comes from the text you
enter in the Notes box in Data Log Pro Setup tab.
User Manual HHP400 Suite 22 of 28
Page 23

M20007 REL-0000 (2103)
4. Legend for the status columns
The samples table has two columns for Status. The legend
provides three symbols to indicate the level of confidence for
pressure and temperature measurements.
Note: Temperature is included only if you selected Record temperature in the Setup tab.
1. The ✓ symbol corresponds to readings that are within the
calibrated range.
2. The ⇵ and ⨯ symbols indicate an abnormal condition.
3. The ⇵ symbol indicates readable data but it is out of range.
4. The ⨯ symbol indicates dashes on the device and no readable
data.
6. Navigation bar
▪ The bar provides you with buttons to jump to the first log or to
▪ The bar also provides you with buttons to navigate to the
▪ The numbers in the bar indicate which log out of the total
7. Save button
Click the Save button on the right side and the Save As box
appears. You can save the file in a PDF and TSV file format.
the last log.
previous log or next log.
number of logs on the device that you are currently viewing.
User Manual HHP400 Suite 23 of 28
Page 24

M20007 REL-0000 (2103)
Setup tab
Overview of the Setup tab
▪ The Setup tab lists parameters you may change. It gives you
usage statistics and it displays three action buttons.
▪ A yellow dot appears on this tab to remind you that you
changed a setting and have not saved it.
Parameter Choices
Four data logging types
1. Individual Samples refers to actual measurements taken at
fixed intervals.
2. Average only refers to average measurements over the
intervals you selected. It takes measurements every 200 ms.
3. Average with peaks refers to average measurements over
the intervals you selected. It also saves the maximum and
minimum measured values during the interval you saved. It
takes measurements every 200 ms.
4. On Demand refers to manually recording actual
measurements rather than at fixed intervals.
Interval types
You select Seconds, Minutes, or Hours from a drop-down menu
and enter a number.
Duration types
▪ You can select: Minutes, Hours, Days, Forever, or Points and
▪ Selecting Forever, makes the number box disappear.
Note: Forever is limited by the remaining number of points on the
device. Look for these numbers on the Setup tab in Data Log Pro.
Notes edit box
Notes you enter in this edit box appear in the Preview tab, the TSV
file, and the PDF file. This field can hold up to 64 characters.
enter a number.
User Manual HHP400 Suite 24 of 28
Page 25

M20007 REL-0000 (2103)
NOTICE
Usage statistics
Usage presents the amount of memory available on the device for
data logging in two ways:
1. The number of data points used out of a maximum of 100 000.
2. The number of logs used out of a maximum of 128.
Read
After pressing this button, Data Log Pro reads the parameters
from the device and displays them in the Setup tab.
Save your configuration changes before you click the Read button.
After you click this button, all changes on-screen are replaced
with the configuration that is on the device.
Note: If the device has a password, then clicking this button re-
quires you to enter a password. This password was created in the
Configuration tab for device.
Write
This button remains unavailable until you make a change in the
Setup tab. It saves the new setup parameters to the device. It
overwrites whatever was on the device.
Note: If the device has a password, then clicking this button re-
quires you to enter a password. This password was created in the
Configuration tab for device.
User Manual HHP400 Suite 25 of 28
Page 26
M20007 REL-0000 (2103)
Application button
Overview
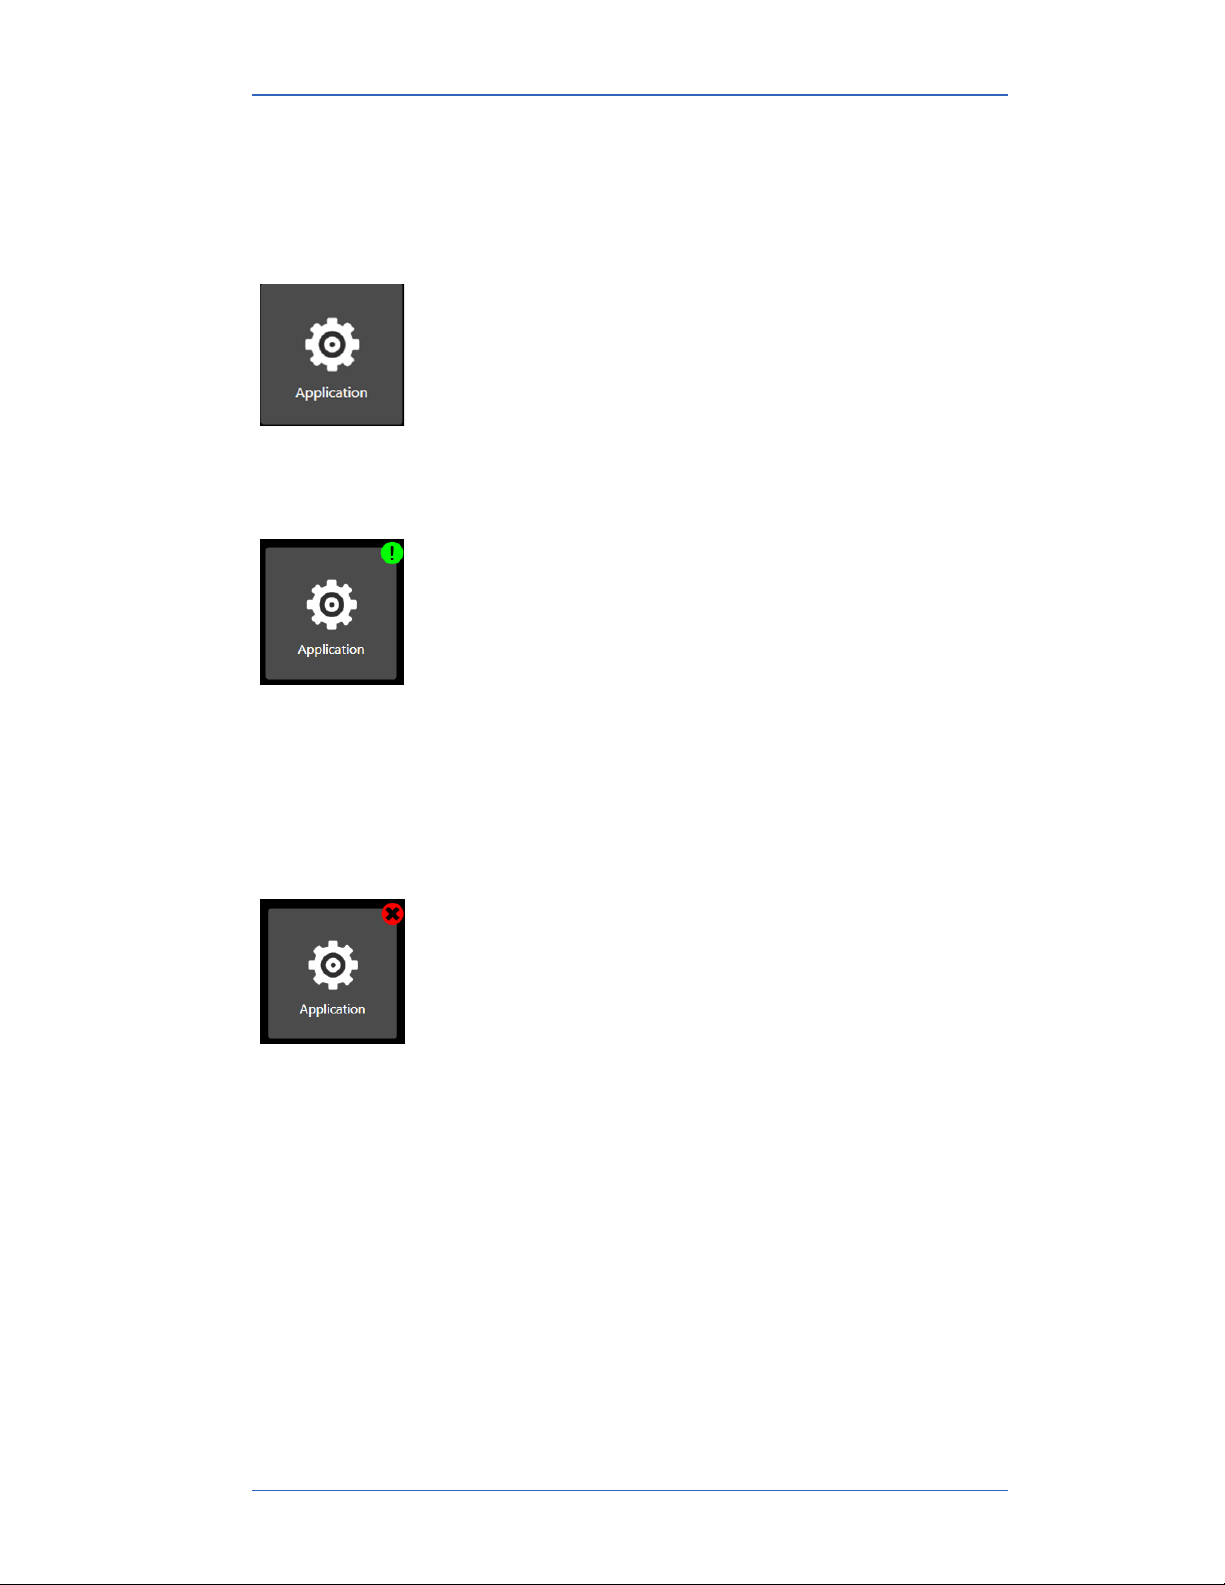
The Application button displays a window with three
sections:
• About.
• Available Update.
• Language Selection.
Application notifies you of available updates
It displays a green alert icon with an exclamation mark to
indicate an Available Update. After clicking this button, it
displays the following message:
“PLEASE BE ADVISED! If you choose to install the
update at this time, you will lose unsaved configuration
information or data log setup changes. Be sure to save
that information to a file or Write it to the connected
device.”
Application notifies you of no internet connection
It displays a red alert icon with an “x” to indicate”
“There is no connection to the update server. This is
usually caused by the PC not having internet connectivity
or the server may be temporarily unavailable.”
User Manual HHP400 Suite 26 of 28
Page 27
M20007 REL-0000 (2103)
Update button
Overview
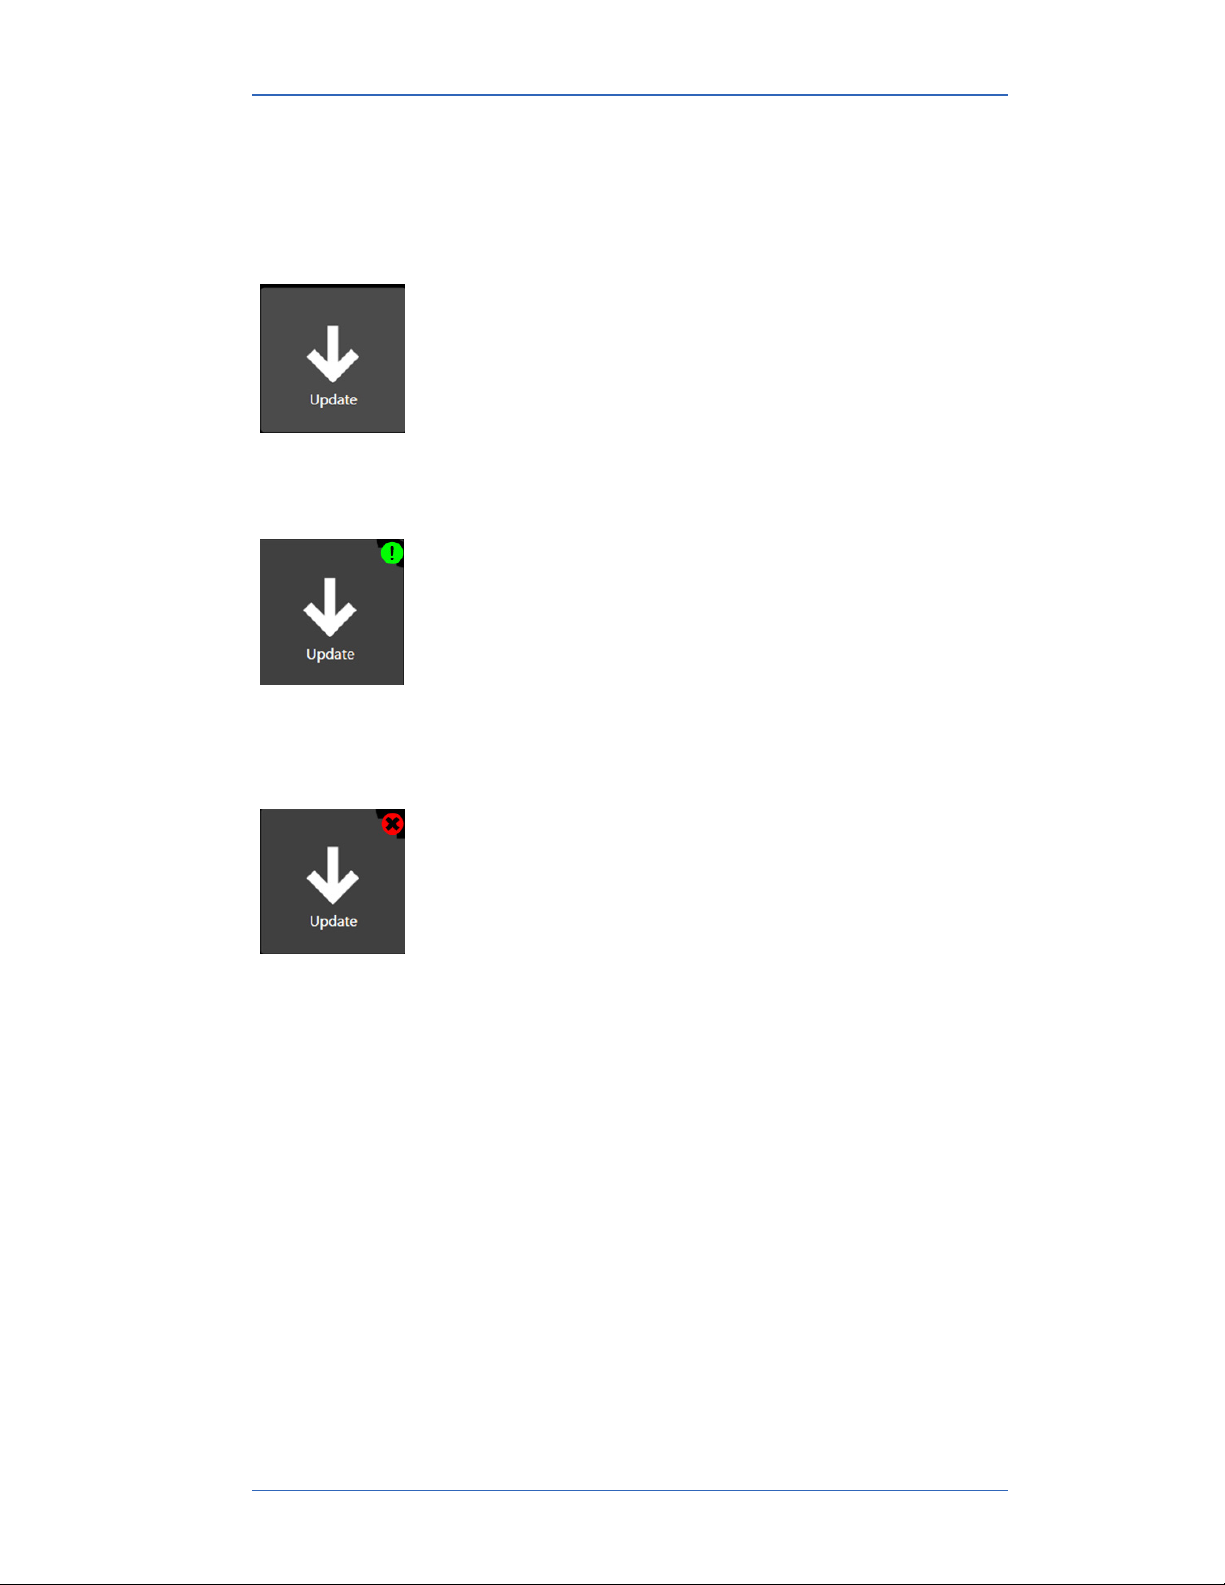
The Update button displays a window with multiple
sections:
• The first section alerts you to updates for the device.
• The second section alerts you to updates for each
sensor that you attach to the device.
Update notifies you of available updates
It displays a green alert icon to indicate an update is
available for the firmware in the device or the sensor.
Update notifies you of no internet connection
It displays a red alert icon to indicate:
“There is no connection to the update server. This is
usually caused by the PC not having internet connectivity
or the server may be temporarily unavailable.”
User Manual HHP400 Suite 27 of 28
Page 28

M20007 REL-0000 (2103)
Help
Register your product
We want you to get the most out of your purchase, and that starts
with a few, easy registration steps.
1. Go to www.Omega.com
2. In the Product Registration section, click Register a product.
Find downloads and documents
1. Go to www.Omega.com.
2. In the Technical Resources section, click Learn More.
3. Select one of these categories to find the files you need:
▫ Product manuals | User Manuals and Quick Start Guides
▫ Downloads | Applications (software), firmware, updates,
installation instructions
▫ Certifications | Certifications and approvals
▫ SDS (MSDS) | Safety Data Sheets
▫ Control Drawings | Intrinsically Safe Drawings
User Manual HHP400 Suite 28 of 28
 Loading...