

Page 1
HHC230
Light Meter
INSTRUCTION
SHEET
LIGHT METER
M5512/0418
Shop online at omega.com e-mail: [email protected]
For latest product manuals: omegamanual.info
HHC230
INTRODUCTION
The pocket size meter is used to measurement of
light intensity with user selectable units of lux and
fc.
SAFETY INFORMATION
It is recommended that you read the safety and
operation instructions before using the absolute
pressure meter.
1. Only operate the measuring instrument properly,
for its intended purpose and within the parame-
ters specified. Do not use force.
2. Never store the product together with solvents,
acids or other aggressive substances.
3. Don’t keep in place with high Temp, or high
humidity.
4. When not use for long time remove battery.
SPECIFICATIONS
Range: 0 to 200000 lux, 0 to 18580 fc
Units: lux, fc
Resolution:
1 lux (0 to 19999), 10 lux (20000 to 200000)
1 fc (0 to 18580
Spectral resp
The CIE photopic curve is an international
standard for the color response of the average
Spectral angle: ƒ′1 < 8%
Acceptance angle:
ƒ′2 <2% cosine corrected (150°)
Total accuracy for CIE standard illuminant A
(2856K): ±(3%rdg + 10dgts)
CIE standard illuminant A can be realized by
means of CIE standard source A, which is defined as: A gas-filled tungsten-filament lamp
operating at a correlated color temperature of
2856K.
Accuracy:
Stated accuracy at 23°C±5°C, <70% R.H.
Temperature Coefficient: 0.1 times the applicable
accuracy specification per °C out of 23°C±5°C.
Measurement rate: 1 times/second.
Operating environment: 0°C to 50°C at <70%
R.H.
Storage temperature: -20°C to 50°C, 0 to 80%
R.H. with battery removed from meter.
Battery: 1.5V (AAA size) x 2pcs.
Battery Life: 180 hours typical.
Low battery indication: The “
when the battery voltage drops below the operating level.
Dimensions:
24.7mm (T) x 50.9mm (W) x 132.9 mm (H).
Weight: Approx. 116g including batteries.
)
onse: CIE photopic.
human eye.
” is displayed
OPERATIONS
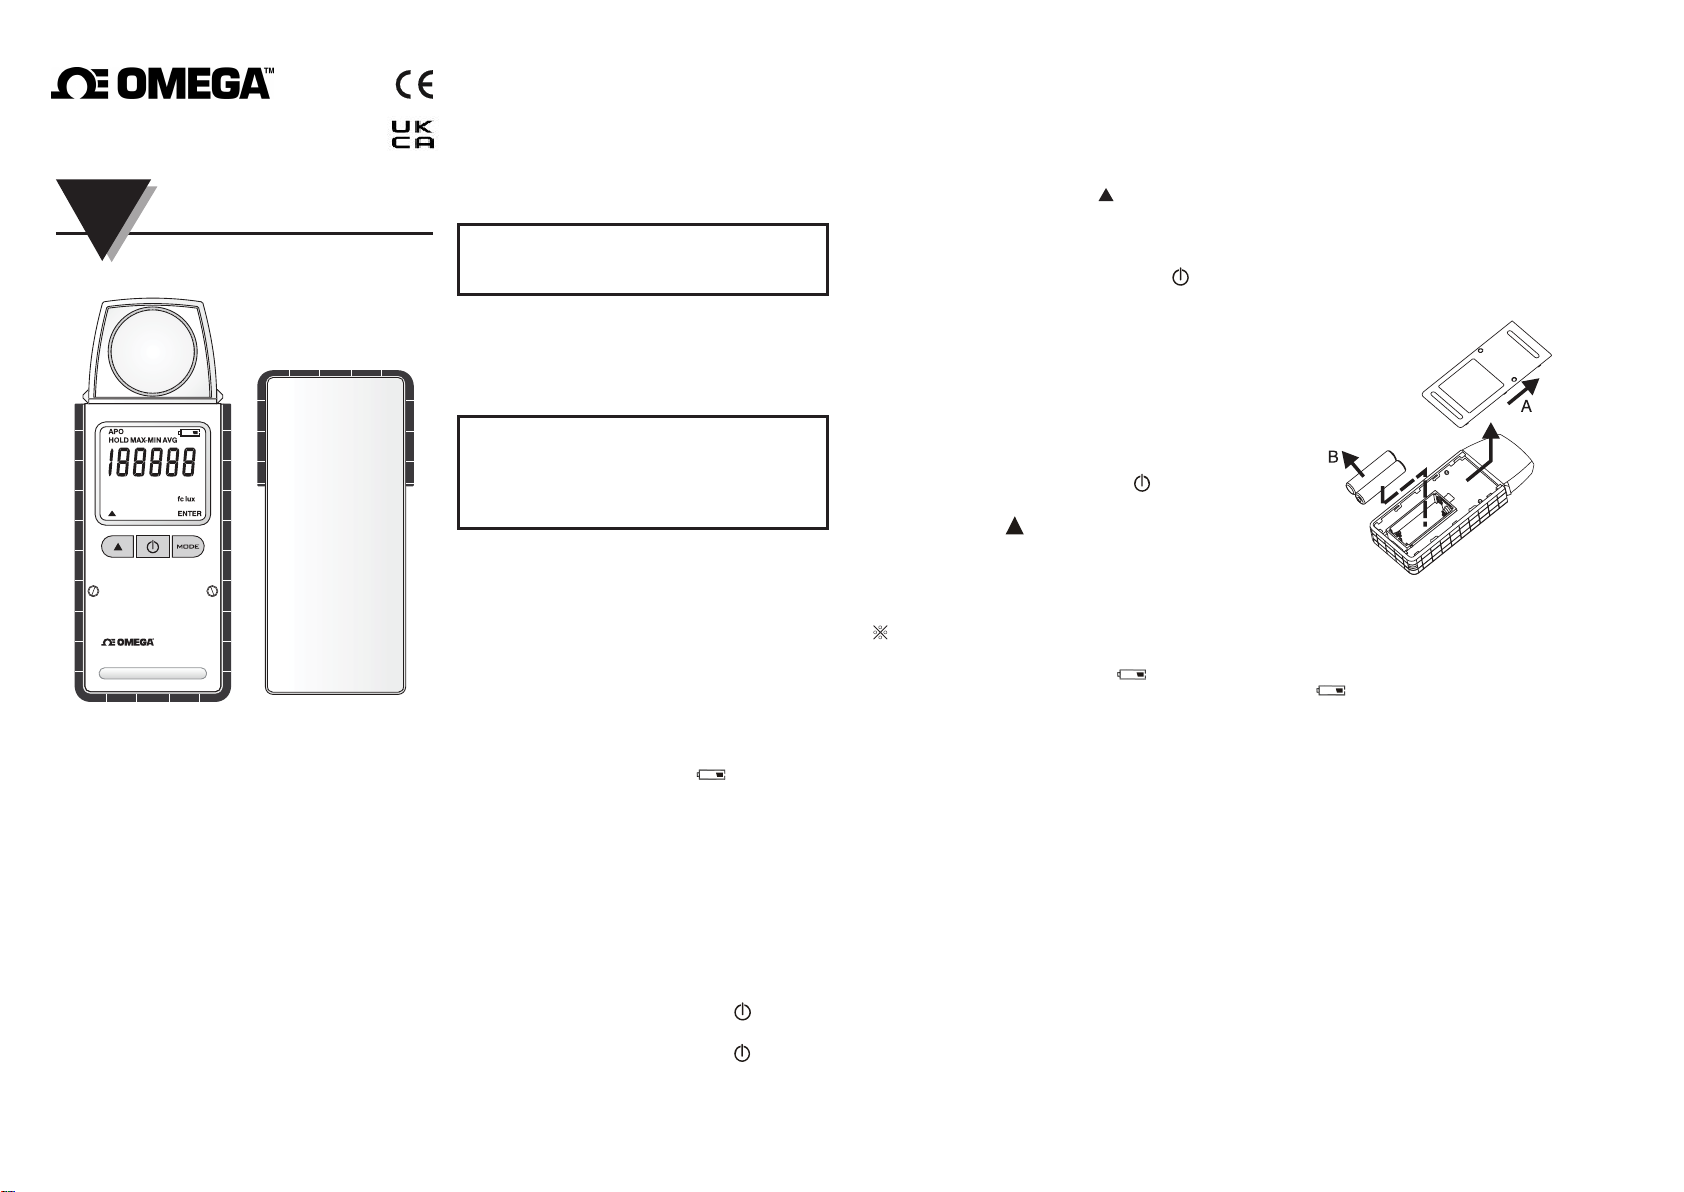
There are 3 operation modes, namely Measure-
ment Mode, Set Mode and Hold Mode.
1. Turning on and off the meter:
power
When
on the meter and enter Measurement Mode.
When power is
seconds turns the power off.
Right
LCD display lights up for one second.
is off, a short push on “ ” key turns
on, press and hold “ ” key for 2
power on, all the indicators on the
after
2. Measurement Mode:
When power is on, the meter starts measuring
and refresh every second.
Changing unit:
In measurement mode, press “
between lux and fc.
Backlight:
In measurement mode, a short push on “
turns on the backlight for dark environment, it
goes off automatically after 15 seconds if without
further operation.
3. Set Mode:
In set mode, user can turn on/off APO function.
(APO = Auto Power Off, when APO is ON, the
meter power off automatically if no operation in
10 minutes)
When power is off, press and hold “
seconds to enter Set Mode.
Short push on “
and OFF.
Push “MODE” key to save the setting, exit APO
setting mode and enter measuring mode.
To turn off power in Set Mode abandon
Note:※
the current setting and previous settings
remain unchanged. If “
appeared, the setting value can works till
power off but did not save to meter.
4. Hold Mode:
In Measurement Mode, short push “Mode” key
to enter Hold Mode with indicator “HOLD”
shows at upper left corner of LCD.
Right after entering this mode, shown in the LCD
is the last measurement and the reading will not
be updated with new measurement.
Push “Mode” key each time the display changes
in following sequence:
(1) Last Measurement: with indicator “HOLD”.
(2) Maximum value recorded: with indicator
“HOLD” + “MAX”.
(3) Minimum value recorded: with indicator
“HOLD” + “MIN”.
(4) Maximum-Minimum value recorded: with
indicator “HOLD” + “MAX-MIN”.
(5) Average of values recorded: with indicator
“HOLD”
” key switches between ON
+ “AVG”.
” key to switch
” key for 2
” indicator
” key
(6) Exit th
To clear the recorded values:
In Hold Mode and during viewing MAX, MIN,
MAX-MIN or AVG, press and hold “Mode” key
for 2 seconds, to clear the recorded data and return to measurement mode.
e Hold Mode and return to Measure-
ment Mode.
MAINTENANCE
Installing and Replacing Battery
A. Battery Cover
B. Battery
1. Power is supplied by 2pcs 1.5V (AAA SIZE).
2. The “
replacement is needed.
3. Push the Battery Cover and lift it in the direction
as shown in the figure.
4. Remove the batteries from battery compartment.
5. Replace with 2 new AAA batteries with polarity
as indicated on the bottom of Battery Compartment.
6. Replace the Battery Cover.
Cleaning
Periodically wipe the case with a damp cloth and
detergent, do not use abrasives or solvents.
” appears in the display when battery
Page 2
Direct all warranty and repair requests/inquiries to the
OMEGA Customer Service Department. BEFORE RETURNING
ANY PRODUCT(S) TO OMEGA, PURCHASER MUST OBTAIN
AN AUTHORIZED RETURN (AR) NUMBER FROM OMEGA’S
CUSTOMER SERVICE DEPARTMENT (IN ORDER TO AVOID
PROCESSING DELAYS). The assigned AR number should then
be marked on t he outside of the return package and on any
correspondence.
The purchaser is responsible for shipping charges, freight,
insurance and proper packaging to prevent breakage in transit.
FOR WARRANTY RETURNS,
please have the following
information available BEFORE
contacting OMEGA:
1. Purchase Order number
2. Model and serial number of the
3. Repair instructions and/or
OMEGA’s policy is to make running changes, not model
changes, whenever an improvement is possible. This affords our
customers the latest in technology and engineering.
OMEGA is a trademark of OMEGA ENGINEERING, INC.
© Copyright 2018 OMEGA ENGINEERING, INC. All rights
reserved. This document may not be copied, photocopied,
reproduced, translated, or reduced to any electronic medium or
RETURN REQUESTS / INQUIRIES
under which the product was
PURCHASED,
product under warranty, and
specific problems relative to
the product.
FOR NON-WARRANTY
REPAIRS,
consult OMEGA for
current repair charges. Have the
following information available
BEFORE contacting OMEGA:
1. Purchase Order number to
cover the COST of the repair,
2. Model and serial number of
the product, and
3. Repair instructions and/or
specific problems relative to
the product.
The information contained in this document is believed to be
correct, but OMEGA accepts no liability for any errors it contains,
and reserves the right to alter specifications without notice.
 Loading...