Omega FLR1600, FLR-1600A, FLV-4600A User guide

Page 1
User’s Guide
Shop online at
omega.com
For latest product manuals:
www.omegamanual.info
FLR-1600A and FLV-4600A Series
Water Flow Meters and Controllers
Page 2

Servicing North America:
U.S.A.: Omega Engineering, Inc., One Omega Drive, P.O. Box 4047
Stamford, CT 06907-0047 USA
Toll-Free: 1-800-826-6342 (USA & Canada only) Customer Service: 1-800-622-2378 (USA & Canada only) Engineering Service: 1-800-872-9436 (USA & Canada only) Tel: (203) 359-1660 Fax: (203) 359-7700 e-mail: [email protected]
For Other Locations Visit omega.com/worldwide
Servicing North America:
U.S.A.: Omega Engineering, Inc., One Omega Drive, P.O. Box 4047
Stamford, CT 06907-0047 USA
Toll-Free: 1-800-826-6342 (USA & Canada only) Customer Service: 1-800-622-2378 (USA & Canada only) Engineering Service: 1-800-872-9436 (USA & Canada only) Tel: (203) 359-1660 Fax: (203) 359-7700 e-mail: [email protected]
For Other Locations Visit omega.com/worldwide
The information contained in this document is believed to be correct, but OMEGA accepts no liability for any errors it contains, and reserves the right to alter specifications without notice.
Page 3


► 
►  use tap water or water with any biological components, minerals
 these
    
  Damage caused by impurity build

► 
the manual for future reference.
► 

1.  
2.  
and let water pass through while bleeding (if the unit is a controller
page 10 of the 
3. Try not to get any water in-between the black electronics case and

these seams.
4. Tighten up both bleed screws, and then block the downstream

 page 18
 page 27
► 
 
► 
of standard gas 
drop is 2 psig, going all the way to 20 psig drop in certain models.     Please see pages 47 and 49 of the manual.

3
Page 4
 
  



   
 
    
4
Page 5
 
 7  8  8  9  10  11  12  12  13  14  14  14    14  14  16  17  18
Line Absolute Pressure 18 Line Temperature 18 Tare 18  19 Flashing Error Message 19
 19  20  20  20  21  21  21  21  21  21  22  22
Rotate Display 22
 23  23  24    26  27  27  28  28
PID Tuning 29
Page 6
 
 31  31  31  32  32  33  34  
Data Format 36
 37  38  39  41  43  43  44    46  47  48
Accessories 49
   
    
6
Page 7

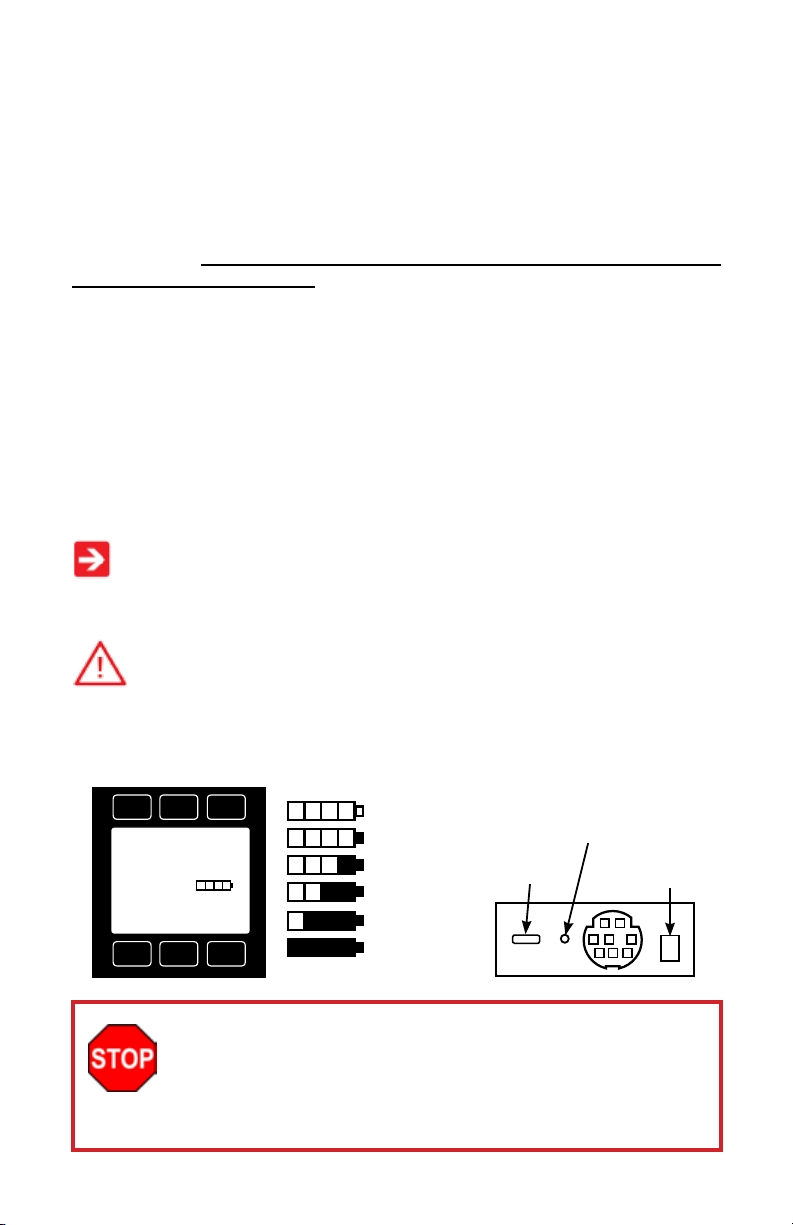
Power Jack










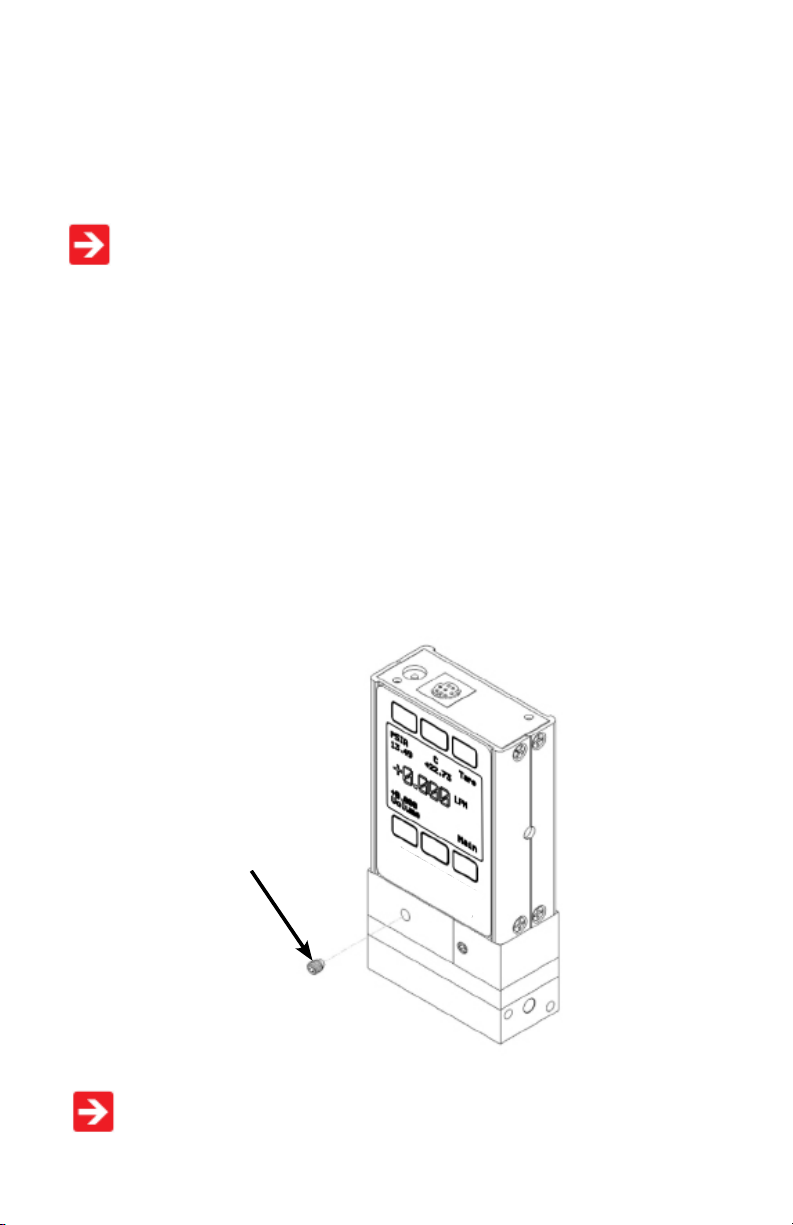
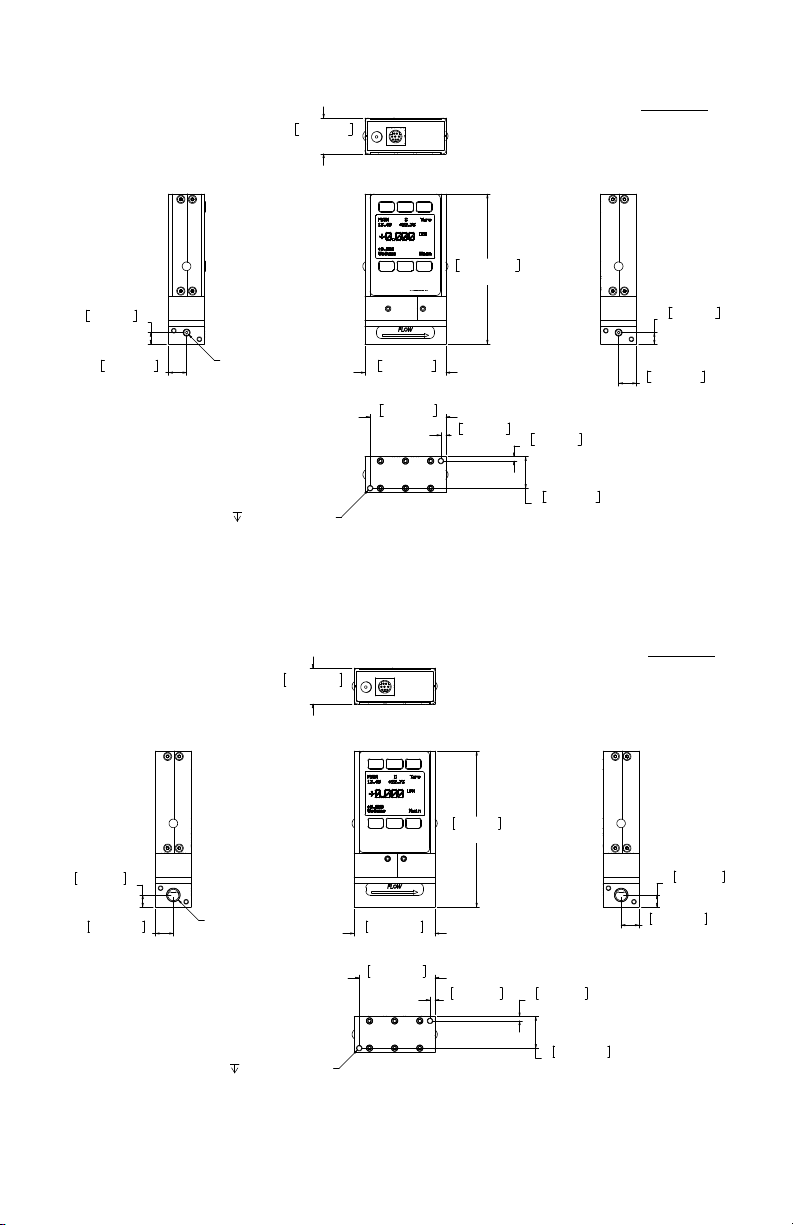
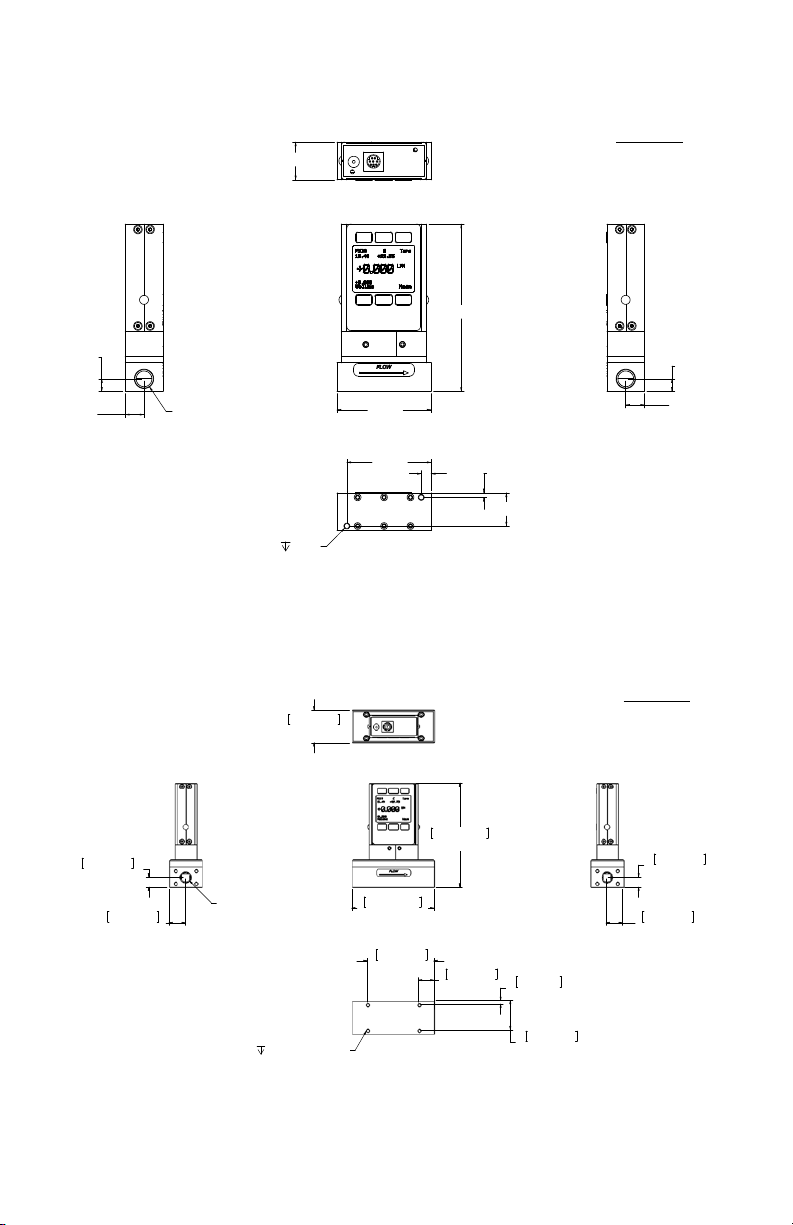
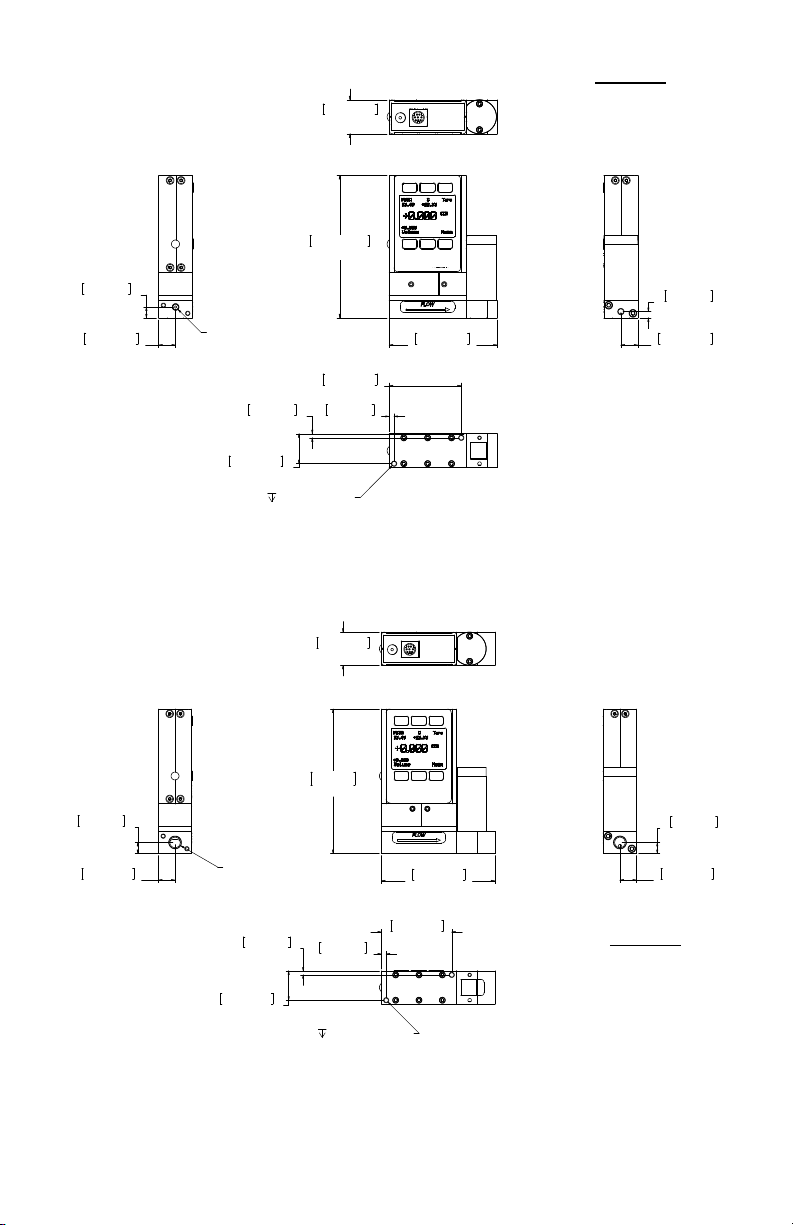
shown with the standard downstream




shown with the standard

7
Page 8

  
 


leakage when the controller is being held closed by the spring force.
  
pressure sensor ports.
  


  

  
 
 

around the port threads.
 
  
 
 
 
8
Page 9

  
   
  
     
  
9
Page 10

    
   
1.   the threads.  
2.  
3.  though you may not see or hear it.
4. 

Repeat steps 1-4 with the second bleed port.
 

  
10
Page 11

 
 
 
 
 
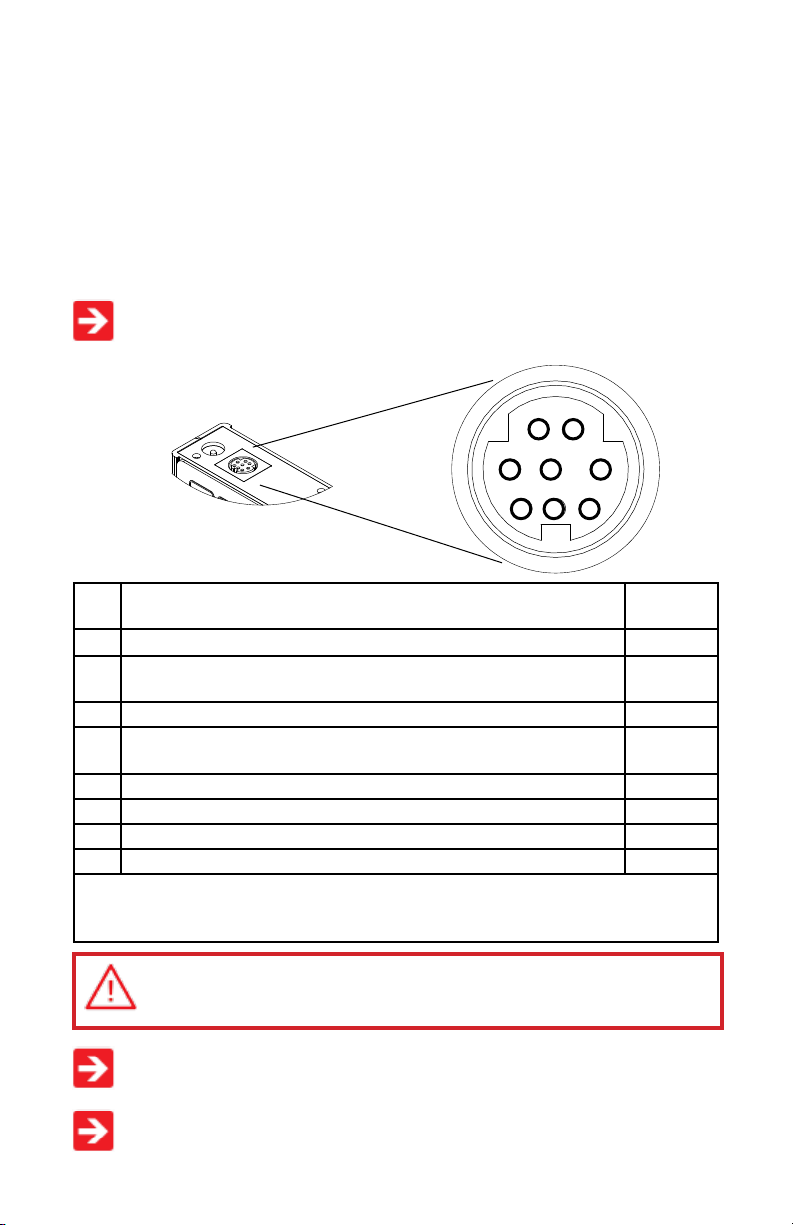
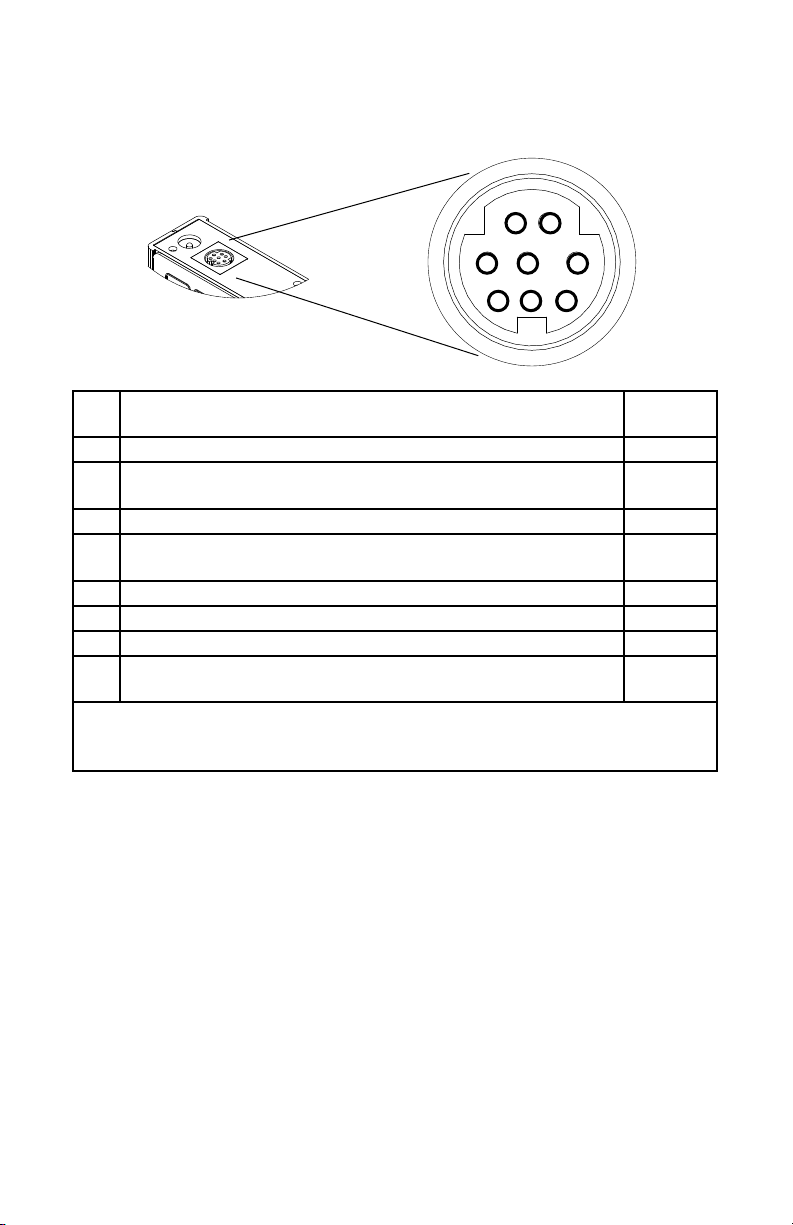
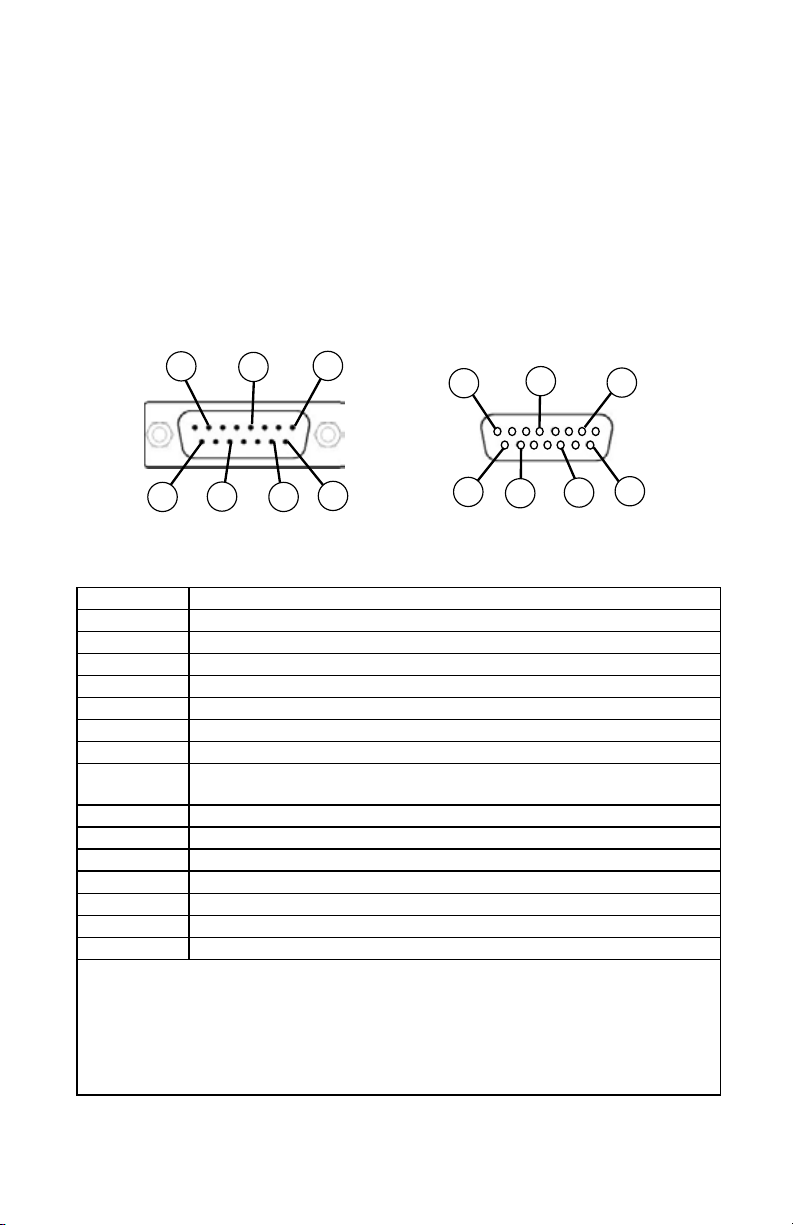
 4-20mA analo
1 2

3 4 5
6 7 8
 
1


2





3  Red

4


 
6  Green 7   8  Purple
      
 
 


11
Page 12

7
6
5
4
3
2
1
8
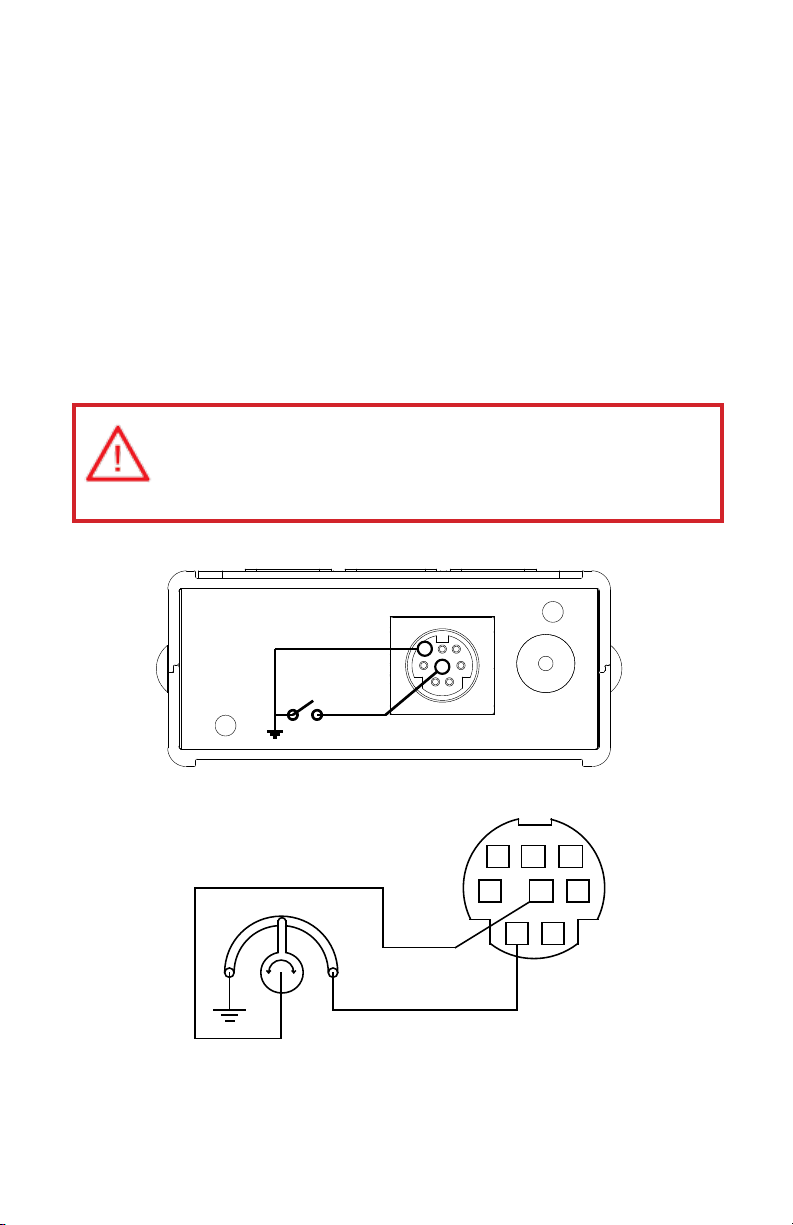
5.12 Vdc
50 KOhm
Potentiometer
0-5 Vdc

Apply analog input to Pin 4 as shown on page 11.


signal to pin 4, with common ground on pin 8.

applied to pin 4, with common ground on pin 8.

applied to pin 4, with common ground on pin 8.

ohm resistor to ground.


  
8
4


12
Page 13
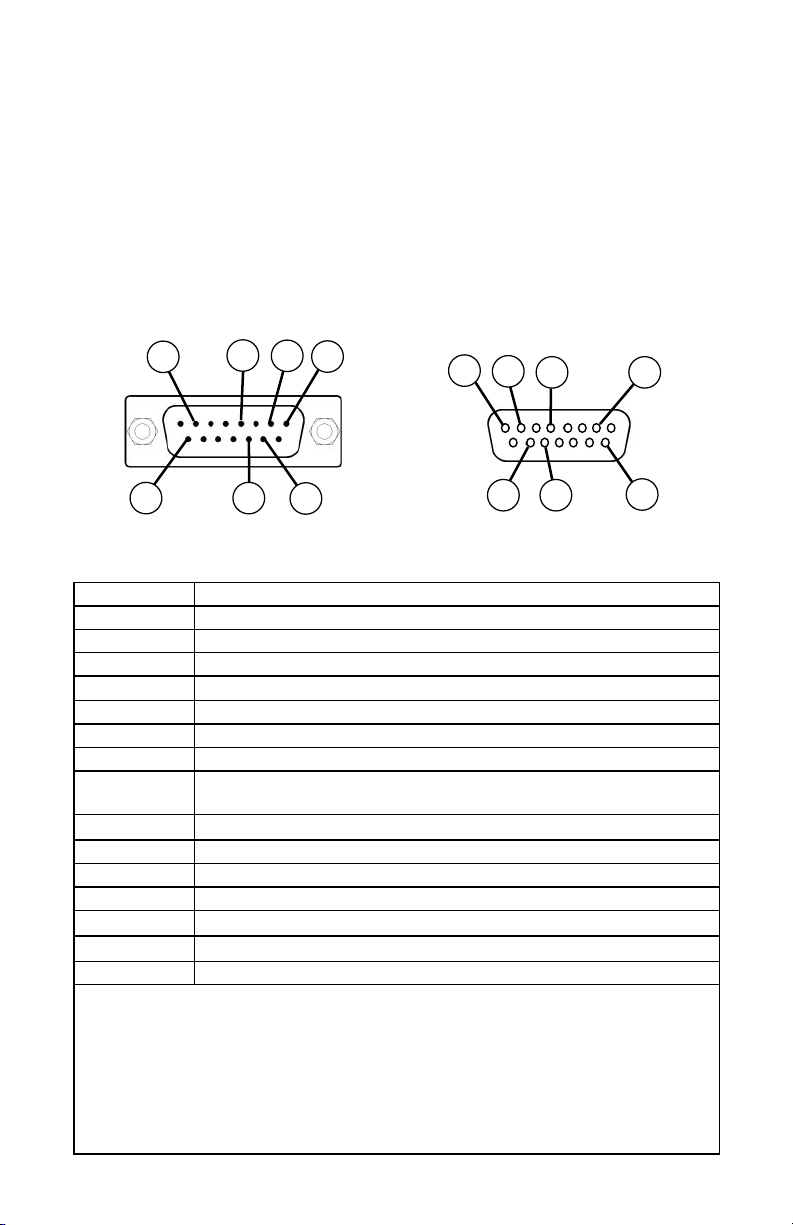

   
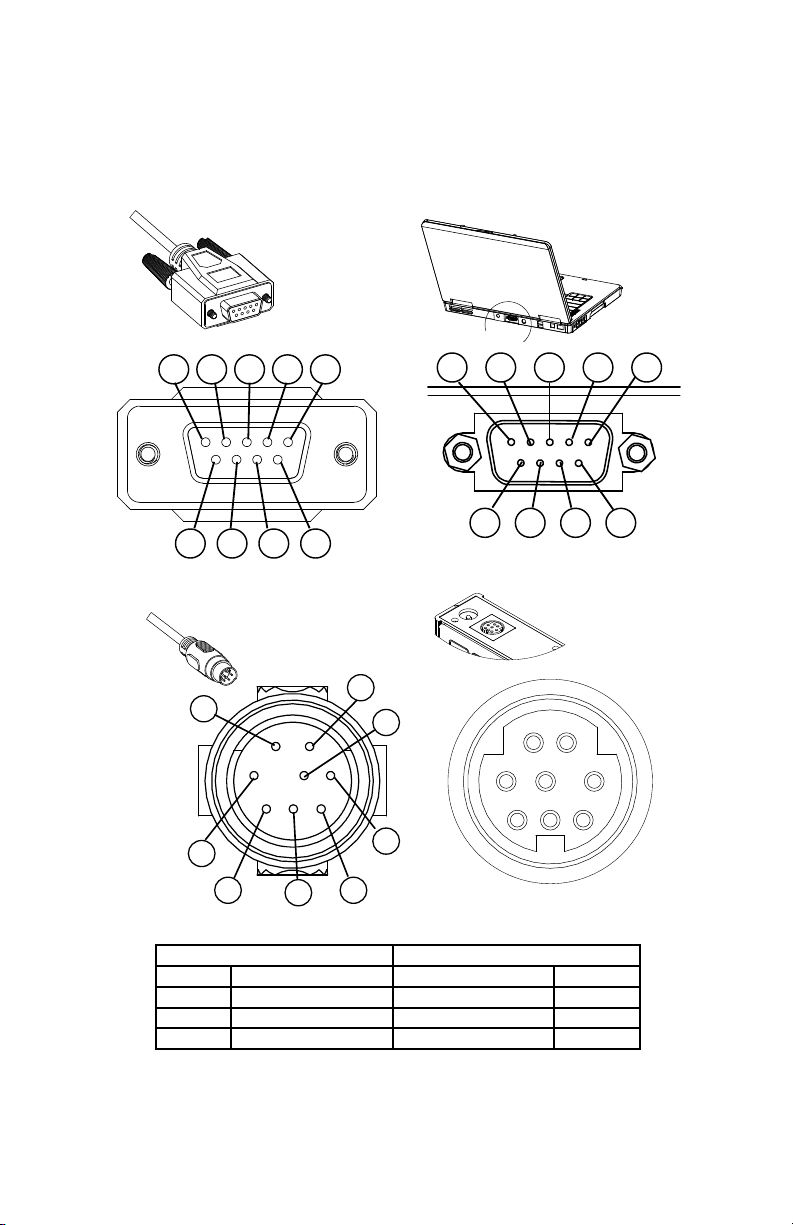
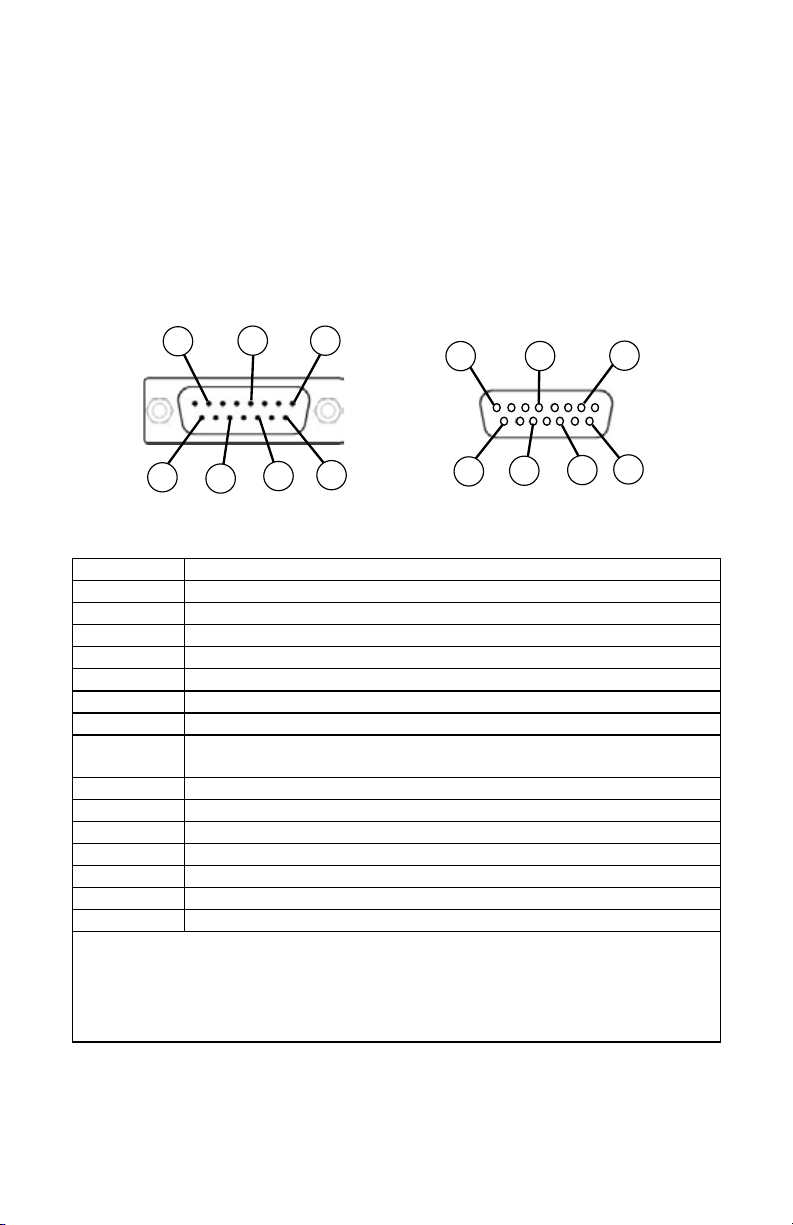
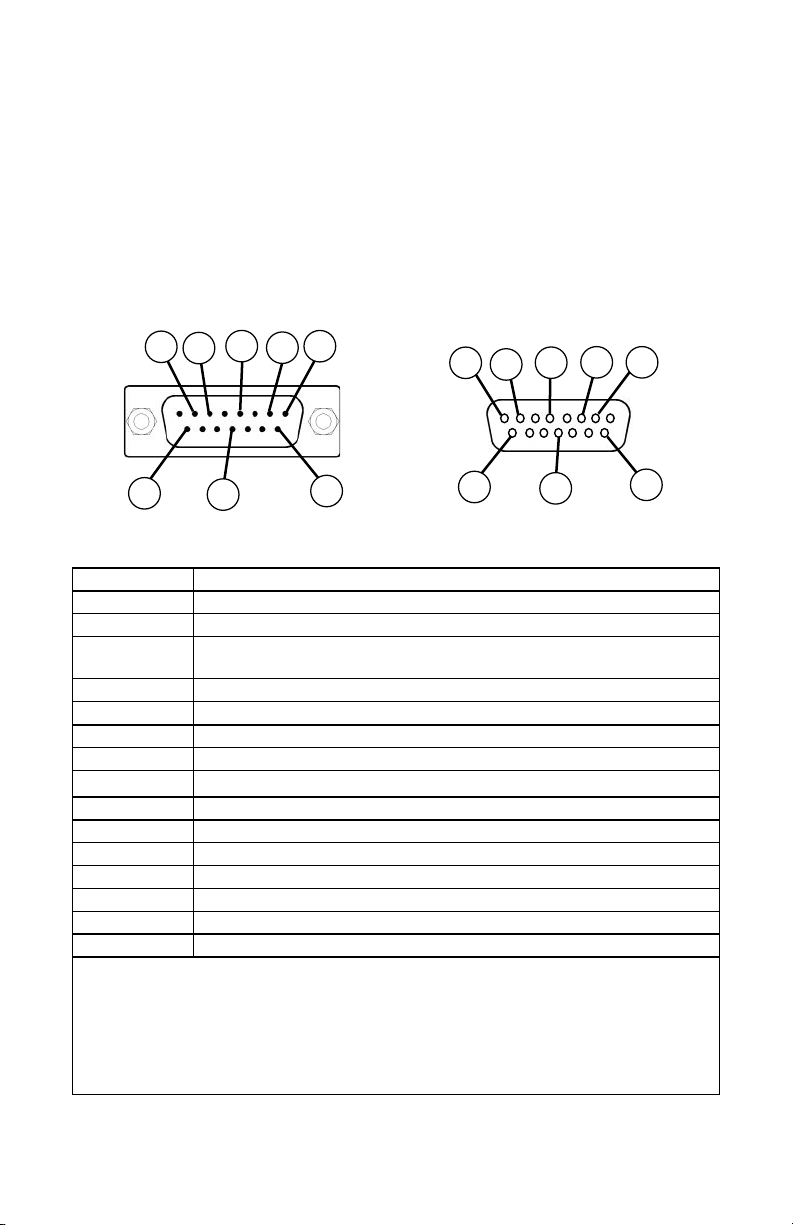
15 3 24
1 532 4
9 8 7 6
 
1
2
5
8
7
4
3
6
 
  Pin   Pin
Ground Ground 8
3 Transmit  3 2  Transmit

9876
13
Page 14


   

    

    

     

  
4-20 mA analog signal that can represent any measured parameter. With this
 
 
   
14
Page 15

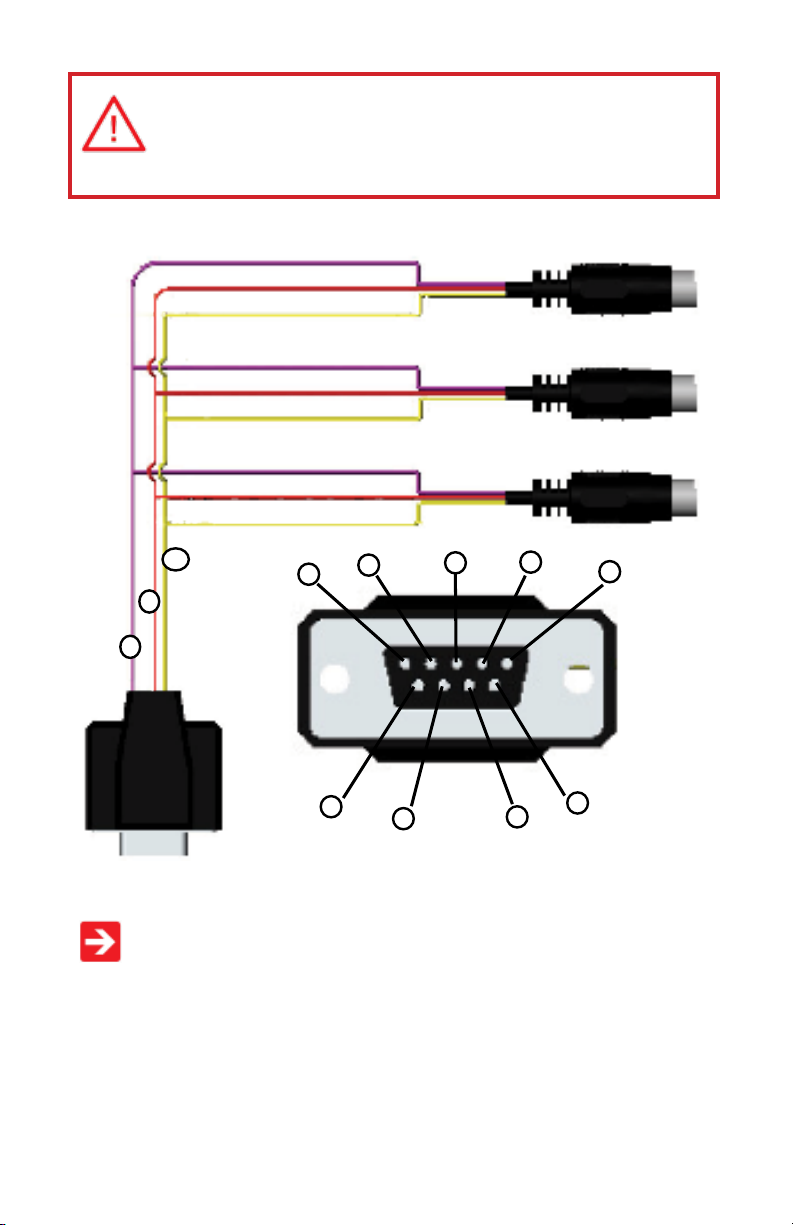
Purple (Ground)
  
Red
Yellow
Purple
Yellow
2
3
5
Red
Purple
Red
Yellow
4
5
3
2
Unit A
Unit B
Unit C
1
9
8
6
7
Female Serial Cable Front

 

Page 16

  



 
 

monochrome display.


contrast.

 

    
 

   
 



 
16


780 mA @

Page 17


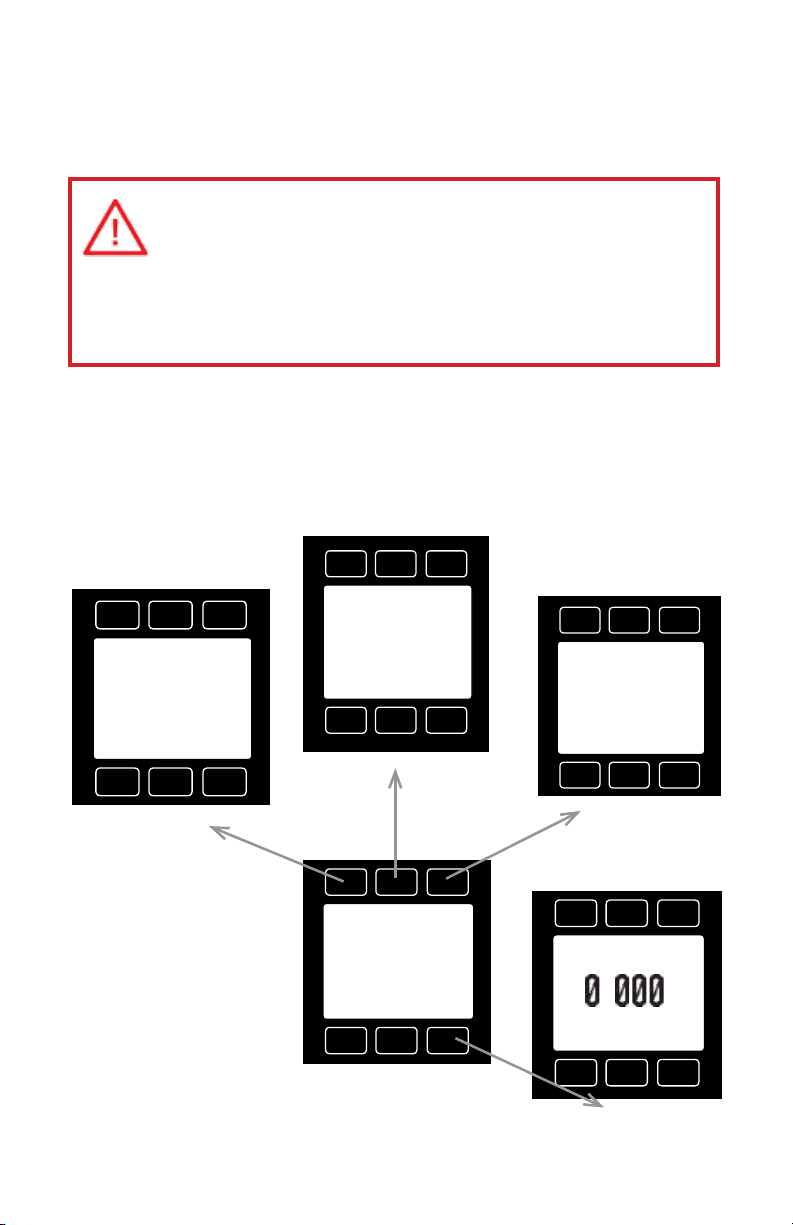
 display as soon as power is applied to the meter.

The display shows, temperature

TARE V
PSIG +13.60
+0.00
CCM MENU
#C
+21.50
CCM
+0.00
WATER
also be displayed if the meter was order
 
parameter will make that parameter the primary display unit.
 
enter the  display.

=0.0
CCM +0.0
CCM
2:05 h:m:s
MENU/
MAINU
PEAK
TOTAL/
TIMER
000.00
BACK RESET

MISC
MFG
DATA
RS232
COMM
MAIN
If your meter was ordered with the
   display. Pushing    display.
 From  you can interact

read manufacturer’s data. Push 
17
Page 18

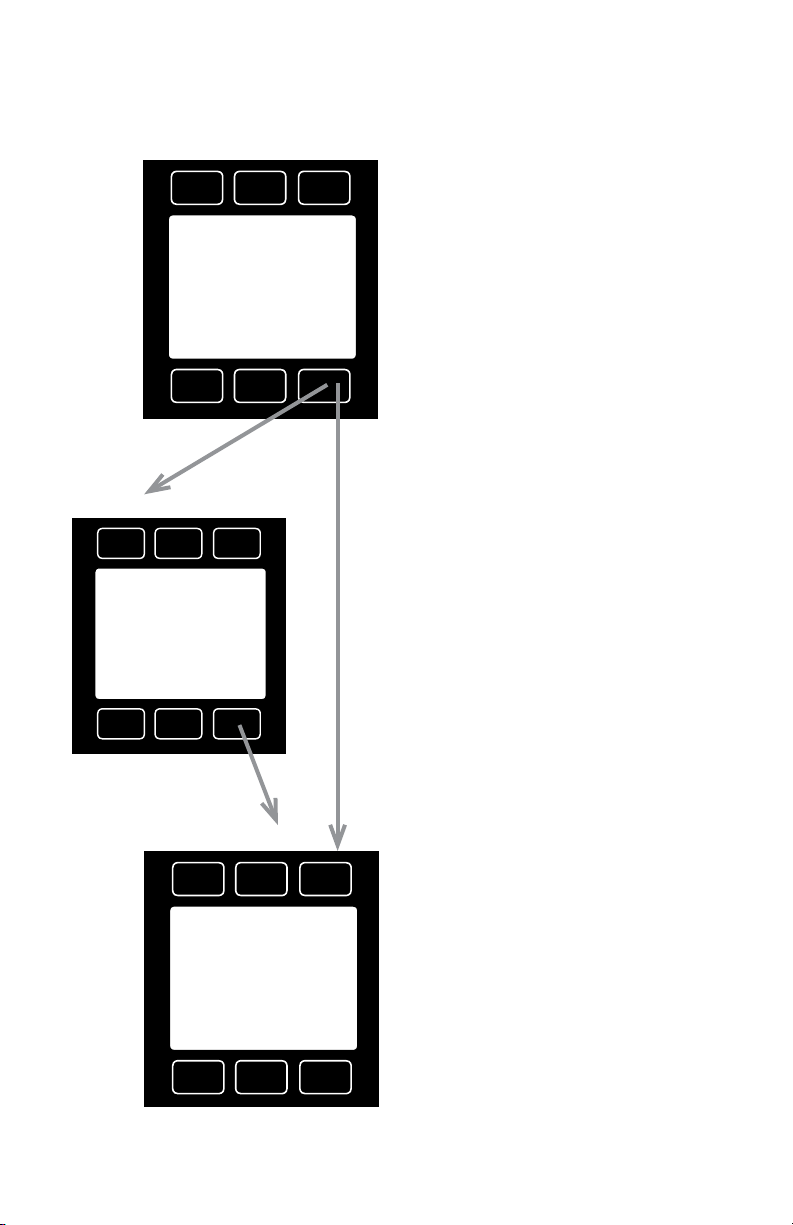
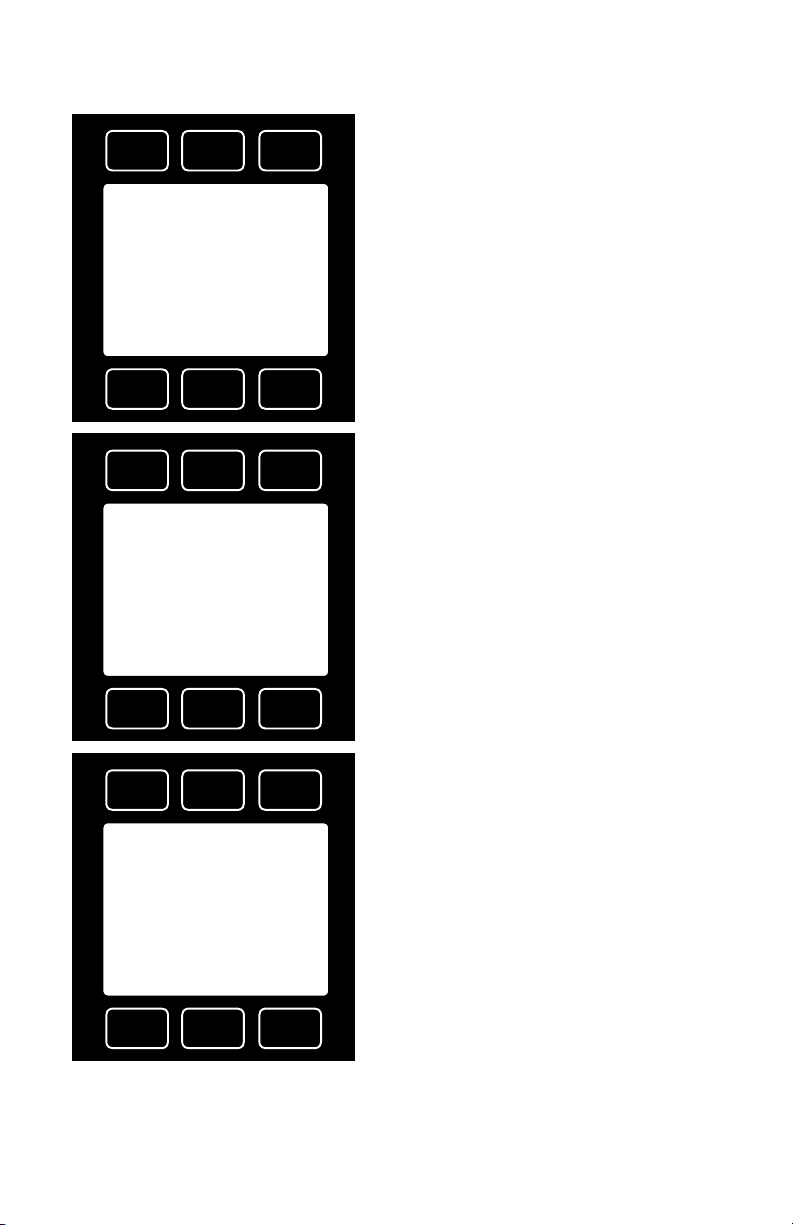
This as the primary displayed parameter.
TARE V
PSIG
+13.60
+0.000
CCM MENU
LN-UP
>#C K #F #R
CANCEL SET
 
 


    
   
#C
+21.50
+0.00
Volu Flow
LN-DN
CCM WATER
MODE
The following parameters are displayed in

 , pressing
the  pressure to the primary display.
 Pressing the  
primary display.

select 
or 
 
front of the desired scale.
 
temperature scale will be displayed on the screen.
Pushing the   
step in obtaining accurate measurements.

18
Page 19
 
the primary display.
 Pressing  switches the screen to the  display.
 An error message ( 
 
  
.


manufacturer’s data.

MODEL
INFO
MISC2
MISC1
BACK MAIN
UNIT ID
BAUD
A
19200
DEVICE/
BACK
UNITS

MAIN

RS232
MFG
MISC
DATA
COMM
MAIN

BACK MAIN

PSIA +13.60
#C
+21.50
+
.
+0.000
CCM MAIN


19
TARE V
CCM
Page 20

UNIT ID
A
BACK MAIN
UNIT ID
C
UP
BAUD
19200
DN
C
BACK
BAUD
RESET A
DN
SET
UP
Access  by pressing
 or on the  display.

   
computer port. Press 

record the ID. Press Reset to return to the

 
  
See RS232 Communicaons (page 31) for informaon about the streaming mode.
 
same baud rate. The default baud rate for
 
in front of   to select the baud rate that
matches your computer. The choices are 38400, 19200, 9600, or 2400 baud.
 
19200
BACK SET
20
Page 21

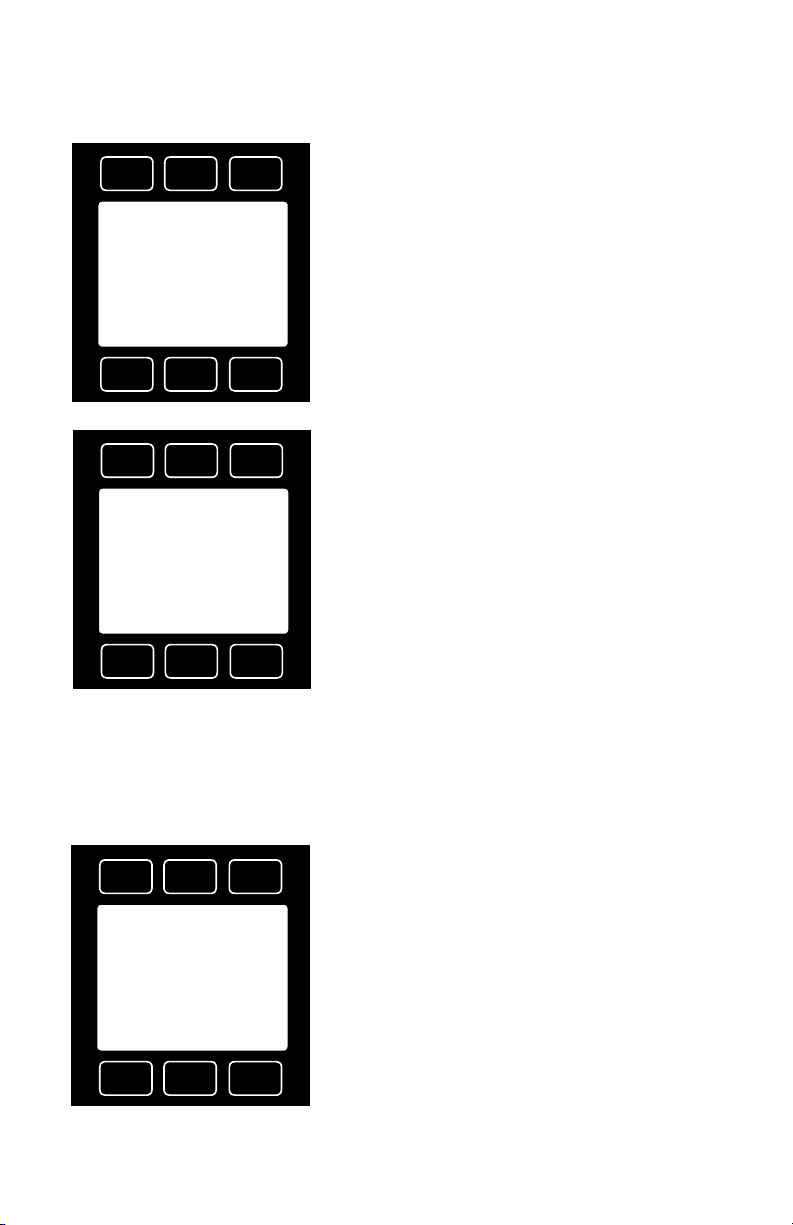
 is accessed by pressing the   or 
  refers to Display Zero Deadband.
PRESS
ZERO BAND
BACK
UP
AVG
LCD
CONTRAST
DOWN
FLOW
AVG
MAIN
SELECT
0.0
>
CANCEL
CLEAR
SET

those caused by diaphragm pumps. Press 
 
DOWN
UP
11
CANCEL
RESET
SET
    
analog or digital signal outputs.
 
Press    
may be useful to make it easier to read and interpret
  
   
Press    

display. The display contrast can be
    
21
Page 22
DIAG TEST
BACK MAIN
SCROLL R8: AP Sig 7871 R9: Temp Sig 39071 R10: DP Side 9986 R11: DP Brdg 36673 R13: AP Brdg 36673 R16: Meter Fun 199 R18: Power Up 32768
BACK MAIN
ROTATE
DISP

Press °  
  
 
  
to making any changes. It is also helpful
 
 
Pressing the  display through the register screens. An

22
Page 23

UP Volumetric Flow Pressure Temperature
DONE SELECT
DOWN
Press  to access menus of units
      
units.
DOWN
UP CCM cm3/h m3/h m3/d in3/m CFH %
CANCEL SET
PAGE
PRESSING SET WILL
AFFECT DISPLAY
AND SERIAL VALUES
VERIFY CONNECTED
SERIAL DEVICES
EXPECT THE CHANGE
CANCEL
SET
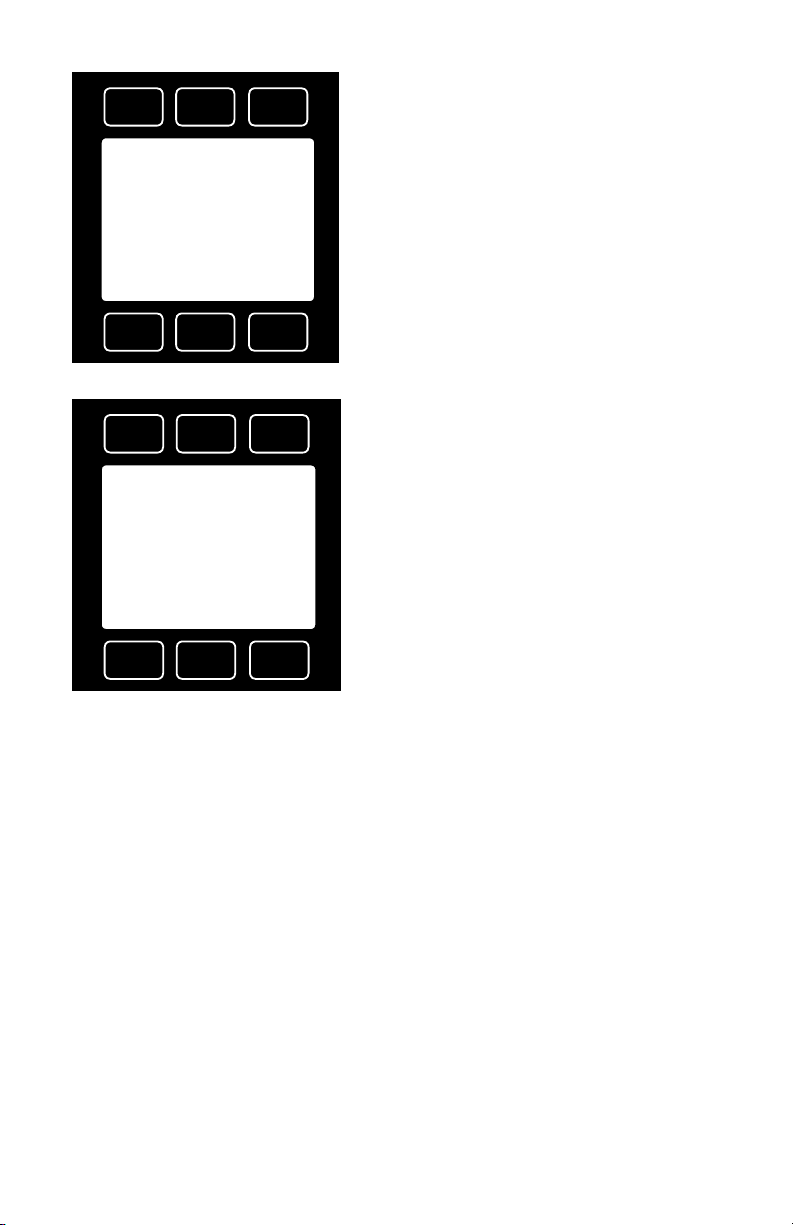

 is accessed by pressing the 
shows the name and telephone number of the manufacturer. Press 

manufacture.
 
MODEL
INFO
OMEGA
Ph 800-826-6342 Fax 203-359-7700
MODEL: FLR-1600A-10SLPM-D SERIAL NO: 80003 DATE MFG: 10/7/2014 DATE CAL: 10/9/2014 CAL BY: DL SW REV: 2V62
BACK MAIN1
BACK MAIN
23
Page 24


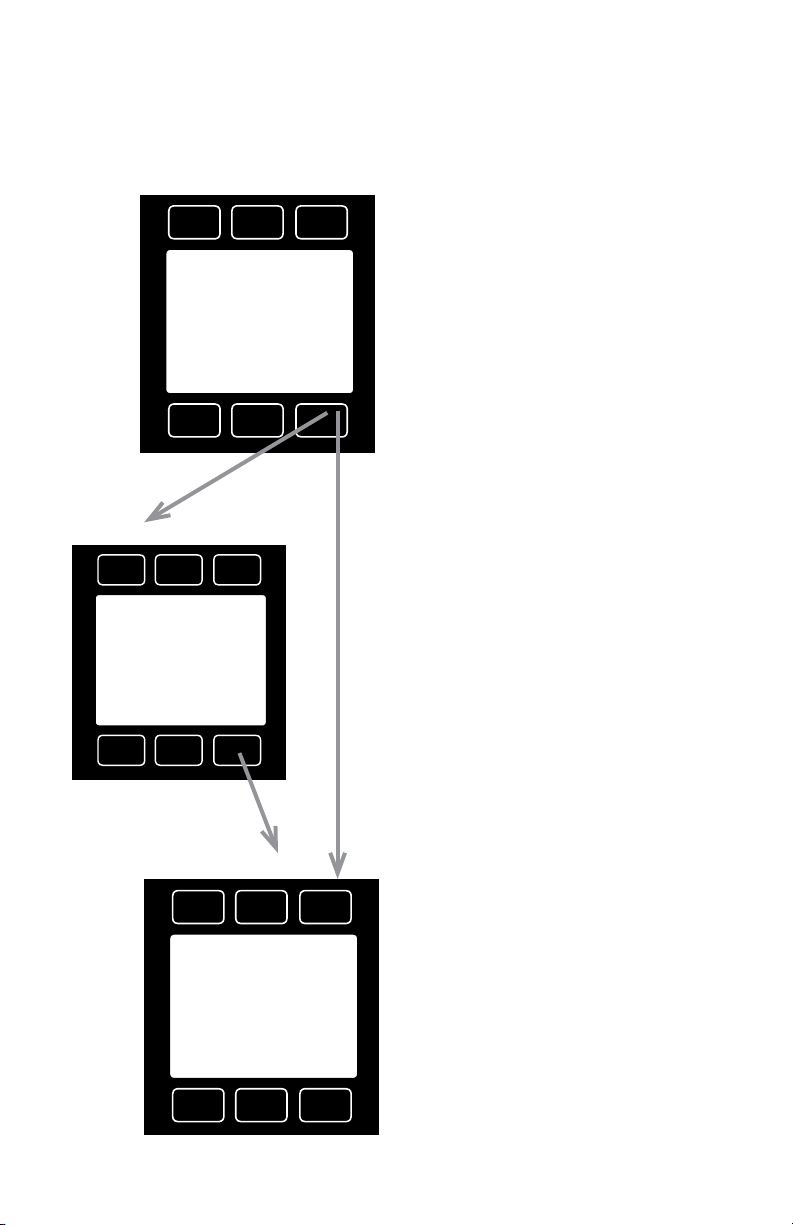
 display as soon as power is applied to the controller.
The display shows, temperature

PSIG +13.60
+21.50
+0.00
+0.00
CCM MENU

TOTAL/
TIMER
SETPT
000.00
CCM +0.0
CCM
2:05 h:m:s
SETPT
#C
0.00
CCM WATER
also be displayed if the meter was order
 
parameter will make that parameter the primary display unit.
 
enter the  display.
If your controller was ordered with the
   display. Pushing  will bring up the  display.
BACK RESET
MENU/
MAINU

MISC
CONTROL
SETUP
MFG
DATA
RS232
COMM
MAIN
 From  you can interact

read manufacturer’s data or access the control set-up display.
Push 
24
Page 25

This as the primary displayed parameter.
SETPT
PSIG
+13.60
+0.000
CCM MENU

 
rate to the primary display.  Pressing  switches the screen to the  display.
 
#C
+21.50
+0.00
VoluFlow
 An error message (    
.
0.000
CCM WATER
The following parameters are displayed in

 , pressing
the  pressure to the primary display.
 Pressing the  
primary display.  The set-point (
in the upper right of the display.

Page 26


manufacturer’s data and access the control setup screen.

MODEL
INFO
Omega
MISC1
BACK
MISC2
DEVICE
UNITS
MAIN
Ph 800-826-6342 Fax 203-359-7700
BACK MAIN

UNIT ID
A
BACK MAIN
BAUD
19200


MISC
MFG
DATA
CONTROL
SETUP
RS232
COMM
MAIN

PSIG +13.60
+0.00
+0.000
CCM MAIN

SETPT
SOURCE
-OFF­AUTO TARE
+0.00
VAR
MAIN
PID
SETPT
LOOP


Please see page 27.
Please see page 20.
Please see page 21.
Please see page 23.
#C
+21.50
SETPT
0.000
CCM WATER
26
Page 27


 

display.

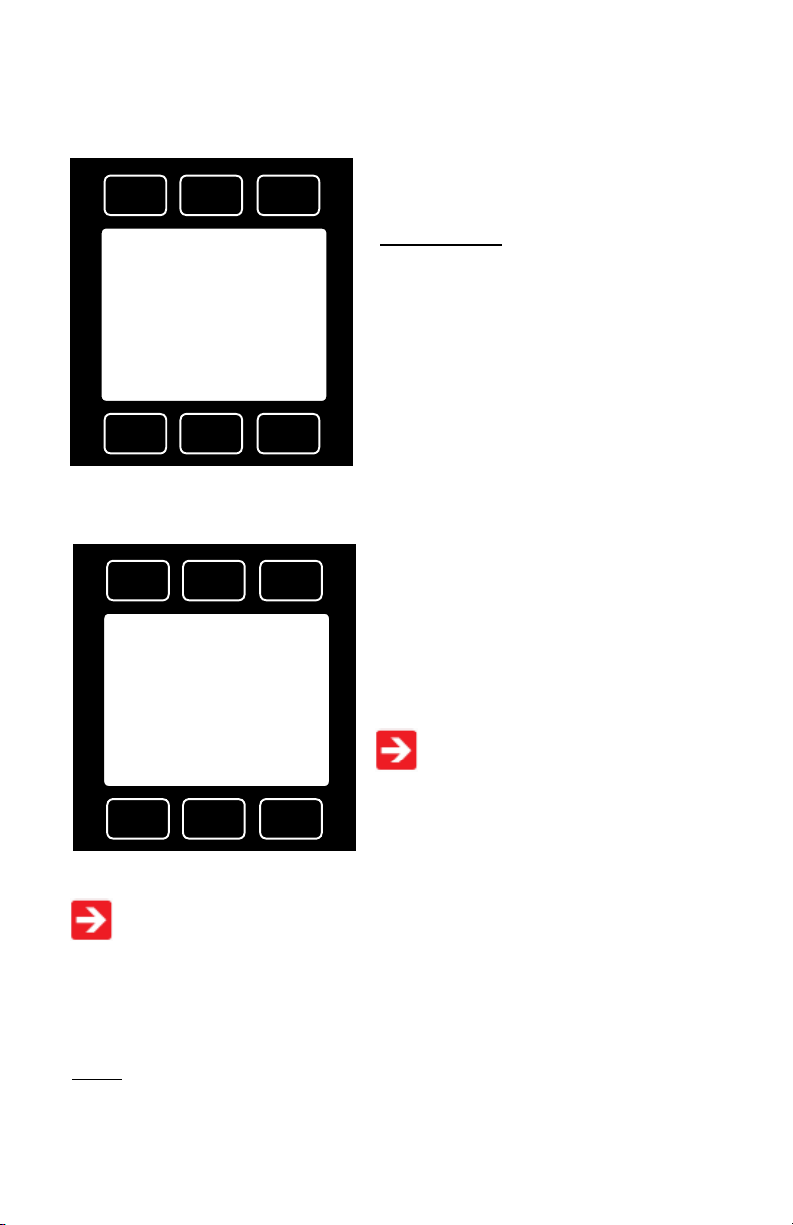
SETPT
SOURCE
- ON ­AUTO TARE
LOOP
VAR
PID
except that of the selected set-point source and it will remember which input is

LN-UP
>Serial/Front Panel Analog
CANCEL SET
LN-DN

 
If nothing is connected to Pin 4, and the controller is set for analog control, the
  If your controller has the 

refers to the . This parameter may be changed using the display only if  is selected as the Input. Press 
 
SETPT
+0.0
MAIN
MODE
  
to your controller.
  

display.
The controller will ignore any set-point
 refers to a remote
   
refers to a set-point applied directly at the controller.
  
 refers to a remote analog set-
 
27
Page 28
   

SETPT
SOURCE
-OFF-
AUTO TARE
LN-UP
> Volumetric Flow
CANCEL SET
LOOP
VAR
PID
LN-DN
SETPT
+0.0
MAIN
MODE
 
  
the controller a set-point, the controller compares that set-point to the measured
    
—refers to the

  
than two seconds.
    
 
28
Page 29

SETPT
SOURCE
- ON -
AUTO TARE
LN-UP
>PD PID PD2I PID
CANCEL SET
P
00100
BACK
LOOP
VAR
PID
LN-DN
I
00000
LOOP
TYPE
SETPT
+0.0
MAIN
MODE
D
02501
MAIN
    
a generic tuning designed to handle most
  
problem.
  
To change the PID loop parameters, push .
Press
 
  

PID loop.
refers to the Integral term of the PID loop. 
loop.
    
  
 
 
29
Page 30

 
 
  
  

ring, or oscillate.

 

  
  
control loop.
Because of these dierences, you will note the following:
    
gain is 200.
2. If the unit was originally shipped with the PD2I algorithm selected, the

primarily to the system phase lags. If you are changing from the default
 
   
30
Page 31


1.  
2. 
3. 
  
4.  or Auto Detect.
 
Feeds” box is not checked and the “Append Line Feeds to Incoming Lines” boxes are checked. Those

6. 

In the         
assignments.

The streaming data rate is controlled by register 91. The recommended default rate

If a slower or faster streaming data rate is desired, register 91 can be changed to a

      
how many parameters are selected. Fewer data parameters can be streamed
  
number of parameters streamed.
To  register 91
To  register 91        

To  to the recommended factory default streaming speed
31
Page 32

  
powered up.
     
      
  
    
 

 
The set-point column and pressure rates should change accordingly. If they do
 

 
 
   
D16000 followed by “Enter”
32
Page 33
 


followed by “Enter”.
     
    
the unit from the streaming mode.

by “Enter”.
     
    
      
the signal begins to “decelerate” as it approaches the new set-point (controls

33
Page 34

RS485 units do not have a streaming mode
  
   
 
1.   
will not stop while you are typing and you will not be able to read what you

so it must be typed correctly. If in doubt, simply hit enter and start again. If

has been typed correctly, the data will stop.
2. 
  
unit from the streaming mode.
3.  should be taken not to assign an address to a unit if more than one unit
   
34
Page 35

     
spreadsheet program as described below.
    
      
make sure the column data format is set to “General”, and click “Finish”. This
 
graphed or manipulated as desired.
 

Page 36

     

    

      
was ordered in units of ccm, the display on the meter would read 2.004 ccm
 

    

 
36
Page 37

     


   
produce.

A A A A A

enter as many as you like.

   

 

 

outlined in the manual.
 


37
Page 38

14. The “Line Delay” box is defaulted to 0 milliseconds. This is where you will
  
would enter 300000 into the box.
 
  


  
  

       
        
38
Page 39
SUPPORTED UNITS: This device supports many dierent units. You may select the desired units (see page 28). Note that only units appropriate to this device are available for selection.
Pressure Units
Absolute Gauge Dierential Notes
PaA PaG PaD pascal hPaA hPaG hPaD hectopascal kPaA kPaG kPaD kilopascal
MPaA MPaG MPaD megapascal
mbarA mbarG mbarD millibar
barA barG barD bar
g/cm2A g/cm2G g/cm2D gram force per square centimeter kg/cmA kg/cmG kg/cmD kilogram force per square centimeter
PSIA PSIG PSID pound force per square inch PSFA PSFG PSFD pound force per square foot
mTorrA mTorrG mTorrD millitorr
torrA torrG torrD torr
mmHgA mmHgG mmHgD millimeter of mercury at 0 C
inHgA inHgG inHgD inch of mercury at 0 C mmH2OA mmH2OG mmH2OD millimeter of water at 4 C (NIST conventional) mmH2OA mmH2OG mmH2OD millimeter of water at 60 C
cmH2OA cmH2OG cmH2OD centimeter of water at 4 C (NIST conventional) cmH2OA cmH2OG cmH2OD centimeter of water at 60 C
inH2OA inH2OG inH2OD inch of water at 4 C (NIST conventional) inH2OA inH2OG inH2OD inch of water at 60 C
atm atmosphere m asl meter above sea level (only in /ALT builds) ft asl foot above sea level (only in /ALT builds)
V volt; no conversions are performed to or from other units
count count count setpoint count, 0 – 64000
% % % percent of full scale
Flow Units
Volumetric Standard Normal Notes
uL/m SuL/m NuL/m microliter per minute
mL/s SmL/s NmL/s milliliter per second mL/m SmL/m NmL/m milliliter per minute mL/h Sml/h NmL/h milliliter per hour
L/s SL/s NL/s liter per second
LPM SLPM NLPM liter per minute
L/h SL/h NL/h liter per hour US GPM US gallon per minute US GPH US gallon per hour
CCS SCCS NCCS cubic centimeter per second
CCM SCCM NCCM cubic centimeter per minute
cm3/h Scm3/h Ncm3/h cubic centimeter per hour
m3/m Sm3/m Nm3/m cubic meter per minute m3/h Sm3/h Nm3/h cubic meter per hour m3/d Sm3/d Nm3/d cubic meter per day in3/m Sin3/m cubic inch per minute
CFM SCFM cubic foot per minute CFH SCFH cubic foot per hour
count count count setpoint count, 0 – 64000
% % % percent of full scale
kSCFM 1000 cubic feet per minute
39
Page 40
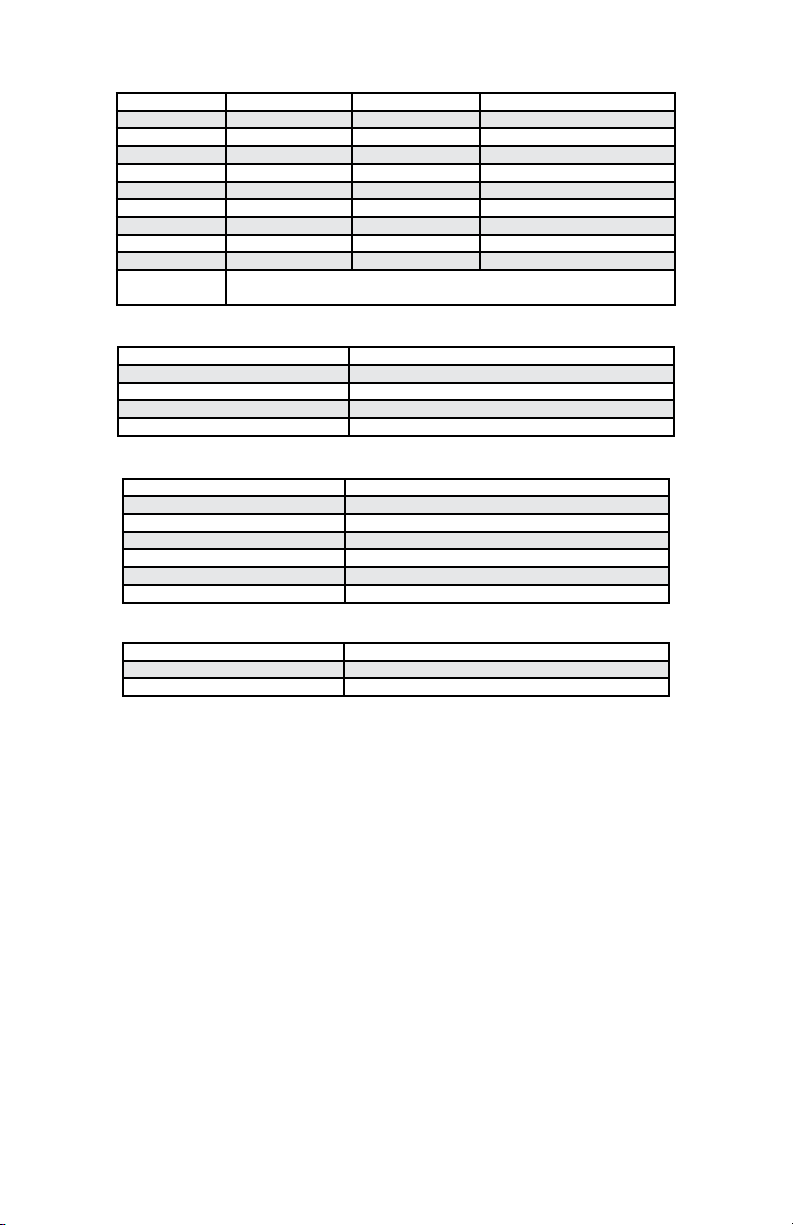
Totalizer Units
Volumetric Standard Normal Notes
uL SuL NuL microliter
mL SmL NmL milliliter
L SL NL liter
US GAL US gallon
cm3 Scm3 Ncm3 cubic centimeter
m3 Sm3 Nm3 cubic meter
in3 Sin3 cubic inch ft3 Sft3 cubic foot
uP
kSft3 1000 cubic feet micropoise, a measure of viscosity; no conversions are performed to or from other units
Temperature Units
Label Notes
°C degree Celsius °F degree Farenheit K Kelvin °R degree Rankine
Time Units
Label Notes
h:m:s Displayed value is hours:minutes:seconds
ms millisecond
s second
m minute
hour hour
day day
Valve Drive Units
Label Notes
count +/- 65536 at full drive
% Percent of full scale drive
40
Page 41



 
for your model.
 
   
 
      

     

   
properly grounded.

  

    
41
Page 42
 
 
inconsistency, or unusual readings is air bubbles trapped in one or both of the
   

  


as from a diaphragm pump, etc. Also, inspect the inside of the upstream
   

This can occur if the output signal is measured some distance from the meter
 
 
  

     

    
42
Page 43

  


     
     

periodic cleaning. If necessary, the outside of the meter can be cleaned with a


Flow Conversion Table:
CCM CCH LPM LPH CFM CFH
CFH 0.0021 0.00003 2.1189 0.035 60.0 1.0
CFM 0.000035 0.0000005 0.035 0.00059 1.0 0.0166
LPH 0.06 0.001 60.0 1.0 1699.0 28.316
LPM 0.001 0.000017 1.0 0.0166 28.316 0.4719
CCH 60.0 1.0 60000.0 1000.0 1699011.0 28317.0
CCM 1.0 0.0167 1000.0 16.667 28317.0 471.947
43
Page 44

                           

     
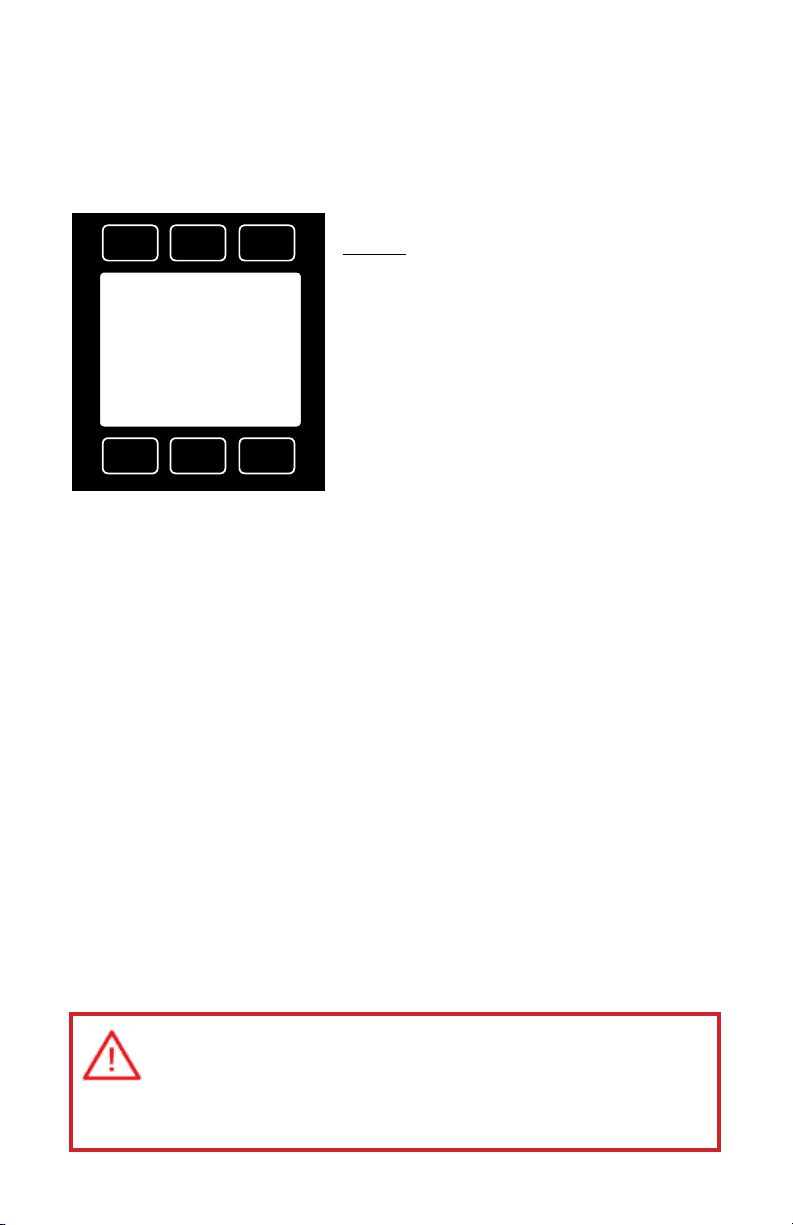
TOTAL/
TIMER
SETPT
+123.4
00123.45 Batch Done
SCCM
+123.4
     
the maximum count is reached. The following
      
00123.45
0000:09:59 SCC
BATCH RESET
MENU
      
counter is cleared.
         
      
   
counter is cleared.
   
with a 1 liter range, the maximum count would be 9999999 liters.

since the last reset in hours, minutes and seconds. The maximum measurable

  to show this as the primary display.
            
 
set-point.
                

,
 
  
44
Page 45

        
    Press . Then use 
DOWN
UP
Batch Size: Scm3
00123.45
˄
BACK/
CANCEL CLEAR
SELECT
DIGIT
SET
 Press     to record        to 
              
   
                        to 
           
 updates to 
 simply press
    
SETPT
TOTAL/
123.4
TIMER
00123.45
+100
REMAIN RESET
SCCM
+123.4
Scm3
4:14 h:m:s
MENU



         



        
you press 
.

              
   

Page 46

   .
                  
 
is charging.   before the unit can be turned on.
   

      
      
         

             
    

TOP VIEW OF DEVICE
Green = Charging Flashing Red = Low Battery
+5 Vdc
Charge Only
3 4 5
#C
PSIA
+21.50
+13.60
+0.000
+0.000
SCCM
CCM MENU
TARE V







  


46
6 7
1 2
8
On / Off
I / O
I O
Page 47
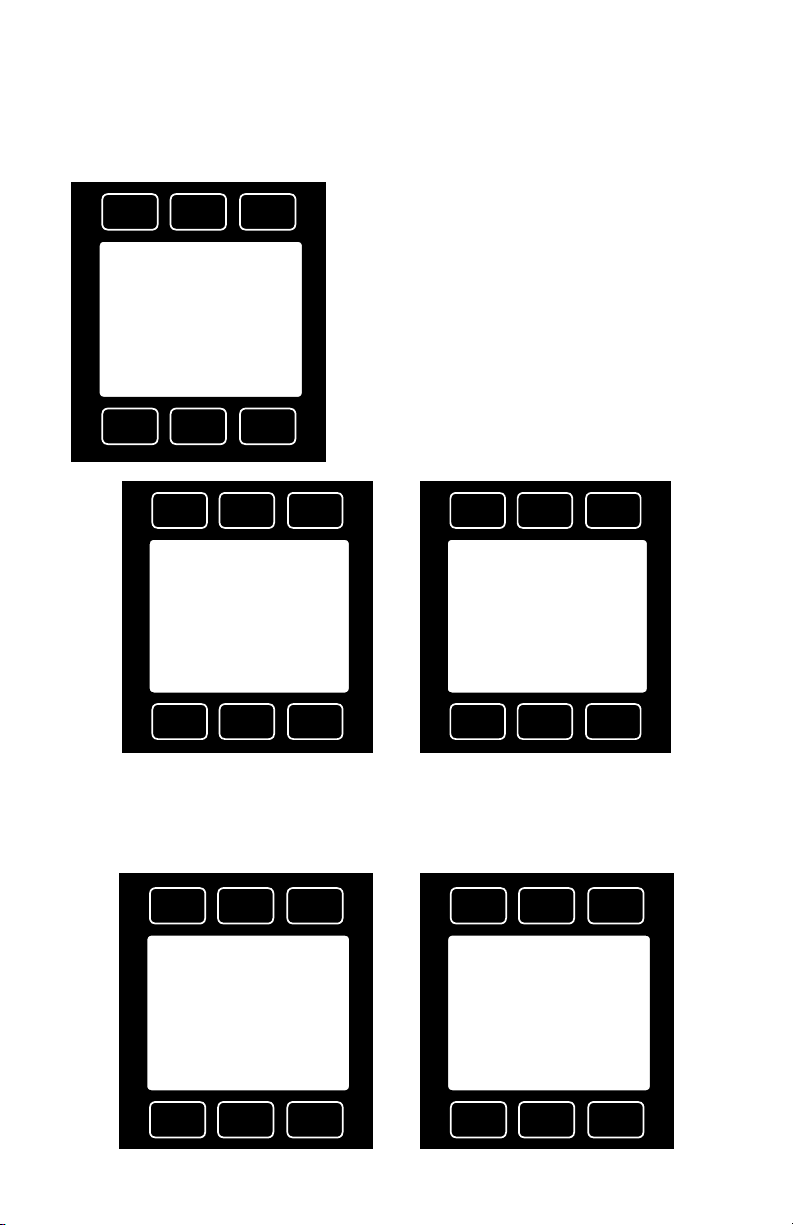

    or  and press  to make a change.
  ”.
PSIA
+13.60
+0.000
CCM
#C
+21.50
+13.60
Abs Press
+0.000 SCCM
TARE V
PSIA
Ait
MENU/
TOTAL
  
displays as “”.

engineering units are changed, and the instrument will prompt you to accept these
changes to the serial line
UP
>Show abs pressure Show gauge pressure Show baro pressure Set button eng units Set device eng units
CANCEL SELECT
DOWN
UP
>Show abs pressure Show gauge pressure Show baro pressure Set button eng units Show device units
CANCEL SELECT
DOWN
The stream absolute pressure sensor can be tared to the
  can be accessed from the
display.
STP/
NTP
BACK
DIAG TEST
TARE P
w/BARO
ROTATE
DISP
MAIN
VENT TO ATMOSPHERE WITH NO FLOW BEFORE
PRESSING SET.
Current absolute
sensor offset:
+0.000 barG
47
Page 48

The   

The ports are to be used with a standard double ended 8 pin

 

front of the box.
 
any receptacle on both boxes.
  
  
Ø .156 Thru 4 Places
1.75
1.75
3.46
3.46
Ø .340 Thru 2 PL
Ø .340 Thru 2 PL
6.75
6.75
6.75
7.56
48
FMA1600-MDB Multi-Drop Box
BB-9 Multi-Drop
1.55
Box
1.55
Ø .175 Thru 2 PL
5.06
5.06
Page 49
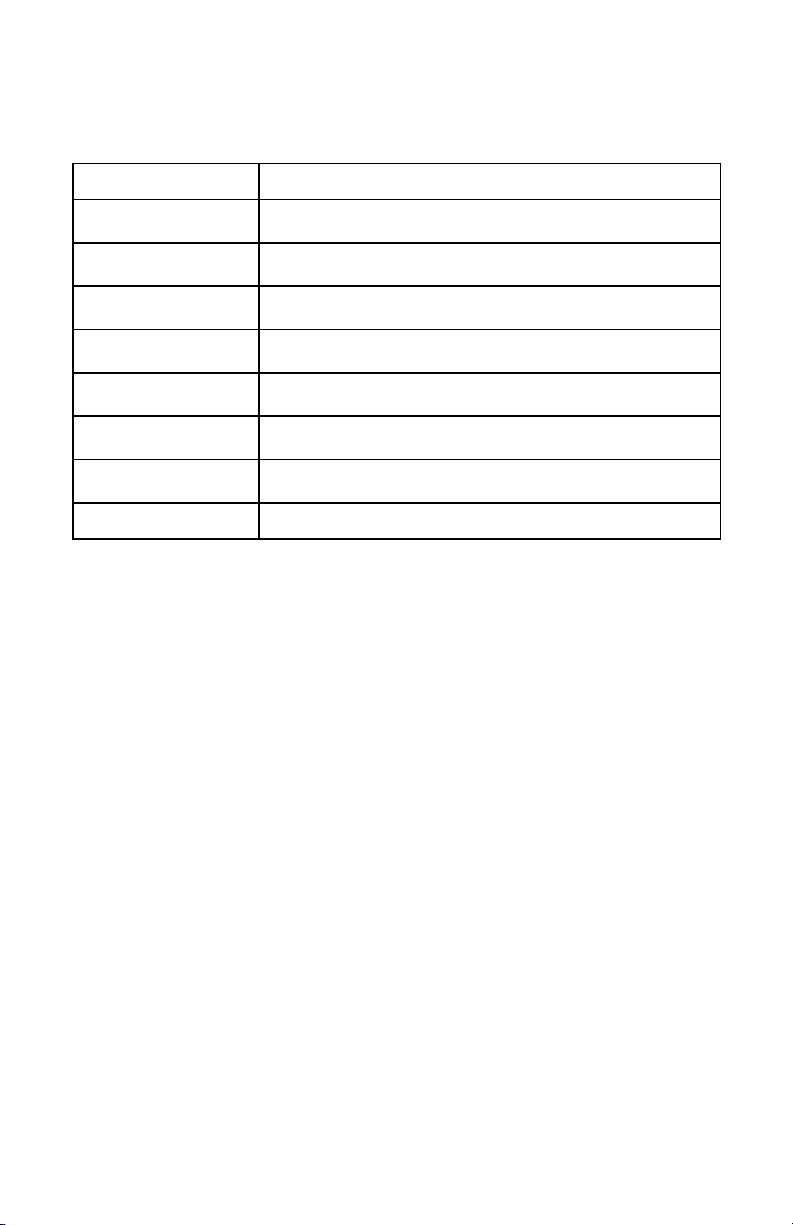
Accessories
Part Number Description
FMA1600-C1
FMA1600-C2
FMA1600-C3
FMA1600-PSU
FMA1600-CRA
FMA1600-C1-25FT
FMA1600-C2-25FT
FMA1600-MDB Multi-Drop Box
8 Pin Male Mini-DIN connector cable, single ended, 6 foot length 8 Pin Male Mini-DIN connector cable, double ended, 6 foot length 8 Pin Male Mini-DIN to DB9 Female Adapter, 6 foot length Universal 100-240 VAC to 24 Volt DC Power Supply Adapter 8 Pin Male Right Angle Mini-Din Cable, single ended, 6 foot length 8 Pin Male Mini-DIN connector cable, single ended, 25 foot length 8 Pin Male Mini-DIN connector cable, double ended, 25 foot length
49
Page 50
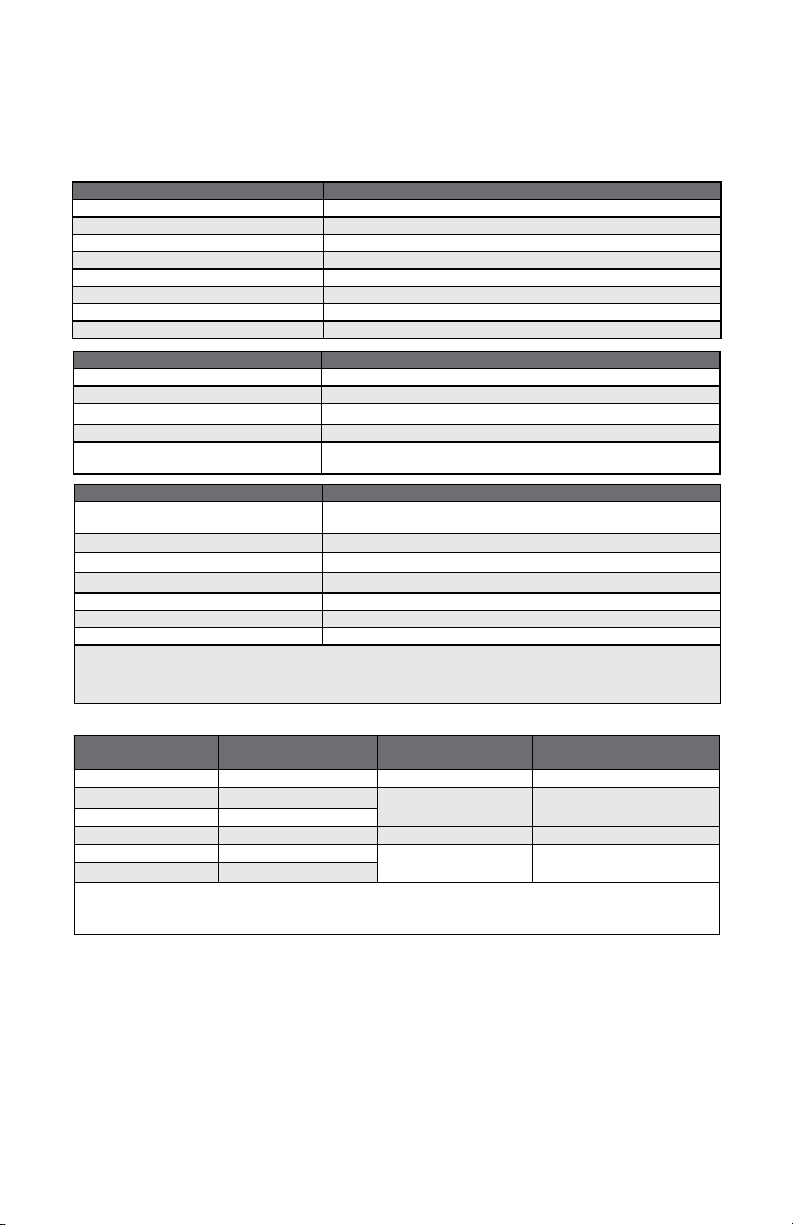
Technical Data for FLR-1600A - Series Water Flow Meters
0 – 0.5 ccm Full Scale through 0 – 10 lpm Full Scale
FLR-1600A-Series water ow meters read both water ow and water temperature. An
optional pressure sensor is also available.
Standard Specications (Contact Omega for available options.)
Performance FLR-1600A Meters
Accuracy at calibration conditions after tare ± 2% Full Scale
Operating Range / Turndown Ratio 2% to 100% Full Scale / 50:1 Turndown
Monochrome LCD Display with integrated
Digital Output Signal
Analog Output Signal
Optional Secondary Analog Output Signal
Electrical Connection Options 8 Pin Mini-DIN / 15-pin D-sub (DB15)
1. The Digital Output Signal communicates Flow and Temperature (optional Pressure sensor available)
2. The Analog Output Signal and Optional Secondary Analog Output Signal communicate your choice of Flow or Temperature
Available Ranges 0.5 ccm to 10 lpm
Zero Shift and Span Shift 0.02% Full Scale / ºCelsius / Atm
Mounting Attitude Sensitivity None
Communication / Power FLR-1600A Meters
Repeatability ± 2% Full Scale
Maximum Flow Rate 128% FS Measurable
Typical Response Time 20 ms (Adjustable)
Warm-up Time < 1 Second
Operating Conditions FLR-1600A Meters
Operating Temperature +10 to +50 ºCelsius
Maximum Pressure 200 psig
Ingress Protection IP40
Wetted Materials
touchpad
1
Options
2
Options
Supply Voltage 7-3 0 Vdc (15-30 Vdc for 4-20 mA outputs) Supply Current 0.040 Amp
302 & 303 Stainless Steel, 316L Stainless Steel, FKM. If your application demands a different material, please contact Omega.
Simultaneously displays Flow and Temperature
(optional Pressure sensor available)
RS232 Serial / RS485 Serial
2
0-5 Vdc / 1-5 Vdc / 0-10 Vdc / 4-20 mA
Range Specic Specications
FLR-1600A Meters
Full Scale Flow
0.5 ccm to 1 ccm 2.0 4.4”H x 2.4”W x 1.1”D M5 (10-32) Female Thread
2 ccm to 500 ccm 2.0
1 lpm 4.0
2 lpm 4.0 4.7”H x 2.7”W x 1.1”D 1/4” NPT Female 5 lpm 10.0
10 lpm 20.0
1. Lower Pressure Drops Available, please contact Omega.
2. Compatible with Swagelok® tube, Parker®, face seal, push connect and compression adapter ttings. VCR and SAE
connections upon request.
Pressure Drop
FS Flow (PSID)
1
at
Mechanical
Dimensions
4.6”H x 2.4”W x 1.1”D 1/8” NPT Female
5.1”H x 4.0”W x 1.6”D 1/4” NPT Female
Process Connections

2
Page 51
26.67mm
DATE
12/17/15
DATE
1.050in
111.68mm
4.397in
FLR-1600A:
0 - 0.5 ccm
0 - 1 ccm
8.53mm .336in
13.34mm
8.89mm .350in
13.34mm .525in
M5X0.8 - 6H
.525in
2X 8-32 UNC .175in[4.45mm]
1/8 NPT
Both Sides
Both Sides
60.33mm
2.375in
56.52mm
2.225in
3.81mm .150in
3.18mm
0.5 ccm to 1 ccm approximate shipping weight: 1.0 lb
26.67mm
1.050in
116mm
4.567in
60.33mm
2.375in
56.52mm
2.225in
3.81mm 3.18mm .150in
.125in
23.50mm .925in
.125in
8.53mm .336in
13.34mm .525in
FLR-1600A:
0 - 2 ccm
0 - 5 ccm 0 - 10 ccm 0 - 20 ccm 0 - 50 ccm
0 - 100 ccm 0 - 200 ccm 0 - 500 ccm
0 - 1 lpm
8.89mm .350in
13.34mm .525in
2X 8-32 UNC .350in[8.89mm]
10 ccm to 1 lpm approximate shipping weight: 1.2 lb

23.50mm .925in
Page 52
.800in
20.32mm
.500in
12.70mm
20.32mm .800in
.500in
12.70mm
Both Sides
1/4 NPT
19.05mm .750in
3.250in
82.55mm
4.45mm .175in
1.425in
36.20mm
4X8-32 UNC .375in[9.53mm]
1.600in
40.64mm
DATE
1/8/2016
4.000in
101.60mm
5.067in
128.70mm



FLR-1600A:
0 - 2 lpm




  




2 lpm approximate shipping weight: 1.5 lb

FLR-1600A:
0 - 5 lpm
0 -10 lpm

5 lpm to 10 lpm approximate shipping weight: 2.6 lb

Page 53
Technical Data for FLV-4600A Water Flow Controllers
0 – 0.5 ccm Full Scale through 0 – 5 lpm Full Scale
FLV-4600A Series water ow controllers display both water ow and water temperature. An
optional pressure sensor is also available.
Standard Specications (Contact Omega for available options.)
Accuracy at calibration conditions
Zero Shift and Span Shift 0.02% Full Scale / ºCelsius / Atm
Operating Range / Turndown Ratio 2% to 100% Full Scale / 50:1 Turndown
Mounting Attitude Sensitivity None Mount with valve cylinder vertical & upright
Monochrome LCD Display with
Digital Input/Output Signal
Analog Input/Output Signal
Optional Secondary Analog
Electrical Connection Options 8 Pin Mini-DIN / 15-pin D-sub (DB15)
1. The Digital Output Signal communicates Flow and Temperature (optional Pressure sensor available)
2. The Analog Output Signal and Optional Secondary Analog Output Signal communicate your choice of Flow or Temperature
Range Specic Specications
Full Scale Flow
Small Valve
Controllers
0.5 ccm to 1 ccm 4.4”H x 3.4”W x 1.1”D M5 (10-32) Female Thread 5 ccm to 50 ccm 5.0
100 ccm 5.0
200 ccm to 500 ccm 7.5
Large Valve
Controllers
1 lpm 4.0
5 lpm 10.0
1. Lower Pressure Drops Available, please contact Omega.
2. Compatible with Swagelok® tube, Parker®, face seal, push connect and compression adapter ttings. VCR and SAE
connections upon request.
Performance Small Valve Controllers Large Valve Controllers
Available Ranges 0.5 ccm to 500 ccm 1 lpm to 5 lpm
after tare
Repeatability ± 2% Full Scale
Maximum Flow Rate 102.4% FS Controllable
Typical Response Time 100 ms (Adjustable)
Warm-up Time < 1 Second
Operating Conditions Small Valve Controllers Large Valve Controllers
Operating Temperature +10 to +50 ºCelsius
Maximum Pressure 150 psig
Valve Type Normally Closed
Ingress Protection IP40
Wetted Materials
Communication / Power Small Valve Controllers Large Valve Controllers
integrated touchpad
1
Options
2
Options
Input/Output Signal
Supply Voltage 12-30 Vdc (15-30 Vdc for 4-20 mA outputs) 24-30 Vdc Supply Current 0.250 Amp 0.750 Amp
Pressure Drop
FS Flow (PSID)
FLV-4600A: 430FR Stainless Steel, 302 & 303 Stainless Steel, 316L
Stainless Steel, FKM, Peruoroelastomer.
Large Valve Controllers Add 416 Stainless Steel, Polyoxymethylene (POM). If your application demands a different material, please contact Omega.
Simultaneously displays Flow and Temperature
2
1
at
4.6”H x 3.6”W x 1.1”D 1/8” NPT Female
5.7”H x 7.7”W x 2.3”D 1/4”NPT Female2 lpm 4.0
± 2% Full Scale
(optional Pressure sensor available)
RS232 Serial / RS485 Serial
0-5 Vdc / 1-5 Vdc / 0-10 Vdc / 4-20 mA
Mechanical
Dimensions
Process Connections
2

Page 54
.150in
3.81mm
23.50mm .925in
3.18mm .125in
2.225in
56.52mm
2X 8-32 UNC
.350in[8.89mm]
13.34mm .525in
.350in
8.89mm
Both Sides
1/8 NPT
3.588in
91.12mm
116mm
4.567in
1
REV.
DATE
1/8/2016
LC-500CCM-D-MSPEC
1.050in
26.67mm
8.89mm .350in
.525in
13.34mm
0.5 ccm to 1 ccm approximate shipping weight: 1.1 lb.
111.68mm
4.397in
3.338in
84.77mm
1.050in
26.67mm
1
REV.
DATE
12/17/2015
LC-1CCM-D-MSPEC
.525in
13.34mm
.336in
8.53mm
Both Sides
M5X0.8 - 6H
4.93mm .194in
.525in
13.34mm
23.50mm
3.81mm .150in.125in
3.18mm
.925in
2.225in
56.52mm
2X 8-32 UNC .175in[4.45mm]
FLV-4600A:
0 - 0.5 ccm 0 - 1 ccm
100 ccm to 500 ccm approximate weight: 1.6 lb

FLV-4600A: 0 - 5 ccm 0 - 10 ccm 0 - 20 ccm 0 - 50 ccm 0 - 100 ccm 0 - 200 ccm 0 - 500 ccm
Page 55
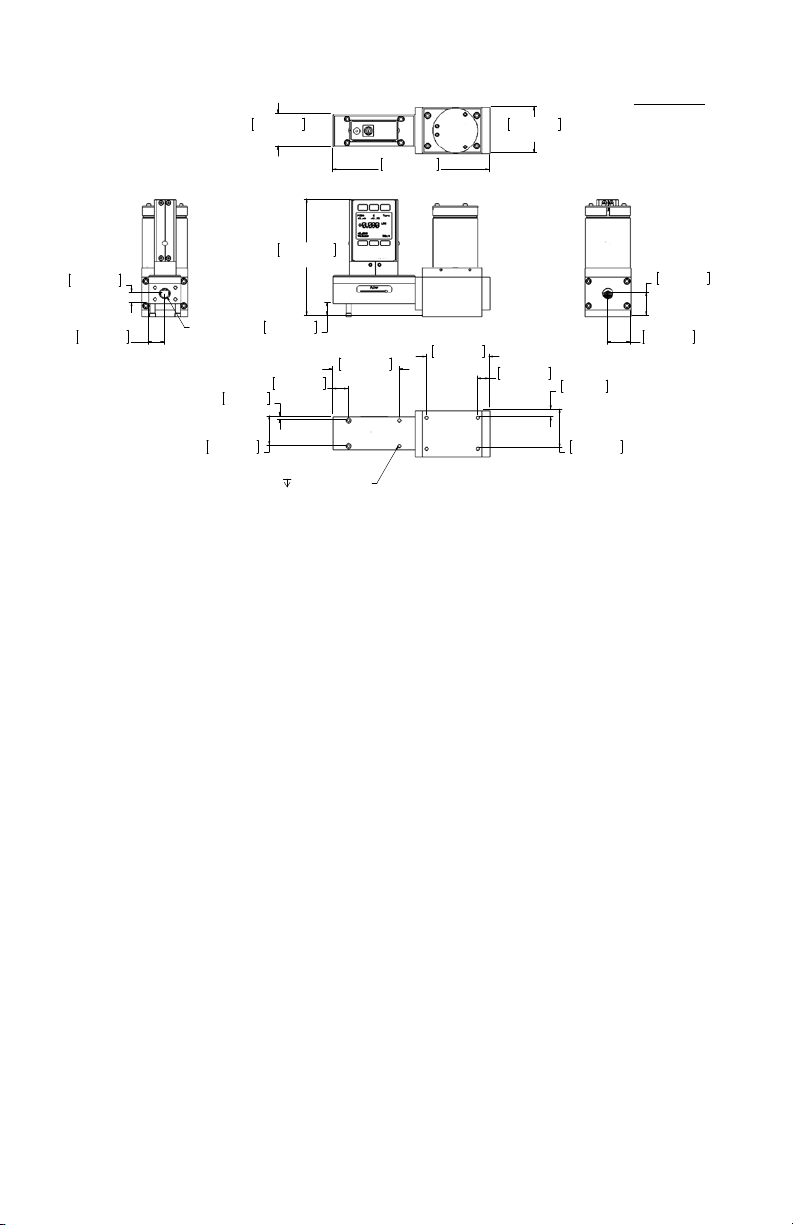
DATE
1/12/2016
57.15mm
2.250in
1.600in
40.64mm
194.31mm
7.650in
144.45mm
5.687in
15.75mm .620in
.375in[9.53mm]4X 8-32 UNC
82.55mm
3.250in .575in
14.61mm
3.075in
78.11mm
.375in
9.53mm
1.875in
47.63mm
4.45mm .175in
.750in
19.05mm
36.20mm
1.425in
1.125in
28.58mm
28.45mm
1.120in
.800in
20.32mm
Both Sides
1/4 NPT
12.70mm .500in
1 lpm to 5 lpm approximate weight: 9.0 lb.
FLV-4600A:
0 - 1 lpm 0 - 2 lpm 0 - 5 lpm

Page 56
Eight Pin Mini-DIN Connector Pin-Outs
If your Instrument was ordered with the standard Eight Pin Mini-DIN
connection, please be sure to reference the following pin-out diagram.
1 2

3 4 5
6 7 8
 


1  

2


3  Red

4


 
6  Green 7  

8

Purple
      

Page 57
DB15 Pin-Outs
If your instrument was ordered with a DB15 connection, be sure to check the
Calibration Label on the device and reference the appropriate pin-out diagram.
The following pin-out chart describes the safest and generally compatible arrangement when connecting a non-FLR-1600A-Series DB15 wire to a DB15 equipped FLR-1600A-Series. Not all features may be available between brands, but the common denominators are featured in our DB15 offerings, along with some options for customization.
DB15
2
9
Male Connector Front View Female Connector Front View
Pin Number Function
1 Ground 2 Primary Analog Signal Output 3 Ground 4 N/C 5 Power Supply (+Vdc) 6 N/C 7 N/C
8
9 Power Supply Common
10 Ground
11 Secondary Analog Signal Output / xed 5.12Vdc 12 N/C 13 RS232 RX (receive) or RS485 – 14 Ground 15 RS232 TX (send) or RS485 +
Check your device’s calibration certicate and user manual for the actual electrical input/ output requirements, as all instruments are custom congured to some extent.
NOTE: Pins 1, 3, 9, 10, and 14 are connected together inside of the device and are common grounding points.
N/C = Not Connected/Open (can be used for custom pin assignments – please consult factory).
5
11
8
15
13
Analog Tare (meters — when grounded)
Analog Set-Point Input (controllers)
8
15
13
11
2
9
5

Page 58
DB15 Pin-Outs
If your instrument was ordered with a DB15 connection, be sure to check the
Calibration Label on the device and reference the appropriate pin-out diagram.
The following pin-out chart describes the safest and generally compatible arrangement when connecting a non-FLR-1600A-Series DB15 wire to a DB15A equipped FLR-1600A­Series. Not all features may be available between brands, but the common denominators are featured in our DB15 offerings, along with some options for customization.
DB15A
2
9
5
3
12
8
7
15
8
15
5
7
12
2
3
9
Male Connector Front View Female Connector Front View
Pin Number Function
1 Ground 2 Primary Analog Signal Output
3
4 Ground 5 Power Supply Common 6 Ground 7 Power Supply (+Vdc)
8 RS232 Tx (send) / RS485 –
9 Ground 10 N/C 11 N/C 12 Secondary Analog Signal Output / xed 5.12Vdc* 13 N/C 14 N/C 15 RS232 Rx (receive) / RS485 +
Check your device’s calibration certicate and user manual for the actual electrical input/ output requirements, as all instruments are custom congured to some extent.
NOTE: Pins 1, 4, 5, 6 and 9 are connected together inside of the device and are common grounding points.
N/C = Not Connected/Open (can be used for custom pin assignments – please consult factory).
* Added to allow for full use of features on FLR-1600A devices, may not be present on host wiring.
Analog Tare (meters — when grounded)*
Analog Set-Point Input (controllers)*

Page 59
DB15 Pin-Outs
If your instrument was ordered with a DB15 connection, be sure to check the
Calibration Label on the device and reference the appropriate pin-out diagram.
The following pin-out chart describes the safest and generally compatible arrangement when connecting a non-FLR-1600A-Series DB15 wire to a DB15B equipped FLR-1600A­Series. Not all features may be available between brands, but the common denominators are featured in our DB15 offerings, along with some options for customization.
DB15B
2
9
Male Connector Front View Female Connector Front View
Pin Number Function
1 Ground
2 Primary Analog Signal Output
3 N/C
4 N/C
5 Power Supply (+Vdc)
6 N/C
7 N/C
8
9 Power Supply Common 10 Ground 11 Secondary Analog Signal Output / xed 5.12Vdc 12 N/C 13 N/C 14 RS232 RX (receive) or RS485 –* 15 RS232 TX (send) or RS485 +*
Check your device’s calibration certicate and user manual for the actual electrical input/ output requirements, as all instruments are custom congured to some extent.
NOTE: Pins 1, 9, and 10 are connected together inside of the device and are common grounding points.
N/C = Not Connected/Open (can be used for custom pin assignments – please consult factory)
* Added to allow for full use of features on FLR-1600A devices, may not be present on host wiring.
5
11
8
15
14
Analog Tare (meters — when grounded)*
Analog Set-Point Input (controllers)*
8
15
14
5
11
2
9

Page 60
DB15 Pin-Outs
If your instrument was ordered with a DB15 connection, be sure to check the
Calibration Label on the device and reference the appropriate pin-out diagram.
The following pin-out chart describes the safest and generally compatible arrangement when connecting a non-FLR-1600A-Series DB15 wire to a DB15B equipped FLR-1600A­Series. Not all features may be available between brands, but the common denominators are featured in our DB15 offerings, along with some options for customization.
DB15K
2
9
5
13
7
8
14
8
7
1314
25
9
Male Connector Front View Female Connector Front View
Pin Number Function
1 N/C 2 Primary Analog Signal Output 3 N/C 4 N/C 5 Power Supply Common 6 N/C 7 Power Supply (+Vdc)
8
9 10 N/C 11 Ground 12 Ground 13
14 15 Ground
Check your device’s calibration certicate and user manual for the actual electrical input/ output requirements, as all instruments are custom congured to some extent.
NOTE: Pins 5, 11, 12 and 15 are connected together inside of the device and are common grounding points.
N/C = Not Connected/Open (can be used for custom pin assignments – please consult factory).
* Added to allow for full use of features on FLR-1600A-Series devices, may not be present on host wiring.
Analog Tare (meters — when grounded)
Analog Set-Point Input (controllers)
Secondary Analog Signal Output / xed 5.12Vdc
RS232 RX (receive) or RS485 –
RS232 TX (send) or RS485 +
*
*
*
60
Page 61
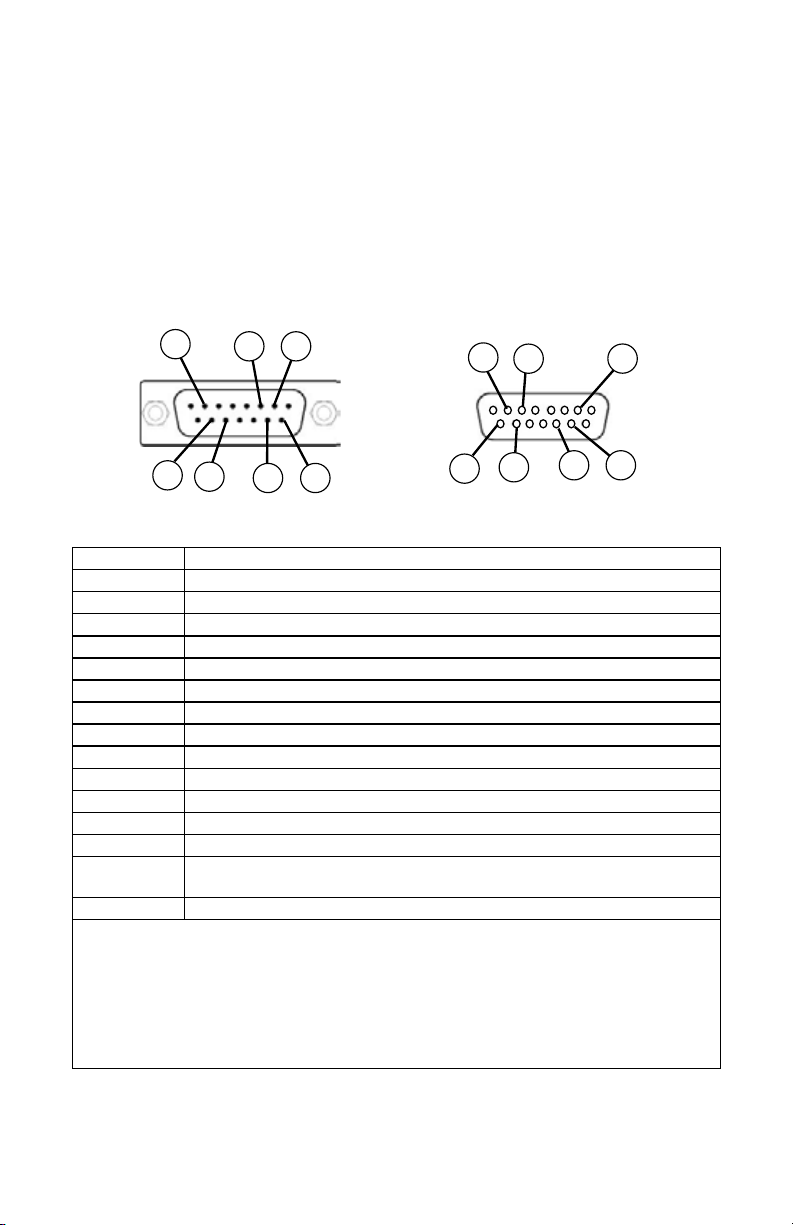
DB15 Pin-Outs
If your instrument was ordered with a DB15 connection, be sure to check the
Calibration Label on the device and reference the appropriate pin-out diagram.
The following pin-out chart describes the safest and generally compatible arrangement when connecting a non-FLR-1600A-Series DB15 wire to a DB15B equipped FLR-1600A­Series. Not all features may be available between brands, but the common denominators are featured in our DB15 offerings, along with some options for customization.
DB15H
2
10
Male Connector Front View Female Connector Front View
Pin Number Function
1 N/C 2 RS232 RX (receive) or RS485 – * 3 N/C 4 N/C 5 Ground 6 Primary Analog Signal Output 7 Power Supply Common 8 N/C 9 N/C
10 Secondary Analog Signal Output / xed 5.12Vdc *
11 Power Supply (+Vdc) 12 Ground 13 N/C
14
15 RS232 TX (send) or RS485 + *
Check your device’s calibration certicate and user manual for the actual electrical input/ output requirements, as all instruments are custom congured to some extent.
NOTE: Pins 5, 11, 12 and 15 are connected together inside of the device and are common grounding points.
N/C = Not Connected/Open (can be used for custom pin assignments – please consult factory). * Added to allow for full use of features on FLR-1600A-Series devices, may not be present on
host wiring.
11
6
7
1514
Analog Tare (meters — when grounded)
Analog Set-Point Input (controllers)
15
7
6
14
11
2
10
61
Page 62
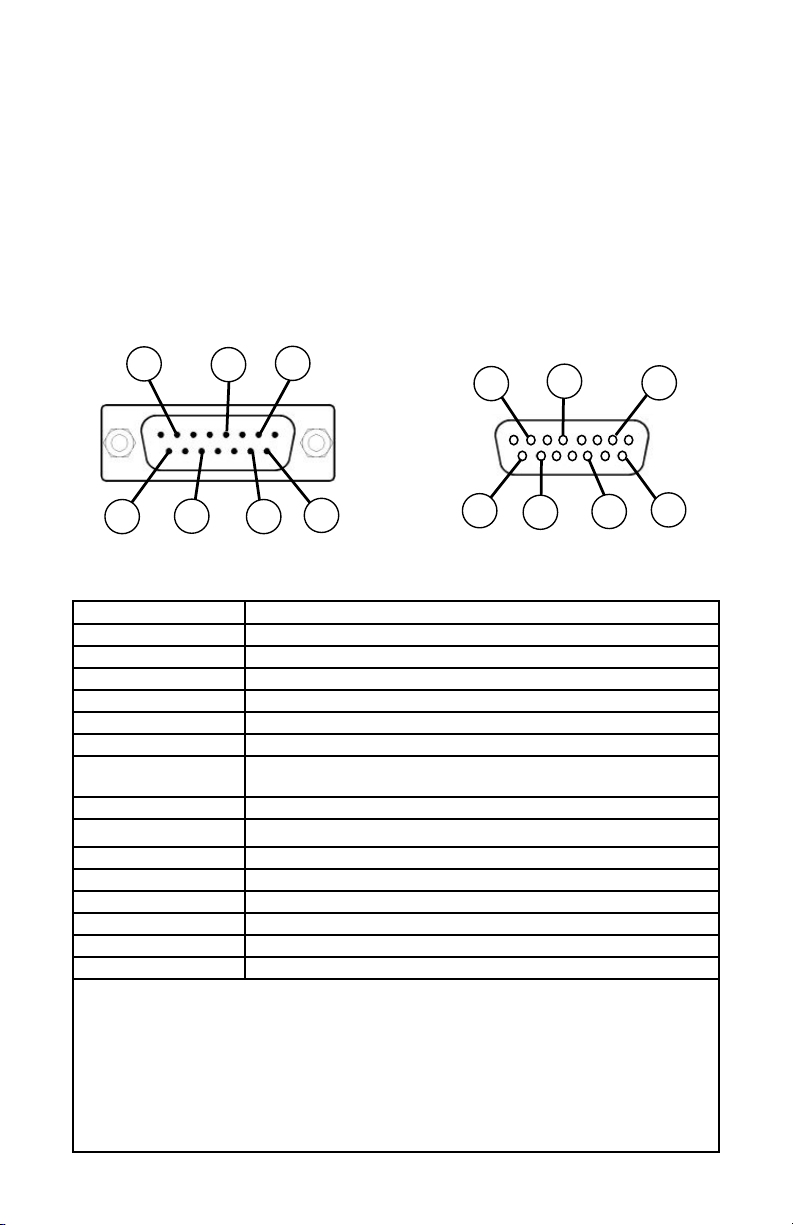
DB15 Pin-Outs
If your instrument was ordered with a DB15 connection, be sure to check the Calibration Label on the device and reference the appropriate pin-out diagram.
The following pin-out chart describes the safest and generally compatible arrangement when connecting a non-FLR-1600A-Series DB15 wire to a DB15O equipped FLR-1600A Series. Not all features may be available between brands, but the common denominators are featured in our DB15 offerings, along with some options for customization.
DB15O
14
7
15
15
7
5
14
11
2
9
2
9
5
11
Male Connector Front View Female Connector Front View
Pin Number Function
1 Ground 2 N/C 3 N/C 4 Primary Analog Signal Output 5 Power Supply (+Vdc) 6 N/C
7
8 N/C
9 Power Supply Common
10 Ground 11 Secondary Analog Signal Output / xed 5.12Vdc 12 N/C 13 N/C 14 RS232 RX (receive) or RS485 –* 15 RS232 TX (send) or RS485 +*
Check your device’s calibration certicate and user manual for the actual electrical input/ output requirements, as all instruments are custom congured to some extent.
NOTE: Pins 1, 9, and 10 are connected together inside of the device and are common grounding points.
N/C = Not Connected/Open (can be used for custom pin assignments – please consult factory)
* Added to allow for full use of features on FLR-1600A devices, may not be present on host wiring.
Analog Tare (meters — when grounded)*
Analog Set-Point Input (controllers)*
62
Page 63
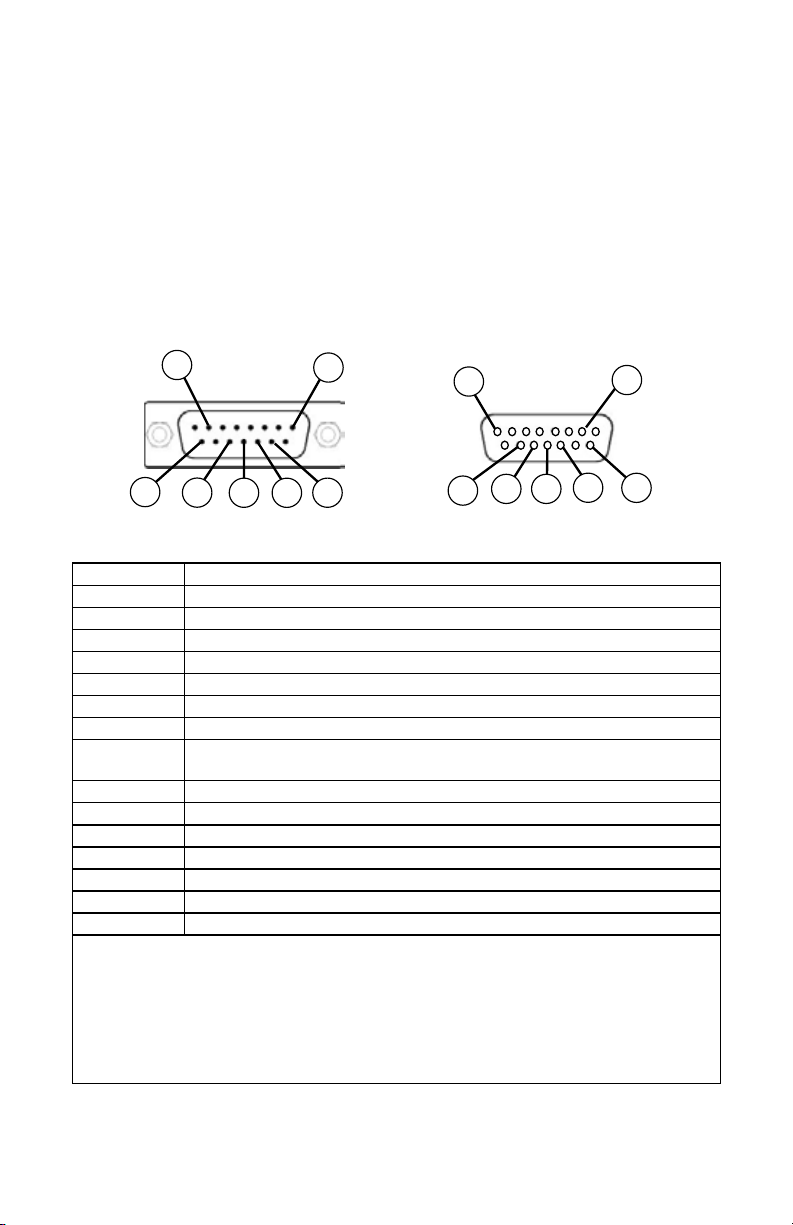
DB15 Pin-Outs
If your instrument was ordered with a DB15 connection, be sure to check the
Calibration Label on the device and reference the appropriate pin-out diagram.
The following pin-out chart describes the safest and generally compatible arrangement when connecting a non-FLR-1600A-Series DB15 wire to a DB15B equipped FLR-1600A­Series. Not all features may be available between brands, but the common denominators are featured in our DB15 offerings, along with some options for customization.
DB15S
2
9
11
12
Male Connector Front View Female Connector Front View
Pin Number Function
1 Ground 2 Primary Analog Signal Output 3 N/C 4 N/C 5 Ground 6 N/C 7 N/C
8
9 Power Supply Common
10 Ground
11 Secondary Analog Signal Output / xed 5.12Vdc * 12 RS232 RX (receive) or RS485 – * 13 Power Supply (+Vdc) 14 RS232 TX (send) or RS485 + * 15 Ground
Check your device’s calibration certicate and user manual for the actual electrical input/ output requirements, as all instruments are custom congured to some extent.
NOTE: Pins 1, 5, 9, 10 and 15 are connected together inside of the device and are common grounding points.
N/C = Not Connected/Open (can be used for custom pin assignments – please consult factory). * Added to allow for full use of features on FLR-1600A-Series devices, may not be present on
host wiring.
8
14
13
Analog Tare (meters — when grounded)
Analog Set-Point Input (controllers)
14
8
13
12
11
2
9
63
Page 64

64
Page 65

WARRANTY/DISCLAIMER
OMEGA ENGINEERING, INC. warrants this unit to be free of defects in materials and workmanship for a period of 13 months from date of purchase. OMEGA’s WARRANTY adds an additional one (1) month grace period to the normal one (1) year product warranty to cover handling and shipping time. This ensures that OMEGA’s customers receive maximum coverage on each product.
If the unit malfunctions, it must be returned to the factory for evaluation. OMEGA’s Customer Service Department will issue an Authorized Return (AR) number immediately upon phone or written request. Upon examination by OMEGA, if the unit is found to be defective, it will be repaired or replaced at no charge. OMEGA’s WARRANTY does not apply to defects resulting from any action of the purchaser, including but not limited to mishandling, improper interfacing, operation outside of design limits, improper repair, or unauthorized modification. This WARRANTY is VOID if the unit shows evidence of having been tampered with or shows evidence of having been damaged as a result of excessive corrosion; or current, heat, moisture or vibration; improper specification; misapplication; misuse or other operating conditions outside of OMEGA’s control. Components in which wear is not warranted, include but are not limited to contact points, fuses, and triacs.
OMEGA is pleased to offer suggestions on the use of its various products. However, OMEGA neither assumes responsibility for any omissions or errors nor assumes liability for any damages that result from the use of its products in accordance with information provided by OMEGA, either verbal or written. OMEGA warrants only that the parts manufactured by the company will be as specified and free of defects. OMEGA MAKES NO OTHER WARRANTIES OR REPRESENTATIONS OF ANY KIND WHATSOEVER, EXPRESSED OR IMPLIED, EXCEPT THAT OF TITLE, AND ALL IMPLIED WARRANTIES INCLUDING ANY WARRANTY OF MERCHANTABILITY AND FITNESS FOR A PARTICULAR PURPOSE ARE HEREBY DISCLAIMED. LIMITATION OF LIABILITY: The remedies of purchaser set forth herein are exclusive, and the total liability of OMEGA with respect to this order, whether based on contract, warranty, negligence, indemnification, strict liability or otherwise, shall not exceed the purchase price of the component upon which liability is based. In no event shall OMEGA be liable for consequential, incidental or special damages.
CONDITIONS: Equipment sold by OMEGA is not intended to be used, nor shall it be used: (1) as a “Basic Component” under 10 CFR 21 (NRC), used in or with any nuclear installation or activity; or (2) in medical applications or used on humans. Should any Product(s) be used in or with any nuclear installation or activity, medical application, used on humans, or misused in any way, OMEGA assumes no responsibility as set forth in our basic WARRANTY / DISCLAIMER language, and, additionally, purchaser will indemnify OMEGA and hold OMEGA harmless from any liability or damage whatsoever arising out of the use of the Product(s) in such a manner.
Direct all warranty and repair requests/inquiries to the OMEGA Customer Service Department.
RETURN REQUESTS/INQUIRIES
BEFORE RETURNING ANY PRODUCT(S) TO OMEGA, PURCHASER MUST OBTAIN AN AUTHORIZED RETURN (AR) NUMBER FROM OMEGA’S CUSTOMER SERVICE DEPARTMENT (IN ORDER TO AVOID PROCESSING DELAYS). The assigned AR number should then be marked on the outside of the return package and on any correspondence.
The purchaser is responsible for shipping charges, freight, insurance and proper packaging to prevent breakage in transit.
FOR WARRANTY RETURNS, please have the following information available BEFORE contacting OMEGA:
1. Purchase Order number under which the product was PURCHASED,
2. Model and serial number of the product under warranty, and
3. Repair instructions and/or specific problems relative to the product.
OMEGA’s policy is to make running changes, not model changes, whenever an improvement is possible. This affords our customers the latest in technology and engineering.
OMEGA is a registered trademark of OMEGA ENGINEERING, INC. © Copyright 2015 OMEGA ENGINEERING, INC. All rights reserved. This document may not be copied, photocopied,
reproduced, translated, or reduced to any electronic medium or machine-readable form, in whole or in part, without the prior written consent of OMEGA ENGINEERING, INC.
FOR NON-WARRANTY REPAIRS,
consult OMEGA for current repair charges. Have the following information available BEFORE contacting OMEGA:
1. Purchase Order number to cover the
COST of the repair,
2. Model and serial number of the product, and
3. Repair instructions and/or specific problems relative to the product.
Page 66

Where Do I Find Everything I Need for
Process Measurement and Control?
OMEGA…Of Course!
Shop online at omega.com
TEMPERATURE
MU
Thermocouple, RTD & Thermistor Probes, Connectors, Panels & Assemblies
MU
Wire: Thermocouple, RTD & Thermistor
MU
Calibrators & Ice Point References
MU
Recorders, Controllers & Process Monitors
MU
Infrared Pyrometers
PRESSURE, STRAIN AND FORCE
MU
Transducers & Strain Gages
MU
Load Cells & Pressure Gages
MU
Displacement Transducers
MU
Instrumentation & Accessories
FLOW/LEVEL
MU
Rotameters, Gas Mass Flowmeters & Flow Computers
MU
Air Velocity Indicators
MU
Turbine/Paddlewheel Systems
MU
Totalizers & Batch Controllers
pH/CONDUCTIVITY
MU
pH Electrodes, Testers & Accessories
MU
Benchtop/Laboratory Meters
MU
Controllers, Calibrators, Simulators & Pumps
MU
Industrial pH & Conductivity Equipment
DATA ACQUISITION
MU
Data Acquisition & Engineering Software
MU
Communications-Based Acquisition Systems
MU
Plug-in Cards for Apple, IBM & Compatibles
MU
Data Logging Systems
MU
Recorders, Printers & Plotters
HEATERS
MU
Heating Cable
MU
Cartridge & Strip Heaters
MU
Immersion & Band Heaters
MU
Flexible Heaters
MU
Laboratory Heaters
ENVIRONMENTAL MONITORING AND CONTROL
MU
Metering & Control Instrumentation
MU
Refractometers
MU
Pumps & Tubing
MU
Air, Soil & Water Monitors
MU
Industrial Water & Wastewater Treatment
MU
pH, Conductivity & Dissolved Oxygen Instruments
M-3792/0516

Loading...