

Page 1
TM
User’s Guide
Shop online at
omega.com
e-mail: [email protected]
For latest product manuals:
omega.com/en-us/pdf-manuals
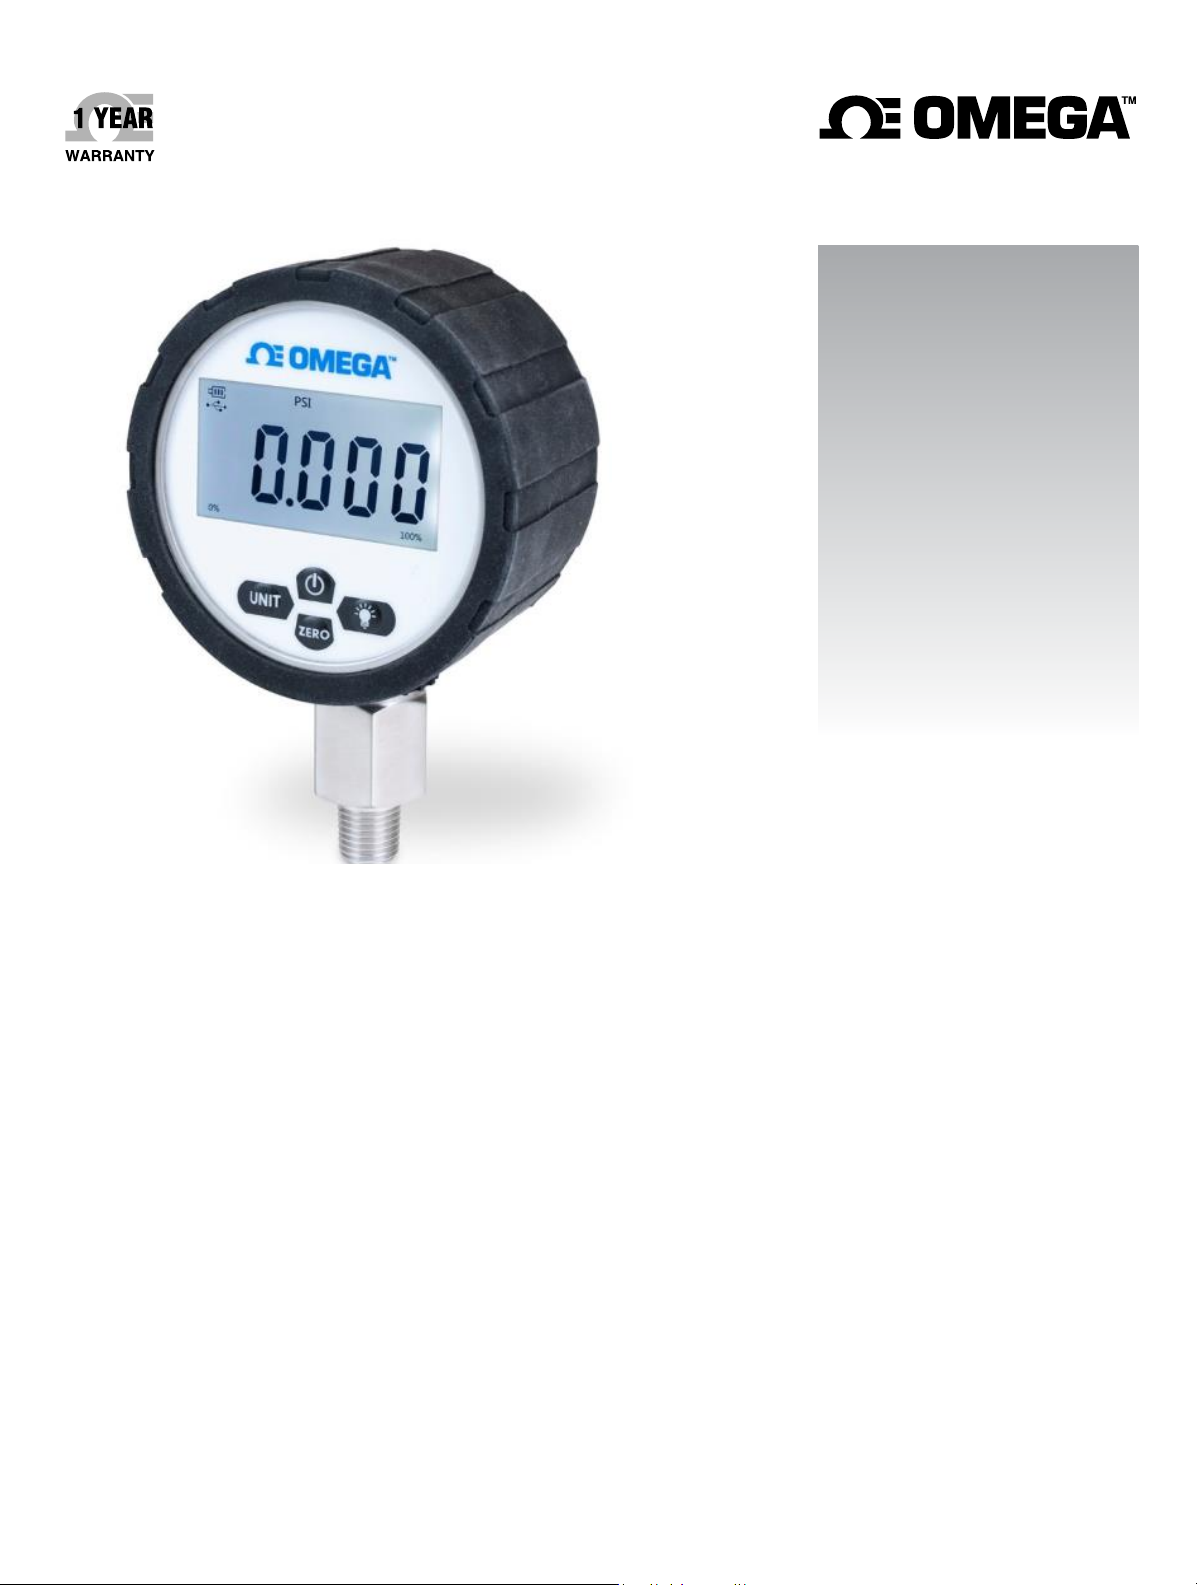
DPG280 SERIES
Digital Pressure Gauge
Page 2

UNRESTRICTED
Table of Contents
Section 1 - Introduction
1.1 Precautions ............................................................................ 2
Section 2 – Setup
2.1 General Dimensions ................................................................3
Section 3 – Menu and Configuration
3.1 LCD and Code Description .....................................................3
3.2 Button Functionality ................................................................4
3.3 Adjust of Filter Constant …......................................................4
3.4 Power …..................................................................................4
3.5 Data Record ...........................................................................4
3.6 Peak Value .............................................................................5
3.7 Troubleshooting ………...........................................................5
Section 4 – Software Instructions
4.1 Software Instructions ..............................................................6
Page 3

UNRESTRICTED
Section 1 – Introduction
1.1 Precautions
• Please check the packaging and appearance after you received the product.
• Please check the mode and specification of the product. Keep correct electrical connection and
mounting method.
• Please installation WITHOUT power.
• During using, please notice the technical and operation conditions: the temperature of medium,
burst pressure, power supply.
• This
• During installation, do not install or disassemble strongly, especially the installation of thread.
• Please install or disassemble with a suitable wrench, otherwise, the damage is not in the scope of
• After starting the gauge, it is a normal phenomenon to take a few minutes to keep it stable and
• If the product is out of order, please contact our after-sale technical staff.
• During installation, the gauge will be affected by installation stress. After installation, please zero
product is a precision device, DO NOT use hard objects to touch the diaphragm or
disassemble.
warranty.
work normally.
clearing.
(!!)The product damage caused by non-professional operation according to the operation
regulation is not the scope by the warranty.
The DPG280 is shipped with 2 AAA batteries outside of the unit. To install or replace batteries,
remove the four screws. Then remove the lid using a flat head screwdriver and the two pry slots
(shown above), as needed.
CAUTION: Do not apply force to keypad area on the front of the unit when
replacing the lid. Force should only be applied on the raised edges of the unit or
areas that do not contain keypad buttons or the screen.
NOTE: Battery operating and storage temperatures can vary by manufacturer.
The temperature rating of the replacement batteries you choose may limit the temperature to a
narrower range than specified for the DPG509. Please consult
the battery manufacturer for temperature limitations.
Battery life will vary based on the quality of batteries installed and combination of selected settings.
Below are general guidelines to maximize battery life:
• Keep the backlight off or rarely use
• Select a
• Avoid prolonged exposure to extreme temperatures
low sampling rate
first
Page 4
UNRESTRICTED
Section 2 – Setup
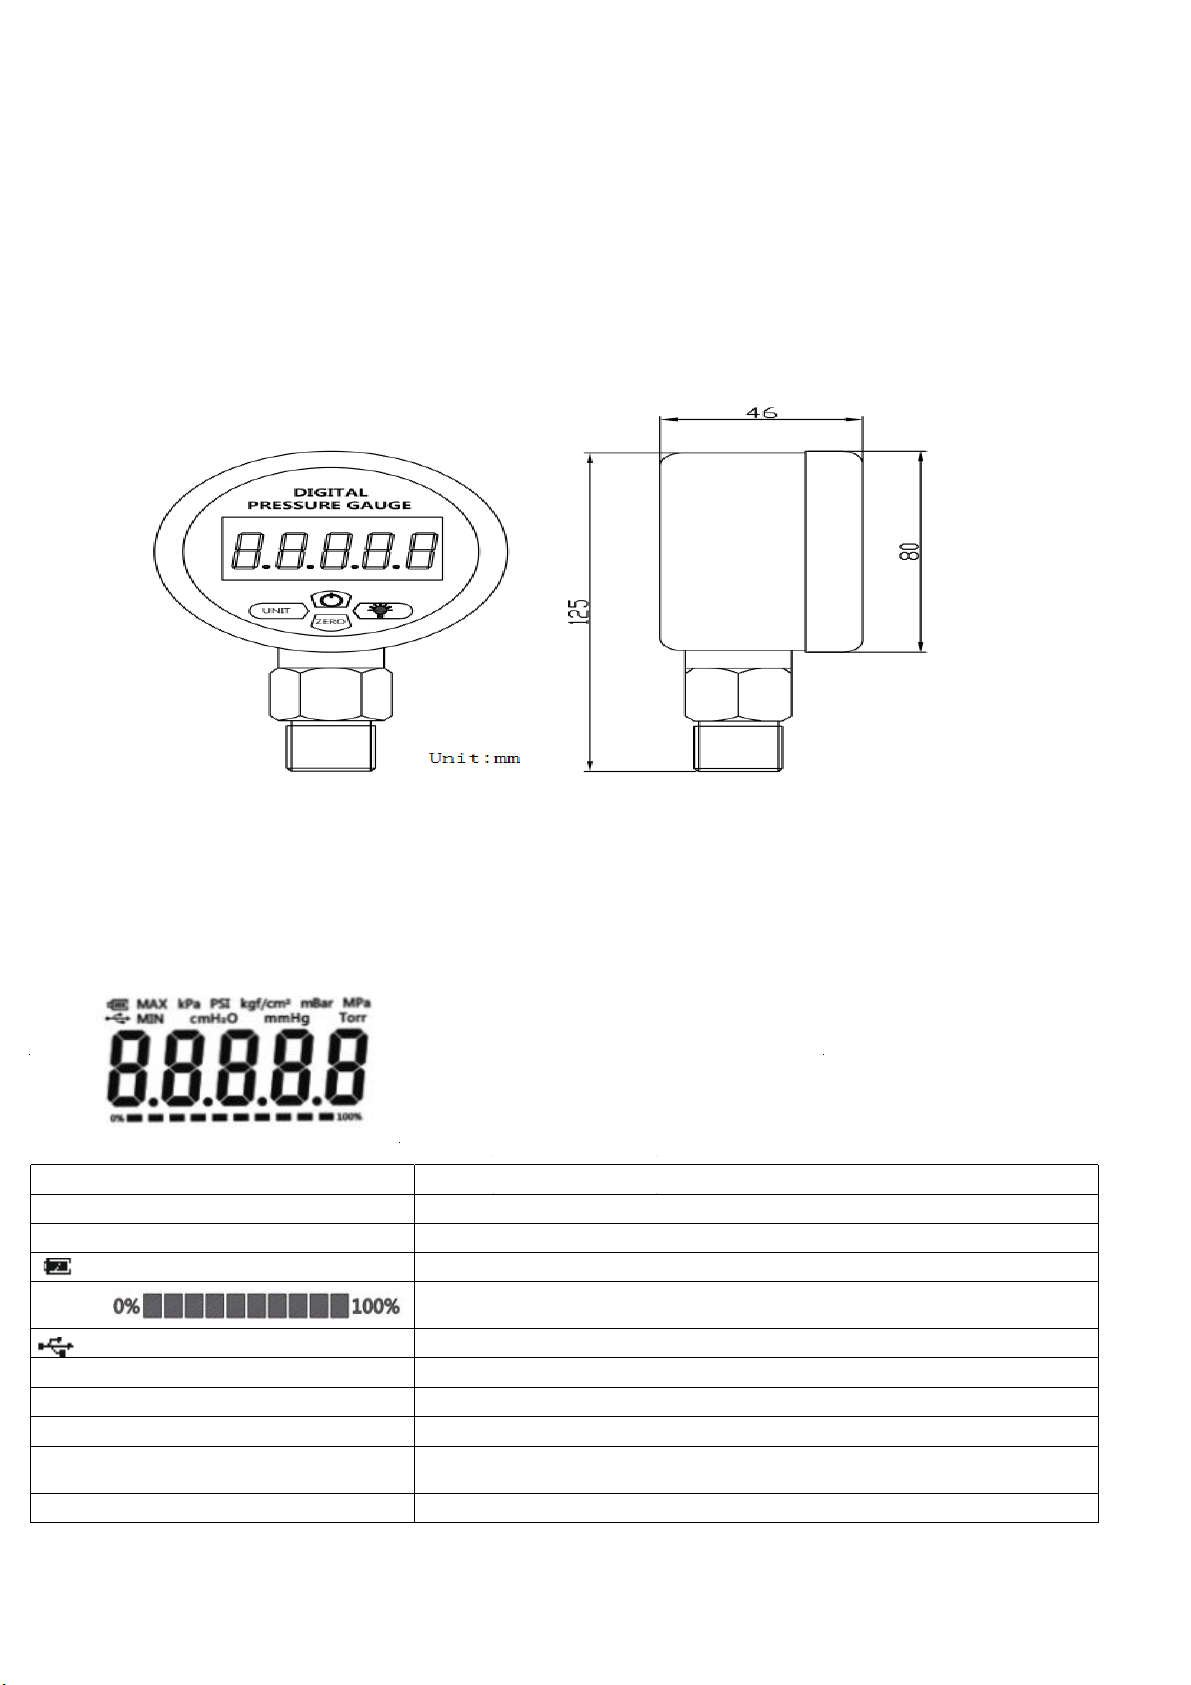
2.1 General Dimensions
Section 3 – Menu and Configuration
3.1 LCD and Code Description
CODE
kPa PSI Kg/cm² Bar Mpa Pressure Unit
MAX/MIN Max/Min Pressure
E-E
E-H
E-P
P-C
DESCRIPTION
Battery Level
Percent
Communication Sign
Abnormal sensor communication or sensor damage
Current Pressure Over Range Use or Sensor Damage
Enter pressure calibration procedure, please power off and exit
Enter Temperature Compensation Procedure, Please Turn Off and Exit
r-03
Filter constant setting
Page 5
UNRESTRICTED
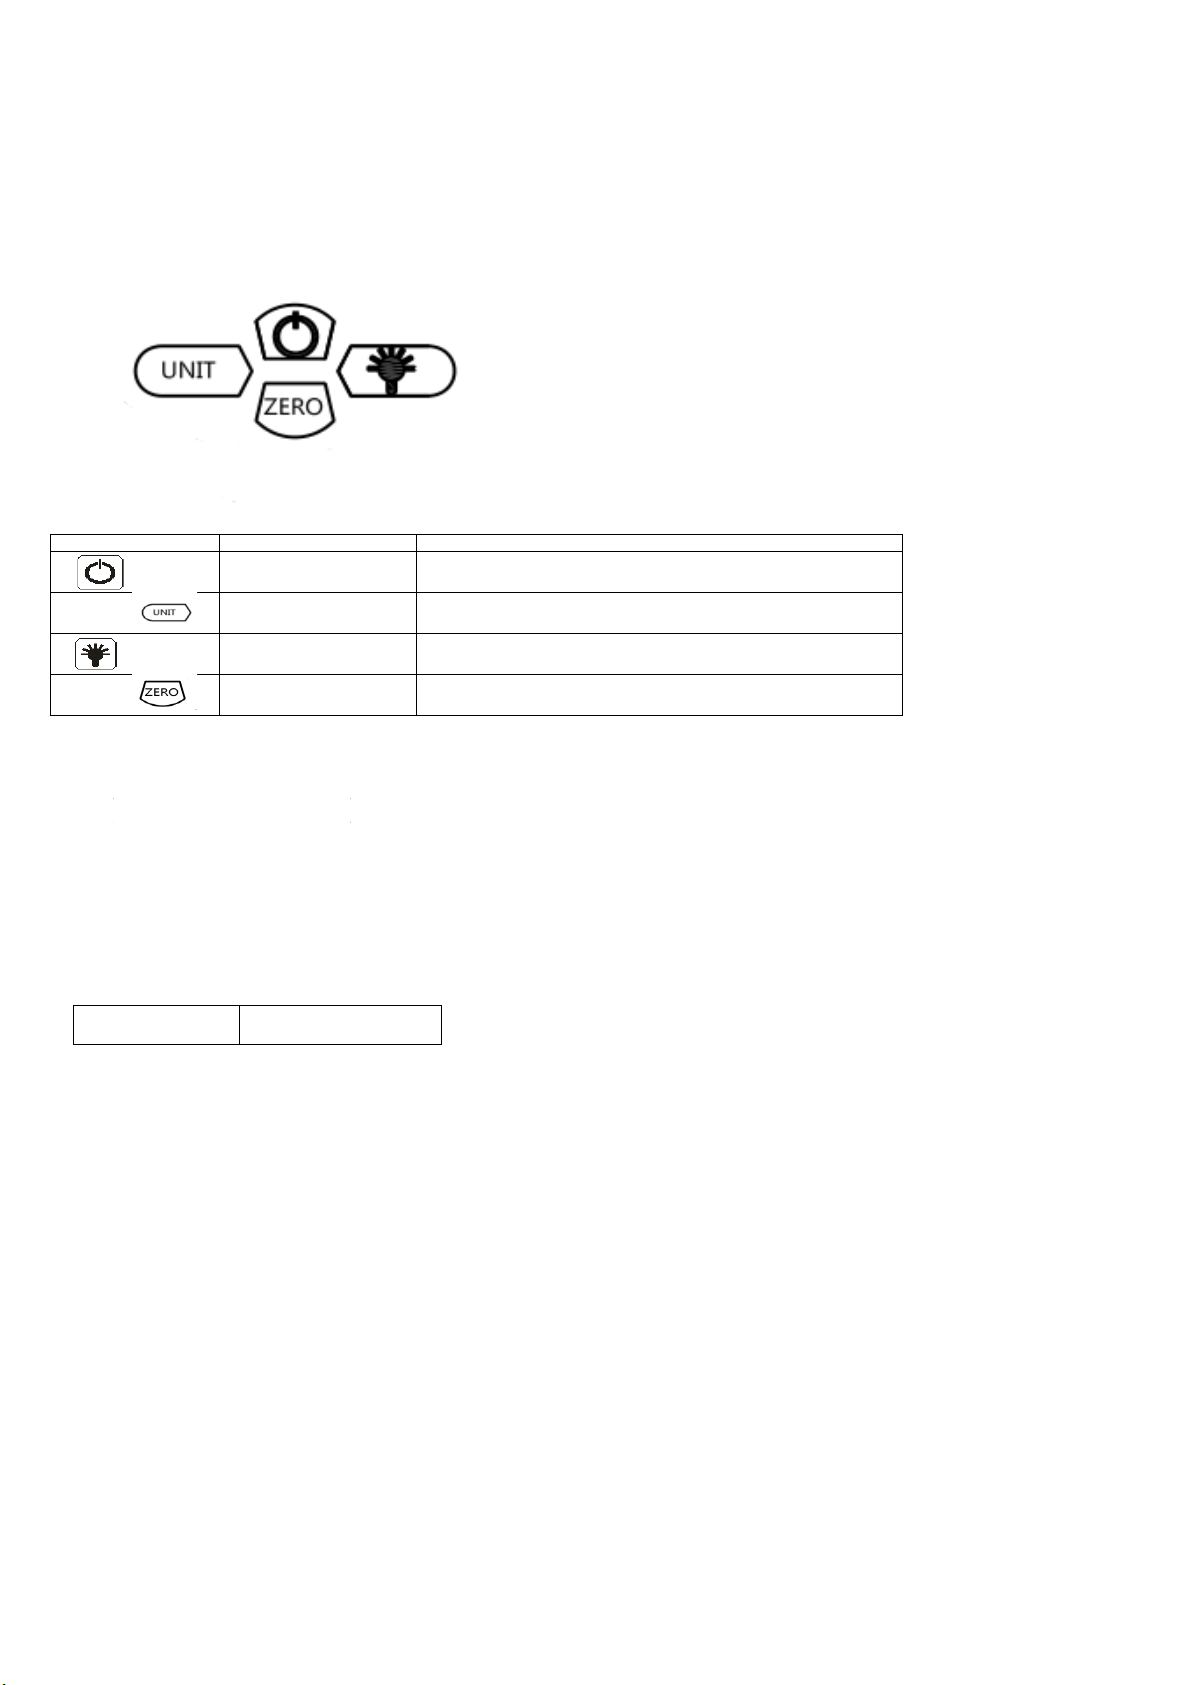
3.2 Button Functionality
BUTTON NAME DESCRIPTION
POWER Short press to turn ON/OFF
UNIT Short press to switch pressure units
BACKLIGHT
ZERO Press for 4 seconds to zero clearing
Short press to turn on the backlight; long press to keep the
backlight on
3.3 Adjust of Filter Constant
Short press ‘back-
light’ and ‘ZERO’ buttons together, it shows ‘r-03', and means the filter
constant is 03. Then change the value through pressing ‘ZERO’ button, the value is between
01~10. After setting, press back-light button to save and quit.
Notice: The value smaller, the figure changes more quickly; the value bigger, the figure
changes more slowly and the figure more stability.
3.4 Power
BATTERY
Two AAA battery
3.5 Data Record
1. On/off data record function
After power, short press ‘ backsign’ begin to flicker, it means the data record function is open.
Press ‘back-light’ button again, then the ‘pressure unit sign’ stop flickering, it means the data record
function is closed.
2. Adjustment the record interval time
Long press ‘back-light’button for 3 seconds till it shows ‘FXXXX’,
such as ‘F0001', it means the data record every one second. Through press ‘power’ and ‘zero’ buttons to
change the value. Through press ‘back-light’ button to shift different position value. After setting, press
‘unit’ button to save and quit. The value range: (1~3600) seconds.
3. Date export
First, please install the correct software on computer.
Second, contact gauge with computer through special USB-line which is in the package box. Third,
operation methods.
light’ button, then the ‘pressure unit
Page 6

UNRESTRICTED
3.6 Peak Value
Long press ‘UNIT’ button for 4 seconds, the screen will show the
Maximum value after last zero clearing, then press ‘UNIT’ button , it will show Minimum value, then
press ‘ UNIT’ button to quit.
During show Max or Min value, long press ‘ZERO’ button to clear record before, and enter a new record.
3.7 Troubleshooting
1.) Question: Back-light Dim
Answer: Low Battery, install new battery
2.) Question: Battery identification flashing
Answer: Low Battery, install new battery
3.) Question: Pressure no change
Answer: Reason Analysis:
(1). Pressure port
(2). Zero
clearing with pressure applied
(3). Pressure sensor damage
Solutions:
(1). Clear pressure connector
(2). Zero clearing without pressure
(3). Return factory for repair
is block
4. Question: Showing ‘E--H’
Answer: Reason Analysis:
(1). Over pressure
(2). Pressure sensor is
Solutions:
(1). Decrease pressure
Return factory for
(2).
5.) Question: Pressure change slowly
Answer: Sampling rate low. Sampling rate value decrease
6.) Question: Pressure change slowly
Answer: Value is beating too fast. Sampling rate value increase
7.) Question: Frequent Pressure Shock
Answer: Add Buffer Tube
8.) Question: High Temperature
Answer: Add Radiator Tube
damaged
repair
Page 7
UNRESTRICTED
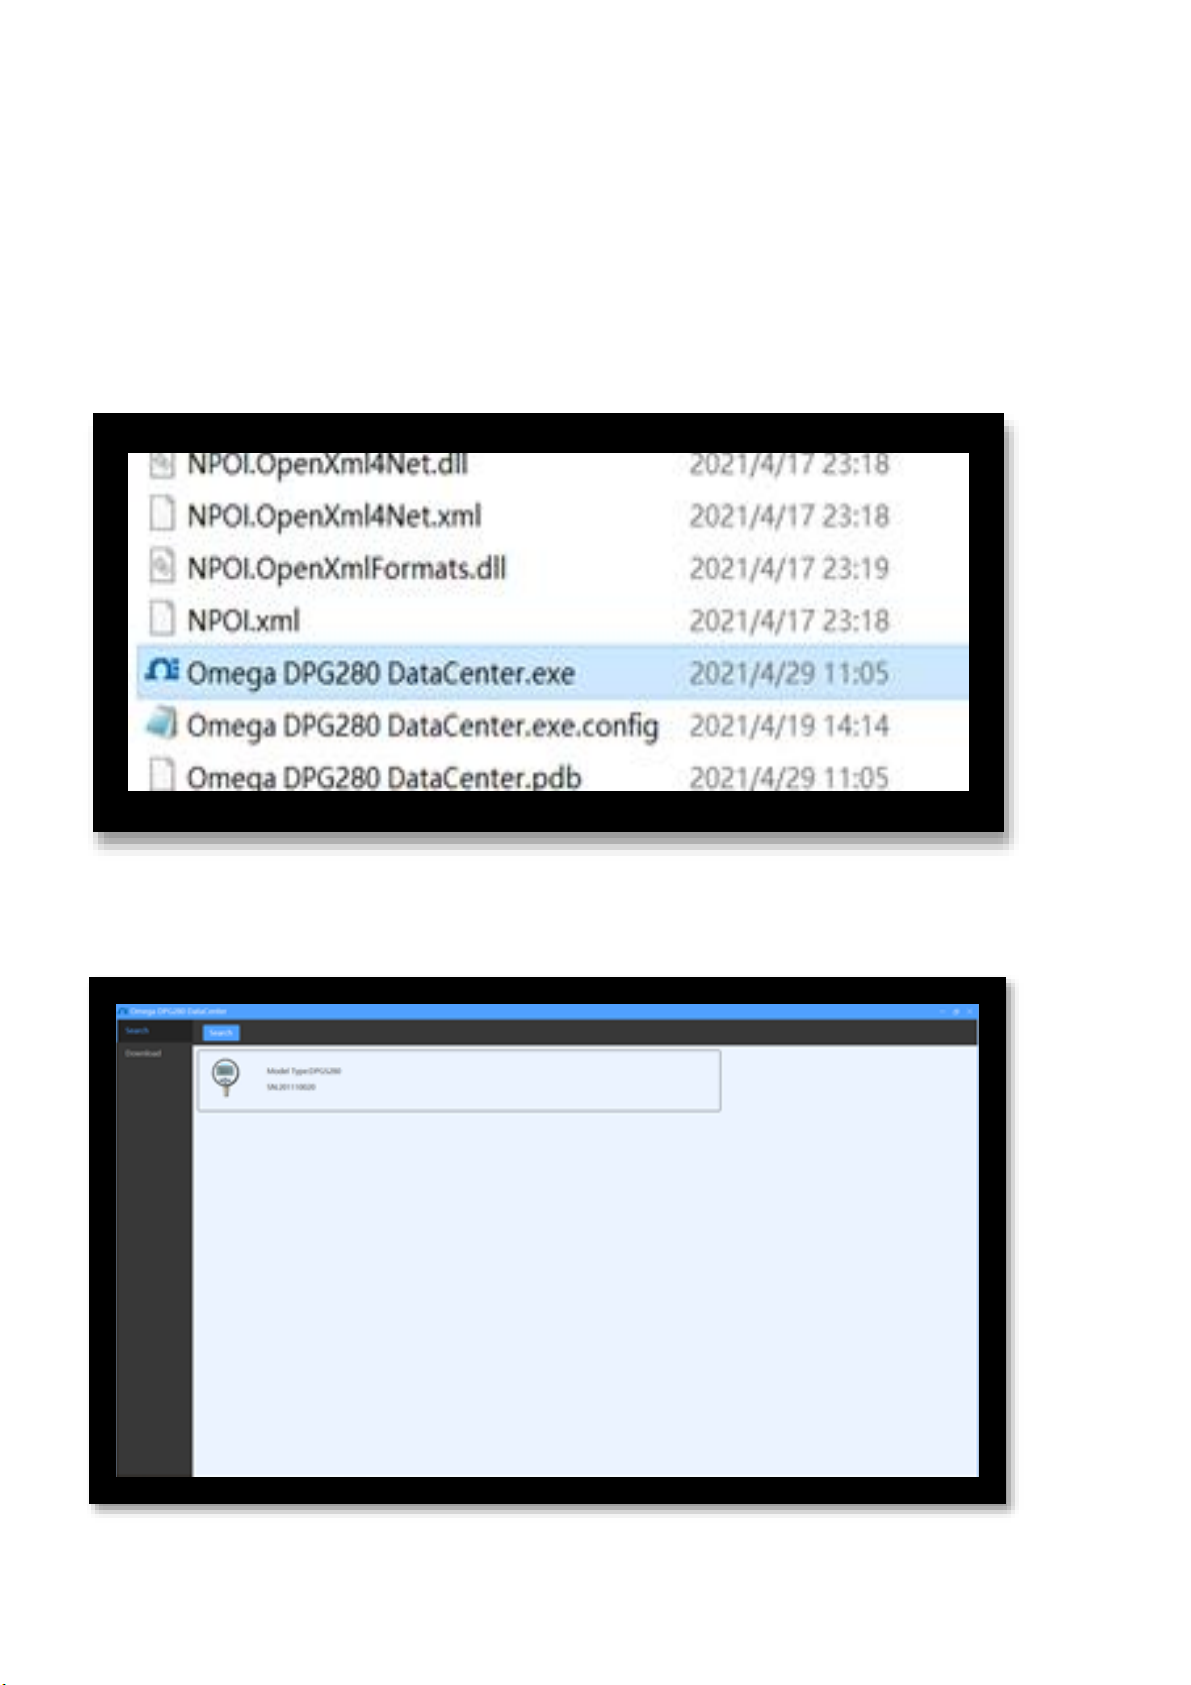
Section 4 - Software Instructions 4.1 Software
Instructions
ⅰQuick start
1. Plugin the USB adaptor. Extract the software package to you desire folder. Click “Omega DPG280 DataCenter.exe” to
start the application. “dot net Framework 4.8” should be install if the software cannot start. This
installation has been placed in the drivers folder.
2. Click the “search” button to list the connected pressure gauge. See the “Driver install” section if no device found.
Page 8
UNRESTRICTED
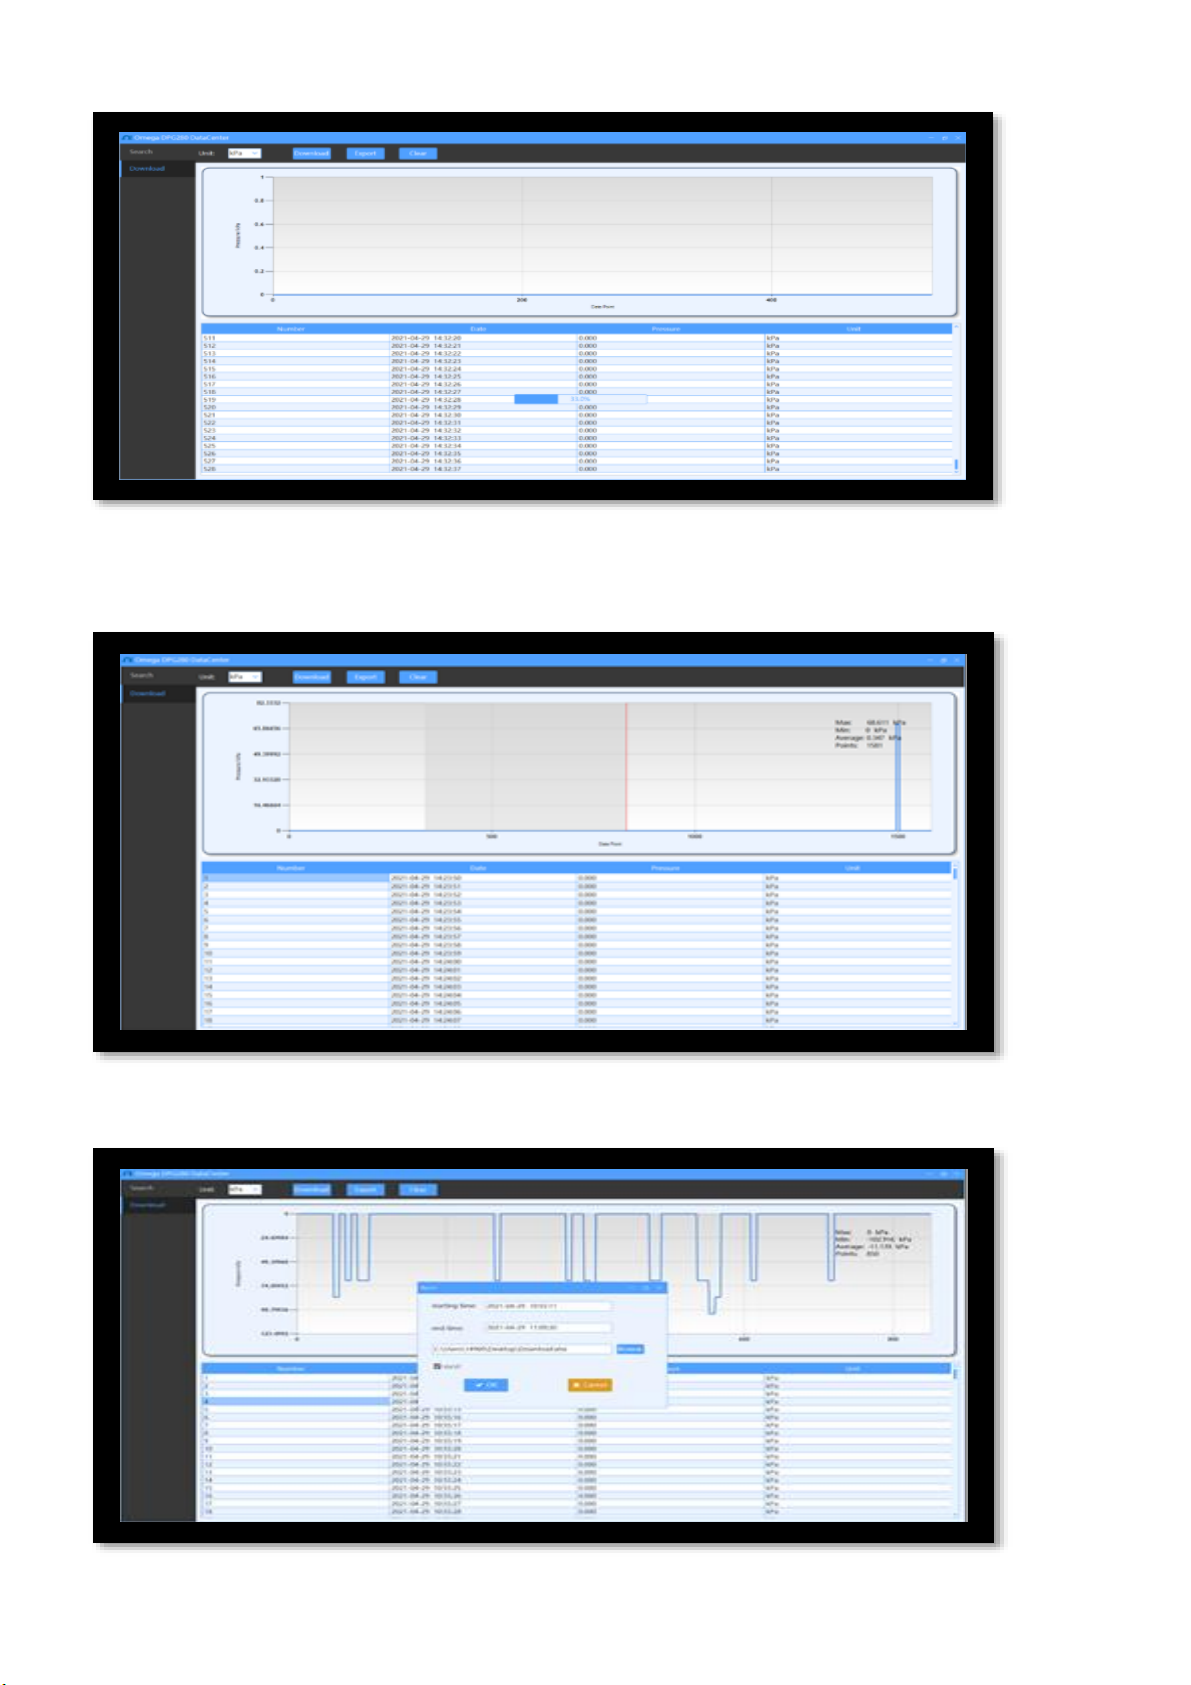
3. Select the unit
and click “download” button to start the download process.
4. Drag the data chart to zoom in the curve, right click to zoom out.
5. Click the “Export” button to export the history data.
Page 9
UNRESTRICTED
6. Click the “Clear” button to clear the history data in gauge.
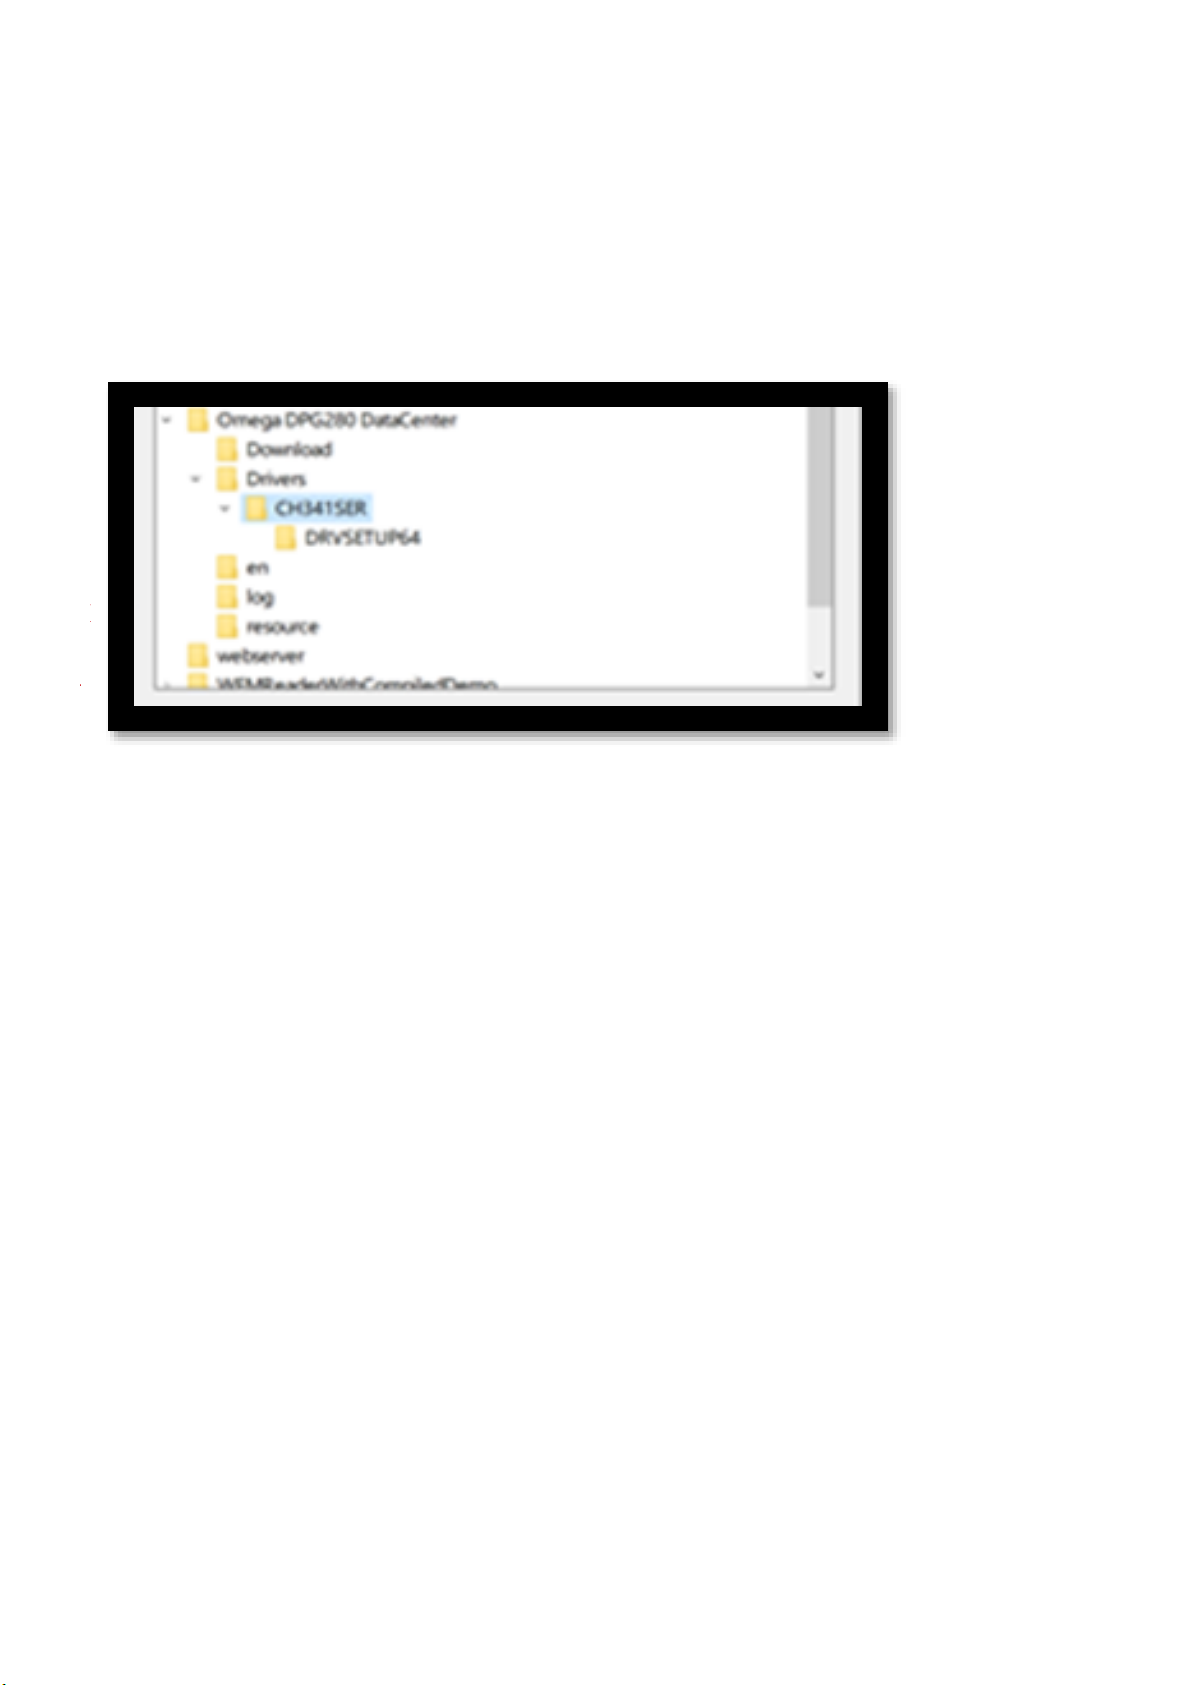
ⅱ Diver install
1. Right click the “This computer” and select “manager”
2. Right click the exclamatory marked USB device and select “update driver”. Click “Browse this computer to find the
driver”. Select the “/Drivers/CH341SER” folder and click “OK” to install the driver.
Page 10

UNRESTRICTED
omega.com
Servicing North America:
U.S.A. Omega Engineering, Inc.
Headquarters:
Customer Service: 1-800-622-2378 (USA & Canada only)
872-9436 (USA & Canada only)
Tel: (203) 359-1660 Fax: (203) 359-7700
e-mail: [email protected]
For Other Locations Visit omega.com/worldwide
The information contained in this document is believed t
reserves the right to alter specifications without notice.
WARRANTY/DISCLAIMER
OMEGA ENGINEERING, INC. warrants this unit to be free of defects in materials and workmanship for a period of 13
months from date of purchase. OMEGA’s WARRANTY adds an additional one (1) month grace period to the normal one
(1) year product warranty to cover handling and shipping time. This ensures that OMEGA’s customers receive maximum
coverage on each product.
If the unit malfunctions, it must be returned to the factory for evaluation. OMEGA’s Customer Service Department will issue an
Authorized Return (AR) number immediately upon phone or written request. Upon examination by OMEGA, if the unit is found to
be defective, it will be repaired or replaced at no charge. OMEGA’s WARRANTY does not apply to defects resulting from any
action of the purchaser, including but not limited to mishandling, improper interfacing, operation outside of design limits,
improper repair, or unauthorized modification. This WARRANTY is VOID if the unit shows evidence of having been tampered
with or shows evidence of having been damaged as a result of excessive corrosion; or current, heat, moisture or
vibration; improper specification; misapplication; misuse or other operating conditions outside of OMEGA’s control.
Components in which wear is not warranted, include but are not limited to contact points, fuses, and triacs.
OMEGA is pleased to offer suggestions on the use of its various products. However, OMEGA neither assumes
responsibility for any omissions or errors nor assumes liability for any damages that result from the use of its
products in accordance with information provided by OMEGA, either verbal or written. OMEGA warrants only
that the parts manufactured by the company will be as specified and free of defects. OMEGA MAKES NO
OTHER WARRANTIES OR REPRESENTATIONS OF ANY KIND WHATSOEVER, EXPRESSED OR IMPLIED, EXCEPT
THAT OF TITLE, AND ALL IMPLIED WARRANTIES INCLUDING ANY WARRANTY OF MERCHANTABILITY AND
FITNESS FOR A PARTICULAR PURPOSE ARE HEREBY DISCLAIMED. LIMITATION OF LIABILITY: The remedies of
purchaser set
forth herein are exclusive, and the total liability of OMEGA with respect to this order, whether based on contract,
warranty, negligence, indemnification, strict liability or otherwise, shall not exceed the purchase price of the
component upon which liability is based. In no event shall OMEGA be liable for consequential, incidental or
special damages.
CONDITIONS: Equipment sold by OMEGA is not intended to
under 10 CFR 21 (NRC), used in or with any nuclear installation or activity; or (2) in medical applications or used on humans.
Should any Product(s) be used in or with any nuclear installation or activity, medical application, used on humans, or
misused in any way, OMEGA assumes no
additionally, purchaser will indemnify OMEGA and hold OMEGA harmless from any liability or damage whatsoever arising out of
the use of the Product(s) in such a manner.
Toll-Free: 1-800-826-6342 (USA & Canada only)
Engineering Service: 1-800-
o be correct, but OMEGA accepts no liability for any errors it contains, and
be used, nor shall it be used: (1) as a “Basic Component”
responsibility as set forth in our basic WARRANTY / DISCLAIMER language, and,
RETURN REQUESTS / INQUIRIES
Direct all warranty and repair requests/inquiries to the OMEGA Customer Service Department. BEFORE RETURNING ANY
PRODUCT(S) TO OMEGA, PURCHASER MUST OBTAIN AN AUTHORIZED RETURN (AR)
NUMBER FROM OMEGA’S
CUSTOMER SERVICE DEPARTMENT (IN ORDER TO AVOID PROCESSING DELAYS). The assigned AR number should then be
marked on the outside o
The purchaser is responsible for shipping charges, freight, insurance and proper packaging to prevent breakage in transit.
FOR WARRANTY RETURNS, please
have the following information available
BEFORE contacting OMEGA:
1. Purchase Order number under
which the
product was PURCHASED,
f the return package and on any correspondence.
2.
Model and serial number of the product under
warranty, and
3.
Repair instructions and/or specific problems
relative to the
product.
Page 11

UNRESTRICTED
FOR
NON-WARRANTY
REPAIRS, consult OMEGA for current
repair charges. Have the following information available
BEFORE contacting OMEGA:
1. Purchase Order number t
o cover the COST of the
repair,
2.
Model and serial number of the product, and
3.
Repair instructions and/or specific problems
relative to
the product.
OMEGA’s policy is to make running changes, no
t model changes, whenever an improvement is possible. This affords our
customers the latest in technology and engineering. OMEGA is a trademark of OMEGA ENGINEERING, INC.
© Copyright 2018 OMEGA ENGINEERING, INC. All rights reserved. This document may not be copied, photocopied,
reproduced, translated, or reduced to any electronic medium or machine-readable form, in whole or in part, without the prior
written consent of OMEGA ENGINEERING, INC.
 Loading...