

Page 1
AQM-101
IAQ Formaldehyde
(HCHO) Logger
INSTRUCTION
SHEET
FEATURES
1) Super large LCD simultaneously display of HCHO level,
Temp., Relative humidity, Calendar (Y/M/D) andTime
(clock).
2) Three (3) smiley icons indicate indoor air quality levels
(0/0.08/0.8ppm), easy to understand HCHO concentration.
3) Stable Electrochemical type sensor for HCHO detection.
4) High alarm threshold is selectable.
5) Manual 0ppm calibration.
6) Audible/Visible LED warning for high HCHO concentration
MAINTENANCE
Cleaning and storage:
1). The meter should be cleaned with a damp cloth and mild
detergent when necessary.
2). Store the meter in an area with moderate temperature
and humidity.
MANUAL CALIBRATION TO ZERO
Before start HCHO manual calibration make sure the area is
ventilation and no HCHO environment. Ensure the calibration
completed, to use adaptor during calibration is recommended.
HCHO meter is completed calibration in factory before
packed. Manual calibration is only for meter inaccuracy.
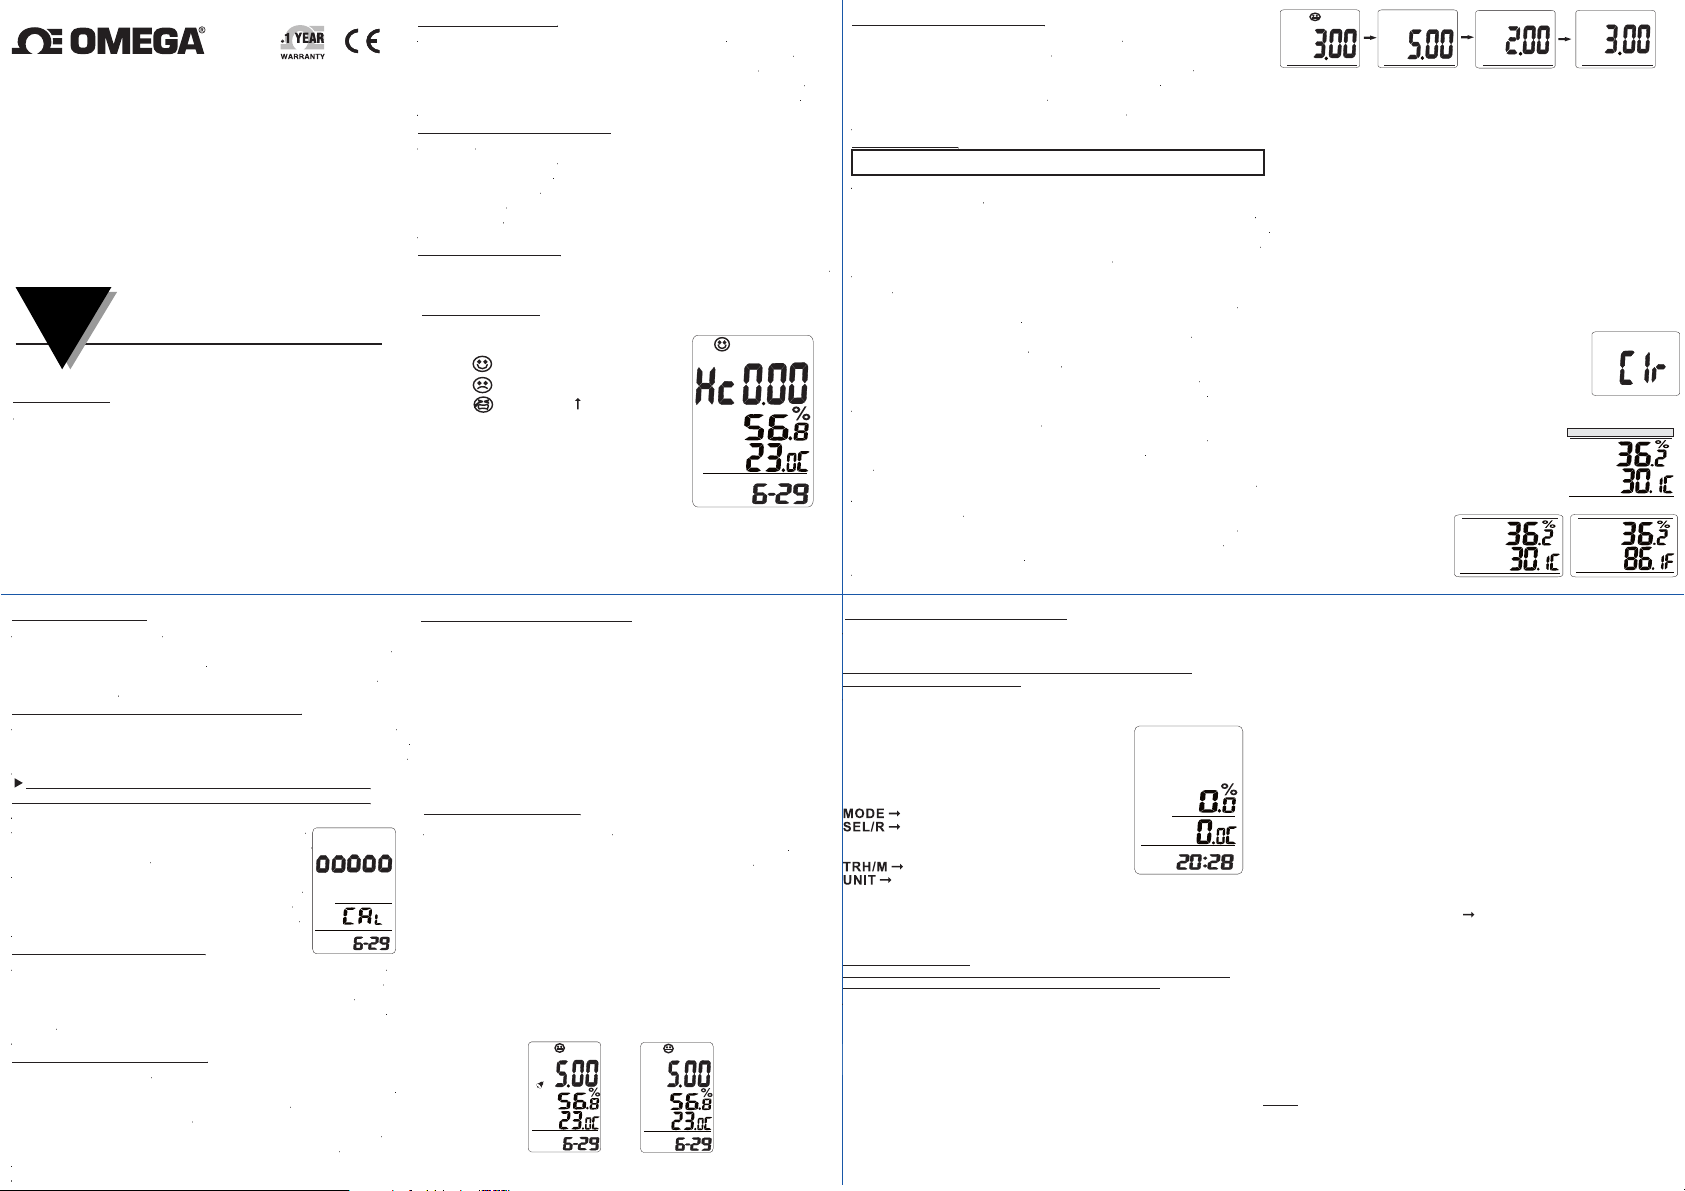
When power on, long press button moreUNIT
than 6 seconds, the value will turn into “00000"
and flash seconds.60
After calibration completed, display will show
full LCD icon for a second. Meter will restart
automatically to return normal measurement.
BATTERY INDICATION
When battery is low (HCHO consumes power ),the reading
of HCHO will be terribly high, could be couple thousand in
ppm. “LO BAT” is flashing at the bottom of the screen,
near calendar and time. Replace new battery when LO BAT
shows.
SETTING DATE & TIME
a) Real time and date:
The meter shows Mo./Date and Hr/Min on the 3rd layer of
display, and each cycle is 16 seconds.
b) Month/Date and Hour/Mi
s button to enter the real date andMODE+POWER
Pres
time setting. The time default is 24-hours format.
M5443/0517
Shop online at: www.omega.com e-mail: [email protected]
For latest product manuals: www.omegamanual.info
MADE IN TAIWAN
n
4
M D
INTRODUCTION
Thank you for purchasing desktop HCHO meter.
It is used to measure HCHO concentration,air temperature
and relative humidity with visible and audible alarms.
This HCHO meter is an ideal instrument for indoor air quality
(IAQ) diagnosis and HVAC system performance verification.
MATERIAL SUPPLIED
(1) Meter
(2) Universal Adaptor
(3) Operation manual
(4) 4 pcs batteries.
(5) USB cable
POWER SUPPLY
The meter is powered by Super heavy duty batteriesAAAx 4 pcs
(Recommended) or anAC adaptor(9V/0.5Aoutput)
LCD DISPLAY
Symbols:
1)ppm HCHO unit
icon
2)
3) icon
4) icon
5)Air Temp.: Ambient Temperature
6)MD : Month / Date
7)HM: Hour / Minute
8)TWA: Time Weighted Average
9)STEL: Short-Term Exposure Limit
10)Logging: When it is in the recording mode
11)VOC, NO2, WBGT, hpa, mbar ,EXTTEMP,lps%,cfm/p are not
available in these models
SETTING DATE & TIME
The meter interchangeably shows current date and time
on the 3rd layer of display, and each cycle is
6 seconds.
The time default is 24-hours format.
After set up, press + to save and exit.MODE POWER
:
:
0ppm~0.08ppm
0.08ppm
:
0.8ppm
:
(8 hours)
(15 minutes weighted average )
+ -->Enter date/time modeMODE POWER
--> Number goes up.SEL/R
--> Number goes down.TRH/M
-->Edit Month/date or Hour/Minute.MODE
-->Select to edit Month or date, Hour or Minute.UNIT
0.8ppm
~
ppm
Humidity
TEMP
AIR
o
M D
1
ALARM SETTING
Set up alarm function:
In normal measurement, press buttons ,SEL/R+POWER
bell will appear alarm function. Once set up, the red
LED will flash if the data exceeding the setting data.
HCHO Hi alarm setting.
- ->
Change digit.UNIT
- ->
Number goes up.SEL/R
- ->
After set up + to save and exit setting.SEL/R POWER
HCHO alarm ON/OFF:
In normal function, short press bell icon appearPOWER
alarm on, short press again to turn off.POWER
HCHO alarm on
Enter HCHO alarm setting.+SEL/R POWER- ->
Number goes down.TRH/M
Humidity
ppm
o
AIR
TEMP
M D
Humidity
ppm
HCHO alarm off
o
AIR
TEMP
M D
5
KEYPAD (CONTROLS)
1) MODE : HCHO mode,MAX,TWA,STEL
2) SEL./R : Edit alarm function
3) TRH.M. : Temp. Humidity mode. Setting/ Next
4) UNIT : Select Temp. unit
5) POWER: Turn meter on/off, alarm on/off.
OPERATION
Warning: Remove batteries when not in use to prevent battery
leakage (Out of warranty) and power consumption.
(a) POWER ON/OFF
Put battery or plug in adaptor, meter turns on automatically .
LCD shows current HCHO, RH & Temperature, Date andTime.
Three(3) smiley icons indicate the indoor air quality level and
appear on the top of first layer display.
Note:
(1) When low battery, meter will restart and logger will stop if
(2) Please use properly power source, input voltage:
(3) Battery life approx. 120 hours when continuous used
(b) TAKING MEASUREMENT
Note:
(c) HCHO MODE
Logger mode: Long press to key start/off.
user switch to adaptor.
100~240 VAC,50-60Hz
Output voltage: DC 7.5~9.0V
Output current: 0.5A,or the meter will be damaged.
The meter starts the measurements when powered
on and response time is less than 30 sec.
Do not hold the meter close to any other source of HCHO.
displa
y. The top layer of display will cycle from HCHO,
Maximum, TWA, STEL.
MODEIn the HCHO Mode, press button to switch HCHO
2
TEMP. HUMIDITYOFFSET
Make sure the meter is off, press buttonSEL/R+TRH/M
then plug in the adaptor at the same time to enter offsetting
mode.
WARNING: DO NOT USE THIS FUNCTION WITHOUT
STANDARD INSTRUMENT.
Example: Standard instrument is 30.2°C,
meter shows 30.0°C.Enter temp. offset mode, press
till 0.2 appear.TRH/M
Offset range of Temp.and RH as below:
Temp.:-9.9°C to +9.9°C / -9.9°F to +9.9°F
RH%:-9.9% to +9.9%
a) Humidity offset:
b) Air temp. offset
After setting up short press to save setting and, POWER “%”
icon will flash a second. Then replug adaptor to return normal
measurement.
Logger setup:
When using datalogger function, please use batteries and adaptor
at the same time to avoid power outages and data loss.
A. Install logger driver for Windows
The PL2303_Prolific_DriverInstaller_v110.exedriver is for
Windows operation system, follow the installation steps
hereunder:
1.Put the CD into CD driver, click
2.The set up status.
3.Click “NEXT” to continue.
4.After complete the installation, press “Finished”.
Increase value
Decrease value
Increase value
Decrease value
PL2303_Prolific_DriverInstaller_v110.exe for installation the
driver.
6
Humidity
TEMP
AIR
H M
ppm
ppm
MAX
ppm
TWA
Note 1:
1)
MAXIMUM:
The unit automatically records maximum reading
and minimum reading after powered on.(MINIMUM is
always 0.00ppm for HCHO meter)
2) TWA: (Time Weighted Average 8 hours)
The meter keeps updating the reading every minute. If
the meter has been powered on for less than 8 hours,
the TWAvalue will be the weighted average of readings
since powered on.
3)STEL: (Short-Term Exposure Limit in 15 minutes weighted
average)The meter keeps updating readings every
minute. If the meter has been powered on for less than
15 minutes, the STEL value shows the weighted average
of reading taken since powered on.
4)RESET MAX:
Press button to get MAX reading andMODE
switch TWA or STEL.Under MAX mode, Long
press button to clear all the values.MODE
(d) TRH MODE : Temperature / Relative Humidity mode
(e) Temperature unit (°C or °F) selection
TRHIn the Mode, the meter displays both
related humidity and air Temperature
simultaneously
Press button to toggle theUNIT
temperature unit (°C or°F).
.
HUMIDITY
AIR
TEMP
HUMIDITY
HUMIDITY
o
3
B. Install the logger software for Windows XP
(win7/win8/VISTA)
Please follow the following steps to install the software
1. Put CD into CD driver, click “Setup.exe” to install
2.Select the destination folder you are go to save by click
Browse button“ ”
3.Once you finish selecting ,press Next“ ”.
4.Select “I accept the LicenseAgreement:(s)” and press NEXT
button.
5.Click NEXT button when you see the following.
6.Press FINISH button to complete the installation.
o
7.Restart the Windows XP system
C Run the software from Windows XP.
1. Plug the USB cable into USB port, since you have already
Installed the USB driver, computer will automatically detect
logger ,
2. Find “Datalogger” in START PROGRAMS
3.Select logger software folder.
Reminder:
Software is installed completed,”Get Datalog’s Identifier”shows
next page(pic.1), then press SETTING button to enter Log setting
Note: If logger is not plugged in USB port, the warning message
“Reminder: Data Logger is not plugged in USB port!”shows next
page(pic.2) Make sure logger is plugged in and choose the
correct COM port.
7
STEL
AIR
TEMP
HUMIDITY
TEMP
ppm
+ TEMPERATURE
AIR
o
o
(Pic.1)
Page 2
(Pic.2)
WARRANTY/DISCLAIMER
materials
s
(1)
that
.
n
n
d
m
,
r
f
a
r
f
t
.
s
s
.
s
R
R
S
R
F
e
e
t
y
.
,
assumes
,
m
h
NOTE:
If software message box show as Pic2.Follow the next steps.
1.Click My computer Content in hardware content, click“ ”” ”
Device manager to find the listed (COMx) listed under Ports“ ”
(COM & LPT as below with red line. If you may Prolific
USB-to-Serial Comm. Port , it means the logger is connected
to computer properly.
2. Remember the Comm port number and go back to software.
3 Click “Setting” ”Comm port“select the port number as you.
see from step 1, then press OK button.
Logger Setting:
(Pic.3)
(Pic.4)
8
(Pic.5)
BASIC:(Pic.3)
1:ID setting
Maximum 20 characters , name your logger press OK
button to confirm
Please type in capital. Space is unacceptable.
2:Current Date/Time
Clock setting, the system automatically shows current date and
time of your pc. Press OK to confirm.
(Note: Schedule date & time refer to current pc date and time)
Please click OK to sync the meter’s date and time
every time.
ALARM&SENSOR:(Pic.4)
1.Appear the parameter.
HCHO model default with Temp. and RH sensor.
SETTING:(Pic.5)
1. Set sample point (K=1,000 multiple basis within total
memory points).
2.Set sample rate, start mode to record:
Select “hour(1~6), “minute(0~59)”,“second(0~59)” time interval.
Select 5 start modes from:
Immediate (Logger start recording immediately)
Real-time(PC is always
y start/off (Start/stop recording by long pressing
Ke
Roll-over (when memory are full, logger covers the earliest memory
Schedule (Select the date and time meter will start recording.)
automatically)
3.Select Unit :
connected with the logger)
SEL/R button)
Select Temperature unit °C/°F for recording,
press OK to confirm.
9
Schedule start mode:
Select the date and time meter will start recording.
The recording start time as software’s current time not
meter’s. Please set up the current time correctly.
Real-time start mode:
1.After set start mode at real-time,datalogger starts login records.
When logger records, the green fan at left corner shows it is
under recording.(Meter should be connected with pc all the time,
under this mode.
2.In real-time mode, it shows “STOP” button instead of
“DOWNLOAD” at the right corner. Press STOPto stop
real-time recording.
Before exit software data has to be downloaded.
Key-start/off mode:
Select the mode to record once long press
button for 3 seconds. Long press R/LESR/LES
button again to stop recording. Data has to be
downloaded before next key-start. LCD
display appear “Logging” at left corner.
After key off the recording, the data has to downloadNOTE:
before restart the Key-Start function.
Roll-over mode:
After Roll-over mode is selected. Press OK, the meter will start to
record. When the data is full, it will cover the earliest memory.
After download the data , long press button to recordSEL/R
without reset up each parameter an
Logger Status:
Before download data, press to show ID,LOGGER status
Records, Sample rate, Unit.
Once button is pressed, recording isNOTE: Download
inactivated.
)
Long press
d selection.
10
Logger function:
Download data:
Press DOWNLOAD button, data download in few seconds.
Graph shows automatically
Please do not press DOWNLOAD button if you won’tNOTE:
stop record. You can press LOGGER STATUS button to see
record points.
Retrieve file:
Press RETRIEVE FILE button to select file and show the graph.
Save data:
Press SAVE button to save txt.or csv.file.After save as txt.
may print as pdf. file if needed.
View Data Table:
Press View button to get data table with details.(pic.6)
Print graph:
Press PRINT button and print graph. Follow the print setting
below to print full screen graph. Press OK to print pdf file.(pic.7)
Print Table Data:
Press table data, the screen shows the
record range, enter the start number to the
end number (For example: 1~500 or
200~1000...or leave it blank for printing
all data ).(pic.8)
Save each pdf. files with different names.
(pic.6)
11
Clear Data:
The data is stored in the memory till next setting start, meter
will clean previous data automatically. So if you start next
data logging, there is no way you can find the data you
haven't stored.
Line color selection:
1.Click the color beside the reading(Temp. RH. HCHO),
color box appear.
2.Move mouse to review and select color.
3.Click to save, the color appear on line and bar.
√
(pic.7)
√
(pic.8)
Zoom in/out&Move
Hold
Hold
Hold
Press
NOTE: May follow the line color selecting, the graph size will
go back to default.
Click
+
Ctrl
Click
+
Ctrl
+
Ctrl
Shift
or
Screen graph zoom in
=
Mouse
Screen graph zoom out
=
Mouse
Click
= Read each measurement .
Mouse
=
Move screen graph
12
SPECIFICATIONS
AQM-101
Meas. Range
Audible alarm
Interfacce
LED(Green.Red)
Temp.range
RH%range
Resolution
Accuracy
Accuracy(HCHO)
Response time
Memory
Sensor life time
TROUBLE SHOOTING
(1) When meter appears break character, please find
out if meter ever dropped to the floor. If “yes”,
please contact with local distributor for technical service.
(2) Error codes:
Er1 : HCHO/Temp./RH sensor is failed
Er2 : HCHO/Temp./RH Over range
( Under vaccum ,ventilated standard gas chamber
). MeetNOISHacceptance criterion within +/-25%
0.00-5.00 ppm (mg/m
YES(Adjustable)
USB
YES
0~50°C (32~122°F)
10 ~ 90%RH
0.01ppm(HCHO) ,1°C/°F ,(1%RH)
±1°C /2°F (Temperature),±5% (10~90%RH)
±5% of reading + 0.03ppm (mg/m3)
of the true value at th e95% confidence level.
Example: OSHAFormaldehyde regulation
0.10ppm ( EPA0.08ppm), accuracywithin
0.025ppm ( 0.075~0.125ppm)
T90:Less than 30 seconds
32,000
Expected3years
13
points
WARRANTY
This instrument is warranted for two years from the date of
3
)
purchase(One year limited warranty applies to cables).AReturn
Authorization letter must be issued before returning for any reason.
This warranty does not apply to defects resulting from action of
the user such as misuse, abuse, alteration neglect, improper
wiring, improper maintenance or repair, or unauthorized
modification, damage resulting from leaking batteries, operation
outside of specification.
During the warranty period the manufacturer reserved the right to
decide either to repair or replace the product.The meters are to be
returned along with good packing to prevent any damage in
shipment and insured against possible damage or loss.
The two years’ warranty doesn’t apply to:
Accessories and batteries (not covered by warranty).
Claims is not acceptable for improper use (including
adaptation to particular applications not foreseen in
the instructions manual) or improper combination
with incompatible accessories or equipment, or by
previous attempts for repair carried out by none
skilled or unauthorized personnel.
Sensor damaged by user improper use
(Watering,Burning,Condensation....)
HCHO LEVELS AND GUIDELINES
Non-enforced reference levels:
a) 0.03 ppm-Average outdoor level.
b) 0.10 ppm-Recommend upper limit for residences by
c) 0.40 ppm-Recommended upper limit for manufactured homes.
d) 0.50 ppm-OSHA workplace limit.
e) 0.75 ppm-OSHA TWAlimit.
f ) 0.80 ppm-Level at which most people first detect odor.
g) 2.00 ppm-OSHA STEL limit.
ASHRAE , ANSI,EPA,NIOSH for STEL.
OMEGA ENGINEERING, INC. warrants this unit to be free of defects in
and workmanship for a period of 13 months from date of purchase. OMEGA’
WARRANTY adds an additional one (1) month grace period to the normal one
year product warranty to cover handling and shipping time. This ensures
OMEGA’s customers receive maximum coverage on each product.
If the unit malfunctions, it must be returned to the factory for evaluation
OME GA’s Customer Service Dep artment will issue a n Authorized Retur
(AR) number immediately upon phone or written request. Upon examinatio
by OMEGA, if the unit is found to be defective, it will be repaired or repla ce
at no charge. OMEGA ’s WARRANTY does not apply to defects resultin g fro
any a ction of t he purchaser, including but not limited to misha ndling
improper interfacing, operation outside o f design limits, improper repair, o
unauthorized modification. This WARRANTY is VOID if the unit shows evidence o
having been tampered with or shows evidence of having been damaged as
result of excessive corrosion; or current, heat, moisture or vibration; imprope
specification; misapplication; misuse or other operating conditions outside o
OMEGA’s control. Components in which wear is not warranted, include but are no
limited to contact points, fuses, and triacs.
OMEGA is pleased to offer suggestions on the use of its various products
However, OMEGA neither assumes responsibility for any omissions or error
nor assumes liability for any damages that result from the use of its product
in accordance with information provided by OMEGA, either verbal or written
OMEGA warrants only that the parts manufactured by the company will be a
specified and free of defects. OMEGA MAKES NO OTHER WARRANTIES O
REPRESENTATIONS OF ANY KIND WHATSOEVER, EXPRESSED O
IMPLIED , EXCEPT THAT OF TITLE, AND ALL IMPLIED WARRANTIE
INCLUDING ANY WARRANTY OF MERCHANTABILITY AND FITNESS FO
A PARTICULAR PURPOSE ARE H EREBY DISCLAIMED. LIMITATION O
LIAB ILITY: The remedi es of purc haser se t forth herein are
exclusive, and the total liability of OMEGA with respect to this order,
whether based on contract, warranty, negligence, indemni fication,
strict liability or otherwise, shall not exceed the purchase price of th
component upon which liability is based. In no event shall OMEGA be liabl
for consequential, incidental or special damages.
CONDITIONS: Equipment sold by OMEGA is not intended to be used, nor shall i
be used: (1) as a “Basic Component” under 10 CFR 21 (NRC), used in or with an
nuclear installation or activity; or (2) in medical applications or used on humans
Should any P roduct(s) be used in or with any nuclear installation or activity
medical application, used on humans, or misused in any way, OMEGA
no responsibility as set forth in our basic WARRANTY/DISCLAIMER language, and
additionally, purchaser will indemnify OMEGA and hold OMEGA harmless fro
any liability or damage whatsoever arising out of the use of the Product(s) in suc
a manner.
14
 Loading...