

Page 1
Espresso Machine
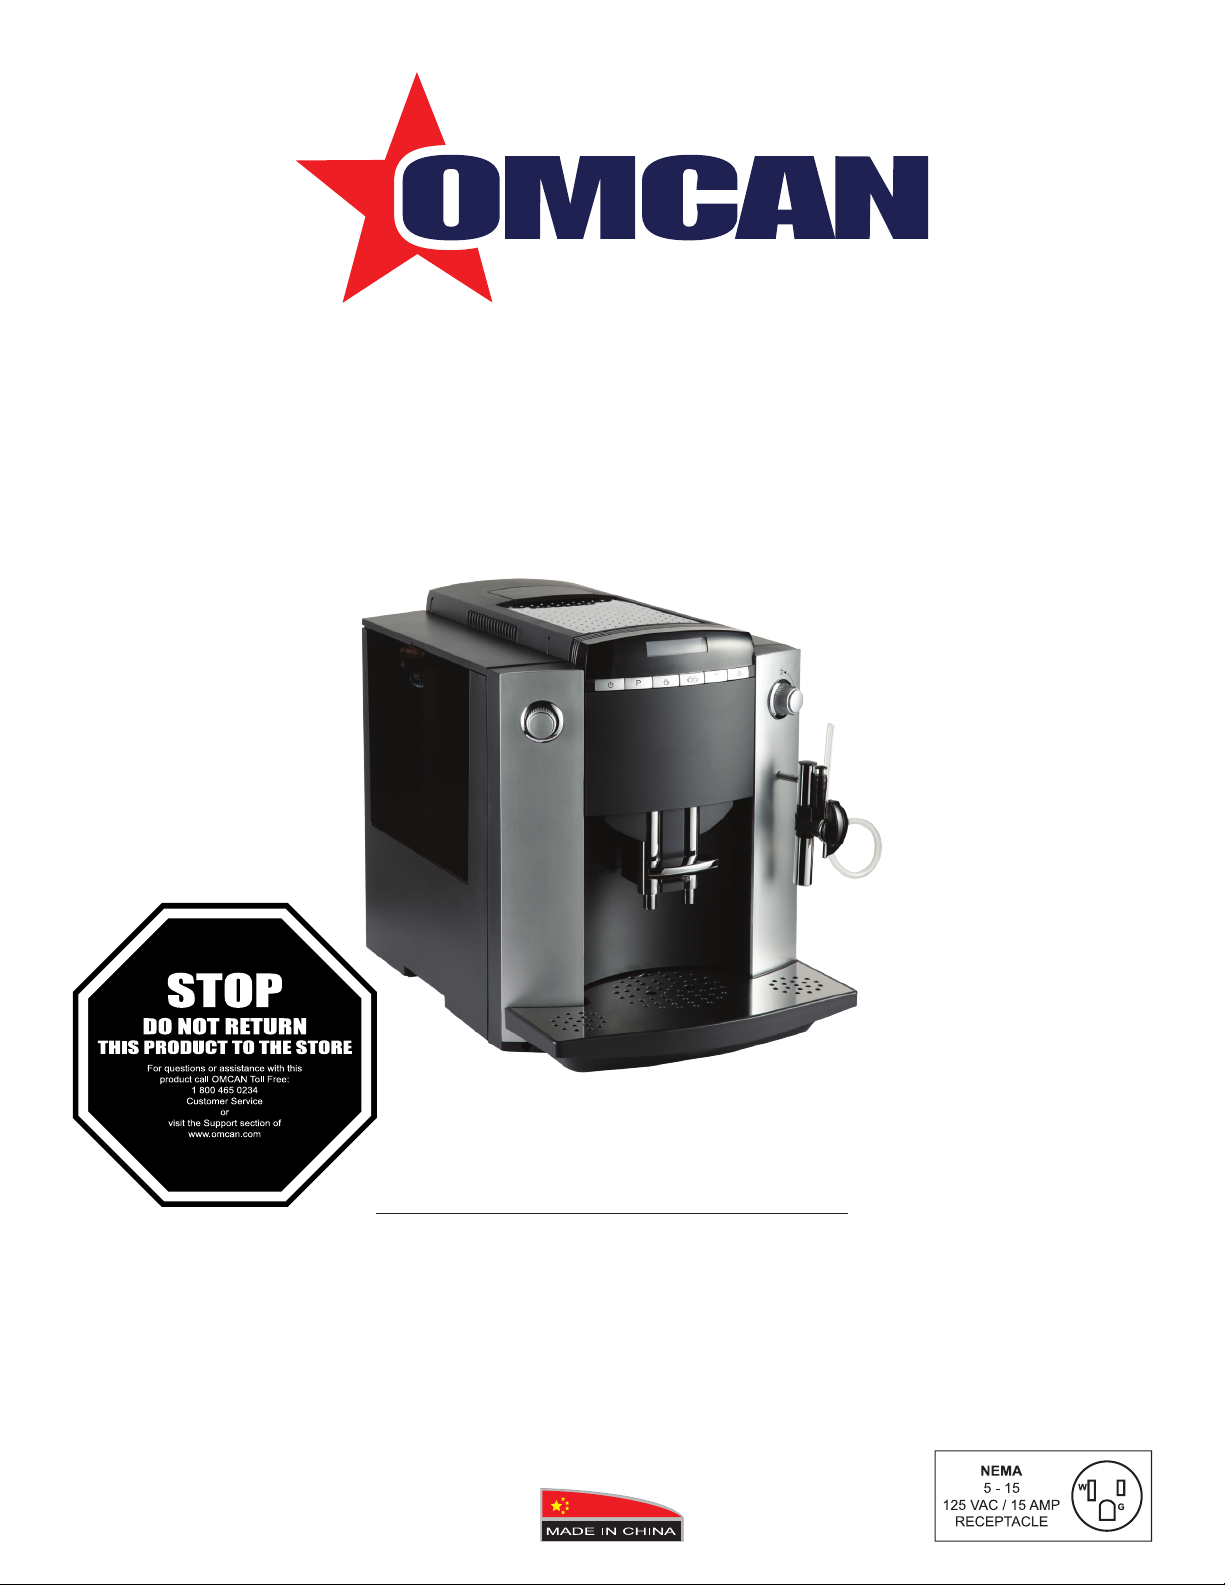
Model CM-CN-0200
Item 21602
Instruction Manual
Revised - 10/20/2017
Toll Free: 1-800-465-0234
Fax: 905-607-0234
Email: service@omcan.com
www.omcan.com
Page 2

Table of Contents
Model CM-CN-0200
Section
General Information
Safety and Warranty
Technical Specications
Installation
Operation
Maintenance
--------------------------------------------------------------------------------------- 6 - 8
--------------------------------------------------------------------------------------- 8 - 14
--------------------------------------------------------------------------------- 14 - 17
--------------------------------------------------------------------------- 3 - 4
--------------------------------------------------------------------------- 4 - 5
Page
-------------------------------------------------------------------------- 6
Troubleshooting
Parts Breakdown
Electrical Schematics
Notes
Warranty Registration
------------------------------------------------------------------------------------------- 21 - 22
----------------------------------------------------------------------------- 17 - 18
---------------------------------------------------------------------------- 18 - 19
---------------------------------------------------------------------------- 20
---------------------------------------------------------------------------- 23
2
Page 3

General Information
Omcan Manufacturing and Distributing Company Inc., Food Machinery of America, Inc. dba Omcan
and Omcan Inc. are not responsible for any harm or injury caused due to any person’s improper or
negligent use of this equipment. The product shall only be operated by someone over the age of 18, of
sound mind, and not under the inuence of any drugs or alcohol, who has been trained in the correct
operation of this machine, and is wearing authorized, proper safety clothing. Any modication to the
machine voids any warranty, and may cause harm to individuals using the machine or in the vicinity of
the machine while in operation.
CHECK PACKAGE UPON ARRIVAL
Upon receipt of an Omcan shipment please inspect for external damage. If no damage is evident on the
external packaging, open carton to ensure all ordered items are within the box, and there is no concealed
damage to the machine. If the package has suffered rough handling, bumps or damage (visible or concealed),
please note it on the bill of lading before accepting the delivery and contact Omcan within 24 hours, so we may
initiate a claim with the carrier. A detailed report on the extent of the damage caused to the machine must be
lled out within three days, from the delivery date shown in the shipping documents. Omcan has no recourse
for damaged products that were shipped collect or third party.
Before operating any equipment, always read and familiarize yourself with all operation and safety
instructions.
Omcan would like to thank you for purchasing this machine. It’s of the utmost importance to save
these instructions for future reference. Also save the original box and packaging for shipping the
equipment if servicing or returning of the machine is required.
--------------------------------------------------------------------------------------------------------------------------------------------------Omcan Fabrication et distribution Companie Limité et Food Machinery d’Amerique, dba Omcan et
Omcan Inc. ne sont pas responsables de tout dommage ou blessure causé du fait que toute personne
ait utilisé cet équipement de façon irrégulière. Le produit ne doit être exploité que par quelqu’un de
plus de 18 ans, saine d’esprit, et pas sous l’inuence d’une drogue ou d’acohol, qui a été formé pour
utiliser cette machine correctement, et est vêtu de vêtements de sécurité approprié. Toute modication
de la machine annule toute garantie, et peut causer un préjudice à des personnes utilisant la machine
ou des personnes à proximité de la machine pendant son fonctionnement.
VÉRIFIEZ LE COLIS DÈS RÉCEPTION
Dès réception d’une expédition d’Omcan veuillez inspecter pour dommages externes. Si aucun dommage
n’est visible sur l’emballage externe, ouvrez le carton an de s’assurer que tous les éléments commandés
sont dans la boîte, et il n’y a aucun dommage dissimulé à la machine. Si le colis n’a subi aucune mauvaises
manipulations, de bosses ou de dommages (visible ou cachée), notez-le sur le bond de livraison avant
d’accepter la livraison et contactez Omcan dans les 24 heures qui suivent, pour que nous puissions engager
une réclamation auprès du transporteur. Un rapport détaillé sur l’étendue des dommages causés à la machine
doit être rempli dans un délai de trois jours, à compter de la date de livraison indiquée dans les documents
d’expédition. Omcan n’a aucun droit de recours pour les produits endommagés qui ont été expédiées ou cueilli
par un tiers transporteur.
3
Page 4

General Information
Avant d’utiliser n’importe quel équipement, toujours lire et vous familiariser avec toutes les opérations
et les consignes de sécurité.
Omcan voudrais vous remercier d’avoir choisi cette machine. Il est primordial de conserver ces
instructions pour une référence ultérieure. Également conservez la boîte originale et l’emballage pour
l’expédition de l’équipement si l’entretien ou le retour de la machine est nécessaire.
--------------------------------------------------------------------------------------------------------------------------------------------------Omcan Empresa De Fabricacion Y Distribucion Inc. Y Maquinaria De Alimentos De America, Inc. dba
Omcan y Omcan Inc. no son responsables de ningun daño o perjuicío causado por cualquier persona
inadecuada o el uso descuidado de este equipo. El producto solo podra ser operado por una persona
mayor de 18 años, en su sano juicio y no bajo alguna inuencia de droga o alcohol, y que este ha sido
entrenado en el correcto funcionamiento de esta máquina, y ésta usando ropa apropiada y autorizada.
Cualquier modicación a la máquina anúla la garantía y puede causar daños a las personas usando la
máquina mientras esta en el funcionamiento.
REVISE EL PAQUETE A SU LLEGADA
Tras la recepcion de un envio Omcan favor inspeccionar daños externos. Si no hay daños evidentes en el
empaque exterior, Habra el carton para asegurararse que todos los articulos solicitados ésten dentro de la
caja y no encuentre daños ocultos en la máquina. Si el paquete ha sufrido un manejo de poco cuidado, golpes
o daños (visible o oculto) por favor anote en la factura antes de aceptar la entrega y contacte Omcan dentro
de las 24 horas, de modo que podamos iniciar una reclamación con la compañia. Un informe detallado sobre
los daños causados a la máquina debe ser llenado en el plazo de tres días, desde la fecha de entrega que se
muestra en los documentos de envío. Omcan no tiene ningun recurso por productos dañados que se enviaron
a recoger por terceros.
Antes de utilizar cualquier equipo, siempre leer y familiarizarse con todas las instrucciones de
operación y seguridad.
Omcan quisiera darles las gracias por la compra de esta máquina. Es de la máxima importancia para
guardar estas instrucciones para referencias en el futuro. También guarde la caja original y el embalaje
para envío del equipo si el mantenimiento o la devolución de la máquina es necesaria.
Safety and Warranty
WARNING
PLEASE READ THE USER MANUAL CAREFULLY BEFORE OPERATING THE MACHINE
• Children do not realize the dangers involved in using electric appliances. For this reason, always keep an
eye on children when they use electric appliances.
• The coffee machine may only be used by instructed people.
• Never use a defective coffee machine or a machine with a defective main cable.
4
Page 5

Safety and Warranty
• Never immerse the coffee machine in water.
PRECAUTIONS
• Never expose the coffee machine to rain, snow, and/or frost, and never touch the machine when your
hands are wet.
• Place the coffee machine on a rm level base that is resistant to any water that may leak. Never place on
hot or warm surfaces (oven hobs). Keep out of the reach of children.
• If you don’t use the machine for a long time (holidays, etc.), always disconnect the main cable.
• Always disconnect main cable before cleaning the machine.
• When disconnecting the main cable, never pull on the main cable or the machine itself.
• Never repair or open the coffee machine yourself. Any repairs may only be carried out by Omcan using
original spare parts and accessories.
• The coffee machine is connected to main supply via main cable.
• Make sure nobody can trip over the main cable and make sure children and pets cannot reach the
machine.
• Never put the coffee machine or individual parts of it into a dishwasher.
• Make sure to install the machine at a place with sufcient air circulation to prevent overheating of the
machine.
1 YEAR PARTS AND LABOUR WARRANTY
Within the warranty period, contact Omcan Inc. at 1-800-465-0234 to schedule an Omcan authorized
service technician to repair the equipment locally.
Unauthorized maintenance will void the warranty. Warranty covers electrical and part failures, not
improper use.
Please see www.omcan.com/warranty.html for complete info.
WARNING:
The packaging components are classied as normal solid urban waste and can therefore be disposed of
without difculty.
In any case, for suitable recycling, we suggest disposing of the products separately (differentiated
waste) according to the current norms.
DO NOT DISCARD ANY PACKAGING MATERIALS IN THE ENVIRONMENT!
5
Page 6

Technical Specications
Model CM-CN-0200
Power 1330 W
Water Tank 1.9 litres / 2 quarts
Pump Pressure Static, Max. 15 bar
Bean Tank Capacity 200 grams / 7 ounce
Coffee Grounds Container Capacity Max. 15 portions
Power Cord Length Approx. 1.3m / 51 3/16”
Electrical 120V / 60 Hz /1
Weight 9.5 kg. / 20.9 lbs.
Dimensions (DWH) 17.7” x 11” x 14.2” / 450 x 279 x 373mm
Packaging Dimensions 15.8” x 15.8” x 18.8” / 400 x 400 x 476mm
Item Number 21602
Installation
CHECK SUPPLY VOLTAGE
The coffee machine is preset in the factory to the correct main voltage. Check if your local main supply voltage
complies with the information given on the type plate on the underside of the coffee machine.
CHECK ELECTRICAL FUSE
The coffee machine is designed for an electric current of 10 amps. Check if the electrical fuse has sufcient
capacity.
FILL WATER TANK
1. Only use fresh, cold water. Never ll in milk, mineral water, or other liquids.
2. Remove the water tank and rinse it with cold, tap water thoroughly.
3. Fill the water tank and reinstall it. Make sure to install the tank properly; it must engage audibly.
FILL COFFEE BEANS
1. To ensure that your machine will work perfectly for a long time and to avoid damage, please note that the
grinding gear of your coffee machine is not suitable for coffee beans which were treated, during or after
roasting, with additives (e.g. sugar). Such coffee blends may damage the grinding gear. Any repair costs
resulting from the use of such blends are not covered by warranty.
2. Open the bean tank cover and remove the aroma preservation cover.
3. Remove any dirt or foreign matter from the bean tank.
4. Fill coffee beans in the bean tank and close the cover.
ADJUSTING THE GRINDING GEAR
You can adjust the grinding gear to the roast of your coffee. We recommend:
6
Page 7

Installation
• A ne grinding degree for bright roasts (the smaller the dots, the ner the grinding)
• A coarse degree for dark roasts (the larger the dots, the coarser the grinding)
1. The grinding degree may only be adjusted while the grinding gear is running.
2. Open the bean tank cover and remove the aroma preservation cover.
3. To adjust the grinding degree, turn the Rotary switch to the required position.
POWER SWITCH
Activate the power switch on your coffee machine before using the machine for the rst time. We recommend
that you switch off your coffee machine with the power switch if you intend not to use it for a longer period of
time (e.g.during holidays).
FIRST USE
1. Fill coffee beans in the bean tank.
2. Switch on the coffee machine using the ON/OFF key. [This will appear on the screen: LANGUAGE
ENGLISH] The illumirated ring is active.
3. Turn the Rotary switch until the required language is displayed.
4. Conrm your selection by pressing the Rotary switch. [This will appear on the screen: FILL WATER]
5. Fill the water tank with fresh water. [This will appear on the screen: OPEN / TANK]
6. Place an empty cup under the replaceable hot water nozzle.
7. Open the steam/hot water draw-off tap. [This will appear on the screen: FILLING SYSTEM / CLOSE / TAP]
8. Close the steam/hot water draw-off tap. [This will appear on the screen: HEATING / PRESS / RINSE]
9. Press the maintenance key. Machine carries out a rinsing operation [This will appear on the screen:
RINSING / READY]
10. If FILL BEANS is displayed, press the coffee draw-off key again. Machine not lled with coffee beans yet.
To get an excellent froth, adjust the coffee spout to the size of your cup.
INSTALLATION OF CLARIS PLUS FILTER CARTRIDGES
If the Claris plus lter cartridge is installed properly, de-scaling of the coffee machine is no longer required.
INSTALLING THE FILTER
1. Fold up the cartridge holder. Install the lter cartridge in the water tank, applying a gentle pressure.
2. Fold down the cartridge holder again until it engages audibly.
3. Fill the water tank with cold, fresh tap water and install it again.
4. Press the programming key. The illuminated ring is active. [This will appear on the screen: FILTER]
5. Press the Rotary switch to start the programming.
6. Turn the Rotary switch until the following message is displayed: YES
Press the Rotary switch to activate the lter cartridge.
7. Put a sufciently large container (approx. 1L) under the replaceable hot water nozzle.
8. If not installed already, insert the Claris plus lter.
9. Open the steam/hot water draw-off tap. [This will appear on the screen: RINSING / FILTER / CLOSE TAP]
10. Close the steam/hot water draw-off tap. Now the coffee machine will heat up to coffee temperature.
[This will appear on the screen: HEATING / READY]
11. The lter is now activated. In Programming Mode, the water hardness selection function is no longer
displayed.
7
Page 8

Installation
REPLACING THE FILTER
1. After drawing off approximately 50 litres, the lter cartridge will be used up. A message requesting you to
replace the lter will appear on the display. [This will appear on the screen: READY / FILTER]
2. Switch off the coffee machine using the ON/OFF key.
3. Press the maintenance key until the following message is displayed: CHG FILTER / OPEN TAP
4. Remove the water tank from the machine and empty it.
5. Fold up the cartridge holder. Install the lter cartridge in the water tank, applying a gentle pressure.
6. Fold down the cartridge holder again until it engages audibly.
7. Fill the water tank with cold, fresh tap water and reinstall it.
8. Place a sufciently large jug (approximately 1L) under the replaceable hot water nozzle and open the
steam/hot water tap. [This will appear on the screen: RINSING / FILTER / CLOSE TAP]
9. Close the steam/hot water draw-off tap. [This will appear on the screen: HEATING / READY]
Operation
ADJUSTING THE WATER QUANTITY FOR COFFEE
1. The indicated value in ML is a reference value and may deviate from the actual value.
2. If you press the draw-off key for 2 cups, the water quantity is doubled automatically.
3. You can change/stop the water quantity during the draw-off operation, too. Turn the Rotary switch until the
required ML value is displayed. You can adjust the water quantity in steps of 5 ML using the Rotary switch.
[This will appear on the screen: READY]
4. Turn the Rotary switch until the required water quantity is displayed. For example: 120 ML
DRAWING OFF 1 CUP OF COFFEE
1. You have the possibility of increasing the strength of the coffee at any time in the grinding process by
pressing the 1- cup draw-off key again. For example: by pressing the 1-cup draw-off key three times, you
get strong coffee. [This will appear on the screen: STRONG]
2. You can choose among three strengths at the push of a button.The longer you press the draw-off key for 1
cup, the stronger your coffee will be. [DISPLAY: MILD / NORMAL / STRONG]
3. You can adjust the water quantity before the draw-off operation using the Rotary switch.
4. You can stop the draw-off operation at any time by pressing any coffee draw-off key.
5. You can check the water quantity used for the last draw-off operation by pressing the Rotary switch.
[This will appear on the screen: READY]
6. Put a cup under the adjustable coffee spout.
7. Press the draw-off key for 1 cup until the required strength is displayed: MILD / 180 ML (water quantity last
adjusted) The illuminated ring is active .
8. Turn the Rotary switch again to select the water quantity individually. For example: 160 ML / MILD
9. Your product is being prepared. [This will appear on the screen: READY]
DRAWING OFF 2 CUPS OF COFFEE
1. Selecting the coffee strength is not possible when drawing off 2 cups of coffee. You will draw off 2 mild cups
automatically.
8
Page 9

Operation
2. You can adjust the water quantity before the draw-off operation using the Rotary switch. The adjusted value
(ML) refers to 1 cup.
3. You can stop the draw-off operation at any time by pressing any coffee draw-off key.
4. You can check the water quantity used for the last draw-off operation by pressing the Rotary switch.
[This will appear on the screen: READY] Put 2 cups under the adjustable coffee spout.
5. Press the draw-off key for 2 cups. [This will appear on the screen: 2 CUPS / 120 ML] (water quantity last
adjusted) The illuminated ring is active.
6. Turn the Rotary switch again to select the water quantity individually. For example: 210 ML / 2 CUPS
7. Your product is being prepared. [This will appear on the screen: READY]
DRAWING OFF PRE-GROUND COFFEE
1. Never use instant coffee or quick-coffee. We recommend that you always use powder from fresh coffee
beans or pre-ground, vacuum-packed coffee. Never ll in more than 2 portions of powder. The pre-ground
coffee tank is no storage tank. Make sure that the pre-ground you use is not too ne. This may cause
blocking of the system. In this case, the coffee only drips out of the coffee spout.
2. If you have lled in too little powder, the message ADD MORE POWDER will be displayed. The coffee
machine stops the operation and returns to “ready for draw off” mode.
3. You can stop the draw-off operation at any time by pressing any coffee draw-off key. [This will appear on
the screen: READY]
4. Put 1 or 2 cups under the adjustable coffee spout.
5. Open the cover of the ller funnel for pre-ground coffee. [This will appear on the screen: FILL / POWDER]
6. Fill 1 or 2 spoonfuls of pre-ground coffee in the ller funnel for pre-ground coffee and close the cover. [This
will appear on the screen: SELECT / CUP / BUTTON]
7. Press the required draw-off key for 1 cup or 2 cups. 120 ML (water quantity last adjusted). The illuminated
ring is active. [This will appear on the screen: POWDER]
8. Turn the Rotary switch again to select the water quantity individually. For example: 210 ML [This will appear
on the screen: POWDER]
9. Your product is being prepared.
DRAWING OFF HOT WATER
1. If you do not change the settings using the Rotary switch, the water quantity last adjusted will be drawn off
automatically.
2. Install the hot water nozzle to obtain perfect water ow. Do not replace the replaceable hot water nozzle
directly after drawing off water because the nozzle is hot after the draw-off operation.
3. At the start of the water draw-off operation, there can be splashing. Avoid direct contact with the skin.
4. Place a cup under the replaceable hot water nozzle.
5. Open the steam/hot water draw-off tap. The illuminated ring is active. For example: 140 ML [This will
appear on the screen: WATER]
6. Adjust the required water quantity by turning the Rotary switch. For example: 200 ML [This will appear on
the screen: WATER]
7. If the required water quantity is reached, the following message is displayed: CLOSE TAP
8. Close the steam/hot water draw-off tap. [This will appear on the screen: READY] Before CLOSE TAP, water
may still escape the system.
9
Page 10

Operation
DRAWING OFF STEAM
1. To ensure perfect operation, clean the 2-stage frothing jet regularly. Screw the nozzle off and hold the
nozzle at the top and at the bottom end and screw it apart. Thoroughly rinse the 3 parts under running
water.
2. Make sure the nozzle has engaged properly. If the nozzle is clogged with dried milk or has not been
attached properly, it might suddenly come off during operation.
3. Install the replaceable 2-stage frothing jet. This is included in your Welcome Pack. Do not replace the
replaceable steam/hot water nozzle directly after drawing off steam because the nozzle is hot after the
draw-off operation.
4. Steam can be used for heating liquids and frothing milk for cappuccino. Make sure that the replaceable 2
stage frothing jet is pushed upwards when liquids are heated. To froth liquids, push the 2-stage frothing jet
downwards turning it slightly.
5. During frothing, some water will escape the system before the actual frothing process. This does not affect
the result (e.g. when frothing milk).
6. At the start of the steam draw-off operation, there can be splashing and the 2-stage frothing jet becomes
hot. Avoid direct contact with the skin. [This will appear on the screen: READY]
7. Place a cup under the 2-stage frothing jet and immerse it in the milk to be frothed or the liquid to be heated.
Press the steam pre-selection key. [This will appear on the screen: HEATING / STEAM / READY]
8. To draw off steam, open the steam/hot water draw-off tap. The illuminated ring is active.
9. You can adjust the steam draw-off time individually by turning the Rotary switch until the required SEC are
displayed. For example: 35 SEC
10. If you do not change the steam draw-off time settings using the Rotary switch, the machine will use the
settings last adjusted. During the steam draw-off operation, the message STEAM is displayed. When the
steam quantity is reached, the message CLOSE TAP is displayed
11. Close the steam/hot water draw-off tap. [This will appear on the screen: READY]
12. As long as STEAM READY is on view in the display, the machine is ready to dispense steam. Before
CLOSE TAP, steam may still escape the system.
DRAWING OFF STEAM WITH THE PROFESSIONAL-CAPPUCCINO FROTHER [OPTIONAL]
The Professional-Cappuccino Frother is optionally available.
CONNECTING THE PROFESSIONAL-CAPPUCCINO FROTHER TO THE COFFEE MACHINE
1. Disassemble the replaceable hot water nozzle or the replaceable 2-stage frothing jet.
2. Mount the Professional-Cappuccino Frother.
3. Press one side of the hose into the opening behind the dial. The optionally available milk container can be
used for sucking in milk.
DRAWING OFF CAPPUCCINO AND HOT MILK WITH PROFESSIONAL-CAPPUCCINO FROTHER
1. Fill the milk container with milk or immerse the hose in the milk directly.
2. Place a cup under the Professional-Cappuccino Frother.
3. Press the steam pre-selection key. [This will appear on the screen: HEATING / STEAM / READY]
4. To draw off steam open the steam/hot water draw-off tap. The illuminated ring is active.
5. You can adjust the steam draw-off time individually by turning the Rotary switch until the required SEC is
displayed. For example: 35 SEC
6. If you do not change the steam draw-off time settings using the Rotary switch, the machine will use the
10
Page 11

Operation
settings last adjusted.
7. For cappuccino, turn the selector switch to area.
8. For hot milk, turn the selector switch to area.
9. Now place the cup with the cappuccino froth or the hot milk under the coffee spout and draw off the product
of your choice.
SWITCHING OFF THE COFFEE MACHINE
1. To ensure perfect operation, please switch your coffee machine to standby mode with the symbol rst, then
switch the machine off with the power switch.
2. Switch off the coffee machine using the ON/OFF key. [This will appear on the screen: RINSING]
3. An automatic rinsing operation is started.
PROGRAMMING
1. When your coffee machine leaves the factory, it is adjusted such that you can draw off coffee without
having to change any settings. However, you can program various parameters individually.
You can program the following stages: Filter / Hardness / Aroma / Temperature / Time / Unit On /
Unit Off / Cups made / Language / Display
2. Use the programming key to open or quit the programming mode (no saving of values effected).
3. Turn the rotary switch to change the adjusted values or to select the next programming step. Press the
rotary switch to check the values adjusted or to save the values selected.
PROGRAMMING THE WATER HARDNESS
1. Water is heated in the coffee machine. As a result, calcication occurs during normal use and is indicated
automatically. Before using the coffee machine for the rst time, the hardness of the water used must be
adjusted. Use the supplied test sticks for this.
2. If the lter is activated, the program step Water Hardness no longer appears.
3. The coffee machine has 5 hardness degrees which can be used and are displayed while you are adjusting
the water hardness. The displayed information means the following:
• LEVEL -- Water hardness function switched off
• LEVEL 1 water hardness degree 1
• LEVEL 2 water hardness degree 2
• LEVEL 3 water hardness degree 3
• LEVEL 4 water hardness degree 4
4. When the coffee machine leaves the factory, it is adjusted to LEVEL 3. You can adjust another hardness.
To do this, proceed as follows: [This will appear on the screen: READY]
• Press the programming key, illuminated ring is active.
• Turn the rotary switch until the following message is displayed: HARDNESS
• Now press the rotary switch to start the programming. [This will appear on the screen: LEVEL 3]
• Turn the rotary switch until the required level is displayed. For example: LEVEL 4
• Press the rotary switch to conrm the required level. [This will appear on the screen: HARDNESS]
• Press the programming key to quit the programming mode. [This will appear on the screen: READY]
PROGRAMMING THE AROMA INTENSIVE OR STANDARD
1. When the machine leaves the factory, the aroma is set to intensive. If requested, it can also be set to
standard. [This will appear on the screen: READY]
11
Page 12

Operation
2. Press programming key until FILTER appears. The illuminated ring is active.
3. Turn the Rotary switch until Aroma is displayed. [This will appear on the screen: AROMA]
4. Press the rotary switch. [This will appear on the screen: INTENSIVE]
5. Turn the Rotary switch until the following message is displayed: STANDARD
6. To conrm the new aroma settings, press the Rotary switch. [This will appear on the screen: AROMA]
7. Press the programming key to quit the programming mode or select the next programming item using the
Rotary switch. [This will appear on the screen: READY]
PROGRAMMING THE TEMPERATURE
1. Press programming key until FILTER appears. The illuminated ring is active.
2. Turn the Rotary switch until Temperature is displayed. [This will appear on the screen: TEMP]
3. Press the Rotary switch. [This will appear on the screen: HIGH]
4. Turn the Rotary switch to change the temperature from HIGH to NORMAL (or vice versa). [This will appear
on the screen: NORMAL]
5. To conrm the new settings, press the Rotary switch. [This will appear on the screen: TEMP]
6. Press the programming key to quit the programming mode or select the next programming item using the
Rotary switch. [This will appear on the screen: READY]
PROGRAMMING THE TIME
1. You must program the time if you want to use the automatic switch-on function. [This will appear on the
screen: READY]
2. Press programming key until FILTER appears. The illuminated ring is active.
3. Turn the Rotary switch until TIME is displayed. [This will appear on the screen: TIME]
4. Now press the Rotary switch to start programming the time. [This will appear on the screen: --:--]
5. Turn the Rotary switch to adjust the hours. [This will appear on the screen: 12:--]
6. Press the Rotary switch to conrm the hour settings and to activate the minutes. [This will appear on the
screen: 12:--]
7. Turn the Rotary switch to select the minutes. [This will appear on the screen: 4:05]
8. To conrm the new settings, press the Rotary switch. [This will appear on the screen: TIME]
9. Press the programming key to quit the programming mode or select the next programming item using the
Rotary switch. [This will appear on the screen: READY]
10. If the machine is disconnected from power supply, the time must be programmed again.
PROGRAMMING THE AUTOMATIC SWITCH-ON TIME
1. You must program the time if you want to use the automatic switch-on function. [This will appear on the
screen: READY]
2. Press programming key until FILTER appears.The illuminated ring is active.
3. Turn the Rotary switch until MACHINE ON is displayed. [This will appear on the screen: UNIT ON]
4. Now press the Rotary switch to start programming the switch-on time. [This will appear on the screen: --:--]
5. Turn the Rotary switch to adjust the hours. [This will appear on the screen: 12:--]
6. Press the Rotary switch to conrm the hour settings and to activate the minutes. [This will appear on the
screen: 12:--]
7. Turn the Rotary switch to select the minutes. [This will appear on the screen: 12:45]
8. To conrm the new switch-on time, press the Rotary switch. [This will appear on the screen: UNIT ON]
9. Press the programming key to quit the programming mode or select the next programming item using the
12
Page 13

Operation
Rotary switch. [This will appear on the screen: READY]
PROGRAMMING THE AUTOMATIC SWITCH-OFF TIME
1. You must program the time if you want to use the automatic switch-off function. [This will appear on the
screen: READY]
2. Press programming key until FILTER appears. The illuminated ring is active.
3. Turn the Rotary switch until Unit off is displayed. [This will appear on the screen: UNIT OFF]
4. Now press the Rotary switch to start programming the switch-on time. [This will appear on the screen: --:--]
5. Turn the Rotary switch to adjust the hours. [This will appear on the screen: 12:--]
6. Press the Rotary switch to conrm the hour settings and to activate the minutes. [This will appear on the
screen: 12:--]
7. Turn the Rotary switch to select the minutes. [This will appear on the screen: 12:45]
8. To conrm the new switch-on time, press the Rotary switch. [This will appear on the screen: UNIT OFF]
9. Press the programming key to quit the programming mode or select the next programming item using the
Rotary switch. [This will appear on the screen: READY]
CUP COUNTER
You can check how many cups of the following coffee products were drawn off:
• 1 cup
• 2 cups
• Powder coffee
1. Press programming key until FILTER appears .The illuminated ring is active.
2. Turn the Rotary switch until CUPS MADE is displayed.
3. Now press the Rotary switch to start programming the item.
4. The total number of drawn off products is displayed. For example: TOTAL 100
5. Press one of the draw-off keys to learn the number of draw-off operations for the individual products (1 cup,
2 cups, powder) For example: press draw-off key for 1 cup 20
6. The number of pre-ground coffee drawn off can be checked by opening the ller funnel for pre-ground
coffee.
7. To quit, press the Rotary switch. [This will appear on the screen: CUPS MADE]
8. Press the programming key to quit the programming mode or select the next programming item using the
Rotary switch. [This will appear on the screen: READY]
PROGRAMMING THE LANGUAGE
ENGLISH is displayed.
PROGRAMMING DISPLAY 24H/AM/PM
1. Press the Rotary switch until FILTER -/_ appears. The illuminated ring is active.
2. Turn the Rotary switch until DISPLAY appears.
3. Press the Rotary switch until ML/OZ appears.
4. Turn the Rotary switch until 24H/AM PM appears.
5. Select a setting of your choice.
6. Press the Rotary switch to save the setting. [This will appear on the screen: DISPLAY]
7. Press the programming key to quit the programming mode or select the next programming item using the
Rotary switch. [This will appear on the screen: READY]
13
Page 14

Operation
PROGRAMMING THE DISPLAY FOR ML/OZ
1. Press the Rotary switch until FILTER -/_ appears. The illuminated ring is active.
2. Turn the Rotary switch until DISPLAY appears.
3. Press the Rotary switch until ML/OZ appears.
4. Select a setting of your choice.
5. Press the Rotary switch to save the setting. [This will appear on the screen: DISPLAY]
6. Press the programming key to quit the programming mode or select the next programming item using the
Rotary switch. [This will appear on the screen: READY]
Maintenance
FILLING IN WATER
1. FILL/WATER: If this information is displayed, drawing off products is no longer possible. [This will appear
on the screen: READY]
2. The water tank should be rinsed daily and relled with fresh water. Only ll in fresh, cold water; never ll in
milk, mineral water, or other liquids.
EMPTYING THE COFFEE GROUNDS CONTAINER
1. EMPTY/GROUNDS: It this message appears on the display, you can no longer draw off coffee. You must
empty the coffee grounds container rst.
2. Carefully take out the drip tray; it is lled with water. [This will appear on the screen: TRAY MISSING]
3. Insert the empty and clean trip tray again. [This will appear on the screen: READY]
4. The red water level indicator appears when the drip tray is full.
DRIP TRAY MISSING
1. NO TRAY: If this information is displayed, the drip tray is not installed properly or was not installed at all.
2. Insert the drip tray. [This will appear on the screen: READY]
FILL COFFEE BEANS
1. The message FILL BEANS will disappear after you draw off your next cup of coffee.
2. We recommend that you clean the bean tank regularly before relling beans using a dry cloth. Before
cleaning the tank, switch off the coffee machine rst.
REPLACING THE FILTER
After drawing off 50 litres, the lter cartridge will be used up. A message requesting you to replace the lter will
appear on the display. (Refer to the section: Replacing the lter under Installation)
CLEANING THE COFFEE MACHINE
After 200 draw-off operations or after 160 rinsing operations, the coffee machine must be cleaned. A message
appears on the display telling you to start the cleaning program. You can still draw off coffee or hot water/
steam. However, we recommend that you should clean the machine within the next few days. [This will appear
on the screen: READY / CLEAN]
14
Page 15

Maintenance
COFFEE MACHINE DECALCIFY
During operation, the machine will calcify. The degree of scaling depends on the hardness of the water in your
region. The machine will inform you when de-scaling is required. You can still draw off coffee or hot water/
steam. However, we recommend that you should de-scale the machine within the next few days. [This will
appear on the screen: READY / CALCIFIED]
GENERAL CLEANING INSTRUCTIONS
1. Never use abrasive objects, pan cleaners, cleaning sponges, or corrosive chemicals to clean the machine.
2. Wipe off the case on the inside and outside using a soft, moist cloth.
3. Clean the replaceable hot water nozzle after each use.
4. After heating milk, draw off some hot water to clean the inside of the replaceable 2-stage frothing jet.
5. Disassemble the 2-stage frothing jet for proper cleaning.
6. The water tank should be rinsed daily and relled with fresh water.
7. If the water tank shows signs of scaling, remove the scaling using a commercial de-scaling solvent. Take
out the water tank.
8. If installed, remove the claris lter cartridge before de-scaling the water tank.
EMPTYING THE SYSTEM
Precondition: Coffee machine switched off
1. This operation is required to protect the coffee machine against frost damage during transports.
2. Place a container under the replaceable hot water nozzle.
3. Press the steam preselection key until the following message is displayed: OPEN TAP / EMPTYING /
CLOSE TAP
4. The coffee machine is switched off.
RINSING THE COFFEE MACHINE
1. When the coffee machine is switched off and has cooled down, a rinsing operation is started when
the machine is switched on again. When the machine is switched off, a rinsing operation is started
automatically.
2. Switch on the coffee machine using the ON/OFF key. [This will appear on the screen: HEATING / PRESS /
RINSE]
3. Press the maintenance key. [This will appear on the screen: RINSING / READY]
CLEANING
Your coffee machine features an integrated cleaning program. The cleaning operation will take approximately
15 minutes.
1. Cleaning tablets, which are specially designed for the cleaning program of your coffee machine, are
available at retail. Please note that machine defects or residues in the water cannot be excluded if you use
inappropriate cleaning solvents.
2. Once started, the de-scaling operation may not be interrupted.
3. After each cleaning operation, the ller funnel for pre-ground coffee should be cleaned. [This will appear on
the screen: READY / CLEAN]
4. Press the maintenance key until the following message is displayed: EMPTY TRAY
5. Empty the tray. [This will appear on the screen: MISSING / TRAY]
6. Insert the tray again and remove the drip grate.
15
Page 16

Maintenance
7. Put a container under the adjustable coffee spout. [This will appear on the screen: PRESS / RINSE]
8. Press the maintenance key. [This will appear on the screen: CLEANING / ADD / TABLET]
9. Fill in the tablet. [This will appear on the screen: PRESS / RINSE]
10. Press the maintenance key again. [This will appear on the screen: CLEANING / EMPTY / TRAY / MISSING
/ TRAY / READY]
11. Wipe coffee powder tank with a dry cloth after the cleaning program has nished. The cleaning operation is
completed successfully.
DE-SCALING
Your coffee machine features an integrated de-scaling program. The de-scaling operation will take
approximately 40 minutes.
1. De-scaling tablets, which are specially designed for the de-scaling program of your coffee machine, are
available at retail. Please note that machine defects or residues in the water cannot be excluded if you use
inappropriate de-scaling solvents.
2. If the coffee machine needs de-scaling, the corresponding message is displayed. You can still draw off
coffee or hot water/steam and start the de-scaling program later.
3. Before starting the de-scaling program, the machine must be switched off. Once started, the de-scaling
operation must not be interrupted.
4. When using the de-scaling solvent, immediately remove any splashes or drips from sensitive surfaces, (i.e.
natural stone and wooden surfaces) or take appropriate precautions.
5. In any case, wait until the de-scaling solvent is used up and the tank is empty. Never rell de-scaling
solvent. [This will appear on the screen: READY / CALCIFIED]
6. Switch off the coffee machine using the ON/OFF key. Remove hot water nozzle / 2-stage frothing jet.
7. Press the maintenance key until the following message is displayed: EMPTY / TRAY
8. Empty the tray. [This will appear on the screen: MISSING / TRAY]
9. Insert the tray again. [This will appear on the screen: OPEN TAP / SOLVENT / IN TANK]
10. Completely dissolve the content of one blister (3 tablets) in a jug containing 0.5 litres of water, and ll
the mixture in the water tank. Reinstall the water tank . [This will appear on the screen: OPEN TAP /
SOLVENT/ IN TANK]
11. Put a sufciently large container under the replaceable hot water nozzle.
12. Open the steam/hot water draw-off valve. [This will appear on the screen: DECALC ON. / CLOSE TAP]
13. Close the steam/hot water draw-off tap. [This will appear on the screen: DECALC ON. / EMPTY TRAY]
14. Empty the tray. [This will appear on the screen: MISSING TRAY]
15. Insert the tray again. [This will appear on the screen: FILL WATER]
16. Rinse the water tank thoroughly and ll it with cold, fresh tap water.
17. Open the steam/hot water draw-off valve. [This will appear on the screen: DECALC ON. / CLOSE TAP]
18. Close the steam/hot water draw-off tap. [This will appear on the screen: DECALC ON. / EMPTY TRAY]
19. Empty the tray. [This will appear on the screen: MISSING TRAY]
20. Insert the tray again. [This will appear on the screen: PRESS RINSE]
21. Press the maintenance key. [This will appear on the screen: RINSING READY] The de-scaling operation is
completed successfully.
CLEANING THE PROFESSIONAL-CAPPUCCINO FROTHER
1. The Professional-Cappuccino Frother must be cleaned after each draw-off operation.
2. Fill water in a container and immerse the hose in it.
16
Page 17

Maintenance
3. Draw off steam until the water/steam mixture is clean.
4. If necessary, disassemble the Professional-Cappuccino Frother and thoroughly rinse the ow regulator with
water.
5. For proper cleaning, use the machine auto cappuccino cleaning agent This is available at retail. Daily
cleaning is recommended.
SWITCHING OFF THE COFFEE MACHINE
1. To ensure perfect operation, please switch your coffee machine to standby mode with the (3) symbol rst
then switch the machine off using the power switch. [This will appear on the screen: READY]
2. Switch off the coffee machine using the ON/OFF key. [This will appear on the screen: RINSING]
3. An automatic rinsing operation is started.
Troubleshooting
SYMPTOMS POSSIBLE CAUSE
Very loud noise coming from the grinding gear Foreign body in grinding gear: Drawing off pre-
ground coffee still possible. Have the coffee machine
checked by Omcan
Too little froth when frothing milk 2-stage frothing jet blocked: Clean 2-stage frothing jet
2-stage frothing jet in wrong position: Draw off steam
Coffee only drips from the coffee spout Grinding degree too ne: Coarser grinding gear
adjustment
Pre-ground coffee too ne: Use a coarser pre-ground
coffee
DISPLAY CAUSE REMEDY
Fill Water Water tank is empty Rell water
Float defective Rinse or de-scale water tank
Fill coffee beans Bean tank is empty Rell beans
Although you have relled beans,
the message still appears
Empty grounds Coffee grounds container full Empty coffee grounds container
Tray reinstalled too early after
emptying
No tray / tray missing Drip tray not installed properly or
missing
Ready clean Cleaning required Start cleaning program
Draw off a cup of coffee.
The message will disappear only
after you have drawn off a cup of
coffee
Wait 5 sec. before reinstalling the
tray
Install tray properly
17
Page 18

Troubleshooting
Ready Decalcify De-scaling required Start de-scaling program
Ready Filter Filter used up Replace lter
Fault General fault 1. Switch off
2. Disconnect from main supply
3. Connect machine to power
supply
4. Switch on
5. Have coffee machine checked
by Omcan
Note: High-frequency, electromagnetic interference may inuence the display. Drawing off coffee is possible at
any time. If the messages or problems still persist, please contact Omcan.
Parts Breakdown
Model CM-CN-0200 21602
Item No. Description Position Item No. Description Position Item No. Description Position
76447 Left Side Cover for WSD18 1 79399 Main PCB for WSD18 24 79406 Turbo Assembly for WSD18 49
76448 Right Side Cover for WSD18 2 76430 Transformer for WSD18 25 39377 Brewing Unit for WSD18 50
79388
79389 Main Body of Front Panel for WSD18 5 76425 Flow Meter for WSD18 27 76418 Grinder Unit for WSD18 53
79390
79391 Plastic Panel for Putting Logo for WSD18 7 64257 ULKA Water Pump for WSD18 30 79408 Back Cover Plate for WSD18 57
79392 Logo for WSD18 8 79400
79393 LED Display Assembly for WSD18 9 79401 Water Tank Feedback Sensor for WSD18 32 79409 Powder Tank Sensor for WSD18 59
79394 Left Knob Assembly for WSD18 10 76441 Grinder Controller for WSD18 33 79410 Top Cover Assembly for WSD18 60
79395 Right Knob Assembly for WSD18 11 64258 Boiler Assembly for WSD18 34 79411 Left Side Cover of Top Cover for WSD18 61
76407 Steam Nozzle Valve for WSD18 12 79402 Boiler Cover for WSD18 35 79412
64253 Electromagnetic Switch Panel for WSD18 13 27224
79396 Steam Valve Subassembly for WSD18 14 79403 120° Connector for WSD18 37 79414 Coffee Grounds Container for WSD18 65
79397 Coffee Outlet Assembly for WSD18 17 79404 T-Join for WSD18 38 79415
64254 LED Light for WSD18 18 64259
64255 PCB for WSD18 19 79405 Motor Sensor for WSD18 45 79417
64256 Water Tank Assembly for WSD18 20 64260
79398
Left Side Cover of Front Panel for
WSD18
Right Side Cover of Front Panel for
WSD18
Water Tank Support Assembly for
WSD18
4 76426 Power-Line Filter for WSD18 26 76423
6 76417 Microswitch for WSD18 29 79407 Grind Blade (Set) for WSD18 54
Water Tank Feedback Sensor Support
for WSD18
Thermo Switch Thermal Protector for
WSD18
Two-Way Check Valve Subassembly
for WSD18
Water Pump Check Valve Assembly for
WSD18
23 64261 Solenoid Valve Assembly for WSD18 48 76427 Cappuccino Frother for WSD18 71
31 76428 On/Off Switch for WSD18 58
36 79413 Bean Tank Cover for WSD18 64
40 79416 Drip Tray for WSD18 67
47 79418 Floater for WSD18 69, 70
Drainpipe Valve Subassembly for
WSD18
Right Side Cover of Top Cover for
WSD18
Tray for Coffee Grounds Container for
WSD18
Stainless Steel Plate of Drip Tray for
WSD18
51
62
66
68
18
Page 19

Model CM-CN-0200 21602
Parts Breakdown
19
Page 20

Electrical Schematics
Transformer
Model CM-CN-0200 21602
DC Motor (small)
Thermostat
Pump
Fusible
Protector
EM1 Power Line
Filter
M2
Power Board
Power Switch
Fusible
Protector
Terminal
Block
N
Power
Line
L
M1
DC Motor
(Big)
20
Boiler
Page 21

Notes
________________________________________________________________________________________
________________________________________________________________________________________
________________________________________________________________________________________
________________________________________________________________________________________
________________________________________________________________________________________
________________________________________________________________________________________
________________________________________________________________________________________
________________________________________________________________________________________
________________________________________________________________________________________
________________________________________________________________________________________
________________________________________________________________________________________
________________________________________________________________________________________
________________________________________________________________________________________
________________________________________________________________________________________
________________________________________________________________________________________
________________________________________________________________________________________
________________________________________________________________________________________
________________________________________________________________________________________
________________________________________________________________________________________
________________________________________________________________________________________
________________________________________________________________________________________
________________________________________________________________________________________
________________________________________________________________________________________
________________________________________________________________________________________
21
Page 22

Notes
________________________________________________________________________________________
________________________________________________________________________________________
________________________________________________________________________________________
________________________________________________________________________________________
________________________________________________________________________________________
________________________________________________________________________________________
________________________________________________________________________________________
________________________________________________________________________________________
________________________________________________________________________________________
________________________________________________________________________________________
________________________________________________________________________________________
________________________________________________________________________________________
________________________________________________________________________________________
________________________________________________________________________________________
________________________________________________________________________________________
________________________________________________________________________________________
________________________________________________________________________________________
________________________________________________________________________________________
________________________________________________________________________________________
________________________________________________________________________________________
________________________________________________________________________________________
________________________________________________________________________________________
________________________________________________________________________________________
________________________________________________________________________________________
22
Page 23

Warranty Registration
Thank you for purchasing an Omcan product. To register your warranty for this product, complete the information below, tear off the card at
the perforation and then send to the address specied below. You can also register online by visiting:
Merci d’avoir acheté un produit Omcan. Pour enregistrer votre garantie pour ce produit, complétez les informations ci-dessous, détachez la
carte au niveau de la perforation, puis l’envoyer à l’adresse spécié ci-dessous. Vous pouvez également vous inscrire en ligne en visitant:
Gracias por comprar un producto Omcan usted. Para registrar su garantía para este producto, complete la información a continuación,
cortar la tarjeta en la perforación y luego enviarlo a la dirección indicada a continuación. También puede registrarse en línea en:
www.omcan.com/warrantyregistration.html
For mailing in Canada
Pour postale au Canada
Por correo en Canadá
OMCAN
PRODUCT WARRANTY REGISTRATION
3115 Pepper Mill Court,
Mississauga, Ontario
Canada, L5L 4X5
PRODUCT WARRANTY REGISTRATION
4450 Witmer Industrial Estates, Unit 4,
For mailing in the US
Pour diffusion aux États-Unis
Por correo en los EE.UU.
OMCAN
Niagara Falls, New York
USA, 14305
or Email to: service@omcan.com
Purchaser’s Information
Name: Company Name:
Address:
Telephone:
City: Province or State: Postal or Zip: Email Address:
Country: Type of Company:
Restaurant Bakery Deli
Dealer from which Purchased: Butcher Supermarket Caterer
Dealer City: Dealer Province or State: Institution (specify):
Invoice: Other (specify):
Model Name: Model Number: Serial Number:
Machine Description:
Date of Purchase (MM/DD/YYYY): Date of Installation (MM/DD/YYYY):
Would you like to extend the warranty? Yes No
Thank you for choosing Omcan | Merci d’avoir choisi Omcan | Gracias por elegir Omcan
23
Page 24

Since 1951 Omcan has grown to become a leading distributor of equipment and supplies to the North
American food service industry. Our success over these many years can be attributed to our commitment
to strengthen and develop new and existing relationships with our valued customers and manufacturers.
Today with partners in North America, Europe, Asia and South America, we continually work to improve
and grow the company. We strive to offer customers exceptional value through our qualied local sales
and service representatives who provide convenient access to over 3,500 globally sourced products.
Depuis 1951 Omcan a grandi pour devenir un des “leaders” de la distribution des équipements et
matériel pour l’industrie des services alimentaires en Amérique du Nord. Notre succès au cours de ces
nombreuses années peut être attribué à notre engagement à renforcer et à développer de nouvelles
et existantes relations avec nos clients et les fabricants de valeur. Aujourd’hui avec des partenaires en
Amérique du Nord, Europe, Asie et Amérique du Sud, nous travaillons continuellement à améliorer et
développer l’entreprise. Nous nous efforçons d’offrir à nos clients une valeur exceptionnelle grâce à
nos ventes locales qualiées et des représentants de service qui offrent un accès facile à plus de 3500
produits provenant du monde entier.
Desde 1951 Omcan ha crecido hasta convertirse en un líder en la distribución de equipos y suministros
de alimentos en América del Norte industria de servicios. Nuestro éxito en estos años se puede atribuir
a nuestro compromiso de fortalecer y desarrollar nuevas relaciones existentes con nuestros valiosos
clientes y fabricantes. Hoy con socios de América del Norte, Europa, Asia y América del Sur, que trabajan
continuamente para mejorar y crecer la empresa. Nos esforzamos por ofrecer a nuestros clientes valor
excepcional a través de nuestro local de ventas y representantes de los servicios que proporcionan un
fácil acceso a más de 3,500 productos con origen a nivel mundial.
 Loading...