

Page 1
Countertop Gas Fryers
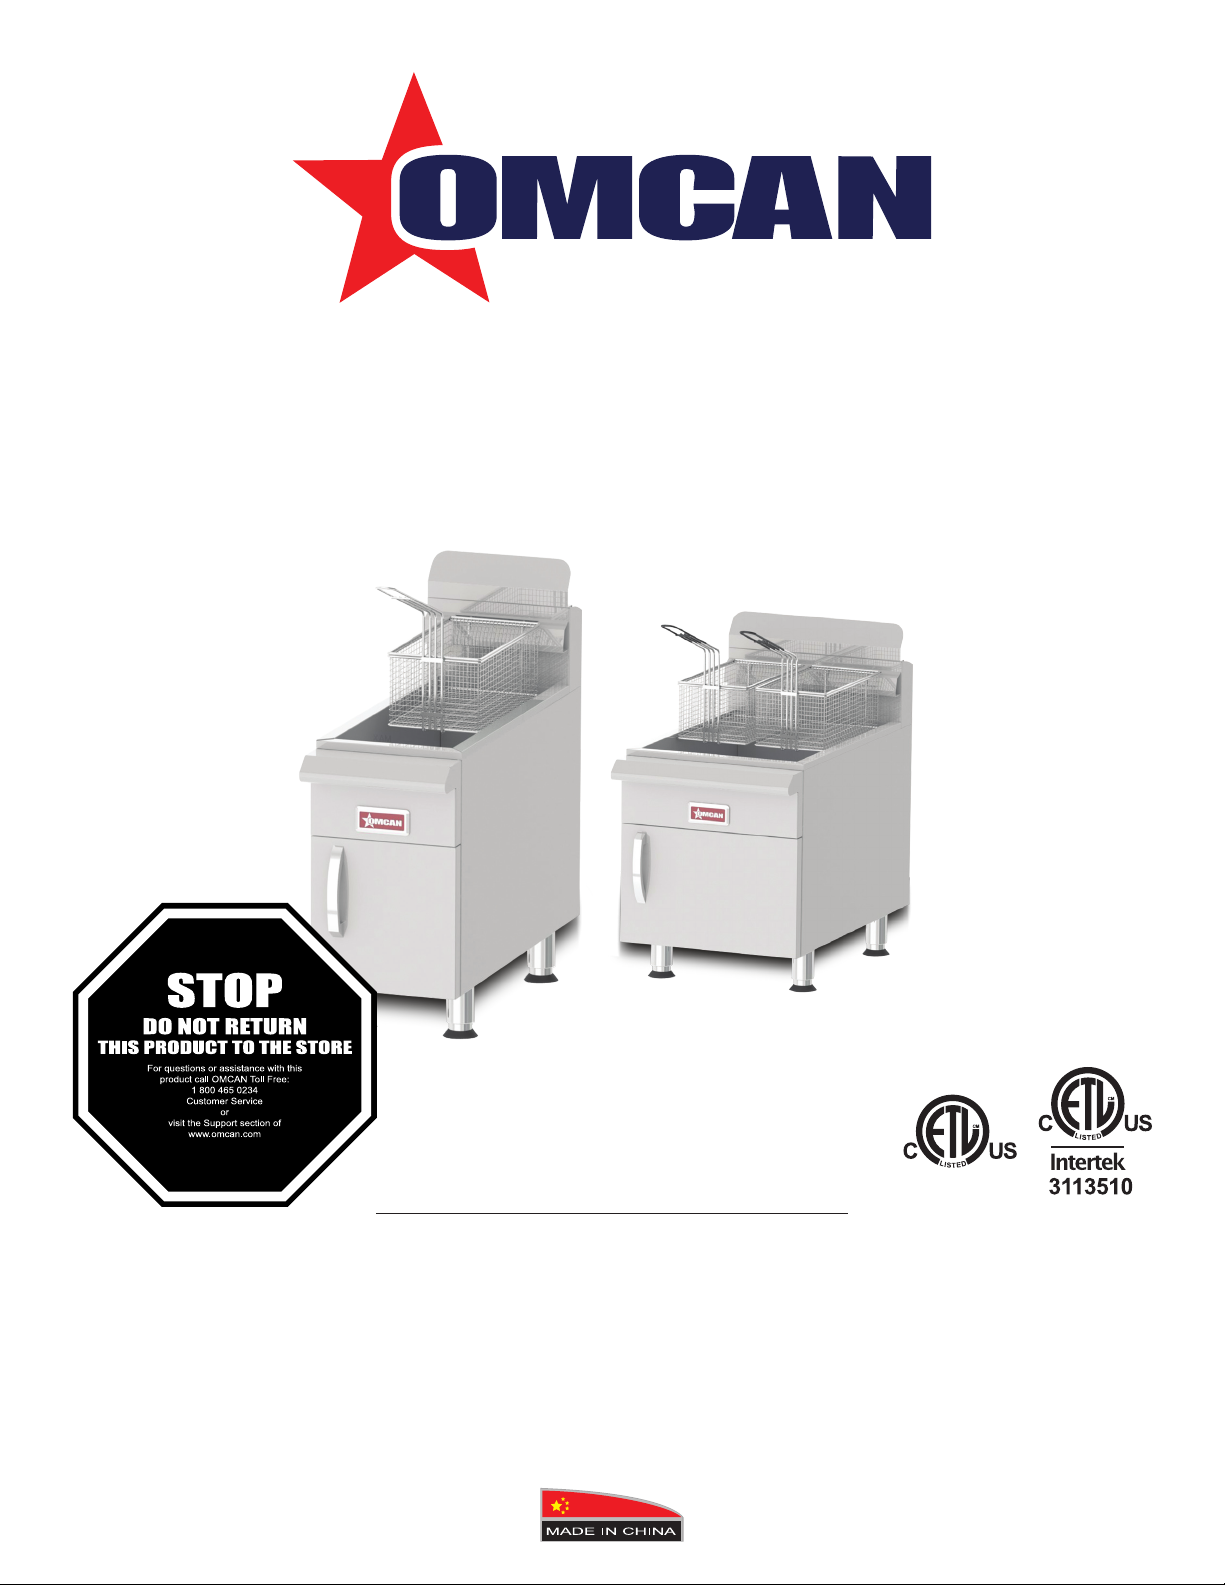
Items 43086, 43087, 43088, 43089
Instruction Manual
Revised - 11/03/2016
Toll Free: 1-800-465-0234
Fax: 905-607-0234
Email: service@omcan.com
www.omcan.com
Page 2

Table of Contents
Item 43086 / Item 43087 / Item 43088 / Item 43089
Section
General Information
Safety and Warranty
Technical Specications
Installation
Assembly
Operation
--------------------------------------------------------------------------------------- 6 - 7
----------------------------------------------------------------------------------------- 7 - 8
--------------------------------------------------------------------------------------- 9 - 10
--------------------------------------------------------------------------- 3 - 4
--------------------------------------------------------------------------- 4 - 5
Page
-------------------------------------------------------------------------- 6
Maintenance
Troubleshooting
Parts Breakdown
Warranty Registration
--------------------------------------------------------------------------------- 11 - 12
----------------------------------------------------------------------------------- 12
---------------------------------------------------------------------------- 13 - 14
---------------------------------------------------------------------------- 15
2
Page 3

General Information
Omcan Manufacturing and Distributing Company Inc., Food Machinery of America, Inc. dba Omcan
and Omcan Inc. are not responsible for any harm or injury caused due to any person’s improper or
negligent use of this equipment. The product shall only be operated by someone over the age of 18, of
sound mind, and not under the inuence of any drugs or alcohol, who has been trained in the correct
operation of this machine, and is wearing authorized, proper safety clothing. Any modication to the
machine voids any warranty, and may cause harm to individuals using the machine or in the vicinity of
the machine while in operation.
CHECK PACKAGE UPON ARRIVAL
Upon receipt of an Omcan shipment please inspect for external damage. If no damage is evident on the
external packaging, open carton to ensure all ordered items are within the box, and there is no concealed
damage to the machine. If the package has suffered rough handling, bumps or damage (visible or concealed),
please note it on the bill of lading before accepting the delivery and contact Omcan within 24 hours, so we may
initiate a claim with the carrier. A detailed report on the extent of the damage caused to the machine must be
lled out within three days, from the delivery date shown in the shipping documents. Omcan has no recourse
for damaged products that were shipped collect or third party.
Before operating any equipment, always read and familiarize yourself with all operation and safety
instructions.
Omcan would like to thank you for purchasing this machine. It’s of the utmost importance to save
these instructions for future reference. Also save the original box and packaging for shipping the
equipment if servicing or returning of the machine is required.
---------------------------------------------------------------------------------------------------------------------------------------------------
Omcan Fabrication et distribution Companie Limité et Food Machinery d’Amerique, dba Omcan et
Omcan Inc. ne sont pas responsables de tout dommage ou blessure causé du fait que toute personne
ait utilisé cet équipement de façon irrégulière. Le produit ne doit être exploité que par quelqu’un de
plus de 18 ans, saine d’esprit, et pas sous l’inuence d’une drogue ou d’acohol, qui a été formé pour
utiliser cette machine correctement, et est vêtu de vêtements de sécurité approprié. Toute modication
de la machine annule toute garantie, et peut causer un préjudice à des personnes utilisant la machine
ou des personnes à proximité de la machine pendant son fonctionnement.
VÉRIFIEZ LE COLIS DÈS RÉCEPTION
Dès réception d’une expédition d’Omcan veuillez inspecter pour dommages externes. Si aucun dommage
n’est visible sur l’emballage externe, ouvrez le carton an de s’assurer que tous les éléments commandés
sont dans la boîte, et il n’y a aucun dommage dissimulé à la machine. Si le colis n’a subi aucune mauvaises
manipulations, de bosses ou de dommages (visible ou cachée), notez-le sur le bond de livraison avant
d’accepter la livraison et contactez Omcan dans les 24 heures qui suivent, pour que nous puissions engager
une réclamation auprès du transporteur. Un rapport détaillé sur l’étendue des dommages causés à la machine
doit être rempli dans un délai de trois jours, à compter de la date de livraison indiquée dans les documents
d’expédition. Omcan n’a aucun droit de recours pour les produits endommagés qui ont été expédiées ou cueilli
par un tiers transporteur.
3
Page 4

General Information
Avant d’utiliser n’importe quel équipement, toujours lire et vous familiariser avec toutes les opérations
et les consignes de sécurité.
Omcan voudrais vous remercier d’avoir choisi cette machine. Il est primordial de conserver ces
instructions pour une référence ultérieure. Également conservez la boîte originale et l’emballage pour
l’expédition de l’équipement si l’entretien ou le retour de la machine est nécessaire.
---------------------------------------------------------------------------------------------------------------------------------------------------
Omcan Empresa De Fabricacion Y Distribucion Inc. Y Maquinaria De Alimentos De America, Inc. dba
Omcan y Omcan Inc. no son responsables de ningun daño o perjuicío causado por cualquier persona
inadecuada o el uso descuidado de este equipo. El producto solo podra ser operado por una persona
mayor de 18 años, en su sano juicio y no bajo alguna inuencia de droga o alcohol, y que este ha sido
entrenado en el correcto funcionamiento de esta máquina, y ésta usando ropa apropiada y autorizada.
Cualquier modicación a la máquina anúla la garantía y puede causar daños a las personas usando la
máquina mientras esta en el funcionamiento.
REVISE EL PAQUETE A SU LLEGADA
Tras la recepcion de un envio Omcan favor inspeccionar daños externos. Si no hay daños evidentes en el
empaque exterior, Habra el carton para asegurararse que todos los articulos solicitados ésten dentro de la
caja y no encuentre daños ocultos en la máquina. Si el paquete ha sufrido un manejo de poco cuidado, golpes
o daños (visible o oculto) por favor anote en la factura antes de aceptar la entrega y contacte Omcan dentro
de las 24 horas, de modo que podamos iniciar una reclamación con la compañia. Un informe detallado sobre
los daños causados a la máquina debe ser llenado en el plazo de tres días, desde la fecha de entrega que se
muestra en los documentos de envío. Omcan no tiene ningun recurso por productos dañados que se enviaron
a recoger por terceros.
Antes de utilizar cualquier equipo, siempre lea y familiarizarse con todas las instrucciones de
funcionamiento y seguridad.
Omcan le gustaría darle las gracias por la compra de esta máquina. Es de la mayor importancia para
salvar estas instrucciones para futuras consultas. Además, guarda la caja original y el embalaje para el
envío del equipo si servicio técnico o devolución de la máquina que se requiere.
Safety and Warranty
This manual contains important information regarding your gas fryer unit. Please read this manual thoroughly
prior to equipment set-up, operation and maintenance. Failure to comply with regular maintenance guidelines
outlined in this manual may void the warranty. MUST READ!!!
WARNINGS
• Do not touch any hot surfaces.
4
Page 5

Safety and Warranty
• Do not immerse unit, cord or plug in liquid at any time.
• Do not operate unattended.
• Do not use this unit for anything other than intended use.
• Do not use outdoors.
• Always use on a rm, dry and level surface at least 12” from walls or any other obstruction.
• Keep children and animals away from unit.
• Any incorrect installation, alterations, adjustments and/or improper maintenance can lead to property loss
and injury. All repairs should be done by authorized professionals only.
• If gas odor is detected, shut unit down at main shutoff valve and contact service company.
• Do not store or use gasoline or other ammable vapors or liquids in the vicinity of this or any appliance.
1 YEAR PARTS AND LABOUR BENCH WARRANTY
Within the warranty period, contact Omcan Inc. at 1-800-465-0234 to schedule a drop off to either
an Omcan authorized service depot in the area, or to an Omcan Service warehouse to repair the
equipment.
Unauthorized maintenance will void the warranty. Warranty covers electrical and part failures, not
improper use.
Please see www.omcan.com/warranty.html for complete info.
WARNING:
The packaging components (cardboard, polyethylene, and others) are classied as normal solid urban waste
and can therefore be disposed of without difculty.
In any case, for suitable recycling, we suggest disposing of the products separately (differentiated
waste) according to the current norms.
DO NOT DISCARD ANY PACKAGING MATERIALS IN THE ENVIRONMENT!
5
Page 6

Technical Specications
Item Number 43086 43087 43088 43089
Gas Type Natural Gas Propane Gas Natural Gas Propane Gas
BTU 26,500 53,000
Oil Capacity 15 lbs. / 7 kg. 30 lbs. / 14 kg.
Temperature 200 - 400°F / 93 - 204°C
Weight 28 kg. / 62 lbs. 38.3 kg. / 84 lbs.
Dimensions 33” x 11” x 30” / 840 x 280 x 760 mm 33” x 17” x 30” / 840 x 430 x 760 mm
CONSTRUCTION
• Welded 16 gauge stainless steel tank with a super smooth machine nish ensures easy cleaning.
• Long lasting bafes are mounted in the heat exchange tubes to provide maximum heating and combustion
efciency.
• Standing pilot light design provides a ready ame when heat is required.
• Cabinet is constructed of stainless steel front and door with galvanized sides and back.
CONTROLS
• Thermostat maintains temperature between 200°F (93°C) and 400°F (204°C).
• Integrated gas control valve acts as a manual and pilot valve, automatic pilot valve, gas lter, pressure
regulator and automatic main valve.
• Gas control valve prevents gas ow to the main burner until pilot is established and shuts off all the gas
ow automatically if the pilot ame goes out.
• Temperature limit automatically shuts off all gas ow if the fryer temperature exceeds 450°F (232°C).
OPERATIONS
• Standing pilot and thermostat maintain temperature automatically at the selected temperature (between
200°F (93°C) and 400°F (204°C)).
• Front 1-1/4” drain, for quick draining.
Installation
Before installing the fryer, verify what type of gas (natural or propane) agrees with the specications on the
fryer date plate, which is located on the inside of the door panel. Make sure the fryer is congured for the
proper elevation.
Minimum clearance from combustible construction:
• 6” (15 cm) from the side of the fryer.
• 6” (15 cm) from the back of the fryer.
• The fryer may not be installed on combustible oors.
6
Page 7

Installation
Minimum clearance from noncombustible construction:
• 6” from side of fryer.
• 6” from back of fryer.
Between the fryer and any open-top ame units:
• 16” (41 cm).
• Install fryer in an area with sufcient air supply for gas combustion at fryer burners.
• Do not obstruct the ow of combustion and ventilation air.
• Provide adequate clearance for air openings into the combustion chamber.
• Do not permit fans to blow directly onto fryer.
• Avoid wall-type fans, which create cross-currents within a room.
• Avoid open windows next to sides or back.
CODES AND STANDARDS
The installer of this unit should be aware of state, county or local code for connecting this equipment to
determine if an external regulator is required.
Assembly
The fryer must be restrained to prevent tipping and the splashing of hot liquid. The means of restraint may be
the manner of installation, such as connection to a battery of appliances, installing the fryer in an alcove, or by
separate means such as adequate ties.
Note: The gas supply pressure at gas inlet should be less than 3.5 kPa.
1. Turn all burner controls OFF.
• Turn gas supply valve OFF.
2. Recongure Pressure Regulator
• Remove converter cap and pin from pressure regulator.
• Carefully remove pin from cap.
• Invert pin and reinstall in cap.
• Be sure gasket is in place on cap, then securely reinstall cap and pin on pressure regulator.
3. Remove burners.
4. Remove and discard orice hoods from burner control nozzles; install orice hoods from kit.
5. Reinstall burners.
6. Turn gas supply valve ON.
7. Adjust pilot ames.
8. Adjust burner ames.
9. Afx propane conversion label to rear of appliance, near the nameplate.
The procedure is complete.
7
Page 8

Assembly
TO CONNECT THE VENT
• Comply with Vapor Removal from Cooking Equipment, ANSI-NFPA Standard #96 (latest edition), available
from the National Fire Protection Association, Batterymarch Park, Quincy, MA 02269.
• Locate the fryer under a hood with adequate connection to an exhaust duct. The hood must extend 6” (15
cm) beyond fryer on both sides.
• Clearance above the fryer should be adequate for combustion by-products to be removed efciently.
• An 18” (46 cm) minimum clearance should be maintained between the ue vent and the lters of the hood
venting system.
• Never make vent connections directly to the fryer.
• Do not obstruct the ow of the gases from the appliance. Proper air balance should be maintained in the
room.
TO CONNECT GAS
• All gas supply connections and any pipe joint compound must be resistant to the action of propane gases.
• The gas inlet is located on the lower rear of the fryer. Codes require that a gas shutoff valve be installed in
the gas line ahead of the fryer.
• The gas supply line must be at least the equivalent of ½” X (12.7 mm) iron pipe for single units and 1-1/4”
(31.75 mm) for batteries. If using the optional quick-disconnect ex hose, ¾” X (19mm) iron pipe for single
units and 1-1/4” (31.75 cm) iron pipe for batteries.
• Make sure the pipes are clean and free of obstructions, dirt, and piping compound.
• A battery requires one or two connections of appropriate size for the gas requirement.
Note: Prior to lighting, check all joints in the gas supply line for leaks. Use soap and water solution. Do not use
an open ame.
After piping has been checked for leaks, fully purge gas pipes to remove air.
GAS PRESSURES (ALL MODELS)
The gas pressure should be set at 5” W.C. (Water Column) (1.25 kPa) of pressure for natural gas and 10” W.C.
(2.54kPa) of pressure for propane gas. If incoming pressure exceeds ½ PSI (3.5 kPa), an additional pressure
regulator must be installed.
TESTING THE GAS SUPPLY PIPING SYSTEM
When test pressures exceed ½ PSI (3.5 kPa), the fryer and its individual shutoff valve must be disconnected
from the gas supply piping system. When test pressures are ½ PSI (3.5 kPa) or less, the fryer must be isolated
from the gas supply piping system by closing its individual shutoff valve.
TO LEVEL
• Check the level of the fryer by placing a level on top of the fryer after gas connections have been made.
• Ensure that the fryer is level front-to-back and side-to-side in the nal installed position.
8
Page 9

Operation
Before any food preparation, thoroughly wipe protective oil from all surface parts and the tank interior with hot
soapy water to remove any lm residue and dust or debris.
To Fill Tank with Oil:
• Solid oil should NOT be used with fryers.
• Melting solid oil will damage the tank and void your warranty.
1. Close the drain valve.
2. Fill the fryer tank with liquid oil.
3. Oil level should be between the min. and max. lines in the fryer tank.
4. Oil will expand when heated. Do not ill the fryer tank past the MAX line.
5. Add fresh oil as needed to maintain oil level.
Lighting the Pilot:
1. Open the door.
2. Turn the thermostat OFF. The thermostat is located behind the door.
3. Push the gas control valve knob and turn to OFF. Wait 5 minutes for unburned gas to vent.
4. Push and turn gas control valve knob to the “L” in PILOT.
5. While still holding the knob in, light the pilot with a lit ame. Continue to depress the knob until pilot remains
lit when knob is released. If the pilot does not remain lit, repeat step 3 through 5.
6. Depress and turn gas control knob to ON.
7. If gas supply is interrupted, repeat steps 2 through 6.
Turning Fryer On:
1. Set the temperature knob to desired temperature.
2. After the set temperature has been reached, the thermostat shuts off the gas ow to burners.
3. The pilot remains lit. The burners will cycle on and off, maintaining the set temperature.
If the oil becomes overheated, a high-temperature shutoff device will turn the gas valve off and extinguish the
pilot. If the fryer shuts down due to overheating, DO NOT relights the pilot until the oil temperature is below
300°F (149°C). If an overheating situation persists, contact your local authorized service ofce.
Turning Fryer Off:
1. Turn the thermostat OFF.
2. To keep the pilot lit, turn the gas valve to “L” in Pilot.
3. To shut off all gas to the system, including the pilot, turn the gas valve knob to OFF.
Extended Shutdown
1. Turn the thermostat knob to OFF.
2. Push in the pilot knob and turn to OFF.
3. Thoroughly drain the fryer. Refer to DRAINING THE FRYER.
4. Clean the fryer according to CLEANING.
5. Turn off the main gas shutoff valve.
BASIC USAGE
1. Set the desired temperature and allow oil to heat.
9
Page 10

Operation
2. To ensure equally fried items, make sure food pieces are about the same size.
3. Drain or wipe dry raw or wet foods to minimize splatter when lowering into hot oil.
4. Add fresh oil as needed.
Guidelines for Fry Baskets
• Do not overll baskets.
• Carefully lower basket into oil.
• When frying doughnuts and fritters, turn product only once during frying.
• When cooking French fries or onion rings, shake the basket several times carefully, as not to splatter oil.
• Batter-covered foods should be dropped carefully, one by one, into oil or basket.
• If using the basket, rst dip the basket into the oil to reduce batter-build up on basket surfaces.
• When frying is completed, remove basket or product.
• Hang basket on rear hanger.
Extending Oil Life
Oil life can be extended by the following guidelines:
• Do not salt foods over the fryer.
• Use good-quality oil.
• Filter oil daily (at a minimum).
• Replace oil if it becomes poorly avored.
• Keep equipment and surrounding area clean.
• Set thermostat correctly.
• Remove excess moisture and particles from food products before placing on fryer.
Draining the Tank
• Turn the thermostat to OFF.
• To keep the pilot lit, turn the gas valve to PILOT.
• Direct the drain spout into the container that you want to drain the oil into.
• Open the drain valve. The oil will drain into the container. When the container is full or the fryer tank is
empty, close the drain valve. Repeat this step until the fryer is empty.
• If desired, perform the weekly clean-out as described under CLEANING.
• Once tank is completely empty, add new oil and set thermostat to desired temperature.
Daily Filtering
• Filter oil at least once a day. Refer to the instructions provided with your ltering equipment.
• A cold fryer will not drain properly.
• Always lter oil between 250°F and 350°F.
• The oil in the cold zone area will remain hard if the heat is only on for a few minutes.
• If necessary, use the clean-out rod to carefully stir the hard oil to an area above the cold zone where it will
melt.
• Use the tank brush to help clear sides and tubes of debris.
10
Page 11

Maintenance
• Hot oil and hot parts can cause burns.
• Use care when operating, cleaning, and servicing the fryer.
• Spilling hot fryer compound can cause severe burns.
• Do not move fryer without draining all frying compound from the tank.
• The fryer should be restrained to prevent tipping when installed in order to avoid the splashing of hot liquid.
• The means of restraint may be the manner of installation, such as connection to a battery of appliances or
installing the fryer in an alcove, or by separate means, such as adequate ties.
CLEANING
NOTE: To maintain cleanliness and increase service life, the fryer should be cleaned daily. Do not immerse
in water or any other liquid, if liquid enters the electrical compartment it may cause a short circuit or electrical
shock.
1. Hot oil and hot parts can cause burns. Use care when operating, cleaning, and servicing the fryer.
2. Clean the unit with the tank brush and a damp cloth then polish with a soft dry cloth.
3. Clean all exterior surfaces with warm soapy water.
4. To avoid ngerprints on highly polished surfaces of stainless steel, apply a cleaner that will leave a thin oily
or waxy lm.
5. To avoid damage, do not use abrasive cleaners or metallic scouring pads.
6. Use a self-soaping, non-metallic scouring pad for stubborn discolorations.
7. If soap or chemical cleaners are used, be sure they are completely rinsed away with clear water
immediately after cleaning. Chemical residue could damage or corrode the surfaces of the unit.
BOIL OUT
Procedure should be done weekly or as required.
• Drain the tank as described under DRAINING THE TANK.
• Once the shortening has been drained, ush out scraps and sediment with a small amount of warm
shortening, using tank brush. Allow the tank to drain thoroughly.
• Close the drain valve and ll tank with non-corrosive, grease-dissolving commercial cleaner. Follow the
manufacturer’s instructions. Do not use chlorine or sulfate/sulde cleaners.
• Add commercial boil-out solution. Solution level must be between the MIN and MAX levels on the fryer
tank.
• Set thermostat to the temperature recommended for the solution being used. Allow solution to simmer for
about 15 to 20 minutes.
• Drain the cleaning solution from the tank.
• Close the drain valve and rell the tank with water. Add 1 cup (1/4 L) of vinegar to neutralize alkaline left by
the cleaner. Solution level must be between the MIN and MAX level on the fryer tank.
• Bring the solution to a simmer only, then turn the thermostat off. Allow to stand for a few minutes.
• Drain the tank according to DRAINING THE TANK. Rinse thoroughly with clear, hot water. All traces of
cleaner must be removed. Dry the tank thoroughly.
• Close the drain valve and add shortening. Follow the FILLING TANK WITH SHORTENING procedure in
this manual. The fryer is now ready for use.
11
Page 12

Maintenance
FLUE VENT INSPECTION
• When the fryer is cool, inspect annually. Check the ue and clear any obstructions.
Service in the US and Canada
Contact your local Service ofce or address on the front of this manual.
Troubleshooting
Problem Cause
No heat Thermostat dial is not turned on. Pilot is not lit. Gas
supply is not turned on. Wire connections are loose
(call for service). Wire connections need cleaning
(call service). Thermopile (call service).
Insufcient or too much heat Thermostat dial is not set to desired temperature.
High limit is tripped (call for service). Temperature
probe (call for service).
Tank will not drain Shortening is too cold. Drain pipe is clogged with
debris.
REFERENCE
Item Number Model Number Description Manufacturer Model Number
43086 -
43087 -
43088 -
43089 -
Countertop Fryer with Thermostat Control
15 Lbs Natural Gas ETL
Countertop Fryer with Thermostat Control
15 Lbs Propane ETL
Countertop Fryer with Thermostat Control
30 Lbs Natural Gas ETL
Countertop Fryer with Thermostat Control
30 Lbs Propane ETL
UR-CF15T-NG
UR-CF15T-LPG
UR-CF30T-NG
UR-CF30T-LPG
12
Page 13

Item 43086
Item 43087
Item 43088
Item 43089
Parts Breakdown
13
Page 14

Parts Breakdown
Item 43086
Item 43087
Item No. Description Position Item No. Description Position Item No. Description Position
77941 Fryer Basket for UR-CF15T-NG 1 77951 Valve, Oil Drain for UR-CF15T-NG 8 77960 Knob for UR-CF15T-NG 15
77942 Filter Panel for UR-CF15T-NG 2 77952 Burner for UR-CF15T-NG 9 77961 Piezo Igniter for UR-CF15T-NG 16
77944 Regulator for UR-CF15T-NG 3 77954 Flame Device System for UR-CF15T-NG 10 77962 Bellows for UR-CF15T-NG 17
79005 Regulator for UR-CF15-LP 3 77955 Thermopile for UR-CF15T-NG 11 77963 Door for UR-CF15T-NG 18
77945 Brand for UR-CF15T-NG 4 77956 Gas Thermostat for UR-CF15T-NG 12 77965 Door Handle for UR-CF15T-NG 19
77946 Pilot Pipe Assy. for UR-CF15T-NG 5 77958 Orice for UR-CF15T-NG 13 77966 Oil Drain Tube for UR-CF15T-NG 20
77949
72410 Foot for UR-CF15T-NG 7 77959 LC Series Limit Control for UR-CF15T-NG 14
Gas Safety Control Valve for URCF15T-NG
6 79006 Orice for UR-CF15-LP 13 77967
Item 43088
Item 43089
Cover (Optional Accessories) for URCF15T-NG
21
Item No. Description Position Item No. Description Position Item No. Description Position
77941 Fryer Basket for UR-CF30T-NG 1 77951 Valve, Oil Drain for UR-CF30T-NG 8 77960 Knob for UR-CF30T-NG 15
77943 Filter Panel for UR-CF30T-NG 2 77952 Burner for UR-CF30T-NG 9 77961 Piezo Igniter for UR-CF30T-NG 16
77944 Regulator for UR-CF30T-NG 3 77954 Flame Device System for UR-CF30T-NG 10 77962 Bellows for UR-CF30T-NG 17
79007 Regulator for UR-CF30-LP 3 77955 Thermopile for UR-CF30T-NG 11 77964 Door for UR-CF30T-NG 18
77945 Brand for UR-CF30T-NG 4 77956 Gas Thermostat for UR-CF30T-NG 12 77965 Door Handle for UR-CF30T-NG 19
77947 Pilot Pipe Assy. for UR-CF30T-NG 5 77958 Orice for UR-CF30T-NG 13 77966 Oil Drain Tube for UR-CF30T-NG 20
77949
72410 Foot for UR-CF30T-NG 7 77959 LC Series Limit Control for UR-CF30T-NG 14
Gas Safety Control Valve for URCF30T-NG
6 79008 Orice for UR-CF30-LP 13 77968
Cover (Optional Accessories) for URCF30T-NG
21
14
Page 15

Warranty Registration
Thank you for purchasing an Omcan product. To register your warranty for this product, complete the information below, tear off the card at
the perforation and then send to the address specied below. You can also register online by visiting:
Merci d’avoir acheté un produit Omcan. Pour enregistrer votre garantie pour ce produit, complétez les informations ci-dessous, détachez la
carte au niveau de la perforation, puis l’envoyer à l’adresse spécié ci-dessous. Vous pouvez également vous inscrire en ligne en visitant:
Gracias por comprar un producto Omcan usted. Para registrar su garantía para este producto, complete la información a continuación,
cortar la tarjeta en la perforación y luego enviarlo a la dirección indicada a continuación. También puede registrarse en línea en:
www.omcan.com/warrantyregistration.html
For mailing in Canada
Pour postale au Canada
Por correo en Canadá
OMCAN
PRODUCT WARRANTY REGISTRATION
3115 Pepper Mill Court,
Mississauga, Ontario
Canada, L5L 4X5
PRODUCT WARRANTY REGISTRATION
4450 Witmer Industrial Estates, Unit 4,
For mailing in the US
Pour diffusion aux États-Unis
Por correo en los EE.UU.
OMCAN
Niagara Falls, New York
USA, 14305
or email to: service@omcan.com
Purchaser’s Information
Name: Company Name:
Address:
Telephone:
City: Province or State: Postal or Zip: Email Address:
Country: Type of Company:
Restaurant Bakery Deli
Dealer from which Purchased: Butcher Supermarket Caterer
Dealer City: Dealer Province or State: Institution (specify):
Invoice: Other (specify):
Model Name: Model Number: Serial Number:
Machine Description:
Date of Purchase (MM/DD/YYYY): Date of Installation (MM/DD/YYYY):
Would you like to extend the warranty? Yes No
Thank you for choosing Omcan | Merci d’avoir choisi Omcan | Gracias por elegir Omcan
15
Page 16

Since 1951 Omcan has grown to become a leading distributor of equipment and supplies to the North
American food service industry. Our success over these many years can be attributed to our commitment
to strengthen and develop new and existing relationships with our valued customers and manufacturers.
Today with partners in North America, Europe, Asia and South America, we continually work to improve
and grow the company. We strive to offer customers exceptional value through our qualied local sales
and service representatives who provide convenient access to over 3,500 globally sourced products.
Depuis 1951 Omcan a grandi pour devenir un des “leaders” de la distribution des équipements et
matériel pour l’industrie des services alimentaires en Amérique du Nord. Notre succès au cours de ces
nombreuses années peut être attribué à notre engagement à renforcer et à développer de nouvelles
et existantes relations avec nos clients et les fabricants de valeur. Aujourd’hui avec des partenaires en
Amérique du Nord, Europe, Asie et Amérique du Sud, nous travaillons continuellement à améliorer et
développer l’entreprise. Nous nous efforçons d’offrir à nos clients une valeur exceptionnelle grâce à
nos ventes locales qualiées et des représentants de service qui offrent un accès facile à plus de 3500
produits provenant du monde entier.
Desde 1951 Omcan ha crecido hasta convertirse en un líder en la distribución de equipos y suministros
de alimentos en América del Norte industria de servicios. Nuestro éxito en estos años se puede atribuir
a nuestro compromiso de fortalecer y desarrollar nuevas relaciones existentes con nuestros valiosos
clientes y fabricantes. Hoy con socios de América del Norte, Europa, Asia y América del Sur, que trabajan
continuamente para mejorar y crecer la empresa. Nos esforzamos por ofrecer a nuestros clientes valor
excepcional a través de nuestro local de ventas y representantes de los servicios que proporcionan un
fácil acceso a más de 3,500 productos con origen a nivel mundial.
 Loading...