

Page 1
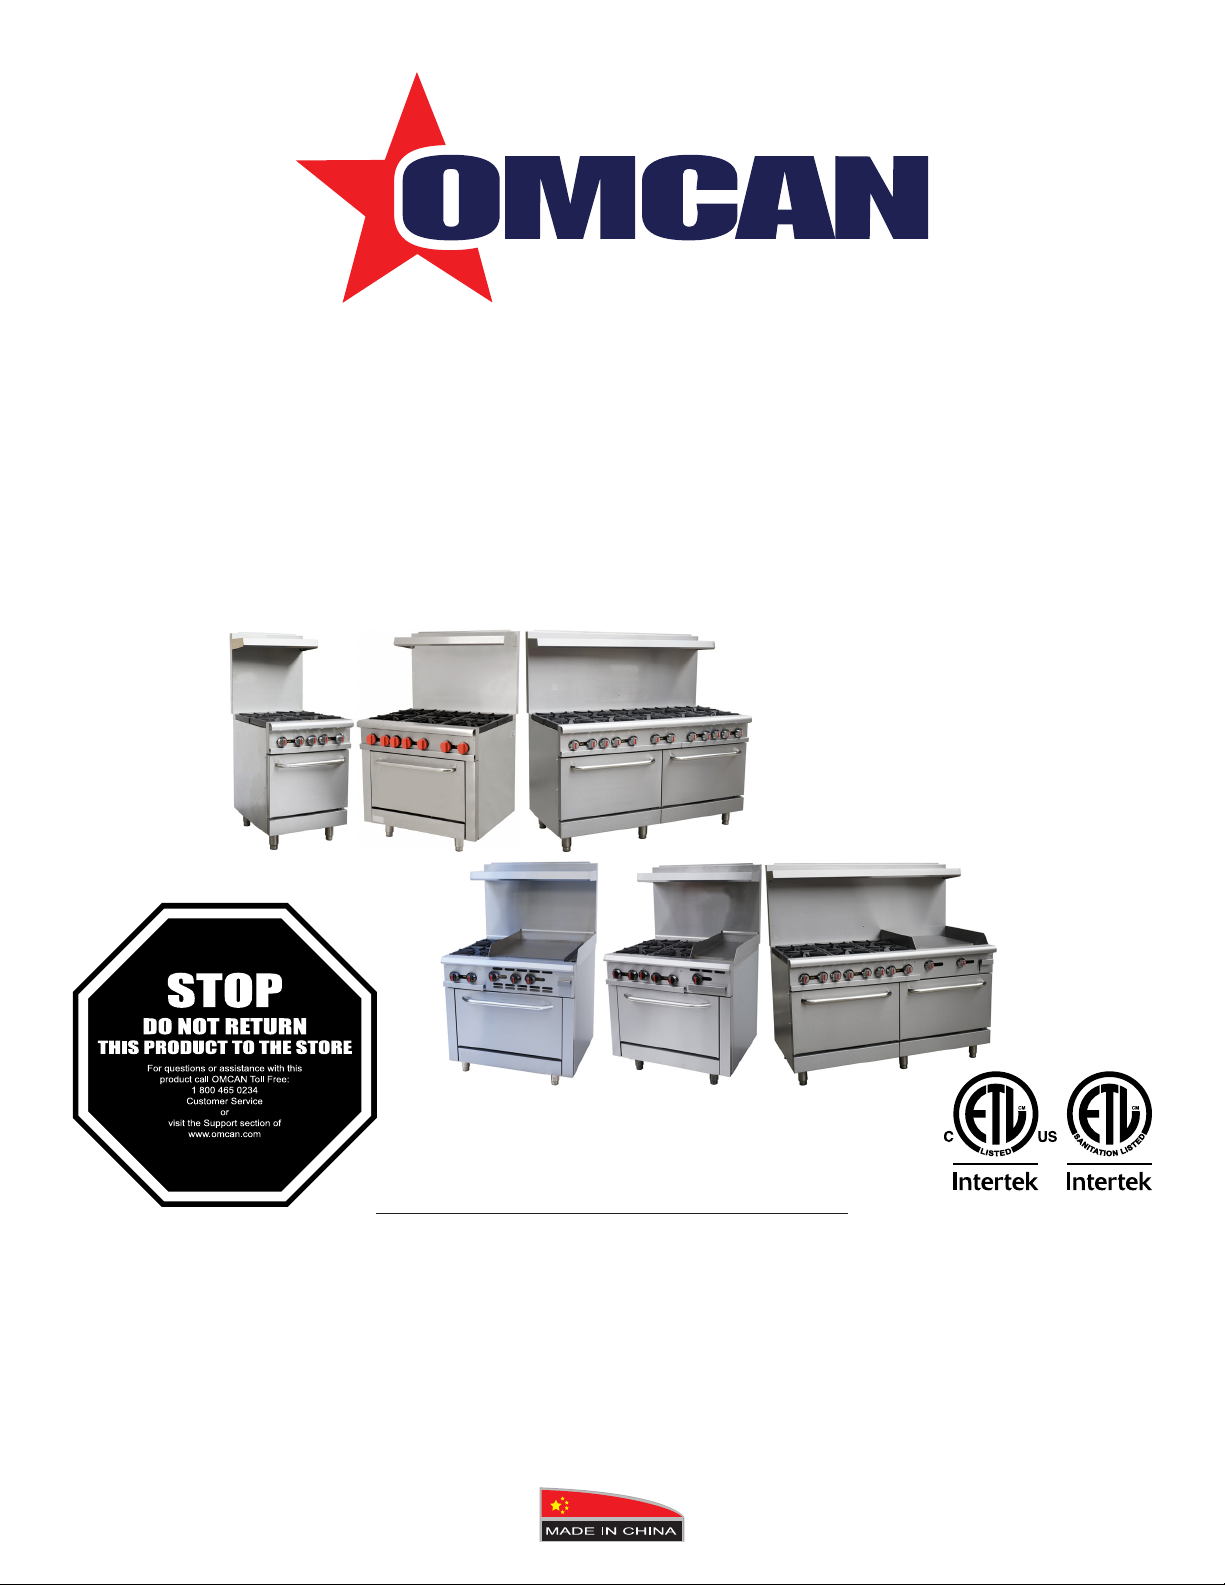
Gas Ranges
Models CE-CN-0609-R (46024), CE-CN-0609-L (46124), CE-CN-0914-R (43151),
CE-CN-0914-L (46151), CE-CN-1524-R (46027), CE-CN-1524-L (46127),
CE-CN-0004-GN (46025), CE-CN-0004-LP (46125), CE-CN-0002-GN (46026),
CE-CN-0002-GL (46126), CE-CN-0006-GN (46028), CE-CN-0006-GL (46128)
Instruction Manual
Revised - 11/29/2018
Toll Free: 1-800-465-0234
Fax: 905-607-0234
Email: service@omcan.com
www.omcan.com
Page 2

Table of Contents
Model CE-CN-0609-R / Model CE-CN-0609-L / Model CE-CN-0914-R
Model CE-CN-0914-L / Model CE-CN-1524-R / Model CE-CN-1524-L
Model CE-CN-0004-GN / Model CE-CN-0004-LP / Model CE-CN-0002-GN
Model CE-CN-0002-GL / Model CE-CN-0006-GN / Model CE-CN-0006-GL
Section
General Information
Safety and Warranty
Technical Specications
Installation
Operation
Maintenance
--------------------------------------------------------------------------------------- 8 - 9
--------------------------------------------------------------------------------------- 9 - 11
--------------------------------------------------------------------------------------- 11
--------------------------------------------------------------------------- 3 - 4
--------------------------------------------------------------------------- 4 - 6
Page
-------------------------------------------------------------------------- 7
Troubleshooting
Parts Breakdown
Notes
Warranty Registration
------------------------------------------------------------------------------------------- 16 - 18
----------------------------------------------------------------------------- 12 - 13
---------------------------------------------------------------------------- 14 - 15
--------------------------------------------------------------------------- 19
2
Page 3

General Information
Omcan Manufacturing and Distributing Company Inc., Food Machinery of America, Inc. dba Omcan
and Omcan Inc. are not responsible for any harm or injury caused due to any person’s improper or
negligent use of this equipment. The product shall only be operated by someone over the age of 18, of
sound mind, and not under the inuence of any drugs or alcohol, who has been trained in the correct
operation of this machine, and is wearing authorized, proper safety clothing. Any modication to the
machine voids any warranty, and may cause harm to individuals using the machine or in the vicinity of
the machine while in operation.
CHECK PACKAGE UPON ARRIVAL
Upon receipt of an Omcan shipment please inspect for external damage. If no damage is evident on the
external packaging, open carton to ensure all ordered items are within the box, and there is no concealed
damage to the machine. If the package has suered rough handling, bumps or damage (visible or concealed),
please note it on the bill of lading before accepting the delivery and contact Omcan within 24 hours, so we may
initiate a claim with the carrier. A detailed report on the extent of the damage caused to the machine must be
lled out within three days, from the delivery date shown in the shipping documents. Omcan has no recourse
for damaged products that were shipped collect or third party.
Before operating any equipment, always read and familiarize yourself with all operation and safety
instructions.
Omcan would like to thank you for purchasing this machine. It’s of the utmost importance to save
these instructions for future reference. Also save the original box and packaging for shipping the
equipment if servicing or returning of the machine is required.
---------------------------------------------------------------------------------------------------------------------------------------------------
Omcan Fabrication et distribution Companie Limité et Food Machinery d’Amerique, dba Omcan et
Omcan Inc. ne sont pas responsables de tout dommage ou blessure causé du fait que toute personne
ait utilisé cet équipement de façon irrégulière. Le produit ne doit être exploité que par quelqu’un de
plus de 18 ans, saine d’esprit, et pas sous l’inuence d’une drogue ou d’acohol, qui a été formé pour
utiliser cette machine correctement, et est vêtu de vêtements de sécurité approprié. Toute modication
de la machine annule toute garantie, et peut causer un préjudice à des personnes utilisant la machine
ou des personnes à proximité de la machine pendant son fonctionnement.
VÉRIFIEZ LE COLIS DÈS RÉCEPTION
Dès réception d’une expédition d’Omcan veuillez inspecter pour dommages externes. Si aucun dommage
n’est visible sur l’emballage externe, ouvrez le carton an de s’assurer que tous les éléments commandés
sont dans la boîte, et il n’y a aucun dommage dissimulé à la machine. Si le colis n’a subi aucune mauvaises
manipulations, de bosses ou de dommages (visible ou cachée), notez-le sur le bond de livraison avant
d’accepter la livraison et contactez Omcan dans les 24 heures qui suivent, pour que nous puissions engager
une réclamation auprès du transporteur. Un rapport détaillé sur l’étendue des dommages causés à la machine
doit être rempli dans un délai de trois jours, à compter de la date de livraison indiquée dans les documents
d’expédition. Omcan n’a aucun droit de recours pour les produits endommagés qui ont été expédiées ou cueilli
par un tiers transporteur.
3
Page 4

General Information
Avant d’utiliser n’importe quel équipement, toujours lire et vous familiariser avec toutes les opérations
et les consignes de sécurité.
Omcan voudrais vous remercier d’avoir choisi cette machine. Il est primordial de conserver ces
instructions pour une référence ultérieure. Également conservez la boîte originale et l’emballage pour
l’expédition de l’équipement si l’entretien ou le retour de la machine est nécessaire.
---------------------------------------------------------------------------------------------------------------------------------------------------
Omcan Empresa De Fabricacion Y Distribucion Inc. Y Maquinaria De Alimentos De America, Inc. dba
Omcan y Omcan Inc. no son responsables de ningun daño o perjuicío causado por cualquier persona
inadecuada o el uso descuidado de este equipo. El producto solo podra ser operado por una persona
mayor de 18 años, en su sano juicio y no bajo alguna inuencia de droga o alcohol, y que este ha sido
entrenado en el correcto funcionamiento de esta máquina, y ésta usando ropa apropiada y autorizada.
Cualquier modicación a la máquina anúla la garantía y puede causar daños a las personas usando la
máquina mientras esta en el funcionamiento.
REVISE EL PAQUETE A SU LLEGADA
Tras la recepcion de un envio Omcan favor inspeccionar daños externos. Si no hay daños evidentes en el
empaque exterior, Habra el carton para asegurararse que todos los articulos solicitados ésten dentro de la
caja y no encuentre daños ocultos en la máquina. Si el paquete ha sufrido un manejo de poco cuidado, golpes
o daños (visible o oculto) por favor anote en la factura antes de aceptar la entrega y contacte Omcan dentro
de las 24 horas, de modo que podamos iniciar una reclamación con la compañia. Un informe detallado sobre
los daños causados a la máquina debe ser llenado en el plazo de tres días, desde la fecha de entrega que se
muestra en los documentos de envío. Omcan no tiene ningun recurso por productos dañados que se enviaron
a recoger por terceros.
Antes de utilizar cualquier equipo, siempre lea y familiarizarse con todas las instrucciones de
funcionamiento y seguridad.
Omcan le gustaría darle las gracias por la compra de esta máquina. Es de la mayor importancia para
salvar estas instrucciones para futuras consultas. Además, guarda la caja original y el embalaje para el
envío del equipo si servicio técnico o devolución de la máquina que se requiere.
Safety and Warranty
THIS MANUAL CONTAINS IMPORTANT INFORMATION REGARDING YOUR PURCHASED EQUIPMENT.
PLEASE READ THE MANUAL THOROUGHLY PRIOR TO EQUIPMENT SET-UP, OPERATION AND
MAINTENANCE. FAILURE TO COMPLY WITH REGULAR MAINTENANCE GUIDELINES OUTLINED
IN THIS MANUAL MAY VOID THE WARRANTY. PLEASE KEEP IT FOR FUTURE REFERENCE AFTER
INSTALLATION AND DO NOT THROW IT AWAY! PLEASE READ!!
4
Page 5

Safety and Warranty
IMPORTANT FOR YOUR SAFETY: THIS MANUAL HAS BEEN PREPARED FOR PERSONNEL QUALIFIED
TO INSTALL GAS EQUIPMENT, WHO SHOULD PERFORM THE INITIAL FIELD START-UP AND
ADJUSTMENTS OF THE EQUIPMENT AS COVERED BY THIS MANUAL.
IMPORTANT: IN THE EVENT A GAS ODOR IS DETECTED, SHUT DOWN UNITS AT MAIN SHUTOFF
VALVE AND CONTACT THE LOCAL GAS COMPANY OR GAS SUPPLIER FOR SERVICE.
FOR YOUR SAFETY: DO NOT STORE OR USE GASOLINE OR OTHER FLAMMABLE VAPORS OR
LIQUIDS IN THE VICINITY OF THIS OR ANY OTHER APPLIANCE.
WARNING: IMPROPER INSTALLATION, ADJUSTMENT, ALTERATION, SERVICE OR MAINTENANCE
CAN CAUSE PROPERTY DAMAGE, INJURY OR DEATH. READ THE INSTALLATION, OPERATING
AND MAINTENANCE INSTRUCTIONS THOROUGHLY BEFORE INSTALLING OR SERVICING THIS
EQUIPMENT.
IN THE EVENT OF A POWER FAILURE, DO NOT ATTEMPT TO OPERATE THIS DEVICE.
ADDITIONAL WARNINGS
• Do not touch any hot surfaces.
• Do not use this unit for any other than intended use.
• Do not use outdoors.
• Always use on a rm, dry and level surface.
• Keep the appliance area free and clear from combustibles.
• The manual shall be retained for future reference.
• Do not store or use gasoline or other ammable vapors or liquids in the vicinity of this or any other
equipment.
• Improper installation, adjustment, alteration, service or maintenance can cause property damage, injury or
death.
• Read the installation and maintenance instructions thoroughly before installing or servicing this equipment.
• Have the equipment installed by a qualied installer in accordance with all federal, state and local codes.
• Do not install or use without all 4 legs.
• This equipment is for use in non-combustible locations only.
• Do not obstruct the ow of combustion and ventilation air.
• Do not spray controls or the outside of the equipment with liquids or cleaning agents.
• Allow for hot parts to cool before cleaning or moving.
• This equipment should only be used in a at, level position.
• Do not operate unattended.
• Any loose dirt or metal particles that are allowed to enter the gas lines on this equipment will damage the
valve and aect its operation.
• If you smell gas, follow the instructions provided by the gas supplier. Do not touch any electrical switch; do
not try to light the burner; do not use a telephone within close proximity.
• Never attempt to move grates while cooking.
5
Page 6

Safety and Warranty
BEFORE INSTALLATION
• Installation of this device should be performed by professional technicians.
• Installation of this unit should conform to provisions of gas safety, installation and usage.
• Check that electrical (if needed) and gas supply agree with the specications on the rating plate located
inside the kick panel of the unit. If the supply and equipment requirements do not agree, do not proceed
with the installation. Contact your dealer immediately.
• Unit must be installed so that the ow of combustion and ventilation air will not be obstructed, ensure that
there is an adequate supply of air in the room to allow proper combustion of gas at the burners.
• This device should be kept a minimum clearance of 12” from combustible construction at the sides and 10”
at the rear. Clearance from non-combustible construction is 0”sides and 6”at the back. Do not install on a
ammable oor or around other combustible objects.
• This item is intended to sit on a solid and level oor.
1 YEAR PARTS AND LABOUR WARRANTY
Within the warranty period, contact Omcan Inc. at 1-800-465-0234 to schedule an Omcan authorized
service technician to repair the equipment locally.
Unauthorized maintenance will void the warranty. Warranty covers part failures, not improper use.
Please see https://omcan.com/disclaimer for complete info.
WARNING:
The packaging components are classied as normal solid urban waste and can therefore be disposed of
without diculty.
In any case, for suitable recycling, we suggest disposing of the products separately (dierentiated
waste) according to the current norms.
DO NOT DISCARD ANY PACKAGING MATERIALS IN THE ENVIRONMENT!
6
Page 7

Technical Specications
24” BURNERS
Model CE-CN-0609-R CE-CN-0609-L
Oven Dimensions 20.5” x 25.8” x 13.9” / 521 x 655 x 353mm
Number of Burners 4 top burner; 1 oven burner
Total Input BTU per
Hour
Oven Temperature 121°C - 288°C / 250°F - 550°F
Dimensions 24” x 32.6” x 59.8” / 610 x 828 x 1519mm
Weight 291 lbs. / 132 kgs.
Item Number 46024 46124
36” BURNERS
Model CE-CN-0914-R CE-CN-0914-L CE-CN-0004-GN CE-CN-0004-LP CE-CN-0002-GN CE-CN-0002-GL
Number of
Burners
Total Input
BTU per
Hour
Oven
Temperature
Thickness of
Griddle Plate
Dimensions
Weight 368 lbs. / 167 kgs. 238 lbs. / 108 kgs. 403.4 lbs. / 183 kgs.
Item Number 43151 46151 46025 46125 46026 46126
36” x 32.6” x 61”
915 x 829 x 1539mm
6 4 2
211,000 BTU 171,000 BTU 181,000 BTU 131,000 BTU 151,000 BTU
121°C - 288°C / 250°F - 550°F
N/A 3/4” / 19mm
151,000 BTU
36” x 32.5” x 60.3”
914 x 826 x 1532mm
60” BURNERS
Model CE-CN-1524-R CE-CN-1524-L CE-CN-0006-GN CE-CN-0006-GL
Number of Burners 10 6
Total Input BTU per
Hour
362,000 BTU 282,000 BTU
Oven Temperature 121°C - 288°C / 250°F - 550°F
Thickness of Griddle
Plate
Dimensions
60” x 32.6” x 59.8”
1524 x 828 x 1519mm
N/A 3/4” / 19mm
60” x 32.6” x 60.3”
1524 x 828 x 1532mm
Weight 291 lbs. / 132 kgs. 683.4 lbs. / 310 kgs.
Item Number 46027 46127 46028 46128
7
Page 8

Installation
• The installation of this equipment must conform with local codes, or with the National Gas Code,
ANSIZ223.1/NFPA 54, or the Natural Gas and Propane Installation Code, CSA B149.1, as applicable.
• The equipment and its individual shuto valve must be disconnected from the gas supply piping system
during any pressure testing of that system at test pressures in excess of ½ psi (3.5 kPa).
• The equipment must be isolated from the gas supply piping system by closing its individual manual shuto
valve during any pressure testing of the gas supply piping system at test pressures equal to or less then ½
psi (3.5 kPa).
CLEARANCE AND POSITIONING AROUND THE EQUIPMENT:
• This equipment must be installed adjacent to non-combustible surfaces only with a minimum spacing of 6”
from all sides. This equipment must be a distance of 6” from other equipment. The equipment must have
the 4” legs installed and be placed on a non-combustible surface.
• For an oven equipped with casters, the installation shall be made with a connector that complies with the
Standard for Connectors for Movable Gas Appliances, ANSI Z21.69/CSA 6.16 and a quick-disconnect
device that complies with the Standard for Quick-Disconnect Devices for Use with Gas Fuel, ANSI Z21.4/
CSA 6.9. When installing the oven with casters and quick-disconnect hose, adequate means must be
provided to limit the movement of the oven without depending on the connector and the quick disconnect
device or its associated piping to limit the oven movement. Restraining means may be attached to the
vertical portion of the base frame in the rear of the oven.
AIR SUPPLY AND VENTILATION:
• The area in front and around the equipment must be kept clear to avoid any obstruction of the ow of
combustion and ventilation air.
• Adequate clearance must be maintained at all times in front of and at the sides of the equipment for
servicing and proper ventilation.
TO INSTALL
NOTE: ALL INSTALLATION MUST BE DONE BY A LICENSED TECHNICIAN.
1. Level the device with a level gauge. The height can be adjusted by the adjustable feet. Unit should not
sway or tilt during operation. Units that are not level will experience operational problems.
2. The mounting position should be well-ventilated with proper hood exhaust system.
3. Codes require that a gas shut o valve should be installed upstream the device where it is easily reached
during operation.
4. Make sure you are using the correct gas supply that is specied for this model. If the gas supply is not
intended for this model, do not proceed with installation.
5. This unit is applicable to low pressure regulating valves only. High pressure regulating valves and medium
pressure regulating valves are not to be used.
6. Check to make sure the connection pipe to the unit has no leaks and that all connections and pipe joint
compound used are resistant to the action of propane gases
7. A pressure regulator must be installed with this unit. Ensure that the regulator type is in agreement with the
rating plate gas supply. Regulator must be upright after installation. If regulator is not level during operation,
performance problems may result.
8. After connecting the appliance to the gas system, check for leaks at joints and pipe ttings; to do so,use
soapy water or a specic leak detector(spray).
8
Page 9

Installation
9. Check the gas supply pressure after installation.
10. Gas supply pressure can be measured with a liquid-lled pressure gauge (e.g. a U shaped pressure gauge,
minimum scale division0.1mbar) or a digital gauge. Procedure as follows:
• Ensure gas is turned o.
• Remove the panel and unscrew the screw on the pressure port,
• Place the pressure gauge.
• Start up the appliance by following the instructions in this owner’s manual.
• Check supply pressure. Pressure must agree with rating plate requirement when the unit is in full
operation.
• After the check, turn o gas and remove the pressure gauge.
• Replace the sealing screw.
IF UNIT HAS GRIDDLE TOP/GRIDDLE + BROILER:
11. Grease collects are packaged in oven for transport, remove from oven.
12. Place grease collector in the opening position. Ensure that grease collector moves freely and is properly
positioned beneath griddle grease chute.
GAS CONVERSION: Conversion from Natural Gas to Liquid Propane (LP) or vice versa may only be
performed by the factory or an authorized service agent.
Operation
When turning on for the rst time please be advised that it might take a little longer to ignite due to the air
existing in the pipe.
BURNERS
1. Turn on the gas supply and ignite the pilot ame with a lighter. If the unit hasn’t been used in a while or if
this is the rst lighting, ignition might take a little longer (about two or three minutes).
2. Press the corresponding valve knob of burner and turn 90 degrees counterclockwise. The burner will be
ignited and the ame will be at Max. To set the ame to Min, rotate counterclockwise another 90 degrees.
3. When nished turn o main burner by rotating the knob clockwise to o position. Pilot should remain lit.
4. For complete shutdown, ensure that all burner knobs are turned to the o position, and then turn main gas
supply o.
OVEN
Before using the oven, please clean the unit completely, especially the oven chamber. Remove all the packing
materials and lm from shipping. Before cleaning the stainless steel accessories, please make sure that the
used detergent contains no corrosive substance and is okay for stainless steel surface cleaning (no chlorine
based cleaners).Then dry with a clean cloth.
9
Page 10

Operation
When rst using, it is normal that there is unpleasant smell that is produced by heating of the insulating
material and oil residue on the metal. If the oven is used for the rst time, do not put any food into the chamber,
set the temperature to 500°F and heat till the smell is gone. When rst using, the duration of ignition may be a
little longer due to the air existing in the new pipe.
1. To ignite, open the kick panel, then press down the oven knob and rotate it counterclockwise to “”, align
with the salient point and press down. Ignite the pilot ame with lighter via the ignition hole.
2. After the pilot ame is ignited, continue pressing the knob for around 30 seconds to allow the thermocouple
to heat. If the pilot goes out again when you release the knob, repeat this operation.
3. Once pilot remains lit, rotate the temperature control knob counter-clockwise to ignite the main burner of
the oven. Select an appropriate temperature according to food requirement. The oven temperature can be
controlled between 250°F and 500°F.
4. To turn o the burner: Rotate the knob clockwise to strip mark and align with the salient point.
IMPORTANT
Dierences in gas supply, environment, and altitude can produce small changes in the set points of the oven,
which may change the accuracy of the dial. For this reason, the temperature indications for the oven are able
to be adjusted. If you notice a dierence in your actual oven temperature from the set point indicated at the
dial, remove the oven knob and loosen the screws holding the indication plate to the manifold cover. Rotate
the indication plate until the actual temperature lines up with the position of the knob, then retighten the screws
and replace the knob.
GRIDDLE
CAUTION: The plate is steel, but the surface is relatively soft and can be scored or dented by the
careless use of a spatula or scraper. Do not try to knock o loose food that may be on the spatula by
tapping the corner edge of the spatula on the griddle surface.
Before rst use – Season the Griddle Plate. A new griddle surface must be seasoned to perform well in
cooking. The metal surface of the griddle is porous and food will stick if the plate is not properly seasoned.
Seasoning lls the pores of the metal with oil and gives the surface a slick, hard nish from which food will
more easily release. To season the griddle plate, please heat griddle top on a low burner setting. Pour one
ounce of cooking oil per square foot of surface onto the griddle and spread over the entire surface using an
insulated cloth. Wipe away any excess oil with an insulated cloth. Repeat 2 to 3 times until griddle has a slick
surface.
10
Page 11

Operation
1. Ensure gas supply is on and ignite the pilot ame with a lighter. If the unit hasn’t been used in a while or if
this is the rst lighting, ignition might take a little longer (about two or three minutes).
2. Press the corresponding valve knob of burner and turn 90 degrees counterclockwise. The burner will be
ignited and the ame will be at Max. To set the ame to Min, rotate counterclockwise another 90degrees.
3. If the ame could not be maintained, turn burner o and wait 5 minutes, then repeat.
4. When nished turn o main burner by rotating the knob clockwise to o position. Pilot should remain lit.
5. For complete shutdown, ensure that all burner knobs are turned to the o position, and then turn main gas
supply o.
Maintenance
CLEANING
NOTE: It is important to check the machine daily. Checking the machine regularly can avoid serious
accidents. Stop using if user feels that there are some problems with the unit. Check the condition of
the machine before and after using every day.
1. Before cleaning, turn o all gas valves.
2. Please clean the burners and drip tray of all debris and spillage daily. A complete cleaning every day will
ensure a good service and extend the service life of the unit.
3. Clean the stainless steel surface with warm soapy water every day and rinse it completely. Do not saturate
range with water, excessive water will cause operational issues. During cleaning, do not clean the stainless
steel surface with abrasive detergent, brush or scraper etc. The residual iron scale may cause rusting.
4. Do not clean the surface with chlorine cleanser (bleach, dish detergent, hydrochloric acid etc.). Do not
clean the oor where the device locates with corrosive substance.
5. Do not change the burner shutter settings.
6. Accumulation of substances containing salt or acidic ingredients, e.g. vinegar, lemon juice, spices, salt etc.
can cause corrosion. Thus, please do not allow these substances to have long contact with the unit.
7. After cleaning, ensure that the ports of the burners are open and clear of any residue.
8. Clean cast iron top grates with a mild soap and water solution. Rinse thoroughly and dry with a clean,
water-absorbent towel. Immediately after drying, season grates lightly with liquid vegetable oil. After
seasoning, replace grates on range and turn burners on LOW, allow grates to heat for 15 minutes before
using pots or pans on the range top. Failure to season grates after cleaning will result in rust.
9. If unit will sit idle for a signicant period of time, please turn o the gas valve upstream the device.
11
Page 12

Troubleshooting
Problem Possible Causes Solution
The pilot ame can’t be ignited. The gas pressure is too low. Adjust the relieve valve to increase
pressure.
The nozzle is clogged. Unclog the nozzle.
The pilot ame is on but the main
burner can’t be ignited.
It has a light back sound when the
gas supply is turned o.
It has a yellow ame and black
smoke
Connection of the thermocouple is
loose.
The thermocouple is defective. Replace the thermocouple.
The gas control valve is
malfunctioning.
The gas pressure is too low. Adjust the relieve valve to increase
The main burner nozzle is clogged. Unclog the nozzle.
The gas control valve is defective. Replace the gas control valve.
Wrong orice size for the gas
supply.
The air shutter is too open. Adjust the damper.
Gas pressure too low. Increase the gas pressure.
Wrong orice size for the gas
supply.
The air shutter is closed too far. Adjust the air shutter.
Running out of gas/propane. Replace tank/ increase gas.
High elevation. Install proper orices for elevation.
Bad air/gas mixture. Increase air ow/gas to the unit.
Tighten the thermocouple.
Replace the gas control valve.
pressure.
Install proper orice.
Install proper orice.
REFERENCE
Item Number Model Number Description
Commercial Range Natural Gas 24” /
46024 CE-CN-0609-R
46124 CE-CN-0609-L
43151 CE-CN-0914-R
46151 CE-CN-0914-L
609mm 4 Burner 1 Oven 151,000 BTU
cETLus ETL Sanitation
Commercial Range Liquid Propane 24”
/ 609mm 4 Burner 1 Oven 151,000 BTU
cETLus ETL Sanitation
Commercial Range Natural Gas 36” /
914mm 6 Burner 1 Oven 210,000 BTU
cETLus ETL Sanitation
Commercial Range Liquid Propane 36”
/ 914mm 6 Burner 1 Oven 210,000 BTU
cETLus ETL Sanitation
12
Manufacturer Model
Number
RGR24-NG
RGR24-LP
RGR36-NG
RGR36-LP
Page 13

46027 CE-CN-1524-R
46127 CE-CN-1524-L
46025 CE-CN-0004-GN
46125 CE-CN-0004-LP
46026 CE-CN-0002-GN
46126 CE-CN-0002-GL
46028 CE-CN-0006-GN
46128 CE-CN-0006-GL
Troubleshooting
Commercial Range Natural Gas 60” /
1524mm 10 Burner 2 Oven 362,000 BTU
cETLus ETL Sanitation
Commercial Range Liquid Propane 60” /
1524mm 10 Burner 2 Oven 362,000 BTU
cETLus ETL Sanitation
Commercial Range with 12” Griddle
Natural Gas 36” / 914mm 4 Burner 1 Oven
171,000 BTU cETLus / ETL Sanitation
Commercial Range with 12” Griddle
Propane 36” / 914mm 4 Burner 1 Oven
171,000 BTU cETLus ETL Sanitation
Commercial Range with 24” Griddle
Natural Gas 36” / 914mm 2 Burner 1 Oven
131,000 BTU cETLus ETL Sanitation
Commercial Range with 24” Griddle
Propane 36” / 914mm 2 Burner 1 Oven
131,000 BTU cETLus ETL Sanitation
Commercial Range with 24” Griddle
Natural Gas 60” / 1524mm 6 Burner
2 Oven 282,000 BTU cETLus ETL
Sanitation
Commercial Range with 24” Griddle
Propane 60” / 1524mm 6 Burner 2 Oven
282,000 BTU cETLus ETL Sanitation
RGR60-NG
RGR60-LP
RGR36-G12-NG
RGR36-G12-LP
RGR36-G24-NG
RGR36-G24-LP
RGR60-G24-NG
RGR60-G24-LP
13
Page 14

Parts Breakdown
Model CE-CN-0609-R 46024
Model CE-CN-0609-L 46124
Model CE-CN-0914-R 43151
Model CE-CN-0914-L 46151
Model CE-CN-1524-R 46027
Model CE-CN-1524-L 46127
Model CE-CN-0004-GN 46025
Model CE-CN-0004-LP 46125
Model CE-CN-0002-GN 46026
Model CE-CN-0002-GL 46126
Model CE-CN-0006-GN 46028
Model CE-CN-0006-GL 46128
14
Page 15

Parts Breakdown
Model CE-CN-0609-R 46024
Model CE-CN-0914-R 43151
Model CE-CN-1524-R 46027
Item
Description Position
No.
66200 Leg for RGR-NG 6 66206
66201 Oven Pilot (NG) for RGR-NG 7A 66207 Pilot Valve (Griddle) Single AP7 for RGR-NG 19D 66213 Griddle Plate Assembly for RGR-NG 25
66202 Oven Burner for RGR-NG 13 66208 Pilot for RGR-NG 19E 66214 Griddle Burner for RGR-NG 38
66203 Knob for Burner for RGR-NG 19 66209 Thermostat Valve for Oven for RGR-NG 19F 66215 Wiring Grid for RGR-NG 42
66204 Knob for Oven for RGR-NG 19A 66210 Front Burner Assembly for RGR-NG 23 66216 Grid Rack for RGR-NG 42A
66205 Valve for RGR-NG 19B 66211 Rear Burner Assembly for RGR-NG 23A 66217 Thermocouple for RGR-NG 44
Item
Description Position
No.
Pilot Valve (Open Burner) Dual AP6 for
RGR-NG
Model CE-CN-0609-L 46124
Model CE-CN-0914-L 46151
Model CE-CN-1524-L 46127
Model CE-CN-0004-GN 46025
Model CE-CN-0002-GN 46026
Model CE-CN-0006-GN 46028
Item
Description Position
No.
19C 66212 Grate for RGR-NG 24
Model CE-CN-0004-LP 46125
Model CE-CN-0002-GL 46126
Model CE-CN-0006-GL 46128
Item
Description Position
No.
66200 Leg for RGR-LP 6 68158
68156 Oven Pilot (LP) for RGR-LP 7A 68159 Pilot Valve (Griddle) Single AP7 for RGR-LP 19D 66213 Griddle Plate Assembly for RGR-LP 25
66202 Oven Burner for RGR-LP 13 68160 Pilot for RGR-LP 19E 66214 Griddle Burner for RGR-LP 38
66203 Knob for Burner for RGR-LP 19 68161 Thermostat Valve for Oven for RGR-LP 19F 66215 Wiring Grid for RGR-LP 42
66204 Knob for Oven for RGR-LP 19A 66210 Front Burner Assembly for RGR-LP 23 66216 Grid Rack for RGR-LP 42A
68157 Valve for RGR-LP 19B 66211 Rear Burner Assembly for RGR-LP 23A 66217 Thermocouple for RGR-LP 44
Item
Description Position
No.
Pilot Valve (Open Burner) Dual AP6 for
RGR-LP
Item
Description Position
No.
19C 66212 Grate for RGR-LP 24
15
Page 16

Notes
________________________________________________________________________________________
________________________________________________________________________________________
________________________________________________________________________________________
________________________________________________________________________________________
________________________________________________________________________________________
________________________________________________________________________________________
________________________________________________________________________________________
________________________________________________________________________________________
________________________________________________________________________________________
________________________________________________________________________________________
________________________________________________________________________________________
________________________________________________________________________________________
________________________________________________________________________________________
________________________________________________________________________________________
________________________________________________________________________________________
________________________________________________________________________________________
________________________________________________________________________________________
________________________________________________________________________________________
________________________________________________________________________________________
________________________________________________________________________________________
________________________________________________________________________________________
________________________________________________________________________________________
________________________________________________________________________________________
________________________________________________________________________________________
16
Page 17

Notes
________________________________________________________________________________________
________________________________________________________________________________________
________________________________________________________________________________________
________________________________________________________________________________________
________________________________________________________________________________________
________________________________________________________________________________________
________________________________________________________________________________________
________________________________________________________________________________________
________________________________________________________________________________________
________________________________________________________________________________________
________________________________________________________________________________________
________________________________________________________________________________________
________________________________________________________________________________________
________________________________________________________________________________________
________________________________________________________________________________________
________________________________________________________________________________________
________________________________________________________________________________________
________________________________________________________________________________________
________________________________________________________________________________________
________________________________________________________________________________________
________________________________________________________________________________________
________________________________________________________________________________________
________________________________________________________________________________________
________________________________________________________________________________________
17
Page 18

Notes
________________________________________________________________________________________
________________________________________________________________________________________
________________________________________________________________________________________
________________________________________________________________________________________
________________________________________________________________________________________
________________________________________________________________________________________
________________________________________________________________________________________
________________________________________________________________________________________
________________________________________________________________________________________
________________________________________________________________________________________
________________________________________________________________________________________
________________________________________________________________________________________
________________________________________________________________________________________
________________________________________________________________________________________
________________________________________________________________________________________
________________________________________________________________________________________
________________________________________________________________________________________
________________________________________________________________________________________
________________________________________________________________________________________
________________________________________________________________________________________
________________________________________________________________________________________
________________________________________________________________________________________
________________________________________________________________________________________
________________________________________________________________________________________
18
Page 19

Warranty Registration
Thank you for purchasing an Omcan product. To register your warranty for this product, complete the information below, tear o the card at
the perforation and then send to the address specied below. You can also register online by visiting:
Merci d’avoir acheté un produit Omcan. Pour enregistrer votre garantie pour ce produit, complétez les informations ci-dessous, détachez la
carte au niveau de la perforation, puis l’envoyer à l’adresse spécié ci-dessous. Vous pouvez également vous inscrire en ligne en visitant:
Gracias por comprar un producto Omcan usted. Para registrar su garantía para este producto, complete la información a continuación,
cortar la tarjeta en la perforación y luego enviarlo a la dirección indicada a continuación. También puede registrarse en línea en:
https://omcan.com/warranty-registration/
For mailing in Canada
Pour postale au Canada
Por correo en Canadá
OMCAN
PRODUCT WARRANTY REGISTRATION
3115 Pepper Mill Court,
Mississauga, Ontario
Canada, L5L 4X5
PRODUCT WARRANTY REGISTRATION
4450 Witmer Industrial Estates, Unit 4,
For mailing in the US
Pour diusion aux États-Unis
Por correo en los EE.UU.
OMCAN
Niagara Falls, New York
USA, 14305
or email to: service@omcan.com
Purchaser’s Information
Name: Company Name:
Address:
Telephone:
City: Province or State: Postal or Zip: Email Address:
Country: Type of Company:
Restaurant Bakery Deli
Dealer from which Purchased: Butcher Supermarket Caterer
Dealer City: Dealer Province or State: Institution (specify):
Invoice: Other (specify):
Model Name: Model Number: Serial Number:
Machine Description:
Date of Purchase (MM/DD/YYYY): Date of Installation (MM/DD/YYYY):
Would you like to extend the warranty? Yes No
Thank you for choosing Omcan | Merci d’avoir choisi Omcan | Gracias por elegir Omcan
19
Page 20

Since 1951 Omcan has grown to become a leading distributor of equipment and supplies to the North
American food service industry. Our success over these many years can be attributed to our commitment
to strengthen and develop new and existing relationships with our valued customers and manufacturers.
Today with partners in North America, Europe, Asia and South America, we continually work to improve
and grow the company. We strive to offer customers exceptional value through our qualied local sales
and service representatives who provide convenient access to over 5,000 globally sourced products.
Depuis 1951 Omcan a grandi pour devenir un des “leaders” de la distribution des équipements et
matériel pour l’industrie des services alimentaires en Amérique du Nord. Notre succès au cours de ces
nombreuses années peut être attribué à notre engagement à renforcer et à développer de nouvelles
et existantes relations avec nos clients et les fabricants de valeur. Aujourd’hui avec des partenaires en
Amérique du Nord, Europe, Asie et Amérique du Sud, nous travaillons continuellement à améliorer et
développer l’entreprise. Nous nous efforçons d’offrir à nos clients une valeur exceptionnelle grâce à
nos ventes locales qualiées et des représentants de service qui offrent un accès facile à plus de 5000
produits provenant du monde entier.
Desde 1951 Omcan ha crecido hasta convertirse en un líder en la distribución de equipos y suministros
de alimentos en América del Norte industria de servicios. Nuestro éxito en estos años se puede atribuir
a nuestro compromiso de fortalecer y desarrollar nuevas relaciones existentes con nuestros valiosos
clientes y fabricantes. Hoy con socios de América del Norte, Europa, Asia y América del Sur, que trabajan
continuamente para mejorar y crecer la empresa. Nos esforzamos por ofrecer a nuestros clientes valor
excepcional a través de nuestro local de ventas y representantes de los servicios que proporcionan un
fácil acceso a más de 5,000 productos con origen a nivel mundial.
 Loading...