

Assembly Guide
Owner’s Manual
http://eshop.macsales.com/Service/index.cfm
http://helpcenter.macsales.com/
Revision 1 February 20 2009 OWCMANMECLSASY
may receive.
ences between the product mentioned in this manual and the product that you
purposes only. Other World Computing assumes no responsibility for any dierwithin may dier from the product that you receive and are there for illustration
and/or design of this product without prior notice. The photographs contained
Other World Computing reserves the right to make changes in the specications
World Computing assumes no responsibility for any errors contained within,
The information contained within is believed to be accurate and reliable. Other
®Copyright 2009 Other World Computing All Rights Reserved
able every day of the week.
port options, from phone support to interactive live chat, availPrefer to talk to a human being? OWC oers a multitude of sup-
3.5” Serial ATA Hard Drives (SATA)
External Storage Enclosure for
library of support information, or our searchable FAQ section.
Visit our tech center for answers to your questions, in either our
Thank you for purchasing your new OWC Mercury
Elite Pro hard drive enclosure. Follow these steps
to install your hard drive mechanism.
OWC Mercury Elite Pro “Classic”
http://eshop.macsales.com/tech_center/index.cfm
is just a click away whenever you need it!
Technical support for your new OWC Mercury Elite Pro enclosure
Troubleshooting:
Unpack your new OWC Mercury Elite Pro enclosure. Depending
on the model purchased, you will have dierent interface cables.
Shown above is the contents of the ‘Quad Interface’ model. The
FireWire / USB only model will include feet, power cord, power
supply, FireWire 400 cable, and USB 2.0 cable.
All OWC Mercury Elite Pro enclosures include an interface cable
for each of the dierent ports the enclosure supports.
Extra accessories are available on our website, if you plan on
using your new enclosure at work and home, you may want to
purchase a second
Remove the top cover from your OWC Mercury Elite Pro enclosure by sliding the top cover towards the rear of the unit. Then,
remove the single Phillips screw securing the top metal shield,
and lift up on it to remove, exposing the inside of the enclosure.
Remove the taped down packet of screws.
Insert the power and SATA cables into the back of the hard drive
and place the drive mechanism into the enclosure.
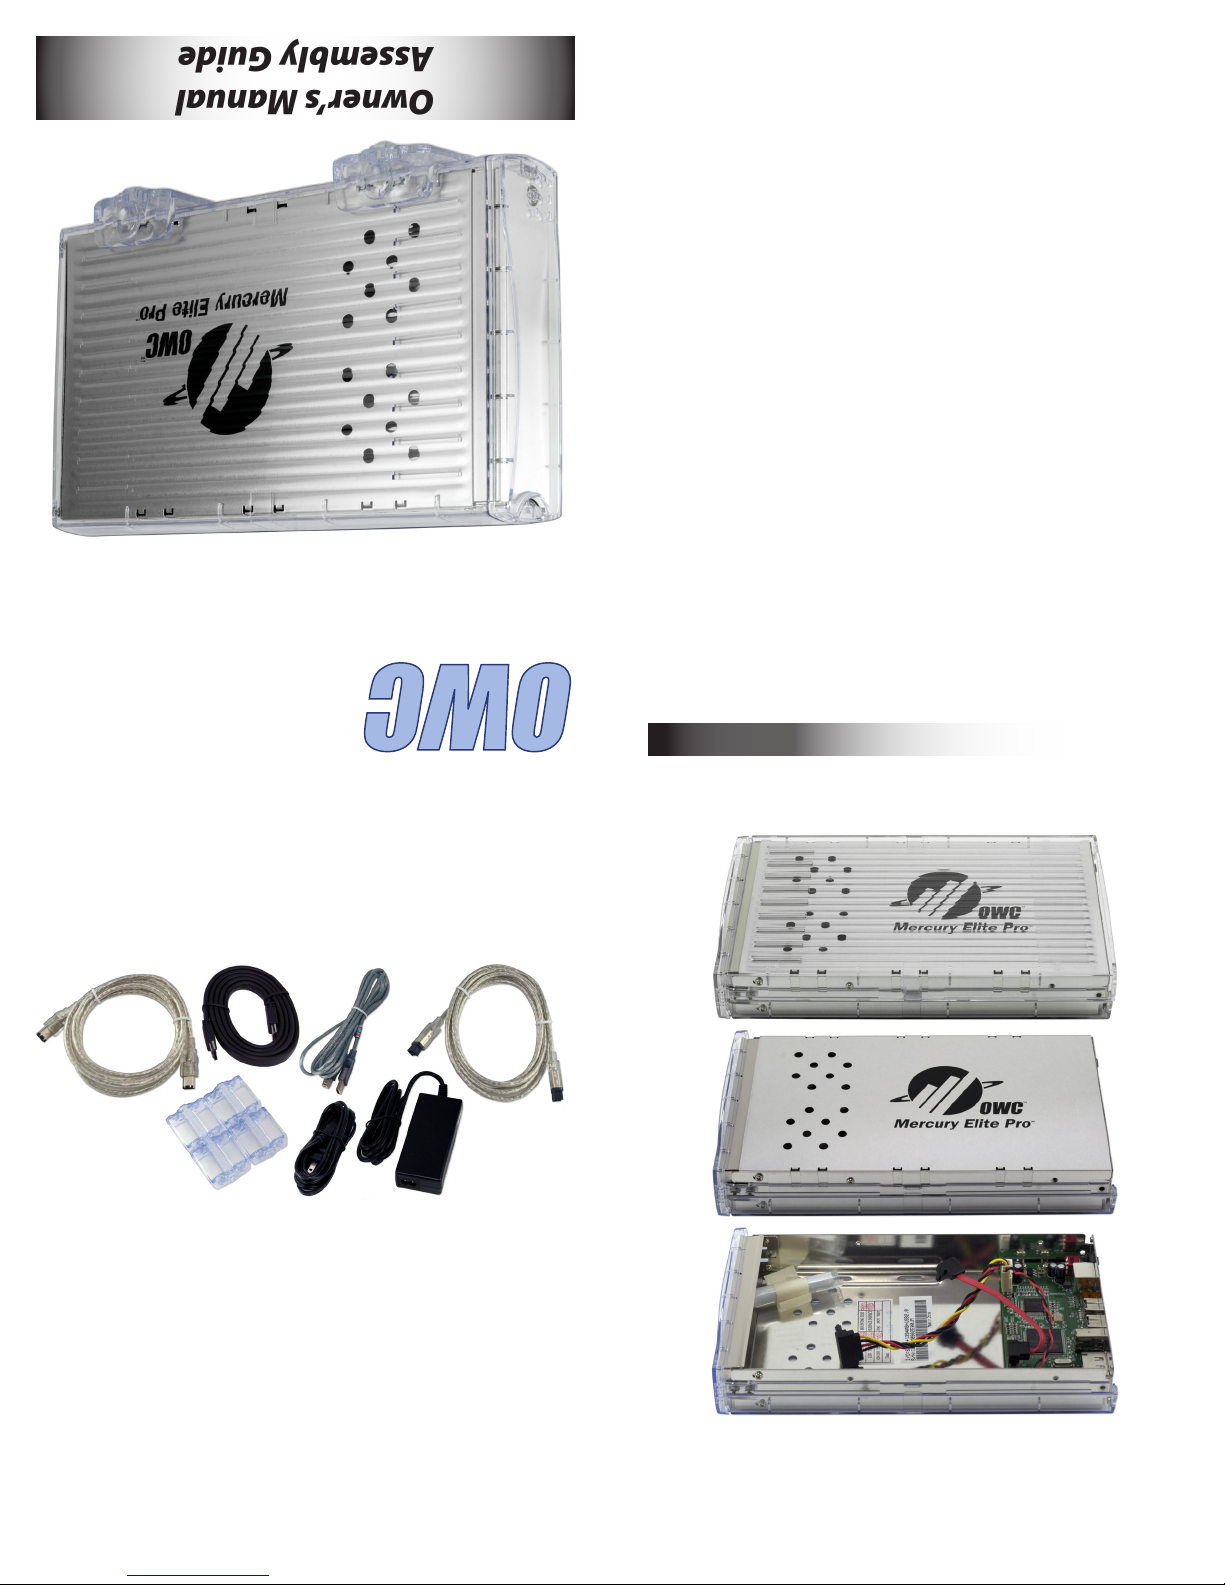
Turn the enclosure on it’s side, removing the bottom plastic
outer shell, and securing the drive you just placed into the enclosure with your ngers as shown above. Lift up on the hard drive
mechanism and line the screwholes up with the cutouts on the
bottom of the enclosure.
Remove the 4 large Phillips screws from the plastic bag
and insert them through the bottom of the enclosure, rmly
tightening into the new hard drive mechanism.
Lay the power and SATA wires at inside the case,
then place the metal shield back on top of the
enclosure.
Secure the metal shield with the 3 short Phillips
screws that were inside the clear plastic bag and
the one screw you removed to initially remove
the metal cover - it takes 2 per side to assemble.
Now that you have your hard drive assembled, take a few moments and look at the back of the OWC Mercury Elite Pro drive
enclosure.
Depending on the model purchased, you will see there are a
multitude of interfaces that the drive enclosure supports. From
the basic FireWire 400 / USB 2.0 enclosure, to the ‘Quad Interface’
model pictured here, the OWC Mercury Elite Pro supports most
any computer.
System Setup:
Your new OWC Mercury Elite Pro drive is simple to hook up to
your computer. Simply choose whichever interface you prefer to
use with your computer. OWC recommends you use the highest
speed interface your computer has for optimum performance.
Highest performance will be gained by using the below listed
interfaces, in order of preference:
1. eSATA
2. FireWire 800 (1394b)
3. FireWire 400 (1394a)
4. USB 2.0
Note we rank USB 2.0 lowest on the list. In raw bandwidth, USB
2.0 oers higher speeds than FireWire 400, but in real-world testing, FireWire 400 is the faster choice.
You cannot hook more than one type of interface up at a time
to your computer. Attempt to do so can damage your computer,
and the OWC Mercury Elite Pro enclosure.
Here are a few tips to get the most out of your new external storage device:
• Treat your OWC Mercury Elite Pro like you treat your computer.
Keep it dry, cool, and out of direct sunlight.
• Always check any peripheral cable that you are going to connect to your OWC Mercury Elite Pro enclosure for damage to it’s
plug before inserting them into the enclosure. Damaged or bent
connector pins are a common cause for problems.
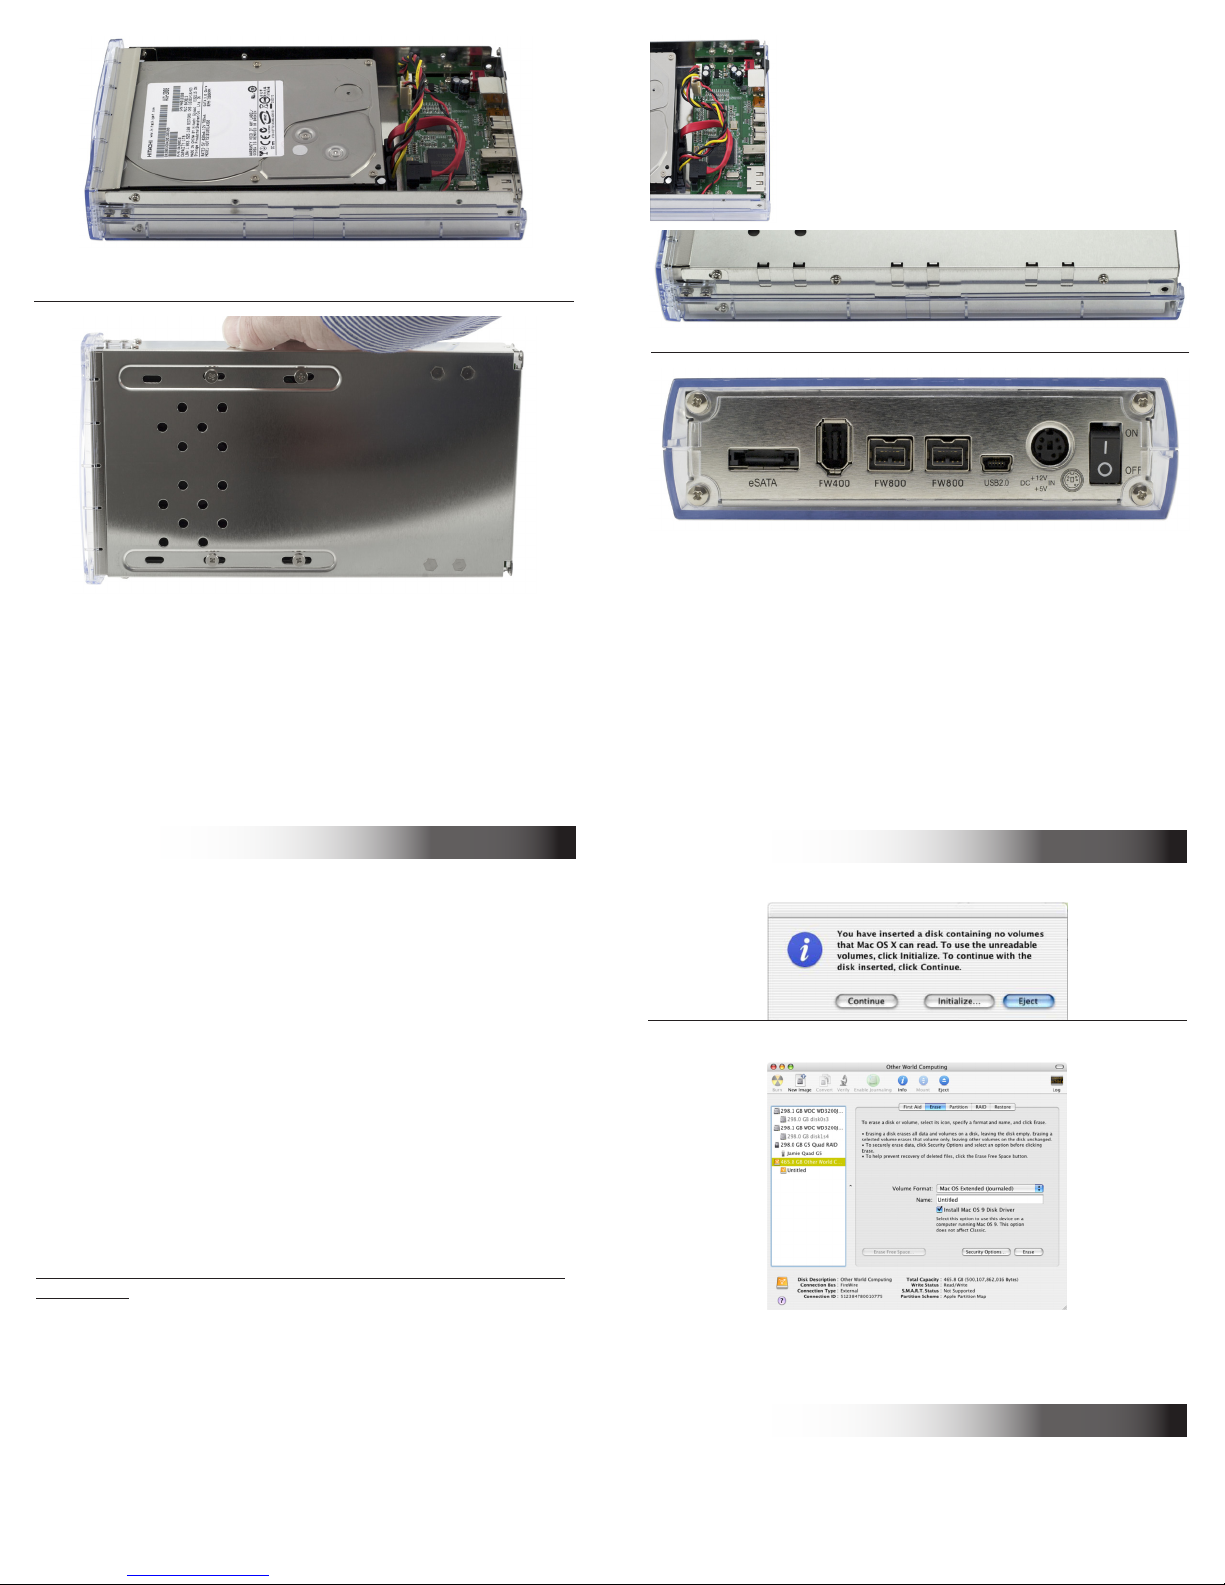
Formatting for use in Mac OS X:
Upon initial startup of your new OWC Mercury Elite Pro external
drive, you will be greeted with the following dialog box:
Click on the Initialize... button to open Apple Disk Utility to proceed with initializing the new hard drive.
Click on the new hard drive icon with no volumes attached to
it and click erase to proceed with initialization of the new hard
drive mechanism. For more detailed instructions, visit:
http://eshop.macsales.com/tech_center/formatting.cfm
Formatting for use with other operating systems:
Not using Mac OS X? Don’t worry, we’re able to walk you through
setup for any type of operating system with step-by-step instructions here:
http://eshop.macsales.com/tech_center/formatting.cfm
Thank you from Other World Computing!
 Loading...