

Page 1

DIGITAL CAMERA
INSTRUCTION
Basic guide P. 2
Review the camera part names,
the basic steps for shooting and
playback, and the basic operations.
MANUAL
z Thank you for purchasing an Olympus digital camera. Before you start to use your
new camera, please read these instructions carefully to enjoy optimum performance
and a longer service life. Keep this manual in a safe place for future reference.
z We recommend that you take test shots to get accustomed to your camera before
taking important photographs.
z The screen and camera illustrations shown in this manual were produced during the
development stages and may differ from the actual product.
z The contents in this manual are based on firmware version 1.0 for this camera. If there
are addition and/or modification of functions due to firmware update for the camera,
the contents will differ. For the latest information, please visit the Olympus website.
Table of Contents P. 24
Page 2

Camera
Mode dial
gP. 4
White balance sensor
gP. 106
SSWF indicator
gP. 14, 124
Control dial
(j) gP. 19, 34
Shutter button
gP. 16, 36, 60
Strap eyelet
gP. 10
F (Exposure
compensation)
button
gP. 49
Self-timer/
Remote control lamp/
Remote control receiver
gP. 62
Lens attachment mark
gP. 12
Mount
(Attach the lens after removing the
body cap from the camera to
prevent dust and dirt from entering
the camera body.)
Built-in flash gP. 77
Hot shoe gP. 79
# (Flash) button gP. 77
</Y/j
(Remote control/Self-timer/
Sequential shooting) button
gP. 61-62, 99
COPY/< (Copy/Print) button
gP. 90, 111
Strap eyelet
gP. 10
Lens release button
gP. 12
Lens lock pin
Mirror gP. 36
EN
When the camera is turned on, the buttons indicated in blue are illuminated, making it
easier to take pictures in dark surroundings.
2
Page 3

AEL/AFL button
gP. 36, 50, 97
0 (Protect) button
gP. 91
Eyecup gP. 62
Viewfinder gP. 6
INFO (Information display)
button gP. 21, 40, 85
q (Playback) button
gP. 18, 82
Diopter adjustment dial
gP. 14
Basic guide
MENU button
gP. 22
LCD monitor
gP. 8, 9, 37
Tripod socket
D (Erase) button
gP. 92
Connector cover
Battery
compartment cover
gP. 11
xD-Picture Card slot
gP. 13
Card access lamp
gP. 13, 16, 117
Multi-connector
gP. 87, 112, 116
Battery
compartment lock
gP. 11
CF card slot
gP. 13
ON/OFF switch
gP. 14
< button gP. 97
P (AF target) button
gP. 57
u (Live view) button
gP. 35
Arrow pad
gP. 20, 22
i button gP. 22
o (Image stabilizer)
button gP. 64
Card cover
gP. 13
Eject button
gP. 13
Names of parts and functions
3
EN
Page 4

Mode dial
The mode dial allows you to change the
camera settings easily according to the
subject.
Advanced shooting modes
• For more advanced shooting and greater creative control, you can set the aperture value and
shutter speed.
• The settings made in the advanced shooting modes are retained even if the camera is turned
off.
P
A
S
M
Program shooting
Aperture priority
shooting
Shutter priority shooting
Manual shooting
Easy shooting modes
• Select according to the shooting scene. The camera sets the appropriate shooting conditions
automatically.
• When rotating the mode dial or turning off the power in the easy shooting modes, functions
with changes made to their settings are restored to the factory default settings.
AUTO
i
l
&
j
/
g
AUTO
PORTRAIT Suitable for shooting a portrait-style image of a person.
LANDSCAPE
MACRO Suitable for taking close-up pictures.
SPORT Suitable for capturing fast-moving action without blurring.
NIGHT+PORTRAIT
Art filter/Scene
Allows you to shoot using an aperture and shutter speed
that the camera sets. (gP. 43)
Allows you to set the aperture manually. The camera
sets the shutter speed automatically. (gP. 44)
Allows you to set the shutter speed manually. The
camera sets the aperture automatically. (gP. 45)
Allows you to set the aperture and shutter speed
manually. (gP. 46)
Allows you to shoot using an optimum aperture and
shutter speed that the camera sets. The built-in flash
pops up automatically in low-light conditions.
Suitable for shooting landscapes and other outdoor
scenes.
Suitable for shooting both the main subject and
background at night.
When you select a desired filter or scene, the camera
optimizes the shooting conditions for that filter or scene.
Most of the functions cannot be changed.
EN
4
Page 5

Setting the art filter/scene
1 Set the mode dial to g.
• The art filter menu is displayed. Press i to display the scene menu.
POP ART1
i
Basic guide
CHILDREN1
2 Use fg to select the filter or scene.
3 Press the i button.
• To change the setting, press the i button again to display the menu.
SET
h
SET
Types of art filters
Icon Art filter Icon Art filter
POP ART
j
SOFT FOCUS
k
PALE&LIGHT COLOR
l
m
n
o
LIGHT TONE
GRAINY FILM
PIN HOLE
Types of scene modes
Icon Mode Icon Mode
CHILDREN
G
HIGH KEY
H
LOW KEY
I
DIS MODE
q
NATURE MACRO
r
CANDLE
&
SUNSET
*
• Art filters are not applied to RAW images.
• If the record mode is set to [RAW] and art filter is applied, the record mode is automatically set
to [YN+RAW].
• The grainy appearance of the picture may be emphasized depending on the type of art filter.
DOCUMENTS
@
PANORAMA
s
FIREWORKS
(
BEACH & SNOW
g
UNDERWATER WIDE
I
UNDERWATER MACRO
H
Names of parts and functions
5
EN
Page 6

Viewfinder
AF target gP. 57
Spot metering area
gP. 48
6
EN
Aperture value
gP. 43-46
Shutter speed
gP. 43-46
Super FP flash
gP. 80
Metering mode
gP. 48
White balance
(Displayed when set
to a setting other than
auto white balance.)
gP. 68
AE lock gP. 50
Flash intensity control
gP. 77
AF confirmation mark
gP. 16, 37, 60
Flash gP. 77
(blinks: charging in progress,
lights up: charging completed)
Shooting mode gP. 4, 43-46
Number of storable
sequential pictures
gP. 61
Image stabilizer gP. 64
ISO sensitivity
gP. 52
Auto bracket
gP. 50, 53, 71, 78
ISO sensitivity value
gP. 52
Battery check
Lit up (ready for use)
Lit up (battery power is low)
Blinks (charging required)
Exposure level indicator gP. 46
Exposure compensation indicator gP. 49
Page 7

Super control panel
The following screen allows the display and setting of shooting settings at the same time
and is called the super control panel. Press the INFO button to display the super control
panel on the LCD monitor.
g“Setting while looking at the super control panel” (P. 21)
My Mode gP. 98
Flash charging
gP. 77
Battery check
gP. 6
Shooting mode
gP. 4, 43-46
Date gP. 15
2009. 03.16
mall
Super Fine
Shutter speed gP. 43-46
Exposure compensation indicator gP. 49
Exposure level indicator gP. 46
Flash intensity control indicator gP. 77
Multiple exposure i gP. 53
Super FP flash h gP. 80
Noise reduction ml gP. 103
Auto bracket 0 gP. 50, 53, 71, 78
Arrow pad function ep gP. 99
RC mode m gP. 80
Image stabilizer HIt gP. 64
AF illuminator T gP. 95
Internal temperature warning m
gP. 123
Aperture value
gP. 43-46
250 F5.6
+2.0
FP BKT
2
AF
RC
IS
OFF
Exposure
compensation value
gP. 49
Exposure level
gP. 46
Picture mode
gP. 72
Color space
gP. 103
Basic guide
Names of parts and functions
Card
gP. 126
AF mode gP. 55
AF target gP. 57
Flash intensity control gP. 77
Flash mode gP. 74
Remote control/Self-timer/Sequential shooting
gP. 61-62
ISO sensitivity gP. 52
White balance gP. 68
White balance compensation gP. 69
Record mode
gP. 66
Face
detection
gP. 38
The functions within this area can be set on
the super control panel.
Number of storable
still pictures
gP. 135
Metering mode gP. 48
Aspect ratio gP. 39
Sharpness N gP. 72
Contrast J gP. 72
Saturation T gP. 72
Gradation z gP. 73
B&W filter x gP. 72
Picture tone y gP. 72
7
EN
Page 8
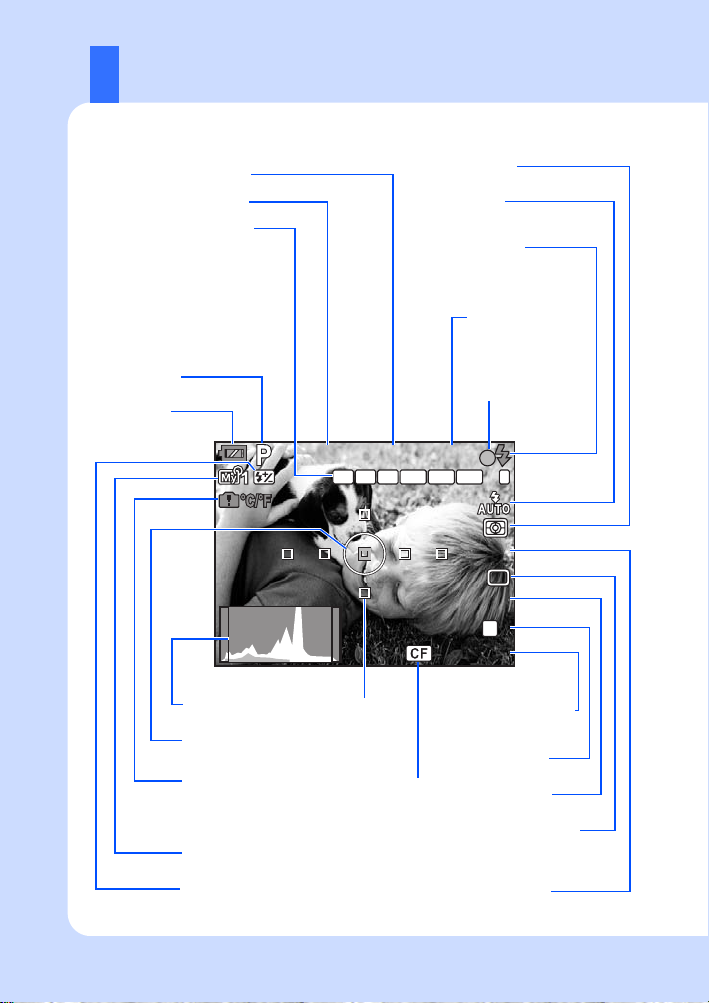
LCD monitor (Live view)
250
F5.6
+2.0
WB
AU TO
IS O
AU TO
N
3 8
IS
You can use the LCD monitor to view the subject while shooting. Press the u button to
use live view. g“Using live view” (P. 35)
Aperture value gP. 43-46
Shutter speed gP. 43-46
Home position p gP. 59
RC mode q gP. 80
Super FP flash s gP. 80
Auto bracket t
gP. 50, 53, 71, 78
AE lock u gP. 50
Live view AF mode po
gP. 36
Image stabilizer vws
gP. 64
Shooting mode
gP. 4, 43-46
Battery check
gP. 6
250
250
Metering mode
gP. 48
Flash mode
gP. 74
Flash gP. 77
(blinks: charging in progress,
lights up: charging completed)
F5.6
+2.0
AEL
BKTFPRCHP
Exposure
compensation value
gP. 49
AF confirmation mark
gP. 16, 37, 60
H-AF
2
IS
WB
AUTO
ISO
AUTO
L
N
38
EN
Histogram
gP. 40
Spot metering area
gP. 48
8
Internal temperature
warning gP. 123
Face detection g
gP. 38, 101
My Mode
gP. 98
Flash intensity control
gP. 77
AF target
gP. 57
Card
gP. 126
Number of storable
still pictures
gP. 135
Record mode
gP. 66
ISO sensitivity
gP. 52
Sequential shooting
gP. 61
Self-timer gP. 62
Remote control gP. 62
White balance
gP. 68
Page 9

LCD monitor (Playback)
x
10
+
2.0
+
2.0
100
WBAUTO
G±0
sRGB
±
0.0
A±0
±
1.0
ISO
45
mm
F5.6
250
NATURAL
N
[
4032x3024,1/8
]
x
10
2009.03.16
21:56
100-0015
15
N
You can switch the monitor display using the INFO button.
g“Information display” (P. 85)
Basic guide
Battery check
gP. 6
Selection check mark
gP. 90, 91, 92
Protect
gP. 91
Print reservation
Number of prints
gP. 109
2009.03.16
Date and time gP. 15
Aspect border gP. 39
Record mode
gP. 66
Pixel count, compression rate
gP. 66
x
10
[
4032x3024,1/8
100-0015
Card gP. 126
Frame number
File number
AF target gP. 57
Histogram gP. 85
21:56
Aspect ratio
gP. 39, 88
Flash intensity control gP. 77
ISO sensitivity gP. 52
Exposure compensation gP. 49
Shooting mode
gP. 4, 43-46
Aperture value gP. 43-46
Focal length gP. 128
(The focal length is
displayed in 1 mm units.)
Shutter speed
gP. 43-46
x
10
+
2.0
+
2.0
F5.6
250
45
WBAUTO
]
L
N
15
Overall displaySimplified display
AF adjustment
gP. 106
White balance
gP. 68
Picture mode gP. 72
Color space gP. 103
White balance compensation
gP. 69
Metering mode
gP. 48
±
mm
1.0
100
ISO
±
0.0
G±0
A±0
sRGB
NATURAL
L
100-0015
15
Names of parts and functions
N
9
EN
Page 10

Unpack the box contents
The following items are included with the camera.
If anything is missing or damaged, contact the dealer from whom you purchased the camera.
Camera Body cap Strap PS-BLS1 (BLS-1)
PS-BCS1 (BCS-1)
Lithium ion charger
• OLYMPUS Master 2 CD-ROM
• Instruction manual
• Warranty card
USB cable
CB-USB6
Video cable
CB-VC2
Lithium ion battery
Eyepiece cover
Attaching the strap
2
3
1
Thread the eyepiece cover through one end of the
strap. Thread the strap as indicated by the arrows.
• Attach the other end of the strap to the other eyelet in the same way.
4
Lastly, pull the strap tight
making sure that it is
fastened securely.
10
EN
Page 11

Preparing the battery
Basic guide
1
AC cable
3
BLS-1 Lithium ion
battery
Direction indicating
W
mark
2
AC wall outlet
1 Charging the battery
Charging indicator
Amber light: Charging in progress
Blue light: Charging completed
(Charging time: Approx. 3 hours
30 minutes)
2 Loading the battery
Battery compartment
2
1
cover
Battery
compartment lock
W
3
BCS-1 Lithium
ion charger
3 Close the battery compartment cover and slide the battery
compartment lock in the direction of E
• Be sure to turn off the camera when you open or close the battery compartment cover.
• When using the camera, be sure to close the battery compartment cover.
Preparations for shooting
Unloading the
Battery lock
battery
Press the battery lock to
unlock the battery.
It is recommended to set aside a backup battery for prolonged shooting in case the battery
in use drains.
11
EN
Page 12

Attaching a lens to the camera
1 Remove the body cap from the camera
and the rear cap from the lens
1
1
2 Attach a lens to the camera
• Align the lens attachment mark (red)
on the camera with the alignment
mark (red) on the lens, then insert the
lens into the camera’s body (1).
• Rotate the lens in the direction
indicated by the arrow until you hear it
click (2).
• Make sure the ON/OFF switch
is set to OFF.
• Do not press the lens release
button.
3 Remove the lens cap
3, 4)
(
Removing the lens from the
camera
While pressing the lens release button
(1), rotate the lens in the direction of
the arrow (2).
2
Rear cap
Alignment mark (Red)
4
2
Body cap
Lens attachment
mark (Red)
2
3
Lens cap
3
2
1
1
Lens release button
12
EN
Page 13

Loading the card
Basic guide
CompactFlash/Microdrive
Open the card cover (1, 2).
Insert the card’s contact area into the slot as
far as it can go (3).
Card cover
1
2
Card access lamp
CF card slot
Connector
3
W mark
Removing the card
CompactFlash/Microdrive
• Press the eject button all the way in to
make it pop out. Press the eject button
again all the way in to eject the card.
• Pull out the card.
Card access lamp
xD-Picture Card
Open the card cover (1, 2).
Insert the card until it is locked into place (3).
1
2
Never open the card cover while the card
access lamp is blinking.
xD-Picture Card
• Press the inserted card lightly and it will be
ejected.
• Pull out the card.
3
xD-Picture Card slot
Preparations for shooting
Eject button
13
EN
Page 14
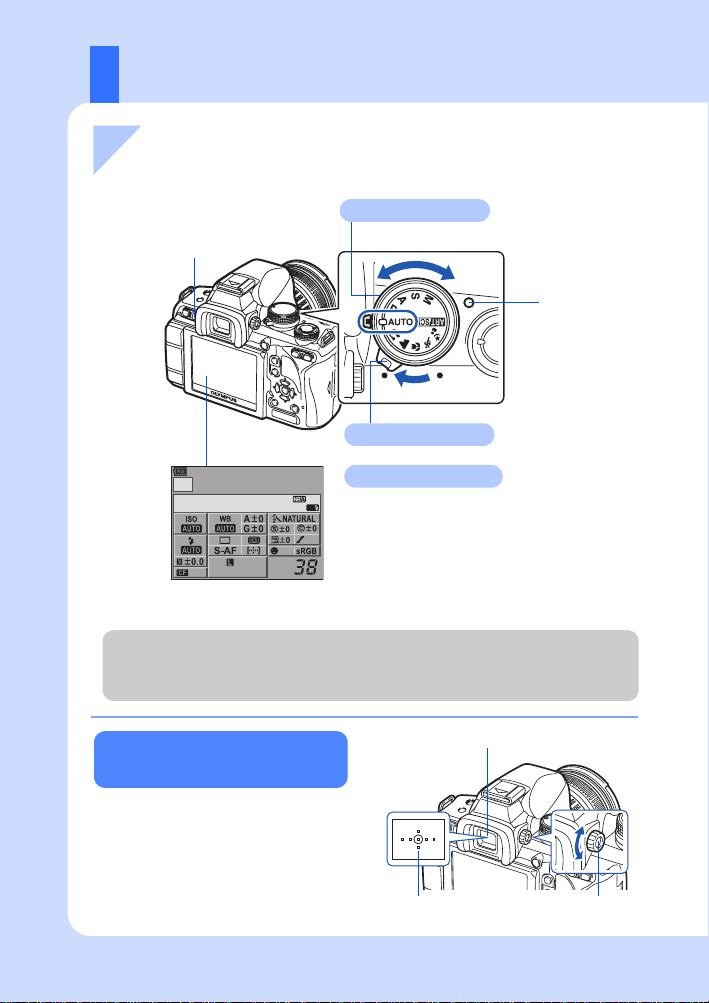
Power on
1 Set the camera’s ON/OFF switch to ON
• To turn off the power, set the ON/OFF switch to OFF.
Mode dial
INFO button
Set the mode dial to AUTO.
ON
SSWF
OFF
SSWF indicator
ON/OFF switch
AUTO
2009. 03.16
arge
Normal
Super control panel
Dust reduction function operation
The dust reduction function is automatically activated when the camera is turned on. Ultrasonic
vibrations are used to remove dust and dirt from the image pickup device’s filter surface. The
SSWF (Super Sonic Wave Filter) indicator blinks while dust reduction is working.
AF
OFF
Adjusting the viewfinder’s
LCD monitor
When the camera is turned on,
the super control panel screen is
displayed on the monitor.
If the super control panel screen
does not appear, press the INFO
button.
Viewfinder
diopter
Adjust the viewfinder’s diopter in
accordance with your vision.
While looking through the viewfinder,
rotate the diopter adjustment dial little by
little.
When you can see the AF target clearly,
adjustment is complete.
Diopter adjustment dialAF target
14
EN
Page 15

Setting the date/time
Date and time information is recorded on the card together with
the images. The file name is also included with the date and time
information. Be sure to set the correct date and time before using
the camera.
1 Press the MENU button
• The menu screen is displayed on
the LCD monitor.
CARD SETUP
CUSTOM RESET
PICTURE MODE
GRADATION
IMAGE ASPECT
BACK
NORM
SET
N
4:3
2 Use fg to select [d],
then press i
’--.--.
--
:
--
--
W
s
REC VIEW
c
MENU DISPLAY
FIRMWARE
j±0 k±0
SETBACK
ENG.
5SEC
OFF
5 Repeat this procedure until
the date and time are
completely set
Y
MD TIME
2009 03 01 14 00
CANCEL
• The time is displayed in the 24-hour format.
6 Use fg to select the
date format
Basic guide
MENU button
Arrow pad
fghi
Y/M/D
SET
Preparations for shooting
3 Use fg to select
[X], then press i
Y
MD TIME
CANCEL
Y/M/D
4 Use fg to select [Y],
then press i
Y
MD TIME
2009
CANCEL
Y/M/D
Y
MD TIME
2009 03 01 14 00
CANCEL
Y/M/D
SET
7 Press the i button
’09.03.01
14:01
W
s
REC VIEW
c
FIRMWARE
BACK
MENU DISPLAY
j±0 k±0
SET
ENG.
5SEC
OFF
8 Press the MENU button
to exit
15
EN
Page 16

Shooting
Viewfinder
Shutter button
1 Place the AF target on the
subject while viewing
through the viewfinder
2 Adjust the focus
Press the shutter
button halfway.
Viewfinder
AF target
Aperture
value
AF confirmation mark
• The focus is locked when a beep tone is outputted. The AF confirmation mark and the AF
target in focus light up in the viewfinder.
• The shutter speed and aperture value that have been set automatically by the camera are
displayed.
• The super control panel is not displayed while the shutter button is pressed.
Shutter speed
Super control panel
AUTO
2009. 03.16
Normal
Card access
lamp
250 F5.6
OFF
arge
AF
3 Release the shutter
16
EN
Press the shutter button all
the way (fully).
• The shutter sounds and the picture is taken.
• The card access lamp blinks and the camera starts recording the picture.
Never remove the battery or card while the card access lamp is blinking. Doing so could
destroy stored pictures and prevent storage of pictures you have just taken.
Page 17

Holding the camera
250
F5.6
3 8
N
Keep your fingers and the
strap away from the lens,
flash, and the white
balance sensor.
Basic guide
Horizontal grip Vertical grip
Taking a picture
while viewing the
monitor
It is possible to use the LCD monitor as a
viewfinder and check the subject’s composition,
or shoot while viewing an enlarged display on
the LCD monitor.
g“Using live view” (P. 35)
1 Press the u (live
view) button to switch
to live view
• The subject is displayed on the
LCD monitor.
250
F5.6
250PPF5.6
I-AF
u button
2 Press the shutter button to
L
N
38
When the camera stops operating
If no operations are performed for approximately 8 seconds while the camera is
on, the monitor backlight turns off to save battery power (when the super control
panel is lit). If no operations are performed for approximately one minute
thereafter, the camera enters the sleep mode (stand-by) and stops operating. The
camera activates again when you touch any button (the shutter button, q button,
etc.). g“BACKLIT LCD (Backlight timer)” (P. 100), “SLEEP” (P. 100)
take the picture
• The picture is taken with the focus adjusted.
Shutter button
Preparations for shooting
17
EN
Page 18

Playback/Erasing
Playing back
images
Close-up
playback
Erasing images
Pressing the q button displays the last picture
taken.
Displays the frame
that is stored 10
q button
Displays the
previous
frame
Arrow pad
Each time you turn the control dial towards U, the
image is incrementally enlarged from 2× to 14×.
Control dial
Play back the image you want to erase and press
the D button.
Use fg to select [YES] and press the i
button to erase.
frames back
Displays the frame
that is stored 10
frames ahead
Displays the
next frame
18
EN
D button
ERASE
YES
NO
BACK SET
Page 19

Basic operations
There are three ways to operate this camera.
Using the direct buttons to operate the
camera gP. 20
You can make the function settings with the
control dial and the direct buttons assigned to a
function. Setting information is displayed in the
viewfinder and on the super control panel while
you are setting a function. This is useful for
operating the camera while composing the
subject in the viewfinder.
Setting on the menu gP. 22
You can use the menu to set shooting and
playback settings and customize camera
functions.
Setting while looking at the super control
panel gP. 21
You can make the function settings with the
super control panel on the LCD monitor. You can
use the super control panel to view the current
settings and directly change the settings.
Descriptions in this manual
The operating instructions of the direct buttons, super control panel and menu are
described as follows in this manual.
•“+” indicates operations performed at the same time.
•“” indicates you should proceed to the next step.
e.g.: When setting the flash intensity control
Direct button # + Fj
Control dial
Basic guide
j
Basic operations
Super control panel ip: [w]
Menu MENU[X][w]
In P, A, S, and M mode, current camera
Resetting the camera
settings
settings (including any changes you have
made) are retained when the power is turned
off. To reset the camera to the factory default
settings, set [RESET].
g“Resetting the camera settings” (P. 94)
19
EN
Page 20

Using the direct buttons to operate the camera
1 Press the button for the function
you want to set
• The direct menu is displayed.
e.g.) Setting Sequential/Self-timer/
Remote control shooting
2
Control dial
j
3
1
6
9
4
SELECT SET
Direct menu
5
2 Turn the control dial to change the setting
• The function assigned to the button that was pressed remains selected for approximately
8 seconds. You can turn the control dial and set the function during that time. If no
operations are performed for 8 seconds, the setting for that function is confirmed.
g“BUTTON TIMER” (P. 98)
List of direct buttons
No. Direct buttons Function Ref. page
1
2
2+3
3
4
5
6
7
8
9
</Y/j
# Sets flash mode P. 74
# + F Flash intensity control P. 77
F Exposure compensation P. 49
P AF target selection P. 57
o Sets image stabilizer P. 64
WB Sets white balance P. 68
AF Sets AF mode P. 55
ISO Sets ISO sensitivity P. 52
d Sets metering mode P. 48
Remote control/Self-timer/Sequential
shooting
P. 61-62
7
8
20
EN
Page 21

Setting while looking at the super control panel
Basic guide
1 Press the INFO button to
display the super control panel
• Press the INFO button again to turn off the
super control panel.
• Press the i button during live view to
display the super control panel.
2009. 03.16
arge
Normal
AF
OFF
2 Press the i button
ISO
OFF
arge
Normal
Cursor lights
Direct menu
METERING
SELECT SET
Displays the selected
function name
Press the i button to display the direct menu indicated at
the position of the cursor. You can also use the direct menu to
change the setting. After changing the setting, press the i
button to confirm your setting. If no operation is made within a
few seconds, your setting is confirmed and the super control
panel is displayed.
INFO button
Control dial
j
i button
p Arrow pad
3 Use p to move the cursor to
the function you want to set,
and change the setting with
the control dial
METERING
OFF
arge
Normal
Basic operations
For details on the functions that can be set with the super control panel, refer to “Super
control panel” (gP. 7).
21
EN
Page 22

Setting on the menu
1 Press the MENU button
to display the menu
CARD SETUP
CUSTOM RESET
PICTURE MODE
GRADATION
Operation
guide
Press the MENU button
to go back one screen
IMAGE ASPECT
BACK
NORM
N
4:3
SET
Press the i button
to confirm the setting
2 Use fg to select a tab, then press i
W Shooting Menu 1
X Shooting Menu 2
q Playback Menu
d Setup Menu: Sets the basic functions of the camera.
Function
3 Use fg to select a
function and i to go
to the setting screen
RC MODE
BRACKETING
MULTIPLE EXPOSURE
8
SETBACK SETBACK
4 Press the i button to confirm the setting
• Press the MENU button repeatedly to exit the menu.
MENU button
Tab
RC MODE
BRACKETING
MULTIPLE EXPOSURE
8
The current setting is displayed
0.0
OFF
OFF
ON
i
RC MODE
BRACKETING
MULTIPLE EXPOSURE
8
Control dial
j
i button
p Arrow pad
SETBACK
00
0.0
OFF
OFF
ON
0.0
OFF
OFF
ON
+
3
+
2
+
1
0
-
1
-
2
-
3
22
For details on the functions that can be set with the menu, refer to “Menu directory” (gP. 137).
EN
Page 23

Displaying the Custom Menu
You can use the Custom Menu to customize the camera settings and operations
to suit your personal preferences. The Custom Menu is added when [c MENU
DISPLAY] in the Setup Menu is set to [ON].
For details of the Custom Menu, refer to “Customizing your camera” (gP. 95)
1 Press the MENU button to display the menu
’09.03.01
SET
14:01
ENG.
j±0 k±0
5SEC
OFF
2 Use fg to select the [d]
tab, then press i
W
s
REC VIEW
c
MENU DISPLAY
FIRMWARE
BACK
3 Use fg to select [c MENU DISPLAY], then press i
Basic guide
4 Use fg to select [ON], then press the i button
c
MENU DISPLAY
ON
i
SETBACK SET
The settings on the Custom Menu are for customizing the camera to suit your
personal preferences or needs. They are not suited to frequent changing.
The initial menu is more than adequate for setting both simple and advanced
shooting functions. Normally, there is no need to display the Custom Menu.
W
s
REC VIEW
c
MENU DISPLAY
FIRMWARE
BACK
The [c] tab is displayed.
c Custom Menu:
Customizes shooting functions.
’09.03.01
14:01
ENG.
j±0 k±0
5SEC
ON
Basic operations
23
EN
Page 24

Table of Contents
Basic guide 2
Identifies the camera part names and describes the basic steps for shooting and
playback.
Names of parts and functions........................................................................................2
Preparations for shooting ............................................................................................10
Basic operations..........................................................................................................19
Camera .........................................................................................................2
Mode dial.......................................................................................................4
Viewfinder .....................................................................................................6
Super control panel.......................................................................................7
LCD monitor (Live view)................................................................................8
LCD monitor (Playback)................................................................................9
Unpack the box contents.............................................................................10
Preparing the battery...................................................................................11
Attaching a lens to the camera....................................................................12
Loading the card .........................................................................................13
Power on.....................................................................................................14
Setting the date/time...................................................................................15
Shooting......................................................................................................16
Playback/Erasing ........................................................................................18
Basic operations..........................................................................................19
Using the direct buttons to operate the camera..........................................20
Setting while looking at the super control panel..........................................21
Setting on the menu....................................................................................22
1 Using live view 35
Functions and operations available only during live view will be explained.
Activating live view ......................................................................................................35
Taking a picture using live view...................................................................................36
Using the face detection function ................................................................................38
Taking a picture using manual focus...........................................................................39
Setting the image aspect.............................................................................................39
Switching the information display................................................................................40
Taking a picture while comparing the effect................................................................41
Enlarged display operation..........................................................................................41
Panorama shooting .....................................................................................................42
Functions available during live view............................................................35
The live view mechanism............................................................................36
AF operation during live view......................................................................38
24
EN
Page 25

2 Exposure 43
Describes functions related to exposure, which is important for shooting. These functions
are for determining the aperture value, shutter speed, and other settings by measuring the
brightness in the picture.
Program shooting ........................................................................................................43
Aperture priority shooting ............................................................................................44
Shutter priority shooting...............................................................................................45
Manual shooting ..........................................................................................................46
Preview function ..........................................................................................................47
Changing the metering mode ......................................................................................48
Exposure compensation..............................................................................................49
AE lock ........................................................................................................................50
AE bracketing ..............................................................................................................50
ISO sensitivity setting ..................................................................................................52
ISO bracketing.............................................................................................................53
Multiple exposure ........................................................................................................53
Bulb shooting...............................................................................................47
3 Focusing and shooting functions 55
Describes the optimal focusing methods according to the subject and shooting conditions.
AF mode selection.......................................................................................................55
AF target selection.......................................................................................................57
Focus lock k If correct focus cannot be obtained ......................................................60
Sequential shooting.....................................................................................................61
Self-timer shooting.......................................................................................................62
Remote control shooting..............................................................................................62
Image stabilizer ...........................................................................................................64
Setting the beep sound................................................................................................65
S-AF (single AF)..........................................................................................55
C-AF (continuous AF)..................................................................................56
MF (manual focus) ......................................................................................56
Simultaneous use of S-AF mode and MF mode (S-AF+MF) ......................56
Simultaneous use of C-AF mode and MF mode (C-AF+MF)......................57
Registering an AF target mode ...................................................................59
4 Record mode, white balance, and picture mode 66
Describes image adjustment functions specific to digital cameras.
Selecting the record mode...........................................................................................66
Recording formats.......................................................................................66
Selecting the record mode ..........................................................................67
Selecting the white balance.........................................................................................68
Setting the auto/preset/custom white balance.............................................69
WB compensation.......................................................................................69
Setting the one-touch white balance...........................................................70
25
EN
Page 26

WB bracketing.............................................................................................................71
Picture mode ...............................................................................................................72
Gradation.....................................................................................................................73
5 Flash shooting 74
Describes how to shoot with the built-in flash and an external flash.
Flash mode setting......................................................................................................74
Built-in flash shooting ..................................................................................................77
Flash intensity control..................................................................................................77
Flash bracketing..........................................................................................................78
External flash shooting................................................................................................79
Shooting with the Olympus wireless RC flash system.................................................80
Using commercially available flashes..........................................................................81
6 Playback functions 82
Describes the functions for image playback.
Single-frame/Close-up playback..................................................................................82
Light box display..........................................................................................................83
Index display/Calendar display....................................................................................84
Information display ......................................................................................................85
Slideshow....................................................................................................................86
Rotating images...........................................................................................................86
Playback on TV ...........................................................................................................87
Editing still images.......................................................................................................87
Image overlay..............................................................................................................89
Copying images...........................................................................................................90
Protecting images........................................................................................................91
Erasing images............................................................................................................92
7 Setup functions 93
Describes the basic settings for using the camera.
Setup Menu.................................................................................................................93
Resetting the camera settings.....................................................................................94
26
EN
X (Date/time setting)................................................................................93
W (Changing the display language)......................................................93
s (Monitor brightness adjustment)...........................................................93
REC VIEW ..................................................................................................93
c MENU DISPLAY.....................................................................................93
FIRMWARE.................................................................................................94
Page 27

8 Customizing your camera 95
Describes how to customize the camera’s settings.
R AF/MF .....................................................................................................................95
LIVE VIEW AF MODE.................................................................................95
AF ILLUMINAT............................................................................................95
AF MODE....................................................................................................95
C-AF LOCK.................................................................................................95
AF AREA.....................................................................................................95
AF AREA POINTER....................................................................................95
AF SENSITIVITY.........................................................................................95
RESET LENS..............................................................................................95
BULB FOCUSING.......................................................................................96
FOCUS RING..............................................................................................96
S BUTTON/DIAL ........................................................................................................96
DIAL FUNCTION.........................................................................................96
DIAL DIRECTION........................................................................................96
AEL/AFL......................................................................................................97
AEL/AFL MEMO..........................................................................................97
; FUNCTION...........................................................................................97
MY MODE SETUP......................................................................................98
BUTTON TIMER .........................................................................................98
A........................................................................................................99
n FUNCTION..........................................................................................99
j FUNCTION...........................................................................................99
T RELEASE/j.........................................................................................................99
RLS PRIORITY S/RLS PRIORITY C ..........................................................99
O fps.......................................................................................................99
U DISP/PC................................................................................................................100
VIDEO OUT...............................................................................................100
SLEEP.......................................................................................................100
BACKLIT LCD (Backlight timer)................................................................100
4 h TIMER (Auto power off).......................................................................100
USB MODE...............................................................................................100
LIVE VIEW BOOST...................................................................................101
g FACE DETECT....................................................................................101
INFO SETTING.........................................................................................101
V EXP/e/ISO ........................................................................................................101
EV STEP...................................................................................................101
METERING ...............................................................................................101
AELMetering..............................................................................................101
ISO............................................................................................................101
ISO STEP..................................................................................................101
ISO-AUTO SET.........................................................................................102
ISO-AUTO.................................................................................................102
BULB TIMER.............................................................................................102
ANTI-SHOCK............................................................................................102
27
EN
Page 28

W # CUSTOM..........................................................................................................102
X K/a/COLOR/WB .............................................................................................103
Y RECORD/ERASE.................................................................................................105
Z K UTILITY ..........................................................................................................106
#X-SYNC.................................................................................................102
#SLOW LIMIT ..........................................................................................102
w+F.......................................................................................................102
AUTO POP UP..........................................................................................102
NOISE REDUCT.......................................................................................103
NOISE FILTER..........................................................................................103
WB ............................................................................................................103
ALL >...................................................................................................103
COLOR SPACE........................................................................................103
SHADING COMP......................................................................................104
K SET.....................................................................................................104
PIXEL COUNT..........................................................................................104
ASPECT SHOOTING................................................................................104
QUICK ERASE..........................................................................................105
RAW+JPEG ERASE.................................................................................105
FILE NAME...............................................................................................105
PRIORITY SET.........................................................................................105
dpi SETTING.............................................................................................106
r/p .....................................................................................................106
EDIT FILENAME.......................................................................................106
PIXEL MAPPING ......................................................................................106
CLEANING MODE....................................................................................106
EXT. WB DETECT....................................................................................106
AF FOCUS ADJ........................................................................................106
EXPOSURE SHIFT...................................................................................108
f WARNING LEVEL.............................................................................108
CU/HI ...........................................................................................108
9 Printing 109
Describes how to print your pictures.
Print reservation (DPOF)...........................................................................................109
Direct printing (PictBridge).........................................................................................111
28
EN
Print reservation........................................................................................109
Single-frame reservation...........................................................................109
All-frame reservation.................................................................................110
Resetting the print reservation data..........................................................111
Connecting the camera to a printer...........................................................112
Easy printing .............................................................................................112
Custom printing.........................................................................................113
Page 29

10Using the OLYMPUS Master software 115
Describes how to transfer and store your camera images to a computer.
Flowchart...................................................................................................................115
Using the provided OLYMPUS Master software .......................................................115
What is OLYMPUS Master?......................................................................115
Connecting the camera to a computer ......................................................................116
Start up the OLYMPUS Master software...................................................................117
Displaying camera images on a computer ................................................................117
Downloading and saving images...............................................................117
Disconnecting the camera from your computer.........................................117
Viewing still images ...................................................................................................118
Transferring images to your computer without using OLYMPUS Master..................119
11Shooting tips and maintenance 120
Refer to this section for troubleshooting and camera maintenance information.
Shooting tips and information....................................................................................120
Error codes................................................................................................................122
Camera maintenance ................................................................................................124
Cleaning and storing the camera ..............................................................124
Cleaning mode k Removing dust............................................................125
Pixel mapping k Checking the image processing functions....................125
12Information 126
Refer to this section for information on optional accessories, camera specifications, and
other useful shooting information.
Card basics................................................................................................................126
Usable cards .............................................................................................126
Formatting the card...................................................................................126
Battery and charger...................................................................................................127
Using your charger abroad........................................................................................127
Interchangeable lenses .............................................................................................128
ZUIKO DIGITAL interchangeable lenses ..................................................128
ZUIKO DIGITAL lens specifications..........................................................129
Program line diagram (P mode)................................................................................131
Flash synchronization and shutter speed..................................................................131
Exposure warning display..........................................................................................132
Flash modes that can be set by shooting mode........................................................133
White balance color temperature...............................................................................134
Record mode and file size/number of storable still pictures ......................................135
Functions that can be registered with My Mode and Custom Reset Setting.............136
Menu directory...........................................................................................................137
Specifications ............................................................................................................142
SAFETY PRECAUTIONS..........................................................................................145
Index..........................................................................................................................151
29
EN
Page 30

Quick reference
Shooting
Taking pictures with
automatic settings
Correct focus cannot be
obtained
Focusing on one area
Taking pictures of nearby
subjects
Taking pictures while
checking the results
Extending the useful life of
the battery
30
EN
Set the mode dial to AUTO and start taking pictures. P. 4
Use focus lock. P. 60
Select the AF target and take the picture. P. 57
The minimum shooting distance varies depending on
the lens. Move to the minimum shooting distance of the
lens from the subject and take a picture.
The camera may be having difficulty focusing on the
subject with auto focus. Lock the focus at the position of
the subject in advance or use MF to fix the distance of
the focus.
It may be easier to focus, even in low light situations,
when using the AF illuminator.
Select the AF target and take the picture using the
desired AF target.
Use MF. It may be helpful to focus while using live view
with an enlarged image.
Set [AF SENSITIVITY] to [SMALL] and focus using a
smaller area.
Use macro lens for close-up shots. P. 128
During live view, you can take a picture while checking
the white balance, exposure compensation, picture
mode, and other settings on the LCD monitor.
You can take a picture while using the live multi view
display to compare the effect of white balance or
exposure compensation.
You can use the preview function to check the depth of
field at a selected aperture value.
You can use live view to check the set exposure
conditions.
You can use [TEST PICTURE] to check the image on
the LCD monitor without recording the image to a card.
Pressing the shutter button halfway, playing back
images, and using the live view function over a long
period of time consumes considerable battery power.
Limiting these actions will help extend the useful life of
the battery.
Set [SLEEP] so that the camera enters sleep mode
faster.
Set [BACKLIT LCD] so that the backlight turns off
faster.
P. 128
P. 56,
P. 60,
P. 121
P. 95
P. 57
P. 39,
P. 41,
P. 56
P. 95
P. 35
P. 41
P. 47
P. 101
P. 98
k
P. 100
P. 100
Page 31
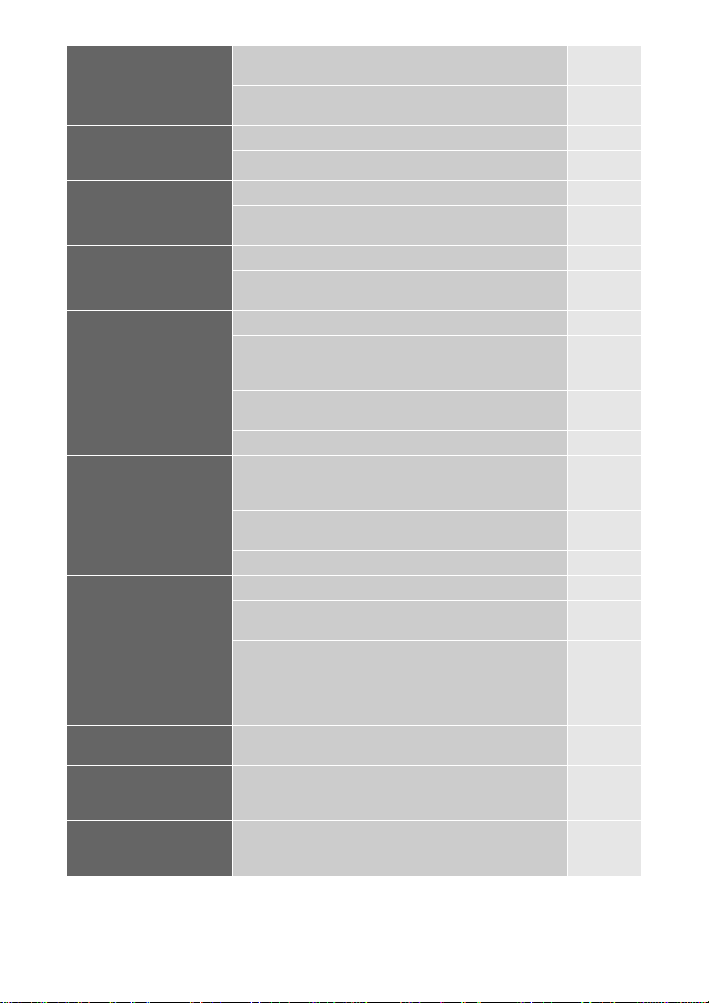
Increasing the number of
pictures that can be taken
Taking pictures in low light
situations without using
the flash
Setting the camera to fire
the flash automatically in
low light situations
Turning off auto firing of
the flash
Taking pictures without
white subjects appearing
too white or black subjects
appearing too dark
Taking monotone pictures
Taking pictures of a
subject against backlight
Brightening a dark backlit
image
Taking pictures with a
blurred background
Taking pictures that stop
the subject in motion or
convey a sense of motion
Reduce the pixel count and compression rate settings.
You can insert two types of cards.
Increase the ISO sensitivity. P. 52
Set the image stabilizer function. P. 64
Set the flash setting to [AUTO]. P. 74
When the mode dial is set to AUTO, the flash
automatically pops up and fires in low light situations.
Set the flash setting to [$]. P. 74
When [AUTO POP UP] is set to [OFF], the flash will not
pop up automatically.
Take a picture while checking the histogram. P. 40
Take a picture while checking the shutter speed and
aperture value displays. If either is blinking, the optimal
exposure is not obtained.
Set the gradation setting to [AUTO]. Subjects with areas
of large contrast are adjusted automatically.
Adjust the exposure compensation. P. 49
Set [PICTURE MODE] to [MONOTONE]. You can take
monotone pictures in black and white, sepia tones,
purplish tones, bluish tones, and greenish tones.
Recorded images can be edited into black-and-white or
sepia-toned images.
Set the art filter to [GRAINY FILM]. P. 5
Set the gradation setting to [AUTO]. P.73
Set the flash setting to [#] (fill-in flash) and take the
picture.
Use spot metering to measure the exposure of the
subject in the center of the picture. If the subject is not in
the center of the picture, use AE lock to lock the
exposure, and then change the composition and take
the picture.
You can adjust the image using [SHADOW ADJ] of
[JPEG EDIT].
Use A (aperture priority) mode to decrease the aperture
value as much as possible. You can blur the background
more by shooting up close to the subject.
Use the S (shutter priority) mode to take the picture. P. 45
P. 66,
P. 104
P. 13,
P. 126
P. 4,
P. 77
P. 77,
P. 102
P. 43-45,
P. 132
P. 73
P. 72
P. 87
P. 74
P. 48,
P. 50
P. 87
P. 44
31
EN
Page 32
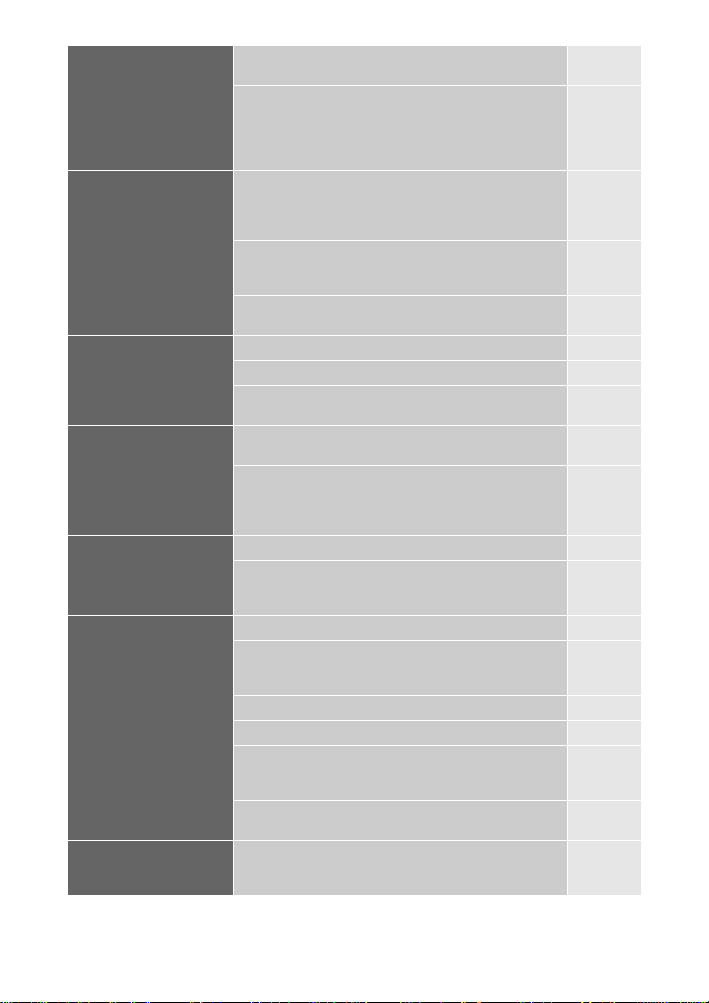
Taking pictures with the
correct color
Taking pictures so that
whites come out white and
blacks come out black
Taking pictures without
noise
Making the viewfinder
easier to view
Optimizing the LCD
monitor
Reducing camera shake
Taking pictures while
checking the level of the
camera
Set the white balance according to the light source. You
can also make fine changes to the settings.
With WB bracket shooting, you can capture 3 to 9
images with different white balance settings for each
picture taken. This enables you to take pictures with the
desired white balance without having to make fine
changes to the settings.
Set the spot metering for highlight or shadow control. If
the subject is not in the center of the picture, use AE lock
to lock the exposure, and then change the composition
and take the picture.
Adjust the exposure compensation. It may be helpful to
use AE bracketing if you are not sure about the
exposure compensation value.
Set the scene mode to [HIGH KEY] or [LOW KEY] and
take a picture.
Set the ISO sensitivity to 200 or another low value. P. 52
Set [NOISE REDUCT.] to [AUTO] or [ON]. P. 103
When the ISO sensitivity is set to 1600 or another high
value, set [NOISE FILTER] to [HIGH].
Adjust the viewfinder’s diopter in accordance with your
vision.
If the viewfinder is still difficult to view after adjusting the
diopter or you want to use the viewfinder without
eyeglasses, you can replace the viewfinder with the
optional diopter compensation eyecup.
You can adjust the brightness of the LCD monitor. P. 93
During live view, set [LIVE VIEW BOOST] to [ON] to
make the subject easier to see without the exposure
reflecting on the LCD monitor.
Set the image stabilizer function. P. 64
Hold the camera firmly when pressing the shutter button.
When using a slow shutter speed, be sure to stabilize
the camera by using a tripod or similar method.
Fire the flash regardless of the light conditions. P. 74
Set the scene mode to [DIS MODE]. P. 5
Increase the ISO sensitivity. When ISO is set to [AUTO],
set the upper limit to a high value, such as 800, so that
ISO automatically increases in low light situations.
Using the self-timer can reduce camera shake that
occurs when the shutter button is pressed.
Display the ruled lines in live view. Compose the shot so
that the subject and ruled lines are horizontally and
vertically aligned.
P. 68
P. 71
P. 48,
P. 50
P. 49,
P. 50
P. 5
P. 103
P. 14
k
P. 101
P. 17
P. 52,
P. 102
P. 62
P. 40
32
EN
Page 33
Playback
Displaying the image after
the picture is taken
Displaying the image after
the picture is taken and
deleting unneeded images
Checking whether the
subject is in focus
Quickly searching for the
desired image
Viewing images on a TV
Comparing images
Settings
Saving the settings
Changing the menu
display language
Not all the functions are
reset to the factory default
settings by [RESET]
Set [REC VIEW]. You can set the number of seconds
that the image is displayed.
Set [REC VIEW] to [AUTO q]. After you take a picture,
the camera switches to playback mode automatically,
allowing you to delete the image.
Use close-up playback to check whether the subject is in
focus.
Use index display to search from a index of between 4
and 100 frames.
Use calendar display to search by the date the picture
was taken.
Use the video cable to play back recorded images on
your TV. You can also view the images as a slideshow.
You can use light box display to display two frames sideby-side.
You can play back another image without changing the
magnification.
You can register two camera settings in [CUSTOM
RESET]. Even if the settings are changed, they can be
returned to their registered settings by resetting the
settings.
You can register up to two current camera settings in
[MY MODE SETUP]. Assign My Mode to the < button
so that you can easily use that function during shooting.
You can change the display language. P. 93
The following functions are not returned to the factory
default settings by [RESET]. Use the menu to change
the respective settings. You can check the default
settings in the “Menu directory” (gP. 137).
RESET1, RESET2 (Custom reset)/PICTURE MODE/
X/W/s/DIAL FUNCTION/DIAL DIRECTION/
MY MODE SETUP/VIDEO OUT/ISO-AUTO/WB/
dpi SETTING/r/p/EDIT FILENAME/
AF FOCUS ADJ./EXPOSURE SHIFT/
f WARNING LEVEL
P. 93
P. 93
P. 82
P. 84
P. 84
P. 87
P. 83
P. 82
P. 94
P. 98
P. 94,
P. 136
33
EN
Page 34
Indications used in this manual
The operation button icons on the body of the camera are used to indicate the operation
buttons in this manual. See “Names of parts and functions” (gP. 2).
In this manual, j indicates the control dial.
The following symbols are used throughout this manual.
x Notes
TIPS
g Reference pages describing details or related information.
Important information on factors which may lead to a malfunction
or operational problems. Also warns of operations that should be
absolutely avoided.
Useful information and hints that will help you get the most out of
your camera.
34
EN
Page 35
1 Using live view
Activating live view
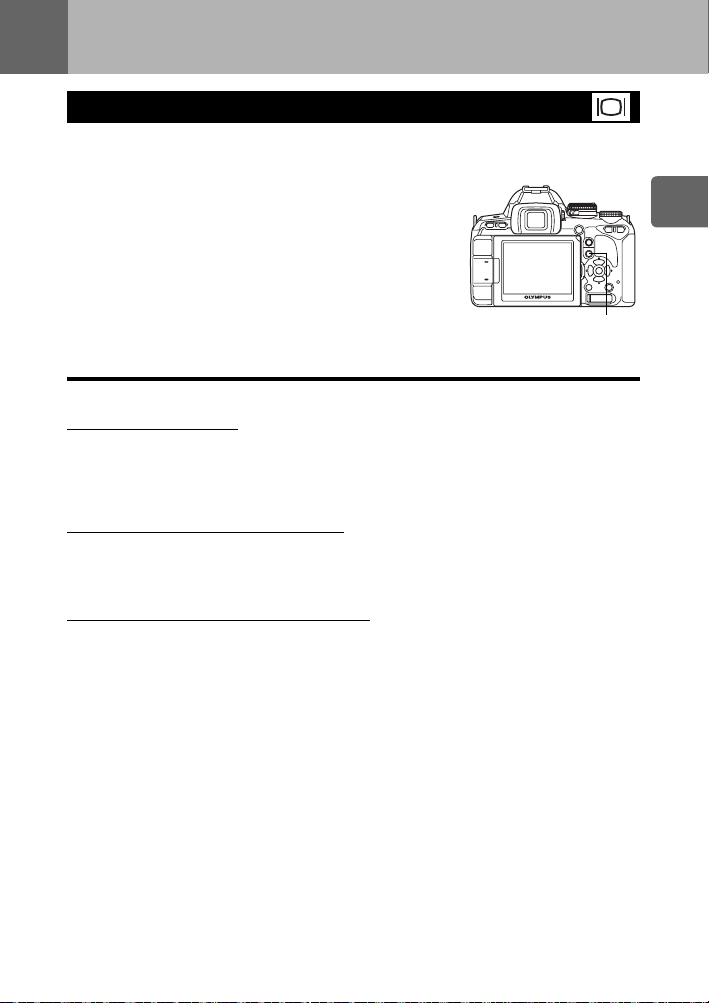
It is possible to use the LCD monitor as a viewfinder. You can view the exposure or white
balance effect and the subject’s composition while you take a picture.
1 Press the u button.
• The mirror is raised and the subject is displayed on the LCD
monitor.
• When [AF MODE] was set to [C-AF], it will be set
automatically to [S-AF] (or [S-AF+MF] in case it was set to
[C-AF+MF]).
Functions available during live view
The following functions can be used during live view.
Focusing during live view
• Taking a picture after selecting the AF system gP. 36
• Taking a picture using focus lock gP. 37
• Taking a picture while adjusting the focus manually gP. 39
• Taking a picture while focusing on a face gP. 38
• Taking a picture while checking the focus by enlarging the zone to be focused gP. 41
Taking a picture while checking the effect
• Taking a picture after comparing the effect of exposure compensation or white
balance gP. 41
• Taking a panoramic picture gP. 42
• Taking a picture while checking the effect of image stabilizer gP. 64
Switching the indications on the LCD monitor
• Turning off the information display/Displaying the histogram or ruled lines gP. 40
• Checking the subject on the monitor even in low light situations gP. 101
1
Using live view
u button
x Notes
• If there is a high-intensity light source within the screen, the image may be displayed darker
but will be recorded normally.
• If the live view function is used over a long period, the temperature of the image pickup device
rises causing images with high ISO sensitivity to appear noisy and unevenly colored. Either
lower the ISO sensitivity or turn off the camera for some time.
• Exchanging the lens will cause live view to stop.
• The following functions are not available during live view.
C-AF/AE lock*/[AEL/AFL]
* You can use AE lock when [LIVE VIEW AF MODE] is set to [IMAGER AF].
• When [IMAGER AF] is selected, you cannot use the AF illuminator.
35
EN
Page 36
The live view mechanism
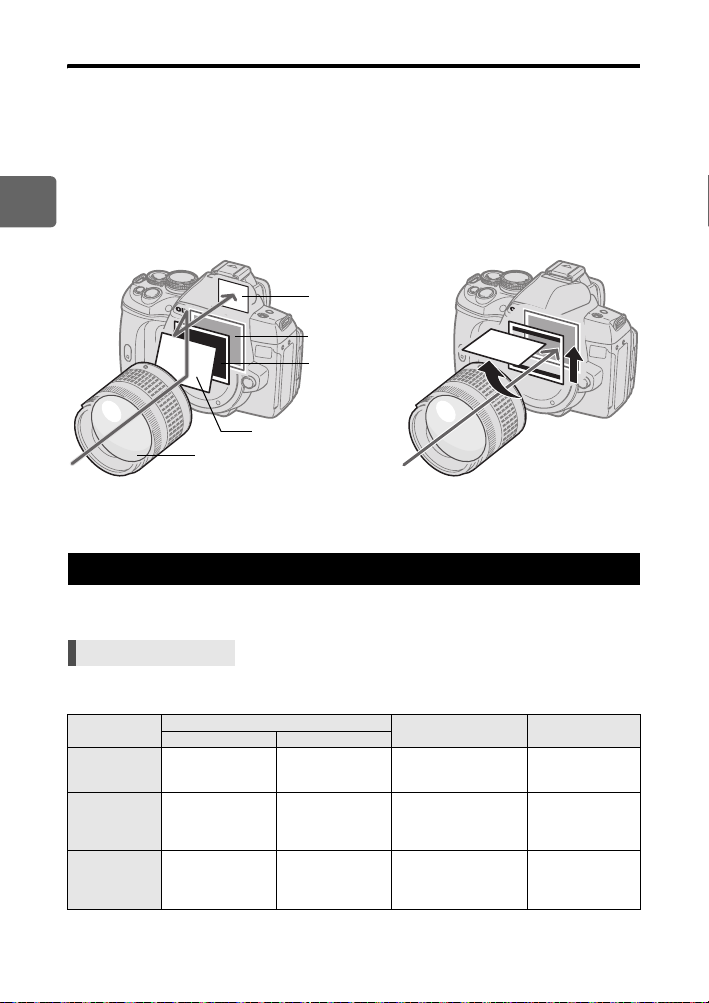
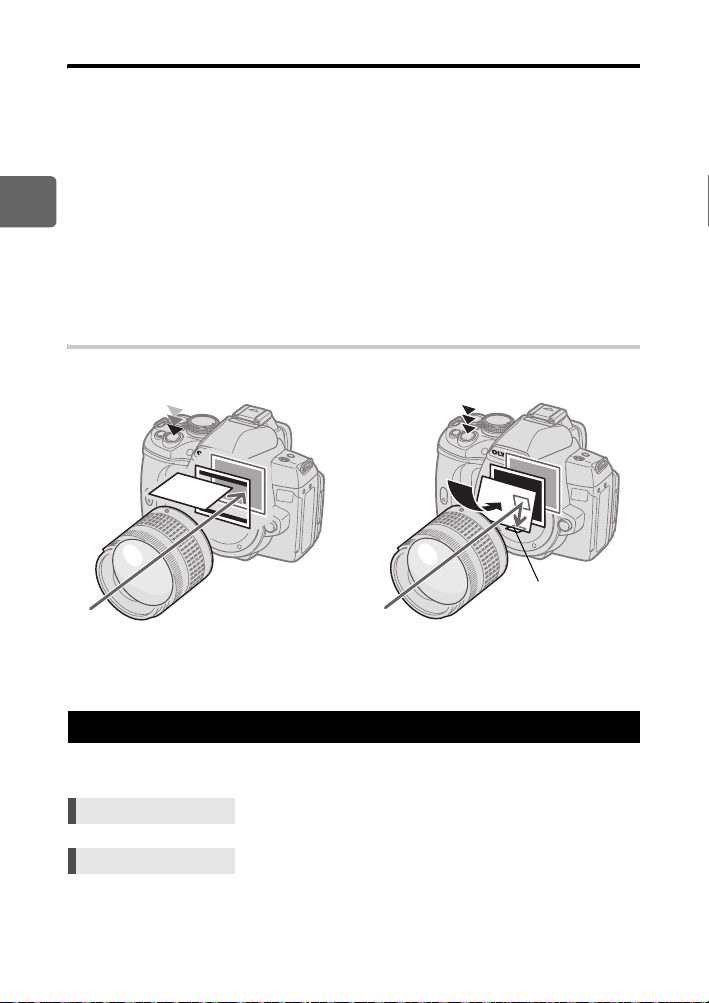
During live view, the image on the LCD monitor is the same image received by the image
pickup device (Live MOS sensor/imager) that is used for shooting. This way you can check
the effects of exposure compensation or white balance on the LCD monitor. Moreover, you
can also enlarge part of the subject to focus on it or display ruled lines to check that the
composition is level.
While the image appears on the LCD monitor during live view, the mirror is raised and the
shutter is open. Therefore, you will not be able to check the subject in the viewfinder.
Correct metering may not be possible if strong light is coming in through the viewfinder. In
1
such case attach the eyepiece cover. g“Eyepiece cover” (P. 62)
Using live view
Taking pictures using the viewfinder Taking pictures using live view
Viewfinder
Image pickup
device
Shutter curtain
Mirror
Lens
• The light coming in through the lens is reflected on the
mirror and you can check the subject in the viewfinder.
• The mirror is raised and the shutter is open.
The image received by the image pickup
device is displayed on the LCD monitor.
Taking a picture using live view
In live view you can choose one of 3 available AF systems. The [LIVE VIEW AF MODE]
setting will determine when and how focusing is performed.
Menu MENU[c][R][LIVE VIEW AF MODE]
Characteristics of the live view AF mode
LIVE VIEW AF
MODE
IMAGER AF
(factory default
setting)
AF SENSOR k
HYBRID AF
* For the latest information about Olympus lenses compatible with Imager AF, visit the Olympus website.
When you are using a lens that is not compatible with [IMAGER AF], [HYBRID AF] will be selected
automatically.
36
EN
Using the shutter button
Halfway down All the way down
AF operation using
the imager
AF operation using
the imager
(approximate
focus)
Shooting
AF operation using
the AF sensor and
then shooting
AF operation using
the AF sensor and
then shooting
Focus lock Restrictions on use
Press the shutter
button halfway.
While holding down the
AEL/AFL button,
press the shutter
button all the way.
While holding down the
AEL/AFL button,
press the shutter
button all the way.
* Only possible
with compatible
lenses.
None
None
Page 37
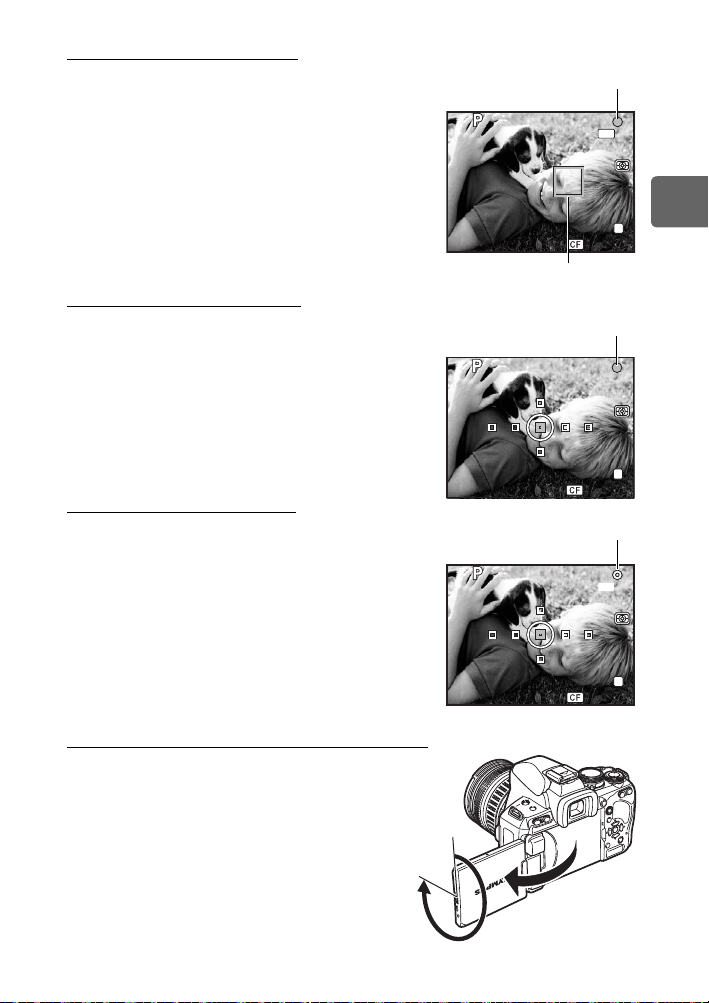
Taking a picture with [IMAGER AF]
250
F5.6
N
3 8
250
F5.6
N
3 8
250
F5.6
N
3 8
1 Press the shutter button halfway.
• When the focus is locked, the AF confirmation mark and
AF target mark light up.
2 Press the shutter button all the way to take a
picture.
Taking a picture with [AF SENSOR]
1 Press the shutter button all the way.
• The mirror is lowered and the picture is taken after the
focus is locked.
• The image that was displayed on the monitor before
lowering the mirror freezes during focusing.
• If correct focus cannot be obtained, you will hear the
sound of the shutter but the picture will not be taken.
• To focus in advance, hold down the AEL/AFL button
and press the shutter button. When the focus is locked,
the AF confirmation mark lights up. When the AF
confirmation mark is blinking, the focus is not locked.
Taking a picture with [HYBRID AF]
1 Press the shutter button halfway.
• The Imager AF will be activated and you can check the
subject on the LCD monitor.
• When the Imager AF achieves approximate focus, the n
mark lights up.
2 Press the shutter button all the way.
• The picture is taken in a similar way as when using [AF
SENSOR].
AF confirmation mark
250
F5.6
I-AF
AF target mark
AF confirmation mark
250
F5.6
n mark
250
F5.6
o
L
38
L
38
N
N
1
Using live view
Shooting while changing the angle of the LCD monitor
You can change the angle of the LCD monitor on the
camera. This enables you to shoot at an awkward
angle while checking the subject’s composition on the
LCD monitor.
• Slowly rotate the LCD monitor within the moveable
range.
270°
L
38
N
37
EN
Page 38
AF operation during live view
[IMAGER AF]
When you press the shutter button halfway, AF is performed by the image pickup device.
[AF SENSOR]
When you press the shutter button all the way, the AF is activated and the picture is taken in
the same way as when taking pictures using the viewfinder (AF is not activated on pressing
the shutter button halfway).
[HYBRID AF]
When you press the shutter button halfway, focusing is performed approximately by the
1
Imager AF and you can check the subject on the LCD monitor. When you press the shutter
Using live view
button all the way, the AF is activated in the same way as with the [AF SENSOR] setting. The
approximate focusing distance is obtained when the shutter button is pressed halfway so the
time it takes to actually take the picture after pressing the shutter button all the way is
shortened. When using S-AF+MF, this is very convenient as you can hold the shutter button
pressed halfway and finely adjust the focus while checking the LCD monitor.
Camera status during AF
Imager AF AF Sensor
Halfway down All the way down
AF Sensor
• AF is performed by the image pickup device. • The mirror is lowered and AF is performed by the
AF sensor. (The mirror is down so the image
display on the monitor freezes just before pressing
the shutter button all the way.)
Using the face detection function
By setting [g FACE DETECT] to [ON], the camera will detect people’s faces in the frame
and adjust the focus and metering automatically.
Direct button < (The setting changes each time the button is pressed.)
Super control panel ip[g FACE DETECT]
38
EN
Page 39
Menu MENU[c][U][g FACE DETECT][ON]
250
F5.6
3 8
N
• In order to use the < button, [Fn FACE DETECT] needs to be set up in the menu in
advance. g“; FUNCTION” (P. 97)
• After setting [g FACE DETECT] to [ON] while using the < button, the following functions
are automatically set to the best settings for taking pictures of people.
Function Setting Ref. page
METERING e P. 48
GRADATION AUTO P. 73
LIVE VIEW AF MODE IMAGER AF P. 36
AF MODE S-AF P. 55
AF AREA b P. 57
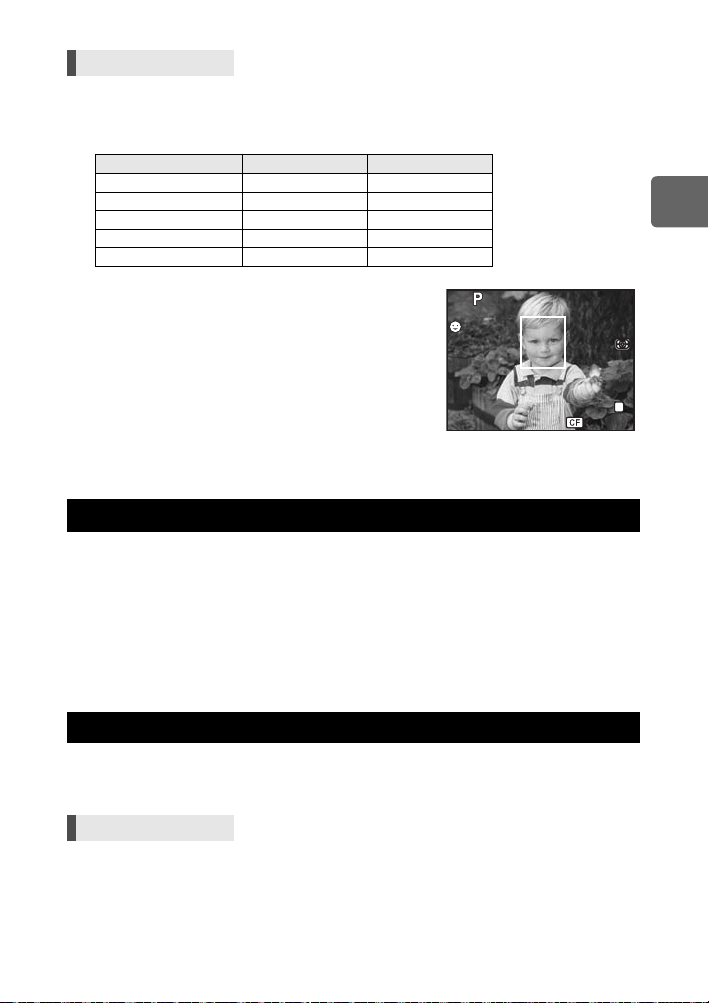
1 If the camera detects a face, a frame will be
displayed in that location.
• When you press the shutter button, the camera will focus
on the position of the face detection frame (however, if a
single AF target is selected with [AF AREA], the camera
will focus on the AF target selected).
•With [AF SENSOR] or [HYBRID AF], the camera will
focus on the AF target that is closest to the face
detection frame.
x Notes
• During sequential shooting, face detection will work only at the first shot.
• Depending on the subject, the camera may not be able to correctly detect the face.
250
F5.6
L
38
Taking a picture using manual focus
During live view, you can take a picture focusing manually while checking the focus on the
LCD monitor.
1 Set the AF mode to [S-AF+MF] or [MF]. g“AF mode selection” (P. 55)
2 Adjust the focus by rotating the focus ring.
•In [S-AF+MF] mode, after pressing the shutter button halfway or pressing the AEL/AFL
button, you can rotate the focus ring to finely adjust the focus before taking the picture.
• Using the enlarged display can be very convenient when adjusting the focus manually.
g“Enlarged display operation” (P. 41)
1
Using live view
N
Setting the image aspect
You can change the aspect ratio (horizontal-to-vertical ratio) when taking pictures using live
view. Depending on your preference, you can set the aspect ratio to [4:3] (standard), [3:2],
[16:9], or [6:6]. JPEG images are trimmed and saved according to the aspect ratio.
Menu MENU[W][IMAGE ASPECT]
x Notes
• RAW images are not trimmed and are recorded with the aspect ratio information at the time of
shooting.
• During RAW image playback, images are displayed with a border based on the aspect ratio.
39
EN
Page 40
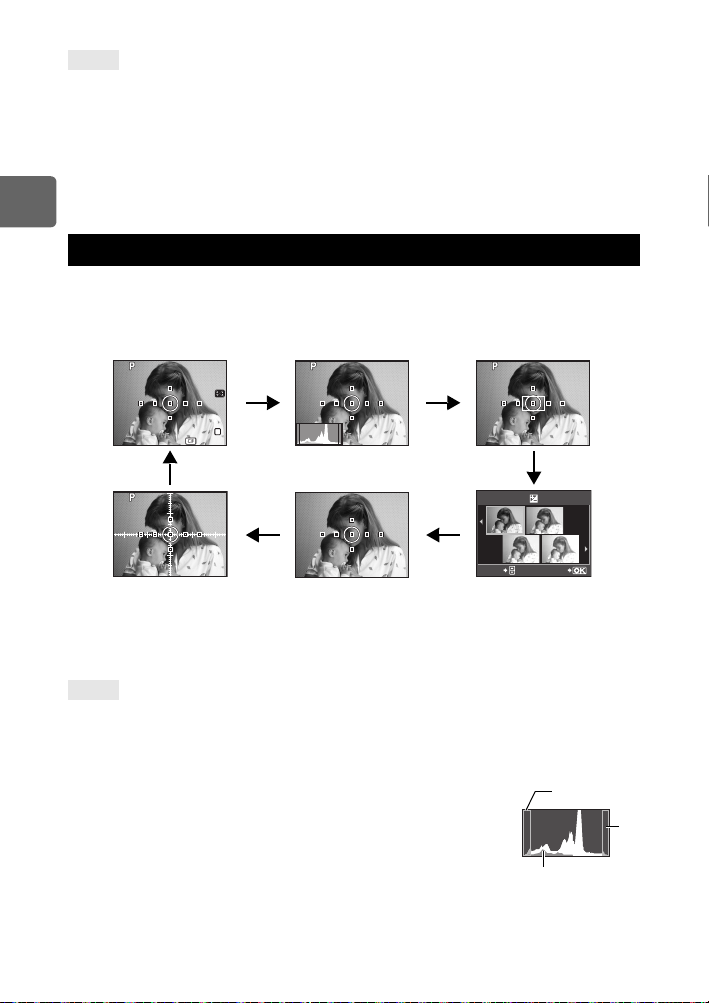
250
F5.6
38
N
250
F5.6
38
250
F5.6
38
250
F5.6
38
+0.7
+1.0
0.0
+0.3
TIPS
To use [IMAGE ASPECT] when taking pictures using the viewfinder:
j Set [ASPECT SHOOTING] to [ALL].
g“ASPECT SHOOTING” (P. 104)
To change the aspect ratio of recorded images:
j You can only change the aspect ratio when the aspect ratio of the image is set to [4:3].
g“Editing still images” (P. 87)
To trim recorded images:
j You can only trim images when the aspect ratio of the image is set to [4:3].
g“Editing still images” (P. 87)
1
Using live view
Switching the information display
You can switch the information displayed on the monitor by pressing INFO button
repeatedly. You can also switch the information displayed by turning the control dial while
pressing the INFO button.
Information display on
250250
F5.6
L
N
38
*2
250
F5.6
38
Scale display
*1 With [INFO SETTING] (gP. 101), you can also select [w] or [x] for the ruled line display.
*2 During multiple exposure shooting (gP. 53), the information display switches to “Multiple exposure
display”.
*1
Histogram display
250
F5.6
Image only
38
Zoom display
(gP. 41)
250
F5.6
0.0
+0.7
F
/
Multi view display
(gP. 41)
38
+0.3
+1.0
SETWB
TIPS
To quickly switch to the frequently used display:
j You can hide the information display for all modes except “Information display on”. g“INFO
SETTING” (P. 101)
How to read the histogram:
j The following shows you how to read the histogram display easily.
1 If the graph has many peaks around here, the image will appear
mostly black.
2 If the graph has many peaks around here, the image will appear
mostly white.
3 The part indicated in green in the histogram shows the luminance
40
EN
distribution within the spot metering area.
3
1
2
Page 41
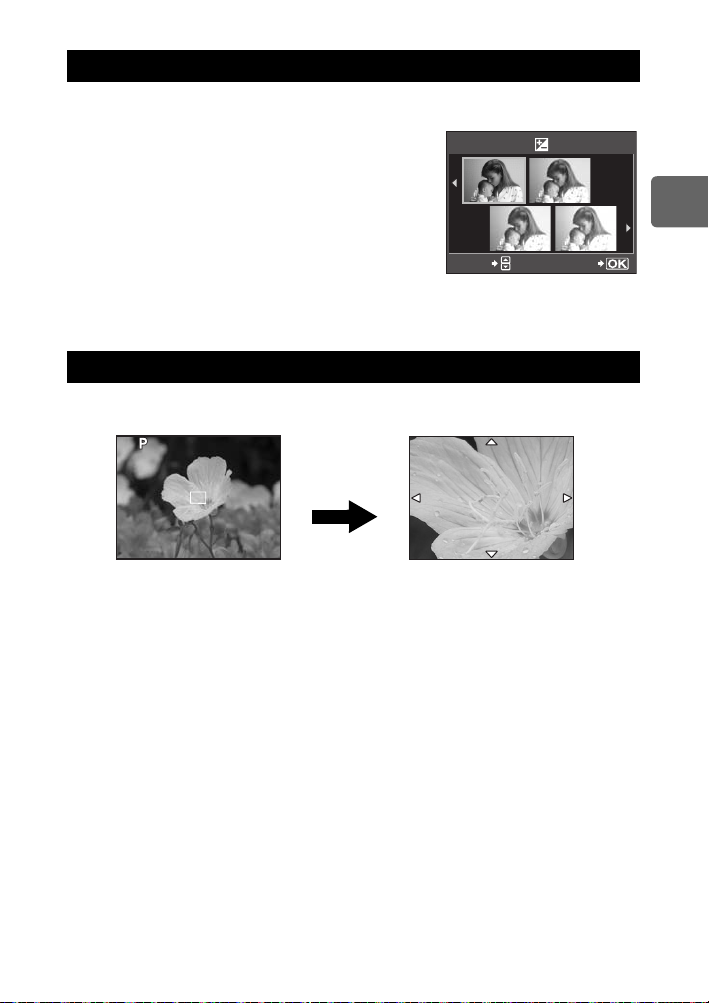
Taking a picture while comparing the effect
+0.7
+1.0
0.0
+0.3
250
F5.6
3 8
10x
You can check the effect of exposure compensation or white balance on a 4-split screen.
1 Press the INFO button repeatedly to display the
multi view display.
g“Switching the information display” (P. 40)
• The exposure compensation comparison screen is
displayed. Press f to switch to the white balance
comparison screen. Press fg to switch the screen.
2 Use hi or the control dial to select the setting
value, then press the i button.
• You can take the picture using the set value.
x Notes
• Exposure compensation is not available in M mode.
• This function cannot be used in g mode.
Enlarged display operation
It is possible to enlarge the subject for display. Enlarging the image during MF makes focus
confirmation and adjustment easier.
250
F5.6
i button
0.0
+0.3
+0.7
F
/
+1.0
SETWB
1
Using live view
38
10x
1 Press the INFO button repeatedly to display the zoom display.
g“Switching the information display” (P. 40)
• The enlargement frame will be displayed.
2 Use p to move the frame and press the i button.
• The area inside the frame is enlarged and displayed.
• Press and hold the i button to return the enlargement frame to the center after it was
moved.
3 Turn the control dial to change the magnification (5×/7×/10×).
• Use p to scroll the frame even during magnification.
• Pressing the i button will cancel the zoom display.
• During zoom display, AF will not be activated even in the shutter button is pressed all the
way. You can take the picture after checking the focus in the zoom display.
41
EN
Page 42
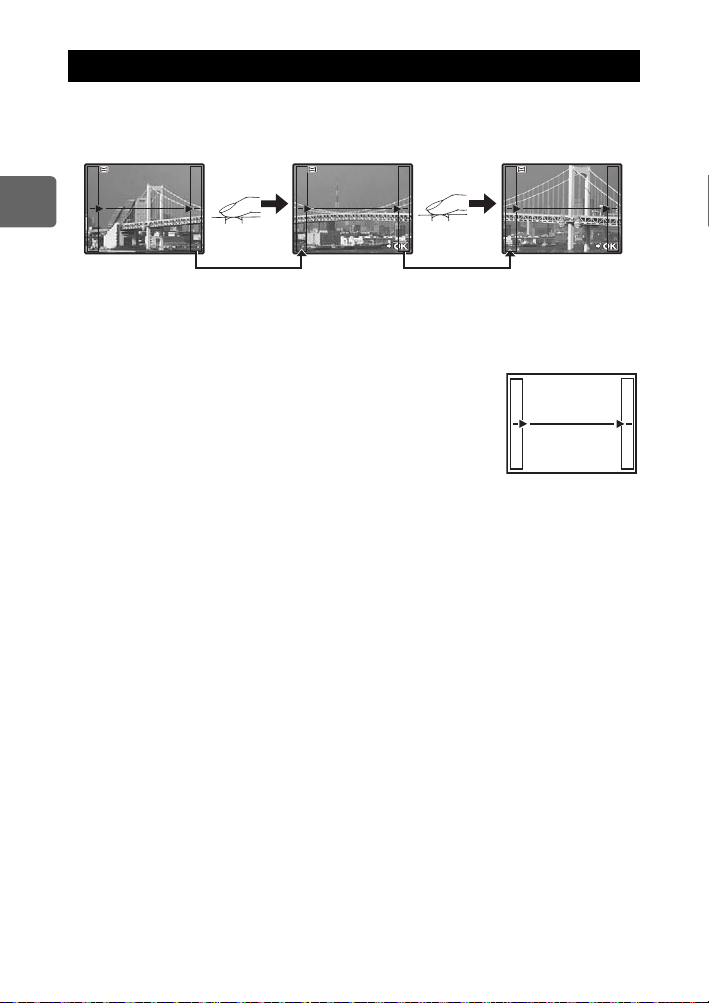
Panorama shooting
250
F5.6
38
[ 3 ]
[ 2 ]
EXIT
EXIT
You can enjoy panorama shooting easily using the OLYMPUS xD-Picture Card. Using
OLYMPUS Master (provided CD-ROM) to join images where the subject’s edges overlap,
you can create a single panorama composite image.
Panorama shooting is possible up to a maximum of 10 images.
250250
F5.6
[ 2 ]
[ 3 ]
1
Using live view
38
• Try your best to include the common parts of the overlapping images when shooting the
subject.
1 Set the mode. g“Setting the art filter/scene” (P. 5)
• Live view is activated.
2 Use p to specify the direction for joining, then shoot the
subject with the edges overlapping.
i
: Joins the next image to the right.
: Joins the next image to the left.
h
f : Joins the next image to the top.
g : Joins the next image to the bottom.
• Shoot while changing the composition such that the subject
overlaps.
• The focus, exposure, etc. will be determined at the first shot.
• The g (warning) mark will be displayed after you have finished taking 10 shots.
• Pressing the i button before shooting the first frame returns to the scene mode selection
menu.
• Pressing the i button in the midst of shooting ends the sequence of panorama shooting,
and allows you to continue with the next one.
x Notes
• Panorama shooting cannot be done if the OLYMPUS xD-Picture Card is not loaded in the
camera.
• During panorama shooting, the image previously taken for position alignment will not be
retained. With the frames or other markers for display in the images as a guide, set the
composition such that the edges of the overlapping images overlap within the frames.
EXIT
EXIT
EXIT
EXIT
42
EN
Page 43
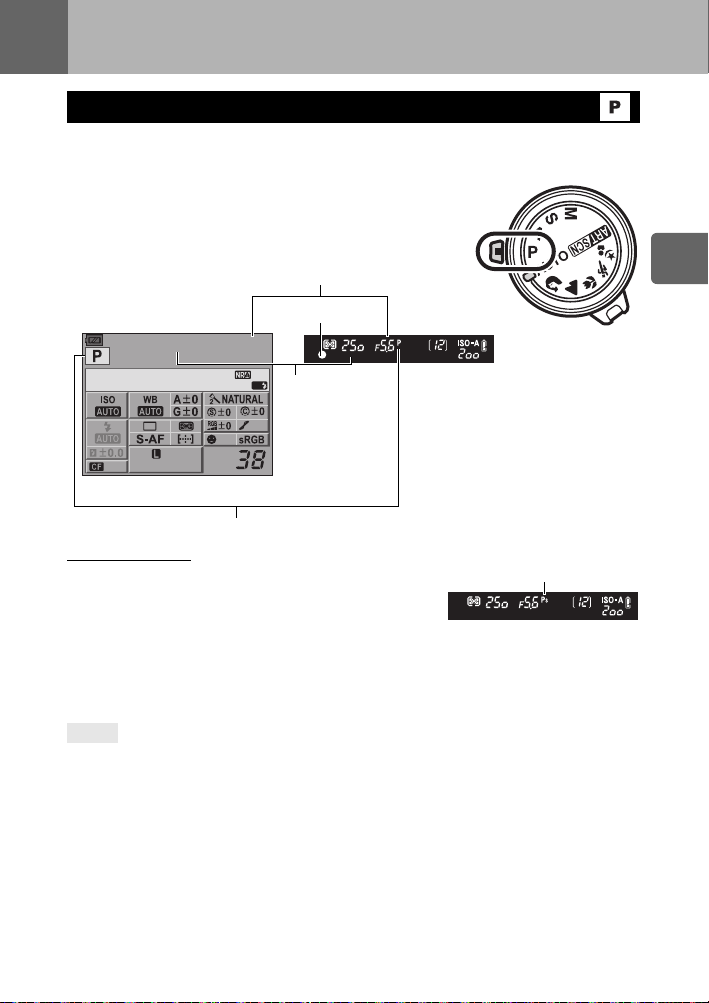
2 Exposure
Program shooting
The camera sets the optimum aperture value and shutter speed automatically according to
the subject brightness.
Set the mode dial to P.
• When the shutter button is half-pressed, the shutter speed
and aperture value are displayed on the viewfinder. Releasing
the shutter button displays the shutter speed and aperture
value on the super control panel screen.
Aperture value
AF confirmation mark
250 F5.6
2009. 03.16
OFF
arge
Normal
Super control panel
Shooting mode
Program shift (
By turning the control dial in the P mode, you can change
the combination of aperture and shutter speed while
maintaining the optimum exposure.
g“Program line diagram (P mode)” (P. 131)
• The program shift setting will not be cancelled after
shooting. To cancel program shift setting, turn the control
dial until the shooting mode indication % on the viewfinder or super control panel changes
to P or turn off the power.
• Program shift is not available when you are using a flash.
%)
Shutter speed
AF
Viewfinder
Program shift
Viewfinder
2
Exposure
TIPS
The shutter speed and aperture value are blinking:
j
The optimum exposure cannot be obtained. For details, see “Exposure warning display” (gP. 132).
43
EN
Page 44
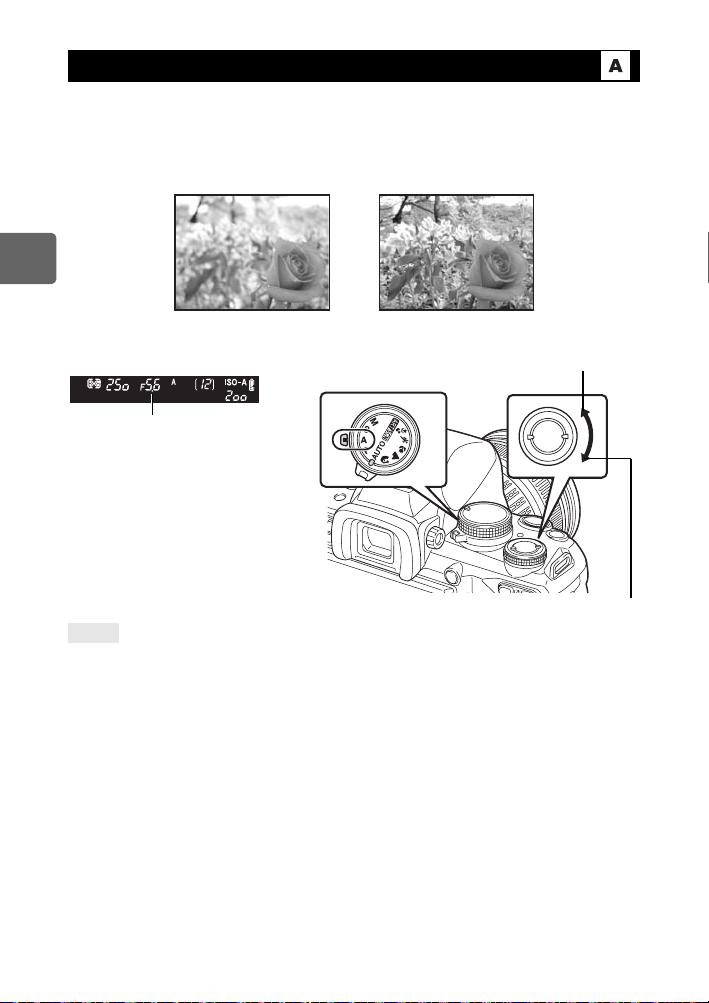
Aperture priority shooting
The camera sets the optimum shutter speed automatically for the aperture value you have
selected. When you open the aperture (decrease the aperture value), the camera will focus
within a shorter range (shallow depth of field) and produce a picture with a blurred
background. When you close the aperture (increase the aperture value), the camera will
focus within a longer range. Use this mode when you wish to add changes to the background
representation.
When the aperture
value (f-number) is
decreased
2
Exposure
Set the mode dial to A and turn the control dial to set the aperture value.
Viewfinder Close the aperture (f-number is increased)
Aperture value
Open the aperture (f-number is decreased)
TIPS
To check the depth of field with the selected aperture value:
j See “Preview function” (gP. 47).
To change the exposure adjustment interval:
j This can be set in 1/3 EV, 1/2 EV or 1 EV increments. g“EV STEP” (P. 101)
Shutter speed is blinking:
j The optimum exposure cannot be obtained. For details, see “Exposure warning
display” (gP. 132).
When the aperture
value (f-number) is
increased
44
EN
Page 45
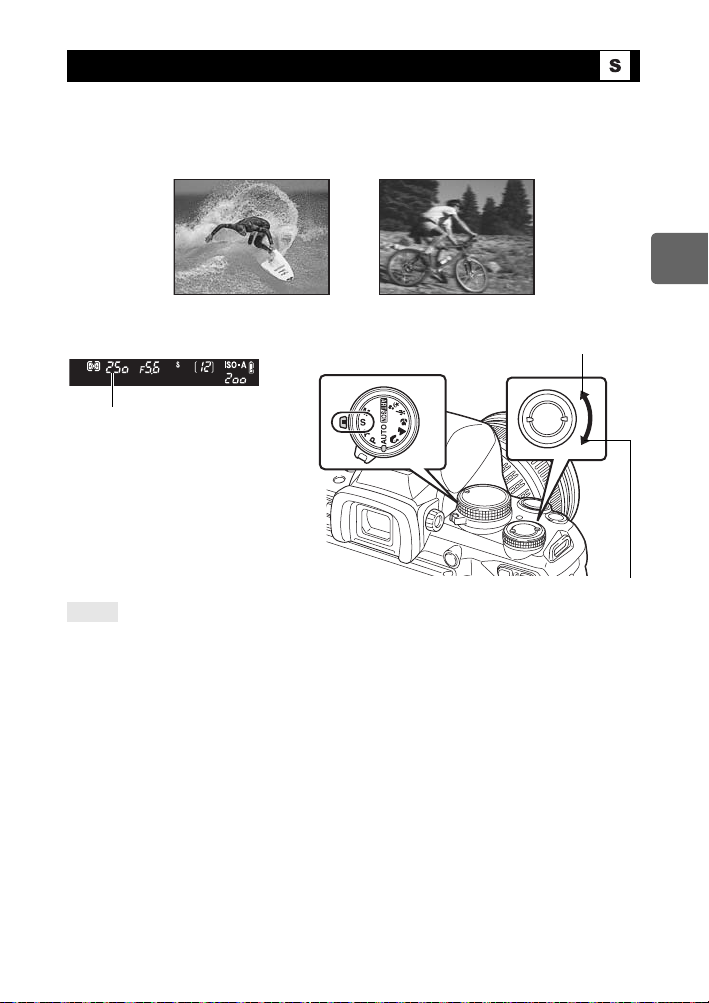
Shutter priority shooting
The camera sets the optimum aperture value automatically for the shutter speed you have
selected. Set the shutter speed depending on the type of effect you want. A higher shutter
speed allows you to capture a fast-moving subject without blur, and a slower shutter speed
blurs a moving subject, creating a feeling of speed or motion. Set the shutter speed
depending on the type of effect you want.
A fast shutter
speed can freeze
a fast action
scene without any
blur.
Set the mode dial to S and turn the control dial to set the shutter speed.
Viewfinder
Shutter speed
TIPS
The picture looks blurred:
j The possibility of camera shake spoiling your picture increases greatly during macro or ultra-
telephoto shooting. Raise the shutter speed or use a monopod or tripod to stabilize the camera.
j When the shutter speed is slow, camera shake is more likely to occur. You can reduce camera
shake by using the image stabilizer. g“Image stabilizer” (P. 64)
To change the exposure adjustment interval:
j This can be set in 1/3 EV, 1/2 EV or 1 EV increments. g“EV STEP” (P. 101)
The aperture value is blinking:
j The optimum exposure cannot be obtained. For details, see “Exposure warning
display” (gP. 132).
A slow shutter
speed will blur a
fast action scene.
This blurring will
give the
impression of
dynamic motion.
Faster shutter speed
Slower shutter speed
2
Exposure
45
EN
Page 46
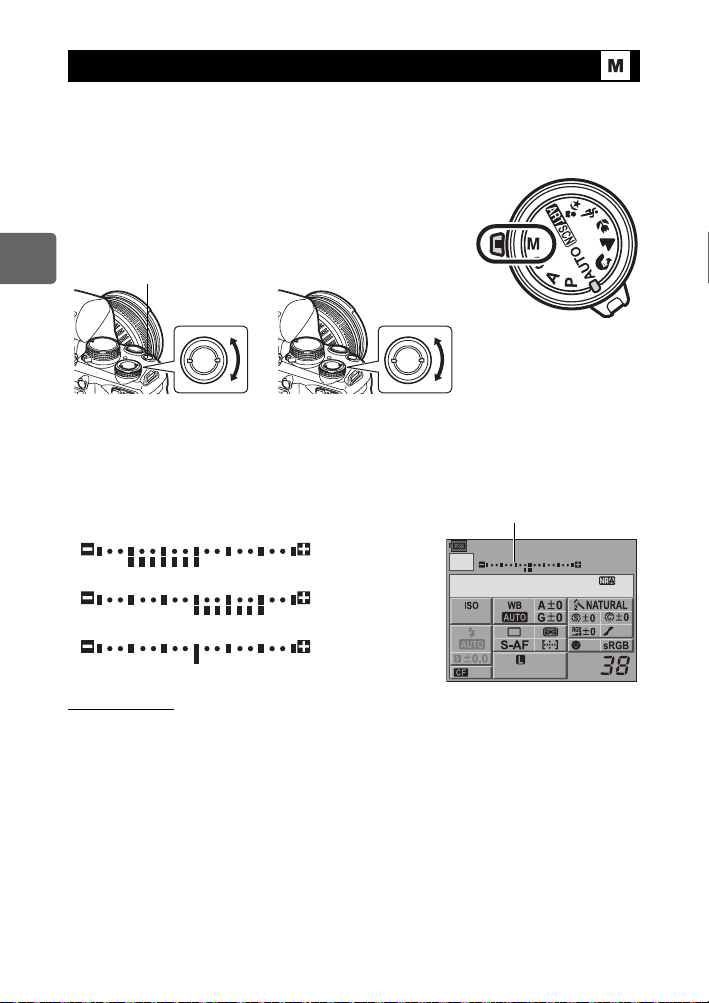
Manual shooting
Allows you to set the aperture and shutter speed manually. You can check how much it
differs from the appropriate exposure by using the exposure level indicator. This mode gives
you more creative control, allowing you to make whatever settings you like, regardless of the
correct exposure.
Set the mode dial to M and turn the control dial to set the
value.
Aperture value: Turn the control
dial while holding down the F
button to set the value.
2
Exposure
F button
• The range of aperture values available varies with the lens type.
• The shutter speed can be set to 1/4000 - 60 sec. or [BULB].
•In M mode the exposure level indicator will be displayed. It shows the difference (ranging
from -3 EV to +3 EV) between the exposure value calculated by the currently selected
aperture and shutter speed and the exposure value considered optimum by the camera. If
the difference exceeds ±3 EV, the entire indicator blinks.
Noise in images
While shooting at slow shutter speeds, noise may appear on-screen. These phenomena are
caused when current is generated in those sections of the image pickup device that are not
normally exposed to light, resulting in a rise in temperature in the image pickup device or
image pickup device drive circuit. This can also occur when shooting with a high ISO setting
in a high-temperature environment. To reduce this noise, the camera activates the noise
reduction function.
g“NOISE REDUCT.” (P. 103)
Shutter speed: Turn the control dial
to set the value.
Underexposure
Overexposure
Optimum exposure
Exposure level indicator
M
2009. 03.16
200
250 F5.6
arge
Normal
-0.3
OFF
46
EN
Page 47
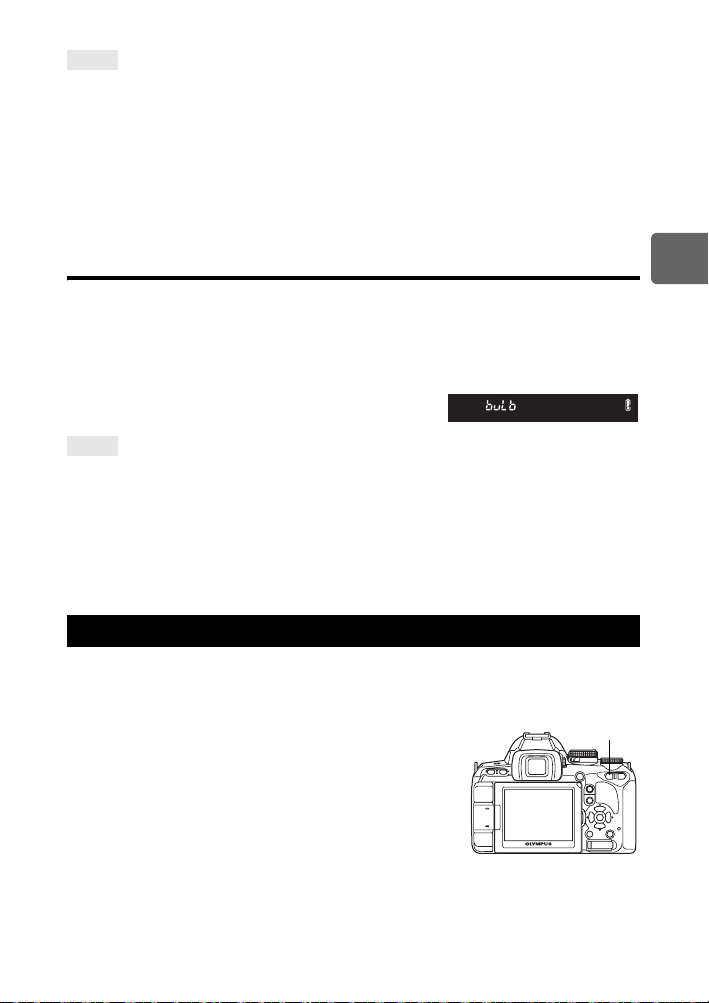
TIPS
The picture looks blurred:
j The use of a monopod or tripod is recommended when taking a picture at slow shutter speed.
j When the shutter speed is slow, camera shake is more likely to occur. You can reduce camera
shake by using the image stabilizer. g“Image stabilizer” (P. 64)
To change the exposure adjustment interval:
j This can be set in 1/3 EV, 1/2 EV or 1 EV increments. g“EV STEP” (P. 101)
To switch the operation between setting the shutter speed and aperture value:
j You can set the aperture value using only the control dial. g“DIAL FUNCTION” (P. 96)
x Notes
• Exposure compensation is not available in M mode.
Bulb shooting
You can take a picture with a bulb exposure time in which the shutter stays open as long as
you hold down the shutter button.
Bulb shooting can also be done using an optional remote control (RM-1). g“Bulb shooting
with the remote control” (P. 64)
In M mode, set the shutter speed to [BULB].
• [buLb] is displayed in the viewfinder and [BULB] on the
super control panel.
TIPS
To automatically end bulb shooting after a specified period of time:
j You can set the maximum time for bulb shooting. g“BULB TIMER” (P. 102)
To fix the focus during manual focus shooting:
j You can fix the focus so the focus does not change even if the focus ring is turned during
exposure. g“BULB FOCUSING” (P. 96)
x Notes
• The following functions are not available during bulb shooting.
Sequential shooing/self-timer shooting/AE bracket shooting/image stabilizer/flash bracketing
Preview function
The viewfinder shows the focused area (depth of field) with the selected aperture value.
For the preview function to work by pressing the < button, it is necessary to set the function
of the < button on the menu beforehand. g“; FUNCTION” (P. 97)
Press the < button to use the preview function.
• When [; FUNCTION] is assigned to [LIVE PREVIEW],
pressing the < button automatically switches the camera to
live view for a preview of the picture on the monitor.
< button
2
Exposure
47
EN
Page 48
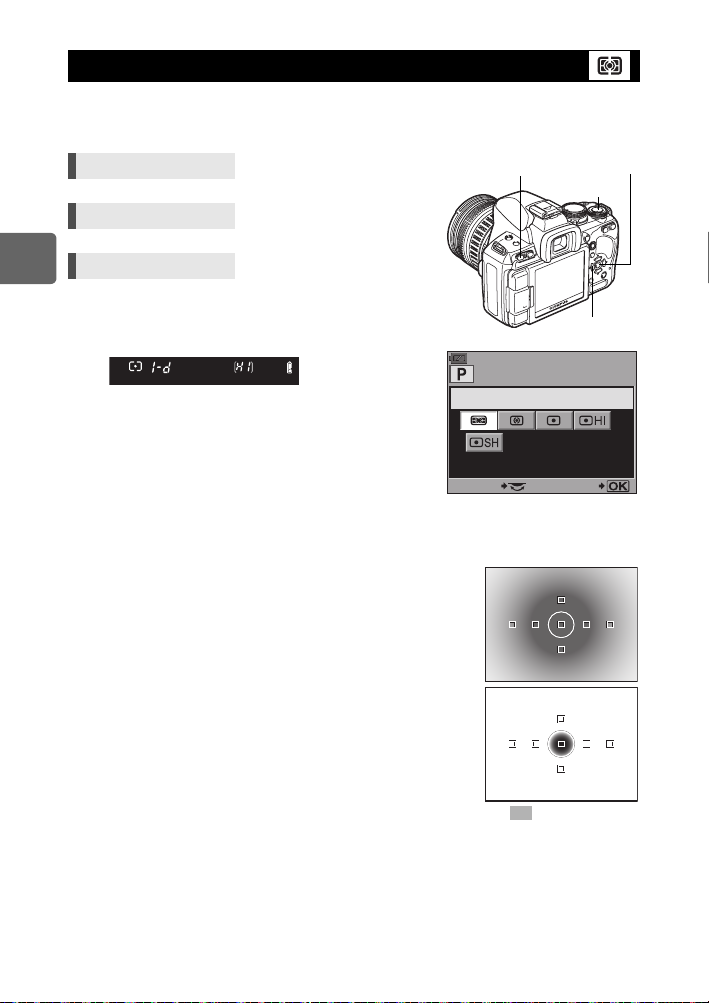
Changing the metering mode
There are 5 ways to measure the subject brightness: Digital ESP metering, Center weighted
averaging metering, and 3 types of spot metering. Select the most suitable mode for the
shooting conditions.
Direct button Gj
MENU button
Super control panel ip: [METERING]
2
Menu MENU[c][V]
Exposure
[METERING]
Setting display
Viewfinder
G : Digital ESP metering
H : Center weighted averaging metering
I : Spot metering
IJ : Spot metering - highlight control
IK : Spot metering - shadow control
G Digital ESP metering
The camera measures the light levels and calculates the light
level differences in 49 separate areas of the image. This mode is recommended for general use.
Setting the AF synchronized function to [ESP+AF] enables metering centered around the AF target
that is in focus with AF.
H Center weighted averaging metering
This metering mode provides the average metering between the
subject and the background lighting, placing more weight on the
subject at the center. Use this mode when you do not want the light
level of the background to affect the exposure value.
I Spot metering
The camera meters a very small area around the center of the subject,
defined by the spot metering area mark in the viewfinder. Use this
mode when there is very strong backlight.
IJ Spot metering - highlight control
When the overall background is bright, white areas of the image will
come out gray if you use the camera’s automatic exposure. Using this
mode enables the camera to shift to over-exposure, allowing accurate
white reproduction.
Metering area is the same as spot metering.
IK Spot metering - shadow control
When the overall background is dark, black areas of the image will come out gray if you use the
camera’s automatic exposure. Using this mode enables the camera to shift to under-exposure,
allowing accurate black reproduction. Metering area is the same as spot metering.
METERING
SELECT SET
: Metering area
i button
j
G button
48
EN
Page 49
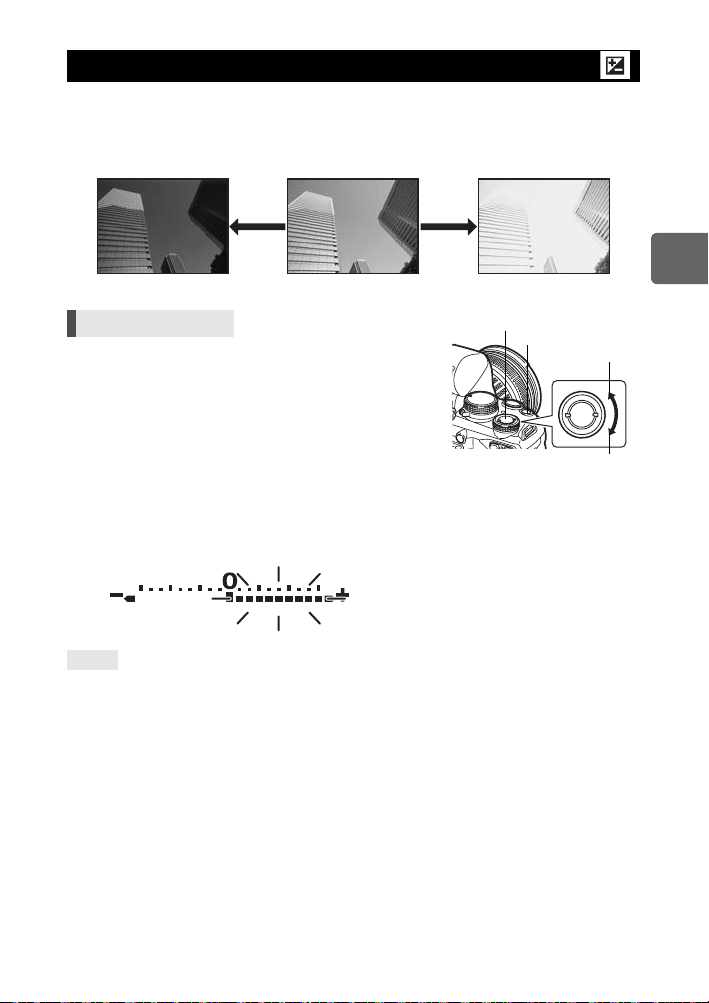
Exposure compensation
In some situations, you may get better results if you manually compensate (adjust) the
exposure value set automatically by the camera. In many cases, bright subjects (such as
snow) will turn out darker than their natural colors. Adjusting toward + makes these subjects
closer to their real shades. For the same reason, adjust toward – when shooting dark
subjects. The exposure can be adjusted in a range of ±5.0 EV.
-2.0EV
Direct button F + j
• The exposure compensation indicator is displayed. The exposure compensation indicator
will not be displayed when the exposure is compensated by 0.
• If the exposure compensation value exceeds the scale of the exposure compensation
indicator, the indicator will blink in the viewfinder. A red vw is displayed on the left and
right edges of the indicator on the super control panel.
TIPS
To change the exposure adjustment interval:
j This can be set in 1/3 EV, 1/2 EV or 1 EV increments. g“EV STEP” (P. 101)
To adjust the exposure compensation using only the control dial:
j You can set the exposure compensation value without pressing F button.
g“DIAL FUNCTION” (P. 96)
x Notes
• Exposure compensation is not available in M and s modes.
±0 +2.0EV
j
F button
Adjust toward –
Adjust toward +
2
Exposure
49
EN
Page 50
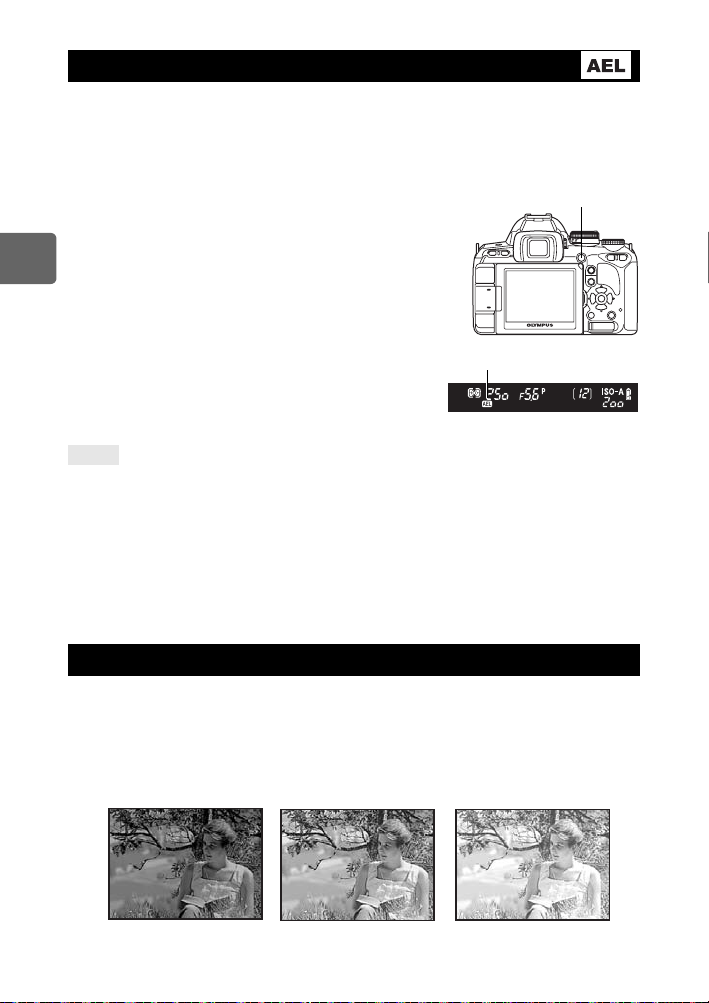
AE lock
The metered exposure value can be locked with the AEL/AFL button (AE lock). Use AE lock
when you want a different exposure setting from the one that would normally apply under the
current shooting conditions.
Normally, pressing the shutter button halfway locks both AF (auto focus) and AE (automatic
exposure), but you can lock the exposure alone by pressing the AEL/AFL button.
Press the AEL/AFL button at the position where you
wish to lock the metering values and the exposure will
be locked. The exposure is locked while the AEL/AFL
button is pressed. Now press the shutter button.
• Releasing the AEL/AFL button cancels AE lock.
2
Exposure
AE lock
TIPS
To lock the exposure:
j You can lock the metering result so that it is not cancelled when the AEL/AFL button is
released.
g“AEL/AFL MEMO” (P. 97)
If you find it difficult to press the AEL/AFL button and shutter button at the same time:
j You can switch the functions of the AEL/AFL button and the < button.
g“A” (P. 99)
To activate AE lock with a set metering mode:
j You can set the metering mode for locking the exposure with the AE lock.
g“AELMetering” (P. 101)
AEL/AFL button
Viewfinder
AE bracketing
The camera automatically shoots a number of pictures at different exposure values for each
frame. Even in conditions where correct exposure is difficult to obtain (such as a backlit
subject or a scene at dusk), you can pick the picture you prefer from a selected number of
frames with a variety of different exposure settings (exposure and compensation values). The
pictures are taken in the following order: Picture with optimum exposure, picture adjusted in –
direction, and picture adjusted in + direction.
e.g.) When BKT is set to [3F 1.0EV]
50
-1.0EV +1.0EV±0
EN
Page 51
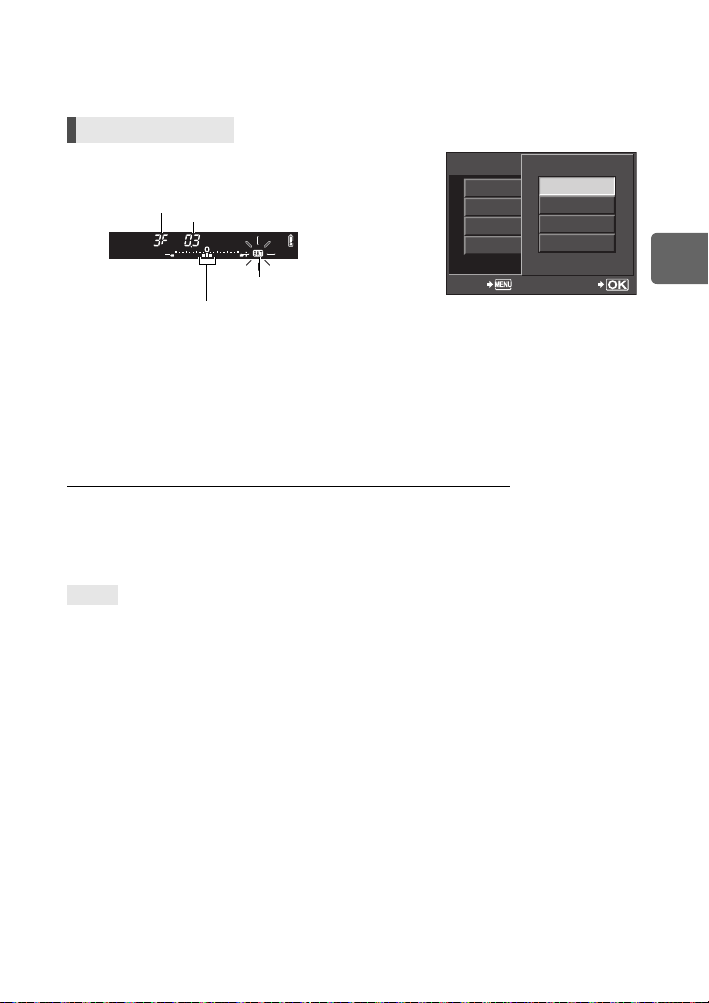
Compensation value: 0.3, 0.7 or 1.0
• The compensation value will change if the EV step is changed. g“EV STEP” (P. 101)
Number of frames: 3
Menu MENU[X][BRACKETING][AE BKT]
Setting display
Number of
frames
Viewfinder
EV STEP
Bracketing
Compensation range
• The exposure value for the remaining
frames blinks during shooting.
AE BKT
WB BKT
FL BKT
ISO BKT
AE BKT
BRACKETING
OFF
3F 0.3EV
3F 0.7EV
3F 1.0EV
SETBACK
Start shooting.
• In single-frame shooting, the exposure changes every time the shutter button is pressed.
• In sequential shooting, hold down the shutter button until the selected number of frames are
taken.
• Releasing the shutter button stops flash bracketing shooting. When it stops, 0 blinks in
the viewfinder and 0 is displayed in green on the super control panel.
How AE bracketing compensates exposure in each shooting mode
Depending on the selected shooting mode, exposure is compensated in the following way:
P mode : Aperture value and shutter speed
A mode : Shutter speed
S mode : Aperture value
M mode : Shutter speed
TIPS
To apply AE bracketing to the exposure value you have compensated:
j Compensate the exposure value, then use the AE bracketing feature. AE bracketing is applied to
the exposure value you have compensated.
2
Exposure
51
EN
Page 52
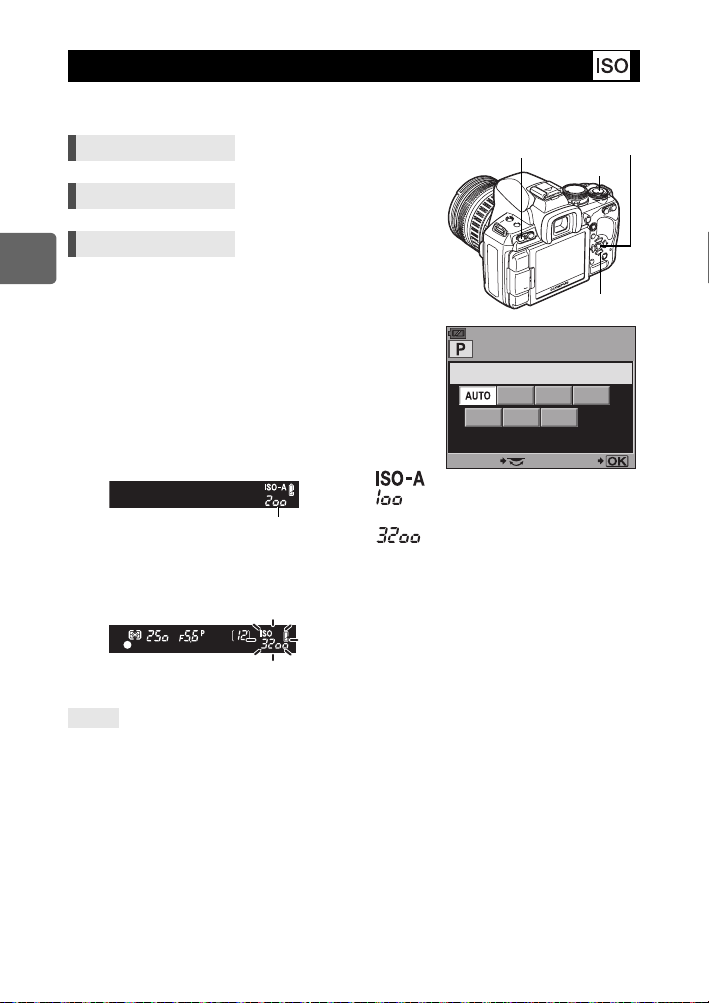
ISO sensitivity setting
The higher the ISO value, the greater the camera’s light sensitivity and the better its ability to
shoot in low light conditions. However, higher values may give pictures a grainy appearance.
Direct button ISOj
MENU button
Super control panel ip: [ISO]
Menu MENU[c][V][ISO]
2
[AUTO] : The sensitivity is set automatically
Exposure
according to the shooting conditions. For
[ISO-AUTO SET], you can set the default
(value normally used when the optimal
exposure can be obtained) and upper limit
(upper limit of ISO that automatically
[100 - 3200] : Fixed ISO sensitivity. [ISO STEP] can be
changes). g“ISO-AUTO SET” (P. 102)
changed to [1/3EV] or [1EV]. g“ISO
STEP” (P. 101)
ISO
800
100 200 400
1600
3200
Setting display
Viewfinder
When set to [AUTO], the
default value is displayed.
AUTO :
100 :
–
3200 :
–
SELECT SET
• 125 and 1250 are displayed in the viewfinder as 120 and 1200, respectively.
Display after setting
Viewfinder
TIPS
To automatically set the optimal ISO in M mode:
j Normally, the AUTO setting is not available in M mode, but you can set it for use in all shooting
modes. g“ISO-AUTO” (P. 102)
When set to [AUTO], ISO-A and the
ISO value determined by the camera
are displayed. For all other settings,
ISO and the set value are displayed.
When set to 2000 or a higher value,
ISO blinks.
i button
j
ISO button
52
EN
Page 53
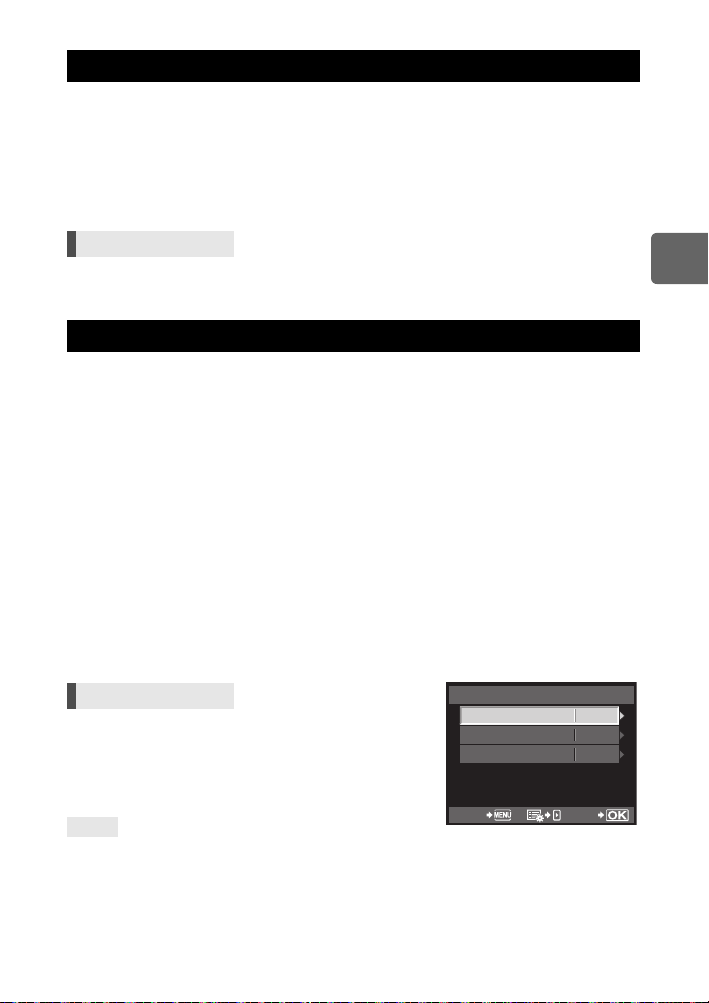
ISO bracketing
The camera automatically takes pictures at a different ISO sensitivity with the shutter speed
and aperture value fixed. 3 images with different exposures are recorded in the order of the
set ISO sensitivity (optimum exposure when set to [AUTO]), exposure in the – direction, and
exposure in the + direction.
Compensation value: 0.3, 0.7 or 1.0
• The compensation value is set in 1/3 EV increments regardless of the ISO step setting.
Number of frames: 3
Menu MENU[X][BRACKETING][ISO BKT]
x Notes
• Bracketing is performed regardless of the upper limit set with [ISO-AUTO SET].
Multiple exposure
This overlays multiple frames and saves it as a single image. The image is saved with the
record mode set at the time the image is saved.
You can overlay an image while taking a picture or overlay a recorded image in playback
mode.
MULTIPLE EXPOSURE
In shooting mode, 2 frames of pictures taken can be overlaid and saved as a single image.
You can also select a stored RAW image and shoot multiple exposures to create an overlay
image.
[FRAME] :Select [2F].
[AUTO GAIN] : When set to [ON], the brightness of each frame is set to 1/2 and the images
[OVERLAY] : When set to [ON], a RAW image recorded on a card can be overlaid with
IMAGE OVERLAY
In playback mode, up to 3 frames of RAW images can be overlaid and saved as a single
image. g“Image overlay” (P. 89)
are overlaid. When set to [OFF], the images are overlaid with the original
brightness of each frame.
multiple exposures and stored as a separate image. The number of
pictures taken is one.
2
Exposure
Menu MENU[X][MULTIPLE
Setting display
• When multiple exposure is set, i is displayed on the
super control panel. When shooting is interrupted, i is
displayed in green.
TIPS
To cancel the image during shooting:
j Pressing the D button cancels the last picture taken.
To shoot multiple exposures while checking the composition for each frame:
j Take pictures using live view. The overlay images are displayed semi-transparently on the LCD
monitor so you can shoot while checking the position of the image overlay.
To overlay 3 or more frames:
j To overlay 3 or more frames, save the image as a RAW file and use [OVERLAY] to repeat the
multiple exposure shooting.
EXPOSURE]
MULTIPLE EXPOSURE
FRAME
AUTO GAIN
OVERLAY
BACK SET
OFF
OFF
OFF
53
EN
Page 54

2
Exposure
x Notes
• When multiple exposure is set, [SLEEP] is set to [OFF] automatically.
• RAW images taken with another camera cannot be used for the overlay image.
• When [OVERLAY] is set to [ON], the images displayed when a RAW image is selected are
developed with the settings at the time of shooting.
• To set the shooting functions, cancel multiple exposure shooting first. Some functions cannot
be set.
• Multiple exposure is cancelled automatically in the following situations.
The camera is turned off/The q button is pressed/The battery power runs out/The card
cover is opened/The card is replaced/The LCD monitor is closed/The USB cable is inserted
• The information for the first frame during multiple exposure shooting is displayed as the
shooting information.
• When a RAW image is selected using [OVERLAY], the JPEG image for the image recorded
in JPEG+RAW is displayed.
• When shooting multiple exposures using bracketing, priority is given to multiple exposure
shooting. While the overlay image is being saved, bracketing is reset to the factory default
setting.
54
EN
Page 55
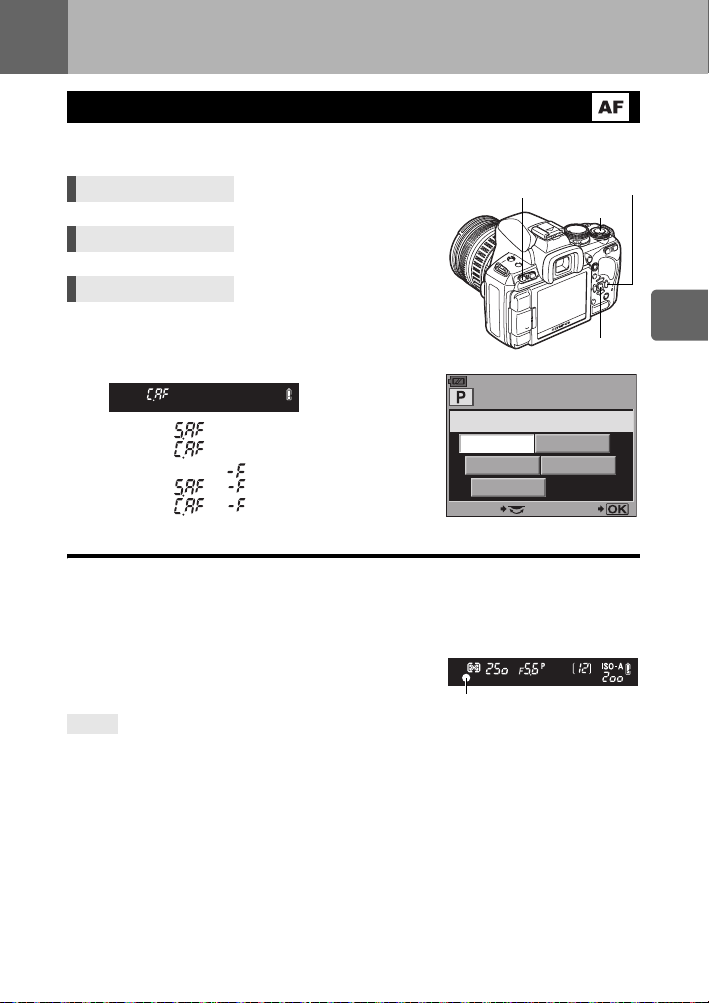
3 Focusing and shooting functions
AF mode selection
The three focus modes S-AF, C-AF, and MF are available with this camera.
You can take pictures by combining S-AF or C-AF mode with MF mode.
Direct button AFj
MENU button
AF button
j
Super control panel ip: [AF MODE]
Menu MENU[c][R]
[AF MODE]
Setting display
S-AF :
C-AF :
MF :
S-AF+MF:
C-AF+MF:
Viewfinder
AF MODE
S-AF
MF S
-AF+
C
SELECT SET
MF
i button
C-
AF
-AF+
MF
S-AF (single AF)
Focusing is performed once when the shutter button is pressed halfway.
If focusing fails, release your finger from the shutter button and press it halfway again. This
mode is suitable for taking pictures of still subjects or subjects with limited movement.
Press the shutter button halfway.
• When the focus is locked, the AF confirmation mark lights
up.
• A beep sound is outputted when the subject is in focus.
TIPS
When it is difficult to focus in the AF mode in low-light conditions:
j The built-in flash can function as an AF illuminator. This makes focusing easier in low-light
conditions using AF mode. g“AF ILLUMINAT.” (P. 95)
When you want to quickly switch from AF mode to MF:
j By registering [MF] to the < button, you can press the < button to switch to MF mode.
g“; FUNCTION” (P. 97)
When you want to be able to shoot even if the subject is not in focus:
j See “RLS PRIORITY S/RLS PRIORITY C” (gP. 99).
To not light up the AF target in the viewfinder when the subject is in focus:
j The AF target in the viewfinder lights red when the subject is in focus. You can set the AF target
so as not to turn on. g“AF AREA POINTER” (P. 95)
Viewfinder
AF confirmation mark
3
Focusing and shooting functions
55
EN
Page 56
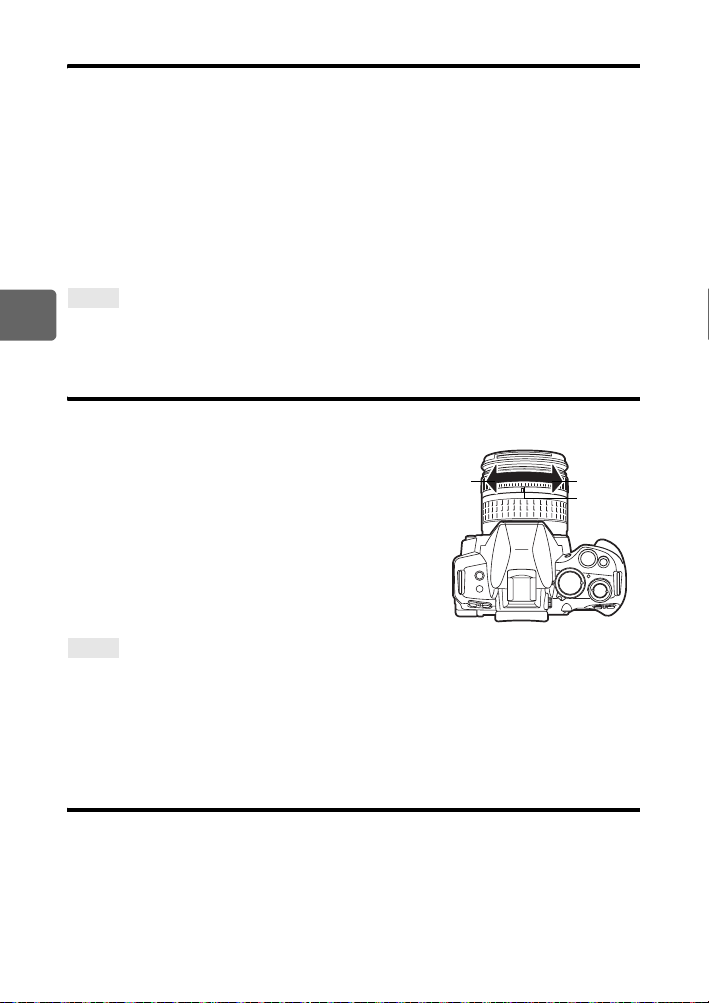
C-AF (continuous AF)
The camera repeats focusing while the shutter button remains pressed halfway. When the
subject is in motion, the camera focuses on the subject in anticipation of its movement
(Predictive AF). Even if the subject moves or you change the composition of the picture, the
camera continues trying to focus.
Press the shutter button halfway and keep it in this position.
• When the subject is in focus and locked, the AF confirmation mark lights up.
• The AF target does not light up, even when the subject is in focus.
• The camera repeats focusing. Even if the subject moves or even if you change the
composition of the picture, focusing is tried continuously.
• A beep sound is outputted when the subject is in focus. The beep sound is not outputted
after the third continuous AF operation, even when the subject is in focus.
TIPS
The camera focuses on something passing in front of the subject:
3
j You can set the camera so as not to change the focus even if the distance to the subject
Focusing and shooting functions
changes. g“C-AF LOCK” (P. 95)
MF (manual focus)
This function allows you to manually focus on any subject.
Adjust the focus using the focus ring.
)
Near
Focus ring
TIPS
To change the rotational direction of the focus ring:
j You can select the rotational direction of the focus ring to suit your preference for how the lens
adjusts to the focusing point. g“FOCUS RING” (P. 96)
For information on whether the subject is in focus (Focus aid):
j When you focus the lens on a subject manually (by turning the focus ring), the AF confirmation
mark lights. When b is set with [AF AREA], AF confirmation lights up if the subject is in focus
at the center AF target.
Simultaneous use of S-AF mode and MF mode (S-AF+MF)
This function allows you to fine-adjust the focus manually by turning the focus ring after AF is
performed in the S-AF mode.
• Press the shutter button halfway. After AF is confirmed, rotate the focus ring to fine-adjust
the focus.
x Notes
• If the shutter button is pressed again after fine-adjusting the focus with the focus ring, the AF
is activated and your adjustments are cancelled.
56
EN
Page 57
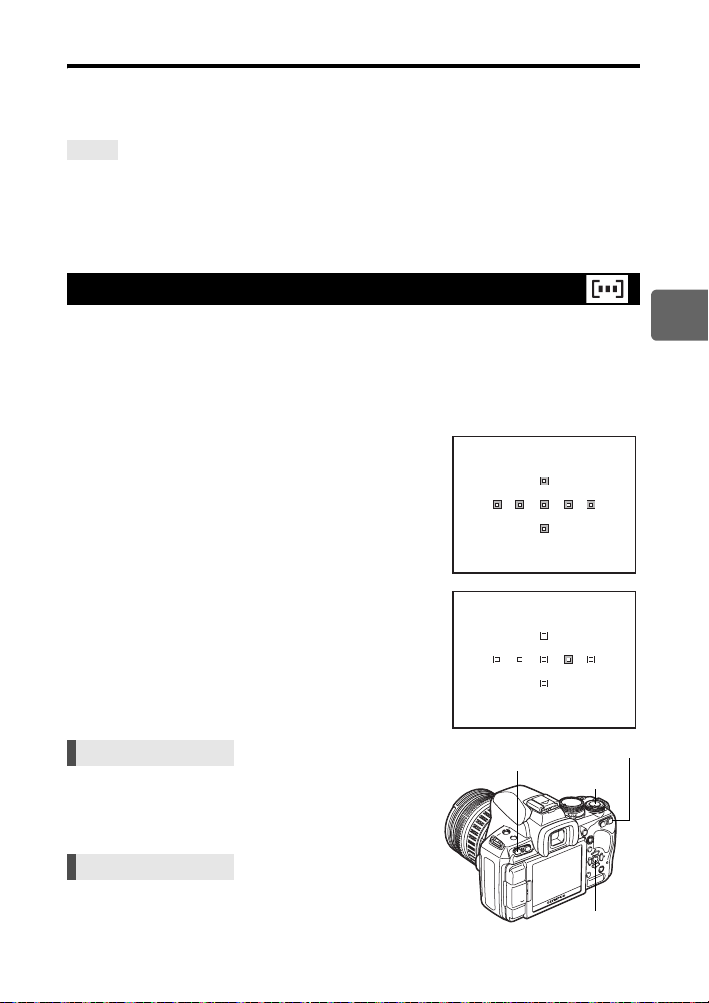
Simultaneous use of C-AF mode and MF mode (C-AF+MF)
Focus with the focus ring and press the shutter button halfway to activate C-AF mode.
• While the shutter button is kept pressed, MF cannot be used.
• When the shutter button is not pressed, focusing with MF is possible.
TIPS
Another way to adjust focus manually in C-AF mode:
j You can set the AEL/AFL button to operate C-AF. g“AEL/AFL” (P. 97)
x Notes
• If the shutter button is pressed again after fine-adjusting the focus with the focus ring, the AF
is activated and your adjustments are cancelled.
AF target selection
This camera has 7 AF targets for focusing on the subject with auto focus. Select the optimal
AF target mode according to your subject and the composition.
There are two AF target modes: All target AF mode, which uses AF at all AF targets, and
Single target AF mode, which uses AF centering around one selected AF target.
When [LIVE VIEW AF MODE] is set to [IMAGER AF], 11 AF targets will be available during
live view. g“Taking a picture using live view” (P. 36)
bAll target AF mode
The camera automatically focuses on the subject in front of
the camera from among the 7 AF targets. This is useful for
shooting moving subjects or relying on the camera for
focusing.
MSingle target AF mode
(o Small-single target AF mode)
The camera focuses using one selected AF target. This is
useful for accurately focusing on the subject after
composing the shot. With M, you can focus using a range
that is somewhat larger than one AF target, but you can only
set the range within the AF target.
When
[SMALL]
is selected for
display changes to
Direct button Pj
• The currently selected AF target lights. When M is set,
you can select the AF target to be used at that point. For
operation, refer to Step 2 in “Selecting the AF target
mode and position” (gP. 58) in the next section.
o. g
[AF SENSITIVITY]
“AF SENSITIVITY” (P. 95)
, the setting
MENU button
P button
j
3
Focusing and shooting functions
Super control panel ip: [AF AREA]j
• When M is set, you can turn the control dial to select
the AF target.
i button
57
EN
Page 58
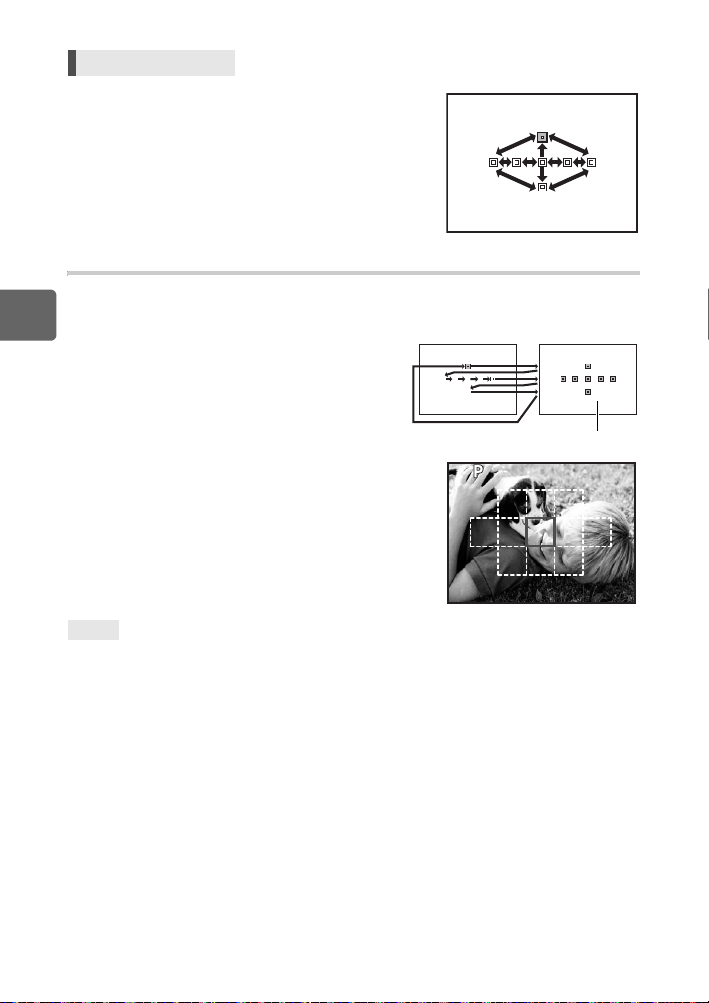
Menu MENU[c][R][AF AREA]
250
F5.6
• When M is set, you can select the AF target with p.
Selecting the AF target mode and position
Select the AF target mode or select the AF target to use with Single target AF mode.
3
1 Press the P button to enable selection of the AF target mode and position.
Focusing and shooting functions
2 Use the control dial or arrow pad to select the
AF target.
The control dial moves in hi directions.
• Press the i button to return the position of the AF
target to the center.
• When [IMAGER AF] is set, you can use the P
button or super control panel to select the AF target. Use
the control dial or arrow pad to select the AF target.
TIPS
Selecting the position of the AF target with the arrow pad without pressing the P
button:
j Press the shutter button halfway and release it, then use the arrow pad to change the position of
the AF target. g“n FUNCTION” (P. 99)
250
F5.6
Set to b.
58
EN
Page 59
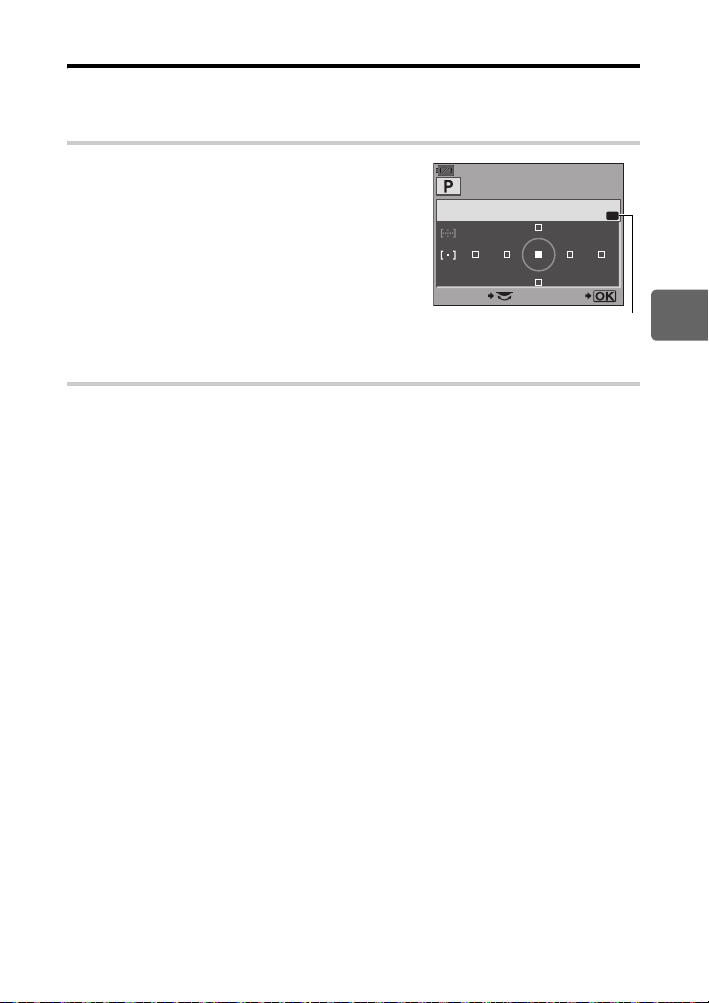
Registering an AF target mode
You can register a frequently used AF target mode and the position of that AF target. You can
then quickly load that registered setting (“home position”) and use it when shooting.
Registering
1 In the screen of Step 2 of “Selecting the AF
target mode and position” (gP. 58), press the
< button and F button at the same time.
• The home position is registered at the time the buttons
are pressed.
• The home position cannot be registered when
operated from a menu.
AF AREA
HP
SELECT
Indicates that the AF target
is being registered.
Shooting
To use this function, you must assign the [PHOME] function to the < button in advance.
g“; FUNCTION” (P. 97)
SET
1 Press the < button.
• The registered home position is selected. Press this button again to switch to the original AF
target mode.
x Notes
• The AF sensitivity is not recorded when registering the home position.
3
Focusing and shooting functions
59
EN
Page 60
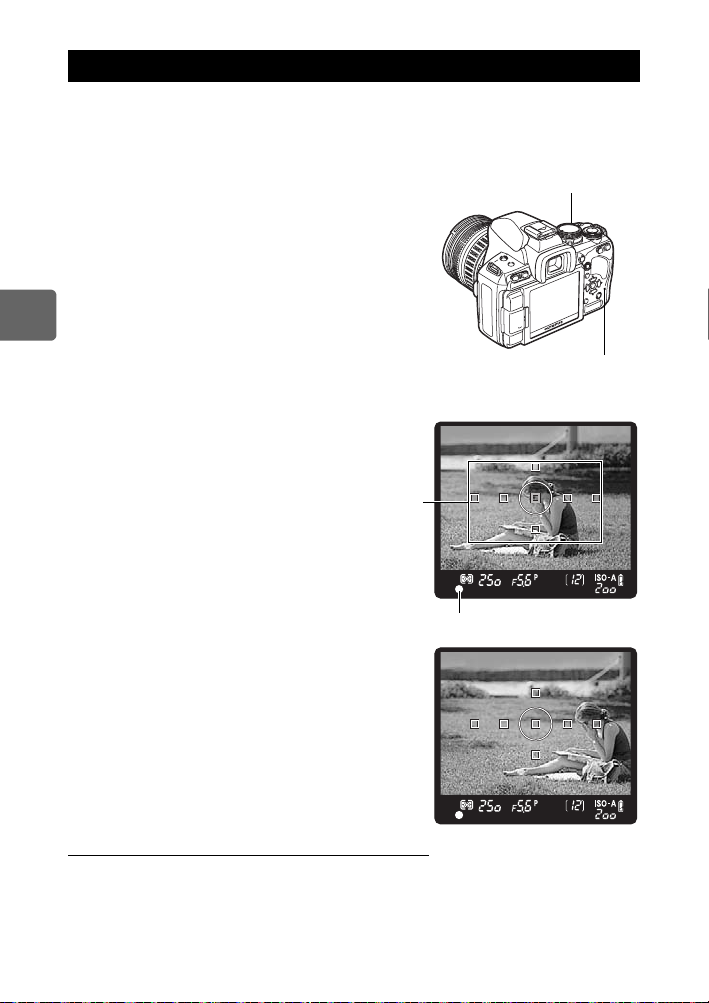
Focus lock k If correct focus cannot be obtained
The camera’s auto focus may not be able to focus on the subject in situations such as when
the subject is not in the center of the frame. If this happens, the easiest solution is to use
focus lock. Use this when composing the subject outside of the AF targets or when the
subject is difficult to focus on.
1 Adjust the AF target with the subject to be
focused and press the shutter button halfway
until the AF confirmation mark lights up.
• The focus is locked. The AF confirmation mark and
the AF target in focus light up in the viewfinder.
• If the AF confirmation mark blinks, press the shutter
button halfway again.
• While the shutter button is being pressed, the super
control panel disappears.
3
Focusing and shooting functions
2 While pressing the shutter button halfway,
move to the desired composition and press the
button all the way.
• The card access lamp blinks while the picture is being
stored on the card.
AF target
Shutter button
Card access lamp
e.g.)The camera focuses using the
center AF target.
AF confirmation mark
If the subject has lower contrast than its surroundings
If the contrast of the subject is weak, such as when the lighting is insufficient or the subject
cannot be seen clearly because of fog, the focus may not be achieved. Focus (focus lock) on
a high-contrast object the same distance away as the intended subject, recompose your shot
and then take the picture.
60
EN
Page 61
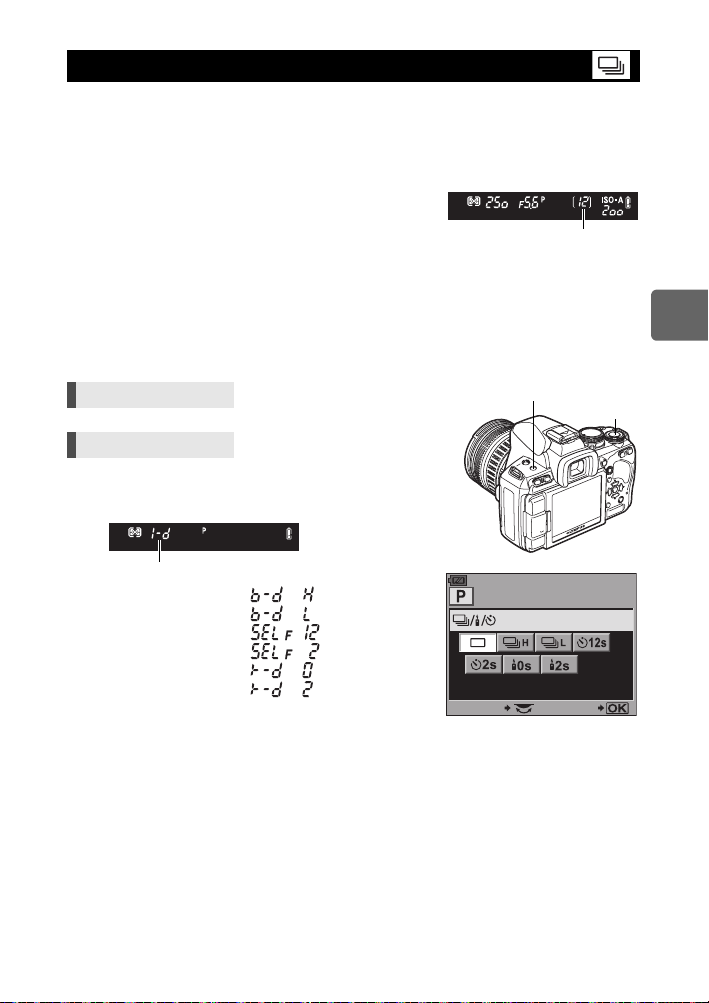
Sequential shooting
Single-frame shooting o Shoots 1 frame at a time when the shutter button is pressed
Sequential shooting H l Shoots at 4 frames/sec. for as long as the shutter button is
Sequential shooting L O Shoots at the set speed (“O fps” (gP. 99)) for as long as
• Press the shutter button fully and keep it pressed. The
camera will take pictures in sequence until you release
the button.
• Focus, exposure, and white balance are locked at the first
frame (during S-AF, MF).
x Notes
• During sequential shooting, if the battery check blinks due to low battery, the camera stops
shooting and starts saving the pictures you have taken on the card. The camera may not save
all of the pictures depending on how much battery power remains.
Setting method
Direct button </Y/jj
Super control panel ip: [j/</Y]
Setting display
Viewfinder
Single-frame shooting
Sequential shooting H :
Sequential shooting L :
12-second self-timer :
2-second self-timer :
Remote control :
2-second remote control :
• Anti-shock display:
A blinking display in the viewfinder and the
D symbol on the super control panel indicates that anti-shock is activated.
g“ANTI-SHOCK” (P. 102)
(normal shooting mode).
pressed (during S-AF, MF).
the shutter button is pressed.
Number of sequential shots
that can be taken
</Y/j button
SELECT SET
j
3
Focusing and shooting functions
61
EN
Page 62
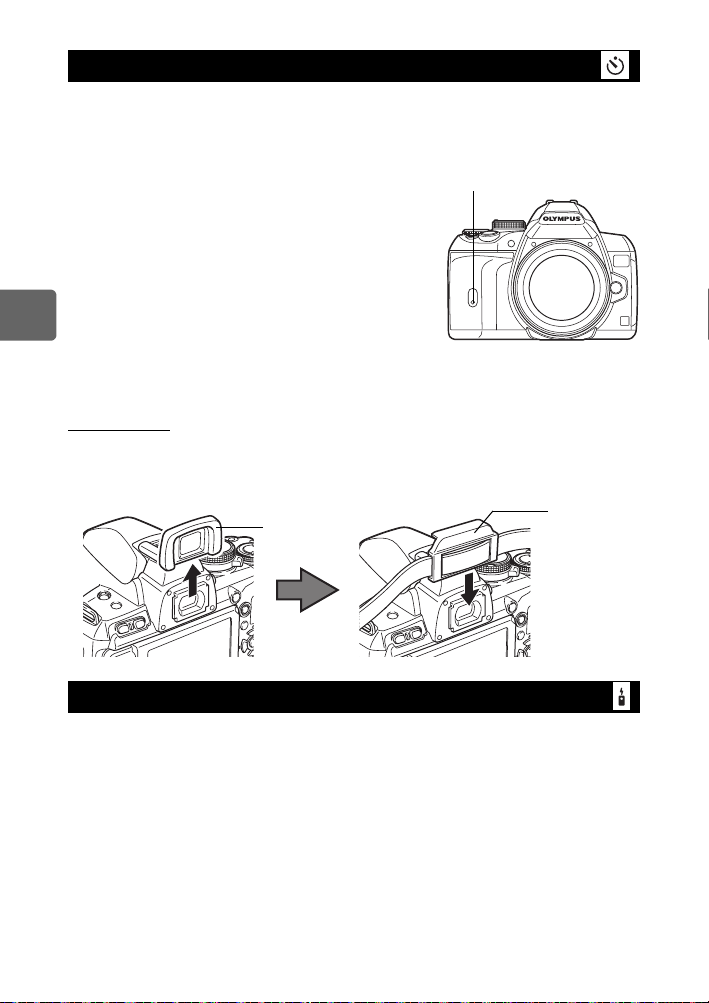
Self-timer shooting
This function lets you take pictures using the self-timer. You can set the camera to release
the shutter after either 12 or 2 seconds. Fix the camera securely on a tripod for self-timer
shooting.
For the setting method, see “Sequential shooting” (gP. 61).
Press the shutter button all the way.
• When Y12s is selected:
First, the self-timer lamp lights up for approximately
10 seconds, then it blinks for approximately
2 seconds and the picture is taken.
• When Y2s is selected:
The self-timer lamp blinks for approximately
2 seconds, and then the picture is taken.
• To cancel the activated self-timer, press the </Y/j
3
button.
Focusing and shooting functions
x Notes
• Do not press the shutter button while standing in front of the camera; this could result in the
subject being out of focus since focusing is performed when the shutter button is pressed
halfway.
Eyepiece cover
When shooting without looking through the viewfinder, attach the eyepiece cover to the
viewfinder to prevent the light entering the viewfinder from changing the exposure. Attach the
eyepiece cover after removing the eyecup as illustrated. The same applies when replacing
with an optional eyecup.
Eyecup
Self-timer lamp
Eyepiece cover
Remote control shooting
By using the optional remote control (RM-1), you can take a picture with yourself in it or a
night scene without touching the camera.
The camera can be set to release the shutter either right away or 2 seconds after the shutter
button on the remote control is pressed. Bulb shooting is also possible when using the
optional remote control.
For the setting method, see “Sequential shooting” (gP. 61).
• Shooting can also be done using an optional remote control cable (RM-UC1).
62
EN
Page 63
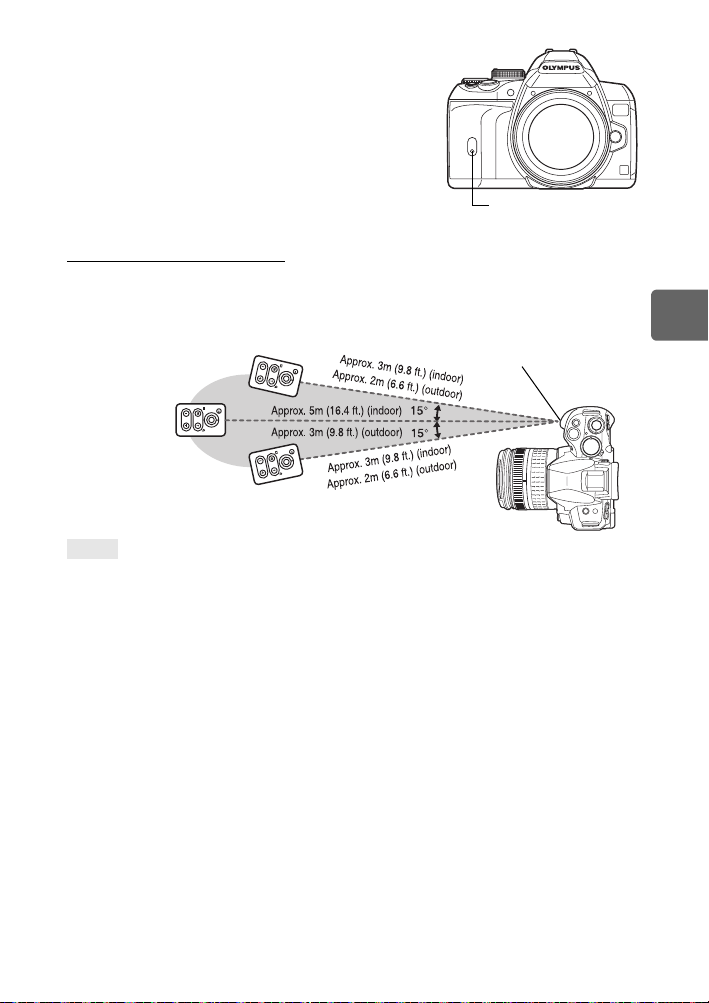
Mount the camera securely on a tripod, point the
remote control at the remote control receiver on the
camera and press the shutter button on the remote
control.
• When <0s is selected:
The focus and exposure are locked, the remote
control lamp blinks and the picture is taken.
• When <2s is selected:
The focus and exposure are locked, the remote
control lamp blinks, and after approximately
2 seconds the picture is taken.
Transmitted signal effective area
Point the remote control at the remote control receiver of the camera within the effective area
as shown below.
When powerful lighting such as direct sunlight is shining on the remote control receiver, or
when fluorescent light or devices emitting electrical or radio waves are nearby, it could
narrow the effective area.
Remote control
TIPS
The remote control lamp does not blink after the shutter button on the remote control
is pressed:
j The transmitted signal may not be effective if the remote control receiver is exposed to powerful
lighting. Move the remote control closer to the camera and press the shutter button on the remote
control again.
j The transmitted signal may not be effective if the remote control is too far from the camera. Move
the remote control closer to the camera and press the shutter button on the remote control again.
j There is signal interference. Point the remote control toward the remote control receiver on the
camera and press and hold down the CH button and the W or T zoom button on the remote
control at the same time for at least three seconds until the remote control lamp on the camera
blinks or a beep sound can be heard, indicating that the signal has been received.
To cancel the remote control shooting mode:
j The remote control shooting mode will not be cancelled after shooting. Press the </Y/j button
to set to [o] (single-frame shooting), etc.
To use the shutter button on the camera in the remote control shooting mode:
j The shutter button on the camera still works even in the remote control shooting mode.
x Notes
• The shutter will not be released if the subject is not in focus.
• Under bright light conditions, the remote control lamp may be difficult to see, making it hard to
determine whether or not the picture has been taken.
• Zoom is not available on the remote control.
Remote control lamp
Remote control receiver
Remote control receiver
3
Focusing and shooting functions
63
EN
Page 64
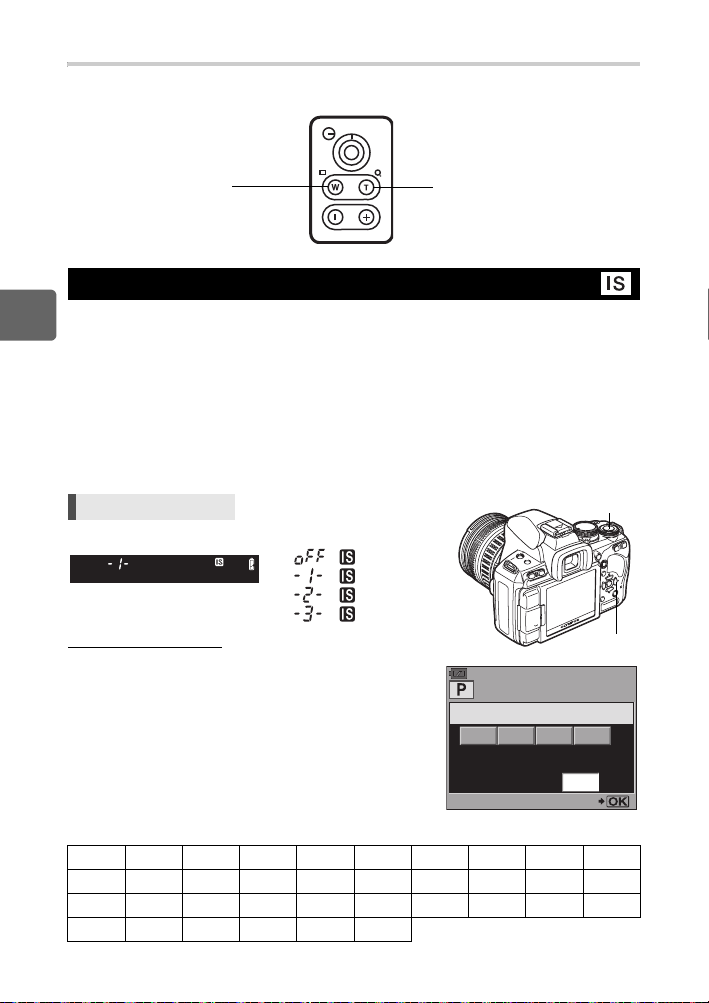
Bulb shooting with the remote control
Set the mode dial to M, then set the shutter speed to [BULB].
g“Bulb shooting” (P. 47)
Press the W button on the remote
control to open the shutter.
When the time set in “BULB
TIMER” (gP. 102) elapses, the
shutter closes automatically.
Press the T button to close the
shutter.
Image stabilizer
You can reduce the amount of camera shake that easily occurs when shooting in low light
3
situations or shooting with high magnification.
Focusing and shooting functions
OFF Image stabilizer is off.
I.S. 1 Image stabilizer is on.
I.S. 2 This is used for panning with the camera in the horizontal direction to achieve a
blurred background. The horizontal image stabilizer is turned off, and only the
vertical image stabilizer is activated.
I.S. 3 This is used for panning with the camera in the vertical direction to achieve a blurred
background (tilting). The vertical image stabilizer is turned off, and only the horizontal
image stabilizer is activated.
Direct button oj
j
Viewfinder
: OFF
: I.S. 1
: I.S. 2
: I.S. 3
Setting the focal length
By setting the focal length of the lens in advance, you can
use the image stabilizer function with lenses other than
Four Thirds system lenses. This setting is deactivated
when a Four Thirds system lens is attached.
1 Press the F button when the image stabilizer is
IMAGE STABILIZER
I.S. 1 I.S. 2 I.S. 3
OFF
turned on.
2 Use the control dial or fg to set the focal length
and press i.
FOCAL LENGTH
Focal lengths that can be set
8mm 10mm 12mm 16mm 18mm 21mm 24mm 28mm 30mm 35mm
40 mm 48 mm 50 mm 55 mm 65 mm 70 mm 75 mm 80 mm 85 mm 90 mm
100 mm 105 mm 120 mm 135 mm 150 mm 180 mm 200 mm 210 mm 250 mm 300 mm
350 mm 400 mm 500 mm 600 mm 800 mm
64
• If the focal length of the lens you are using is not listed, select the closest value.
EN
1000 mm
o button
50
SET
mm
Page 65

x Notes
• The image stabilizer cannot correct excessive camera shake or camera shake that occurs
when the shutter speed is set to the slowest speed. In these cases, it is recommended that
you use a tripod.
• When using a tripod, set [IMAGE STABILIZER] to [OFF].
• When using a lens with an image stabilization function, turn off the image stabilization
function of either the lens or the camera.
• If [IMAGE STABILIZER] is set to [I.S.1], [I.S.2] or [I.S.3] and you turn off the camera, the
camera will vibrate. This is due to the camera initializing the image stabilizer mechanism.
Without this initialization, the image stabilizer may not be able to achieve the proper effect.
• You may notice an operating sound or vibration when the image stabilizer is activated.
• If the image stabilizer icon blinks in red on the monitor, it indicates a failure of the image
stabilizer function. If you take a picture as is, the composition may be off. Consult your
Olympus Authorized Service Center.
• The image stabilizer will not activate at shutter speeds of over 2 seconds.
• If the internal temperature of the camera exceeds the specified temperature, the image
stabilizer is deactivated and the image stabilizer icon lights red on the monitor.
Setting the beep sound
When set to [OFF], you can turn off the beep sound that is emitted when the focus locks by
pressing the shutter button.
Menu MENU[X][8]
3
Focusing and shooting functions
65
EN
Page 66
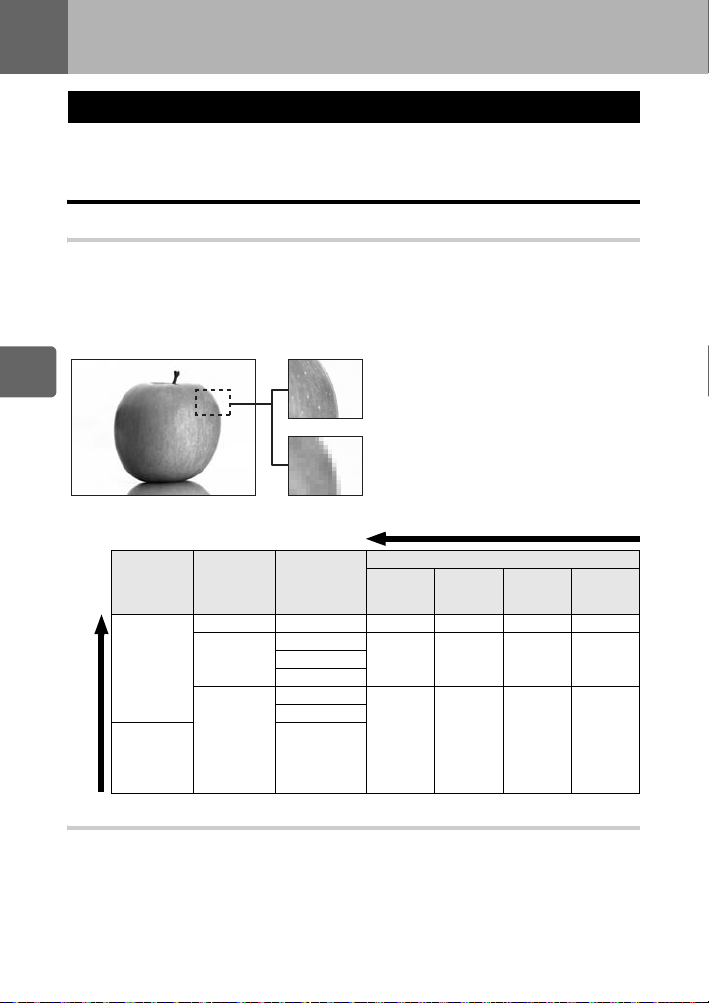
4
Record mode, white balance, and picture mode
Selecting the record mode
You can select a record mode in which to take pictures. Choose the record mode that is best
for your purpose (printing, editing on a PC, website editing, etc.).
Recording formats
JPEG
For JPEG images, select a combination of image size (Y, X, W) and compression rate (SF,
F, N, B). An image consists of pixels (dots). When you enlarge an image with a low pixel
count, it will be displayed as a mosaic. If an image has a high pixel count, the file size
(amount of data) will be larger and the number of storable still pictures will be lower. The
higher the compression, the smaller the file size. However, the image will have less clarity
when played back.
4
Record mode, white balance, and picture mode
Image with a high pixel count
Image with a low pixel count
Image becomes clearer
Compression rate
F
(Fine)
1/4
N
(Normal)
1/8
Application
Select for the
print size
For smallsized prints
and use on a
web site
Number of pixels increases
Number of
pixels
Y (Large) 4032 × 3 024 YSF YF YN YB
X (Middle)
W (Small)
Pixel
count
3200 × 2400
1600 × 1200
1280 × 960
1024 × 768
640 × 480
SF (Super
Fine)
1/2.7
XSF XF XN XB2560 × 1920
WSF WF WN WB
RAW
This is unprocessed data that has not undergone changes in white balance, sharpness,
contrast or color. To display as an image on the computer, use OLYMPUS Master. RAW data
cannot be displayed on a different camera or by using common software, and it cannot be
selected for print reservation. RAW files are assigned an “.ORF” file extension.
RAW images can be edited with this camera and saved as JPEG data. g“Editing still
images” (P. 87)
66
EN
B
(Basic)
1/12
Page 67
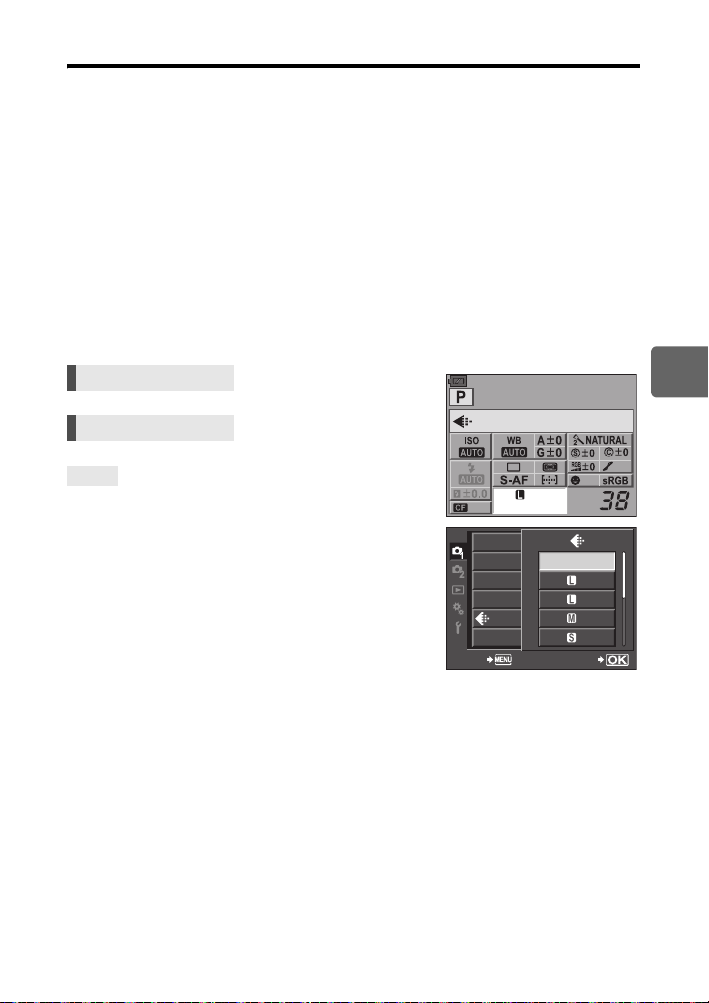
Selecting the record mode
JPEG
For JPEG, you can register 4 combinations of images sizes (Y, X, W) and compression
rates (SF, F, N, B) from the 12 total combinations available. g“K SET” (P. 104)
When you select the X or W image size, you can further select the pixel size.
g“PIXEL COUNT” (P. 104)
JPEG+RAW
Records both a JPEG and RAW image at the same time each time you take a picture.
RAW
Records the image in RAW data format.
e.g.) The following 9 record modes are available when YF/YN/XN/WN are registered
RAW : RAW
JPEG : YF/YN/XN/WN
JPEG+RAW: YF+RAW/YN+RAW/XN+RAW/WN+RAW
Super control panel ip: [K]
Menu MENU[W][K]
TIPS
To quickly set the record mode:
j By setting [RAWK] to the < button, you can turn the
control dial while pressing the < button to change the
record mode.
Each time you press the < button, you can easily switch
between JPEG data only and JPEG and RAW data.
g“; FUNCTION” (P. 97)
To find out the file size/number of storable still
pictures for each record mode:
j “Record mode and file size/number of storable still
pictures” (gP. 135)
Normal
CARD SETUP
CUSTOM RESET
PICTURE MODE
GRADATION
IMAGE ASPECT
BACK
arge
4
Record mode, white balance, and picture mode
OFF
RAW
F
N
N
N
SET
67
EN
Page 68
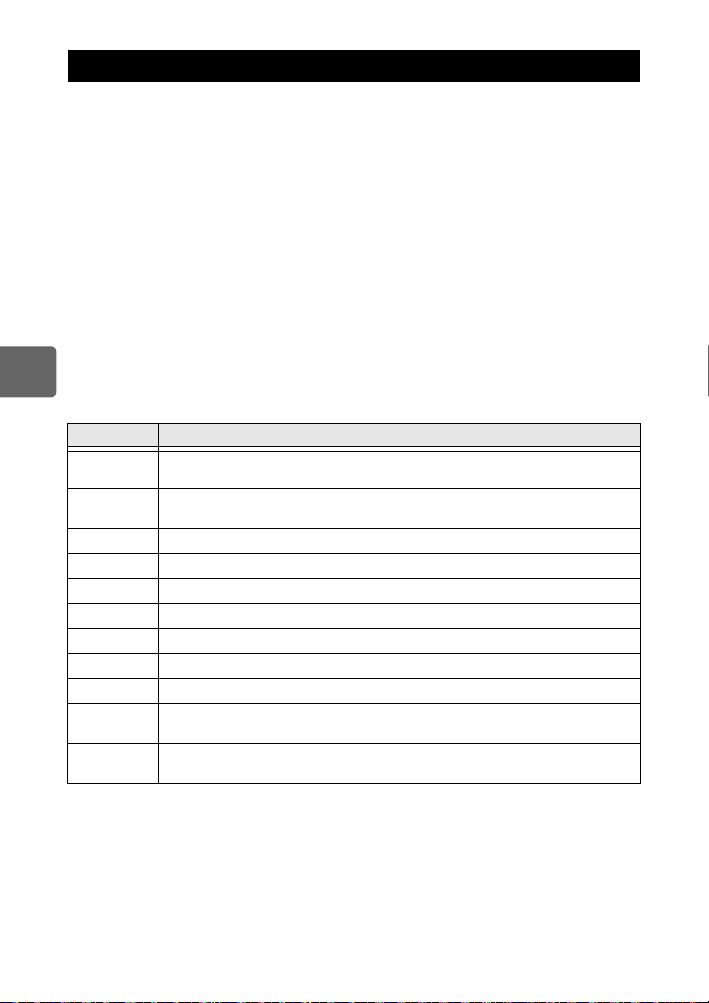
Selecting the white balance
Color reproduction differs depending on light conditions. For instance, when daylight or
tungsten lighting is reflected on white paper, the shade of white produced will be slightly
different for each. With a digital camera, white color can be adjusted to reproduce more
natural white with a digital processor. This is called white balance. There are 4 options for
setting the WB with this camera.
Auto white balance [AUTO]
This function enables the camera to automatically detect white in images and adjust the color
balance accordingly. Use this mode for general use.
Preset white balance [5][2][3][1][w][x][y][n]
8 different color temperatures are preset according to the light source. For example, use
preset WB when you want to reproduce more red in the picture of a sunset, or capture a
warmer artistic effect under artificial lighting.
Custom white balance [CWB]
You can set the color temperature from 2000K to 14000K. For details on color temperature,
refer to “White balance color temperature” (gP. 134).
One-touch white balance [V]
You can set the optimum white balance for the shooting conditions by pointing the camera at
4
a white object like a sheet of white paper. The white balance achieved with this setting is
Record mode, white balance, and picture mode
saved as one of the preset WB settings.
WB mode Light conditions
AUTO
5 5300K
2 7500K For shooting outdoors in the shadows on a clear day
3 6000K For shooting outdoors on a cloudy day
1 3000K For shooting under a tungsten light
w 4000K For shooting under white fluorescent lighting
x 4500K For shooting under a neutral white fluorescent lamp
y 6600K For shooting under a daylight fluorescent lamp
n 5500K For flash shooting
V
CWB
Used for most light conditions (when there is a white portion framed in the
viewfinder). Use this mode for general use.
For shooting outdoors on a clear day, or to capture the reds in a sunset or the
colors in a fireworks display
Color temperature set by one-touch WB.
g“Setting the one-touch white balance” (P. 70)
Color temperature set in custom white balance menu. This can be set from 2000K
to 14000K. When the value has not been set, it is set to 5400K.
68
EN
Page 69
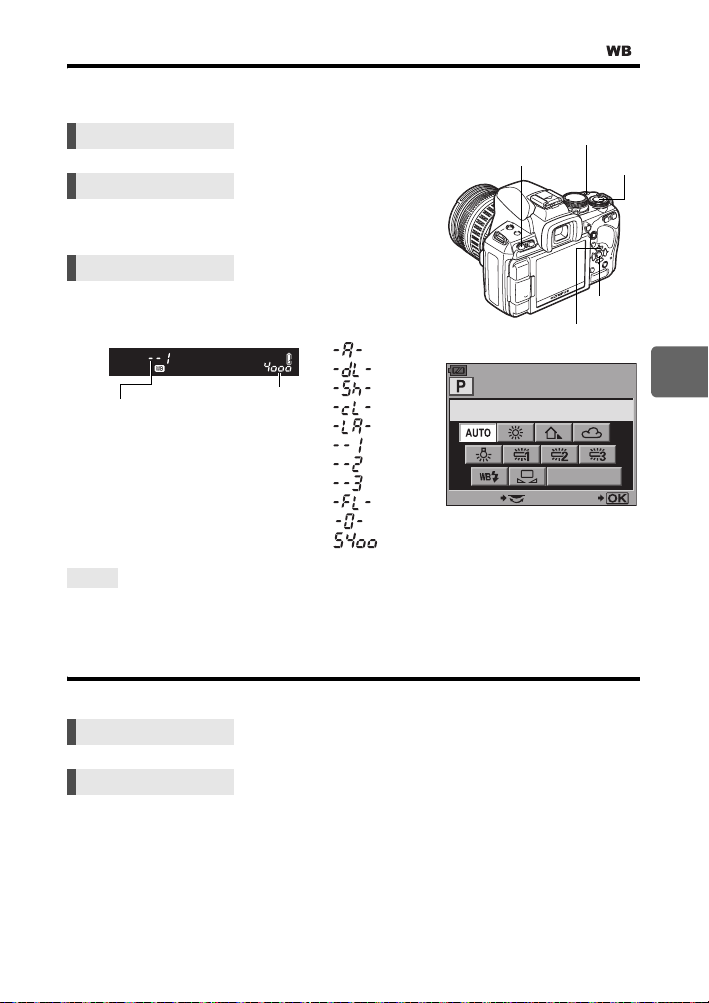
Setting the auto/preset/custom white balance
You can adjust the white balance by selecting the appropriate color temperature for the light
conditions.
Direct button WBj
MENU button
F button
j
Super control panel ip: [WB]
• Custom white balance is set by selecting [CWB] and
turning the control dial while pressing down the F button.
Menu MENU[c][X][WB]
Setting display
Viewfinder
WB mode
• During custom white balance, the
color temperature is displayed.
TIPS
When subjects that are not white appear white:
j In the auto WB setting, if there is no near-white color in the image framed in the screen, the white
balance will not be correctly determined. In such a case, try preset WB or one-touch WB settings.
Color temperature
:AUTO
: 5
: 2
: 3
: 1
: w
: x
: y
: #
: V
:CWB
WB
SELECT SET
i button
WB button
CWB 5400
WB compensation
This function lets you make fine changes to the auto WB and preset WB settings.
4
Record mode, white balance, and picture mode
Super control panel ip: [>]
Menu MENU[c][X][WB]
• Select the white balance to adjust and press i.
69
EN
Page 70
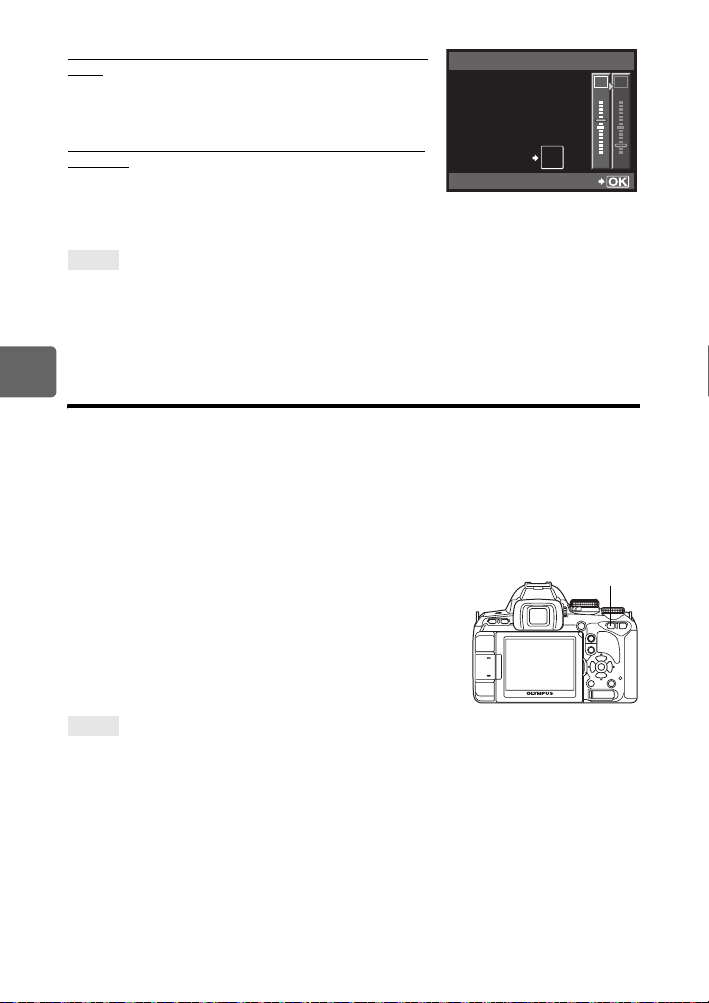
Adjusting the white balance in the A direction (AmberBlue)
Depending on the original WB conditions, the image will
become more amber when adjusted toward +, and bluer
when adjusted toward –.
Adjusting the white balance in the G direction (GreenMagenta)
Depending on the original WB conditions, the image will
become greener when adjusted toward +, and magenta
when adjusted toward –.
• The white balance can be adjusted in 7 increments in each direction.
TIPS
Checking the white balance you have adjusted:
j After setting the compensation value, point the camera at the subject to take test shots. When
the AEL/AFL button is pressed, sample images that have been taken with the current WB
settings are displayed.
Adjusting all WB mode settings at once:
j See “ALL >”(gP. 103).
4
Setting the one-touch white balance
Record mode, white balance, and picture mode
This function is useful when you need a more precise white balance than preset WB can
provide. Point the camera at a sheet of white paper under the light source you want to use to
determine the white balance. The optimum white balance for the current shooting conditions
can be saved in the camera. This is useful when shooting a subject under natural light, as
well as under various light sources with different color temperatures.
Set [; FUNCTION] to [V] beforehand. (gP. 97)
WB PREVIEW
AUTO
>
AEL
AFL
1 Point the camera at a sheet of white paper.
• Position the paper so that it fills the viewfinder. Make sure there are no shadows.
2 While holding down the < button, press the shutter
button.
• The one-touch white balance screen appears.
3 Select [YES] and press the i button.
• The white balance is registered.
• The registered white balance will be stored in the camera as
a preset WB setting. Turning the power off does not erase the
data.
A
+
2
SET
< button
G
–
5
TIPS
After pressing the shutter button, [WB NG RETRY] is displayed:
j When there is not enough white in the image, or when the image is too bright, too dark or the
colors look unnatural, you cannot register the white balance. Change the aperture and shutter
speed settings, then repeat the procedure from Step 1.
70
EN
Page 71
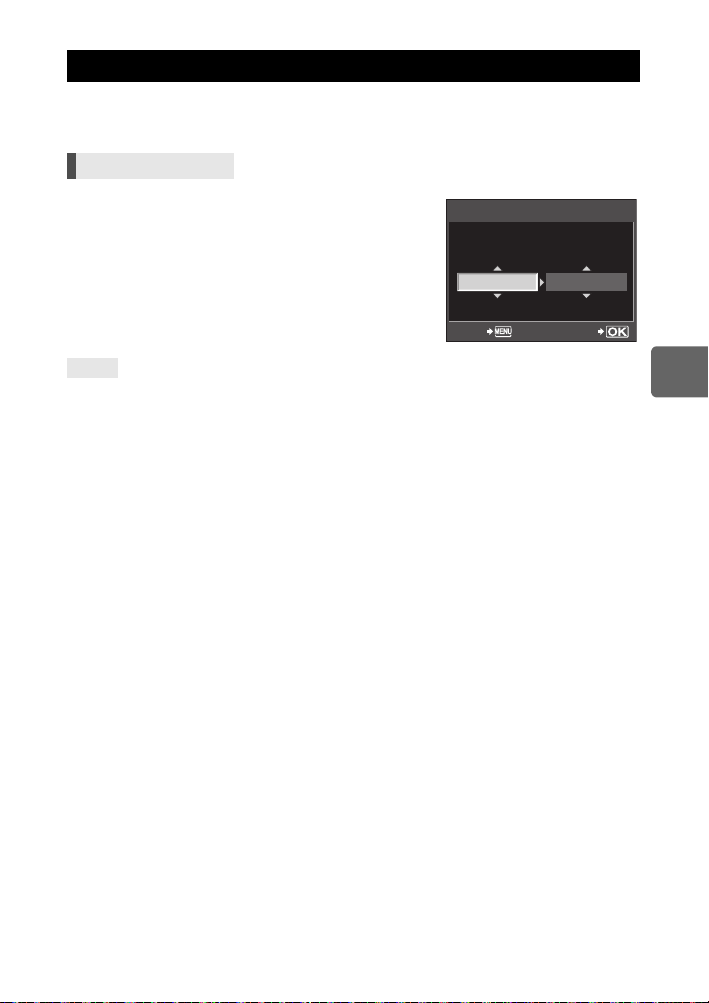
WB bracketing
Three images with different white balances (adjusted in specified color directions) are
automatically created from one shot. One image has the specified white balance, while the
others are the same image adjusted in different color directions.
Menu MENU[X][BRACKETING][WB BKT]
• Select from [OFF], [3F 2STEP], [3F 4STEP], or [3F
6STEP] for the EV step for both the A-B (amber-blue)
direction and the G-M (green-magenta) direction.
• When the shutter button is pressed down all the way,
3 images adjusted in specified color directions are
automatically created.
BACK SET
TIPS
To apply WB bracketing to the white balance:
j Adjust white balance manually, then use the WB bracketing feature. WB bracketing is applied to
the white balance you have adjusted.
x Notes
• During WB bracketing, the camera cannot shoot the pictures if there is not enough memory in
the camera and card for storing at least the selected number of frames.
WB BKT
A-BG
3F 4STEP 3F 4STEP
-
M
4
Record mode, white balance, and picture mode
71
EN
Page 72
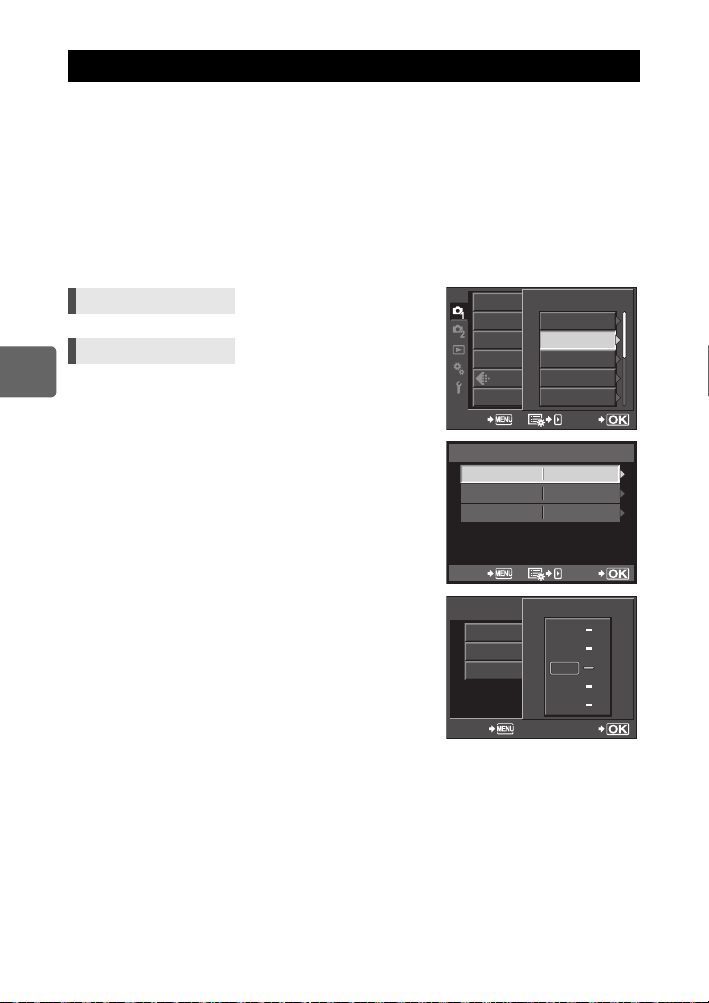
Picture mode
You can select image tone to create unique image effects. You can also fine-adjust image
parameters such as contrast and sharpness for each mode. The adjusted parameters are
recorded in each picture effect mode.
[hVIVID] : Produces vivid colors.
[iNATURAL] : Produces natural colors.
[jMUTED] : Produces flat tones.
[ZPORTRAIT] : Produces beautiful skin tones.
[MONOTONE] : Produces black and white tone.
[CUSTOM] : Select one picture mode, set the parameters, and register the setting.
You can also register the gradation to [CUSTOM]. This setting is stored
separately from [GRADATION] in the menu. g“Gradation” (P. 73)
Super control panel ip: [PICTURE MODE]
Menu MENU[W][PICTURE
4
MODE]
Record mode, white balance, and picture mode
The adjustable parameters vary according to the picture
modes.
The individual parameters are as follows.
[CONTRAST] : Distinction between light and dark
[SHARPNESS] : Sharpness of the image
[SATURATION]: Vividness of the color
[B&W FILTER] : Creates a black and white image. The
filter color is brightened and the
[N: NEUTRAL] : Creates a normal black and white
[Ye: YELLOW] : Reproduces clearly defined white
[Or: ORANGE]: Slightly emphasizes colors in blue
[R: RED] : Strongly emphasizes colors in blue
[G: GREEN] : Strongly emphasizes colors in red
[PICT. TONE] : Colors the black and white image.
[N: NEUTRAL] : Creates a normal black and white image.
[S: SEPIA] : Sepia
[B: BLUE] : Bluish
[P: PURPLE] : Purplish
[G: GREEN] : Greenish
complementary color is darkened.
image.
cloud with natural blue sky.
skies and sunsets.
skies and brightness of crimson
foliage.
lips and green leaves.
CARD SETUP
CUSTOM RESET
PICTURE MODE
GRADATION
IMAGE ASPECT
BACK
i
CONTRAST
SHARPNESS
SATURATION
BACK
i
CONTRAST
SHARPNESS
SATURATION
PICTURE MODE
h
VIVID
i
NATURAL
j
MUTED
Z
PORTRAIT
MONOTONE
SET
NATURAL
J
0
±
N
0
±
T
0
±
SET
CONTRAST
NATURAL
Lo Hi
+2
Hi
Lo Hi
+1
Lo
00
-
Lo
-
SETBACK
Hi
0
1
2
72
EN
Page 73
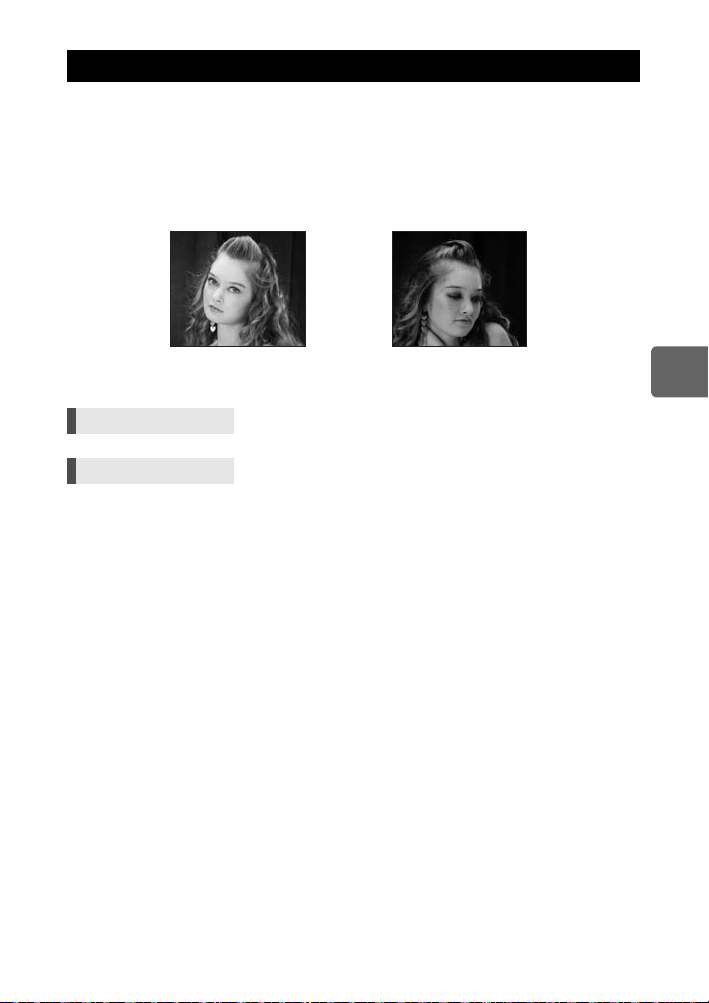
Gradation
In addition to the [NORMAL] gradation setting, you can select from 3 other gradation
settings.
[HIGH KEY]: Gradation for a bright subject.
[LOW KEY] : Gradation for a dark subject.
[AUTO] : Divides the image into detailed regions and adjusts the brightness
[NORMAL] :Use [NORMAL] mode for general uses.
separately for each region. This is effective for images with areas of large
contrast in which the whites appear too bright or the blacks appear too dark.
HIGH KEY
Suitable for a subject that
is mostly highlighted.
Super control panel ip: [GRADATION]
Menu MENU[W][GRADATION]
x Notes
• Contrast adjustment does not work when set to [HIGH KEY], [LOW KEY], or [AUTO].
LOW KEY
Suitable for a subject that
is mostly shadowed.
4
Record mode, white balance, and picture mode
73
EN
Page 74
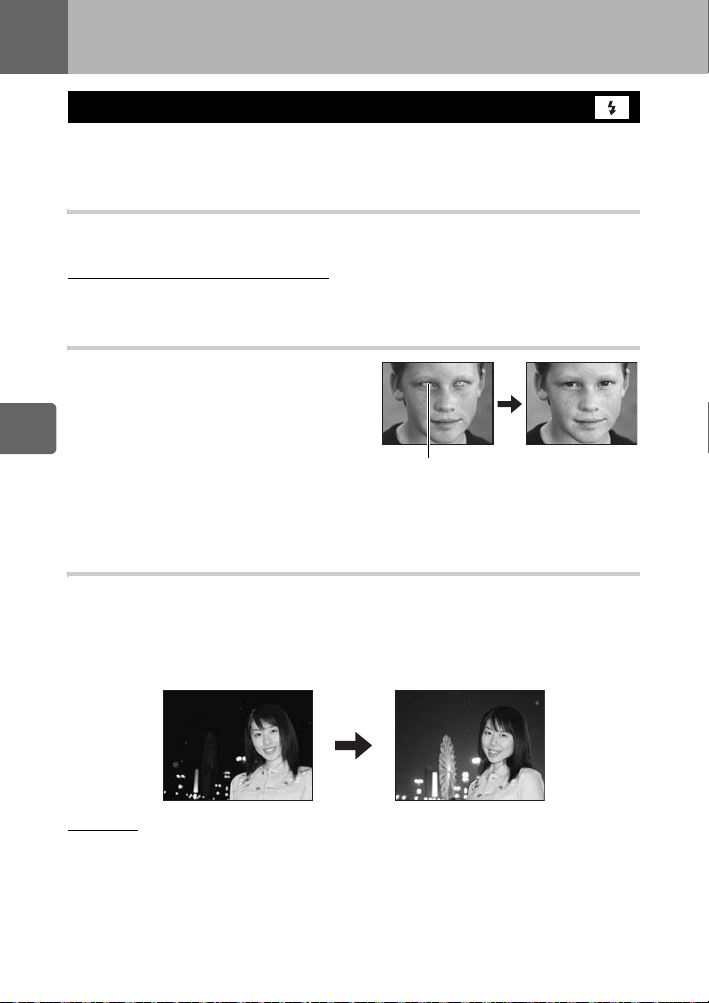
5 Flash shooting
Flash mode setting
The camera sets the flash mode according to various factors such as firing pattern and flash
timing. Available flash modes depend on the exposure mode. The flash modes are available
to optional external flashes.
Auto flash AUTO
The flash fires automatically in low light or backlight conditions.
To shoot a subject with backlighting, position the AF target over the subject.
Flash synchronization speed/Slow limit
Shutter speed can be changed when the built-in flash fires. g“#X-SYNC.” (P. 102),
“#SLOW LIMIT” (P. 102)
Red-eye reduction flash !/H
In the red-eye reduction flash mode, a series of
pre-flashes are emitted just before the regular
flash fires. This helps accustom the subject’s
eyes to the bright light and minimizes the redeye phenomenon. In S/M mode, the flash
5
always fires.
Flash shooting
x Notes
• After the pre-flashes, it takes about 1 second
before the shutter is released. Hold the camera firmly to avoid camera shake.
• Effectiveness may be limited if the subject is not looking directly at pre-flashes, or if the
shooting range is too far. Individual physical characteristics may also limit effectiveness.
Slow synchronization (1st curtain) #SLOW
The slow synchronization flash is designed for slow shutter speeds. Normally, when shooting
with a flash, shutter speeds cannot go below a certain level to prevent camera shake. But
when shooting a subject against a night scene, fast shutter speeds can make the background
too dark. Slow synchronization allows you to capture both the background and the subject.
Since the shutter speed is slow, be sure to stabilize the camera by using a tripod so as not to
cause the picture to be blurred.
The subject’s eyes appear red
1st curtain
Usually, the flash fires right after the shutter fully opens. This is called 1st curtain. This
method is usually used during flash shooting.
74
EN
Page 75
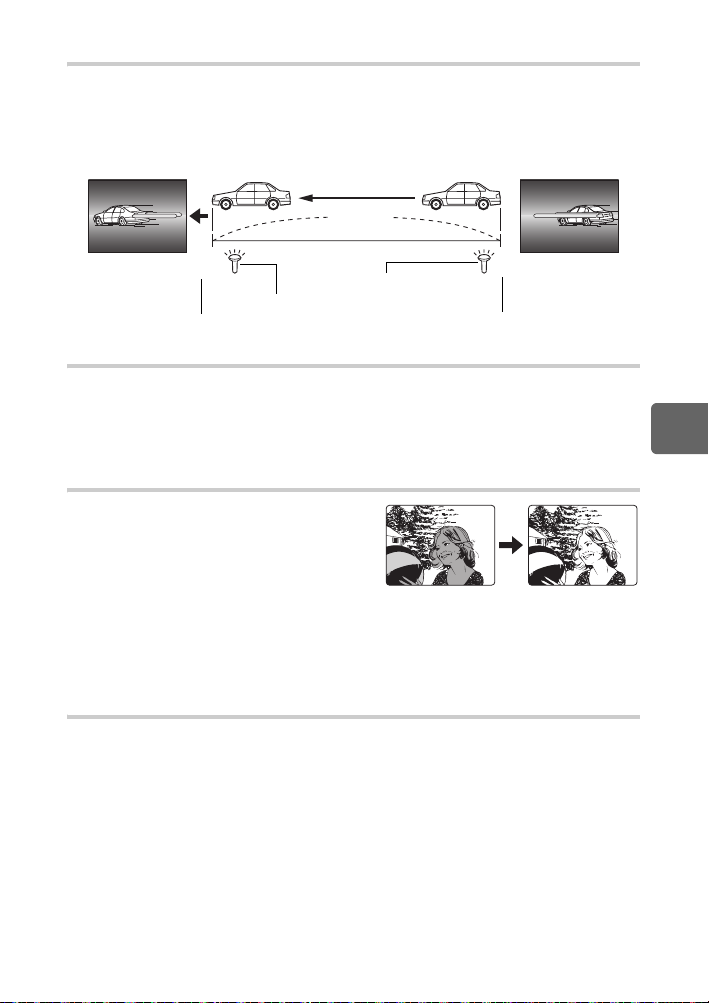
Slow synchronization (2nd curtain) #SLOW2/2nd CURTAIN
2nd curtain flash fires just before the shutter closes. Changing the flash timing can create
interesting effects in your picture, such as expressing the movement of a car by showing the
tail-lights streaming backwards. The slower the shutter speed, the better the effects turn out.
In S/M mode, the flash always fires.
When the shutter speed is set to 2 sec.
2 seconds
2nd curtain
Slow synchronization (1st curtain)/Red-eye reduction flash !SLOW
While using slow synchronization with flash shooting, you can also use this function to
achieve red-eye reduction. When shooting a subject against a night scene, this function
allows you to reduce the red-eye phenomenon. As the time from emitting pre-flashes to
shooting is long in 2nd curtain synchronization, it is difficult to achieve red-eye reduction.
Hence, only 1st curtain synchronization setting is available.
Fill-in flash #
The flash fires regardless of the light conditions.
This mode is useful for eliminating shadows on
the subject’s face (such as shadows from tree
leaves), in a backlight situation, or for correcting
the color shift produced by artificial lighting
(especially fluorescent light).
x Notes
• When the flash fires, the shutter speed is set to 1/180 sec. or less. When shooting a subject
against a bright background with the fill-in flash, the background may be overexposed. In this
case, use the optional FL-50R external flash or a similar flash and shoot in the Super FP flash
mode. g“Super FP flash” (P. 80)
Flash off $
The flash does not fire.
Even in this mode, the flash can be used as an AF illuminator when it is raised. g“AF
ILLUMINAT.” (P. 95)
2
seconds
Shutter closes
1st curtain flash fires
2nd curtain flash fires
0
1st curtain
seconds
Shutter fully opens
5
Flash shooting
75
EN
Page 76
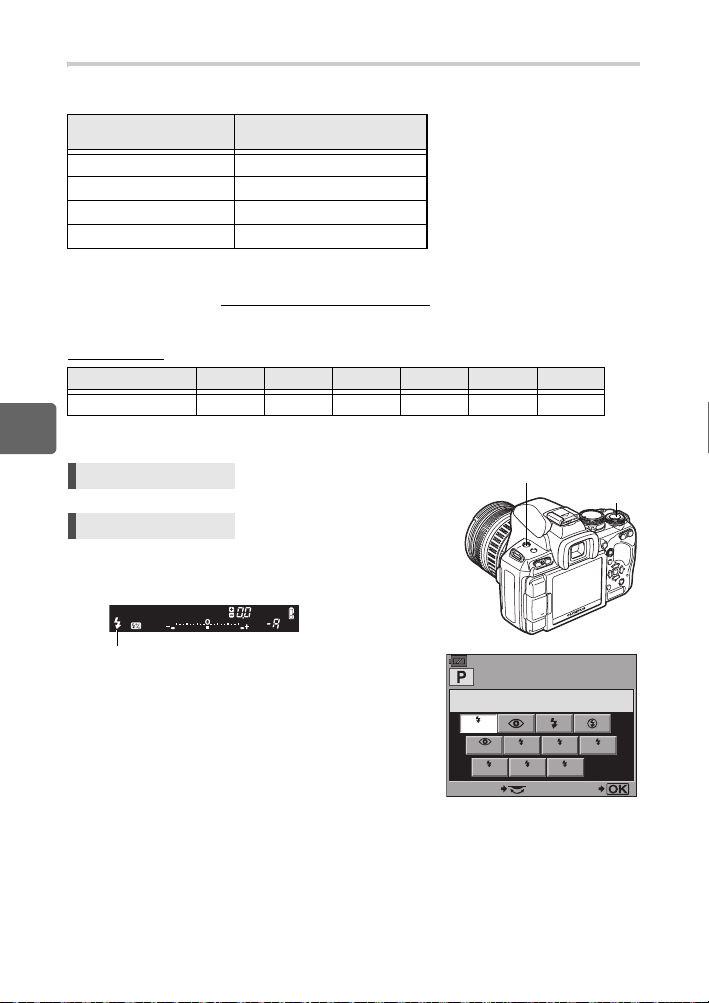
Manual flash
This allows the built-in flash to output a fixed amount of light. To shoot with manual flash, set
the f-number on the lens based on the distance to the subject.
Ratio of amount of light GN: Guide number
FULL (1/1) 17 (12)
1/4 8.5 (6)
1/16 4.3 (3)
1/64 2.2 (1.5)
ISO 200 (Equivalent to ISO 100)
Calculate the f-number on the lens using the following formula.
Aperture (f-number) =
GN × ISO sensitivity
Distance to the subject (m)
ISO sensitivity
ISO value 100 200 400 800 1600 3200
ISO sensitivity 1.0 1.4 2.0 2.8 4.0 5.6
5
Setting method
Flash shooting
Direct button # + j
# button
Super control panel ip: [FLASH MODE]
Setting display
Viewfinder
j
76
EN
Flash mode
• For details on displaying the settings, refer to
“Flash modes that can be set by shooting
mode” (gP. 133).
FLASH MODE
AUTO
SLOWSLOW SLOW2 FULL
1/4 1/16 1/64
SELECT
SET
Page 77
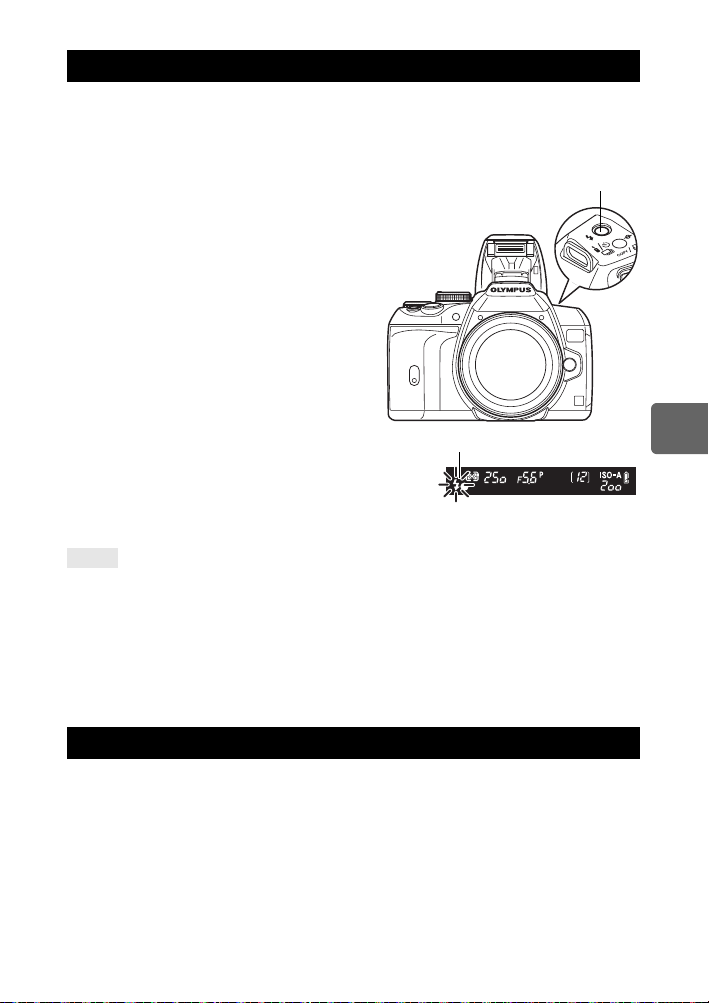
Built-in flash shooting
#
If you shoot a subject using a lens that is wider than 14mm (equivalent to 28mm on a 35mm
film camera), the light emitted by the flash may produce a vignette effect. Whether or not
vignetting occurs also depends on lens type and shooting conditions (such as distance to the
subject).
1 Press the # button to raise the built-in
flash.
• The built-in flash will pop up automatically and
fire in low light conditions under the following
modes.
AUTO/i/&///G/r/g
2 Press the shutter button halfway.
•The # (flash stand-by) mark lights when the
flash is ready to fire. If the mark is blinking, the
flash is charging. Wait until charging is
complete.
3 Press the shutter button all the way.
TIPS
When you do not want the flash to pop up automatically:
j Set [AUTO POP UP] to [OFF]. g“AUTO POP UP” (P. 102)
To shoot without having to wait for the flash to finish charging:
j See “RLS PRIORITY S/RLS PRIORITY C” (gP. 99).
x Notes
• When [#RC MODE] is set to [ON], the built-in flash will fire only to communicate with the
external flash so it will not function as a flash. g“Shooting with the Olympus wireless RC
flash system” (P. 80)
Flash intensity control
The flash intensity can be adjusted from +3 to -3.
In some situations (e.g., when shooting small subjects, distant backgrounds, etc.), you may
get better results by adjusting the amount of light emitted by the flash (“flash intensity”). It is
useful when you intend to increase the contrast (distinction between light and dark) of images
to make the images more vivid.
Flash stand-by mark
Viewfinder
button
5
Flash shooting
77
EN
Page 78
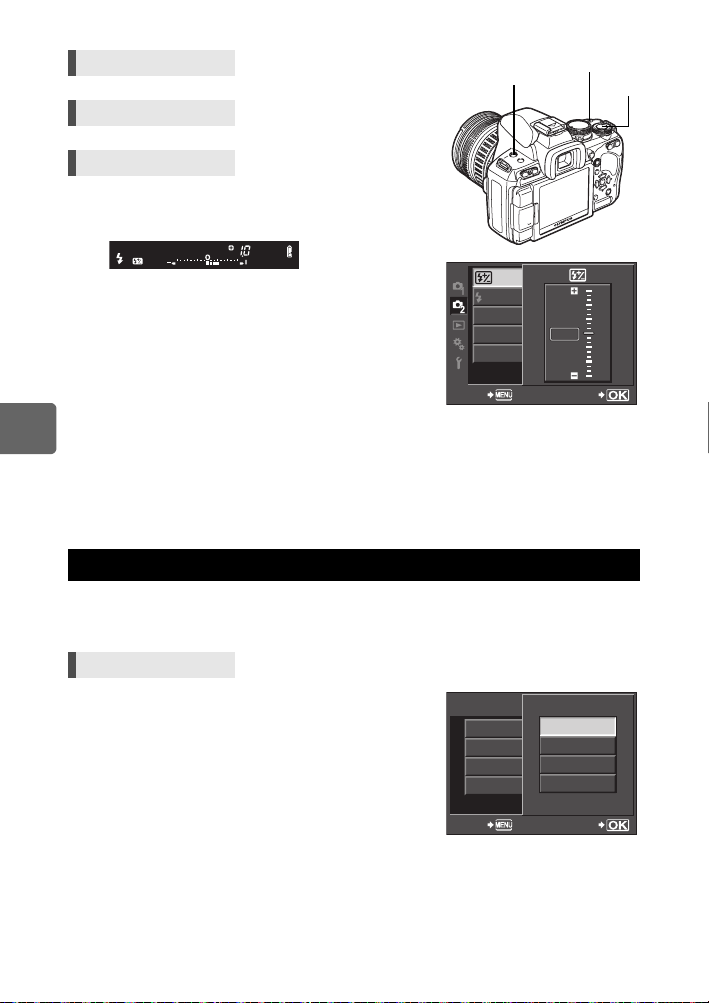
Direct button # + Fj
# button
Super control panel ip: [w]
Menu MENU[X][w]
Setting display
Viewfinder
RC MODE
BRACKETING
MULTIPLE EXPOSURE
8
x Notes
5
• This does not work during manual flash.
Flash shooting
• This does not work when the flash control mode on the electronic flash is set to MANUAL.
• If flash intensity is adjusted on the electronic flash, it will be combined with the camera’s flash
intensity setting.
• When [w+F] is set to [ON], the flash intensity value will be added to the exposure
compensation value. g“w+F” (P. 102)
Flash bracketing
The camera shoots multiple frames, changing the amount of light emitted by the flash for
each shot. The camera shoots 3 frames at a time with the following amount of light: optimum
light, light adjusted in the – direction, and light adjusted in the + direction.
F button
OFF
00
OFF
SETBACK
0.0
+
+
+
-
ON
-
-
j
3
2
1
0
1
2
3
Menu MENU[X][BRACKETING][FL BKT]
• The compensation value will change according to the EV
step. g“EV STEP” (P. 101)
• In single-frame shooting, the amount of light emitted by
the flash changes every time the shutter button is
pressed.
• In sequential shooting, hold down the shutter button until
the selected number of frames are taken.
• Releasing the shutter button stops flash bracketing
shooting. When it stops, 0 blinks in the viewfinder
and 0 is displayed in green on the super control
panel.
78
EN
BRACKETING
AE BKT
WB BKT
FL BKT
ISO BKT
FL BKT
OFF
3F 0.3EV
3F 0.7EV
3F 1.0EV
SETBACK
Page 79
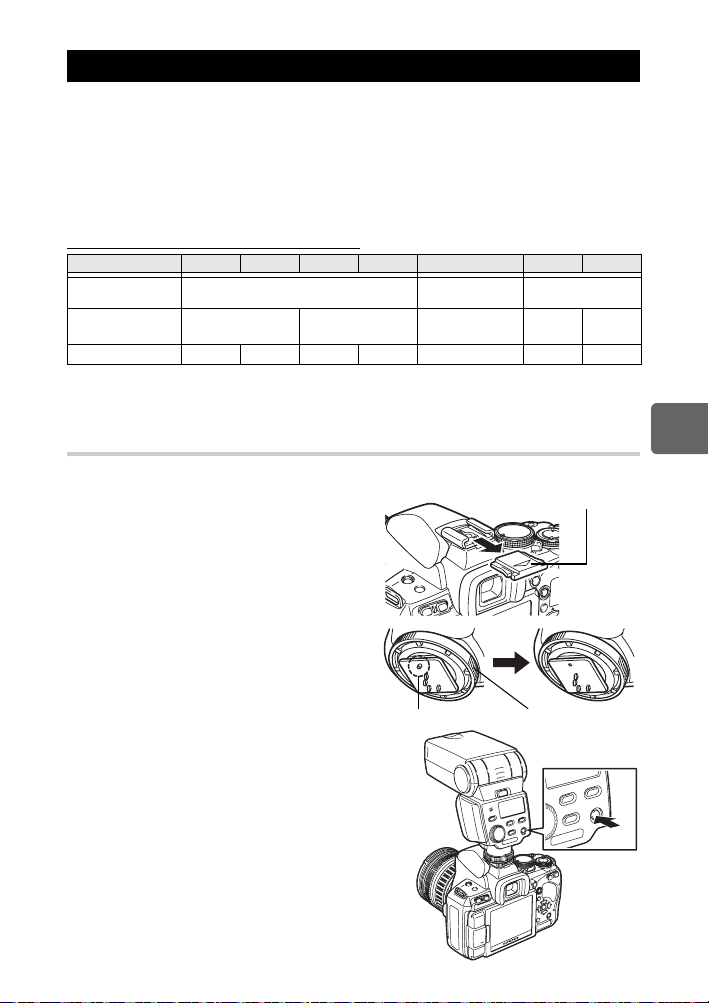
External flash shooting
In addition to the camera’s built-in flash capabilities, you can use any of the external flash
units specified for use with this camera. This enables you to take advantage of a wider variety
of flash shooting techniques to suit different shooting conditions.
The external flashes communicate with the camera, allowing you to control the camera’s
flash modes with various available flash control modes, such as TTL-AUTO and Super FP
flash. An external flash unit specified for use with this camera can be mounted on the camera
by attaching it to the camera’s hot shoe. You can also attach the flash to the flash bracket on
the camera using the bracket cable (optional).
Refer to the external flash’s manual as well.
Functions available with external flash units
Optional flash FL-50R FL-50 FL-36R FL-36 FL-20 RF-11 TF-22
Flash control mode
GN (Guide number)
(ISO100)
RC mode 9 k 9 kkkk
* The focal length of the lens that can be used (Calculated based on 35 mm film camera)
x Notes
• The FL-40 optional flash cannot be used.
Using the external electronic flash
Be sure to attach the flash to the camera before turning on the flash’s power.
1 Remove the hot shoe cover by sliding it
in the direction indicated by the arrow in
the illustration.
• Keep the shoe cover in a safe place to avoid
losing it. You can attach the shoe cover to the
back of the eyepiece cover, which is attached
to the strap. Put the shoe cover back on the
camera after removing the external flash.
TTL-AUTO, AUTO, MANUAL,
FP TTL AUTO, FP MANUAL
GN50 (85 mm*)
GN28 (24 mm*)
GN36 (85 mm*)
GN20 (24 mm*)
TTL-AUTO,
AUTO, MANUAL
GN20 (35 mm*) GN11 GN22
TTL-AUTO,
MANUAL
Hot shoe cover
5
Flash shooting
2 Attach the electronic flash to the hot
shoe on the camera.
• If the lock pin is protruding, turn the shoe lock
ring as far as it will go in the direction opposite
to LOCK. This will pull the lock pin back
inside.
Lock pin
Lock ring
3 Turn on the flash.
• When the charge lamp on the flash lights up,
charging is complete.
• The flash will be synchronized with the camera at a
speed of 1/180 sec. or less.
4 Select a flash mode.
5 Select the flash control mode.
• TTL-AUTO is recommended for normal use.
6 Press the shutter button halfway.
• Shooting information such as ISO sensitivity,
aperture value, and shutter speed is communicated
between the camera and flash.
7 Press the shutter button all the way.
79
EN
Page 80
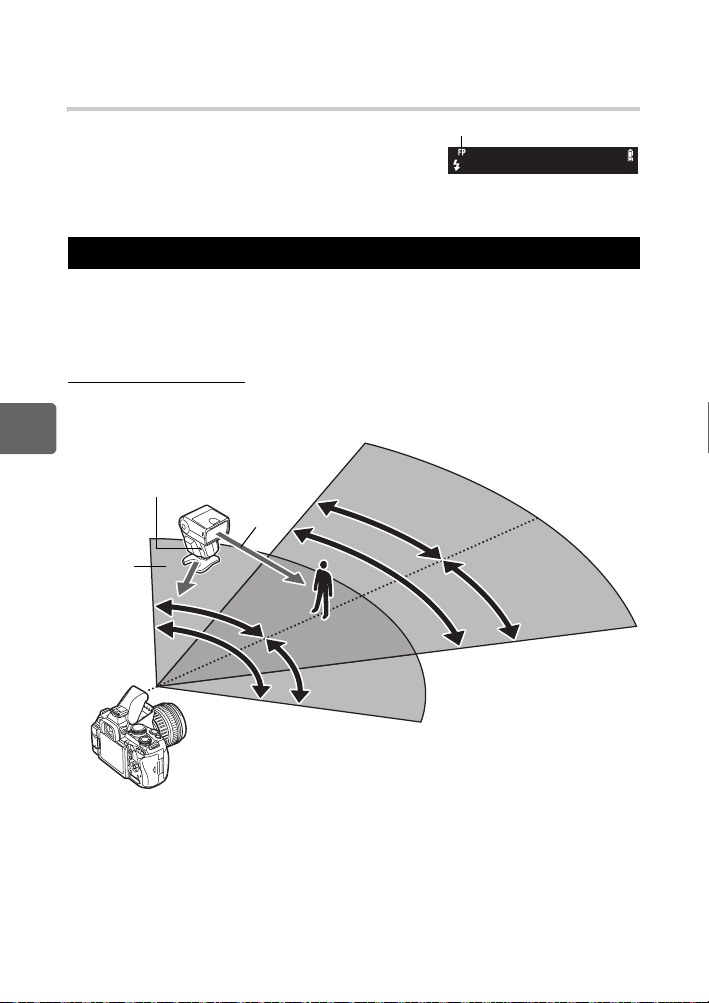
x Notes
100
50
30
60
• The built-in flash cannot be used when an external flash is attached to the hot shoe.
Super FP flash
Super FP flash is available with the FL-50R or FL-36R. You
can use the Super FP flash even where normal flashes
cannot be used with high shutter speed.
Fill-in flash shooting with the aperture open (such as in
outdoor portrait shooting) is also possible with Super FP
flash. For details, refer to the external flash’s manual.
Super FP flash
Viewfinder
Shooting with the Olympus wireless RC flash system
Wireless flash shooting is possible with the Olympus wireless RC flash system. With this
wireless flash system, you can take pictures using multiple wireless flashes and control the
flashes in three groups (A, B, and C). The built-in flash is used to communicate between the
camera and the external flashes.
For details on using the wireless flash, see the manual of the external flash.
Wireless flash setup range
Position the wireless flash so that the wireless sensor faces the camera. The setup range
guidelines are as shown below. The range changes according to the surrounding
environment.
5
Flash shooting
Direction of
the camera
Remote sensor
50°
50
Direction of
the emitted
flash
°
60
60°
30°
30
°
°
30°
3030°
10m
100°
°
100
50°
5050°
5m
1 Position the flash while referring to the “Wireless flash setup range”, and turn on
the flash.
2 Press the MODE button on the flash to set it to RC mode, and set the channel and
group of the flash.
3 Set RC mode on the camera to [ON].
• MENU[X][#RC MODE][ON]
• The super control panel switches to RC mode.
80
• You can press the INFO button to switch the super control panel display.
EN
Page 81
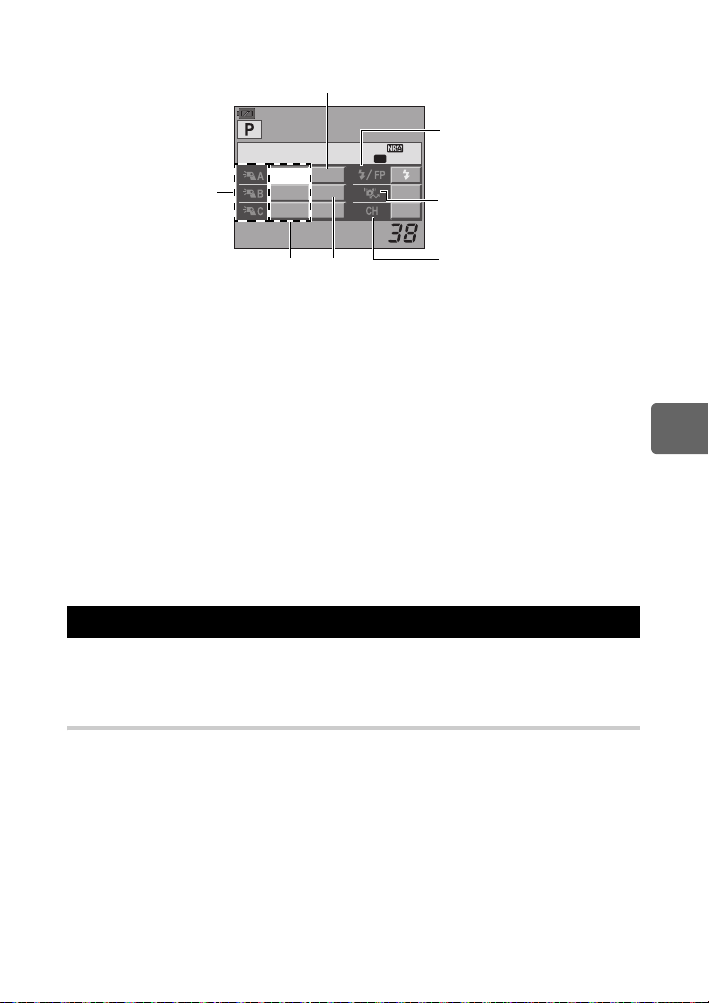
4 Use the super control panel to set the flash mode and other settings for each
group.
Flash intensity value
Group
• Select the flash
control mode and
adjust the flash
intensity individually
for groups A, B, and
C. For MANUAL,
select the flash
intensity.
2009. 03.16
TTL
OFF
Flash control
mode
+1.0
1 / 8
–
Flash
intensity
RC
Normal flash/Super FP flash
• Switch between normal flash
and Super FP flash.
LOM
Communication light level
2
• Set the communication light level
to [HI], [MID], or [LO].
Channel
• Set the communication channel to
the same channel used on the
flash.
5 Select a flash mode.
• Red-eye reduction flash is not possible in RC mode.
6 Press the # button to raise the built-in flash.
7 After shooting preparations are completed, take some test shots to check the
flash operation and images.
8 Begin shooting while checking the charging completed indications of the camera
and flash.
x Notes
• Although there is no limit to the number of wireless flashes you can use, it is recommended
that each group have no more than three flashes to prevent flash malfunction due to mutual
interference.
• In RC mode, the built-in flash is used to control the wireless flash. The built-in flash cannot be
used for flash shooting in this mode.
• For 2nd curtain synchronization, set the shutter speed and anti-shock settings to within 4
seconds. Wireless flash shooting may not operate properly when using a slower shutter
speed or anti-shock setting.
Using commercially available flashes
You cannot use the camera to adjust the amount of light emitted from a commercially
available flash except for a flash specified for use with this camera. To use a commercially
available flash, connect it to the hot shoe. Set the camera’s shooting mode to M.
Non-specified commercial flashes
5
Flash shooting
1) Exposures when using a flash require that adjustments be made on the flash. If a flash is
used in the auto mode, match it with the f-number and ISO sensitivity settings on the
camera.
2) Even if the flash auto f-number and ISO sensitivity are set the same as on the camera, the
correct exposure may not be obtained depending on the shooting conditions. In such a
case, adjust the auto f-number or ISO on the flash or calculate the distance in the manual
mode.
3) Use a flash with an illumination angle that matches the focal length of the lens. The focal
length of the lens for 35 mm film is approximately twice as long as the focal length of the
lenses designed for this camera.
4) Do not use a flash unit or other accessory TTL flash that has additional communication
functions other than the specified flashes, since it may not only fail to function normally,
but may also cause damage to the camera’s circuitry.
81
EN
Page 82
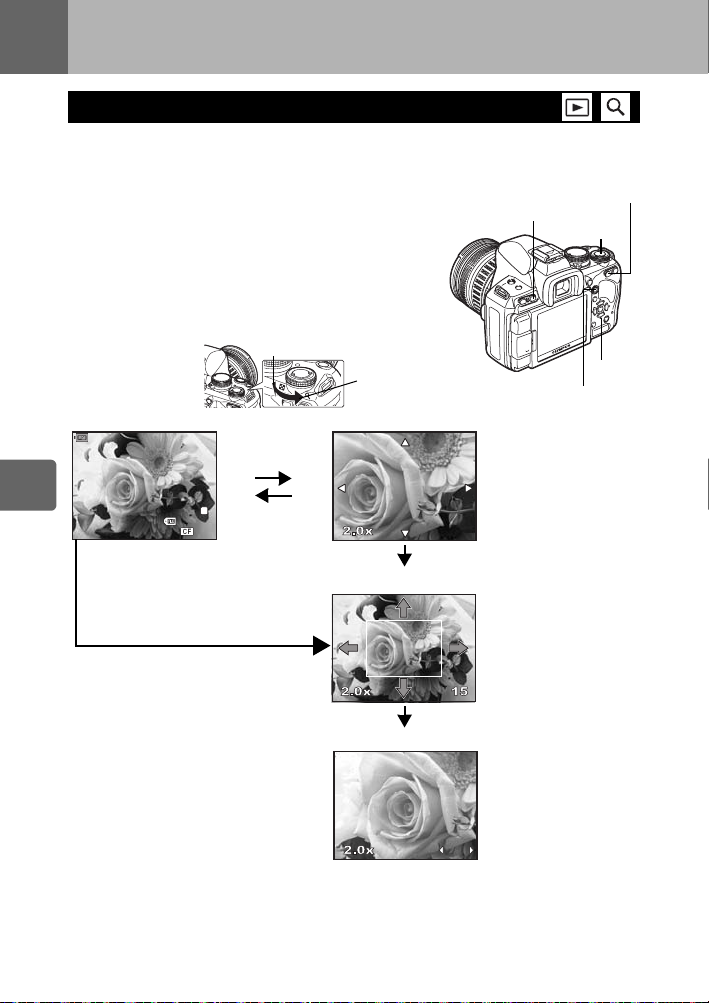
6 Playback functions
[4032x3024,1/8]
2009.03.16
21:56
100-0015
15
N
Single-frame/Close-up playback
The basic procedure for viewing pictures are as shown below.
However, before using any of these functions, follow Step 1 below. You can set the camera to
automatically switch to single-frame playback mode after shooting. g“REC VIEW” (P. 93)
1 Press the q button (Single-frame playback).
• The last recorded image appears.
• The LCD monitor turns off after more than 1 minute if no
operations are performed. The camera will turn off
automatically if there is no operation after 4 hours. Turn
on the camera again.
2 Use p to select images you want to view. You can
also turn the control dial to switch to U for closeup playback.
G
U
(Single-frame playback) (Close-up playback)
INFO button
q button
Press p to change the
close-up position.
< button
j
p
6
Playback functions
2009.03.16
f : Displays the frame that is
g : Displays the frame that is
i : Displays the next frame
h : Displays the previous frame
• To exit the playback mode, press the
q button again.
• Pressing the shutter button halfway
resumes the shooting mode.
[4032x3024,1/8]
100-0015
21:56
stored 10 frames back
stored 10 frames ahead
Press the < button
• Plays back the image at a
10× magnified close-up
position.
82
EN
L
N
15
Press the INFO button
(Close-up position playback)
Press the INFO button
(Close-up frame-by-frame playback)
Press p to move the display
of the close-up position.
When [g FACE DETECT]
(gP. 39) is set to [ON], a
frame is displayed around a
detected face. Press i to
move the frame to another
face.
Press hi to view frame-byframe close-ups.
When [g FACE DETECT]
is set to [ON], press fg
to move to another face in
close-up position.
• Press the INFO button to
151515
return to close-up
playback.
Page 83
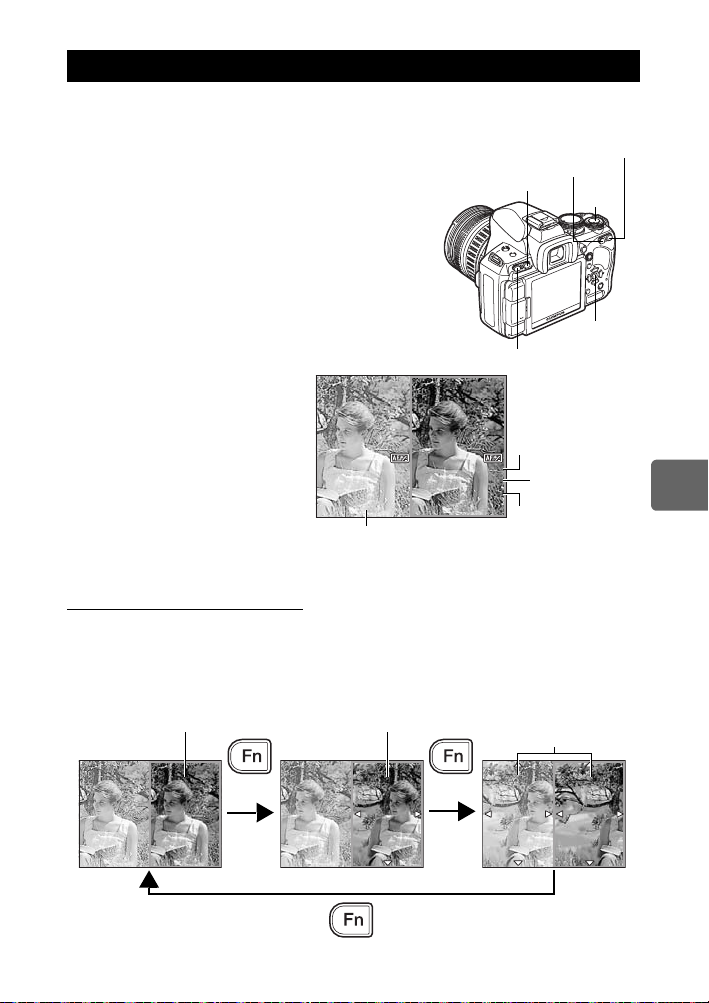
Light box display
+2
2.0x
54
53
+2
±0
W
T
+1
+1
±0
W
T
2.0x
54
53
2.0x
54
53
2.0x
54
53
You can view the playback image and another image together on the left and right sides of
the monitor. This is useful if you want to compare images you recorded using bracketing.
1 Press the P button during single-frame
playback.
• The frame being viewed is displayed on the left side of
the monitor, and the next frame is displayed on the right
side. The image is displayed at the same magnification
of the image being viewed.
• The image on the left is the benchmark image.
INFO button
P button
< button
j
2 Press p to select the image on the right.
• You can protect, erase or copy the image on the right.
3 Press the P button.
• The camera returns to single-frame playback of the
image on the left at the magnification being viewed.
MENU button
AF compensation
value during shooting
+2
+2
T
W
2.0x
Benchmark image
±0
53
+1
+1
T
W
±0
54
AF compensation value
in the wide direction
(when [AF FOCUS ADJ.] is set)
Operations during light box display
• Pressing the i button replaces the image on the left with the image on the right and
becomes the new benchmark image.
• You can use the control dial to change the magnification of both images at the same time.
• Pressing the < button or INFO button allows you to move the position of the image on the
right with the p button. Pressing the < button or INFO button again allows you to move
the positions of both images with the p button.
p : Selects the right image p : Scrolls the right image p : Scrolls both images in
synchronization
**
i button
AF compensation
value in the
telephoto direction
6
Playback functions
2.0x
53
54
2.0x
53
54
*
2.0x
* You can also use the INFO button
in the same way for this procedure.
53
54
83
EN
Page 84
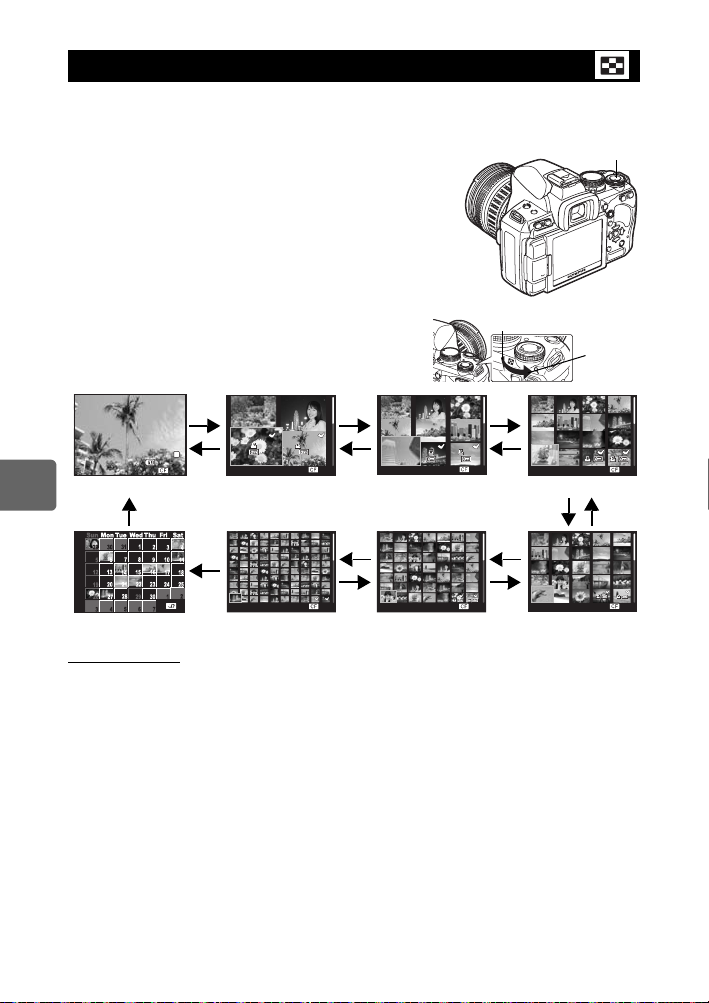
Index display/Calendar display
x
10
2009.03 .16
21:56
15
x
10
2009.03 .16
21:56
15
2009.03 .16
21:56
15
2009.03 .16
21:56
15
2009.03 .16
21:56
15
2009.03 .16
21:56
15
[
4032 x3024, 1/8
]
100-001 5
15
N
2009.03 .16
21:56
This function lets you show several images on the monitor at the same time. This is useful
when you want to quickly search a number of pictures to find a particular image.
During single-frame playback, each time you turn the
control dial toward G, the number of images shown
changes between 4, 9, 16, 25, 49 and 100 pictures.
h
:Moves to the previous frame
:Moves to the next frame
i
f :Moves to the upper frame
g :Moves to the lower frame
• To return to single-frame playback, turn the control dial to U.
G
x
2009.03.16
(Single-frame playback)
6
21:56
[
4032x3024,1/8
100-0015
]
L
N
2009.03.16
15
21:56
10
2009.03.16
15
(9-frame index display)(4-frame index display)
21:56
x
10
2009.03.16
15
(16-frame index display)
Playback functions
2009
4
(Calendar display)
2009.03.16
21:56
(100-frame index display)
15
2009.03.16
21:56
(49-frame index display)
15
2009.03.16
(25-frame index display)
Calendar display
With the calendar, you can display images recorded on the card by date. If more than one
image was taken on a single date, the image shot first on that date is displayed.
Use p to select a date and press the i button to play back images for the selected date in
single-frame display.
21:56
21:56
j
U
15
15
84
EN
Page 85
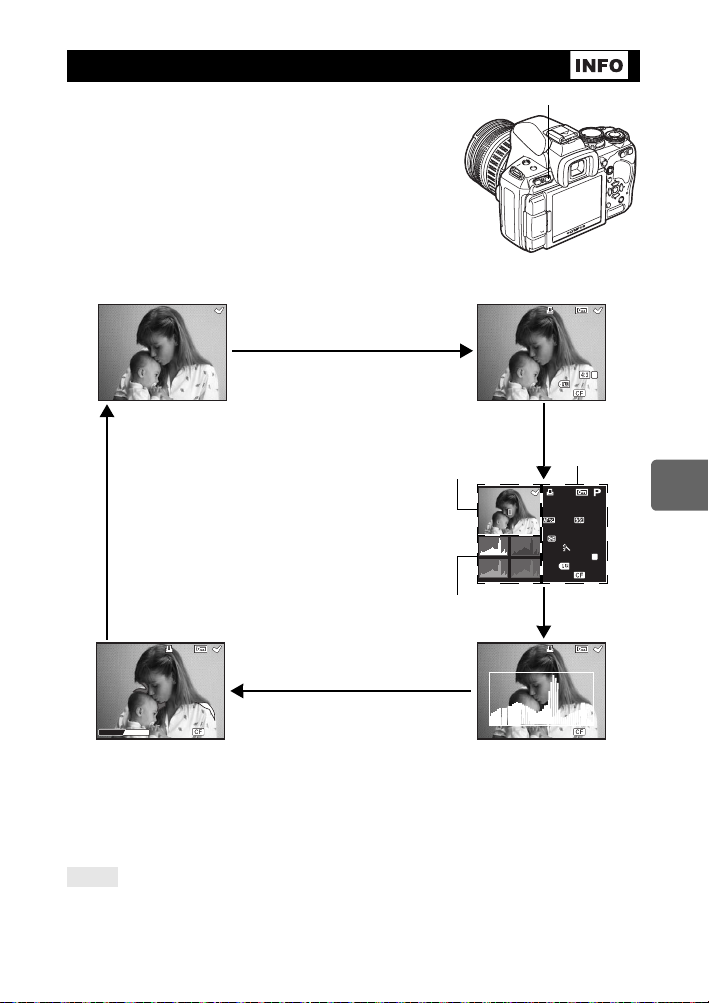
Information display
[
4032 x3024,1/8
]
x
10
2009.03.16
21:56
100-0015
15
x
10
N
N
x
10
+
2.0
+
2.0
100
WBAUTO
G±0
sRGB
±
0.0
A±0
±
1.0
ISO
45
mm
F5.6
250
NATURAL
N
15
x
10
15
This allows you to display detailed information about the
image.
Luminance information can also be displayed with histogram
and highlight graphs.
Press the INFO button repeatedly until the desired
information is displayed. You can also switch the
information displayed by turning the control dial while
pressing the INFO button.
• This setting is stored and will be shown the next time the
information display is called up.
Image only
INFO button
Simplified display
[
4032x3024,1/8
2009.03.16
21:56
x
10
100-0015
]
L
N
15
Highlight/
Shadow display
*Histogram
If the bars in the histogram are
higher on the right, the image may
be too bright. If the bars are higher
on the left, the image may be too
dark. Compensate the exposure or
shoot again.
x
SHADOW
HILIGHT
10
15
Highlight&Shadow Histogram display
Over- or underexposed parts of the recorded image are
displayed.
Highlights (overexposed) parts will be shown in red.
Shadows (underexposed) parts will be shown in blue.
TIPS
To quickly switch to the frequently used display:
j You can hide the information display for all modes except “Simplified display”. g“INFO
SETTING” (P. 101)
*
Histogram
Distribution of the
brightness of the
recorded image is
displayed in a histogram
(brightness component
graph).
Shooting
information
x
10
F5.6
250
ISO
45
mm
±
1.0
WBAUTO
A±0
sRGB
NATURAL
100-0015
Overall
display
x
10
+
2.0
+
2.0
100
±
0.0
G±0
L
15
15
6
Playback functions
N
85
EN
Page 86
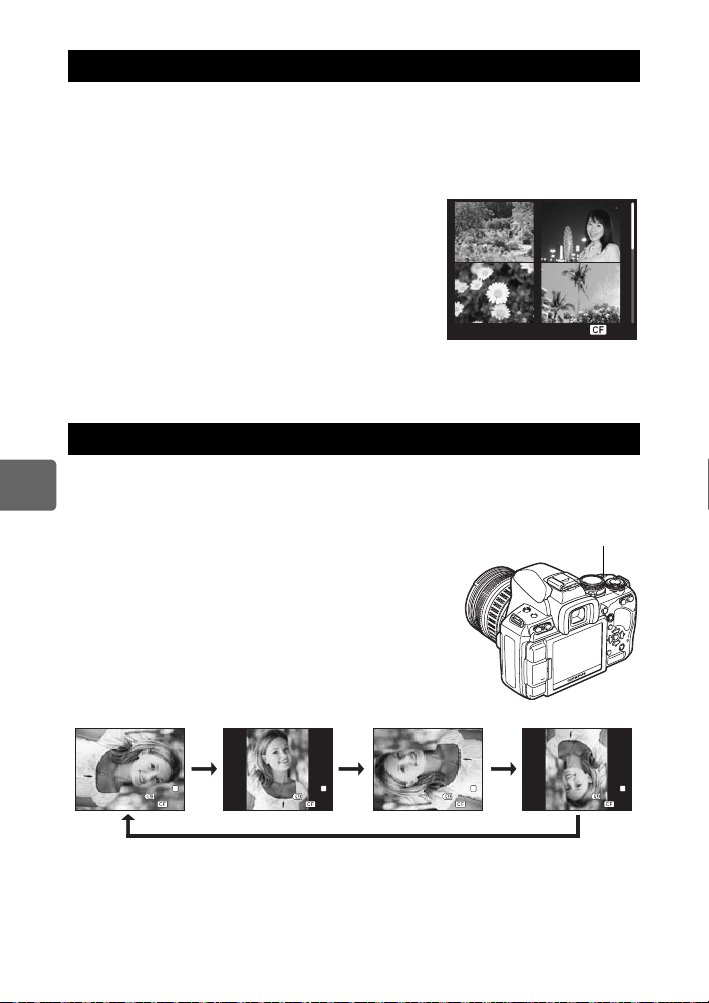
Slideshow
2009.03.16 12:00
15
[
4032x 3024, 1/8
]
2009.03 .16
21:56
100-001 5
15
[
4032x 3024, 1/8
]
2009.03 .16
21:56
100-001 5
15
[
4032x 3024, 1/8
]
2009.03 .16
21:56
100-001 5
15
[
4032x 3024, 1/8
]
2009.03 .16
21:56
100-001 5
15
N
N
N
N
This function displays images stored on the card one after another. Images are displayed
one-by-one for about 5 seconds starting from the currently displayed image. Slideshow can
be performed using index display. You can select the number of frames displayed during
slideshow from 1, 4, 9, 16, 25, 49 or 100.
1 MENU[q][m]
2 Use fg to select the number of frames
displayed.
3 Press the i button to start the slideshow.
4 Press the i button to stop the slideshow.
When selecting [L]
x Notes
• If the slideshow is left running for about 30 minutes, the camera will turn off automatically.
Rotating images
This function lets you rotate images and display them vertically on the monitor during singleframe playback. This is useful when taking pictures with the camera held vertically. The
6
images will automatically be displayed in the correct direction even if the camera is rotated.
Playback functions
1 MENU[q][y]
• When set to [ON], images shot vertically will be
automatically rotated and displayed during playback. You
can also press the F button to rotate and display the
image.
• The rotated image will be recorded on the card in that
position.
F button
Original image before rotating
2009.03.16
86
EN
FFF
[
21:56
4032x3024,1/8
100-0015
]
L
N
15
2009.03.16
21:56
[
4032x3024,1/8
100-0015
]
L
N
15
2009.03.16
21:56
[
4032x3024,1/8
100-0015
]
L
N
15
2009.03.16
21:56
[
4032x3024,1/8
100-0015
]
L
N
15
F
Page 87
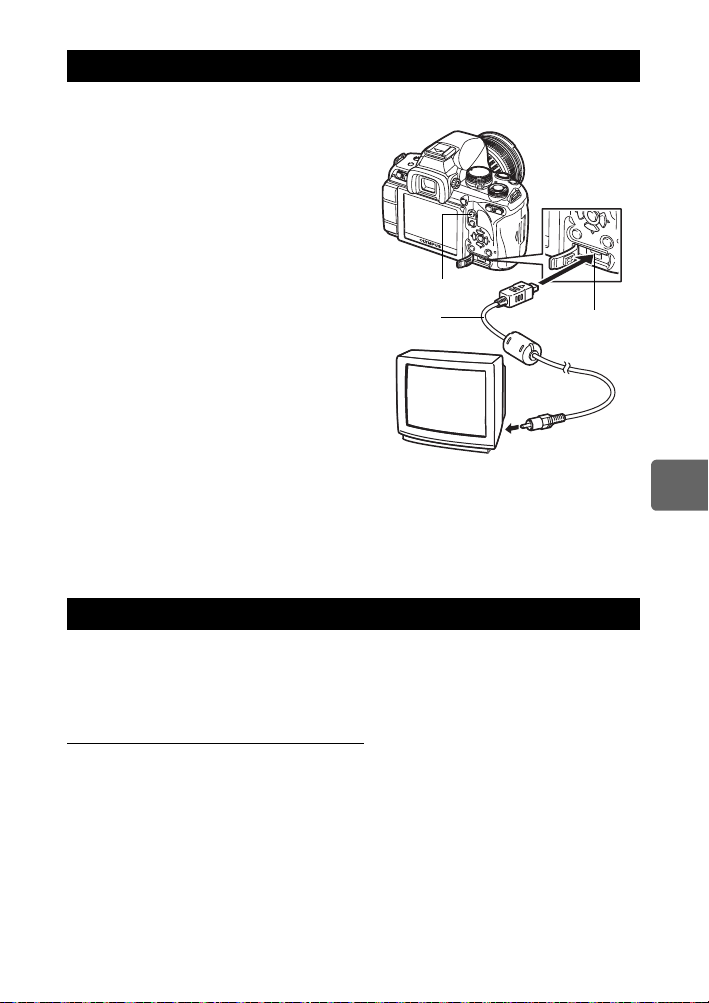
Playback on TV
Use the video cable provided with the camera to play back recorded images on your TV.
1 Turn the camera and TV off, and
connect the video cable as illustrated.
2 Turn on the TV and set it to the video
input mode. For details on switching to
the video input mode, refer to the TV’s
manual.
3 Turn the camera on and press the q
(playback) button.
q button
Video cable
x Notes
• To connect the camera to a TV, use the provided video cable.
• Make sure that the camera’s video output signal type is the same as the TV’s video signal
type. g“VIDEO OUT” (P. 100)
• The camera’s monitor turns off automatically when the video cable is connected to the
camera.
• The image may appear off-center depending on the TV screen.
Editing still images
Recorded images can be edited and saved as new images. Available editing functions
depend on the image format (image record mode).
A JPEG file can be printed as is without modification. A RAW file, on the other hand cannot
be printed as is. To print a RAW file, use the RAW edit function to convert the RAW data
format to JPEG.
Editing images recorded in RAW data format
The camera performs image processing (such as white balance and sharpness adjustment)
on images in the RAW data format, then saves the data to a new file in the JPEG format.
While checking recorded images, you can edit them to your liking.
Image processing is performed based on the current camera settings. Change the
camera settings to suit your preferences before editing.
Multi-connector
Video input terminal
6
Playback functions
87
EN
Page 88
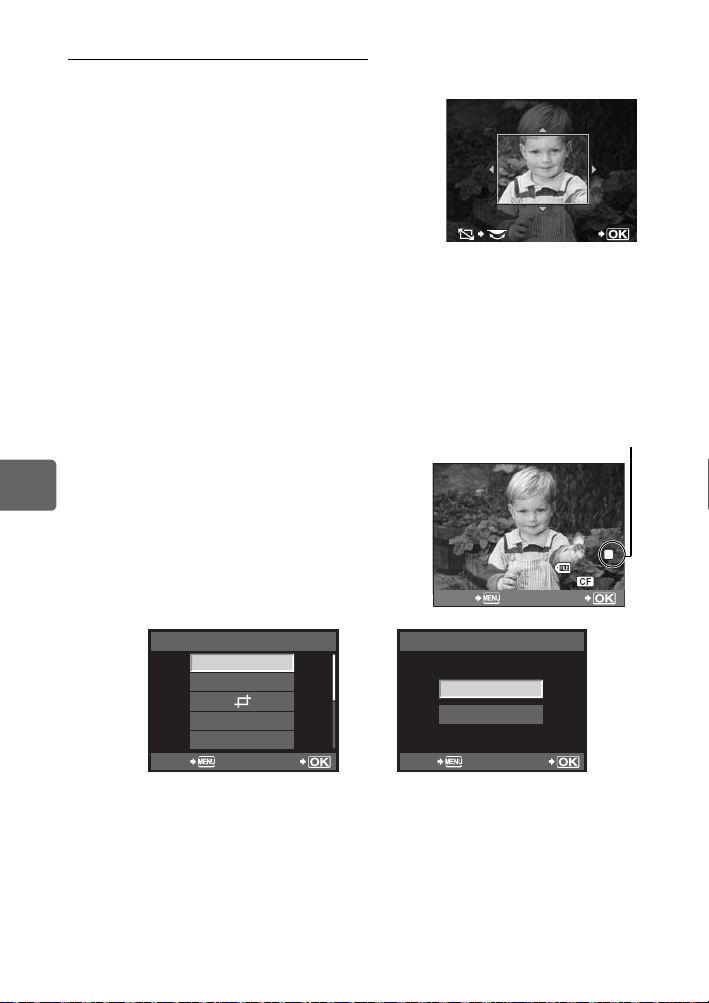
Editing images recorded in JPEG data format
100-0020
N
40
[SHADOW ADJ] Brightens a dark backlit subject.
[REDEYE FIX] Reduces the red-eye phenomenon during flash shooting.
[P] Set the trimming size with the control
[BLACK & WHITE] Creates black and white images.
[SEPIA] Creates sepia-toned images.
[SATURATION] Sets the color depth. Adjust the color saturation checking the picture on
[Q] Converts the image file size to 1280× 960, 640 × 480, or 320 × 240.
[ASPECT] Changes the aspect ratio of images from 4:3 (standard) to [3:2], [16:9],
dial and the trimming position with the
arrow pad.
SETSET
the screen.
Images with an aspect ratio other than 4:3 (standard) are converted to
the closest image file size.
or [6:6]. After changing the aspect ratio, use the arrow pad to specify the
trimming position.
1 MENU[q][EDIT][RAW/JPEG]
2 Use hi to select an image, then press the i
button.
6
• The camera recognizes the image data format.
• For images recorded in JPEG+RAW, a selection
Playback functions
screen will appear, asking you which data to edit.
3 The setting screen varies with the image data
format. Select the item you want to edit and do
the following steps.
JPEG EDIT
SHADOW ADJ
REDEYE FIX
BLACK & WHITE
SEPIA
SET
88
EN
BACK
• The edited image is saved as another image, apart from the original image.
• To exit the edit mode, press the MENU button.
x Notes
• Red-eye correction may not work depending on the image. Red-eye correction may affect
other parts of the image, as well as the eyes.
• Editing of a JPEG image is not possible in the following cases:
When an image is recorded in RAW, when an image is processed on a PC, when there is not
enough space in the card memory, when an image is recorded on another camera
• When resizing ([Q]) an image, you cannot select a larger number of pixels than was
originally recorded.
• [P] and [ASPECT] can only be used to edit images with an aspect ratio of 4:3 (standard).
Confirm the data format from here.
BACK SET
RAW DATA EDIT
YES
NO
BACK SET
L
100-0020
N
40
Page 89
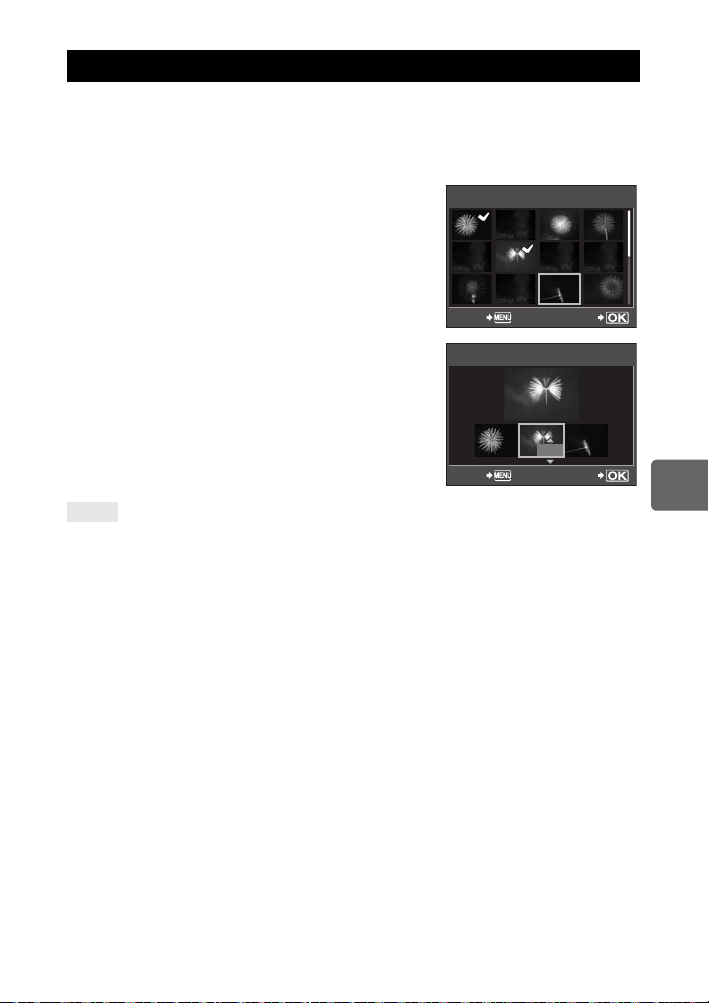
Image overlay
RAW
RAW
RAW
RAW
RAW
RAW
RAW
x
0.3
x
0.1
x
0.3
Up to 3 frames of RAW images taken with the camera can be overlaid and saved as a
separate image. The image is saved with the record mode set at the time the image is saved.
1 MENU[q][EDIT][IMAGE OVERLAY]
2 Select the number of frames to overlay and press the i button.
3 Use p to select a frame and press the i button.
• Repeatedly select images only for the number of frames
selected in Step 2.
• To cancel your selection, press the i button again.
4 Use hi to select an image, then use fg to
select the gain for each image. Press the i
button.
• Select from 0.1 to 2.0.
• The displayed image changes as the gain is adjusted.
IMAGE OVERLAY
RAW
RAW
BACK SET
IMAGE OVERLAY
RAW
RAW
RAW
RAW
RAW
5 Use fg to select [YES], then press the i
button.
TIPS
To overlay 4 or more frames:
j To overlay 4 or more frames, save the overlay image as a RAW file and use [IMAGE OVERLAY]
repeatedly.
x Notes
• When the record mode is set to [RAW], the overlay image is saved as [YN+RAW].
• When selecting a frame to overlay, the JPEG images for images recorded in JPEG+RAW are
displayed.
x
x
0.3
0.3
BACK SET
x
0.1
6
Playback functions
89
EN
Page 90
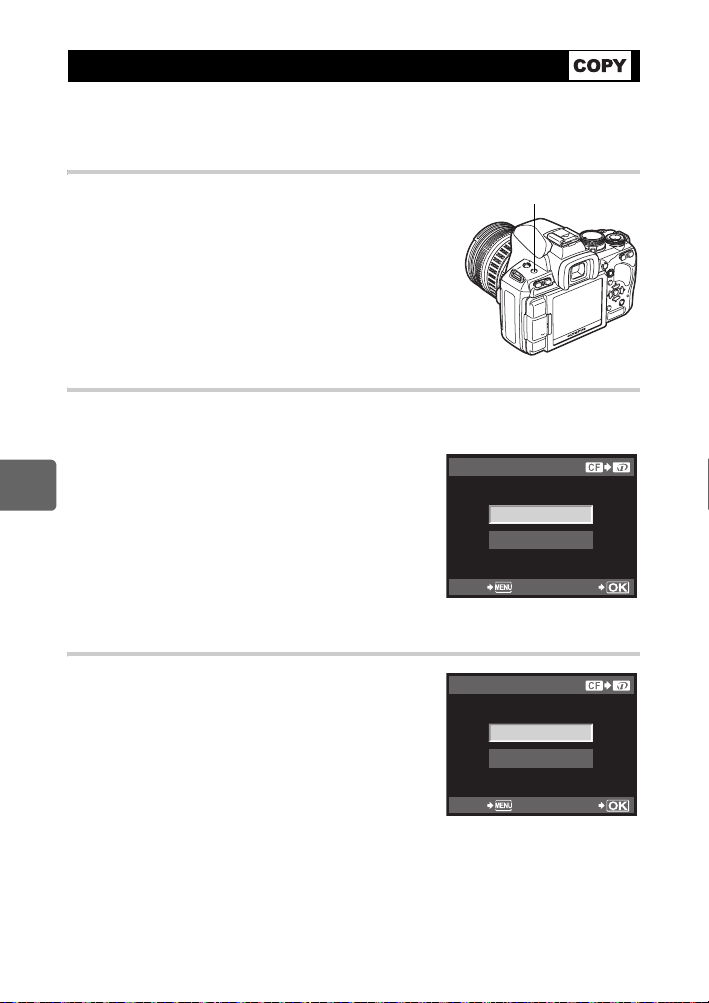
Copying images
This function lets you copy images to and from the xD-Picture Card and CompactFlash or
Microdrive. This menu can be selected if both cards are inserted. The selected card is the
copying source. g“r/p” (P. 106)
Single-frame copy
1 Play back the image you want to copy and press the
COPY/< button.
COPY/< button
2 Use fg to select [YES], then press the i button.
Copying selected frames
This function lets you select multiple images and copy them all at the same time during
single-frame playback or index display.
1 Display the images you want to copy and press the
i button.
6
• The selected images will be shown with v.
• To cancel your selection, press the i button again.
Playback functions
2 Press p to display the next images you want to
copy and press the i button.
COPY SELECT
3 After you have selected the images to copy, press
the COPY/< button.
4 Use fg to select [YES], then press the i
button.
Copying all the frames
1 MENU[q][COPY ALL]
2 Press i.
BACK SET
COPY ALL
3 Use fg to select [YES], then press the i
button.
YES
NO
YES
NO
90
BACK SET
EN
Page 91
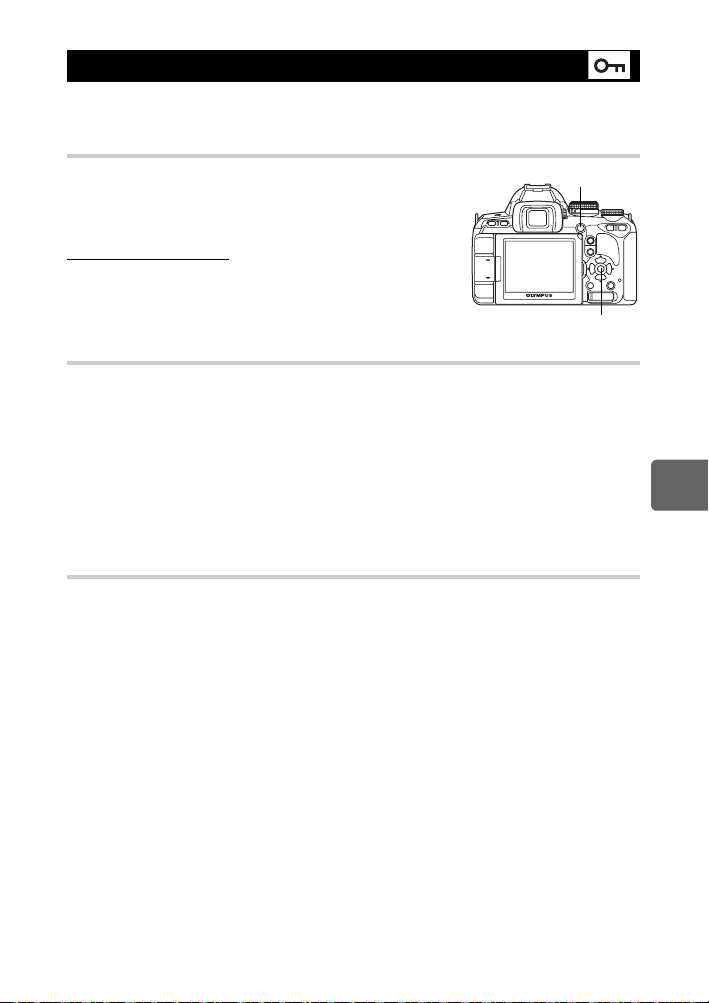
Protecting images
Protect images you do not want to erase. Protected images cannot be erased by the singleframe or all-frame erase function.
Single-frame protect
Play back the image you want to protect and press the 0
button.
• 9 (protect mark) is displayed on the top right corner of the
screen.
To cancel the protection
Display the images that are protected and press the 0
button.
Protecting selected frames
This function lets you select multiple images and protect them all at the same time during
single-frame playback or index display.
0 button
i button
1 Display the images you want to protect and press the i button.
• The selected images will be shown with v.
• To cancel your selection, press the i button again.
• During index display, press p to select the images you want to protect and press the i
button.
2 Press p to display the next images you want to protect and press the i button.
3 After you have selected the images to protect, press the 0 button.
Canceling all protections
This function lets you cancel the protection of several images at one time.
1 MENU[q][RESET PROTECT]
2 Use fg to select [YES], then press the i button.
x Notes
• Formatting the card erases all images even if they have been protected.
g“Formatting the card” (P. 126)
• Protected images cannot be rotated even when the F button is pressed.
6
Playback functions
91
EN
Page 92
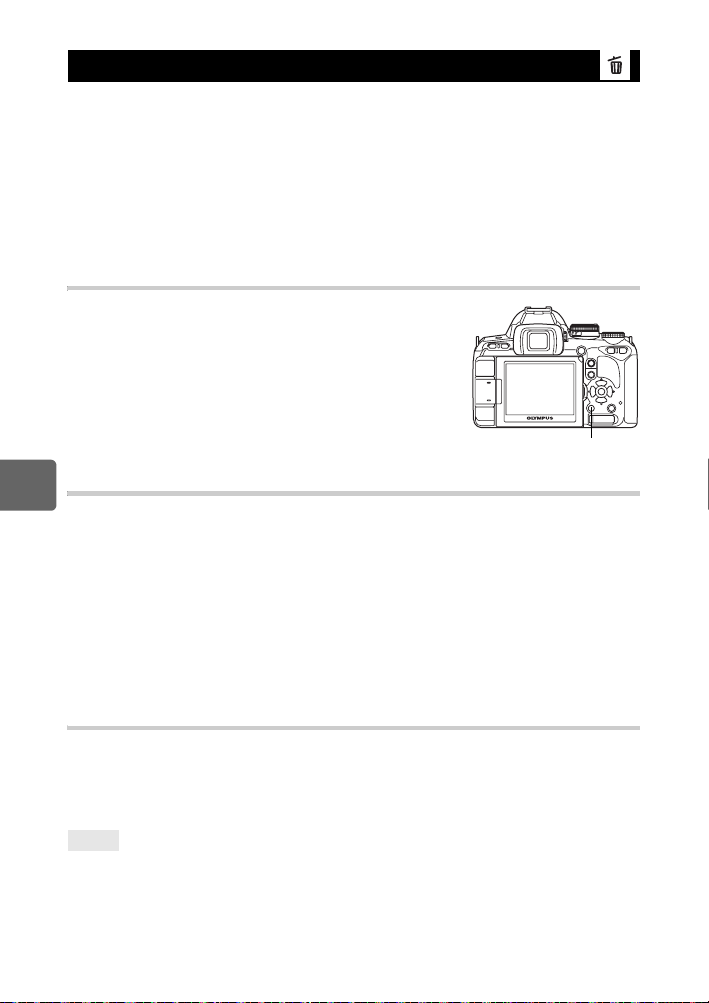
Erasing images
Lets you erase recorded images. You can select single-frame erase, which erases only the
currently displayed image; all-frame erase, which erases all the images stored on the card; or
selected frame erase, which erases only the frames selected.
x Notes
• When you perform all-frame or selected frame erase on images recorded using RAW+JPEG,
both the RAW and JPEG images are erased. When using single-frame erase, you can select
whether to erase the JPEG, RAW, or both RAW and JPEG images. g“RAW+JPEG
ERASE” (P. 105)
• Protected images cannot be erased. Cancel protected images, then erase them.
• Once erased, images cannot be restored. g“Protecting images” (P. 91)
Single-frame erase
1 Display the images you want to erase and press the D
button.
2 Use fg to select [YES], then press the i button.
Erasing selected frames
6
This function lets you erase selected images at one time during single-frame playback or
Playback functions
index display.
1 Display the images you want to erase and press the i button.
• The selected images will be shown with v.
• To cancel your selection, press the i button again.
• During index display, press p to select the images you want to erase and press the i
button.
2 Press p to display the next images you want to erase and press the i button.
3 After you have selected the images to erase, press the D button.
4 Use fg to select [YES], then press the i button.
All-frame erase
D button
1 MENU[W][CARD SETUP]
2 Use fg to select [ALL ERASE], then press the i button.
3 Use fg to select [YES], then press the i button.
• All frames will be erased.
TIPS
To erase immediately:
j If you have set “QUICK ERASE” (gP. 105) to [ON], pressing the D button will erase an image
immediately.
j You can set the initial position of the cursor to [YES]. g“PRIORITY SET” (P. 105)
92
EN
Page 93
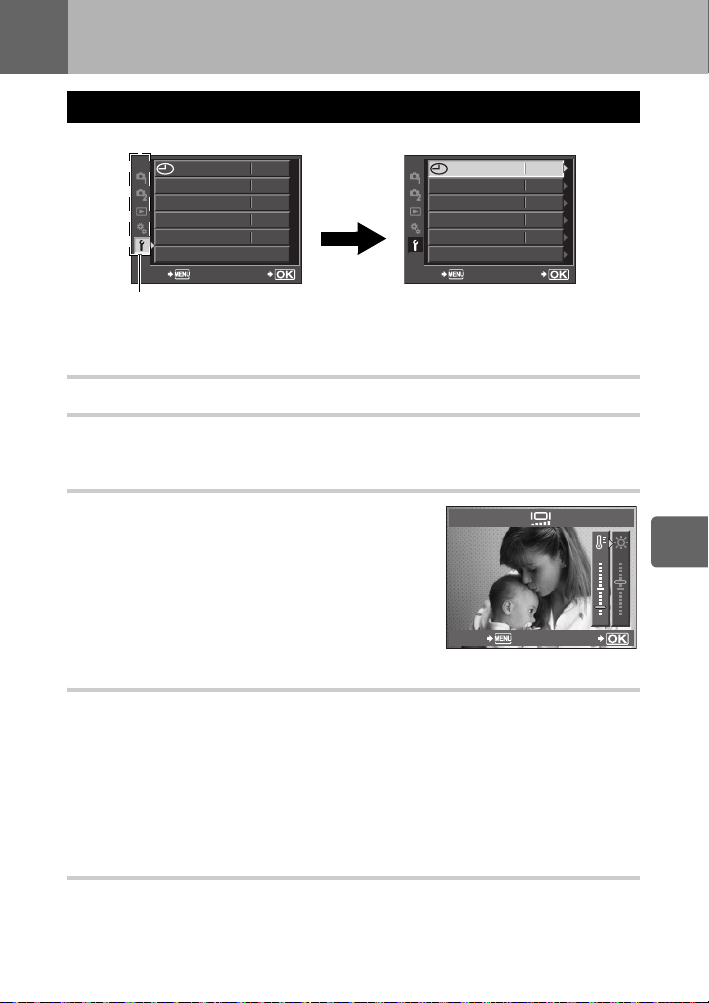
7 Setup functions
Setup Menu
Use the Setup Menu to set the basic camera functions.
’09.03.01
14:01
W
s
REC VIEW
c
MENU DISPLAY
FIRMWARE
BACK
Use fg to select [d], then
press i.
ENG.
j±0 k±0
5SEC
SET
ON
W
i
s
REC VIEW
c
FIRMWARE
BACK
Use fg to select a function,
then press i.
MENU DISPLAY
For details on using the menu lists, see “Setting on the menu” (gP. 22).
X (Date/time setting) gP. 15
W (Changing the display language)
You can change the language used for the on-screen display and error messages from
ENGLISH to another language.
s (Monitor brightness adjustment)
You can adjust the brightness and color temperature of the
monitor. Color temperature adjustment will affect only the
LCD monitor display during playback.
Use hi to switch between j (color temperature) and k
(brightness), and use fg to adjust the value between
[+7] - [-7].
’09.03.01
ENG.
j±0 k±0
5SEC
SET
14:01
ON
–5+
7
2
Setup functions
BACK SET
REC VIEW
You can display the picture you have just taken on the monitor while it is being recorded to
the card, and to select how long the picture is displayed. This is useful for making a brief
check of the picture you have just taken. Pressing the shutter button halfway while checking
the picture lets you resume shooting immediately.
[1SEC] – [20SEC] Selects the number of seconds to display each picture. Can be set in
[OFF] The picture being recorded to the card is not displayed.
units of 1 second.
[AUTOq] Displays the image being recorded, and then switches to playback
mode. This is useful for erasing a picture after checking it.
c MENU DISPLAY gP. 23
93
EN
Page 94
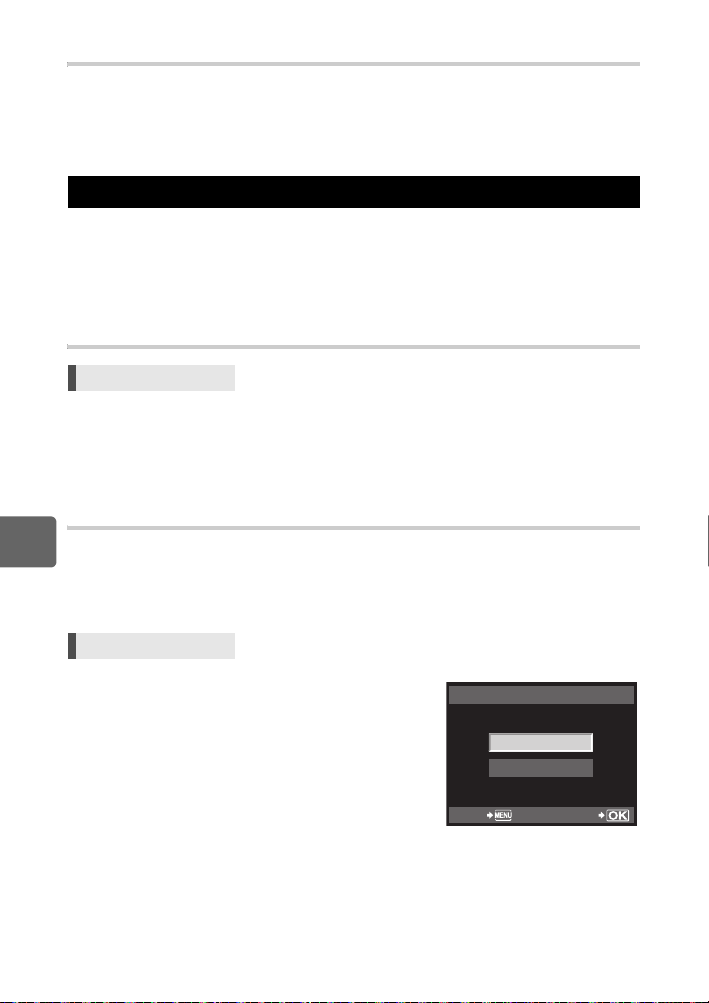
FIRMWARE
Your product’s firmware version will be displayed.
When you make inquiries about your camera or accessories or when you want to download
software, you will need to state which version of each of the products you are using.
Press i. Your product’s firmware version will be displayed. Press the i button to return to
the previous screen.
Resetting the camera settings
In P, A, S, and M mode, current camera settings (including any changes you have made)
are retained when the power is turned off. To reset the camera to the factory default settings,
set [RESET]. You can register settings in advance to [RESET1] and [RESET2]. The camera
settings at that time are registered in [RESET1] and [RESET2]. For details on the registered
functions, refer to “Functions that can be registered with My Mode and Custom Reset
Setting” (gP. 136).
Registering [RESET1]/[RESET2]
Menu MENU[W][CUSTOM RESET]
1 Select either [RESET1]/[RESET2] to register and press i.
• If settings have already been registered, [SET] is displayed next to [RESET1]/[RESET2].
Selecting [SET] again overwrites the registered setting.
• To cancel the registration, select [RESET].
2 Select [SET] and press the i button.
Using reset settings
This resets the camera to the factory default settings. You can also reset the camera to the
7
[RESET1] or [RESET2] setting.
Setup functions
[RESET] Resets to the factory default settings. For the default settings, see
[RESET1]/[RESET2] Resets to the registered settings.
“Menu directory” (gP. 137).
Menu MENU[W][CUSTOM RESET]
1 Select [RESET], [RESET1] , or [RESET2] and press
the i button.
2 Use fg to select [YES], then press the i
button.
94
EN
RESET1
YES
NO
BACK SET
Page 95
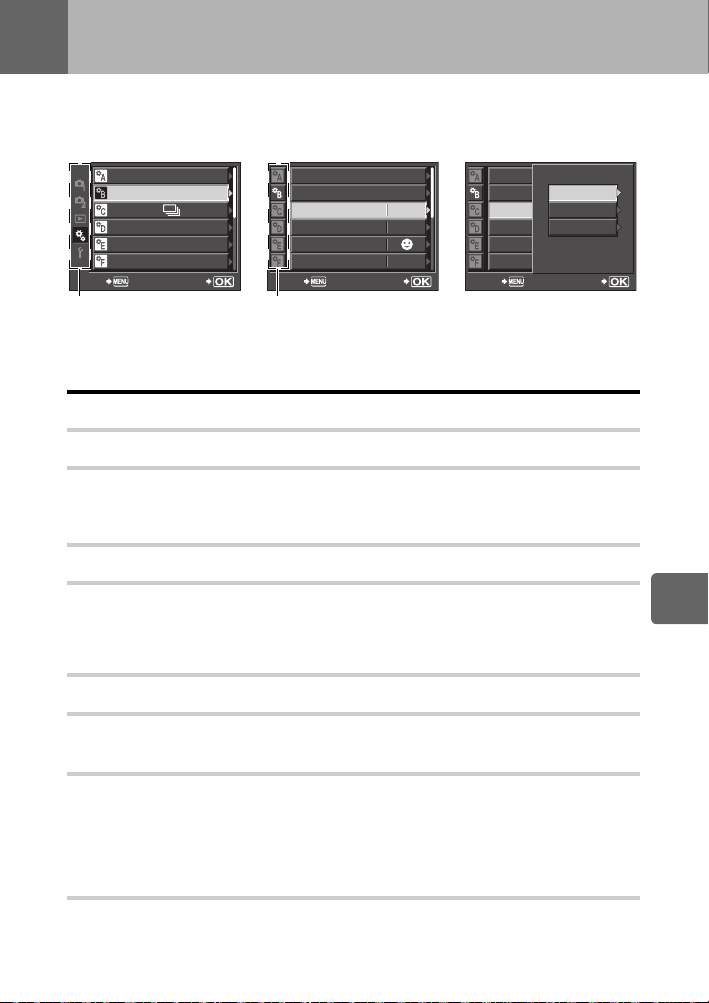
8 Customizing your camera
Use the Custom Menu to customize the shooting functions. The Custom Menu has 9 tabs (R
toZ) that are divided according to the functions to be set.
In the default setting, the Custom Menu is not displayed. To customize the functions, set
[c MENU DISPLAY] in the Setup Menu to [ON] to display the Custom Menu. (gP. 23)
AF/MF
BUTTON/DIAL
RELEASE/
DISP/PC
e
EXP/
/ISO
CUSTOM
#
BACK
Use fg to select [c], then
press i.
SET
DIAL FUNCTION
DIAL DIRECTION
AEL/AFL
AEL/AFL MEMO
;
FUNCTION
MY MODE SETUP
BACK
Use fg to select tab R to
Z, then press i.
S1/C2/M1
OFF
---
SET
DIAL FUNCTION
DIAL DIRECTION
AEL/AFL
AEL/AFL MEMO
;
MY MODE SETUP
BACK
Use fg to select a function,
then press i.
For details on using the menu lists, see “Setting on the menu” (gP. 22).
R AF/MF
LIVE VIEW AF MODE gP. 36
AF ILLUMINAT.
The built-in flash can be set to function as an AF illuminator. This makes focusing easier in
low-light conditions using AF mode. To use this function, raise the flash.
AF MODE gP. 55
C-AF LOCK
When set to [ON], during focusing with C-AF mode, this prevents the focus from changing
even if the distance to the subject suddenly changes. This is effective when shooting at a
location where something passes in front of or behind the subject.
AF AREA gP. 57
AEL/AFL
FUNCTION
S-AF
C-AF
MF
SET
S1/C2/M1
OFF
8
Customizing your camera
AF AREA POINTER
When set to [OFF], the AF target does not light in the viewfinder when the subject is in focus.
AF SENSITIVITY
You can set the range of the AF target for focusing when [AF AREA] is set to M.
[NORMAL] The camera focuses using a range that is somewhat larger than the selected
AF target.
[SMALL] The camera focuses only within the selected AF target. When [SMALL] is
selected, the setting display for [AF AREA] becomes o.
RESET LENS
When set to [ON], this resets the focus of the lens (infinity) each time the power is turned off.
95
EN
Page 96
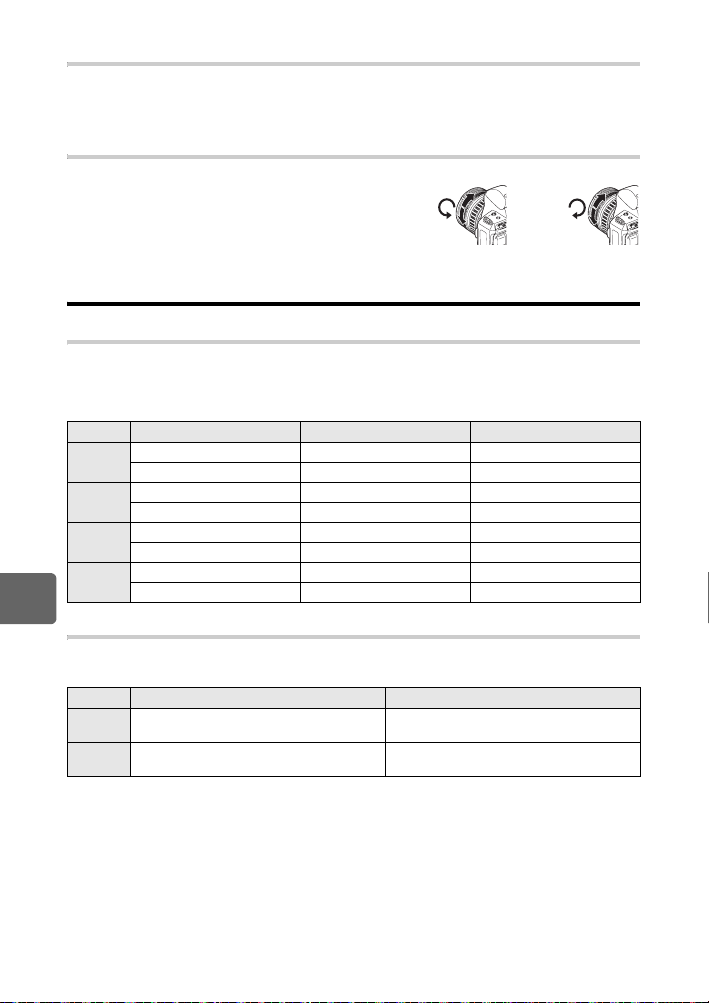
BULB FOCUSING
You can set the camera to enable focus adjustments during bulb shooting with MF.
[ON] During exposure, you can turn the focus ring and adjust the focus.
[OFF] The focus is locked during exposure.
FOCUS RING
You can customize how the lens adjusts to the focal point
by selecting the rotational direction of the focus ring.
Near
)
)
S BUTTON/DIAL
DIAL FUNCTION
You can also switch the operation of the control dial to the opposite of factory default settings.
For example, after setting [P] to [F], in P mode you can adjust the exposure compensation
using the control dial and set the program shift using the control dial while holding down the
F button.
Mode Setting j F button + j
% (program shift) Program shift Exposure compensation
P
F Exposure compensation Program shift
FNo. Aperture value Exposure compensation
A
F Exposure compensation Aperture value
SHUTTER Shutter speed Exposure compensation
S
F Exposure compensation Shutter speed
SHUTTER Shutter speed Aperture value
M
8
DIAL DIRECTION
Customizing your camera
You can select the rotational direction of the control dial and the direction in which the shutter
speed/aperture value will increase or decrease.
FNo. Aperture value Shutter speed
Setting q (rotational direction of the dial) r (rotational direction of the dial)
• Slower shutter speed
DIAL1
• Open the aperture (f-number is decreased)
• Faster shutter speed
DIAL2
• Close the aperture (f-number is increased)
• Faster shutter speed
• Close the aperture (f-number is increased)
• Slower shutter speed
• Open the aperture (f-number is decreased)
Near
96
EN
Page 97
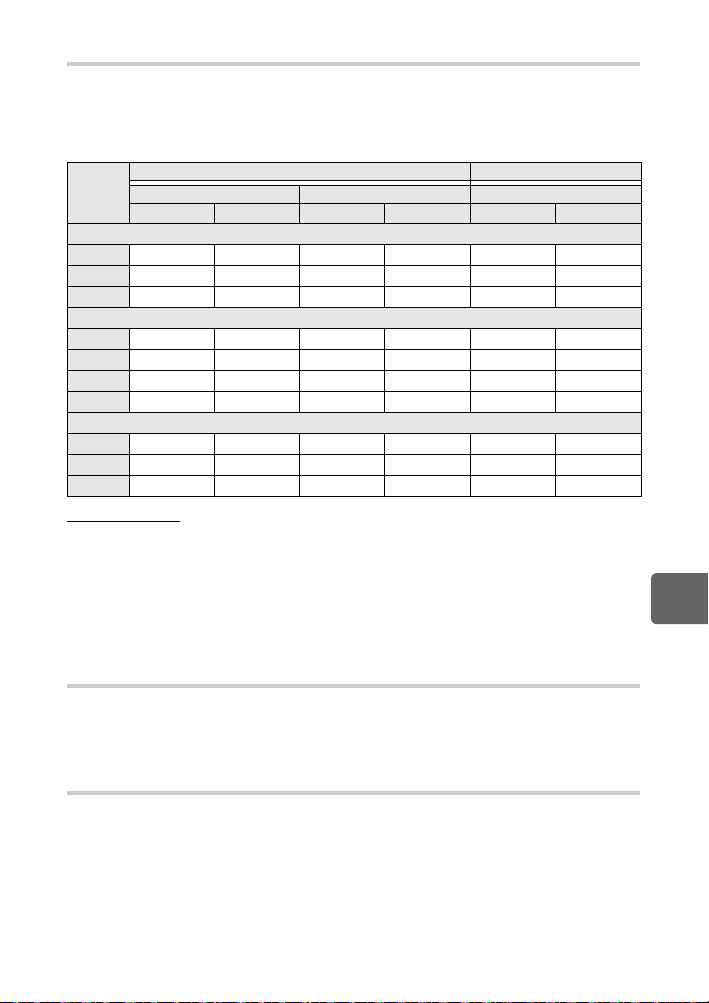
AEL/AFL
You can use the AEL/AFL button to perform AF or metering operations instead of using the
shutter button.
Select the function of the button to match the operation when the shutter button is pressed.
Select [mode1] to [mode4] in each focus mode. (You can only select [mode4] in C-AF
mode.)
Shutter button function AEL/AFL button function
Mode
[S-AF]
mode1
mode2
mode3
[C-AF]
mode1
mode2
mode3
mode4
[MF]
mode1
mode2
mode3
Half-press Full press When holding down AEL/AFL
Focus Exposure Focus Exposure Focus Exposure
S-AF Locked kkkLocked
S-AF kkLocked k Locked
k Locked kkS-AF k
C-AF start Locked Locked kkLocked
C-AF start k Locked Locked k Locked
k Locked Locked k C-AF start k
kkLocked Locked C-AF start k
k Locked kkkLocked
kkkLocked k Locked
k Locked kkS-AF k
Basic operations
[mode1] For determining the metered exposure while focusing. AE lock is activated while
pressing the AEL/AFL button, allowing you to adjust the focus and determine
[mode2] For determining the exposure when you press the shutter button fully. This is
the exposure separately.
useful for shooting scenes with significant changes in lighting, such as on a stage.
[mode3] For focusing with the AEL/AFL button instead of the shutter button.
[mode4] Press the AEL/AFL button to focus, and press the shutter button fully to
determine the exposure.
AEL/AFL MEMO
You can lock and maintain the exposure by pressing the AEL/AFL button.
[ON] Press the AEL/AFL button to lock and maintain the exposure. Press again to
cancel the maintaining of the exposure.
[OFF] The exposure will be locked only while the AEL/AFL button is pressed.
; FUNCTION
You can assign a function to the < button.
[Fn FACE DETECT]
Press the < button to set [g FACE DETECT] to [ON] and activate the optimal
settings. Press again to set it to [OFF].
g“Using the face detection function” (P. 38), “g FACE DETECT” (P. 101)
[PREVIEW]/[LIVE PREVIEW] (electronic)
While holding down the < button, you can use the preview function. When set to
[LIVE PREVIEW], pressing the < button automatically switches the camera to live
view for a preview of the picture on the monitor.
g“Preview function” (P. 47)
8
Customizing your camera
97
EN
Page 98
[V]
Press the < button to acquire the WB value.
g“Setting the one-touch white balance” (P. 70)
[P HOME]
Press the < button to switch to the registered AF home position. Press the button
again to switch to the original AF target mode. If you turn off the camera while it is set
to the AF home position, the original position will not be stored.
g“Registering an AF target mode” (P. 59)
[MF]
Press the < button to switch AF mode to [MF]. Press the button again to switch to
the original AF mode.
[RAWK]
Press the < button to switch from JPEG to JPEG+RAW or from JPEG+RAW to
JPEG for the record mode.
You can change the record mode by turning the control dial while holding down the <
button.
[TEST PICTURE]
Pressing the shutter button while pressing the < button enables you to check the
picture you have just taken on the monitor without having to record the picture to the
card. This is useful when you want to see how a picture turned out without saving it.
[MY MODE]
While holding down the < button, you can take pictures using the camera settings
registered in the [MY MODE SETUP].
g“MY MODE SETUP” (P. 98)
[OFF]
Does not allow function allocation.
MY MODE SETUP
You can store two frequently used settings as My Mode. You can select which My Mode
setting to use in advance by following the steps under “Executing” below. To use My Mode,
set [; FUNCTION] to [MY MODE] and hold down the < button while shooting. g“;
FUNCTION” (P. 97)
Registering
1) Select [MY MODE1] or [MY MODE2] and press i.
8
2) Select [SET] and press the i button.
Customizing your camera
• The current settings are registered in the camera. For details on the functions that can
be registered to My Mode, refer to “Functions that can be registered with My Mode and
Custom Reset Setting” (gP. 136).
• To cancel the registration, select [RESET].
Executing
1) Select [MY MODE1] or [MY MODE2] and press the i button.
2) Select [YES] and press the i button.
• The selected My Mode is set.
• When shooting, press the shutter button while holding down the < button.
BUTTON TIMER
The direct button may remain selected even after it is released.
[3SEC]/[5SEC]/[8SEC] The button remains selected during the number of seconds
[HOLD] The button remains selected until you press it again.
• Buttons that can be set with [BUTTON TIMER]
98
ISO, F, WB, #, G, AF, </Y/j
EN
indicated.
Page 99
A
You can switch the functions of the AEL/AFL button and the < button. When you select
[ON], the AEL/AFL button will function as the < button, and the < button will function as
the AEL/AFL button.
• The setting also applies to the < button on the optional power battery holder when
attached to the camera.
n FUNCTION
You can set the function of the arrow pad.
[OFF] To prevent malfunction, the functions assigned to the arrow pad will not be
activated when the button is pressed.
[ON] The functions assigned to the arrow pad will be activated.
[P] You can use the arrow pad to select the position of the AF target. Selection is
possible for a short time after the shutter button is pressed halfway and released.
g“Selecting the AF target mode and position” (P. 58)
j FUNCTION
Other functions can be assigned to the j/Y/< button.
[j/</Y]
g“Sequential shooting” (P. 61), “Self-timer shooting” (P. 62), “Remote control
shooting” (P. 62)
[AF AREA]
g“AF target selection” (P. 57)
[AF MODE]
g“AF mode selection” (P. 55)
[WB]
g“Selecting the white balance” (P. 68)
[METERING]
g“Changing the metering mode” (P. 48)
[ISO]
g“ISO sensitivity setting” (P. 52)
T RELEASE/j
RLS PRIORITY S/RLS PRIORITY C
Normally, this camera does not release the shutter while the AF is operating or the flash is
charging. If you want to release the shutter without waiting until these operations have
completed, use the setting below. You can set the release priority individually in AF mode.
RLS PRIORITY S Sets release priority for S-AF mode gP. 55.
RLS PRIORITY C Sets release priority for C-AF mode gP. 56.
O fps
You can set the number of pictures shot in one second when using sequential shooting with
[O] from [1fps] to [3fps].
8
Customizing your camera
99
EN
Page 100
U DISP/PC
VIDEO OUT
You can select NTSC or PAL according to your TV’s video signal type.
You will need to set this when you want to connect the camera to a TV and play back images
in a foreign country. Make sure the correct video signal type is selected before connecting the
video cable. If you use the wrong video signal type, recorded pictures will not play back
properly on your TV.
TV video signal types in major countries and regions
Check the video signal type before connecting the camera to your TV.
NTSC North America, Japan, Taiwan, Korea
PAL European countries, China
SLEEP
After a specified period of time elapses with no operations being performed, the camera
enters the sleep mode (stand-by) to save battery power. After the super control panel is
displayed for a specified period of time, the backlight turns off. After a specific period of time
has further passed, the camera enters sleep mode. [SLEEP] lets you select sleep timer from
[1MIN], [3MIN], [5MIN], or [10MIN], [OFF] cancels the sleep mode.
The camera activates again as soon as you touch any button (the shutter button, q button,
etc.).
BACKLIT LCD (Backlight timer)
To save battery power, after the super control panel is displayed for a specified period of
time, the monitor backlight turns off and the monitor darkens. Select from [8SEC], [30SEC],
or [1MIN] for the time until the backlight turns off. [HOLD] sets the backlight to stay on.
The monitor backlight turns on again as soon as you touch any button (the shutter button,
arrow pad, etc.).
4 h TIMER (Auto power off)
8
You can set the camera to turn off automatically if not operated for 4 hours. It will not turn off
Customizing your camera
if this is set to [OFF].
USB MODE
You can connect the camera directly to a computer or printer with the provided USB cable. If
you specify the device you are connecting to beforehand, you can skip the USB connection
setting procedure normally required every time you connect the cable to the camera. For
details on how to connect the camera to either device, refer to “Connecting the camera to a
printer” (gP. 112) and “Connecting the camera to a computer” (gP. 116).
[AUTO]
The selection screen for the USB connection will be displayed every time you connect
the cable to a computer or printer.
[STORAGE]
Allows you to transfer images to a computer. Also, select to use the OLYMPUS
Master software via PC connection.
[MTP]
Allows you to transfer images to a computer running Windows Vista without using the
OLYMPUS Master software.
[CONTROL]
100
EN
Allows you to control the camera from a PC using the optional OLYMPUS Studio.
 Loading...