

Page 1

INSTRUCTIONS
Page 2
Thank you for purchasing the OLYMPUS OM-4T . This new SLR camera employs
titanium — a metal lighter and 6 times stronger than aluminum — in the construction
of the main part of the body. It is the world's first 35 mm single lens reflex camera
equipped with Multi Spot Metering and our new Full Synchro Flash System.
This camera has been designed to facilitate serious photography with professional-
level techniques including daylight synchro-flash photography, all with a minimum
of effort: Its aim is to expand the sphere of creative photography. We recommend
that before using the camera, you read this instruction manual carefully, confirming
the instructions on the camera so that you can get the very best performance and
service life from your ne w camera.
Note: All the components of the Olympus OM-4T are carefully designed and their production and
assembly is strictly controlled to enhance the unmatched performance of the system. If any interchangeable lenses, flashes, or accessories other than Olympus products are used, Olympus cannot
be responsible for poor results or damage of th e OM-4T .
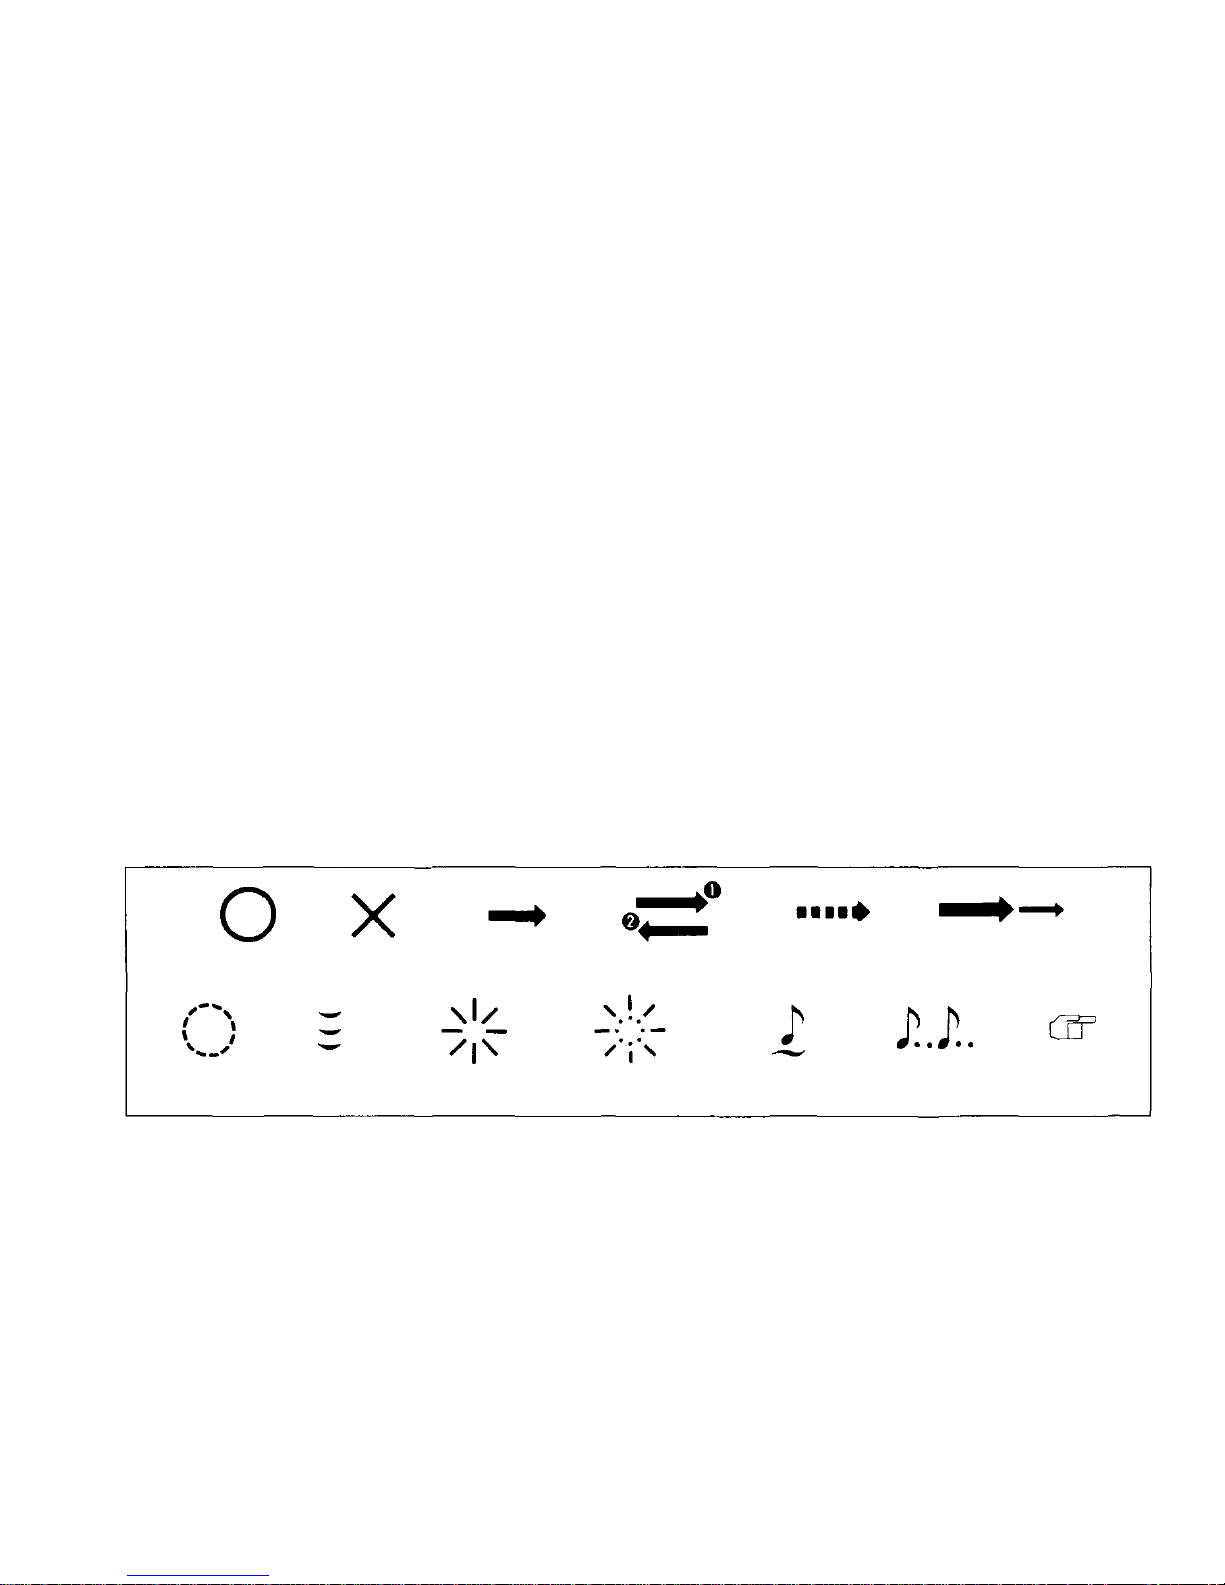
Correct
Incorrect
Operation
Operation order
Automatic
operation
Two-step operation
Attention
Press
lightly
Lamp on
Lamp blinking
Continuous
sound
Intermittent
sound
Reference
1
Page 3

TABLE OF CONTENTS
< Preparations before Taking Pictures >
Dioptric
Correction
...............
4
Mounting
the
Lens
................
6
Loading
the
Batteries
..............
8
Checking
the
Batteries
..............
9
Loading
the
Film
.................
11
Setting
the ISO
Film
Speed
...........
15
< Taking Photographs (I) >
— Automatic Exposure —
TTL
Direct
Light
Metering
...........
18
Rewinding
the
Film
...............
22
< Taking Photographs (I I) >
— Automatic Exposure —
How to Use the
Spot
Measurement
......
25
How to
Clear
the
Spot
Metering
........
28
How to Use the "Multi-Spot Measurement"
Mode
.......................
29
Highlight
Control
.................
32
Shadow
Control
.................
35
< Taking Photographs (III) >
— Automatic Exposure —
How to Use the Exposure Memory
Lock
System
..................
39
< Taking Photographs (IV) >
— Manual Exposure —
How to Take Picture on Center-
Weighted,
Averaged
Metering
.........
44
How to Use the
Spot
Measurement
......
46
< Taking Photographs (V) >
— Flash Photography —
Taking Daylight Synchro-Flash Photographs
(Super
FP
Flash
Mode)
............
50
< Other Operations >
Using
the
Self-Timer ...............
55
Exposure
Compensation ............. 56
Bulb
Exposure ..................
57
How to Shoot when the Batteries
are
Exhausted
.................. 58
Using
the
Viewfinder
Illuminator .......
60
How to Turn Off the Beeper
..........
61
Changing
the
Focusing
Screen .........
62
Changing
the
Camera
Back ...........
64
Attaching
the
Grip
................ 65
Handling
Care
................... 66
Description
of
Controls
............. 68
Specifications ................... 72
2
Page 4

< Preparations before Taking Pictures >
3
Page 5
Dioptric Correction
The OM-4T permits dioptric adjustment according to you r eyesight.
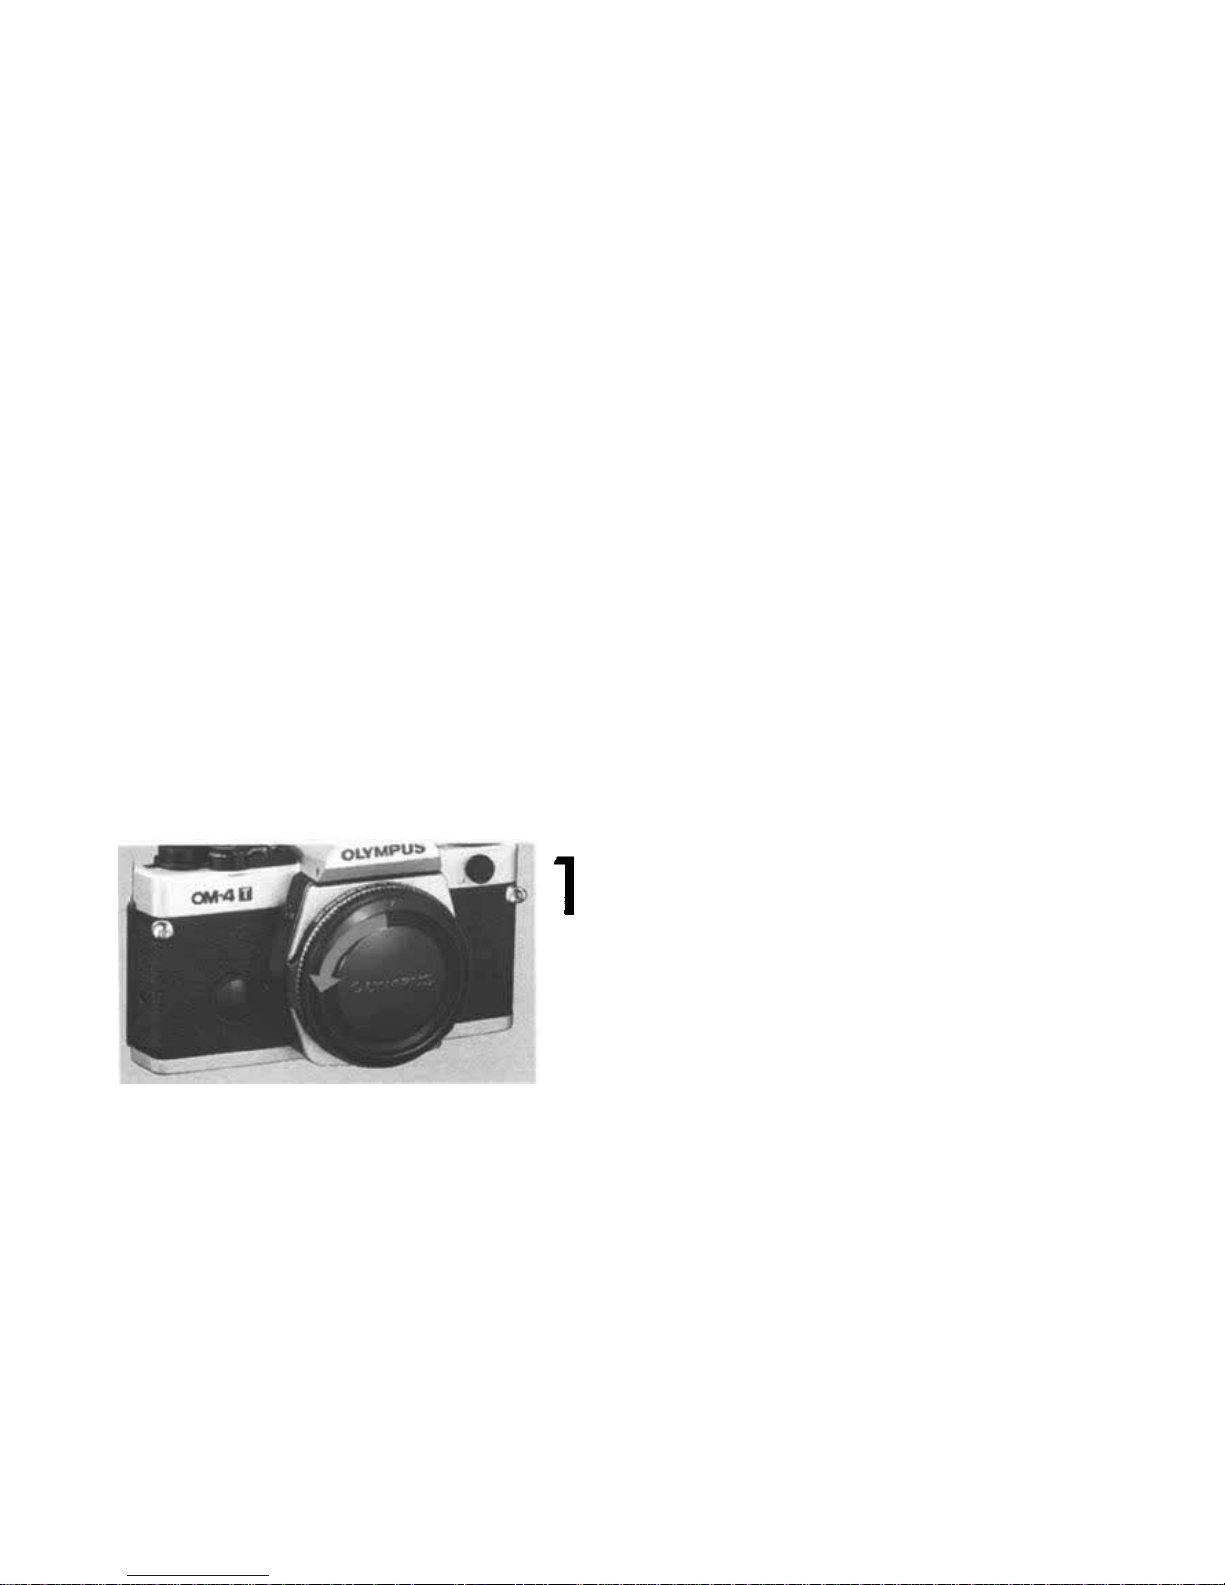
Remove the body cap.
4
Page 6
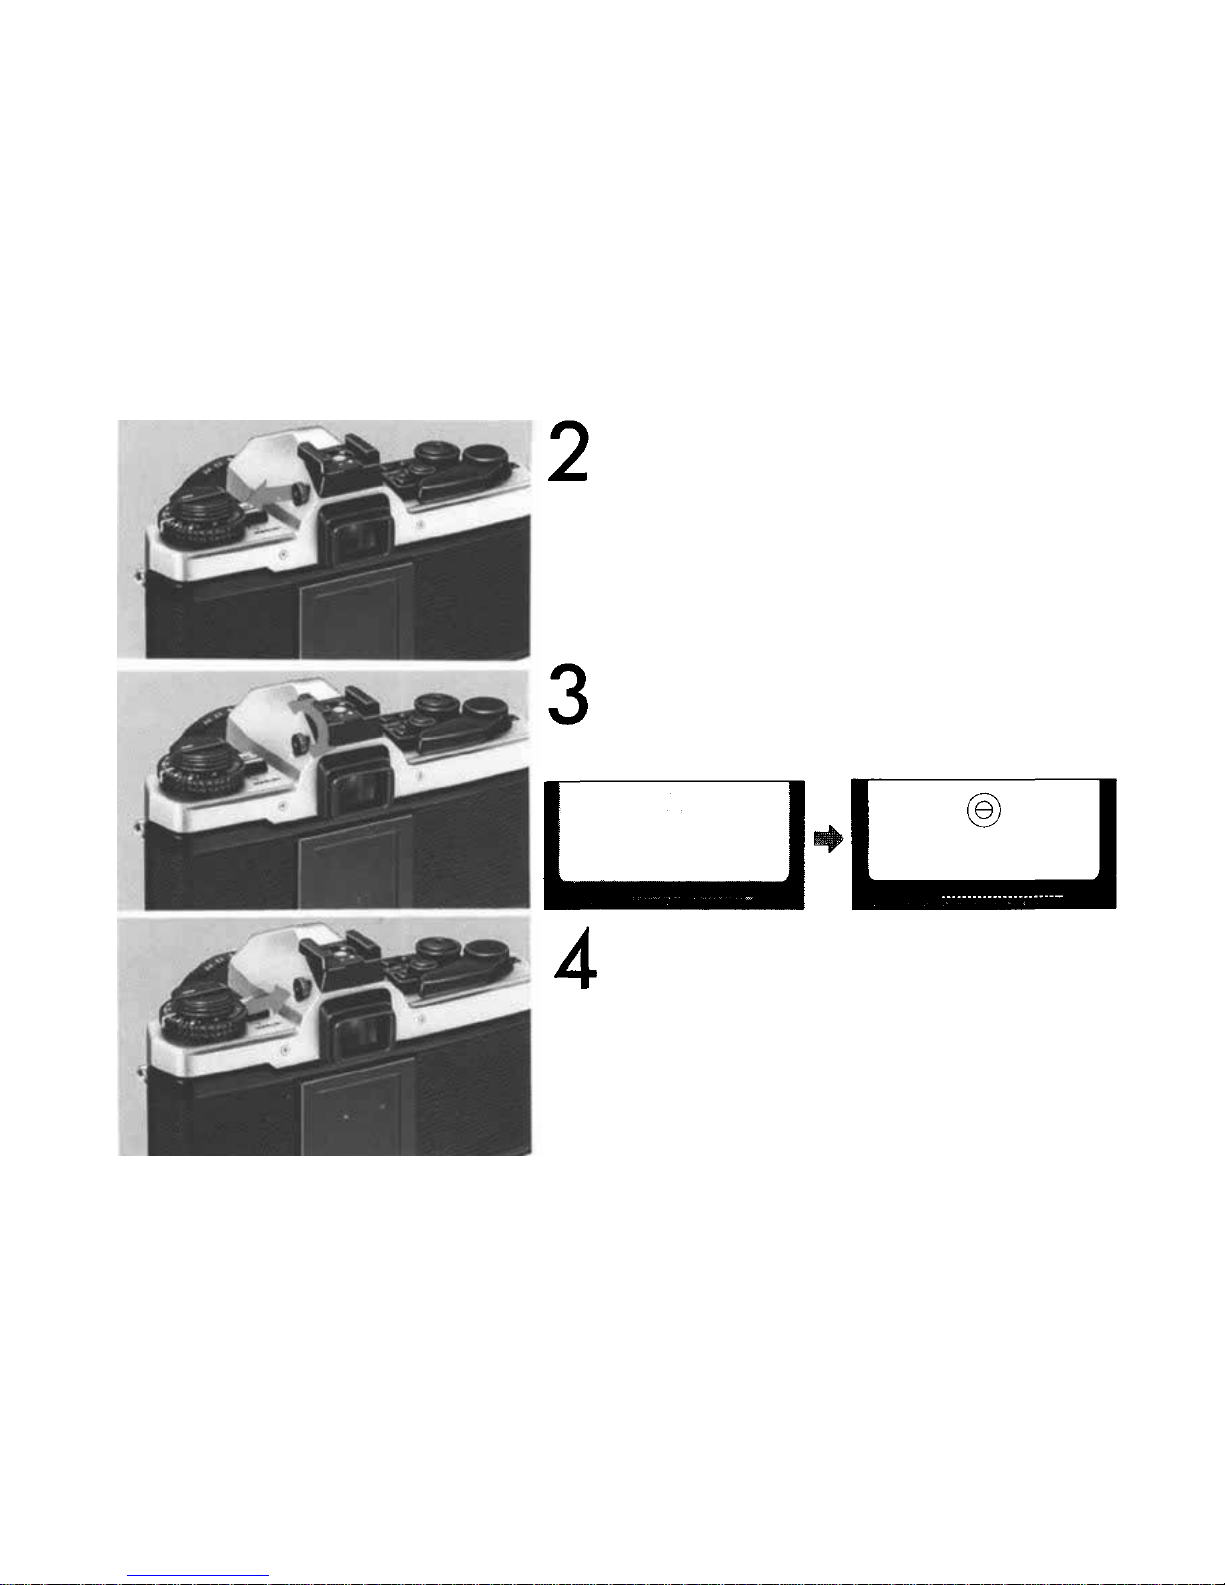
Pull out the diopter adjustment knob.
Turn and adjust the knob so that the matscreen
appears sharp.
Push
the
knob
back
in
until
it
locks.
5
Page 7
Mounting t h e Lens
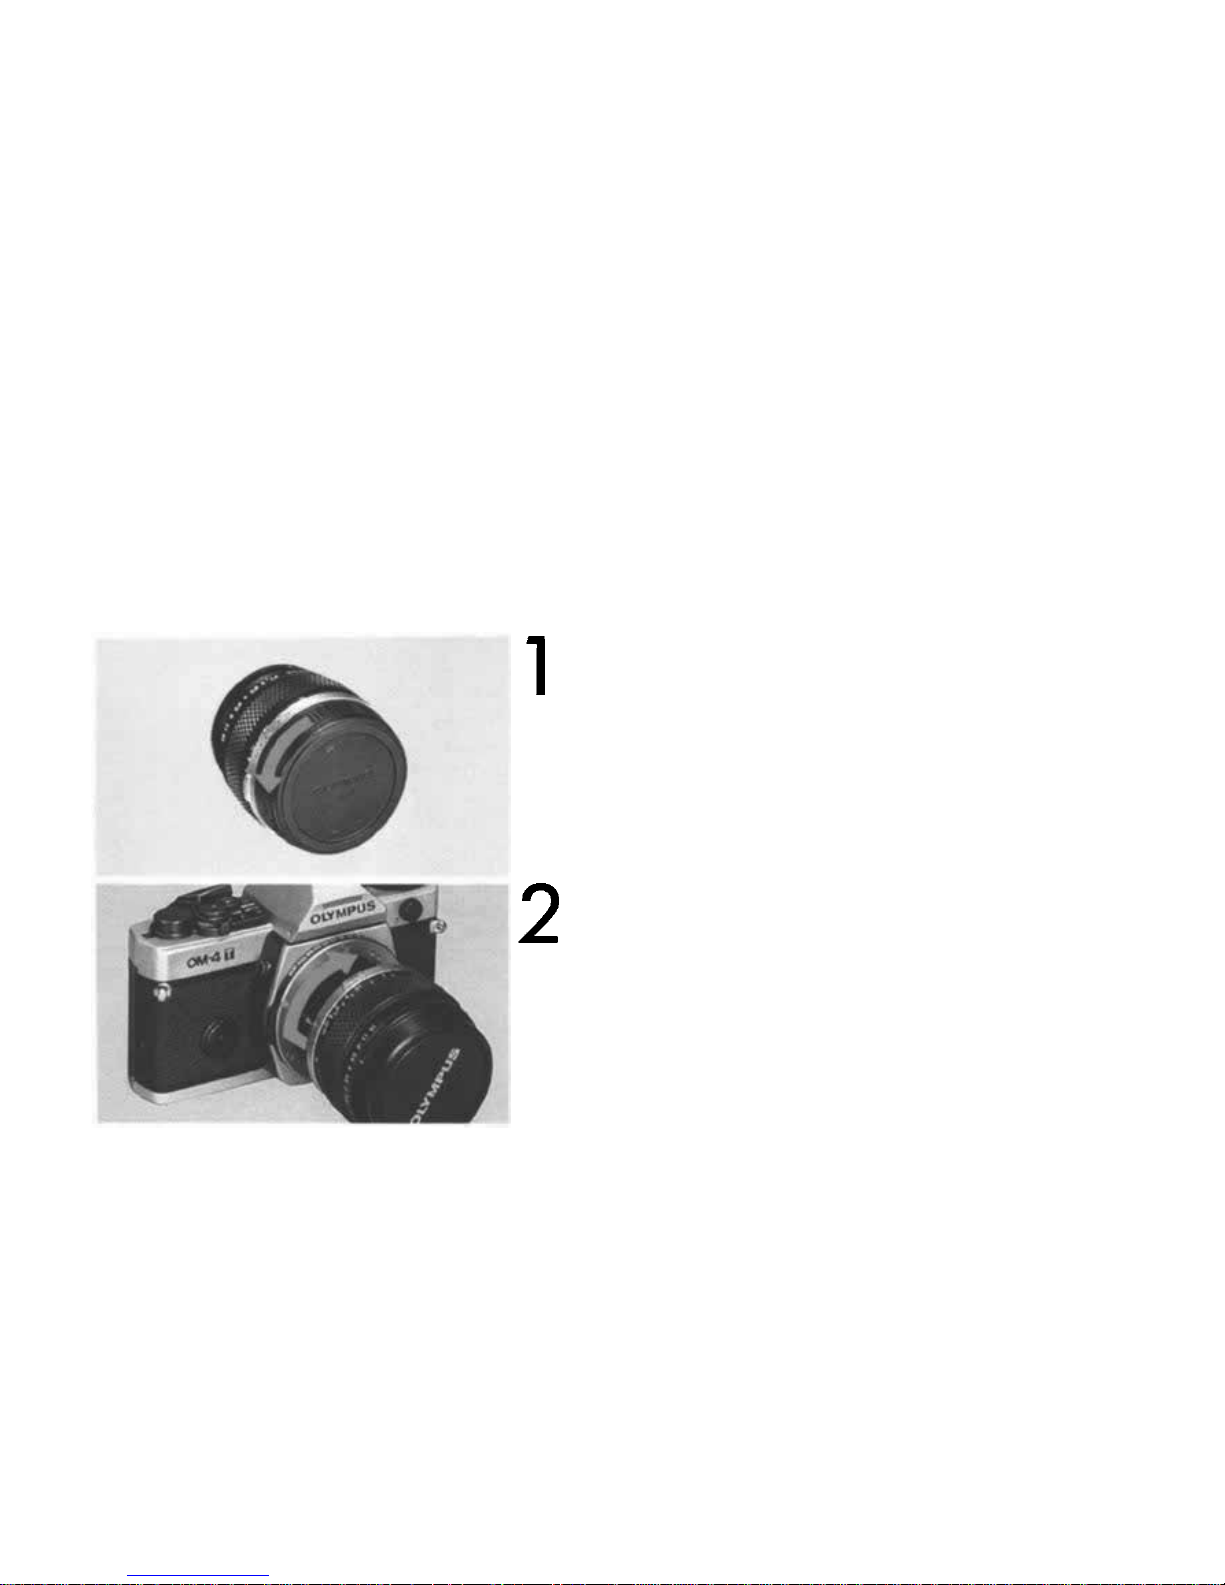
Remove the rear lens cap.
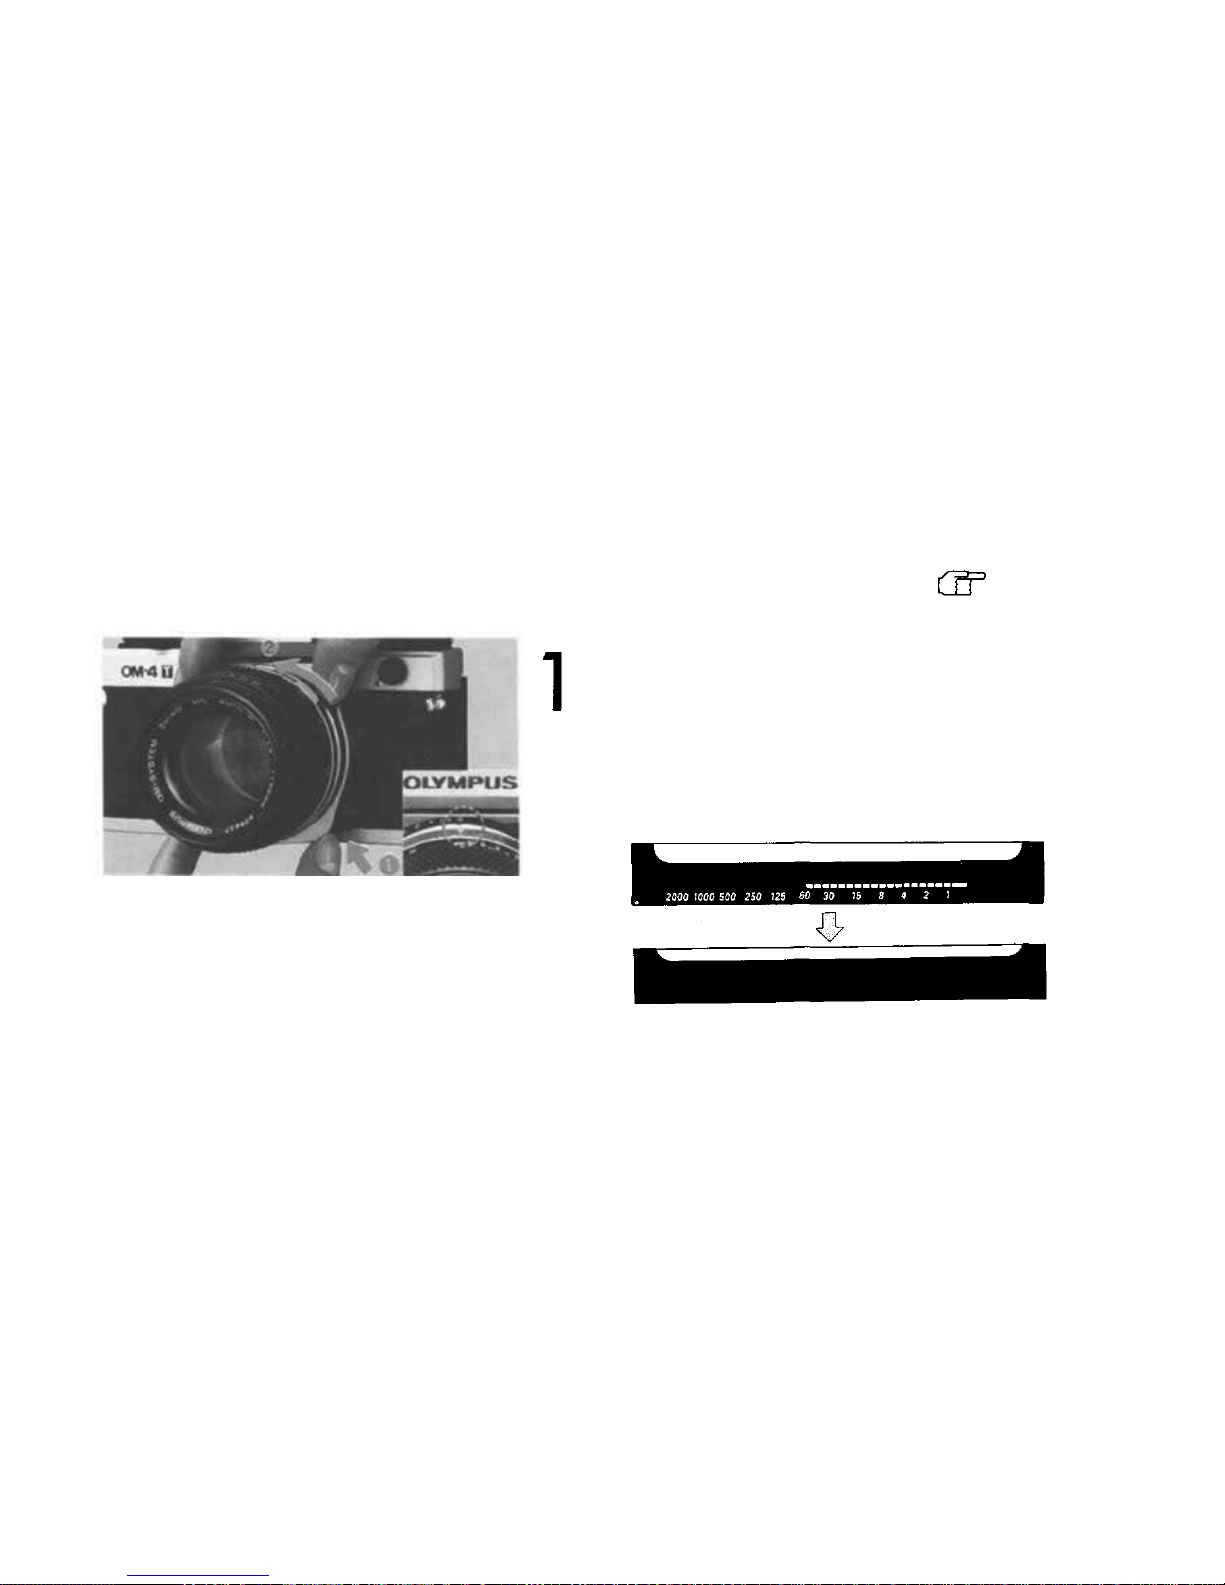
Align the red dots and rotate the lens clock-
wise
until
it
locks.
6
Page 8
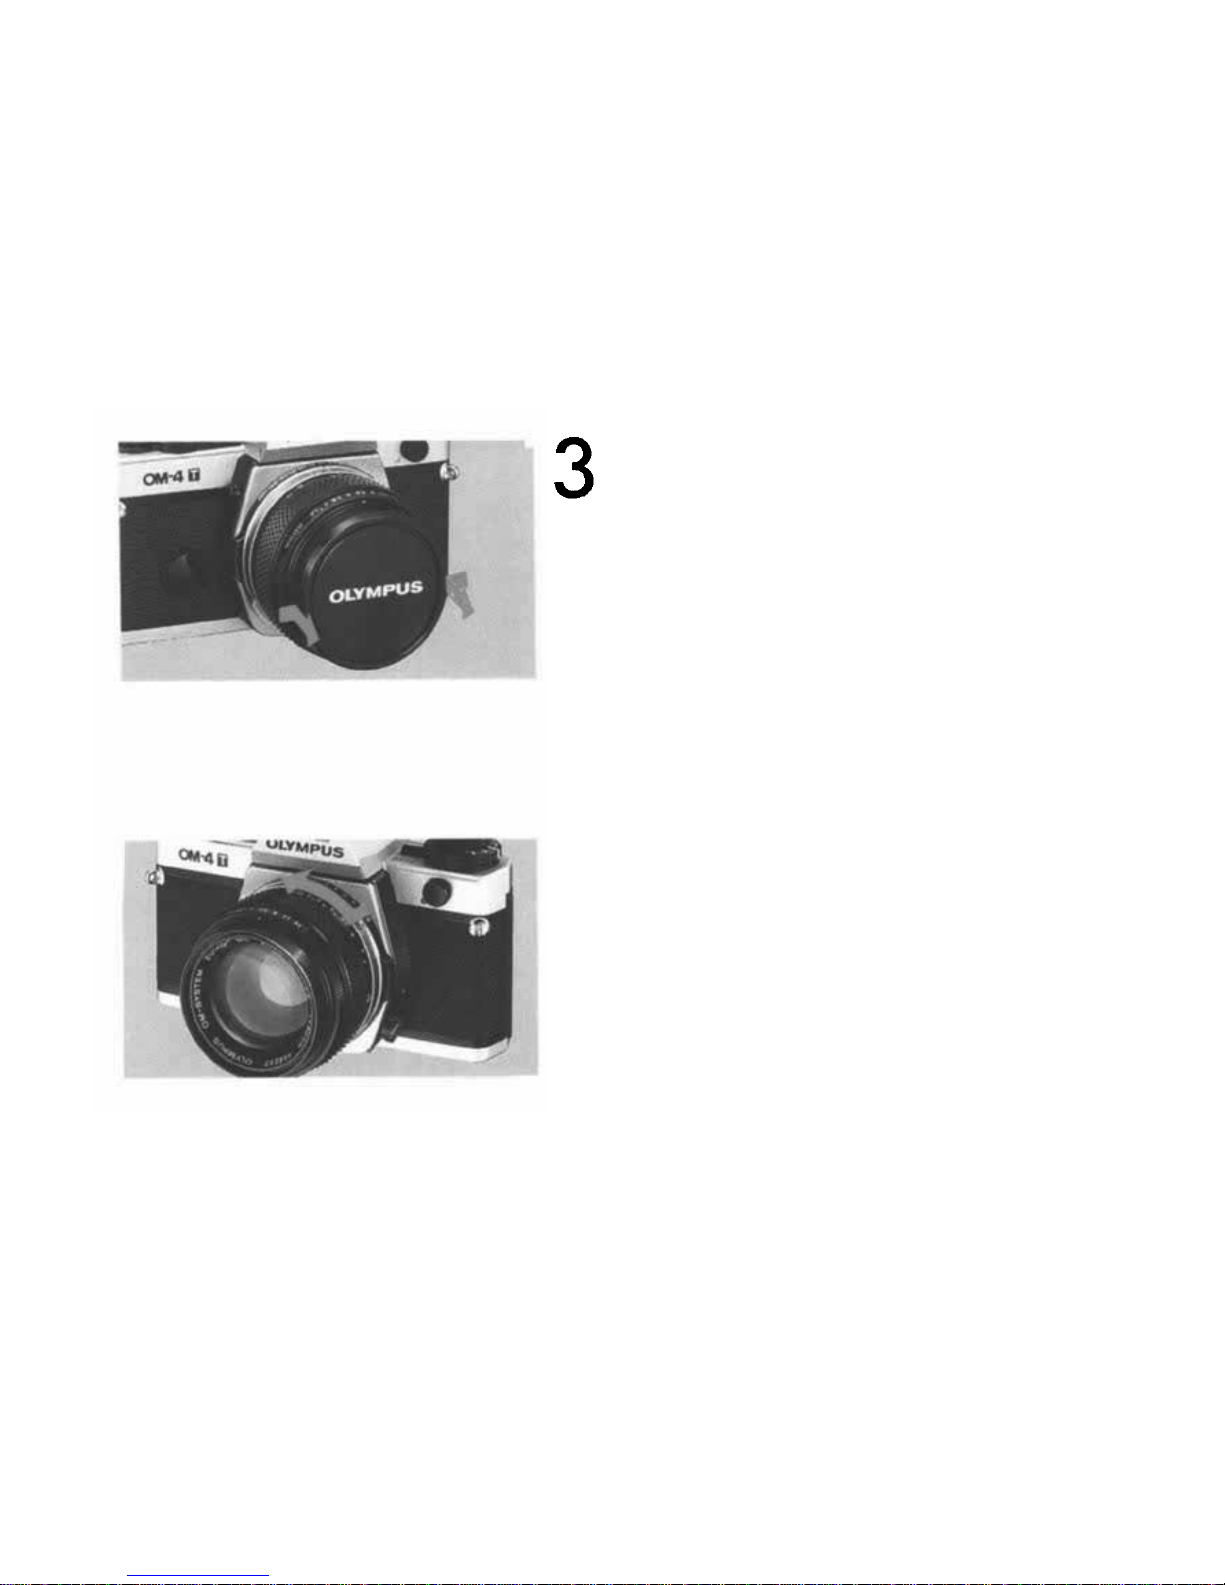
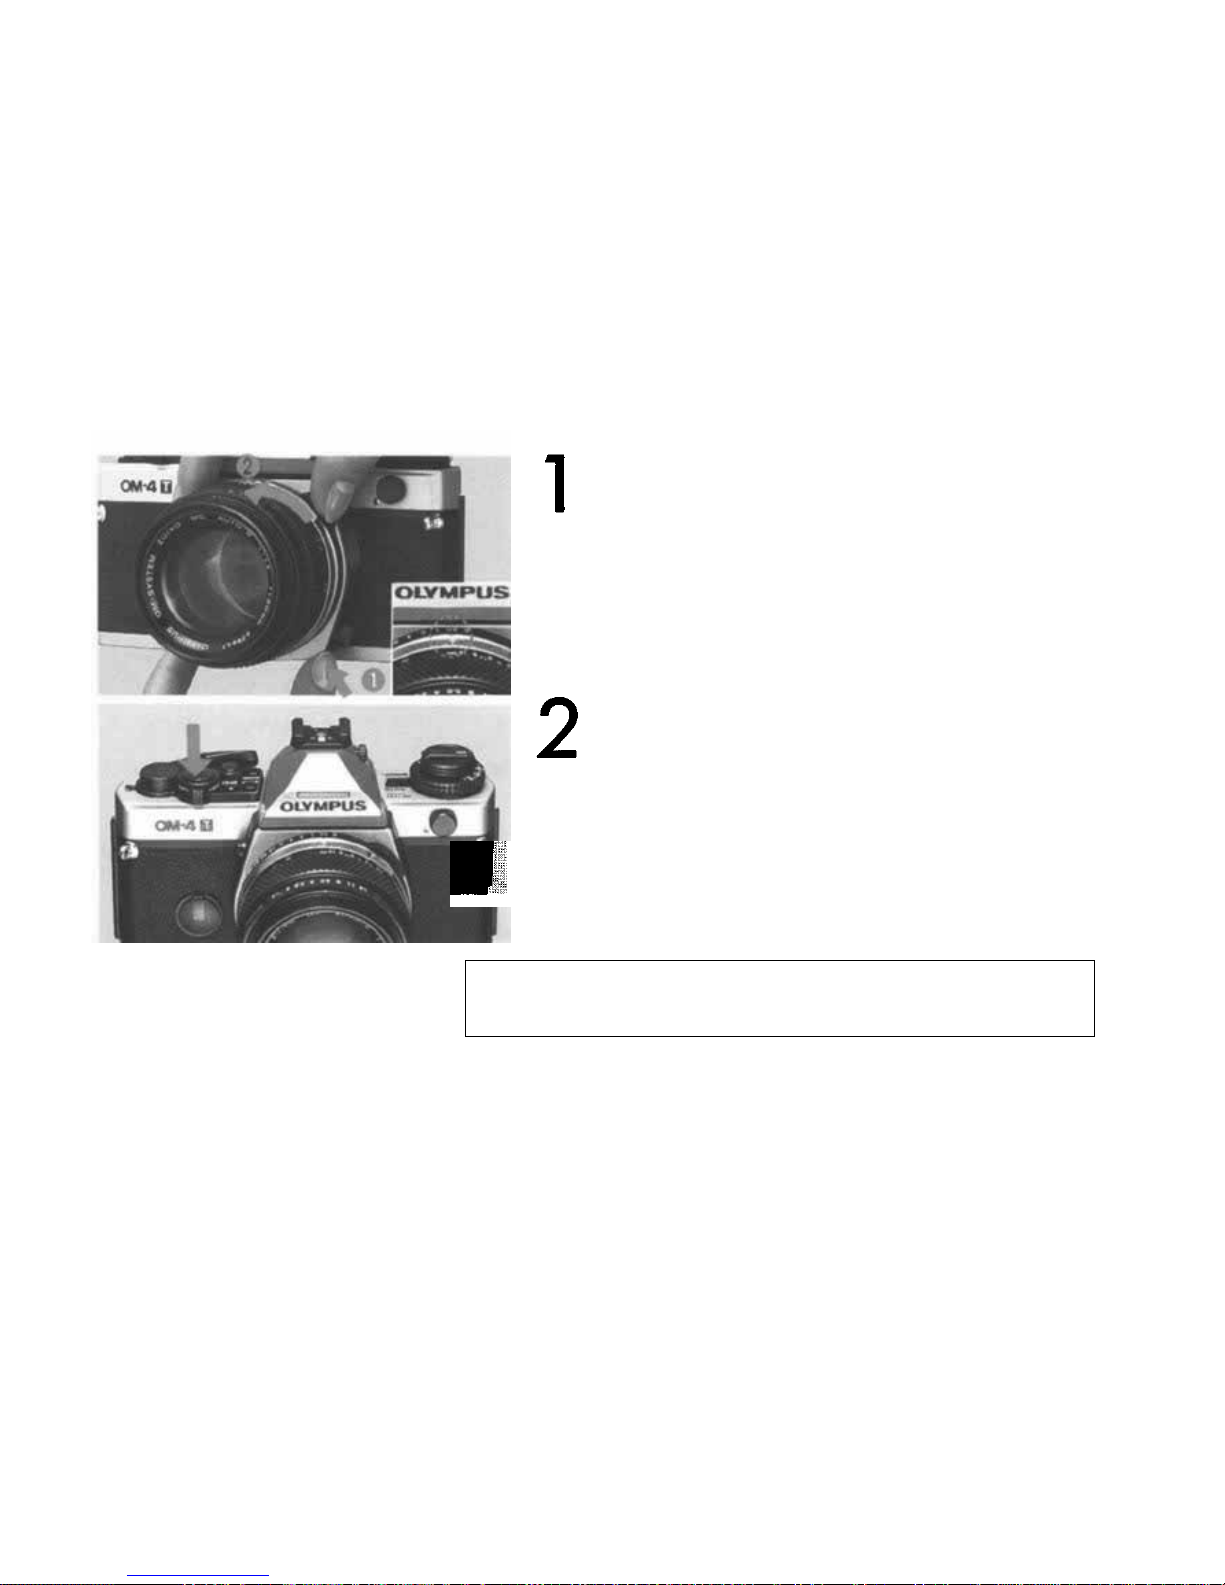
Remove the front lens cap. (Press in the mount
tabs on the edges of the lens cap parallel with
"OLYMPUS").
Press
the
lens
release
button
and
turn
the
lens
counter-clockwise.
Removing the Lens:
7
Page 9
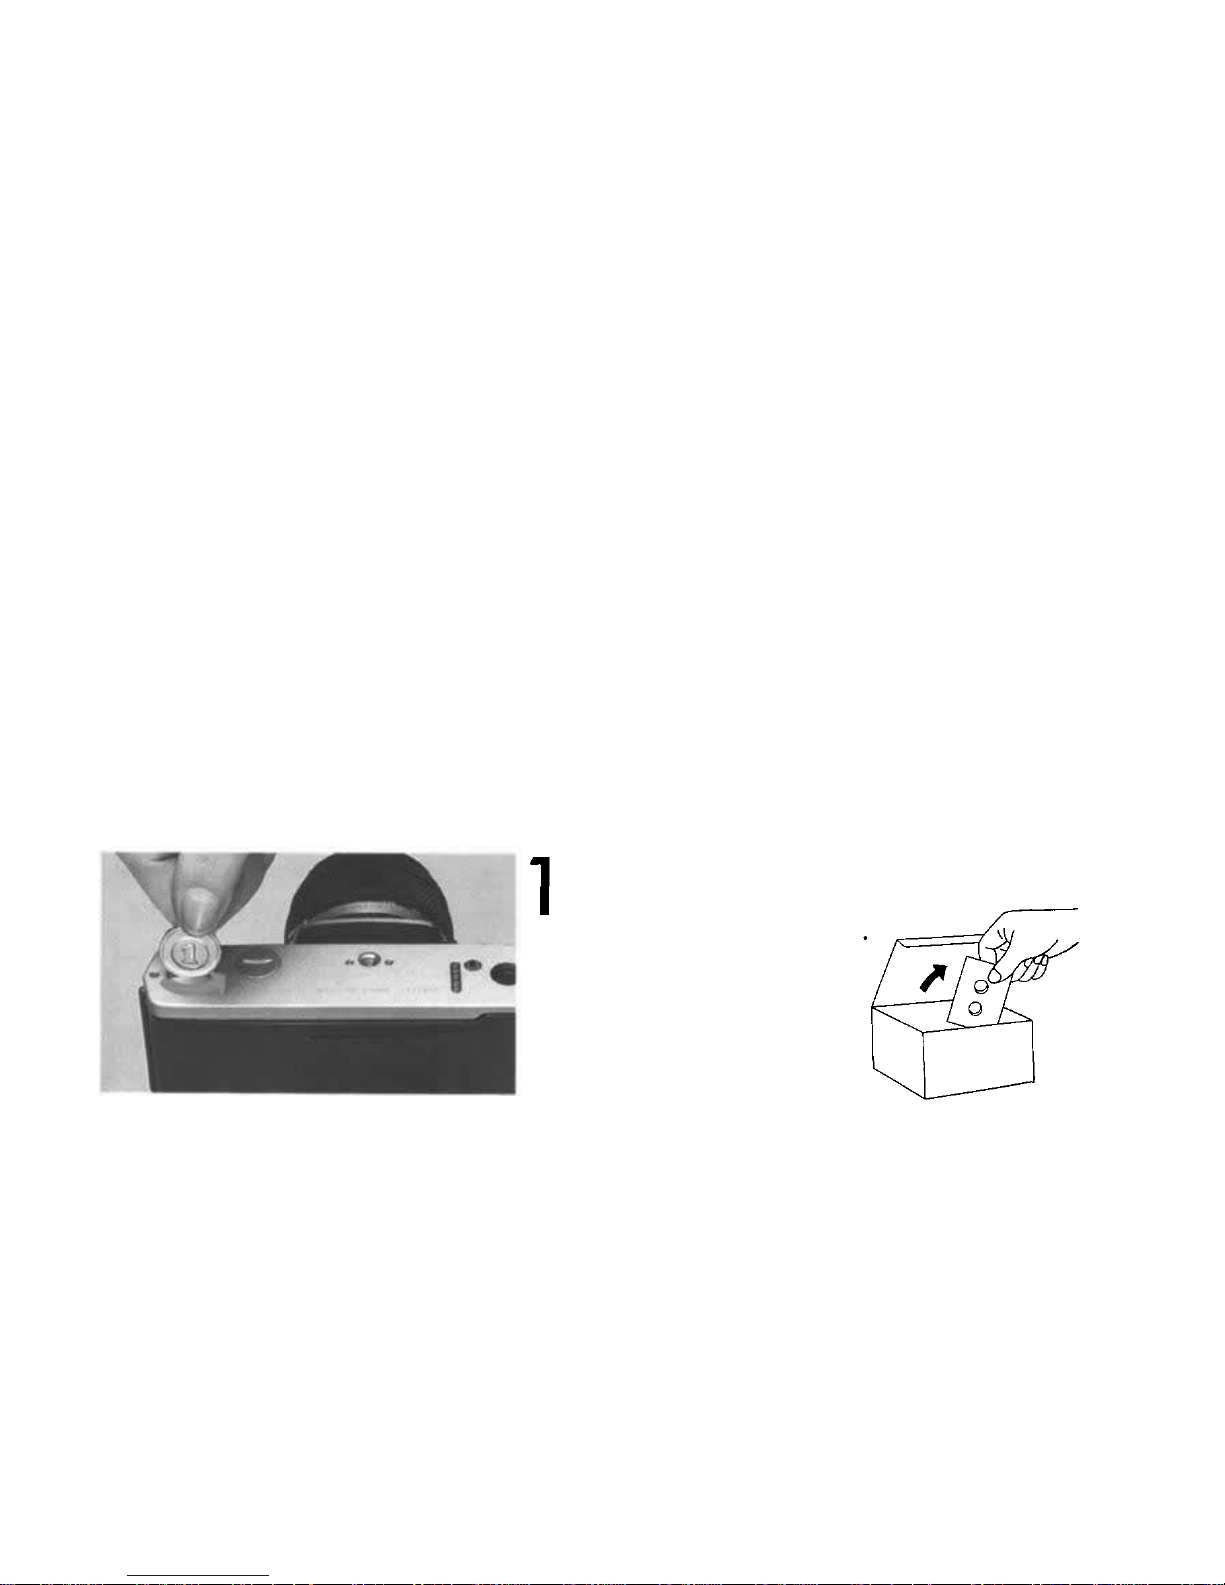
Loading t h e Batteries
Do not use different types of batteries or new and old batteries at t he same time. If you are not
likely to use the camera for a long period of time, remove the batteries before putting it away.
Remove the battery cover.
8
Page 10
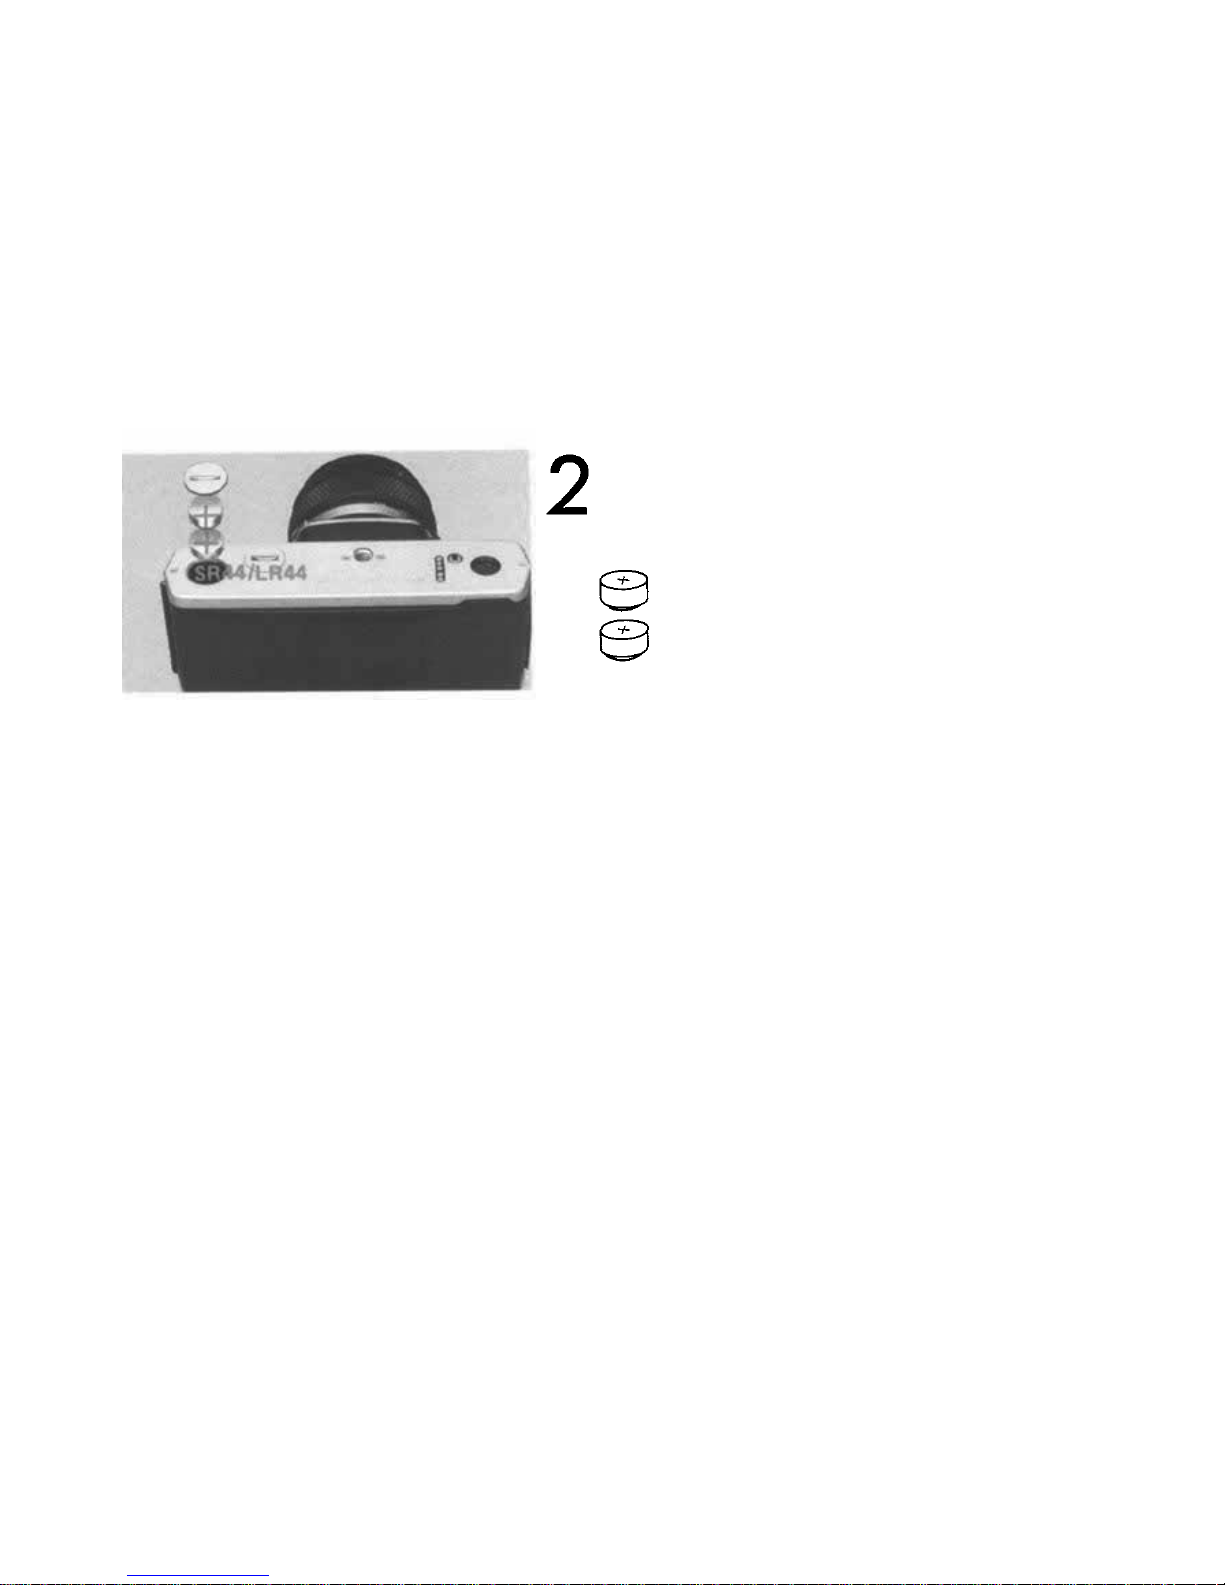
Wipe battery surfaces clean. Make sure that +
signs are facing upwards.
Checking the Batteries
Always check the batteries after inserting new batteries, when shooting in cold weather, or if the
camera has not been used for a long time.
9
Page 11
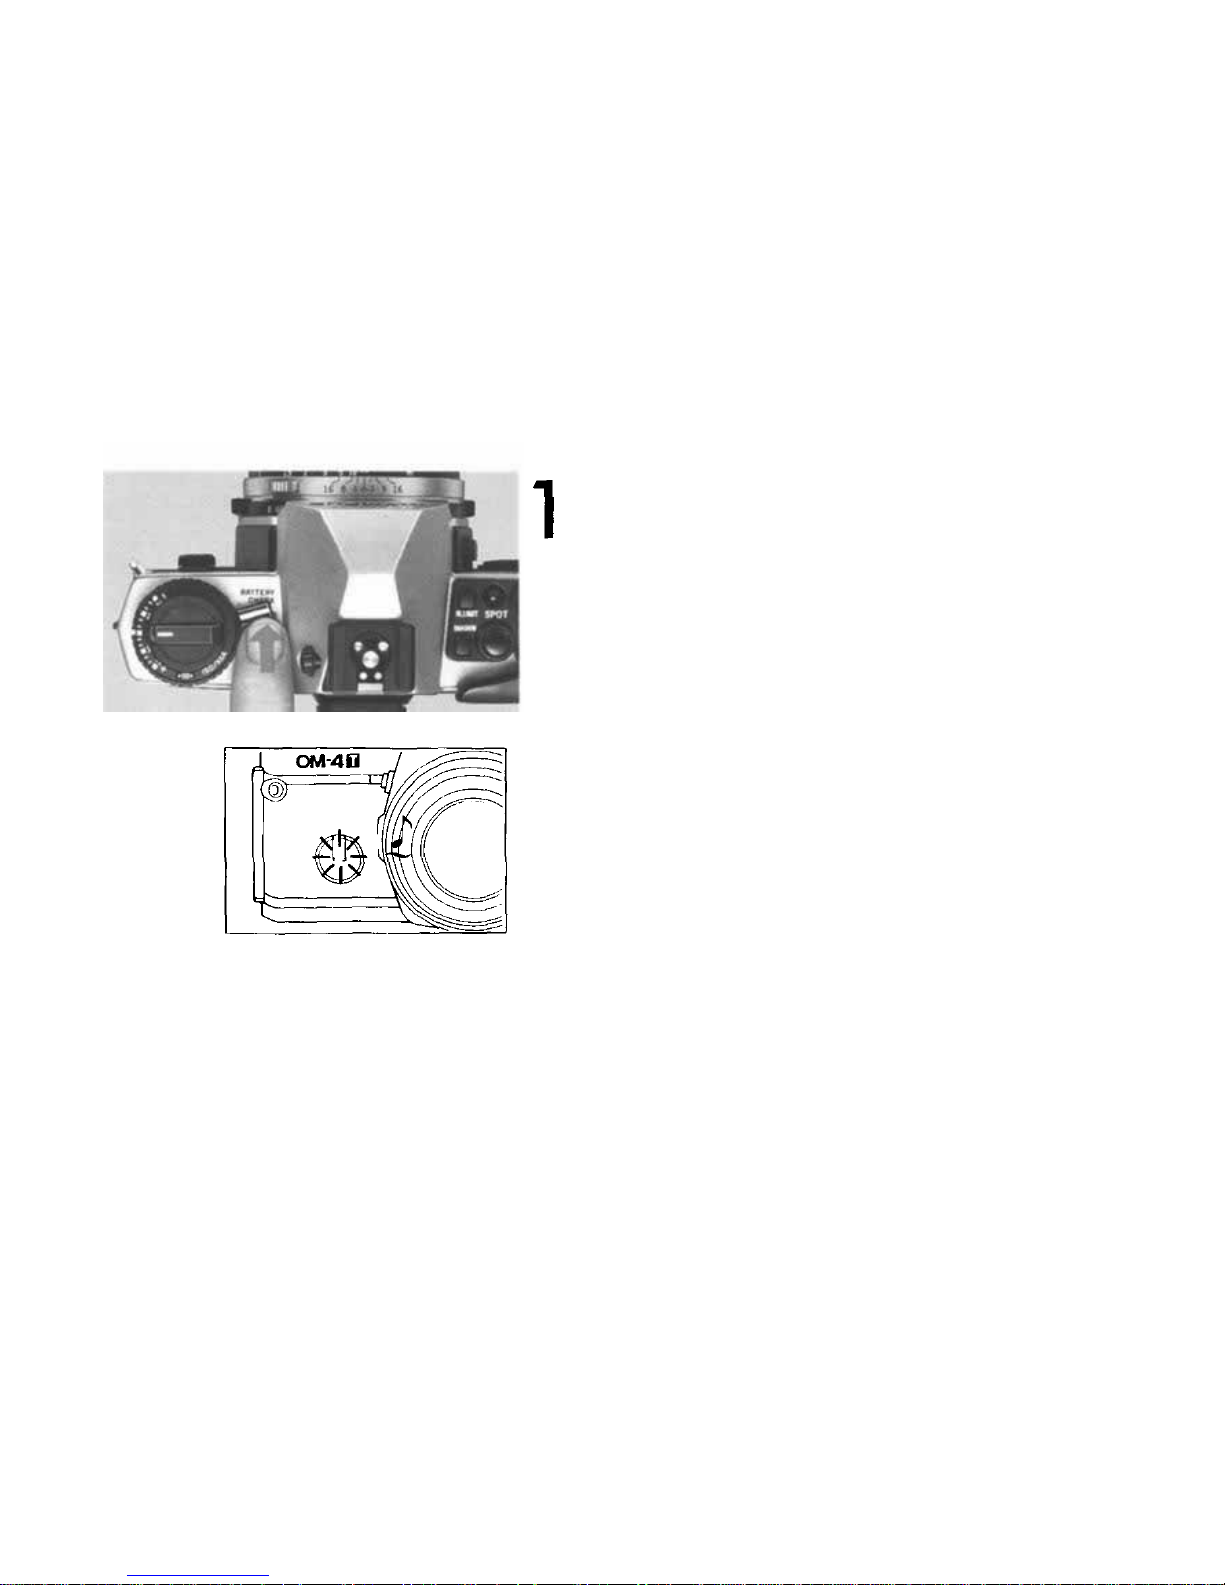
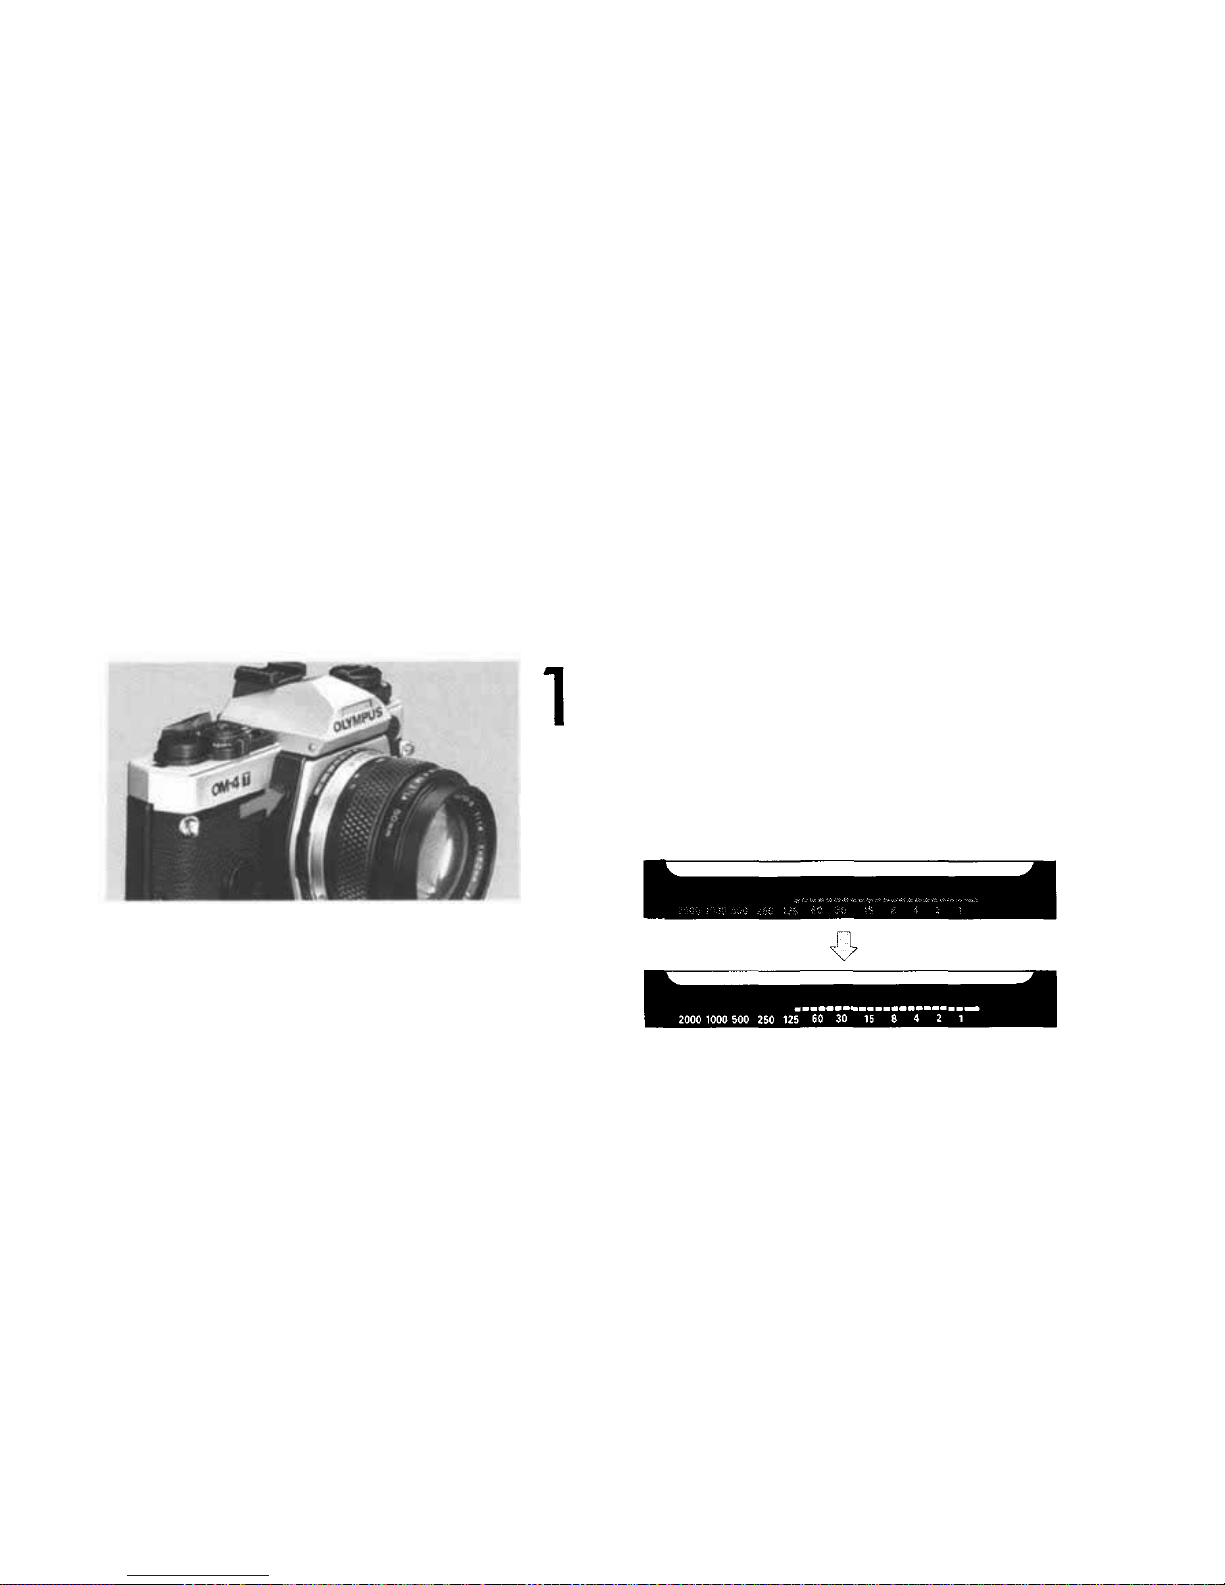
Rotate the mode selector dial to the "BATTERY
CHECK" position.
The
audible
and
visual
signals
will
tell
you
that
the batteries have enough power. As the battery
power weakens, the signals will become intermittent
then vanish completely when they are exhausted.
Replace the batteries.
10
Page 12
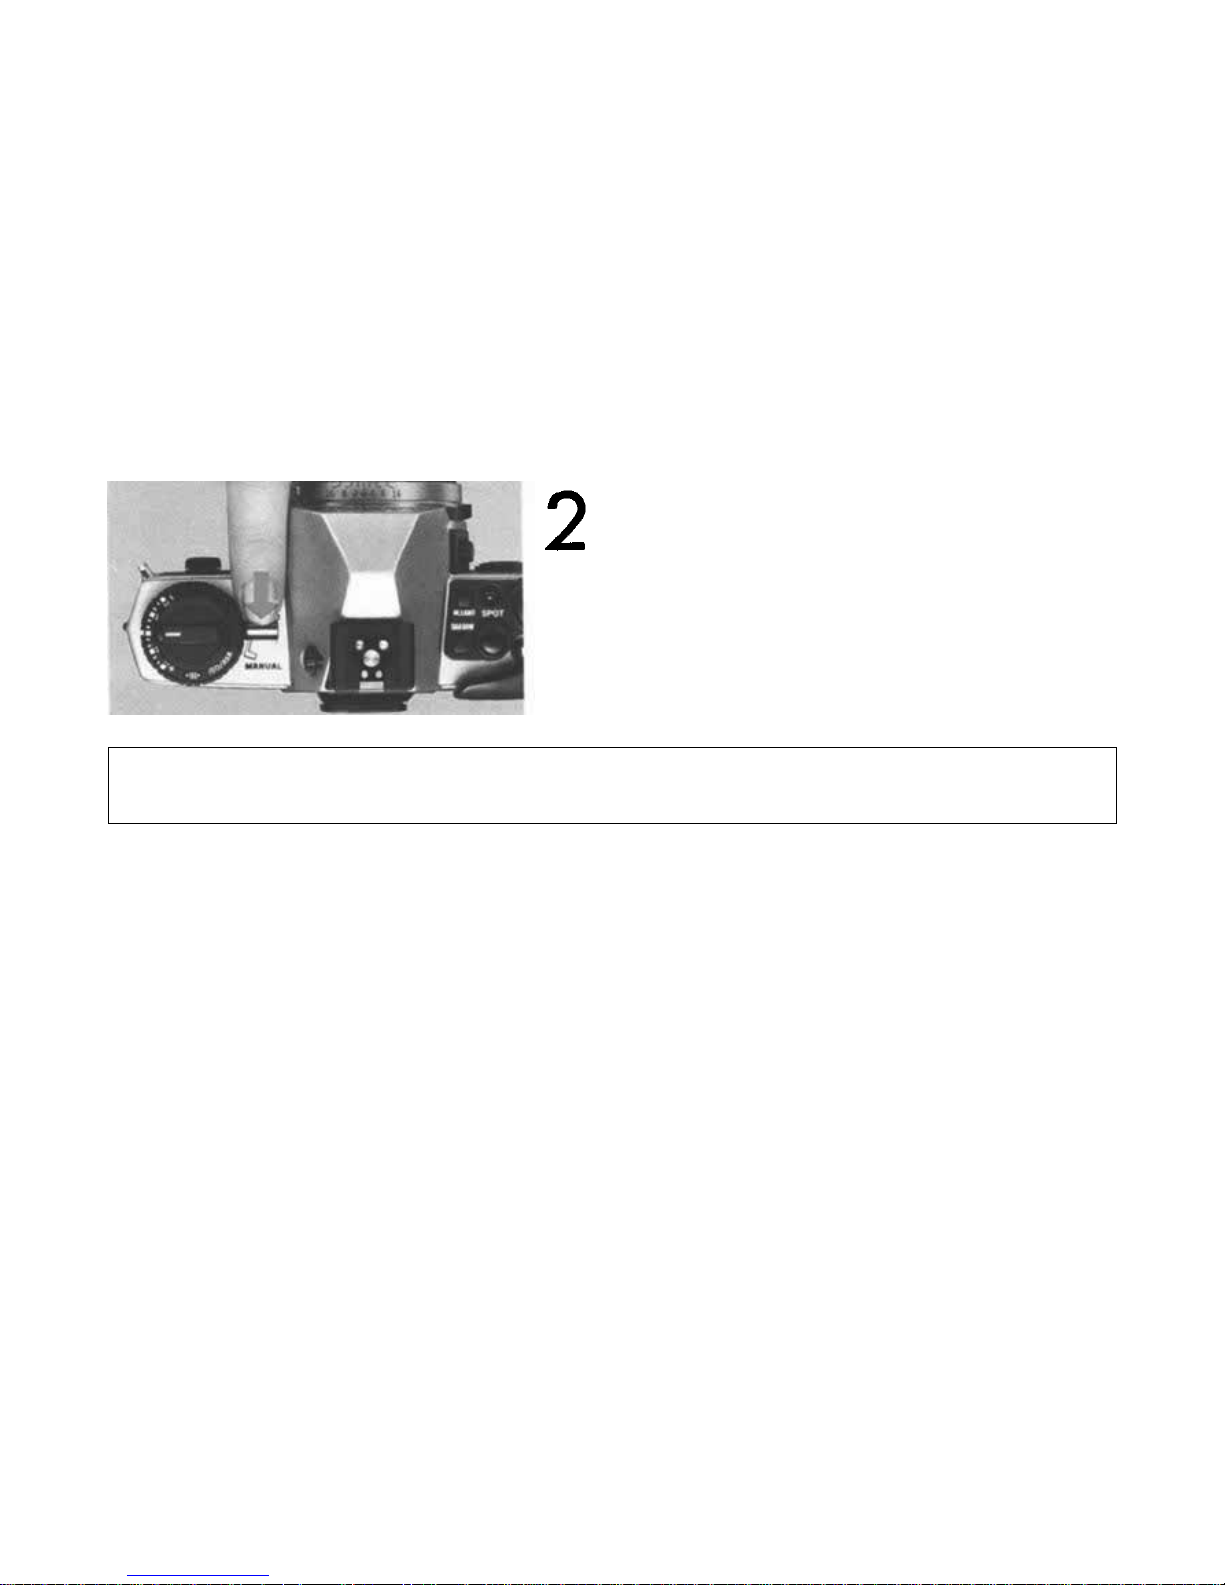
After the check, set back the dial.
When
checking
the
batteries,
the
audible
and
visual
signals
will
automatically
turn
off in 30
seconds.
If you
then
press
the
shutter
release,
the
shutter
will
trip
in the
auto
exposure
mode.
Loading the Film
11
Page 13
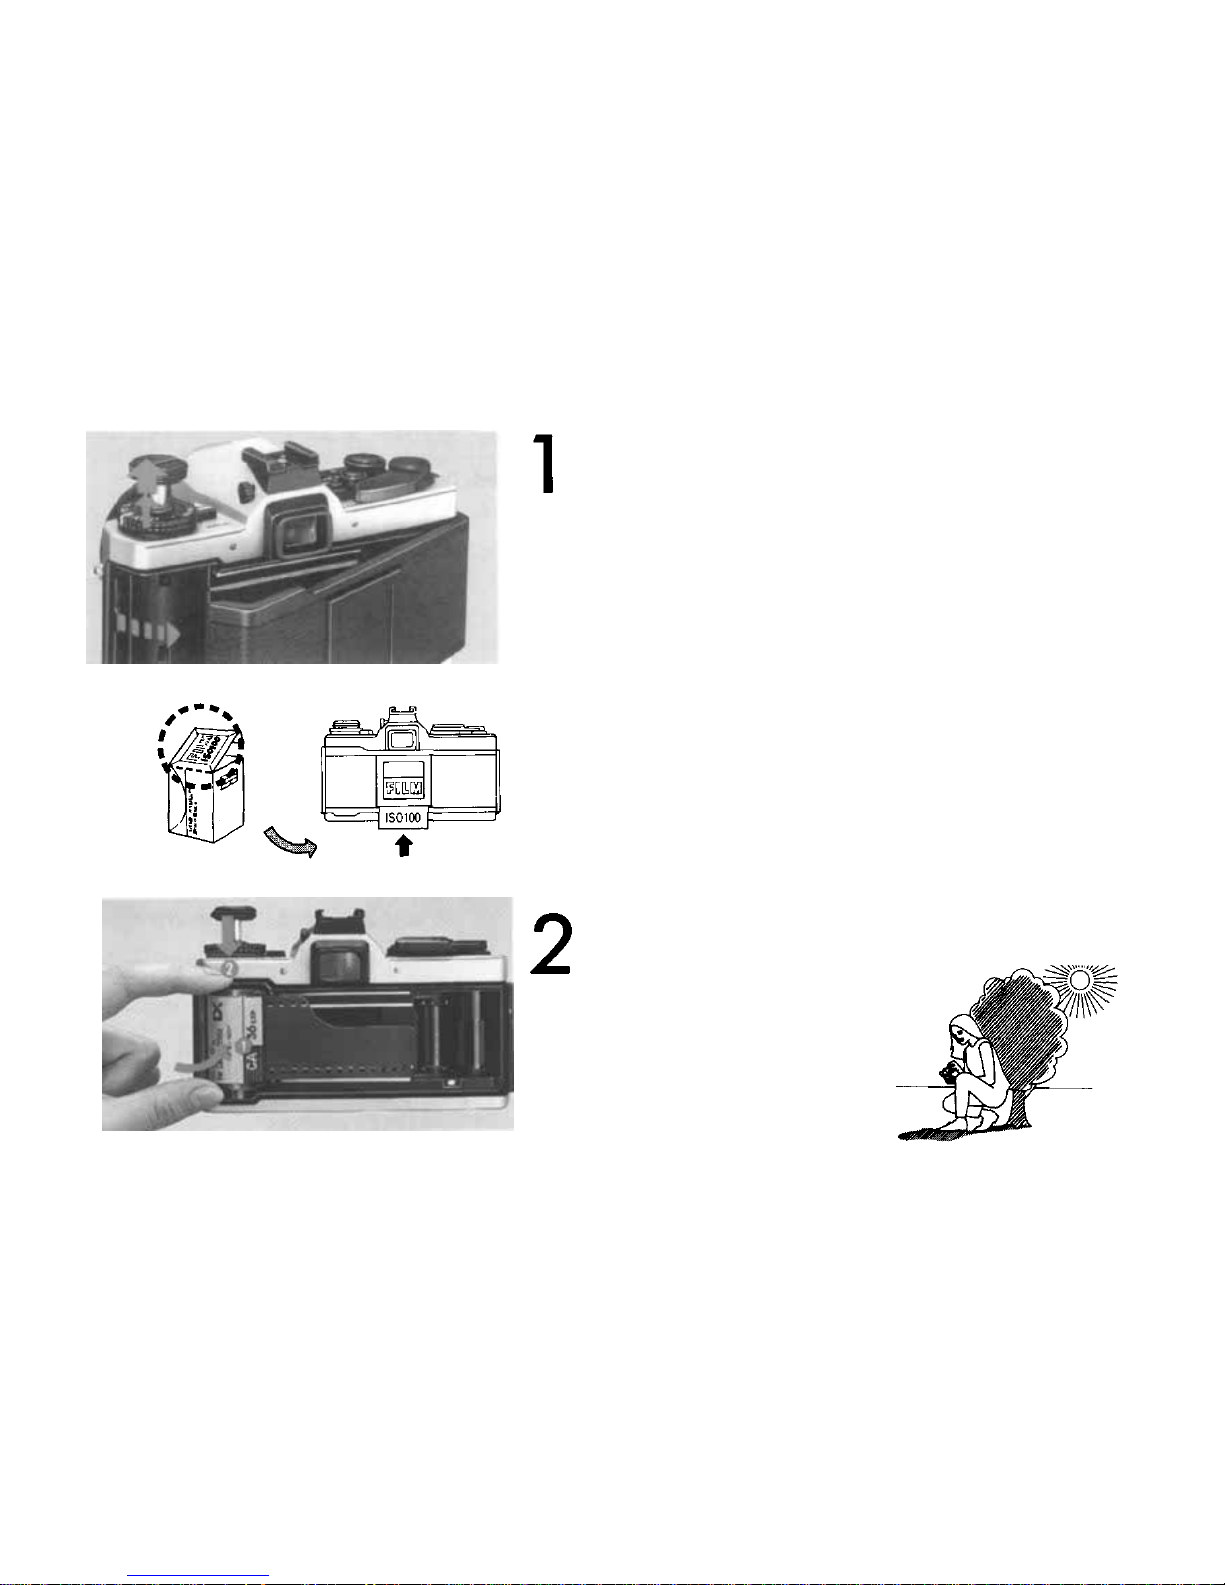
Pull up on the rewind knob to open the camera
back.
Tear off the top of the film box and insert it
into the memo holder. It will remind you which film
you are using.
Insert the cartridge and push dow n th e film re-
wind knob. (Always load the film in the shade.)
12
Page 14
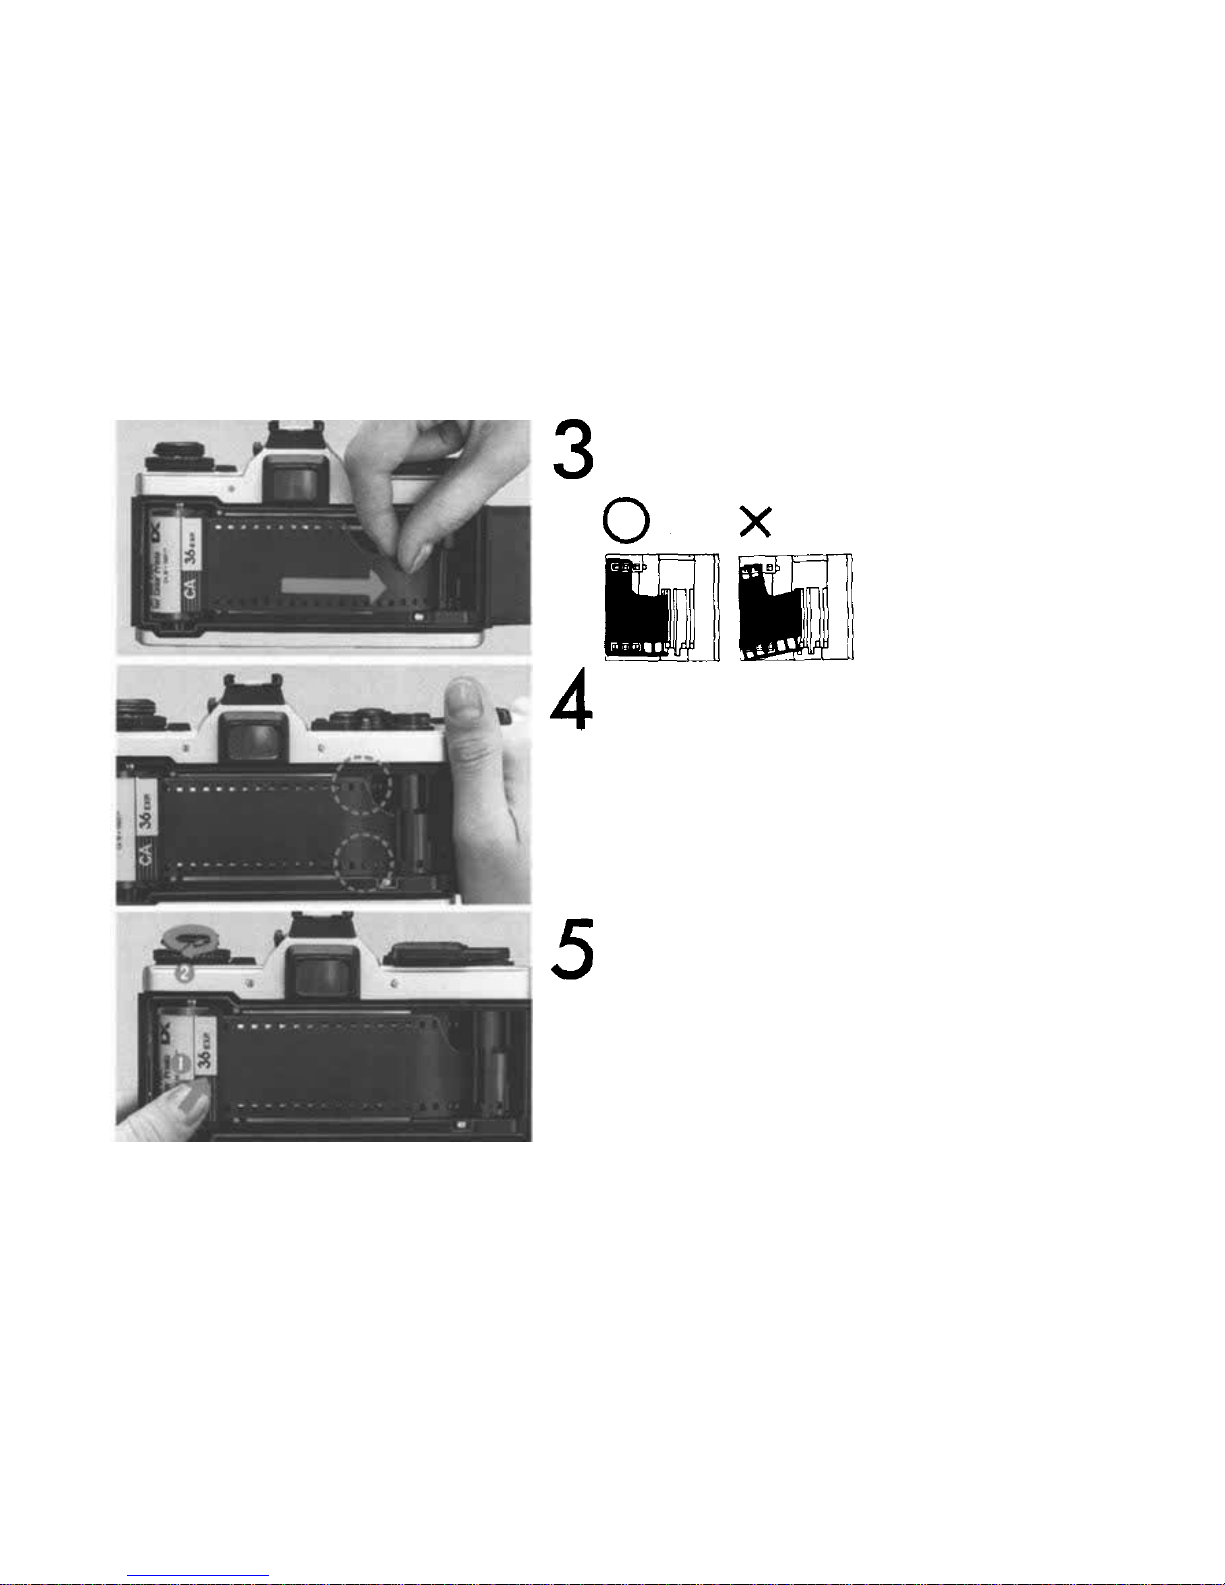
Insert the film leader into the take-up spool.
Wind
the
film
and
make
sure
the
sprocket
teeth
catch both the upper and lower film perforations.
Ta ke up the slac k by turning the rewind crank
clockwise.
13
Page 15
Close
the
camera
back
until
it
clicks
into
place.
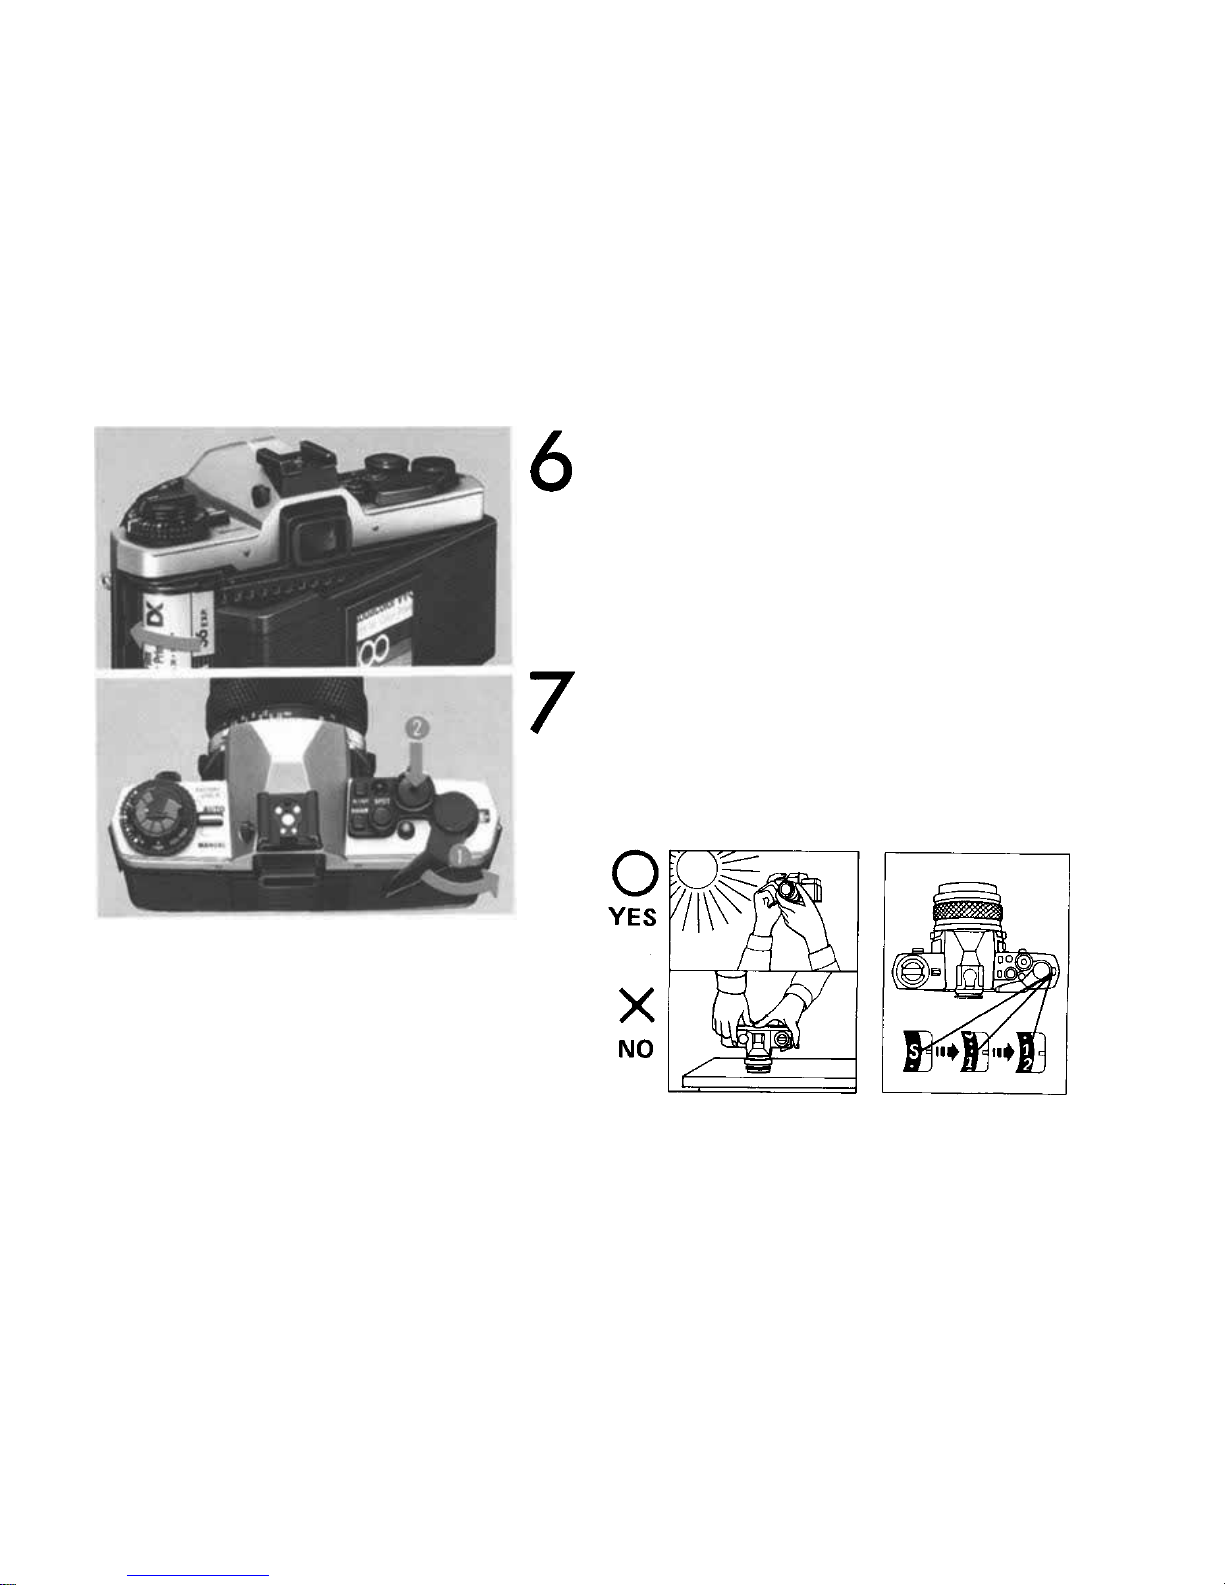
Face the camera toward light and take two
blind shots. This will bring the film to the first frame.
14
Page 16
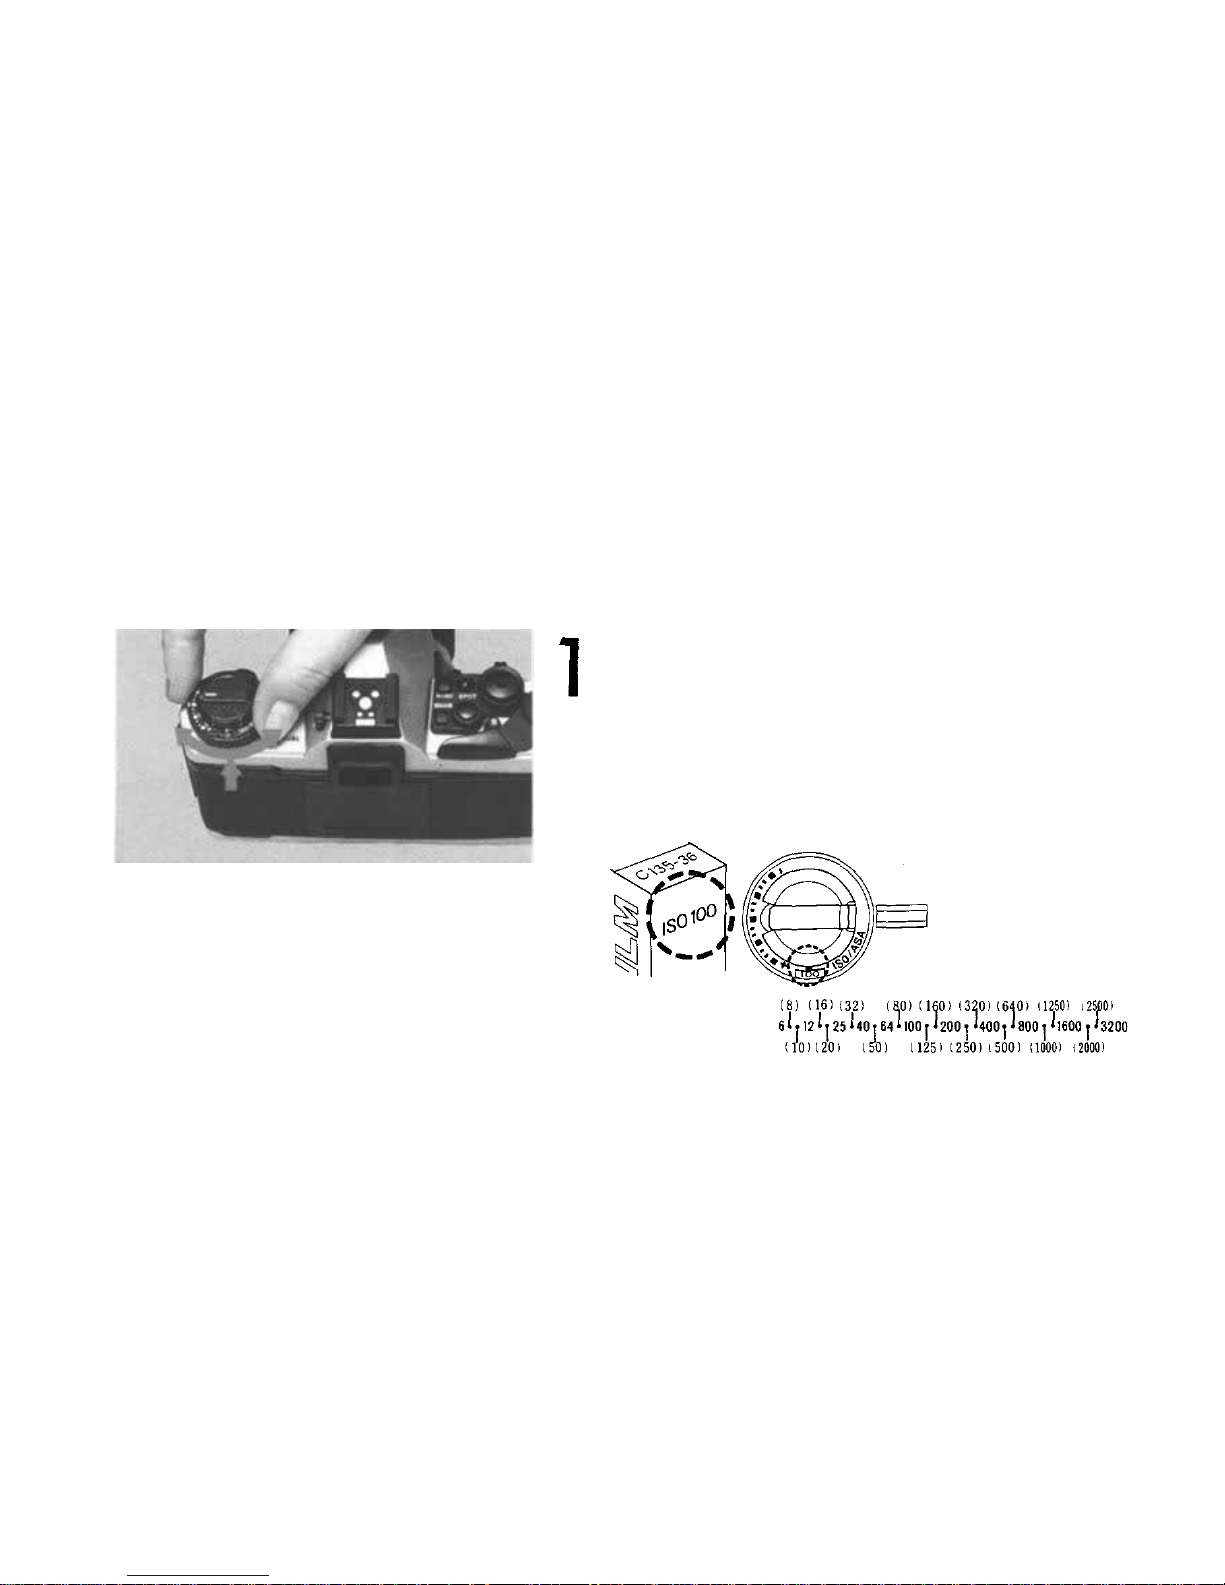
Setting the ISO Film Speed
Lift up the outer collar and rotate until the
ISO speed appears in the window.
Film speed
15
Page 17
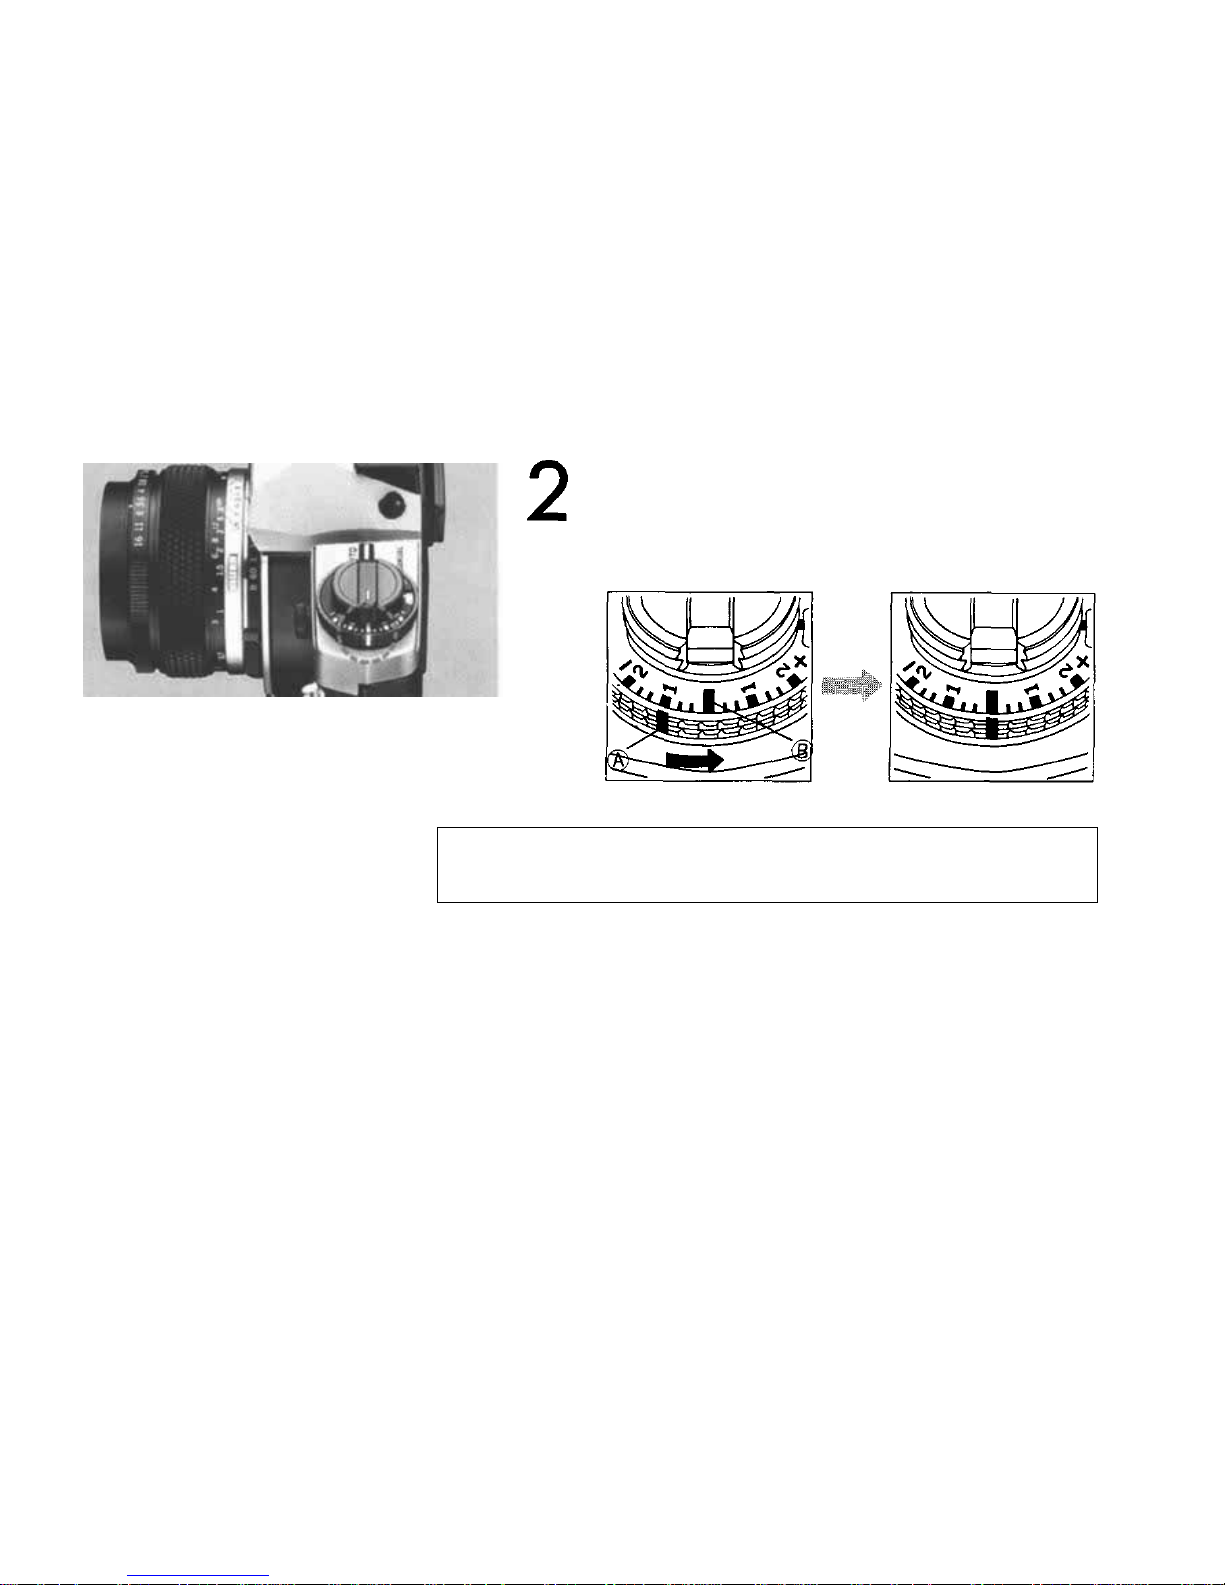
Align the exposure line A with the index B .
If the exposure compensation dial does not turn to the
desired ISO number, set it onc e at an intermediate value then
repeat the procedure.
16
Page 18

The OM-4T enables aperture-preferred automatic exposure on TTL direct light metering
(center-weighted,
averaged
light
metering).
This
mode
can be
used
for
most
of the
subjects
under normal conditions — when shooting with the sun behind you, when the subject
contrast is not too strong, and so forth.
< Taking Photographs ( I) >
— Automatic Exposure —
17
Page 19
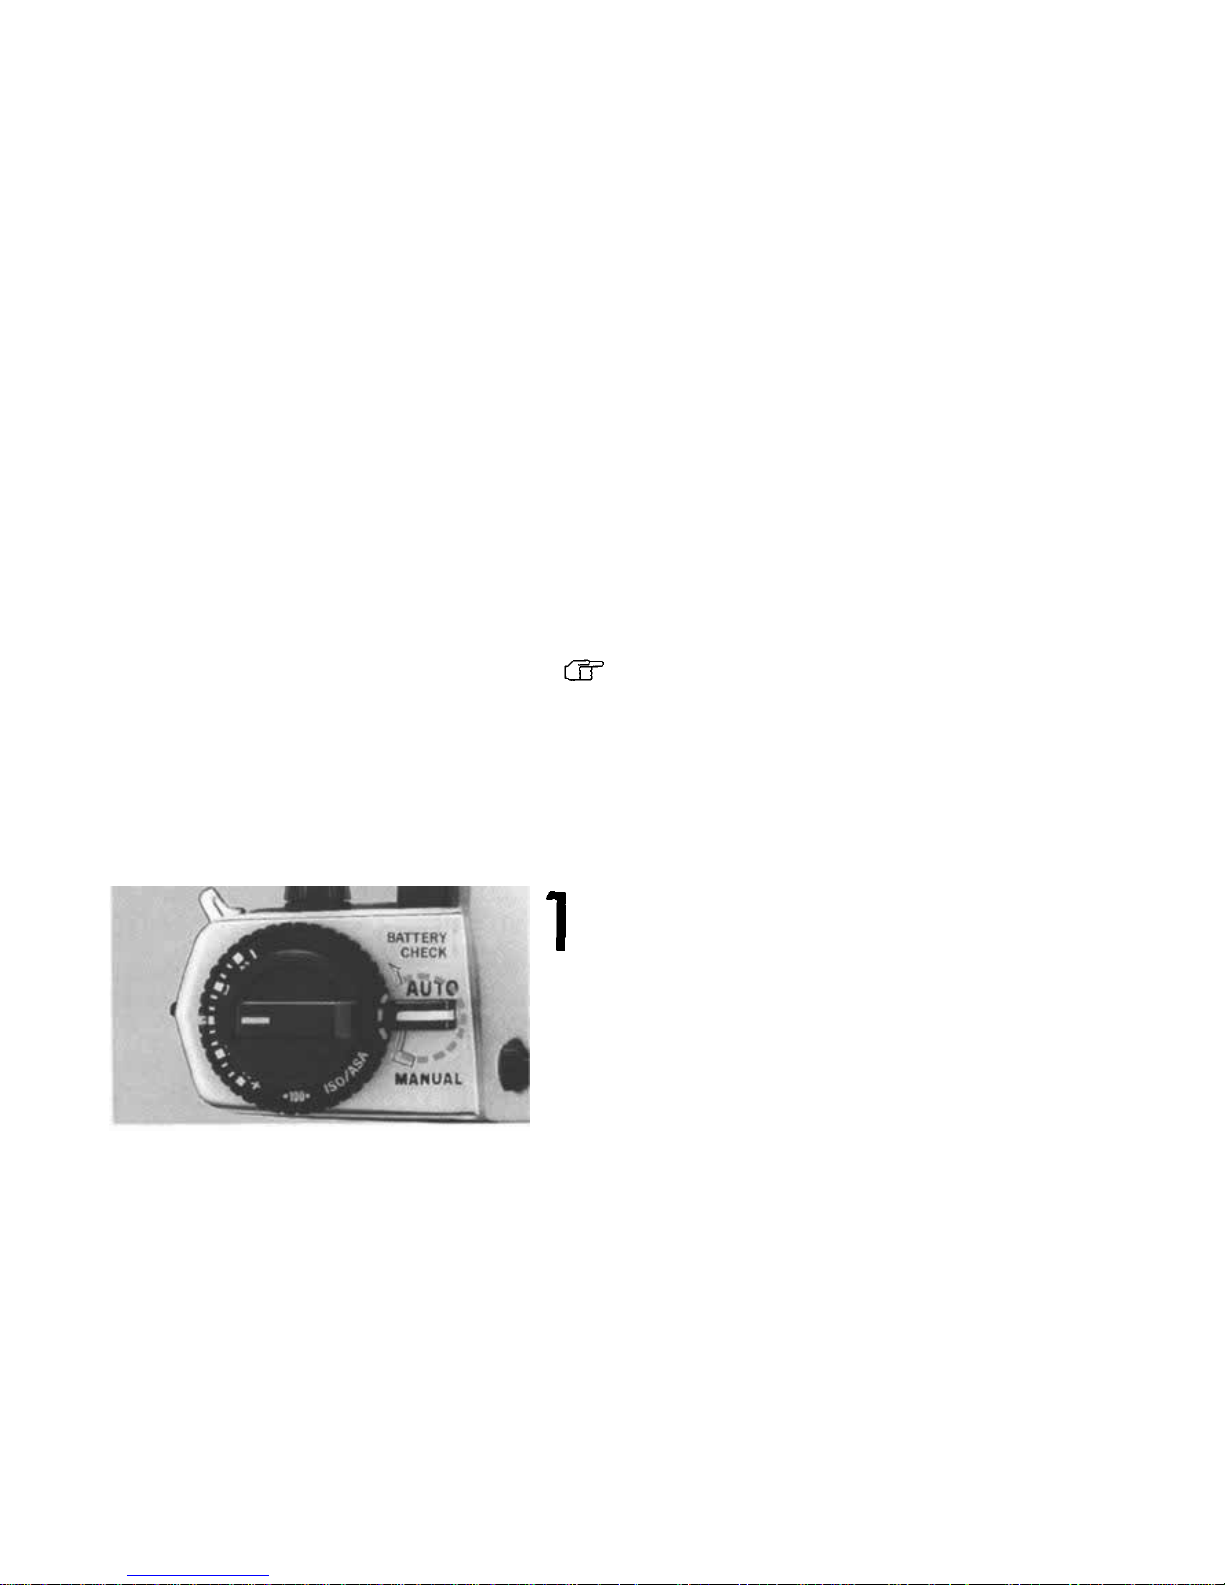
TT L Direct Light Metering
Aperture-preferred automatic exposure allows you to take pictures by utilizing the lens depth of
field effect (b lu r r ed background, for example). P. 95
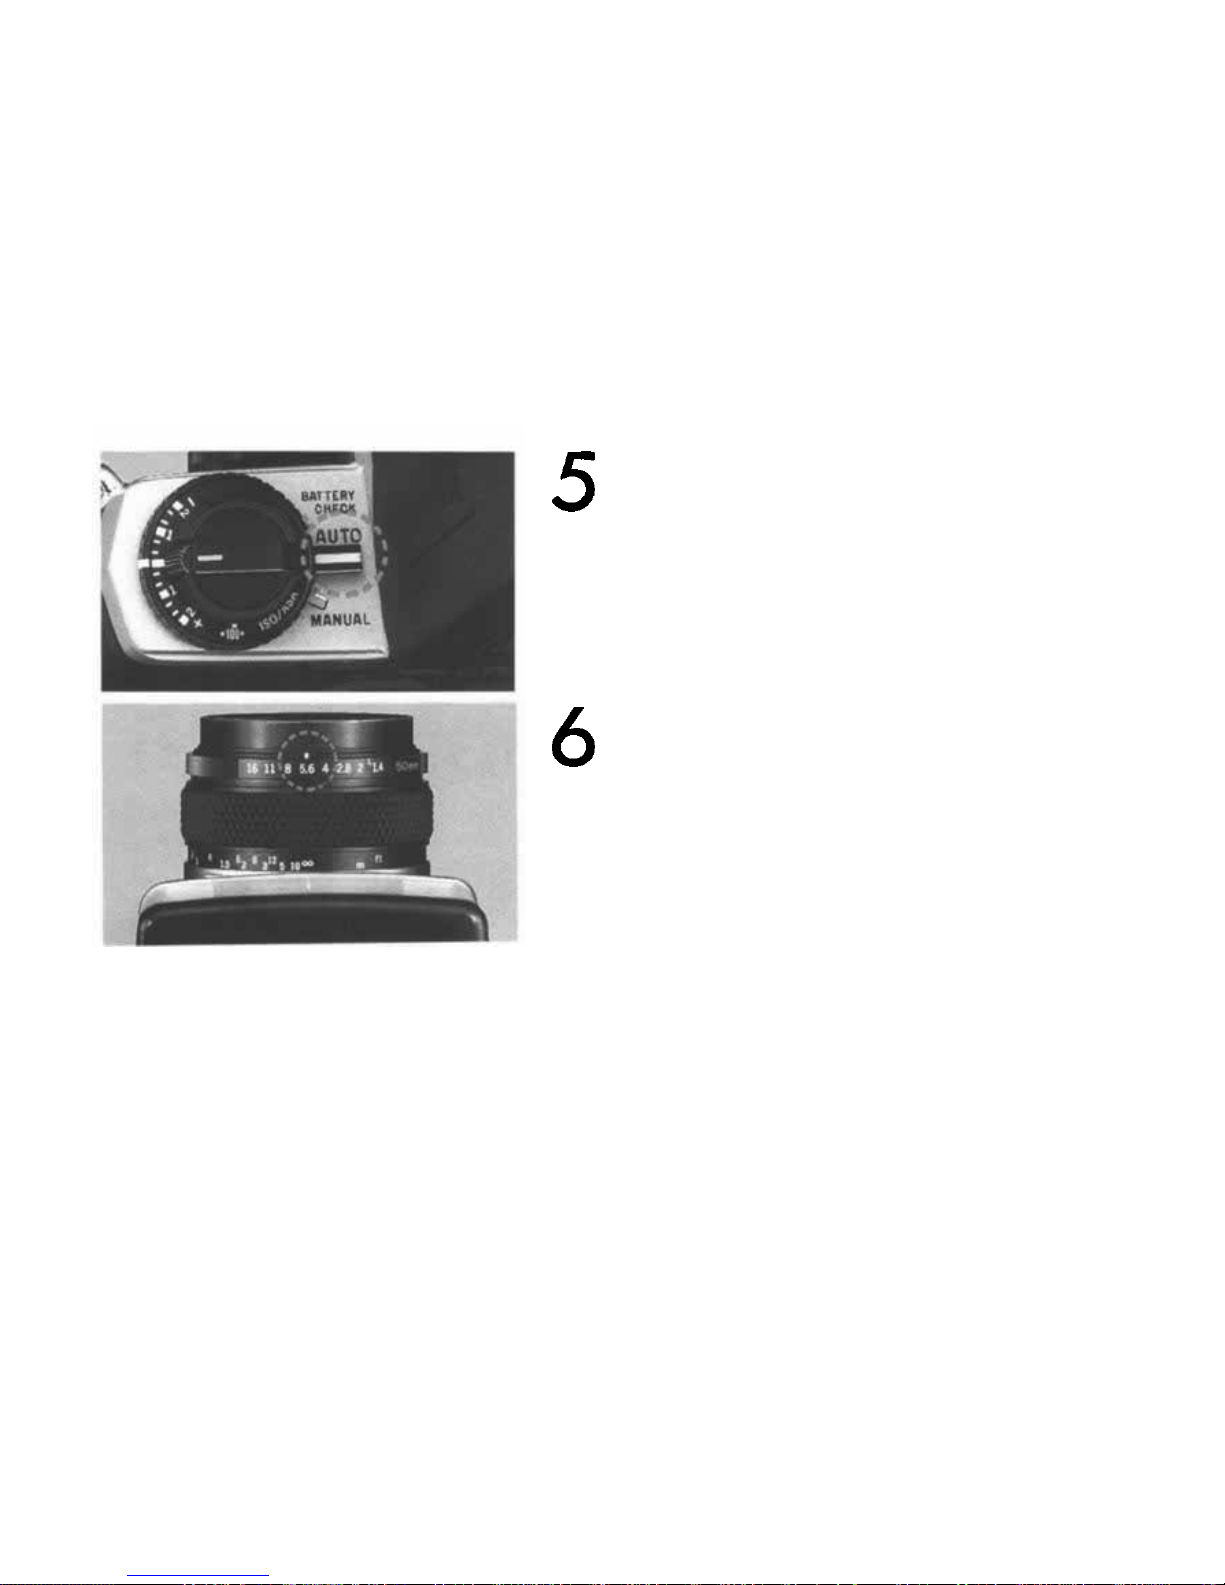
Set the mode selector lever to the "AUTO"
position.
18
Page 20
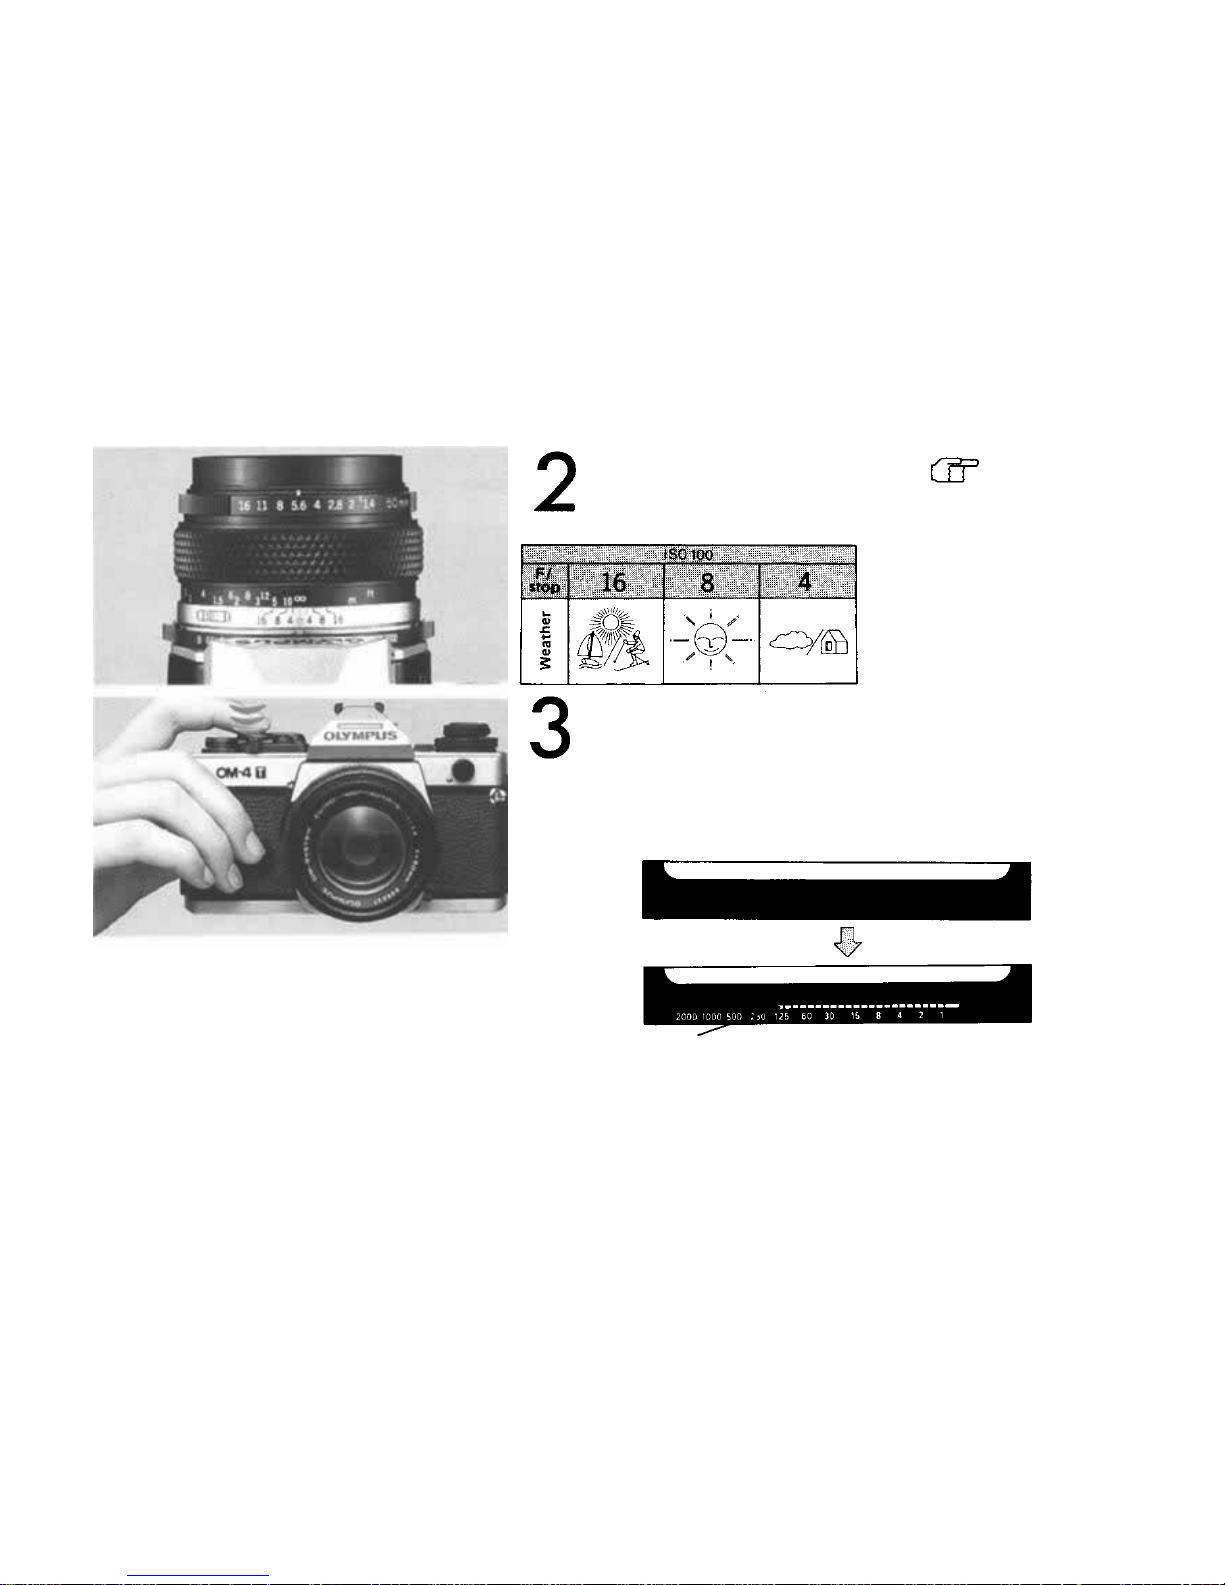
Reference
P. 117
Set the aperture.
Basic aperture settings;
Press
the
shutter
release
lightly
to
activate
the
viewfinder display.
The ba r tip indicates the shutter speed.
19
Page 21
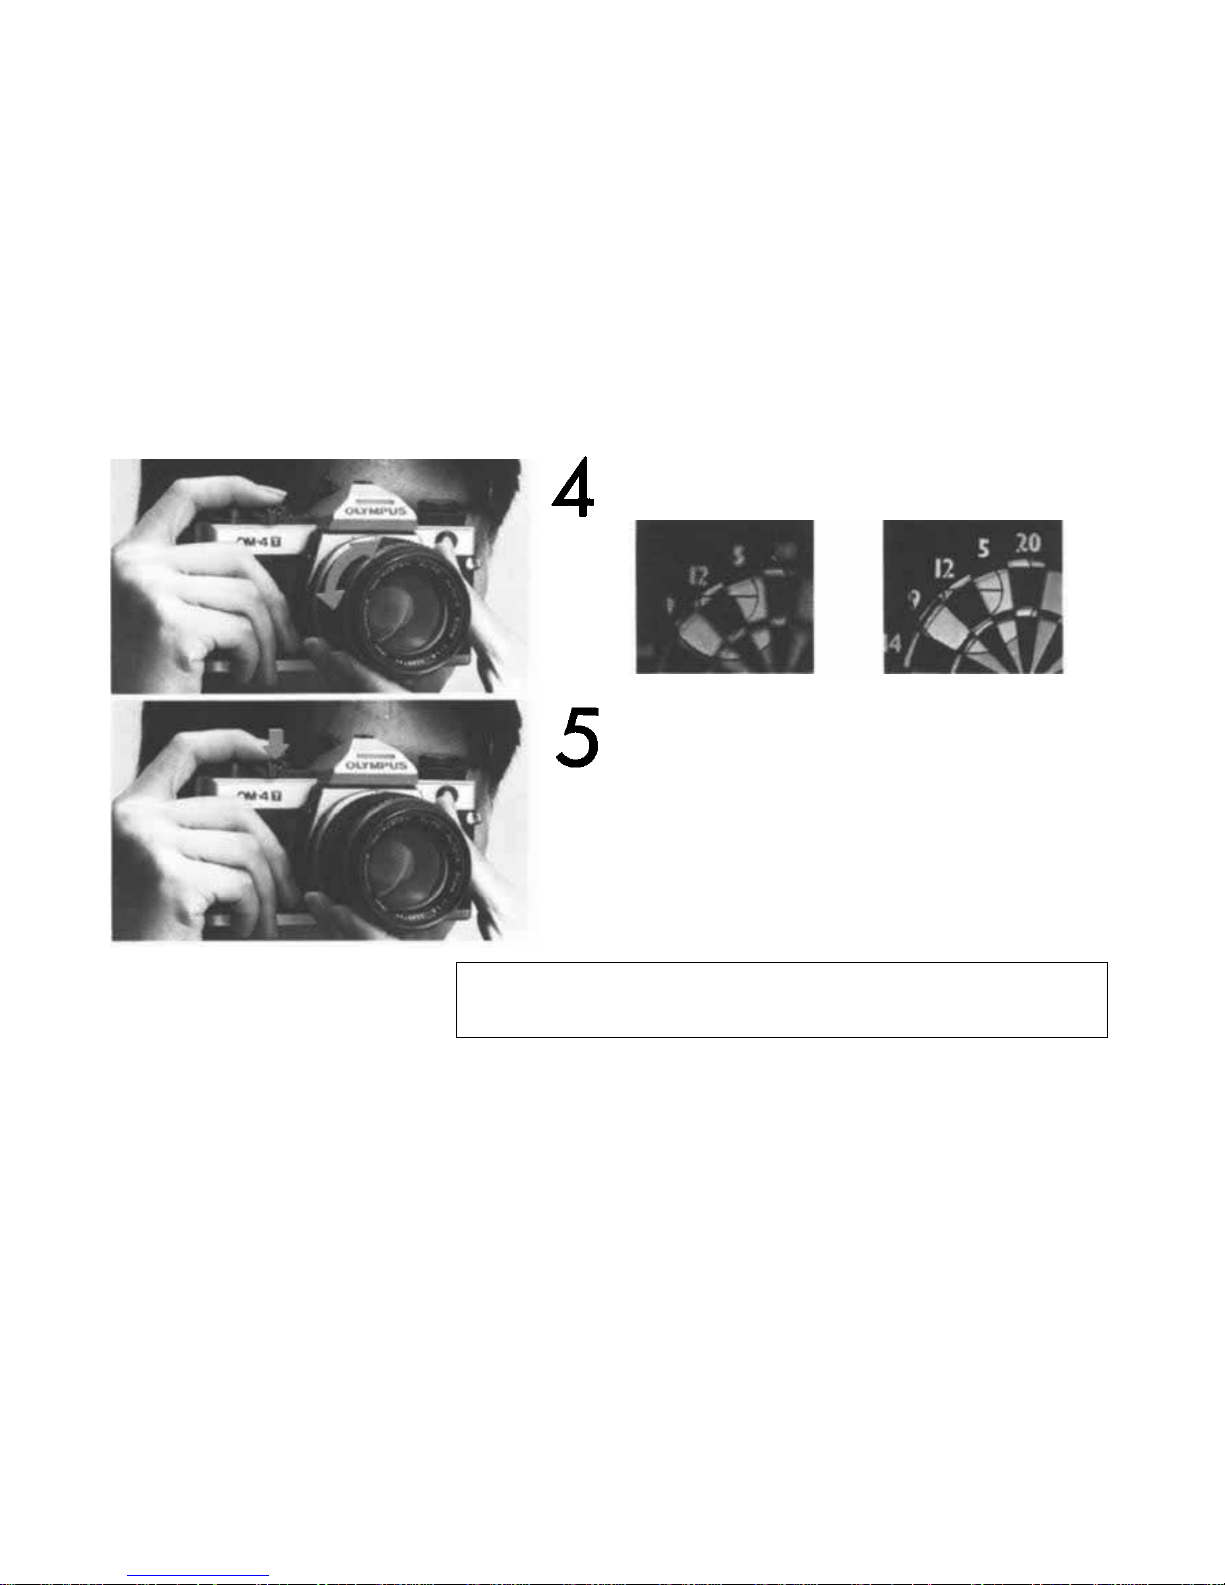
Focus on your subject.
Press
the
shutter
release
to
take
the
picture.
A
built-in
battery
conserver
turns
off the
viewfinder
dis-
play after 120 sec.
20
Page 22
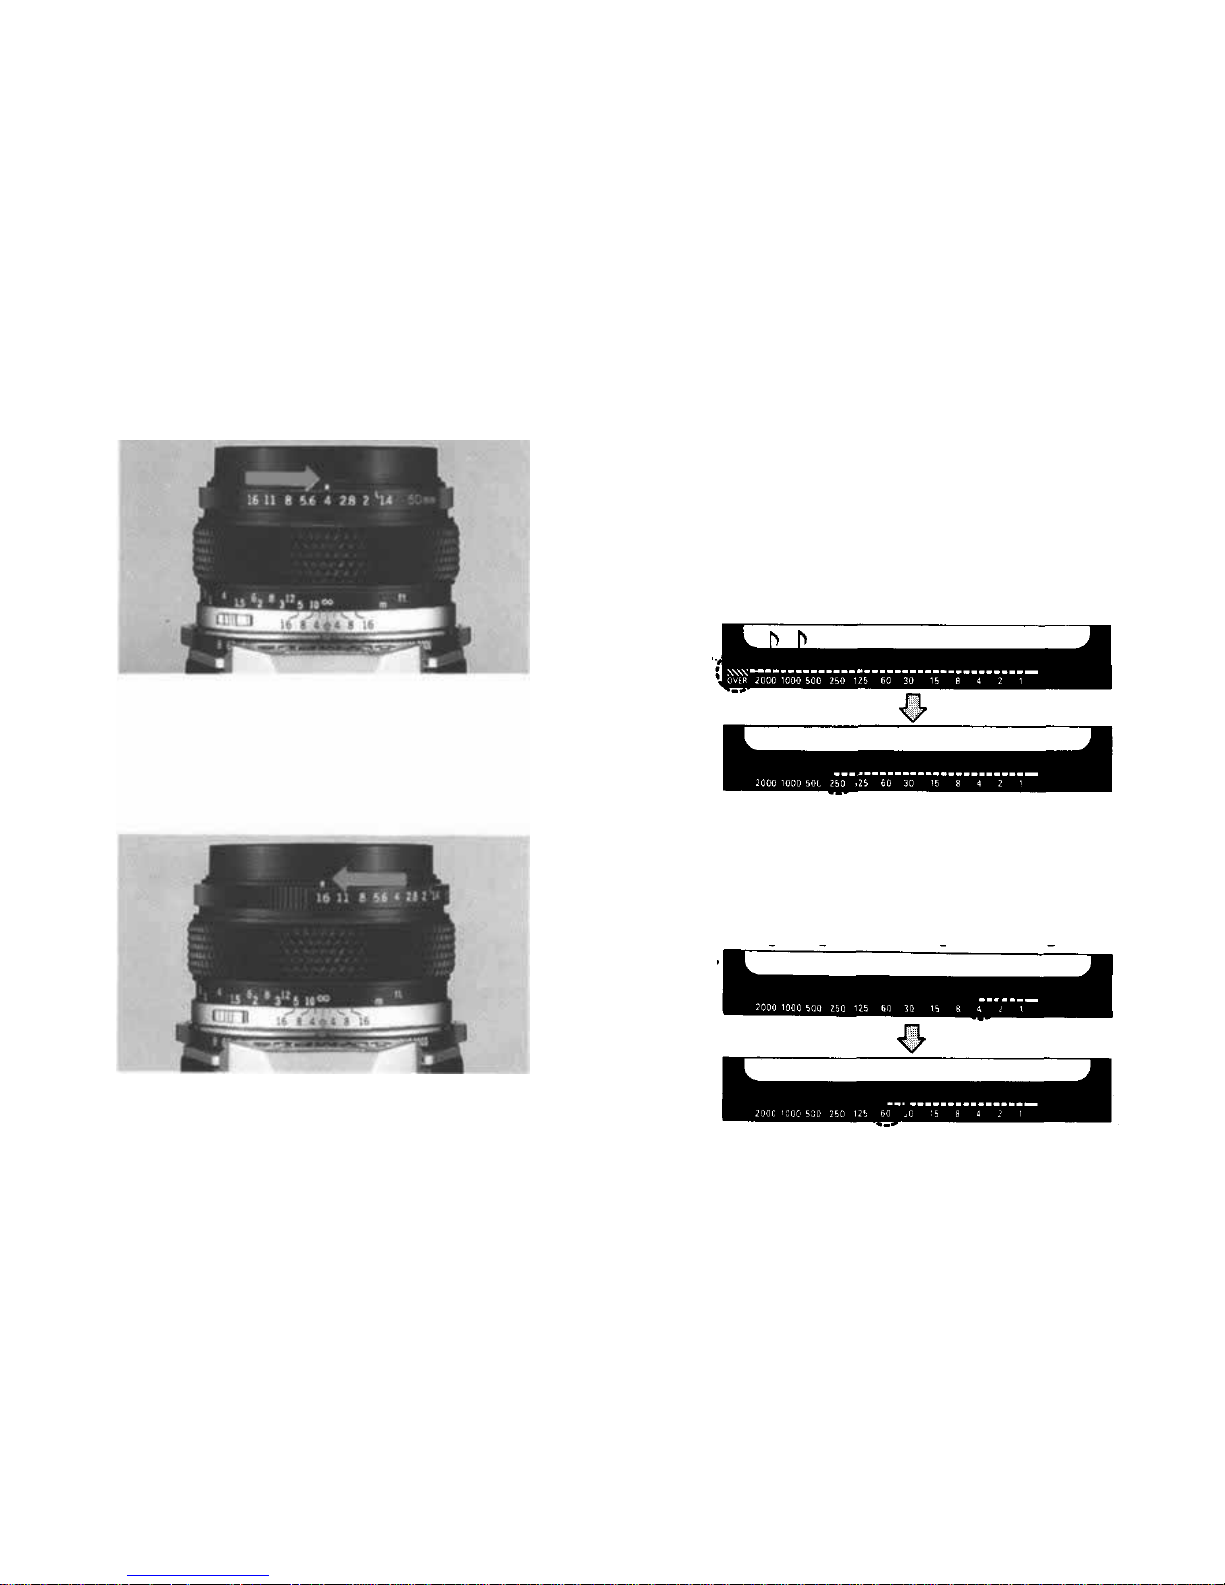
If you see an overexposure warning signal
("OVER" blinks), set the aperture to a larger number.
If the shutter speed is t oo slow, set the aperture
to smaller number to prevent camera shake.
21
Page 23
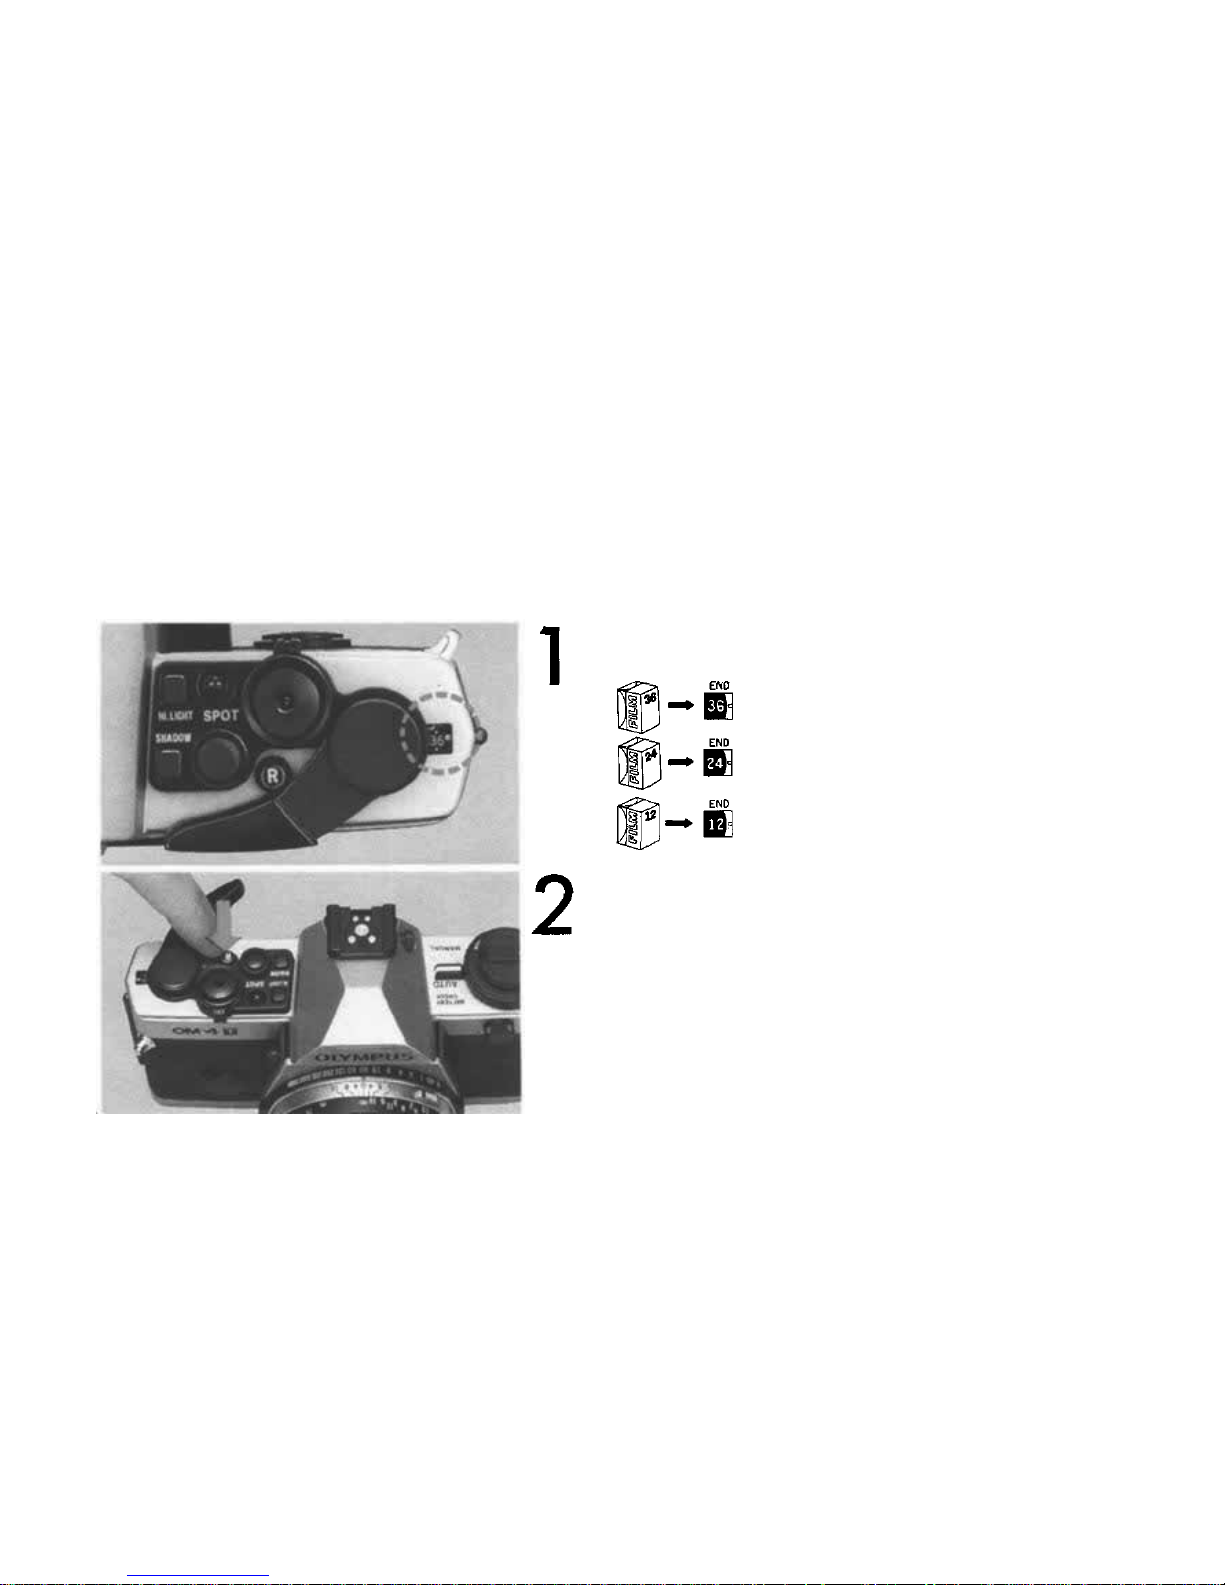
Rewinding the Film
When the exposure counter indicates the end
of your roll of film.
Push the "R" button.
22
Page 24
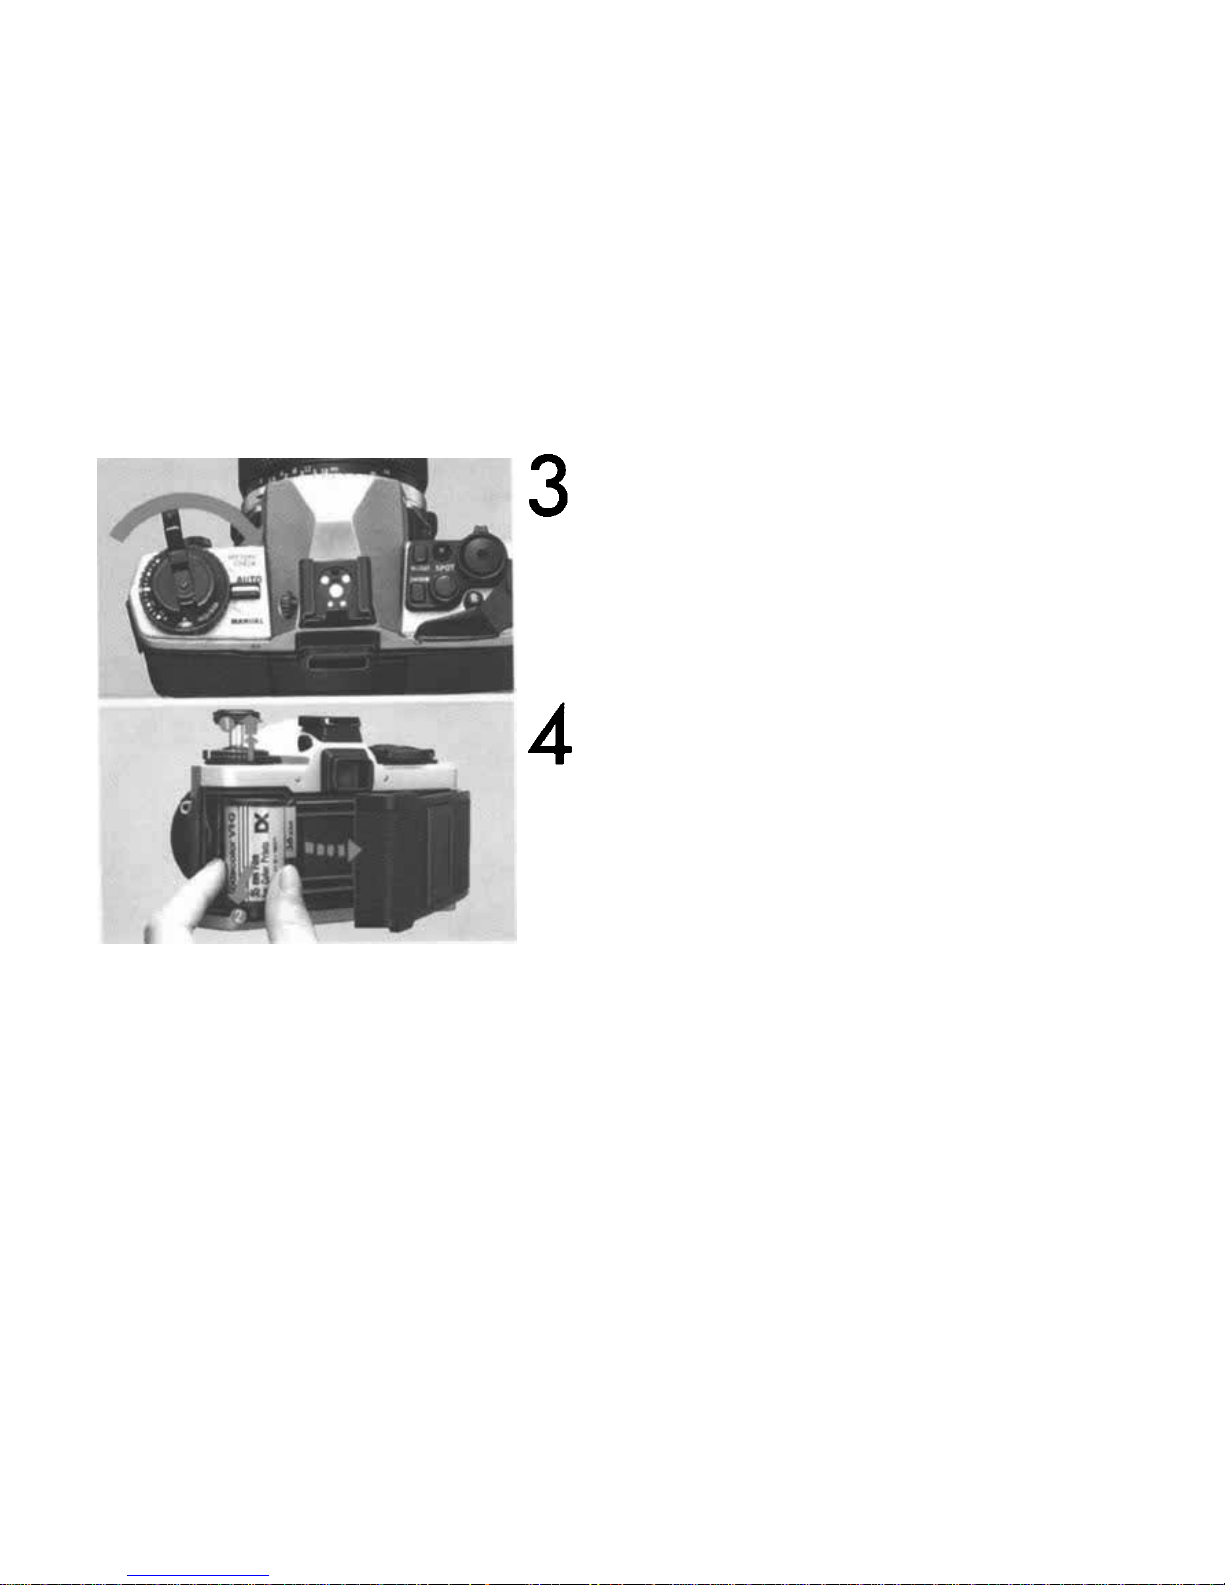
Fold out the rewind crank and wind it until
the film tension is released.
Open the camera back by pulling up on the
rewind knob and remove the film.
23
Page 25

The spot metering system of the OM-4T enables you to control the exposure as you like. It
insures perfect exposure of backlighted and high contrast subjects and expands shooting
possibilities in the a ut o m od e fo r m o r e creative photography.
Taking Photographs (I I)
— Automatic Exposure —
24
Page 26
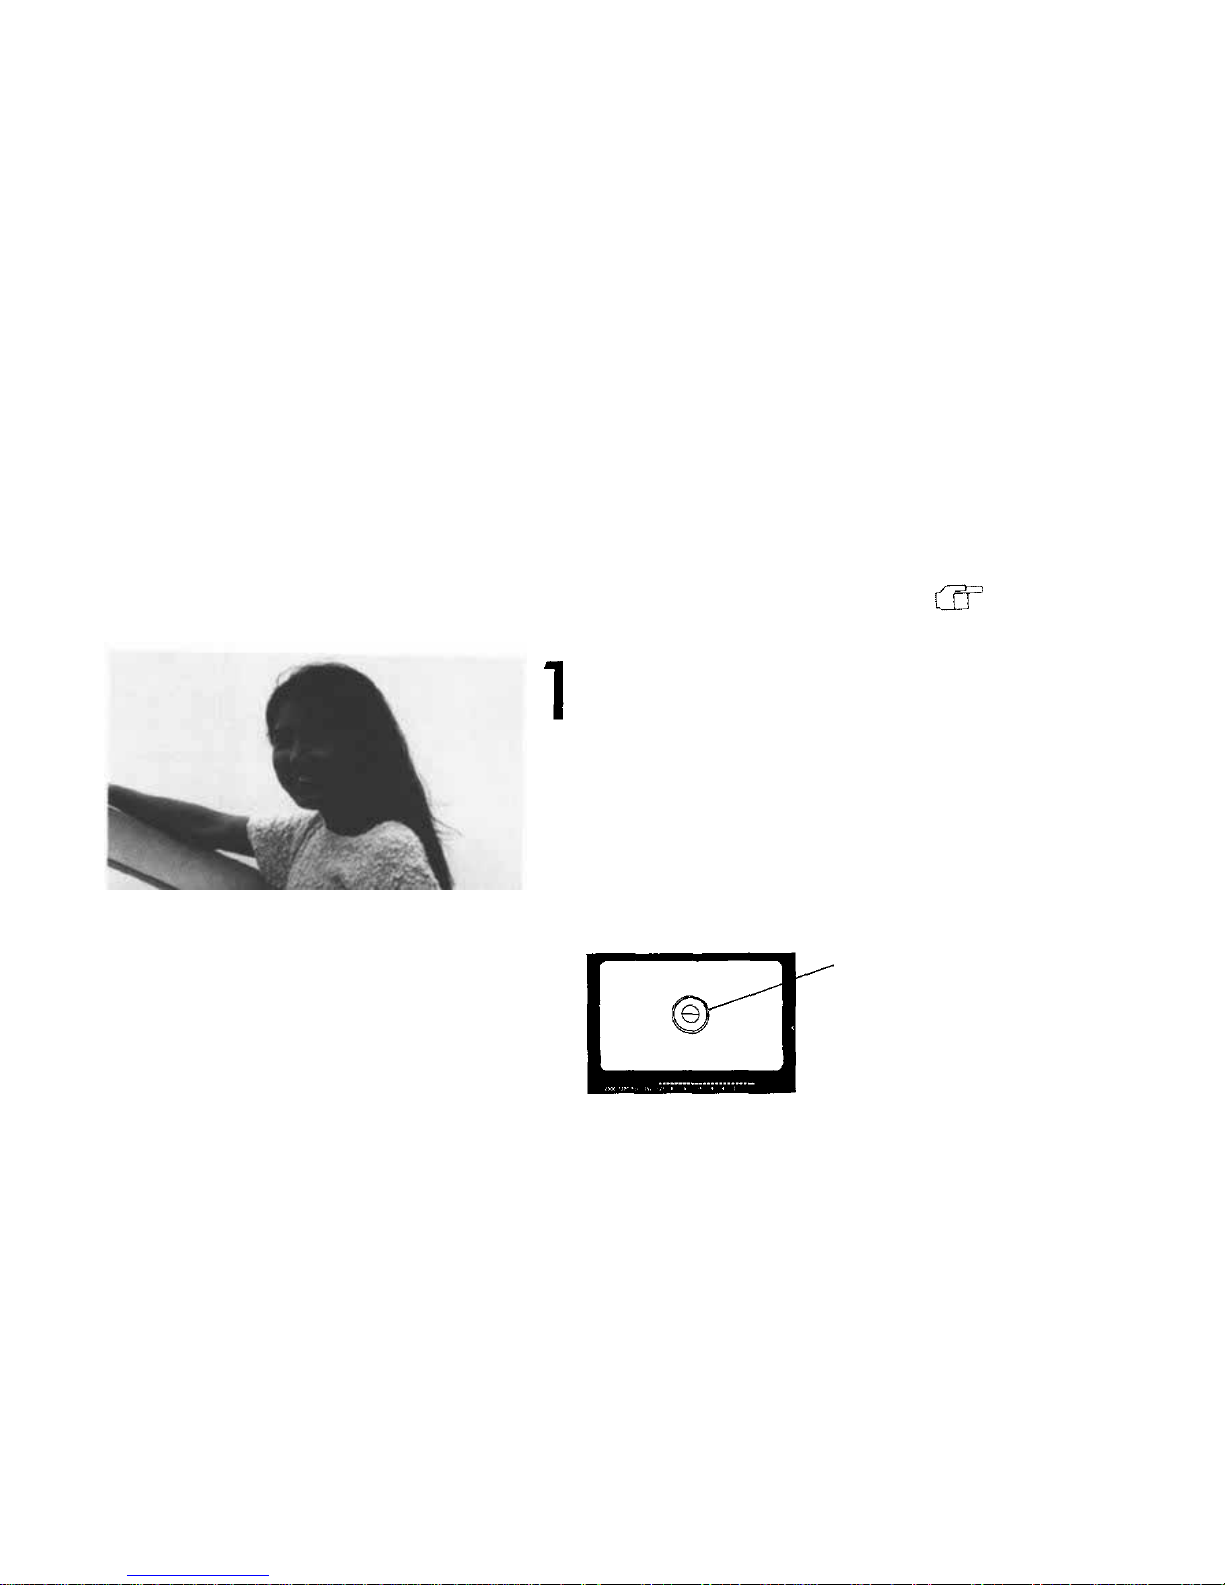
How to Use the Spot Measurement
Reference
P.
96-100
Align
the
microprism
area
with
the
area
you want to measure. (The spot metering range is
outlined by the outer edge of the microprism.)
Spot metering range
25
Page 27
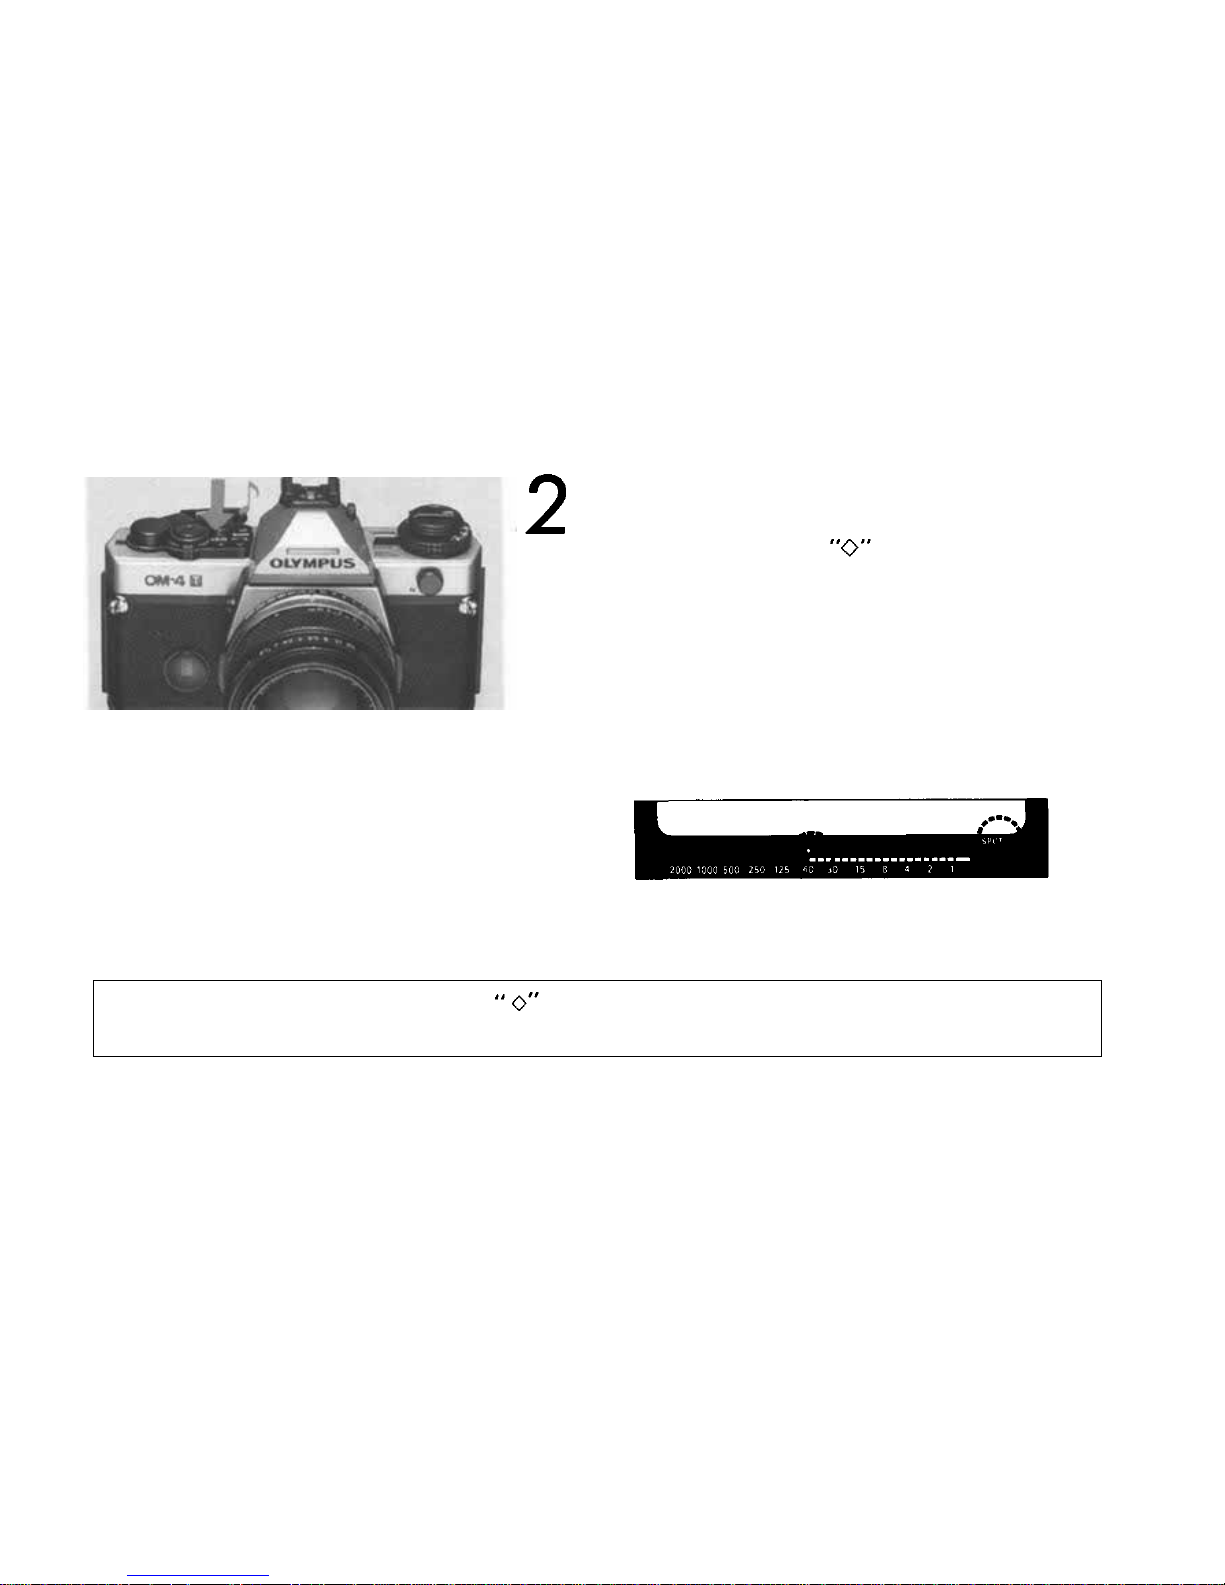
Press the spot button to take meter reading.
You will hear an electronic sound and the word
"SPOT" wil l appear in the viewfinder. The metered
value is displayed by the mark.
If you shift the camera, another mark will indicate the exposure value in the center of
the frame along with the spot metered value.
26
Page 28
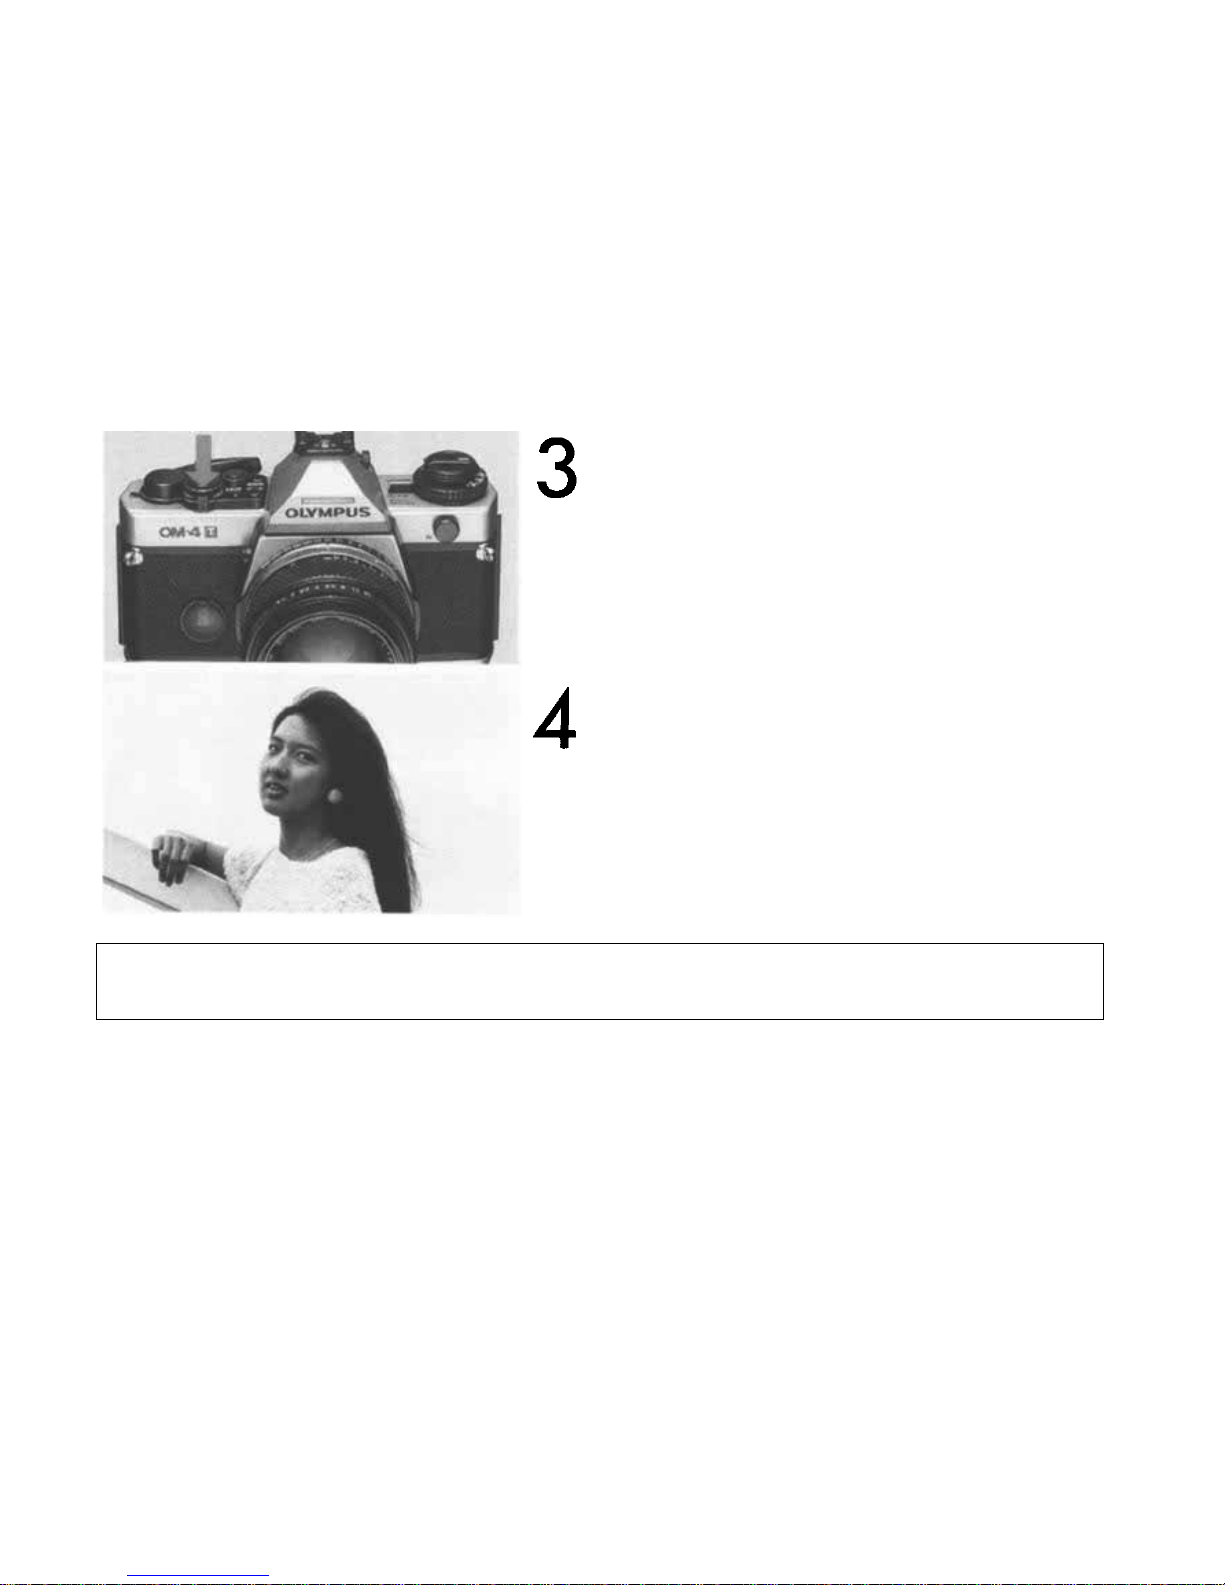
Press the shutter release to take the picture.
The subject will turn out correctly exposed,
regardless of the brightness of the background.
The
spot
metering
mode
will
be
automatically
cleared
after
the
shutter
has
tripped,
or
after
120
seconds
have
passed,
and it
will
return
to
the,
TTL
direct
light
metering
mode.
27
Page 29
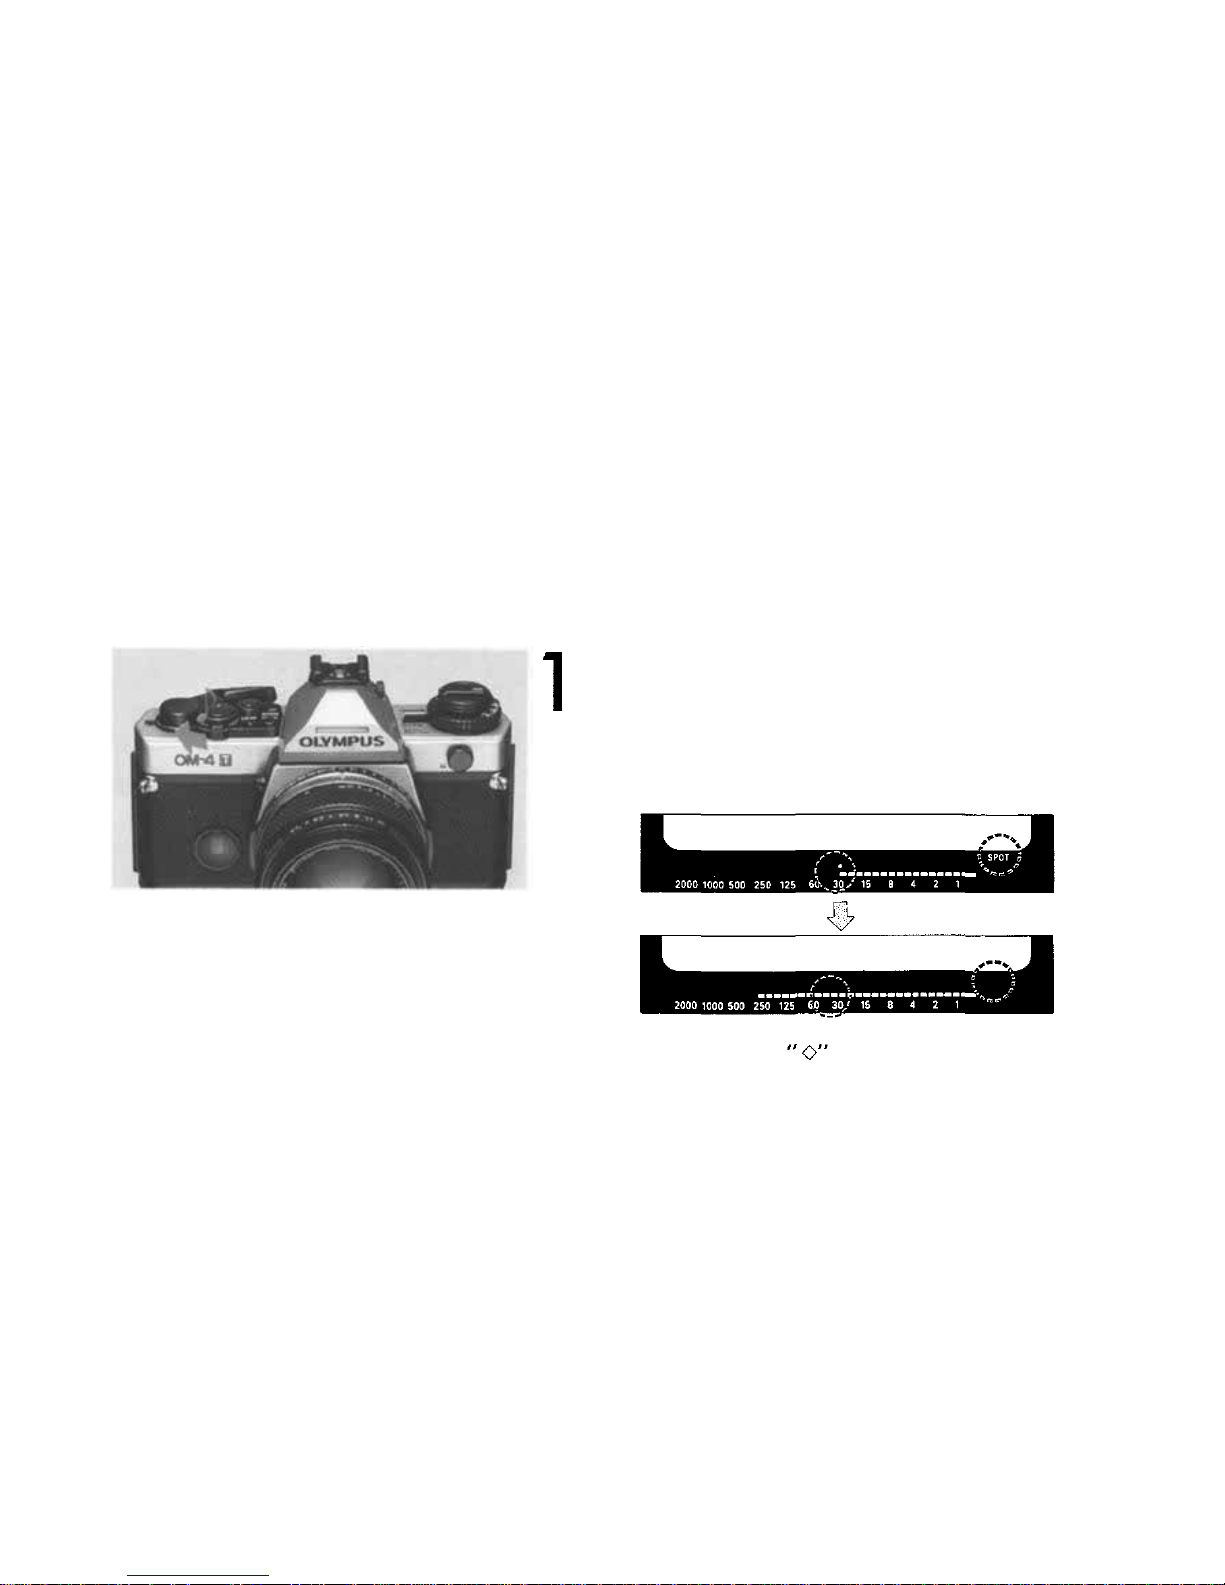
How t o Clear t h e Spot Metering
With the lever at "CLEAR", the mode will
return to TTL direct light metering.
"SPOT" and mark disappear.
28
Page 30
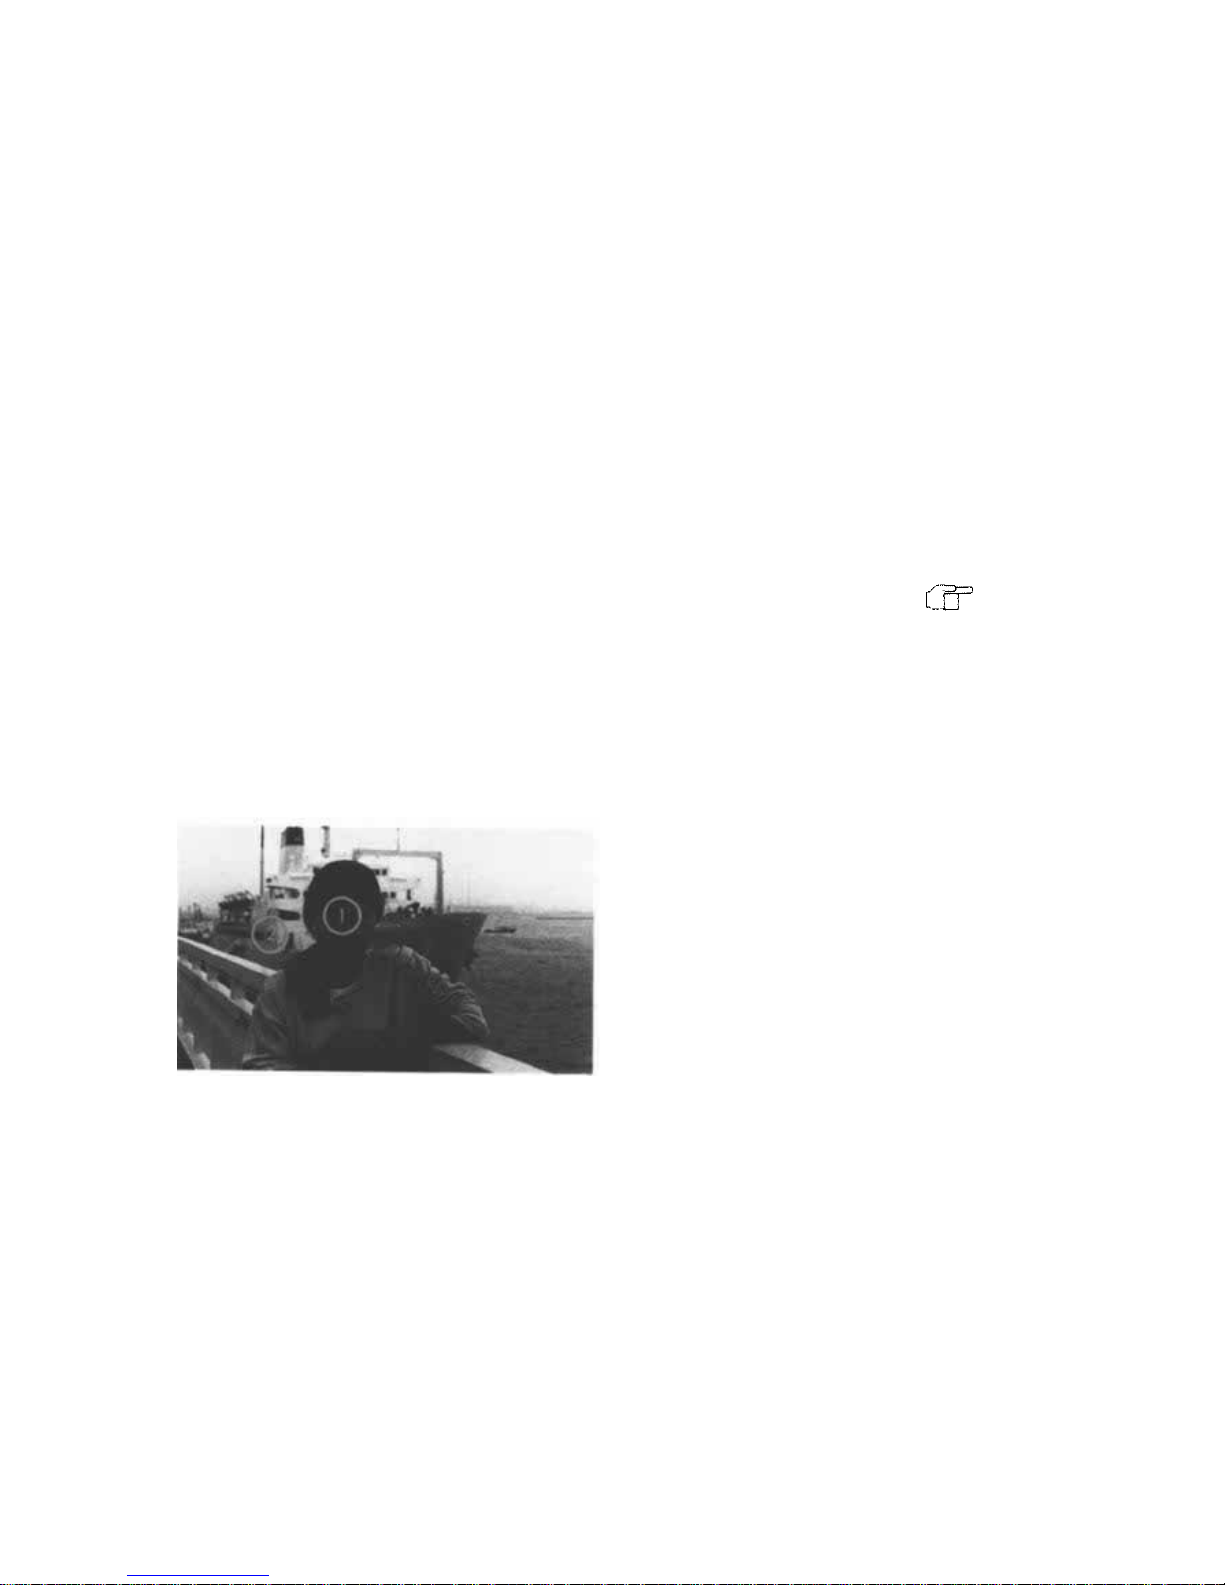
How to Use the "Multi-Spot Measurement" Mode
Reference
P. 101-104
Spot metering is possible in up to 8 spots.
This sample photo shows a backlighted subject.
29
Page 31
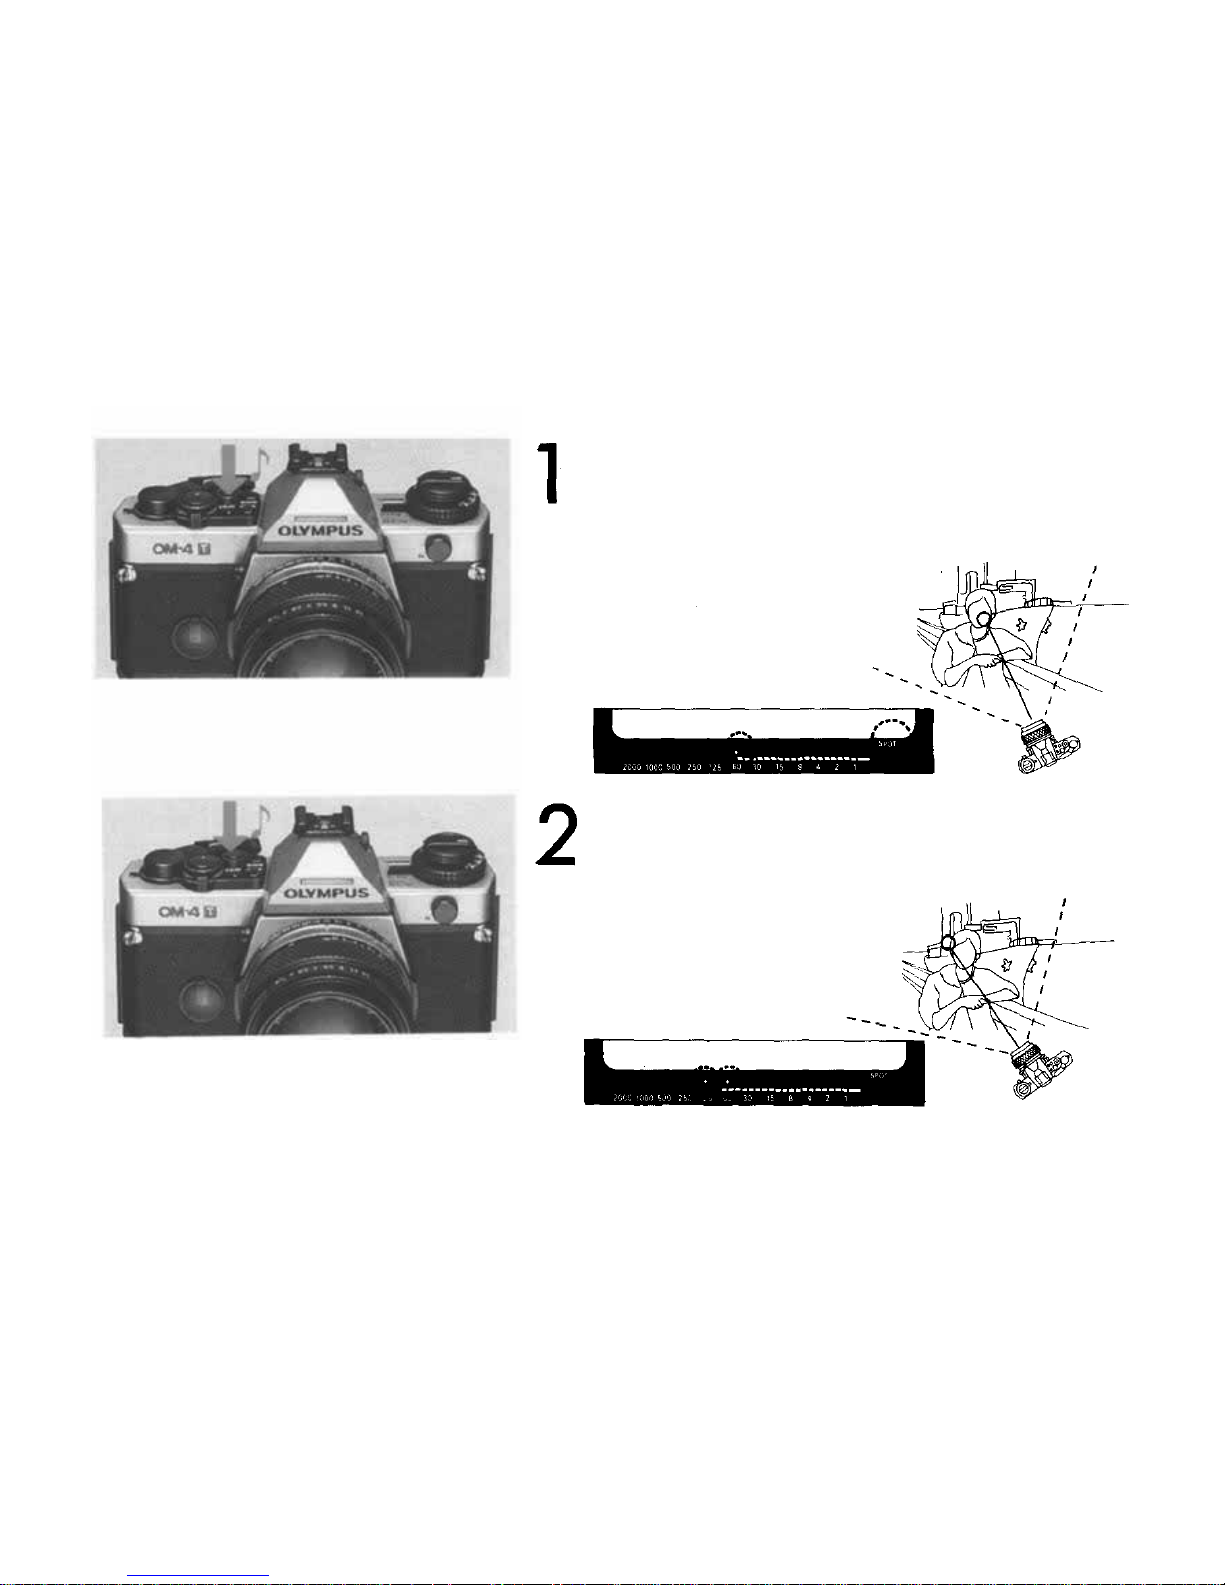
Take spot metering on the face (first spot).
Take spot metering on the ship in the back-
ground (second spot).
30
Page 32
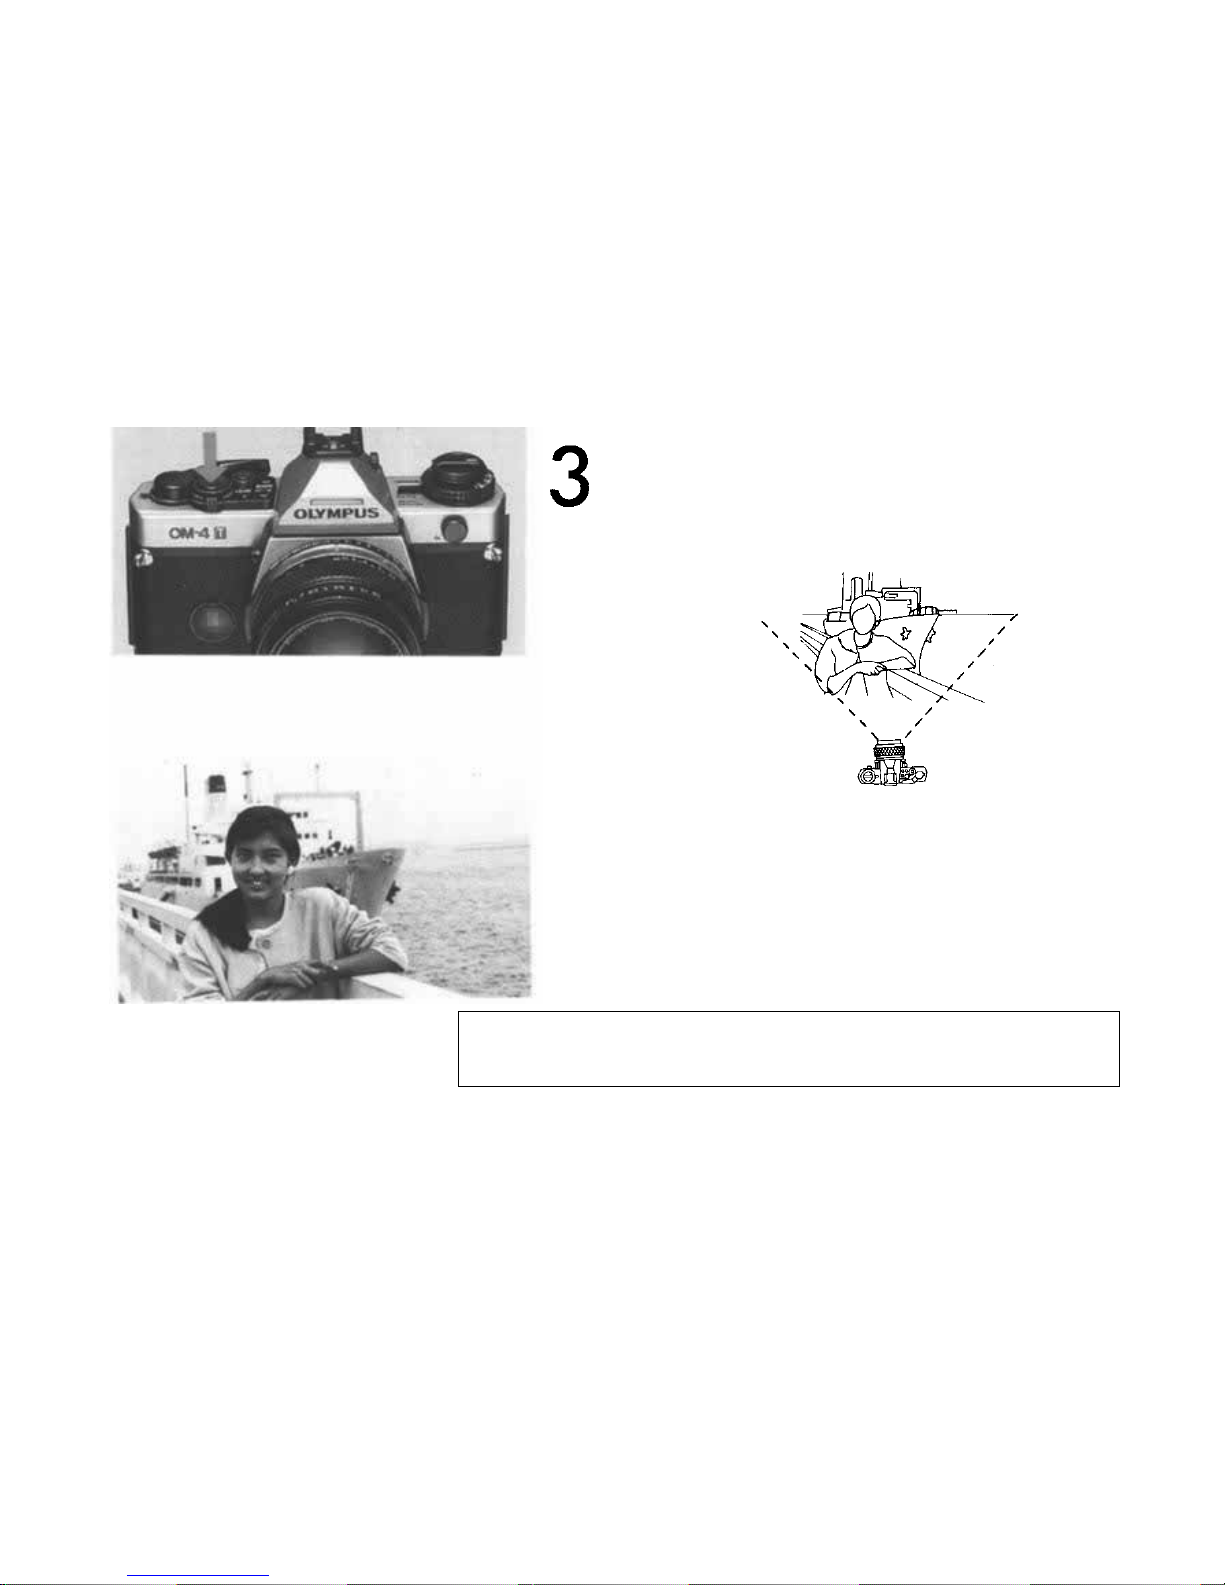
Compose your picture and press the shutter
release.
Both the subject and the background are
correctly exposed.
To cancel the metered value, operate the clear lever.
31
Page 33
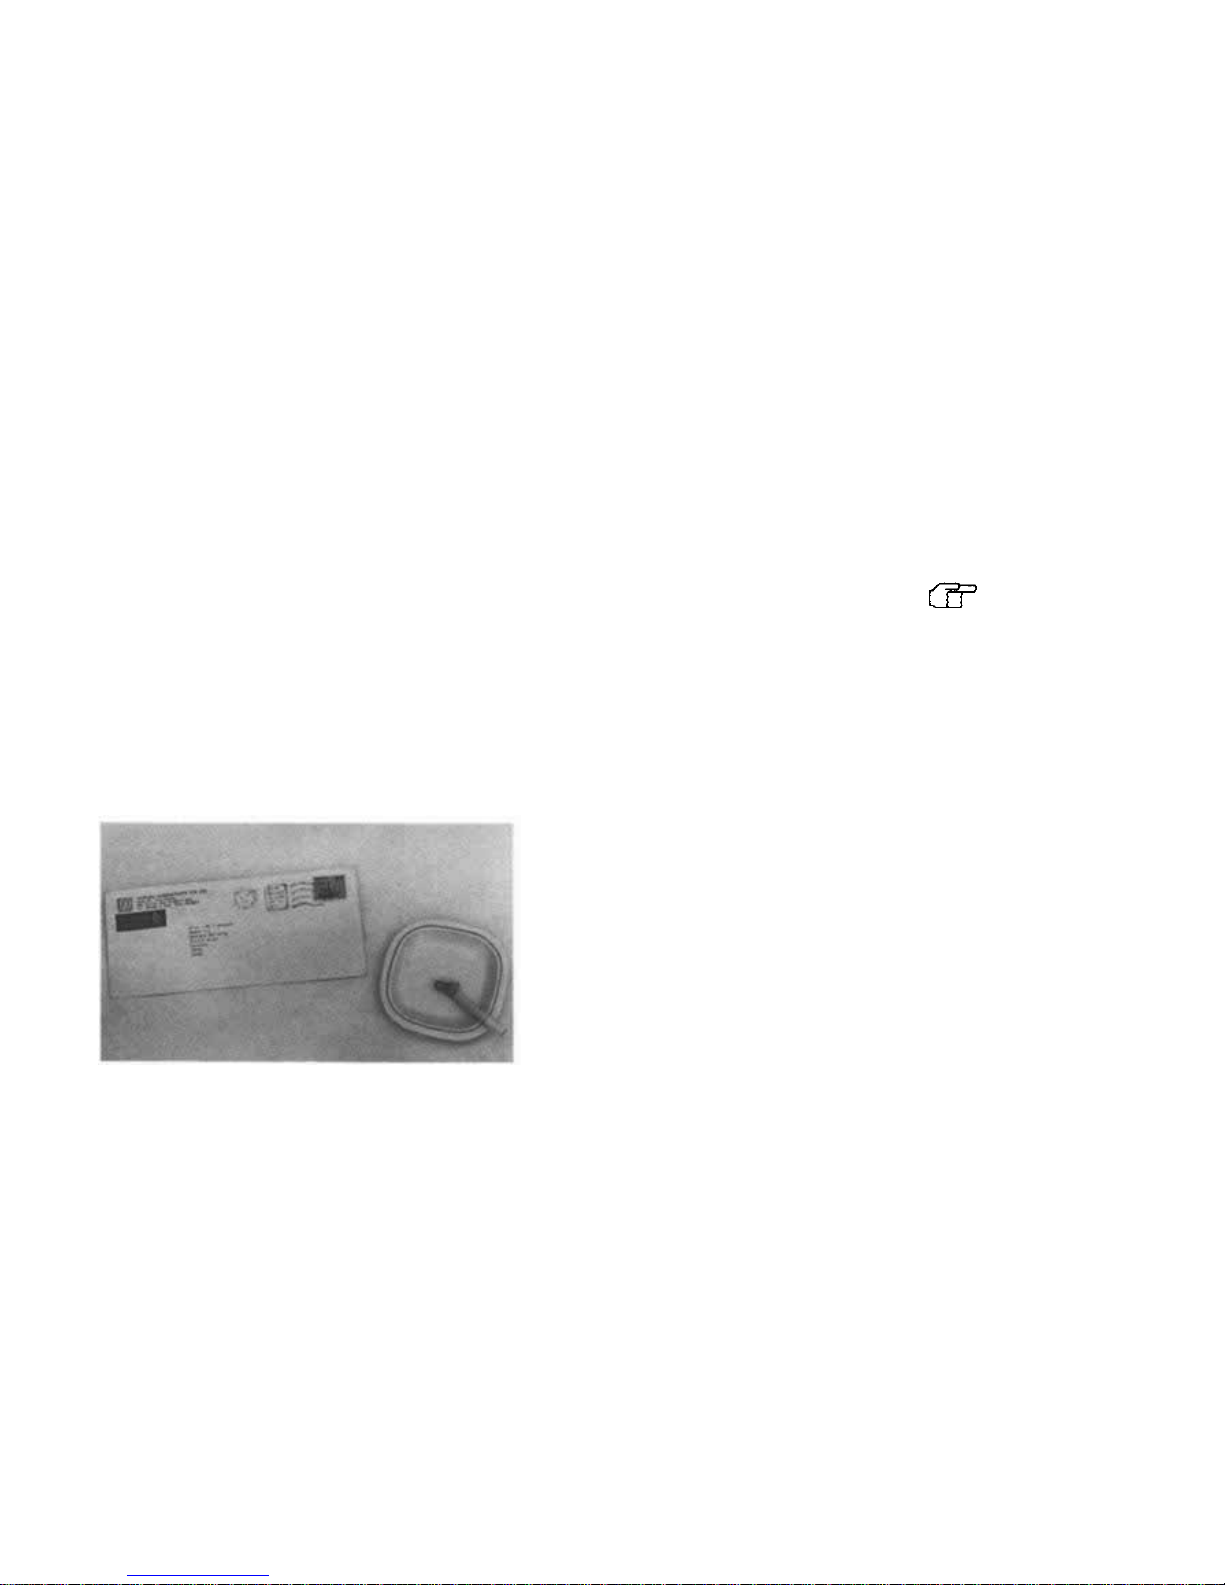
Highlight Control
If you want to render white objects in white...
Reference
P. 105-106
In ordinary shooting, white objects will turn
out grayish if the picture is taken in strong
brightness over the entire frame..
32
Page 34
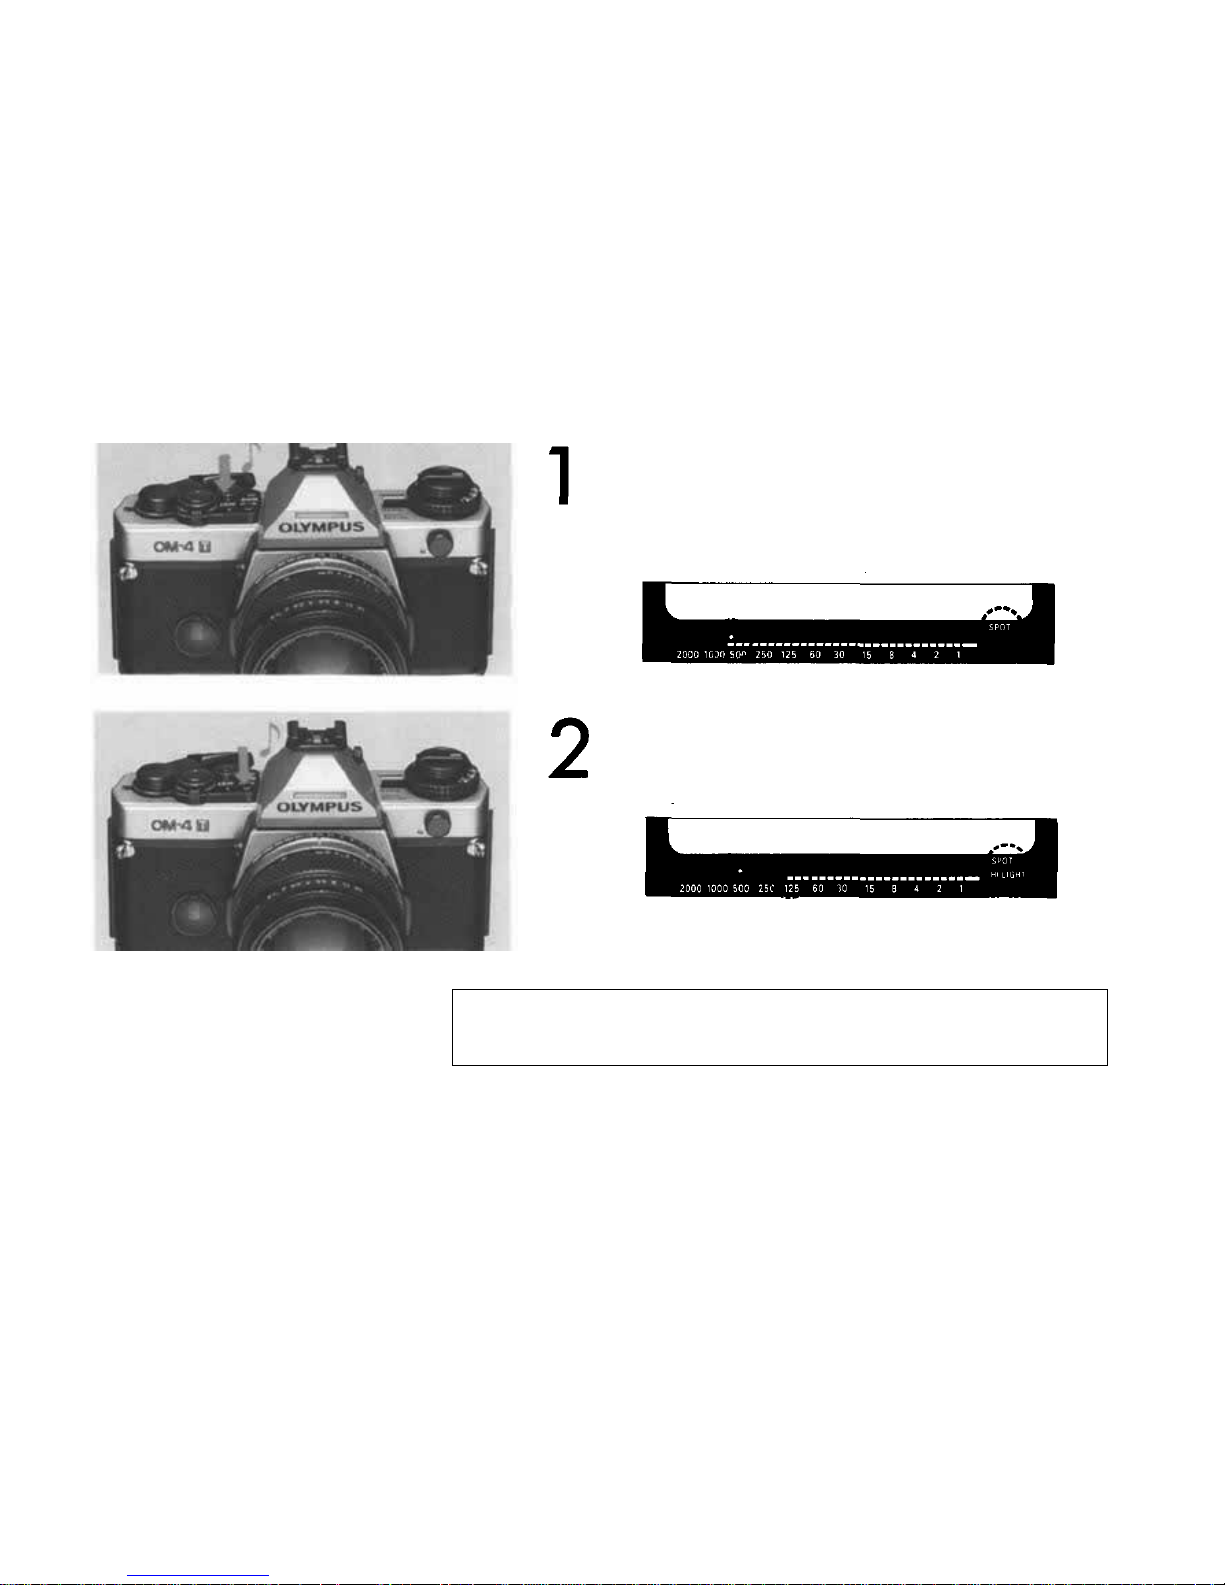
Take spot metering on the part of the subject
which you want to render in white.
Press
the HI.
LIGHT
button.
Exposure will be automatically corrected to give 2-step
overexposure.
33
Page 35
Press the shutter release to t ake the picture.
The white object turns out white.
The highlight control is cleared by pressing the HI. LIGHT
button
once
again.
To
cancel
the
metered
value,
use the
clear
lever.
34
Page 36
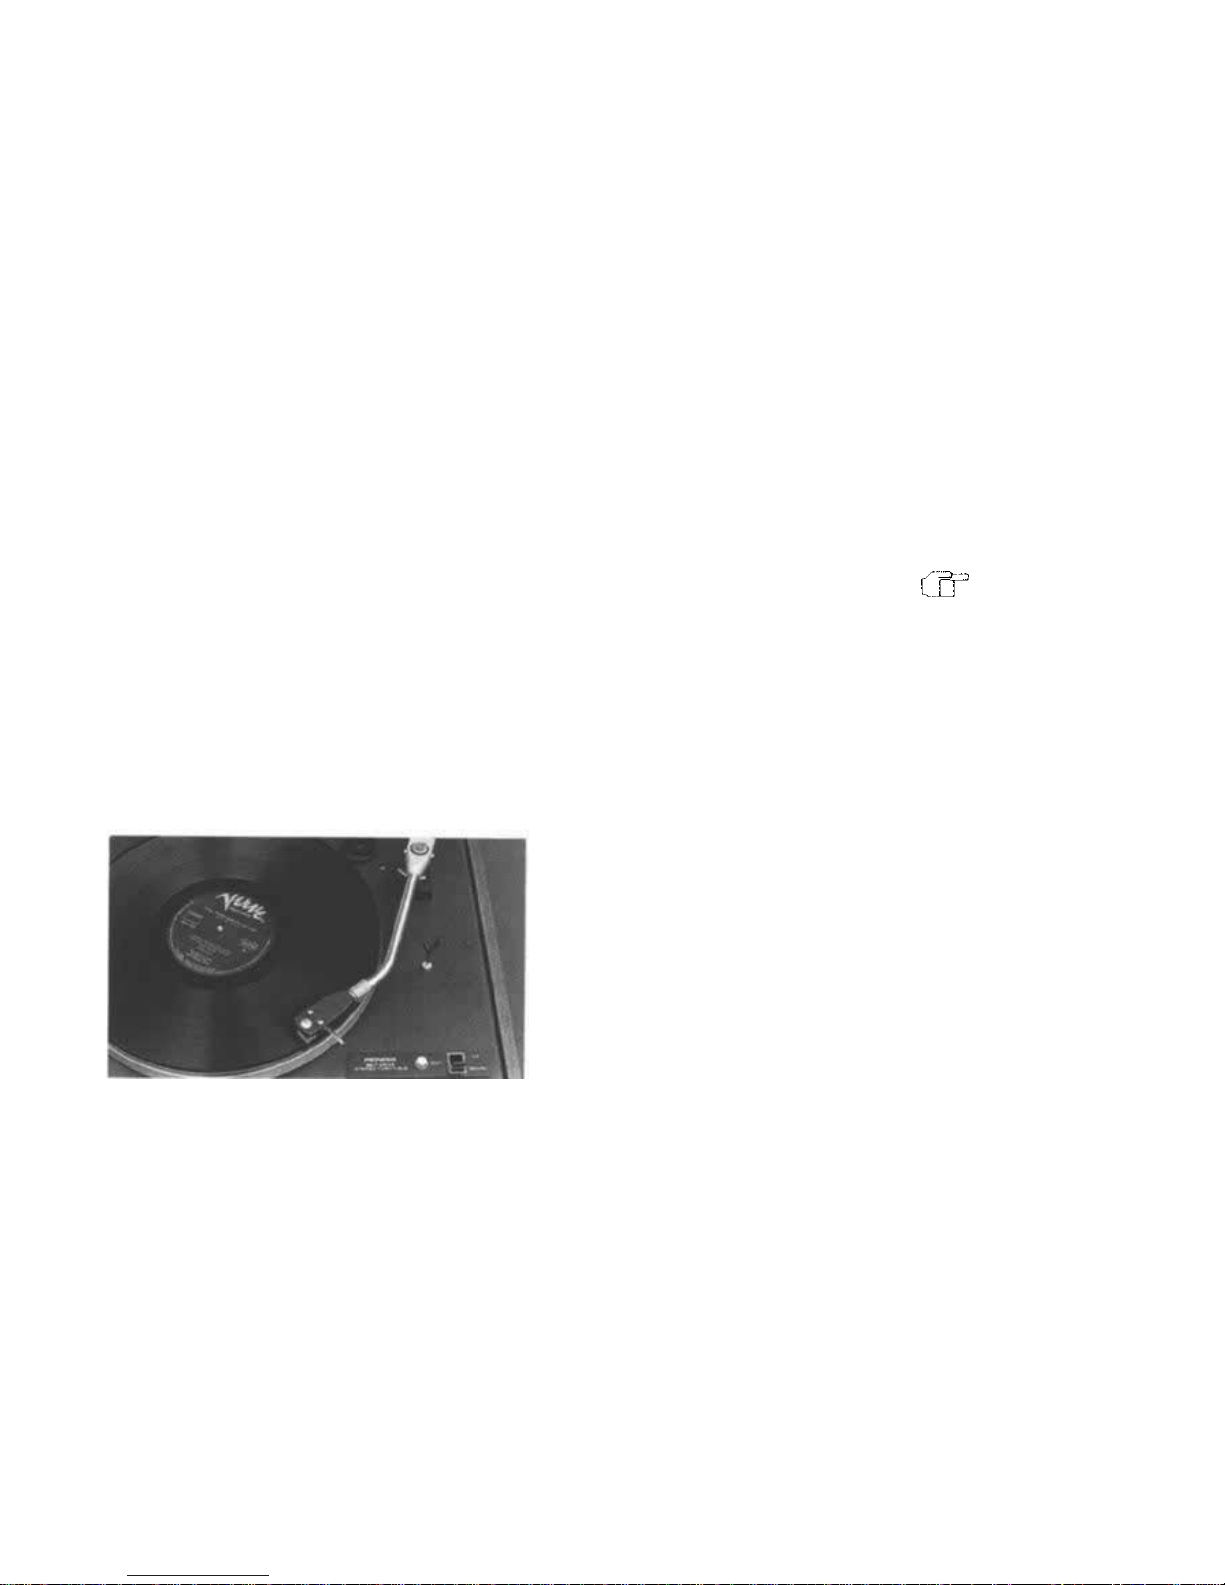
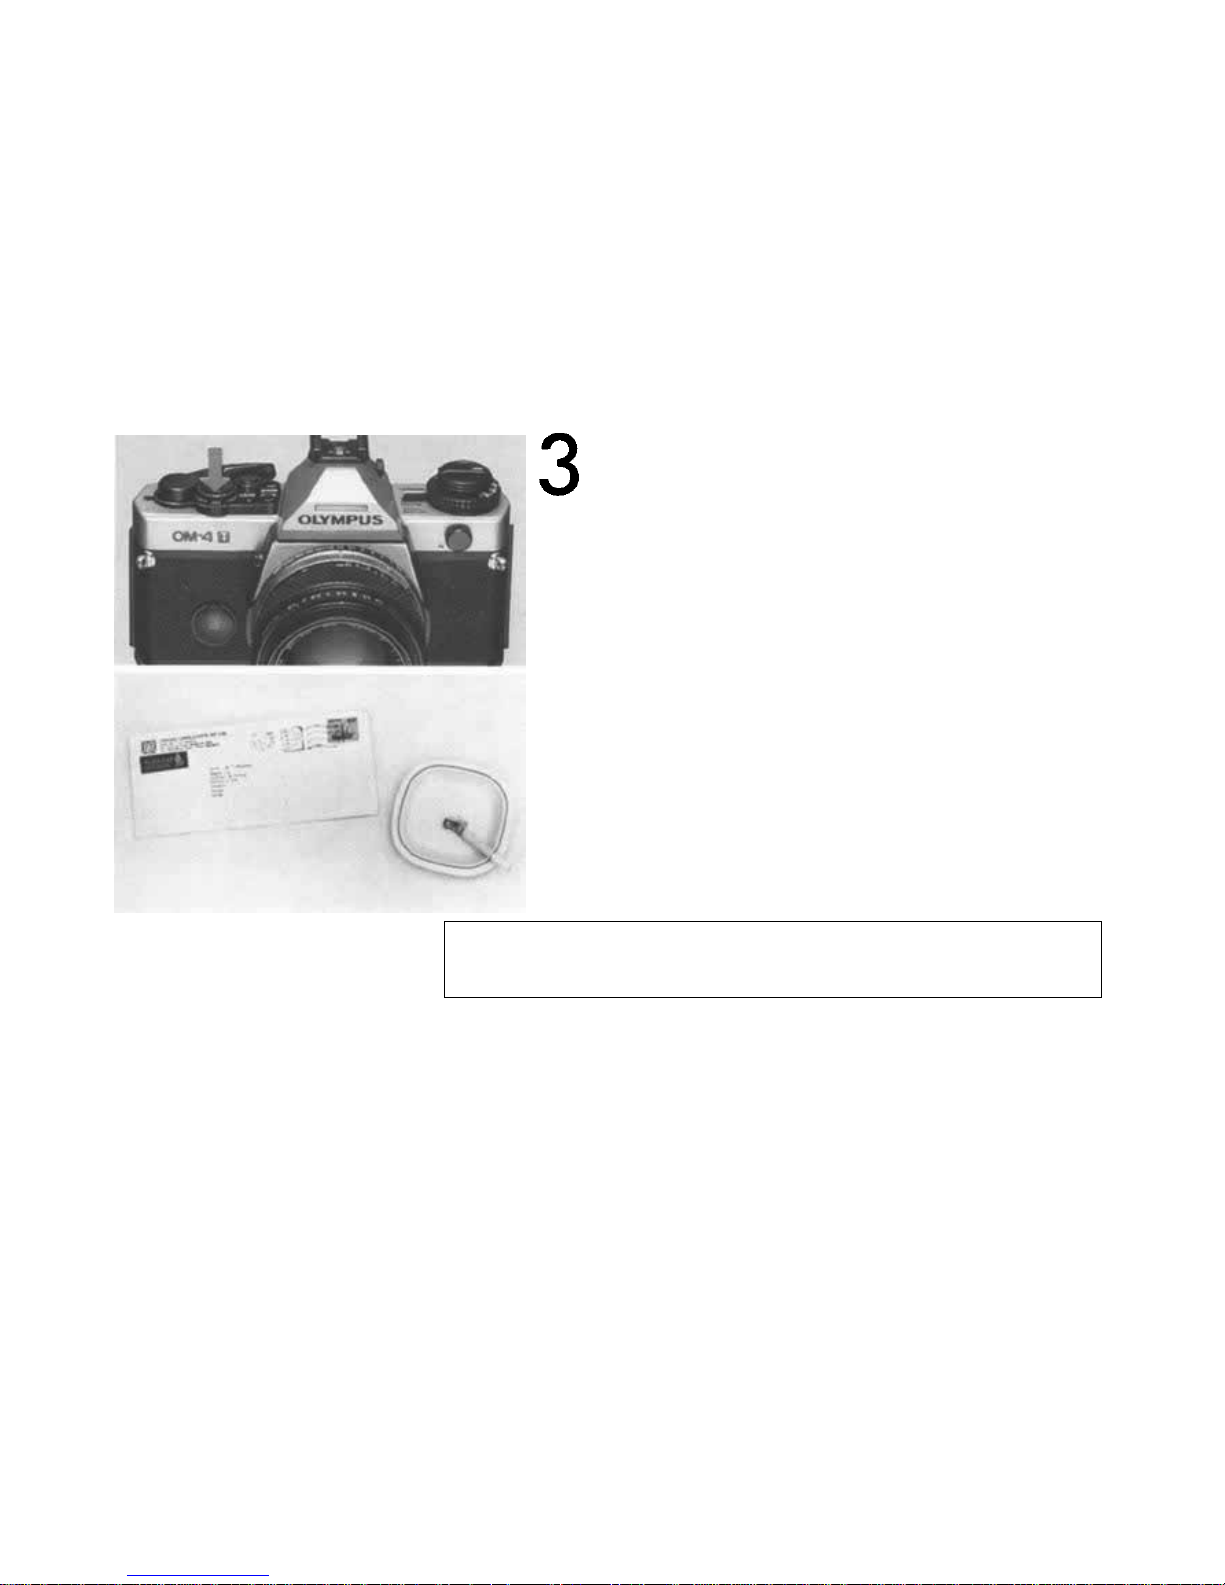
Shadow Control
Reference
P. 107-108
If you want to render black objetcts in black...
In ordinary shooting, black objects will turn
out grayish if it is very dark over the entire picture
frame.
35
Page 37
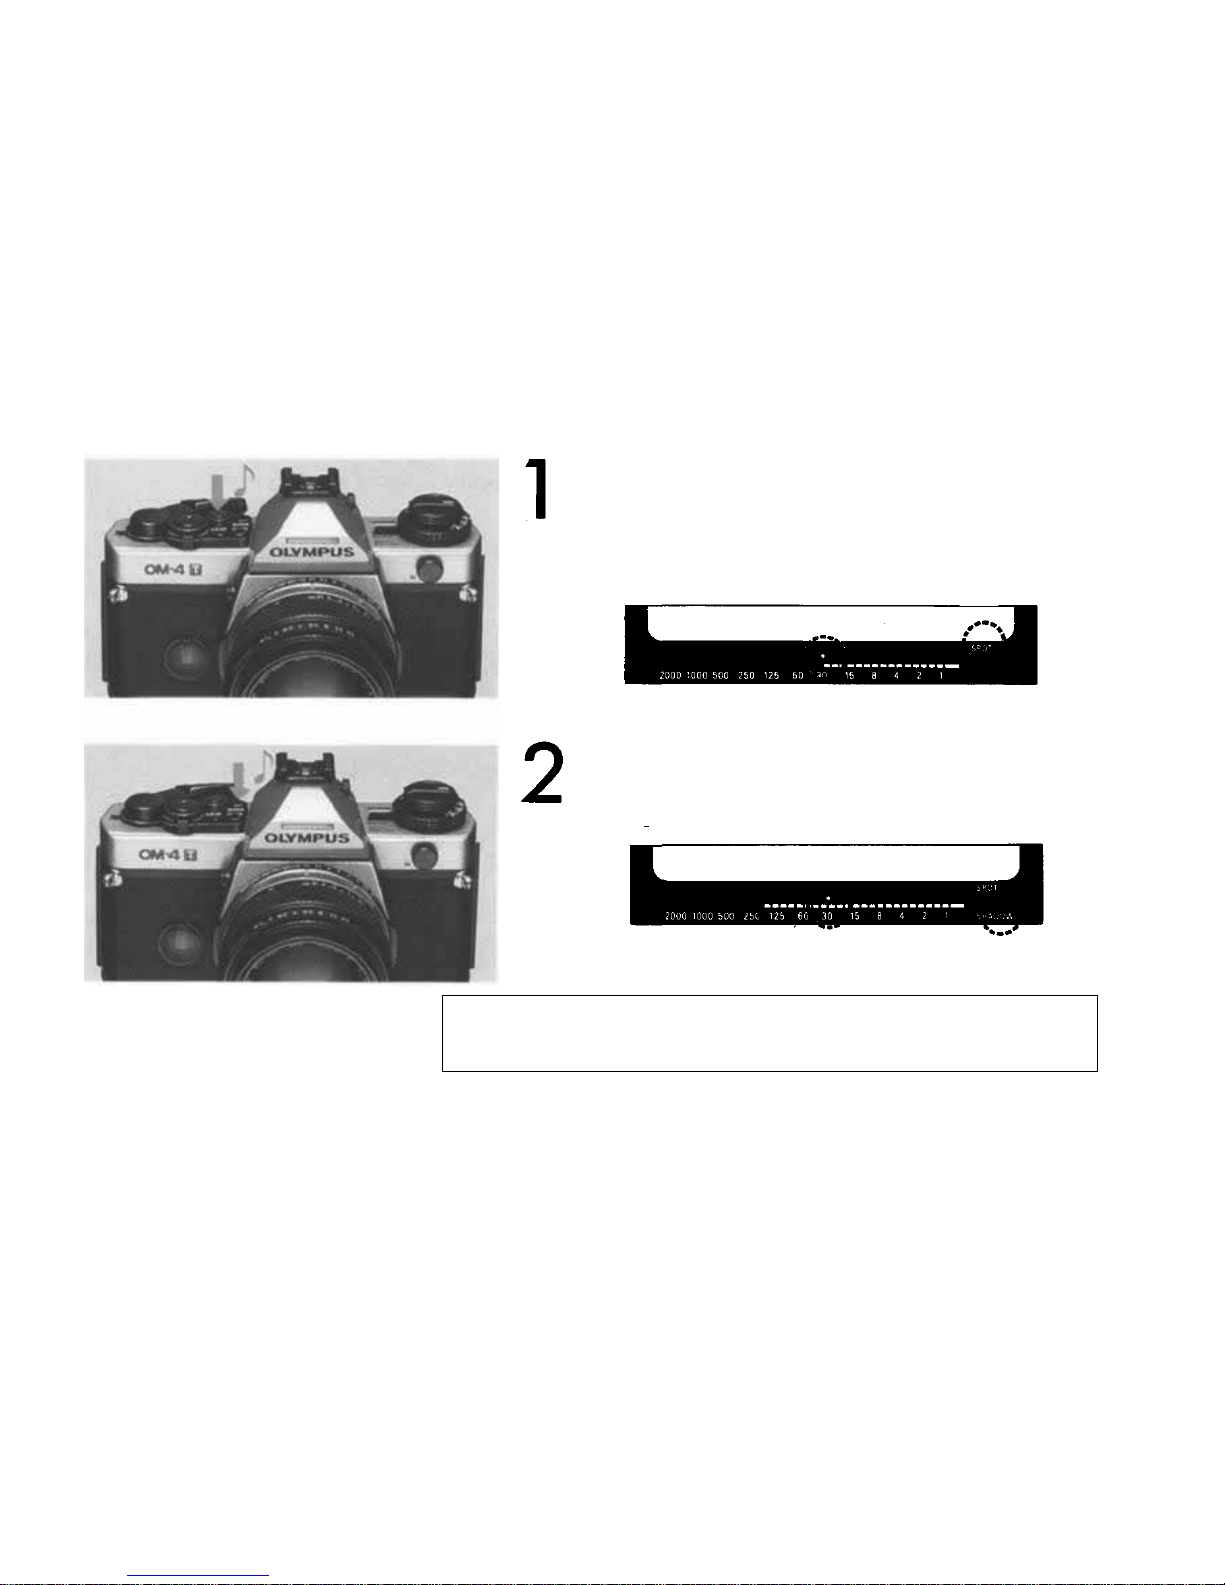
Take spot metering on the spot which you want
to render in black.
Press
the
SHADOW
button.
Exposure will be automatically corrected to give 2 2/3-
step underexposure.
36
Page 38
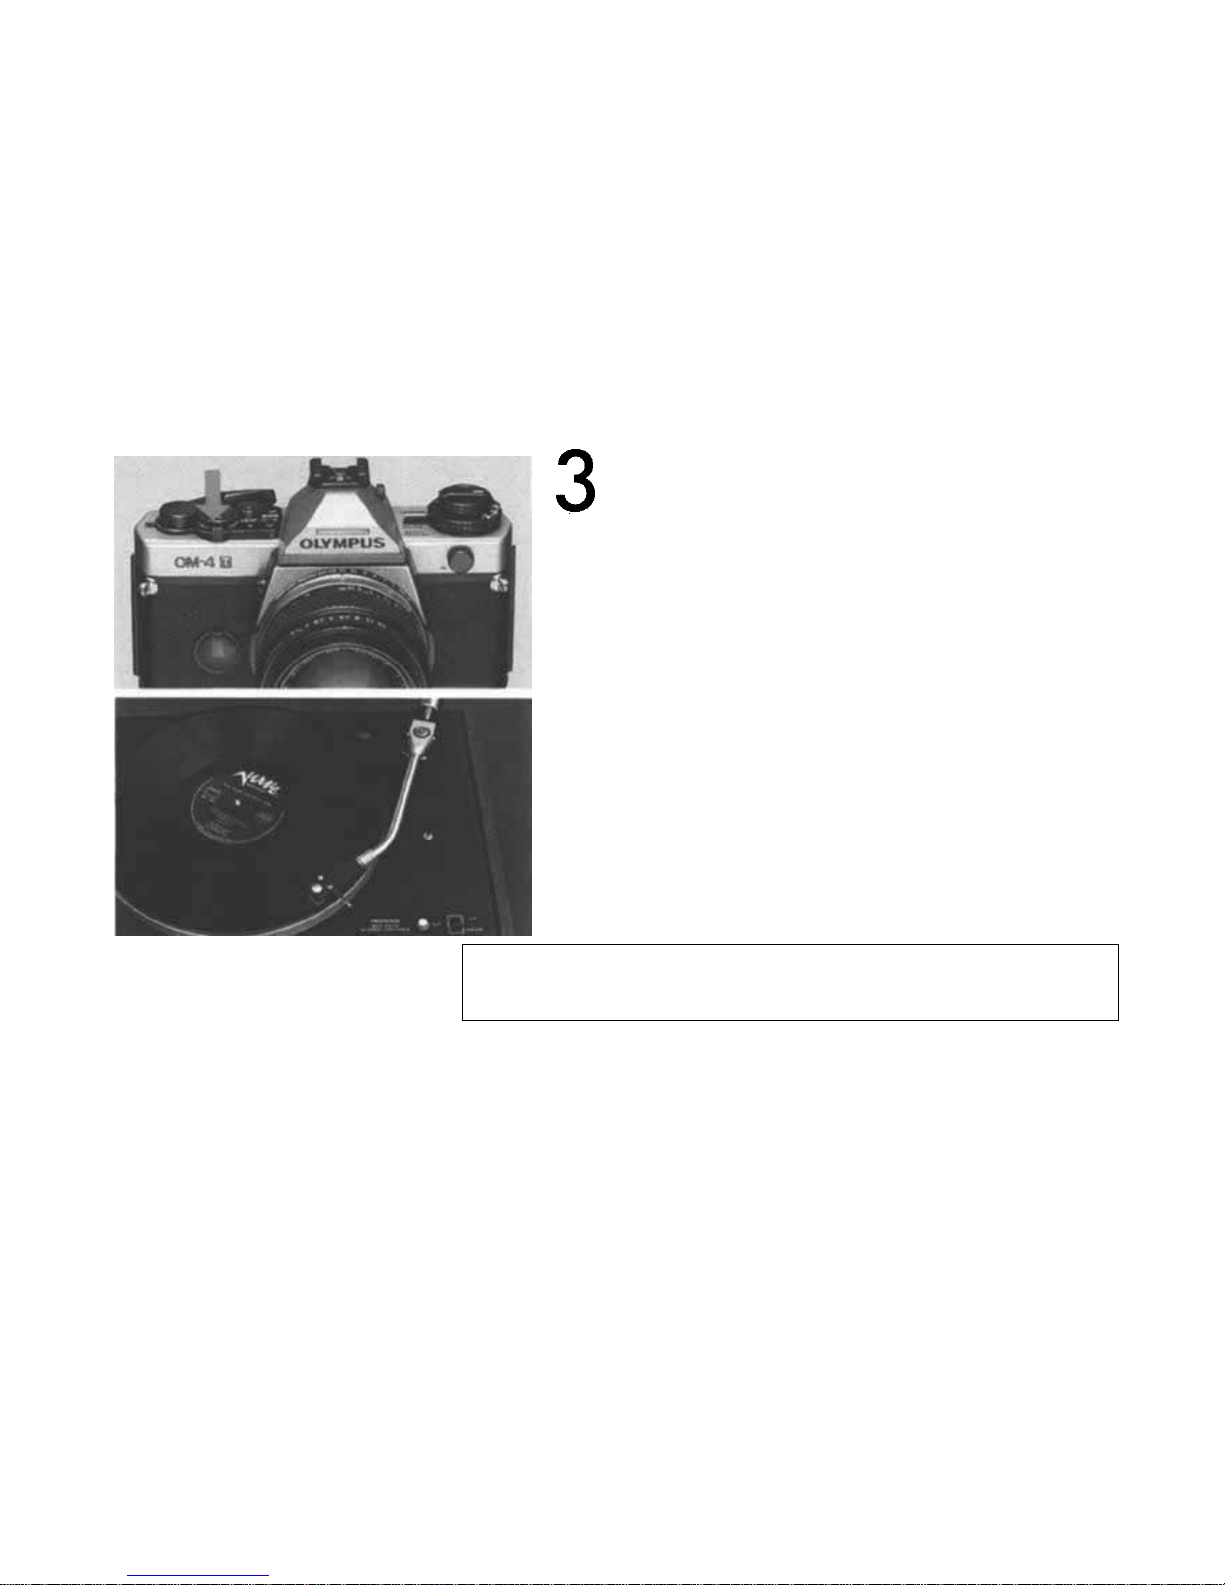
Press the shutter release t o take the picture.
The black object turns out black.
The shadow control is cleared by pressing the SHADOW
button once again. To cancel the metered value, use the clear
lever.
37
Page 39

Taking Photographs (III)
— Automatic Exposure —
In automatic exposure, the same picture will be exposed with a very different exposure
value if it is taken in different backgrounds. The OM-4T has an exposure memory lock
system to solve this problem. It can be used in both the TTL direct metering and spot
metering modes. Once an exposure value stored in memory, it does not vary even if you
change the aperture (or shutter speed).
38
Page 40
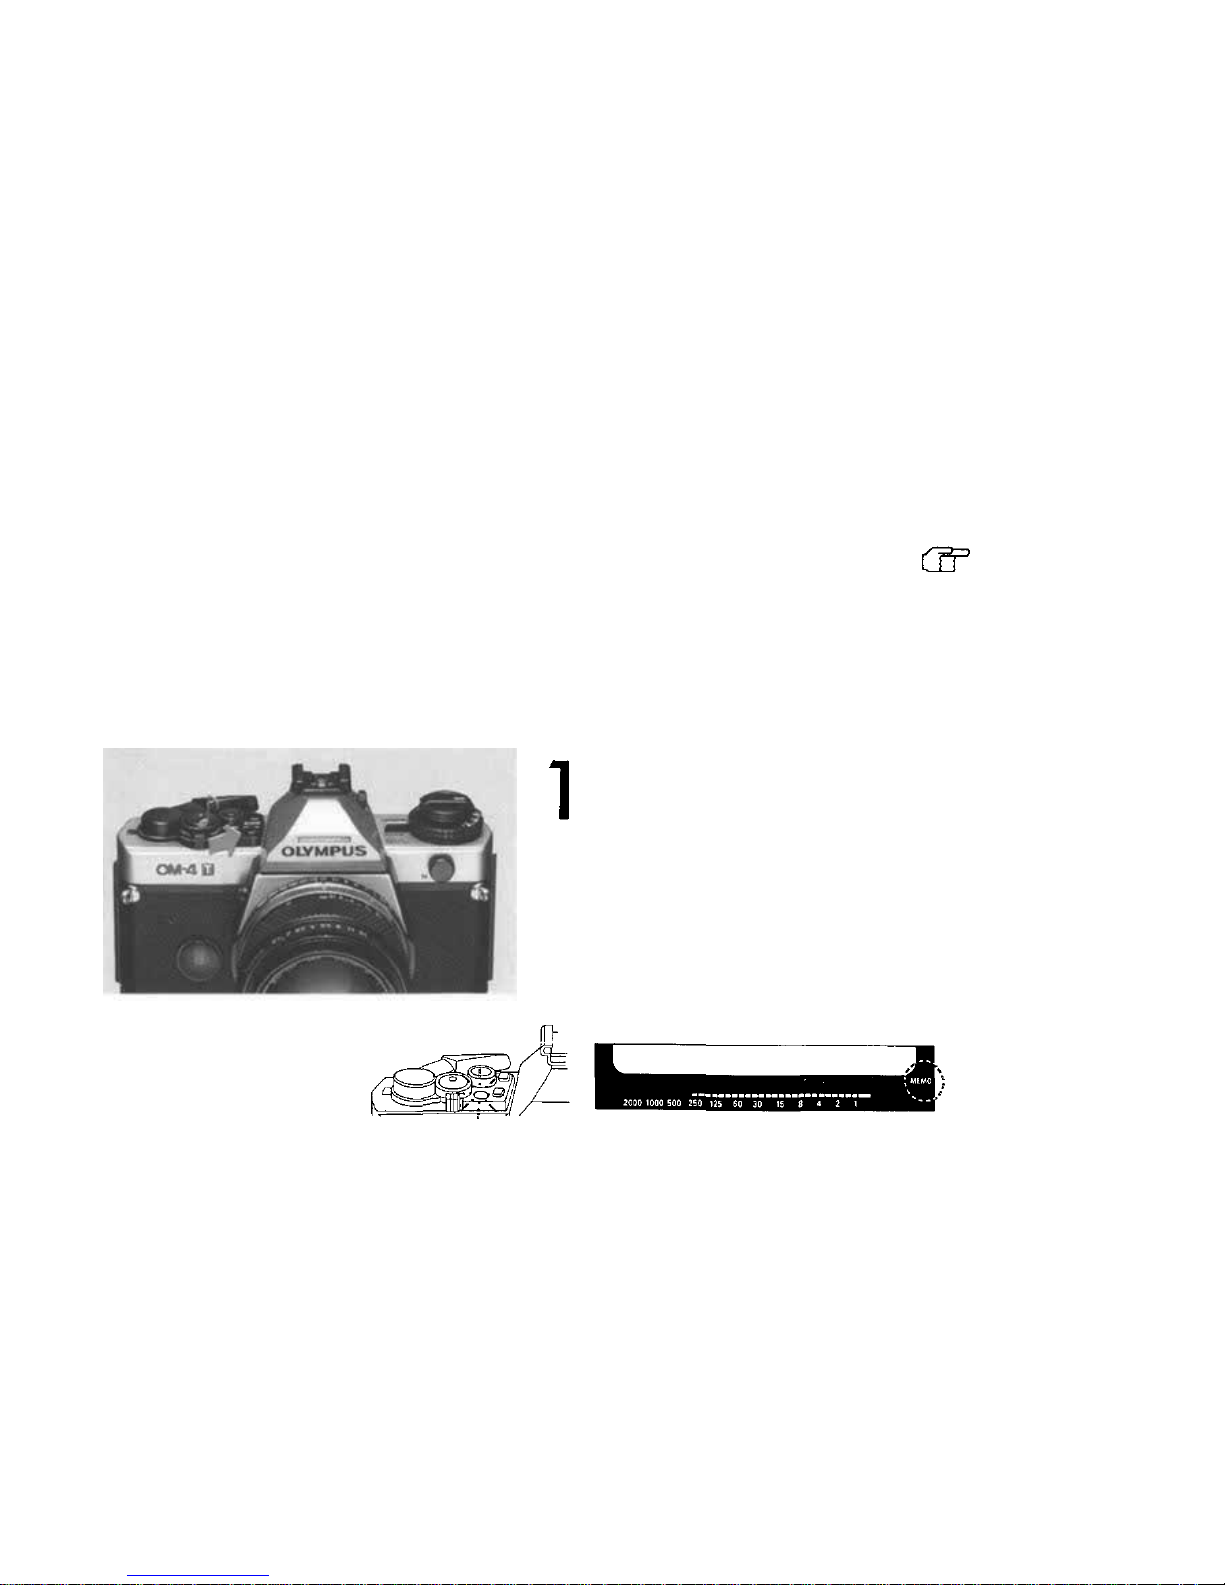
Ho w to Use th e Exposure Memory Lock System
The memory lock system is convenient for taking many pictures of the same subject in different
backgrounds or costumes.
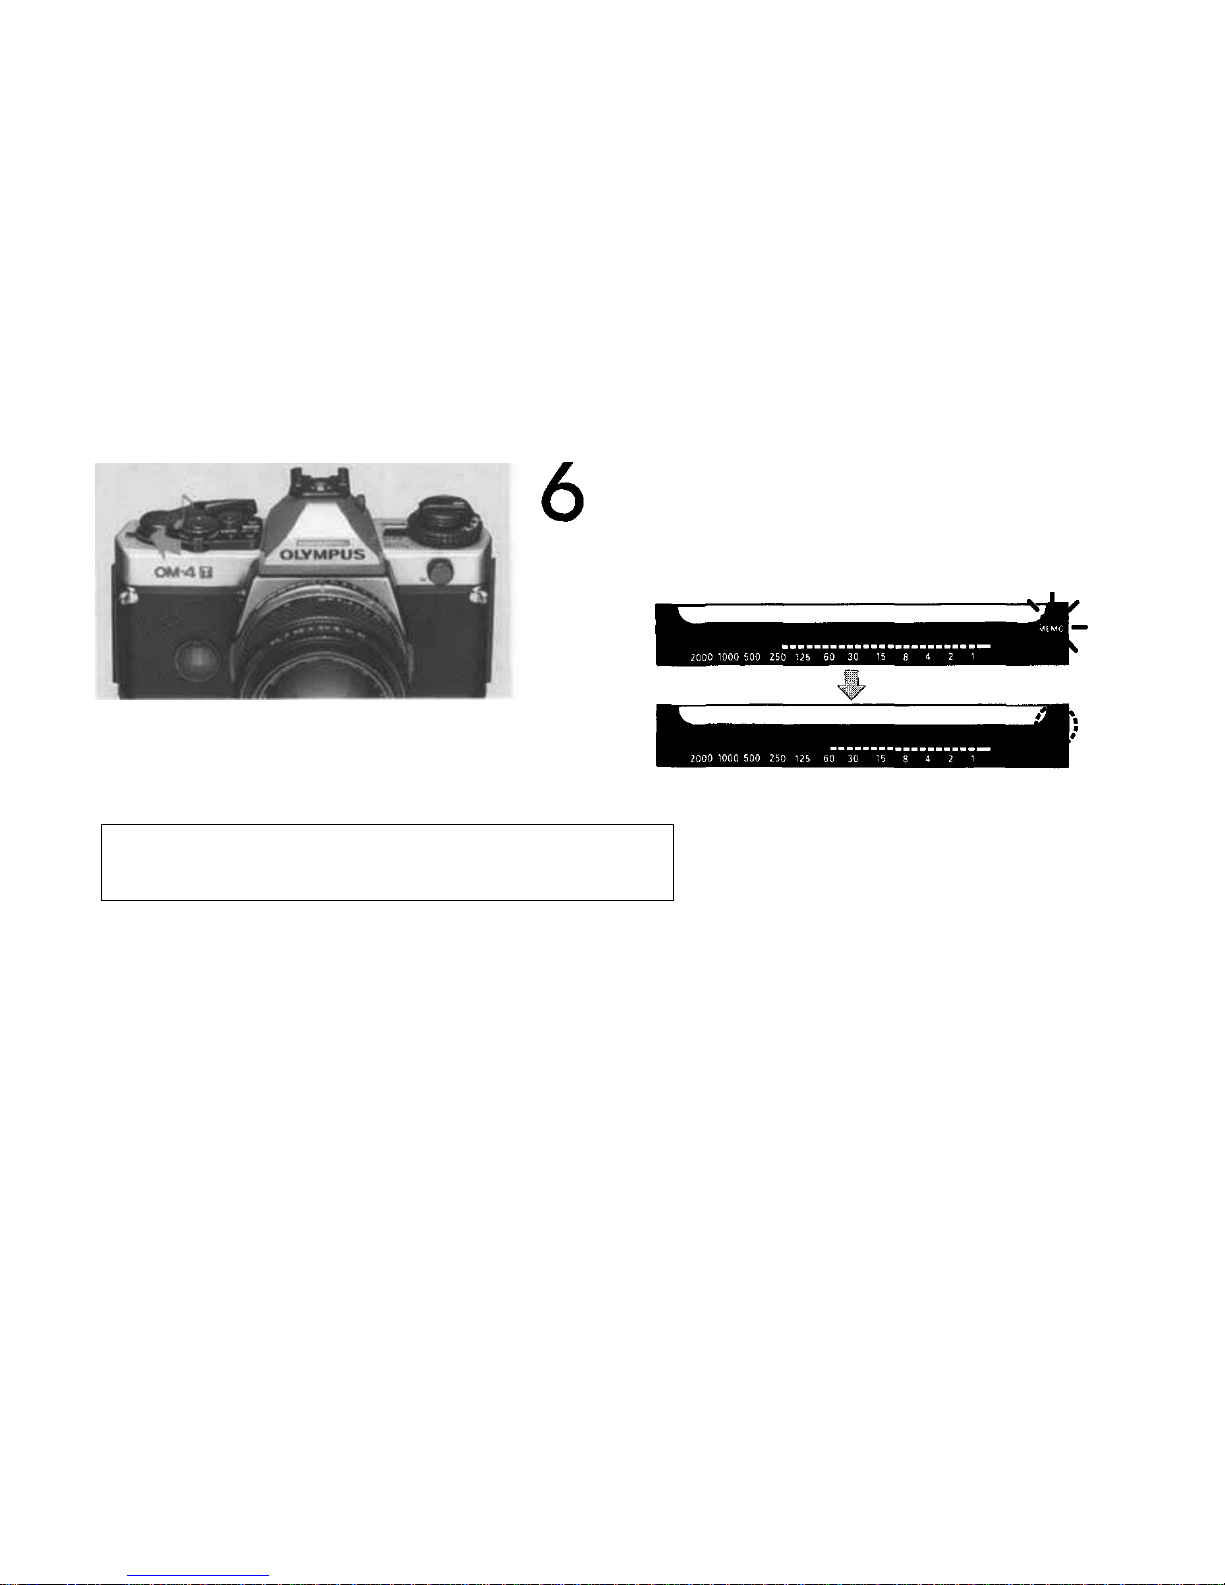
Operate the lever to set up the memory mode.
The letters "MEMO" will appear in the viewfinder
and the memory signal will blink twice.
Reference
P. 109-110
39
Page 41
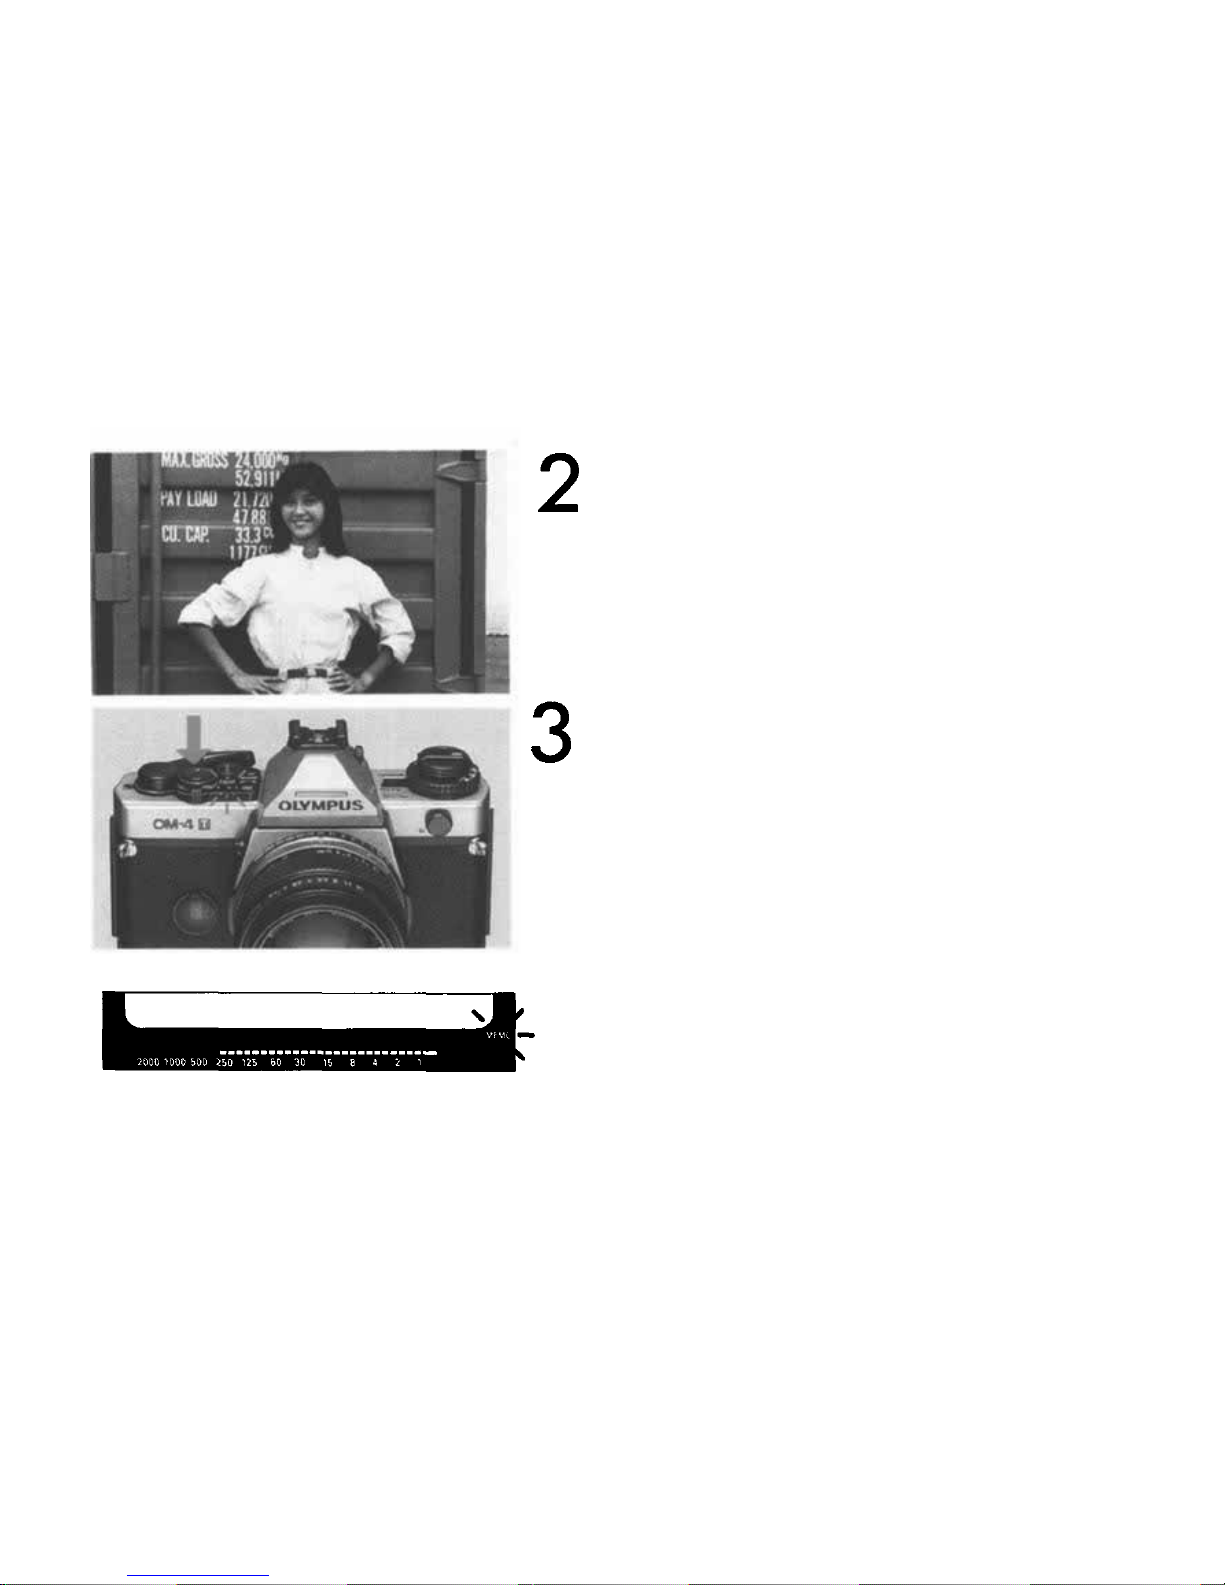
Frame the composition as you desire.
The Exposure Value is Stored in Memory afte r
Shooting.
40
Page 42
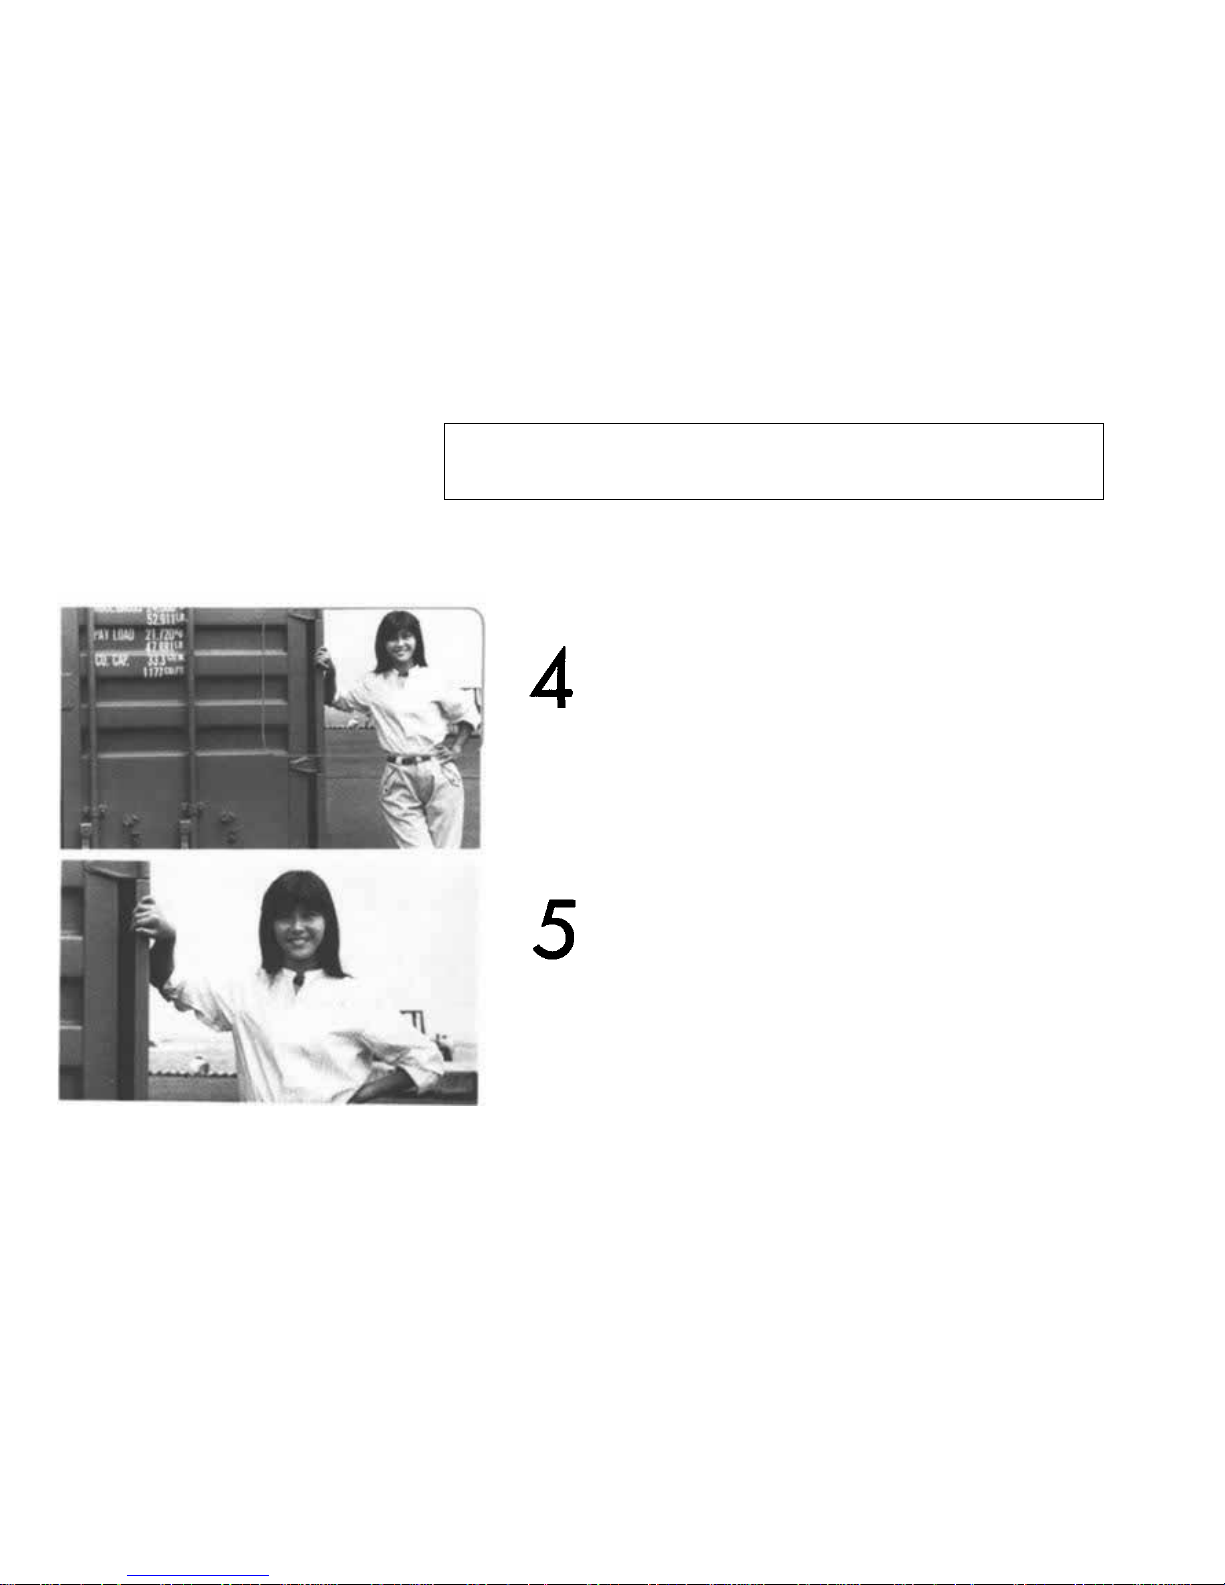
The memory will keep on f or 60 minutes after the shutter
has
tripped.
Change the composition and shoot.
The subject is exposed with the same exposure
value even if you change the composition.
41
Page 43
To clear the memory, use the clear lever.
The memory is also cleared in the follow ing cases:
1. When a lens is mounted or dismounted.
2. When the mode lever is switched.
42
Page 44

Taking Photographs ( IV )
— Manual Exposure —
The OM-4T permits manual exposure on center-weighted, averaged metering and spot
metering. It allows you to choose the optimum aperture and shutter speed whic h su it your
subject and ta st e.
43
Page 45
How to Take Pictures on Center-Weighted, Averaged Metering
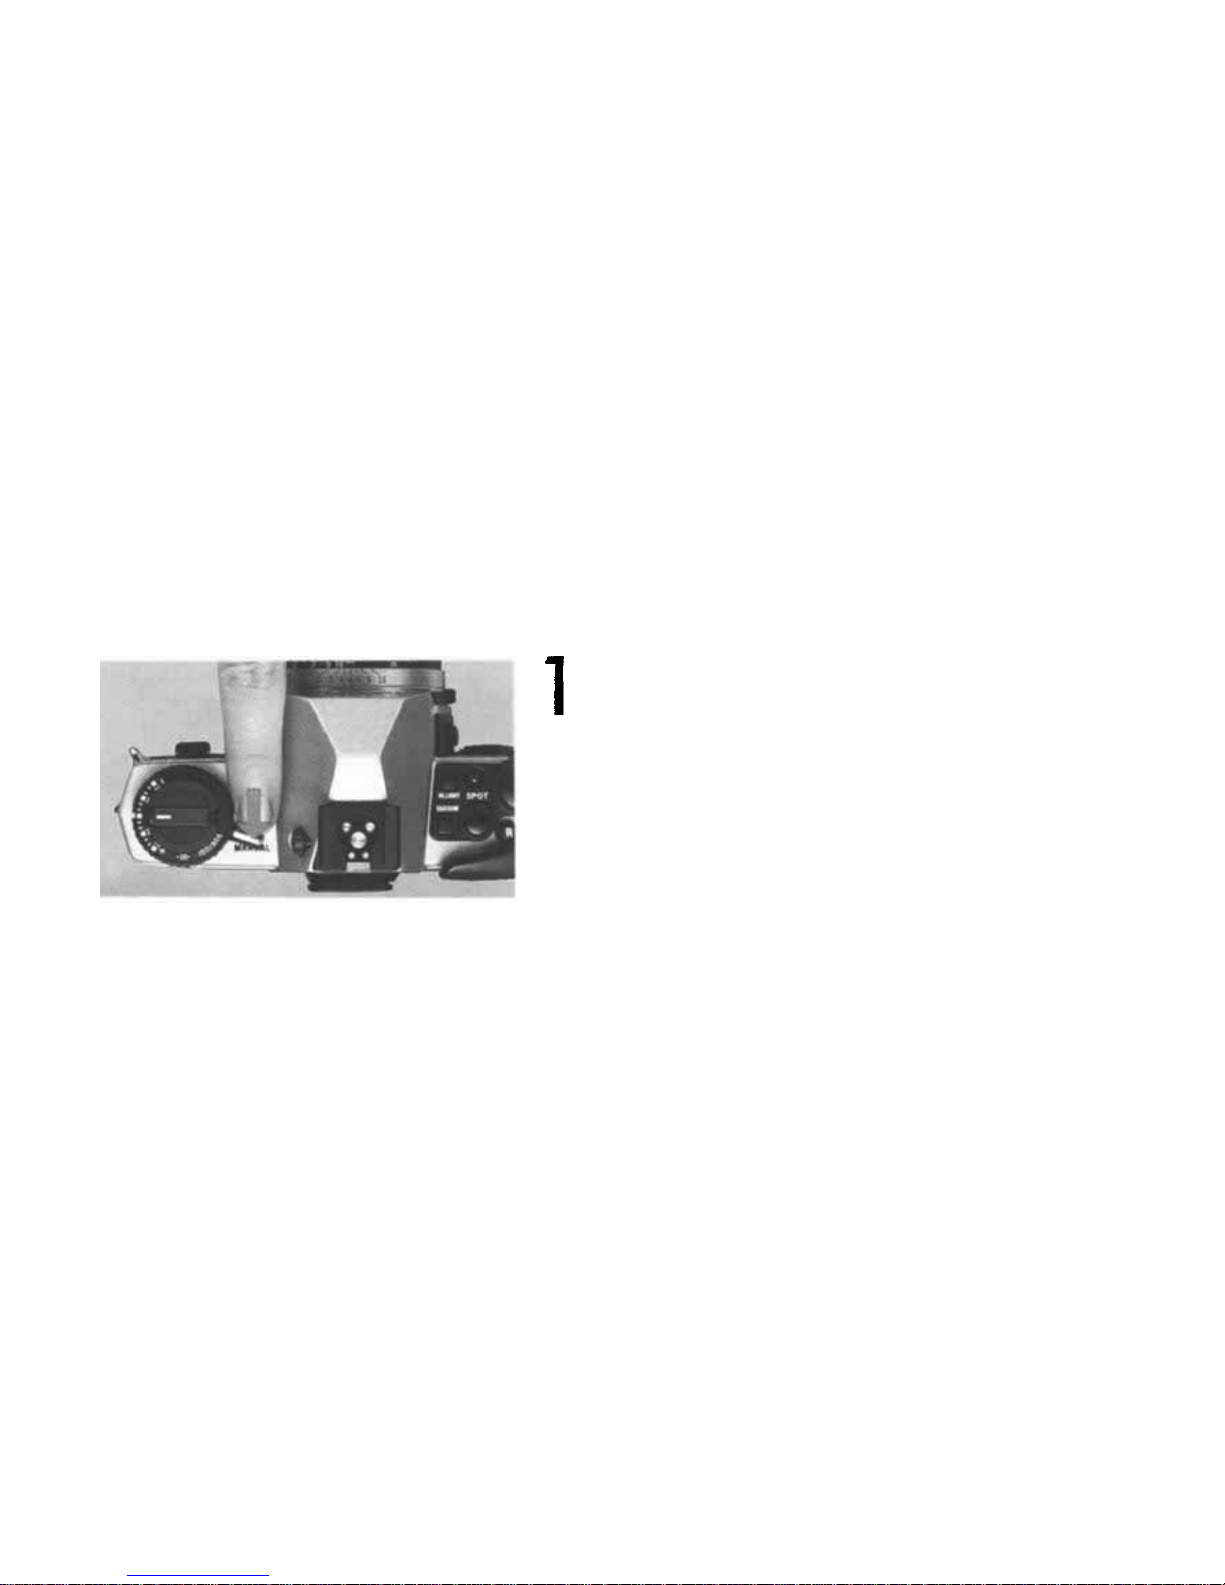
Set the mode selector dial to the "MANUAL"
position.
44
Page 46
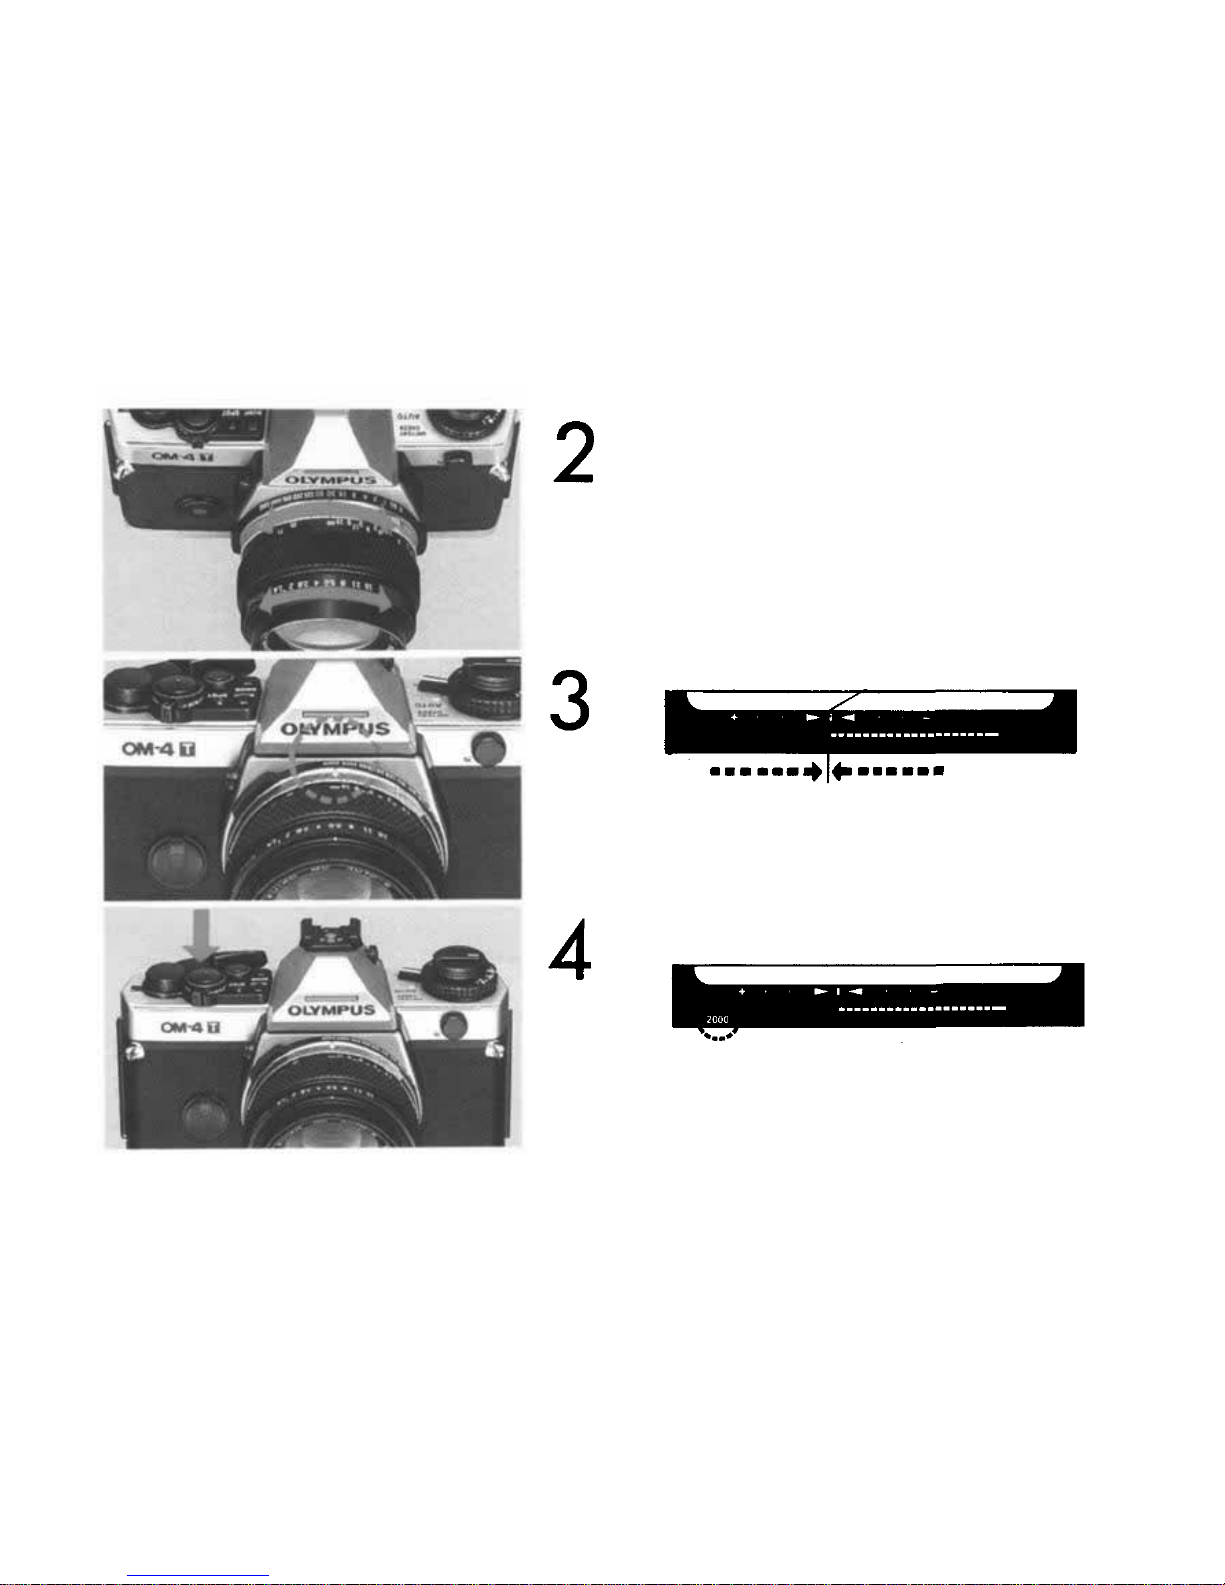
Set the bar graph tip to th e fixed point between
the arrows by adjusting the aperture and/or shutter
speed rings.
Fixed point
The
shutter
speed
you
have
set
will
be
displayed
in the viewfinder.
Shoot.
45
Page 47
How to Use the Spot Measurement
Reference
P. 96-100
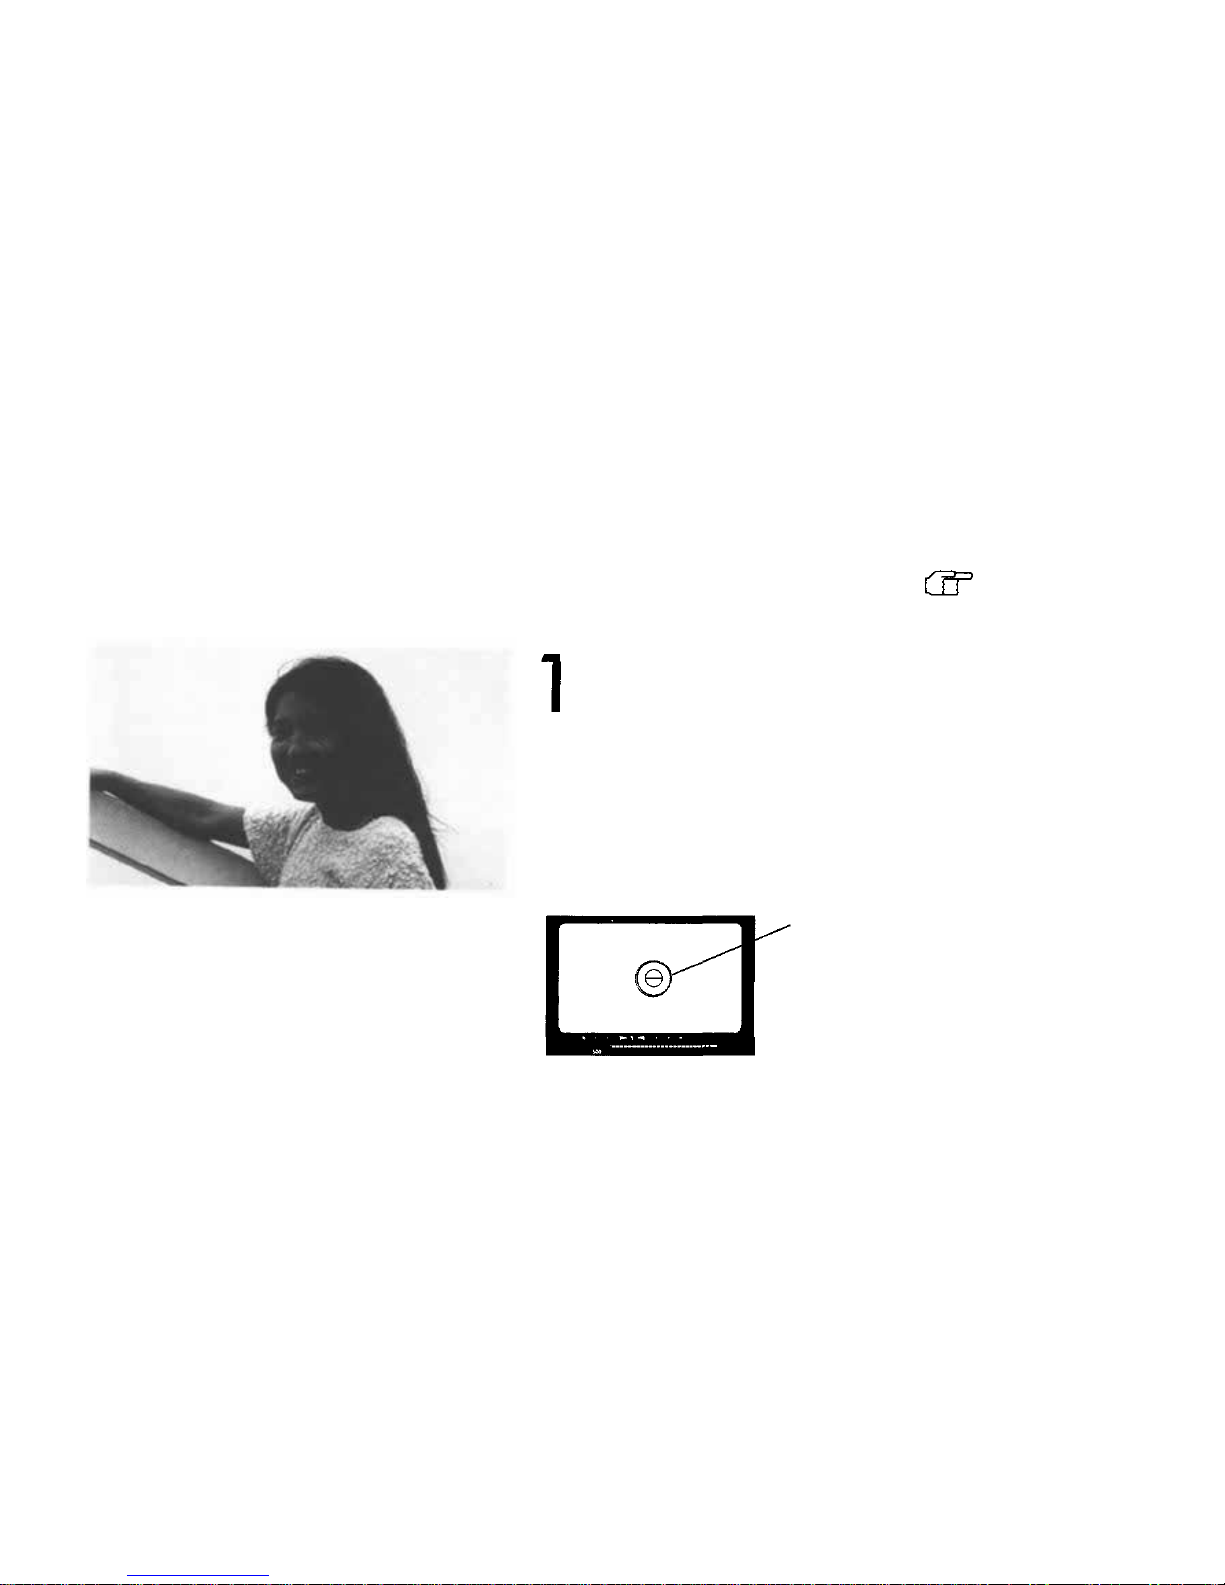
Align the microprism area with the area you
want to measure.
Spot metering range
46
Page 48
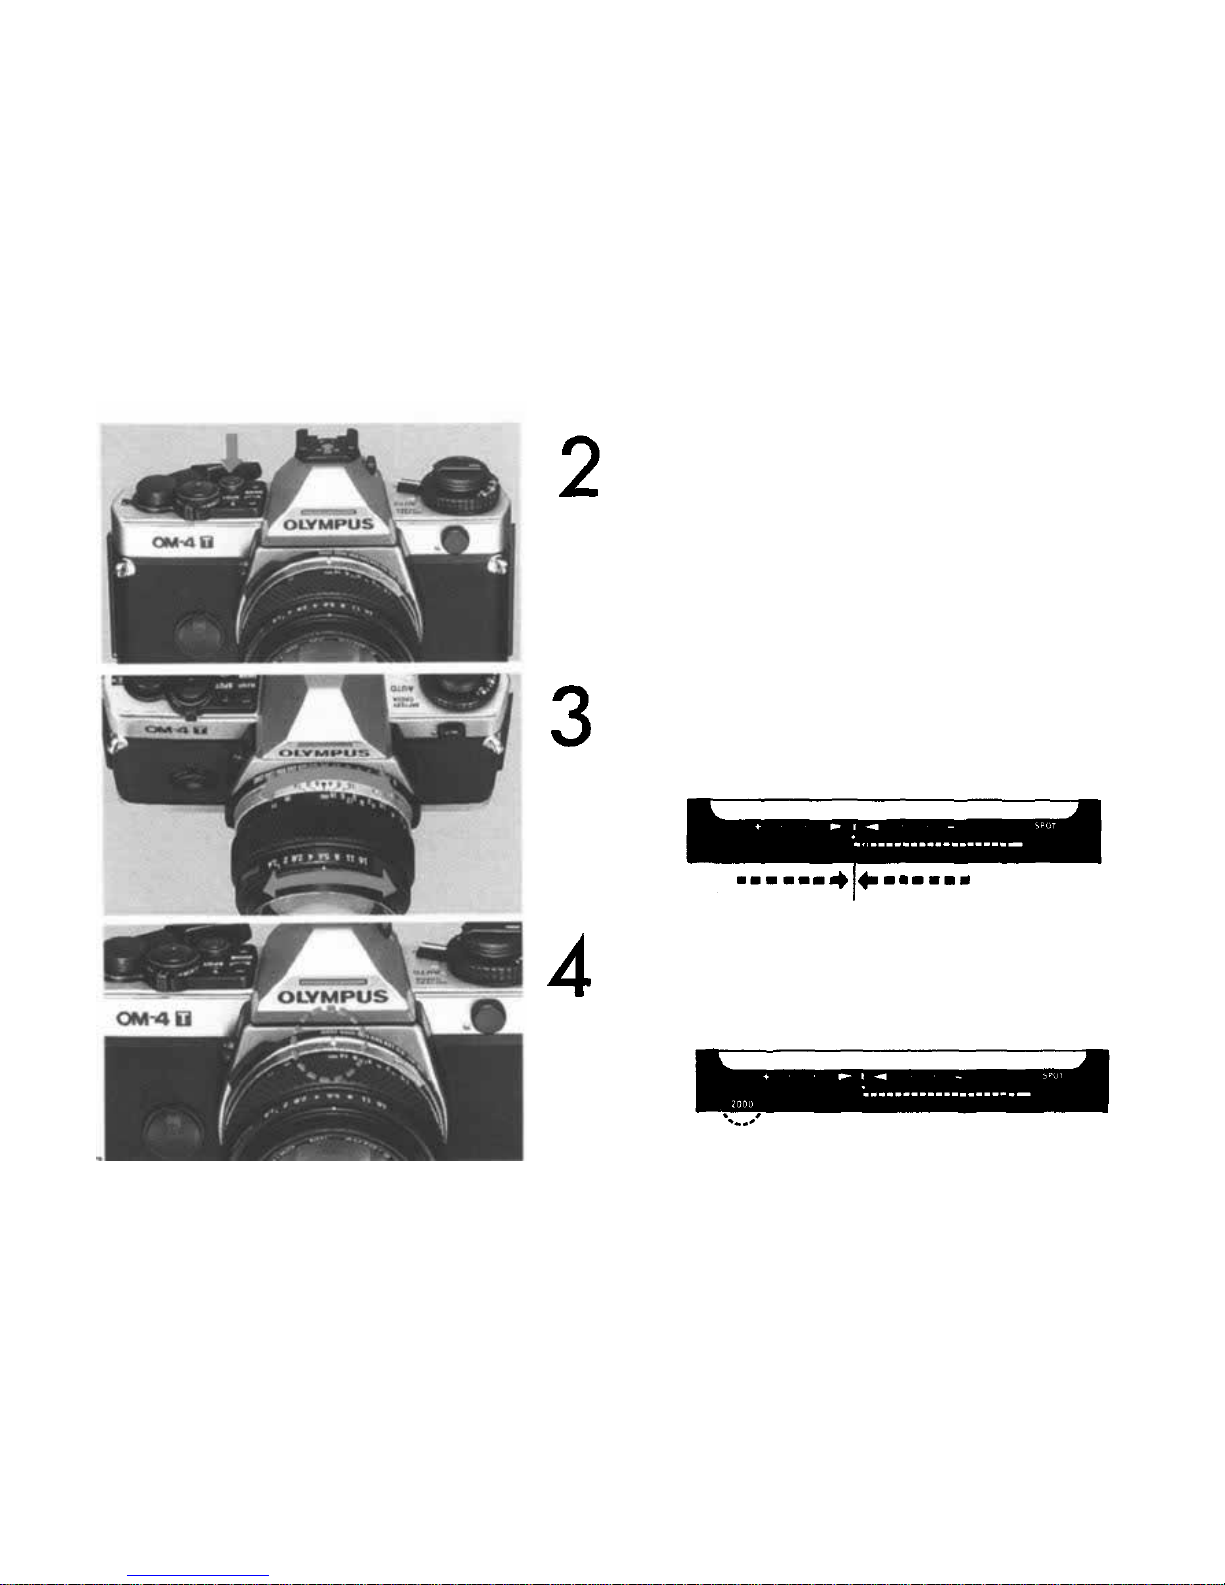
Press
the
spot
button
to
take
meter
reading.
Set the bar graph tip to the fixed point between
the arrows by adjusting the aperture and/or shutter
speed rings.
The shutter speed you have set will be displayed
in the viewfinder.
47
Page 49
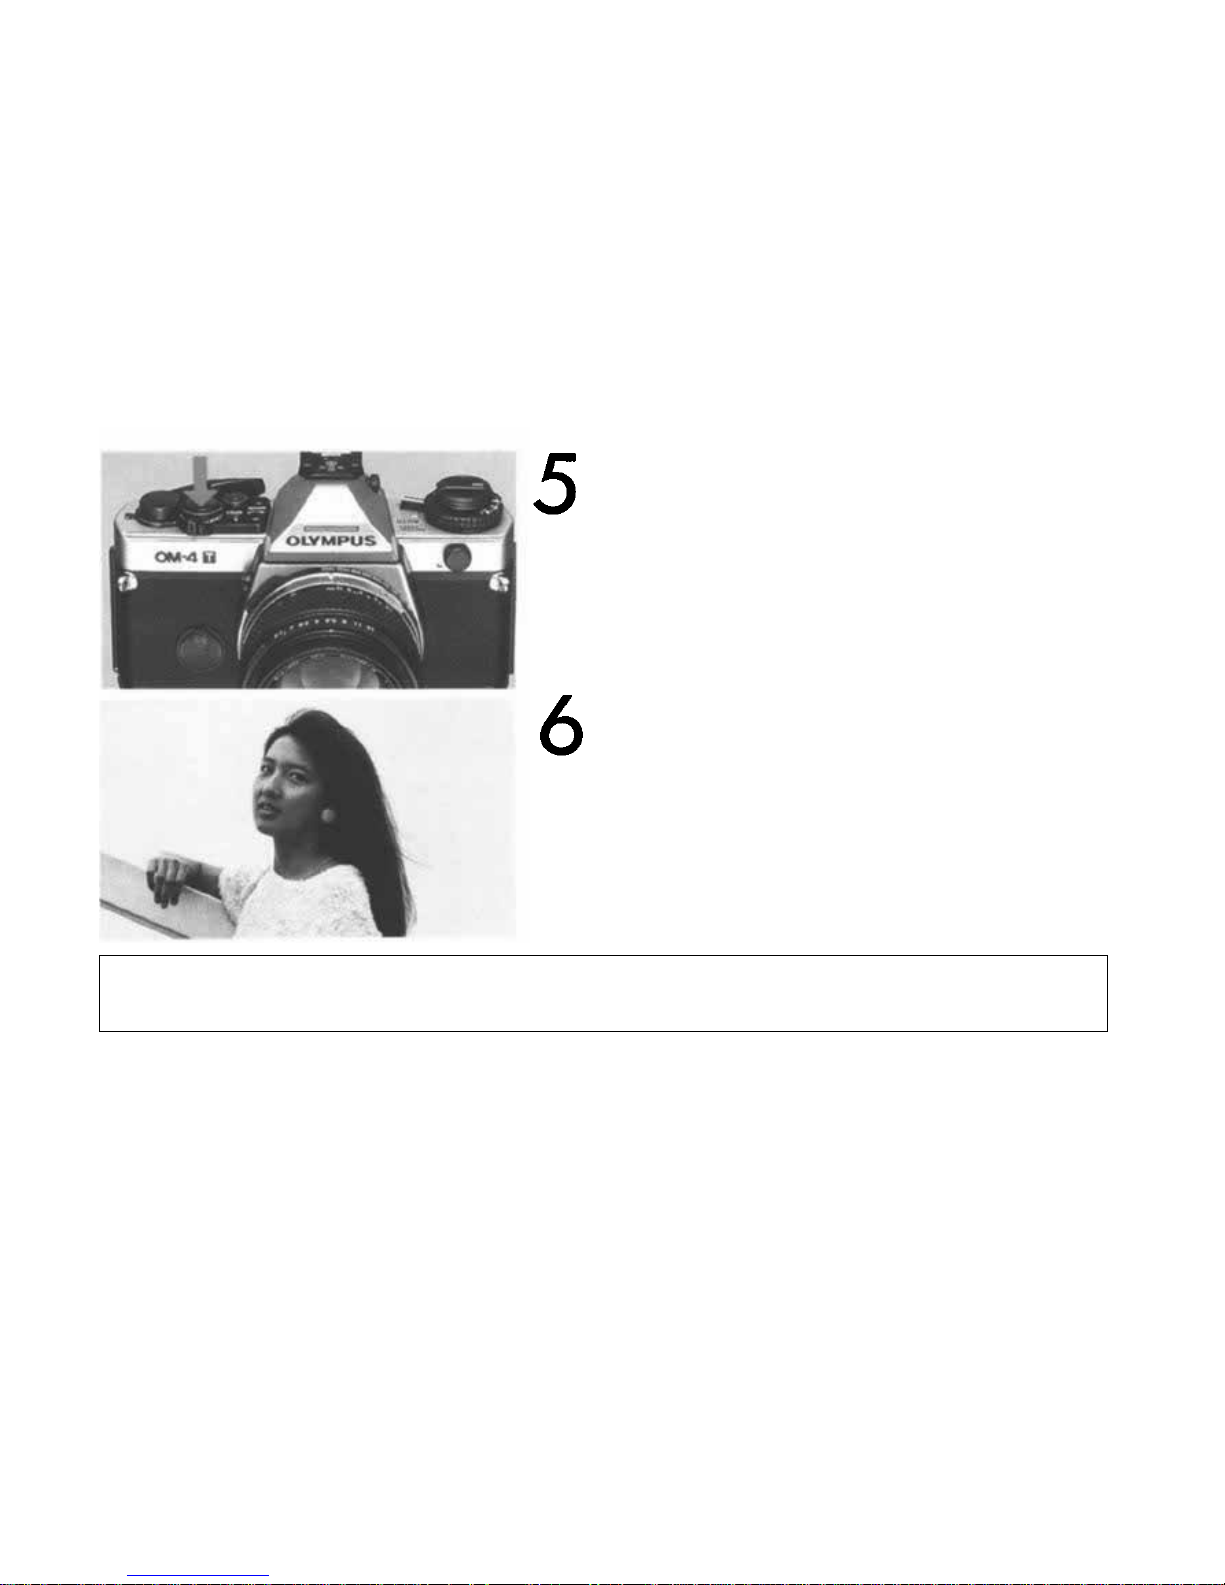
Shoot.
The subject will turn out correctly exposed,
regardless of the brightness of the background.
It is also possible t o use the multi-spot metering, highlight control and shadow control. In any
case,
correct
exposure
is
obtained
by
simply
setting
the bar
graph
at the
fixed
point.
48
Page 50

< Taking Photographs (V) >
— Flash Photography —
The OM-4T is the perfect companion for the world's first Full Synchro Flash F280. Profes-
sional standards are within the reach of every owner, even during daylight synchro — flash
photography — an area which has traditionally required considerable skill.
49
Page 51
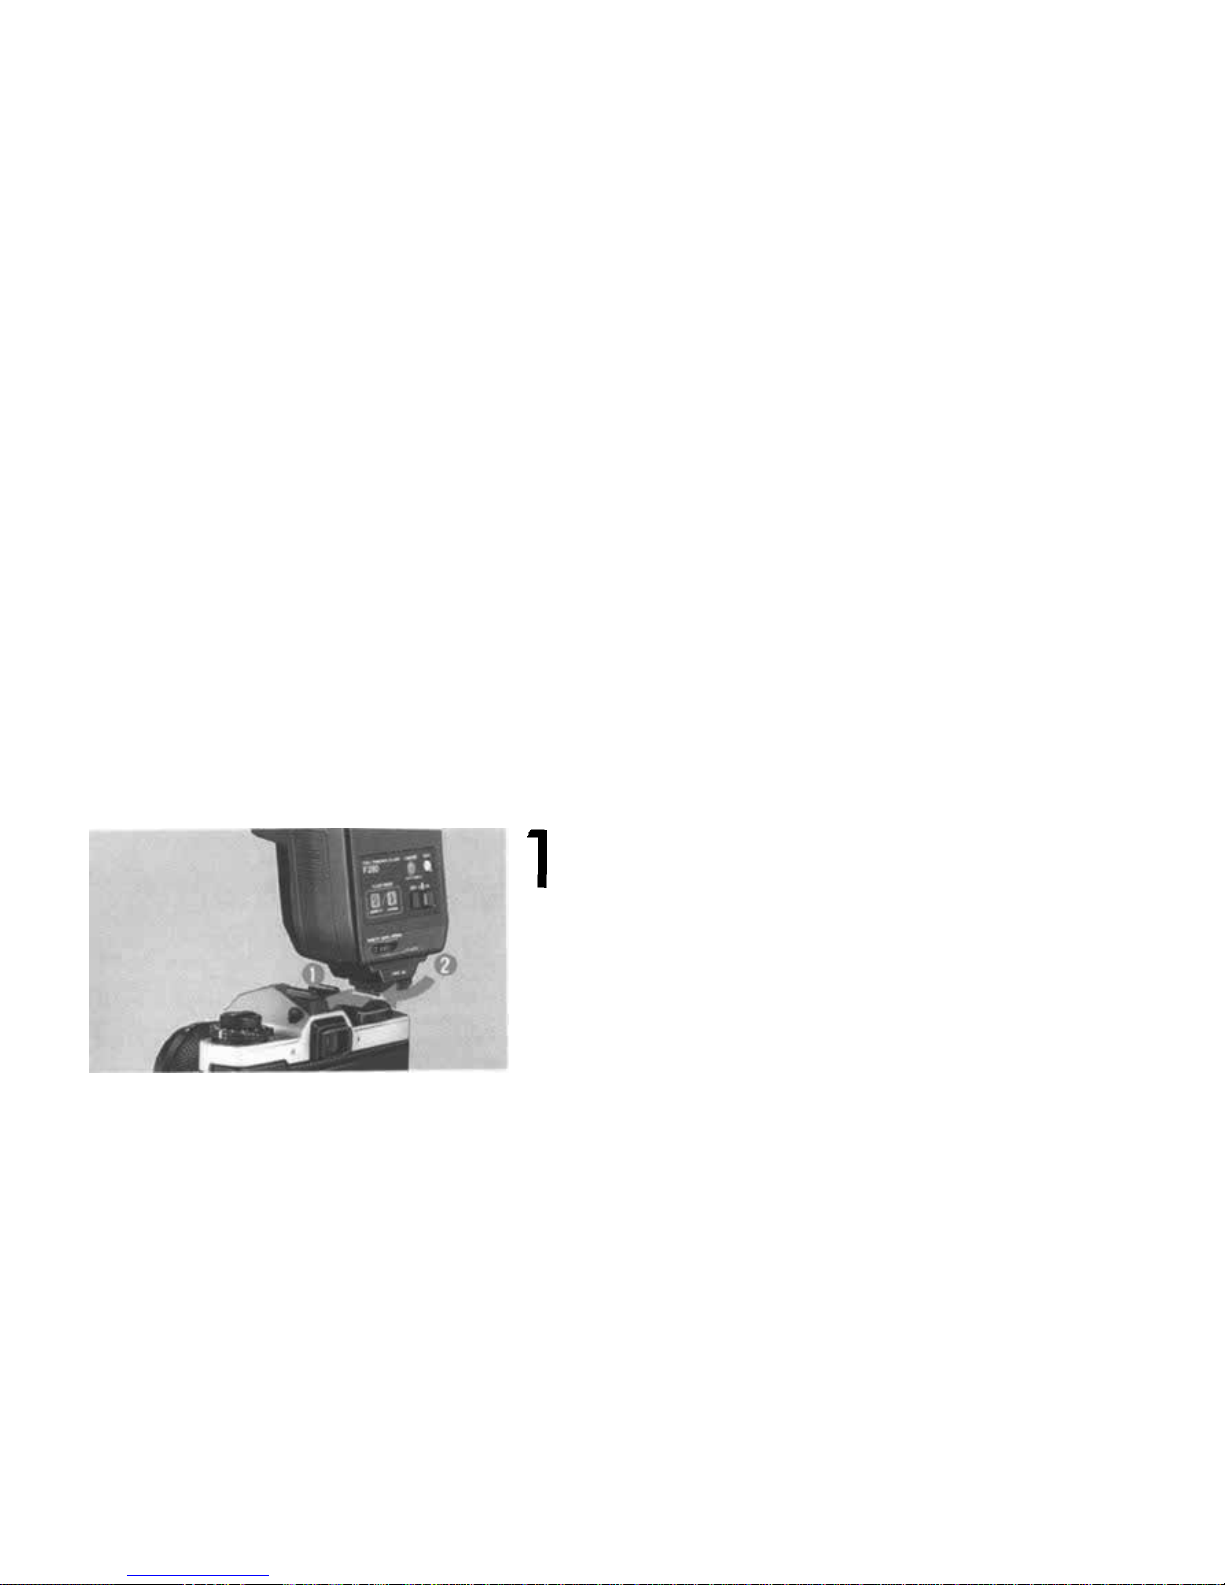
Taking Daylight Synchro-Flash Photographs (Super FP Flash Mode)
For OTF Au to using the Normal OTF F lash mode, re fer to the F280 instruction manual.
Slide
the
F280
into
the
accessory
shoe
and
secure it with the lock screw.
50
Page 52
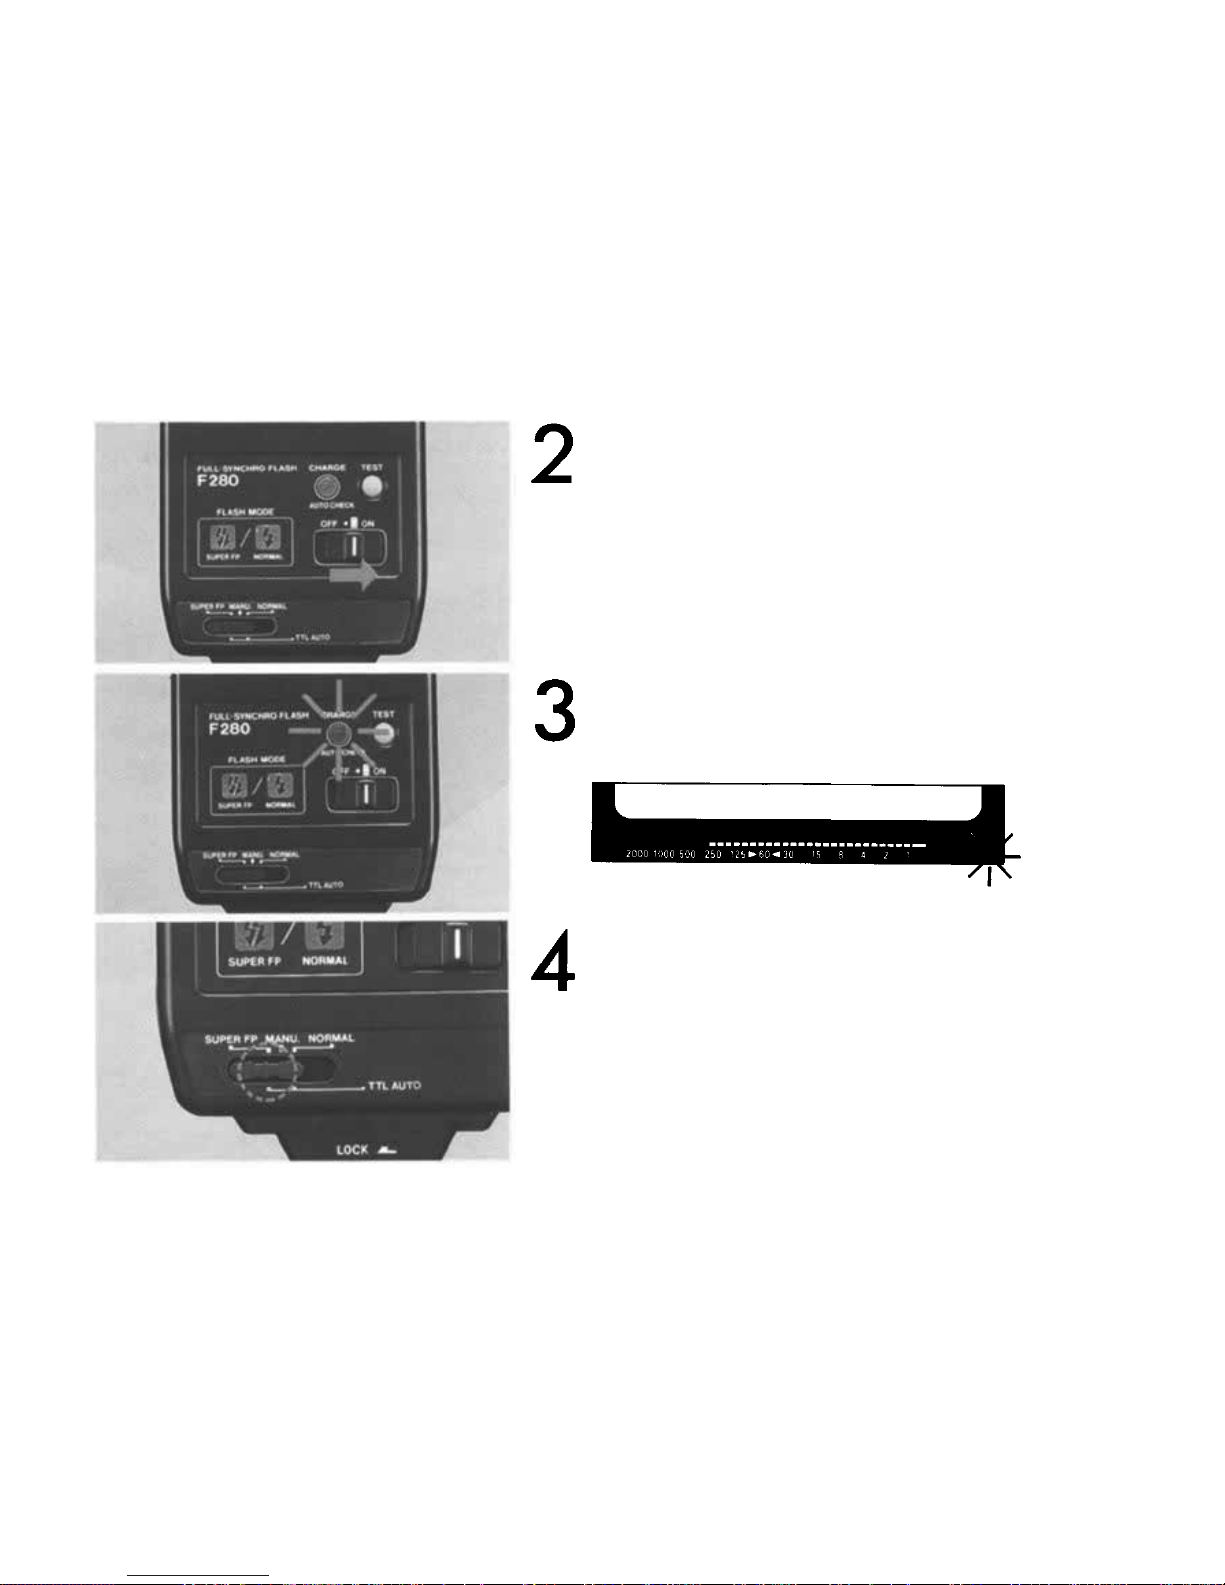
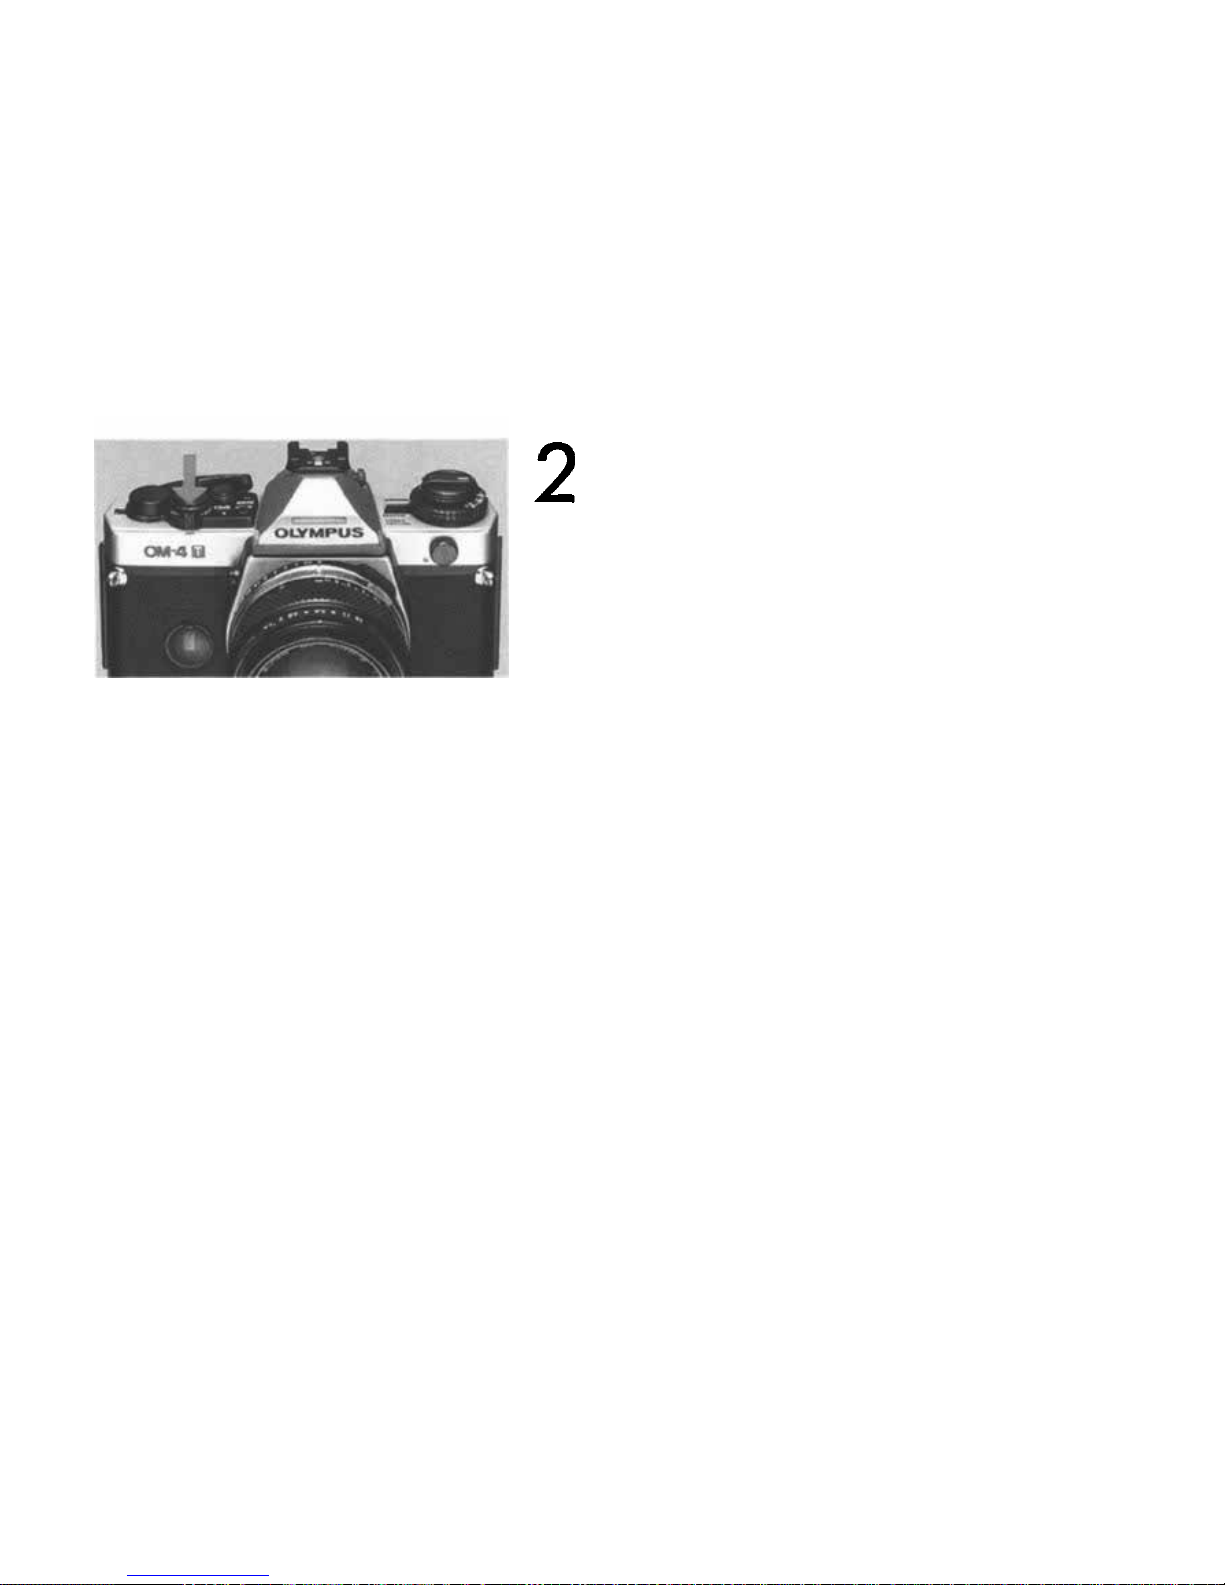
Turn t h e power sw i t ch ON .
Check the charge indicator.
Set the mode switch to SUPER FP.
51
Page 53
Set the camera mode to AUTO.
Select an aperture that results in a shutter speed
faster than 1/60 sec. (for slower speeds consult the
F280 manual).
52
Page 54
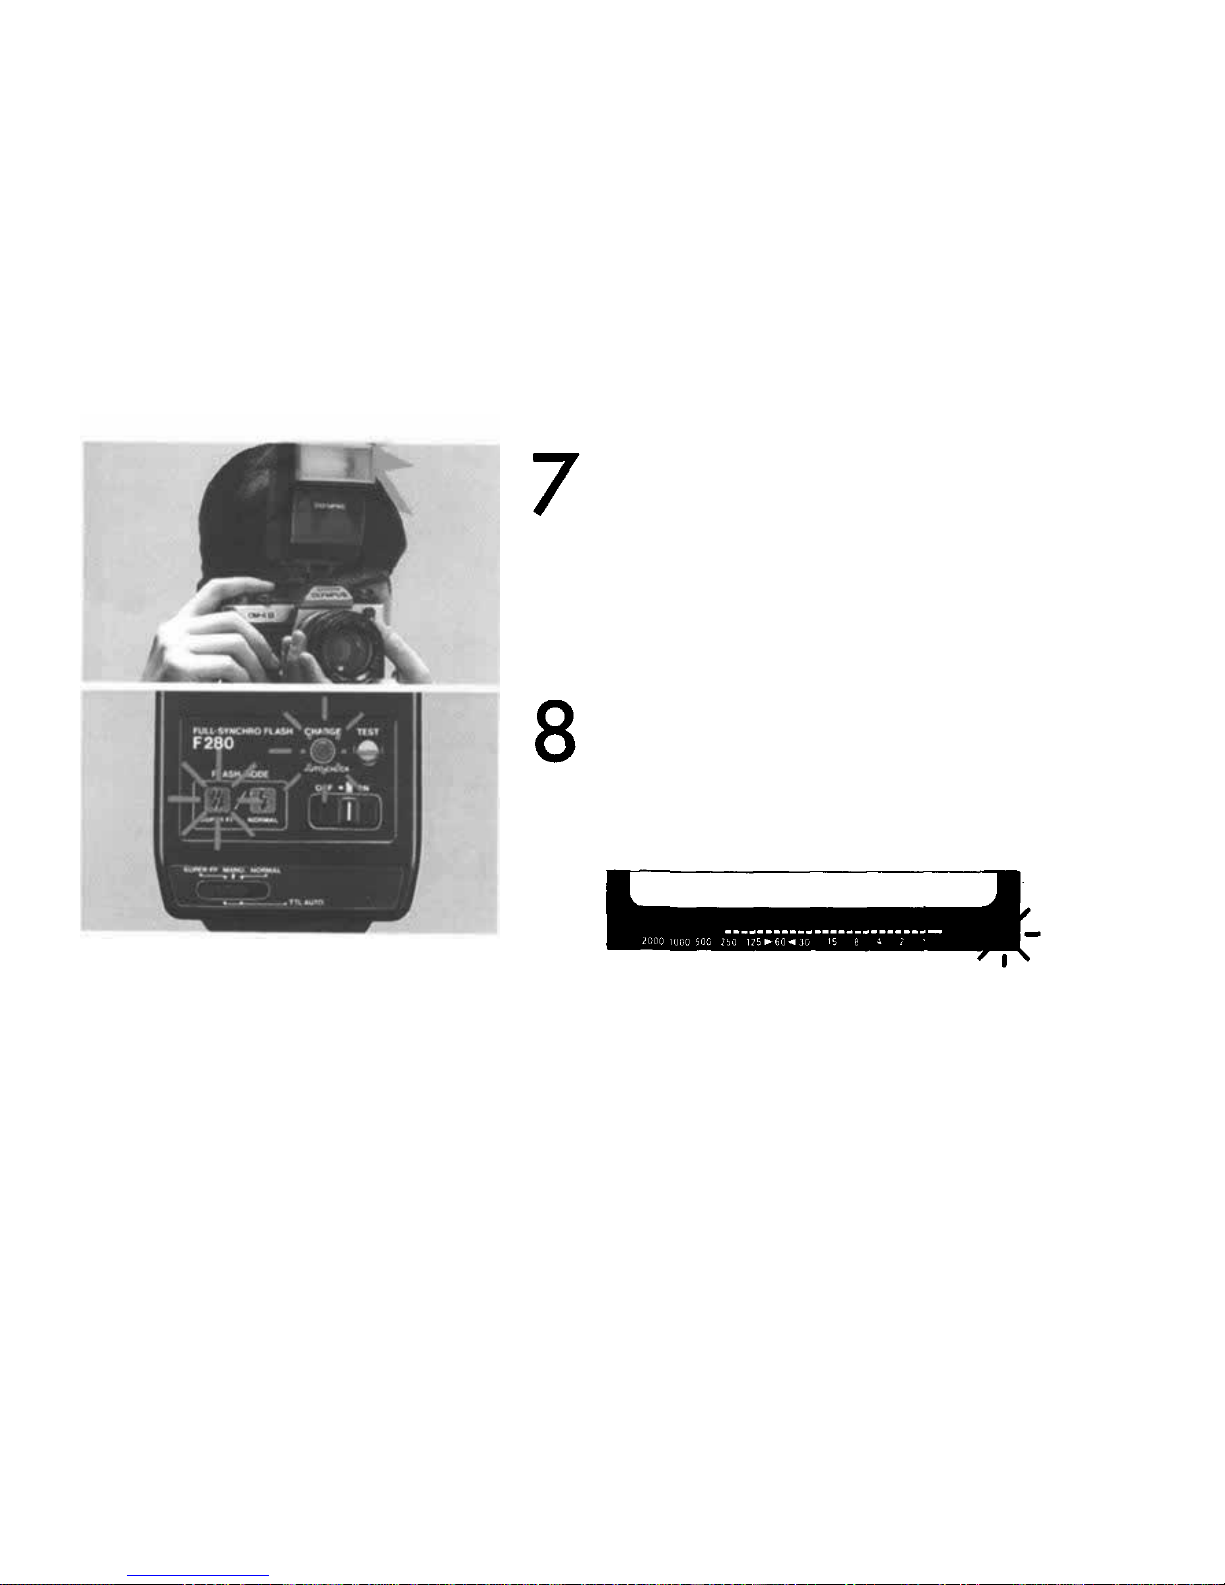
Press the shutter release.
Confirm a correct exposure by checking the
indicator.
53
Page 55

< Other Operations >
54
Page 56
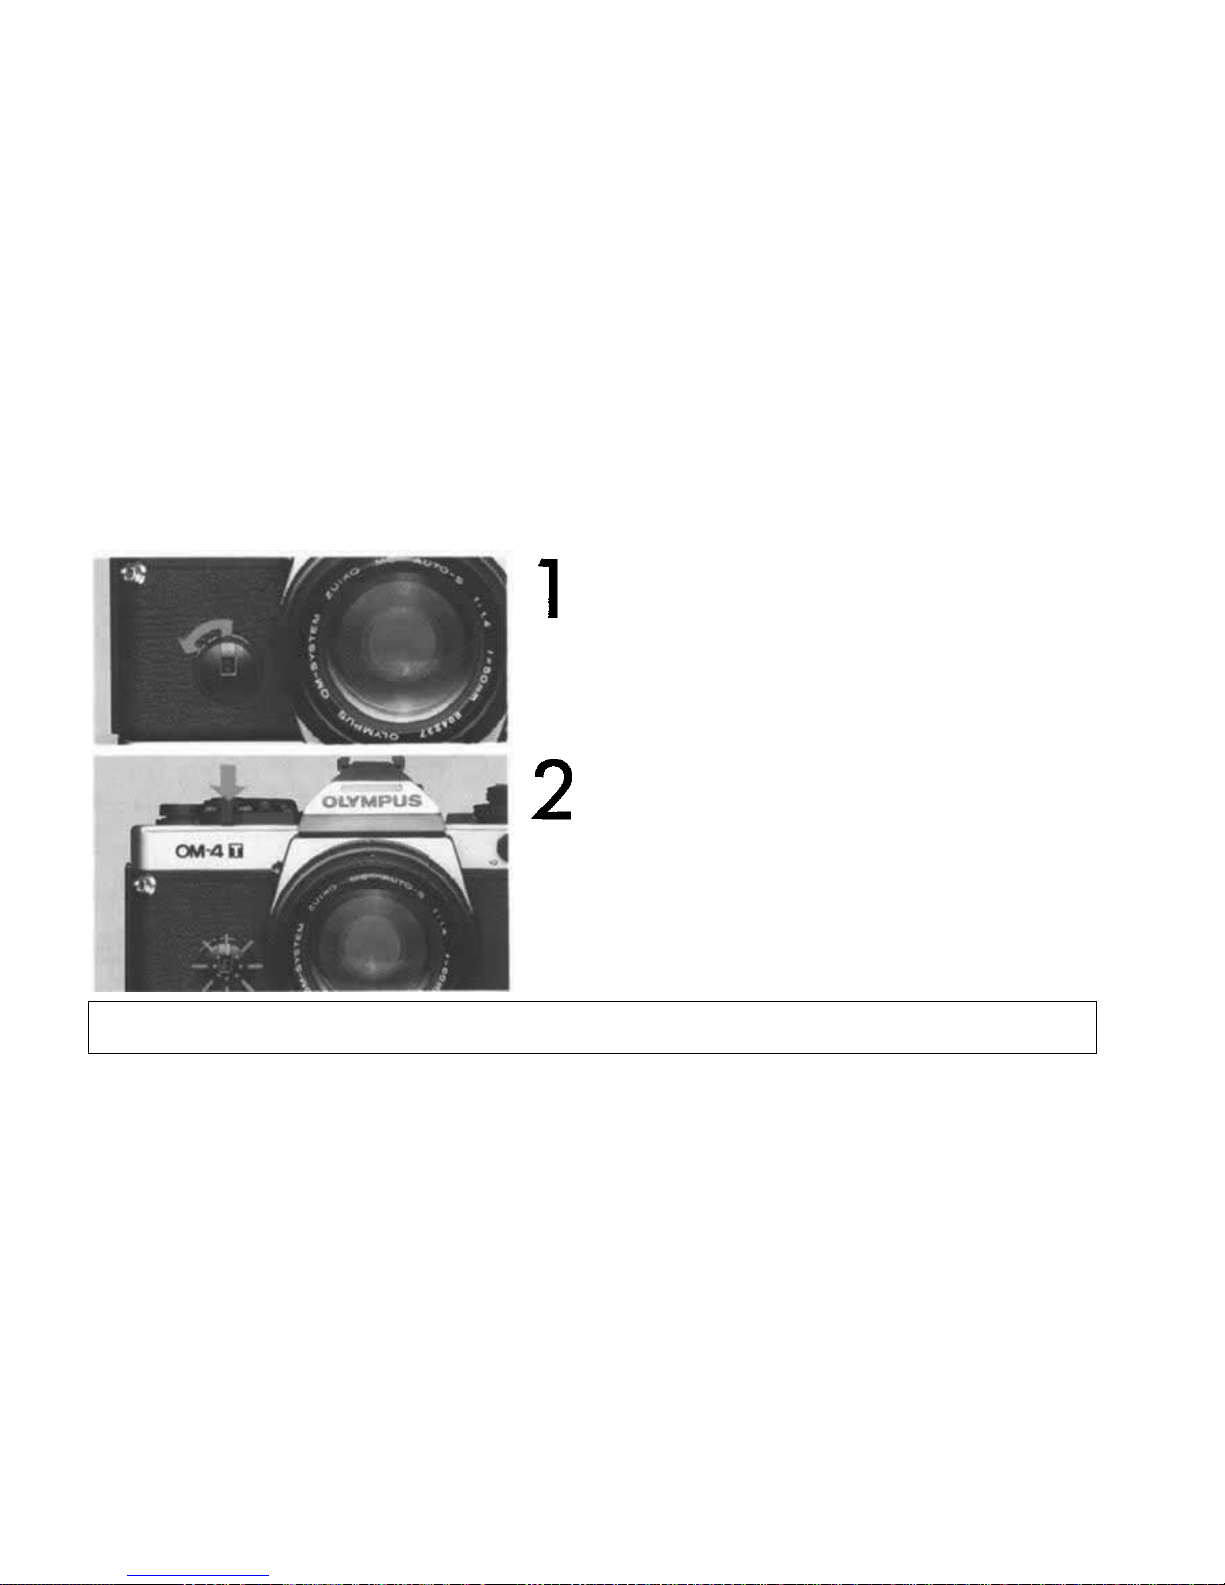
Using th e Self-Timer
Push the lever down outward.
Press the shutter release to start the self-timer.
The shutter will fire in 12 seconds.
The
shutter
will
trip
immediately
if the
self-timer
lever
is
returned
while
it is
running.
55
Page 57
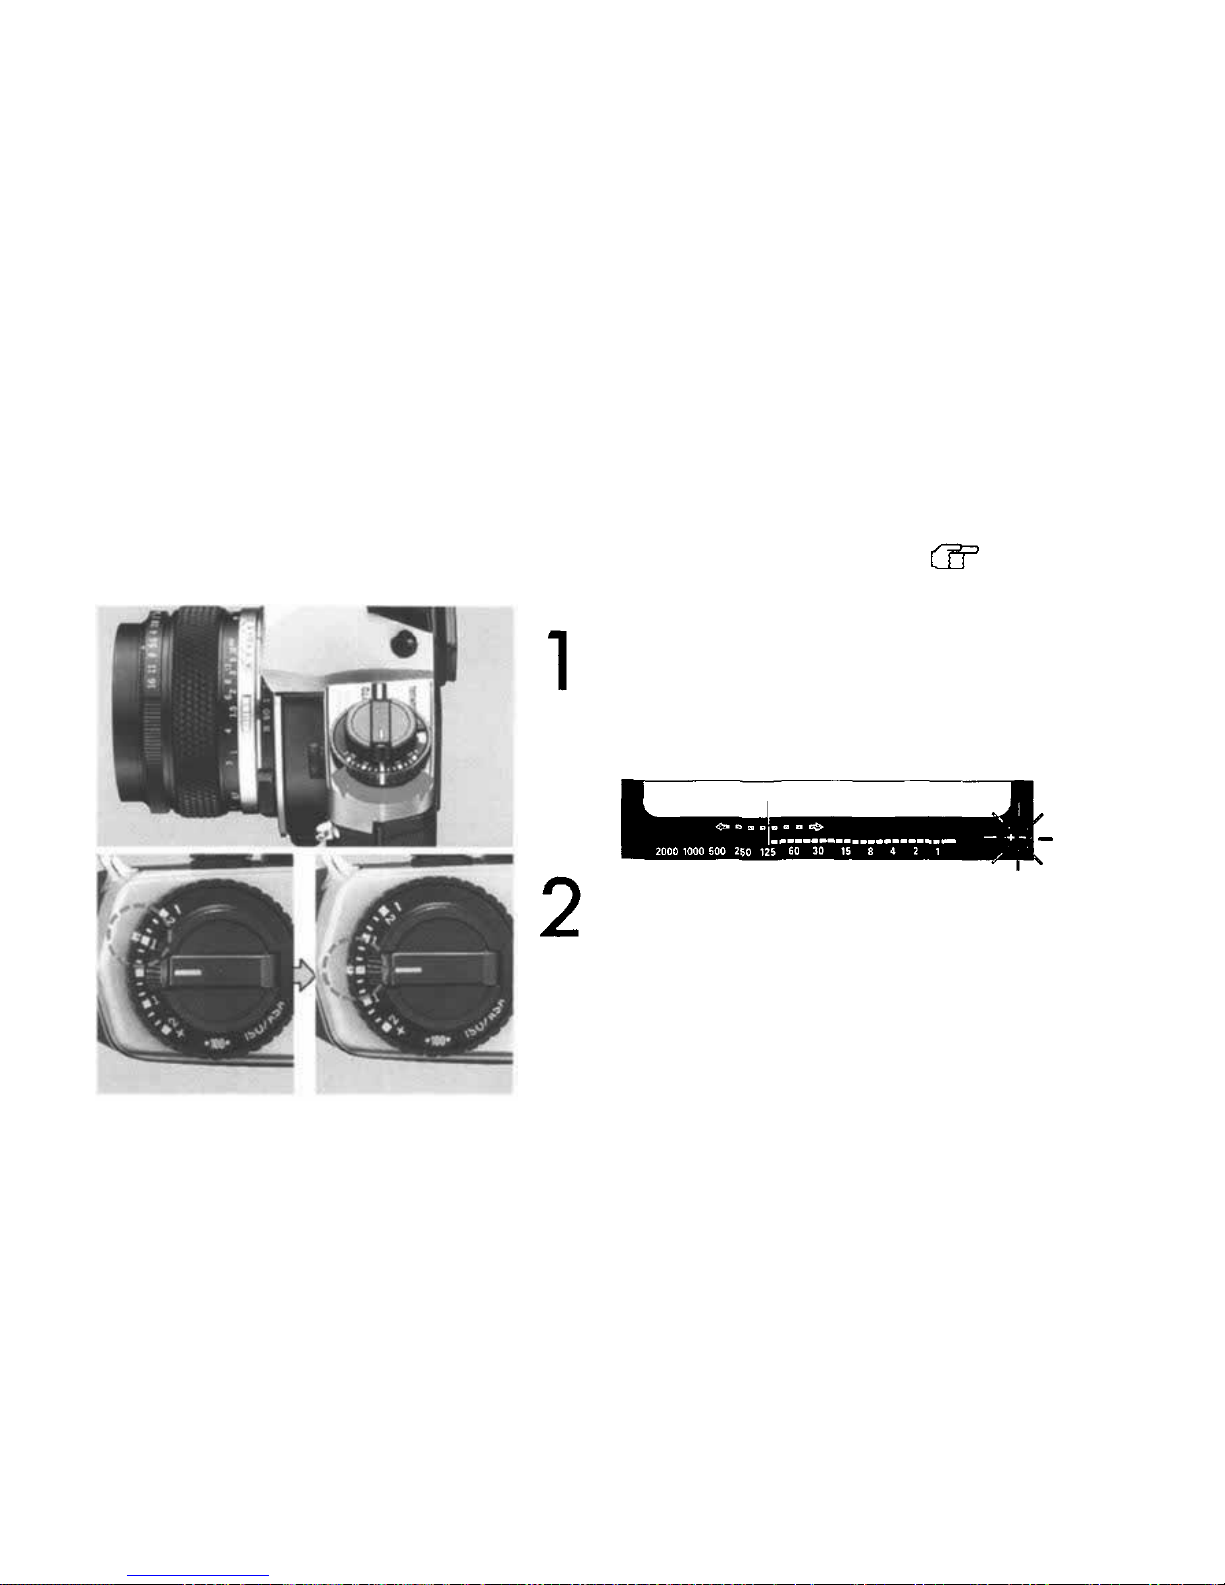
Exposure Compensation
Reference
P. 116
When an exposure compensation is set, the
indicator lights in the viewfinder.
After shooting, return the dial to its original
position.
56
Page 58
Bulb Exposure
Reference
P. 120
While pressing the "B" lock button, turn and
set the shutter speed dial to "B".
The display in the view finder disappears.
57
Page 59
The
shutter
will
remain
open
as
long
as the
shut-
ter release bu t to n is h e l d depressed.
How to Shoot when the Batteries ar e Exhausted
If the batteries are exhausted and you do want to t ake pictures immediately, use the mechanical
shutter speed of 1/60 sec.
58
Page 60
While
pressing
the "B"
lock
button,
rotate
the shutter ring to the red "60" position.
Shoot. The mechanical shutter will operate to
trip at 1 /60 sec.
You cannot use the motor drive, winders and flashes
with the mechanical shutter.
59
Page 61
Using the Viewfinder Illuminator
Push the button if the viewfinder display is
too dar k to read.
60
Page 62
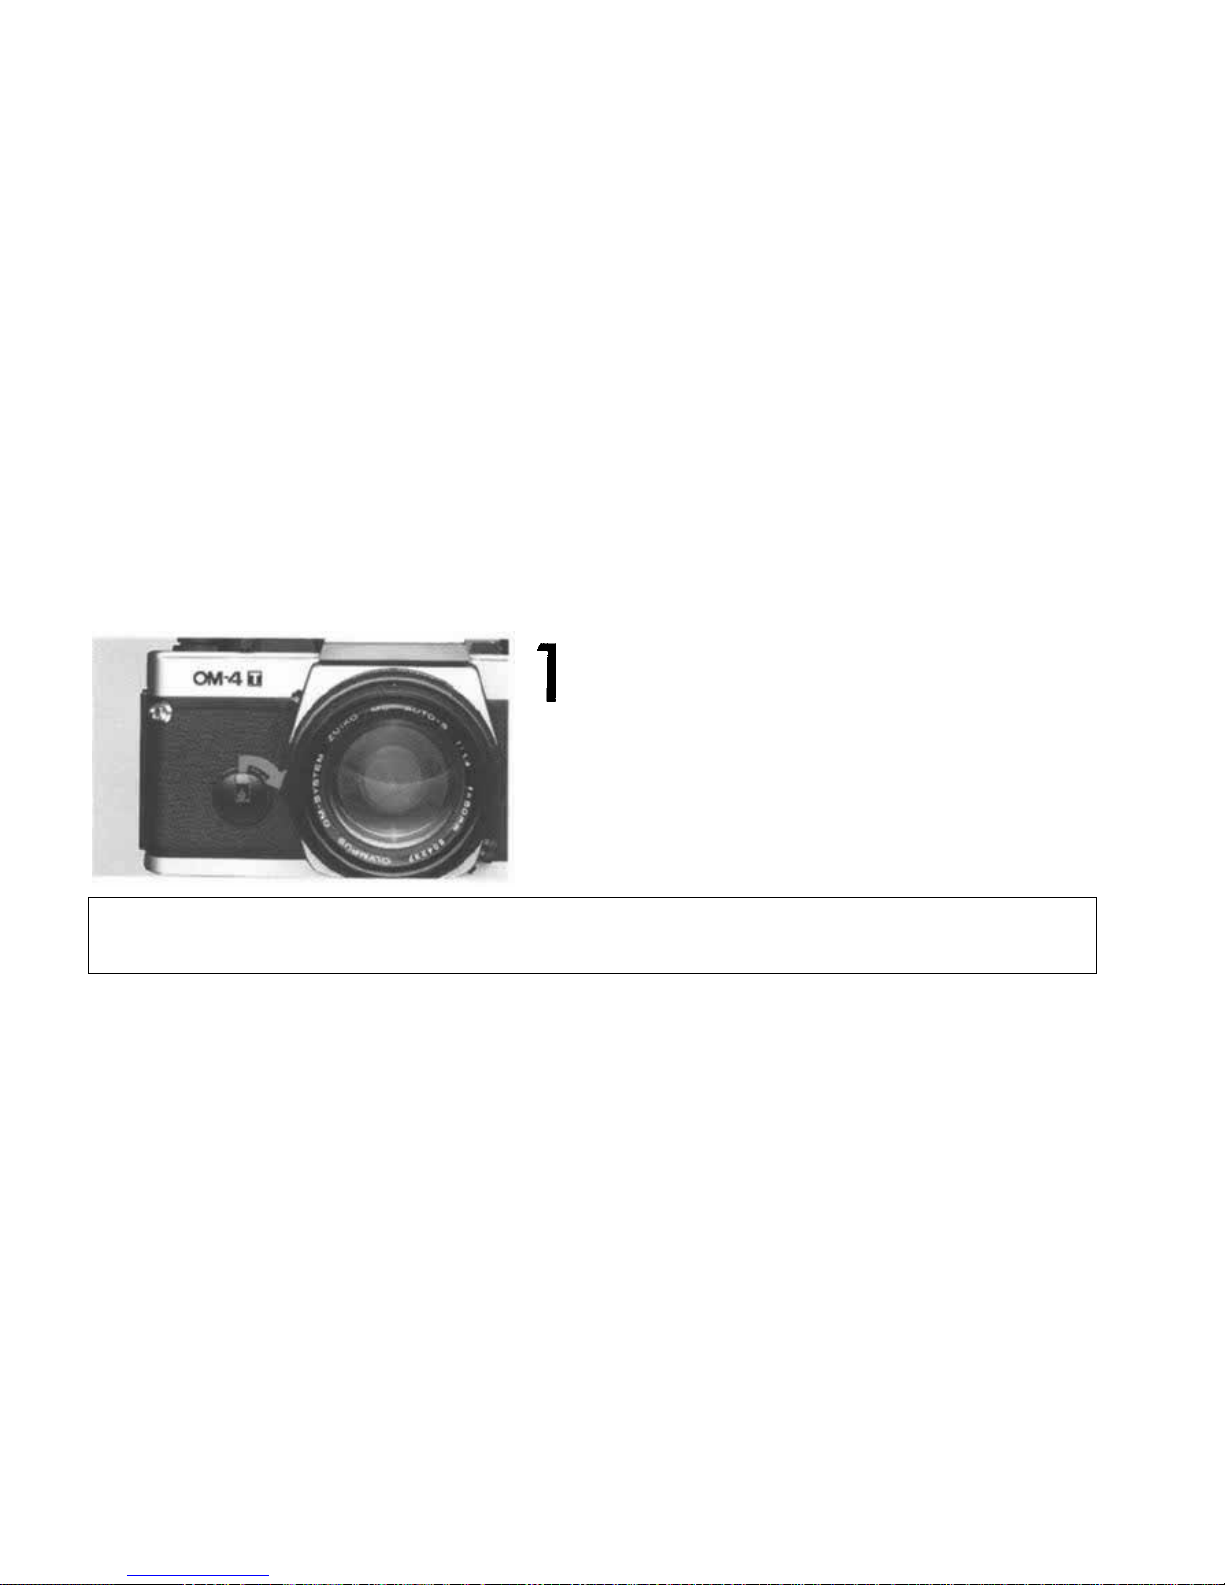
How to Turn Of f the Beeper
To turn off the audible signal, push the lever to
the right (in the direction of the arrow).
You will no longer hear PCV sounds when turning on the spo t metering, highlight and shadow
controls, when operating the memory/clear lever, checking the batteries, or when mounting and
dismounting the lens.
61
Page 63
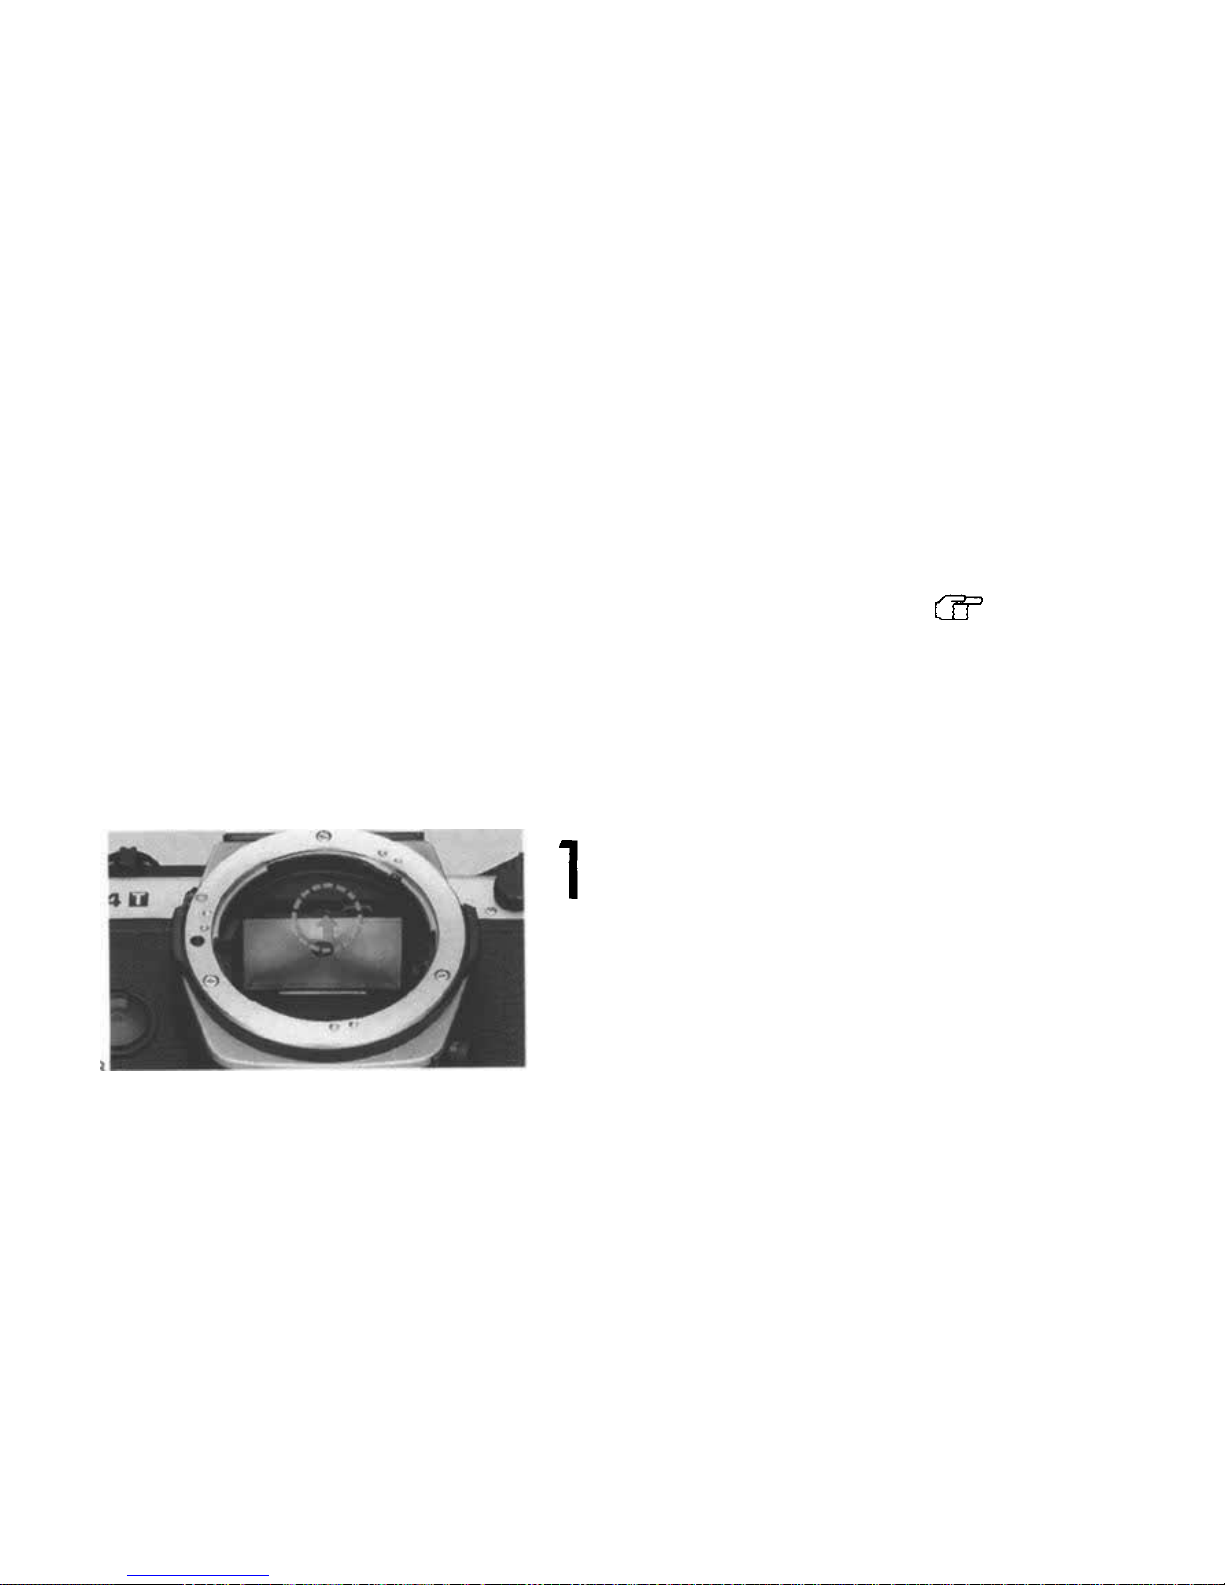
Changing t h e Focusing Screen
Reference
P. 139-140
14 screens are available to cover a wide range of applications.
Pull d own the screen frame.
Pull the lug at top inside the body mount toward
you t o swing down th e screen frame.
62
Page 64
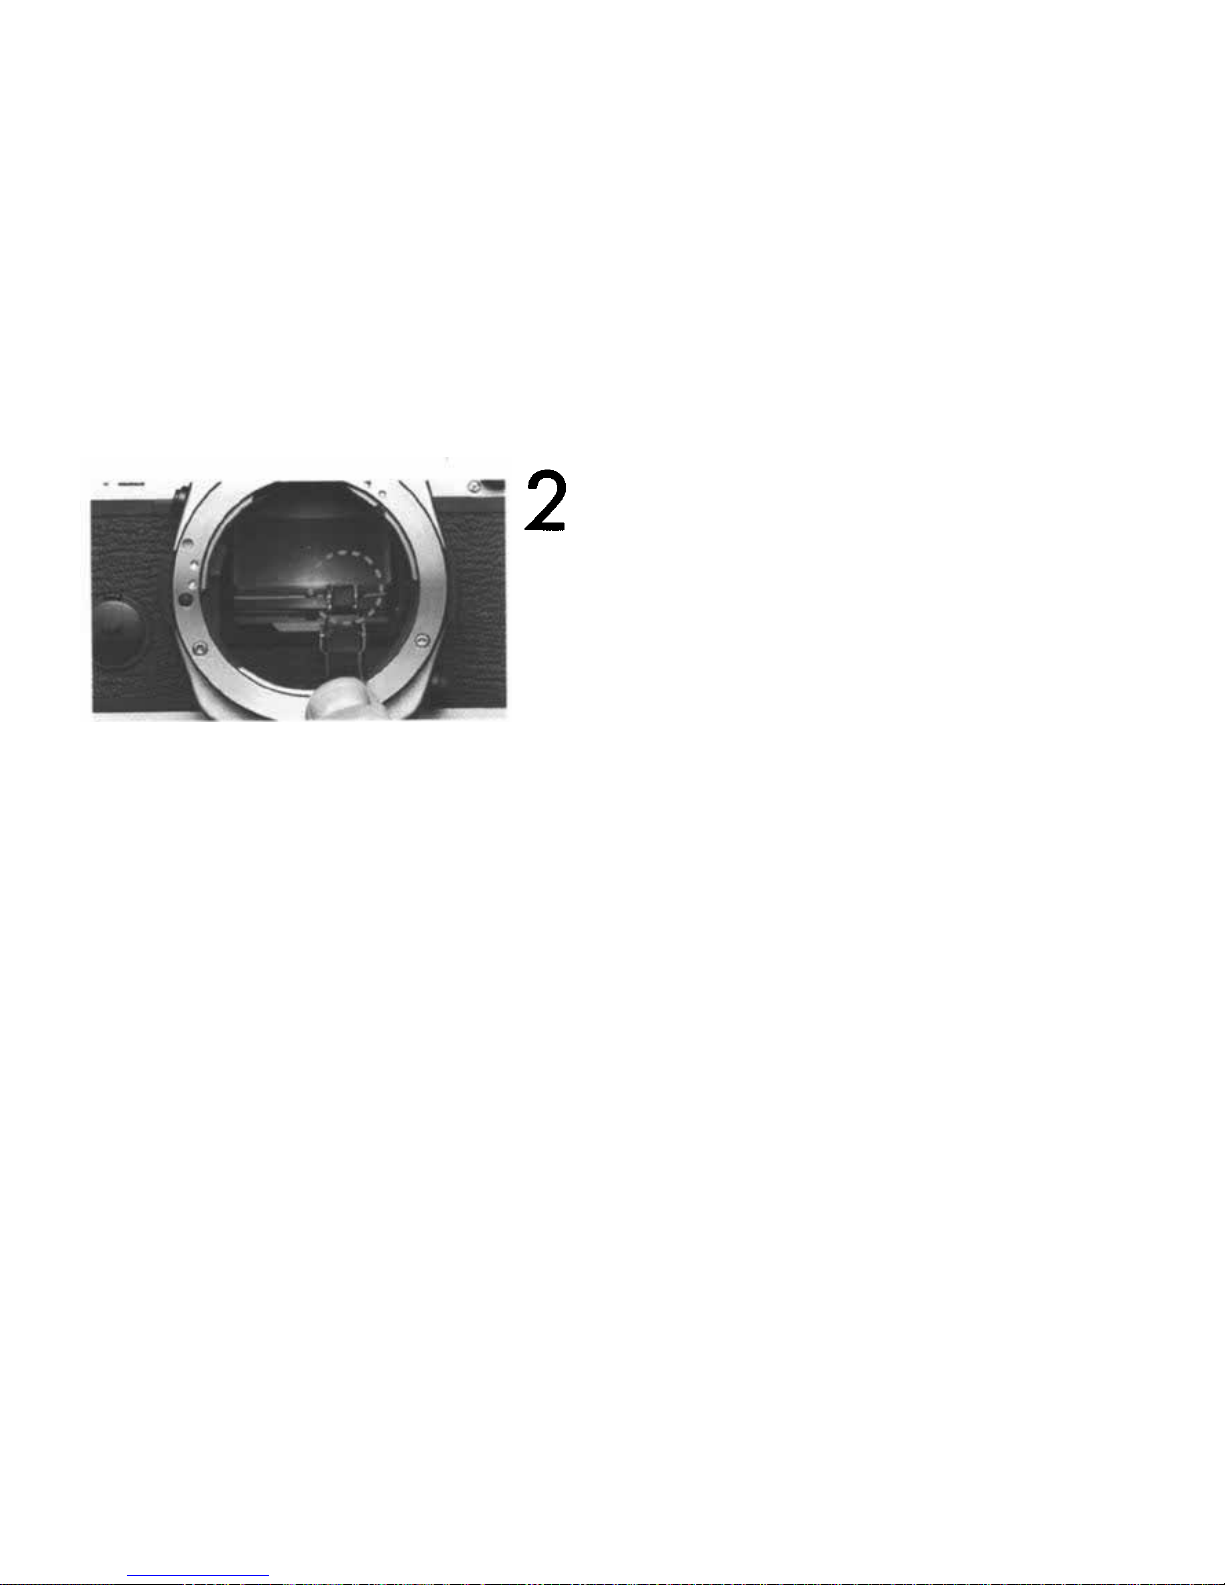
To change the focusing screen, use the tweezers
supplied with an optional focusing screen. Push the
frame
upward
until
you
hear a click.
63
Page 65
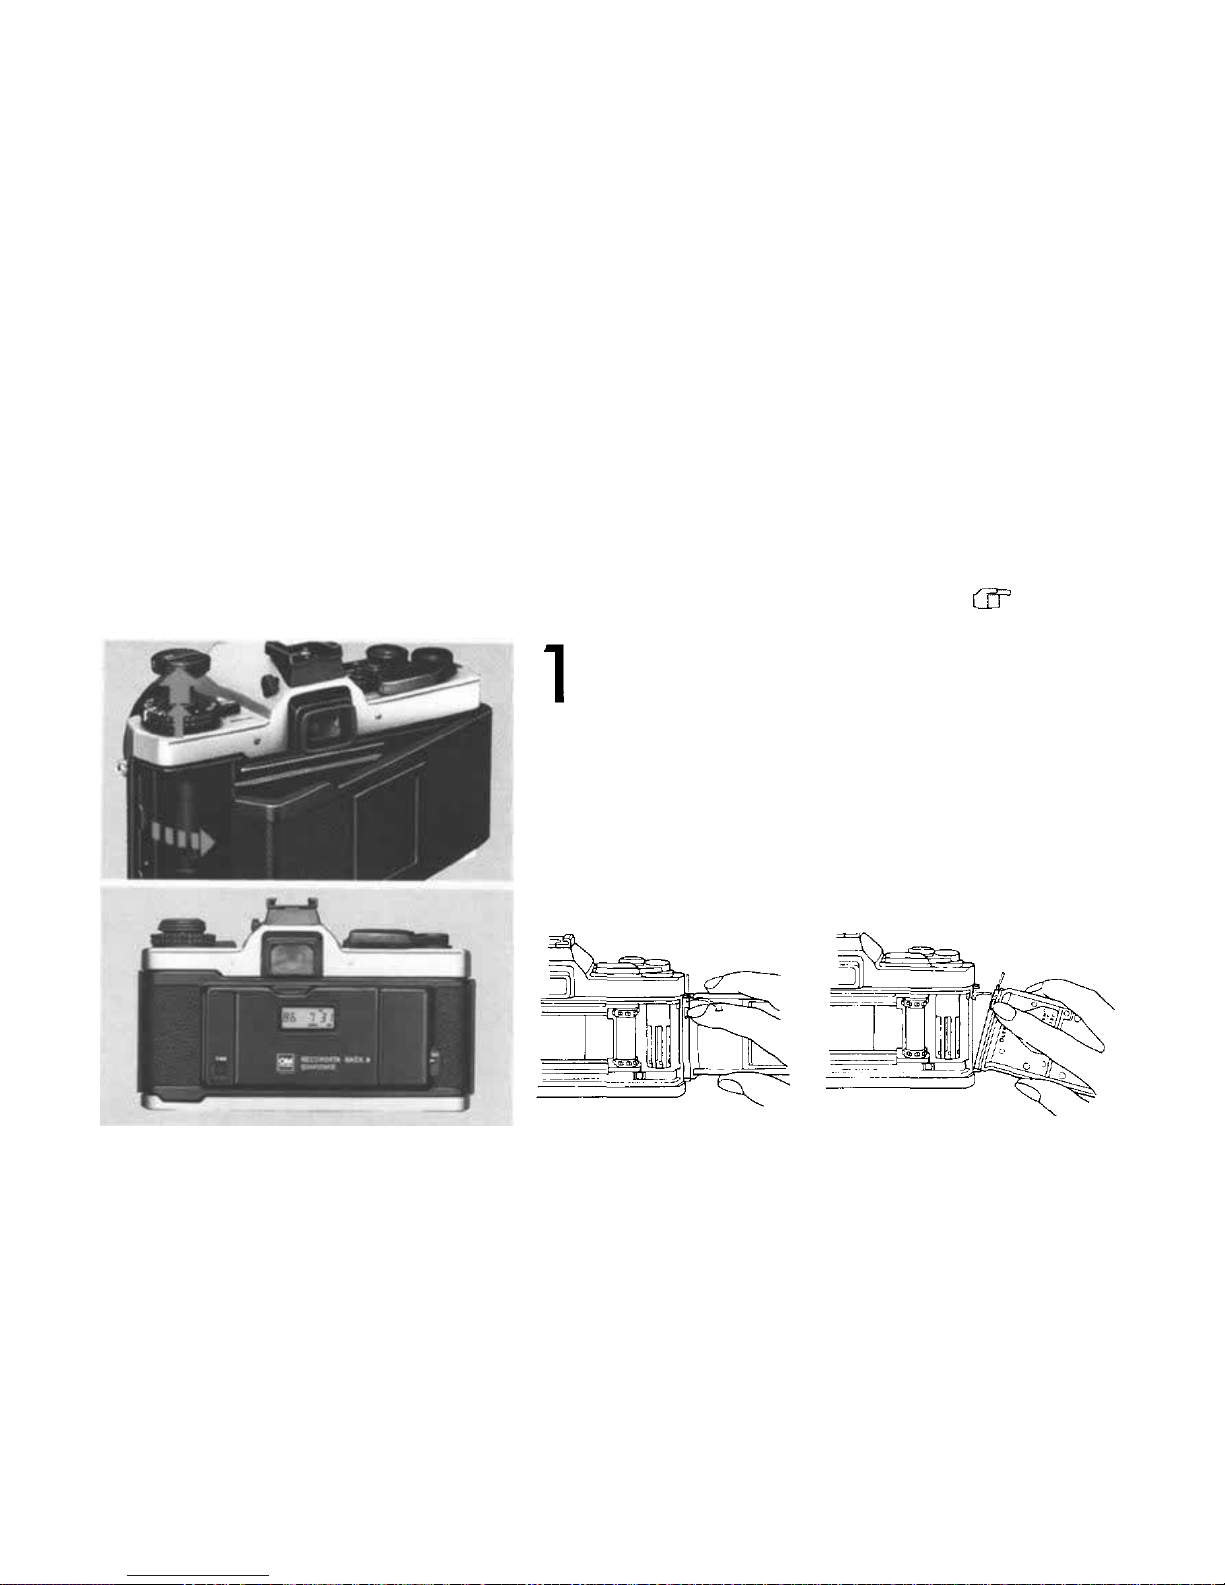
Changing the Camera Back
The camera back is interchangeable with the Recordata Back or 250 Film Back.
Open the camera back. Press down on the
camera back release button and remove the camera back.
P. 133
Removing
Attaching
64
Page 66
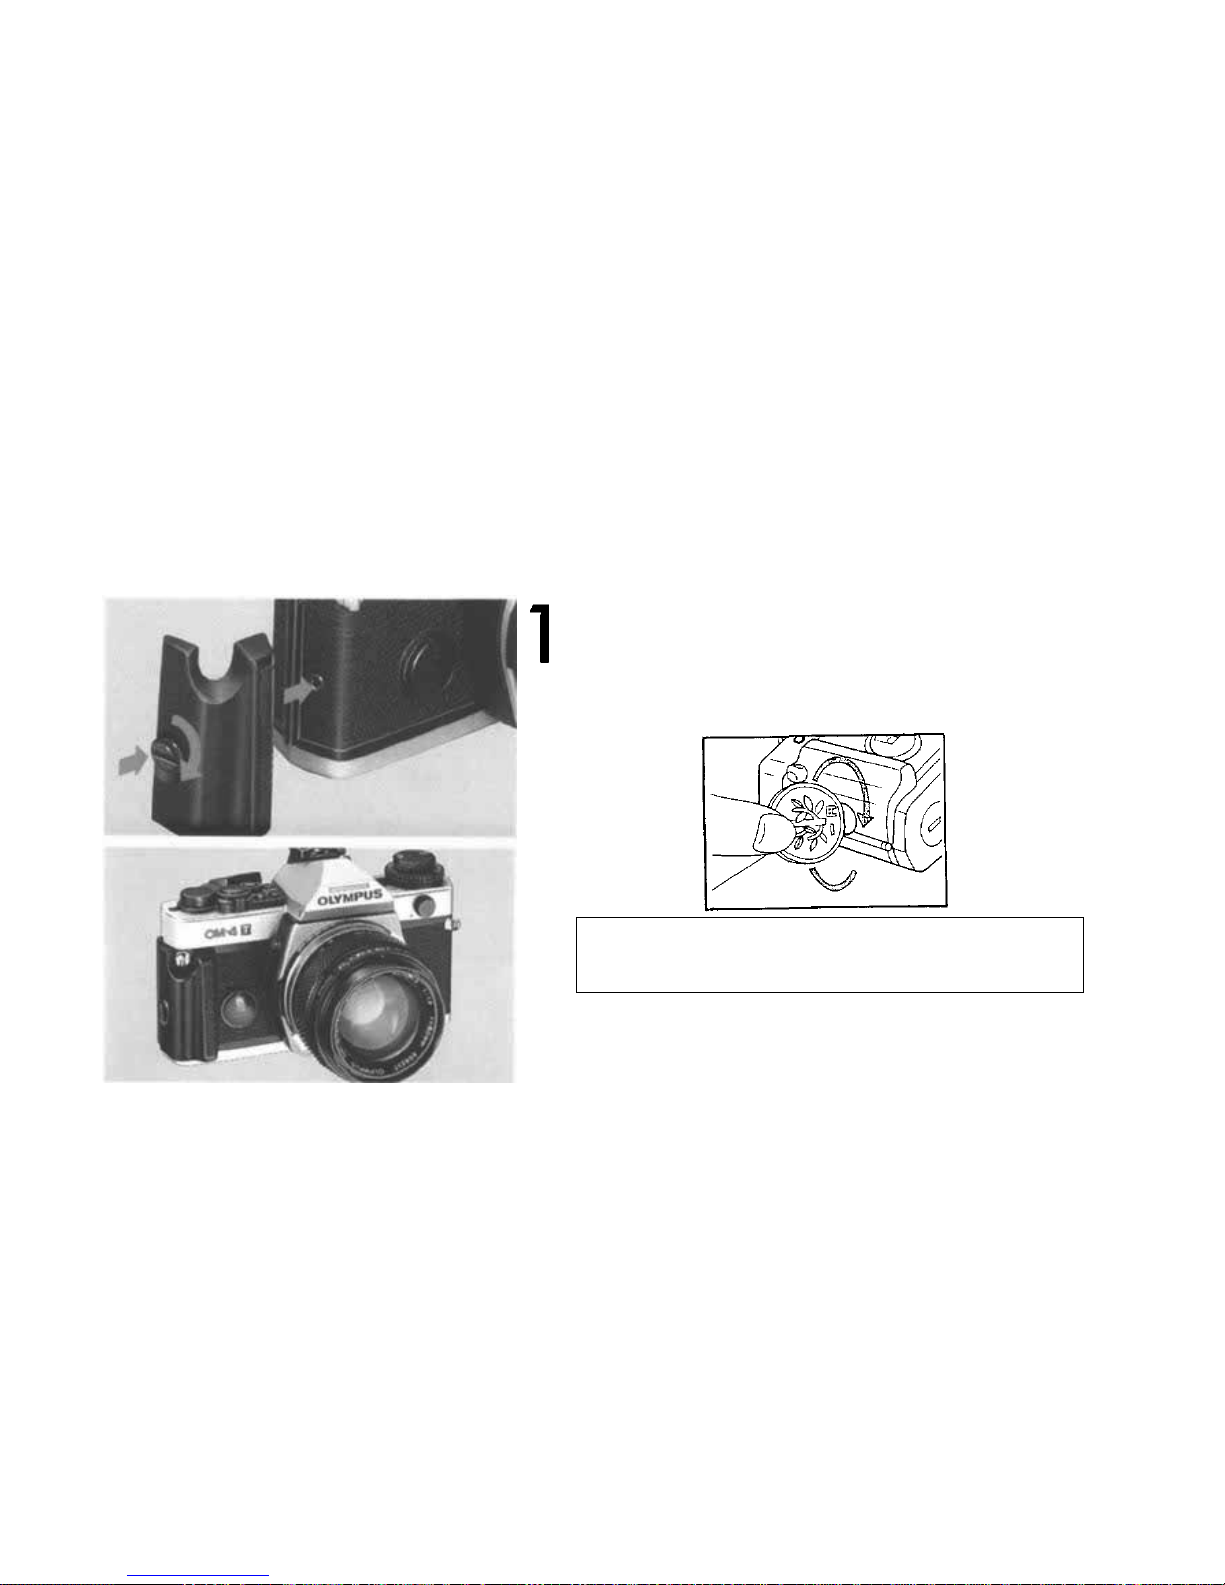
Attaching the Grip
Attach the Camera Grip 1 (optional accessory).
When using a motor drive or winders, detach
the Grip.
65
Page 67
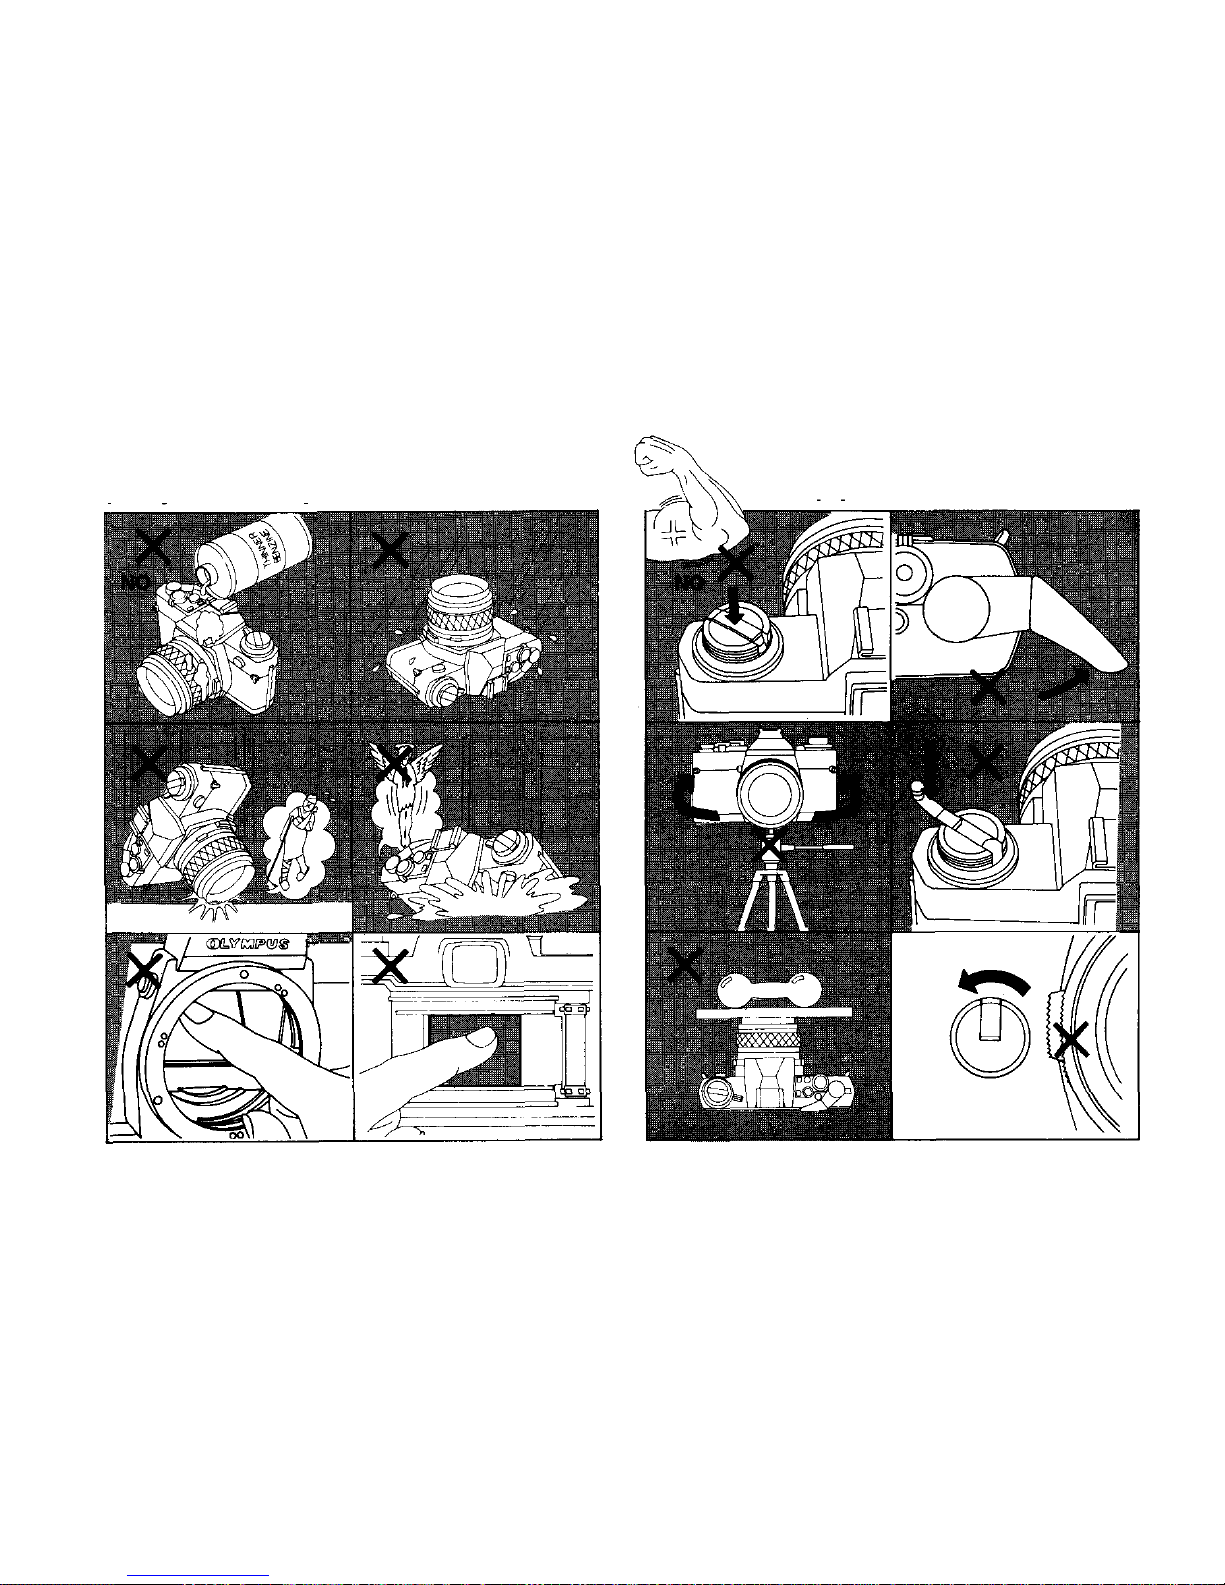
Handling C ar e
Tak e c ar e in handling the camera.
Do not use extra force.
66
Page 68
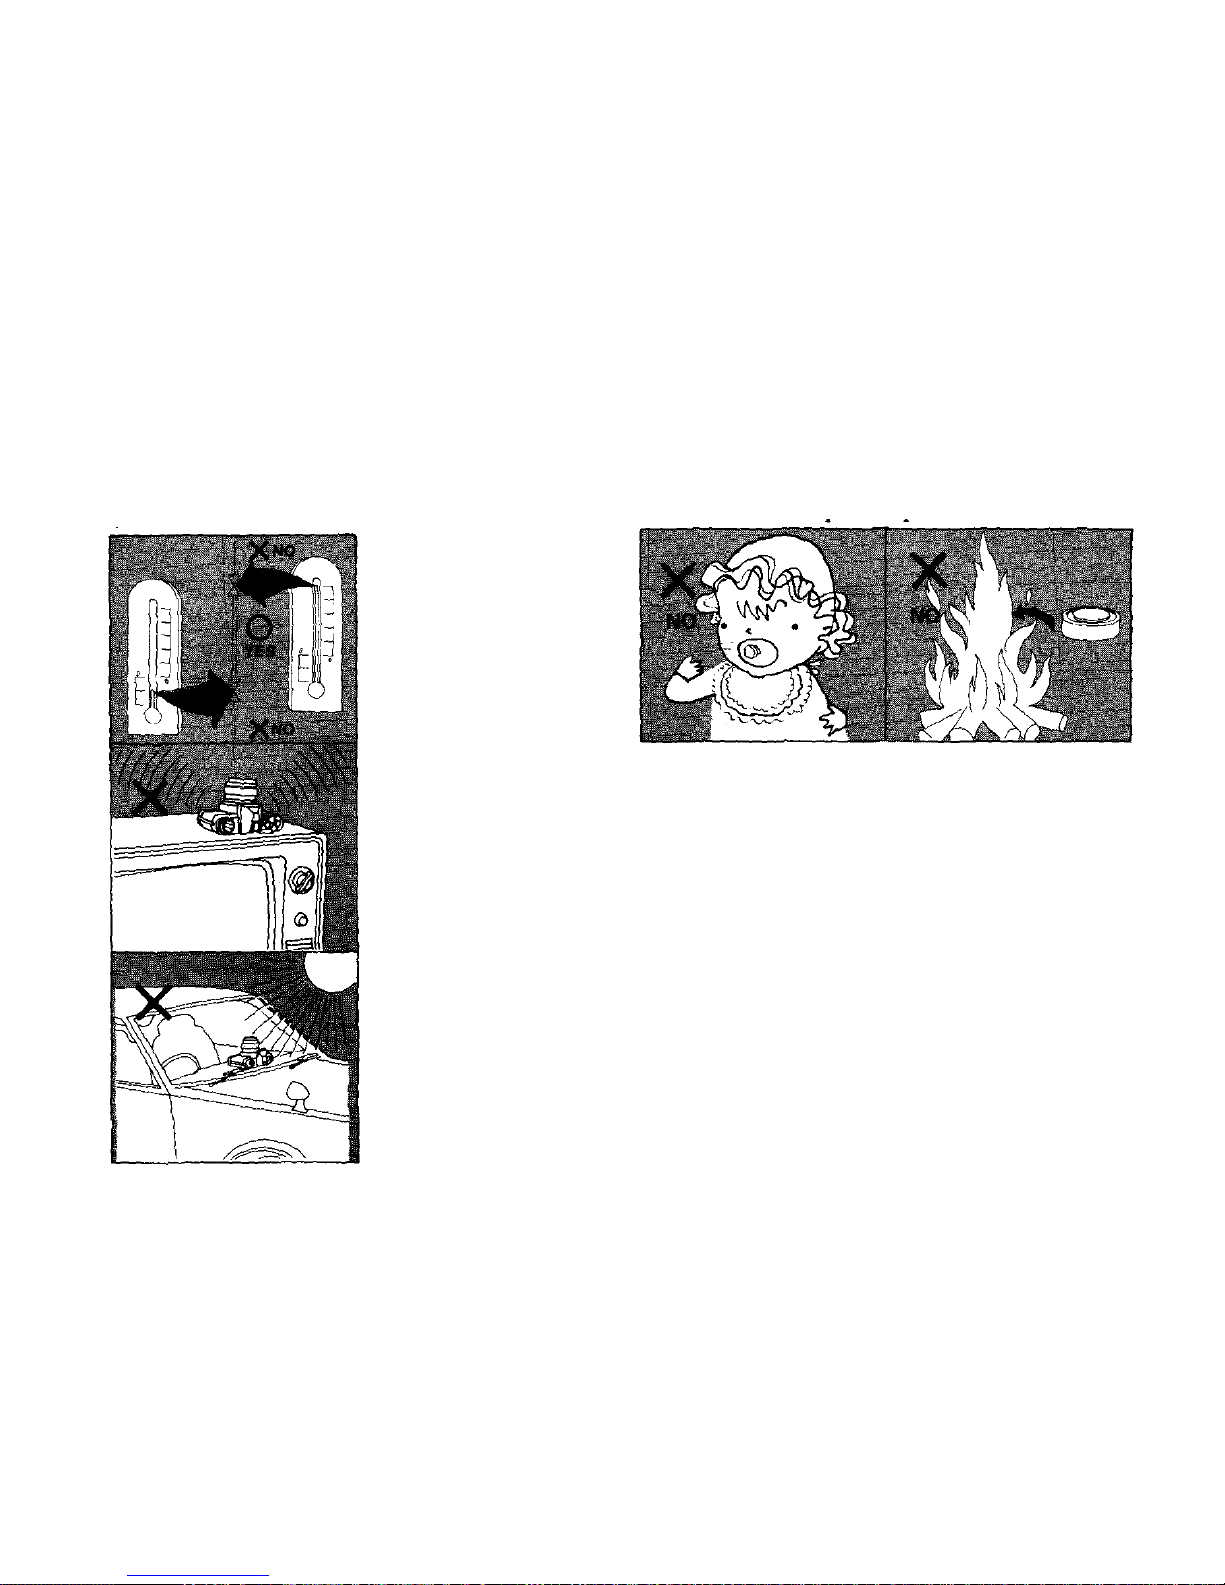
Storage Care
Battery Precaution
Guard against high temperatura and magnetic fields.
67
Page 69
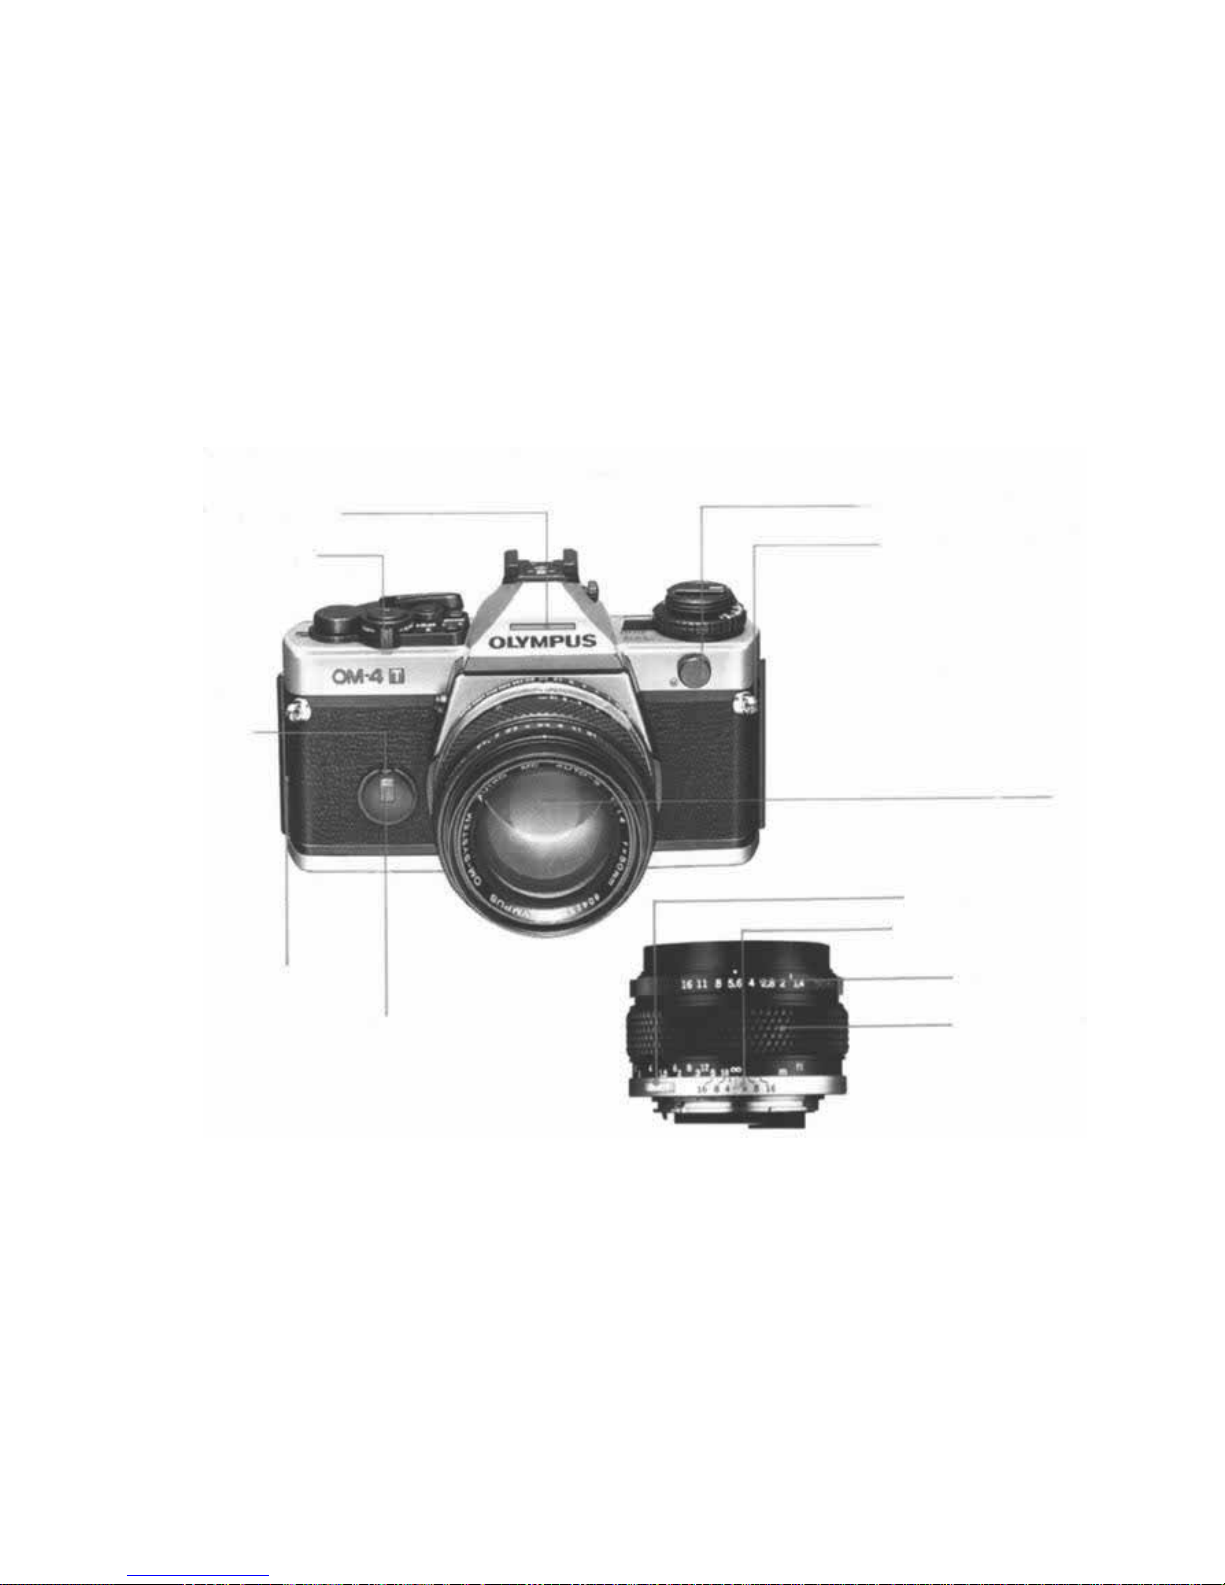
Description of Controls
1 Finder Light Window
2 CLEAR/MEMORY
Lever
3 Self-Timer/
Electronic
Beeper Muffling
Lever
4 Grip Lock Screw
5 Self-Timer/Battery Check Signal
6 TTL Auto Cord Socket
7 Shoulder Strap Eyelet
8 Lens
9 Lens Release Button
10 Depth of Field Scale
11 Aperture Ring
12 Focusing Ring
68
Page 70
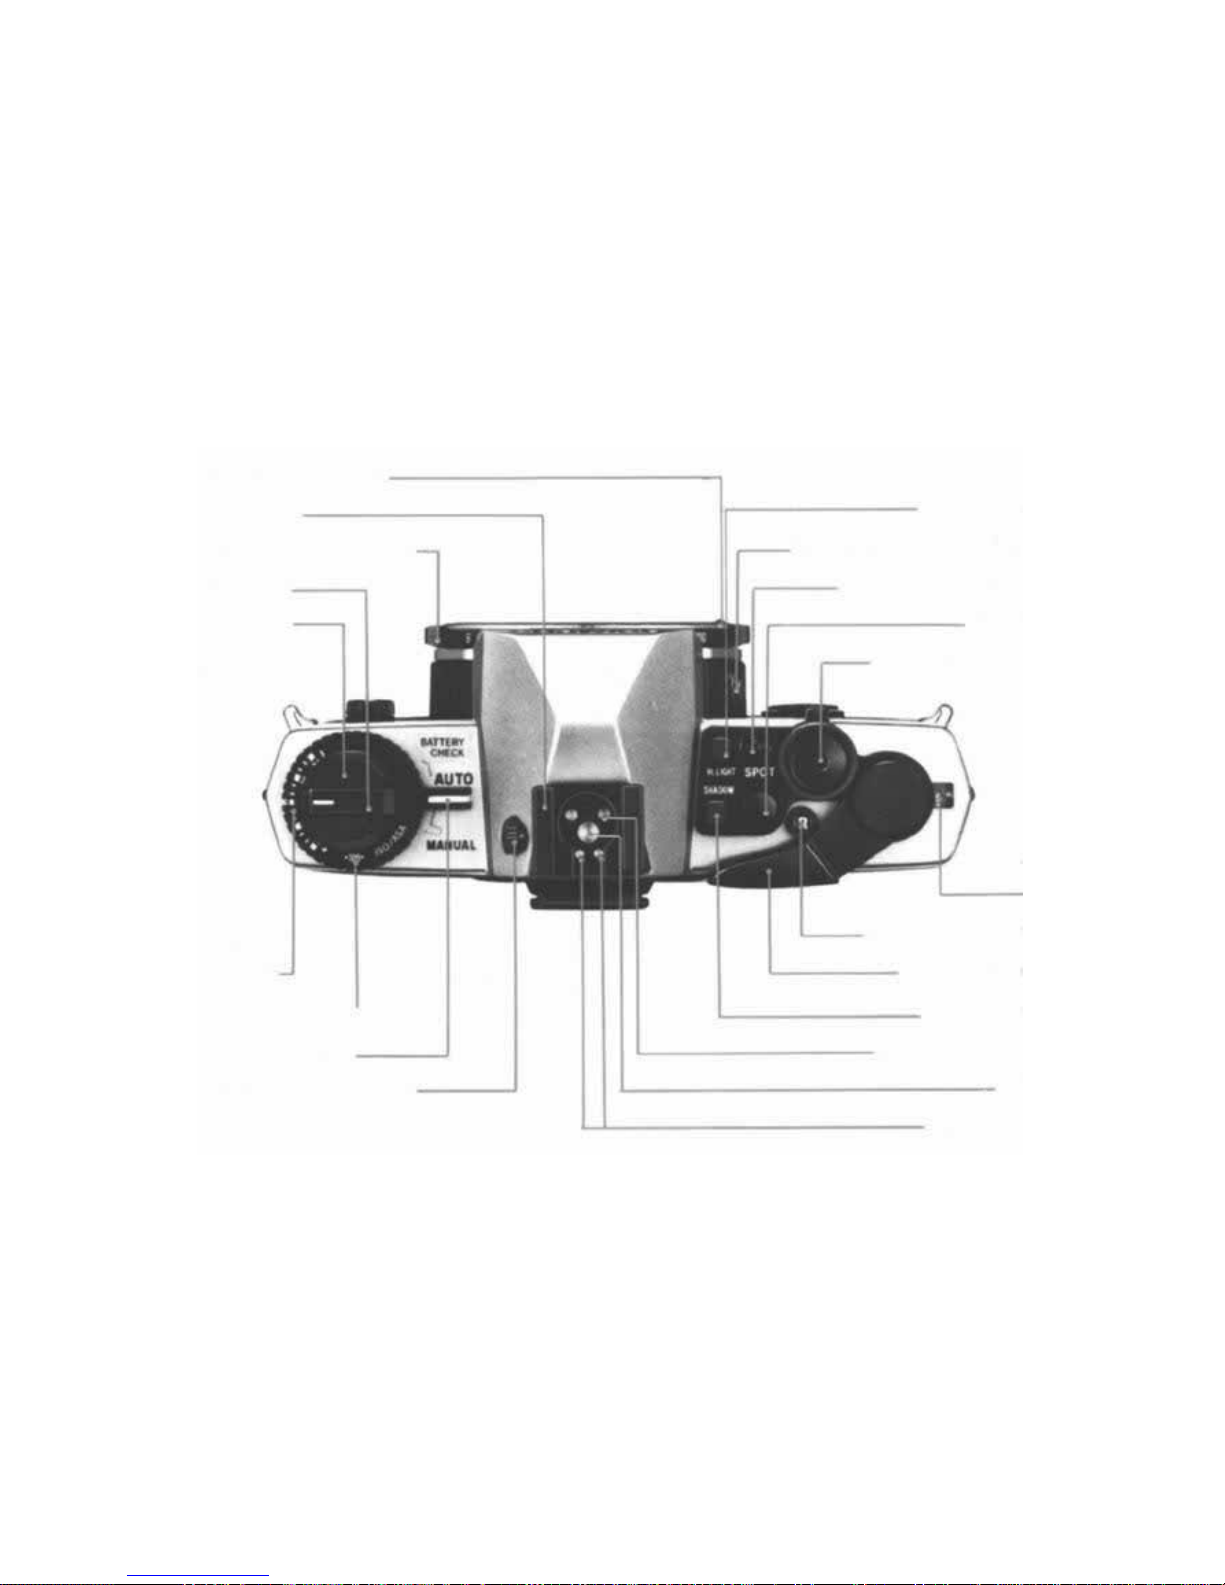
13 Automatic Clear Button
14 Accessory Shoe
15 Manual Shutter Speed Ring
16 Rewind Crank
17 Rewind Knob/
Camera Back
Release
22 HI. LIGHT Button
23 Viewfinder Illumination Button
24 MEMORY Indicator Lamp
25 SPOT Button
26 Shutter Release Button
18 Film Speed
Dial/Exposure
Compensation Dial
19 IS O/AS A Film Speed
Window
20 Mode Selector Lever
21 Dioptric Adjustment Knob
27 Exposure
Counter
28 Rewind Release Button
29 Film Advance Lever
30 SHADOW Button
31 Flash Control Contact
32 X Contact
33 Super FP Contact
69
Page 71
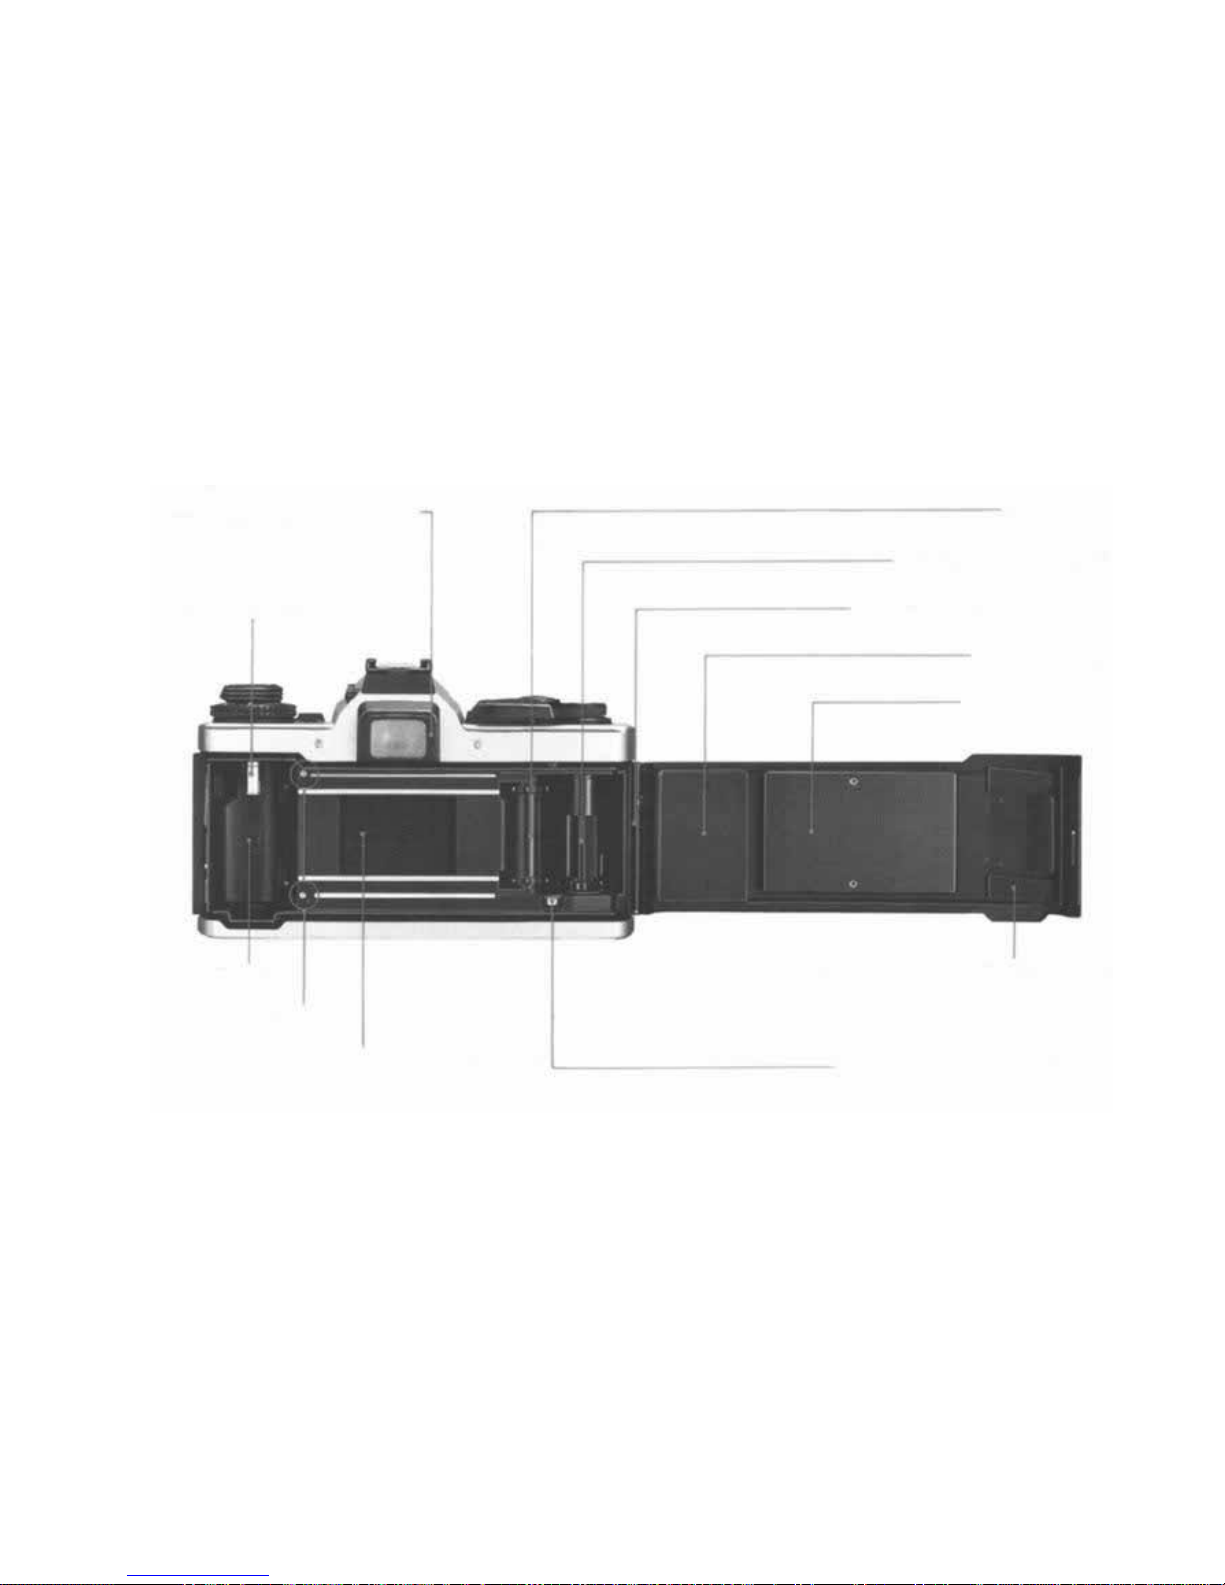
34 Viewfinder Eyepiece Frame
35 Film Rewind Shaft
36 Film Chamber
37 Film Guide Pins
38 Sprocket
39 Film Take-up Spool
40 Camera Back Release Pin
41 Camera Back
42 Pressure Plate
44 Shutter Curtain
43 Film Cartrige Pressure Spring
45 Recordata Back Contact
70
Page 72
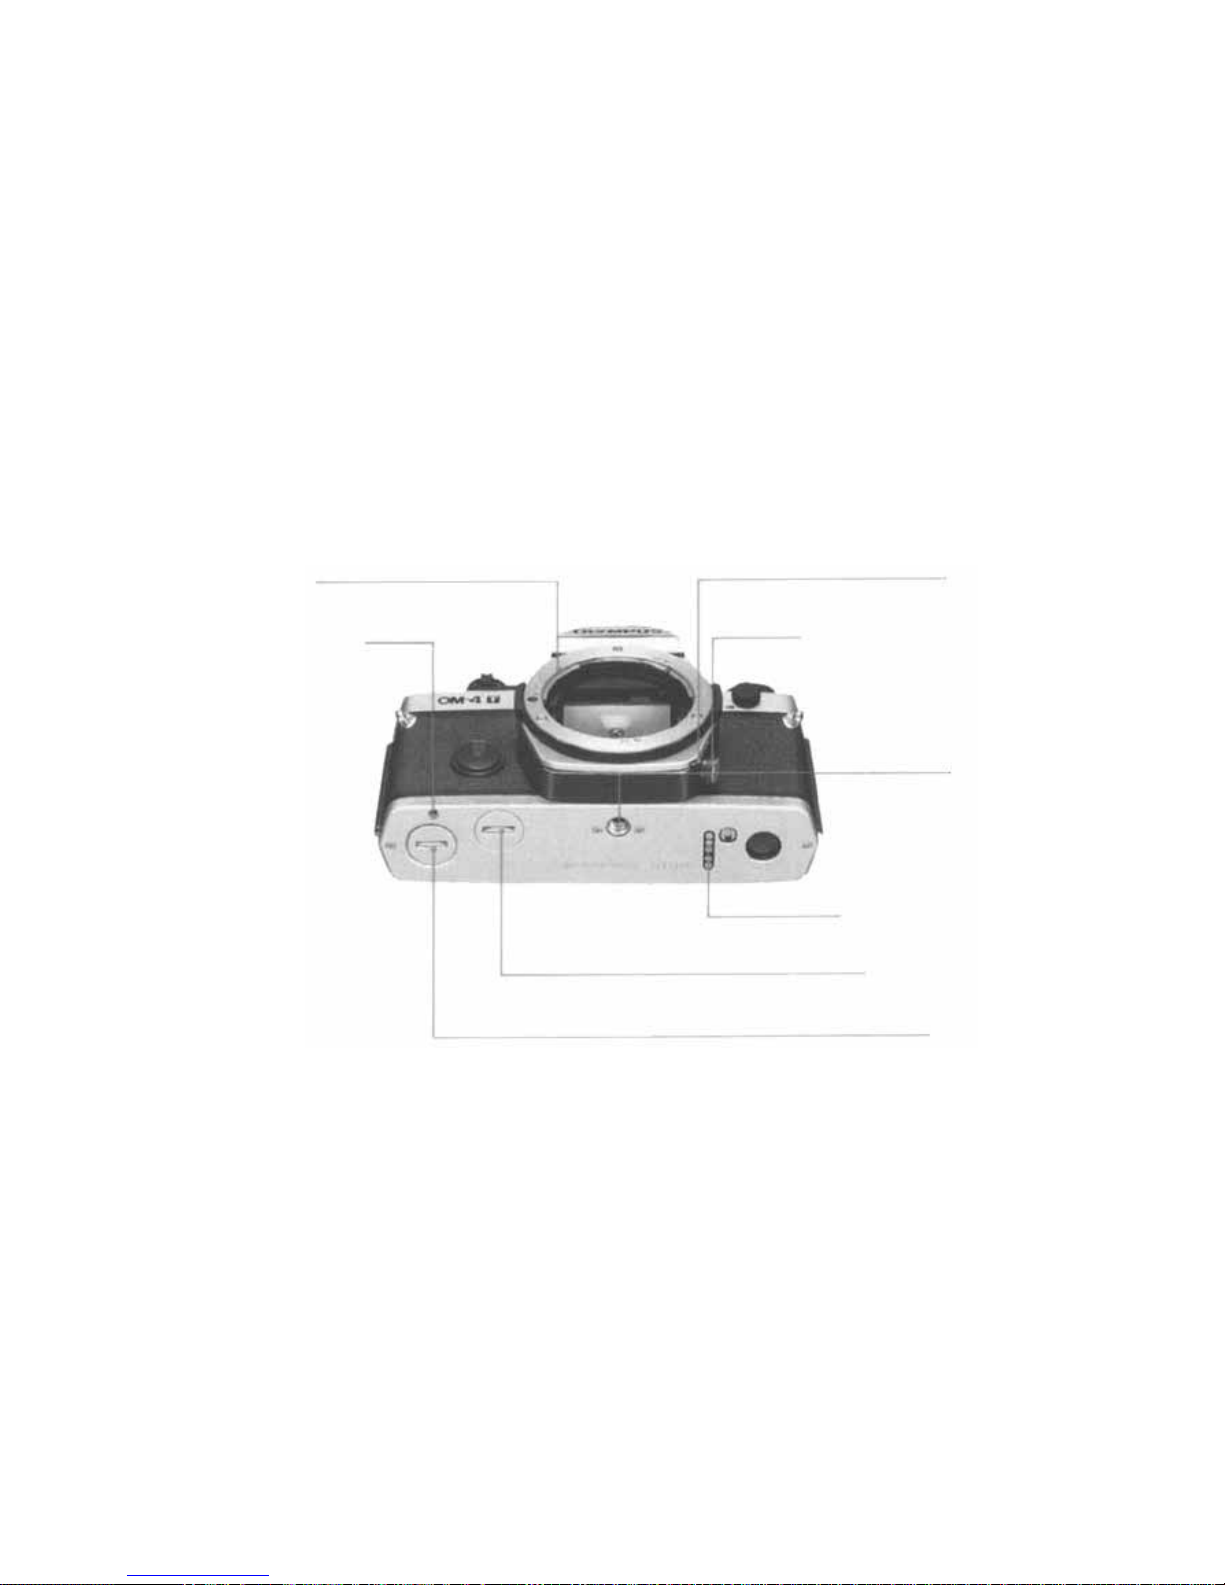
52 Lens Mount Ring
53 Motor Guide Pin Hole
46 B Lock Button
47 Flash Synchronization Socket
48 Tripod Socket
49 Motor Coupling Terminals
50 Motor Coupling Socket
51 Battery Chamber
71
Page 73

Specifications
Type: TTL auto-exposure 35mm SLR camera
Film Format: 24mm x 36mm
Lens mount: Olympus OM mount
Shutter: Electronically controlled cloth focal plane shutter; 1/2000 sec. max.
shutter speed; 1/60 sec. mechanical shutter speed
Synchronization: X contact (synchronization at speeds of 1/60 sec. or
slower); Super FP Flash contact; Hot shoe (with X and Super FP Flash
contacts); 5-pin connector for T-series flash, synchro socket fo r X
Light measuring method: Center-weighted, average light measurement,
switchable to spot measurement; spot measurement selective in 3 modes;
multi-spot, highlight-and shadow-based methods.
Automatic exposure control by averag e light measurement: TTL Direct "of f-
the-film" Light Measuring with aperture-preferred electronic shutter;
exposure control range: about 1 min. ~1/2000 sec. light measuring range:
approx. EV-5 ~ EV19 (ISO 100, 50mm F1.4, normal temperature and
humidity); ±2 EV exposure compensation.
Automatic exposure control by spot measurement: TTL spot metering
memory system (with AE lock); exposure control range: about 4 min. ~
1/2000 sec. light measuring range: approx. EV 0 — EV 19 (ISO 100,
50mm F1.4, no rmal temperature and humidity); ±2 EV exposure compen-
sation.
Automatic exposure memory control: Exposure value memory system (60
min. limiter)
Manual exposure control: B, 1 sec.~1/2000 sec. mechanical exposure speed
1/60 sec.
Flash exposure control: Super FP Flash mode (when using the Full Synchro
Flash
F280)
"OTF"
AUTO:
Synchronizes
with
shutter
speeds
from
1/60
sec.
to
1/2000
sec.;
MANUAL:
Synchronizes
with
all
shutter
speeds
up to
1/2000 sec.; Normal "OTF" or Manual Flash mode (when using a T-series
Flash or Full Synchro Flash F280) Synchronizes with shutter speeds of
1/60 sec . and slower.
Film speed: ISO 6 ~ 3200
Film-advance:
Film
advance lever
with
130° angle
for one
long
or
several
short
strokes and pre-advance angle 30°; motor drive and winder usable
Film rewind: Rewind crank (motorized rewind with Motor Drive 2 possible)
Viewfinder: Viewfinder with dioptric correction; dioptric correction range
+1.0 ~ -3.0 diopters; interchangeable focusing screens; microprism/split
image-matte type screen standardized; finder view field: 97% of actual
picture field; magnification: 0.84X at infinity with -0.5 diop. and 50mm
lens
Viewfinder information: LCD multi-mode display (2-min. limiter); built-in
illuminator, (10-sec, limiter)
Self-timer: 12-sec. delay electronic self-timer
Battery check: 3-level display with LED and alarm sound; aut omatic lock
with batteries exhausted
Power Source: Two 1.5V silver-oxide batteries SR44 (Eveready EPX-76;
alkaline manganese batteries LR44 or equivalent)
Camera back: Removable hinge type, with memo holder; interchangeable.
with Recordata Backs and 250 Film Back
Dimensions: 136 x 84 x 50mm (5.35" x 3.30" x 1.97") (body al o ne )
Weight: 510g (18 oz.) (body alone)
72
Page 74

OLYMPUS OPTICAL CO ., LTD.
San-Ei Build ing, 22-2, Nishi Shinjuk u 1-chome, Shinjuku-ku Tokyo, Japan Tel. 03-340-2211
OLYMPUS CORPORATION
Crossways Park, Woodbury, New York 11797, U.S.A. Tel. 516-364-3000
OLYMPUS OPTICAL CO. (EUROPA) GMBH
Postfach 104908, Wendenstrasse 14-16, 2 Hamburg 1 , West Germany. Tel. 040-2-3773-0
OLYMPUS OPTICAL CO. (UK.) LTD.
PRINTED IN JAPAN 0786·3MS
2-8 Honduras Street, London EC1Y OTX, England. Tel. 01-253-2772
73
 Loading...