

Page 1

INSTRUCTIONS
Page 2
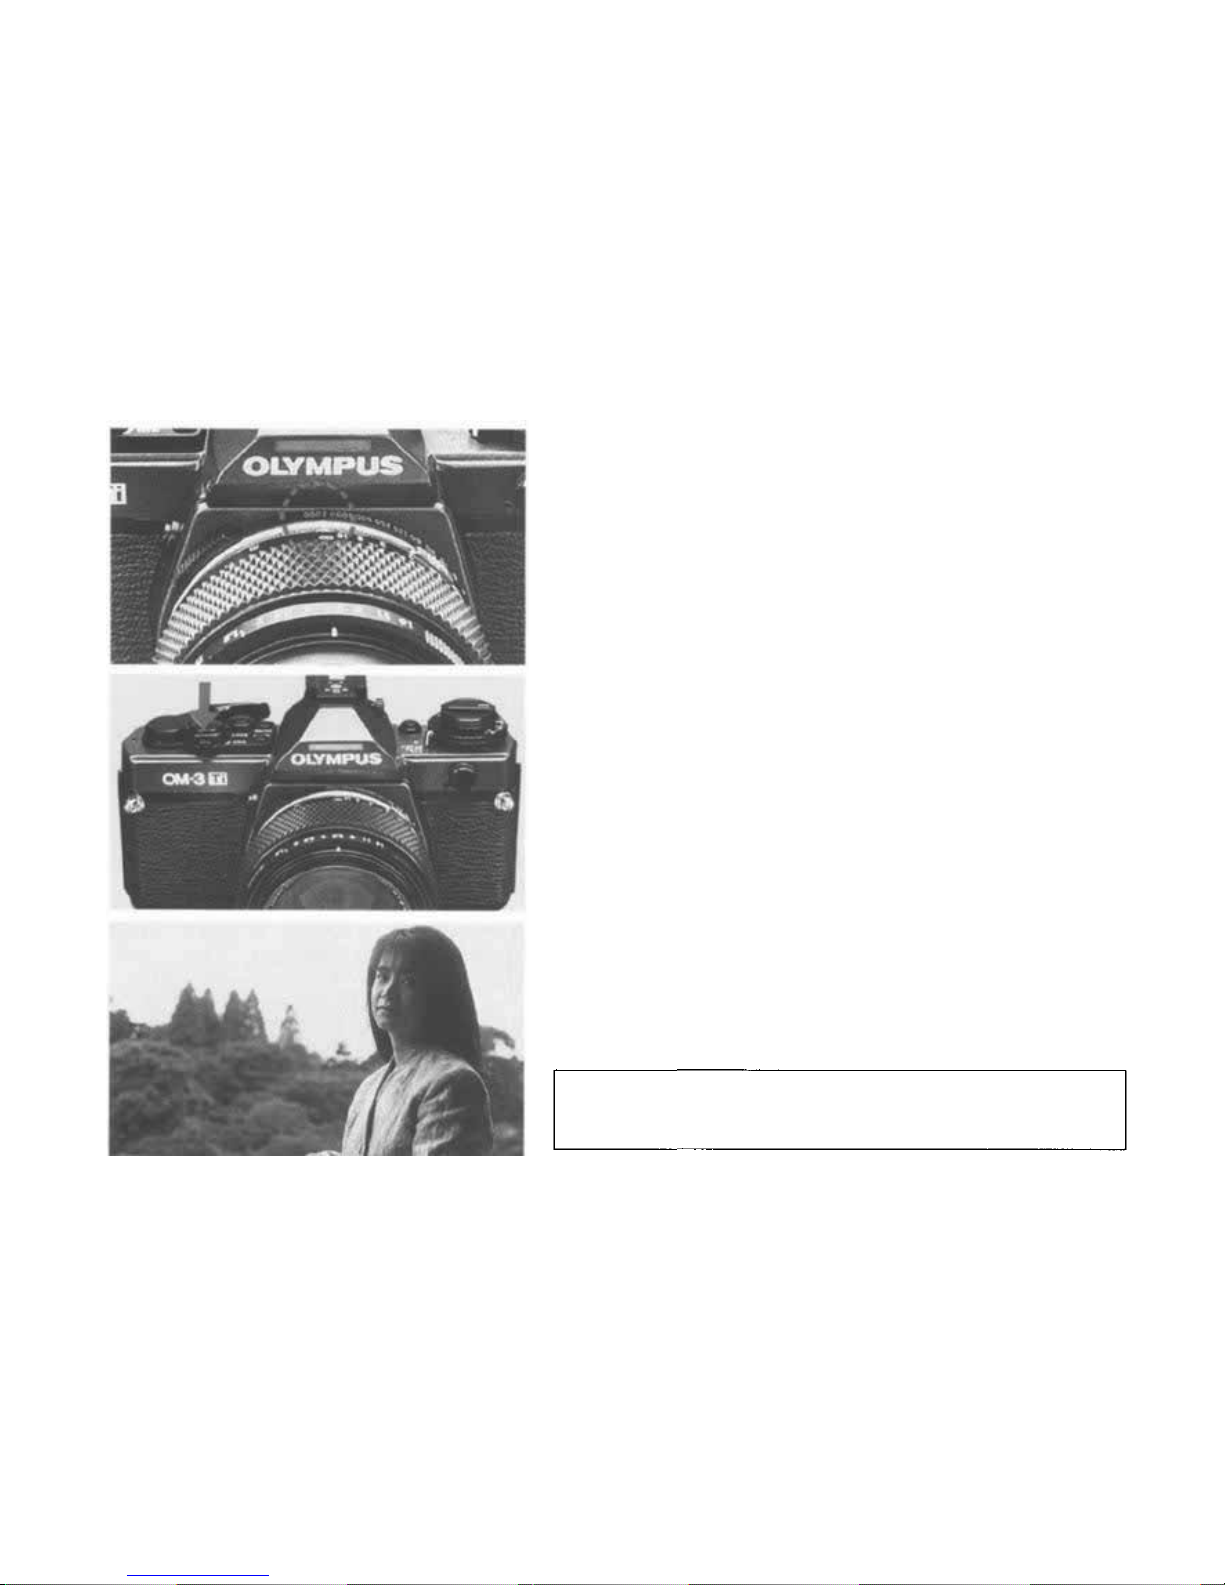
Thank you for purchasing the OLYMPUS OM-3Ti. This durable, lightweight SLR camera incorporates
titanium — a metal that's lighter than aluminum, yet six times stronger — in the camera body. It is a
single lens reflex camera with a mechanical shutter. Features include Multi Spot Metering, OTF Auto
Flash and Super FP Flash Control System. Designed to facilitate serious photography with such
professional-level techniques as daylight synchro-flash photography, the purpose of the OM-3Ti is to
expand the sphere of creative photography. Before using t h e camera, we recommend that you read this
instruction manual carefully, familiarizing yourself with the operating instructions so you can ge t the ve ry
best performance and service life f ro m your new camera.
Note: Al l the components of the Olympus OM-3Ti are carefully designed and their production and assembly is strictly
controlled to enhance the unmatched performance of the system. If any interchangeable lenses, flashes, or
accessories other than Olympus products are used, Olym pus ca nnot be responsible fo r poor results or damage
of the OM-3Ti.
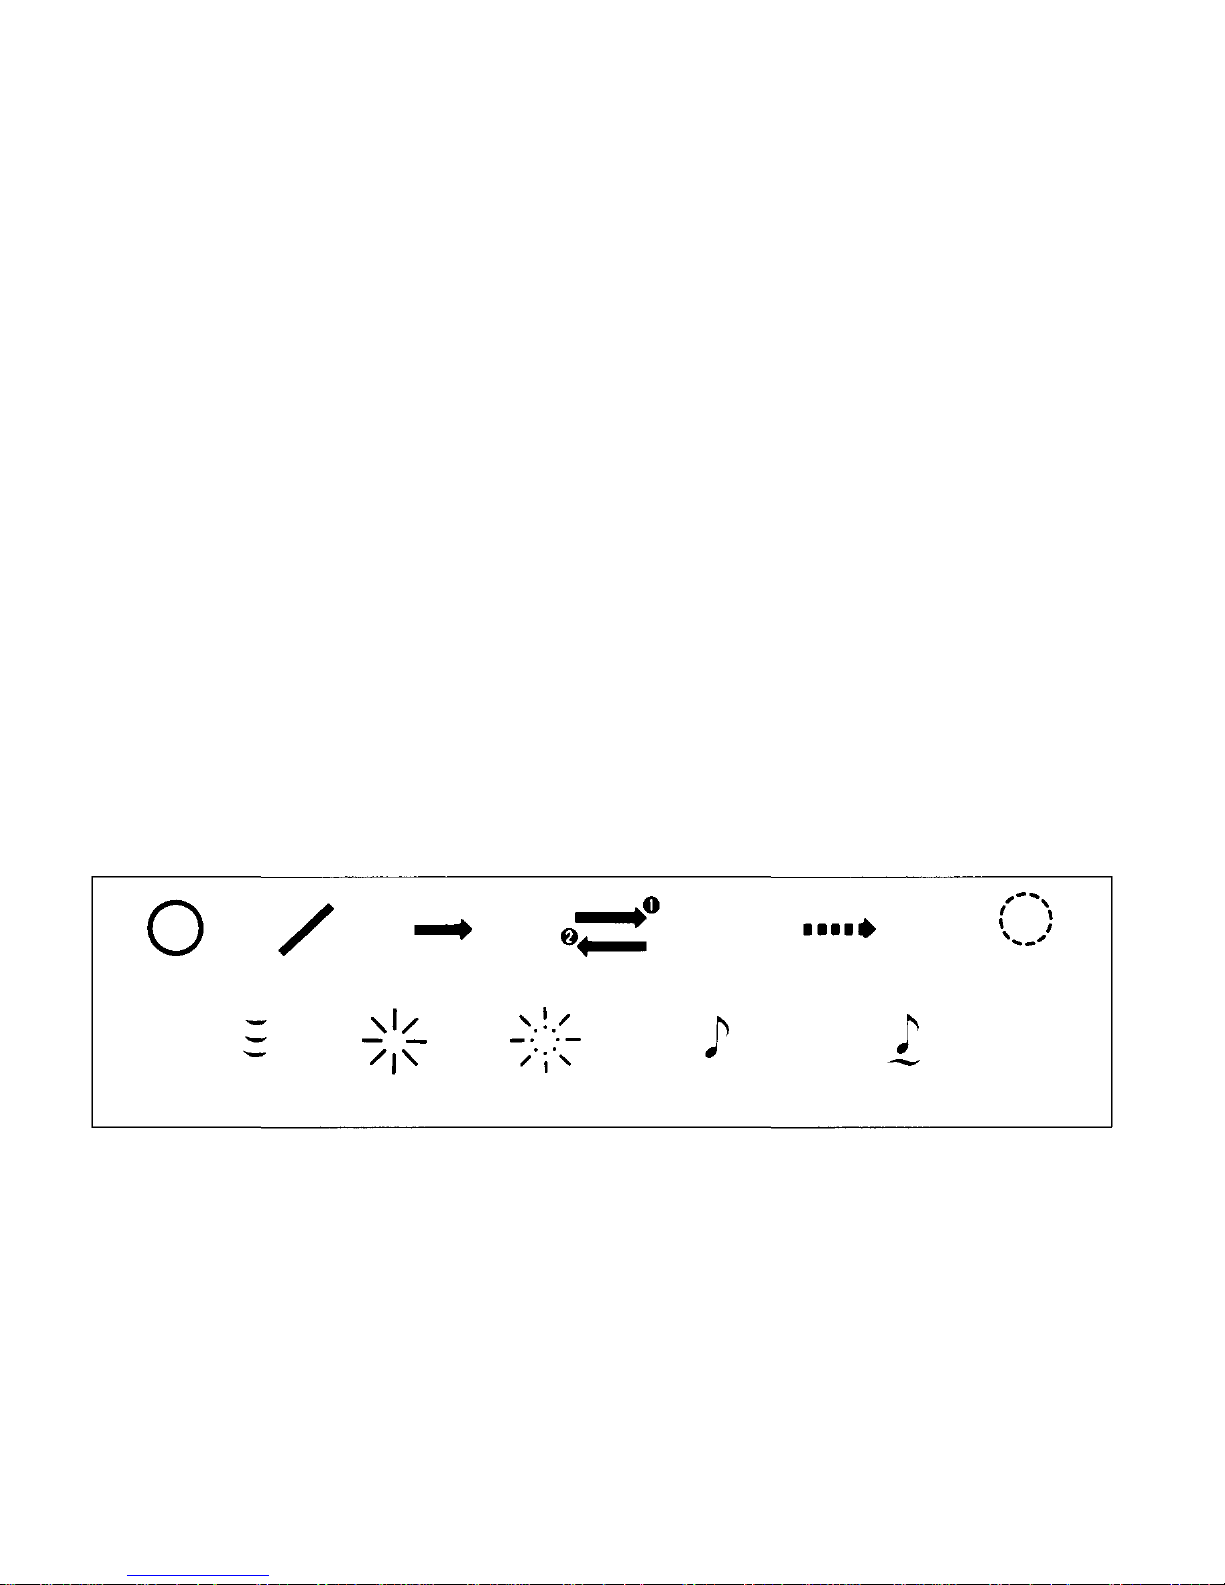
Correct
Incorrect Operation Operation order
Automatic operation
Attention
Press lightly
Lamp on
Lamp blinking Single beep
Continuous beep
1
Page 3

TABLE OF CONTENTS
< Preparation before Taking Pictures >
• Dioptric Correction 5
• Mounting th e Lens 7
• Loading th e Batteries 9
• Checking the Batteries 11
• Loading the Film 13
• Setting the ISO Film Speed 16
< Taking Photographs (I) >
— Center Weighted Average Light Metering —
• Center-Weighted Average
Light Metering 19
• Rewinding the Film 22
< Taking Photographs (II) >
— Spot Metering —
• How to Use Spot Metering 25
• How to Clear Spot Metering 28
• How to Use the Multi-Spot Metering 29
• Highlight Control 32
• Shadow Control 35
< Taking Photographs (III) >
— Flash Photography —
• Taking OTF A ut o Flash Photographs 39
• Taking Daylight Synchro-Flash Photographs
(Super FP Flash Mode) 42
< Taking Photographs (IV) >
— Other Operations —
• Exposure Compensation in the OTF
Au t o Flash Mode 45
• Bulb Exposure 46
• Using the Viewfinder Illuminator 47
• Changing t he Focusing Screen 48
• Changing t he Camera Back 49
• Attaching the Grip 50
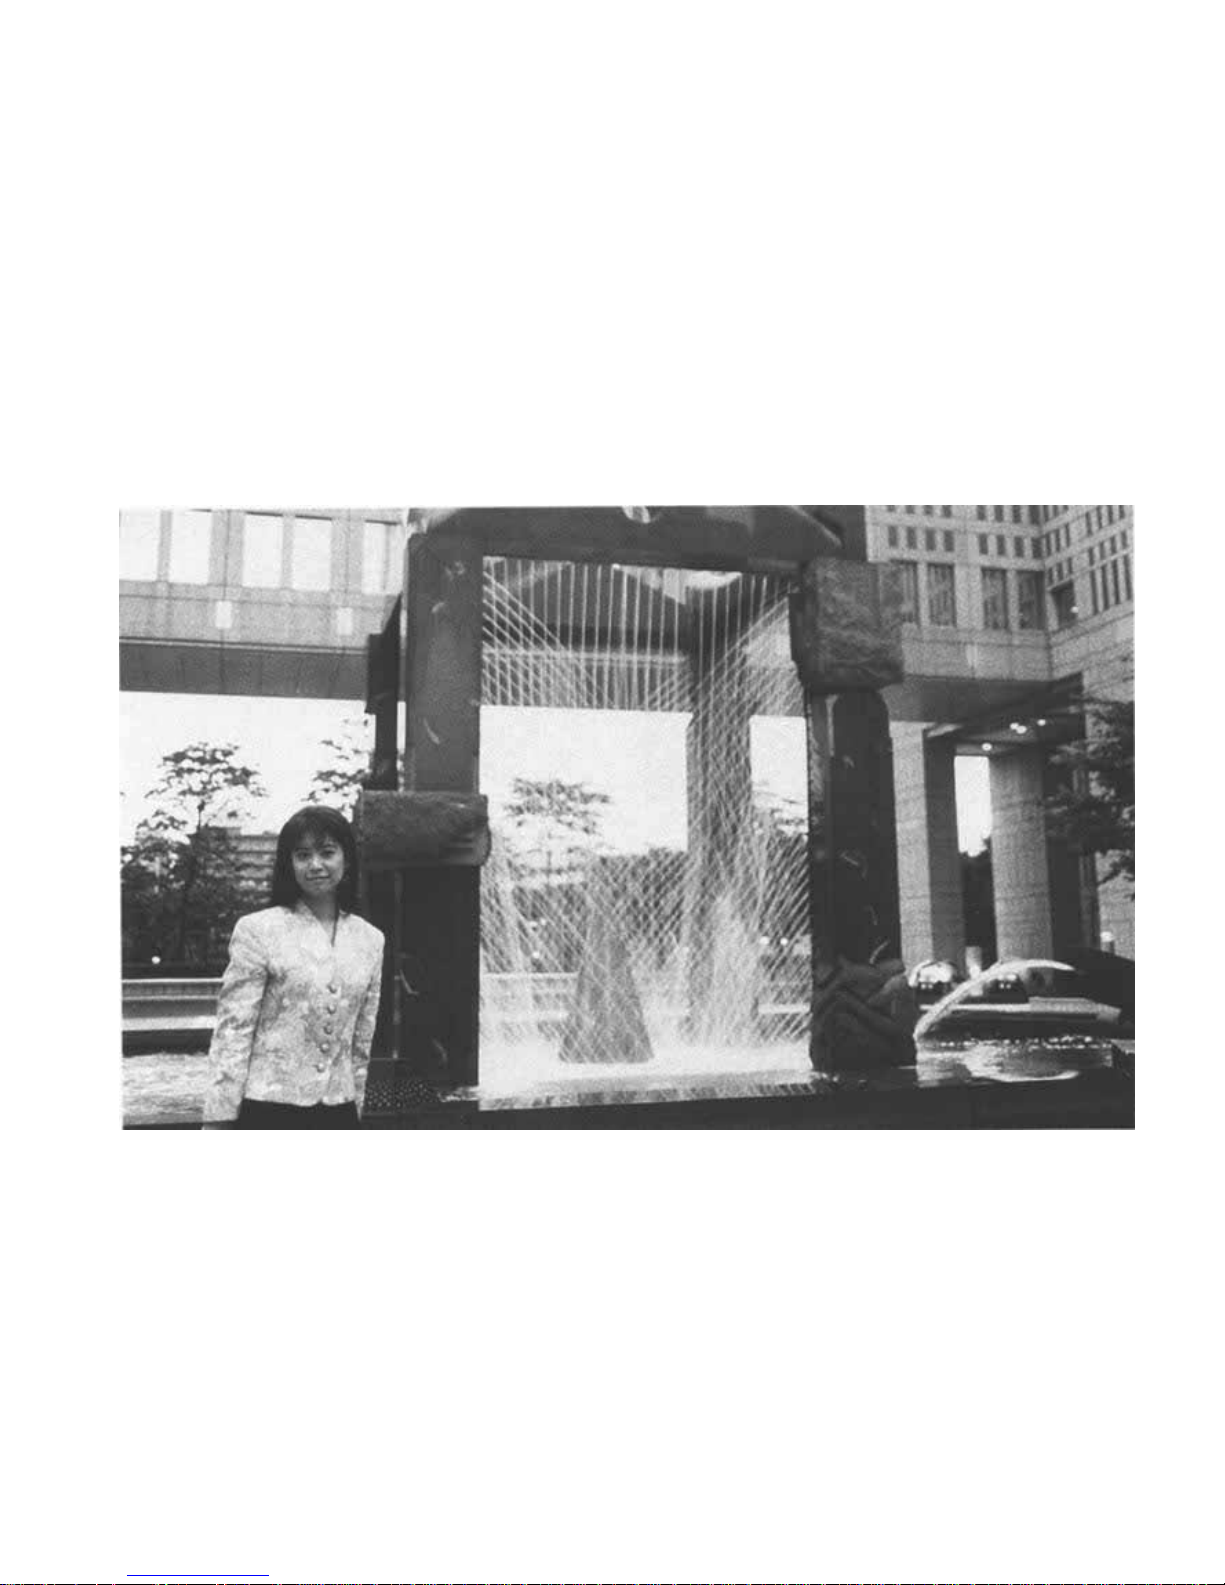
2
Page 4

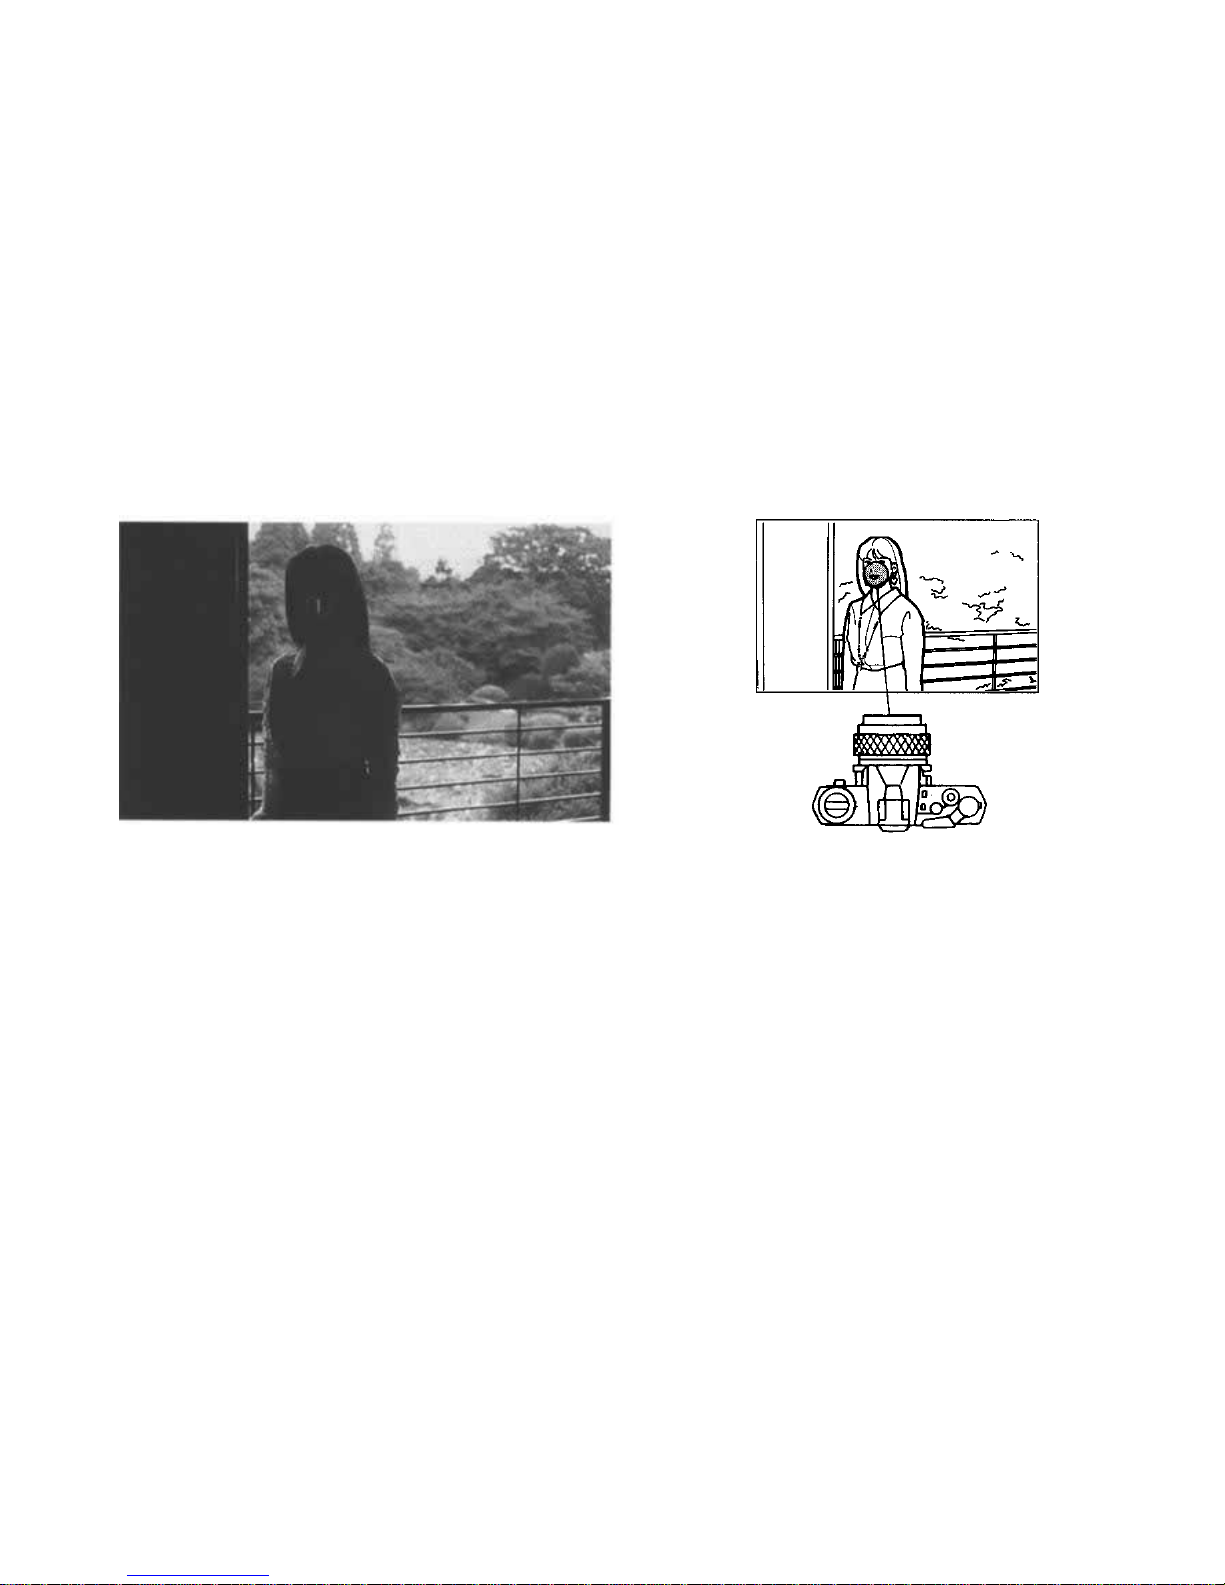
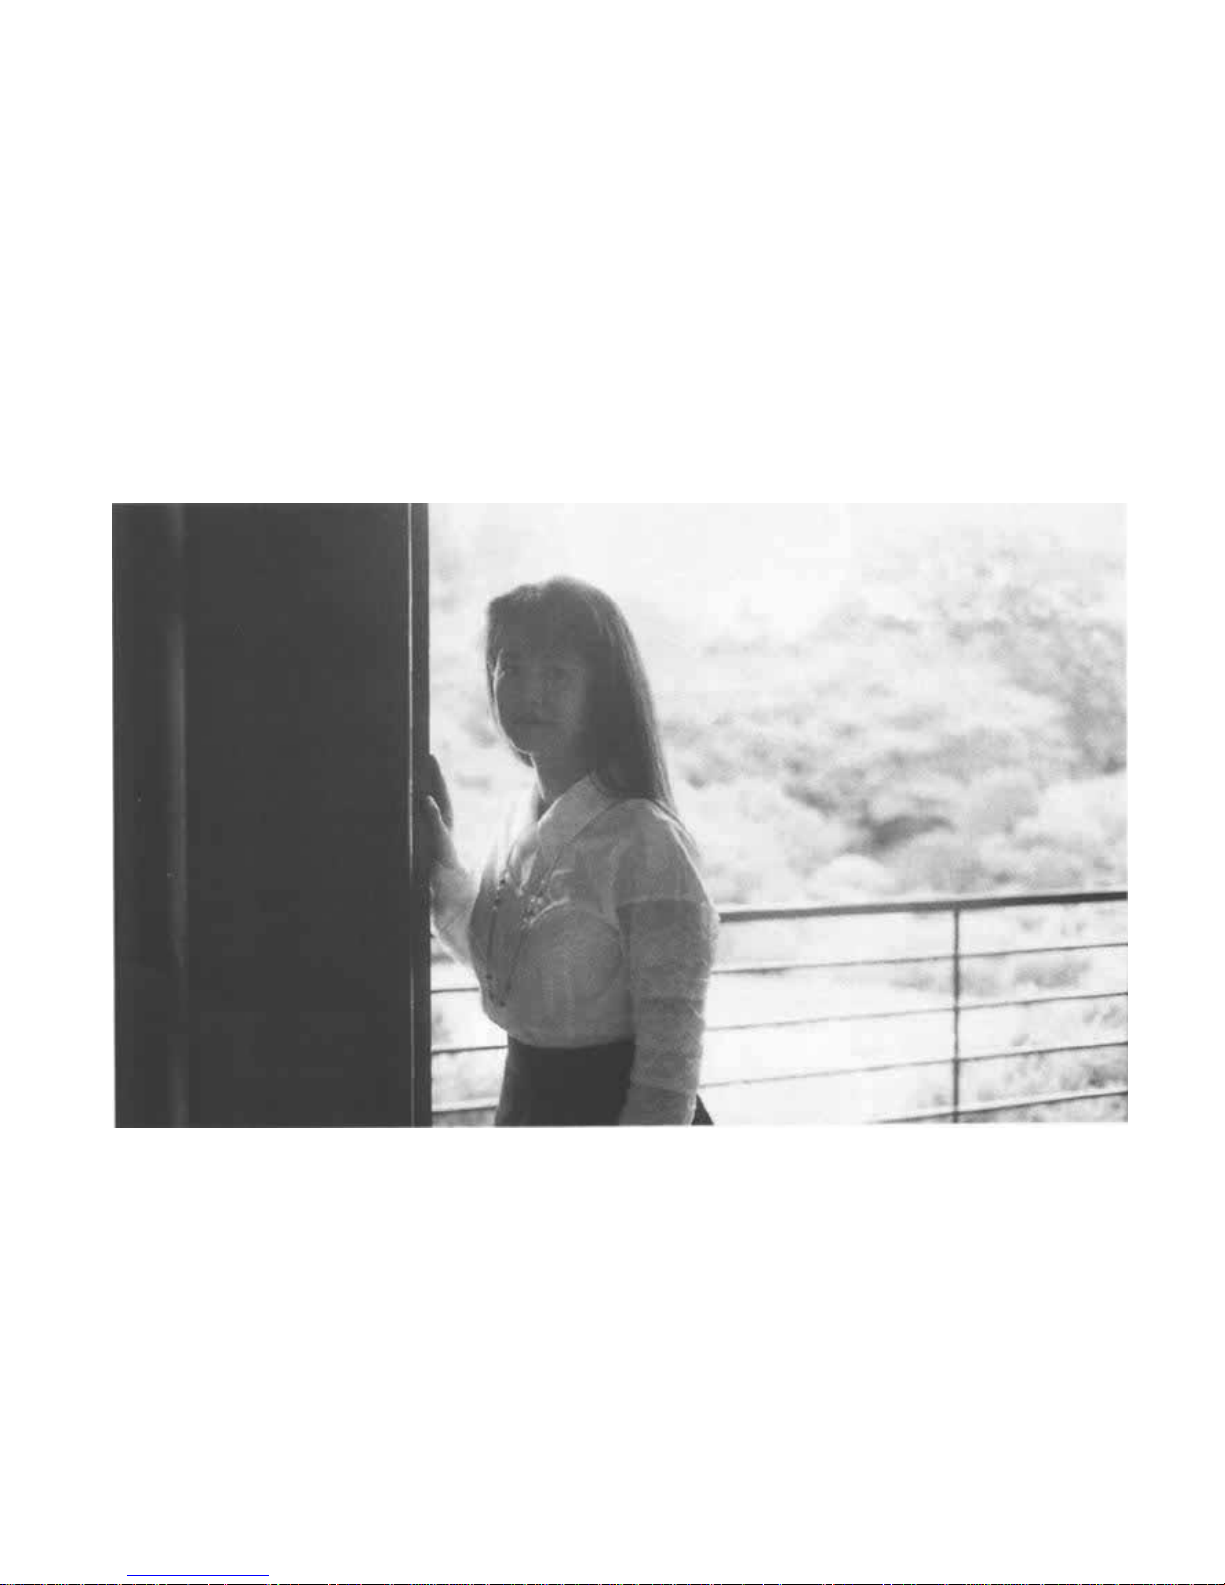
TABLE OF CONTENTS
< For Your Creative Photography >
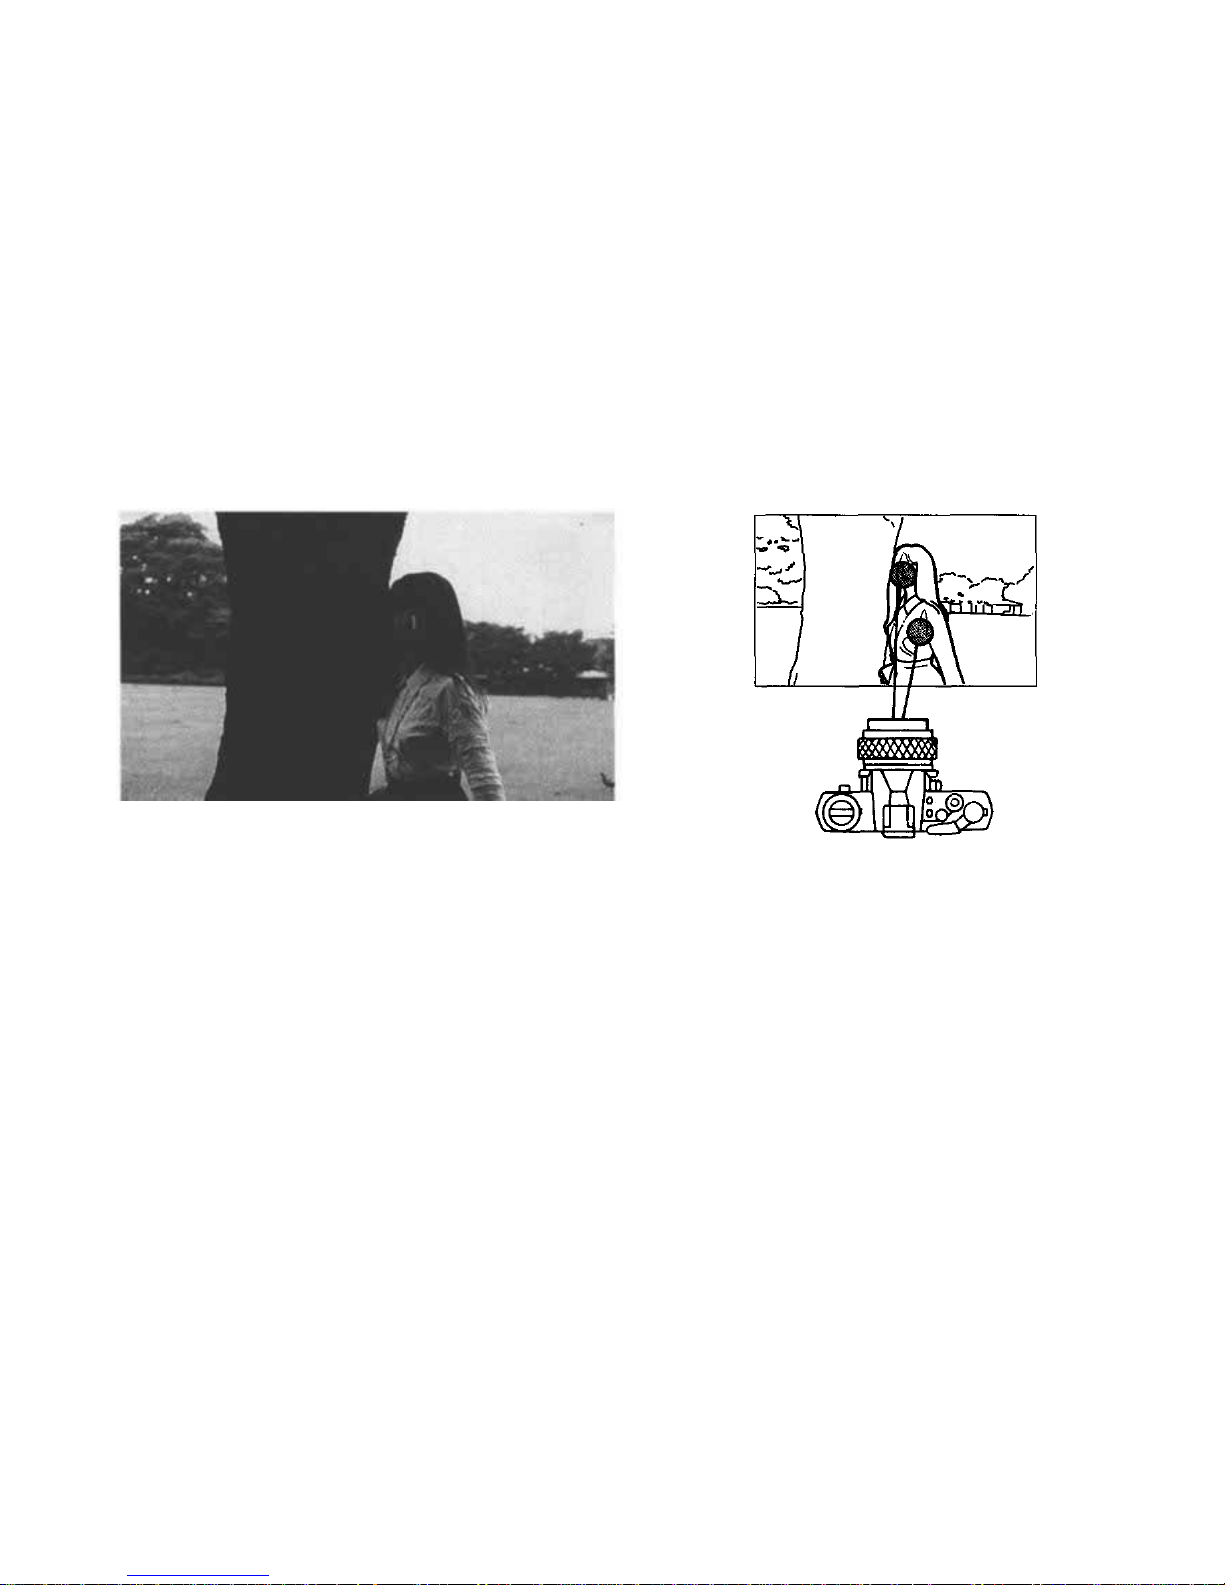
• The Fascinating Results of Creative Exposure
and High-Speed Synchronization 53
• Center-Weighted Average Light Metering 55
• OTF Auto Light Metering 56
• SPOT Metering (1) 57
• SPOT Metering (2) 58
• Shooting with One-Point Spot Metering 61
• Shooting w it h Mul ti-Spot Metering 63
• Sophisticated Multi-Spot Metering 65
• Highlight Control 67
• Shadow Control 69
• Viewfinder Information 71
• Exposure Compensation 72
• Depth of Field 72
• Depth of Field Scale 73
• Preview Button 74
• Shutter Speeds 75
• Bulb Exposure 76
• Multiple Exposures 77
• Infrared Photography 77
< OM SYSTEM >
• Flash Photography 79
• OTF Auto Flash 80
• Operation of T-Series Flash 80
• Main Specifications of T-Series Flash 81
• Main Specifications of F280 82
• Usi ng Elec tr on ic Flashes Other than the
T-Series Flash Units 82
• Bounce Flash 83
• Shooting with a Motor Drive 85
• Motor Drive Group 86
• Recordata Back 4 87
• Macrophotography 88
• Chart o f Photographic Ranges 89
• Macro Photo Units 90
• Finder Group Units 92
• Selection of Filters 95
• Handling Care 97
• Questions and Answers 99
• Description of Controls 104
•Specifications 108
3
Page 5

< Preparations before Taking Pictures >
4
Page 6
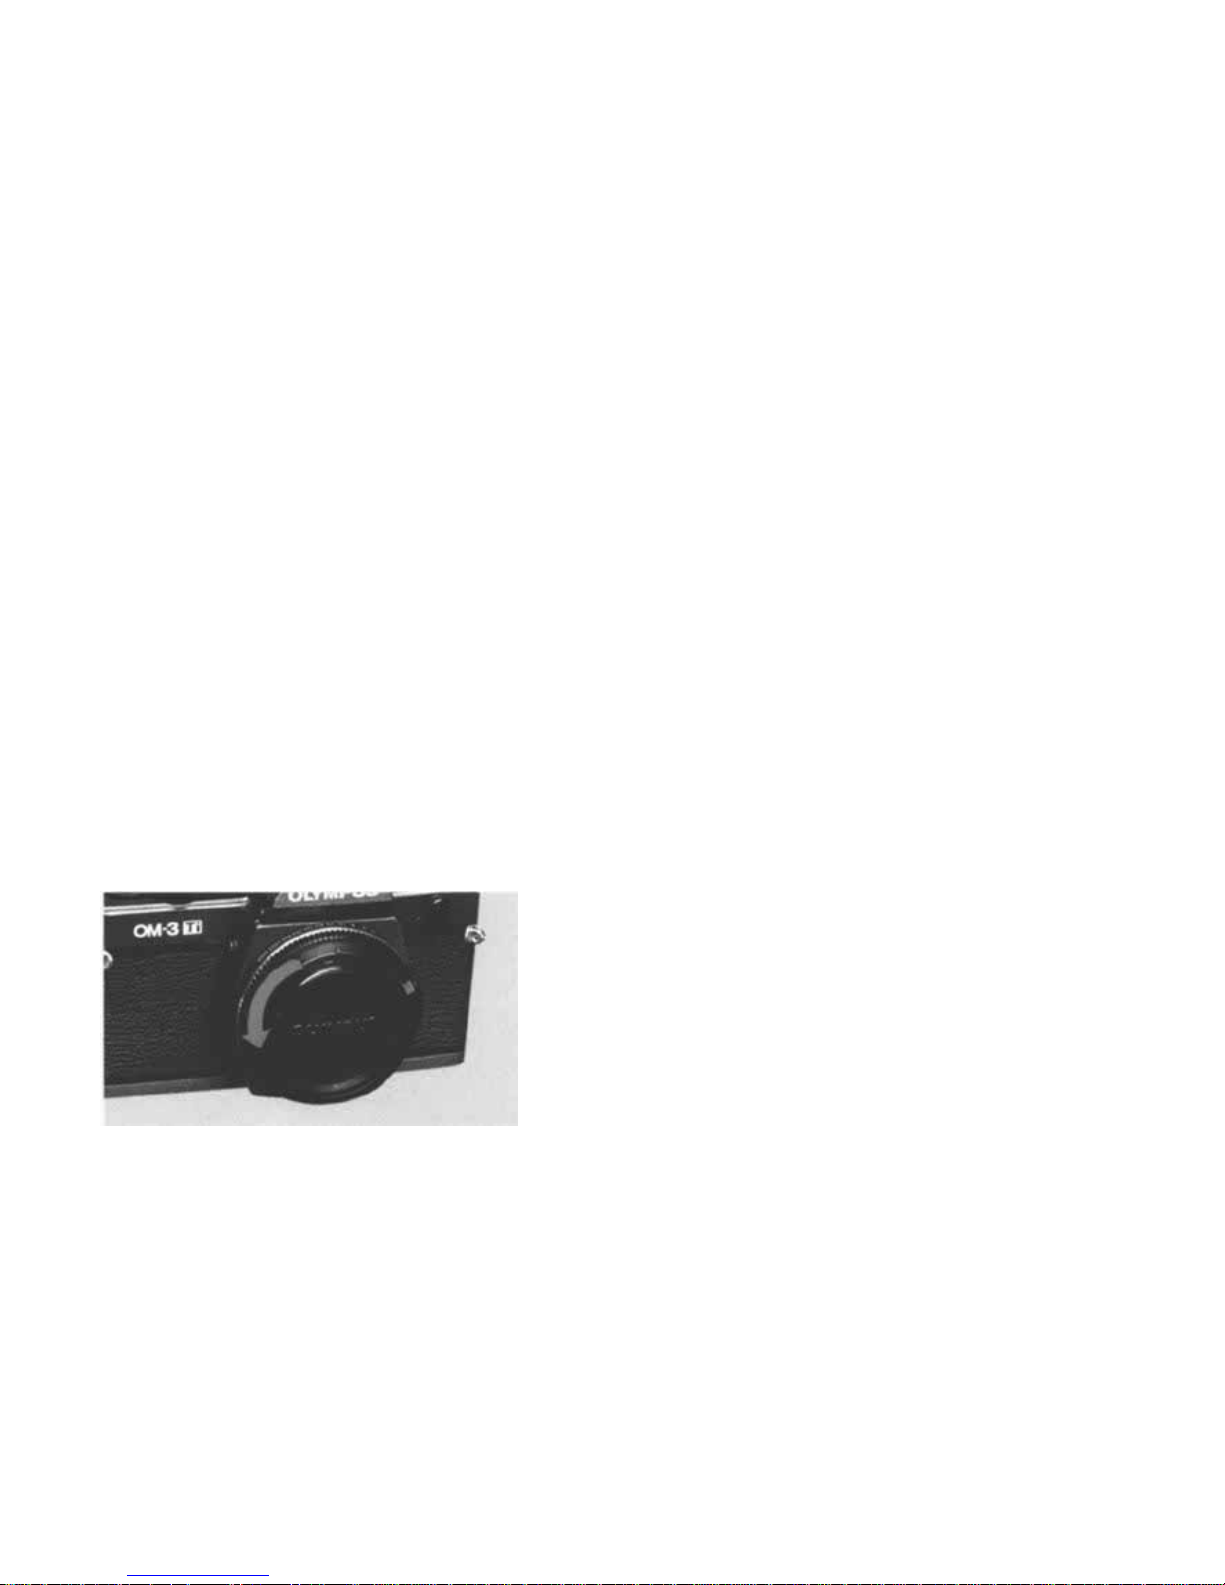
Dioptric Correction
The OM-3Ti permits dioptric adjustment according to you r eyesight.
Remove the body ca p.
1
5
Page 7
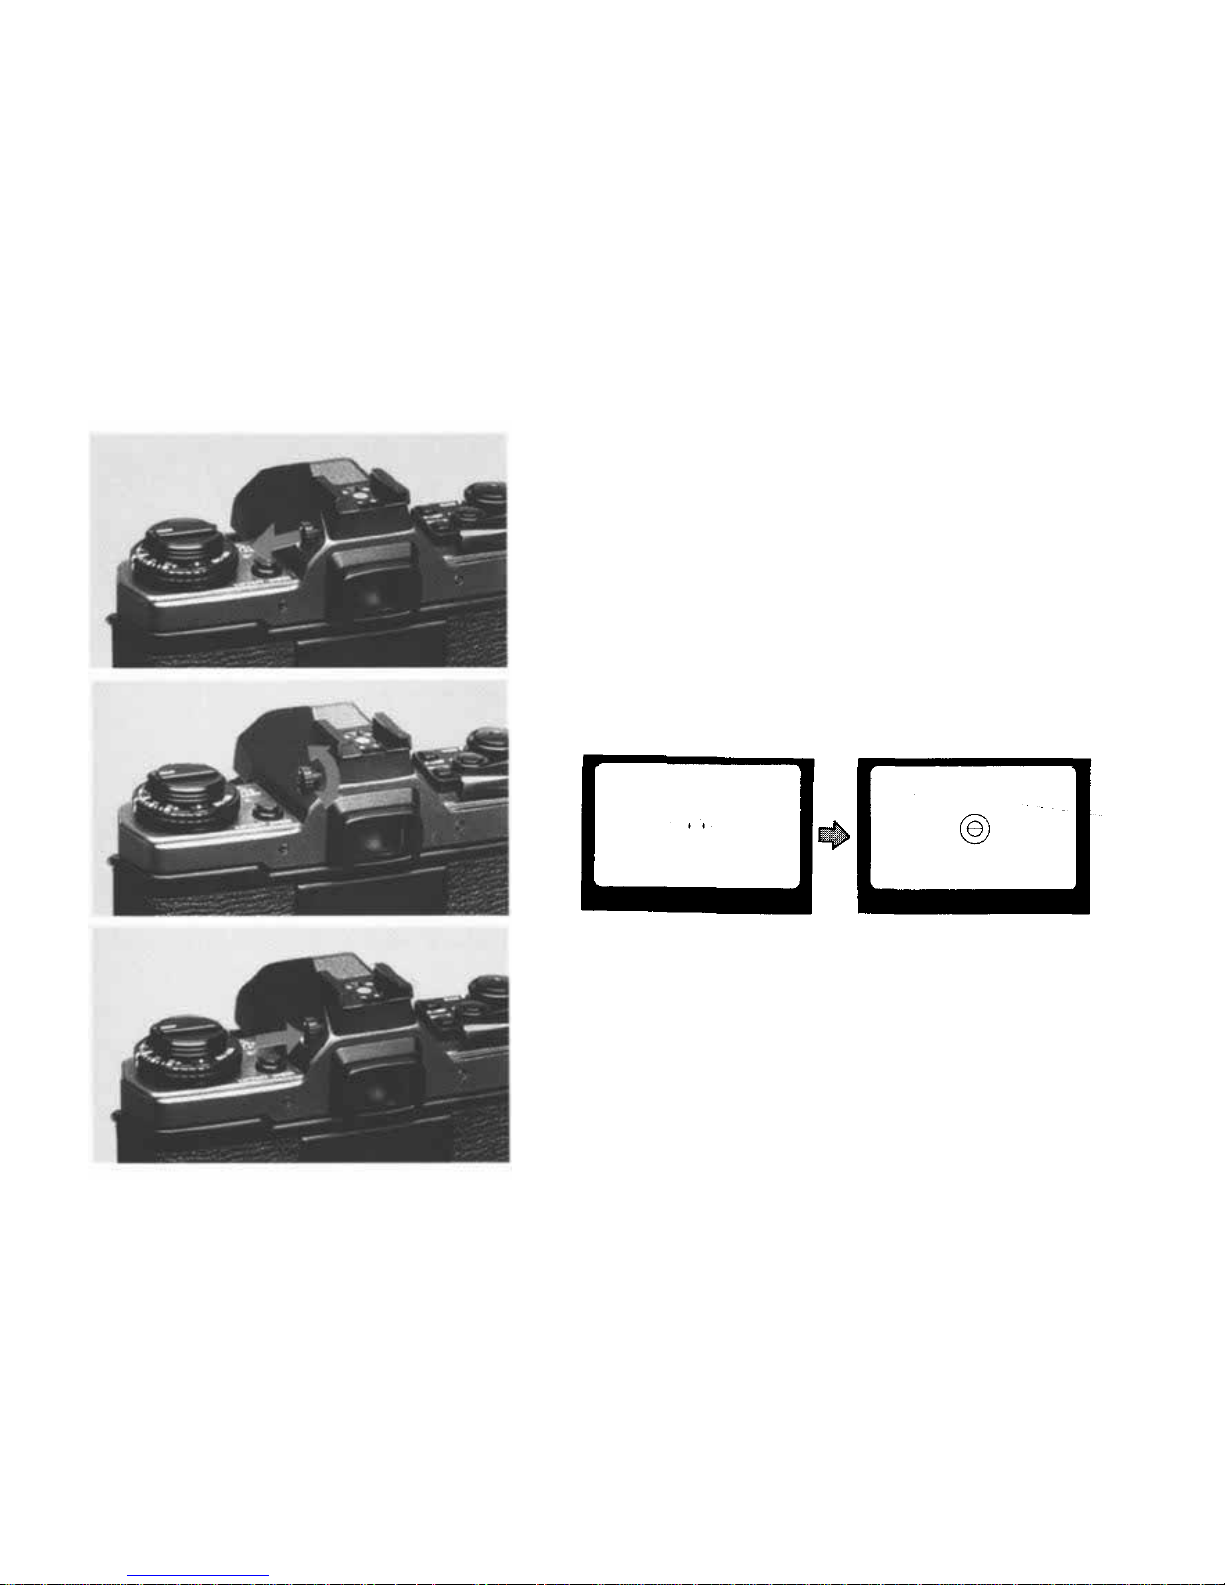
Pull out the diopter adjustment knob.
2
Turn and adjust the knob so that the matscreen appears
sharp.
Push t he knob ba ck in until it locks.
3
4
6
Page 8
Mounting the Lens
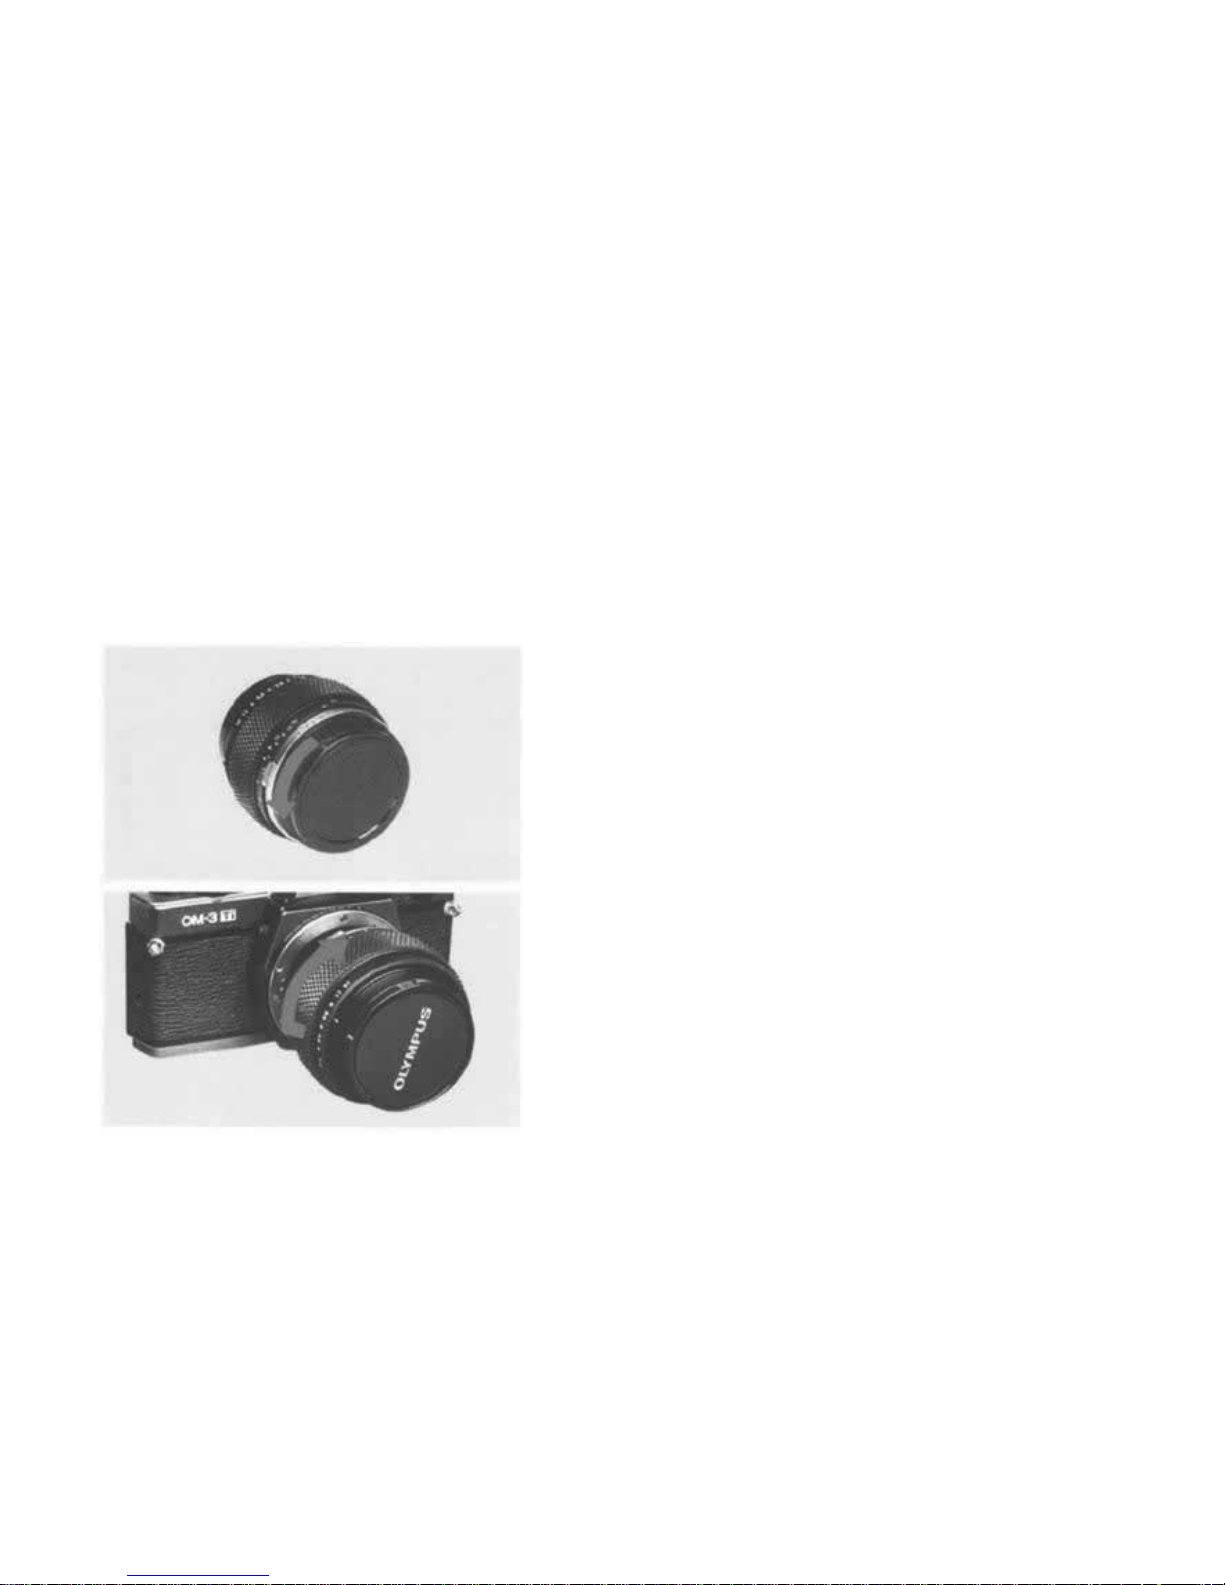
Remove the rear lens cap.
1
Align the red dots and rotate the lens clockwise until it
locks.
2
7
Page 9
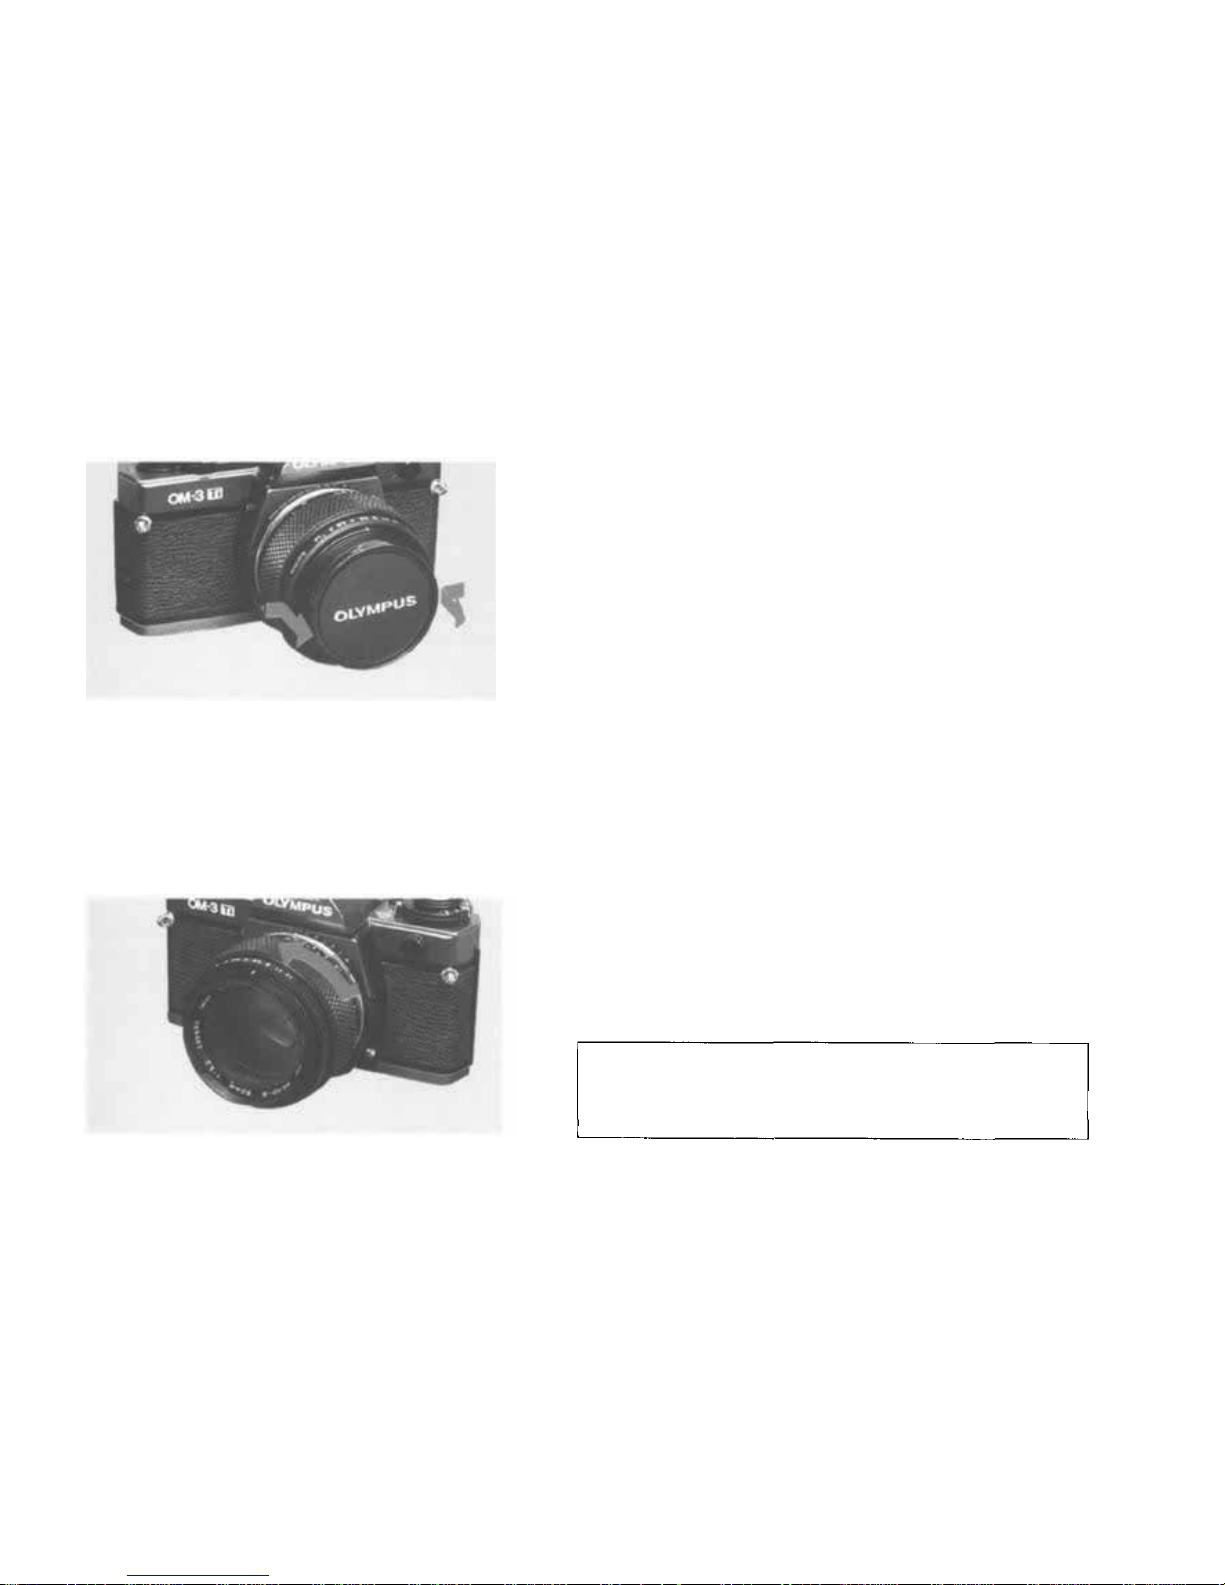
Remove the front lens cap. (Press in the mount tabs on
the edges of the len s cap parallel with "OLYMPUS").
3
Removing the Lens
Press the lens release button a nd turn the lens counterclockwise.
Mounting of a third-party lens can damage the
automatic clear button. This disables the spot
function.
8
Page 10
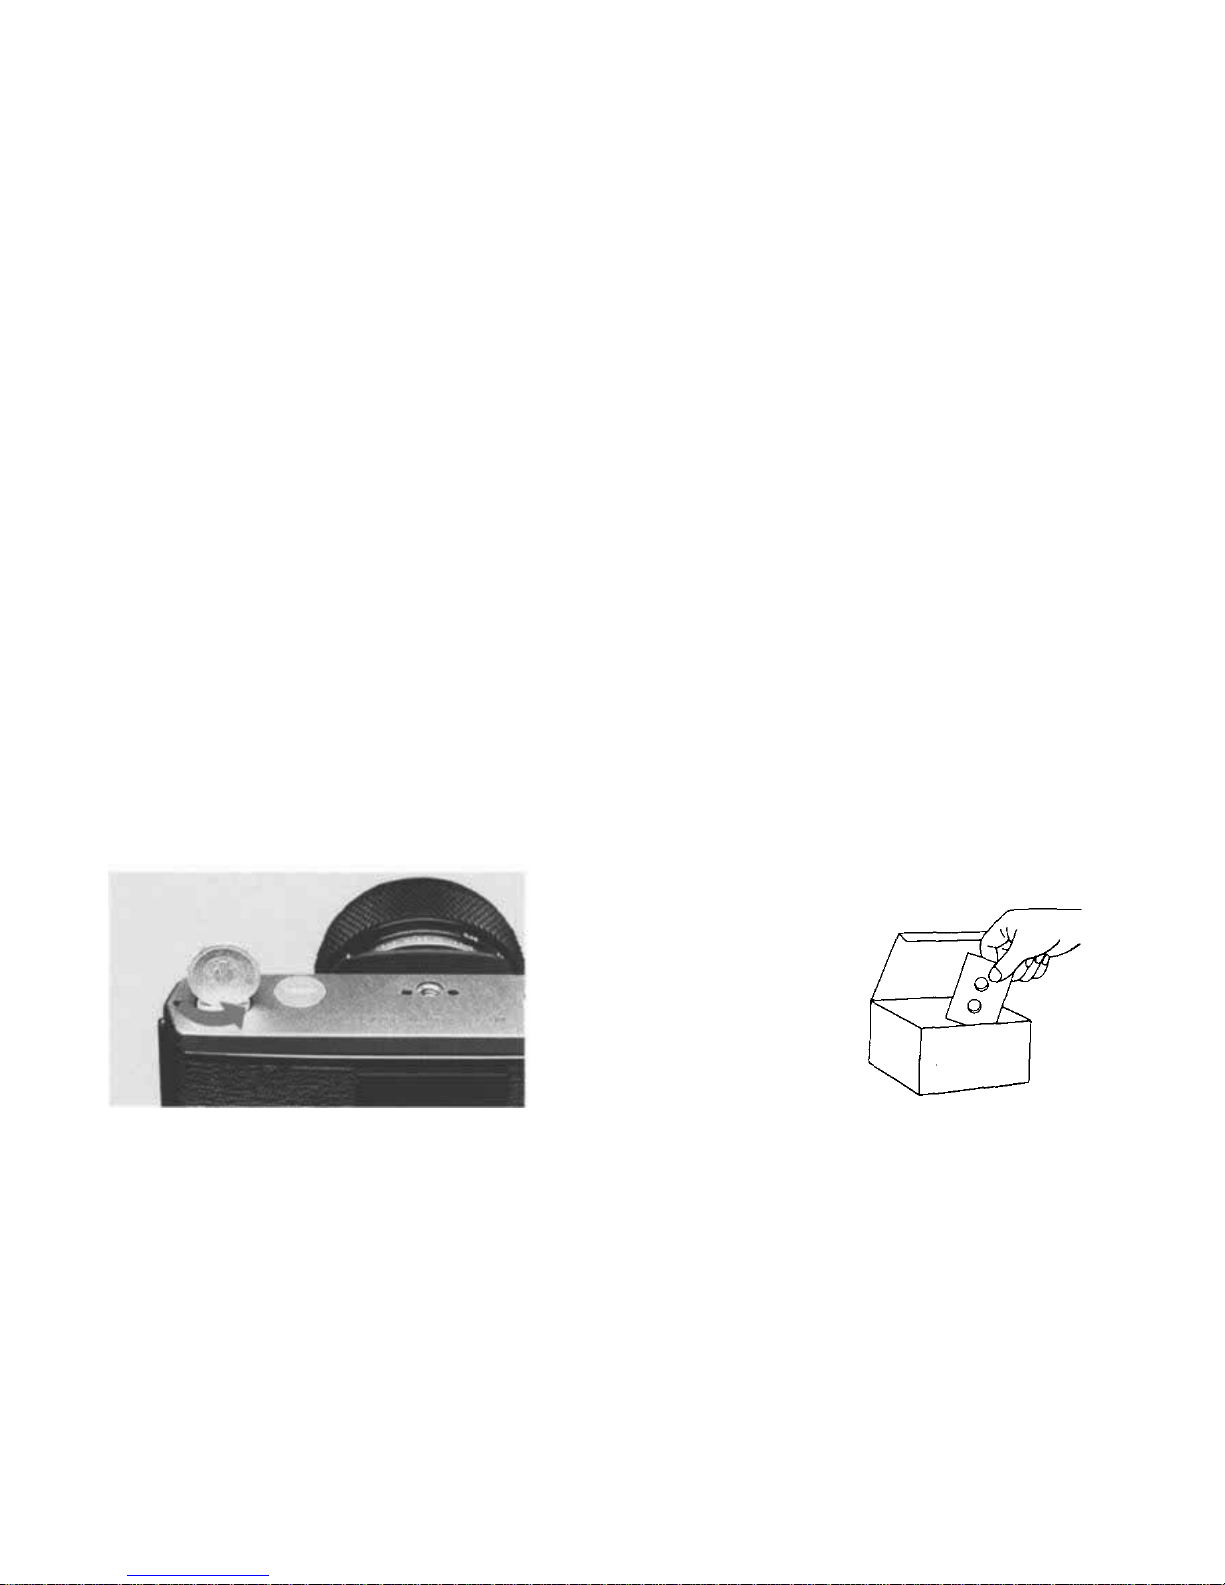
Loading the Batteries
Do not use different types of batteries or new and old batteries at the same time. If you are not likely to use
the camera fo r a long period of time, remove the batteries before putting it away.
Remove t he battery cover.
1
9
Page 11
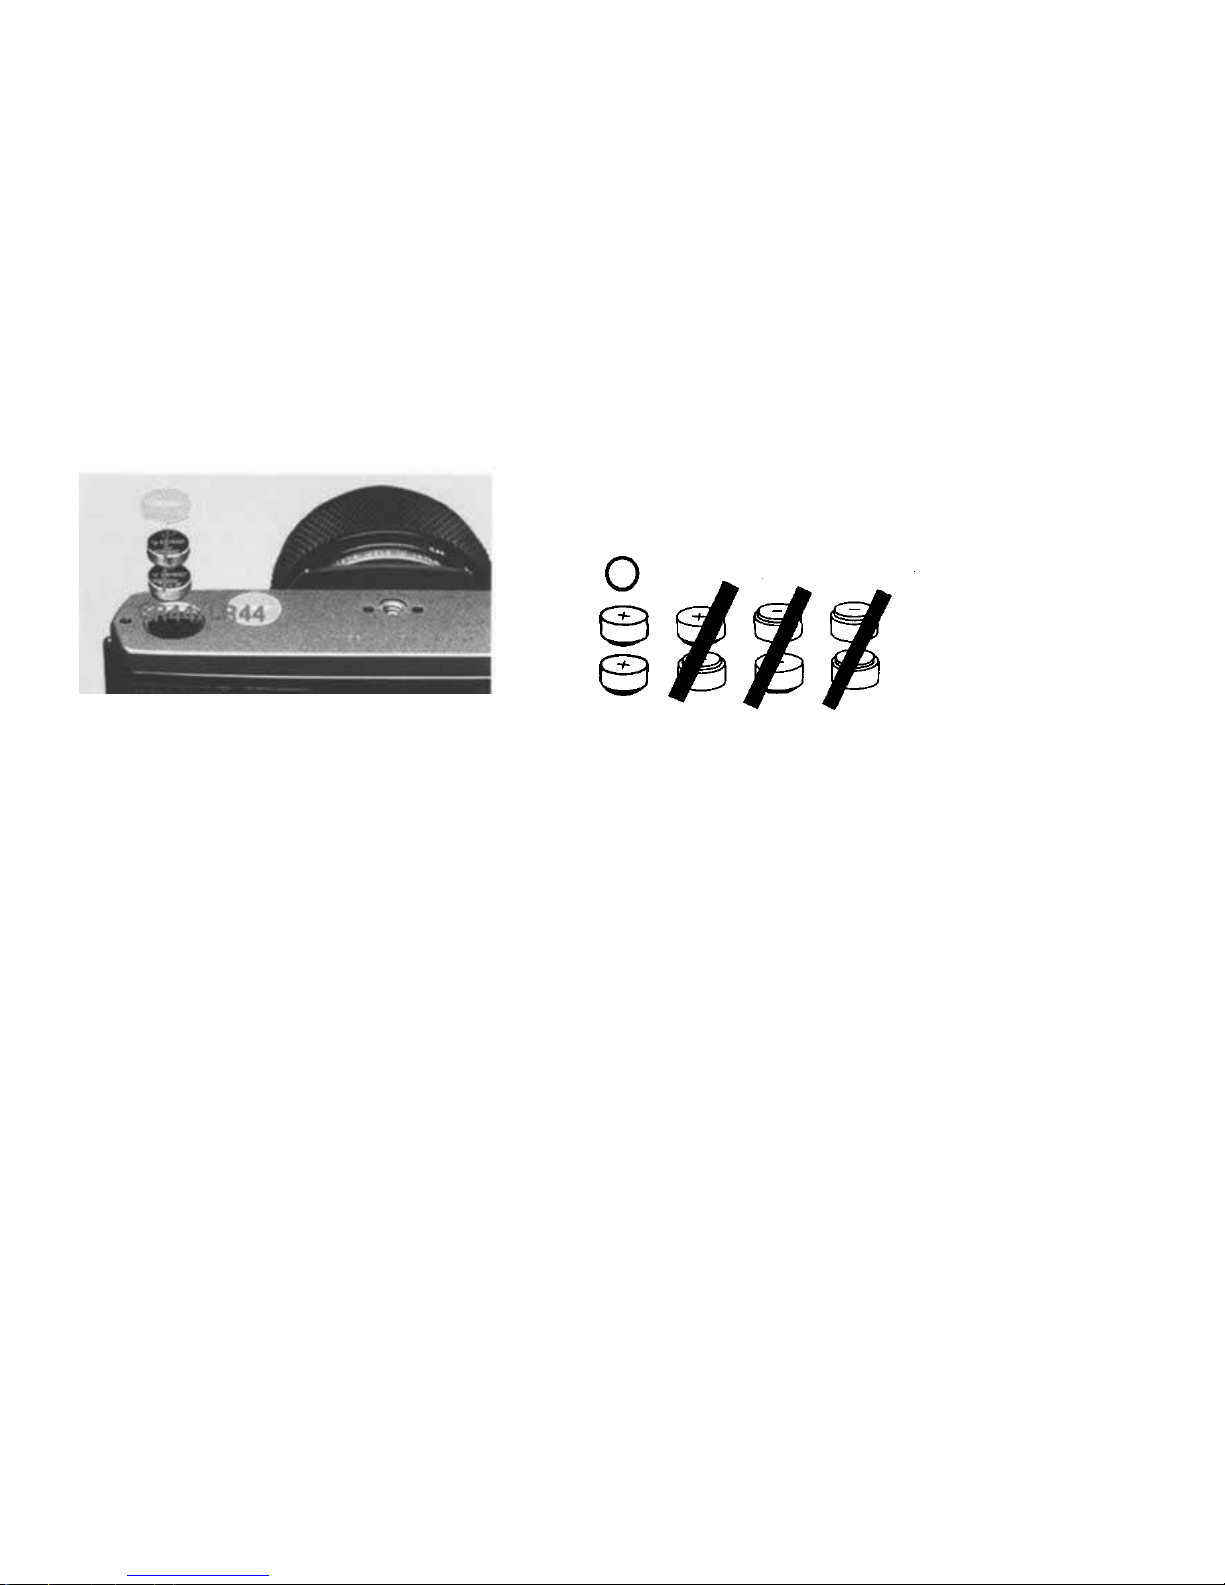
Wipe battery surfaces clean. Make sure that +
signs are facing upwards.
2
Use two SR44 silver oxide or LR44 alkaline manganese
batteries or one CR-1/3N lithium battery.
10
Page 12
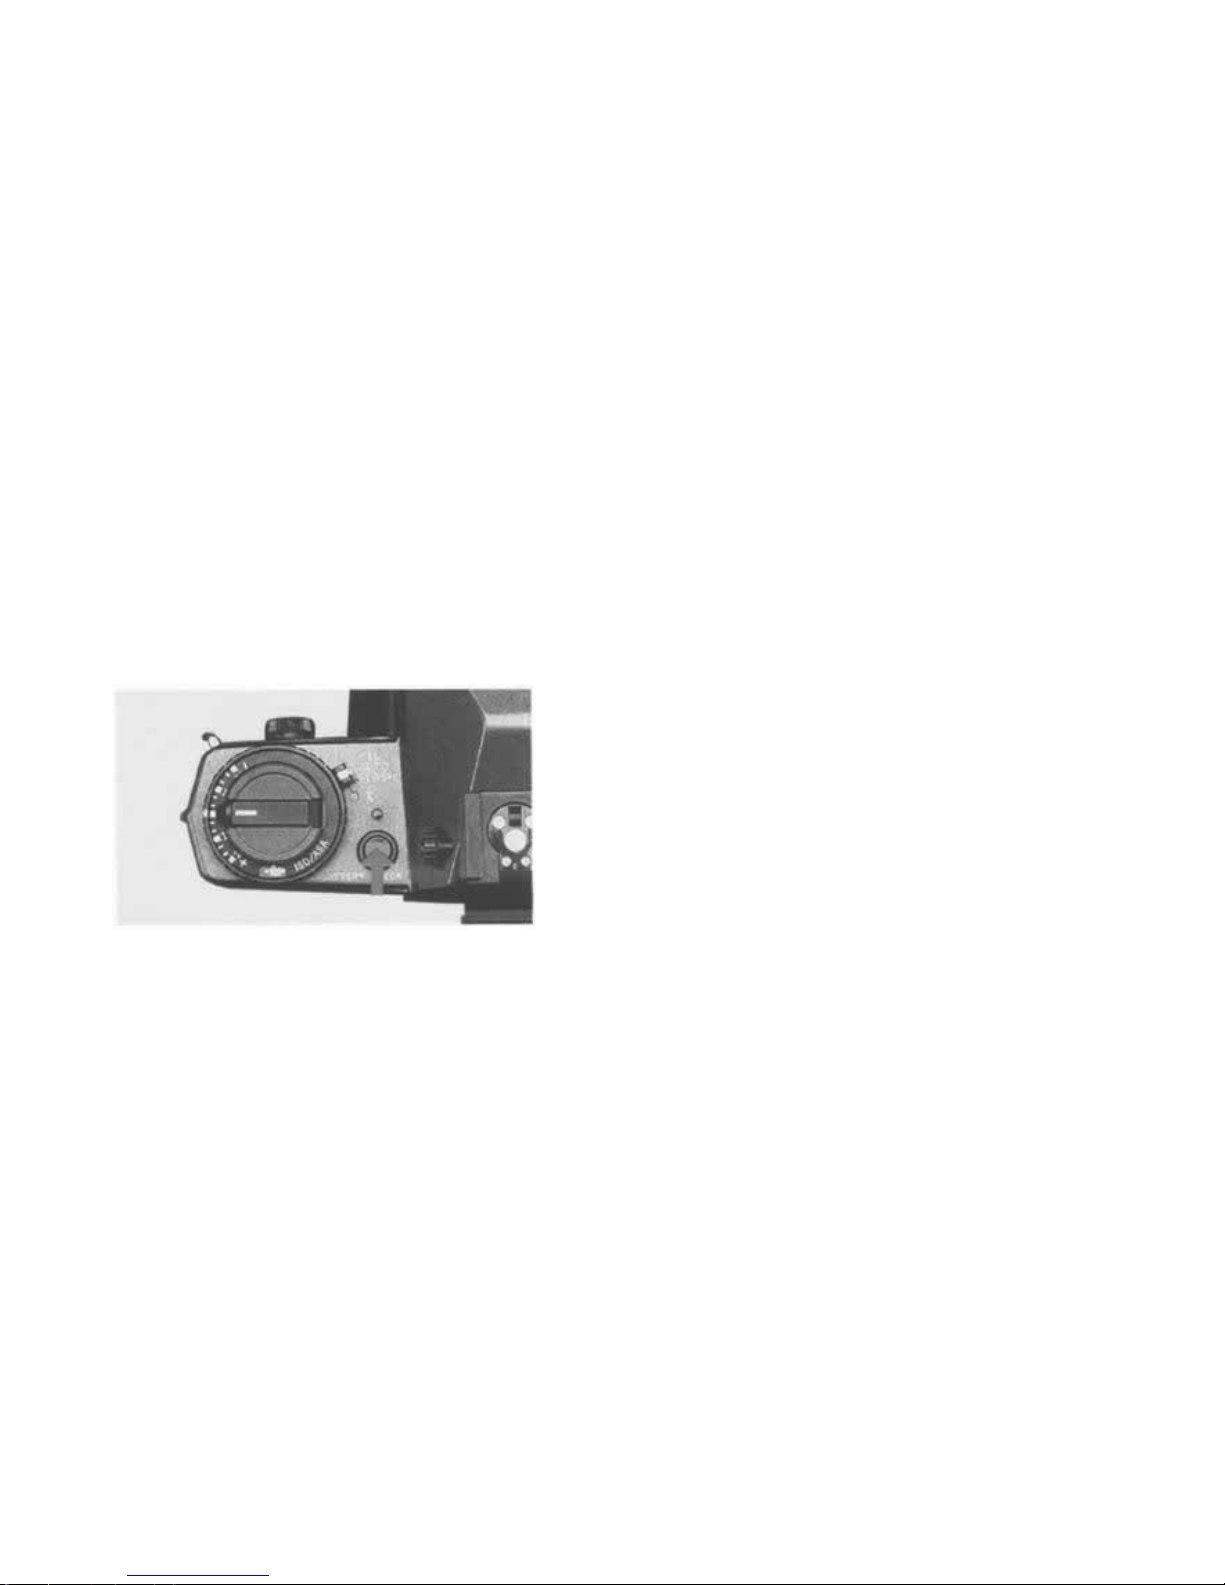
Checking the Batteries
Always check the batteries after inserting new batteries, when shooting in co ld weather, or if the camera has
not been used for a long time.
Press the BATTERY CHECK button.
1
11
Page 13
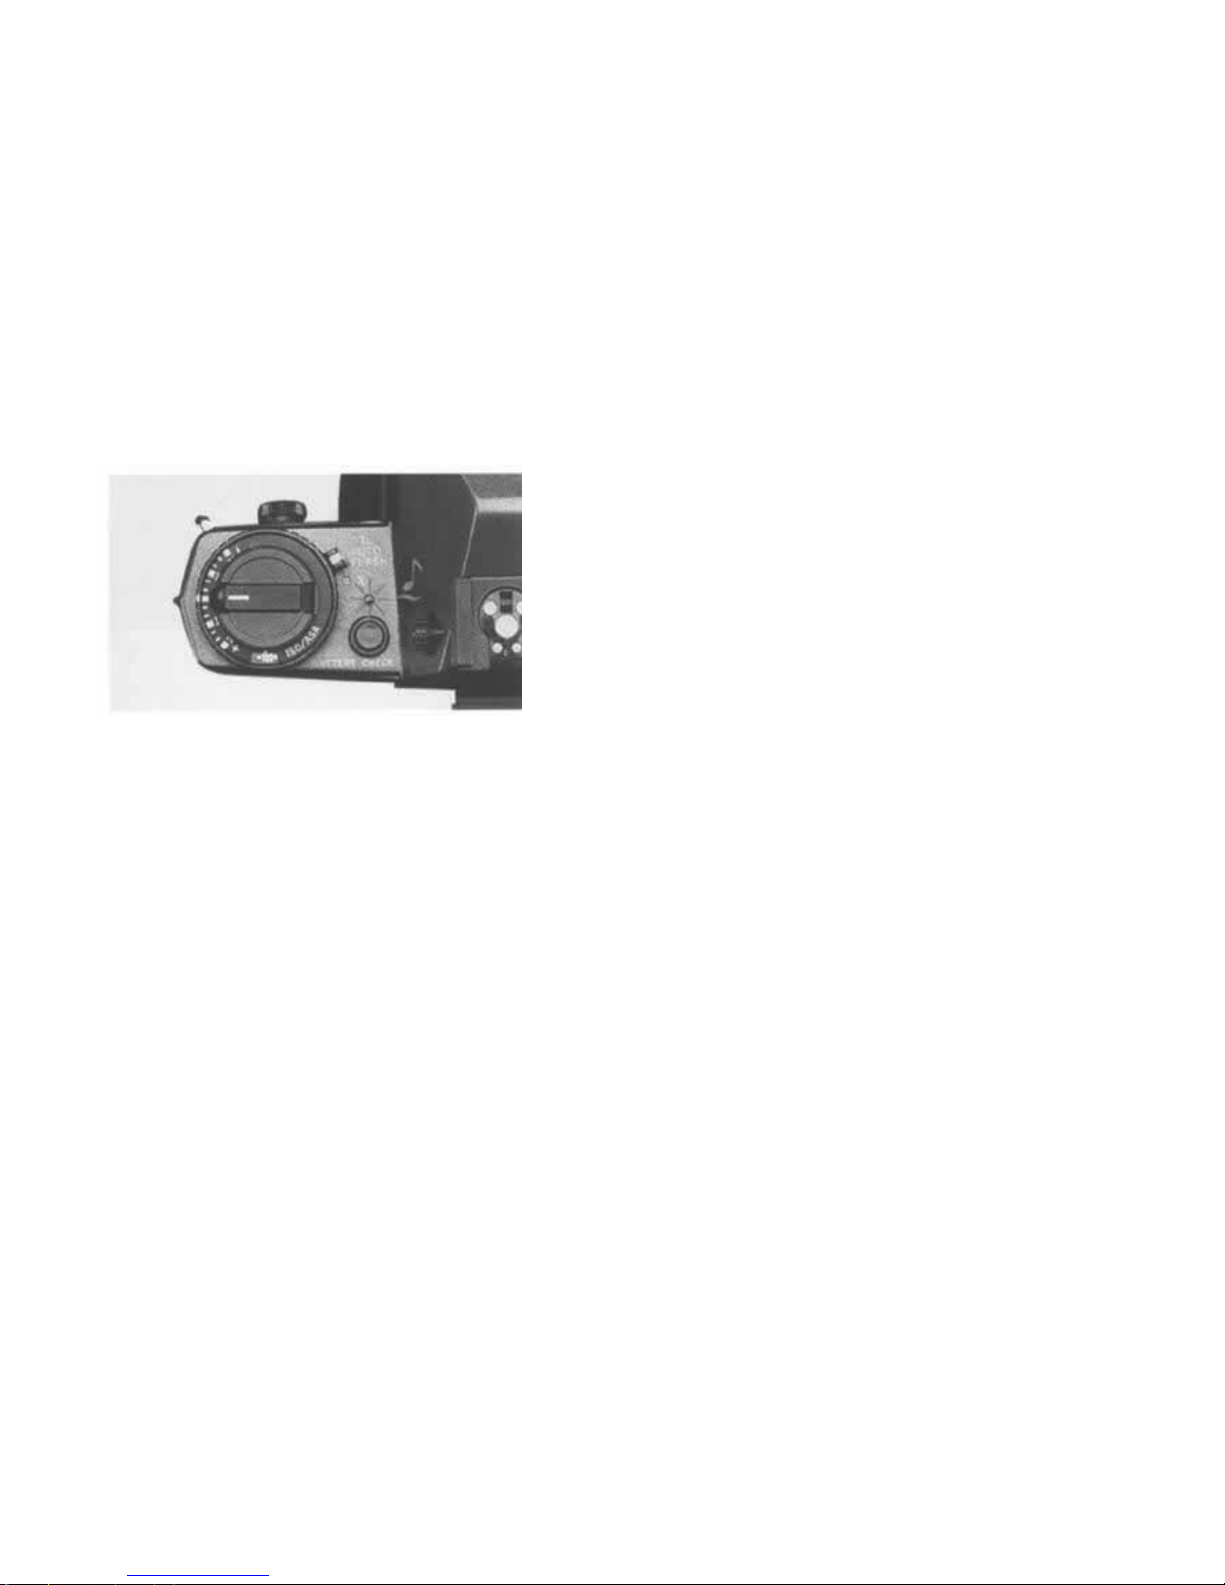
The battery check indicator ligh ts and th e camera beeps to
tell you that the batteries have enough power. As the
battery power weakens, the signals will become
intermittent then vanish completely when they are
exhausted.
2
12
Page 14
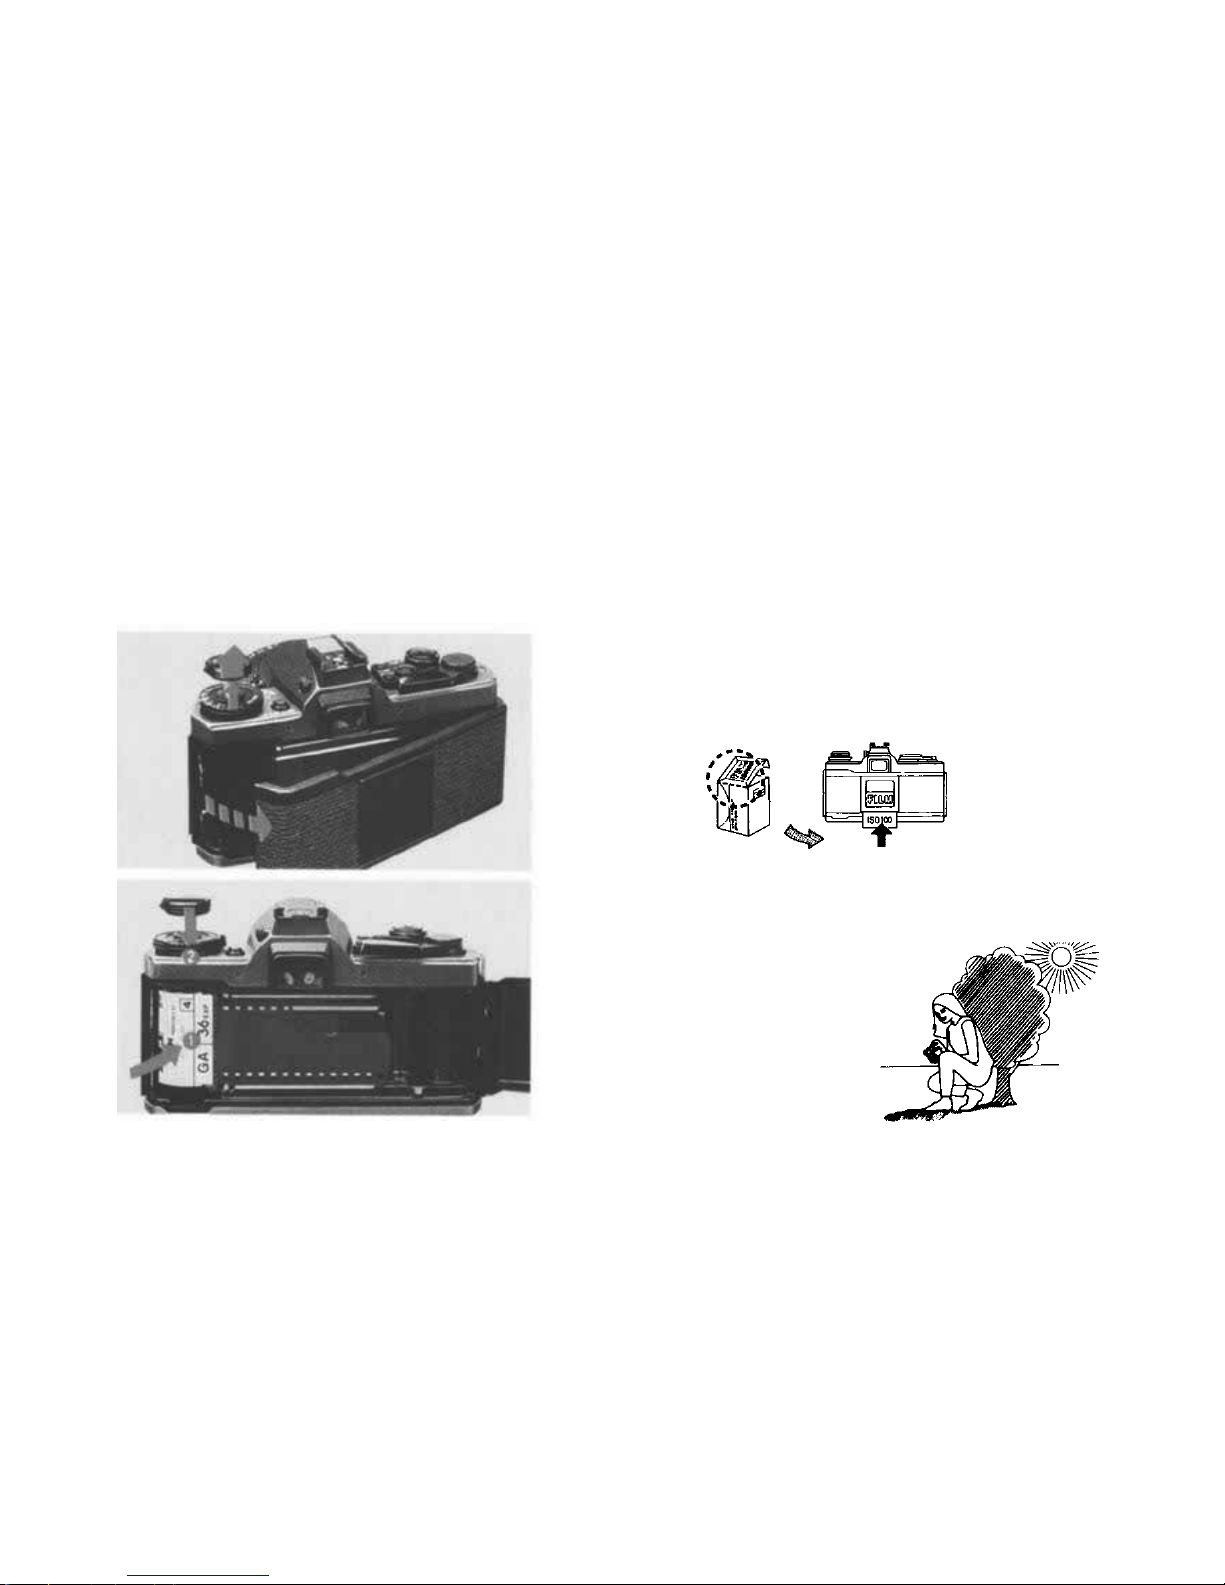
Loading the Film
Pull up o n t he rewind knob t o open the camera back.
Tear off the to p of t he film box a nd insert it into the memo
holder. It wi ll remind you which film you are usin g.
1
Insert the cartridge and push down the film rewind
knob. (Always load the film in the shade.)
2
13
Page 15
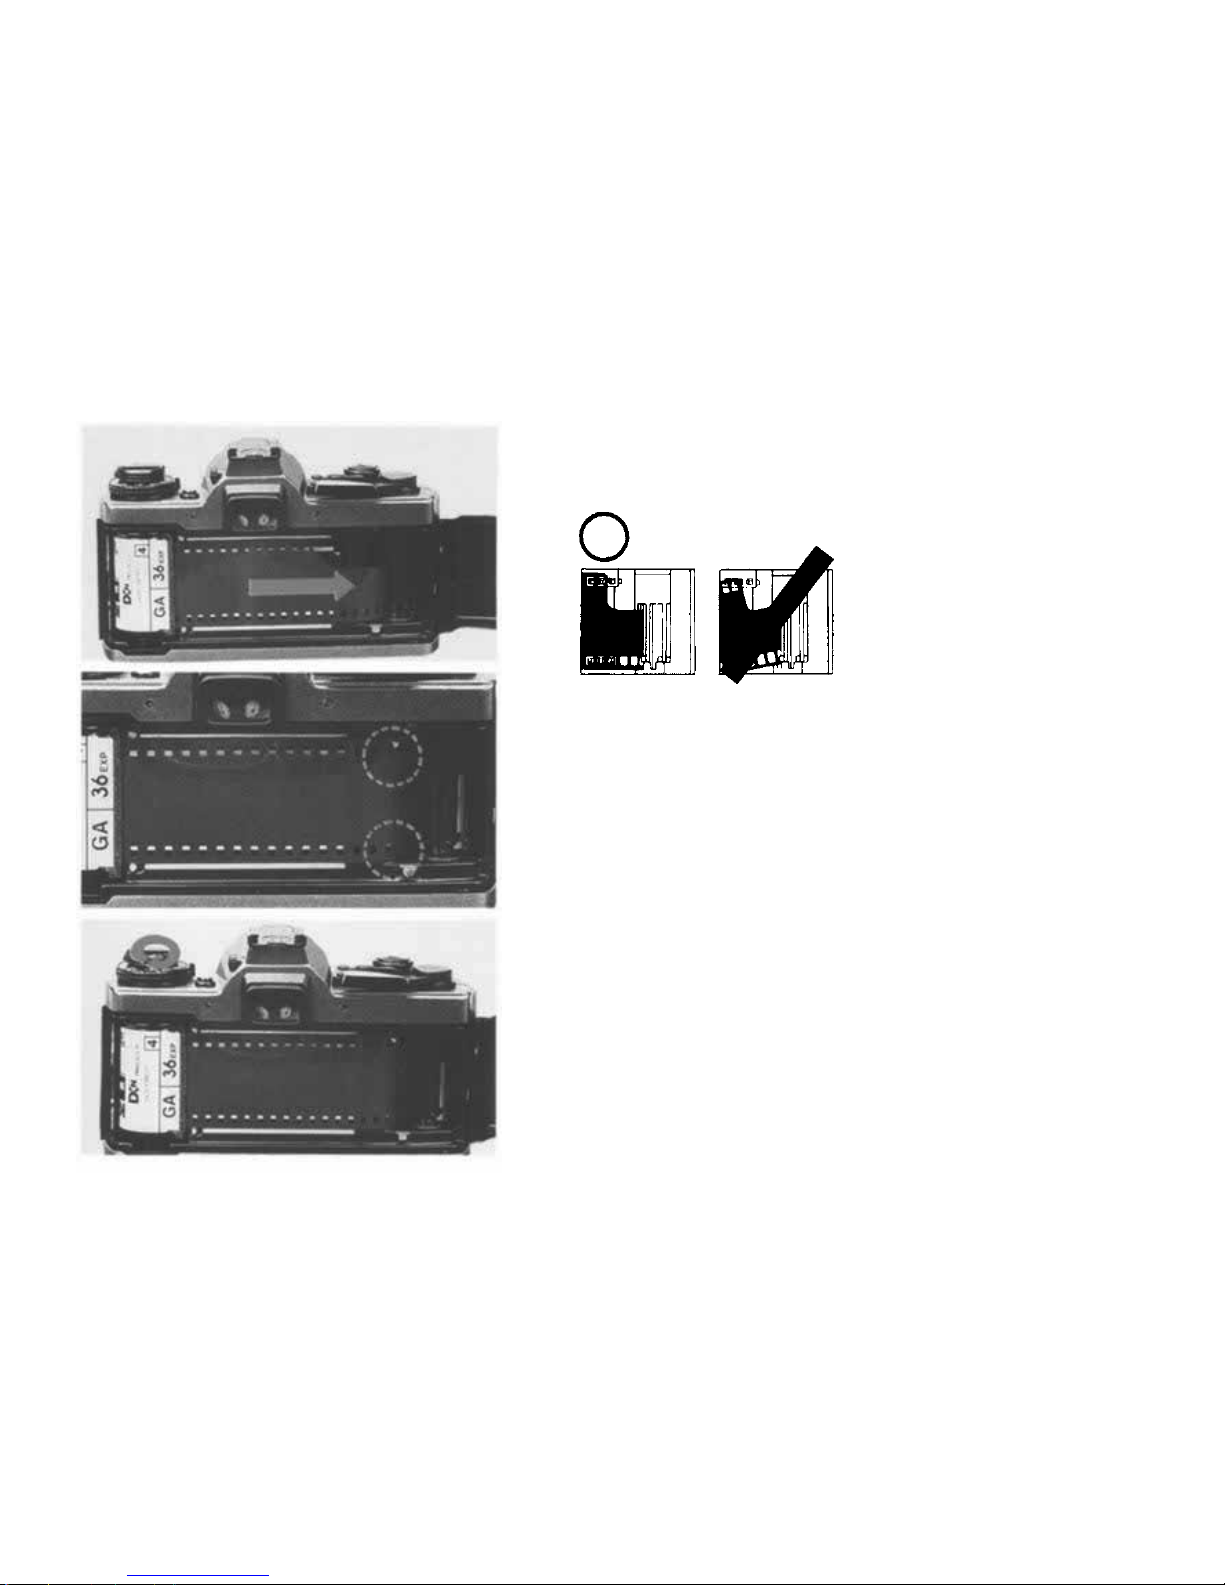
Insert t h e film leader into the take-up spool.
Wind the film and make sure the sprocket teeth catch
both the upper an d lower film perforations.
3
4
Take up the slack by turning the rewind crank
clockwise.
5
14
Page 16
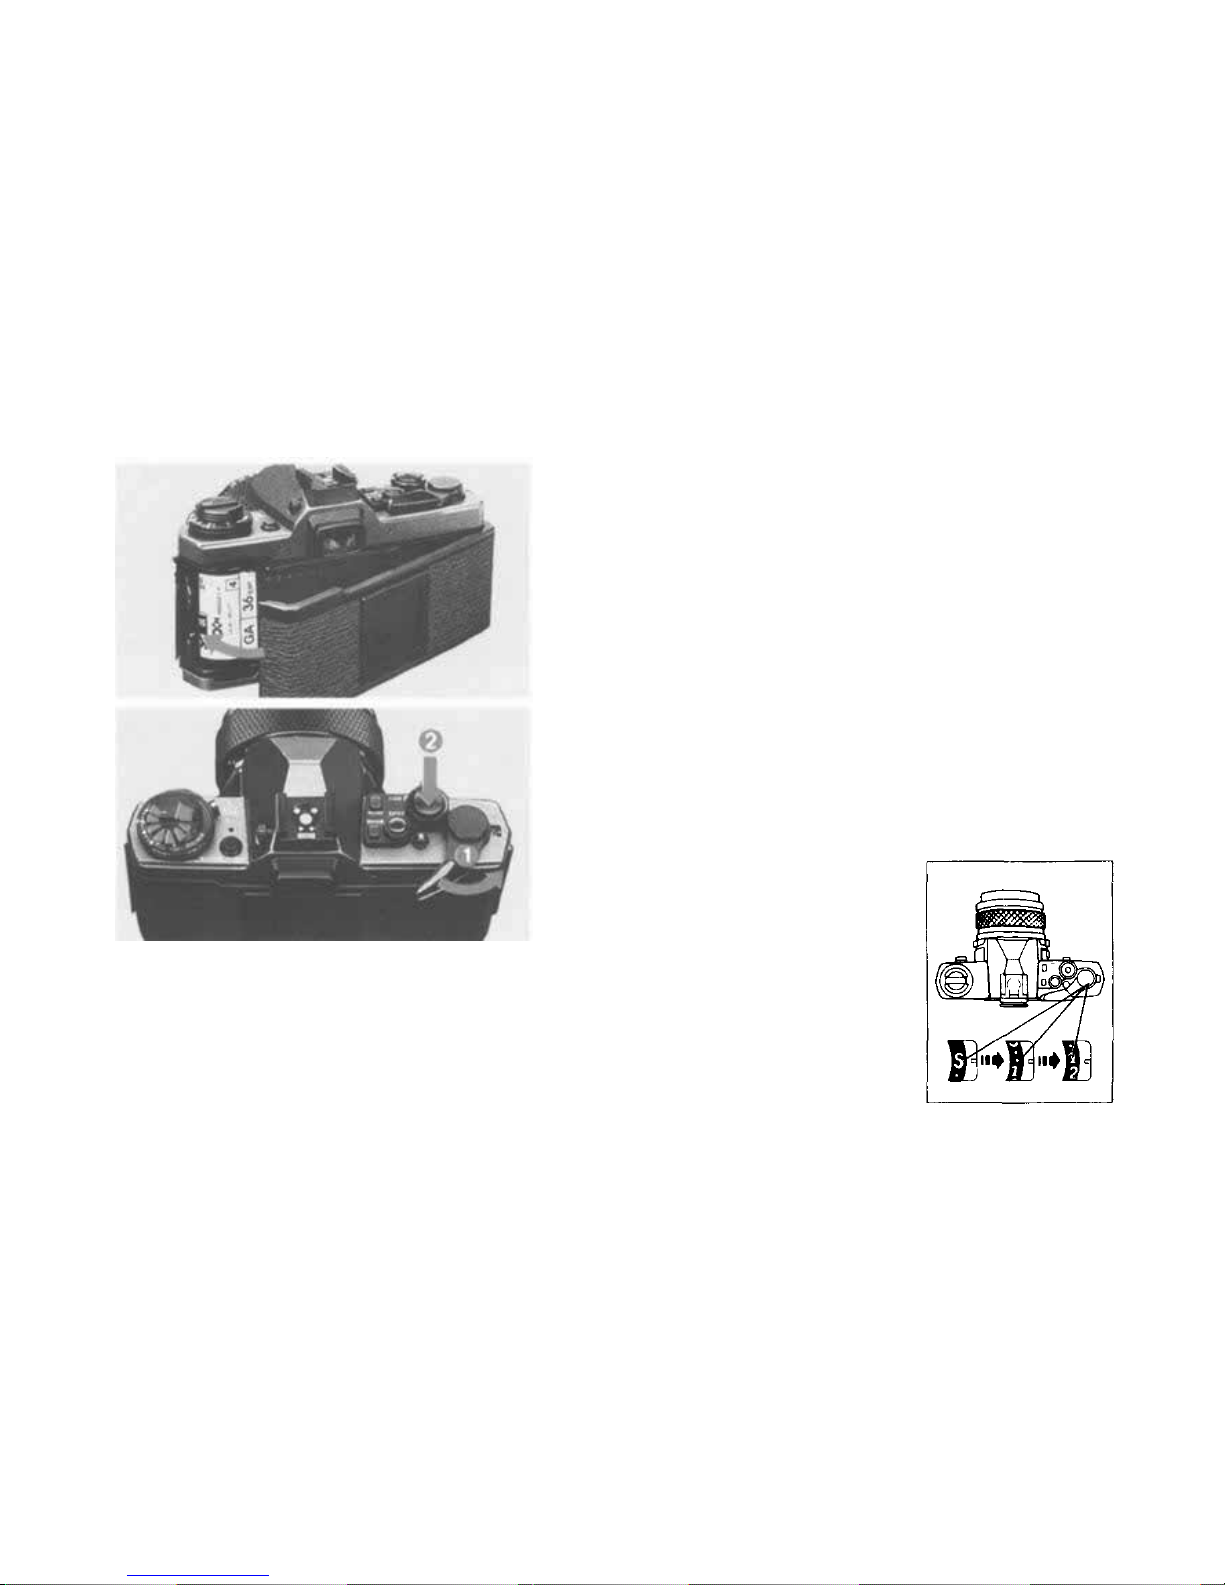
Close th e camera back until it clicks into place.
Face the camera toward light and take two blind shots.
This will bring the film to the first frame.
6
7
15
Page 17
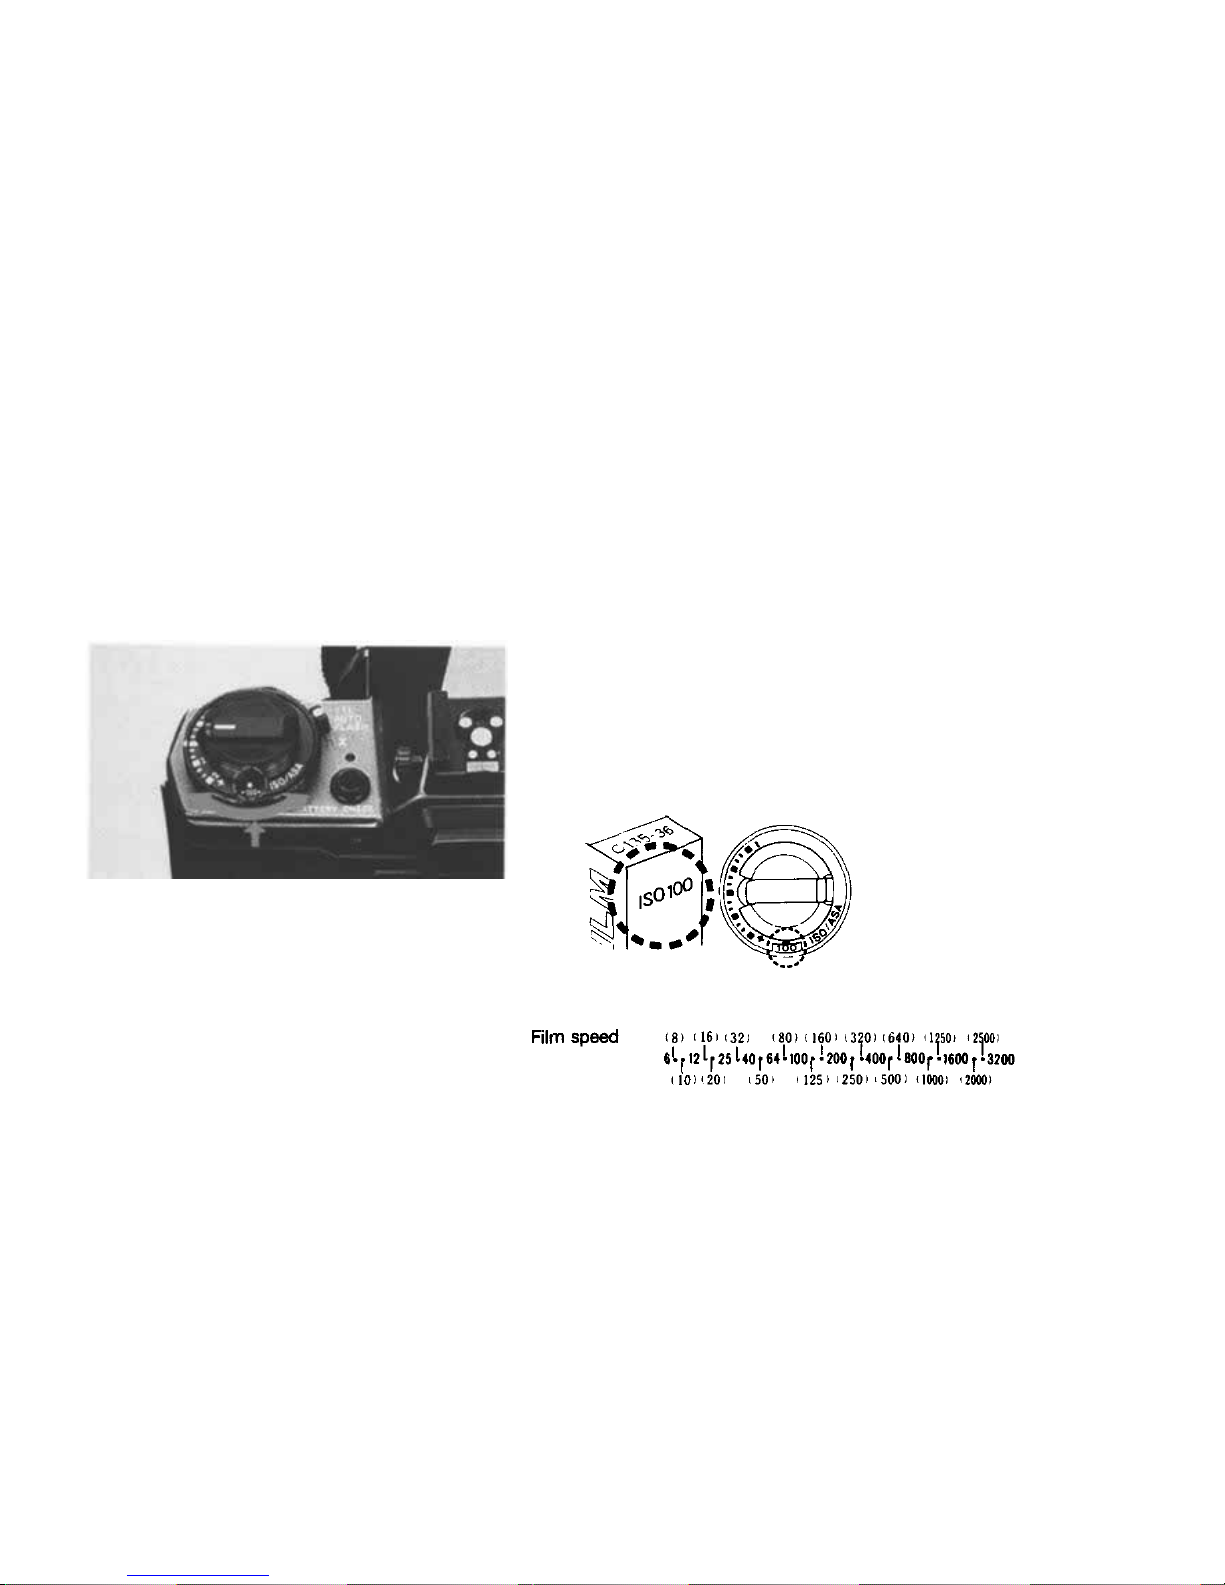
Setting the ISO Film Speed
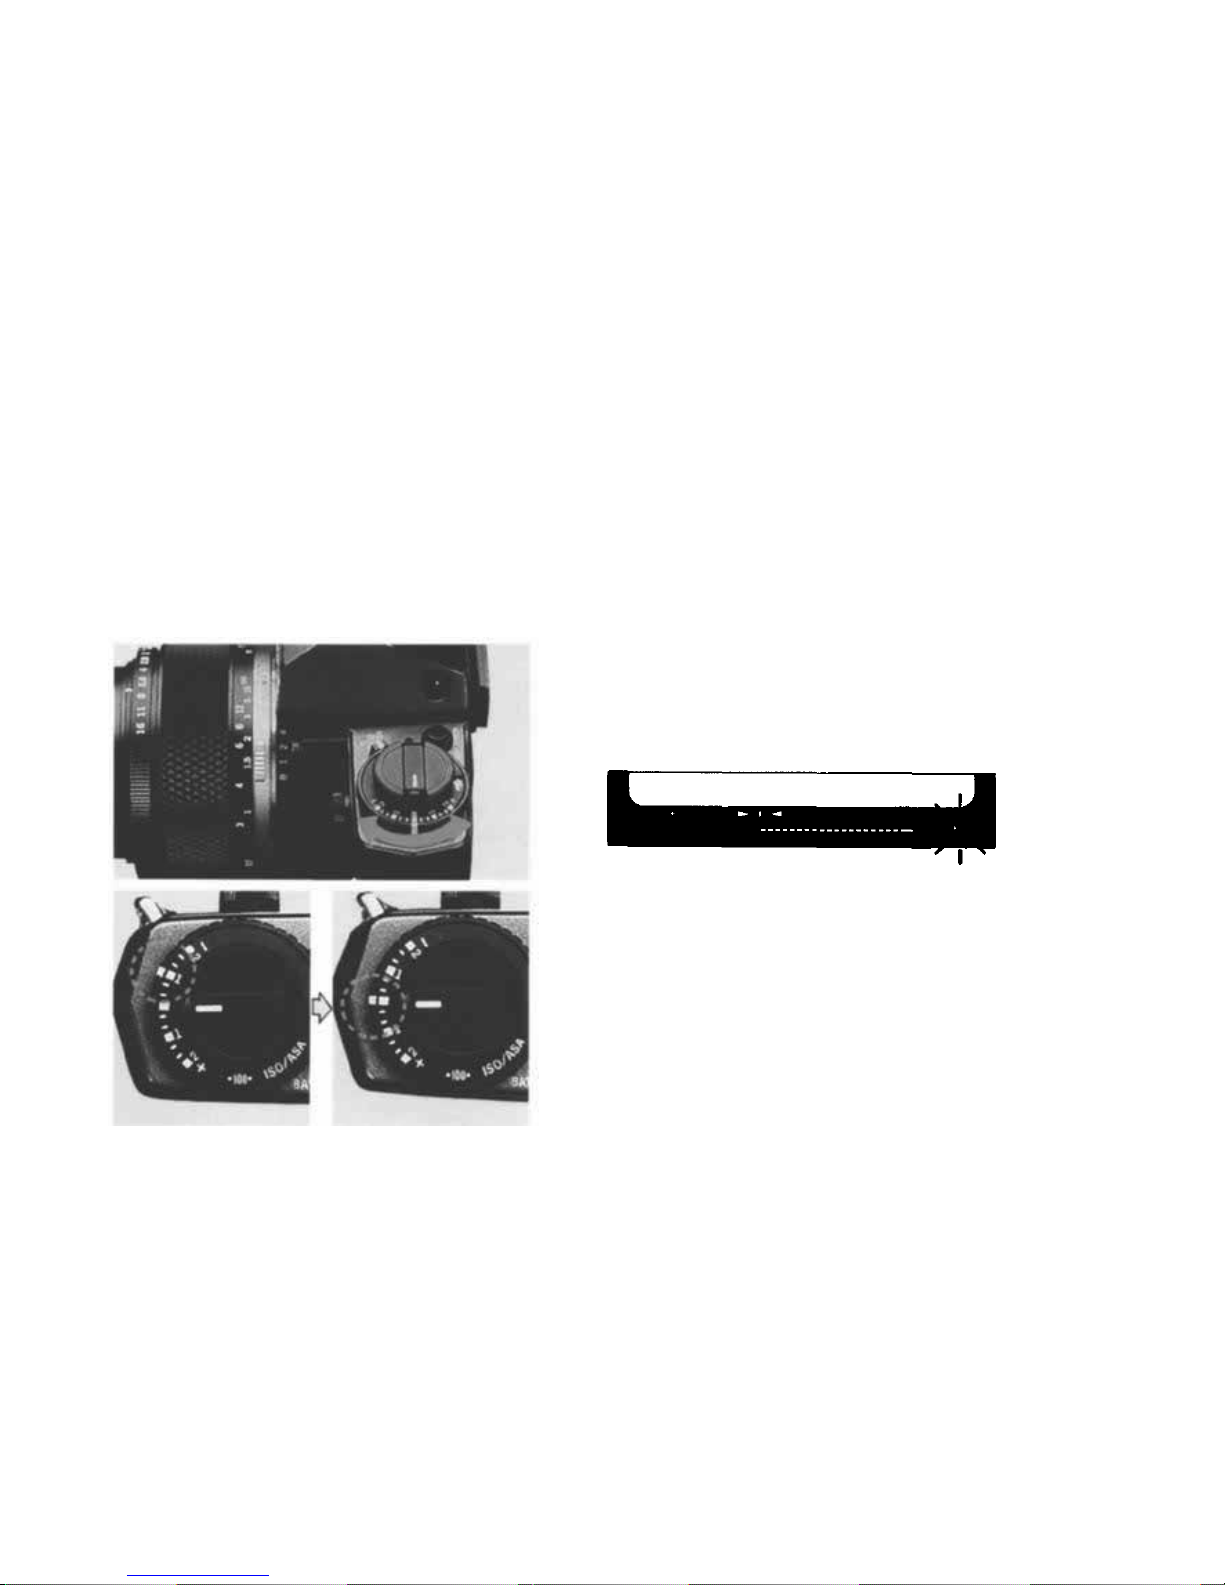
Lift up the outer collar and rotate until th e ISO speed
appears in the window.
1
16
Page 18

Align the exposure line A with the index B.
2
If the exposure compensation dial does not turn to the desired ISO number,
set it once at an intermediate value then repeat the procedure.
17
Page 19

< Taking Photographs (I) >
— Center-Weighted Average Light Metering —
The OM-3Ti's exposure mode employs center-weighted average light metering. This meets a wide range of
shooting requirements.
18
Page 20
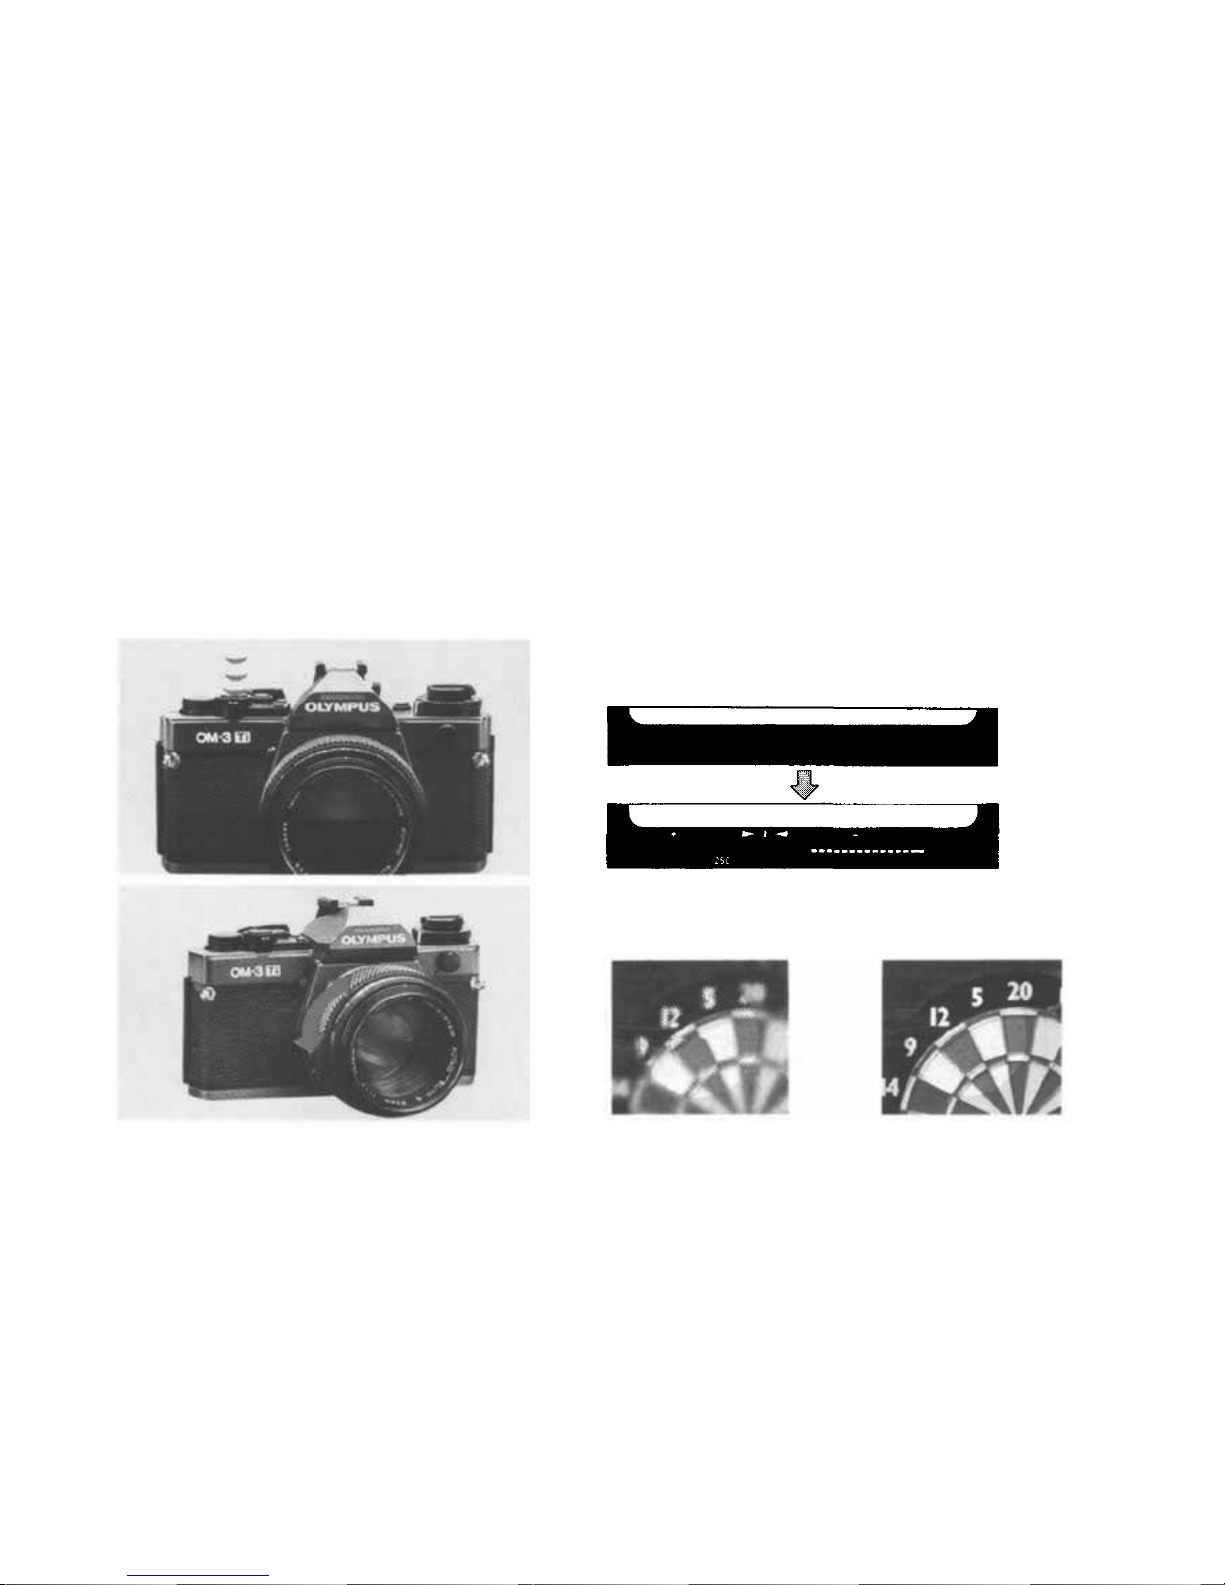
Center-Weighted Average Light Metering
Press the shutter release lightly to activate the vie wfinder
display.
1
Focus on your subject.
2
19
Page 21
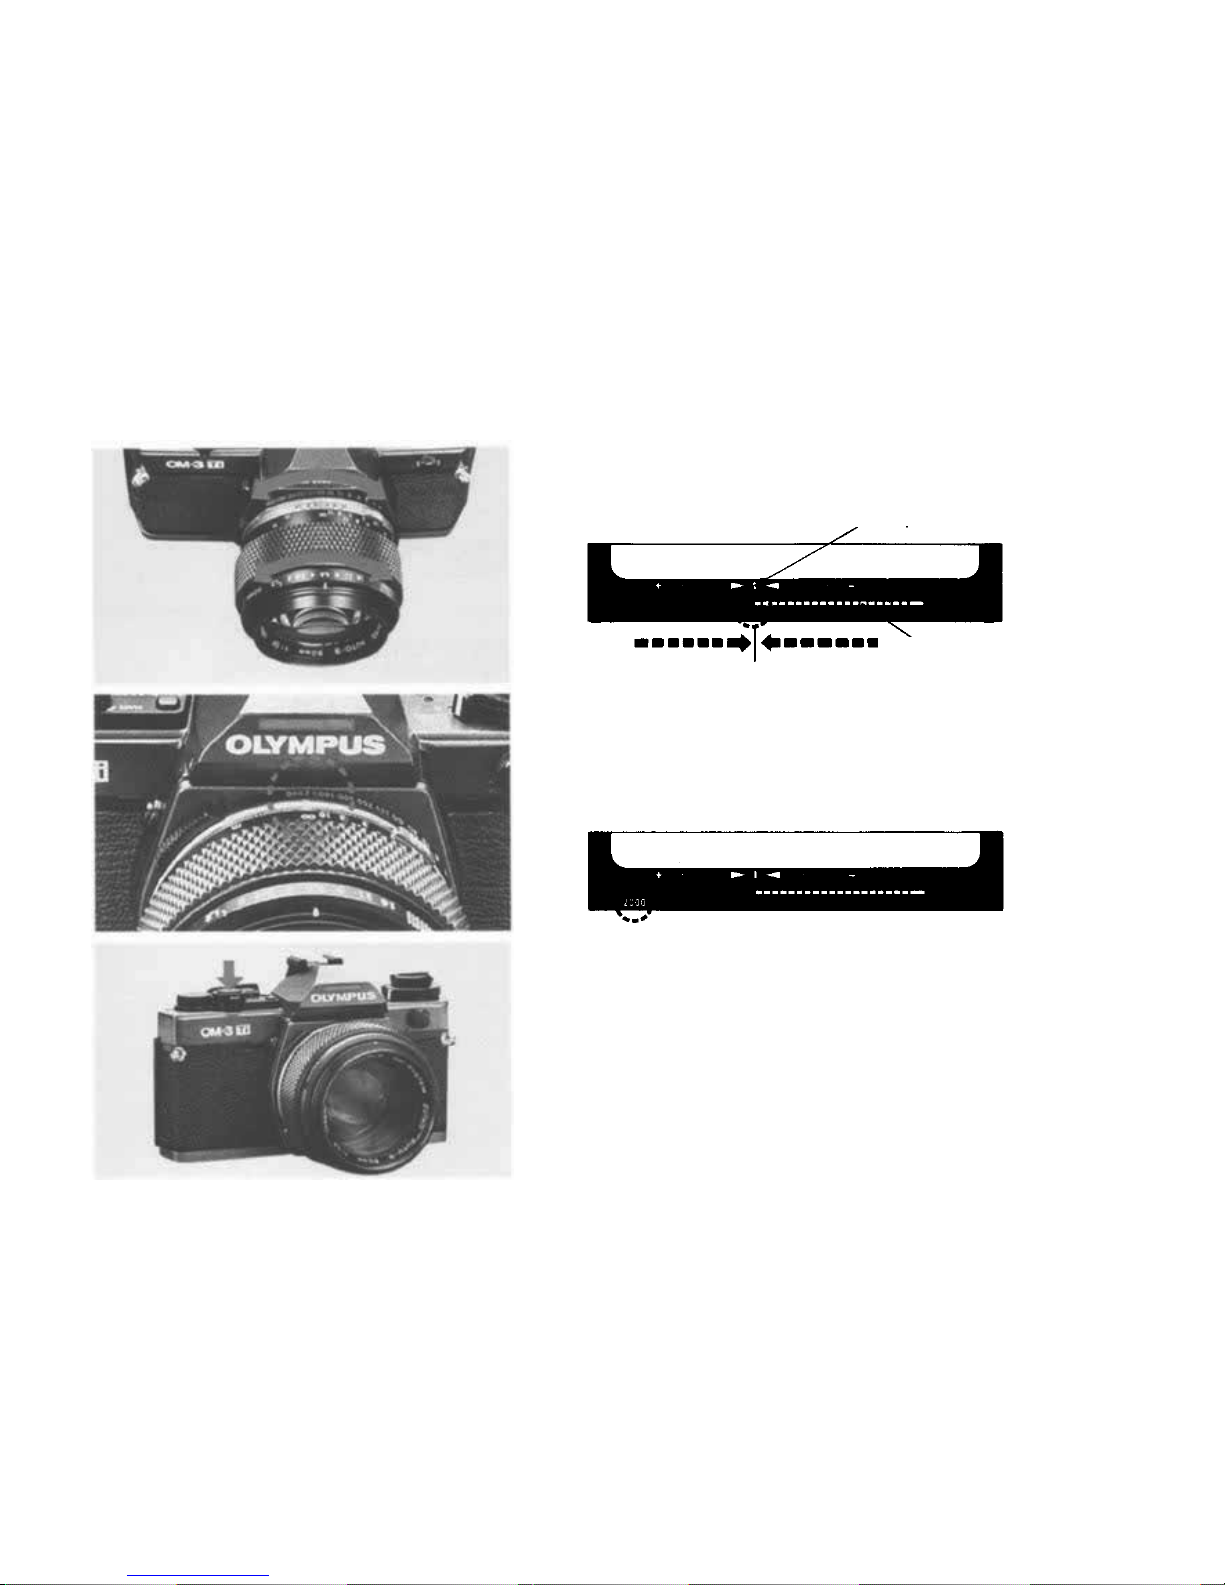
Set the bar graph tip to the fixed point between the a rro ws
by adjusting the aperture and/or shutter speed rings
Fixed point
3
Bar display
The shutter speed you have set will be displayed in the
viewfinder.
4
Compose th e s ho t and press the shutter release.
5
20
Page 22
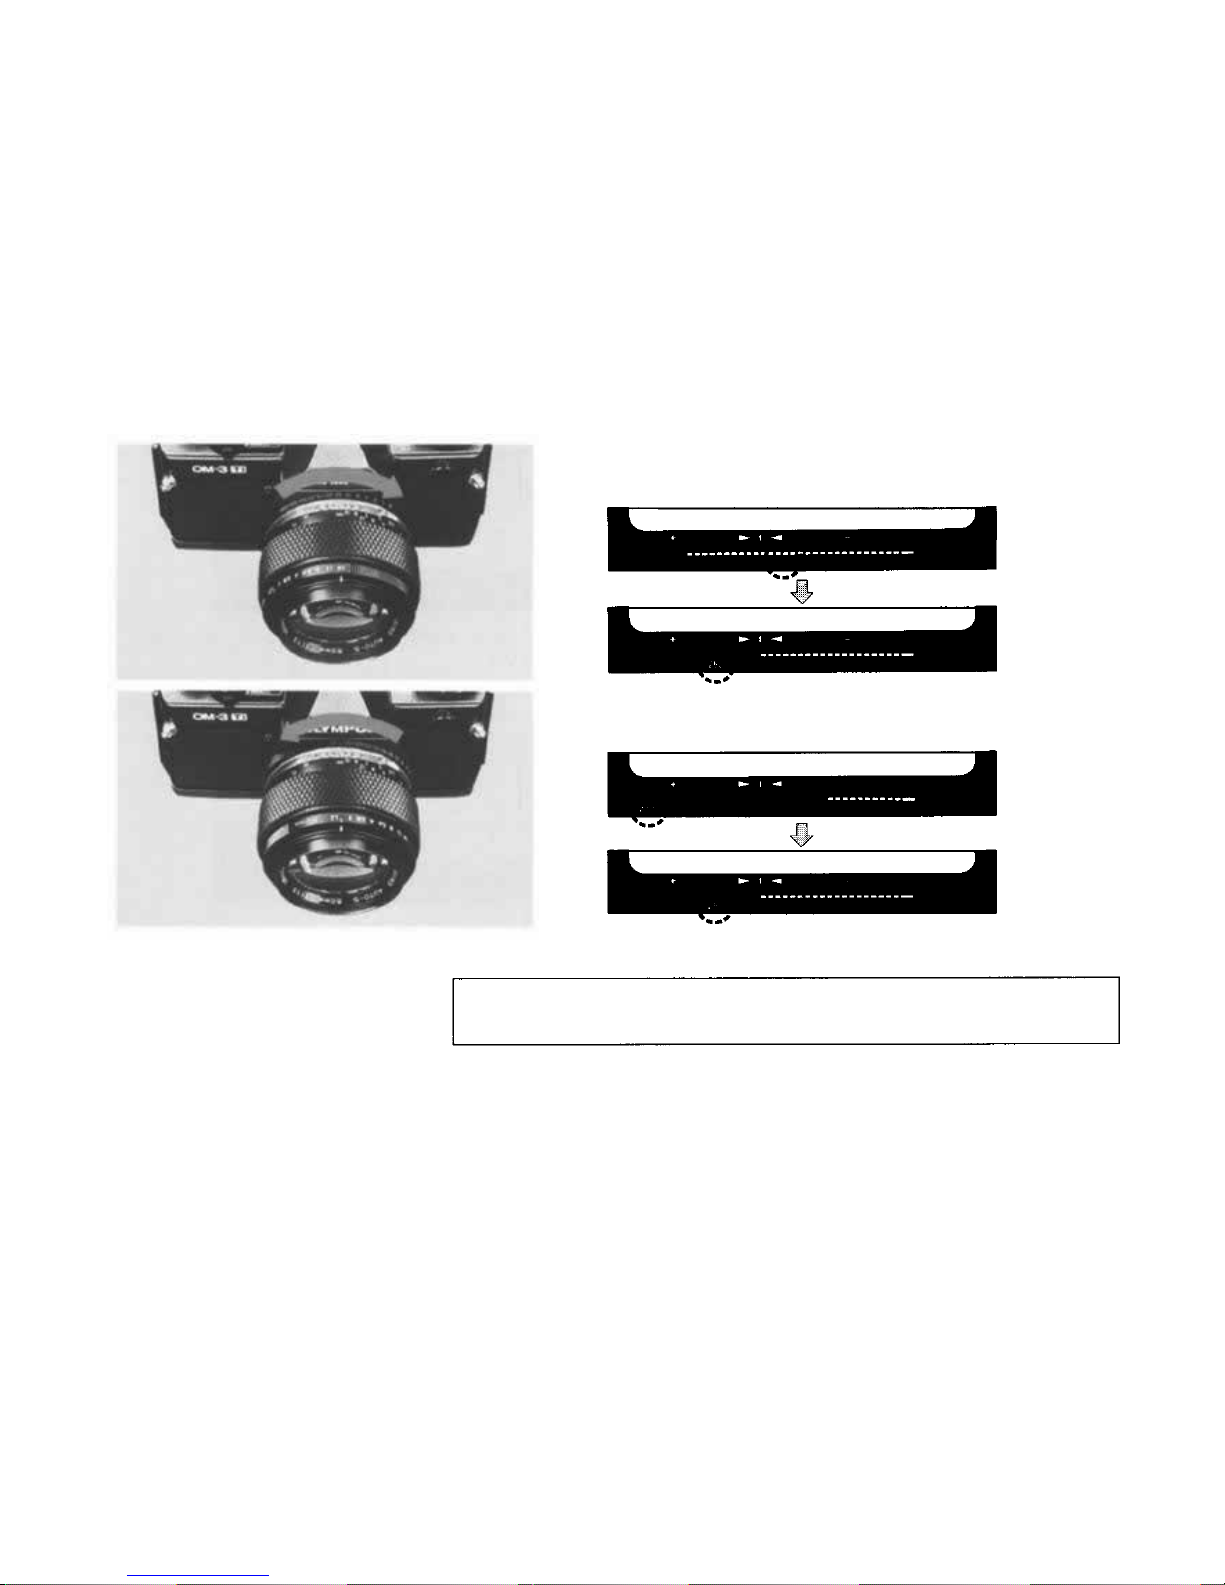
When the subject is too bright, select a faster shutter
speed.
When the subject is too dark, select a slower shutter
speed.
The viewfinder display wil l go out af t e r about 60 seconds. To turn the display back on
again, touch the shutter release button lightly.
21
Page 23
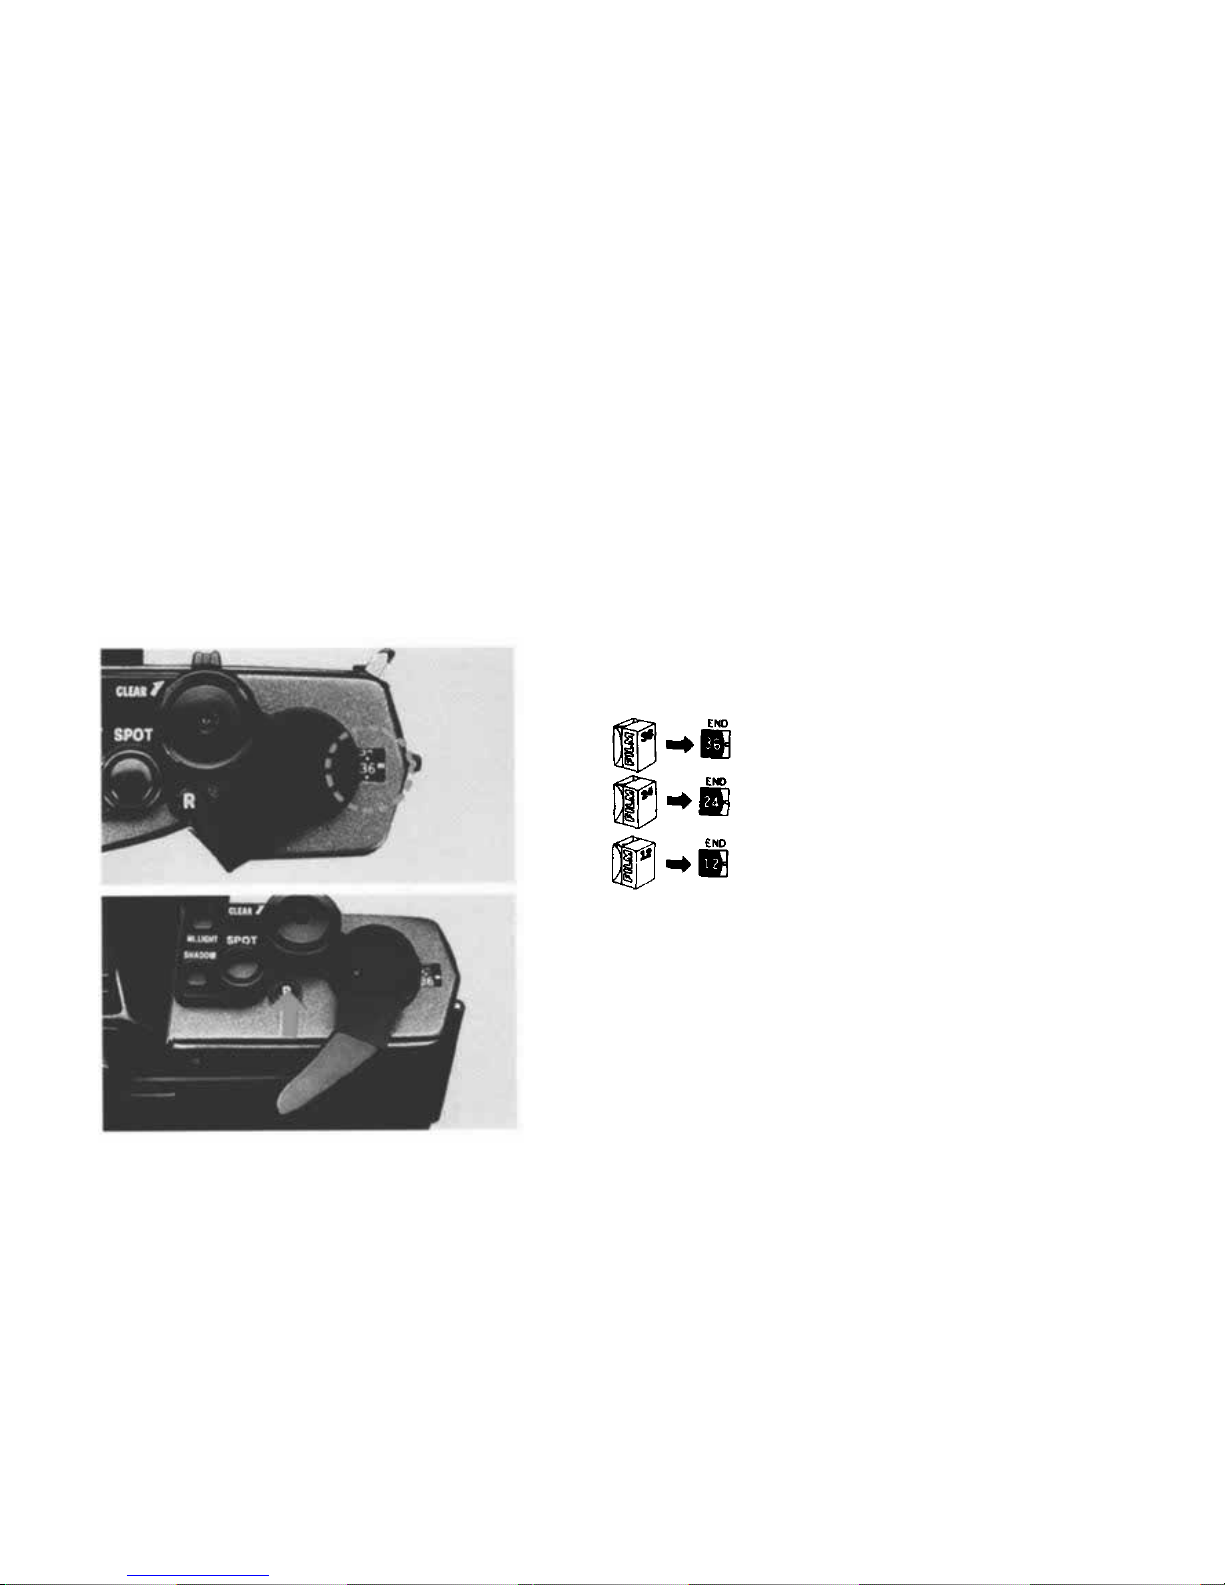
Rewinding the Film
When the exposure counter indicates the end of your
roll o f film.
1
Push the "R" Rewind Release Button.
2
22
Page 24
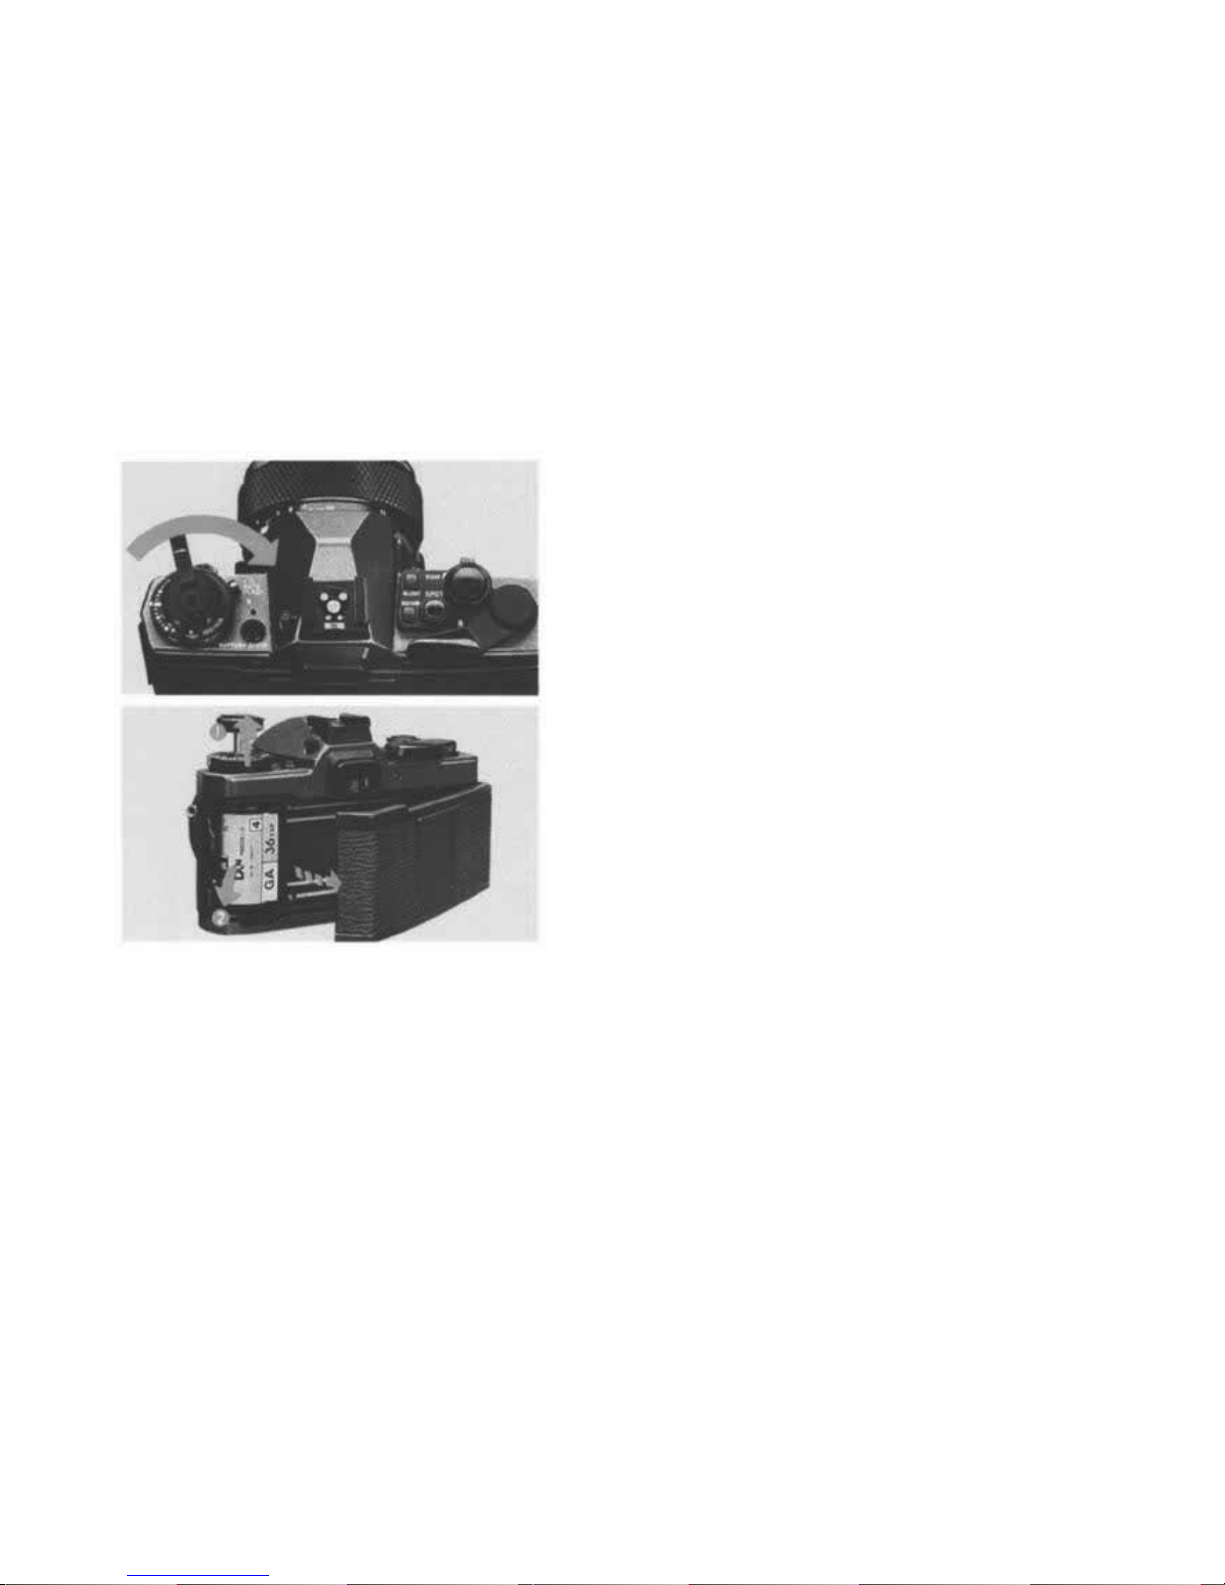
Fold o ut the rewind cran k and w ind it until the f ilm
tension is released.
Open the camera back by pulling up on the rewind
knob and remove the film.
3
4
23
Page 25

< Taking Photographs (II) >
— Spot Metering —
The spot metering system of the OM-3Ti enables you to control the
exposure as you like.
It insures perfect
exposure of backlighted and high-contrast subjects and expands shooting possibilities for more creative
photography.
24
Page 26
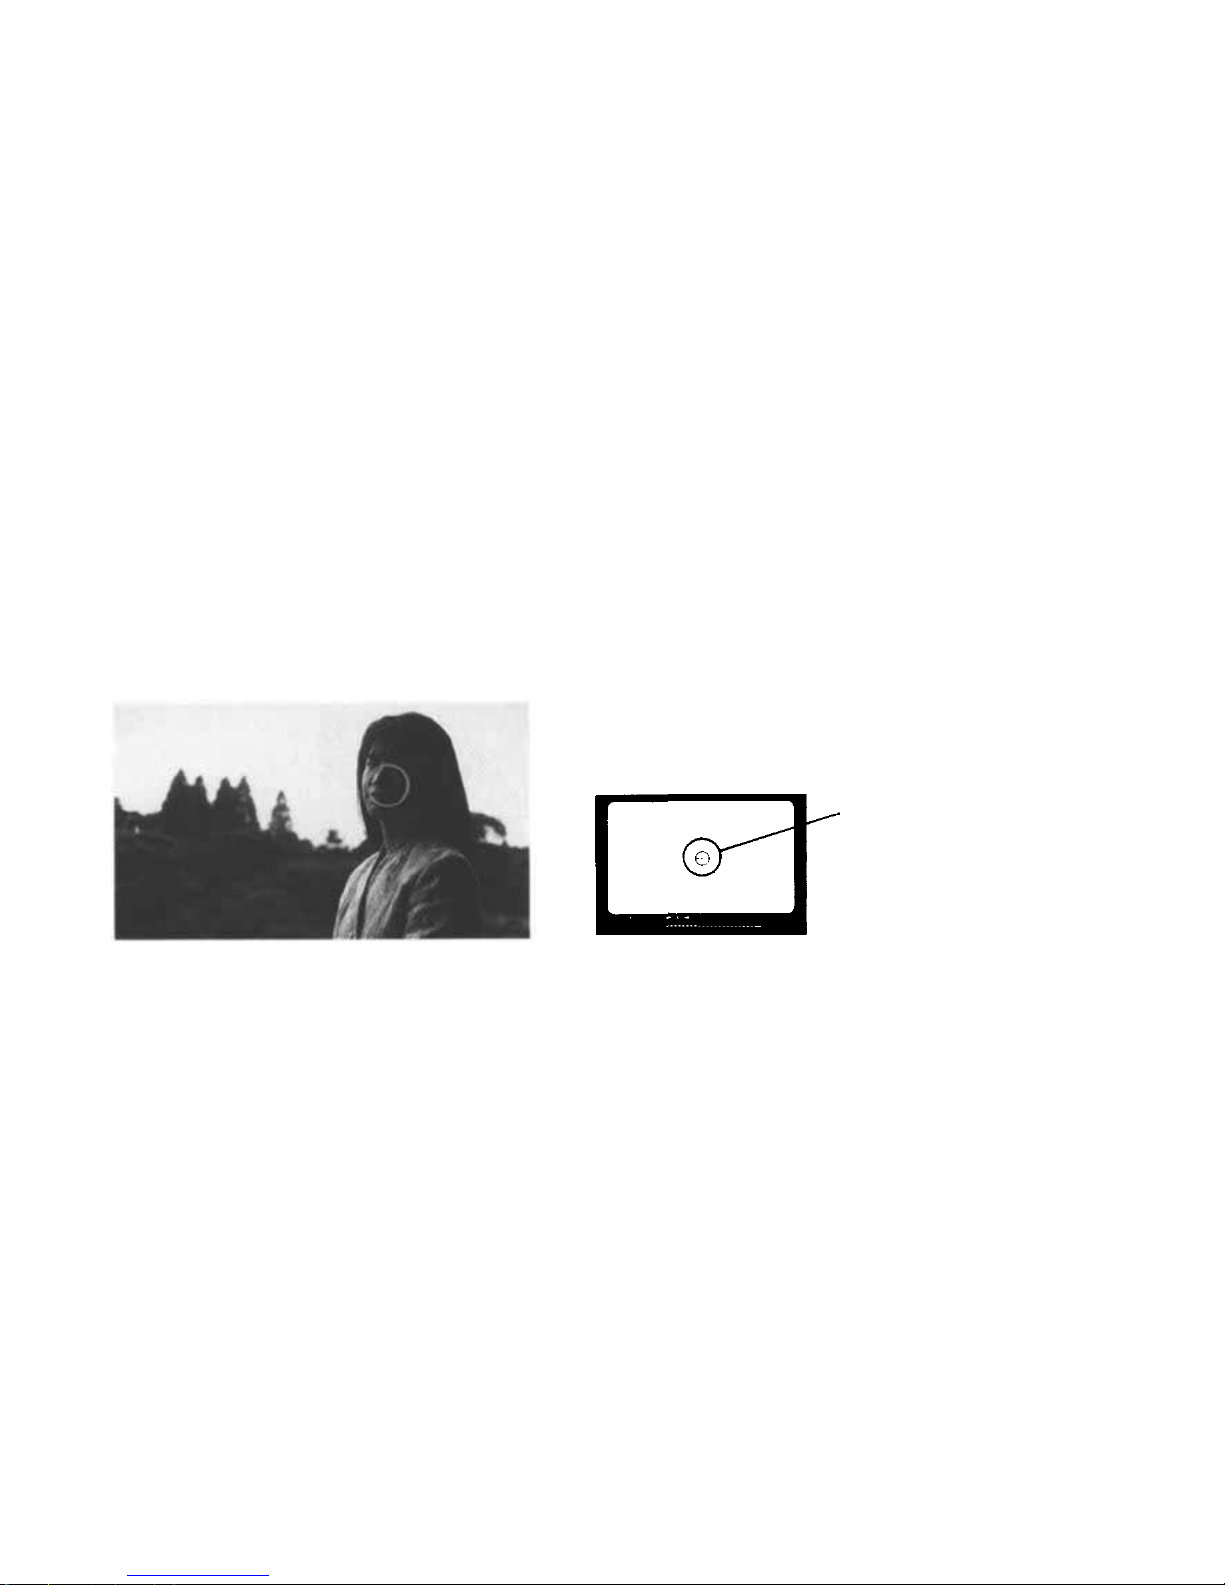
How to Use Spot Metering
Reference
P 57-62
Align the microprism area with the area you want to
measure. ( The spot metering range is outlined by the
outer edge o f the microprism.)
1
Spot metering range
25
Page 27
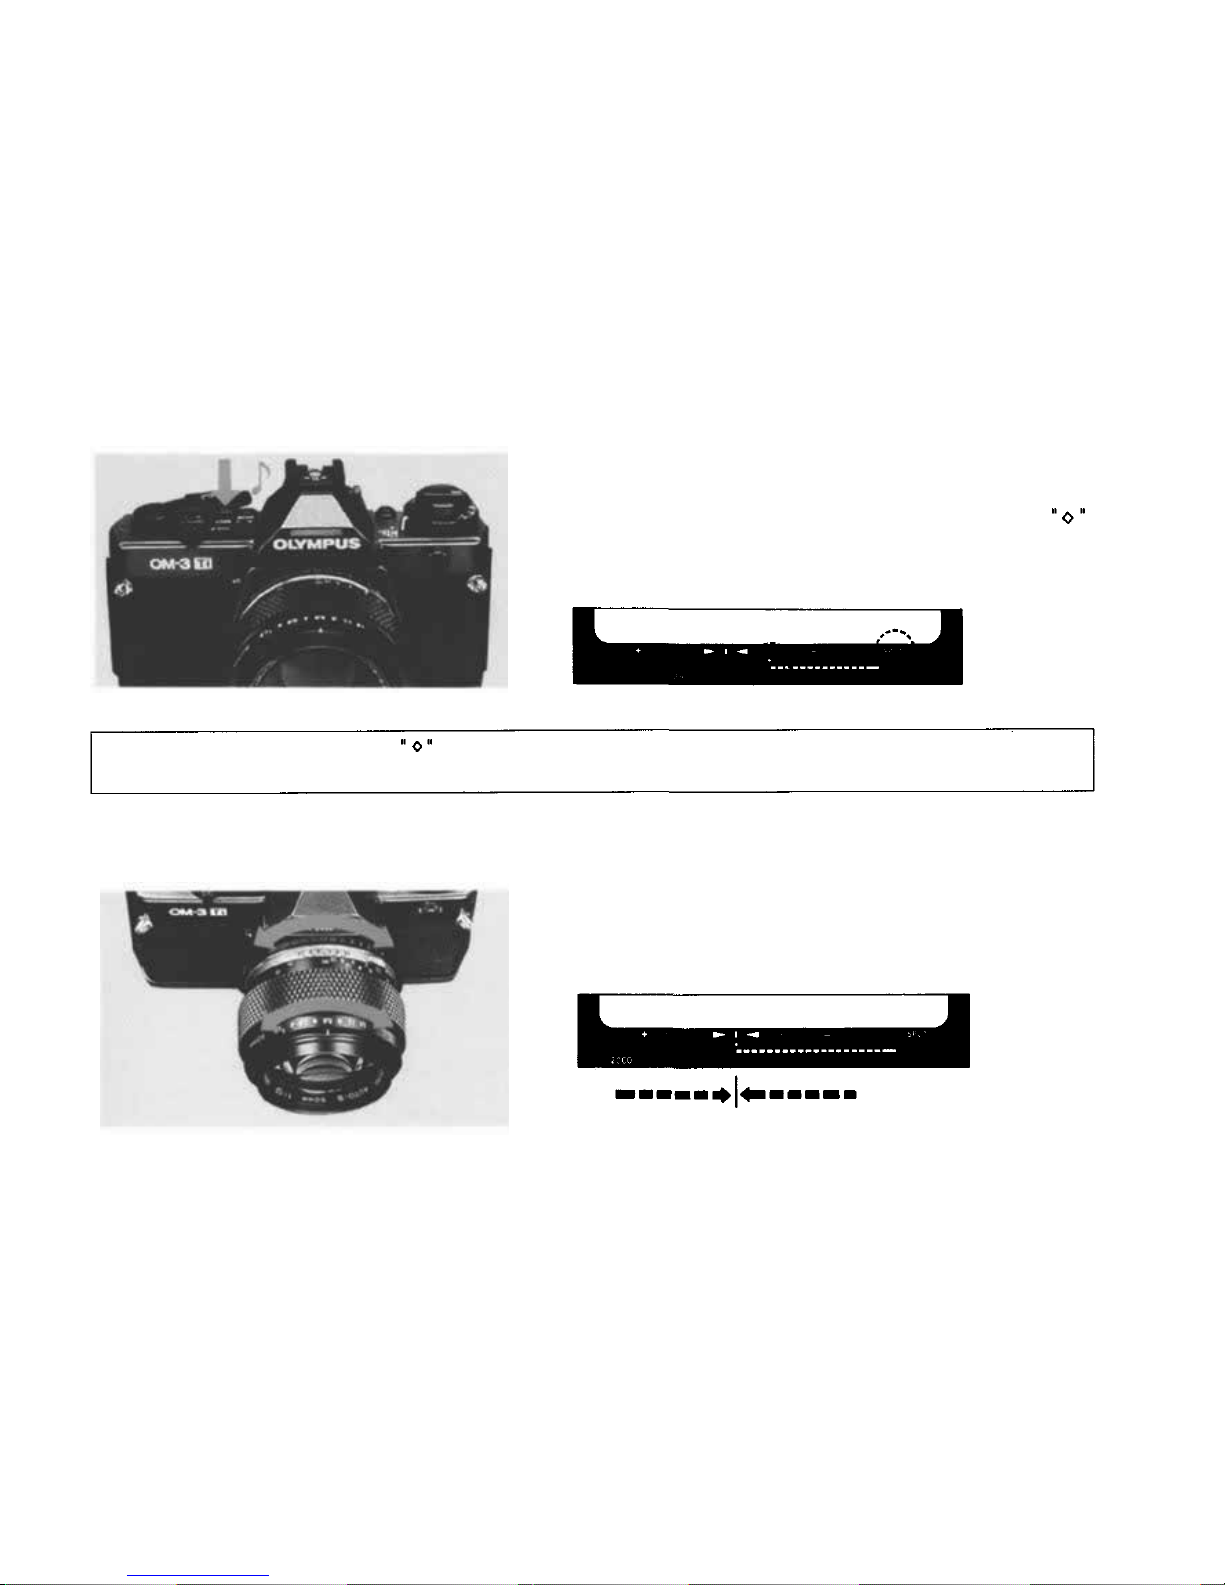
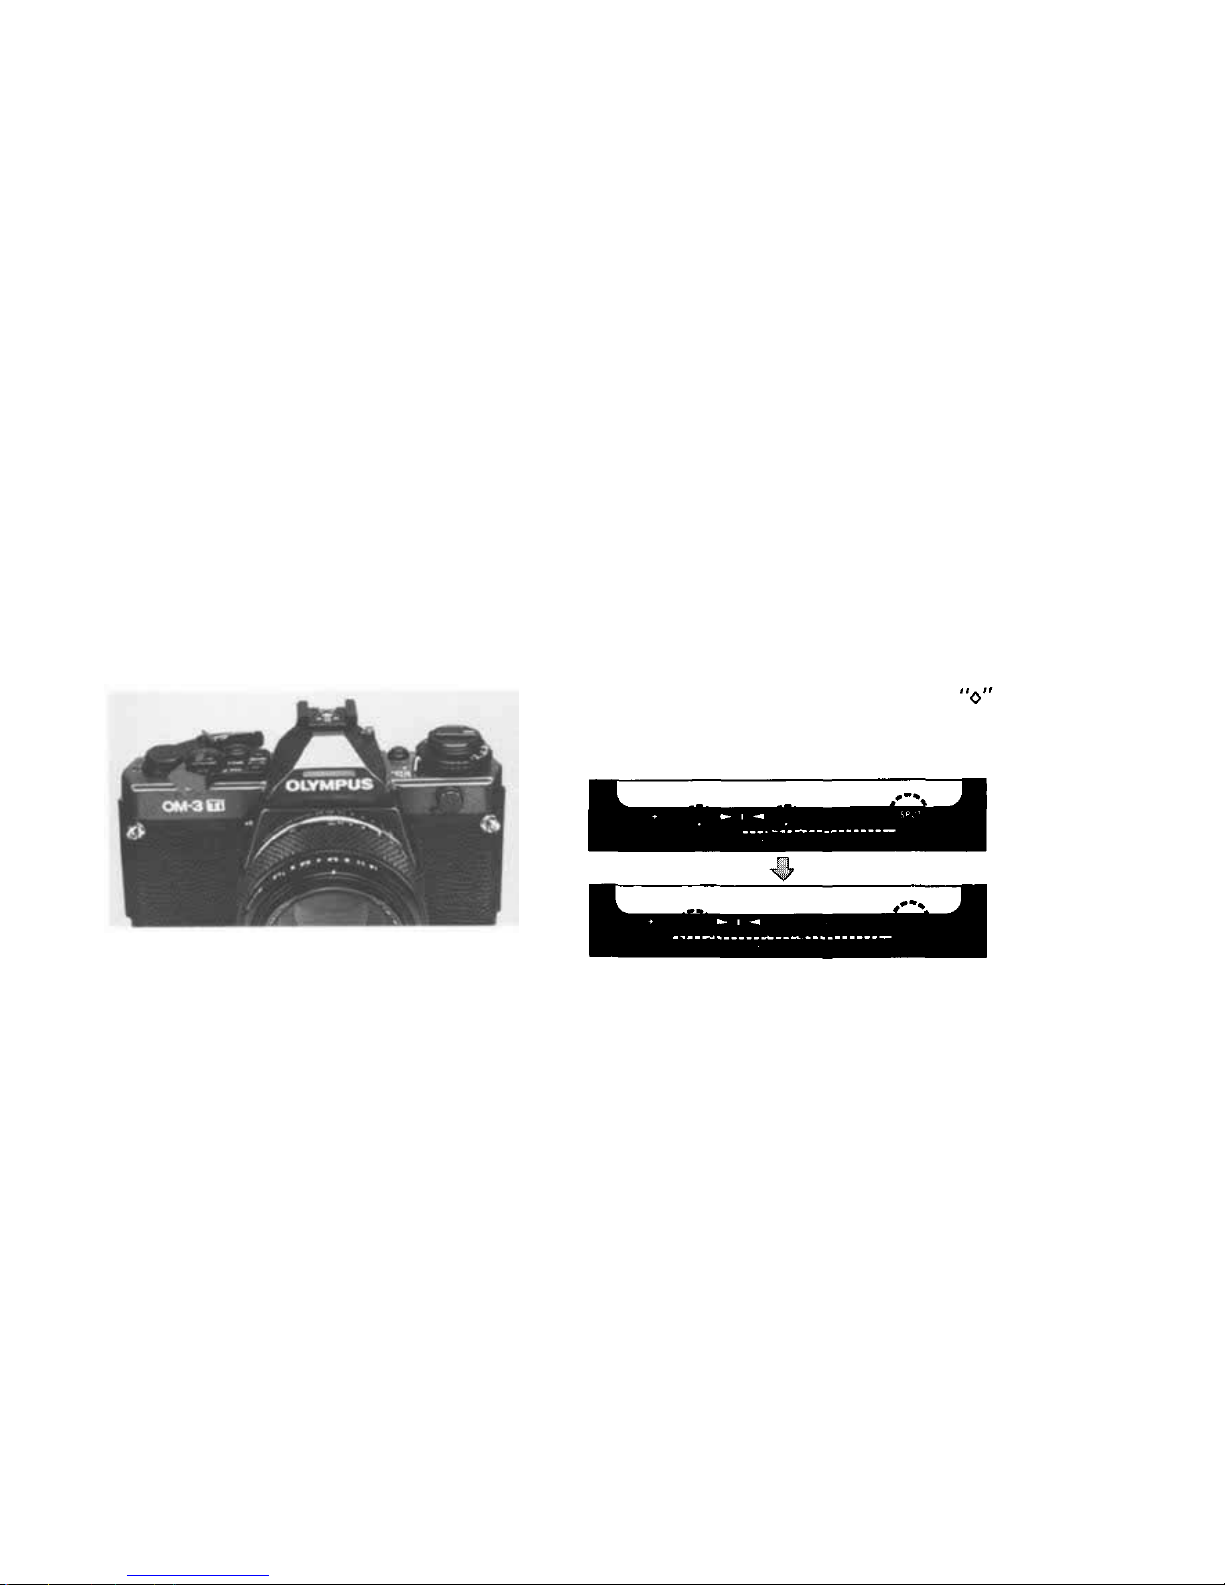
Press the spot button to take a meter reading. Yo u wi ll he ar
an electronic sound and the word "SPOT" will appear in the
viewfinder. The metered value is displayed by the
mark.
2
Set th e bar graph tip to the fixed point between the arro ws
by adjusting t he aperture and/or shutter speed rings.
3
If you move the camera, another mark will indicate the exposure value in the center of the frame along with
the spot metered value.
26
Page 28
The shutter speed you have set will be displayed in the
viewfinder.
4
Press the shutter release to take the picture.
5
The subject will turn out correctly exposed, regardless of
the brightness of the background.
6
The spot metering mode is automatically canceled after the shutter
releases or when 60 seconds has passed since it w as engaged.
Center-weighted average metering wi l l be restored.
27
Page 29
How to Clear Spot Metering
Set the lever to CLEAR. "SPOT" and mark will
disappear and the mode will return to center-weighted
average metering.
1
28
Page 30
How to Use the Multi-Spot Metering
Reference
P63-66
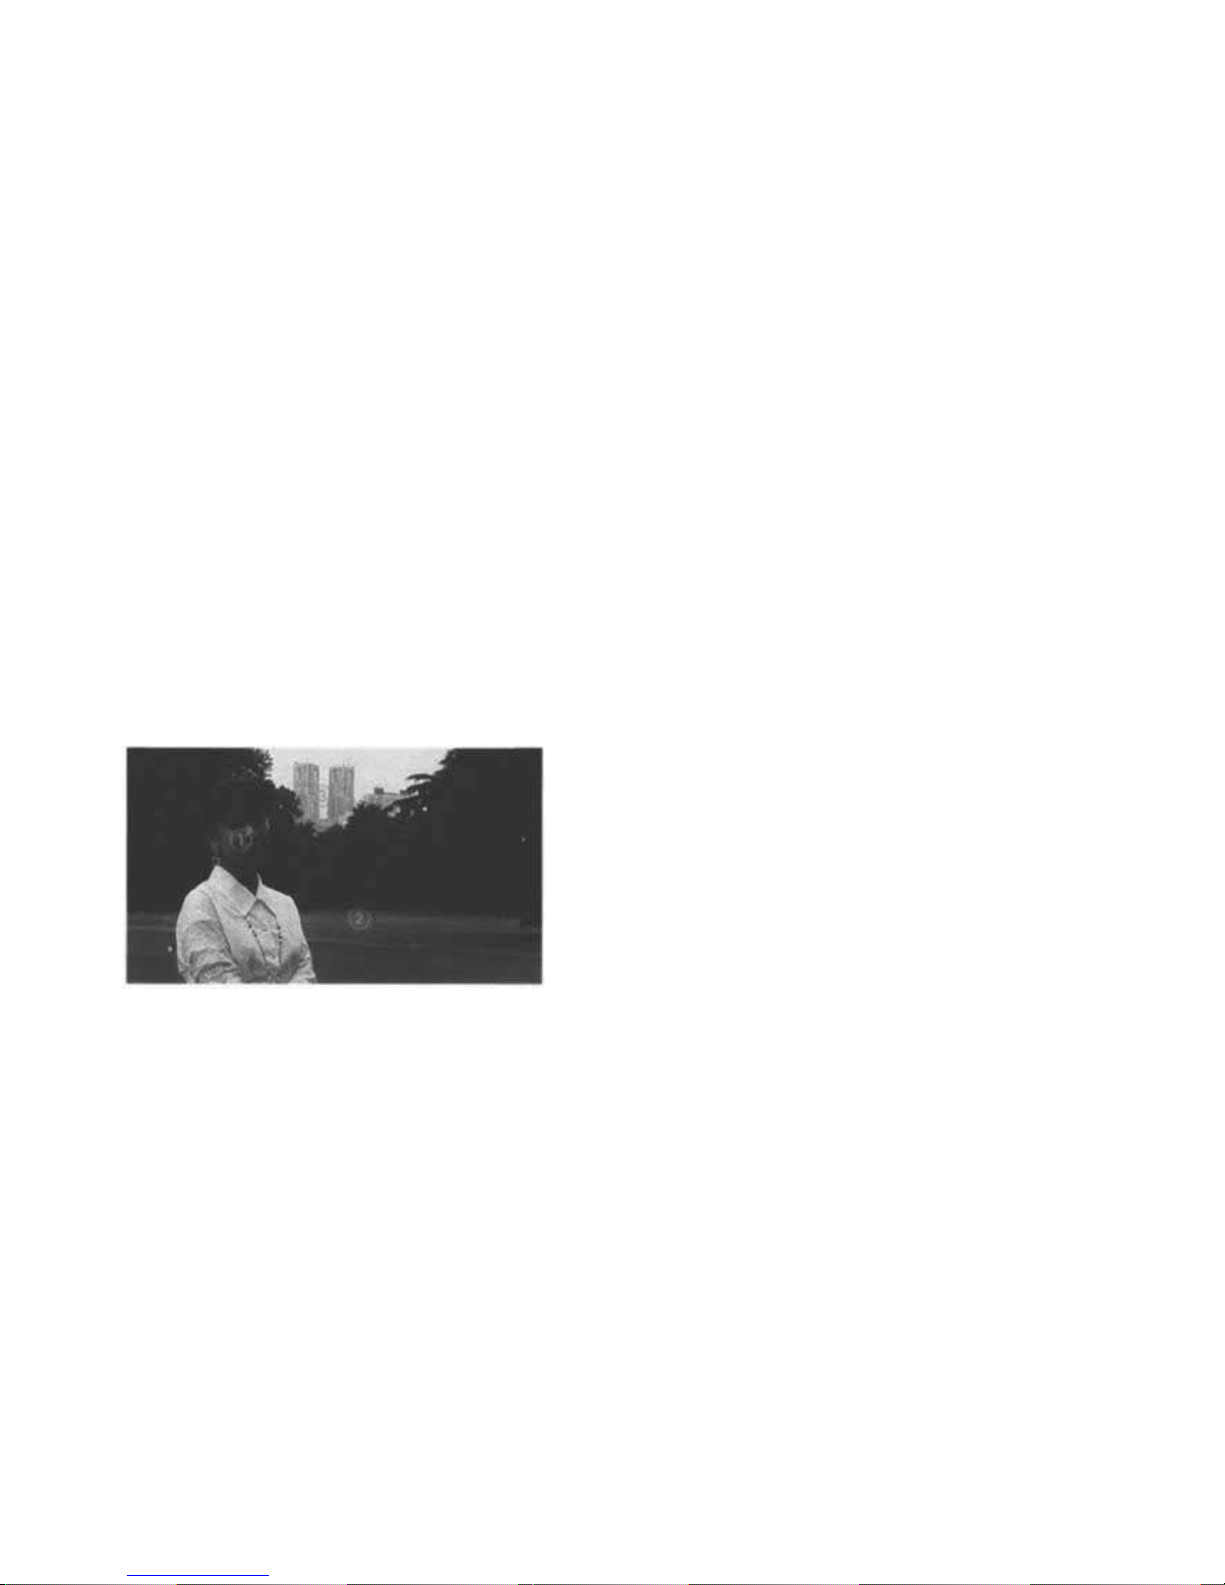
This sample photo shows a backlighted subject.
Spot metering is possible in up to 8 spots.
29
Page 31
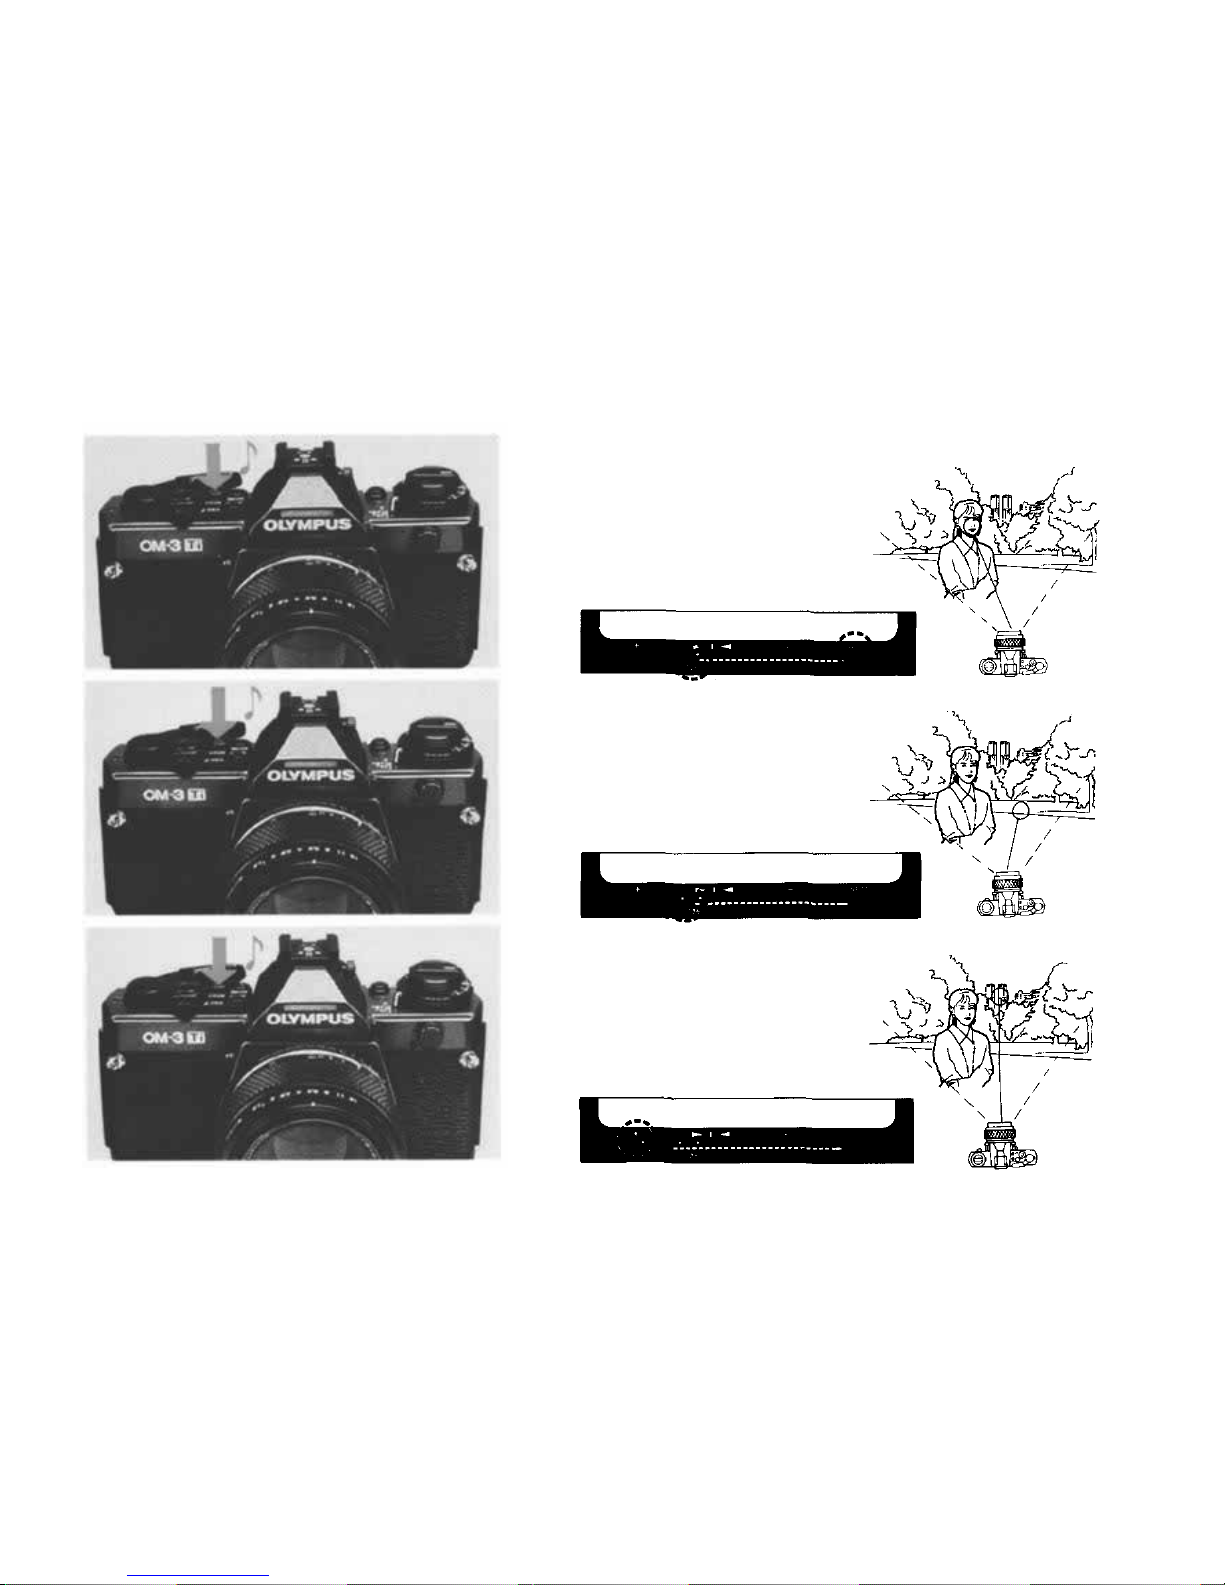
Take spot metering on the face (first spot)
1
Take spot metering on the lawn (second spot).
2
Take spot metering on the building in the background (third
spot).
3
30
Page 32
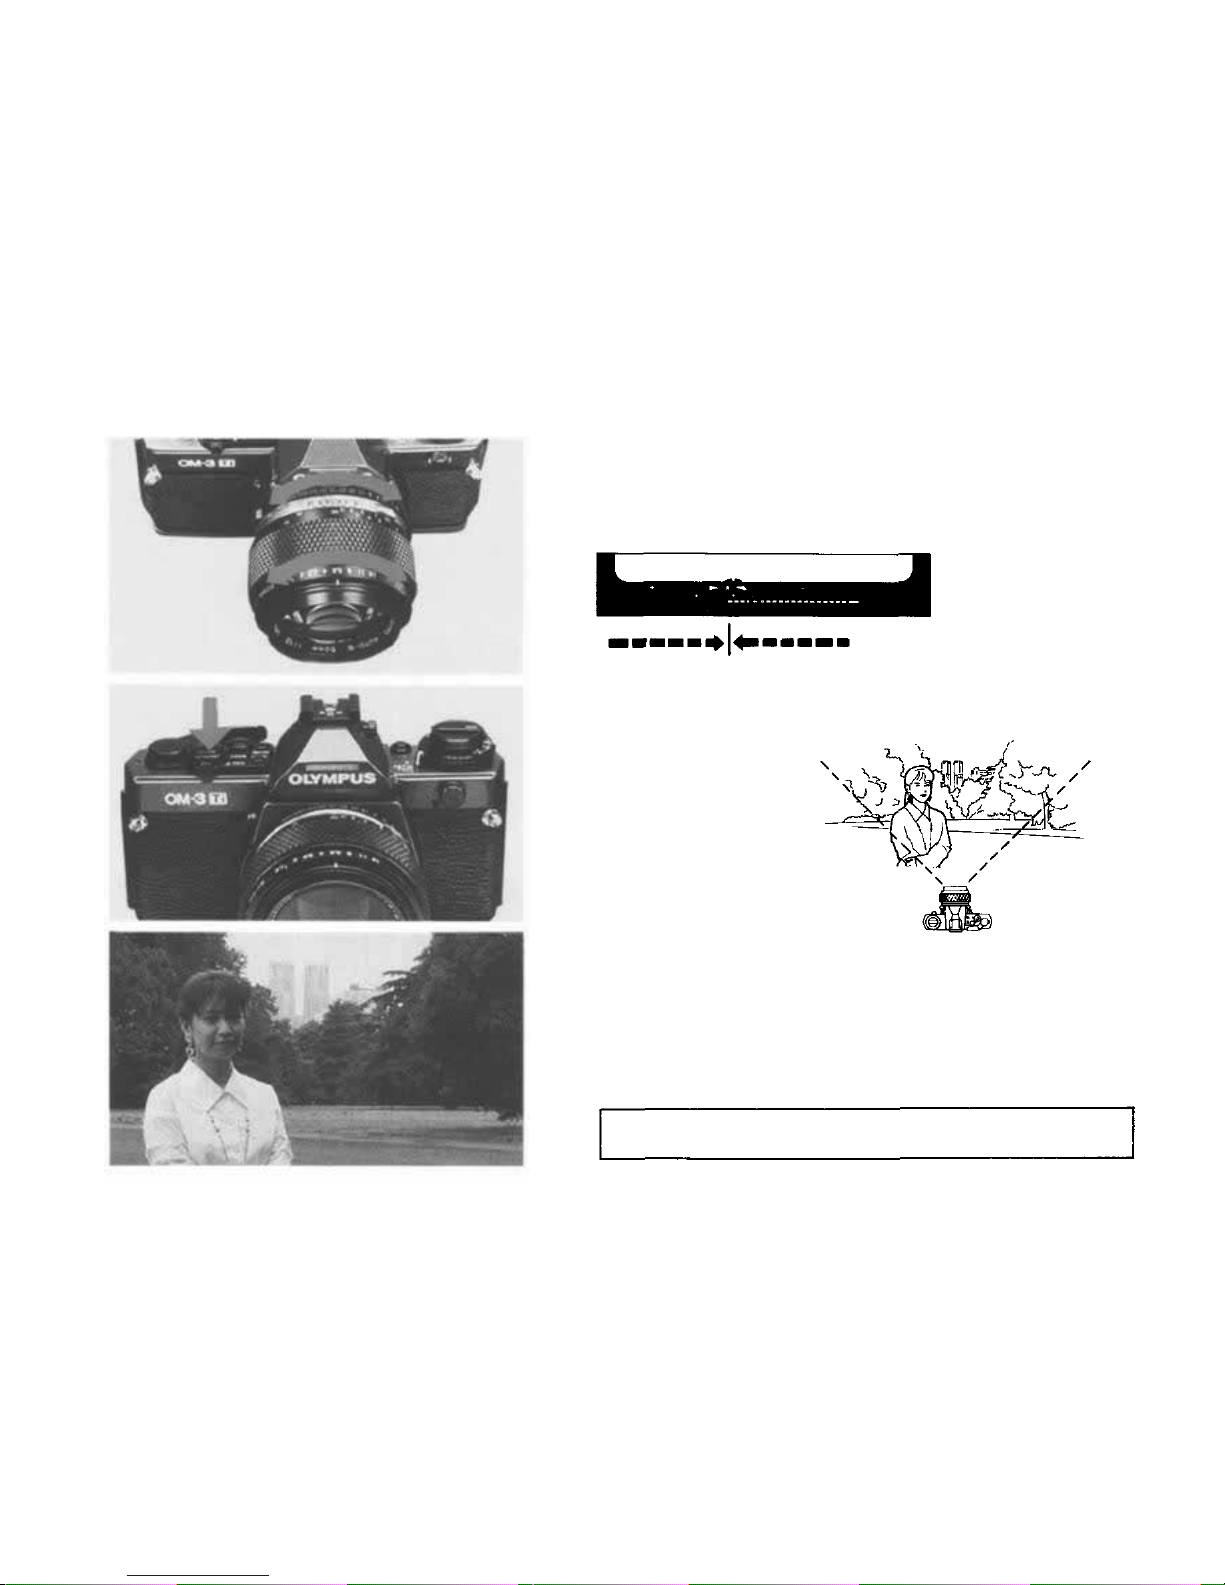
Set the bar graph t ip to t he fixed point between th e arrows
by adjusting the aperture and/or shutter speed rings.
Compose your picture and press the shutter release.
4
5
Exposure is achieved by averaging the brightness of the
three metered points.
To cancel the metered value, operate the clear lever.
31
Page 33
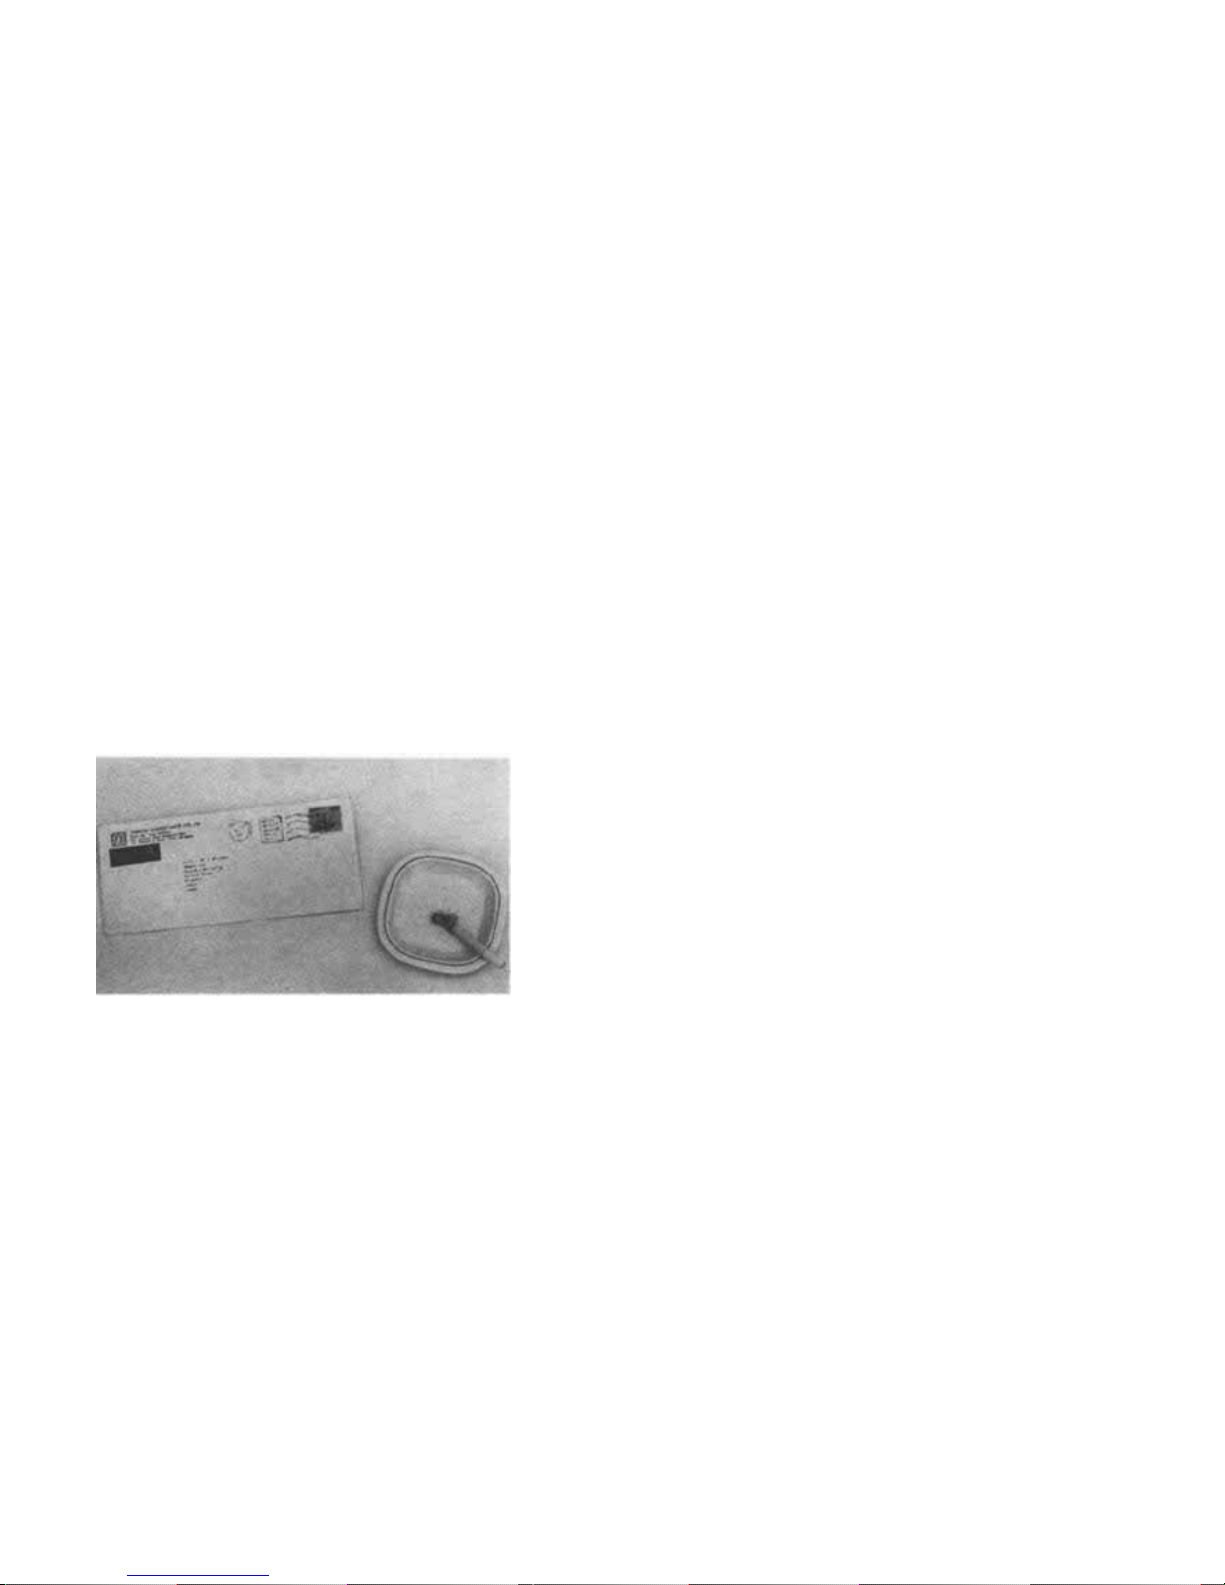
Highlight Control
If you wa n t to render white objects as white ...
Reference
P 67-68
In ordinary shooting, white objects will turn out grayish
if the picture is taken in strong brightness over the
entire frame.
32
Page 34
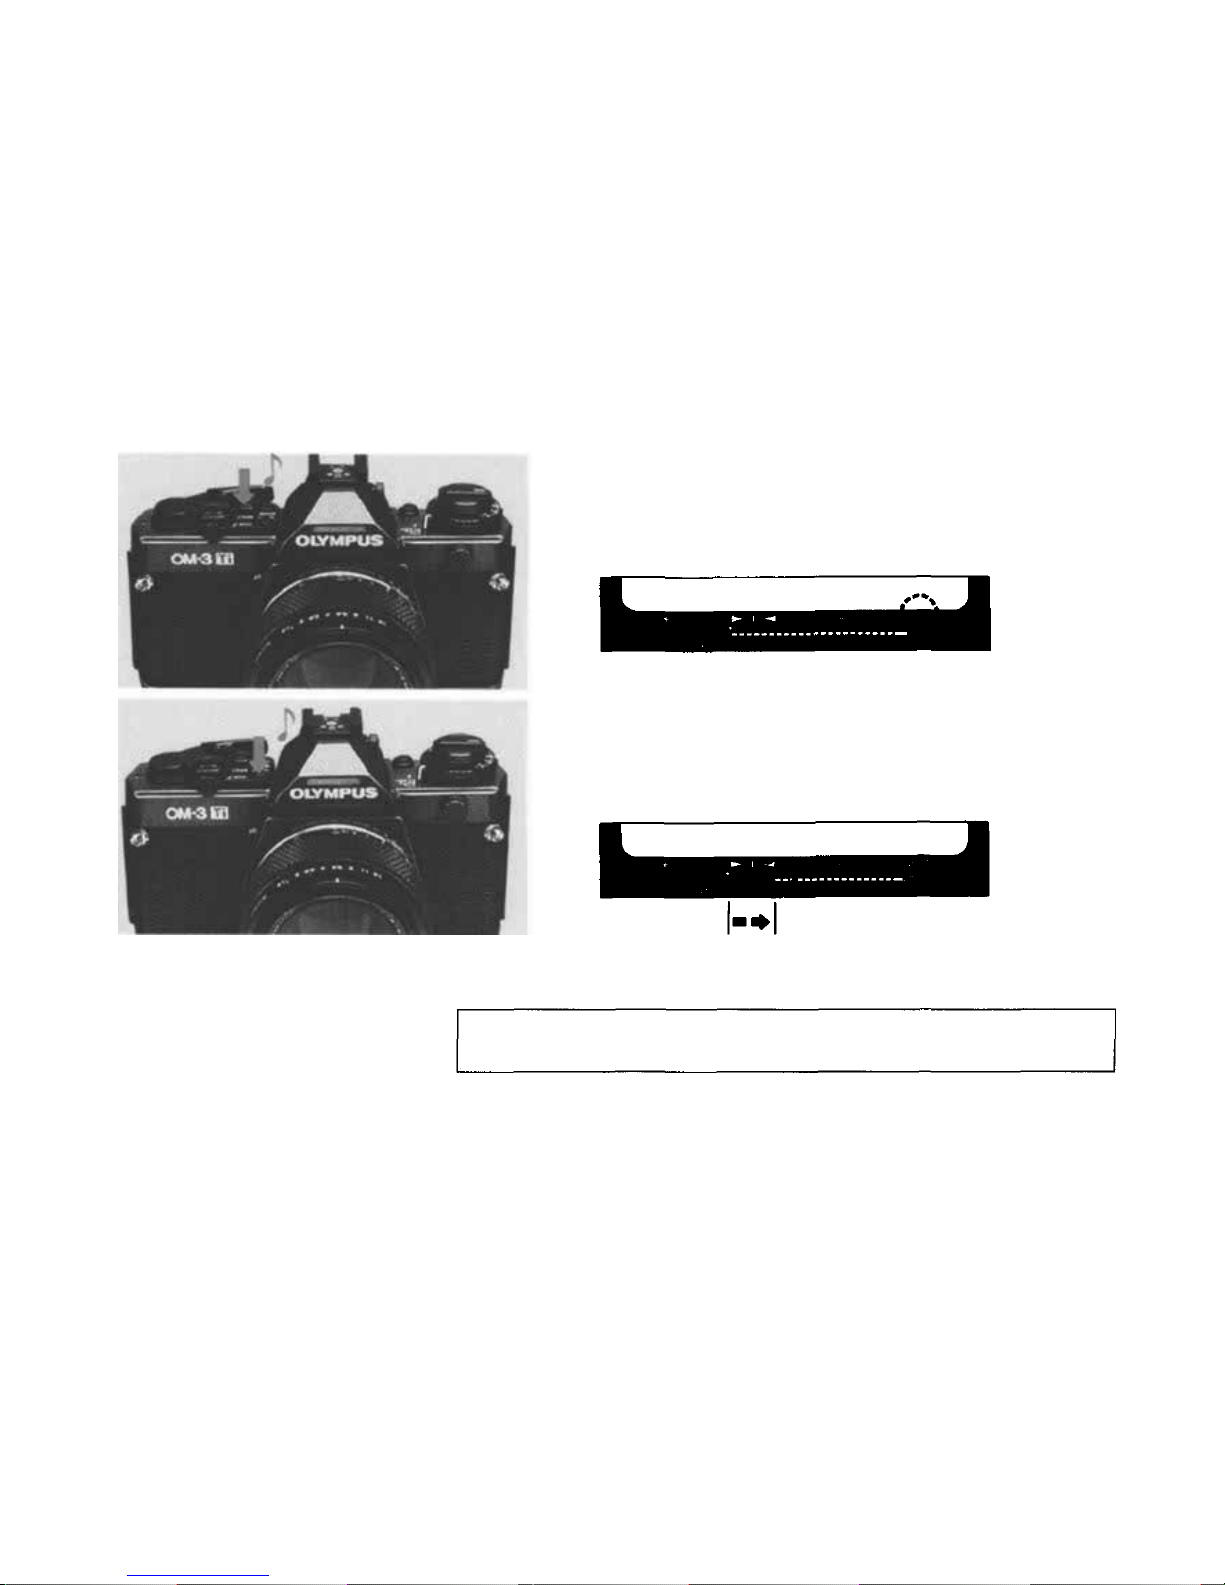
Take spot metering on the part of the subject which
you wa nt to render in white.
Press t he HI.LIGHT button.
1
2
The bar display shows 2-step automatic compensation.
33
Page 35
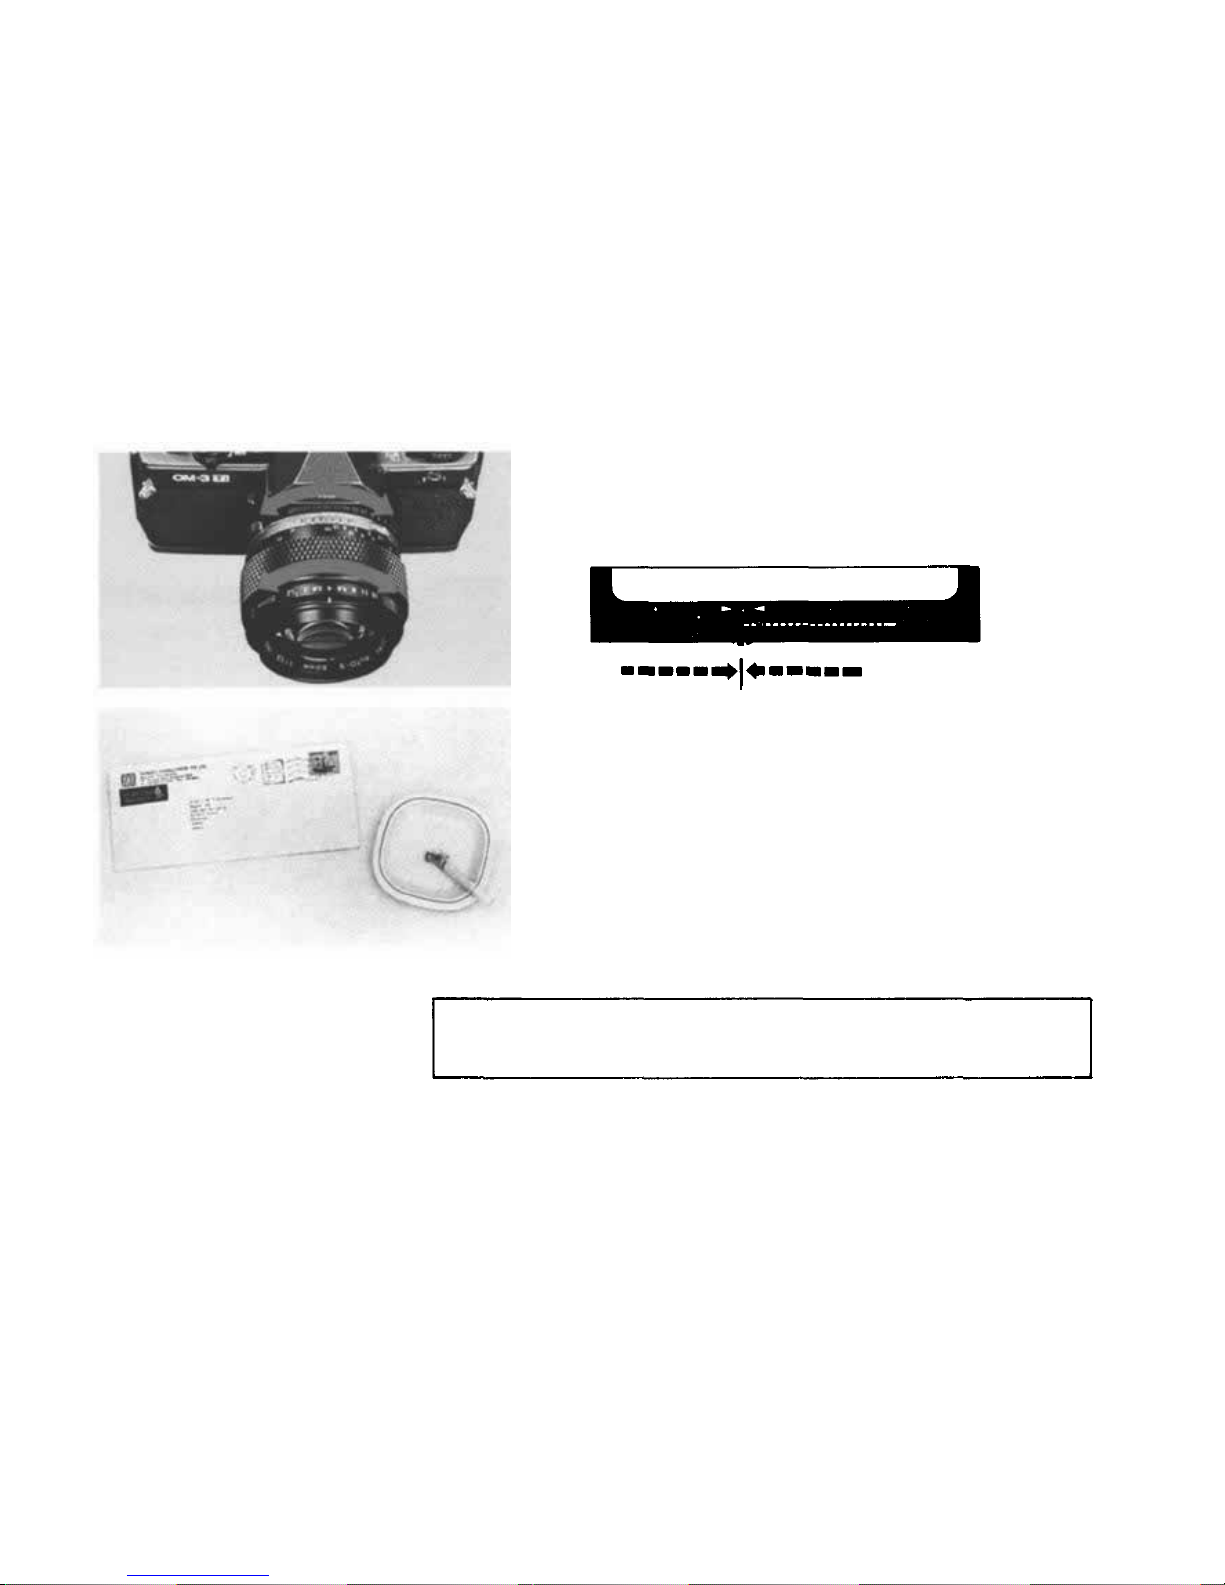
Set the bar graph tip t o t he fixed point between the arrows
by adjusting the aperture and/or shutter speed rings.
Press the shutter release. Exposure is automatically
corrected to give 2-step overexposure, ensuring that white
objects turn out white.
3
4
The highlight control is cleared by pressing the HI.LIGHT button once
again. To cancel the metered value, use the clear lever.
34
Page 36
Shadow Control
If you want to render black objects in black...
Reference
P 69-70
In ordinary shooting, black objects will turn out grayish
if it is very dark over the entire picture frame.
35
Page 37
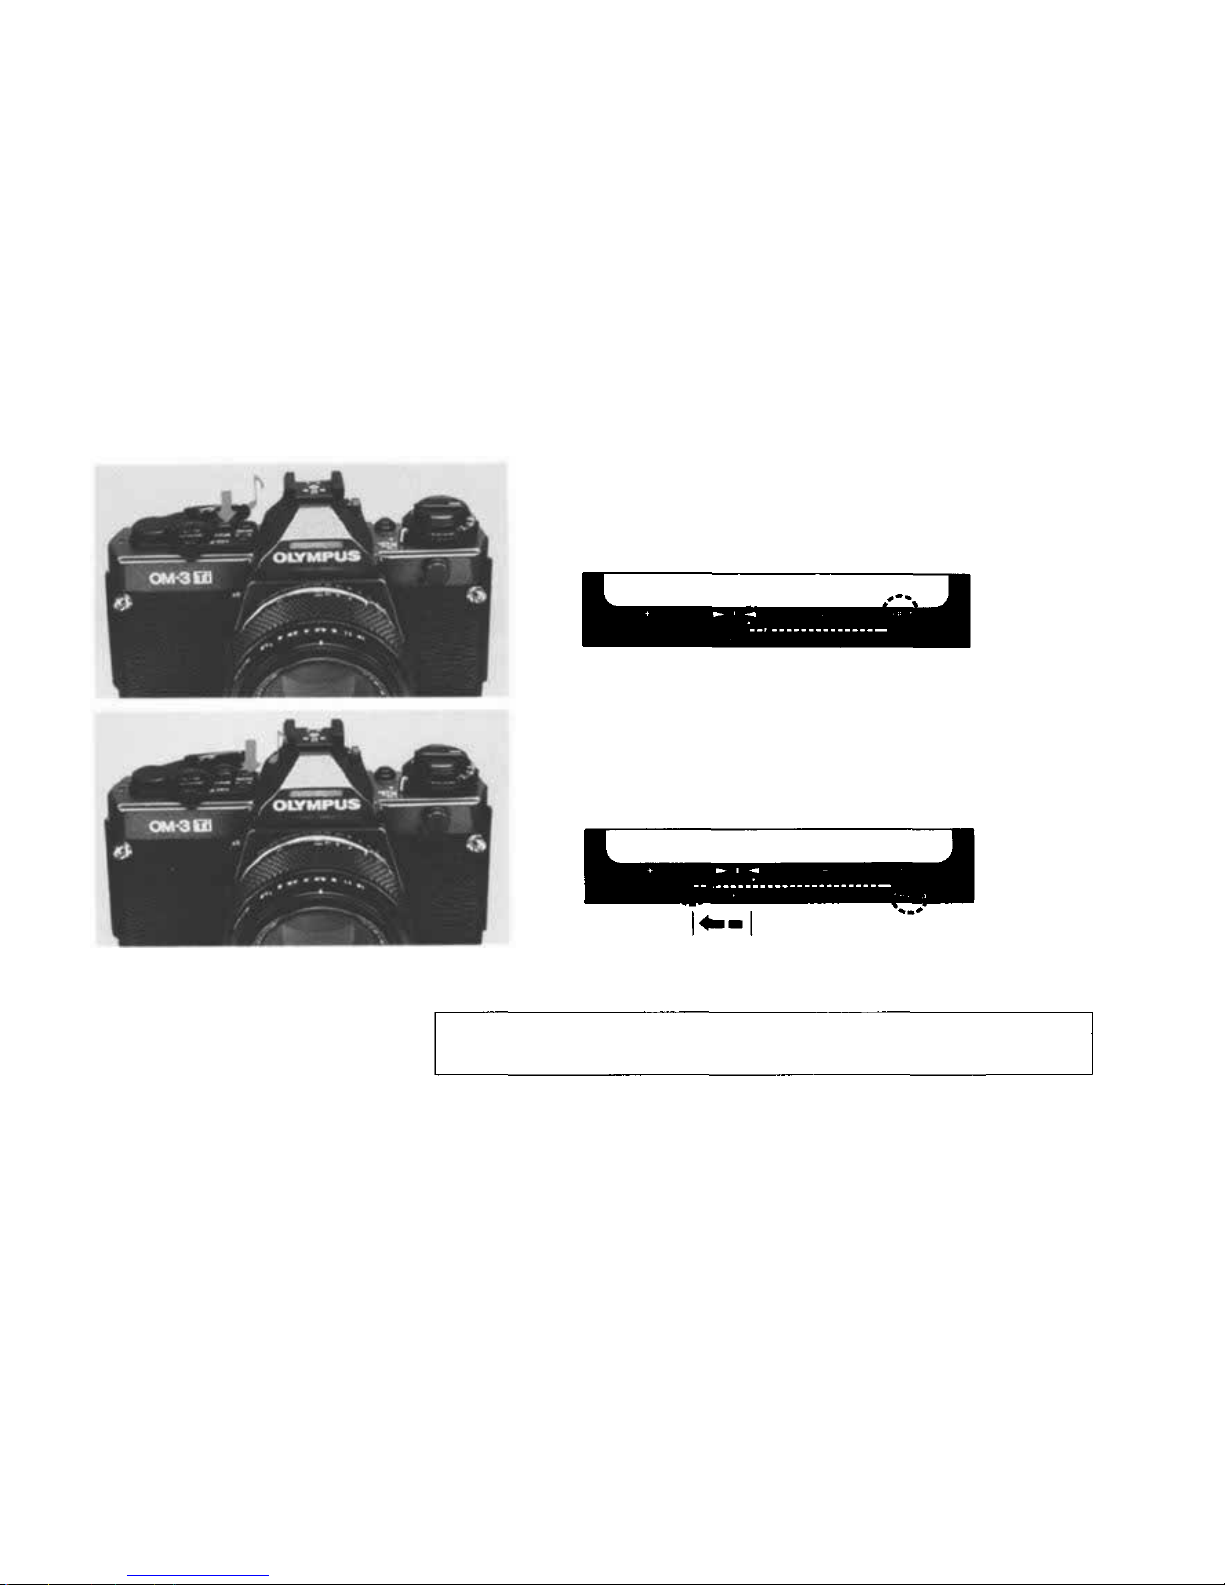
Take spot metering on the spot which you want to
render in black.
1
Press t he SHADOW button.
2
The bar display shows 2
²/
³
-step automatic compensation.
36
Page 38
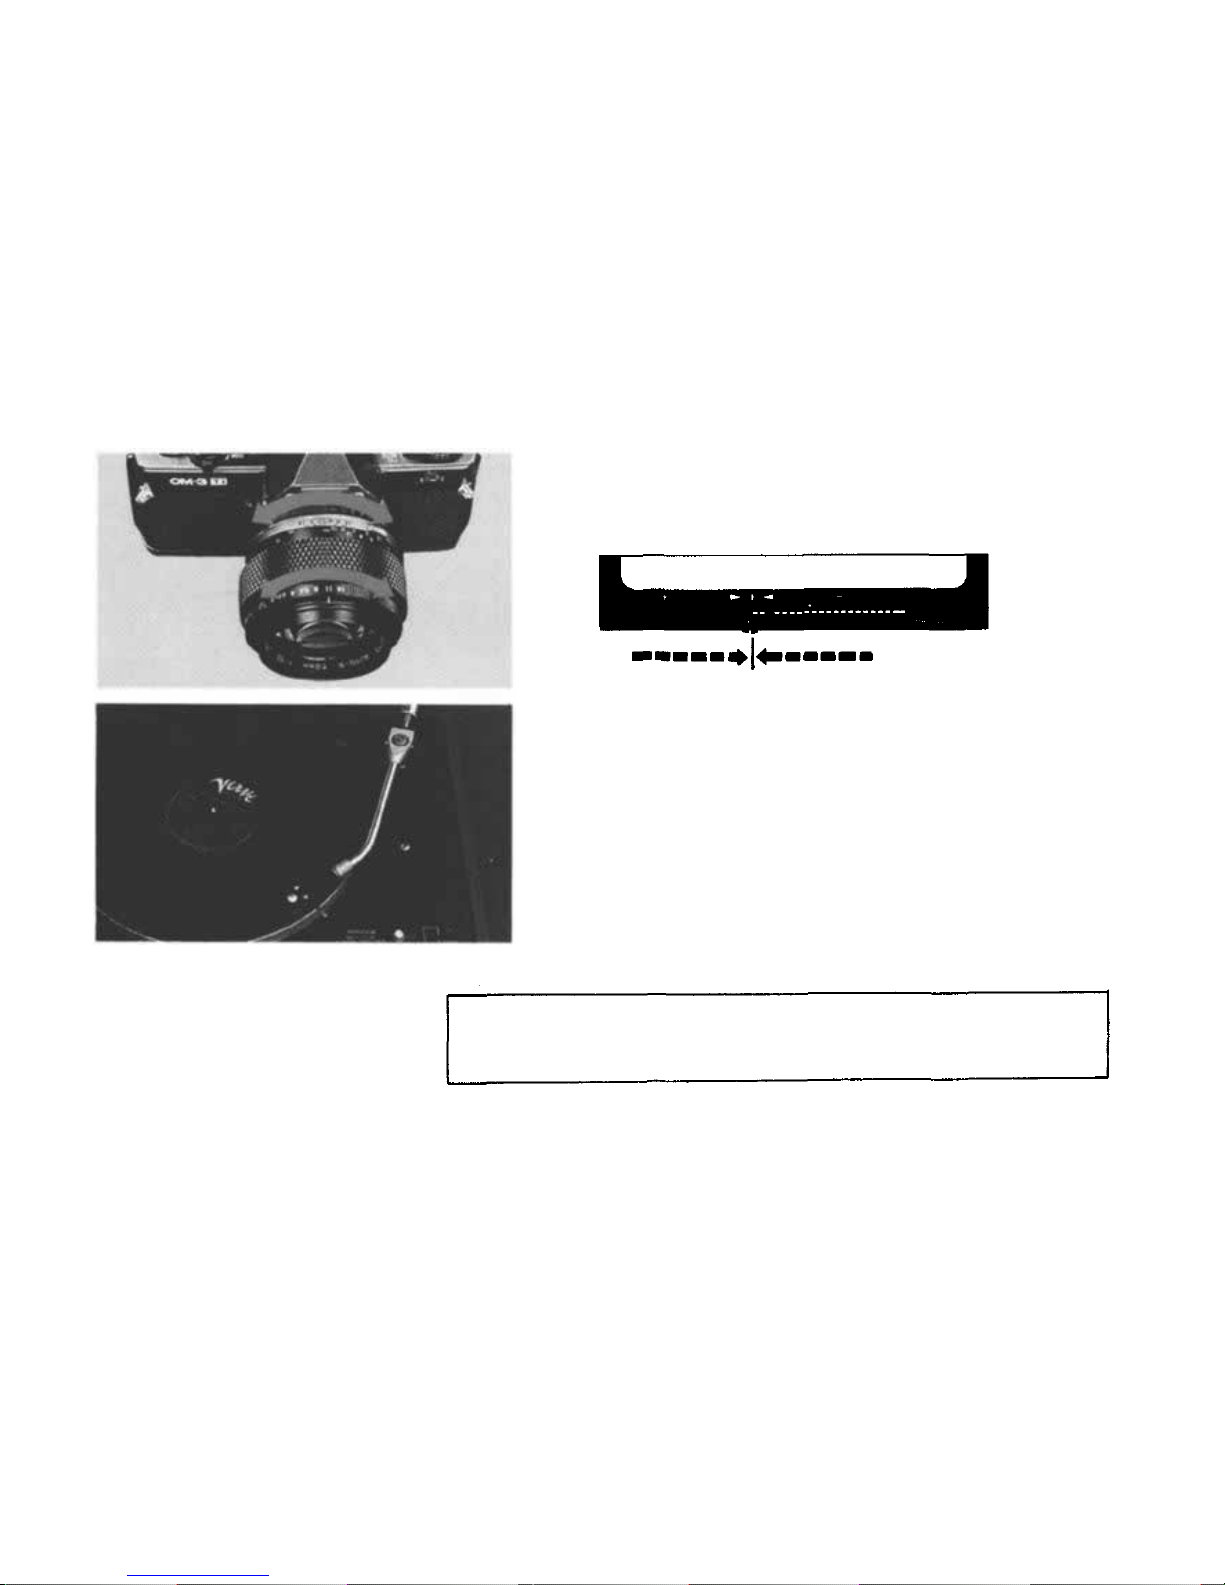
Set the bar graph tip t o the fixed point between the arrows
by adjusting the aperture and/or shutter speed rings.
3
Press the shutter release. Exposure is automatically
corrected to give 2²/3-step underexposure, ensuring that
black objects turn out black.
4
The shadow control is cleared by pressing the SHADOW button once
agai n. To cance l th e metered value, use the clear lever.
37
Page 39

< Taking Photographs (III) >
— Flash Photography —
38
Page 40
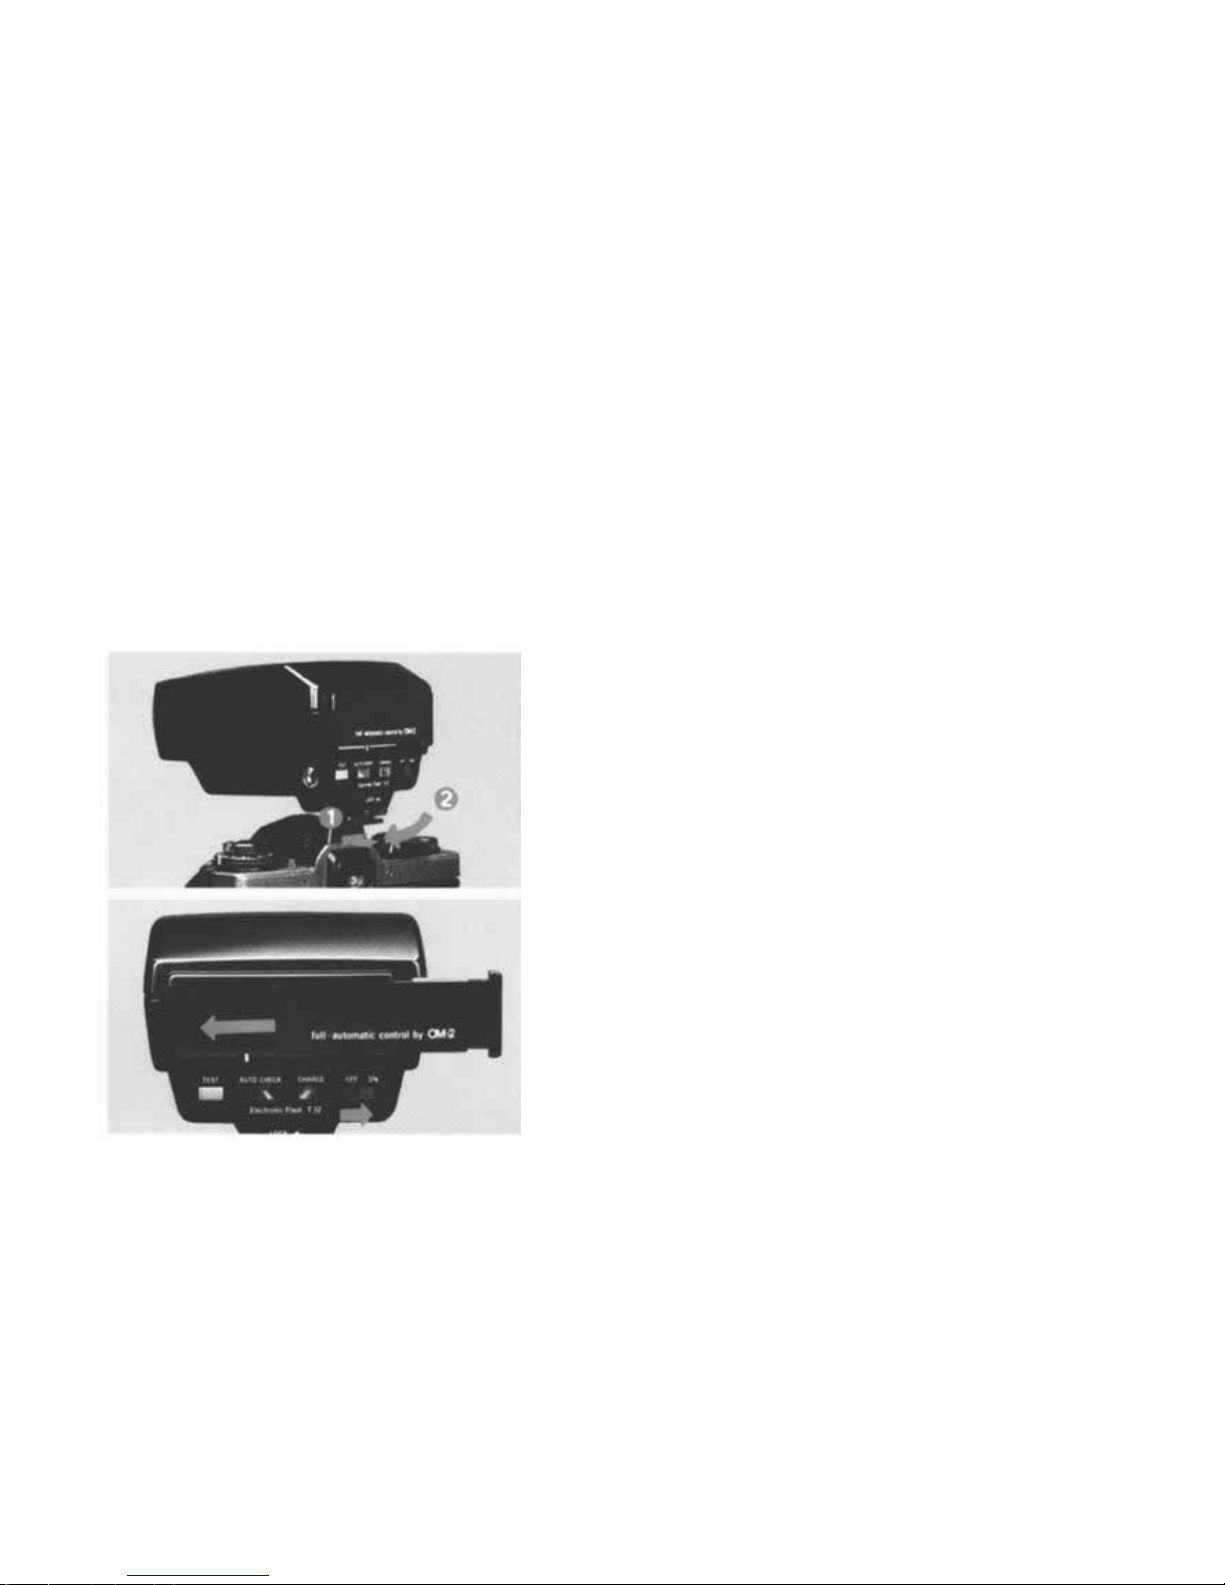
Taking OTF Auto Flash Photographs
The following describes flash operation procedure when using a T-Series flash.
Reference
P 79-84
Slide a T-Series flash into the accessory shoe and secure it
with the lock screw.
1
Mount the provided chart on the back of the flash and
switch on its power.
2
39
Page 41
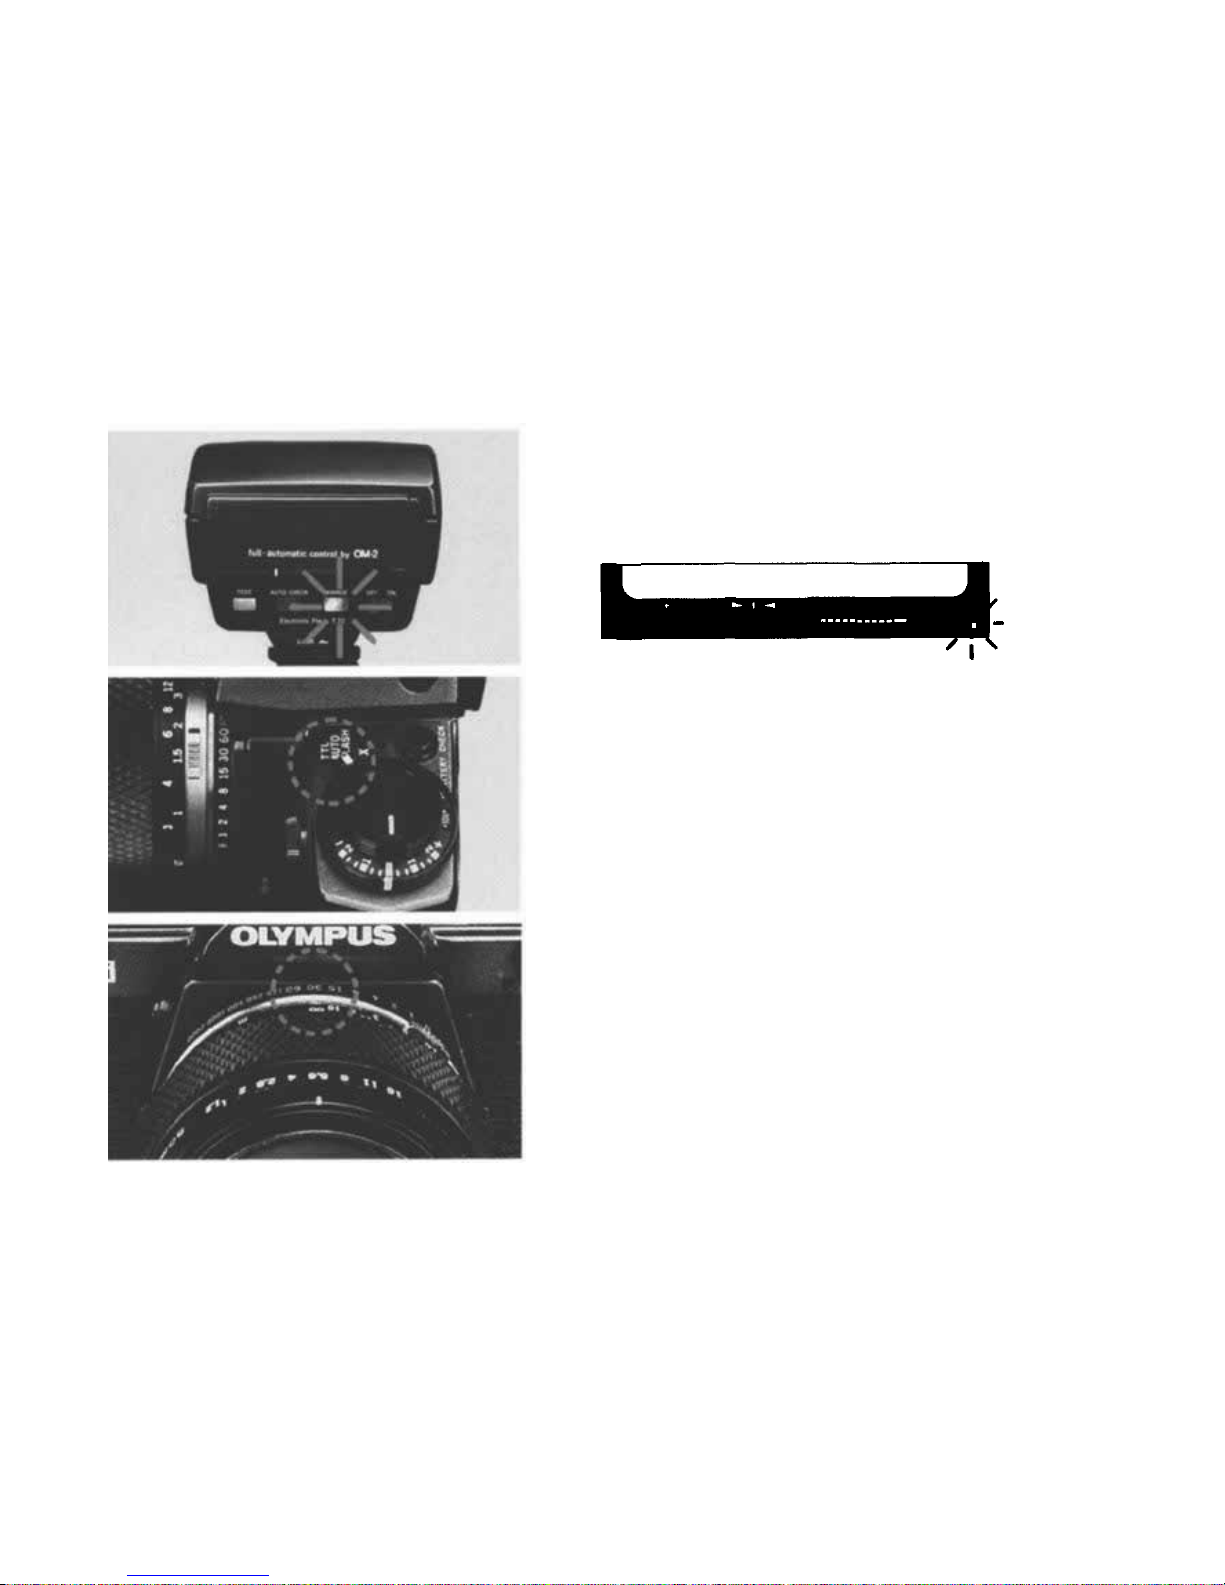
Check the indicator.
3
Set the flash mode t o TTL A UT O FLASH to take OTF auto
flash photographs. (TTL auto flash and OTF auto flash are
the same function.)
4
Select a shutter speed. The flash synchronization range is
B.1~1/60-sec.
5
40
Page 42
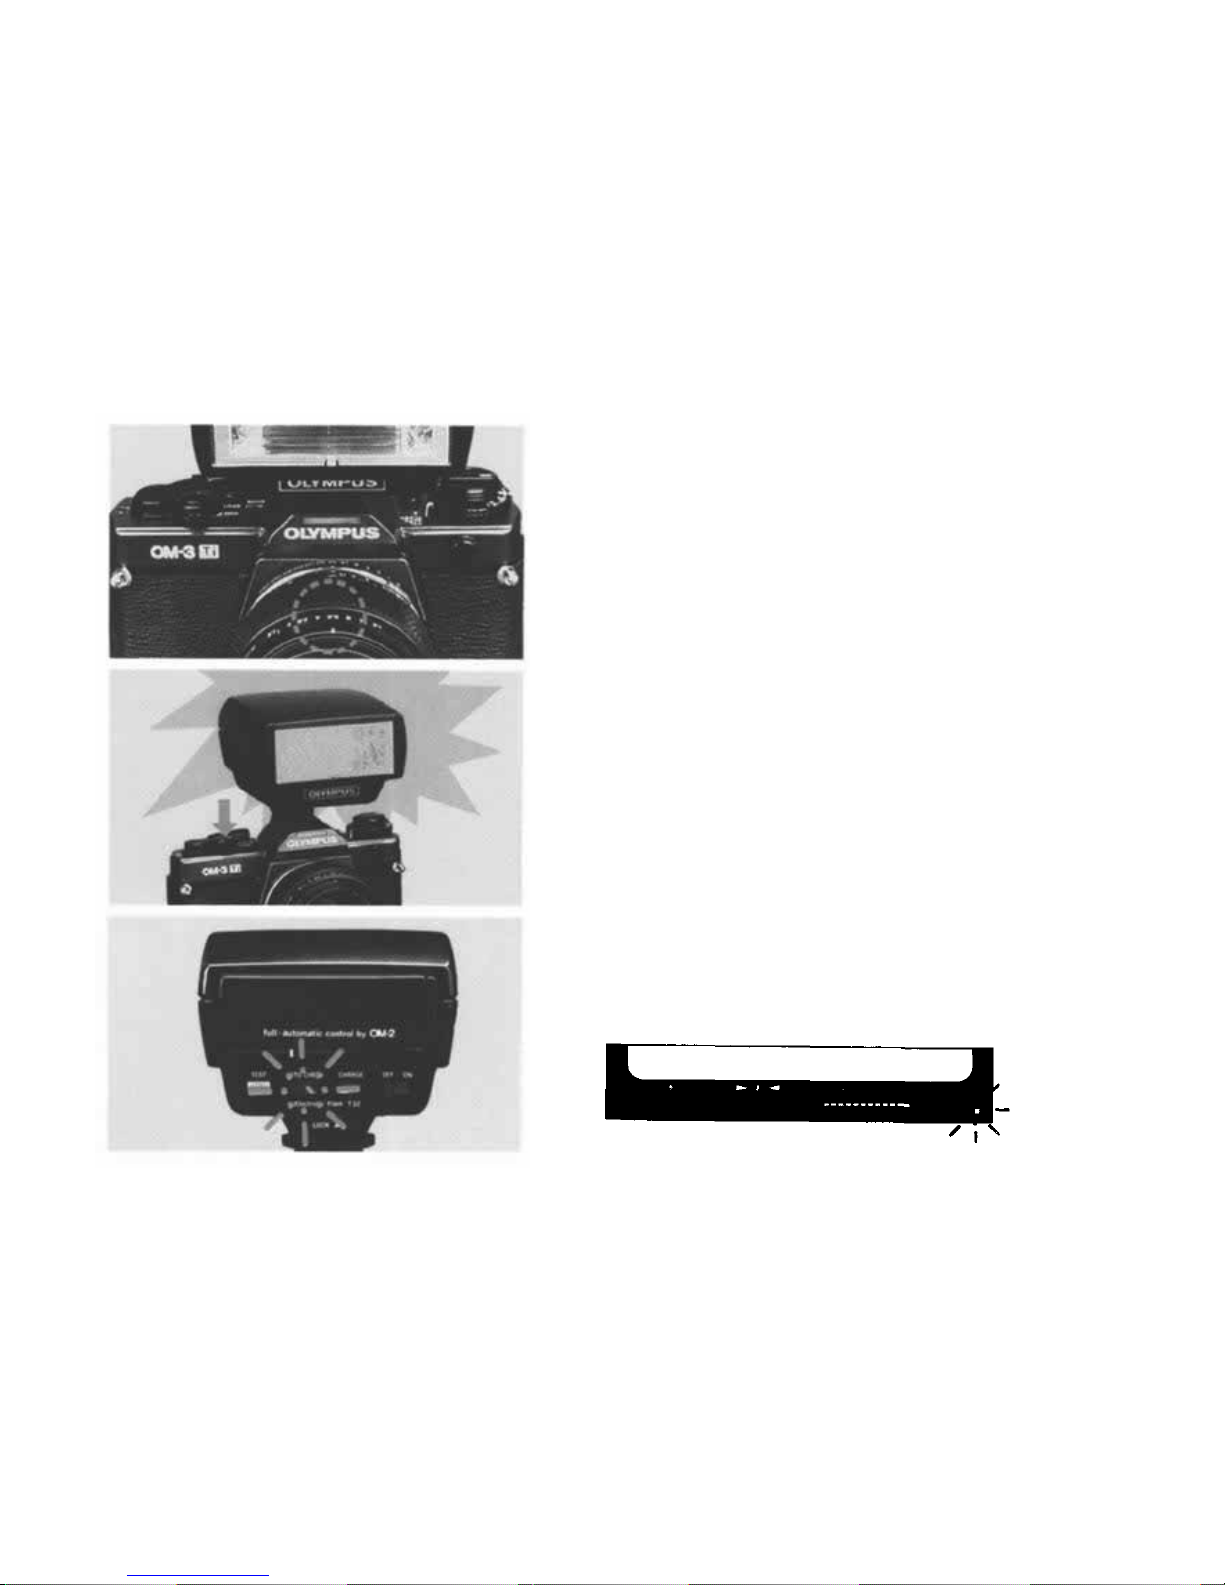
Select an aperture.
Press the shutter release.
Check the green LED in the viewfinder. If it blinks, the
photograph has been shot with correct exposure. If it is off,
flash strength was insufficient.
6
7
8
41
Page 43
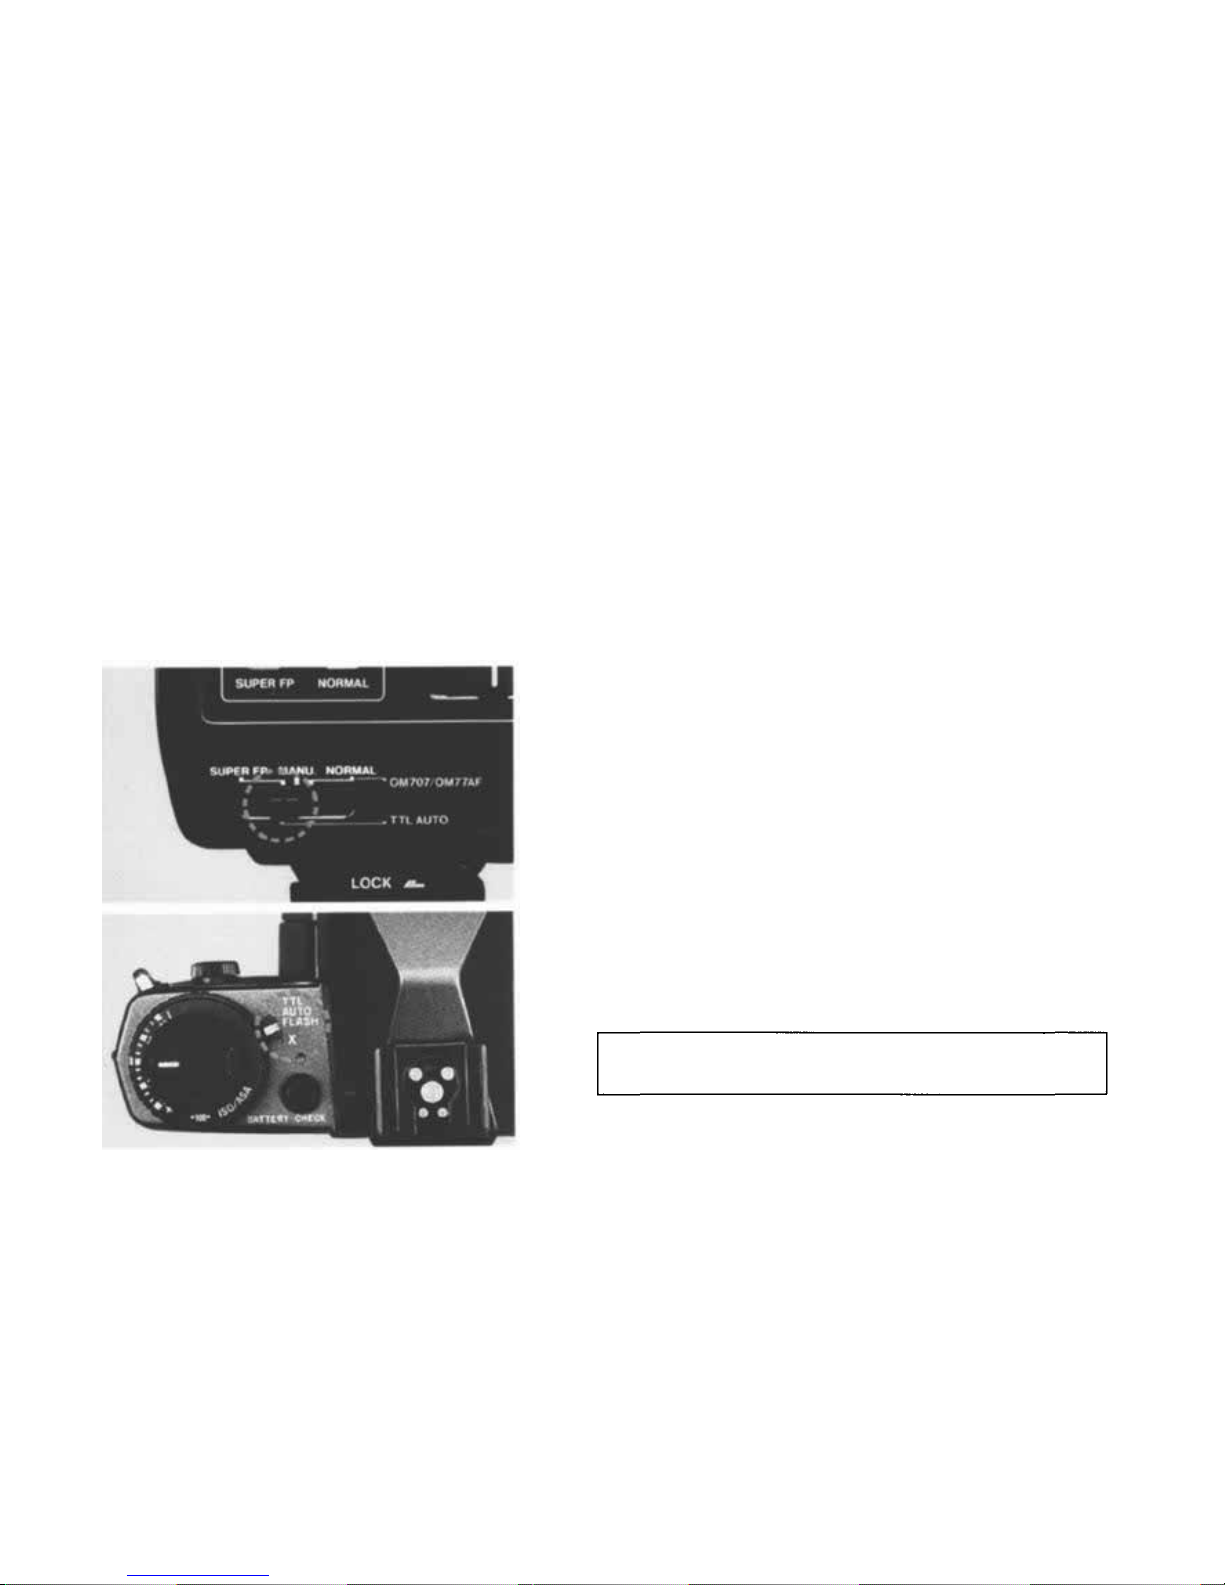
Taking Daylight Synchro-Flash Photographs (Super FP Flash Mode)
The following describes flash operation procedure when using t h e F280. For OTF Auto using the Normal OTF Flash
mode, refer to the F28 0 instruciton manual.
Set the F280's m ode to SUPER FP.
1
Set the flash mode selector lever to TTL AUTO FLASH or
X.
2
Either mode can be used in the Super FP Flash mode.
42
Page 44
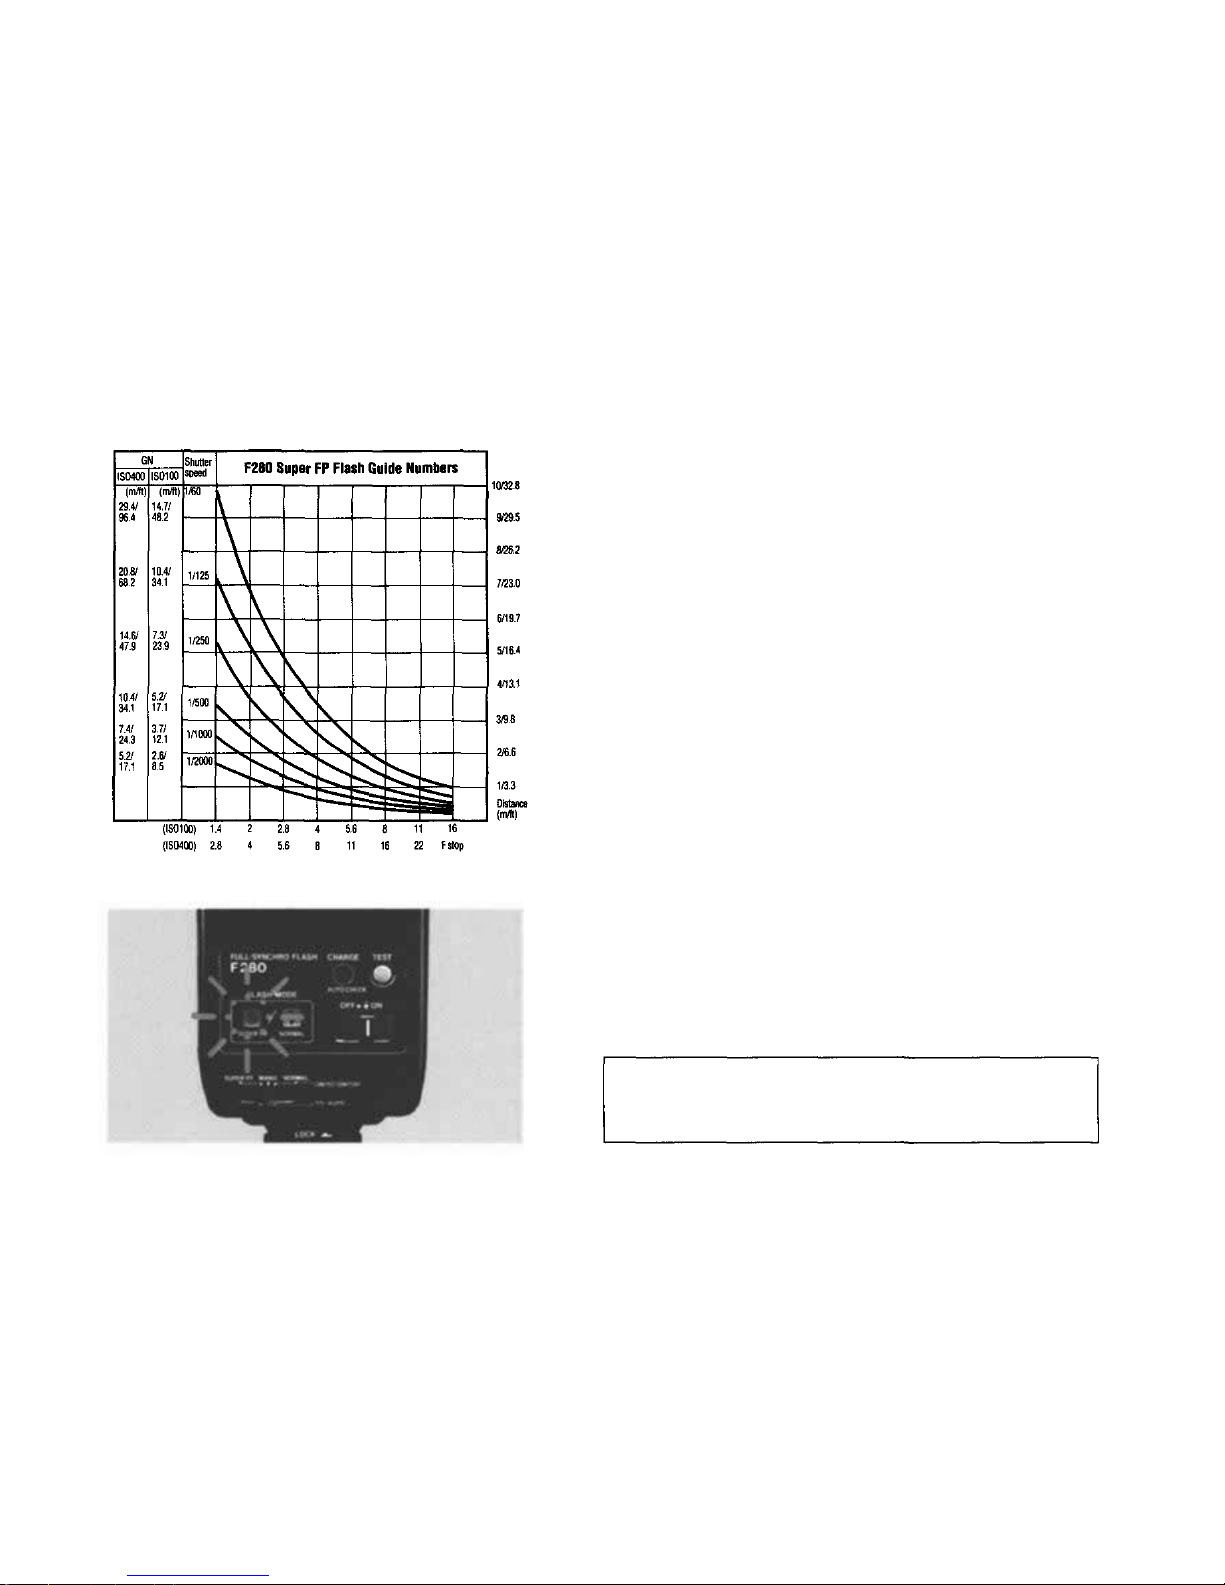
Select a shutter speed between 1/2000 a nd 1/6 0 se c. a nd
aperture according to the chart on the left.
3
Press the shutter release and confirm correct exposure by
checking the indicator o n t h e flash. (There is no exposure
confirmation display shown in the viewfinder.)
4
At temperatures under -10°C (14°F) uneven exposure may
sometimes occur due to temporary degradation of Super FP
Fla sh function.
43
Page 45

< Taking Photographs (IV) >
— Other Operations —
44
Page 46
Exposure Compensation in the OTF Auto Flash Mod e
Reference
P72
When an exposure compensation is set, the indicator
blinks in the viewfinder.
1
After shooting, return the dial t o its origina l position.
2
45
Page 47
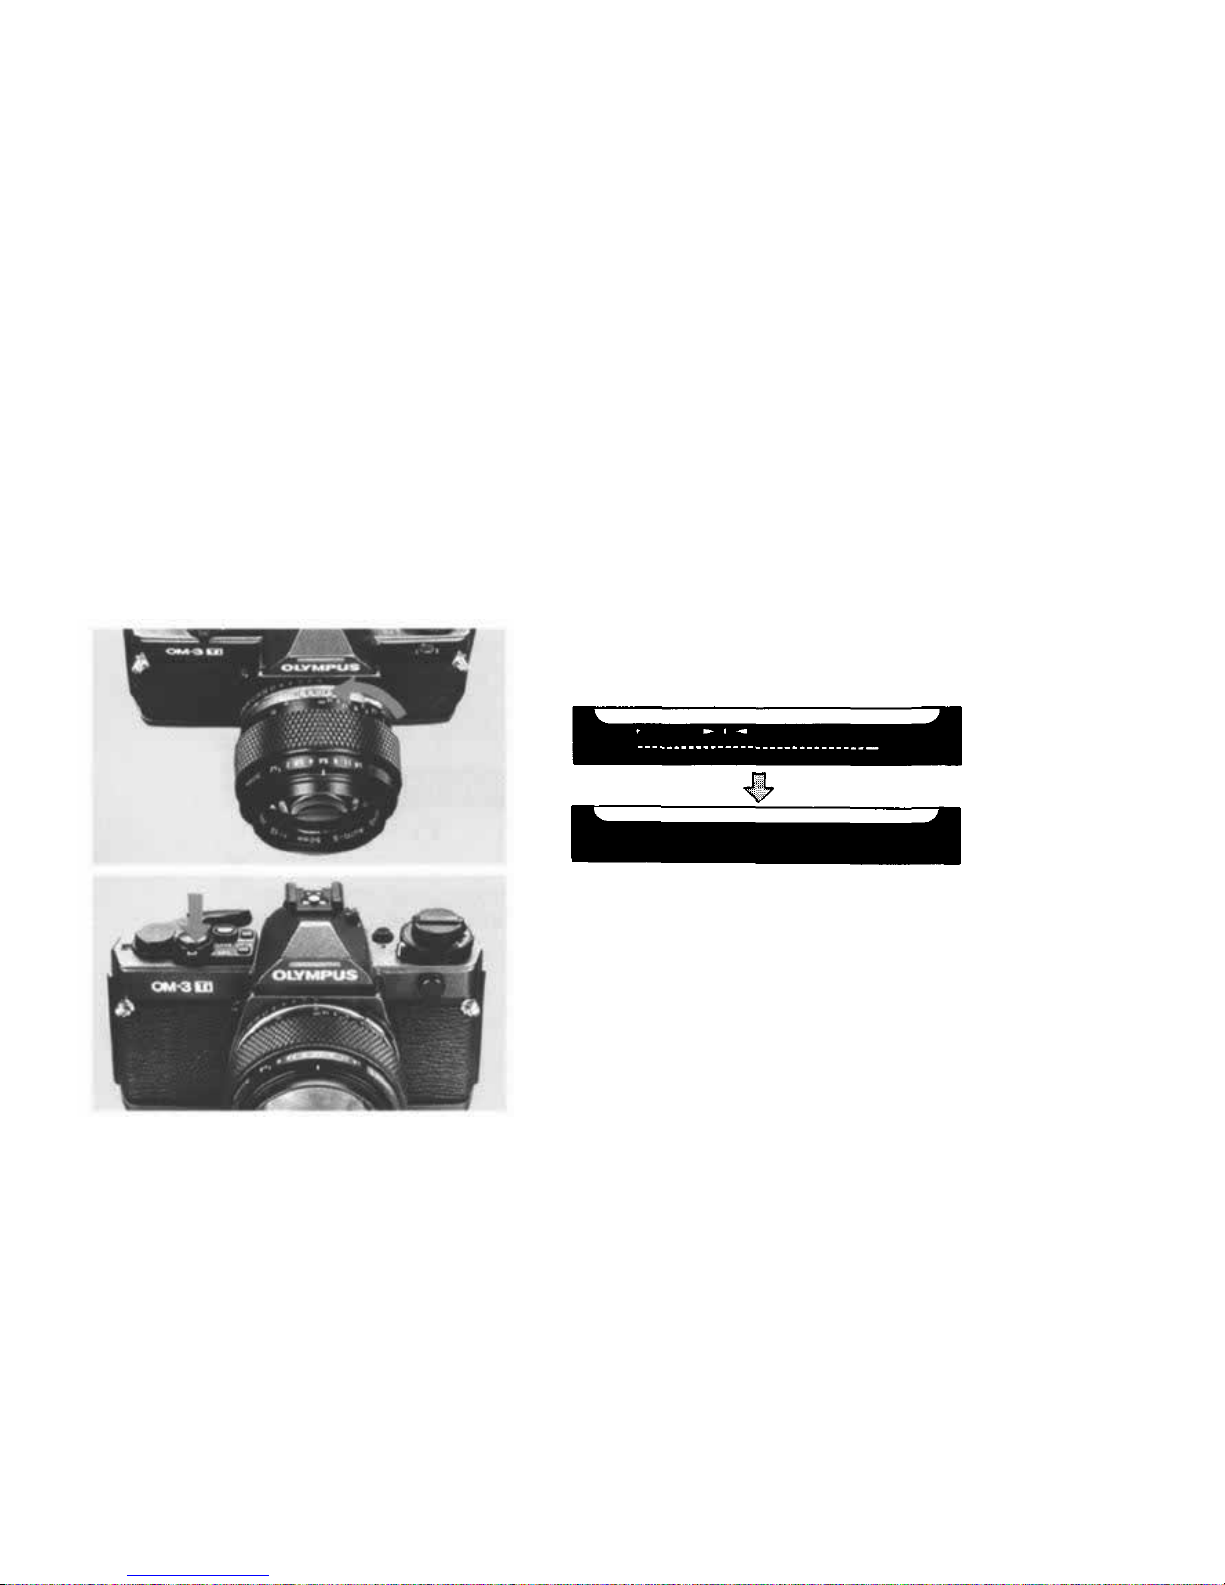
Bu l b Exposure
Reference
P76
Turn and set the shutter speed dial to "B".
1
The display in t he viewfinder disappears.
The shutter will remain open as long as the shutter
release button is held depressed.
2
46
Page 48
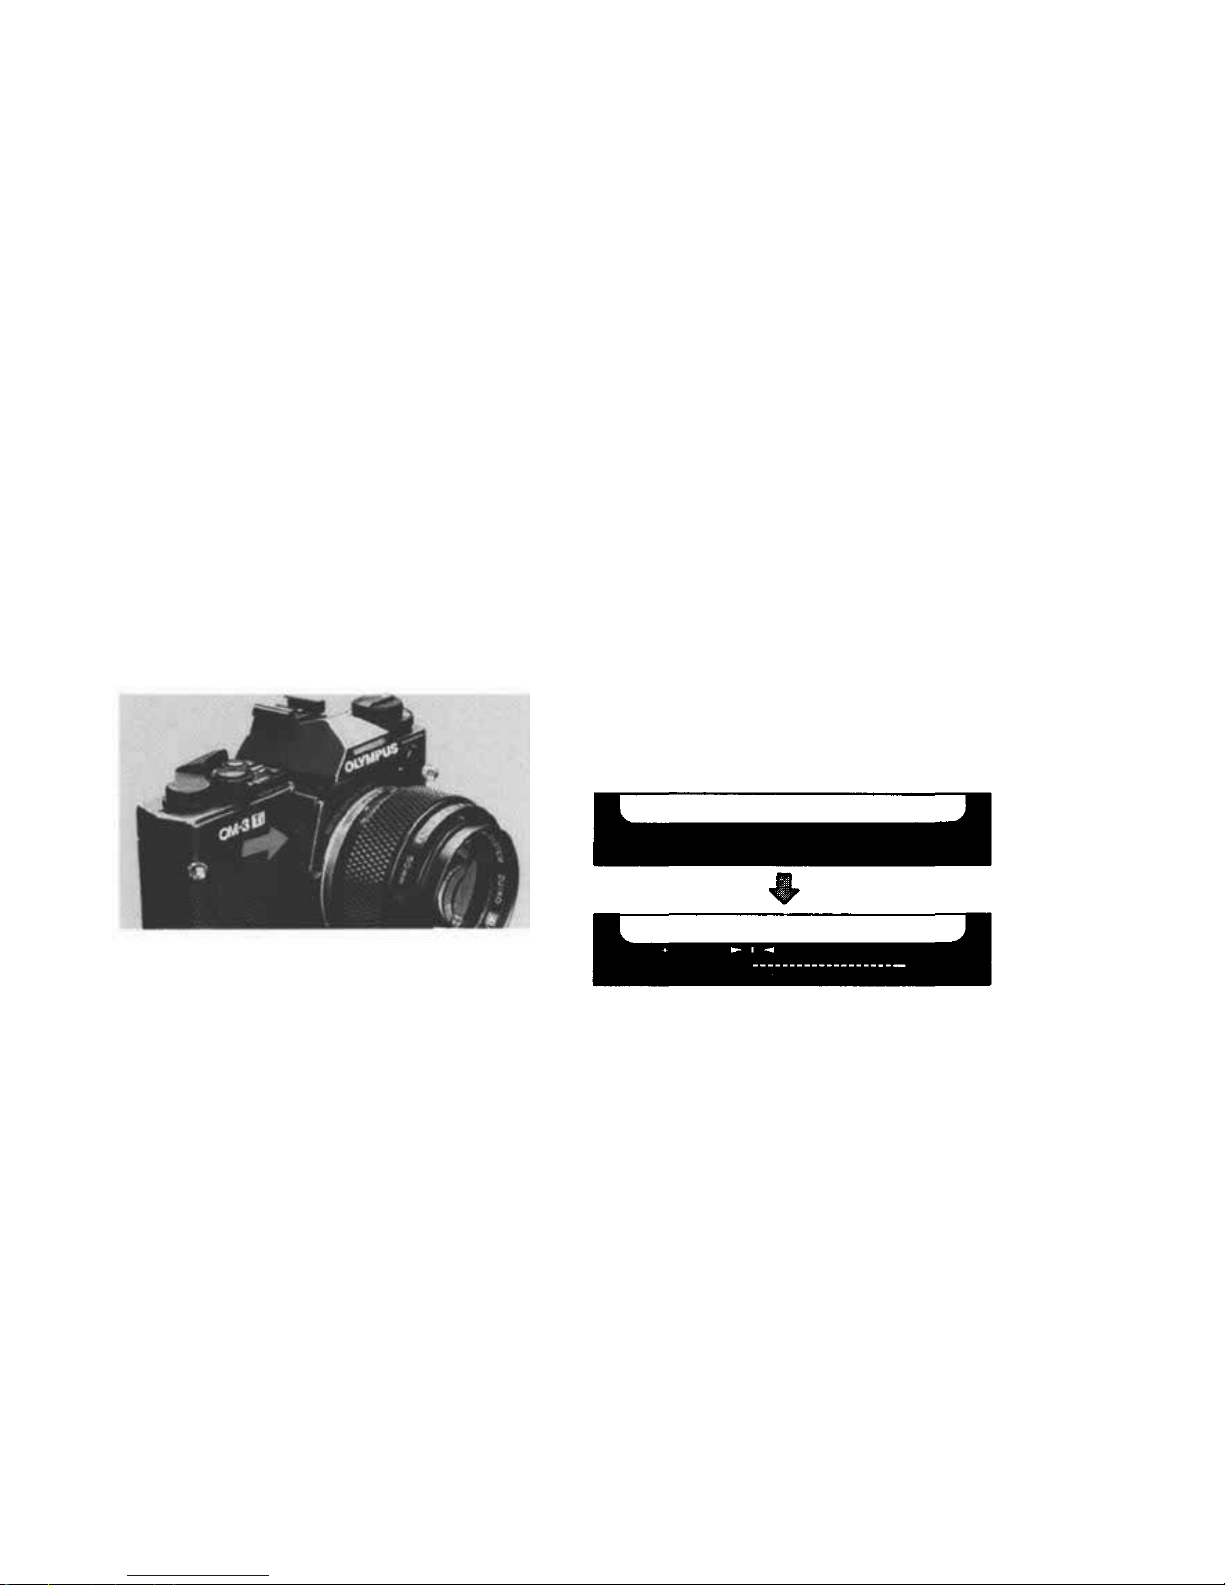
Using the Viewfinder Illuminator
Push the viewfinder illumination button if the viewfinder
display is too dark to read.
1
The illuminator will shut off after 10 sec.
47
Page 49
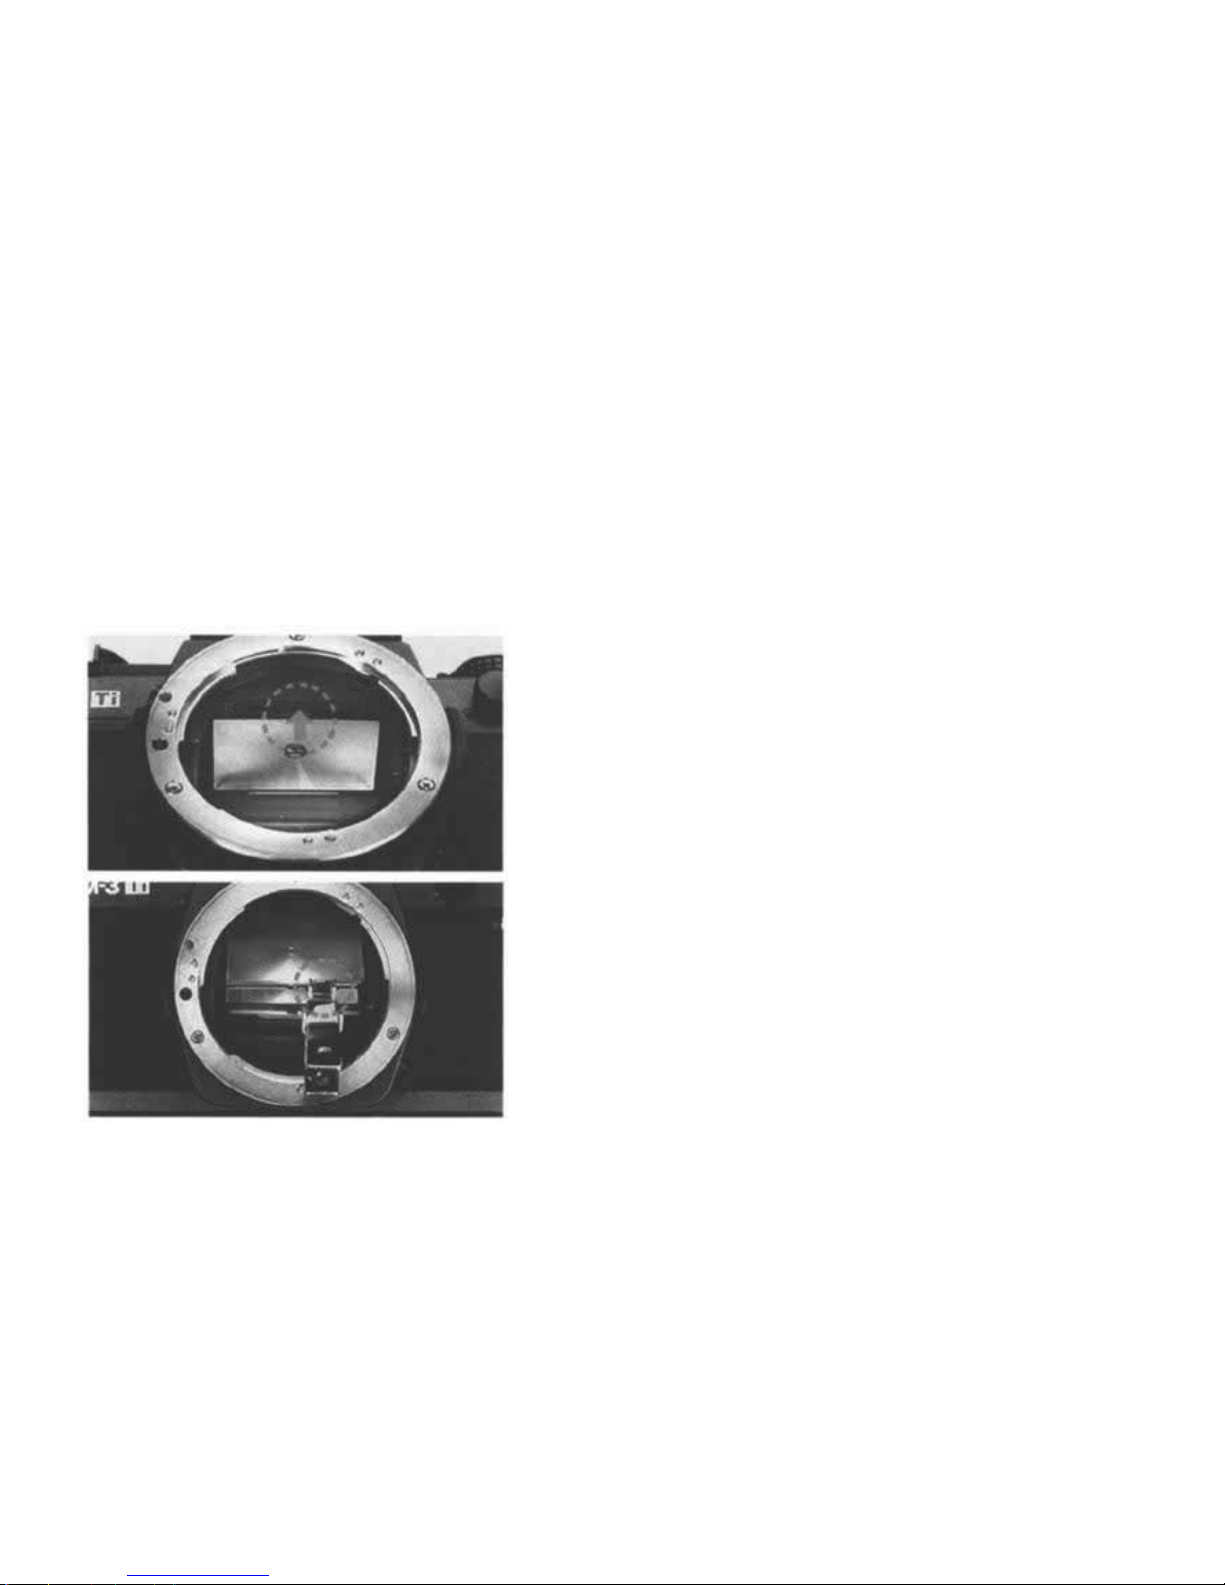
Changing the Focusing Screen
Reference
P 92-94
Pull down the screen frame.
Pull the lug at top inside the body mount toward you to
swing d own the screen frame.
1
To change the focusing screen, use the tweezers
supplied with an optional focasing screen. Push the
frame upward until you hear a click.
2
48
Page 50
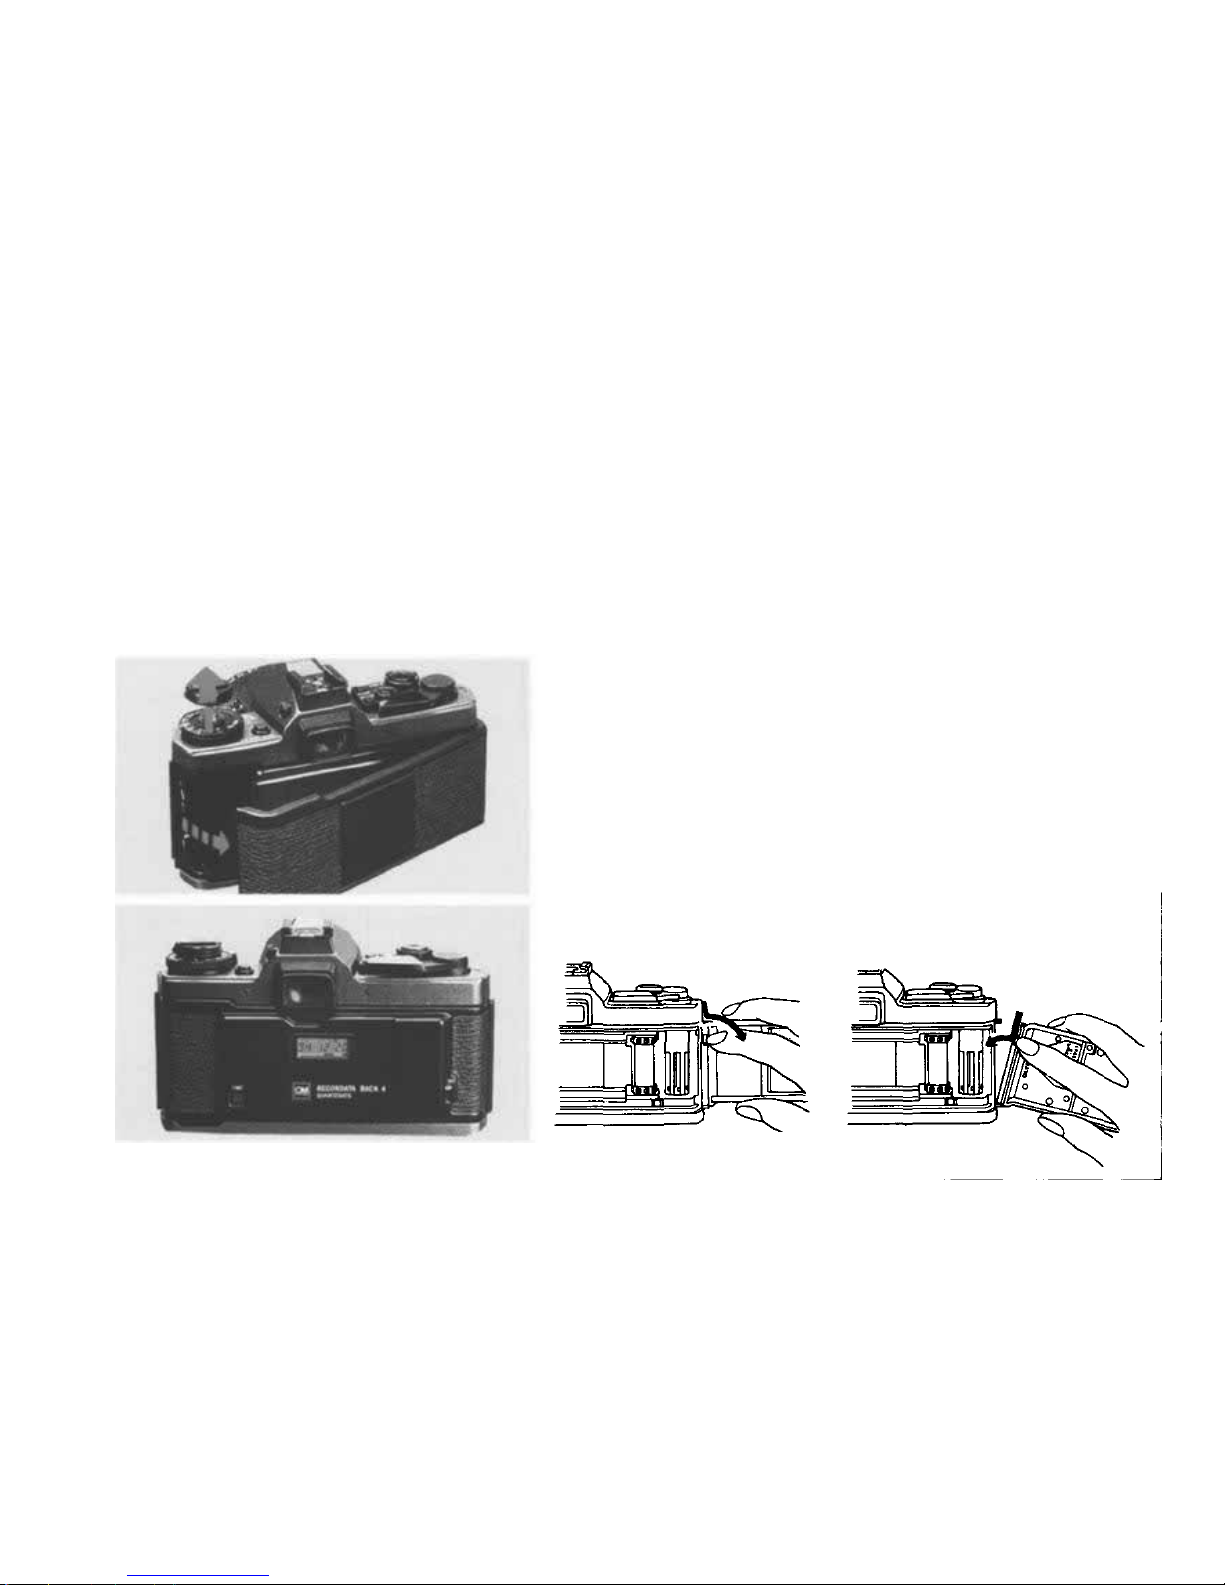
Changing the Camera Back
The camera back is interchangeable with the Recordata Back 4.
Open the camera back. Press down on the camera
back release button and remove the camera back.
1
Removing
Attaching
49
Page 51
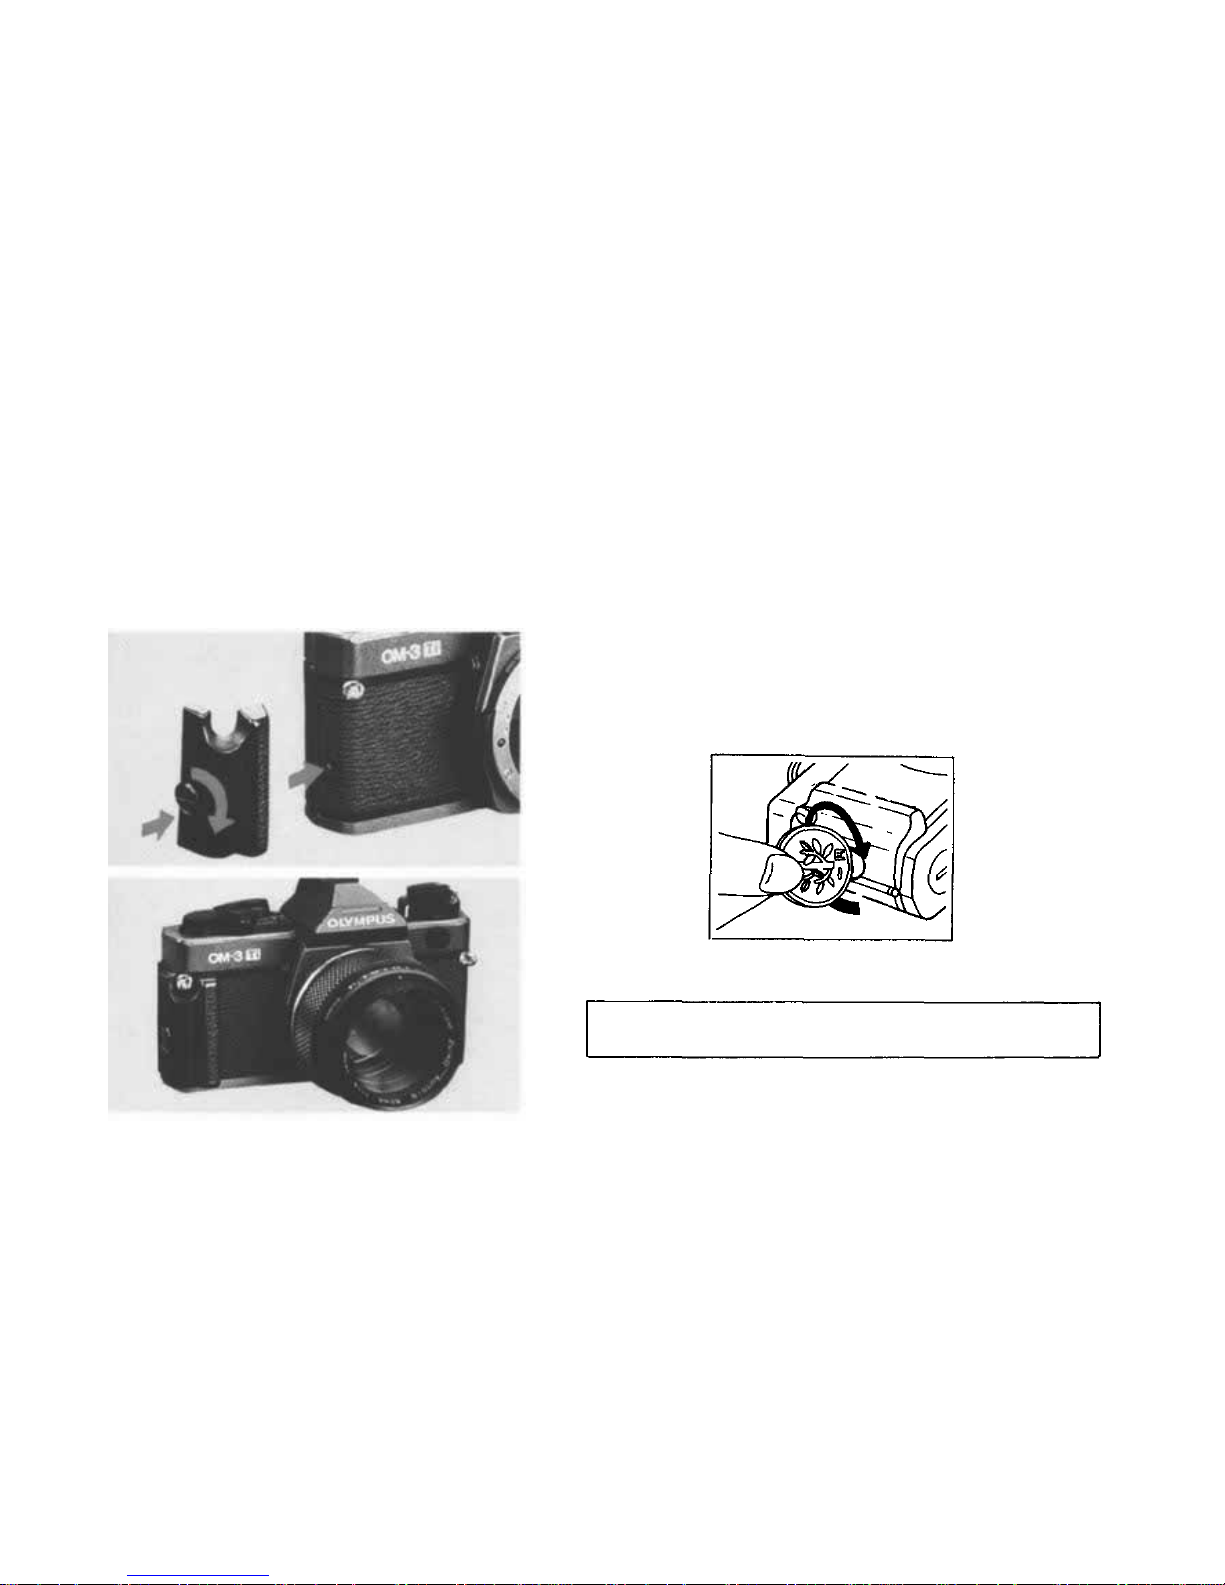
Attaching the Grip
Attach the provided Camera Grip.
1
When using a motor drive or winder, detach the Grip.
50
Page 52
Page 53

< For Your Creative Photography >
52
Page 54

THE FASCINATING RESULTS OF CREATIVE EXPOSURE AN D
HIGH-SPEED
SYNCHRONIZATION
By
Aklo
Kojima
Have you always been satisfied with the resulting images
when using the camera's meter or an automatic exposure
system?
Chances are, most of the time you've been happy with
the results. Occasionally, however, you may have been
disappointed by photographs that didn't turn out as
expected, especially shots wit h backlighting or other
special lighting conditions, or those shots where you tried
to capture a particular mood or express your own
creativity.
Color reversal films, in particular, allow for only a narrow
latitude of exposure so that in many cases satisfactory
results are not obtained with simple automatic exposure.
Generally speaking, the results given by a camera's light
meter represent exposure values obtained by a metering
system that has been specifically adopted fo r that
camera. They do not always represent data as the result
of analytical measurement of various conditions such a s
the subject's brightness range and distribution as well as
contrast. In actual shooting conditions, however, there is
often a very wide brightness range (luminance range) —
from the brightest spot to the darkest spot in a picture. In
some landscapes, for example, there can be a difference
of as much as 8 exposure values (EV) in the brightness
range of an image, representing a brightness/darkness
ratio of more than 1 : 200. The subject brightness range
that a film can reproduce ( or an effective exposure range
of a fi l m ) is limit ed to about 4- 5 EV. Therefore, in many
cases it is impossible t o accurately reproduce th e subject
in its entire range on film.
The automatic exposure system (AE) on ordinary
cameras generally selects exposure using an exposure
meter in combination with the film speed. However, if
photography is to be a means of communication, the
photographer must control the tone of the picture in order
to most effectively emphasize the mood and expression
of the subject. To do this, it is necessary to choose th e
exact spot on which you want t o emphasize the desired
tone and match this spot to the effective exposure range
of a film.
To meet such exposure requirements, the following three
types of exposure are available.
Center-based exposure is the most commonly used type
of exposure. By matching the center of t he subject's
brightness range to the center of the film's exposure
range, the subject is reproduced with greater emphasis
on the center-measured tone. If the brightness range is
grea ter than th e range of th e film, the extremes will be
ignored.
Shadow-based exposure gives the highest priority to the
shadow area in the subject brightness range. The tone in
the highlight area that is not covered may be ignored.
53
Page 55

Highlight-based exposure, on the contrary, gives the
highest priority to the highlight area. This exposure allows
the shadow area to come out somewhat darker.
Advanced photographers oriented for creative
photography base their exposure selection on these
considerations. Measuring the values on several
important spots of the image with a hand-held s po t m eter,
they have to take all the troublesome and time-
consuming steps necessary to calculate the exposure
mentally. If everything goes well, the image will be
properly exposed.
The OM-3Ti does all this automatically. Equipped with a
spot metering system and built-in computer, it calculates
the correct exposure value and frees the photographer
from having to make numerous complicated exposure
calculations. Now, with the OM-3Ti camera, it's easy f or
everyone to obtain high-precision, "creative" exposure
control.
When combined with a T-Series flash, the OTF direct
light metering function offers total control of flash
strength, eliminating any bothersome calculation of
exposure. When combined wi th the F280, Super FP flash
control is possible with a high speed shutter. This allows
fo r daylight synchro, offering the benefits of flash use in
well-lit conditions and daylight synchro shooting of fast-
moving subjects. Moreover, because daylight synchro
with a wide open aperture can result in out-of-focus
background, the subject can stand out to render a more
dramatic or portrait-like effect.
All these flash capabilities are very attractive to
photographers engaged in creative activities with 35mm
SLRs. Additionally, those flashes with the Super FP
mode have a long emission duration which conventional
flash units don't have. If this is put to good use, it is
possible to create a totally new photographic effect. It all
depends on your creativity.
54
Page 56
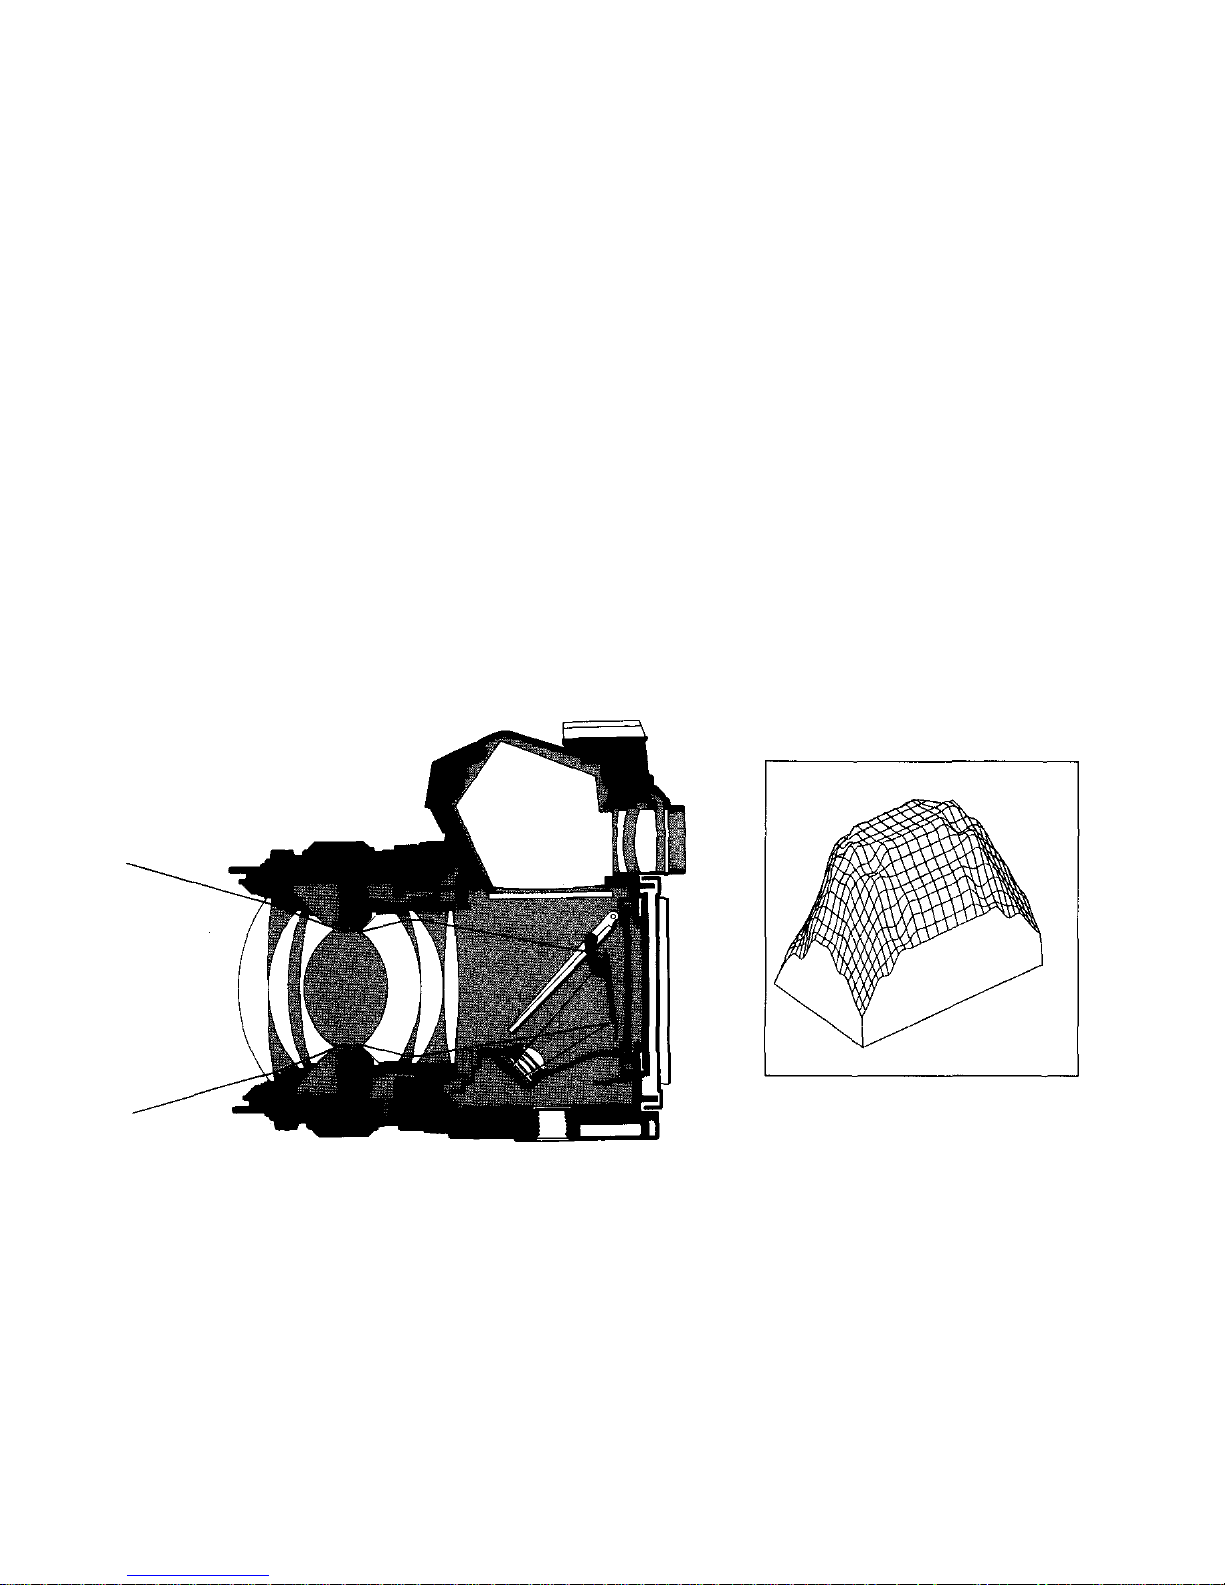
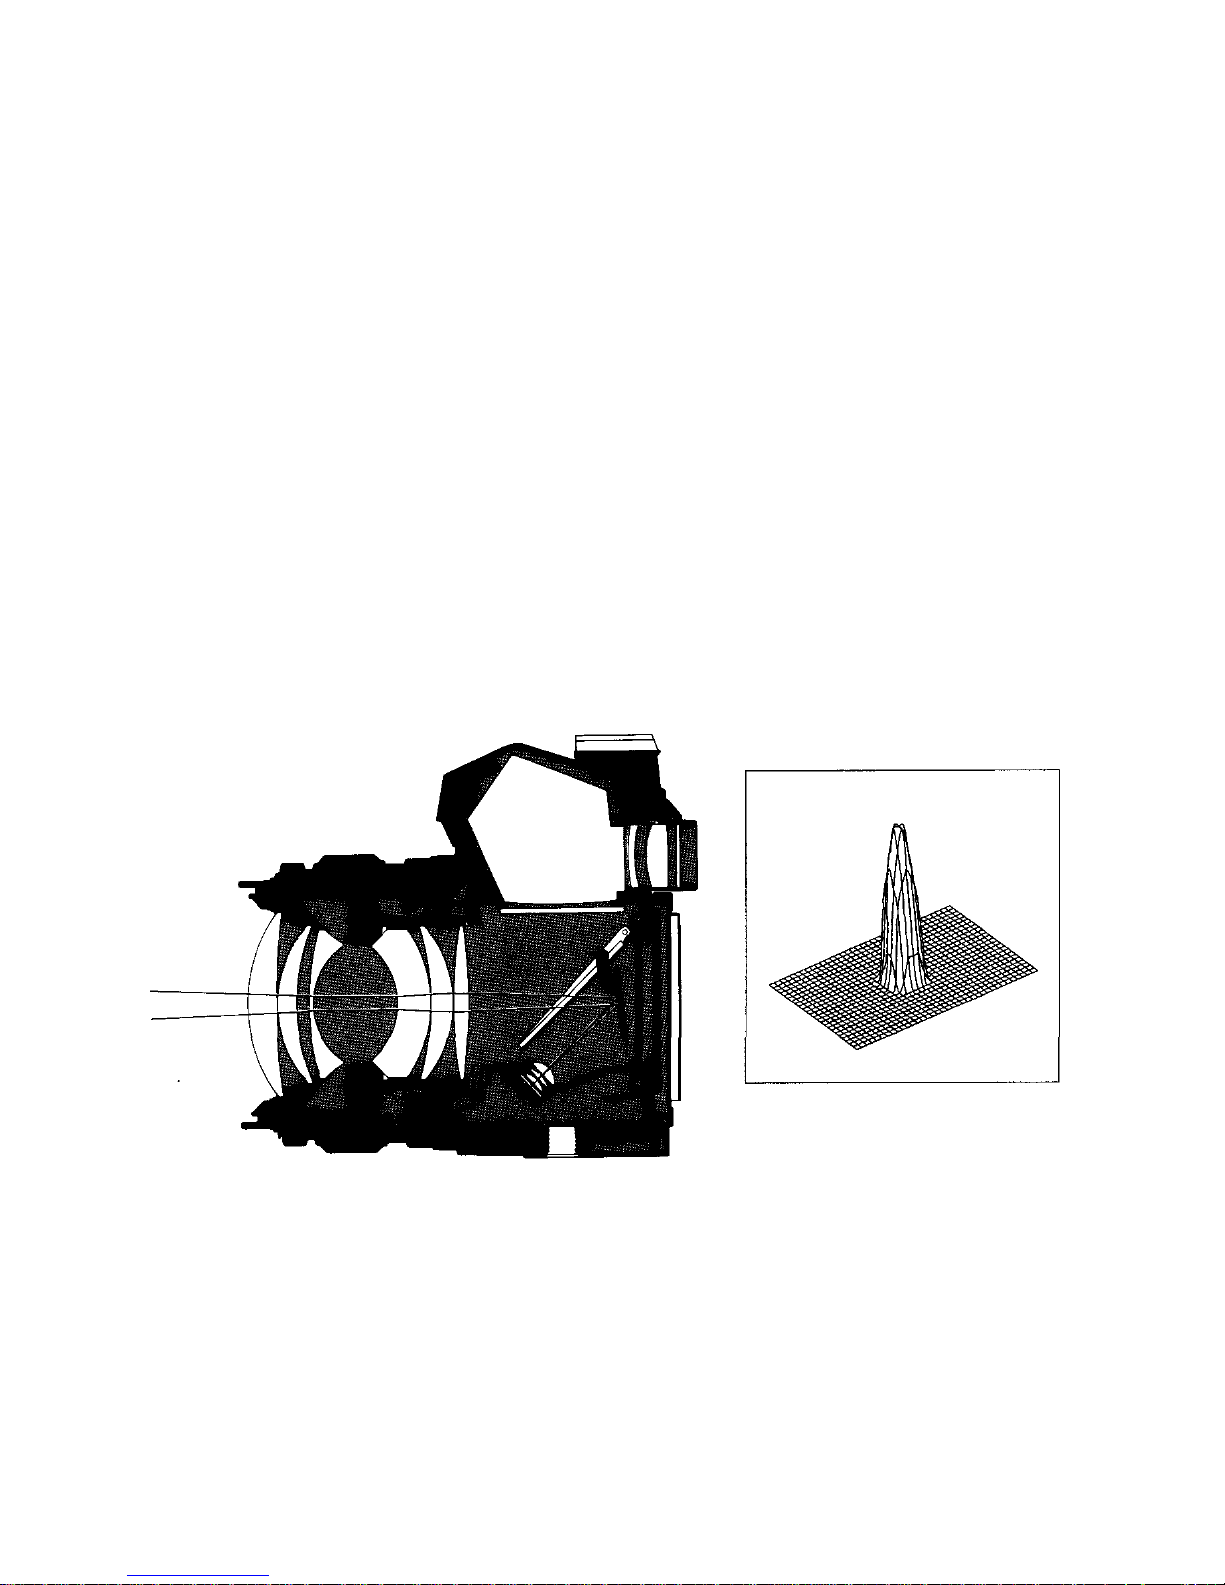
CENTER-WEIGHTED AVERAGE LIGHT METERING
The OM-3Ti uses center-weighted average light metering
for its basic light metering system. This system
emphasizes measurement of brightness in th e center of
the screen, rather than averaging measurement of the
brightness of the e n tire screen. Thus, th e main subject in
the center is unlikely to be insufficiently exposed, even
when the background is to o bright or to o dark. This
metering system thereby does an excellent job of
handling most ordinary shooting situations — such as
situations when front-lighting and contrast isn't too strong.
Since the OM-3Ti has a light-receiving element in an
ideal position at the bottom of th e mirror box, th e amount
of light that arrives at the light-receiving element doesn't
change even when the focusing screen is replaced. For
this reason, the OM-3Ti achieves correct light metering
with all focusing screens. Additionally, there is no
adverse effect from rear incidence light through the
eyepiece.
Center-weighted average metering
3-dimensional sensitivity distribution
diagram
55
Page 57
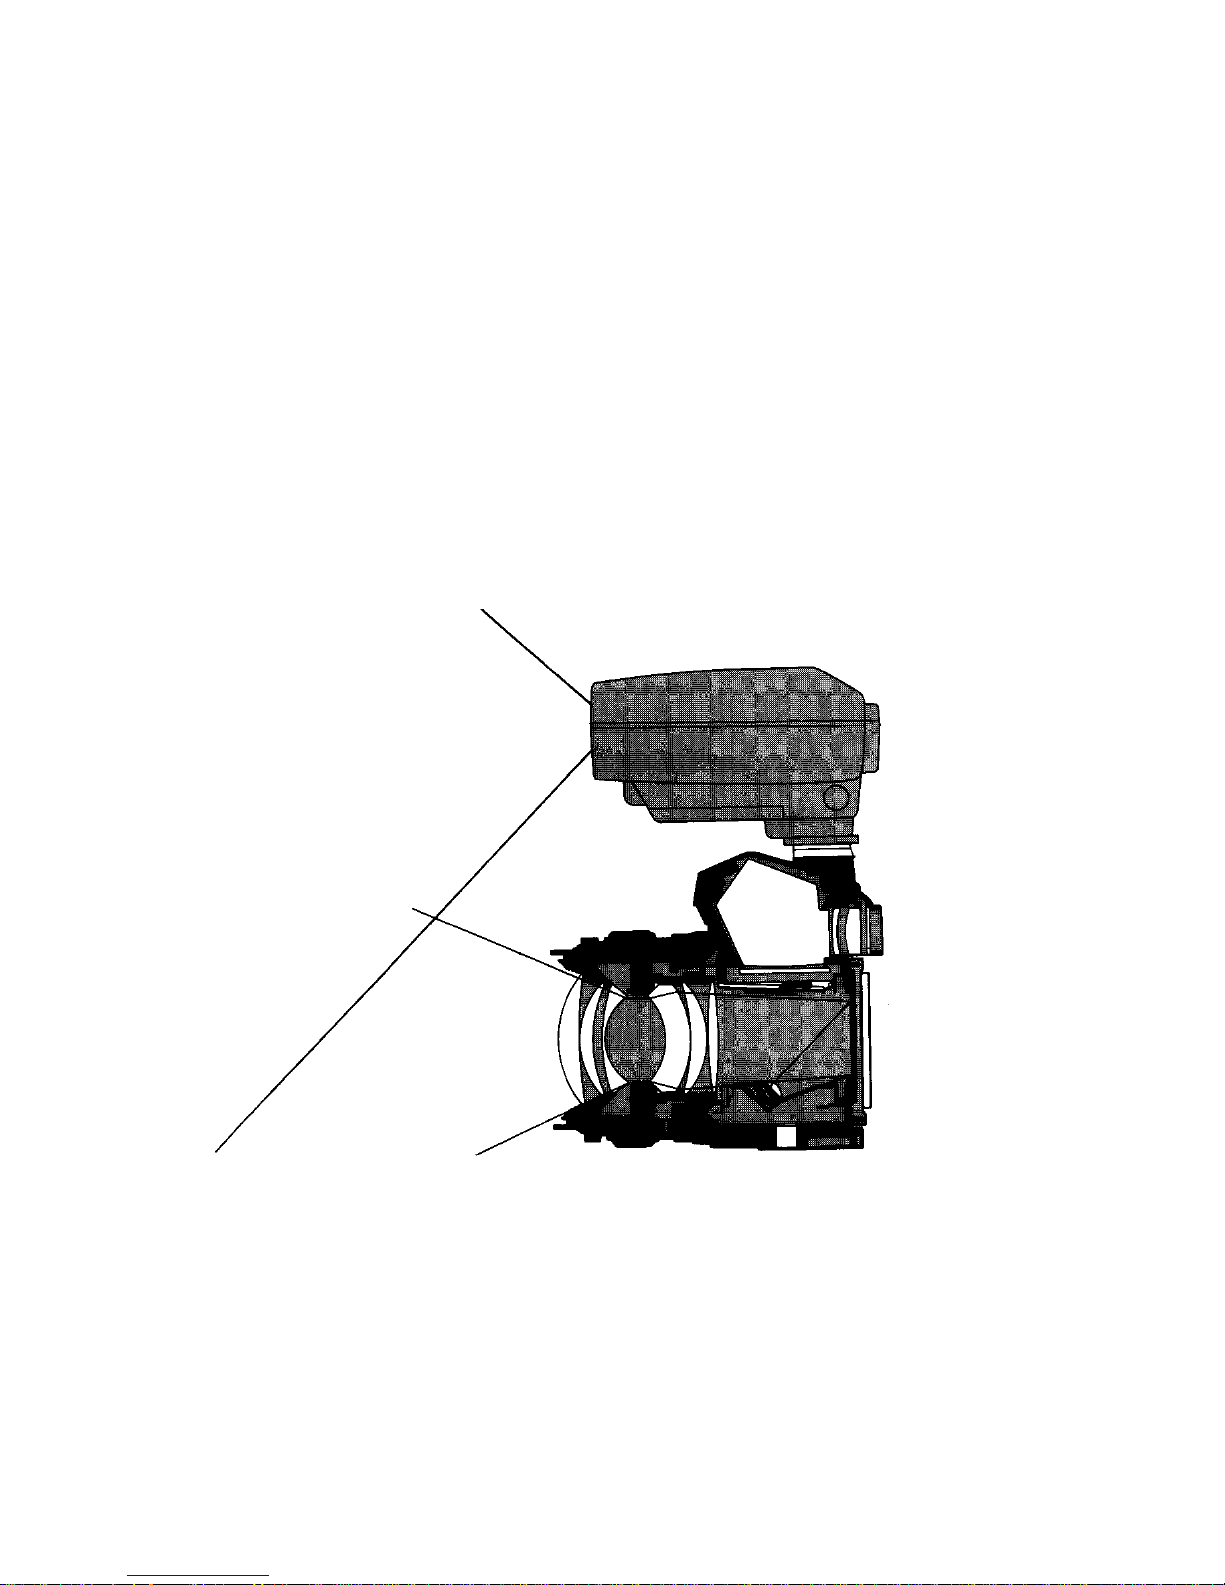
OTF AUTO LIGHT METERING
The OM-3Ti has manually sele c ta b l e shutter speeds. But
combined wi t h a T-series flash, the camera also provides
full control of flash lighting via OTF a uto light metering.
This system automatically controls flash intensity while
directly metering the flash
lighting being exposed on film.
For this reason, there is no
deviation between the
metering area of the flash
sensor and the area actually
exposed. Moreover, all
aperture settings can be used. So advanced techniques
such as multi-flash and bounce-flash are at your
command, and are all fully automatic. Moreover,
troublesome exposure calculation in macro photography
is completely eliminated.
Center-weigh ted
average light metering is
also used in flash
shooting.
56
Page 58
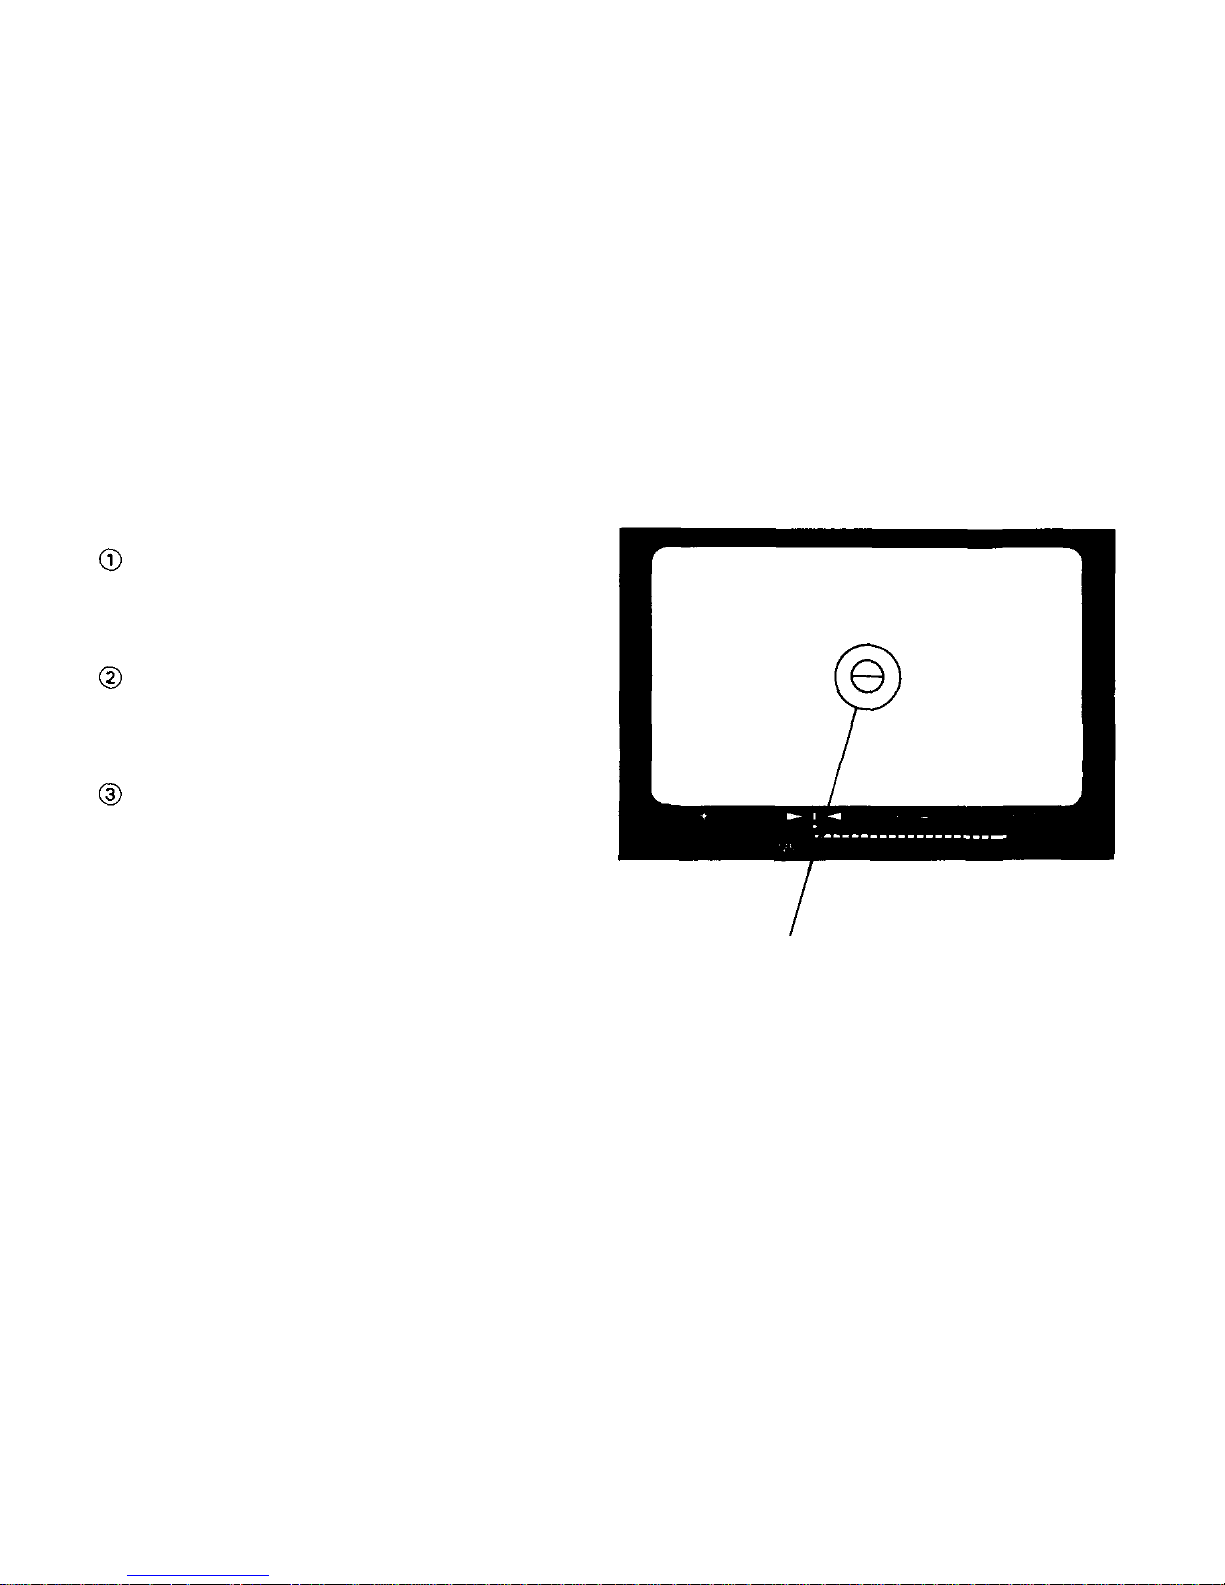
SPOT METERING (1)
This spot metering system measures the brightness of
the central spot of the picture frame (2% of the entire
frame).
The center-weighted average light metering provides
correct exposure for subjects in follow light and in
pictures having a nearly uniform brightness throughout
the entire frame. Exposure compensation is necessary,
however, f or backlit subjects and in compositions using
special lighting in whic h there is a difference in brightness
between the subject and background. In some cases, it
would also be desirable to express subtle lighting effects
according to the photographer's subject motive. To
realize such sophisticated expressions, fine metering of
various spots on the subject is required. If the "Spot"
button of the OM-3Ti is pressed, the metering mode
switc hes to spot metering in which the brightness of the
area (corresponding to the microprism section in the
center of the viewfinder) is metered and stored in
memory. By using this spot metering, photographers can
control exposure as desired to realize creative
lig h t i n g compositions.
Spot metering 3-dimensional
sensitivity distribution diagram
57
Page 59
SPOT METERING (2)
To ensure correct operation of the spot metering:
In spot metering, it is necessary to put the area
to be metered in the microprism section. If there
is a brighter spot in the microprism section, th an
the intended subject, the metering value will be
affected.
If a lens is changed, t he light receiving angle fo r
spot metering also changes automatically. The
angle is narrower with telephoto lenses, and wider
with wide angle lenses. However, the metering
area seen in the viewfinder does not change.
When a zoom lens is used, Spot Metering on the
telephoto side permits metering in n arr ow er rang e
and t h a t on th e wide angle side in a wider range,
thus allowing the users to choose the metering
range freely.
Spot metering area
58
Page 60
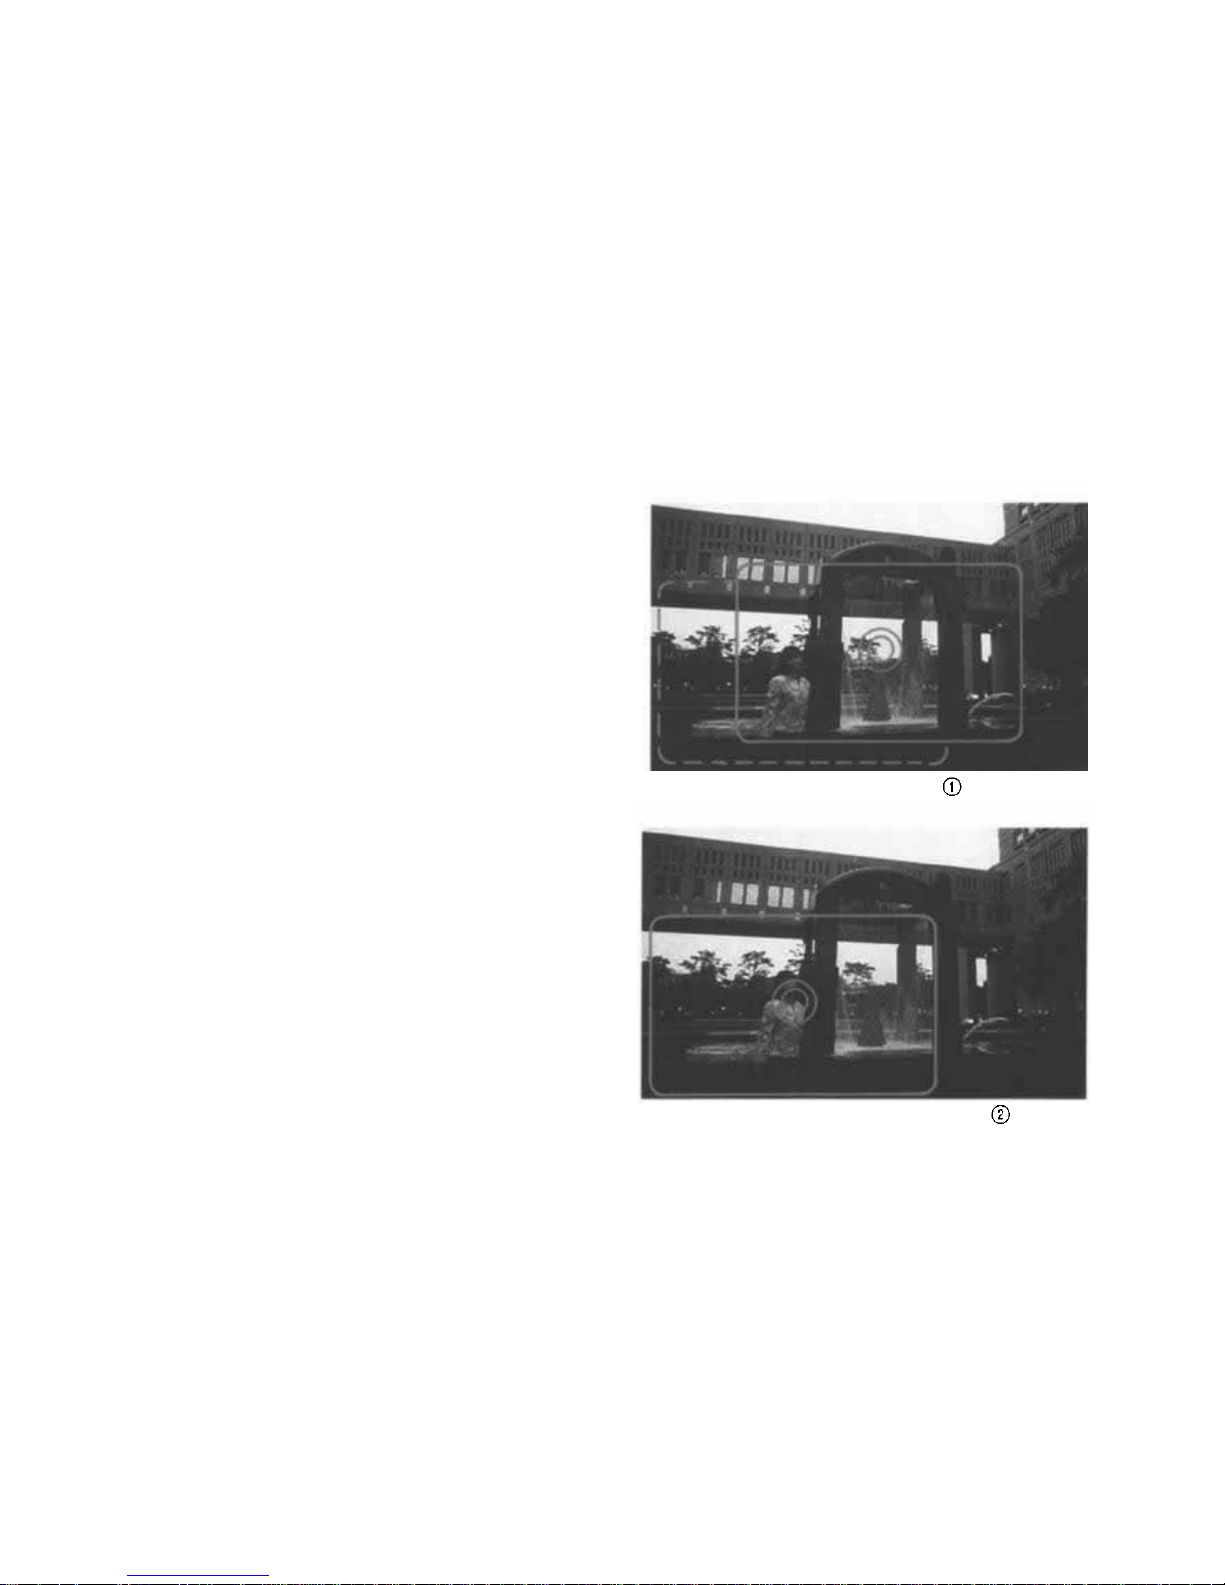
When you point the camera at the main subject and
press the spot button, the camera will measure the
brightness of the area where you position the outer edge
of the microprism and hold it in memory. This metered
value is kept in memory even if the camera angle is
changed afterwards. So you can recompose the shot in
whatever way you want.
Exposure selection can be achieved by simple operation
of the aperture and shutter speed rings after choosing
your favorite composition.
After th e shot, spot metering is automatically disengaged
and center-weighted average light met ering is restored.
When you want to cancel the input value immediately,
operate the clear lever. Even without doing so, input
value will automatically be canceled 60 seconds later.
Spot metering
Framing
59
Page 61
60
Page 62
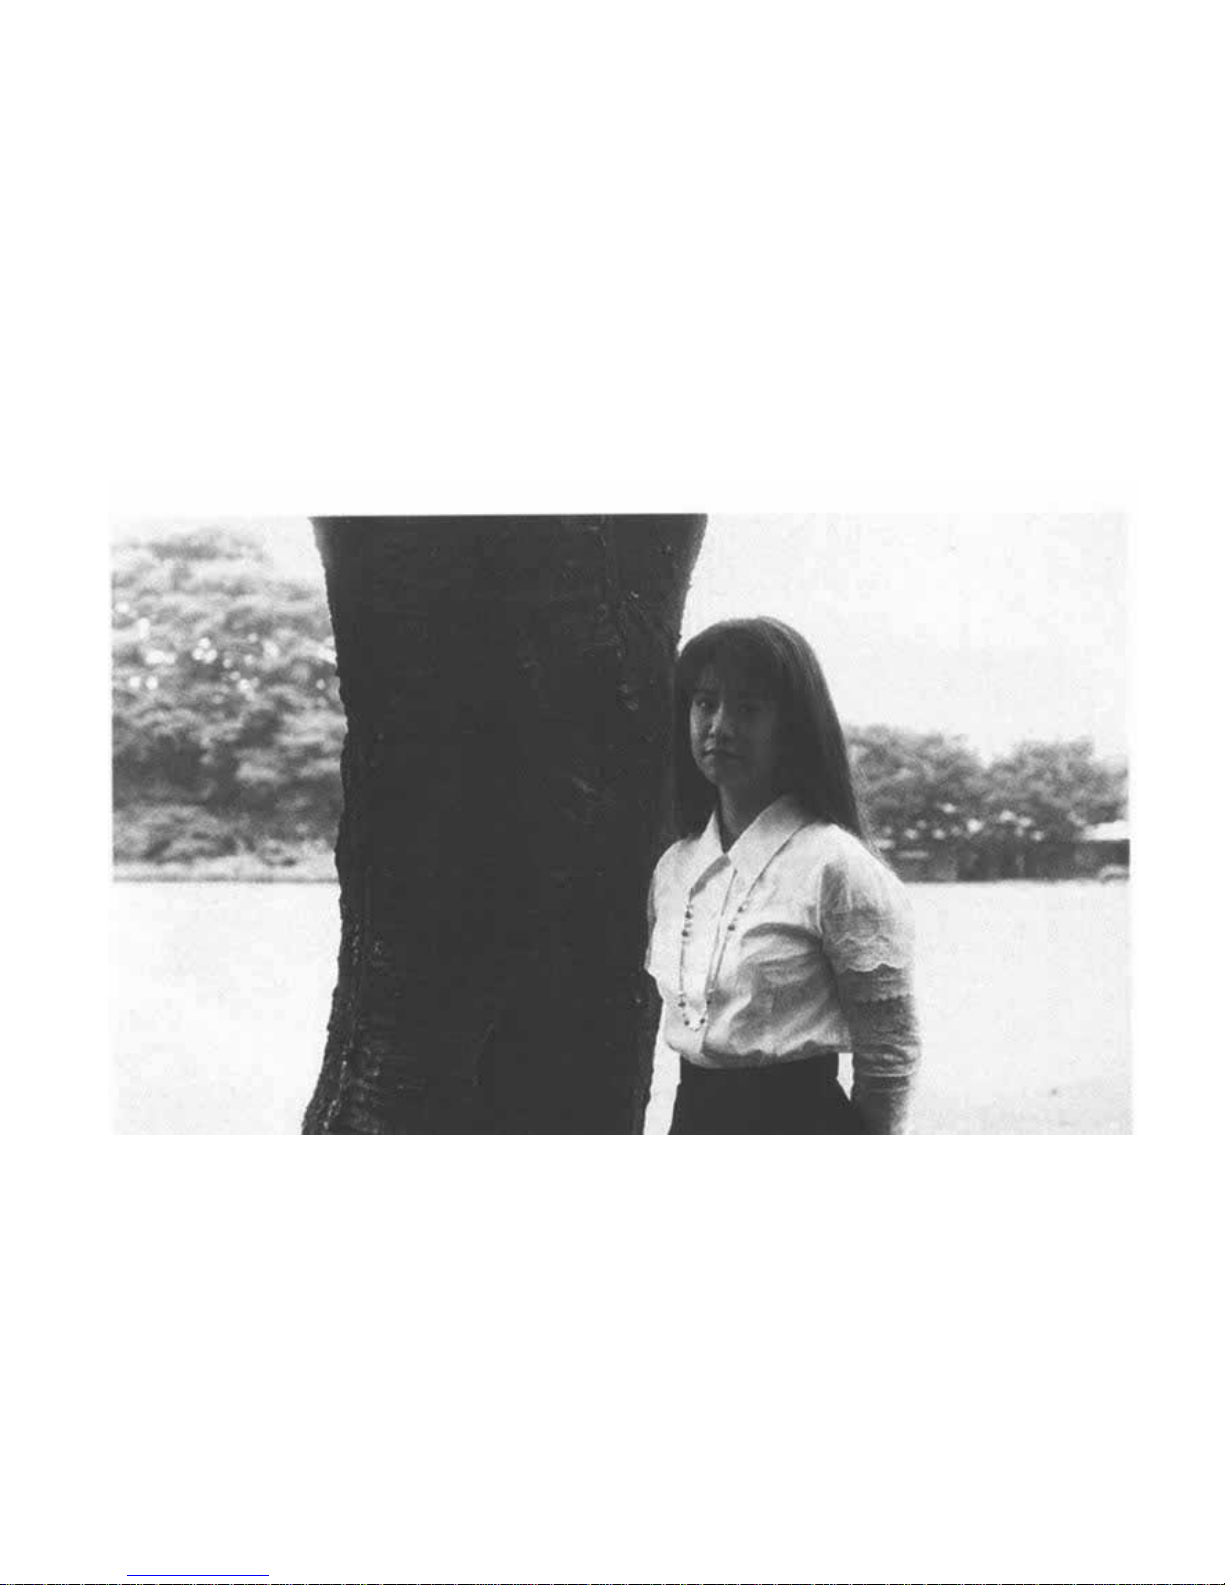
SHOOTING WITH ONE-POINT SPOT METERING
This is partial metering of only one point o n the picture
frame. Correct exposure is obtained by simply pressing
the spot button. We w il l give a simple ex a mp l e to explain
when one-point spot metering is used. If a backlighted girl
is exposed on averaged light metering, the expressions in
her face will not be clear because it comes out entirely
underexposed under th e effect of sunlight. For correct
exposure of her face, it is recommended to make a one-
point spot metering on it. Conventional exposure
operations based on the photographer's experiences and
guesswork have thus been completely eliminated to
facilitate exposure compensation in backlight. A s soon as
the spot button is pressed, the brightness of the spot area
is locked. So you can frame your picture as you like.
To clear the input value, operate the clear lever.
61
Page 63
62
Page 64
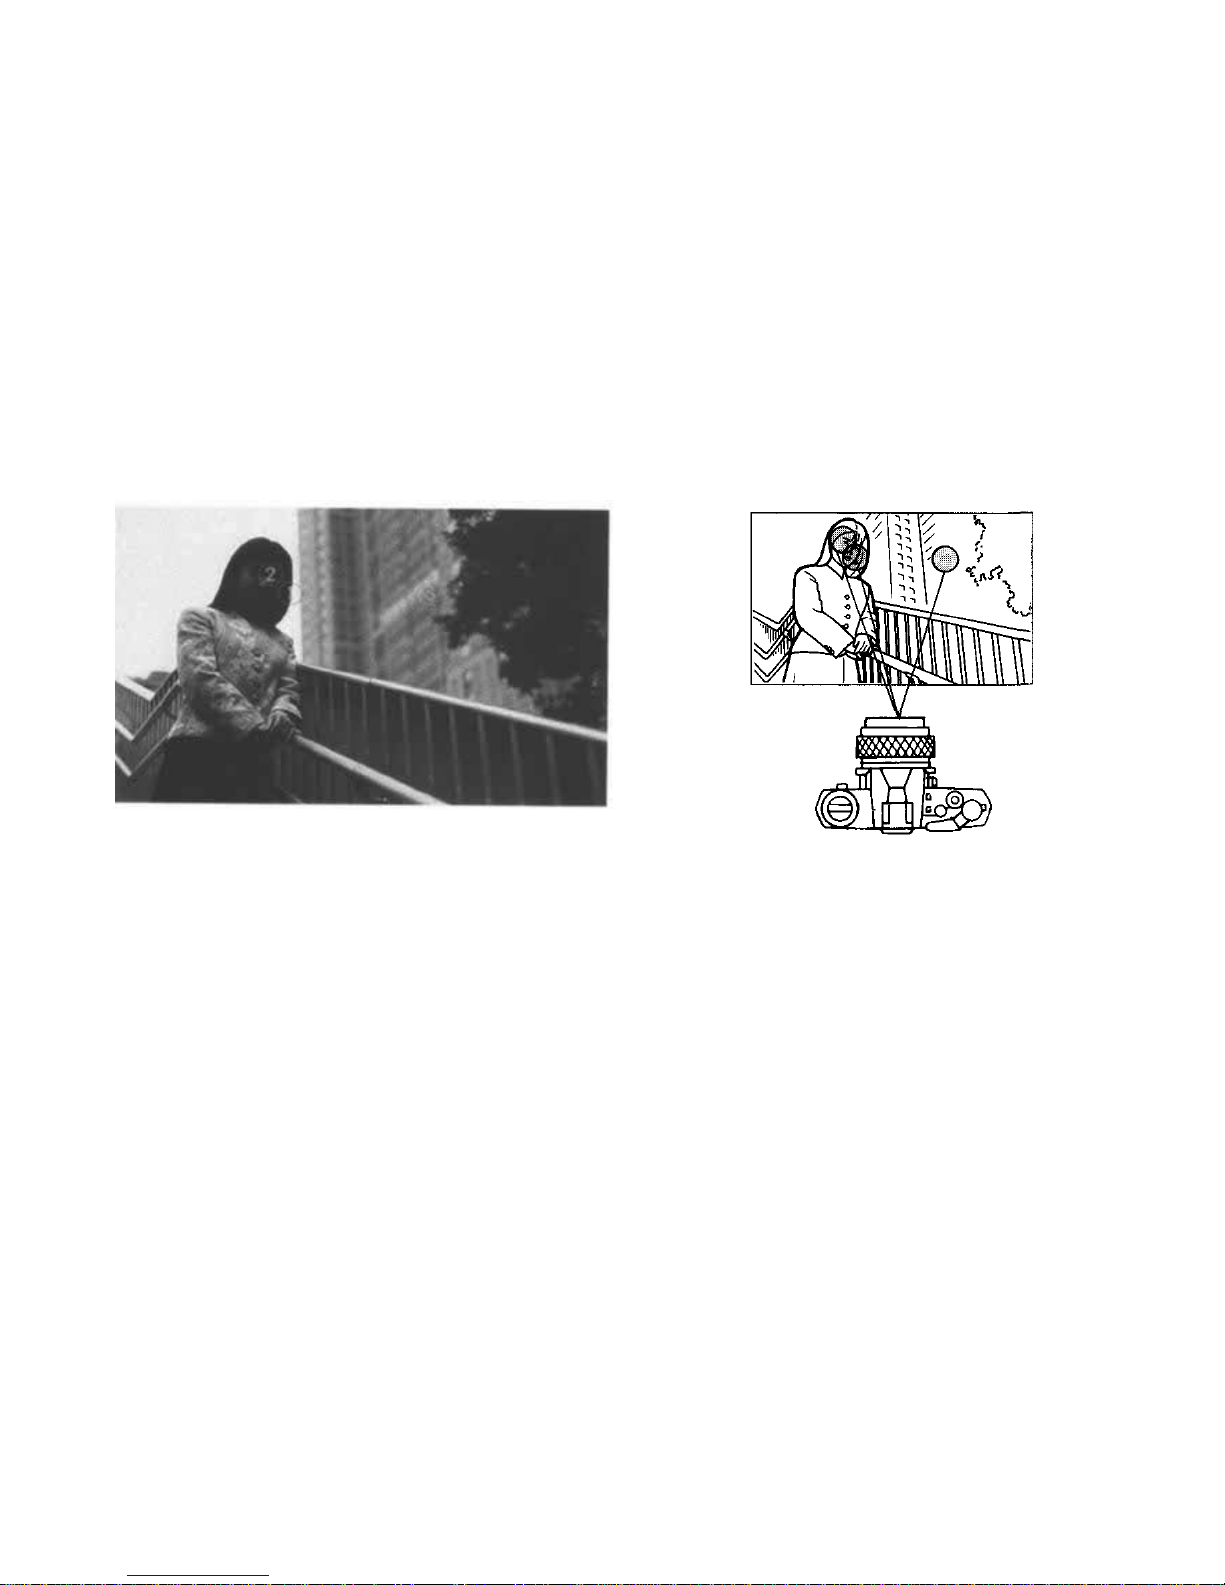
SHOOTING WITH MULTI-SPOT METERING
This is a partial metering of two or more spots on th e
picture frame. It can be used to determine exposure by
taking into account various spots that differ in brightness.
The picture above shows an example in which the
exposure of the background should also be considered
while taking care to prevent underexposure of a girl. The
first spot metering is made on her face by bringing it in
the microprism section. Then t h e second spot metering is
made on her dress by directing the camera. Exposure is
determined from the average of the two metered values
to meet the photographer's requirement. It is also
possible to input more than two points in the same
procedure. Metering is possible as many times as you
wan t, but the spot metering allows only up to e ight points
to be stored in memory. If more than eight points are
input, the last eight points are stored as a basis for
determining the exposure value.
63
Page 65
64
Page 66
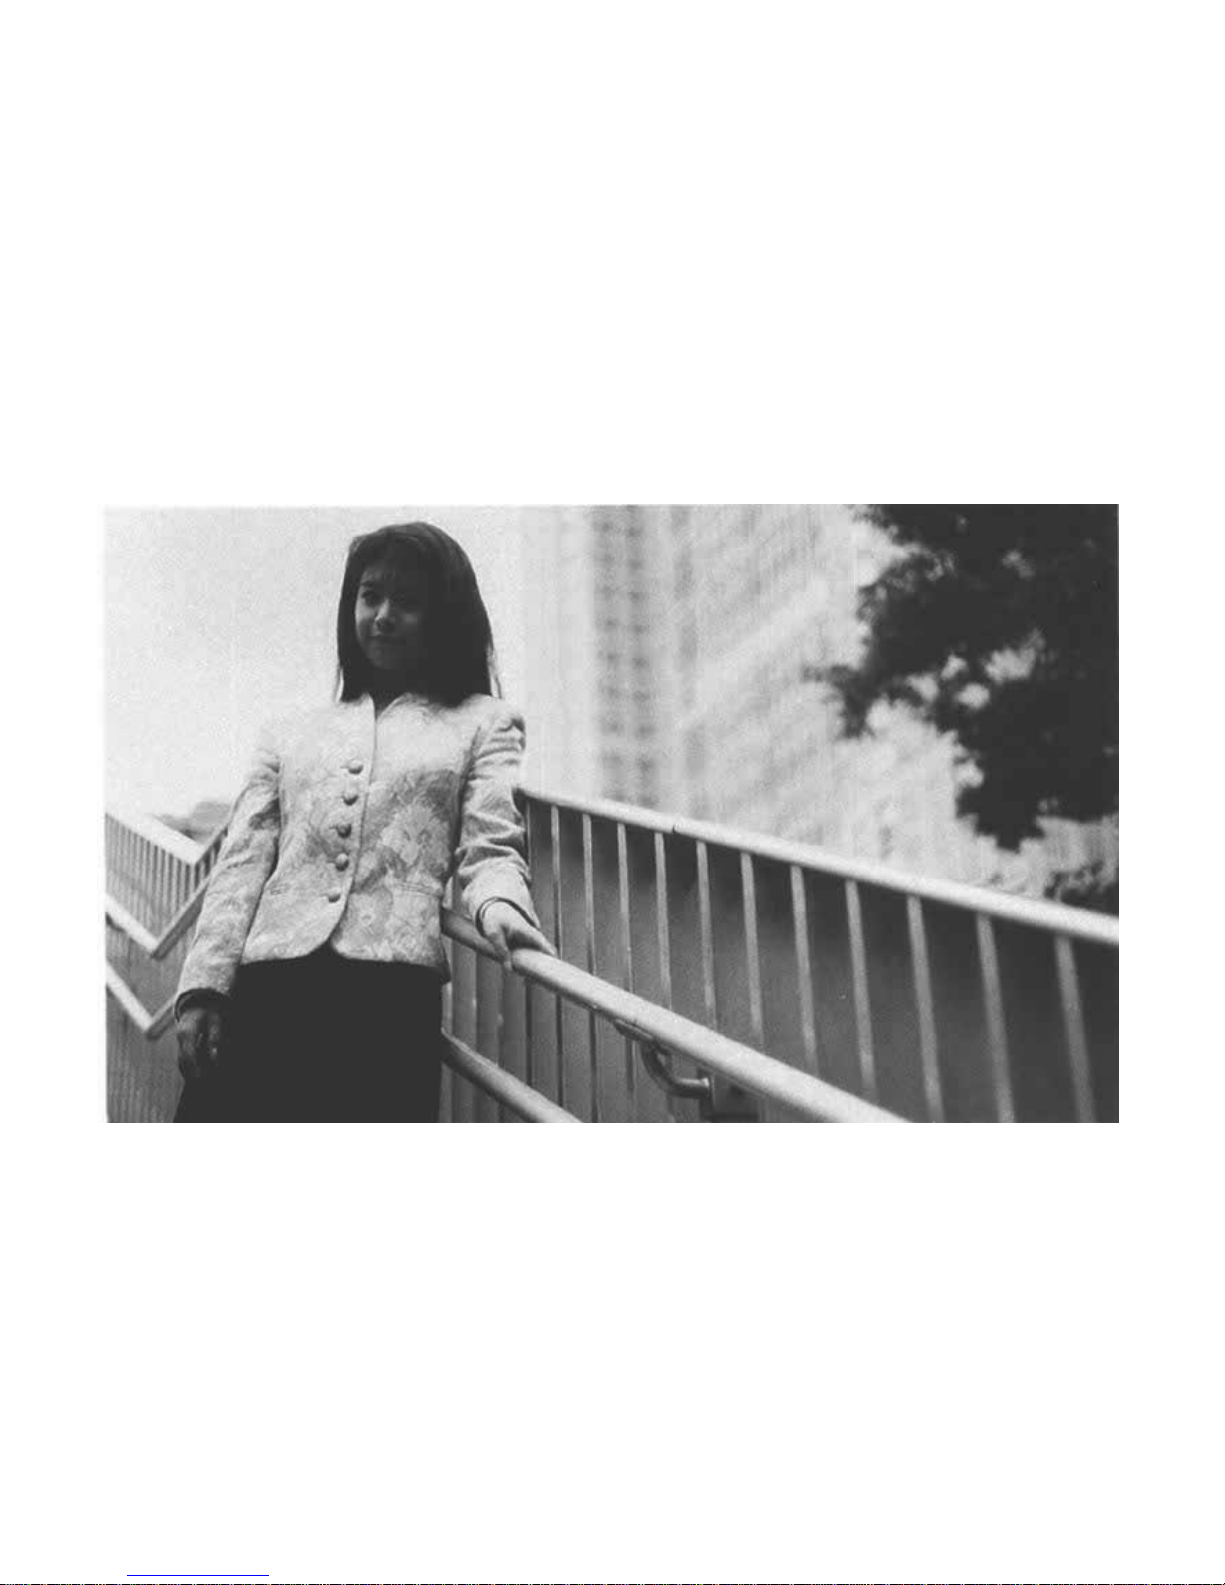
The OM-3Ti's multi-spot metering system provides
highly sophisticated lig ht measurements. Let us take
an example in the picture above. If you want to place
emphasis on the exposure of the girl, taking the
background brightness into consideration, too , yo u
can take two spot meterings on her face and one spot
metering on the background, for instance. Exposure
is determine d from the average of these three values,
with greater emphasis on the girl (a 2:1 lighting ratio).
With this system, photographers can weight their
exposures so as to make sure the prime subject is
exposed properly and the secondary subject is con-
sidered. This is now done without guesswork, in a
straightforward easy to understand manner.
SOPHISTICATED MULTI-SPOT METERING
65
Page 67
66
Page 68
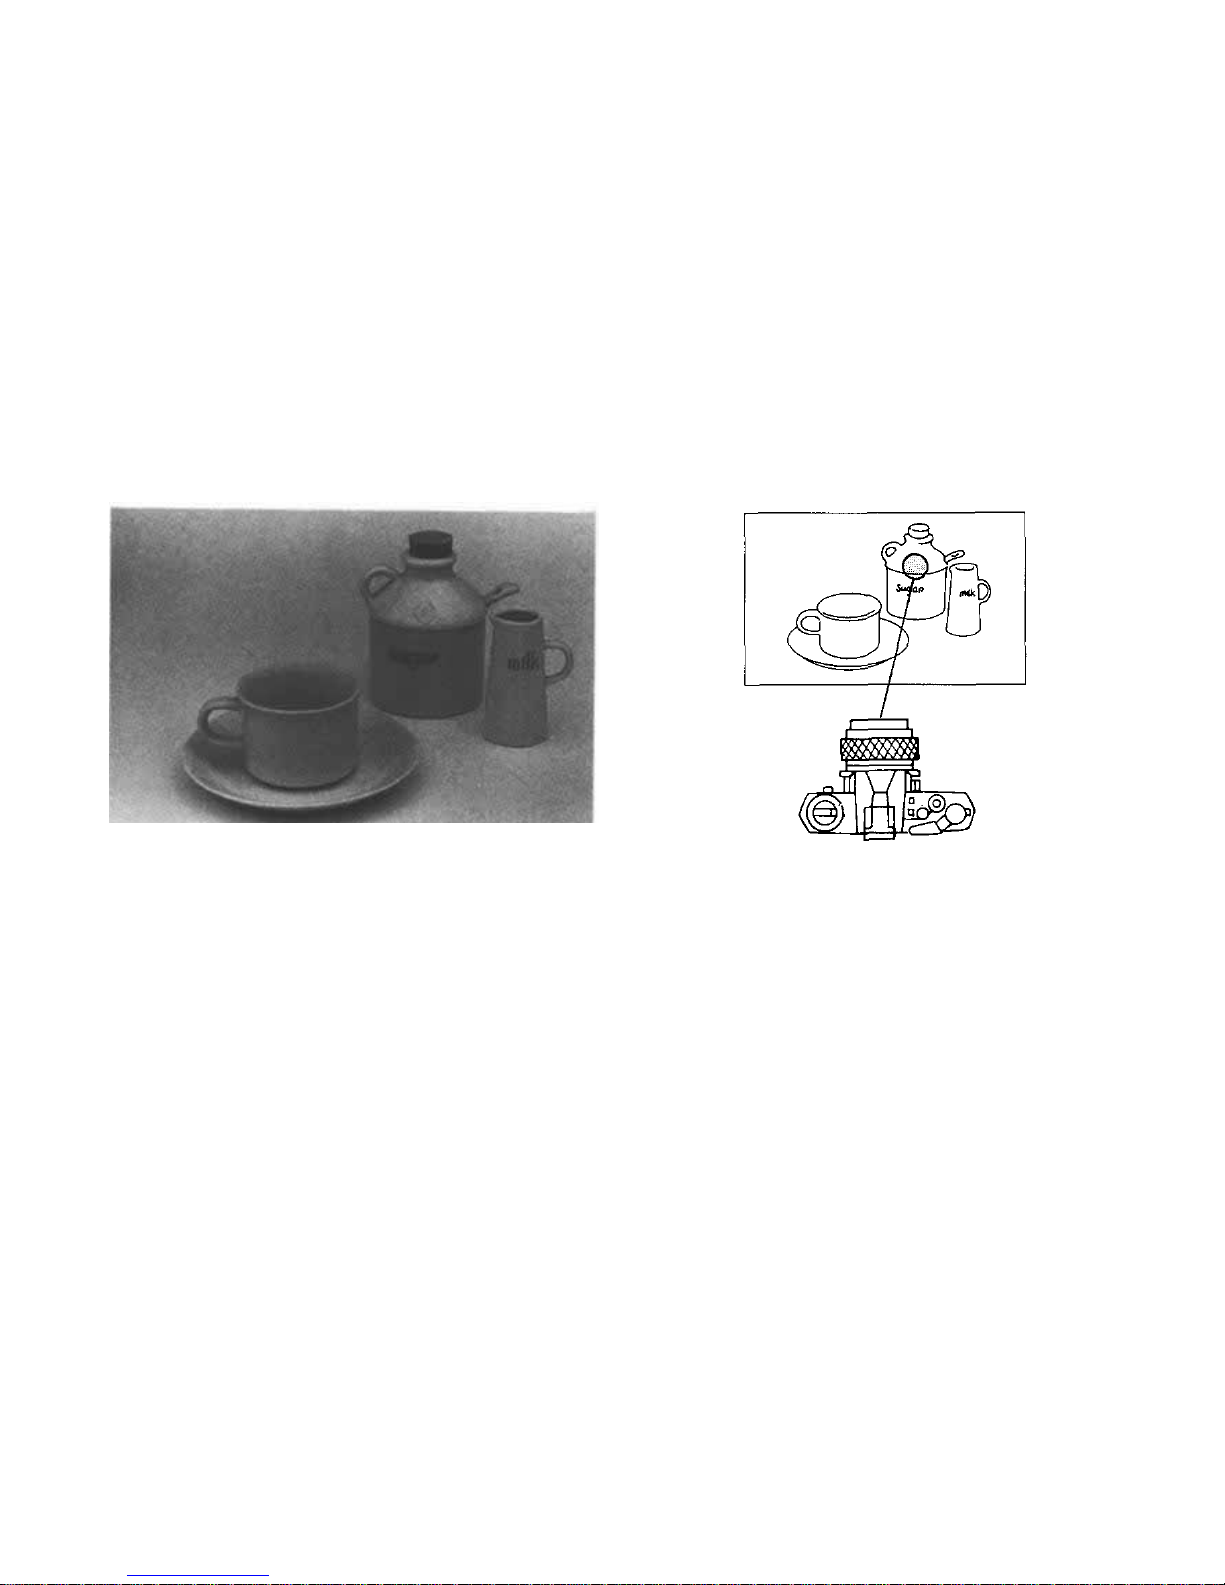
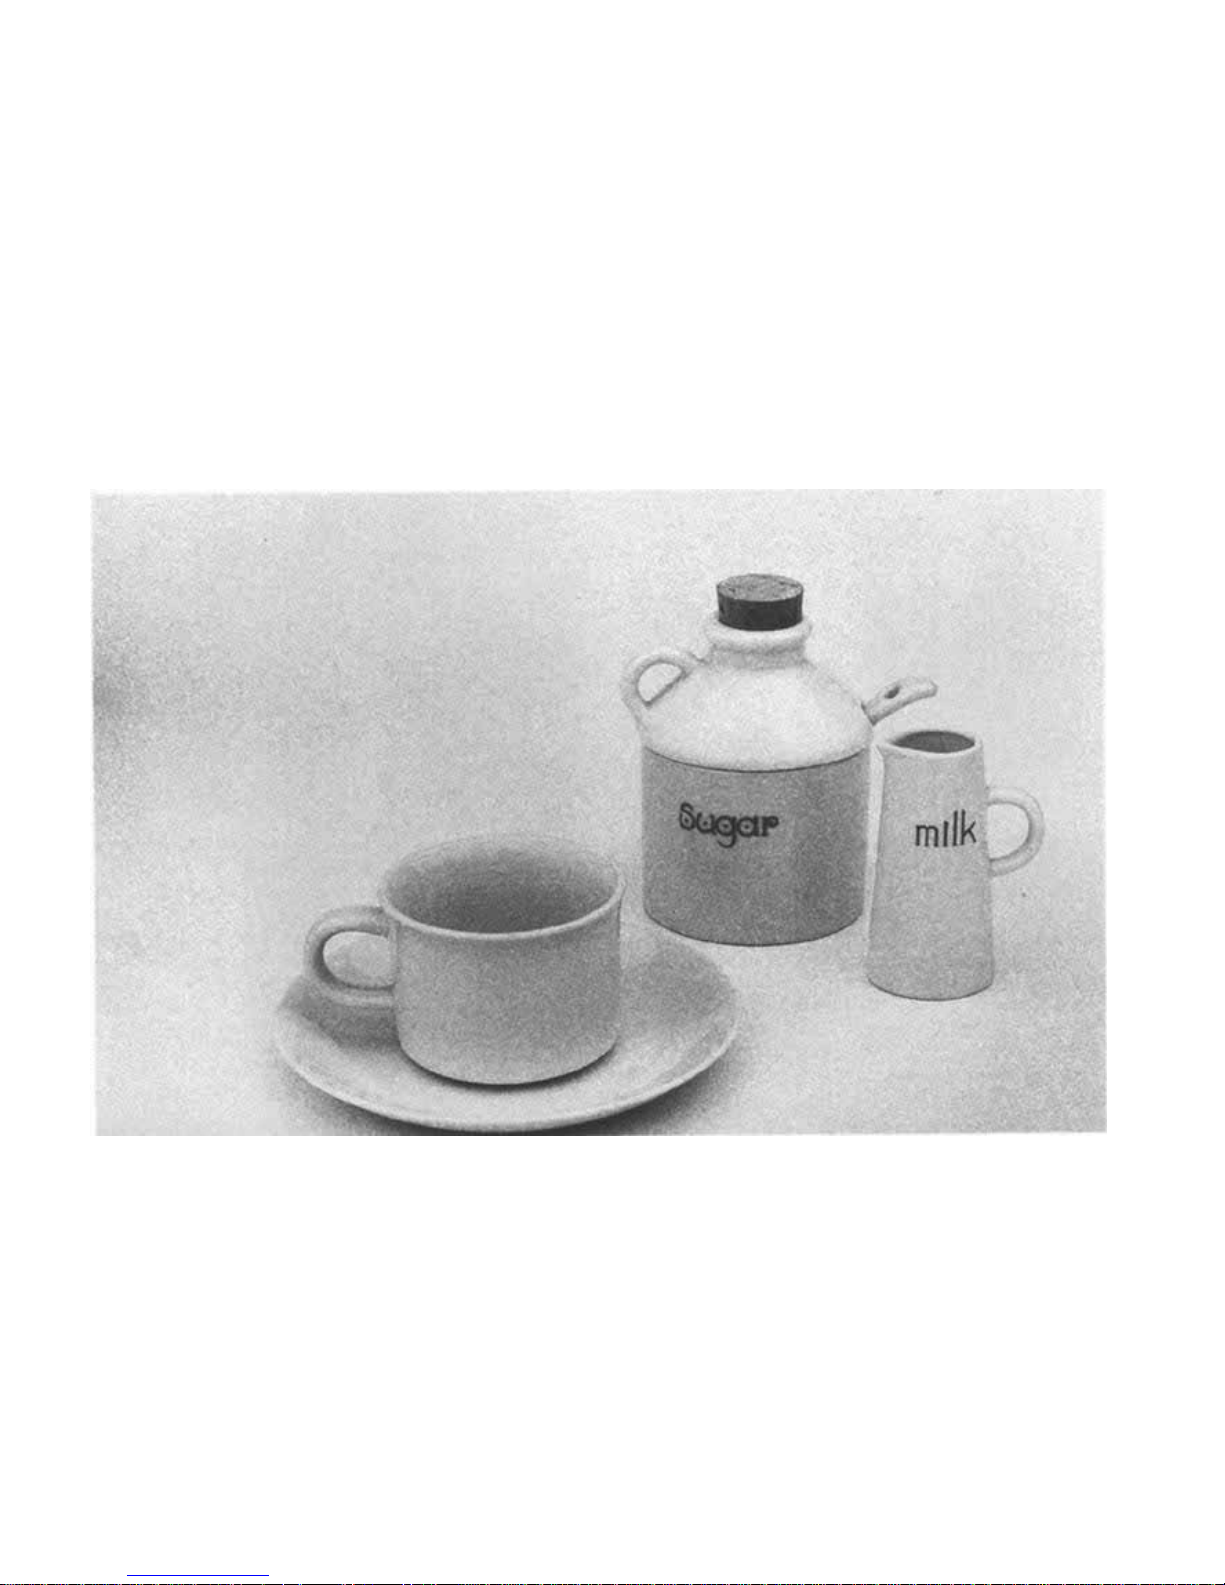
HIGHLIGHT CONTROL
The Highlight button enables white objects to come
out white. It is very useful f or copy wor k and shooting light or white subjects on the whole. After spot
metering is made on the white subject, then press the
Highlight button. The exposure value needed for
rendering it in true white will be automatically calculated and set.
In the example picture, the brightest spot of the
tableware has been metered on spot metering. Press-
ing the Highlight button increases exposure and
provides the correct overall exposure to make the
tableware white and not a dullish gray.
If the Highlight button is pressed again after the
"highlight control" is once set up, only the "highlight
control" is released and the camera returns to spot
metering. To reset center-weighted averaging light
metering, operate the Clear lever.
*l f th e Highlight button is pressed after several spots
have been measured the exposure value for the
brightest spot only will be adjusted.
67
Page 69
68
Page 70
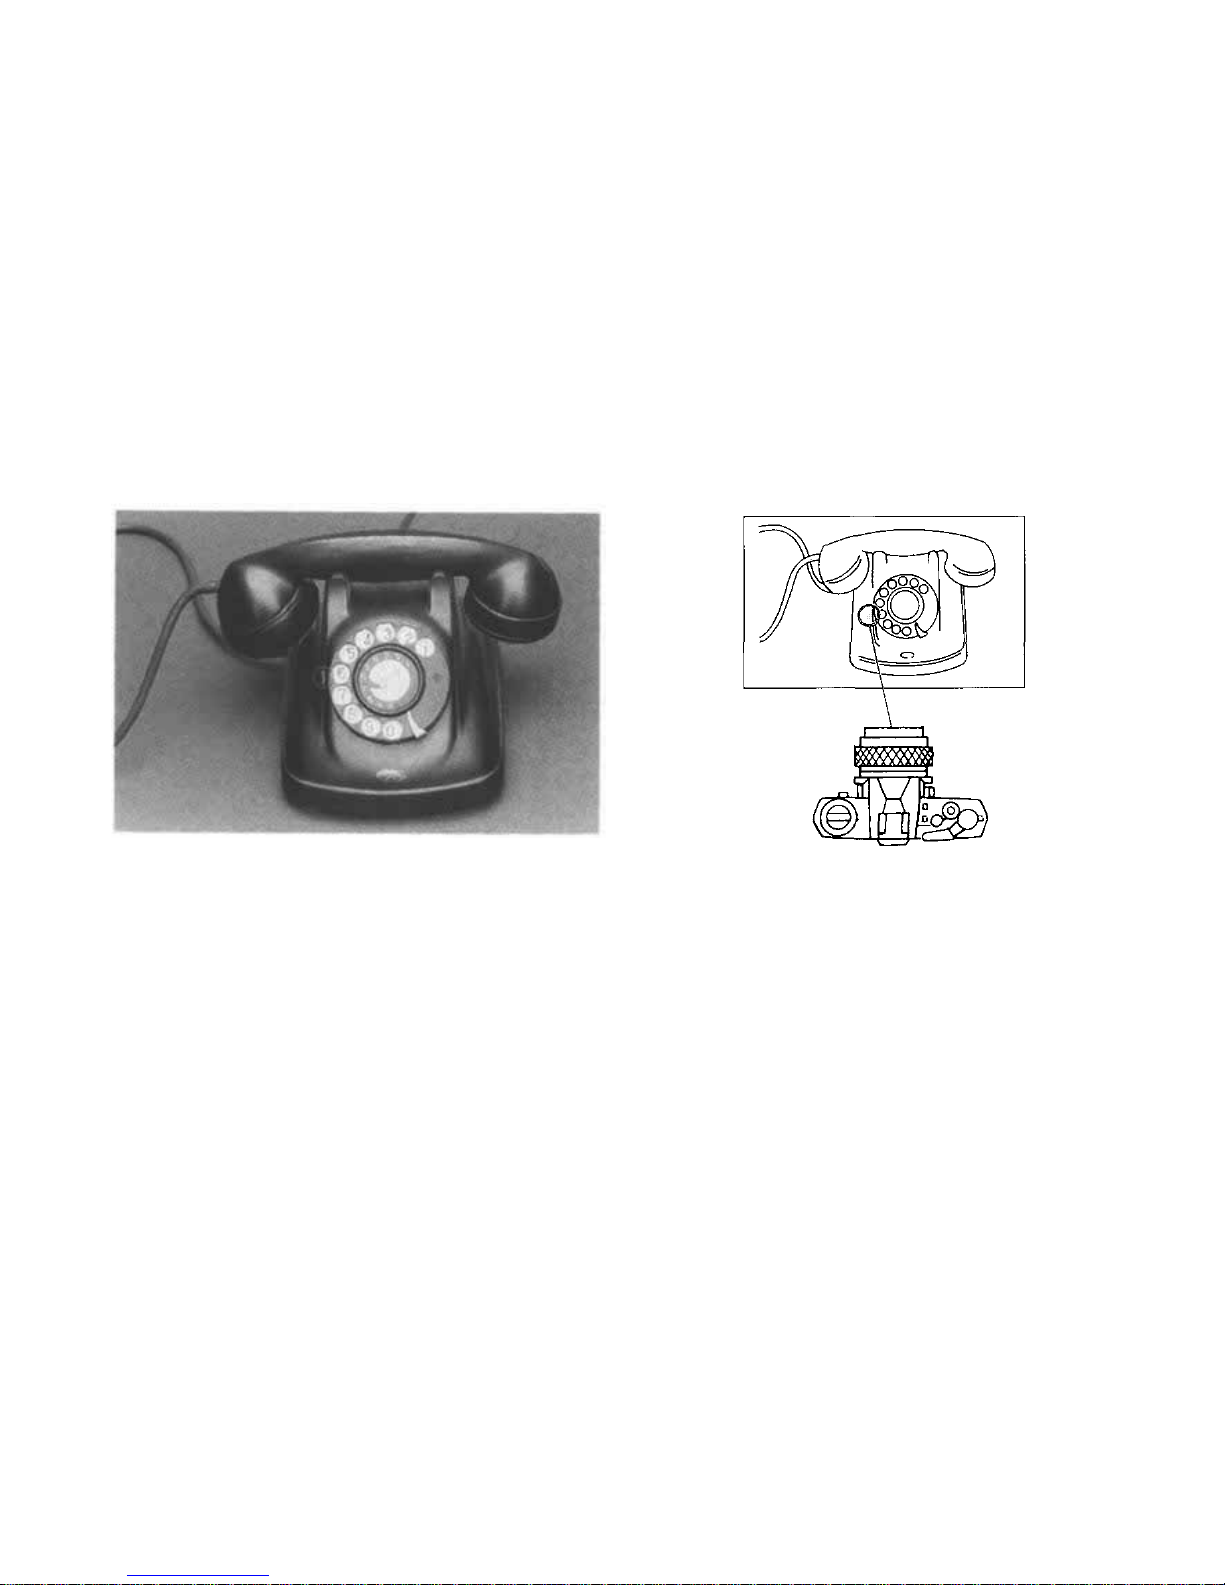
SHADOW CONTROL
The Shadow button enables black objects to accurately come out black. It is very useful fo r shooting
da rk or blackish subjects o n the whole.
Af ter a spot metering is made on the black subject,
then press the Shadow button. The exposure value
needed for rendering it in a rich black will thus be
automatically calculated.
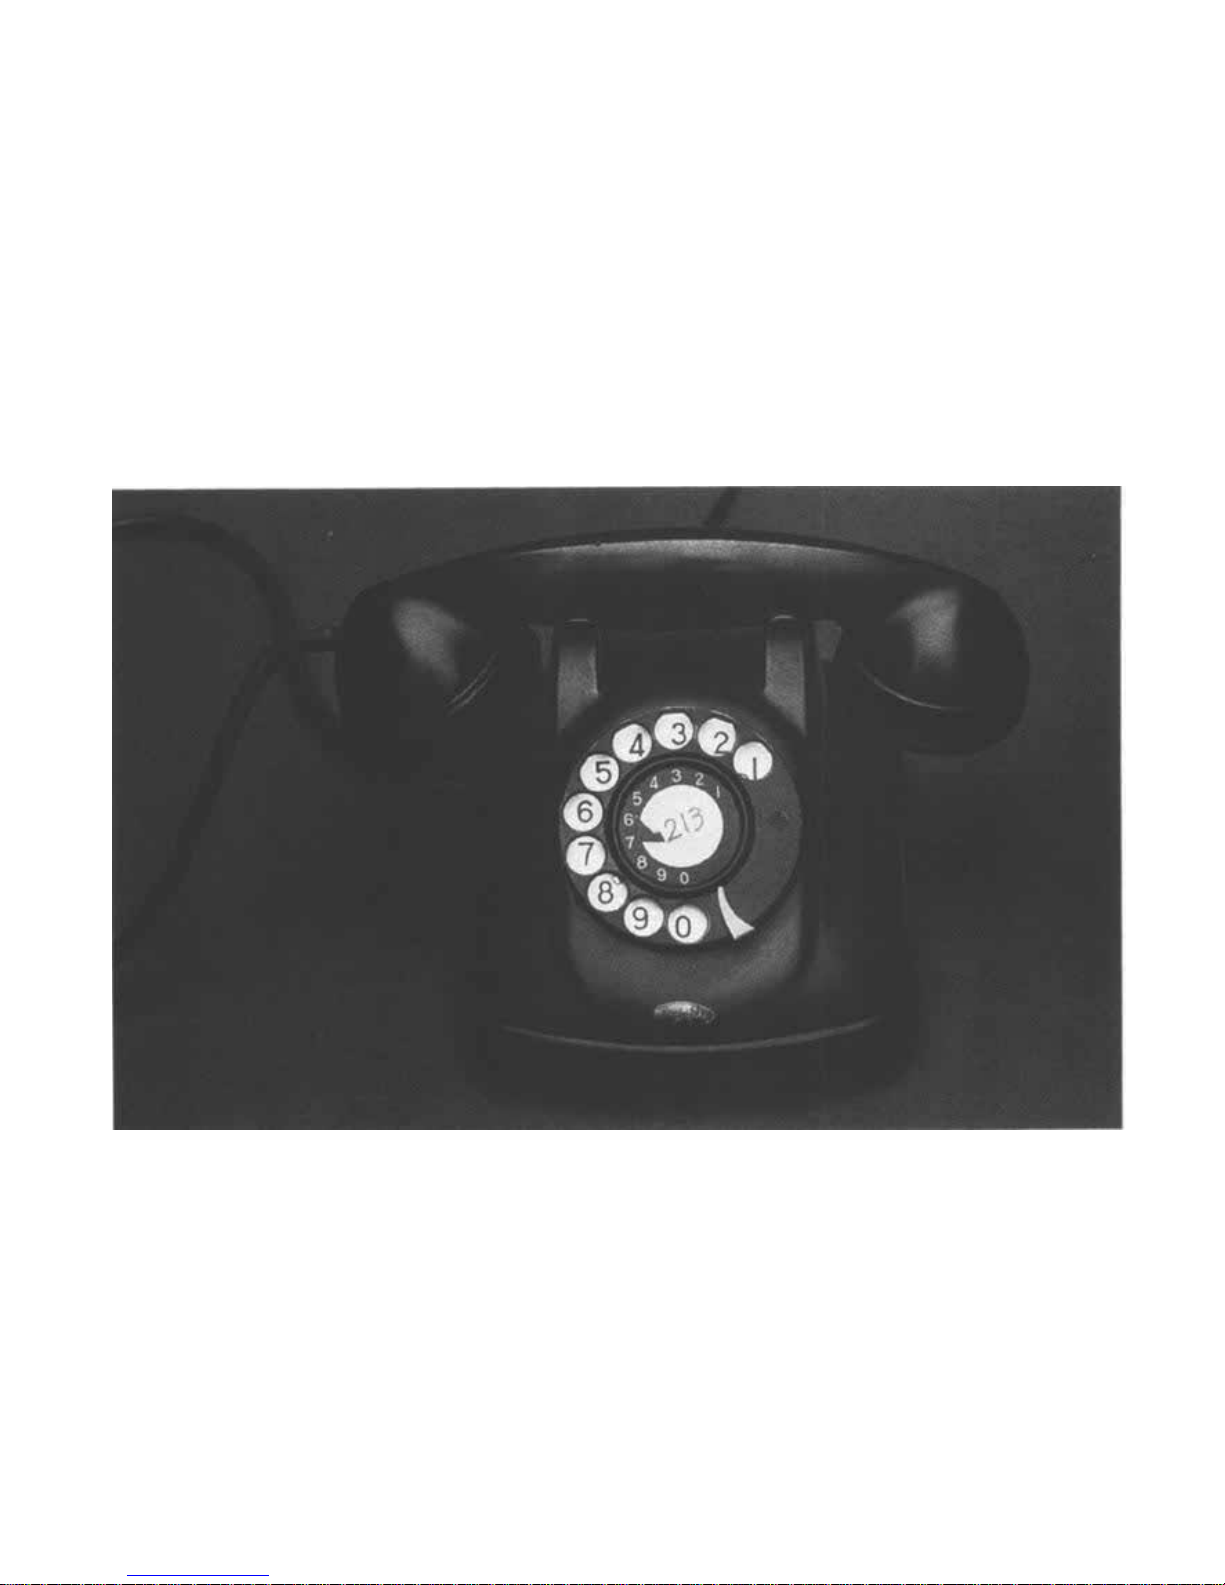
In the example picture, the deep shadow area beside
the dial has been inputted. As a result, the black
portion comes out "black" without being grayish. By
using this function, it is possible to express subtle
tone variations on the dark area which would be
ignored in ordinary photography because they would
appear as a dark gray without detail.
If the Shadow button is pressed again after the
"shadow control" is already activated, only the
"shadow control" is released and the camera returns
to s p o t metering. To reset center- weighted averaging
light metering, operate the Clear lever.
*lf the Shadow button is pressed after several spot
inputs, th e exposure value for the darkest spot only
will be adjusted.
69
Page 71
70
Page 72
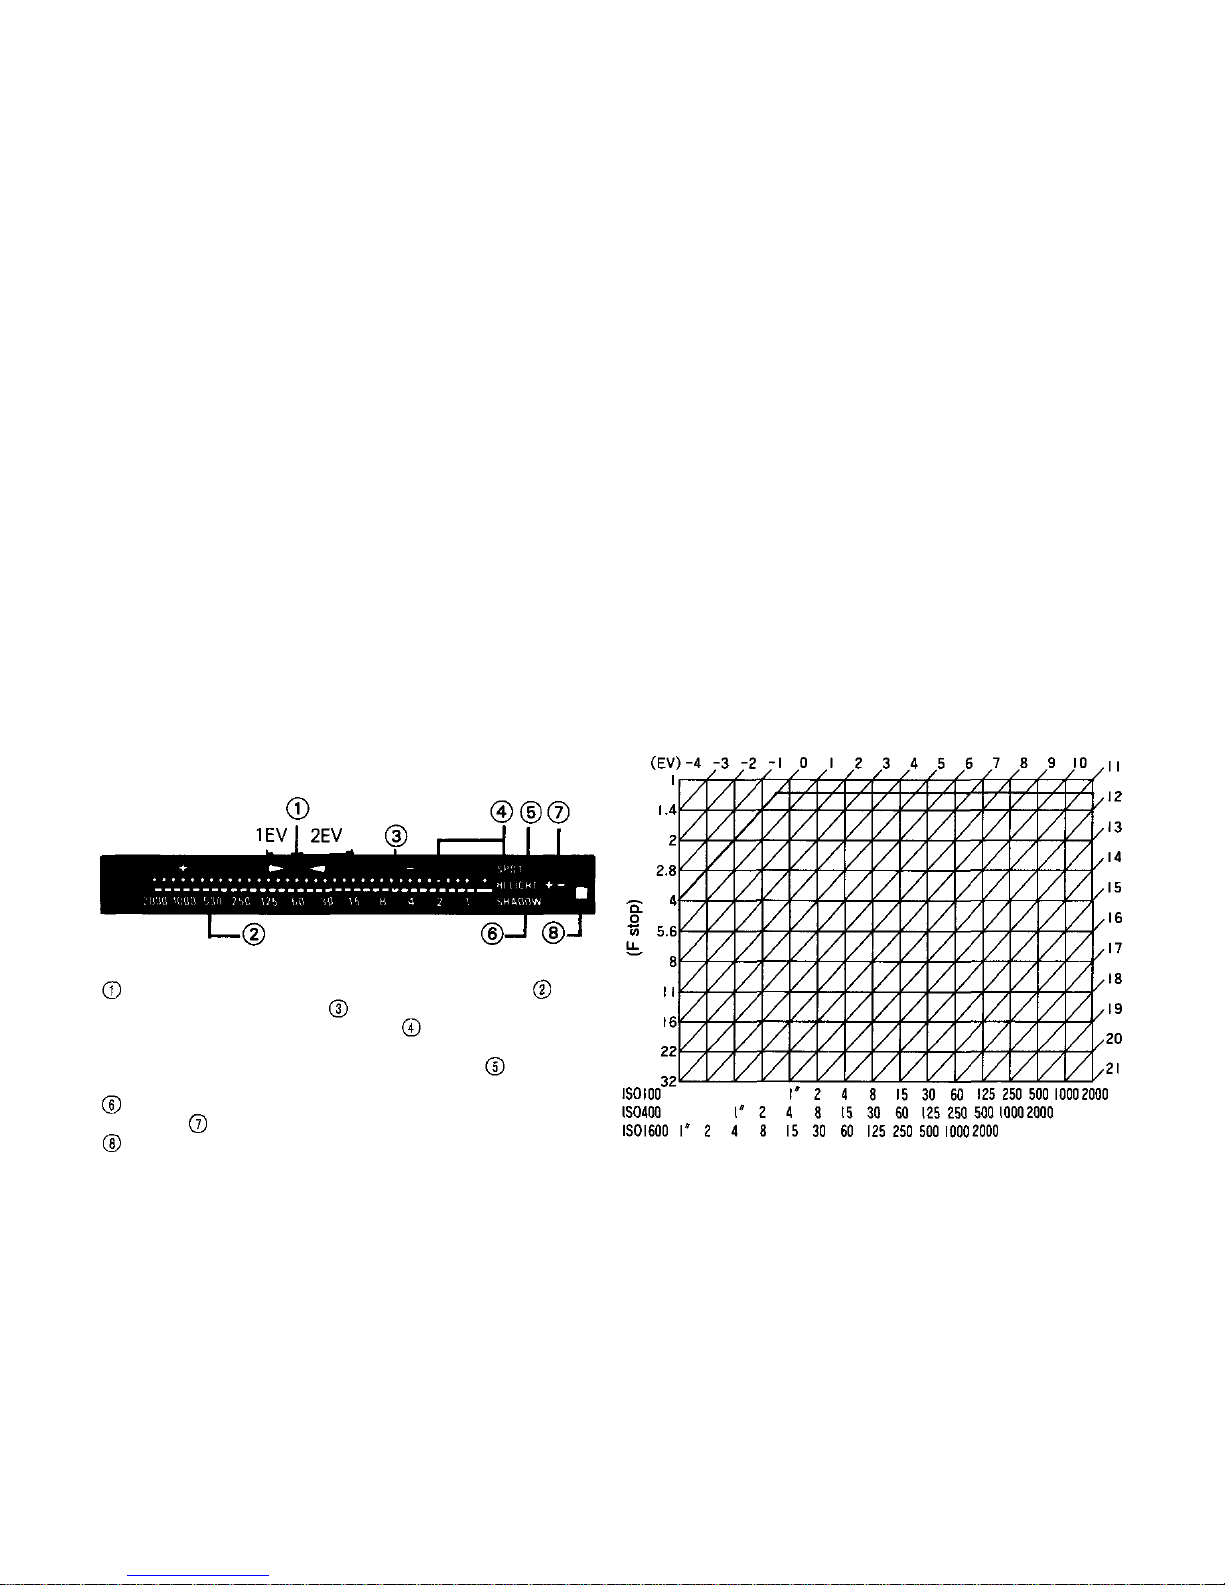
VIEWFINDER INFORMATION
The OM-3Ti shows shooting information clearly on a
large liquid crystal display so th at you can concentrate
your attention on the subject in the viewfinder. When
shooting with center-weighted average light metering or
with spot metering, correct exposure can be obtained
simply by aligning th e bar displays with the fixed point by
manipulating t he aperture and shutter-speed rings. Ease
of use is further enhanced since the bar display moves in
the same direction as the aperture ring rotates. The
viewfinder displays various information as shown below:
Note: In actual shooting c ircumstances, displays will not appear
simultaneously as shown.
recharged. It blinks when the shot has been correctly
exposed [when the camera is used with a T-Series flash
or the F280 (Normal OTF mode) ]. In addition, the ent ire
bar display blinks if you are out of the camera's light
metering range.
The light metering range of t h e OM-3Ti is as shown in the
chart below.
This is a fixed point f or correct exposure. The
selected shutter speed. The analog display of the
metered value is shown by bar. In the Spot mode,
SPOT appears and input metered value and luminance
value during metering is indicated by dot. HI.LIGHT
turns on when the highlight button is pressed.
SHADOW turns on when the shadow button is
pressed. +- blinks during exposure compensation.
The green LED goes on after the flash has been
Light Metering Rang e wit h 5 0mm F1.2
Fixed point
Shutter speed
(Aperture setting)
(Shutter speed)
71
Page 73
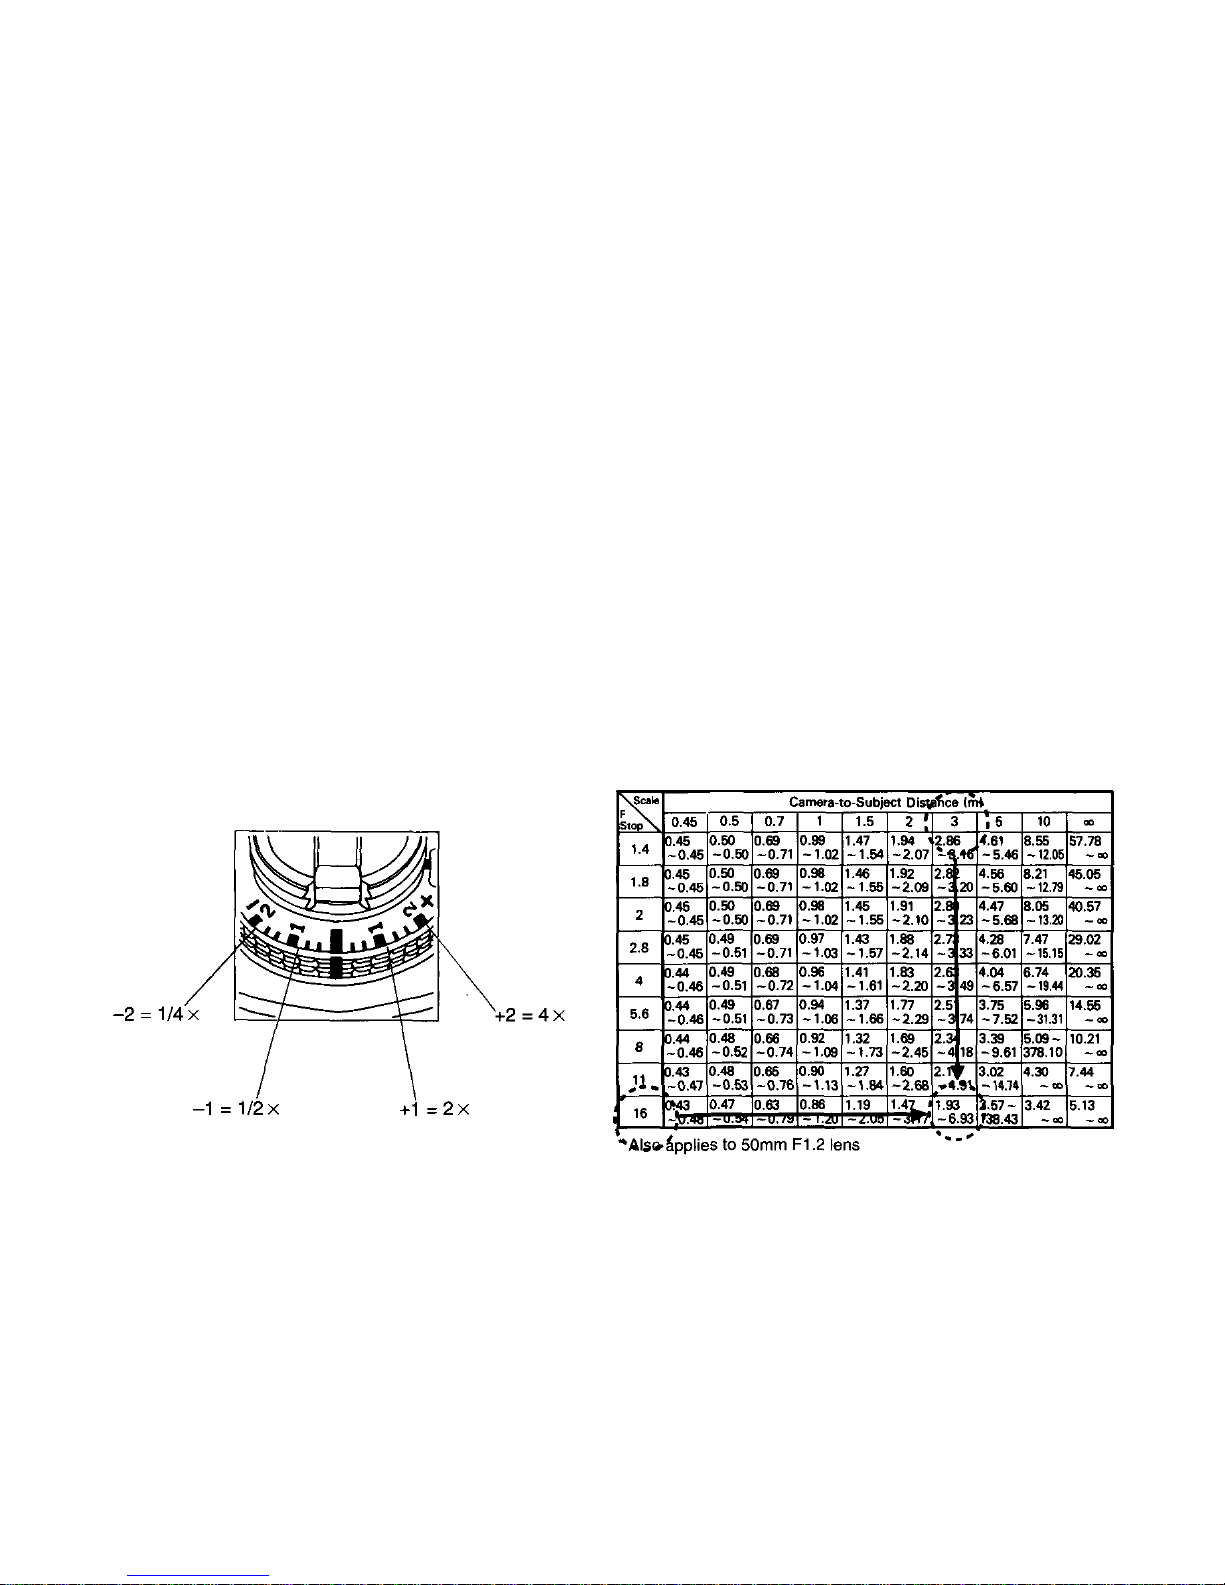
EXPOSURE COMPENSATION
The OM-3Ti also permits exposure compensation with
the exposure compensation dial in OTF auto flash
shooting. If the background is brighter than t he subject,
turn th e dial and set it to a (+) side position. The amount
of exposure is double o n (+1) position, and fo u r times on
(+2) position. If the background is darker than the
subject, turn the dial and set it to a (-) position.
If the compensation dial is turned, the +/- display in the
viewfinder blinks. The bar graph display shifts according
to the amount of compensation.
DEPTH OF FIELD
Depth of field is the area of acceptable sharpness in front of
and behind t he subject in focus. A s you get closer to your
subject or
as
you open your lens (e.g. from F16 to F2.8) the
depth of field becomes shallower. By stopping your lens
down (e.g. f rom F2.8 to F16) or getting farther away fro m
your subject this depth of field can be increased.
The table below shows that when the camera-to-subject
distance is 3m, the depth of field at F16 ranges from 1.93m
to 6.93m.
As you press the preview button, looking through the view-
finder, you can ascertain the actual depth of field.
Depth of Field Table (50mm F1.8 lens)*
Circle of least confusion 1/30mm
72
Page 74
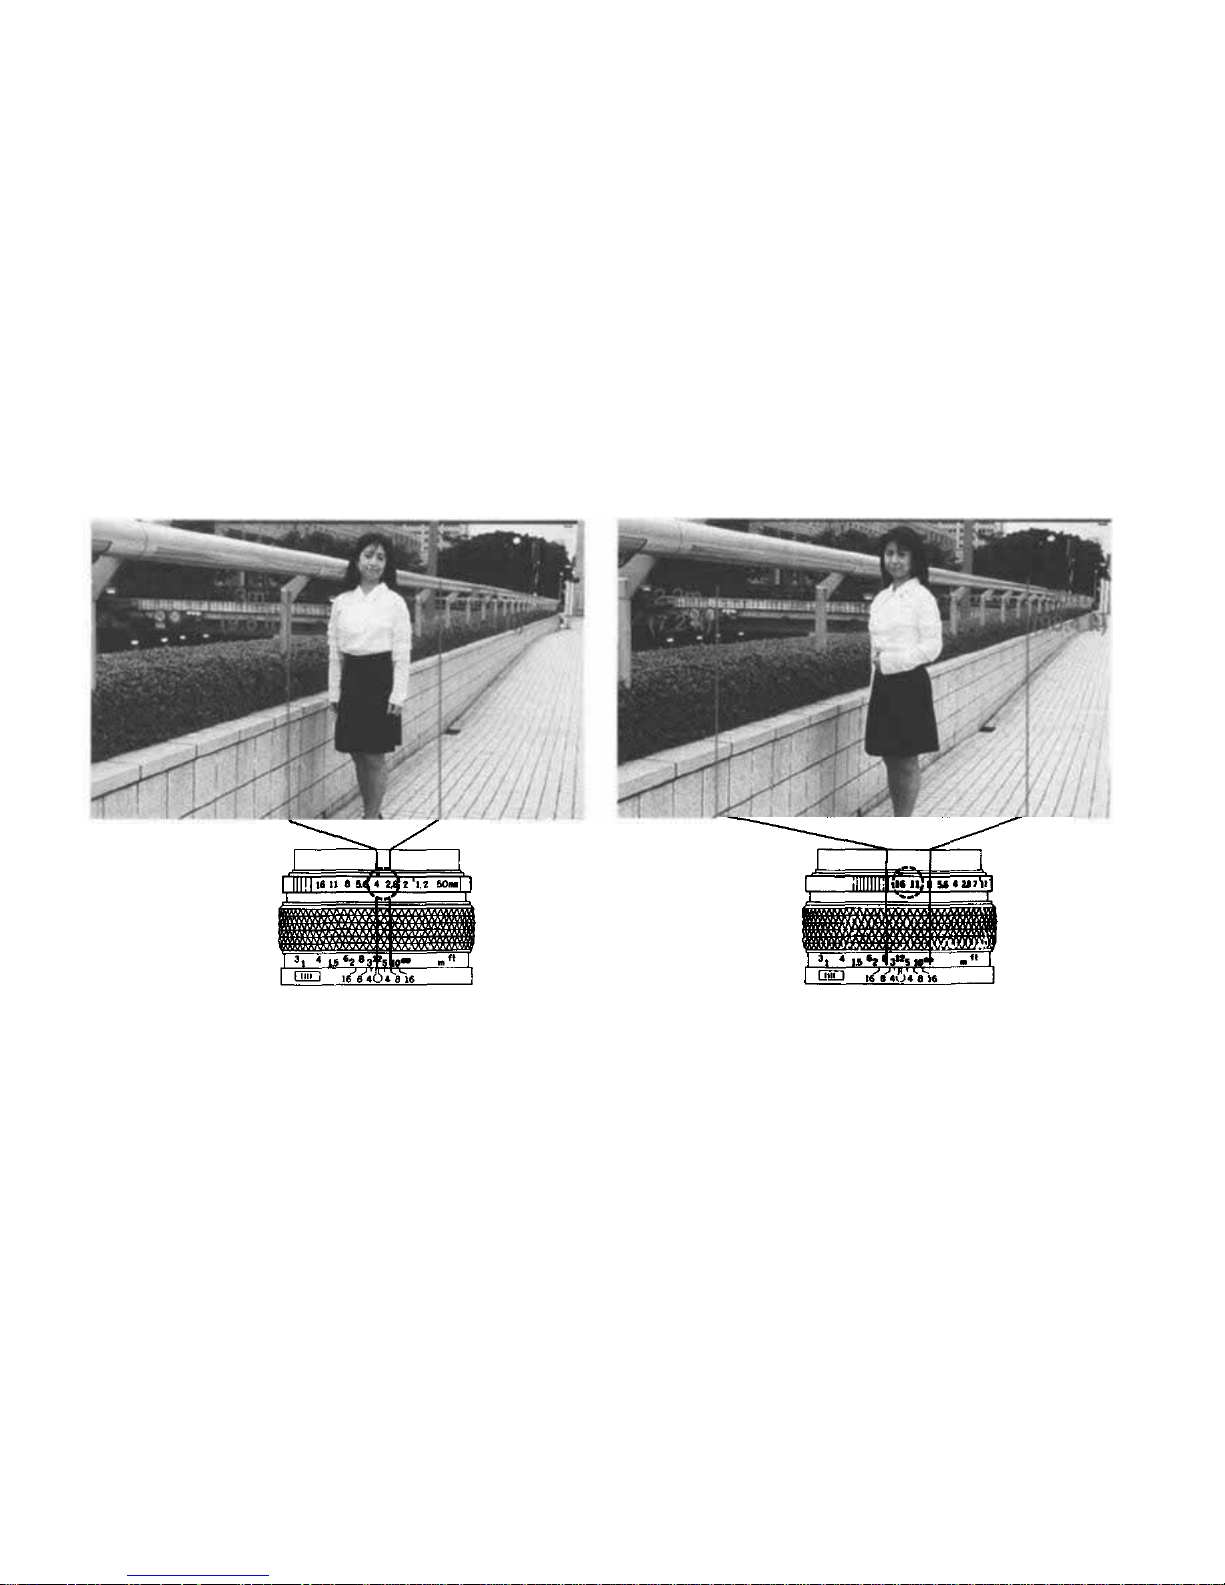
DEPTH OF FIELD SCALE
The double series of numbers engraved on the depth of
field scale represent F stops: F4, F8 and F16. Once you
have focused on your subject, all objects within the
distance range indicated on the lens distance scale
between the marks for the F/stop you have selected will
have acceptable sharpness.
• For other lenses, see the lens instruction manual.
73
Page 75
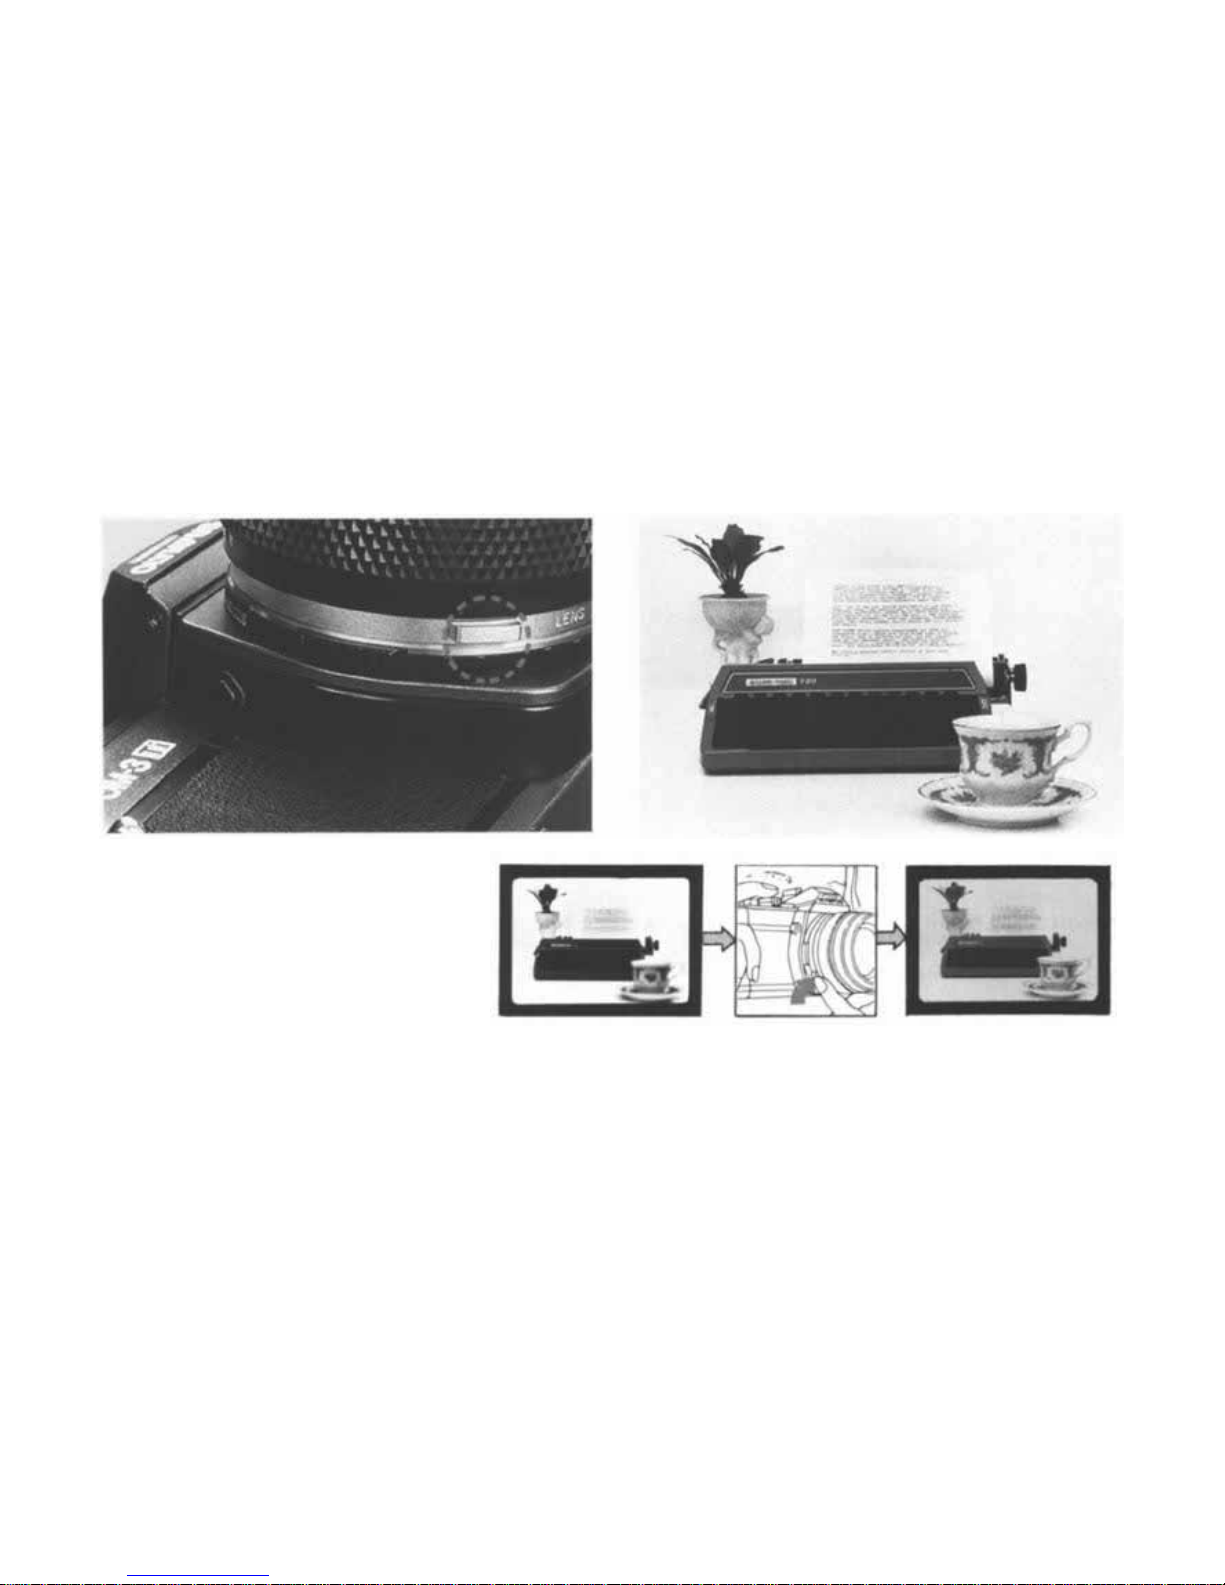
PREVIEW BUTTON
When you wish to see which objects fall
within th e acceptable zo ne of sharpness
(depth of field), press the preview button
on your lens. The diaphragm of the lens
will stop down to the preset F stop
enabling you to se e t he depth of field in
the viewfinder.
CAUTION: If you jerk the preview button while
depressing the shutter release button halfway down
the shutter might be released.
74
Page 76
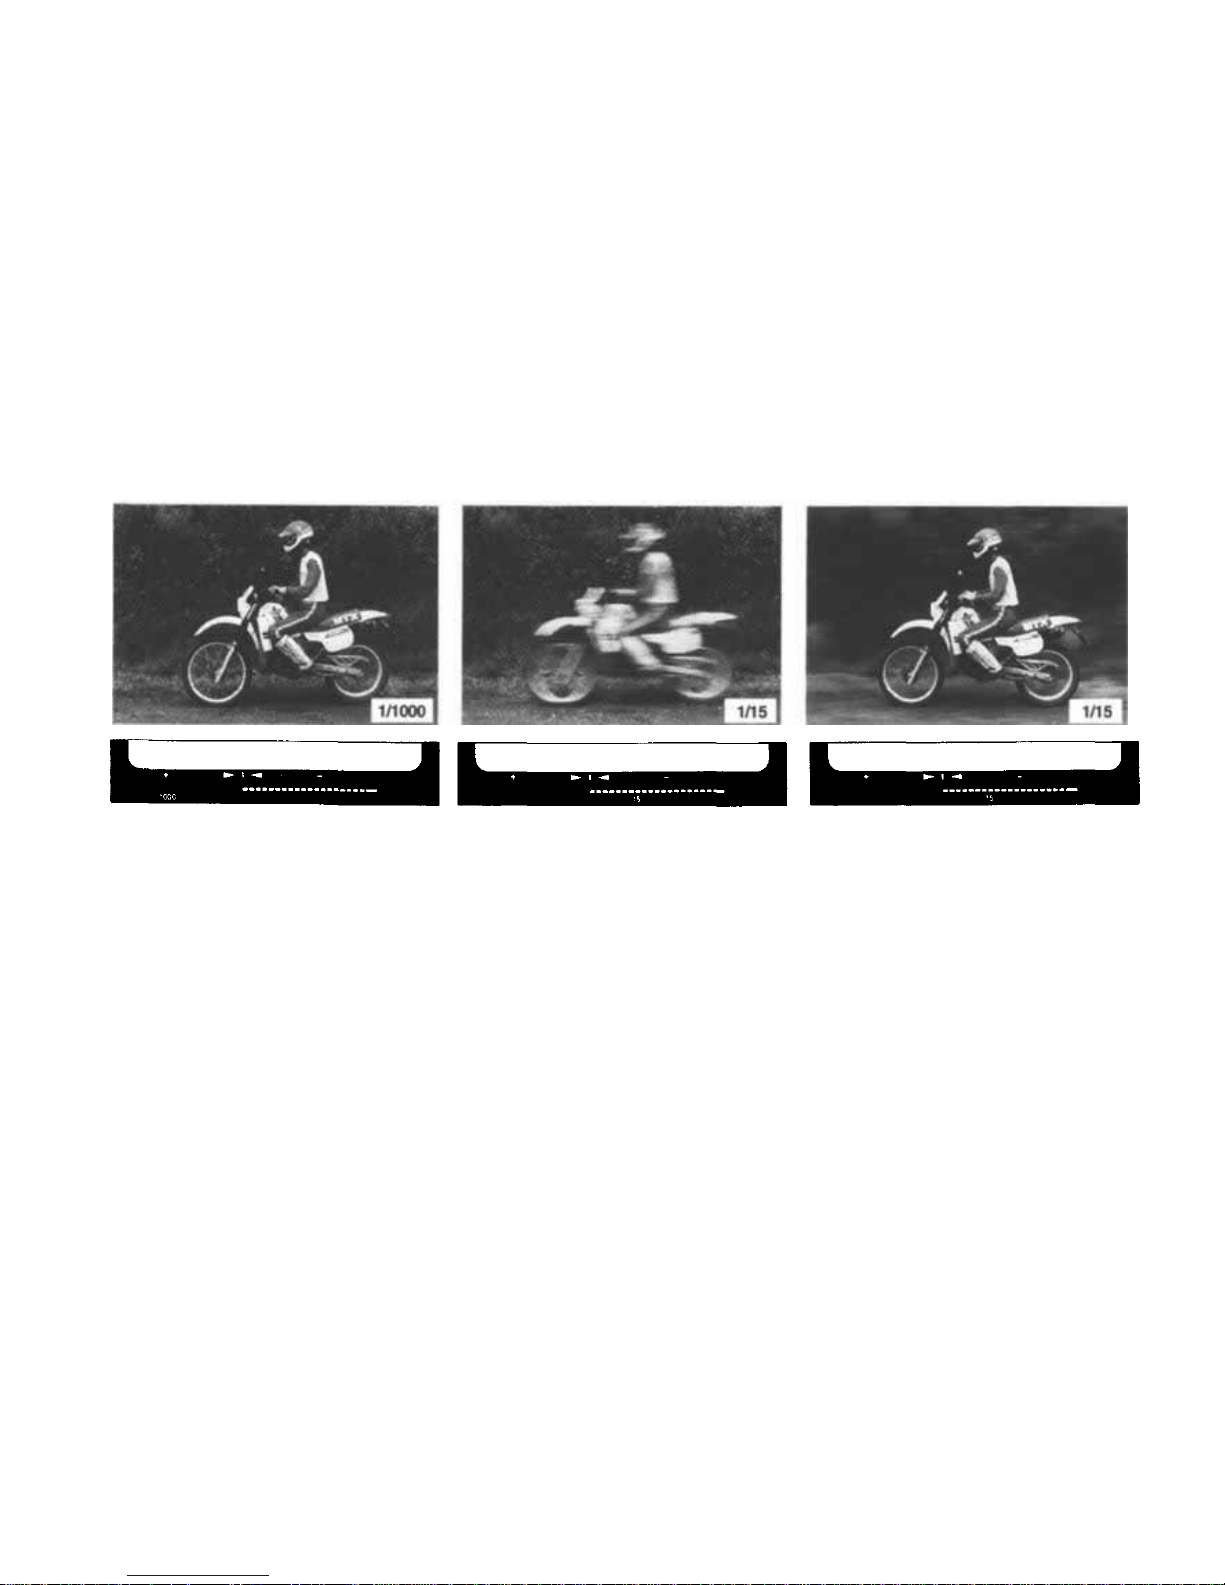
This camera offers various possibilities for visual
expression by changing the shutter speed.
High shutter speeds can be used to "freeze" a
moving subject to give sharp definition of the image.
Shutter speeds of 1/2000 ~ 1/500 sec. c an "stop" the
movement of a considerably fas t moving subject. A
shutter speed o f about 1 /250 sec. will be enough to
shoot a child at play, if he is not moving too quickly.
There ar e two methods for giving dynamic expressions. The first one is to blur out the movement of the
subject itself, thereby creating a moving image. The
second one is to pan the camera according to the
movement of the subject. While the background is
blurred, the subject is sharply defined to create a
moving image.
*ln using slow shutter speeds, it is necessary to guard
against camera shake. We will suggest a very
practical method for choosing shutter speeds.
Generally, shutter speeds of which denominator
value is larger than the focal length value of the lens
used ar e good fo r preventing camera shake. If you
ar e using a 50mm lens, fo r exam pl e, shutter speeds
of 1/60 sec. or higher are best; and if you are using
a 200mm lens, shutter speeds of 1/250 sec. or
higher ar e best.
SHUTTER SPEEDS
75
Page 77
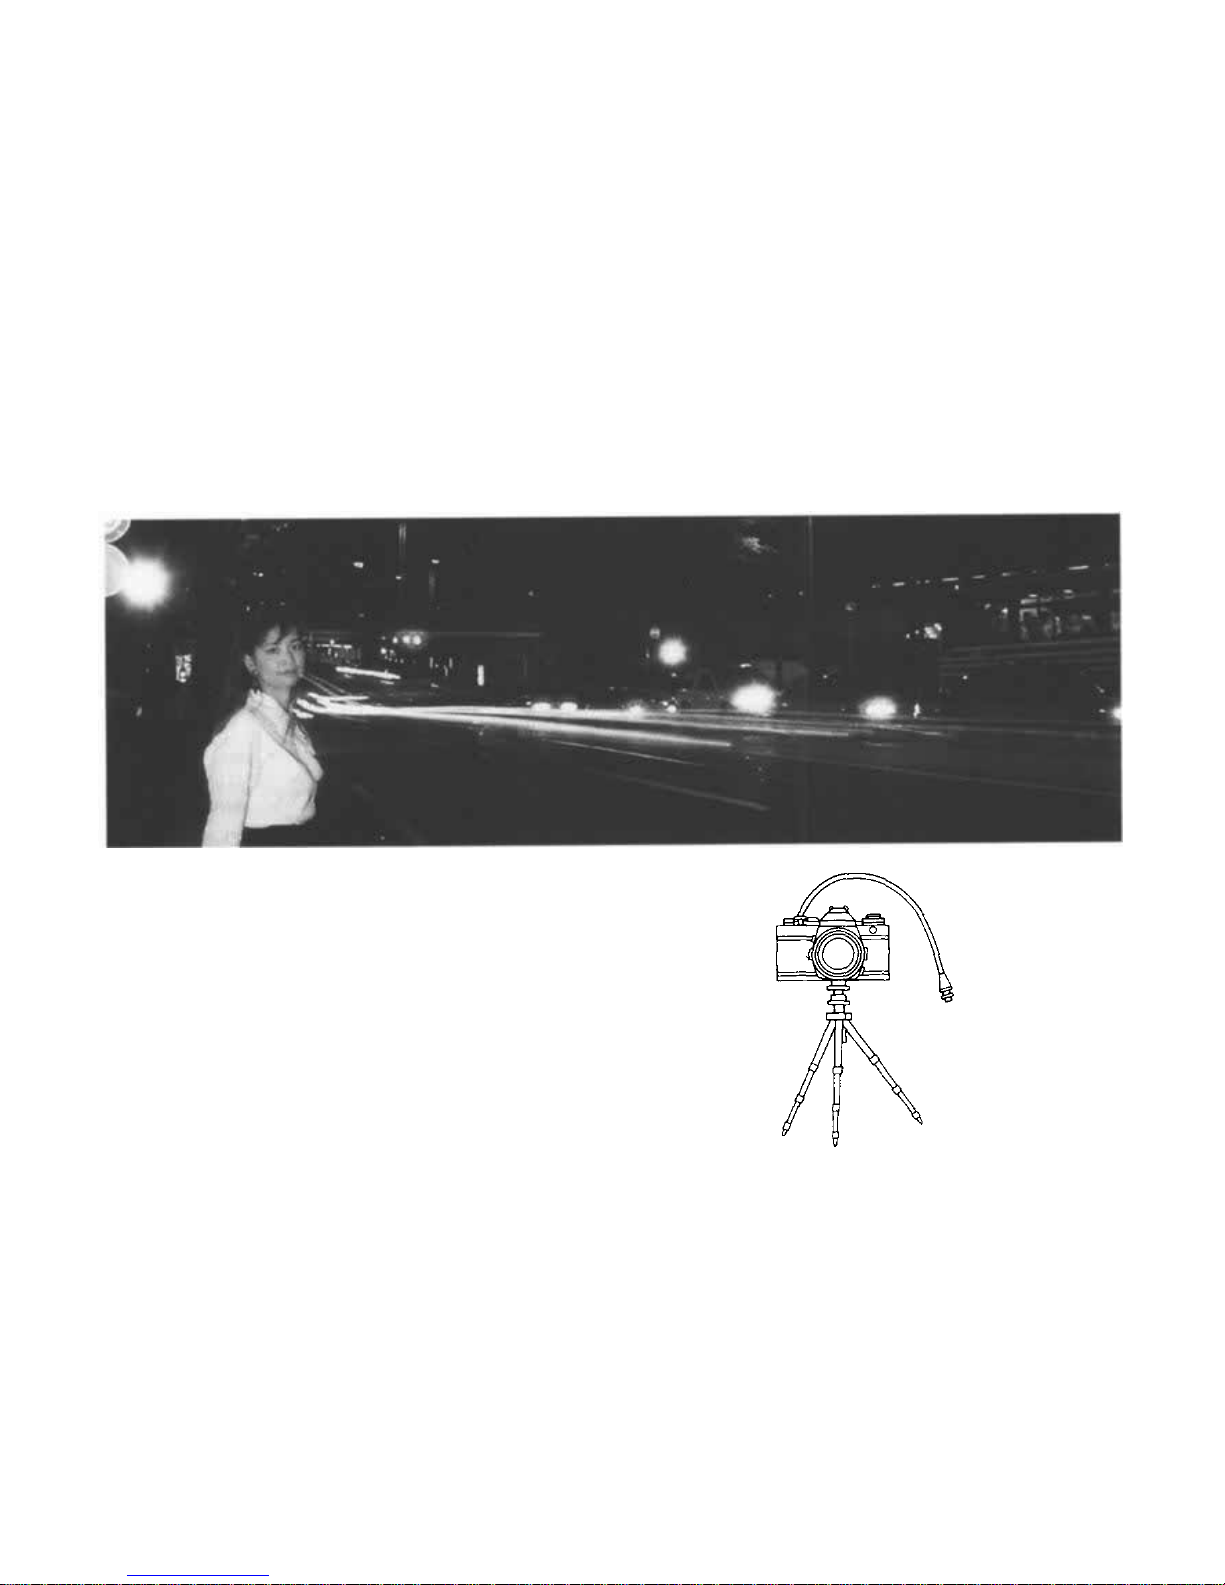
BULB EXPOSURE
When an extended shutter speed is required, as in stellar
photography and night-scene shooting, use the B (bulb)
mode. Almost no battery power will be consumed in this
setting. Automatic control of flash strength by the OTF
auto metering function is also possible in this mode.
However, the green LED in the viewfinder won't light.
Note: Use of a tripod and cable release is recommended fo r bulb
shooting.
76
Page 78
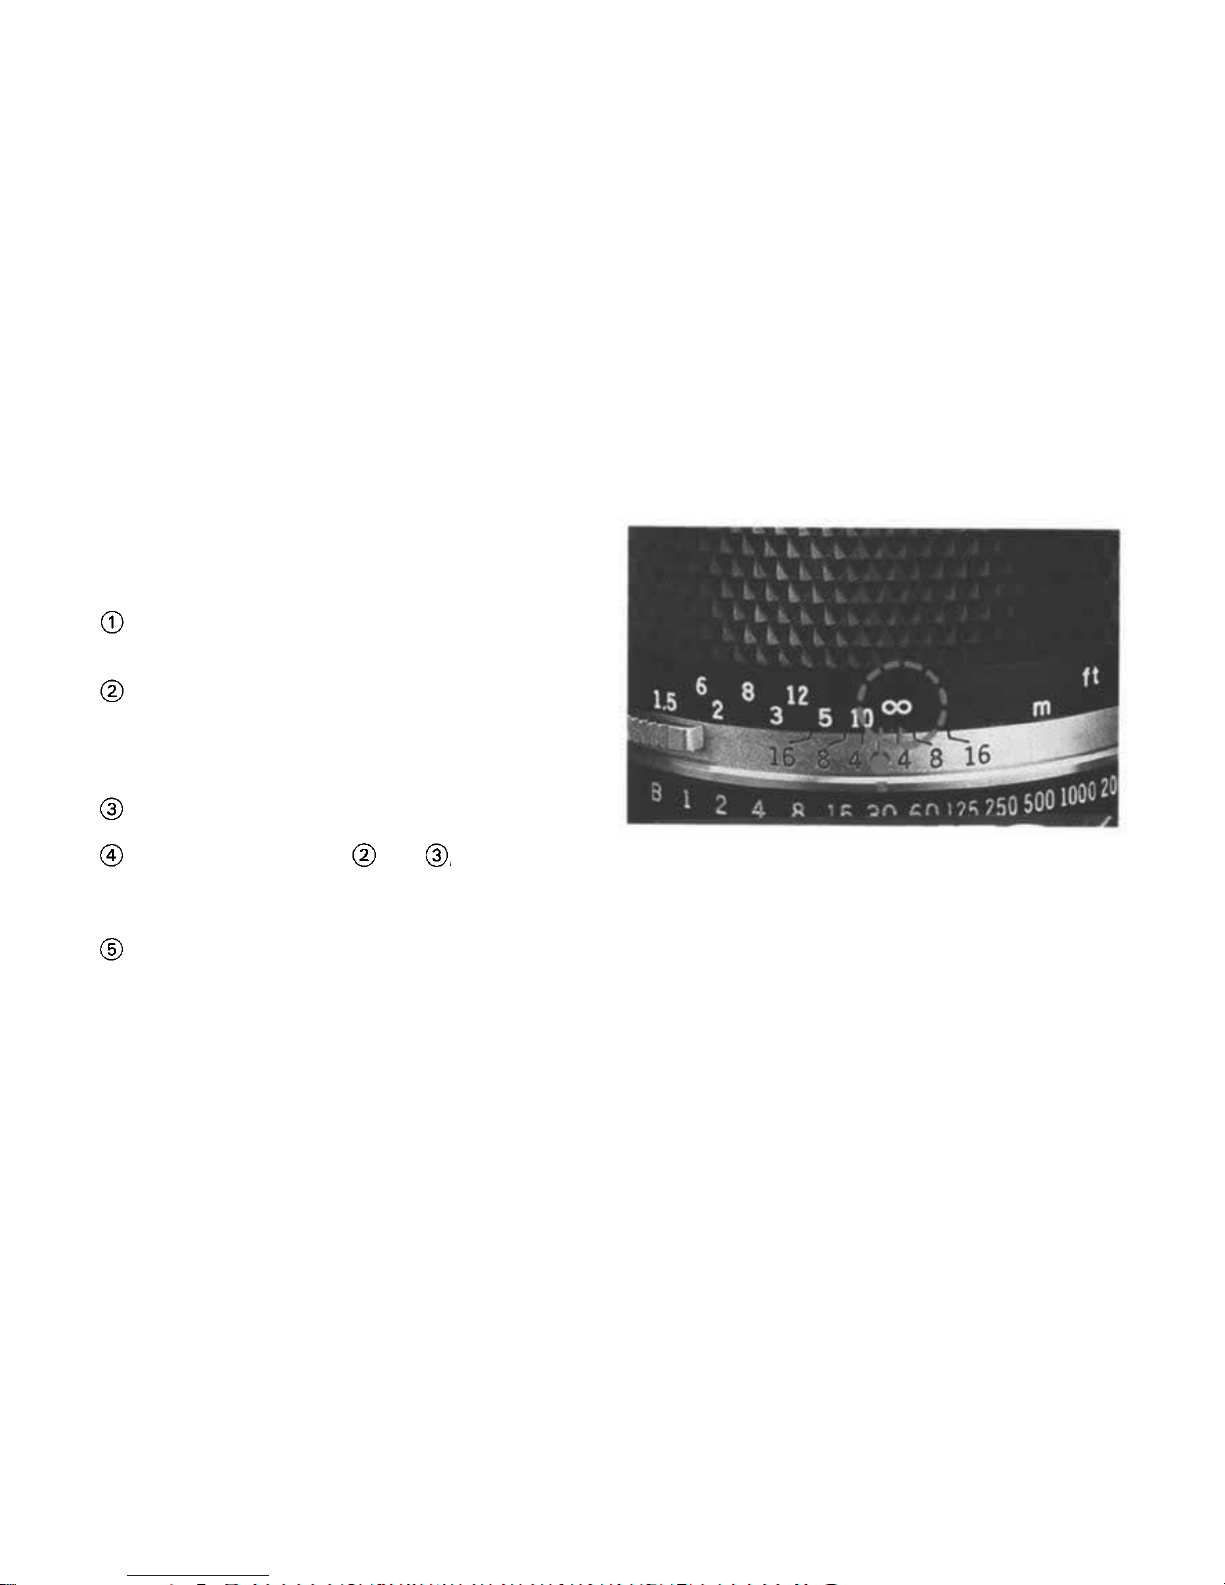
MULTIPLE EXPOSURES
INFRARED PHOTOGRAPHY
By tripping the shutter several times on the same
frame, multiple images are produced on the same
frame.
This is how to do:
After the first exposure is ended, erect the rewind
crank and turn it clockwise as far as it will go to
take up film slack.
While holding both t he rewind knob and rewind
button with your fingers to prevent them from
moving, wind the fi lm advance lever.
In fact , the film is not wound and th e shutter is
cocked by this operation.
Press the shutter release as y ou would do normally, and double exposure wil l occur.
By repeating t h e steps an d , t h e fr ame will
be exposed as many times as you want. However,
the frame counter advances each time the shutter
release is pressed.
After ending the multiple exposure, put the front
lens ca p o n a n d ma ke a blind shot.
Note: The frame may shift slightly.
When shooting infrared pictures with infrared film
and a red filter, the point of focus will slightly differ if
you focus visually. The amount of shift varies with the
lens and a red line or red do t is marked on the lens'
depth of fie ld scale to compensate f or it. First, focus
the lens without a red filter on as you would do
normally. Next, read that distance on the distance
scale and shift it opposite the i n frared mark, then put
on a red filter and shoot. (The above picture shows
the distance at infinity.)
Page 79

78
Page 80
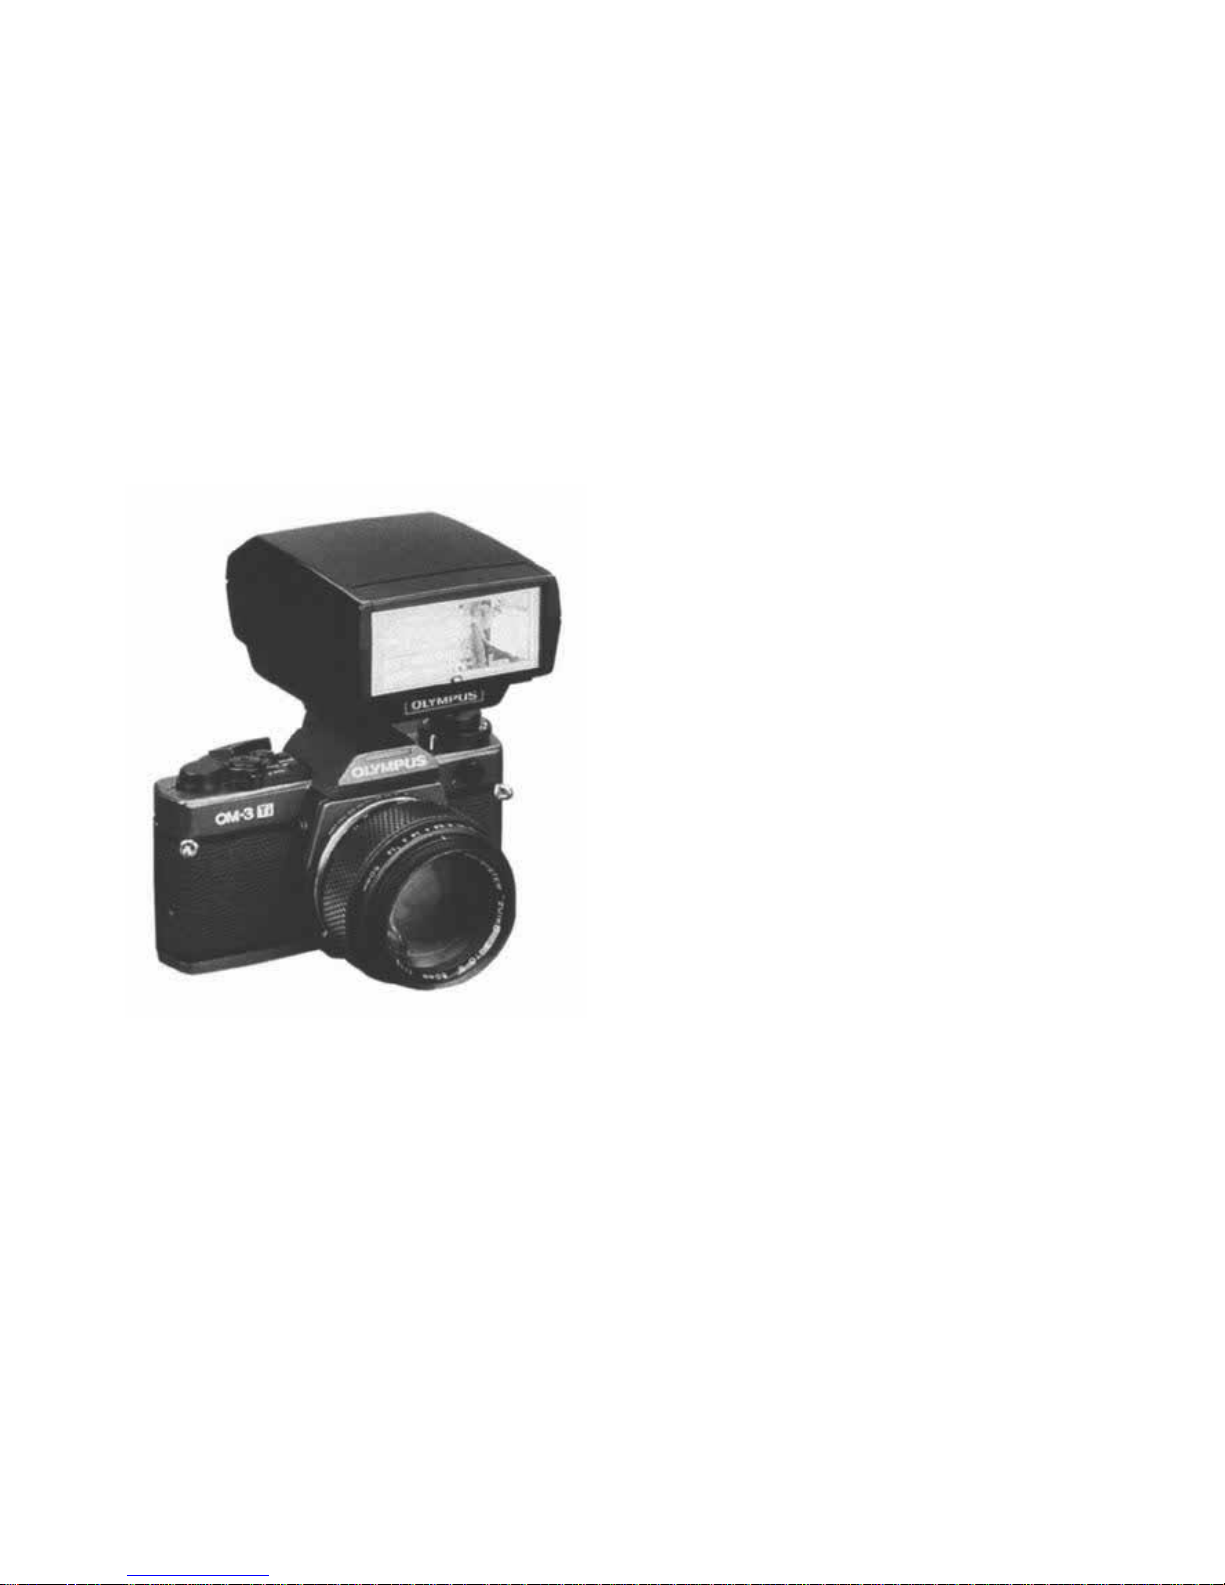
FLASH PHOTOGRAPHY
Electronic flash is very similar to daylight. As it is
well balanced for daylight type color films that are
most popular, the electronic flash is used for various
photographic applications. Electronic flash is especially useful in unfavorable lighting situations,
ensuring easy, error-free pic ture taking. In dim light,
for example, without an electronic flash you will h ave
to use slow shutter speed with a risk of causing
camera shake and blurred pictures. Under t he illumination of a flourescent lamp or incandescent lamp,
the picture often does not come out with correct
colors because it lacks proper color balance. Elec-
tronic flash solves all these problems.
The electronic flash can also be used in daylight as
fill-in light for backlighted subjects or subjects with
too strong a contrast as well as for freezing a fast
moving subject.
Because the OM-3Ti provides full control of T-series
flashes, there is no operation required on the flash
side such as setting the film speed and aperture,
mode switchover, and exposure compensation. Since
The OTF auto light metering system can measure
the light that the film, no exposure error occurs due
to the difference in covering range of the flash's l i g ht
receptor and picture frame. You can not only take
flash pictures in the auto and manual modes, but also
use sophisticated techniques such as bounce, diffuse,
ultra close-ups, and multi-lamp flash with ease in a
fully automatic mode.
79
Page 81
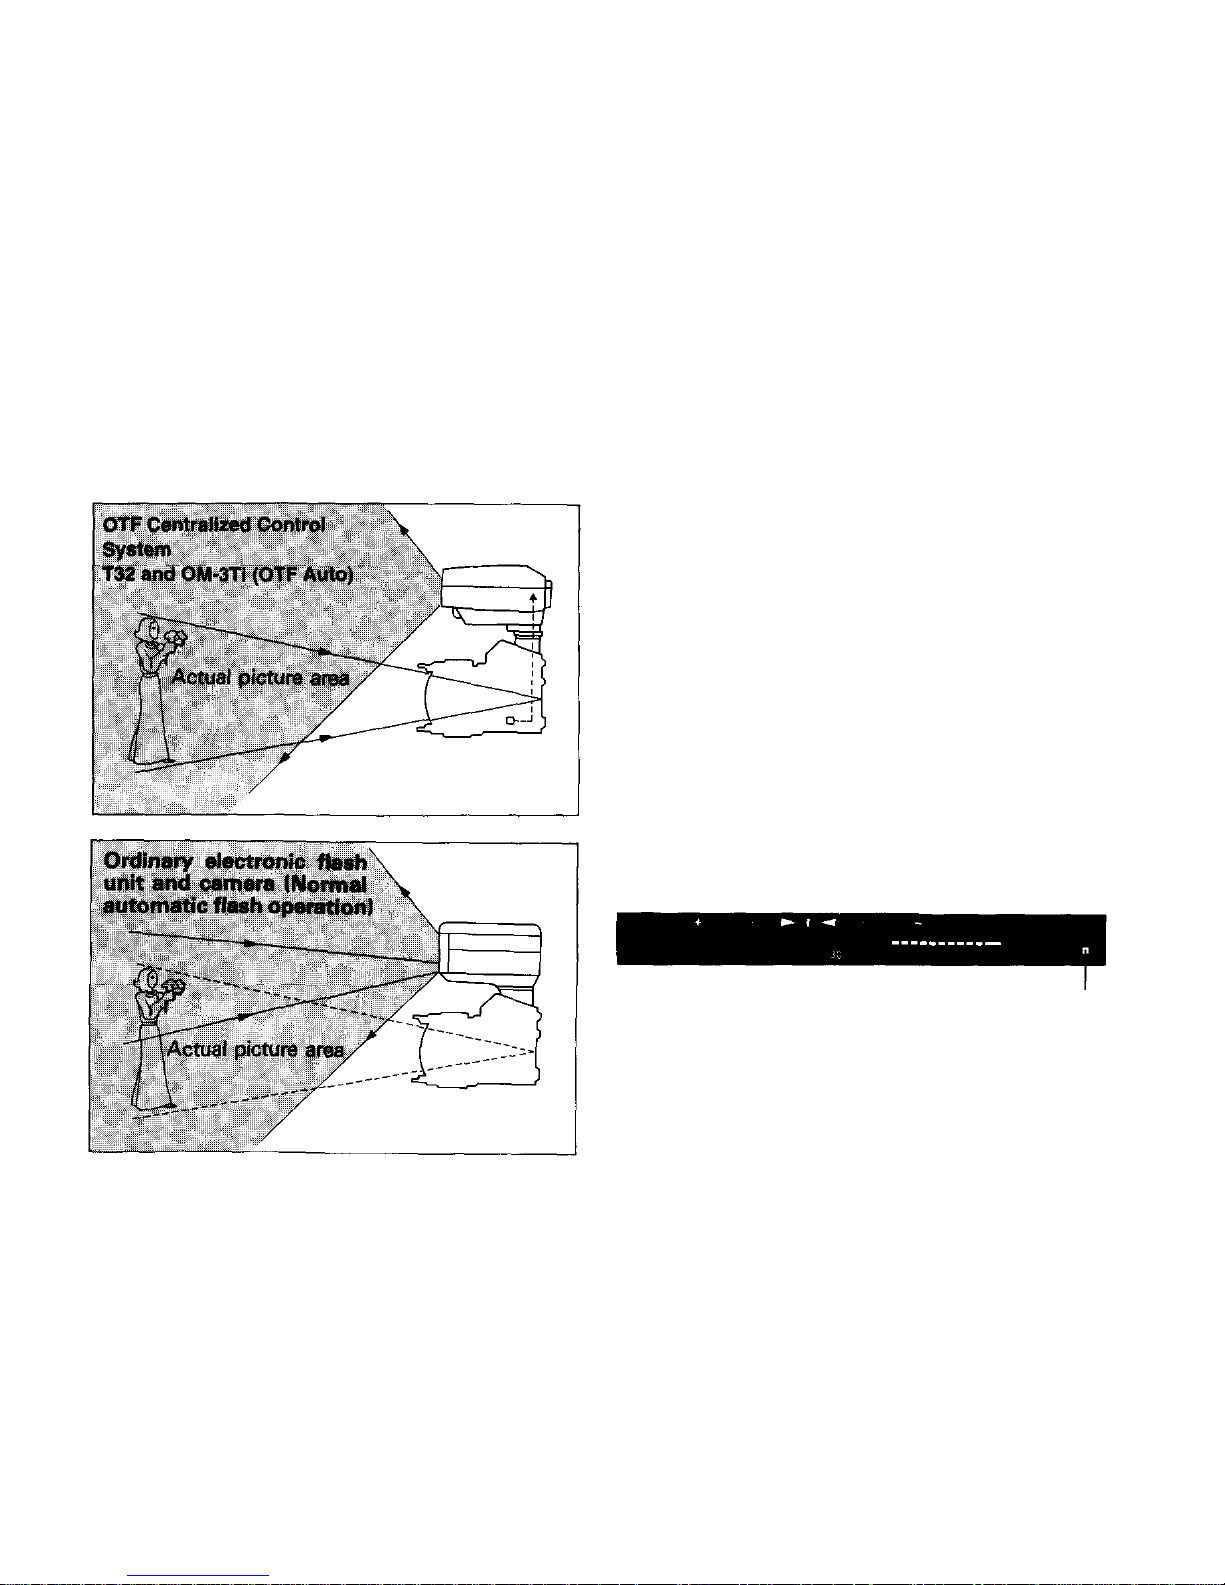
OTF AUTO FLASH
OPERATION OF T-SERIES FLASH
With a T-series flash on the camera, the flash mode will
automatically switch according to th e camera mode.
If you take pictures in the auto mode, set the camera's
mode le ver to "TTL AUTO FLASH". Wh en the green LED
turns on in the viewfinder, the flash is ready for firing.
Shoot using 1/60-sec. o r slower shutter speed. If you take
pictures in the manual mode, set the camera's mode
lever to " X " and select 1/60-sec. or slower shutter speed.
Flash strength is always at full emission. For more
information, refer to the flash's instruction manual.
<OTF AUTO FLASH MODE>
± exposure compensation possible.
The required quantity of light is also adjusted
depending on the amo unt o f compensation.
Lights up when the flash
is fully charged; blinks on
cor rect flash firing
80
Page 82

MAIN SPECIFICATIONS OF T-SERIES FLASH
Electronic
Flash T32
Electronic
Flash T20
T28 Macro
Single Flash 1
T28 Macro
Twi n Flash 1
T10 Ring
Flash 1
T8 Ring
Flash 2
Guide Number
ISO
100m
(ISO
100
ft.)
32
(104)
20
(66)
28
(92)
Single 28 (92)
Twin 22 (72)
10
(33)
8
(26)
Coverage An gle
53° vertical,
74° horizontal
40° vertical,
58° horizontal
53° vertical,
74° horizontal
53° vertical
74° horizontal
(Single)
80°
80°
Flash Duration
1/40,000 —
1/1,000 sec.
1/40,000—
1/1,000 sec.
1/40,000—
1/1,000 sec.
1/40,000—
1/1,000 sec.
1/40,000—
1/330 sec.
1/40,000—
1/330 sec.
Number
of
flashes
1 00 — 500 with
AA-size alkaline
batteries
120—500 with
AA-size alkaline
batteries
Dimensions
(less b atte ries )
Weight
81(H)x70(W)x
104(D) mm
320 gr.
68(H)x57(W)x
77(D)
mm
160 gr.
73(H) x 50(W)
x
32(D)
mm
110gr.
73(H)x50(W)x
32(D)
mm
210 gr.
86ø x18 mm
95 gr.
91ø
X18.5
mm
110gr.
(Reflector 1:
200ø x 32 mm
80
gr.)
(Reflector 2:
150ø
x 3 2 m m ,
40
gr.)
100—500 with
AA-size
alkaline
batteries
(T Power
Control 1)
81
Page 83

MAIN SPECIFICATIONS OF
F280
Guide number (ft.)
Coverage angle
Number of flashes
Flash D ur ation
Dimensions
Weight
28 [ISO 100 meters at Normal
(92) OTF Flash]
53° vertical, 74° horizontal
80 — 6,000 with
AA-size alkaline batteries
Super FP Flash mode:
1/25 sec.
Normal OTF Flash mode:
1/40,000 — 1/1 ,000 sec.
110(H) x 68(W) x 71(D)mm
250 gr. (less batteries)
USING ELECTRONIC FLASHES
OTHER THAN THE T-SERIES
FLASH UNITS
Mount the flash on the accessory shoe.
If you are using a flash that has no direct contact,
connect the flash synchro cord to the synchro
terminal.
Set the film speed on the flash.
Set the shutter speed ring to 1 /60 sec.
If the flash has an AUTO/MANUAL switching
device, set it to either AU TO or MANUAL.
Determine t he aperture and set it on the camera.
If y ou ar e using an aut o flash, set the desired F
stop on the flash unit and th en set the aperture
ring to this F stop.
If you are using a manual flash, calculate the
aperture by the following formula or using the
flash's calculator panel and set it with the camera's
aperture ring. (ISO 100m/ft.)
Aperture =
Flash guide number
Flash-to-subject distance (m/ft.)
82
Page 84
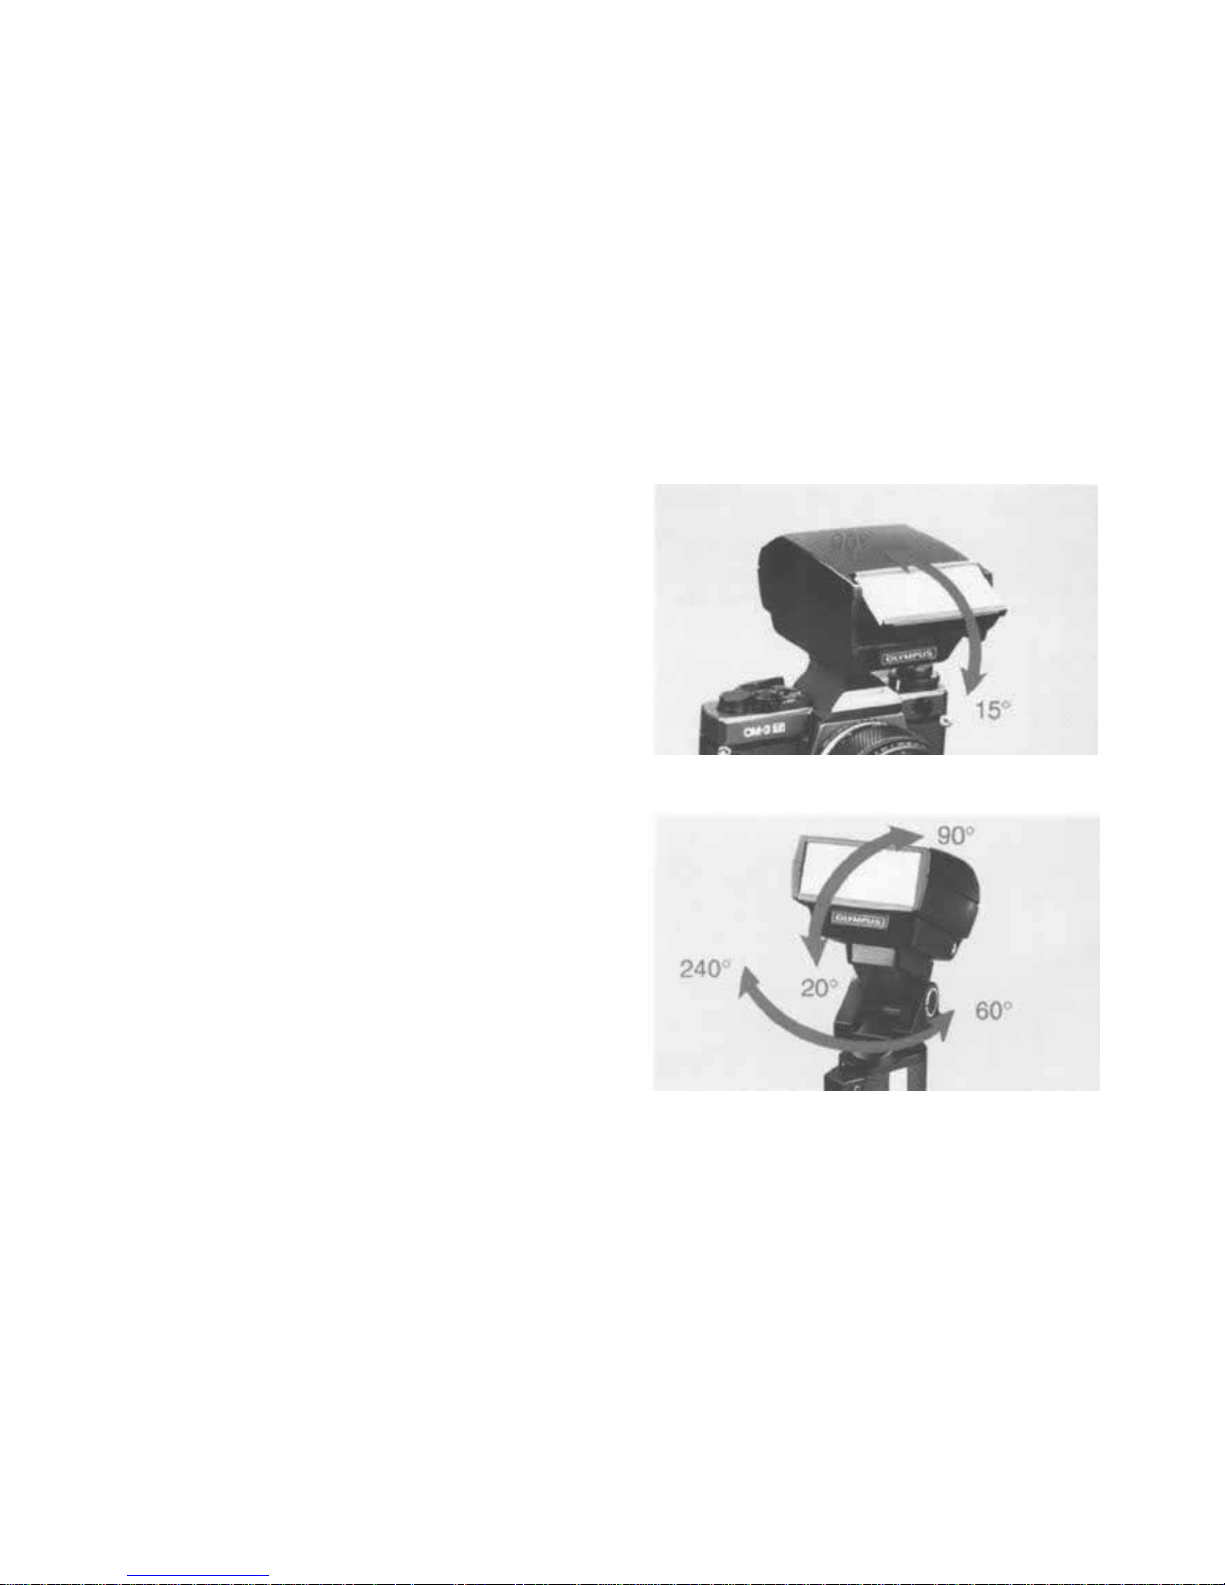
BOUNCE FLASH
The T32 has an adjustable flash head that tilts as much
as 90° up and 15° down. When combined with the Power
Bounce Grip 2, angle c an be adjusted up to 90° up, 20°
down, 240° horizontally, and 60° to the camera side.
Bounce flash is possible in the OTF Auto Flash mode
with or without the Power Bounce Grip 2.
83
Electronic Flash T32
Power Bounce Grip 2
Page 85
84
Page 86
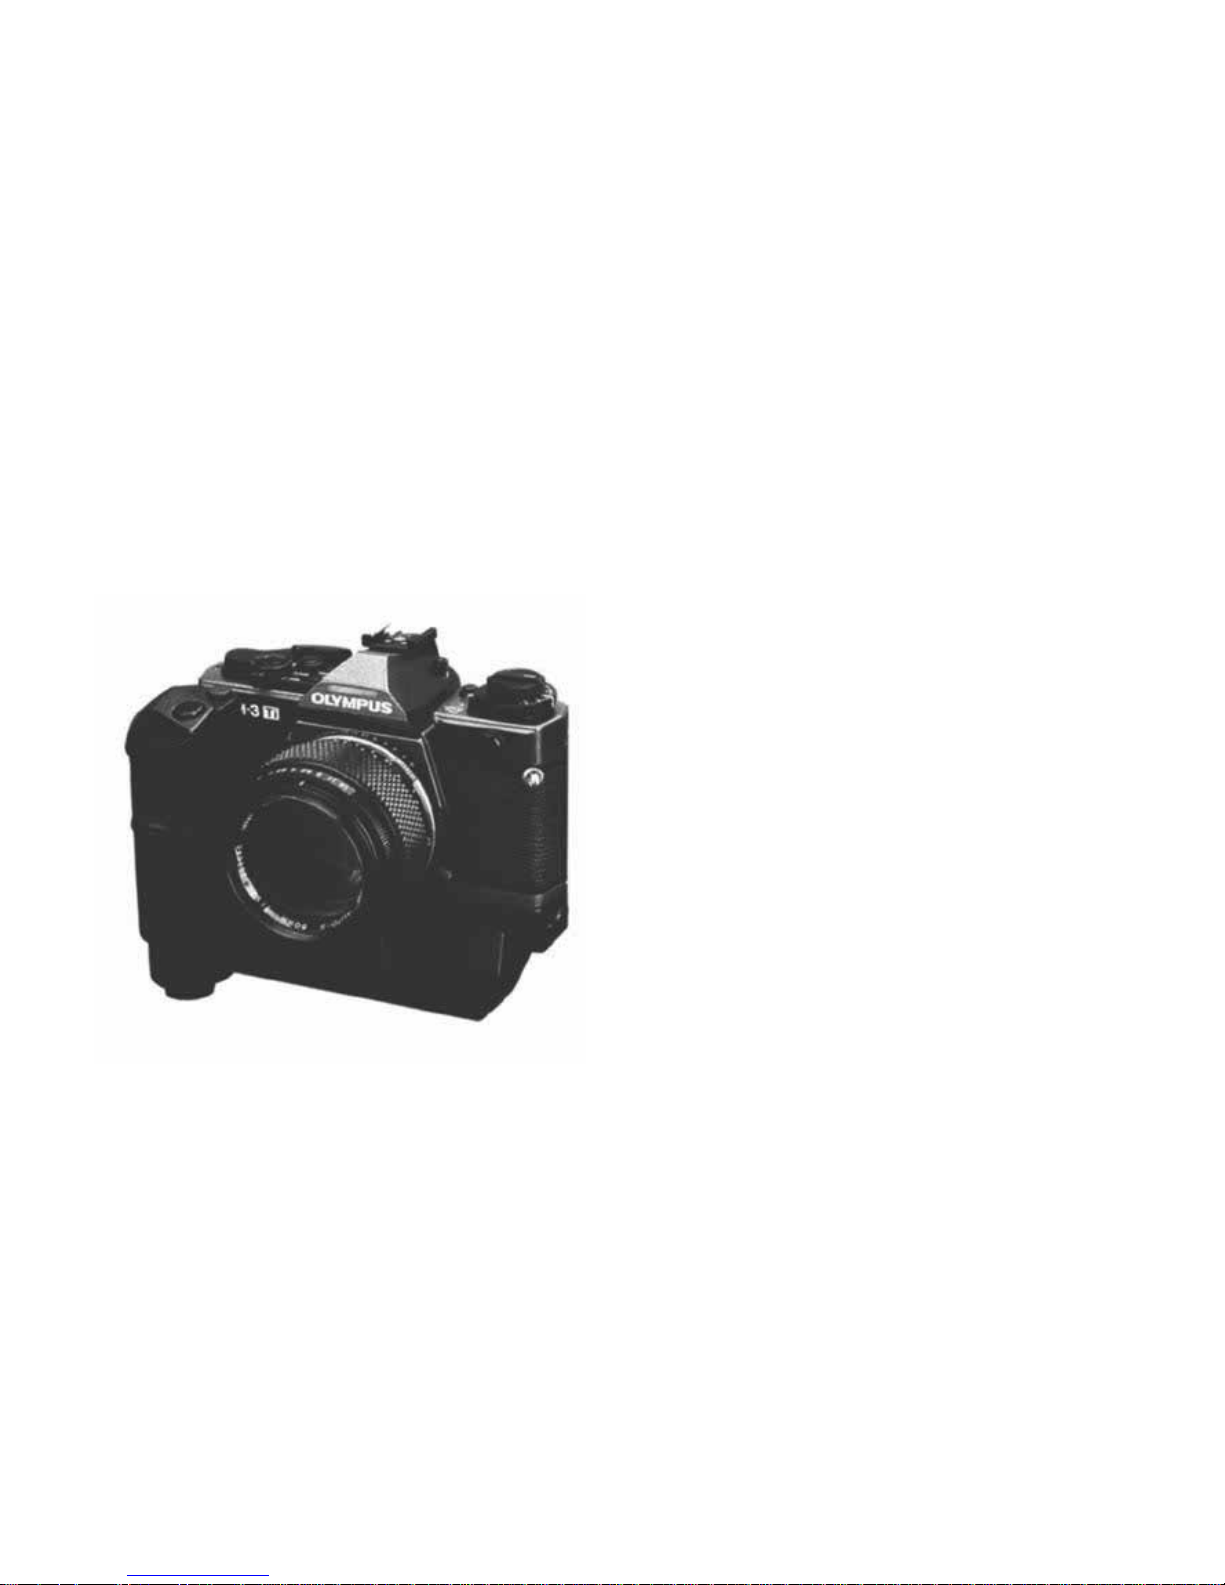
SHOOTING WITH A MOTOR DRIVE
Shooting with a motor drive is very exciting because it
enables you to capture your subject in a critical moment
by making several shots in a second.
The high speed O M System motor drive has achieved an
extremely compact and lightweight design to take full
advantage of its ease of operation and high
maneuverability. Motor Drive 2 is the 5-frames-persecond high speed motor drive with a built-in computer. It
is equipped with an LCD display of t h e number of frames
and th e operating procedure and also permits motorized
rewind when it is attached to the OM-3Ti.
In addition, the Winder 2 is also available, which offers
both single-frame exposures and sequential exposur es
on dial switching.
The OM System's outstanding maneuverability and
operability are ideal f or shooting dynamic sports photos
and documentary press photos. Various accessories can
be connected by a direct contact.
•
The Motor Drive 1 can also be used, but motorized
rewind is impossible.
85
Page 87

MOTOR DRIVE GROUP
Selection o f Motor Units
•Motor Dri ve 2. if you want to shoot very fast moving
subjects such as a dashing animal or a racing car
driving a t full speed, the Motor Drive 2 is the best
choice because it permits continuous shooting at a
hig h speed of up to five frames a second. This quick
shooting capability will often allow yo u t o catch a
dramatic instant.
•Winder 2. The Winder 2 is very helpful for shooting
impressive moments such as sports scenes and
children at play. As it permits continuous shooting at
a rate of up to 2 .5 frames a second, you will not mis s
a decisive moment.
Selection of Power Sources
•For the Motor Drive 2, the following two power
units are available: a small, lightweight and portable
flat-type rechargeable power unit, M.15V Ni-Cd
Contr ol Pack 2, an d a grip-type battery power unit,
M 18V Control Grip 2, which provides added stability
whe n used with a telephoto lens.
•The Winder 2 has a self-contained power supply,
but an external power units is also available:
M.6V Power Pack 1.
Remote Control System
• Winder 2 allows you to remote-control the camera using
the dedicated remote cord. Tripping the shutter without
camera shake makes it very useful for shooting wild birds
and animals, macro-photography and photomicrography.
• M.Quartz Remote Controller 1 is provided with an
electronic counter which allows you to trigger the camera
and check operation via an LCD displa y from a remote
location. It can also be used to switch between singleframe and continuous shooting modes. You can select an
interval from 0.5 seconds to 24 hours between shots
photographed in continuous mode.
• M.Remote Cord 1.2m/5m connects the Winder 2 with
the camera.
86
Page 88
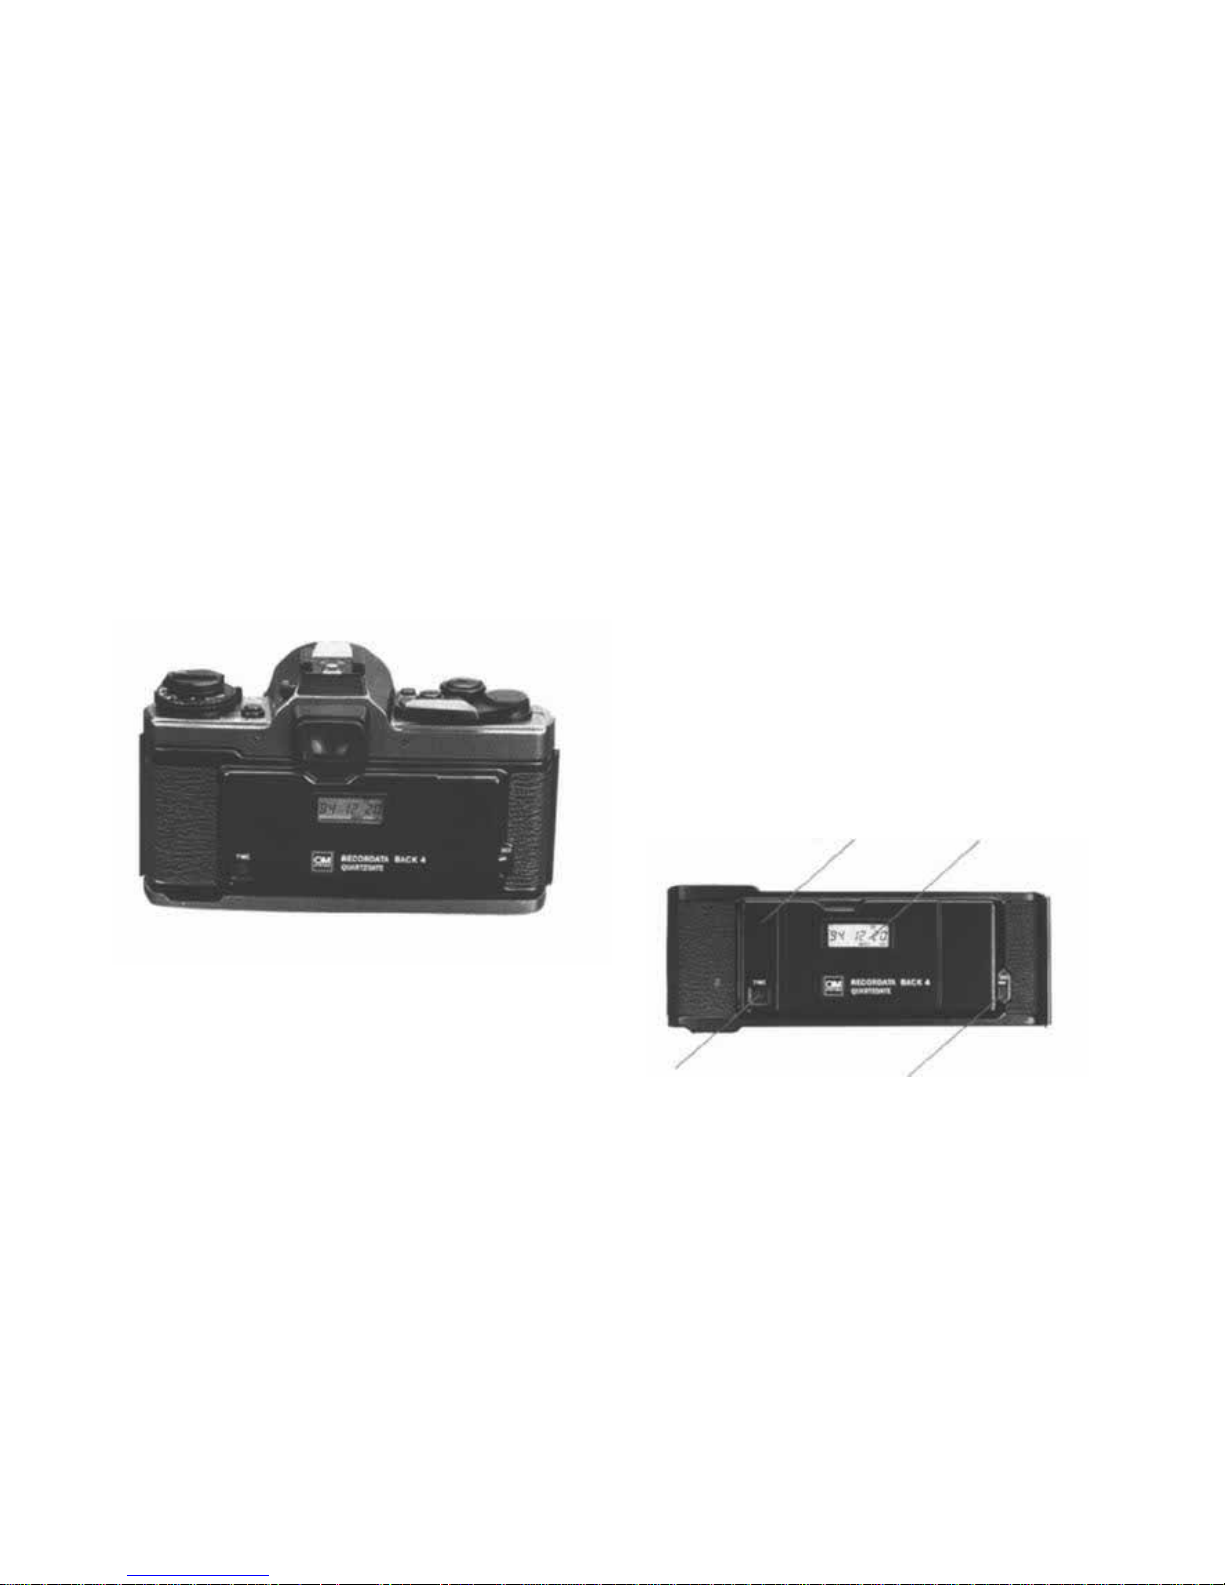
RECORDATA BACK 4
Interchangeable camera back for data imprinting.
Data imprinting is possible in the following forms:
(1) Year—month —day (Japanese date description),
(2) Month—day—year (American date description),
(3) Day—month —year (European date description),
(4) Hour—minute, (5) Counter (additive type), (6)
Classification number up to 6 digits. Provided with an
imprint clear switch to be used when dat a imprinting
is unnecessary. This Recordata Back can also be used
as a clock which indicates the hour, minute and
second vi a a Time Button.
87
Control panel cover
Battery Check/
Time button
Record switch
Display window
Page 89
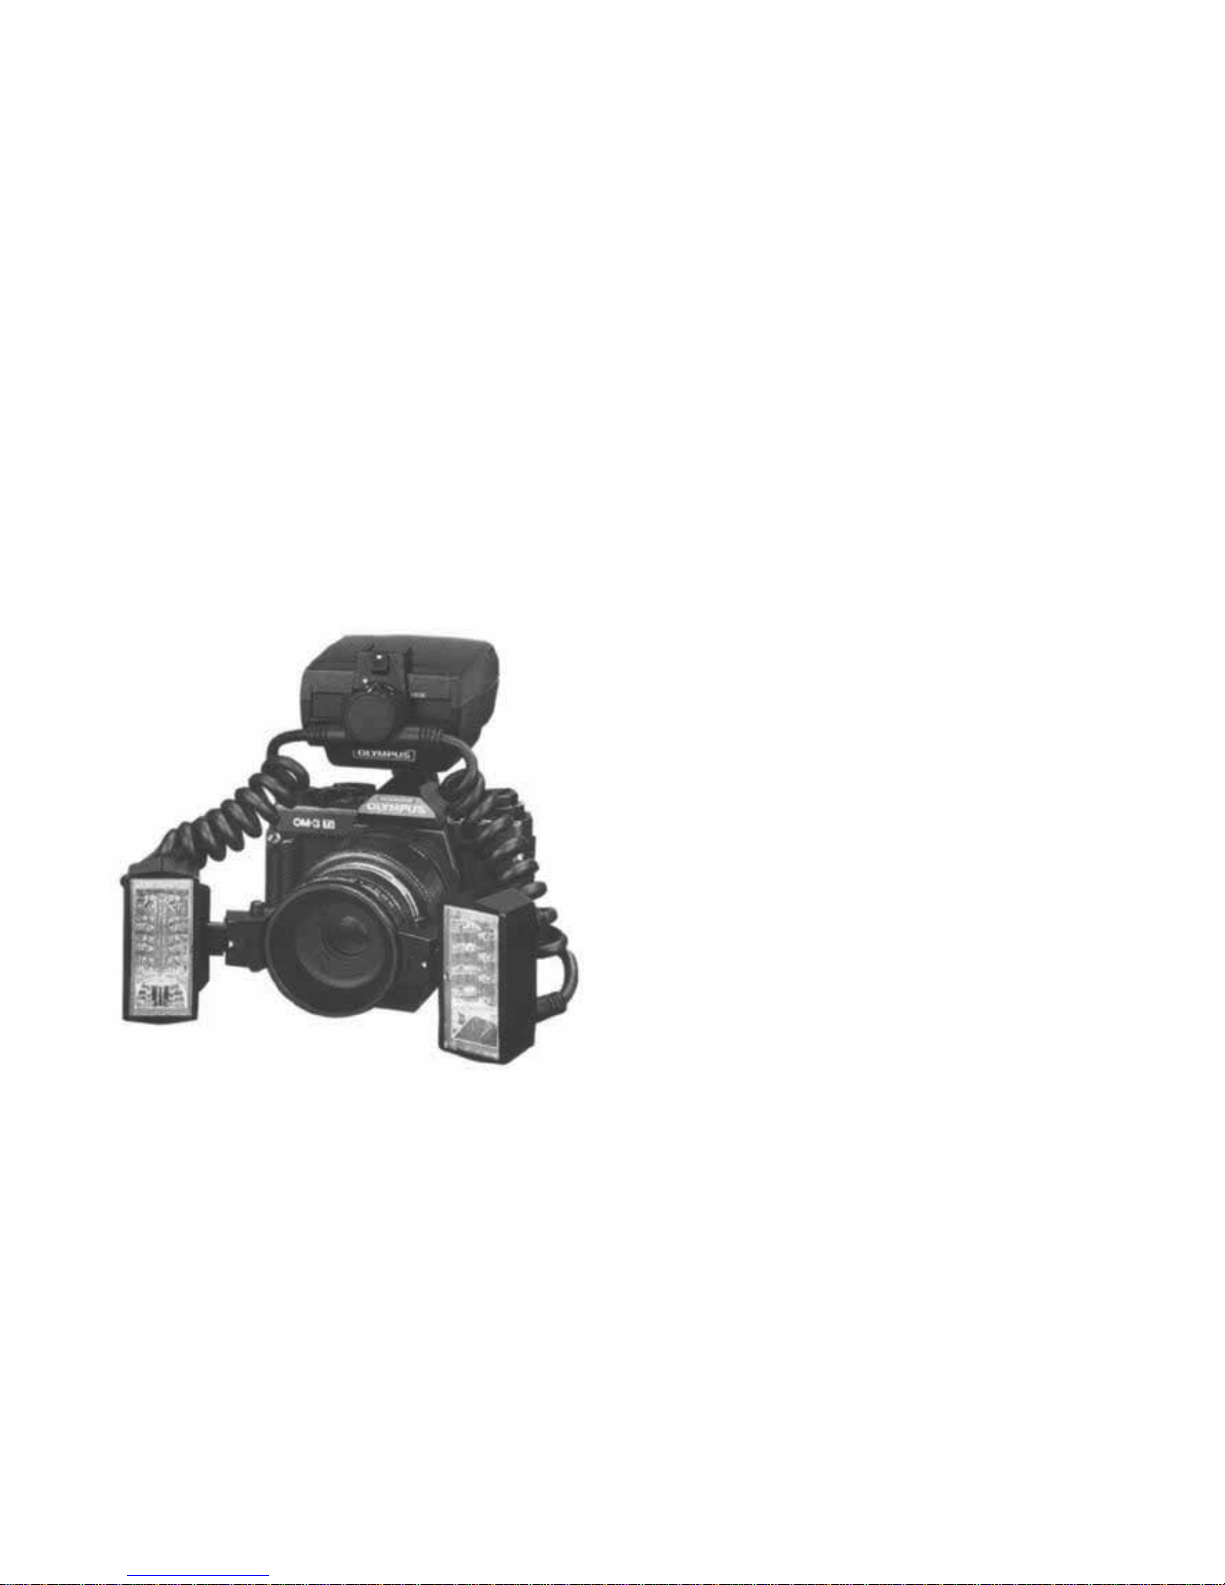
MACROPHOTOGRAPHY
The world of macrophotography is filled with marvel-
lous discoveries. However, macrophotography has
been generally considered difficult; calculations of
correc t exposure, in particular, have been a difficult
job even for professionals.
Equipped with an OTF auto metering, the OM-3Ti
has solved this problem to always provide correct
exposure, regardless of the magnification and
aperture. All complicated exposure calculations for
multi-lamp flashing are now quite unnecessary.
The OM-3Ti also provides a complete macro system
including a wide choice of macro lenses tha t offer
excellent life-size and magnified pictures as well as
extension units that enable you to take handheld
macro pictures.
88
Page 90
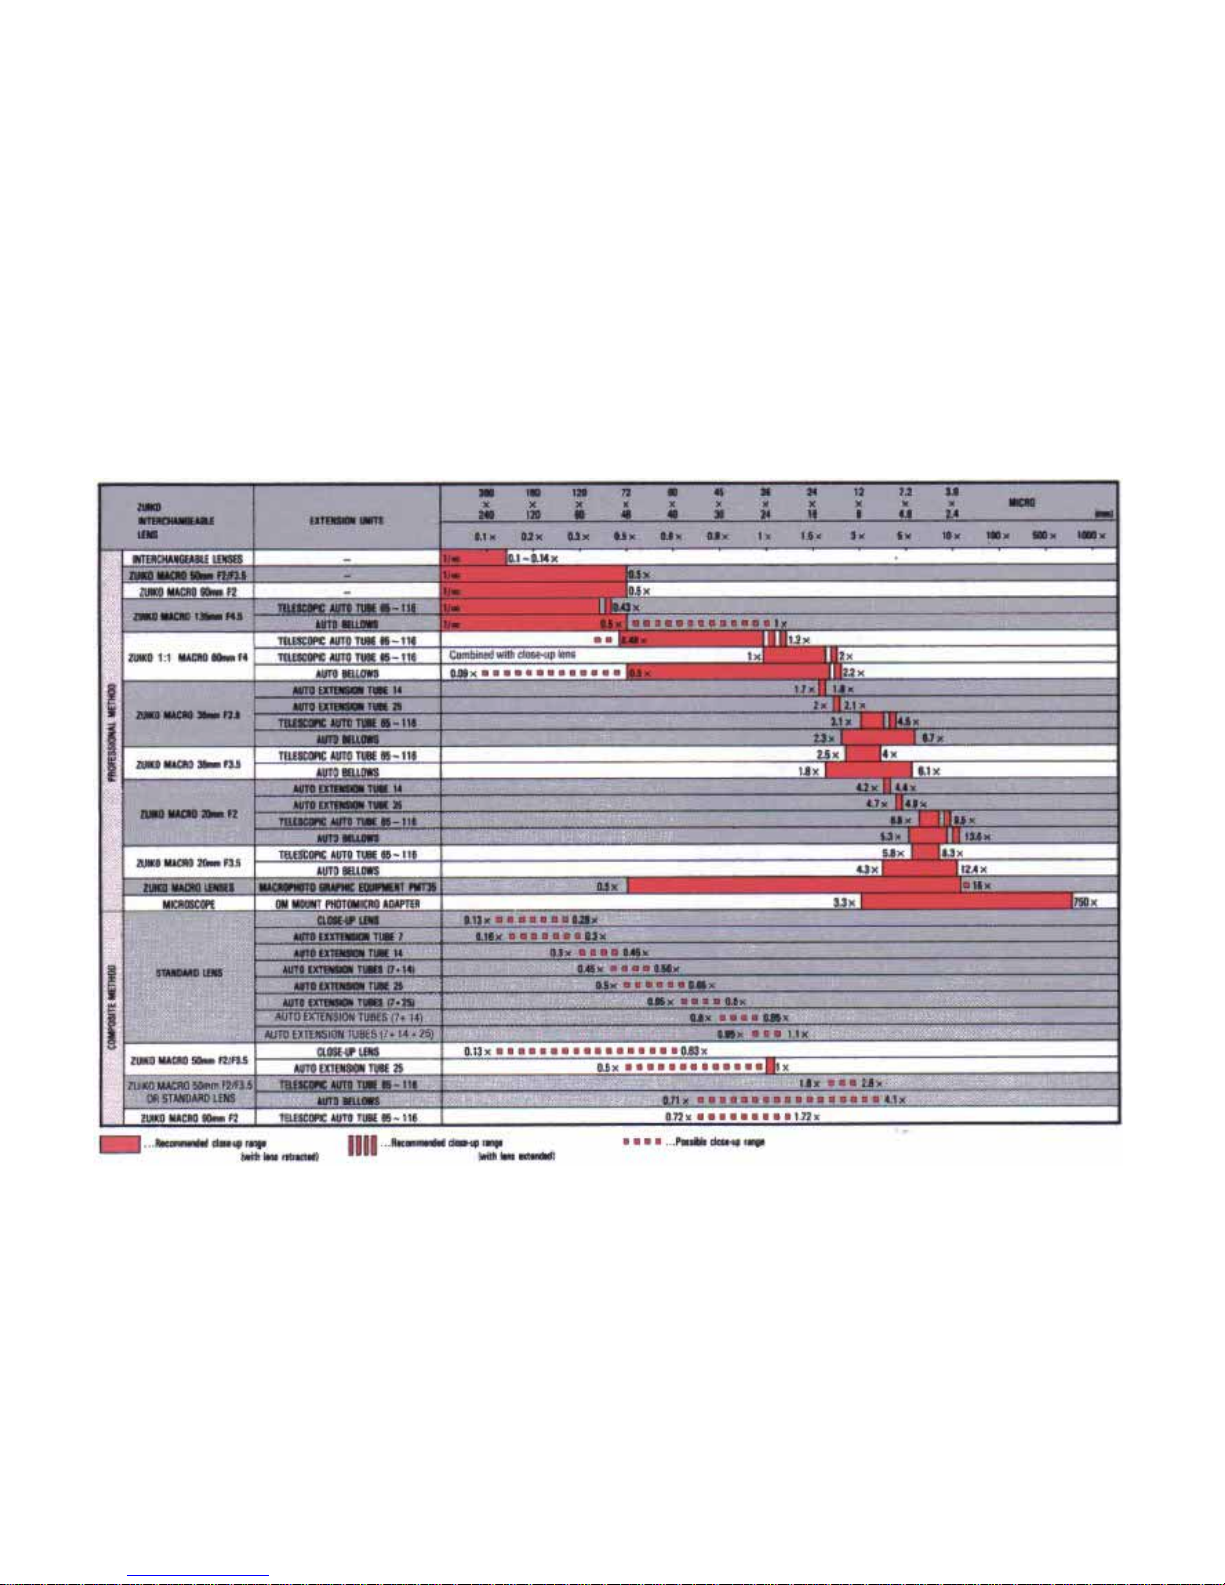
CHART OF PHOTOGRAPHIC RANGES
89
Page 91

MACRO PHOTO UNITS
Simplified Macro System
It allows you to take close-ups up to life size with
ease. With this macro system, you will come upon
unexpected an d wonderful discoveries in tiny things
around you such as writing instruments, printed
letters, f lowers in a vase, etc .
•Close-up Lenses 49mm f = 40mm. Simply screw
th em in the front of th e standard lens, and y o u c a n
take up to 0.63X close-ups.
•Auto Extension Tubes 7, 14 and 25 These
adapters are placed between the lens and camera
body and available in three thicknesses: 7mm,
14mm and 25mm. They can be used in seven combinations. W ith the standard lens, you can take up
to 1.1X close-ups.
Basic System
This is a complete macro system th at permits low to
high magnifications. It will produce a brilliant image
of the marvelous world of tiny things such as the
geometric beauty of the compound eye of a dragon
fly and close-ups of flowers. An indoor type and
outdoor type are available.
Indoor type: This system uses an auto bellows,
macro photo stand, top-light illumination device,
etc. in combination with various macro lenses. It is
suited for taking high-magnification pictures in a
room or studio.
•Auto Bellows A basic unit that helps you take full
advantage of the system's capabilities with a variety
of ligh ting units and mounts. The stop-down lever
that lets you use a variety of OM System lenses a t
preset aperture or operated in combination wi th the
double cable release, affords an automatic dia-
phragm photo function.
•Zuiko Macro 20mm F2 Large-aperture macro
lens designed exclusively for macrophotography.
Combined with the Auto Be l l o ws, it permits magnifications ranging from 4.2X to 16X. Provided with a
helicoid f o r fine focusing.
90
Page 92

•Zuiko Macro 38mm F2.8 Bright, high-magnification macro lens designed exclusively for macro
photography. Combined with the Auto Bellows, it
permits magnifications ranging f ro m 2.3 X to 6.7X .
Provi d e d with a heli c o i d for fine focusing.
•Macrophoto Stand VST-1W A compact and sturdy
multipurpose stand for solid camera support in
close-up and macrophoto work. Comes with frosted
stage glass for incident light and may be used in
conjunction with Trans-illuminator Base X-DE for
lighting o f transparent subjects f r o m beneath.
•Epi-illuminator PM-LSD-W A two-piece lighting
set providing ideal reflected light for macrophoto-
graphy. Moving the filament allows you to change
the position an d field of illumination.
Outdoor type: This is a handy and highly manueverable system which includes macro lenses, telescopic
auto extension tube 65—116, etc.
•Telescopic Aut o Extension Tube 65-116 With
its variable tube length, this auto extension tube
enables you to change the shooting distance and
magnification freely.
•Zuiko 1:1 Macro 80mm F4 This lens is designed
specifically for life-size reproductions. It functions at
its best at a 1 :1 ratio, but gives outstanding images
from 1 /2 to 2X life-size, the range of magnifications
available when used wi th the Au to Bellows. With
the Telescopic Auto Tube it goes up to life-size, and
the close-up lens is used to extend the range to 2X
magnifications.
•Zuiko Macro 135mm F 4. 5 Shoots from infinity to
life-size wit h the A uto Bellows, or 0.43X magnifi-
cations with the Telescopic Au to Tube, giving long
working distances and minimal perspective distortion. It has a helicoid ring fo r fine focusing.
•Zuiko Macro 50mm F2 Large-aperture macro lens
which is as fast as a normal lens. Basic design
magnification 0.1X. Because aberrations are mini-
mized a t c lose and f ar distances, this lens exhibits
excellent resolution from infinity to as close as
0.24m.
•Zuiko Macro 50mm F3.5 Designed f o r optimum
performance at 1 /1 0 magnifications, this outstand-
ing lens gives superb results in general purpose
photography at infinity, or for macro subjects as
large as 1 /2 life-size.
•Zuiko Macro 90mm F2 This medium-range
telephoto macro lens covers a wide focusing range
from 1/2X close-ups to infinity. With its large
aperture ratio of F2, it provides excellent image
definition in macro photography and promises good
performance at infinity f or extended picture-taking
possibilities.
91
Page 93
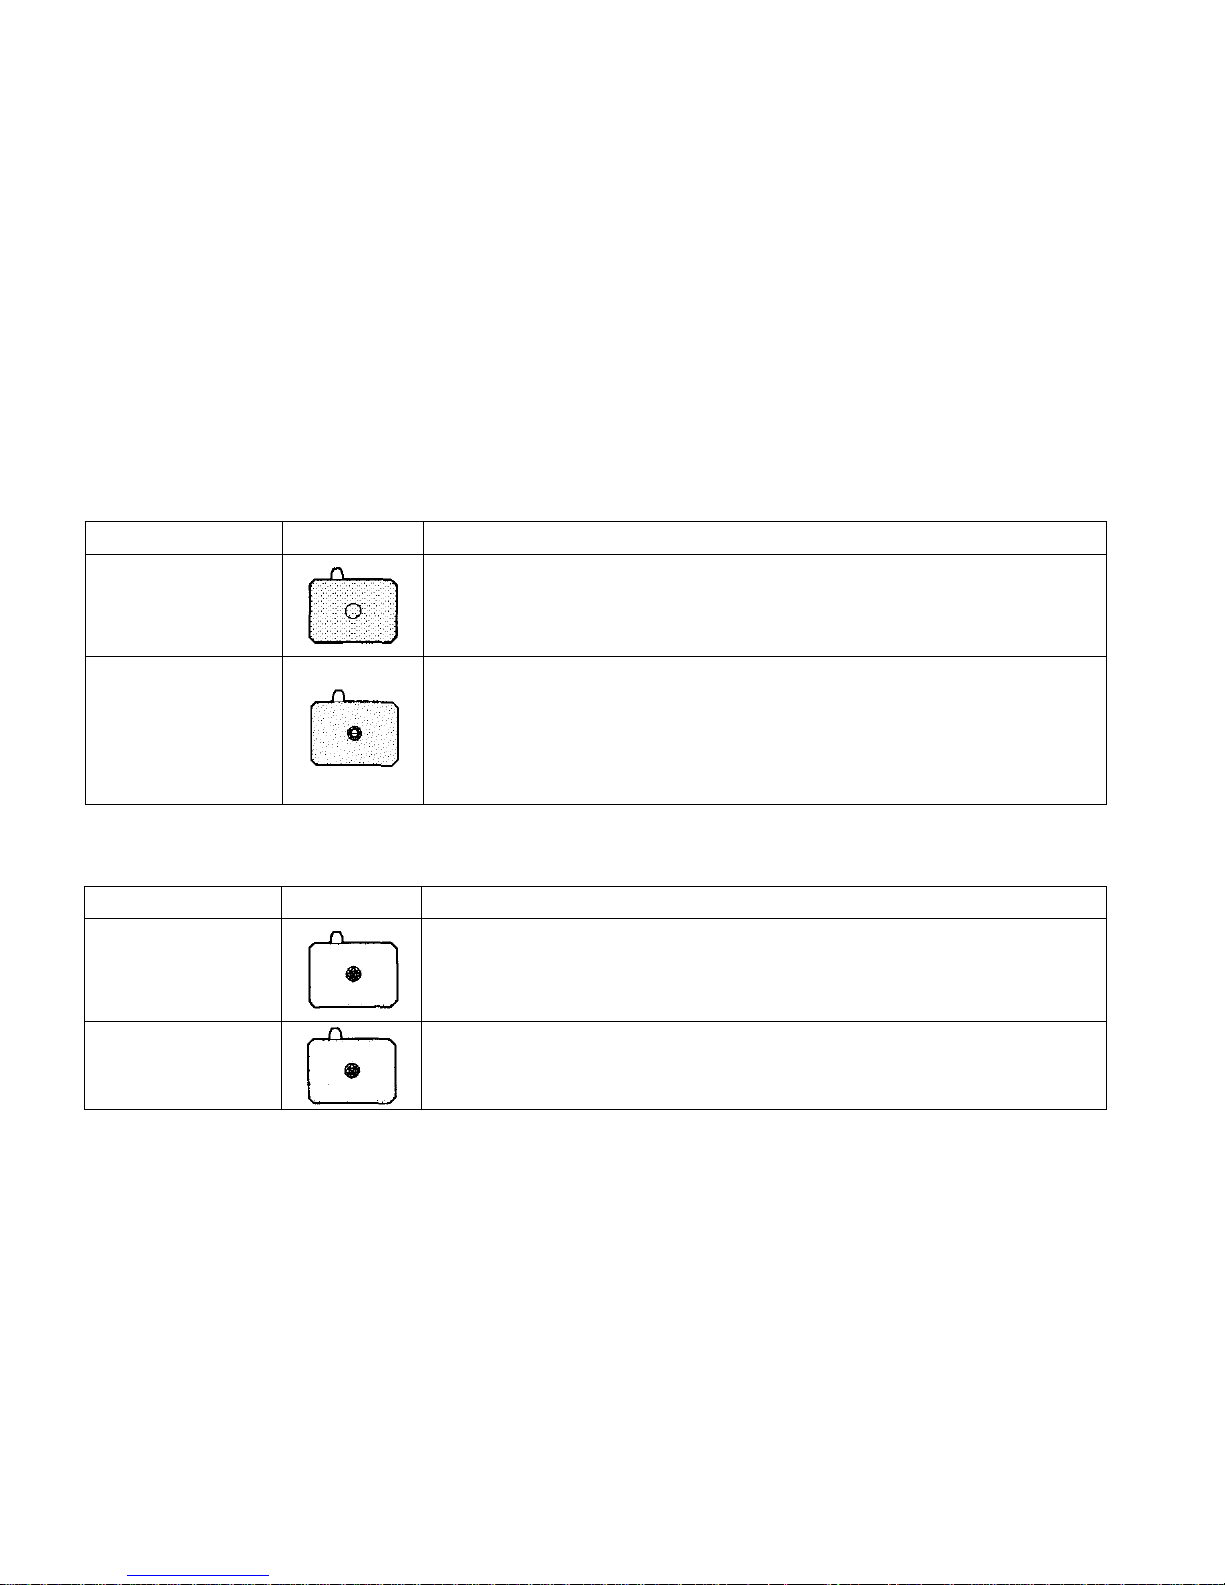
FINDER GROUP UNITS
The above screens can also be mounted on the OM-2S/P, 2S, 3, 4, 4Ti and 4T but not on the OM-1, 1N, 2 and 2 N.
TYPE
2-4
All matte type
(for most lenses)
2-13
Micro/split Image-matte
type
(for most lenses)
SCREEN
FEATURES
Bright focusing screen newly developed. Suitable for general
photography. Accurate focusing can be achieved especially in
combination with a fast lens. Suitable for shooting with a lens having a
wide-open aperture of F4 or less.
(There is a circle showing the spot metering range.)
Bright focusing screen newly developed. Most suitable for normal
photography, like the 1-13. Since the central split-image is encircled by a
microprism collar and the outer area has a matte surface, the screen can
be used in th e same wa y as th e standard 1-1 and 1-3 Screens. Wh en a
lens wit h a maximum speed of F5.6 or slower is used, the prisms darken
and the focusing must be made on the matte area.
TYPE
1-1
Microprism-matte
type
(for most lenses)
1-2
Microprism-matte
type
(for standard &
telephoto lenses)
SCREEN
FEATURES
Standard type, suitable fo r general photography. Fast and accurate
focusing is done on the central microprism spot as well as on the
surrounding matte area. When a lens with a maximum speed of F5.6 or
slower is used, the microprism darkens and focusing must be made on
the matte area.
Suitable for general photography in conjunction with a standard or
telephoto lens. Focusing is done on the microprism spot as well as on the
matte area. When a lens with a maximum speed of F8 or slower is used,
the split prism darkens.
92
Page 94
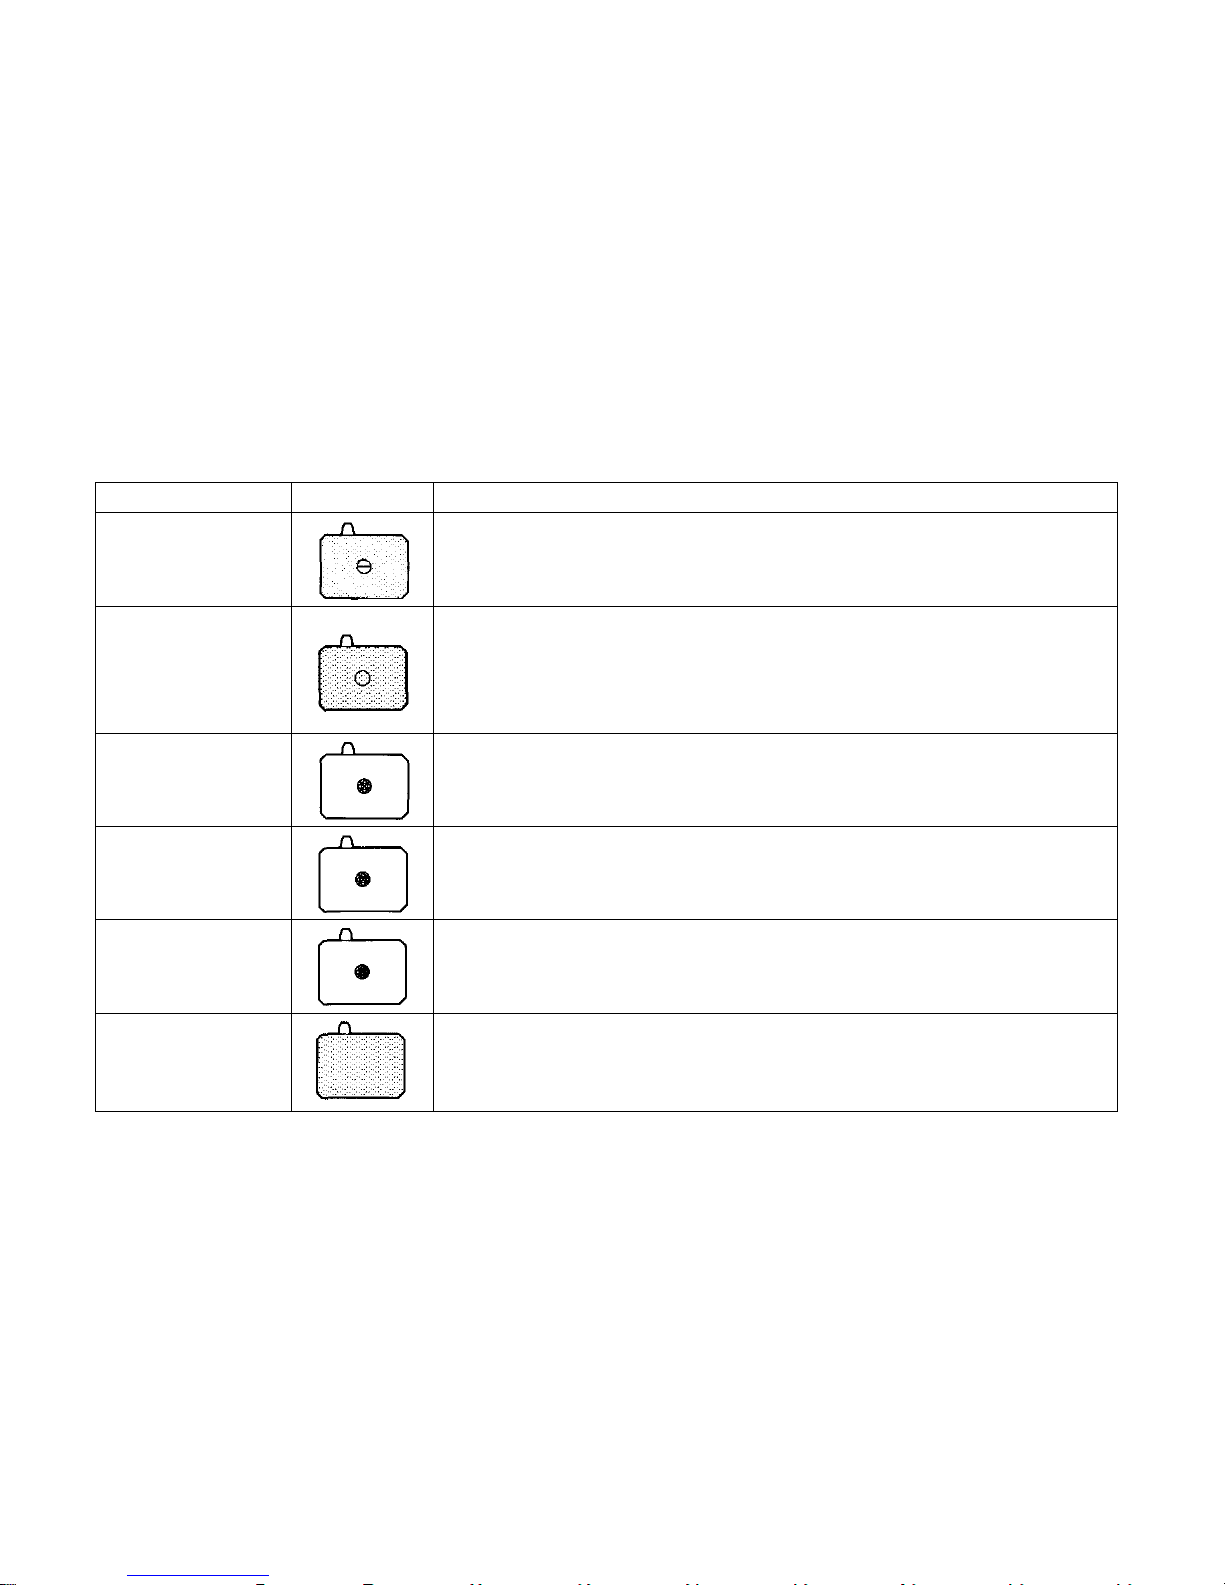
TYPE
1-3
Split image-matte
type
(f or most lenses)
1-4N
All matte type
(for most lenses)
1-5
Microprism-clear
field type
(for wide angle &
standard lenses)
1-6
Microprism-clear
field type
(for standard &
telephoto lenses)
1-7
Microprism-clear
field type
(for super
telephoto lenses)
1-8
All matte type
(for telephoto lenses &
astronomical telescopes)
SCREEN
FEATURES
Suitable for general photography ensuring critical focusing, and ideal for
photographers who prefer the split-field and coincidence type focusing.
When a lens with a maximum speed of F5.6 or slower is used, the split prism
darkens.
Suitable f or general photography and ideal f o r photographers wh o prefer a
view field free from microprism or split prism and for those who are
accustomed to focus using matte area. Also suitable for super telephoto
photography and close-up photography in conjunction with macro lenses and
Aut o Bellows.
(There is a circle showing the spot metering range.)
This transparent screen provides an exceptionally bright finder image.
Highly suitable for snapshots using wide angle lenses. The lack of matte
surface means depth-of-field effects cannot be ascertained.
This screen provides a n extremely bright finder image. Focusing is d on e o n
the microprism spot. The lack of matte surface means depth-of-field effects
cannot be ascertained.
Developed primarily for use with super telephoto lenses this clear field screen
provides an extremely bright finder image. The micro-prism spot remains
bright even with a lens whose maximum speed is F11. The lack of matte
surface means depth-of-field effects cannot be ascertained.
This screen is ideal for use with super telephoto lenses of 300mm or more in
focal length, or for astrophotography. The extreme fineness of th e ma tte
surface permits outstanding field definition. More accurate focusing may be
achieved by the use of the Varimagni Finder.
93
Page 95
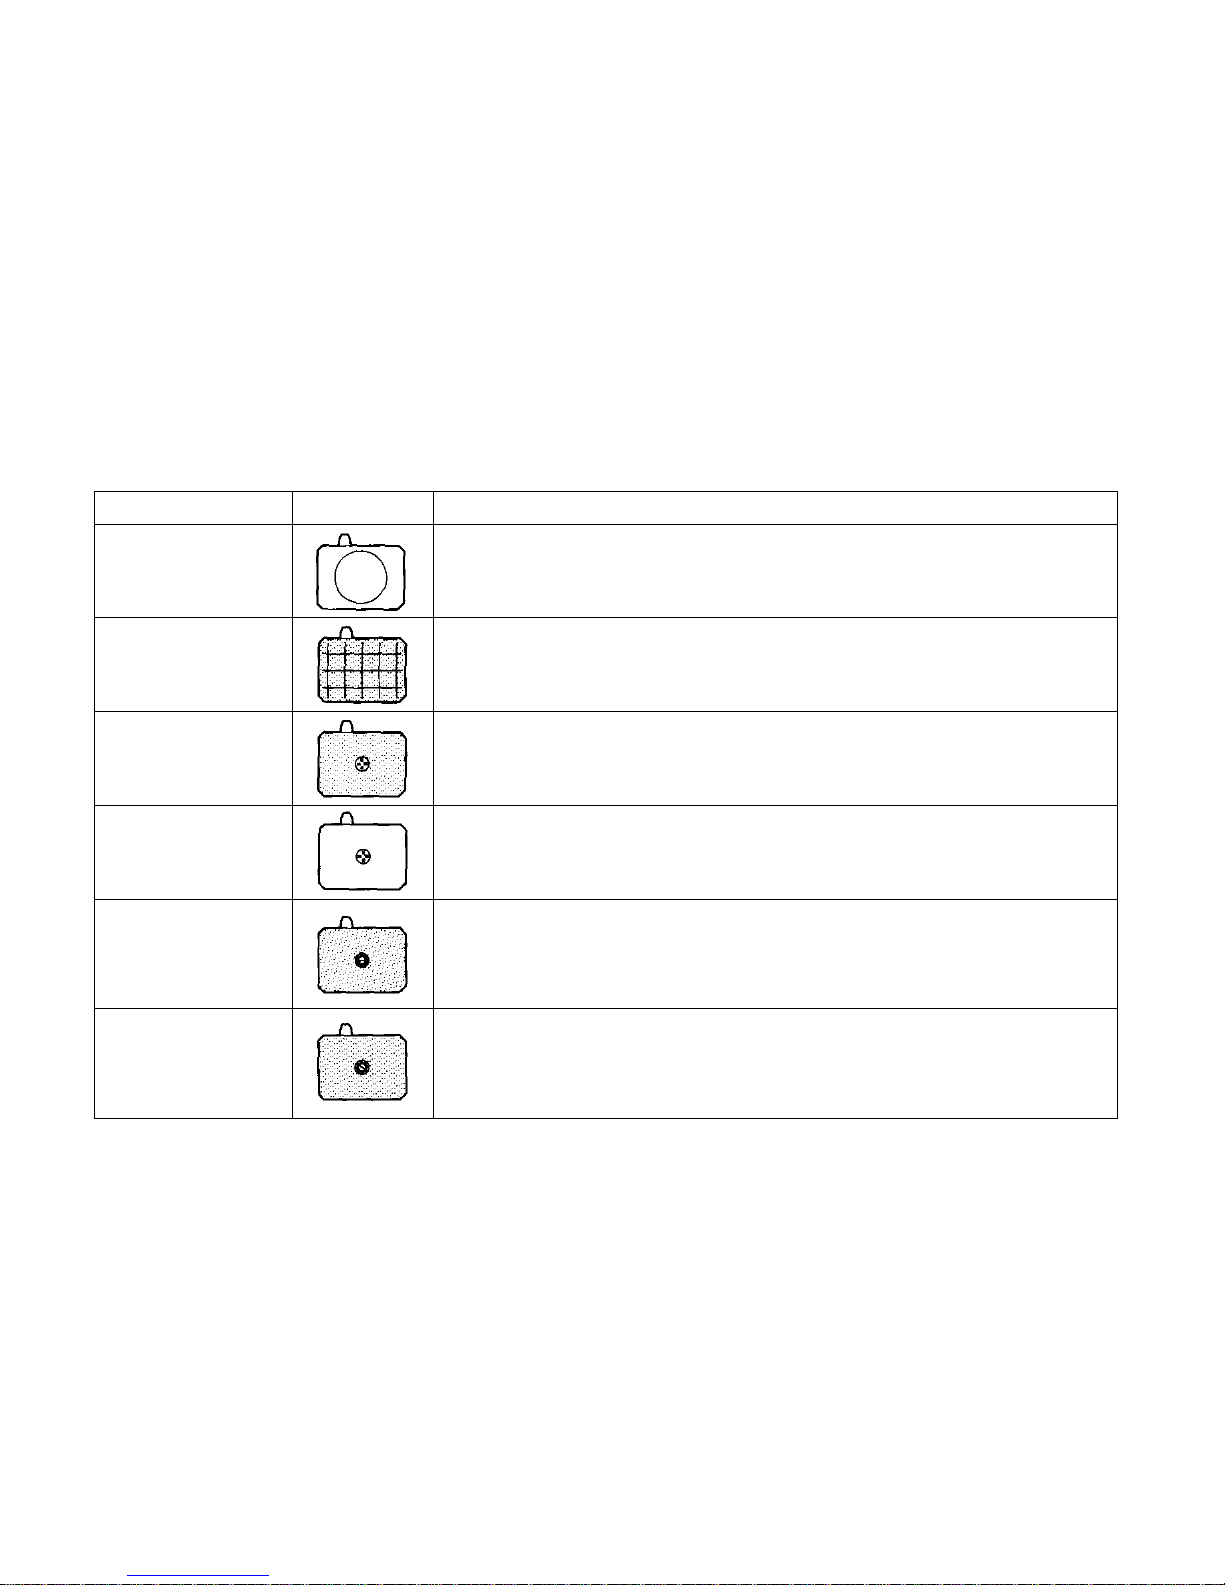
TYPE
1-9
Clear field type
(for endoscopic
photography)
1-10
Checker-matte
type
(for shift lens)
1-11
Cross hairs-matte
type
(for close-up &
macro-
photography)
1-12
Cross hairs-clear
field type
(for photomicrography
& macrophotography
greater than life size)
1-13
Microprism/split
image-matte
type
(for most lenses)
1-14
Microprism/split
image-matte
type
(fo r mo st lenses)
SCREEN
FEATURES
Designed for use with OLYMPUS fiberoptic endoscopes. This condenser type
screen without fresnel lens requires no focusing when a special adapter
couples t h e camera with the fiberscope. Exposure is ma de automatically by
the light supply.
The grid lines engraved on the all-matte surface are u se d for vertical and horizon-
tal picture alignment. Though originally designed fo r architectural photography
with the shift lens, it is also suitable for general and super-telephotography, and
close-up/macrophotography with macro lenses and Auto Bellows.
Highly advantageous for close-up and macrophotography with Auto Bellows
and extension tubes. For focusing in low magnification close-up photography,
use the matte area and in macrophotography greater than life size, use the
double cross hairs the same way as with the 1-12.
The transparent screen offers the photographer focusing with an unusually
bright finder image. To focus, first correct your diopter using a dioptric
correction lens or Varimagni Finder so that each line of the double cross hairs
can be seen clearly and separately. Then bring the Spacemen into focus.
Most suitable for normal photography, this screen assures pinpoint focusing. The
central split-image rangefinder is encircled by a microprism collar. Since the outer
area has a matte surface, the screen can be used in the same way as the standard
1-1 and 1-3 Screens. When a lens with a maximum speed of F5.6 or slower is
used, the prisms darken and the focusing must be made on the matte area.
Most suitable for normal photography. The central split-image range finder,
encircled by a microprism collar, is inclined 45 degrees to allow easy focusing on
subjects with vertical or horizontal li ne s. When a lens with a maximum speed of
F5.6 or slower is used, the pr isms darken and focusing must be made on the
matte area. The meter needle giv e s corre ct light readings.
94
Page 96

SELECTION OF FILTERS
With the aperture and shutter, the camera can control
the amount of light, but not the quality of light.
Therefore, it is necessary to filter the light com-
ponents that are not wanted f or visual expressions.
Filters are useful for this purpose.
Filters for color and B&W films
Skylight (1A): For absorbing ultraviolet rays. It yields
natural colors on the part of a subject in the shade
under a blue sky by filtering the light from the sky.
It can be used to protect the lens, but it is not
recommended to use this filter for subjects which are
not affected by ultraviolet r ay s o r a blue s ky because
the color balance m ay be impaired.
L3 (UV): In the open air on a bright day, there are a
lot of ultraviolet rays t o which photographic films are
sensitive although they are invisible to the human
eye. Affected by these rays scattering in the air,
distant landscapes may turn out whitish and unclear.
The skylight filter cuts off detrimental ultraviolet rays.
It can always be used f or lens protection.
ND2/ND4: Neutral gr ay filter fo r reducing the light
quantity without affecting the color and contrast.
Use this filter if you want to open t he aperture for a
blurred
background,
or
produce
special
"blur"
effects
with a slow shutter speed, or to reduce the light
intensity without increasing the shutter speed o n a
reflex telephoto lens which has no aperture control
mechanism. Available in two types: ND2 for reducing
the light intensity by one stop and ND4 for reducing
it by two stops.
C-POL (circularly polarizing filter): For blocking
the light reflected from the surface of glass, water
and tile to take sharp pictures of fish in the water,
sub jec ts behind a sh ow window, e tc. It c a n also be
used as a contrast filter f or color pictures of land-
scapes, because it cuts off the light reflected from
dus t or vapor under a blue sky as well as the surface
of leaves and grass . A s this is a c irc ula rl y polarizing
filter it can be used on cameras using a h alf-mirror
such as the OM-3Ti.
95
Page 97

Filters for B& W films
Y48 (Y2): Yellow filter which absorbs ultraviolet,
violet and part of blue light. It decreases the effect of
blue sky and brings out the clouds. It is also useful for
taking distant shots on a bright clear day. with this
filter, the sensitivity of films becomes closer to th at
of the human eye so that ordinary shots at close
distance will appear very natural with a slightly
enhanced contrast.
O56 (02): Orange filter which absorbs a wider range
of light (from ultraviolet rays to blue-green light) tha n
Y48, thus producing a n intensified contrast. It can
also be used for infrared film.
R60 (R1): Red filter which absorbs violet, blue, green
light and part of yellow light, thus blocking almost all
light except for red and similar colors. As it produces
a strong contrast effect, distant shots turn out sharp
and crisp while the tone of blue sky weakens. This
filter is indispensable f or bringing ou t the e f fects of
infrared film.
Filters f or color films
A4 (81C): On a cloudy or rainy day, pictures taken on
daylight film tend t o appear blueish. This amber film
suppresses blue and produces natural colo r reproduc-
tion. It ca n also be used fo r creating warm and mild
effects intentionally under ordi nary light.
B4 (82C): Subjects under morning or evening glow
will turn out reddish if they are taken on daylight film.
This blue filter suppresses re d and produces natural
color reproduction. In contrast with A4, it can be
used for bringing out cool, blueish effects under
ordinary light .
96
Page 98
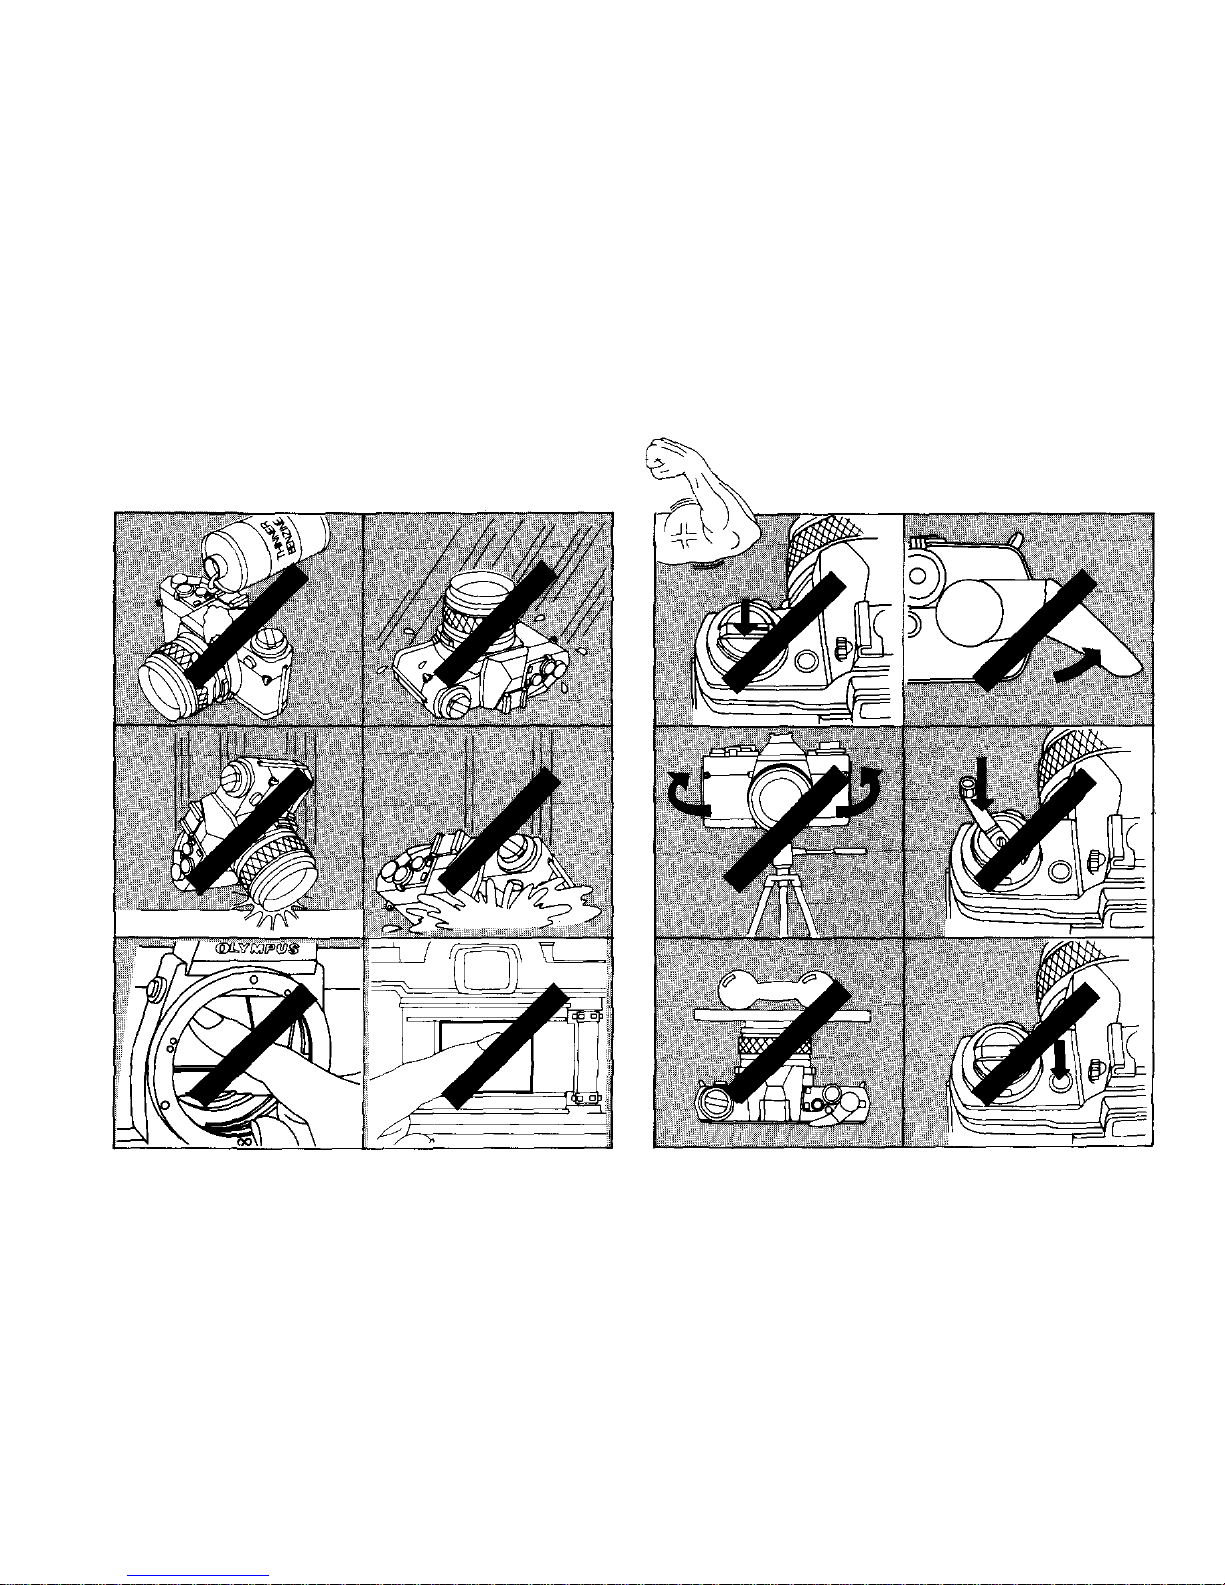
Handling Care
Take care in handling t he camera.
Do not use extra force.
97
Page 99
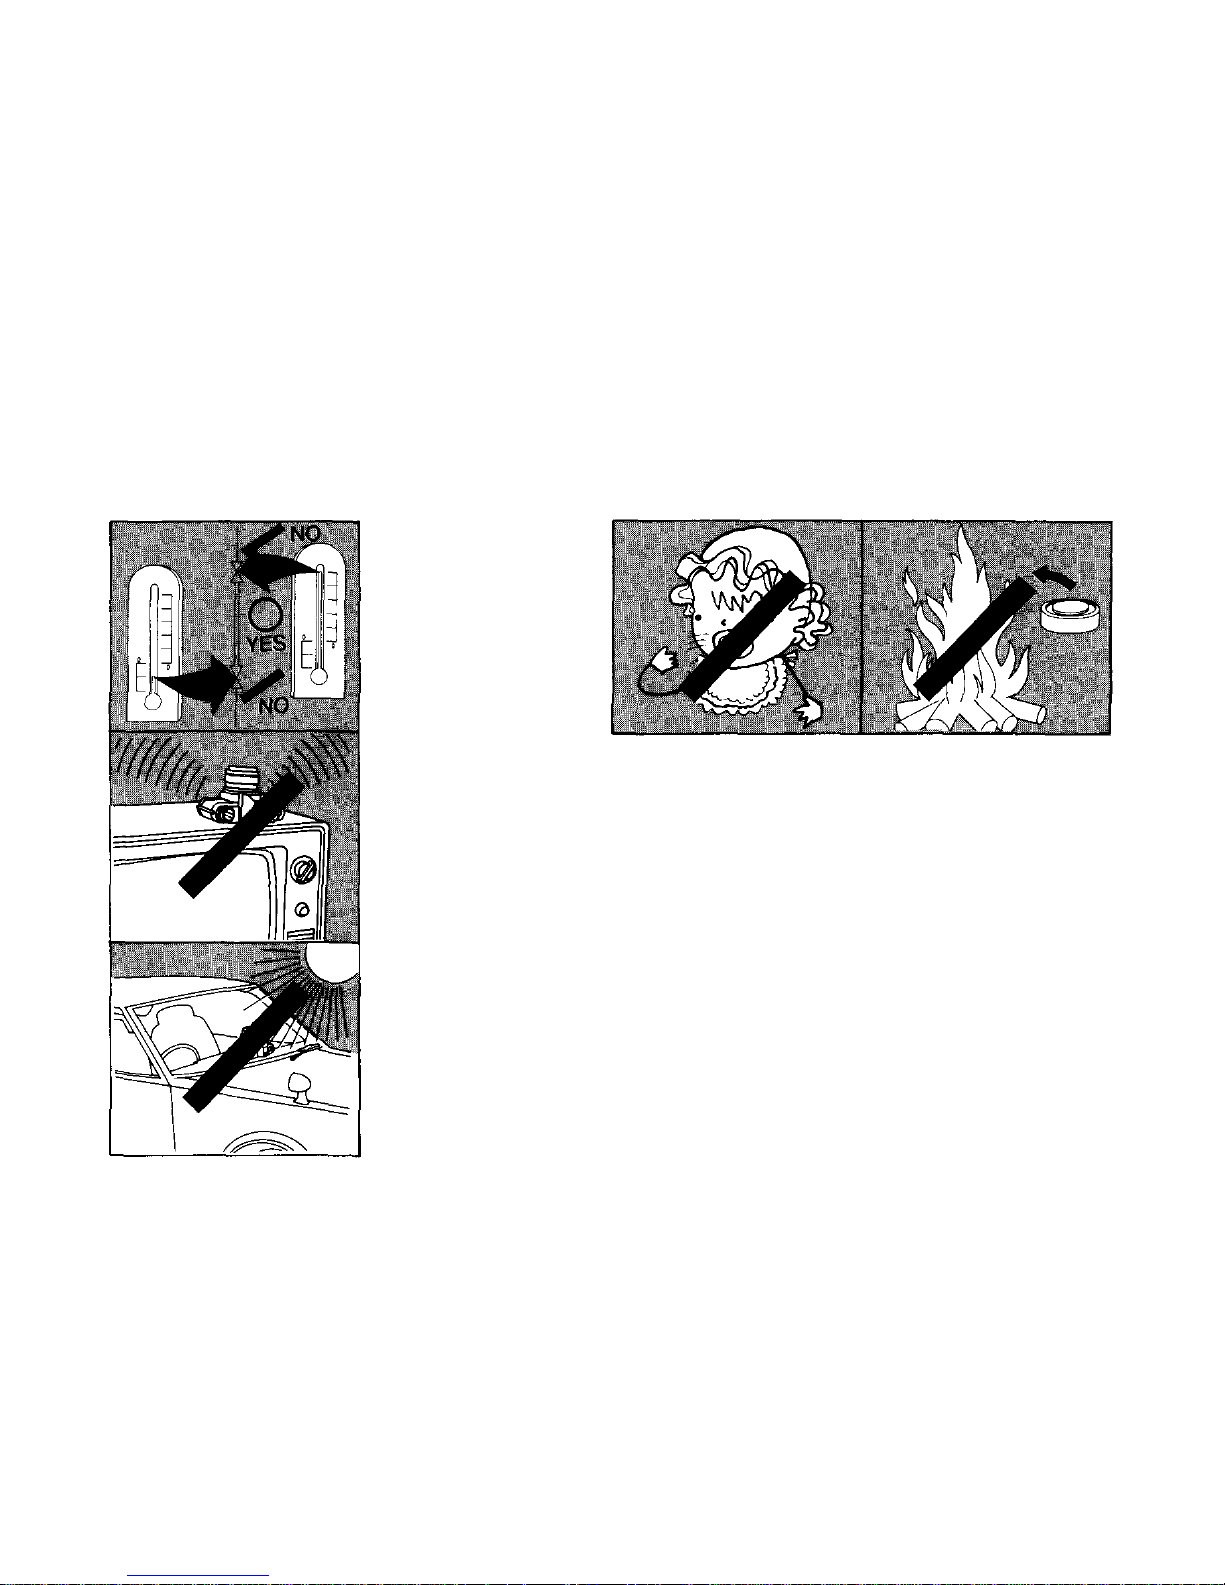
Storage Care
Battery Precaution
Guard against high temperature and magnetic fields.
98
Page 100

QUESTIONS AND ANSWERS (1)
Q: There ar e sometimes scratches on the film.
A: The cause may be a soiled film passage. The film
compartment may be soiled by film debris
accumulated during long use of the camera. Be sure
to dust off the camera periodically.
Q: How do I store the camera?
A: Remove the camera from its case and store it in a
dry, well-ventilated place. Protect against excess
moisture by using packs of silica gel or other
desiccant in t he storage area. Do not store the units
near moth balls or similar volatile chemical materials
to avoid the possibility of damage to metal surfaces.
Q: How can I turn off the beep?
A: Operate the flash mode lever while pressing the
battery check button. You can also tu rn on the beep
in the sam e way.
Q: This camera doesn't have a power switch. What
should I do when I don't use the camera?
A: The batteries will last f or approx. 1 year when the
camera is used under ordinary circumstances. When
the bulb mode is engaged, battery consumption is
further decreased because the circuitry does not
operate even if the shutter release is pressed
accidentally. Remove the batteries when the camera
is not to be used for an extended period of time.
Q: W he n w i ll spot metering be canceled?
A: (1) When the shutter is released. (2) When the clear
lever is operated. (3) When more than 60 seconds
have elapsed. (4) When the flash mode lever is
operated. (5 ) When the lens is changed. (6) Whe n a
T-Series flash or the F280 is switched on. (7) When
the shutter speed ring is set to B.
Q: The flash fires even with 1/125-sec. or faster
shutter speed. Can I take a properly exposed
picture?
A: Unless the Super FP mode is engaged, synchro-
99
 Loading...