

Olympia Faucets, Inc. P-2371T, P-2374T, P-2370T, P-2372T, P-2375T Installation Instructions Manual
Tools:
OLYMPIA FAUCETS, INC.
Interchange City Distribution Center #20
1277 Heil Quaker Boulevard
La Vergne, TN 37086
(888) 772-7701
www.olympiafaucets.com
Adjustable Wrench Plumbers Putty Sealant Tape Rags
Model Number: P-2370T, P-2371T, P-2372T,
P-2374T, P-2375T (CP, BN)
Warnings and Notes:
Check with local plumbing code requirements before installation.
This product should be installed by a local listed plumber.
Do not use plumbers putty on threads.
Installation Steps:
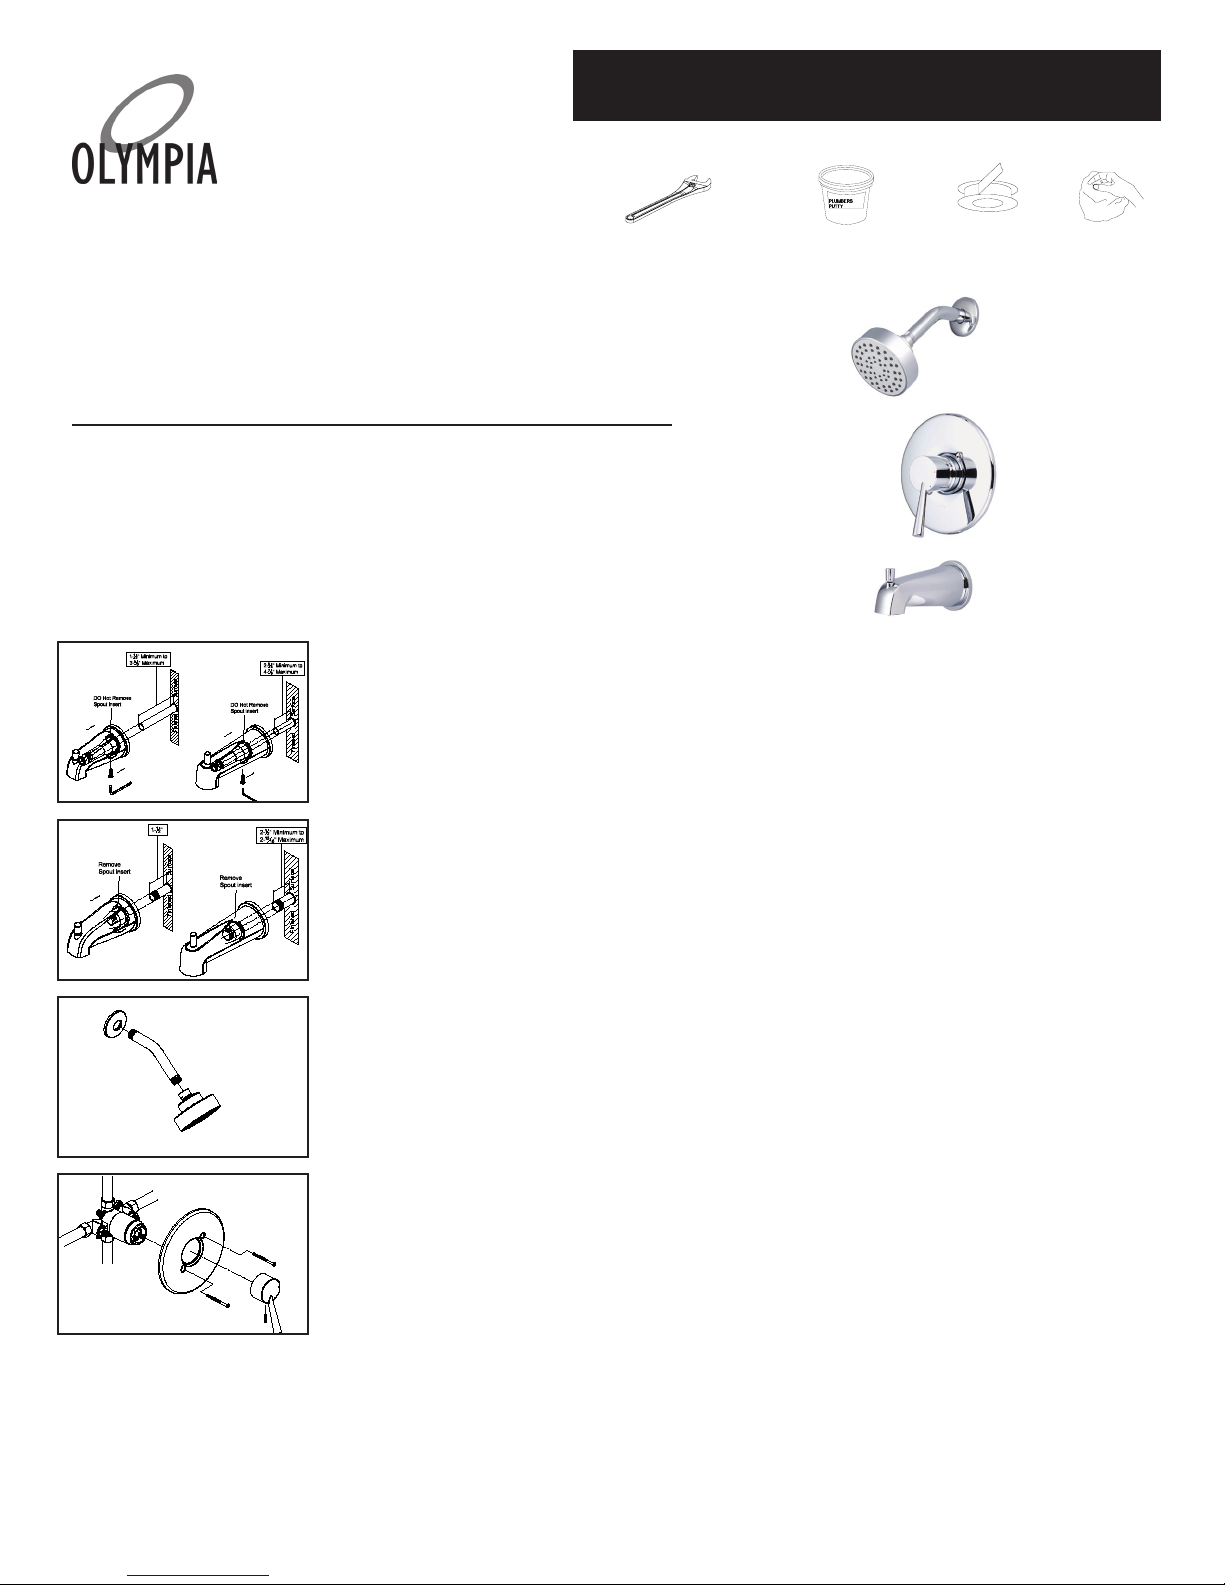
Single Handle Tub And Shower Trim Set
(1) For slip-t Installation:
with a minimum length of 1-1/2” to a maximum length of 3-5/8” and
2-5/8” minimum length to a maximum length of 4-7/8” for 7” extended
tub spout from nished face of tub or wall. Then end of copper tube
should be chamfered free of any burrs to prevent cutting or nicking
o-ring inside the spout. The outside surface may be sanded free from
nicks and scratches. Press and twist the spout over copper tube ush
with the nished tub or wall surface. Tighten the set screw, but do not
overtighten.
The 1/2” nominal copper tube must be cut
INSTALLATION
(2) For IPS Installation:- The 1/2” threaded pipe nipple must be kept with a
minimum length 1-1/8” to maximum length of 1-3/8” and minimum length
2-1/2” to maximum length of 2-13/16” for 7” extended tub spout from nished
face of tub or wall. Remove the octagonal nut inside the spout by using nose
pliers. Apply sealant tape at the threaded connection. Screw tub spout onto
the threaded pipe nipple and tighten by strap wrench.
3) Caution: To avoid plugging the showerhead spray outlet use sealant tape
on the shower arm threads. Remove temporary nipple from the shower
elbow. Use silicon to caulk the back of the shower arm ange. Slide the
shower arm ange over the shower arm. Apply the sealant tape on the both
threaded ends of shower arm and install the shower arm to the shower
elbow. Carefully tighten with a clean strap wrench. Press the shower arm
ange against the nished wall. Flush out the system. Thread the showerhead to the shower arm.
(4) Slide the face plate on the valve. Secure the face plate with the help of
face plate screws. Use silicon to caulk around the face plate. Tighten the set
screw on the bottom of handle with help of 3/32” Allen wrench to secure the
handle on the valve.

Exploded Drawing:
* Note: Please specify nish/color when ordering.
ITEM # DESCRIPTION
A OP-640001* Shower Arm Flange
B OP-640002* Shower Arm
C OP-640038* Shower Head
C OP-640039* 1.5 GPM Shower Head
D OP-640037* Rain Shower Head (For P-2374T,
P-2375T)
E OP-440051* Face Plate
F OP-140011* Lever Handle
G OP-490011 3/32” Allen Wrench
H OP-640007* Diverter Tub Spout (For P-2370T)
I OP-640008* Escutcheon (For P-2370T, P-
2371T)
J OP-640019* Non Diverter Tub Spout (For P-
2371T)
K OP-640040* Extended Diverter Tub Spout (For
P-2374T)
1 OP-440052 3/32” Allen Screw
2 OP-440010* Face Plate Screw
For more care information or trouble shooting
inquiries about your Olympia product, Please call:
OLYMPIA FAUCETS, INC. (888) 772-7701
7AM - 8PM EST (4AM to 5PM PST)
www.olympiafaucets.com
 Loading...