

Page 1
Bedienungsanleitung
Operating Instructions
MODE
FILE/REP
ERASE
MEMO 99
Page 2

Ihr neues Gerät funktioniert nicht?
Geben Sie das Gerät bitte nicht gleich zurück, sondern rufen Sie uns zuerst
an.
Probleme an technischen Geräten haben oft nur geringe Ursachen, die sich
unkompliziert und schnell lösen lassen.
Unser Fachpersonal kennt Ihren Gerätetyp und wird Ihnen mit wertvollen
Tipps helfen.
Sie erreichen unsere Service−Experten unter der Nummer
01 80−50 07 51 4 (1 Minute = 0,14 )
Hinweis: Sollte der Fehler telefonisch nicht beseitigt werden können,
erfahren Sie bei Ihrem Anruf eine Service−Adresse und alle weiteren
notwendigen Informationen.
Lieber Kunde,
wir freuen uns, dass Sie sich für dieses Gerät entschieden haben. Beachten
Sie bitte folgende Punkte:
Die Garantiezeit für Ihr Gerät beträgt 24 Monate.
Bewahren Sie unbedingt den Kaufbeleg und möglichst die
Originalverpackung auf. Nur so kann innerhalb der Garantiezeit
eine kostenfreie Reparatur oder ein Austausch stattfinden.
Mit freundlichen Grüßen
Ihr Olympia Team
2
Page 3

1
Inhaltsverzeichnis
1 Sicherheitshinweise 5. . . . . . . . . . . . . . . . . . . . . . . . . . . . . . . . . . .
Bestimmungsgemäße Verwendung 5. . . . . . . . . . . . . . . . . . . . . . . . . . . .
Verwendung in extremer Umgebung 5. . . . . . . . . . . . . . . . . . . . . . . . . . .
Batterien 5. . . . . . . . . . . . . . . . . . . . . . . . . . . . . . . . . . . . . . . . . . . . . . .
Aufladbare Akkus 5. . . . . . . . . . . . . . . . . . . . . . . . . . . . . . . . . . . . . . . . .
Medizinische Geräte 5. . . . . . . . . . . . . . . . . . . . . . . . . . . . . . . . . . . . . .
Entsorgung 6. . . . . . . . . . . . . . . . . . . . . . . . . . . . . . . . . . . . . . . . . . . . .
2 Displayanzeigen 7. . . . . . . . . . . . . . . . . . . . . . . . . . . . . . . . . . . . . . .
3 Bedienelemente 8. . . . . . . . . . . . . . . . . . . . . . . . . . . . . . . . . . . . . . .
4 In Betrieb nehmen 9. . . . . . . . . . . . . . . . . . . . . . . . . . . . . . . . . . . . .
Einlegen der Batterien 9. . . . . . . . . . . . . . . . . . . . . . . . . . . . . . . . . . . . .
Mikrofon 9. . . . . . . . . . . . . . . . . . . . . . . . . . . . . . . . . . . . . . . . . . . . . . .
Kopfhörer 9. . . . . . . . . . . . . . . . . . . . . . . . . . . . . . . . . . . . . . . . . . . . . .
5 Einstellungen 10. . . . . . . . . . . . . . . . . . . . . . . . . . . . . . . . . . . . . . . . .
Datum und Zeit einstellen 10. . . . . . . . . . . . . . . . . . . . . . . . . . . . . . . . . . .
Gerät einschalten (TIME−Modus) 11. . . . . . . . . . . . . . . . . . . . . . . . . . . . . .
Gerät ausschalten 11. . . . . . . . . . . . . . . . . . . . . . . . . . . . . . . . . . . . . . . .
Betriebsarten 11. . . . . . . . . . . . . . . . . . . . . . . . . . . . . . . . . . . . . . . . . . . .
6 Bedienung 13. . . . . . . . . . . . . . . . . . . . . . . . . . . . . . . . . . . . . . . . . . .
Aufnahmequalität 13. . . . . . . . . . . . . . . . . . . . . . . . . . . . . . . . . . . . . . . . .
Nachrichten verwalten 14. . . . . . . . . . . . . . . . . . . . . . . . . . . . . . . . . . . . .
Aufnahme−Empfindlichkeit 14. . . . . . . . . . . . . . . . . . . . . . . . . . . . . . . . . .
Hold−Funktion (Tastensperre) 15. . . . . . . . . . . . . . . . . . . . . . . . . . . . . . . .
Lautstärke 15. . . . . . . . . . . . . . . . . . . . . . . . . . . . . . . . . . . . . . . . . . . . . .
Speicherkartenfunktion 15. . . . . . . . . . . . . . . . . . . . . . . . . . . . . . . . . . . . .
VOX (Spracherkennung) aktivieren/deaktivieren 16. . . . . . . . . . . . . . . . . . .
Aufnehmen 16. . . . . . . . . . . . . . . . . . . . . . . . . . . . . . . . . . . . . . . . . . . . .
Sprachgesteuerte Aufnahme (VOX) 17. . . . . . . . . . . . . . . . . . . . . . . . . . . .
Nachrichten abspielen 18. . . . . . . . . . . . . . . . . . . . . . . . . . . . . . . . . . . . .
Nachricht(en) wiederholen 19. . . . . . . . . . . . . . . . . . . . . . . . . . . . . . . . . .
Nachrichten wiederholen (Ausschnitt) 20. . . . . . . . . . . . . . . . . . . . . . . . . .
Wiederholen abbrechen 20. . . . . . . . . . . . . . . . . . . . . . . . . . . . . . . . . . . .
Wiedergabe unterbrechen 20. . . . . . . . . . . . . . . . . . . . . . . . . . . . . . . . . . .
Nachricht löschen 20. . . . . . . . . . . . . . . . . . . . . . . . . . . . . . . . . . . . . . . .
Alle Nachrichten löschen 21. . . . . . . . . . . . . . . . . . . . . . . . . . . . . . . . . . .
Nachrichten bearbeiten (Teilen) 22. . . . . . . . . . . . . . . . . . . . . . . . . . . . . . .
Nachrichten bearbeiten (Schneiden) 22. . . . . . . . . . . . . . . . . . . . . . . . . . .
Gerät formatieren (ALLES löschen) 23. . . . . . . . . . . . . . . . . . . . . . . . . . . .
3
Page 4

Inhaltsverzeichnis
7 Softwareinstallation und Bedienung 24. . . . . . . . . . . . . . . . . . . . . . . .
Installation eines USB−Treibers 24. . . . . . . . . . . . . . . . . . . . . . . . . . . . . . .
Nachrichten auf dem Computer abspielen 25. . . . . . . . . . . . . . . . . . . . . . .
Daten Up−/Downloaden 25. . . . . . . . . . . . . . . . . . . . . . . . . . . . . . . . . . . .
8 Technische Daten 27. . . . . . . . . . . . . . . . . . . . . . . . . . . . . . . . . . . . . .
Technische Daten 27. . . . . . . . . . . . . . . . . . . . . . . . . . . . . . . . . . . . . . . .
4
Page 5

Sicherheitshinweise
1 Sicherheitshinweise
Lesen Sie diese Bedienungsanleitung sorgfältig durch.
Bestimmungsgemäße Verwendung
Dieses Diktiergerät ist geeignet zum Aufzeichnen jeder Art von Sprache.
Jede andere Verwendung gilt als nicht bestimmungsgemäß. Bitte beachten
Sie, dass das Überspielen aufgenommener Nachrichten ohne Erlaubnis, außer für private Zwecke, verboten ist. Bitte das Gerät nicht während der Fahrt
mit einem Auto, Motorrad, etc. verwenden, die Unfallgefahr durch Ablenkung
wird erhöht. Eigenmächtige Veränderungen oder Umbauten sind nicht zulässig. Öffnen Sie das Gerät in keinem Fall selbst und führen Sie keine eigenen
Reparaturversuche durch.
Verwendung in extremer Umgebung
Vermeiden Sie Belastungen durch Rauch, Staub, Erschütterungen, Chemikalien, Feuchtigkeit, Hitze oder direkte Sonneneinstrahlung.
Batterien
Achtung: Das Gerät wird ausschließlich über Batterien betrie-
ben. Jede andere Art von Stromversorgung ist untersagt.
Aufladbare Akkus
Achtung bei der Verwendung von Akkus: Werfen Sie Akkus
nicht ins Feuer. Verwenden Sie nur Akkus des gleichen Typs!
Achten Sie auf die richtige Polung! Bei verkehrter Polung der Akkus besteht beim Aufladen Explosionsgefahr.
Medizinische Geräte
Achtung: Benutzen Sie das Diktiergerät nicht in der Nähe von
medizinischen Geräten. Eine Beeinflussung kann nicht völlig
ausgeschlossen werden.
5
Page 6

Sicherheitshinweise
Entsorgung
Wollen Sie Ihr Gerät entsorgen, bringen Sie es zur Sammelstelle Ihres kommunalen Entsorgungsträgers (z. B. Wertstoffhof). Das nebenstehende Symbol bedeutet, dass Sie das Gerät auf keinen Fall
in den Hausmüll werfen dürfen! Nach dem Elektro− und Elektronikgerätegesetz sind Besitzer von Altgeräten gesetzlich gehalten, alte
Elektro− und Elektronikgeräte einer getrennten Abfallerfassung zuzuführen. Verpackungsmaterialien entsorgen Sie entsprechend
den lokalen Vorschriften.
Akkus/Batterien nicht im Hausmüll entsorgen. An vielen Orten (Supermarkt, Elektrogeschäft) gibt es spezielle Behälter zur richtigen
Entsorgung der Batterien.
6
Page 7
Displayanzeigen
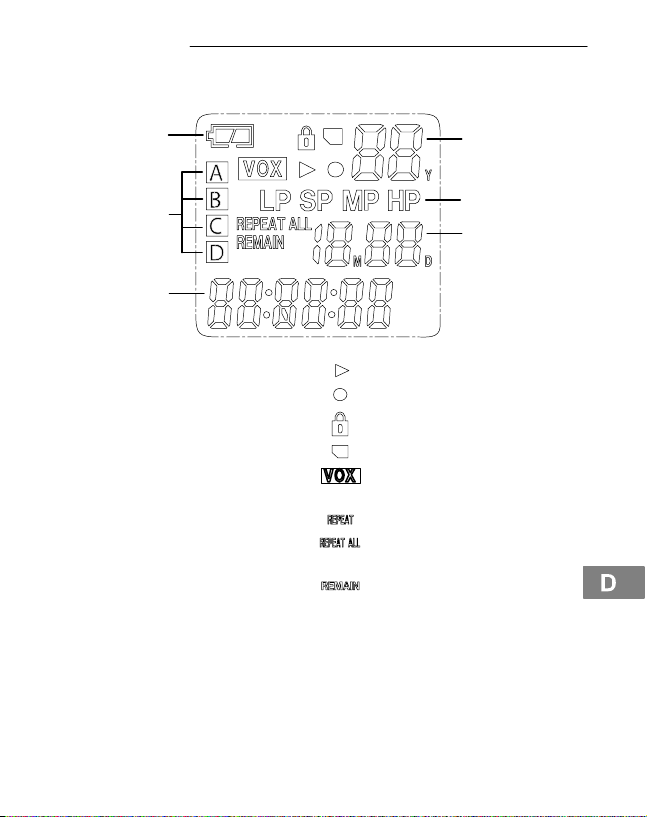
2 Displayanzeigen
LOCATION OF INDICATORS
A
B
F
E
D
C
A Batteriestatusanzeige Abspielen
B Speicherplätze (Ordner) Aufnehmen
C Stunden/Minuten/Sekunden HOLD (Tastensperre)
D Monat/Tag SD−Speicherkarte
E Aufnahmequalität VOX (sprachgesteuerte
F Jahr/Nachrichten Wiederholen (Aktuelle Nachricht)
Aufnahme)
Wiederholen (Alle Nachrichten
eines Ordners)
Verbleibende Zeit während der
Aufnahme
7
Page 8
Bedienelemente
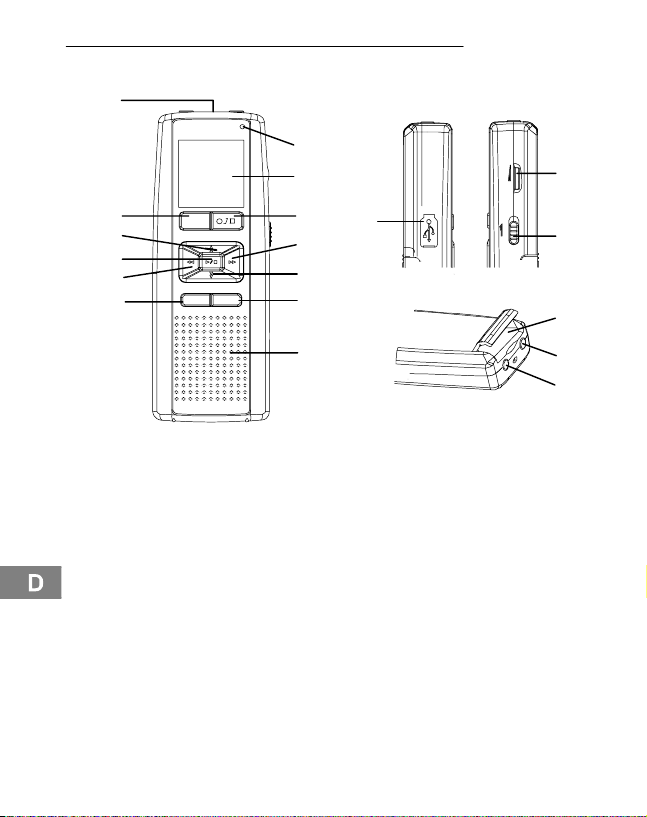
3 Bedienelemente
1
11
10
2
MODE
3
4
5
68
FILE/REP
ERASE
9
12
5
3
17
VOLVOL
HOLDHOLD
16
15
7
14
13
1 Mikrofon 10 LCD−Display
2 MODE (Auswahl)−Taste 11 Aufnahme aktiv (Anzeige)
3 OBEN−/UNTEN−Taste 12 USB−Anschluss
4 ABSPIELEN/STOPP−Taste 13 MIC (Mikrofon)−Buchse
5 VORLAUF−/RÜCKLAUF−Taste 14 EAR (Ohrhörer)−Buchse
6 FILE/REP (Ordner/Wiederho-
len)−Taste
7 Lautsprecher 16 HOLD,Tastensperre An/Aus
8 ERASE (Löschen/Pause)−Taste 17 Lautstärkerädchen
9 AUFNAHME/STOPP−Taste
8
15 Speicherkartenfach
Page 9
In Betrieb nehmen
4 In Betrieb nehmen
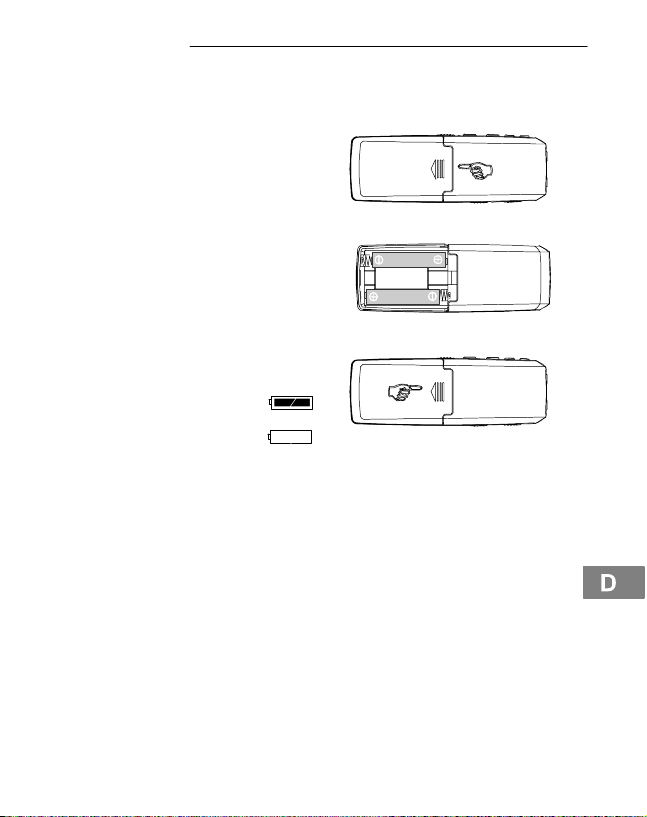
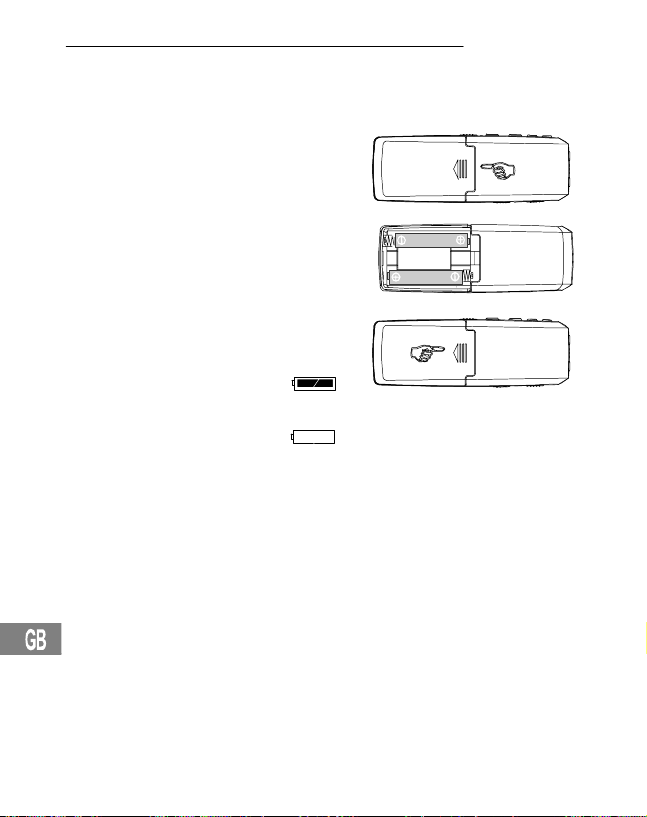
Einlegen der Batterien
Öffnen Sie das Batteriefach durch
Herausziehen und Abnehmen der
Abdeckung.
Einsetzen von 2 AAA Batterien
(nicht enthalten). Achten Sie auf
die richtige Polung.
Batteriefach wieder schließen.
Die Batterien sind voll.
Die Batterien sind leer.
Der Ladezustand der
Batterien wird im Display
angezeigt.
Hinweis: Beim Austausch der Batterien bleiben die aufgenommenen Nachrichten erhalten. Datum und Zeit müssen neu eingestellt werden.
Mikrofon
Sie können ein externes Mikrofon an die MIC−Buchse des Geräts anschließen. Sobald das Mikrofon angeschlossen ist, wird das integrierte Mikrofon
deaktiviert.
Kopfhörer
Sie können einen Kopf−/Ohrhörer an die EAR−Buchse des Geräts anschließen. Sobald der Kopf−/Ohrhörer angeschlossen ist, wird der Lautsprecher automatisch deaktiviert.
9
Page 10

Einstellungen
5 Einstellungen
Datum und Zeit einstellen
Wenn die Batterien eingelegt sind, befindet sich das Gerät im TIME−
Modus. Es erscheinen 1
Jahreszahl im Display. Datum und Zeit wie folgt einstellen:
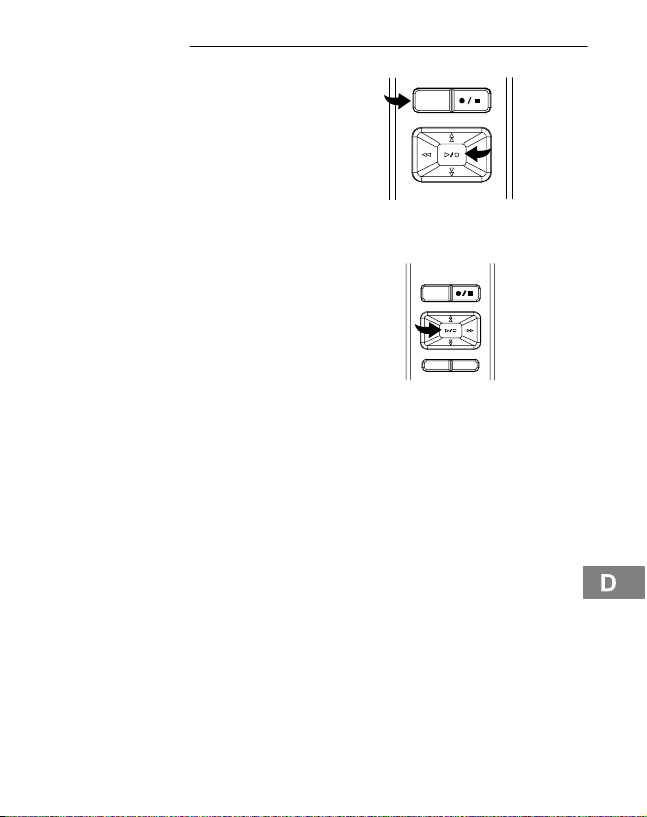
Solange Datum und Zeit im Display angezeigt werden (TIME−
Modus), drücken Sie die MODE−
Taste, um den TIME−Modus zu verlassen. Nachrichtenanzahl, Qualität, Dauer der Nachricht etc.
erscheinen im Display. Halten
Sie die MODE−Taste ein zweites Mal gedrückt, um die Datums− und Zeiteinstellungen aufzurufen. Drücken Sie die UNTEN−Taste dreimal, bis das Jahr
(06 voreingestellt) angezeigt wird.
Drücken Sie die VORLAUF− oder
RÜCKLAUF−Taste zum Einstellen
des Jahres. Um die Änderungen
zu übernehmen, drücken Sie die
ABSPIELEN/STOPP−Taste.
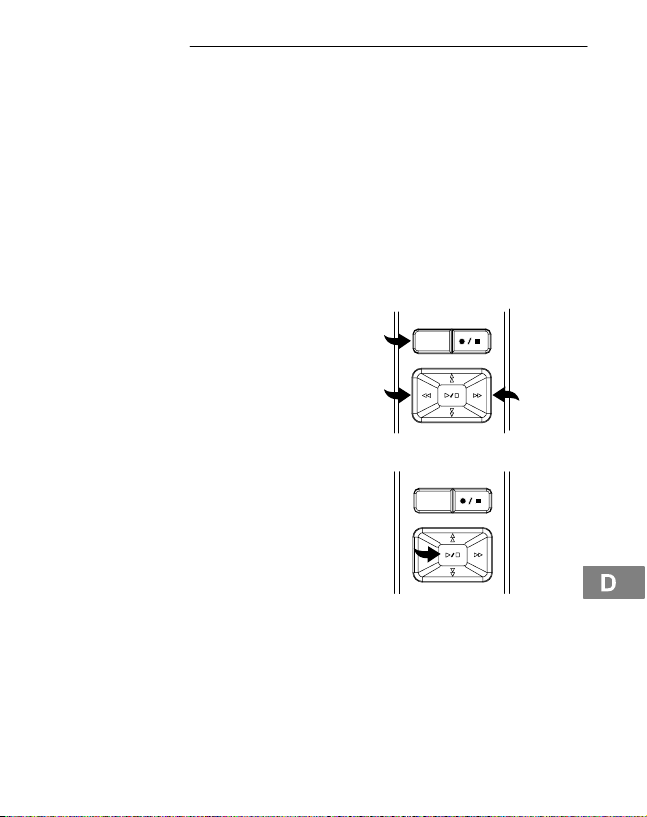
Drücken Sie die UNTEN−Taste.
Wählen Sie mit der VORLAUF−
oder RÜCKLAUF−Taste den Monat
aus und bestätigen Sie mit der ABSPIELEN/STOPP−Taste. Drücken
Sie die UNTEN−Taste ein zweites
Mal, um mit der VORLAUF− oder
RÜCKLAUF−Taste den Tag einzustellen. Um die Uhrzeit einzustellen, gehen Sie
wie zuvor beschrieben (Monat) vor.
01D (Monat, Tag), 12:00:00 (Std., Min.,Sek.) und die
M
MODE
Y
DM
Y
DM
10
Page 11
Einstellungen
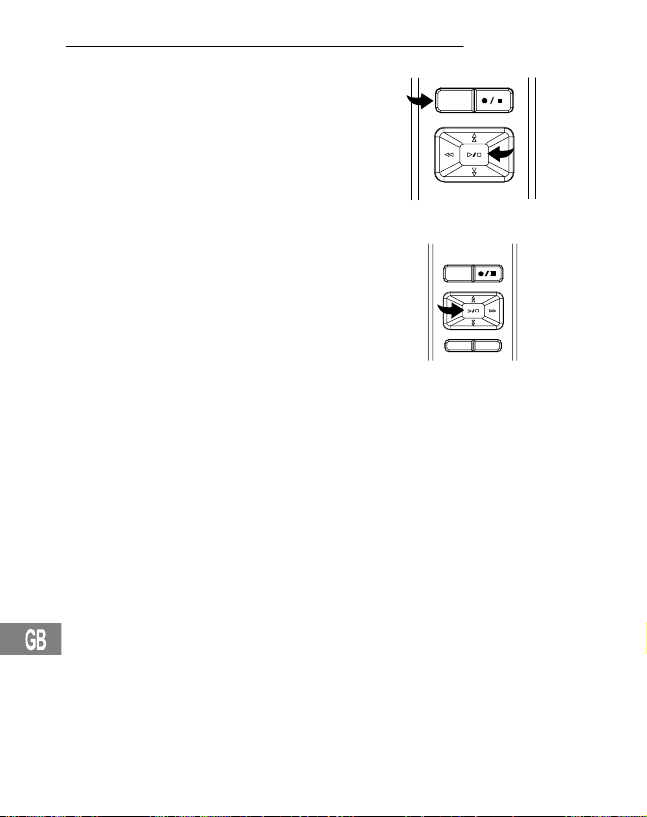
Gerät einschalten (TIME−Modus)
Um das Gerät einzuschalten und
in den TIME−Modus zu gelangen,
drücken Sie die ABSPIELEN/
STOPP−Taste. Datum und Zeit
werden angezeigt.
Drücken Sie die MODE−Taste, um
vom TIME−Modus in den Stand−by-Modus zu wechseln.
Gerät ausschalten
2
Wenn Sie sich im Stand−by−Modus
befinden, drücken Sie die
ABSPIELEN/STOPP−Taste, bis
Sie sich im TIME−Modus befinden.
Hinweis: Betätigen Sie eine Minute
lang keine Taste, schaltet sich das
Gerät automatisch ab.
Betriebsarten
Die verschiedenen Betriebsarten werden wie folgt im Display angezeigt:
MODE
MODE
FILE/REP ERASE
Stand−by−Modus
− Anzahl der Nachrichten
− Aufnahmequalität
− Batteriekapazität
− Speicherplatz
− Dauer der aktuellen Nachricht
TIME−Modus
− Batteriekapazität
− Monat/Tag
− Tageszeit
11
Page 12

Einstellungen
Hinweis: Alle folgend aufgeführten Einstellungen gehen davon aus, dass Sie
sich im Stand−by−Modus befinden.
Hinweis: Um alle in diesem Kapitel beschriebenen Einstellungen zu verlassen, drücken Sie die MODE−Taste oder halten Sie die ABSPIELEN/STOPP−
Taste gedrückt.
12
Page 13
6 Bedienung
Aufnahmequalität
Sie können zwischen vier verschiedenen Aufnahmequalitäten für die
Sprachaufzeichnung wählen.
3
Bedienung
Aufnahmemodus
Aufnahmequalität Max. Aufnahmedauer
HP (High Play) Bestmögliche 2 Std. 40 Min.
MP (Medium Play) Sehr gute 4 Std.
SP (Standard Play) Gute 8 Std.
LP (Long Play) Für lange Aufnahme 25 Std. 30 Min.
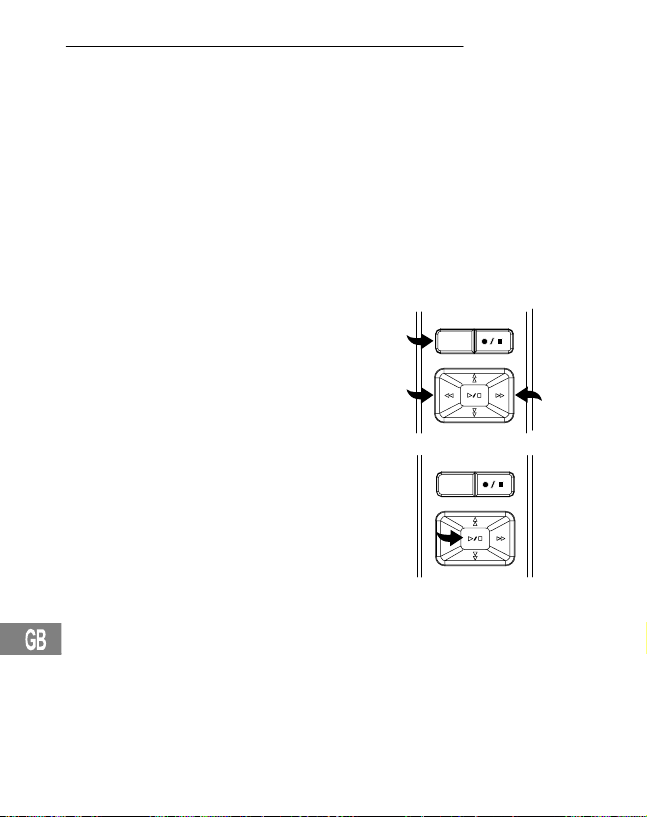
Schalten Sie das Gerät in den
Stand−by−Modus und drücken Sie
MODE
die MODE−Taste, bis SET" im Display angezeigt wird. Wählen Sie
mit der VORLAUF− oder RÜCKLAUF−Taste die gewünschte Qualität aus.
Bestätigen Sie die gewählte Einstellung mit der ABSPIELEN/
MODE
STOPP−Taste.
13
Page 14
Bedienung
Nachrichten verwalten
Dieses Gerät bietet 4 Ordner (A, B, C, D) zum Speichern der Nachrichten. Sie
können insgesamt 396 Nachrichten oder 25,5 Stunden im LP−Modus (siehe
Aufnahmequalität Seite 13) speichern. Ein Ordner kann max. 99 Nachrichten
aufnehmen. Um einen Ordner auszuwählen:
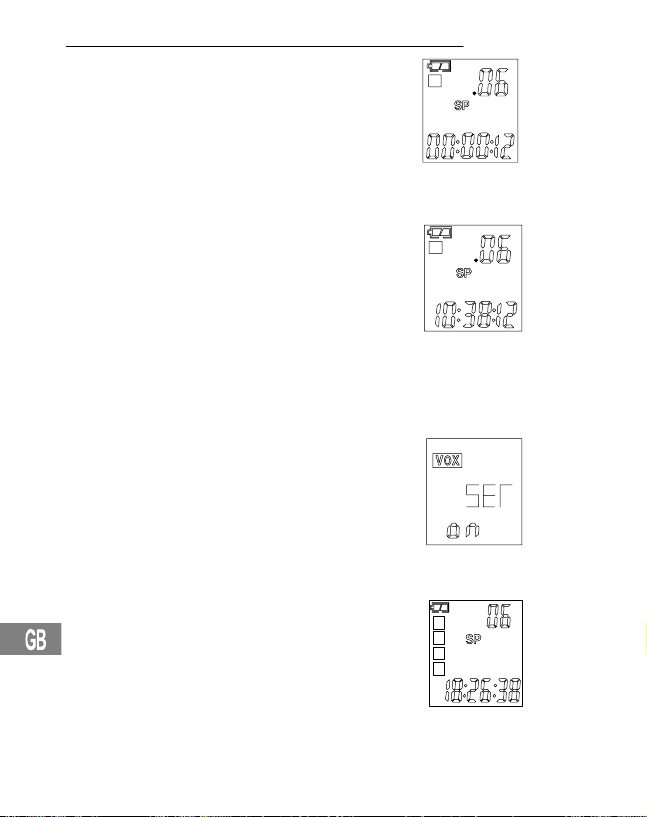
Drücken Sie die FILE/REP−Taste,
um den gewünschten Ordner/Speicherplatz (A, B, C, D) zu wählen.
Die Zahl in der rechten oberen
Ecke im Display zeigt die Gesamtzahl der aufgenommenen Nachrichten im jeweiligen Ordner an.
Die Zeit unten im Display zeigt
die Gesamtaufnahmezeit der aus−
gewählten Nachricht an.
Hinweis: Immer wenn Sie eine Nachricht aufnehmen, erzeugt das Gerät eine
fortlaufende Nummer, angefangen bei 1. Wenn kein Speicher mehr zur Verfügung steht, zeigt das Display ’’FULL’’ an. Wie Sie Nachrichten löschen, erfahren Sie auf Seite 20.
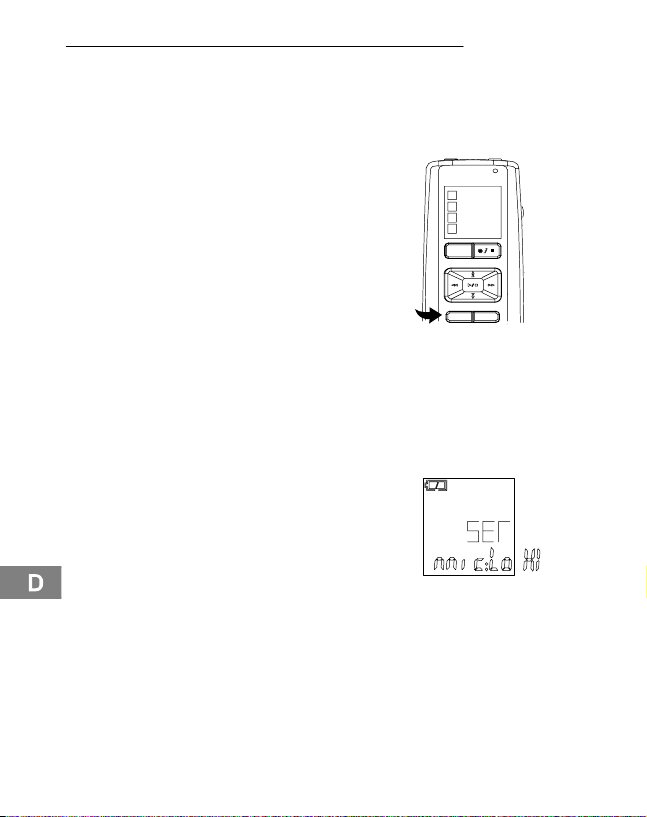
Aufnahme−Empfindlichkeit
Um die Aufnahme−Empfindlichkeit
einzustellen, halten Sie die MODETaste gedrückt, bis SET" im Display erscheint. Drücken Sie die
OBEN− oder UNTEN−Taste, bis
MIC:LO/HI im Display erscheint.
Stellen Sie die Funktion mit der
VORLAUF− oder RÜCKLAUF Taste auf LO, wenn Sie Geräusche aufnehmen, die sehr nah am Mikrofon sind. Wenn Sie Geräusche aufnehmen, die
weiter weg sind, stellen Sie die Funktion mit der VORLAUF− oder RÜCKLAUF−Taste auf HI. Bestätigen Sie die Einstellungen mit der ABSPIELEN/
STOPP−Taste.
4
A
B
C
D
MODE
FILE/REP ERASE
14
Page 15
Bedienung
Hold−Funktion (Tastensperre)
Schieben Sie den HOLD−Regler
nach oben (rechts), um alle Tasten
zu deaktivieren. Im Display wird ein
Schloss−Symbol angezeigt. Um die
Tasten zu aktivieren, schieben Sie
den HOLD−Regler wieder zurück.
Hinweis: Auch wenn die HOLD−Funktion aktiviert ist, kann das Gerät ausgeschaltet werden.
Lautstärke
Drehen Sie das Laustärkerädchen
in die gewünschte Richtung, um
die Geräuschausgabe lauter oder
leiser zu stellen.
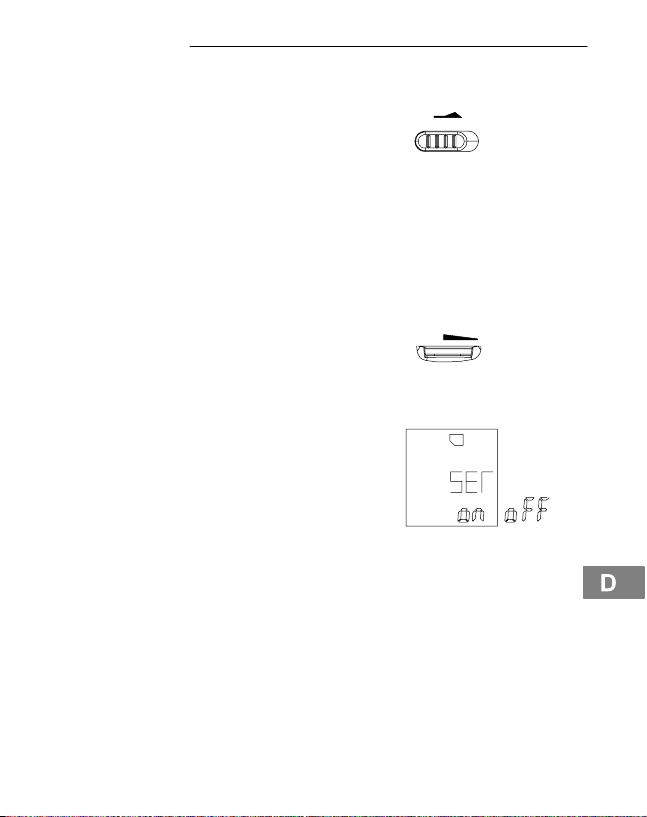
Speicherkartenfunktion
Das Gerät kann eine Speicherkarte (SD oder FLASH Memory)
aufnehmen. Drücken Sie die
MODE−Taste so lange, bis SET im
Display erscheint. Drücken Sie die
OBEN− oder UNTEN−Taste, bis
das Speicherkartensymbol erscheint. Sie haben die Möglichkeit,
diese Funktion mit der VORLAUF−
oder RÜCKLAUF−Taste zu aktivieren oder zu deaktivieren (ON/
OFF).
HOLDHOLD
VOLVOL
15
Page 16
Bedienung
VOX (Spracherkennung) aktivieren/deaktivieren
Um VOX" zu aktivieren/deaktivieren, halten Sie die MODE−Taste
gedrückt, bis SET erscheint. Drü−
cken Sie die OBEN− oder UNTEN−
Taste, bis im Display VOX" erscheint. Mit der VORLAUF− oder
RÜCKLAUF−Taste stellen Sie die
VOX"−Funktion Ein oder Aus. Bestätigen Sie mit der ABSPIELEN/STOPP−
Taste.
Aufnehmen
Das Gerät ist mit einer automatischen Spracherkennung (VOX) ausgestattet
(siehe Sprachgesteuerte Aufnahme Seite 17). Ist VOX" deaktiviert (siehe
oben), können Sie normale Aufnahmen tätigen.
Versetzen Sie das Gerät in den
Stand−by−Modus und wählen Sie
die gewünschte Aufnahmequalität
(siehe Aufnahmequalität Seite 13).
Wählen Sie einen Ordner/Speicherplatz durch Betätigen der
FILE/REP−Taste (siehe Nachrichten verwalten Seite 14).
5
MODE
A
B
C
D
Wenn Sie während der Aufnahme die Batterien entfernen,
wird die Aufnahme unterbrochen. Die aktuelle Aufnahme kann
eventuell beschädigt oder gelöscht werden. Das Diktiergerät benötigt einige Minuten, um den Normalbetrieb wieder aufzunehmen. Im
Display wird solange LOAD" angezeigt.
Es wird empfohlen, Ihre Aufnahmen auf dem PC oder externen Datenträgern zu sichern. (Siehe Softwareinstallation und Bedienung
Seite 24)
16
Page 17
Bedienung
Während Sie sich im Stand−by−
Modus befinden, drücken Sie die
AUFNAHME/STOPP−Taste. Die
LED leuchtet rot und die mitlaufende Zeit erscheint. Sprechen Sie
in das integrierte Mikrofon oder
schließen Sie ein Sie ein externes
Mikrofon an die MIC−Buchse an und sprechen Sie mit normaler Lautstärke.
Drücken Sie die AUFNAHME/STOPP−Taste erneut, um die Aufnahme zu
beenden.
Drücken Sie die ABSPIELEN/
STOPP−Taste, um die verbleibende Zeit während des Aufnehmens anzuzeigen. REMAIN"
erscheint im Display und die verbleibende Zeit wird angezeigt.
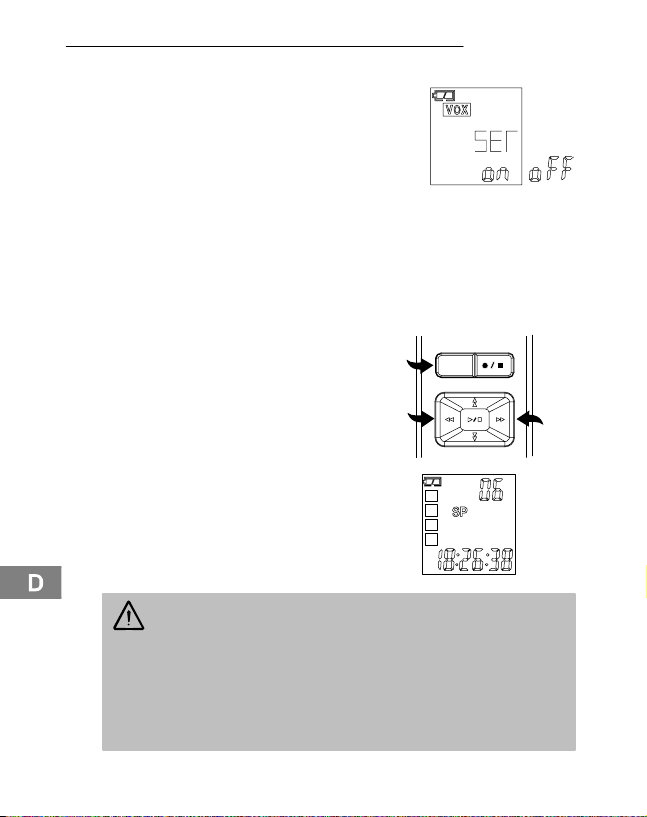
Sprachgesteuerte Aufnahme (VOX)
6
Wenn VOX" aktiv ist, nimmt das Gerät nur auf, wenn Sie sprechen. Machen
Sie eine Pause, unterbricht das Gerät die Aufnahme und setzt sie erst fort,
wenn Sie weitersprechen.
"VOX" muss aktiviert sein (siehe
VOX aktivieren/deaktivieren Seite
16). Schalten Sie das Gerät ein
und wählen Sie die gewünschte
Aufnahmequalität (siehe Aufnahmequalität Seite 13).
A
A
REMAIN
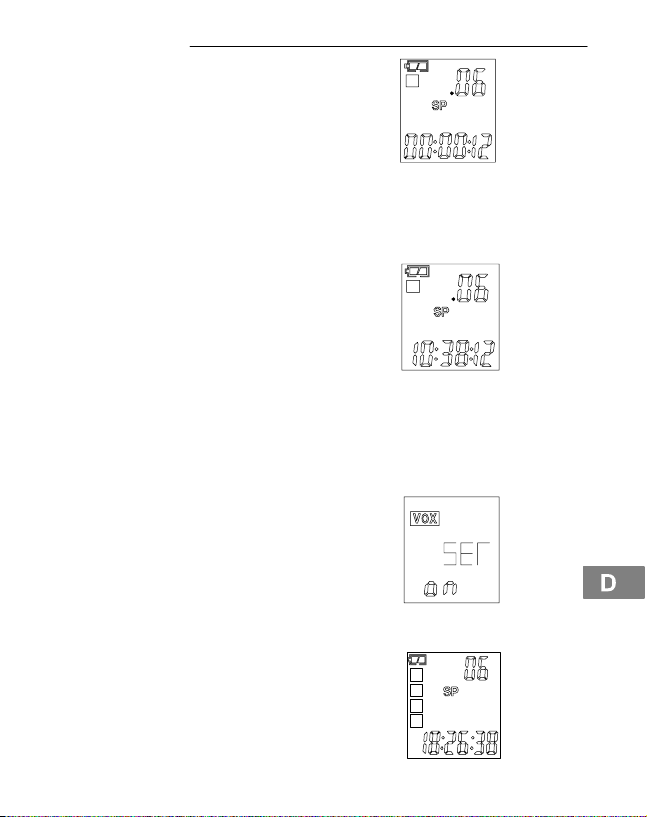
Während Sie sich im Stand−by−
Modus befinden, wählen Sie mit
der FILE/REP−Taste einen Ordner
(A, B, C, D) aus, in dem die Nachricht gespeichert werden soll.
A
B
C
D
17
Page 18

Bedienung
Drücken Sie die AUFNAHME/
STOPP−Taste, das Aufnahmesymbol und die Zeitanzeige für die aktuelle Aufnahme werden im
Display angezeigt. Die LED leuchtet rot. Sprechen Sie in das integrierte Mikrofon oder schließen Sie
ein externes Mikrofon an die MIC−Buchse an. Sobald Sie anfangen zu sprechen, beginnt das Gerät die Aufnahme. Wenn das Gerät die Aufnahme unterbricht, blinkt die LED am Gerät, bis die Aufnahme fortgesetzt wird. Drücken
Sie die AUFNAHME/STOPP−Taste, um die Aufnahme zu beenden.
Hinweise:
Die ersten Geräusche aktivieren den Rekorder und werden eventuell
nicht mit aufgenommen.
Bei einer Veränderung der Lautstärke der Sprache unterbricht das Gerät
nicht die Aufnahme.
Die Aufnahme wird bereits nach 2 Sekunden Stille unterbrochen.
Durchgängiges Aufnehmen siehe Seite 16.
Bei einer normalen Lautstärke (Sprechen) ist eine Entfernung von
ca. 10 cm angemessen.
Nachrichten abspielen
Schalten Sie das Gerät ein, wechseln Sie in den Stand−by−Modus
und drücken Sie die FILE/REP−
Taste und wählen Sie einen
Ordner (A, B, C, D).
A
B
C
D
MODE
FILE/REP ERASE
18
Drücken Sie die OBEN− oder
UNTEN−Taste, um die gewünschte
Nachricht auszuwählen. Die Nummer und Länge der Nachricht werden im Display angezeigt.
Page 19
Bedienung
Drücken Sie die ABSPIELEN/
STOPP−Taste, um die aktuelle Nachricht abzuspielen. Während der Wiedergabe drücken Sie die
AUFNAHME/STOPP−Taste, um die
Uhrzeit und das Datum der
Aufnahme zu überprüfen. Während
des Abspielens können Sie durch Drücken der ERASE−Taste die Wiedergabe
anhalten und wieder fortsetzen. Die Nachricht wird nicht gelöscht.
Für den Vor− oder Rücklauf während der aktuellen Wiedergabe
drücken Sie die VORLAUF− oder
RÜCKLAUF−Taste. Die Wiedergabe läuft dann mit 10 Sekunden/s. Um die Geschwindigkeit auf
30 Sekunden/s zu erhöhen, halten
Sie die VORLAUF− oder RÜCKLAUF−Taste 3 Sekunden lang gedrückt.
An gewünschter Stelle die ABSPIELEN/STOPP−Taste drücken.
Nachricht(en) wiederholen
Wenn Sie eine oder alle Nachrichten wiederholen möchten, halten
Sie während der Wiedergabe einer
Nachricht die FILE/REP−Taste gedrückt, bis REPEAT" (Eine Nachricht) im Display angezeigt wird.
Halten Sie die FILE/REP−Taste erneut gedrückt, bis REPEAT ALL" (Alle Nachrichten wiederholen) angezeigt
wird. Das Gerät wiederholt eine oder alle Nachrichten des angezeigten Ordners. Um das Wiederholen zu deaktivieren, halten Sie die FILE/REP−Taste
gedrückt.
A
B
REPEAT ALL
19
Page 20
Bedienung
Nachrichten wiederholen (Ausschnitt)
Um einen bestimmten Teil einer
Nachricht zu wiederholen, drücken
Sie während der Wiedergabe die
FILE/REP−Taste einmal. A" wird im
Display angezeigt, somit haben Sie
den Startpunkt markiert. Drücken Sie
an gewünschter Stelle der Wiedergabe die FILE/REP−Taste erneut. B" wird im Display angezeigt, womit Sie den
Endpunkt markiert haben.
Wiederholen abbrechen
Um das Wiederholen abzubrechen, drücken Sie die ABSPIELEN/STOPP−
Taste.
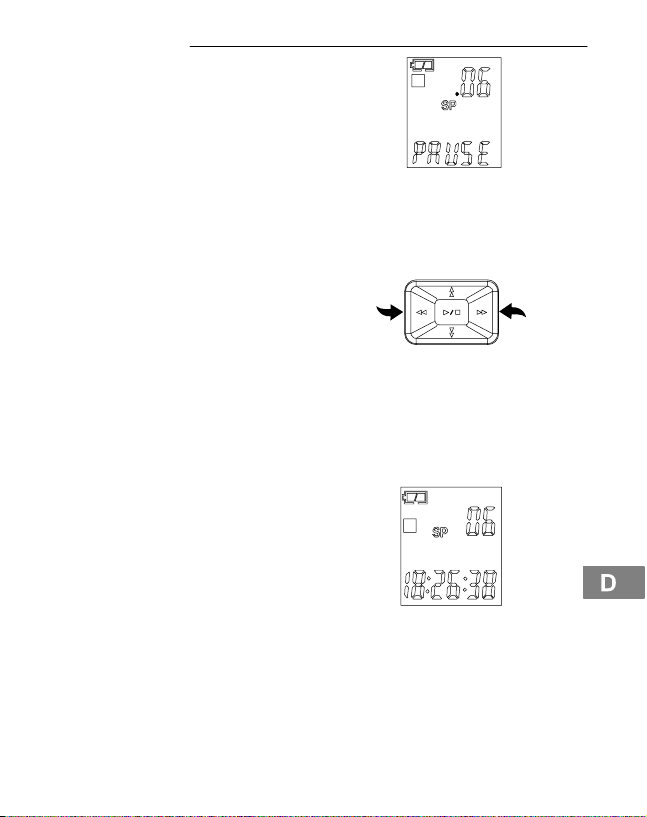
Wiedergabe unterbrechen
Um die Wiedergabe zu unterbrechen, drücken Sie die ERASE−
Taste. PAUSE" wird im Display
angezeigt. Zum weiteren Abspielen drücken Sie die ERASE−Taste
erneut. Die Nachricht wird nicht gelöscht.
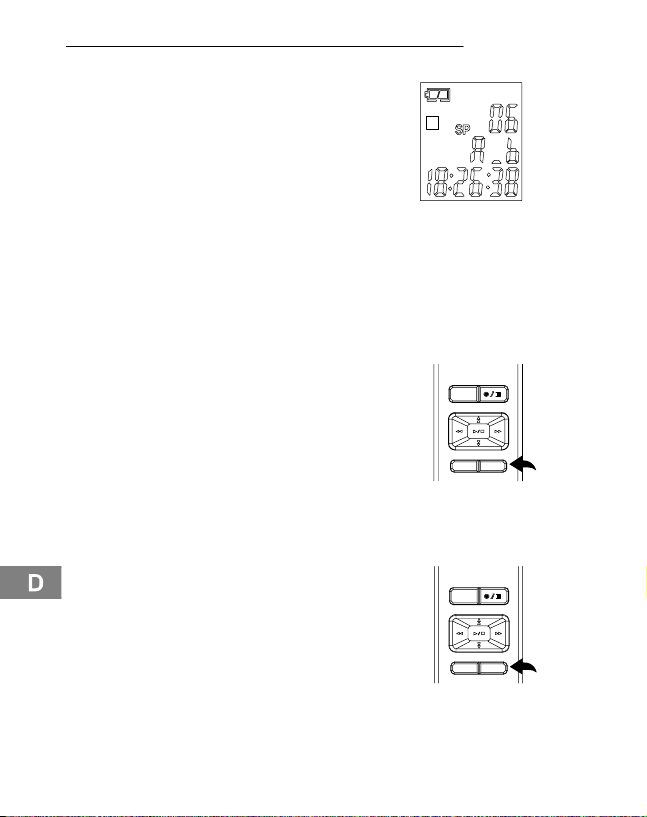
Nachricht löschen
Wählen Sie die zu löschende
7
Nachricht aus und drücken Sie die
ERASE−Taste. DEL 1" erscheint
im Display und die Nachricht wird
abgespielt. Drücken Sie während
der Wiedergabe die ERASE−Taste
erneut, um die Nachricht zu löschen.
B
MOD
E
FILE/REP ERASE
MODE
FILE/REP
ERASE
20
Page 21

Alle Nachrichten löschen
Wählen Sie den zu löschenden
8
Ordner aus (A, B, C, D), halten Sie
die ERASE−Taste gedrückt, bis
dEL ALL" im Display erscheint.
Drücken Sie die ERASE−Taste erneut, um alle Nachrichten im ausgewählten Ordner zu löschen.
Hinweis: Das Löschen der Nachrichten kann nicht rückgängig gemacht
werden.
MODE
FILE/REP ERASE
Bedienung
21
Page 22
Bedienung
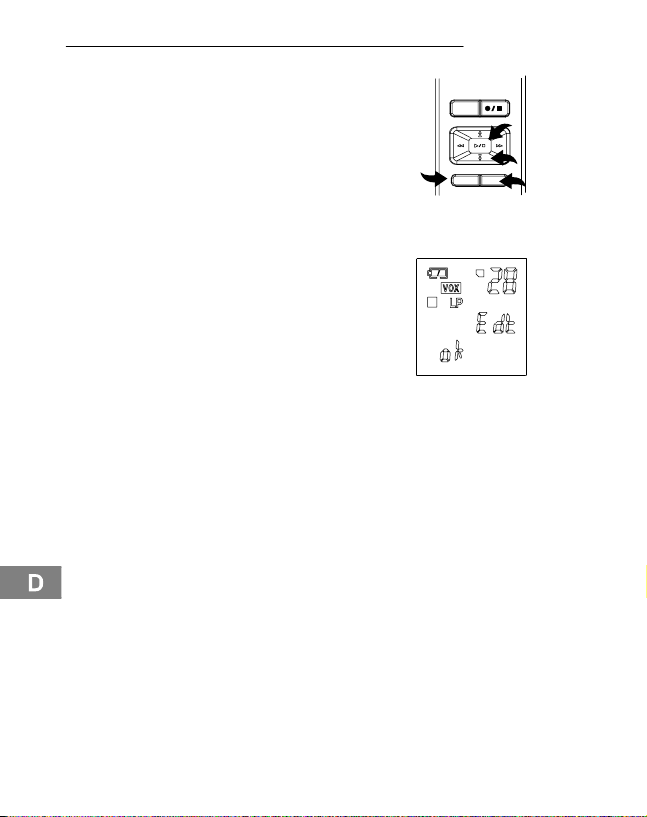
Nachrichten bearbeiten (Teilen)
Wählen Sie den gewünschten Ordner aus und halten Sie zuerst die
UNTEN−Taste (1) gedrückt, bis
"Edt" im Display angezeigt wird.
Wählen Sie eine Nachricht aus.
Drücken Sie die ABSPIELEN/
STOPP−Taste (2) zur Wiedergabe
der Nachricht.
Drücken Sie währenddessen die
FILE/REP−Taste (3), um einen
Schnitt zu setzen. Die Nachricht
wurde an der Marke geteilt.
Drücken Sie die ABSPIELEN/
STOPP−Taste (2), um zu bestätigen. Aus einer vorhandenen Nachricht wurden zwei erzeugt.
Nachrichten bearbeiten (Schneiden)
Wählen Sie die gewünschte Nachricht aus. Drücken und halten Sie die UNTEN−Taste (1), bis Edt" im Display angezeigt wird. Wählen Sie eine Nachricht aus und drücken Sie die ABSPIELEN/STOPP−Taste (2), um die Nachricht wiederzugeben.
Während des Abspielens drücken Sie die ERASE−Taste (4), um einen Startpunkt festzulegen. A St" wird im Display angezeigt. Drücken Sie die ERASE−
Taste (4), um den Endpunkt festzulegen. bEd" wird im Display angezeigt.
Drücken Sie die ABSPIELEN/STOPP−Taste (2), um den Vorgang zu bestätigen. Die Nachricht zwischen Start− und Endpunkt wird geschnitten.
MOD
E
FILE/REP ERASE
3
B
2
1
4
22
Page 23
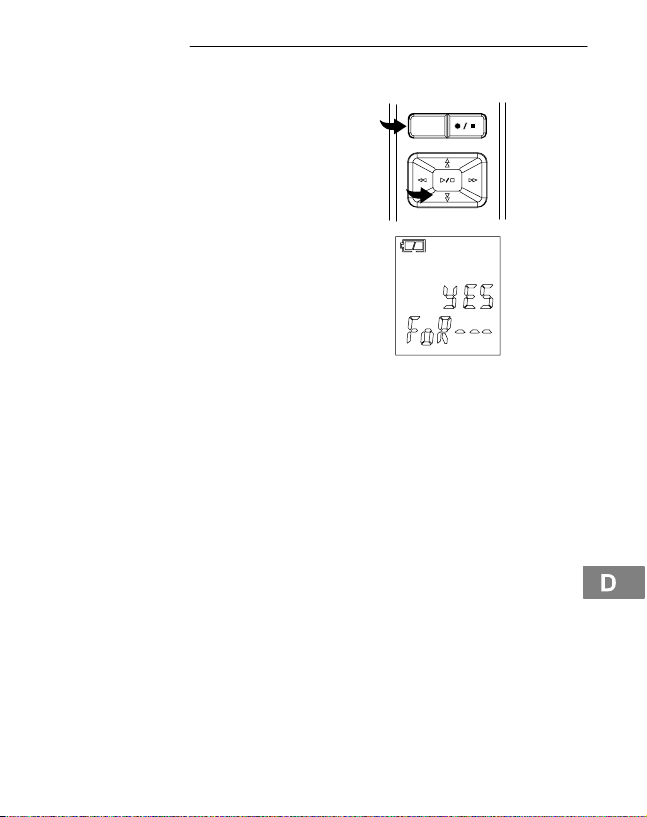
Gerät formatieren (ALLES löschen)
Bedienung
Halten Sie die MODE−Taste gedrückt, bis SET" im Display er-
MODE
scheint. Drücken Sie die UNTEN−
Taste, bis FoR" im Display
erscheint.
Benutzen Sie die VORLAUF−
oder RÜCKLAUF−Taste, um ’’Yes’’
auszuwählen. Drücken und halten
Sie anschließend die ERASE−
Taste. Alle Daten und Nachrichten
auf dem Gerät werden gelöscht.
Hinweis: Wählen Sie No", wenn Sie das Gerät nicht formatieren wollen.
Hinweis: Das Formatieren des Geräts kann nicht rückgängig gemacht
werden.
Hinweis: Das Formatieren dauert ca. 20 Sekunden; währenddessen sind alle
Tasten ohne Funktion.
Hinweis: Das Löschen der Daten kann nicht rückgängig gemacht werden.
23
Page 24

Softwareinstallation und Bedienung
7 Softwareinstallation und Bedienung
Hinweis: Das Gerät und die Software werden von den Betriebssystemen
Windows 98 SE, ME, 2000 und XP unterstützt. Detaillierte Informationen
entnehmen Sie der Anleitung zu Ihrem Betriebssystem.
Das Diktiergerät wird komplett mit Software und USB−Kabel geliefert. Das
bietet die Möglichkeit, Ihre aufgenommenen Nachrichten auf den PC zu
übertragen. Die beiliegende Software kann die Nachrichten Ihres Diktiergeräts in das WAV−Format umwandeln, so dass Sie mit dem Windows Media
Player (im Lieferumfang Ihres Betriebssystems) angehört werden können.
Installation eines USB−Treibers
Bei der Benutzung von Windows ME, 2000 oder XP muss kein Treiber installiert werden, diese Betriebssysteme erkennen das Diktiergerät automatisch. Das Gerät wird im Arbeitsplatz als Wechseldatenträger angezeigt.
Wenn Sie Windows 98 SE verwenden, muss der USB−Treiber installiert
werden und die USB−Massenspeicher−Funktion aktiviert sein.
Achtung: Der Treiber wird automatisch mit installiert, wenn Sie die Voice
Manager Software auf Ihrem PC installieren.
24
Page 25
Softwareinstallation und Bedienung
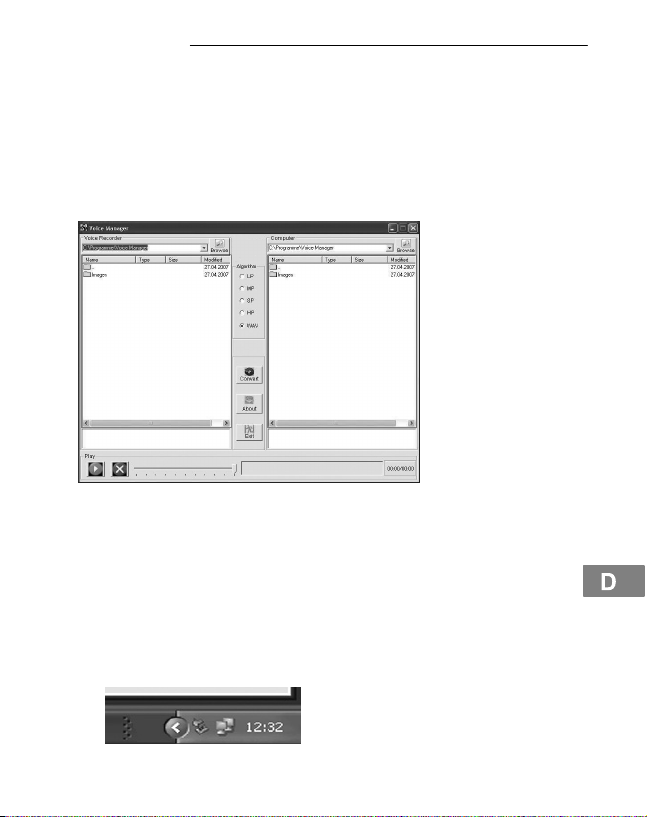
Nachrichten auf dem Computer abspielen
Die Nachrichten auf dem Diktiergerät wurden in einem besonderen Format
abgespeichert. Es ist möglich, dass Ihr Computer die Nachrichten nicht wiedergeben kann. Installieren Sie den Voice Manager/Treiber auf Ihrem Computer. Stellen Sie rechts das gewünschte Zielverzeichnis auf Ihrem Computer ein, markieren Sie links die zu konvertierenden Nachrichten und wählen
in der Mitte WAV" aus. Klicken Sie auf CONVERT. Die gewählten Nachrichten sind nun als Wav−Dateien auf Ihrem Computer abgespeichert.
Daten Up−/Downloaden
1. Schließen Sie das Gerät mit dem mitgelieferten USB−Kabel an den
Computer an. Im Display des Diktiergeräts wird USB" angezeigt.
2. Sie können per Drag und Drop Dateien zwischen Diktiergerät und
Computer austauschen.
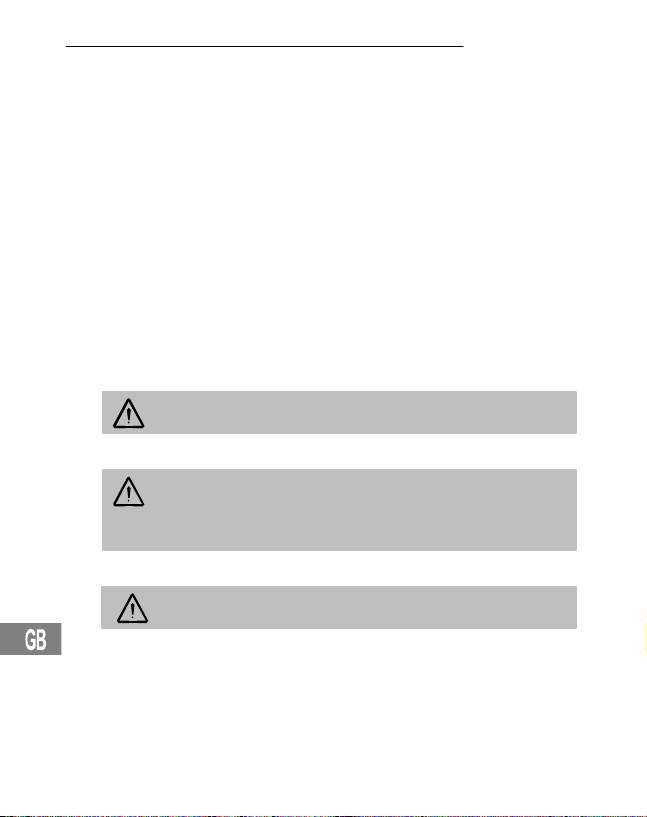
3. Für das Entfernen Ihres Diktiergeräts vom PC gehen Sie bitte wie folgt
vor: Doppelklicken Sie in der Taskleiste auf das Symbol <Hardware
sicher entfernen>.
25
Page 26

Softwareinstallation und Bedienung
Wählen Sie das Gerät aus und klicken Sie auf Beenden. Sie können jetzt
das Diktiergerät vom Computer entfernen.
26
Page 27

8 Technische Daten
Technische Daten
Technische Daten
Speicherart Integrierter Flash−Speicher, SD− und
Max. Aufnahmedauer 25,5 Std. im LP−Modus
Lautsprecher 0,2 W (8 Ohm)
Ausgangsleistung 100 mW
Stromquelle 3 V, 2 x AAA Batterien
Laufzeit 10 Stunden bei Aufnahme
Maße 115 (H) x 40 (B) x 20 (T) mm
Gewicht (ohne Batterien) 50 g
USB 1.1
Flash−Speicherkarten verwendbar
6,5 Stunden bei Wiedergabe mit
halber Lautstärke
27
Page 28

9
Contents
1 Safety Information 30. . . . . . . . . . . . . . . . . . . . . . . . . . . . . . . . . . . . .
Intended use 30. . . . . . . . . . . . . . . . . . . . . . . . . . . . . . . . . . . . . . . . . . . . . . . . . . .
Use in extreme conditions 30. . . . . . . . . . . . . . . . . . . . . . . . . . . . . . . . . . . . . . . . . .
Batteries 30. . . . . . . . . . . . . . . . . . . . . . . . . . . . . . . . . . . . . . . . . . . . . . . . . . . . . .
Rechargeable batteries 30. . . . . . . . . . . . . . . . . . . . . . . . . . . . . . . . . . . . . . . . . . . .
Medical equipment 30. . . . . . . . . . . . . . . . . . . . . . . . . . . . . . . . . . . . . . . . . . . . . . .
Disposal 31. . . . . . . . . . . . . . . . . . . . . . . . . . . . . . . . . . . . . . . . . . . . . . . . . . . . . .
2 Display Indicators 32. . . . . . . . . . . . . . . . . . . . . . . . . . . . . . . . . . . . . .
3 Operating Elements 33. . . . . . . . . . . . . . . . . . . . . . . . . . . . . . . . . . . .
4 Putting Into Operation 34. . . . . . . . . . . . . . . . . . . . . . . . . . . . . . . . . .
Inserting the batteries 34. . . . . . . . . . . . . . . . . . . . . . . . . . . . . . . . . . . . . . . . . . . . .
Microphone 34. . . . . . . . . . . . . . . . . . . . . . . . . . . . . . . . . . . . . . . . . . . . . . . . . . . .
Headset 34. . . . . . . . . . . . . . . . . . . . . . . . . . . . . . . . . . . . . . . . . . . . . . . . . . . . . .
5 Settings 35. . . . . . . . . . . . . . . . . . . . . . . . . . . . . . . . . . . . . . . . . . . . .
Setting the date and time 35. . . . . . . . . . . . . . . . . . . . . . . . . . . . . . . . . . . . . . . . . . .
Switching on (TIME mode) 36. . . . . . . . . . . . . . . . . . . . . . . . . . . . . . . . . . . . . . . . .
Switching off 36. . . . . . . . . . . . . . . . . . . . . . . . . . . . . . . . . . . . . . . . . . . . . . . . . . .
Operating modes 36. . . . . . . . . . . . . . . . . . . . . . . . . . . . . . . . . . . . . . . . . . . . . . . .
6 Operation 38. . . . . . . . . . . . . . . . . . . . . . . . . . . . . . . . . . . . . . . . . . . .
Recording quality 38. . . . . . . . . . . . . . . . . . . . . . . . . . . . . . . . . . . . . . . . . . . . . . . .
Managing messages 39. . . . . . . . . . . . . . . . . . . . . . . . . . . . . . . . . . . . . . . . . . . . . .
Recording sensitivity 39. . . . . . . . . . . . . . . . . . . . . . . . . . . . . . . . . . . . . . . . . . . . . .
Hold function (key lock) 40. . . . . . . . . . . . . . . . . . . . . . . . . . . . . . . . . . . . . . . . . . . .
Volume 40. . . . . . . . . . . . . . . . . . . . . . . . . . . . . . . . . . . . . . . . . . . . . . . . . . . . . . .
Memory card function 40. . . . . . . . . . . . . . . . . . . . . . . . . . . . . . . . . . . . . . . . . . . . .
Activating/Deactivating the VOX feature (voice detection) 40. . . . . . . . . . . . . . . . . . . .
Recording 41. . . . . . . . . . . . . . . . . . . . . . . . . . . . . . . . . . . . . . . . . . . . . . . . . . . . .
Voice−activated recording (VOX) 42. . . . . . . . . . . . . . . . . . . . . . . . . . . . . . . . . . . . . .
Playing messages 43. . . . . . . . . . . . . . . . . . . . . . . . . . . . . . . . . . . . . . . . . . . . . . .
Replaying message(s) 44. . . . . . . . . . . . . . . . . . . . . . . . . . . . . . . . . . . . . . . . . . . . .
Replaying message(s) (excerpt) 45. . . . . . . . . . . . . . . . . . . . . . . . . . . . . . . . . . . . . .
Stopping repeat playback 45. . . . . . . . . . . . . . . . . . . . . . . . . . . . . . . . . . . . . . . . . .
Interrupting repeat playback 45. . . . . . . . . . . . . . . . . . . . . . . . . . . . . . . . . . . . . . . . .
Erasing messages 45. . . . . . . . . . . . . . . . . . . . . . . . . . . . . . . . . . . . . . . . . . . . . . .
Erasing all messages 45. . . . . . . . . . . . . . . . . . . . . . . . . . . . . . . . . . . . . . . . . . . . .
Editing messages (seperate) 46. . . . . . . . . . . . . . . . . . . . . . . . . . . . . . . . . . . . . . . .
Editing messages (cut) 46. . . . . . . . . . . . . . . . . . . . . . . . . . . . . . . . . . . . . . . . . . . .
Formatting the device (delete everything) 47. . . . . . . . . . . . . . . . . . . . . . . . . . . . . . .
28
Page 29

Contents
7 Software Installation and Operation 48. . . . . . . . . . . . . . . . . . . . . . . .
Installing a USB driver 48. . . . . . . . . . . . . . . . . . . . . . . . . . . . . . . . . . . . . . . . . . . . .
Playing messages on the computer 49. . . . . . . . . . . . . . . . . . . . . . . . . . . . . . . . . . .
Uploading/Downloading data 49. . . . . . . . . . . . . . . . . . . . . . . . . . . . . . . . . . . . . . . .
8 Technical Data 51. . . . . . . . . . . . . . . . . . . . . . . . . . . . . . . . . . . . . . . .
Technical data 51. . . . . . . . . . . . . . . . . . . . . . . . . . . . . . . . . . . . . . . . . . . . . . . . . .
29
Page 30
Safety Information
1 Safety Information
Please read this operating instruction manual thoroughly.
Intended use
This digital voice recorder is designed to record all kinds of vocal communication.
Any other use is considered unintended use. Please note that the dubbing of
recorded messages without authorisation is prohibited except for private purposes. Do not use the device while driving a vehicle, motorcycle etc. to prevent the increased risk of an accident through being distracted. Unauthorised
modification or reconstruction is not permitted. Under no circumstances open
the device or complete any repair work yourself.
Use in extreme conditions
Prevent excessive exposure to smoke, dust, vibration, chemicals, moisture,
heat and direct sunlight.
Batteries
Attention: The equipment is design to be operated by batteries.
Any other form of power supply is forbidden.
Rechargeable batteries
Attention when using batteries: Never throw batteries into a
fire. Only use batteries of the same type! Pay attention to correct
polarity. Incorrect polarity of the batteries represents a risk of
explosion during charging.
Medical equipment
Attention: Do not use the voice recorder in the vicinity of medical
equipment. Effects on such equipment cannot be fully ruled out.
30
Page 31

Safety Information
Disposal
In order to dispose of your device, bring it to a collection point provided by your local public waste authorities (e.g. recycling centre).
The adjacent symbol indicates that the device must not be disposed
of in normal domestic waste! According to laws on the disposal of
electronic and electrical devices, owners are obliged to dispose of
old electronic and electrical devices in a separate waste container.
Packaging materials must be disposed of according to local regulations.
Batteries must not be disposed of in domestic waste. Special collection containers are provided at certain sites (supermarkets, electric
shops).
31
Page 32

Display Indicators
2 Display Indicators
LOCATION OF INDICATORs
A
B
C
A Battery status indicator Play
B Memory locations (files) Recording
C Hours/Minutes/Seconds HOLD (key lock)
D Month/Day SD memory card
E Recording quality VOX (voice−activated
F Year/Messages Replay (current message)
recording)
Replay (all messages in a file)
Remaining time during
recording
F
E
D
32
Page 33

3 Operating Elements
1
11
10
2
MODE
3
4
5
68
FILE/REP
ERASE
9
12
5
3
Operating Elements
17
VOLVOL
HOLDHOLD
16
15
7
14
13
1 Microphone 10 LCD display
2 MODE (selection) button 11 Recording active (indicator)
3 UP/DOWN button 12 USB connection port
4 PLAY/STOP button 13 MIC (microphone) jack
5 FORWARD/BACK button 14 EAR (earphone) jack
6 FILE/REP (file/replay) button 15 Memory card compartment
7 Loudspeaker 16 HOLD, key lock on/off
8 ERASE (delete/pause) button 17 Volume control
9 RECORD/STOP button
33
Page 34
Putting Into Operation
4 Putting Into Operation
Inserting the batteries
Open the battery compartment by
sliding out the cover and removing it.
Insert 2 AAA batteries (not supplied).
Pay attention to correct polarity.
Close the battery compartment
again.
The batteries are fully
charged.
The batteries are empty.
The charge status of the
batteries is indicated in
the display.
Note: The recorded messages are retained when the batteries are replaced.
When replacing the batteries, the date and time will have to reset.
Microphone
You can connect an external microphone to the MIC jack on the device. As
soon as the microphone is connected, the integrated microphone is deactivated.
Headset
Earphones/headset can be connected to the EAR jack on the device. As soon
as the headset/earphone is connected, the loudspeaker is automatically
deactivated.
34
Page 35

5 Settings
Setting the date and time
After inserting the batteries, the device is in TIME mode. 1M 01D (month, day),
12:00:00 (hr., min., sec.) and year appear in the display. Set the date and time
as follows:
While the date and time appear in
the display (TIME mode), press the
MODE button to close TIME mode.
The number of messages, recording quality, duration of message,
etc. appear in the display. Press
and hold the MODE button to activate
the date and time setting process. Press the DOWN button three times until the
year appears (06 is preset).
Press the FORWARD or BACK
button to set the year. Press the
PLAY/STOP button to save the
changes.
Press the DOWN button. Use the
FORWARD or BACK button to select the month and confirm it by
pressing the PLAY/STOP button.
Press the DOWN button a second
time and then use the FORWARD
or BACK button to set the day. Proceed as above (month) to set the time.
MODE
Settings
y
DM
y
DM
35
Page 36
Settings
Switching on (TIME mode)
Press the PLAY/STOP button to
switch the device on and activate
TIME mode. The date and time are
displayed.
Press the MODE button to switch
from TIME mode to Standby mode.
Switching off
If Standby mode is active, press
10
and hold the PLAY/STOP button
until TIME mode is activated.
Note: The device switches off
automatically if no button is pressed
over a period of one minute.
Operating modes
The operating mode displays differ as follows:
MODE
MODE
FILE/REP ERASE
36
Standby mode
− Number of messages
− Recording quality
− Battery capacity
− Memory location
− Length of the current message
TIME mode
− Battery capacity
− Month/Day
− Time
Page 37

Settings
Note: All the following operations for programming settings assume that the
device is in Standby mode.
Note: To cancel the programming process for the settings described in this
chapter, either press the MODE button or press and hold the PLAY/STOP button.
37
Page 38
Operation
6 Operation
Recording quality
There are four different recording qualities available for selection to record
the voice messages.
11
Recording mode
Recording quality Max. recording time
HP (High Play) Best possible 2 hours 40 min.
MP (Medium Play) Very good 4 hours
SP (Standard Play) Good 8 hours
LP (Long Play) For long recording 25 hours 30 min.
Switch the device to Standby mode
and press the MODE button until
MODE
SET" appears in the display. Select the required quality using the
FORWARD or BACK buttons.
Confirm the setting selected by
pressing the PLAY/STOP button.
MODE
38
Page 39

Operation
Managing messages
The device has 4 files (named A, B, C and D) in which to store the messages.
You can store a total of 396 messages or 25,5 hours in LP mode using all the
files (refer to Page 38 Recording quality"). A max. of 99 messages can be recorded in one file. Proceed as follows to select a file:
Press the FILE/REP button to select
the required file/memory location
(A, B, C, D). The number in the top
right corner of the display indicates
the total number of messages recorded in the respective file. The
time at the bottom of the display
indicates the total recording time of
the message selected.
Note: When a message is recorded, the device automatically generates a
consecutive number for it, starting with 1. When no more memory space is
available, FULL’’ appears in the display. Refer to Page 45 to learn how to
erase messages.
Recording sensitivity
To set the recording sensitivity,
press and hold the MODE button
until SET" appears in the display.
Press the UP or DOWN button
until MIC:LO/HI appears in the display. Press the FORWARD or
BACK button to set the function to
LO to record sounds the sources of which are near the microphone. If the
sources of sounds to be recorded are further away, use the FORWARD or
BACK button to set the function to HI. Confirm the setting by pressing the
PLAY/STOP button.
12
A
B
C
D
MODE
FILE/REP ERASE
39
Page 40

Operation
Hold function (key lock)
Slide the HOLD control upwards to
deactivate all the buttons. A padlock
icon appears in the display. Slide the
HOLD back to activate all the buttons again.
Note: The device can still be switched off even if the HOLD function is activated.
Volume
Turn the volume control in the required direction to increase or reduce the volume of the recordings
when played.
Memory card function
A memory card (SD or FLASH
memory) can be plugged into the
device. Press and hold the MODE
button until SET" appears in the
display. Press the UP or DOWN
button until the memory card icon
appears. This function can be activated or deactivated (ON/OFF) using the FORWARD or BACK buttons.
Activating/Deactivating the VOX feature (voice detection)
To activate/deactivate VOX",
press and hold the MODE button
until SET" appears in the display.
Press the UP or DOWN button
until VOX" appears in the display.
Use the FORWARD or BACK button to switch the VOX" function on
or off. Confirm the setting by pressing the PLAY/STOP button.
HOLDHOLD
VOLVOL
40
Page 41

Recording
13
The device is equipped with an automatic voice activity detector (VOX) (refer
to 42 Voice activated recording (VOX)". If VOX" is deactivated (see above),
you can record in the normal way.
Set the device to Standby mode
and select the recording quality re-
MODE
quired (refer to Page 38 Recording quality").
Select a file/memory location by
pressing the FILE/REP button
(refer to Page 39 Managing messages").
A
B
C
D
Do not remove the batteries while recording or otherwise
interrupt the recording process. Doing so may result in lost or
damaged recording files. The recorder will take a few minutes to
resume normal operations (the display will read LOAD" until
normal function resumes).
Operation
In order to protect your voice recordings, it is good practice to
regularly save backup copies of your recordings (see the Software Installation and Operation section of this manual for more
information).
41
Page 42
Operation
When in Standby mode, press the
RECORD/STOP button. The LED
lights up red and the recording
timer appears. Speak into the integrated microphone or connect an
external microphone to the MIC
jack and speak at a normal volume. Press the RECORD/STOP button again to end recording.
Press the PLAY/STOP button to
display the time remaining for recording. REMAIN", together with
the remaining time for recording,
appear in the display.
Voice−activated recording (VOX)
14
When VOX" is activated, the device only records when you speak. If you
pause, the device interrupts recording and only resumes when you start
speaking again.
VOX" must be activated (refer to
activating/deactivating VOX" Page
40). Switch the device on and select the required recording quality
(refer to Page 38 Recording quality").
When the device is in Standby
mode, press the FILE/REP button
to select a file (A, B, C, D) in which
the message should be stored.
A
A
REMAIN
A
B
C
D
42
Page 43

Operation
Press the RECORD/STOP button,
the recording icon lights up and the
time indicator for the current recording appears. The LED lights
up red. Speak into the microphone
integrated or connect an external
microphone to the MIC jack. The
device begins to record the moment you start to speak. If recording is interrupted, the red LED flashes until recording is resumed. Press the RECORD/
STOP button again to end recording.
NOTE:
The first noises activate the recorder and it is possible they will not be
recorded.
The device does not interrupt recording should the volume of the speaker
change.
Recording is interrupted following 2 seconds silence.
For information on continuous recording, refer to Page 41.
A distance of approx. 10 cm from the device is considered reasonable for
recording at a normal volume (speaking).
Playing messages
Switch the device on, activate
Standby mode and press the FILE/
REP button to select a file (A, B,
C, D).
A
B
C
D
MODE
FILE/REP ERASE
Press the UP or DOWN button to
select the required messages. The
message number and length appear in the display.
43
Page 44
Operation
Press the PLAY/STOP button to play
the current message. Press the
RECORD/STOP button during playback to check the time and date of
recording. While the message is
being played back, press the ERASE
button to interrupt playback and again to
resume. The messages is not deleted.
To wind forward or back while playing the current message, press the
FORWARD or BACK button, respectively. Playback continues at
10 seconds/s. To increase the
speed to 30 seconds/s, press and
hold the FORWARD or BACK button for 3 seconds. Press the PLAY/STOP button at the required position.
Replaying message(s)
If you want to replay one or all the
messages, press and hold the
FILE/REP button while a message
is being played until REPEAT" (replay one message) appears in the
display. Press and hold the FILE/
REP button again until REPEAT
ALL" (replay all messages) appears in the display. The device replays one or
all the messages from the file displayed. To deactivate the replay function,
press and hold the FILE/REP button.
A
B
REPEAT ALL
44
Page 45
Replaying message(s) (excerpt)
In order to replay a specific excerpt
from a message, press the FILE/
REP button while a message is
B
being played. A" appears in the display indicating you have marked a
starting point. Press the FILE/REP
button again at the end of the excerpt of the message. B" appears in the display indicating you have marked the
end point.
Stopping repeat playback
To stop the message being replayed, press the PLAY/STOP button.
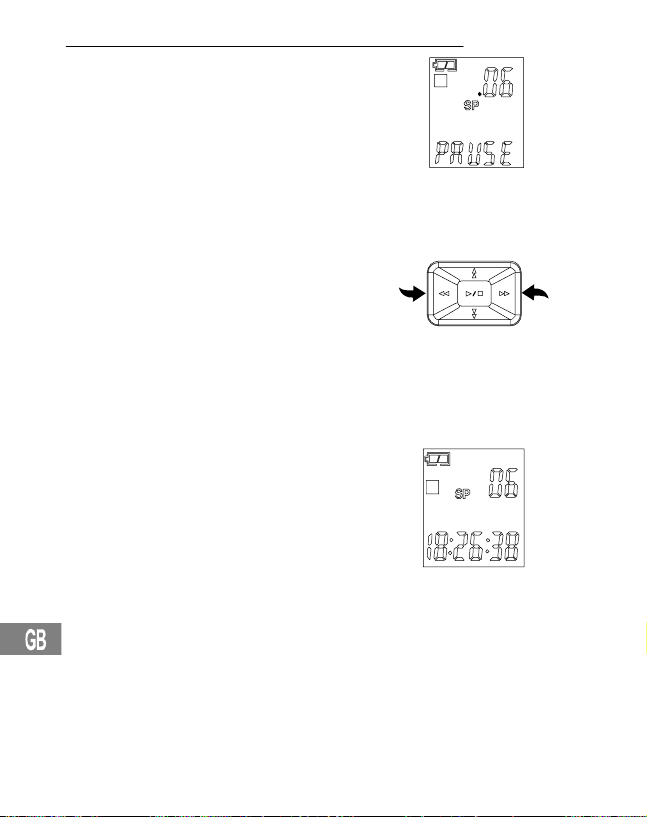
Interrupting repeat playback
To interrupt playback immediately,
press the ERASE button. PAUSE"
appears in the display. Press the
MOD
E
ERASE button to continue playback. The messages is not deleted.
FILE/REP ERASE
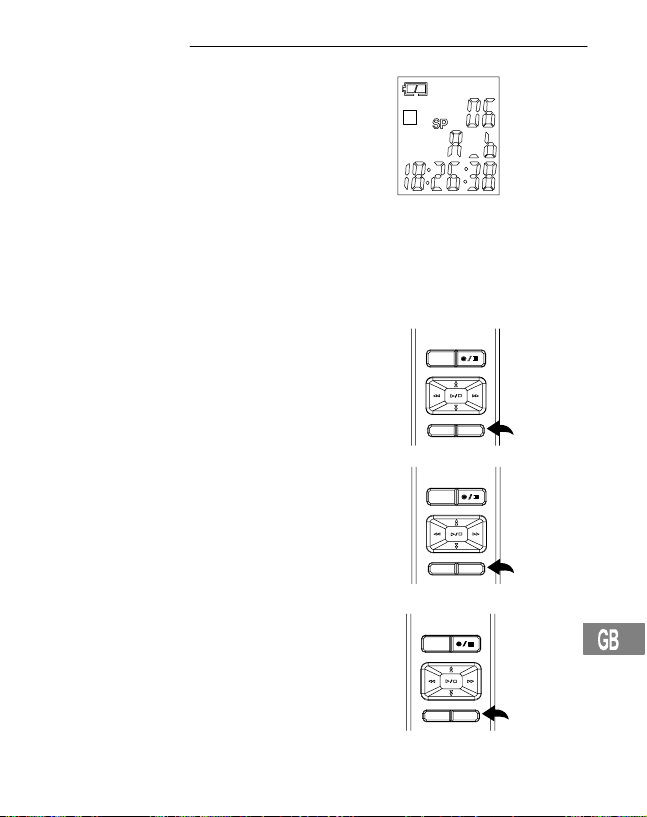
Erasing messages
15
Select the message to be deleted
and press the ERASE button.
MODE
DEL 1" appears in the display and
the messages is played. Press the
ERASE button while it is playing in
order to delete the messages.
FILE/REP
ERASE
Erasing all messages
16
Select the file (A, B, C, D) containing all the messages to be deleted,
press and hold the ERASE button
until dEL ALL" appears in the display. Press the ERASE button
again to delete all the messages in
the selected file.
Note: Deleted messages cannot be restored.
MODE
FILE/REP ERASE
Operation
45
Page 46
Operation
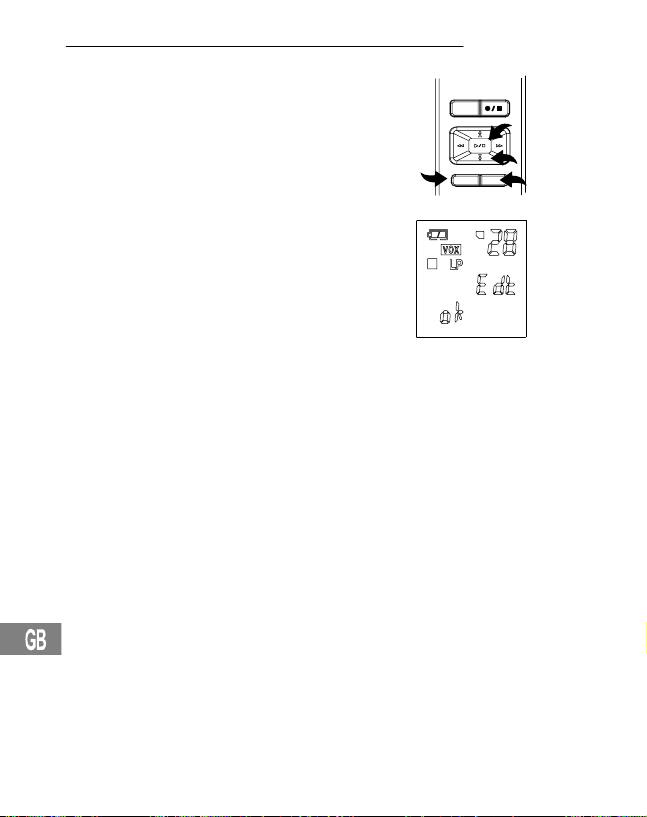
Editing messages (seperate)
Select the required file and then
press and hold the DOWN button
(1) until Edt" appears in the display. Select a messages. Press the
PLAY/STOP button (2) to play the
message.
While it is playing, press the FILE/
REP button (3) to set a cut. The
messages is cut at this point.
Press the PLAY/STOP button (2) to
confirm the action. Two messages
are thus produced from one message.
Editing messages (cut)
Select the required file and then press and hold the DOWN button (1) until
Edt" appears in the display. Select a message. Press the PLAY/STOP button
(2) to play the message.
While it is playing press the ERASE button (4) to select a start point. A St"
will show on display. Press again ERASE button to select an end point. bEd"
will show on display. Press the PLAY/STOP button (2) to confirm the action.
The message between start point and end point will be cut.
MOD
E
FILE/REP ERASE
3
B
2
1
4
46
Page 47

Formatting the device (delete everything)
Operation
Press and hold the MODE button
until SET" appears in the display.
MODE
Press the DOWN button until
FoR" appears in the display.
Use the FORWARD or BACK button to select Yes’’. Then press and
hold the ERASE button. All the
data and messages stored on the
device are deleted.
Note: Select No" if you do not want to format the device.
Note: Formatting the device cannot be reverted.
Note: Formatting takes approx. 20 seconds; none of the buttons function dur-
ing this period.
Note: Deleted data cannot be restored.
47
Page 48

Software Installation and Operation
7 Software Installation and Operation
Note: The device and software are supported by the Windows 98 SE, ME,
2000 and XP operating systems. Refer to the manual supplied with your operating system for more details.
The voice recorder is supplied complete with software and USB cable. This
provides the option of transferring your recorded messages to a PC. The
software enclosed can convert the messages on the voice recorder to WAV
format so that you can play them using the Windows Media Player (supplied
with your operating system).
Installing a USB driver
No drivers need to be installed if Windows ME, 2000 or XP are used since
these operating systems detect the voice recorder automatically. The device
is indicated on the desktop as a removable medium.
If Windows 98 SE is used, the USB driver must be installed and the USB
bulk memory function activated.
Attention: The driver is automatically installed during installation of the
Voice Manager Software on the PC.
48
Page 49
Software Installation and Operation
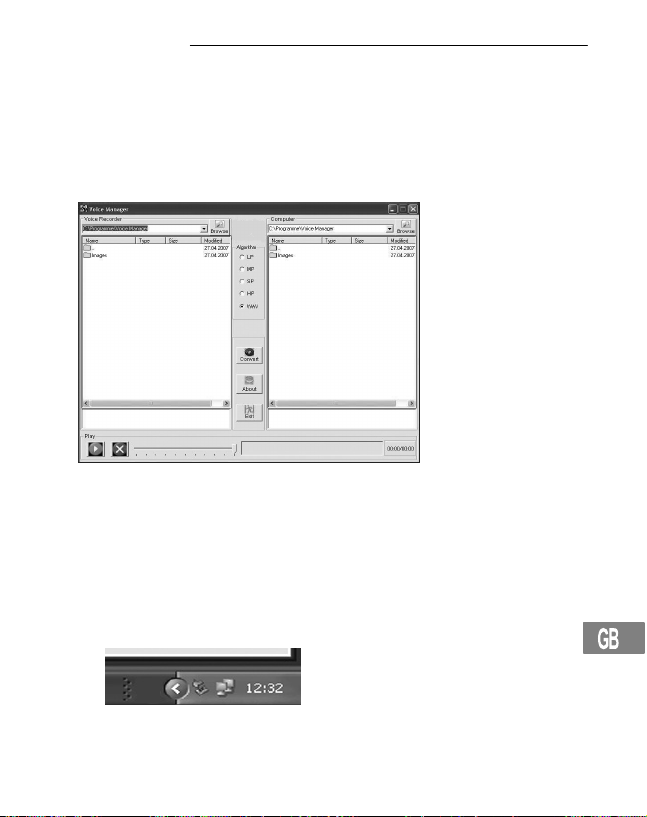
Playing messages on the computer
The messages on the voice recorder are stored in a specific format. It is
possible that your computer cannot play the messages. Install the Voice
Manager/driver on your computer. Define the required target folder on the
computer on the right, mark the message to be converted on the left and
select WAV" from the middle column. Click on CONVERT. The messages
selected are then stored as WAV files on your computer.
Uploading/Downloading data
4. Connect the device to a computer using the USB cable supplied. USB"
appears in the voice recorder display.
5. Exchange files between the voice recorder and computer by means of
the drag and drop function.
6. Please proceed as follows to disconnect your voice recorder from the
PC: Double−click on the <Remove hardware> icon in the toolbar.
49
Page 50

Software Installation and Operation
Select the device and click on Exit. You can now disconnect the voice
recorder from the computer.
50
Page 51

8 Technical Data
Technical data
Technical Data
Type of memory Integrated Flash memory, SD and
Max. recording time 25,5 hours in LP mode
Loudspeaker 0.2 W (8 Ohm)
Output power 100 mW
Current source 3 V, 2 x AAA batteries
Runtime 10 hours for recording
Dimensions 115 (H) x 40 (W) x 20 (H) mm
Weight (without batteries) 50 g
USB 1.1
Flash memory card can be used
6.5 hours for playback at half volume
51
Page 52

52
Page 53

53
Page 54

Wir behalten uns inhaltliche und technische Änderungen vor.
 Loading...