

Page 1
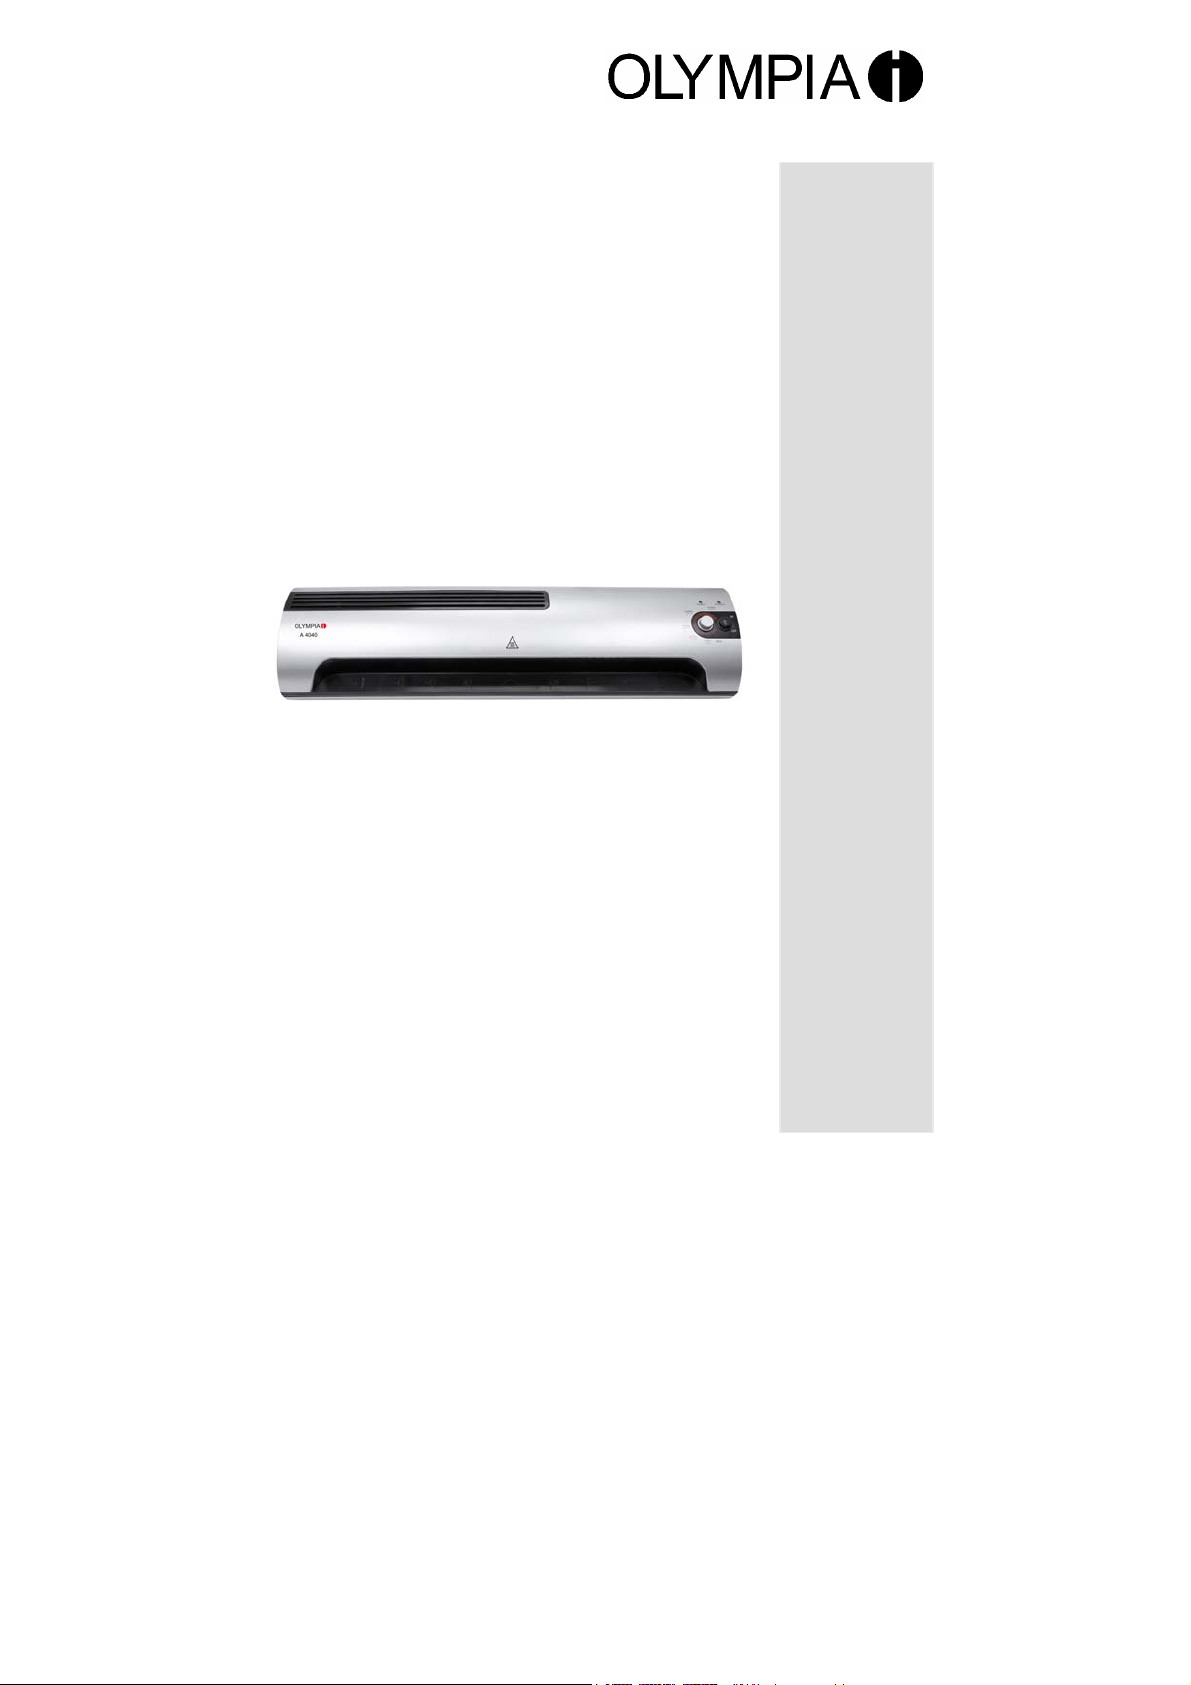
Laminiergerät
Laminator
Machine à plastifier
Aparato laminador
Plastificatrice
Lamineerapparaat
Olympia Business Systems Vertriebs GmbH
Zum Kraftwerk 1 D-45527 Hattingen
Tel. 0 23 24 / 68 01-0 Fax 0 23 24 / 68 01–99
http://www.olympia-vertrieb.de
(15.03.2012)
OLYMPIA A2 A 4040
Page 2

Deutsch
Wichtige Sicherheitsanweisungen.........................................................................4
Empfehlung...........................................................................................................5
Haftungsausschluss..............................................................................................5
Bestimmungsgemäße Verwendung ......................................................................5
Leistungsmerkmale...............................................................................................6
Heißlaminieren......................................................................................................7
Kaltlaminieren .......................................................................................................8
Folienstau beheben ..............................................................................................8
Pflege und Reinigung............................................................................................9
Fehlerbehebung....................................................................................................9
Entsorgungshinweis............................................................................................10
Garantie ............................................................................................................10
English
Important Safety Information...............................................................................11
Recommendation................................................................................................12
Exemption From Liability.....................................................................................12
Intended Use.......................................................................................................12
Features ............................................................................................................13
Hot Laminating....................................................................................................15
Cold Laminating ..................................................................................................15
Clearing Foil Jams ..............................................................................................15
Cleaning and Servicing .......................................................................................16
Troubleshooting ..................................................................................................16
Disposal Notes....................................................................................................17
Warranty ............................................................................................................17
Français
Consignes importantes de sécurité.....................................................................18
Recommandation................................................................................................19
Exclusion de la garantie......................................................................................19
Utilisation conforme aux prescriptions.................................................................19
Caractéristiques de performance ........................................................................20
Plastification à chaud ..........................................................................................21
Plastification à froid.............................................................................................22
Elimination de bourrage ......................................................................................23
Entretien et nettoyage.........................................................................................23
Elimination d'erreurs ...........................................................................................24
Reseignemet sur la évacuation...........................................................................24
Garantie ............................................................................................................24
2
Page 3

Español
Instrucciones de seguridad importantes..............................................................25
Recomendaciòn ..................................................................................................26
Exclusión de responsabilidad..............................................................................26
Uso previsto........................................................................................................26
Características prestacionales ............................................................................27
Laminación en caliente .......................................................................................29
Laminación en frío ..............................................................................................29
Eliminar un atasco de pelíula transparente.........................................................30
Cuidado y limpieza..............................................................................................30
Indicación sobre la eliminación de residuos........................................................30
Eliminación de fallos ...........................................................................................31
Garantía ............................................................................................................ 31
Italiano
Istruzioni importanti di sicurezza .........................................................................32
Consiglio ............................................................................................................33
Esclusione di responsabilità................................................................................33
Impiego conforme alle disposizioni .....................................................................33
Caratteristiche di prestazione..............................................................................34
Plastificazione a caldo.........................................................................................35
Plastificazione a freddo.......................................................................................37
Rimuovere l'intasamento da pellicola..................................................................37
Cura e pulizia......................................................................................................37
Indicazione sopra l'eliminazione die rifiuti ...........................................................37
Soluzione di problemi..........................................................................................38
Garanzia ............................................................................................................38
Nederlands
Belangrijke veiligheidsinstructies.........................................................................39
Advies ............................................................................................................40
Uitsluiting van aansprakelijkheid .........................................................................40
Voorgeschreven gebruik .....................................................................................40
Kenmerken..........................................................................................................41
Heetlamineren.....................................................................................................42
Koudlamineren....................................................................................................43
Klem zitttende folie losmaken .............................................................................43
Verzorging en reiniging .......................................................................................44
Verwijderings tip..................................................................................................44
Storingen verhelpen............................................................................................45
Garantie ............................................................................................................45
Konformitätserklärung / Declaration of Conformity..............................................46
3
Page 4

Wichtige Sicherheitsanweisungen
Um ein zuverlässiges Arbeiten mit dem Laminiergerät zu gewährleisten,
beachten Sie bitte Folgendes:
1
2
3
4
5
6
7 Kindern ist der Aufenthalt im Arbeitsbereich der betriebsberei-
8 Bei Nichtbenutzung des Gerätes Netzstecker ziehen.
9
10
11
12
13
14
15
16 Schneiden Sie keine Folientaschen zu. Die entstehenden
17 Lose Teile von Bekleidung, Krawatten, Schmuck, langes Haar
Lesen Sie diese Anweisungen bitte sorgfältig durch und beachten Sie bei der Handhabung Ihres Gerätes.
Bedienungsanleitung für zukünftige Benutzung aufbewahren
.
Beschädigung des Netzsteckers oder Netzkabels vermeiden.
Netzkabel nie verdrillen. Das Gerät bei beschädigtem Netzkabel oder Netzstecker nicht in Betrieb nehmen.
Verwenden Sie das Gerät nicht in der Nähe von heißen Oberflächen oder in feuchter Umgebung und schützen Sie es vor direkter Sonneneinstrahlung und starker Staubeinwirkung.
Vor dem Reinigen des Gerätes immer den Netzstecker ziehen.
Verwenden Sie keine Lösungsmittel oder aggressive Reinigungsmittel.
Metallische Gegenstände können nicht laminiert werden.
ten Maschine nicht gestattet.
Das Gerät immer sofort ausschalten, wenn ein strenger Geruch
entsteht oder das Gerät nicht in Betrieb ist.
Netzstecker nicht mit feuchter Hand berühren.
Stellen Sie sicher, dass der Ein/Aus-Schalter in Stellung „OFF“ ist,
bevor das Laminiergerät an das Stromnetz angeschlossen wird.
Nur dafür vorgesehene Folientaschen, wie unter Punkt Leis-
tungsmerkmale angegeben, in das Gerät einführen. Zu groß
gewählte Folientaschen können Folienstaus verursachen.
Laminieren Sie keine hitzeempfindlichen Materialien mit diesem
Gerät, wie z. B. Thermopapier.
Beim Laminieren von feuchten Dokumenten erzielen Sie
schlechte Laminierergebnisse.
Verwenden Sie keine Folientaschen, die für die Kaltlaminierung
vorgesehen sind, beim Heißlaminieren. Die Maschine, die Folientasche und das Dokument werden dabei beschädigt.
Schnittkanten können Folienstaus verursachen.
oder andere lose Gegenstände von der Einlassöffnung fernhalten. Verletzungsgefahr!
4
Page 5

18
19
Die Steckdose und der Netzanschluss des Gerätes müssen aus
Sicherheitsgründen frei zugänglich sein, damit die Stromversorgung im Notfall schnell getrennt werden kann!
Das Gerät darf nur in trockenen, geschlossenen Räumen benutzt
werden.
Empfehlung
Wenn sehr weiche Materialien (wie Servietten) oder kleine Formate laminiert
werden sollen, dann empfehlen wir zur Vermeidung von möglichen Staus
das Laminiergut zusätzlich in ein gefaltetes Blatt Papier zu legen. Dieses
muss mit der Knickkante voran in das Laminiergerät eingeführt werden.
Ausweise und Dokumente können ihre Gültigkeit verlieren, wenn sie laminiert werden, weil die Dokumentenechtheit anschließend nicht mehr überprüfbar ist.
Falls Sie das Produkt einmal an eine andere Person weitergeben möchten,
legen Sie bitte diese Gebrauchsanweisung immer dazu.
Haftungsausschluss
Wir übernehmen keine Garantie für die Richtigkeit der Informationen, die
sich auf technische Eigenschaften sowie die hier vorliegende Dokumentation beziehen. Das in dieser Dokumentation beschriebene Produkt und ggf.
dessen Zubehör unterliegen einer ständigen Verbesserung und Weiterentwicklung. Aus diesem Grund behalten wir uns das Recht vor, Komponenten,
Zubehör, technische Spezifikationen sowie die hier vorliegende Dokumentation des Produktes ohne vorherige Ankündigung jederzeit zu ändern.
Bestimmungsgemäße Verwendung
Mit diesem Laminiergerät können Heißlaminierfolien und Kaltlaminierfolien
bearbeitet werden. Es können Bilder, Karten, Dokumente, Papier usw. bis
zu einer Gesamtdicke von 1,0 mm laminiert werden. Jede andere Verwendung gilt als nicht bestimmungsgemäß. Eigenmächtige Veränderungen oder
Umbauten sind nicht zulässig.
5
Page 6

Leistungsmerkmale
Schutz und Veredelung für Ihre Dokumente.
Laminiert Fotos, Dokumente, Graphiken, Ausweise usw. bis Größe DIN A2
Das Gerät arbeitet mit 2 Heizwalzen, hat eine schnelle Aufwärmzeit und laminiert ohne Träger.
• 2 LED Lampen zeigen die Betriebszustände an
• Automatische Abschaltung bei Überhitzung
• Hochwertiges Heizsystem verhindert Schlieren- und Blasenbildung
• Aufwärmzeit nur ca. 4-8 Minuten
• Abkühlzeit auf Zimmertemperatur 40-60 Minuten.
• Folienstärke von mindestens 75 µm und maximal 250 µm
Laminiersystem: Hot-Roller Technik,
4 Transportwalzen
Laminiertemperatur: 110 °C – 150 °C
Maximale Laminierbreite: 490 mm
Maximale Laminierdicke: 1,0 mm
Laminiergeschwindigkeit: 350 mm/min
Spannungsversorgung: 220 - 240 Volt, 50 Hz
Stromaufnahme: 2,3 A, 500W
Abmessungen (LxBxH): 665 x 195 x 118 mm
Gewicht: ca. 7,7 kg
6
Page 7

Heißlaminieren
1 Schließen Sie das Stromkabel an eine gut zugängliche Standard-
steckdose an.
Achtung: Prüfen Sie, ob die Spannungsangabe des Gerätes mit
der Ihres Stromnetzes übereinstimmt (220 - 240 V, 50 Hz).
2 Schalten Sie den Ein/Aus-Schalter an der rechten Geräteoberseite ein
(I).
3 Der Antriebsmotor für die Transportrollen läuft an, die rote Anzeige-
leuchte (POWER) leuchtet und die Aufwärmphase beginnt. Nach etwa
3 Minuten (75 µm); 4 Minuten (100 µm); 5 Minuten (125 µm); 6 Minuten (175 µm); 7 Minuten (250 µm) ist die korrekte Betriebstemperatur
erreicht und die grüne Anzeigeleuchte (READY) leuchtet.
4 Legen Sie das Laminiergut in die Folientasche so ein, dass allseitig
etwa 3 bis 5 mm Abstand vom Folienrand vorhanden ist.
Achtung: Verwenden Sie ausschließlich Heißlaminierfolien.
5 Führen Sie die Folie zusammen mit dem Laminiergut in den Einführ-
schlitz des Laminiergerätes ein. Die geschlossene Seite der Folie ist
hierbei zuerst einzuführen.
Hinweis: Um ein Falten der Laminierfolie zu vermeiden darf nie die
offene Seite der Laminierfolie zuerst in den Einführschlitz des Laminiergerätes einführt werden. Beim Einführen der Folie bitte die Anweisungen am Einführschlitz beachten. Der Laminiervorgang erfolgt automatisch.
Achtung: Die austretende Folie ist nach dem Laminieren sehr heiß
und weich. Daher mit dem laminierten Produkt vorsichtig umgehen.
Hinweis: Zum Ebnen kann das laminierte Produkt mit einem Buch
oder einem anderen schweren, ebenen Gegenstand gepresst werden.
7
Page 8

Kaltlaminieren
1 Schließen Sie das Stromkabel an eine gut zugängliche Standard-
steckdose an.
Achtung: Prüfen Sie, ob die Spannungsangabe des Gerätes mit
der Ihres Stromnetzes übereinstimmt (220 - 240 V, 50 Hz).
2 Schalten Sie den Ein/Aus-Schalter an der rechten Geräteseite ein (I).
3 Der Antriebsmotor für die Transportrollen läuft an, die rote Anzeige-
leuchte (POWER) und die grüne Anzeigeleuchte (READY) leuchten.
Achtung: Haben Sie das Laminiergerät kurz vorher zum Heißlaminieren eingesetzt, müssen Sie das Laminiergerät abkühlen lassen. Die Abkühlzeit dauert bis zu 60 Minuten.
4 Entfernen Sie die Schutzfolie von der Folientasche.
5 Legen Sie das Laminiergut in die Folientasche so ein, dass allseitig
etwa 3 bis 5 mm Abstand vom Folienrand vorhanden ist.
6 Führen Sie die Folie zusammen mit dem Laminiergut in den Einführ-
schlitz des Laminiergerätes ein. Die geschlossene Seite der Folie ist
hierbei zuerst einzuführen.
Hinweis: Um ein Falten der Laminierfolie zu vermeiden darf nie die
offene Seite der Laminierfolie zuerst in den Einführschlitz des Laminiergerätes einführt werden. Beim Einführen der Folie bitte die Anweisungen am Einführschlitz beachten. Der Laminiervorgang erfolgt automatisch.
Folienstau beheben
Dieses Laminiergerät ist mit der Funktion „Jam Release“ ausgerüstet, um
Folienstaus schnell wieder beheben zu können.
1 Beim Blockieren der Folie das Gerät ausschalten und den Schalter
auf der rechten oberen Geräteseite auf die Position „REW“ stellen.
2 Halten Sie das Laminiergerät fest und ziehen Sie die Folie zusammen
mit dem Laminiergut aus dem Einführschlitz des Laminiergerätes.
3 Schalten Sie den Schalter an der rechten oberen Geräteseite wieder
auf die Position „FWD“.
4 Danach muss das Gerät wahrscheinlich mehrmals, wie unter Punkt
„Pflege und Reinigung“ beschrieben, gereinigt werden.
5 Falls sich Folienstaus ständig wiederholen oder sich gestaute Folie
nicht mehr aus dem Laminiergerät ziehen lässt, wenden Sie sich bitte
an unsere Hotline (siehe Garantie).
8
Page 9
Pflege und Reinigung
Ablagerungen und Klebereste an den Transportwalzen können das Laminierergebnis beeinflussen. Darum müssen die Transportwalzen regelmäßig
nach der Benutzung gereinigt werden:
Hierzu ein gefaltetes Blatt Papier in den Einführschlitz einführen. Klebereste
werden vom austretenden Papier mitgenommen. Den Vorgang mehrmals
wiederholen.
Vor dem feuchten Reinigen des Gerätes immer den Netzstecker ziehen.
Falls erforderlich, kann das Gehäuse mit einem in milder Seife und klarem
Wasser getränkten Tuch gereinigt werden. Verwenden Sie keine Lösungsmittel oder aggressive Reinigungsmittel.
Fehlerbehebung
Fehler Lösungen
• Rote LED (POWER) leuchtet nicht
• Gerät reagiert nicht
• Folienstau • Prüfen Sie die Größe der verwen-
• laminierte Folie ist nicht vollstän-
dig durchsichtig
• Prüfen Sie, ob das Stromkabel
korrekt in die Standardsteckdose
eingesteckt wurde.
• Falls der Fehler nicht behoben
wurde, wenden Sie sich an unsere
Hotline.
deten Folientasche.
• Benutzen Sie nur Folientaschen in
der angegebenen Größe.
• Stellen Sie sicher, dass die Folientasche gerade in das Gerät eingeführt wurde.
• Um den Stau zu beheben, folgen
Sie den Anweisungen unter Punkt
„Folienstau beheben“.
• Laminieren Sie dieselbe Folie erneut, um das Laminierergebnis zu
verbessern.
Die Konformität mit den
EU-Richtlinien wird durch das CEZeichen bestätigt.
9
Page 10

Entsorgungshinweis
Dieses Symbol (die durchgestrichene Abfalltonne) bedeutet, dass
dieses Produkt nach der Lebenszeit zu einem für den Endanwender
verfügbaren Rücknahme- oder getrenntem Sammelsystem
zurückgebracht werden muss. Dieses Symbol gilt nur in den Staaten der
EWR. EWR = Europäischer Wirtschaftsraum, welcher die EU Mit-
gliedstaaten plus den Staaten Norwegen, Island und Lichtenstein umfasst.
Garantie
Bitte unbedingt aufbewahren!
Lieber Kunde,
wir freuen uns, dass Sie sich für das Olympia Laminiergerät A 4040; ent-
schieden haben. Sollte sich an Ihrem Gerät wider Erwarten ein technisches
Problem ergeben, beachten Sie bitte folgende Punkte:
• Die Garantiezeit für Ihr Gerät beträgt 24 Monate.
• Bewahren Sie unbedingt den Kaufbeleg und die Originalverpackung auf.
• Sollte ein Problem auftreten, rufen Sie bitte zuerst unsere Hotline an:
0180/5007514 (0,14 € / Minute,
0,42 € aus dem Mobilfunknetz)
Oft kann unser Fachpersonal telefonisch helfen.
• Kann jedoch der Fehler telefonisch nicht beseitigt werden, bitten wir Sie,
das Gerät in der Original-Verpackung an folgende Anschrift zu senden:
Service-Center Hattingen
Zum Kraftwerk 1
45527 Hattingen
Garantiereparaturen können nur mit beigefügtem Kaufbeleg erfolgen.
Herzlichen Dank für Ihr Verständnis.
Mit freundlichen Grüßen
Ihre Olympia Business Systems
10
Page 11

Vertriebs GmbH
11
Page 12

Important Safety Information
Please observe the following information to ensure reliable operation of
the laminator:
1
2
3
4
5
6
7 Children must not be allowed in the vicinity of the equipment
8 Disconnect the power plug when the unit is not in use.
9
10
11
12
13
14
15
16 Do not cut foil pockets to size. The resulting cut edges could
17 Keep loose clothing, ties, jewellery, long hair and other loose
18
19
Read this manual thoroughly and observe the instructions and
information in it when operating the unit.
Keep the operating instruction manual available for future
reference
.
Prevent damage to the power plug and power cable. Never
twist the power cable. Do not operate the unit if the power cable
or power plug is damaged.
Do not use the unit in the vicinity of hot surfaces or in damp
environments and protect it from direct sunlight and dusty
conditions.
Disconnect the power plug before starting to clean the unit.
Never use any solvents or aggressive cleaning agents.
Metallic objects cannot be laminated.
when it is ready to operate.
Always switch the unit off immediately if it emits a strong smell
or it is not in operation.
Do not touch the power plug with moist hands.
Ensure that the On/Off switch is in the "OFF" position before
connecting the laminator to the mains power supply.
Only insert recommended foil pockets, as specified in the
Section "Features", in the unit. Using foil pockets which are too
large could lead to the unit jamming.
Do not laminate heat-sensitive materials, such as thermal
paper, in the unit.
Lamination of moist documents produces poor results.
Do not use foil pockets, intended for cold lamination, for hot
lamination. This could damage the machine, foil pockets and
document.
cause the foil pockets to jam.
objects away from the infeed opening. Risk of injury!
The socket and the mains connection of the device must be freely
accessible for safety reasons so that the power supply can be
disconnected in emergencies.
The device may only be used indoors in dry rooms.
12
Page 13

Recommendation
If very soft materials (such as serviettes) or small formats are to be
laminated, then we recommend placing these within a folded piece of paper
to avoid possible jamming. The piece of paper has to be placed in the
lamination device with the folded edge first.
Identification papers and documents can lose their validity if they are
laminated, because they can then no longer be checked.
In case you wish to let another person use this product, please include these
instructions.
Exemption From Liability
We cannot guarantee that the information on the technical properties and
that contained in this document is correct. The product and, where
applicable, its accessories, described in this document are subject to
constant improvement and further development. For this reason, we reserve
the right to modify components, accessories, technical specifications and
related documentation of the product at any time without notification.
Intended Use
This laminator has been conceived for use processing hot and cold
laminating foil. It is possible to laminate pictures, maps, documents, paper
etc. up to a total thickness of 1,0 mm. Any other use is considered
unintended use. Unauthorised modifications or reconstructions are not
permitted.
13
Page 14

Features
Protection and refinement of your documents.
Laminate photographs, documents, graphics, identity cards etc. up to A2
size. The unit operates using 2 heating rollers, has a quick warm-up phase
and laminates without a carrier.
• 2 LED lamps indicate the operating states
• Automatic switch-off in the event of overheating
• High quality heating system prevents smudging and blistering
• Warm-up phase only about 4-8 minutes
• Cool down phase to room temperature, 40-60 minutes
• Foil thickness, minimum 75 µm and maximum 250 µm
Laminating system: Hot roller technology,
4 transport rollers
Laminating temperature: 110 °C – 150 °C
Maximum laminating width: 490 mm
Maximum lamination thickness: 1.0 mm
Laminating speed: 350 mm/min
Power supply: 220 - 240 Volt, 50 Hz
Power consumption: 2.3 A, 500W
Dimensions (LxWxH): 665 x 195 x 118 mm
Weight: Approx. 7,7 kg
14
Page 15

Hot Laminating
1 Connect the power cable to an easily accessible, standard electrical
socket.
Caution: Check that the voltage specifications of the unit correspond
to that of your power supply network (220 - 240 V, 50 Hz).
2 Switch on the On/Off switch on the right-hand side of the unit (I).
3 The drive motor for the transport rollers starts up, the red indicator
lamp (POWER) lights up and the warm-up phase begins. The correct
operating temperature is reached after about 3 minutes (75 µm); 4
minutes (100 µm); 5 minutes (125 µm); 6 minutes (175 µm); 7 minutes
(250 µm) and the green indicator lamp (READY) lights up.
4 Insert the document to be laminated in the pouches so that there is a
margin of approx. 3 - 5 mm to the edge of the foil on all sides.
Caution: Only use foil intended for hot laminating.
5 Insert the foil containing the document in the laminator's insertion slot.
Insert the ready closed side of the pouch first.
Note: To prevent the laminating foil from creasing, never insert the
open end of the foil pocket in the insertion slot of the laminator first. When
inserting the foil, observe the instructions on the insertion slot. The
laminating process occurs automatically.
Caution: The foil is very hot and soft when ejected following
lamination. Therefore, handle the laminated product with extreme care.
Note: To flatten the laminated product, place a book or similar heavy,
flat object, on it.
15
Page 16

Cold Laminating
1 Connect the power cable to an easily accessible, standard electrical
socket.
Caution: Check that the voltage specifications of the unit correspond
to that of your power supply network (220 - 240 V, 50 Hz).
2 Switch on the On/Off switch on the top, right-hand side of the unit
(I).
3 The drive motor for the transport rollers starts up, the red and green
indicator lamps (POWER and READY, respectively) light up.
Caution: If the laminator was switched to hot laminating shortly
before, allow it to cool down. The equipment takes about 60 minutes to cool
down.
4 Remove the protective foil from the pouch.
5 Insert the document to be laminated in the pouch so that there is a
margin of approx. 3 - 5 mm to the edge of the foil on all sides.
6 Insert the foil containing the document in the laminator's insertion slot.
Insert the ready closed side of the foil first.
Note: To prevent the laminating foil from creasing, never insert the
open end of the pouch in the insertion slot of the laminator first. When
inserting the foil, observe the instructions on the insertion slot. The
laminating process occurs automatically.
Clearing Foil Jams
The laminator is provided with a "Jam Release" function in order to clear foil
jams quickly.
1 If the foil jams, switch the equipment off and set the switch on the right
top side of the unit to its "REW" position.
2 Hold the laminator firmly and pull the foil together with the document
to be laminated out of the laminator's insertion slot.
3 Set the switch on the right top side of the unit to its "FWD" position.
4 It will probably be necessary to then clean the unit several times as
described in the Section "Cleaning and Servicing".
5 If foil jams occur repeatedly or jammed foil cannot be removed from
the laminator, please contact our hotline.
16
Page 17
Cleaning and Servicing
Deposits and residual adhesive on the transport rollers can influence the
results of the laminating process. Therefore, the transport rollers must be
cleaned periodically after use:
To do this, insert a folded piece of paper in the insertion slot. Residual
adhesive is removed and taken up by the paper when ejected. Repeat the
process several times.
Disconnect the power plug before starting to clean the unit with a damp
cloth. If necessary, the housing can be cleaned using a cloth moistened with
clean water with a little mild soap applied. Never use any solvents or
aggressive cleaning agents.
Troubleshooting
Fault Corrective measures
• Red LED (POWER) does not light
up
• Unit does not respond
• Foil jam • Check the foil pockets being used
• Laminated foil is not completely
transparent
• Check that the power plug has
been properly connected to the
power socket.
• If the fault cannot be cleared,
contact our hotline.
are the correct size.
• Only use pouches of the size
specified.
• Ensure that the pouch has been
inserted correctly in the unit.
• To clear the fault, follow the
instructions in the Section "Clearing
Foil Jams".
• Laminate the same foil again to
improve the lamination result.
Conformity of the equipment to the
EU directives is confirmed by the
CE symbol.
17
Page 18

Disposal Notes
This symbol [the crossed-out wheeled bin/PICTURE] means that the
product should be brought to the return and or separate collection
systems available to end-users, when the product has reached the
end of its lifetime. This symbol applies only to the countries within
the EEA. EEA = European Economic Area, which comprises the EU
Member States plus Norway, Iceland, and Liechtenstein.
Warranty
In the case of a defect, please return the device together with the receipt and
original packing material to the point-of-sale.
18
Page 19

Consignes importantes de sécurité
Afin de garantir un travail fiable avec la machine à plastifier, veuillez tenir compte des points suivants :
1
2
3
4
5
6
7 Il est interdit aux enfants de séjourner dans la zone de travail
8 Retirez la fiche de secteur quand vous ne vous servez pas de
9
10
11
12
13
14
15
16 Ne coupez pas les poches de plastique sur mesure. Les arêtes
Veuillez lire attentivement ces instructions et tenez-en compte
lors du maniement de votre machine.
Conservez le mode d'emploi pour une utilisation future
.
Evitez tout endommagement de la prise de secteur ou du câble
de réseau. Ne jamais torsader le câble de réseau. Ne mettez
jamais la machine en service si le câble de réseau ou la prise
de secteur sont endommagés.
N'utilisez jamais la machine dans les environs de surfaces très
chaudes ou dans un environnement humide et ne la soumettez
pas à un ensoleillement direct et à une poussière importante.
Retirez toujours la prise de secteur avant de nettoyer l'appareil.
N'utilisez jamais de solvants ou de produits d'entretien agressifs.
Des objets métalliques ne peuvent pas être plastifiés.
quand la machine est prête à fonctionner.
la machine.
Débrancher toujours immédiatement l’appareil quand une forte
odeur se fait sentir ou quand l’appareil ne fonctionne pas.
Ne touchez pas la prise de secteur avec des mains humides.
Assurez-vous que l'interrupteur Marche/Arrêt est en position
„OFF“ avant de brancher la machine à plastifier sur le réseau.
N'introduire dans l'appareil que des poches de plastique pré-
vues à cet effet comme indiqué au point Caractéristiques. Le
choix de poches de plastique trop grandes peut entraîner un
bourrage.
Ne plastifiez pas avec cet appareil des matériaux sensibles à la
chaleur comme par ex. le papier photosensible.
Vous obtiendrez de mauvais résultats si vous plastifiez des documents humides.
N'utilisez pas, pour la plastification à chaud, des poches de
plastique prévues pour la plastification à froid. La machine, la
poche de plastique et le document en seraient endommagés.
de coupe formées peuvent provoquer un bourrage.
19
Page 20

17 Eloignez de l'ouverture d'introduction toute partie de vêtement
qui bouge, cravates, bijoux, cheveux longs ou autres objets à
l'air libre. Risque de blessures !
18 Pour des raisons de sécurité, la prise et le raccordement au ré-
seau doivent être facile-ment accessibles afin de pouvoir interrompre rapidement l’alimentation électrique en cas d’urgence !
19 N’utilisez votre appareil que dans des pièces fermées et sè-
ches.
Recommandation
Si des matériaux très souples (tels que serviettes en papier) ou des petits
formats doivent être plastifiés, nous recommandons de les placer dans une
feuille de papier pliée en vue d’éviter d’éventuels bourrages. Les introduire
dans la plastifieuse, le bord de pliage en avant.
Les pièces d’identité et les documents peuvent perdre leur validité lorsqu’ils
sont plastifiés car leur authenticité ne peut plus être vérifiée.
Au cas où vous désireriez transmettre ce produit à une autre personne,
veuillez ne pas oublier de joindre ce mode d’emploi.
Exclusion de la garantie
Nous n'assurons pas de garantie en ce qui concerne l'exactitude des informations qui se rapportent aux propriétés techniques ainsi qu'à la présente
documentation. Le produit décrit dans cette documentation et, le cas
échéant, ses accessoires sont soumis à une amélioration et à un perfectionnement technique constants. Pour cette raison, nous nous réservons le droit
de modifier, à tout moment et sans annonce préalable, les composants, les
accessoires, les spécifications techniques ainsi que la documentation présente du produit.
Utilisation conforme aux prescriptions
Cette machine à plastifier permet de traiter des feuilles de plastification à
chaud et des feuilles de plastification à froid. Des images, des cartes, des
documents, du papier etc. d'une épaisseur totale de 1,0 mm max. peuvent
être plastifiés. Tout autre utilisation est considérée comme non conforme à
son usage. Il n'est pas permis d'apporter des modifications et des transformations sans concertation préalable.
20
Page 21

Caractéristiques de performance
Protection et façonnage de vos documents.
Plastifie photos, documents, graphiques, papiers d'identité etc. d'une taille
A2 max. L'appareil travaille avec 2 rouleaux chauffants, a un temps
d’échauffement rapide et plastifie sans support.
• 2 lampes DEL indiquent les états de fonctionnement
• Mise hors service automatique en cas de surchauffe
• Un système de chauffage de grande qualité empêche la formation
de vagues et de bulles
• Temps de mise en température d'env. 4 - 8 minutes seulement
• Temps de refroidissement à température ambiante d'env. 40 – 60
minutes.
• Epaisseur de la feuille de plastique d'au moins 75 µm et de 250 µm
maximum
Système de plastification : Technique à Hot-Roller
4 rouleaux de transport
Température de plastification : 110 °C – 150 °C
Largeur maximale de plastification : 490 mm
Epaisseur maximale de plastifica-
tion :
Vitesse de plastification : 350 mm/min
Tension : 220 - 240 Volt, 50 Hz
Consommation de courant : 2,3 A, 500W
Mesures (L x l x H) : 665 x 195 x 118 mm
Poids : Env. 7,7 kg
1,0 mm
21
Page 22

Plastification à chaud
1 Branchez le câble électrique dans une prise de courant standard faci-
le d'accès.
Attention : Contrôlez si les données relatives à la tension de l'appa-
reil correspondent bien à celles de votre réseau (220 - 240 V, 50 Hz).
2 Branchez l'interrupteur Marche/Arrêt situé sur le côté supérieur droit
de l'appareil (I).
3 Le moteur de commande des rouleaux de transport démarre, le
voyant lumineux rouge (POWER) s'allume et la phase de mise en
température commence. Au bout d'env. 3 minutes (75 µm); 4 minutes
(100 µm); 5 minutes (125 µm); 6 minutes (175 µm); 7 minutes (250
µm) la température de fonctionnement est obtenue et l'indicateur lumineux vert (READY) s'allume.
4 Introduisez le matériau à plastifier dans la poche de plastique de ma-
nière à ce que de tous les côtés, il y ait une marge d'env. 3 à 5 mm
par rapport au bord de la feuille de plastique.
Attention : N'utilisez que des feuilles à plastifier à chaud.
5 Introduisez la feuille de plastique avec le matériau à plastifier dans la
fente d'introduction de la machine à plastifier. Introduire ici en premier
le côté fermé de la feuille de plastique.
Remarque : Afin d'éviter que la feuille de plastique forme un pli, n'in-
troduisez jamais le côté ouvert de la feuille de plastique dans la fente d'introduction de la machine. Tenez compte des instructions données au niveau
de la fente d'introduction quand vous introduisez la feuille de plastique.
L'opération de plastification se fait automatiquement.
Attention : La feuille de plastique sortante est très chaude et molle
après la plastification. C'est pourquoi il faut manier prudemment le produit
plastifié.
Remarque : Afin d'aplanir le produit plastifié, on peut presser celui-ci
sous un livre ou sous un autre objet plat et lourd.
22
Page 23

Plastification à froid
1 Branchez le câble électrique dans une prise de courant standard faci-
le d'accès.
Attention : Contrôlez si les données relatives à la tension de l'appa-
reil correspondent bien à celles de votre réseau (220 - 240 V, 50 Hz).
2 Branchez l'interrupteur Marche/Arrêt situé sur le côté supérieur droit
de l'appareil (I).
3 Le moteur d'entraînement des rouleaux de transport tourne, le voyant
lumineux rouge (POWER) et le voyant lumineux vert (READY) s'allument.
Attention : Si vous venez d'utiliser la machine à plastifier pour plastifier à chaud, vous devez la faire refroidir. Le temps de refroidissement est
de 60 minutes au maximum.
4 Retirez la feuille de protection de la poche de plastique.
5 Introduisez le matériau à plastifier dans la poche de plastique de ma-
nière à ce que de tous les côtés, il y ait une marge d'env. 3 à 5 mm
par rapport au bord de la feuille de plastique.
6 Introduisez la feuille de plastique avec le matériau à plastifier dans la
fente d'introduction de la machine à plastifier. Introduire ici en premier
le côté fermé de la feuille de plastique.
Remarque : Afin d'éviter que la feuille de plastique forme un pli, n'in-
troduisez jamais le côté ouvert de la feuille de plastique dans la fente d'introduction de la machine. Tenez compte des instructions données au niveau
de la fente d'introduction quand vous introduisez la feuille de plastique.
L'opération de plastification se fait automatiquement.
23
Page 24

Elimination de bourrage
Cette machine à plastifier est équipée de la fonction „Jam Release“ (déblocage de bourrage) permettant d'éliminer rapidement un bourrage.
1 En cas de blocage de la feuille de plastique, débrancher l'appareil et
mettre l'interrupteur situé sur le côté droit en position „REW“.
2 Maintenez fermement la machine à plastifier et tirez la feuille de plas-
tique avec le matériau à plastifier hors de la fente d'introduction de la
machine à plastifier.
3 Remettez en position „FWD" l'interrupteur situé sur le côté droit de
l'appareil.
4 Ensuite, l'appareil doit vraisemblablement être nettoyé plusieurs fois,
comme décrit au point „Entretien et nettoyage“.
5 Si les bourrages par les feuilles de plastique se répètent continuelle-
ment ou si la feuille bloquée ne peut plus être retirée de la machine à
plastifier, veuillez vous adresser à notre hotline.
Entretien et nettoyage
Des dépôts et des restes de colle sur les rouleaux de transport peuvent influencer le résultat de la plastification. C'est pourquoi les rouleaux de transport doivent être nettoyés périodiquement après l'emploi :
A cet effet, introduire une feuille de papier pliée dans la fente d'introduction.
Les restes de colle seront emportés par le papier sortant. Répéter plusieurs
fois l'opération.
Retirez toujours la prise de secteur avant d'effectuer un nettoyage humide
de l'appareil. Si nécessaire, le boîtier peut être nettoyé avec un savon doux
et un chiffon trempé dans de l'eau claire. N'utilisez jamais de solvants ou de
produits d'entretien agressifs.
24
Page 25
Elimination d'erreurs
Erreurs Solutions
• Le voyant DEL rouge (POWER)
ne s'allume pas
• L'appareil ne réagit pas
• Bourrage par les feuilles de plasti-
que
• La feuille plastifiée n'est pas par-
faitement transparente
• Contrôlez si le câble électrique a
été correctement mis dans la prise
de courant standard.
• Si l'erreur n'a pas été éliminée,
adressez-vous à notre hotline.
• Contrôlez la taille de la poche de
plastique utilisée.
• N'utilisez que des poches de plastique de la taille indiquée.
• Assurez-vous que la poche de
plastique a été introduite bien droite dans l'appareil.
• Pour éliminer le bourrage, suivez
les instructions données au point
„Elimination de bourrage“.
• Plastifiez cette feuille une nouvelle
fois pour améliorer le résultat de la
plastification.
Le signe CE confirme la conformité
aux directives UE.
Reseignement sur la évacuation
Ce symbole (un conteneur à déchets barré d´une croix) signifie que
le produit, en fin de vie, doit être retourné à une des systèmes de
collecte mis à la disposition des utilisateurs finaux. Ce symbole
s’applique uniquement aux pays de l’EEE. EEE = Espace
économique européen, qui regroupe les États membres de l’UE plus
la Norvège, l’Islande et le Liechtenstein.
Garantie
Cher client,
Nous sommes très heureux que vous ayez choisi cet appareil.
En cas de défaut, veuillez retourner l’appareil dans son emballage
d’origine et accompagné du bon d’achat au magasin où vous l’avez
acheté.
25
Page 26

Instrucciones de seguridad importantes
Tenga en cuenta los aspectos siguientes a fin de garantizar un trabajo
fiable con el aparato laminador:
1
2
3
4
5
6
7 Para niños está prohibida la estancia en el área de trabajo de la
8 En caso de no utilización del aparato se debe sacar la clavija
9
10
11
12
13
14
15
Lea las presentes instrucciones detenidamente y tenga las
mismas en cuenta a la hora de manejar el aparato.
Guardar el manual de instrucciones para cualquier utilización
posterior
.
Evitar cualquier daño de la clavija de red o del cable de red.
Jamás se debe torcer el cable de red. En caso de cualquier
daño del cable de red o de la clavija de red no se debe poner el
aparato en servicio.
No utilice el aparato ceca de superficies calientes o en un
entorno húmedo y proteja el mismo frente a la radiación solar
directa y fuertes efectos de polvo.
Antes de la limpieza del aparato siempre se deba sacar la
clavija de red. No utilice disolventes o agentes de limpieza
agresivos.
No se pueden laminar objetos metálicos.
máquina en disposición de servicio.
de red.
Se debe desconectar el aparato inmediatamente cuando se
percibe un olor penetrante o cuando el aparato no se encuentra
en servicio.
Con las manos húmedas no se debe entrar en contacto con la
clavija de red.
Asegúrese de que el interruptor de conectado/desconectado se
encuentra en la posición "OFF“ antes de conectar el aparato
laminador a la red de corriente.
En el aparato sólo se deben introducir fundas de película
transparente previstas según las indicaciones del punto
Características prestacionales. Unas fundas de película
transparente excesivamente grandes pueden originar atascos
de película transparente.
No lamine materiales termosensibles como, por ejemplo, papel
térmico, con este aparato.
Al laminar documentos húmedos no se consiguen buenos
resultados de laminación.
Para la laminación en caliente no debe utilizar fundas de
película transparente previstas para la laminación en frío. En tal
26
Page 27

caso, la máquina, la funda de película transparente y el
documento sufrirían daños.
16 No corte las fundas de película transparente. Los cantos de
corte que se producen pueden originar atascos de película
transparente.
17 Las partes sueltas de la ropa, corbatas, bisutería, pelo largo u
otros objetos sueltos deben mantenerse alejados del orificio de
entrada. ¡Peligro de lesiones!
18 Por motivos de seguridad, la caja de enchufe y la conexión a
red del aparato deberán quedar accesibles, para facilitar la
desconexión de la alimentación eléctrica en caso de
emergencia.
19 Utilice el aparato sólo en locales cerrados y secos.
Recomendación
Cuando se trata de laminar materiales muy blandos (como servilletas) o
formatos pequeños, entonces recomendamos, a fin de evitar posibles
atascos, depositar el producto a laminar en una hoja de papel plegado. Éste
se debe introducir con el borde de doblado hacia delante en el aparato
laminador.
Si se laminan Documentos Nacionales de Identidad y otros documentos,
éstos pueden perder su validez, ya que a continuación no es posible
comprobar la autenticidad de los documentos.
Si en algún momento se entrega el producto a otra persona, siempre se
deberá adjuntar las presentes instrucciones de uso.
Exclusión de responsabilidad
No asumimos garantía alguna para la integridad de las informaciones que
se refieren a características técnicas, así como a la presente
documentación. El producto descrito en la presente documentación y, en
caso dado, sus accesorios están sujetos a la mejora continua y al desarrollo
ulterior. Por este motivo nos reservamos el derecho de modificar en
cualquier momento y sin previa notificación los componentes, accesorios,
especificaciones técnicas, así como la presente documentación del
producto.
Uso previsto
Con este Aparato laminador se pueden procesar películas transparentes de
laminación en caliente y películas transparentes de laminación en frío. Se
pueden laminar figuras, tarjetas, documentos, papel, etc. hasta un espesro
27
Page 28

total de 1,0 mm. Cualquier otro uso se considera no conforme al objetivo
previsto. Se prohibe expresamente cualquier modificación o transformación.
Características prestacionales
Protección y mejora de sus documentos.
Para laminar fotos, documentos, gráficos, Documentos Nacionales de
Identidad, etc. hasta un tamaño máximo de DIN A2. El aparato trabaja con 2
rodillos calefactores, tiene un rápido Tiempo de calentamiento y lamina sin
materias portantes.
• Las 2 lámparas de LED muestran los estados de servicio
• Desconexión automática en caso de sobrecalentamiento
• El sistema de calentamiento de alta calidad impide la formación de
marcas y burbujas
• Tiempo de calentamiento reducido de sólo aproximadamente 4 – 8
minutos
• El tiempo de enfriamiento hasta alcanzar temperatura ambiente es
de aproximadamente 40 - 60 minutos.
• Espesor de película transparente de al menos 75 µm y de 250 µm
como máximo
Sistema de laminación: Técnica Hot Roller
4 rodillos de transporte
Temperatura de laminación: 110 °C – 150 °C
Máxima anchura de laminación: 490 mm
Máximo espesor de laminación: 1,0 mm
Velocidad de laminación: 350 mm/min
Alimentación de tensión: 220 - 240 Voltios, 50 Hz
Consumo de corriente: 2,3 A, 500W
Dimensiones (longitud x anchura x
altura):
Peso: Aproximadamente 7,7 kg
665 x 195 x 118 mm
28
Page 29

Laminación en caliente
1 Conecte el cable de corriente a una caja de enchufe estándar
fácilmente accesible.
Atención: Compruebe si la indicación de tensión del máquina
coincide con la de su red de corriente (220 - 240 V, 50 Hz).
2 Conecte el interruptor de conectado/desconectado en la parte
superior derecha del aparato (I).
3 El motor de accionamiento para los rodillos de transporte arranca, la
lámpara de indicación roja (POWER) se ilumina y la fase de
calentamiento comienza. Al cabo de aproximadamente 3 minutos (75
µm); 4 minutos (100 µm); 5 minutos (125 µm); 6 minutos (175 µm); 7
minutos (250 µm) se alcanza la temperaura de servicio correcta y la
lámpara de indicación verde (READY) se ilumina.
4 Introduzca el producto a laminar en el compartimento de laminación
de tal modo que exista una distancia de aproximadamente 3 a 5 mm
respecto al borde de la película transparente en todos los lados.
Atención: Utilice exclusivamente películas transparentes de
laminación en caliente.
5 Introduzca la película transparente junto al producto a laminar en la
ranura de entrada del aparato laminador. El lado cerrado de la
película transparente debe ser introducida en primer lugar.
Advertencia: A fin de evitar el plegado de la películas
transparentes de laminación jamás se debe introducir primero el lado
abierto de la películas transparentes de laminación en la ranura de entrada
del aparato laminador. Durante la introducción de la película transparente se
deben tener en cuenta las instrucciones que figuran en la ranura de entrada.
El proceso de laminación se realiza de forma automática.
Atención: La película transparente saliente está muy caliente y
blanda después de la laminación. Por lo tanto, se debe manejar el producto
laminado con precación.
Advertencia: Para aplanar el producto laminado se puede
prensar el mismo con un contabilizar o con otro objeto pesado y plano.
29
Page 30

Laminación en frío
1 Conecte el cable de corriente a una caja de enchufe estándar
fácilmente accesible.
Atención: Compruebe si la indicación de tensión del máquina
coincide con la de su red de corriente (220 - 240 V, 50 Hz).
2 Conecte el interruptor de conectado/desconectado en la parte
superior derecha del aparato (I).
3 El motor de accionamiento para los rodillos de transporte arranca, la
lámpara de indicación roja (POWER) y la lámpara de indicación verde
(READY) se iluminan.
Atención: Si ha utilizado el aparato laminador recientemente para
la laminación en caliente, debe dejar que se enfríe. El tiempo de
enfriamiento dura hasta 60 minutos.
4 Retire la película de protección de la funda de película transparente.
5 Introduzca el producto a laminar en el compartimento de laminación
de tal modo que exista una distancia de aproximadamente 3 a 5 mm
respecto al borde de la película transparente en todos los lados.
6 Introduzca la película transparente junto al producto a laminar en la
ranura de entrada del aparato laminador. El lado cerrado de la
película transparente debe ser introducida en primer lugar.
Advertencia: A fin de evitar el plegado de la películas transparentes
de laminación jamás se debe introducir primero el lado abierto de la
películas transparentes de laminación en la ranura de entrada del aparato
laminador. Durante la introducción de la película transparente se deben
tener en cuenta las instrucciones que figuran en la ranura de entrada. El
proceso de laminación se realiza de forma automática.
30
Page 31
Eliminar un atasco de pelíula transparente
Este aparato laminador está equipado con la función "Jam Release“ para
poder eliminar rápidamente cualquier atasco de película transparente.
1 En caso de bloqueo de la película transparente se debe desconectar
el aparato y posicionar el interruptor en la parte izquierda del aparato
a la posición "REW“.
2 Sujete el aparato laminador y pase la película transparente con
presión junto al producto a laminar por la ranura de entrada del
aparato laminador.
3 Vuelva a situar el interruptor situado en la parte izquierda del aparato
a la posición "FWD“.
4 A continuación es muy probable que haya que limpiar el aparato
repetidamente según se describe en el punto "Cuidado y limpieza“.
5 Si los atascos de película transparente se repiten continuamente o si
no es posible sacar la película transparente atascada del aparato
laminador rogamos se ponga en contacto con nuestra línea de
asistencia telefónica.
Cuidado y limpieza
Las acumulaciones y restos de pegamento en los rodillos de transporte
pueden repercutir sobre el resultado de laminación. Por este motivo se
deben limpiar los rodillos de transporte periódicamente después de la
utilización del aparato:
A tal fin se debe introducir una hoja plegada de papel en la ranura de
entrada. El papel saliente arrastra los restos de pegamento. Este proceso
se debe repetir varias veces.
Antes de la limpieza en húmedo del aparato siempre se deba sacar la
clavija de red. Si fuera necesario, se puede limpiar la carcasa con un paño
empapado en jabón suave y agua transparente. No utilice disolventes o
agentes de limpieza agresivos.
Indicación sobre la eliminación de residuos
Este símbolo (imagen de un cubo de basura tachado) significa que
el producto deberia ser llevado a los sistemas de recogida
dispuestos para los usuarios finales cuando llegue al final de su
vida útil. Este símbolo solo tiene validez en los países de la EEA.
EEA incluye a los países miembros de la UE y Noruega, Islandia y
Liechtenstein.
31
Page 32
Eliminación de fallos
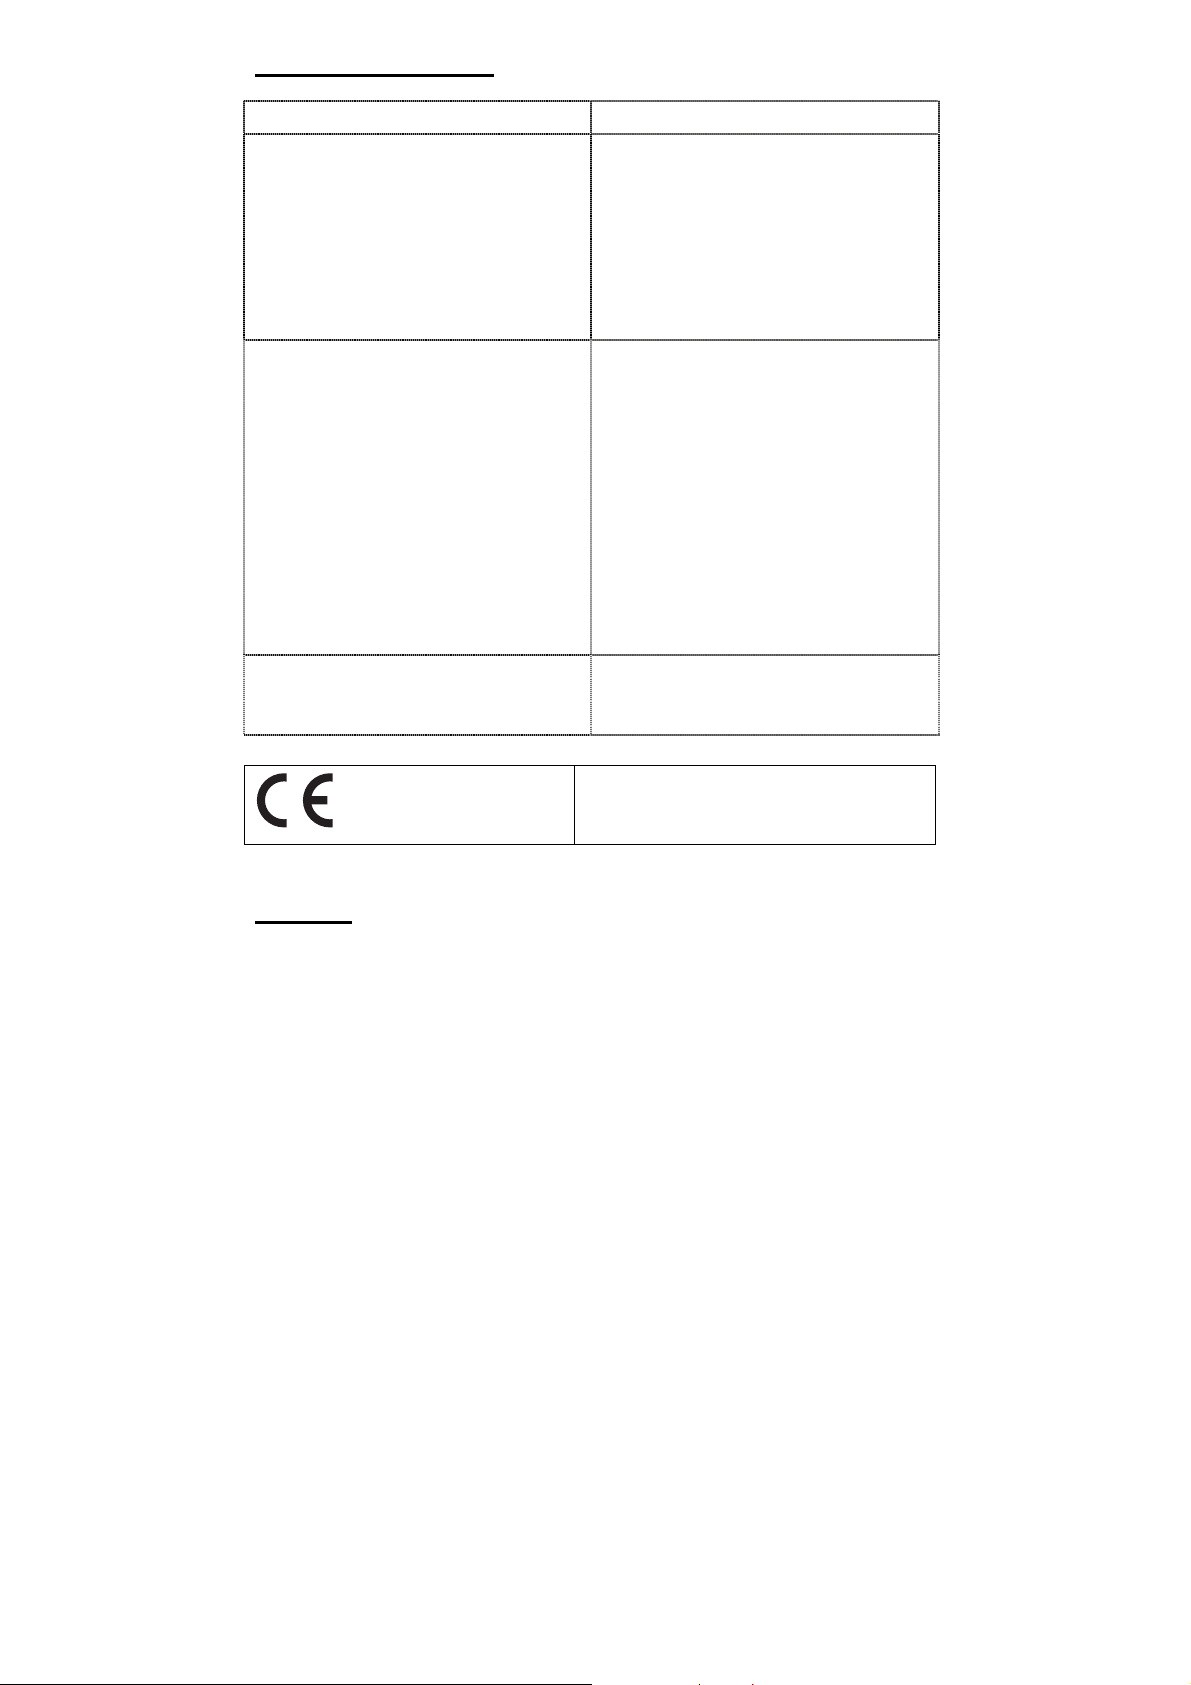
Error Soluciones
• El LED rojo (POWER) no se
ilumina
• El aparato no reacciona
• Atasco de pelíula transparente • Compruebe el tamaño de la funda
• La película transparente laminada
no es completamente
transparente
• Compruebe si el cable de
corriente está correctamente
enchufado en la caja de enchufe
estándar.
• Si no ha sido posible eliminar el
error rogamos se ponga en
contacto con nuestra línea de
asistencia telefónica.
de película transparente utilizada.
• Utilice sólo fundas de película
transparente del tamaño indicado.
• Asegúrese de que la funda de
película transparente haya sido
introducida de forma recta en el
aparato.
• Siga las instrucciones que figuran
en el punto "Eliminar un atasco de
pelíula transparente“ para eliminar
el atasco.
• Vuelva a laminar la misma
película transparente para mejorar
el resultado de laminación.
La conformidad con las
directivas de la UE queda afirmada
mediante el símbolo CE.
Garantía
Estimado cliente,
nos alegramos de que Usted se haya decidido por este aparato.
En caso de un defecto devuelva el aparato junto con el justificante de
compra y el embalaje original al lugar donde lo ha adquirido.
32
Page 33

Istruzioni importanti di sicurezza
Per garantire un funzionamento affidabile della plastificatrice, si prega di
osservare quanto segue:
1
2
3
4
5
6
7 Tenere lontano i bambini dal campo di lavoro dell'apparecchio
8 In caso di inutilizzo dell'apparecchio estrarre la spina di alimen-
9
10
11
12
13
14
15
16 Non tagliare le pellicole di plastificazione nel tentativo di adat-
Leggere attentamente queste istruzioni ed osservarle scrupolosamente nell'utilizzo del vostro apparecchio.
Conservare le istruzioni per l'uso per gli utilizzi futuri
.
Evitare danneggiamenti della spina o del cavo di alimentazione.
Non attorcigliare il cavo di alimentazione. In caso di spina o cavo di alimentazione danneggiati non mettere in funzione l'apparecchio.
Non utilizzare l'apparecchio nelle vicinanze di superfici roventi o
in ambiente umido e proteggerlo dall'esposizione diretta dei
raggi del sole e dall'influenza di ambienti fortemente polverosi.
Staccare sempre la spina di alimentazione prima della pulizia
dell'apparecchio. Non utilizzare solventi o detergenti aggressivi.
Non è possibile la plastificazione di oggetti metallici.
in condizioni di funzionamento.
tazione.
Procedere allo spegnimento immediato dell’apparecchio non
appena si sviluppa un forte odore o in caso di non impiego.
Non toccare la spina di alimentazione con le mani bagnate.
Assicurarsi che l'interruttore ON/OFF sia in posizione di „OFF“ pri-
ma di collegare la plastificatrice alla rete elettrica.
Inserire nell'apparecchio solo pellicole per plastificazione da
come descritto al punto "Caratteristiche di prestazione". La
scelta di pellicole per plastificazione troppo grandi può causare
un intasamento della pellicola.
Evitare di compiere con l'apparecchio la plastificazione di materiali sensibili al calore come per es. carta termica per fax.
In caso di plastificazione di documenti umidi i risultati saranno
insoddisfacenti.
Evitare durante la plastificazione a caldo l'uso di pellicole per
plastificazione previste invece per la plastificazione a freddo. In
caso contrario l'apparecchio, la pellicola di plastificazione ed il
documento saranno danneggiati.
tarne le dimensioni. Gli spigoli da taglio risultanti possono infatti
causare un intasamento della pellicola.
33
Page 34

17 Tenere lontano dall'apertura di inserimento le parti libere del-
l'abbigliamento, cravatte, gioielli, capelli lunghi o altri oggetti liberi. Pericolo di lesioni!
18 Per motivi di sicurezza, la presa e il cavo di rete
dell’apparecchio devono essere facilmente accessibili per poter
disinserire l’alimentazione elettrica in caso d’emergenza!
19 Impiegare l’apparecchio solo in ambienti chiusi, asciutti.
Consiglio
Se si tratta di plastificare materiali molto morbidi (come tovaglioli di carta) o
formati particolarmente piccoli, si consiglia di posizionare l’oggetto da plastificare tra un ulteriore foglio di carta ripiegata allo scopo di evitare intasamenti. Rivolgere in tal caso il foglio con la piegatura verso la plastificatrice.
Carte d’identità e documenti possono perdere la loro validità in caso di plastificazione, visto che l’autenticità del documento non è così più verificabile.
n caso di cessione del prodotto ad un altra persona, si prega di corredare
sempre l’apparecchio con le presenti istruzioni per l’uso.
Esclusione di responsabilità
Non si assume nessuna garanzia per l'esattezza delle informazioni che fanno riferimento alle caratteristiche tecniche ed alla presente documentazione
allegata. Il prodotto descritto in questa documentazione ed i suoi accessori
eventualmente necessari sono soggetti a continue migliorie e sviluppo. Per
tale motivo ci riserviamo il diritto di modificare in qualsiasi momento e senza
preavviso alcuno, componenti, accessori, specifiche tecniche e la qui presente documentazione del prodotto.
Impiego conforme alle disposizioni
Con questa plastificatrice è possibile applicare pellicole per plastificazione a
caldo e a freddo. Possono essere plastificate fotografie, cartine, documenti,
lettere ecc. con uno spessore complessivo di 1,0 mm. Qualsiasi altro impiego è da ritenersi non conforme alle disposizioni. Non sono ammesse modifiche o variazioni arbitrarie.
34
Page 35

Caratteristiche di prestazione
Protezione e valorizzazione per i vostri documenti.
Plastificazione di fotografie, documenti, grafiche, tessere ecc. fino ad alla
grandezza DIN A2. L'apparecchio dispone di 2 rulli a caldo, il tempo di riscaldamento è breve e la plastificazione viene eseguita senza supporto.
• 2 spie LED indicano lo stato di funzionamento
• spegnimento automatico in caso di surriscaldamento
• ottimo sistema di riscaldamento contro la formazione di strie e bolle
• tempo di riscaldamento di soli ca. 4–8 minuti
• tempo di raffreddamento fino a temperatura ambiente
ca.40 - 60 minuti
• spessore di pellicola da minimo 75 µm a massimo 250 µm
Sistema di plastificazione: Tecnica "rullo a caldo"
4 rulli di trasporto
Temperatura di plastificazione: 110 °C – 150 °C
Larghezza di plastificazione mas-
sima:
Spessore massimo di plastifica-
zione:
Velocità di plastificazione: 350 mm/min
Tensione di alimentazione: 220 - 240 Volt, 50 Hz
Assorbimento di corrente: 2,3 A; 500W
Dimensioni (LxPxH): 665 x 195 x 118 mm
Peso: ca. 7,7 kg
490 mm
1,0 mm
35
Page 36

Plastificazione a caldo
1 Collegare il cavo di alimentazione ad una presa di corrente facilmente
accessibile.
Attenzione: Verificare che il valore di tensione dell'apparecchio corri-
sponda con quello della rete elettrica (220 - 240 V, 50 Hz).
2 Accendere l'interruttore ON/OFF sul lato superiore destro dell'appa-
recchio (I).
3 Il motore di azionamento dei rulli di trasporto si avvia, la lampada spia
rossa (POWER) si accende ed inizia la fase di riscaldamento. Dopo
circa 3 minuti (75 µm); 4 minuti (100 µm); 5 minuti (125 µm); 6 minuti
(175 µm); 7 minuti (250 µm) viene raggiunta la corretta temperatura
d'esercizio e si accende la lampada spia verde (READY).
4 Inserire il foglio da plastificare nella busta in pellicola in modo da ave-
re su tutti i lati una distanza di circa 3-5 mm dal bordo.
Attenzione: Utilizzare esclusivamente pellicole per plastificazione a
caldo.
5 Inserire la pellicola insieme al foglio da plastificare nella fessura di in-
serimento della plastificatrice. Inserire per primo il lato chiuso della
busta in pellicola.
Avvertenza: Per evitare la piegatura della pellicola di plastificazio-
ne non inserire mai per primo il lato aperto della busta in pellicola nella fessura di inserimento della plastificatrice. Nell'inserimento della pellicola
osservare le istruzioni riportate sulla fessura di inserimento. La procedura di
plastificazione avviene automaticamente.
Attenzione: La pellicola in uscita dalla plastificatrice è molto calda e
molle. Maneggiare quindi con cautela il prodotto plastificato.
Avvertenza: Per la spianatura del prodotto plastificato è possibile
pressarlo con un libro o con un altro oggetto piano e pesante.
36
Page 37

Plastificazione a freddo
1 Collegare il cavo di alimentazione ad una presa di corrente facilmente
accessibile.
Attenzione: Verificare che il valore di tensione dell'apparecchio corri-
sponda con quello della rete elettrica (220 - 240 V, 50 Hz).
2 Accendere l'interruttore ON/OFF sul lato superiore destro dell'appa-
recchio (I).
3 Il motore di azionamento dei rulli di trasporto si avvia, la lampada spia
rossa (POWER) e la lampada spia verde (READY) si accendono.
Attenzione: Avendo impiegato la plastificatrice poco prima per compiere la plastificazione a caldo, si renderà necessario fare raffreddare la plastificatrice fino. L'intervallo di raffreddamento dura fino a 60 minuti.
4 Eliminare la pellicola protettiva dalla pellicola per plastificazione.
5 Inserire il foglio da plastificare nella busta in pellicola in modo da ave-
re su tutti i lati una distanza di circa 3-5 mm dal bordo.
6 Inserire la pellicola insieme al foglio da plastificare nella fessura di in-
serimento della plastificatrice. Inserire per primo il lato chiuso della
busta in pellicola.
Avvertenza: Per evitare la piegatura della pellicola di plastificazio-
ne non inserire mai per primo il lato aperto della busta in pellicola nella fessura di inserimento della plastificatrice.
Nell'inserimento della pellicola osservare le istruzioni riportate sulla fessura
di inserimento. La procedura di plastificazione avviene automaticamente.
37
Page 38
Rimuovere l'intasamento da pellicola
Questa plastificatrice è equipaggiata con la funzione „Jam Release / Rimozione intasamento“, allo scopo di rimuovere rapidamente eventuali intasamenti causati dalle pellicole.
1 In presenza di un intasamento causato dalla pellicola, spegnere l'ap-
parecchio e spostare l'interruttore presente rispettivamente sul lato sinistro in posizione di „REW“.
2 Tenere ferma la plastificatrice ed estrarre la pellicola assieme al do-
cumento da plastificare dalla fessura di introduzione della plastificatrice.
3 Spostare quindi l'interruttore presente sul lato sinistro dell'apparecchio
nuovamente in posizione „FWD“.
4 Fatto questo sarà probabilmente necessario pulire l'apparecchio più
volte seguendo quanto riportato al punto „Cura e pulizia“.
5 Nel caso di frequenti intasamenti o non potendo estrarre la pellicola
causa dell'intasamento dalla plastificatrice, si prega di rivolgersi alla
nostra hotline.
Cura e pulizia
Incrostazioni e residui di adesivo sui rulli di trasporto possono influire sul risultato di plastificazione. Effettuare quindi periodicamente una pulizia dei rulli di trasporto dopo l'utilizzazione:
A questo scopo inserire nella fessura di inserimento un foglio di carta ripiegato. I residui di adesivo vengono asportati dal foglio di carta in uscita. Ripetere più volte il procedimento.
Staccare sempre la spina di alimentazione prima di inumidire l'apparecchio
per pulirlo. Qualora necessario, la custodia può essere pulita con un panno
inumidito in sapone neutro ed acqua pulita. Non utilizzare solventi o detergenti aggressivi.
Indicazione sopra l’eliminazione dei rifiuti
Questo simbolo significa che il prodotto, giunto a fine vita,
dovrebbe essere conferito ai punti di raccolta differenziata a
disposizione dell’utente finale. Questo simbolo si applica ai paesi
aderenti all’EEA. EEA = Europea Economic Area che
comprende gli stati membri dell’EU, compresi Norvegia, Islanda
e Liechtenstein.
38
Page 39
Soluzione di problemi
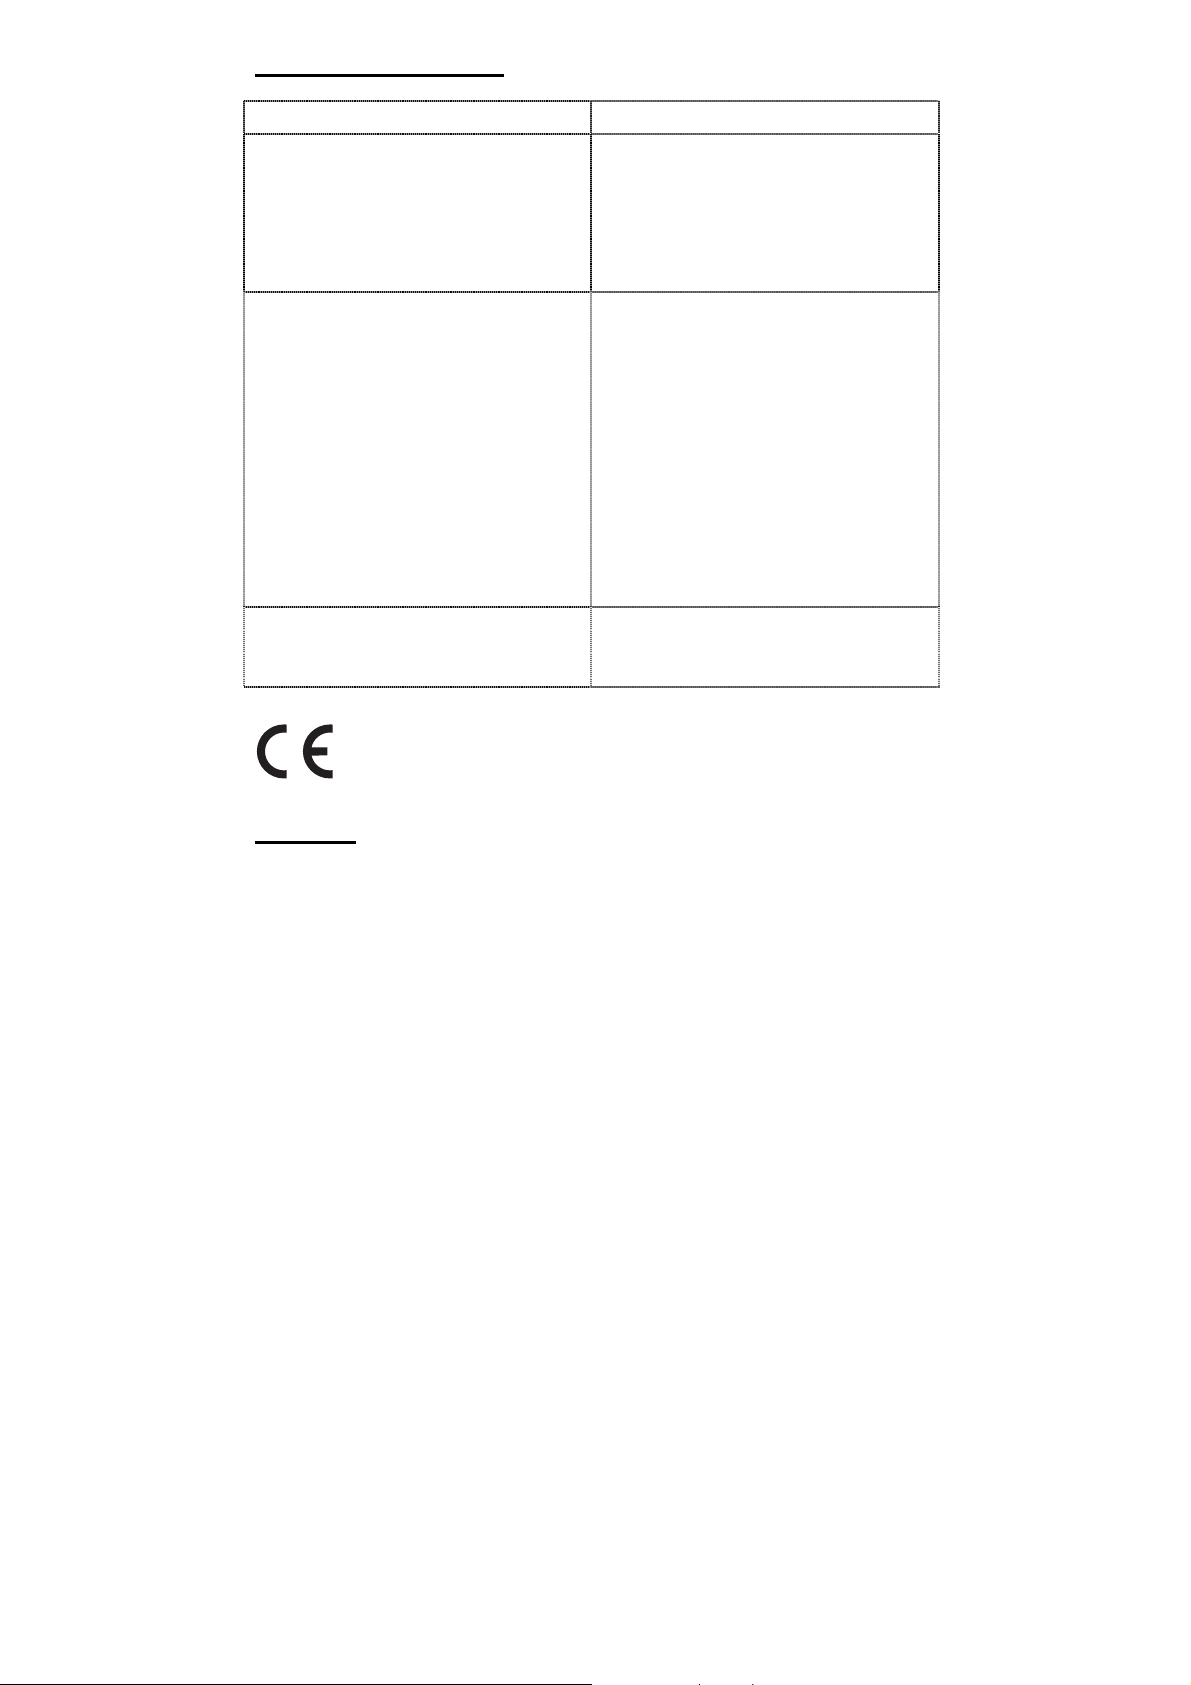
Problema Soluzione
• Spia LED rossa (POWER) non si
accende più
• Apparecchio non reagisce
• Intasamento da pellicola • Verificare la dimensione della pel-
• Pellicola plastificata non è comple-
tamente trasparente
• Controllare il corretto inserimento
del cavo elettrico nella presa standard.
• Nel caso di mancata soluzione del
problema, rivolgersi alla nostra
hotline.
licola per plastificazione utilizzata.
• Impiegare solo pellicole per plastificazione nelle dimensioni indicate.
• Assicurarsi che la pellicola di plastificazione sia stata appena inserita nell'apparecchio.
• Per rimuovere l'intasamento, seguire le istruzioni riportate al punto
„Rimuovere l'intasamento da pellicola“.
• Sottoporre a plastificazione la
stessa pellicola al fine di migliorare il risultato della plastificazione.
La conformità con le
normative EU viene confermata dal
marchio CE.
Garanzia
Caro cliente,
ci congratuliamo con Lei per aver scelto questo apparecchio.
In caso di difetti La preghiamo di ritornare l'apparecchio, completo di imballo
originale e scontrino di acquisto, al punto vendita dove è stato effettuato
l'acquisto.
39
Page 40

Belangrijke veiligheidsinstructies
Neem het volgende in acht om er zeker van te zijn dat u het
lamineerapparaat correct gebruikt:
1
2
3
4
5
6
7 Kinderen moeten uit de buurt blijven van een ingeschakeld
8 Als het apparaat niet wordt gebruikt dan moet de stekker uit het
9
10
11
12
13
14
15
16 Snij lamineerhoesjes niet op maat. De snijkanten die hierbij
17 Loszittende delen van kleding, stropdassen, sieraden, lang
Lees deze instructies aandachtig door en volg ze op bij het
gebruik van het apparaat.
Gebruiksaanwijzing voor toekomstig gebruik bewaren
.
Beschadiging van netstekker en netsnoer voorkomen. Netsnoer
niet laten opkrullen. Het apparaat niet in gebruik nemen als het
netsnoer of de stekker beschadigd is.
Gebruik het apparaat niet in de buurt van hete oppervlakken of
in een vochtige omgeving en bescherm het tegen directe
zonnestraling en sterke stofbelasting.
Vóór het schoonmaken van het apparaat altijd de stekker uit het
stopcontact trekken. Gebruik geen oplosmiddelen of agressieve
reinigingsmiddelen.
Metalen voorwerpen kunnen niet gelamineerd worden.
apparaat.
stopcontact worden getrokken.
Het apparaat altijd onmiddellijk uitschakelen als u een sterk
prikkelende geur ruikt of als het apparaat niet wordt gebruikt.
Netstekker niet met vochtige handen vastpakken.
Overtuig uzelf ervan dat de Aan/Uit-schakelaar op 'Off' staat
voordat u het lamineerapparaat op het lichtnet aansluit.
Alleen geschikte lamineerhoesjes (zie 'Kenmerken') in het
apparaat plaatsen. Te groot gekozen lamineerhoesjes kunnen
tot gevolg hebben dat de folie klem komt te zitten.
Lamineer met dit apparaat geen hittegevoelige materialen,
zoals thermisch papier.
Bij het lamineren van vochtige documenten bereikt u slechte
lamineerresultaten.
Gebruik bij het heetlamineren geen lamineerhoesjes die
bestemd zijn voor koudlamineren. Het apparaat, het
lamineerhoesje en het document worden hierbij beschadigd.
ontstaan kunnen tot gevolg hebben dat de folie klem komt te
zitten.
haar of andere losse voorwerpen uit de buurt van de
40
Page 41

invoeropening houden. Gevaar voor persoonlijk letsel!
18 Stopcontact en netstekker van het apparaat moeten om
redenen van veiligheid vrij toegankelijk zijn opdat u de
stroomvoorziening in geval van nood snel kunt onderbreken!
19 Het apparaat mag alleen in gesloten, droge ruimten worden
gebruikt.
Advies
Als zeer zachte materialen (zoals servetten) of kleine formaten moeten
worden gelamineerd dan adviseren wij om het materiaal in een gevouwen
vel papier te leggen. Zo voorkomt u vastlopers. Dit vel moet met de vouw
naar voren in het lamineerapparaat worden ingevoerd.
Legitimatiebewijzen en documenten kunnen ongeldig worden als ze worden
gelamineerd, omdat de echtheid van het document vervolgens niet meer te
controleren is.
Mocht u het product ooit aan een andere persoon willen doorgeven, voeg
dan deze gebruiksaanwijzing altijd bij.
Uitsluiting van aansprakelijkheid
Wij aanvaarden geen aansprakelijkheid voor de juistheid van deze
gebruiksaanwijzing of de informatie die betrekking heeft op technische
eigenschappen van het product. Het in deze documentatie beschreven
product en de bijbehorende accessoires worden voortdurend verder
ontwikkeld en verbeterd. Daarom behouden wij ons het recht voor om
componenten, accessoires, technische specificaties en deze
gebruiksaanwijzing zonder voorafgaande aankondiging op elk gewenst
moment te wijzigen.
Voorgeschreven gebruik
Met dit lamineerapparaat kunnen heetlamineerfolies en koudlamineerfolies
worden bewerkt. Er kunnen foto's, kaarten, documenten, papier enzovoort
tot een totale dikte van 1,0 mm worden gelamineerd. Elk ander gebruik is in
strijd met de voorschriften. Eigenmachtige wijzigingen of ombouw zijn niet
toegestaan.
41
Page 42

Kennmerken
Bescherming en veredeling van uw documenten.
Lamineert foto's, documenten, grafieken, pasjes enzovoort tot formaat DIN
A2. Het apparaat werkt met 2 verwarmingsrollen heeft een korte opwarmtijd
en lamineert zonder drager.
• 2 LED's signaleren de bedrijfsstatus
• Automatische uitschakeling bij oververhitting
• Hoogwaardig verwarmingssysteem voorkomt vorming van rimpels of
bellen
• Opwarmtijd slechts 4-8 minuten
• Afkoelingstijd tot kamertemperatuur ongeveer 40 - 60 minuten.
• Dikte van de folie minimaal 75 µm en maximaal 250 µm
Lamineersysteem: Hotrol-techniek
4 transportrollen
Lamineertemperatuur: 110 °C – 150 °C
Maximale lamineerbreedte: 490 mm
Maximale lamineerdikte: 1,0 mm
Lamineersnelheid: 350 mm/min
Voedingsspanning: 220 – 240 volt, 50 Hz
Opgenomen stroom: 2,3 A; 500W
Afmetingen (l × b × h): 665 x 195 x 118 mm
Gewicht: ca. 7,7 kg
42
Page 43

Heetlamineren
1 Steek de netstekker in een goed bereikbaar stopcontact.
Let op: Controleer of de voedingsspanning die op het apparaat
vermeld staat overeenkomt met die van het elektriciteitsnet (220 – 240 V, 50
Hz).
2 Schakel de Aan/Uit-schakelaar aan de rechterbovenkant van het
apparaat in (I).
3 De aandrijfmotor voor de transportrollen begint te draaien, het rode
signaallampje (POWER) licht op en de opwarmingsfase begint. Na
ongeveer 3 minuten (75 µm); 4 minuten (100 µm); 5 minuten (125
µm); 6 minuten (175 µm); 7 minuten (250 µm) is de juiste
bedrijfstemperatuur bereikt en licht het groen signaallampje (READY)
op.
4 Leg het te lamineren voorwerp zodanig in het lamineerhoesje dat aan
alle kanten 3 à 5 mm afstand tot de folierand overblijft.
Let op: Gebruik uitsluitend heetlamineerfolies.
5 Steek de folie samen met het te lamineren voorwerp in de
invoeropening van het lamineerapparaat. De gesloten kant van de
folie moet het eerst in het apparaat worden ingevoerd.
Opmerking: Om vouwen in de lamineerfolie te voorkomen mag nooit
de open kant van de lamineerfolie als eerste in de invoeropening van het
lamineerapparaat worden gestoken. Bij het invoeren van de folie beslist de
instructies op de invoeropening opvolgen. Het lamineerproces verloopt
automatisch.
Let op: De eruit komende folie is na het lamineren zeer heet en
zacht. Daarom voorzichtig omgaan met het gelamineerde voorwerp.
Opmerking: Om het gelamineerde voorwerp plat te maken kan het
onder een boek of ander zwaar voorwerp worden gelegd.
43
Page 44

Koudlamineren
1 Steek de netstekker in een goed bereikbaar stopcontact.
Let op: Controleer of de voedingsspanning die op het apparaat
vermeld staat overeenkomt met die van het elektriciteitsnet (220 – 240 V, 50
Hz).
2 Schakel de Aan/Uit-schakelaar aan de rechterbovenkant van het
apparaat in (I).
3 De aandrijfmotor voor de transportrollen begint te draaien, het rode
signaallampje (POWER) en het groen signaallampje (READY) lichten
op.
Let op: Hebt u het lamineerapparaat kort van tevoren gebruikt voor
heetlamineren dan moet u het laten afkoelen. De afkoelingstijd duurt
maximaal 60 minuten.
4 Verwijder de beschermfolie van het lamineerhoesje.
5 Leg het te lamineren voorwerp zodanig in het lamineerhoesje dat aan
alle kanten 3 à 5 mm afstand tot de folierand overblijft.
6 Steek de folie samen met het te lamineren voorwerp in de
invoeropening van het lamineerapparaat. De gesloten kant van de
folie moet het eerst in het apparaat worden ingevoerd.
Opmerking: Om vouwen in de lamineerfolie te voorkomen mag nooit
de open kant van de lamineerfolie als eerste in de invoeropening van het
lamineerapparaat worden gestoken. Bij het invoeren van de folie beslist de
instructies op de invoeropening opvolgen. Het lamineerproces verloopt
automatisch.
Klem zitttende folie losmaken
Dit lamineerapparaat biedt de functie 'Jam Release' om klem zittende folie
snel te kunnen losmaken.
1 Bij het blokkeren van folie het apparaat uitschakelen en de schakelaar
aan de linkerkant van het apparaat in de stand “REW” zetten.
2 Houd het lamineerapparaat vast en trek de folie samen met het te
lamineren voorwerp uit de invoeropening van het lamineerapparaat.
3 Schuif de schakelaar aan de linkerkant van het apparaat weer in de
stand “FWD”.
4 Vervolgens moet het apparaat waarschijnlijk enkele malen worden
gereinigd, zoals beschreven onder het kopje 'Verzorging en reiniging'.
44
Page 45
5 Als de folie voortdurend klem komt te zitten of klem zittende folie niet
meer uit het lamineerapparaat kan worden getrokken, neem dan
contact op met onze hotline.
Verzorging en reiniging
Aangekoekt materiaal en lijmresten op de transportrollen kunnen het
lamineerresultaat verslechteren. Daarom moeten de transportrollen
regelmatig na gebruik worden schoongemaakt:
Hiervoor een gevouwen blad papier in de invoeropening steken. Lijmresten
worden door het eruit komend papier meegenomen. Deze handeling enkele
malen herhalen.
Vóór het vochtig afwissen van het apparaat altijd de stekker uit het
stopcontact trekken. Indien nodig kan de buitenkant worden afgewist met
een doek die in milde zeep en schoon water is gedrenkt. Gebruik geen
oplosmiddelen of agressieve reinigingsmiddelen.
Verwijderings tip
Dit symbool betekent dat het Product na zijn levensduur naar een
verzamelpunt wordt terug gebracht door de laatst verkopende. Dit
symbool geldt alleen in de Staten van de E.W.R.
E.W.R. = Europa´s gebied: welke de EU staten + de Noorwegen,
Ysland en Lichtenstein omringd.
45
Page 46
Storingen verhelpen
Storing Maatregel
• Rode LED (POWER) brandt niet
• Apparaat reageert niet
• Folie zit klem • Controleer het formaat van het
• Gelamineerde folie is niet volledig
transparant.
• Controleer of de stekker van het
netsnoer correct in het stopcontact
is gestoken.
• Neem contact op met onze hotline
als de storing niet is verholpen.
gebruikte lamineerhoesje.
• Gebruik alleen lamineerhoesjes
van het voorgeschreven formaat.
• Overtuig uzelf ervan dat het
lamineerhoesje recht in het
apparaat werd gestoken.
• Volg de instructies onder het kopje
'Klem zitttende folie losmaken' op
om klem zittende folie uit het
apparaat te trekken.
• Lamineer dezelfde folie nogmaals
om het lamineerresultaat te
verbeteren.
De overeenstemming met de EUrichtlijnen wordt bevestigd door de
CE-markering.
Garantie
Geachte klant,
Het verheugt ons dat u voor dit apparaat hebt gekozen.
Geef het apparaat in geval van een defect met de kassabon en de
originele verpakking terug in de zaak, waar u het gekocht heeft.
46
Page 47
The manufacturer hereby declares that the equipment complies with the stipulations
GB
defined in the following guidelines and standards:
Der Hersteller erklärt hiermit, dass das Gerät mit den Bestimmungen der Richtlinien
D
und Normen übereinstimmt:
Le fabricant déclare par la présente que l'appareil est conforme aux règlements et
F
normes en vigueur:
Por medio de la presente, el fabricante declara que este aparato está conforme a lo
E
dispuesto en las directivas y normas vigentes:
De fabrikant verklaart hierbij dat het apparaat voldoet aan de bepalingen in de
NL
richtlijnen en normen:
Il costruttore dichiara con la presente che la macchina sotto descritta è conforme alle
I
norme delle direttive:
Konformitätserklärung / Declaration of Conformity
Olympia A 4040
73/23/EEC EN 60950-1: 2001+A11
89/336/EEC EN 55014-1: 2000+A1+A2
EN 50014-2: 1997+A1
EN 61000-3-2: 2000+A2
EN 61000-3-3: 1995+A1
OLYMPIA Business Systems Vertriebs GmbH
Zum Kraftwerk 1
45527 Hattingen
Phone: 0 23 24 / 68 01-0
Fax: 0 23 24 / 68 01-99
E-Mail: [email protected]
Hattingen, März, 2012 Heinz Prygoda, Managing Director
....................................................... ................................................
Ort, Datum Name und Unterschrift
DoC No.: 4040 / Version 01 / 15.03.2012
47
Page 48

48
Page 49

Diese Bedienungsanleitung dient der Information. Ihr Inhalt ist nicht Vertragsgegenstand.
Alle angegebenen Daten sind lediglich Nominalwerte. Die beschriebenen Ausstattungen und
Optionen können je nach den länderspezifischen Anforderungen unterschiedlich sein.
Wir behalten uns inhaltliche und technische Änderungen vor.
49
 Loading...