

Olivon AZ2, AZ1 User Manual
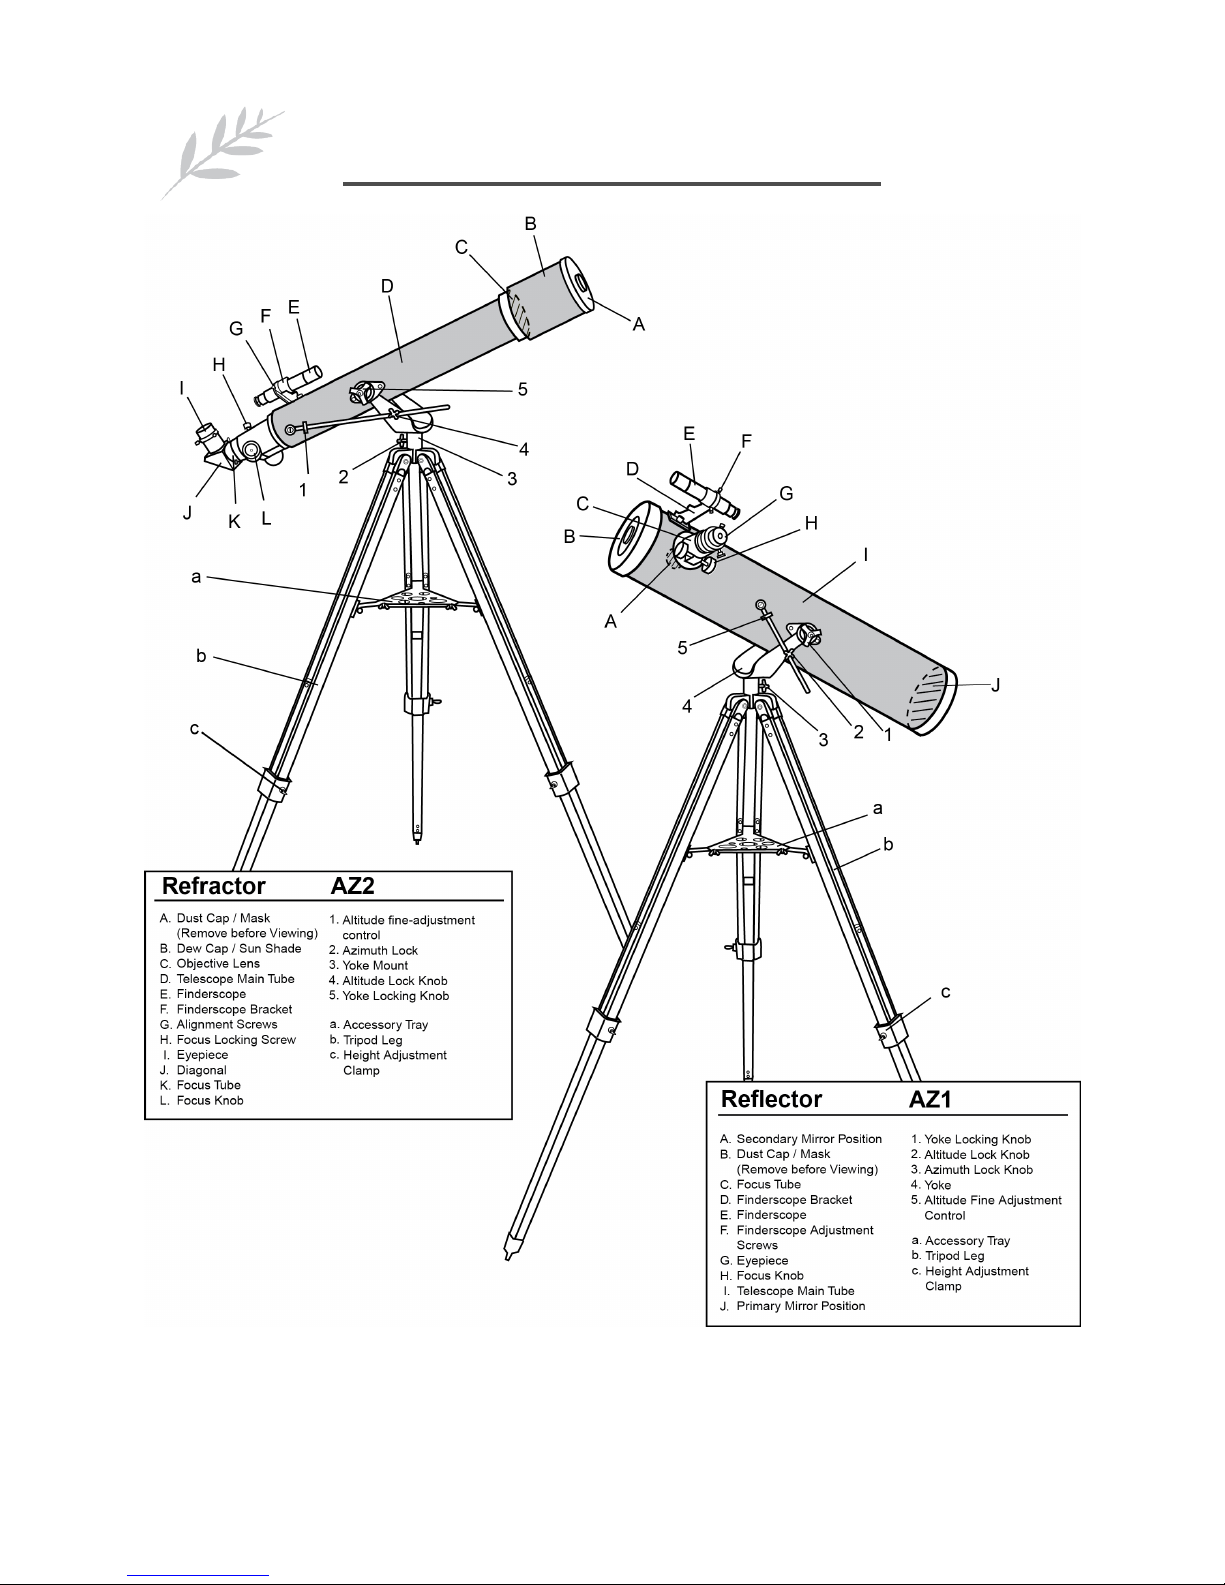
Olivon AZ Mount User Manual
Important Safety Note: DO NOT observe the sun with your telescope. Serious and
permanent damage to the observer’s eye may result.
Olivon AZ Mount User Manual

Assembly Instructions
A. Tripod Setup
1. Mount Installation:
Using the provided screws, attached the three tripod legs to the connection flanges on the
altazimuth mount, then secure the screws with the provided wing nuts.
2. Tripod Height Adjustment:
For all three tripod legs, extend the tripod legs by loosening the locking screws on the tripod legs
and pulling the lower leg sections outward, then tighten the locking screws to secure the position
of the lower leg sections.
Now spread the tripod legs and stand the tripod on even ground, so you can adjust the height of
each leg as required.
3. Accessory Tray Installation:
Fasten the accessory tray to the center brace of the tripod using the provided screws. Please do
not ignore this step as the tray not only provides you with the convenience of holding small
accessories but also adds stability to the tripod.
B. AZ Mount Setup
Elevation Adjustment Control And Telescope Tube Installation:
1. Slide Elevation Adjustment Control though the hole of the bolt on the side of AZ mount.
2. Place the telescope tube into the AZ fork mount, and align the threaded studs on the
telescope’s side with the slot near the top of the fork mount.
3. Using the two black thumbscrews, fasten the aligned parts mentioned in step 2.
4. Lastly use the small locking screw to secure the Elevation Adjustment Control to the
telescope’s threaded hole by the fastened parts mentioned in step 3.
C. Finder Scope/Red Dot Finder Installation
1. Remove the pair of nuts on the top of telescope near the eyepiece to expose the two bolts.
2. Align the holes on the base plate of your finder scope/red dot finder with the exposed bolt,
facing in the same direction as the main telescope.
3. Fasten the nuts removed in step 1 back to the exposed bolts, and secure the finder scope/
red dot finder.
Olivon AZ Mount User Manual
 Loading...