

Page 1
E-1
INSTALLATION MANUAL
WT-503 Working Table
I. Accessory parts II. Installation procedures
1. Turn off the machine and unplug the power cord
from the power outlet.
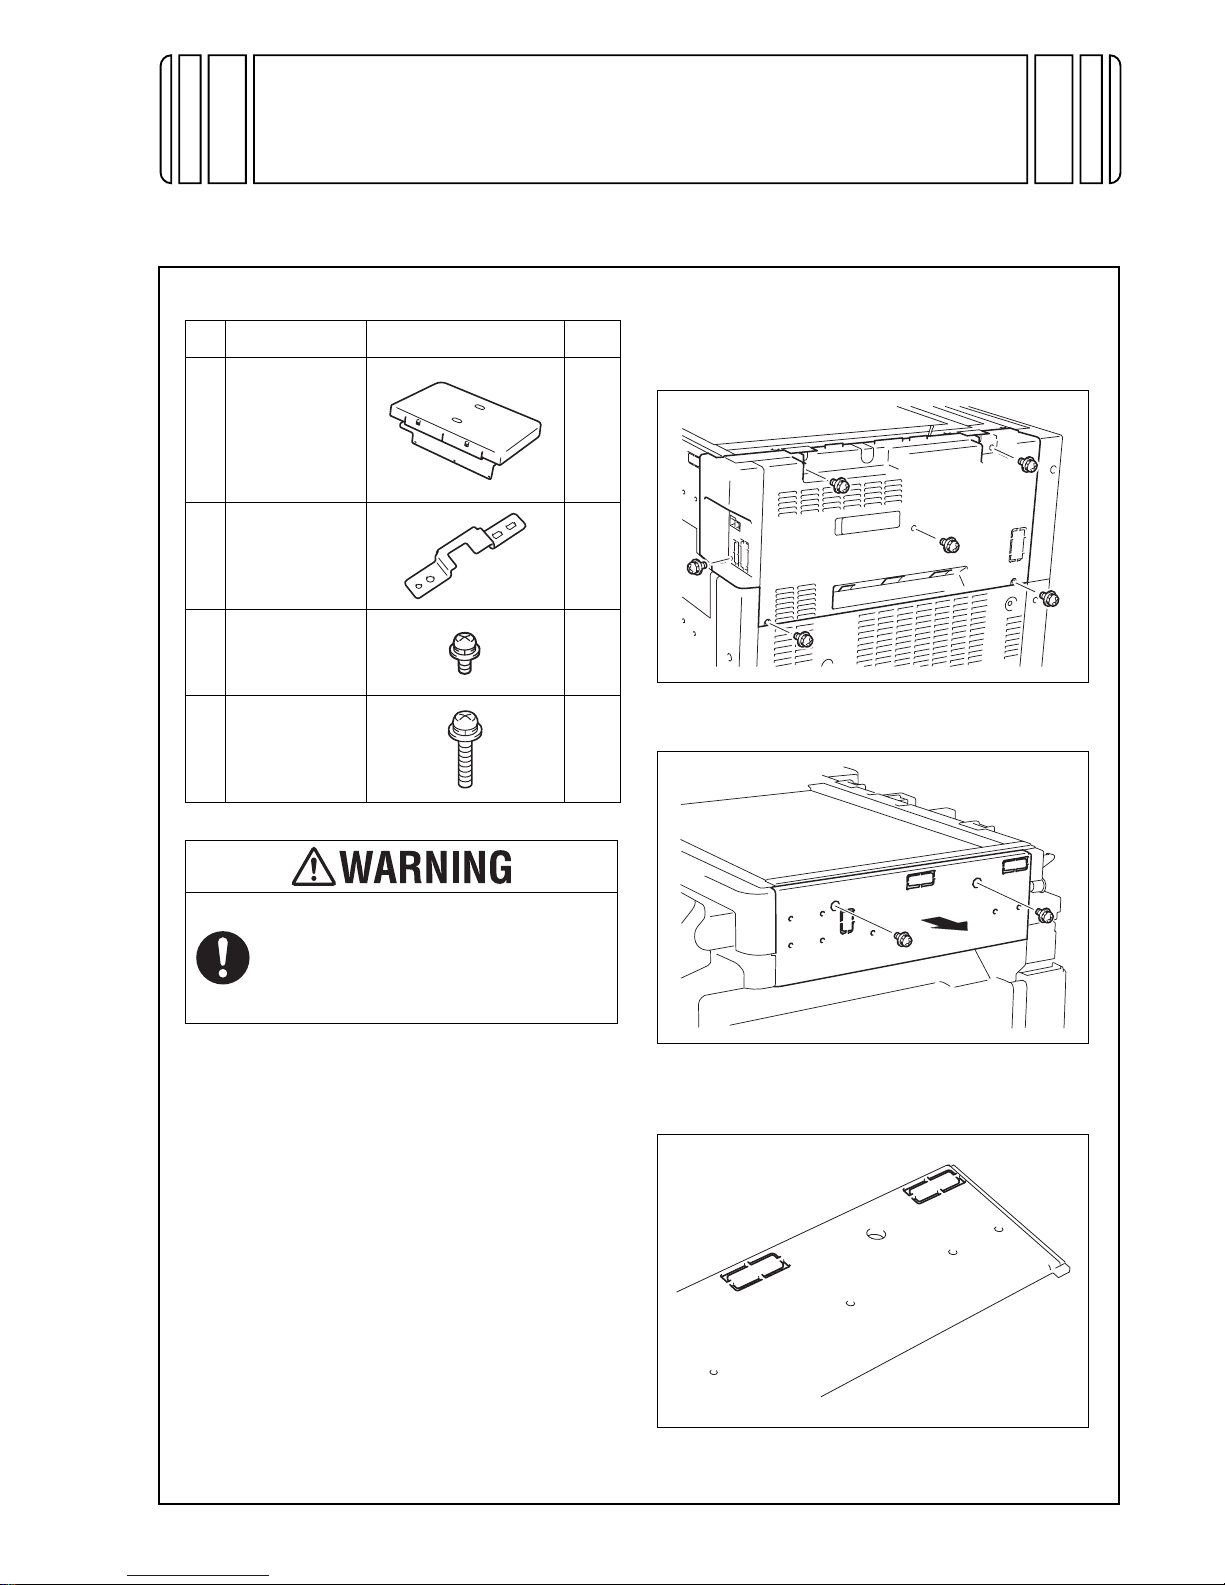
2. Remove the rear cover (six screws).
3. Remove the right upper cover from the machine
(two screws).
4. Cut out the dividing covers (two places) of the
right upper cover that has been removed in step 3
using an appropriate tool such as a nipper.
No. Name Shape Q’ty
1. Working table
1
2. Mounting
blacket
2
3. Screw A
(3 × 8 mm)
4
4. Screw B
(3 × 16 mm)
3
After unpacking, be sure to get rid of the
packaging materials and keep them out of
the reach of children.
Putting the head in the plastic bag
involves danger of suffocation.
A02FIXC023DA
A02FIXC024DA
A090IXC001DA
9J08IXC075DA
A083IXC022DA
A02FIXC004DA
A02FIXC025DA
Applied Machine: d-Color MF201
COLOR MFP: 20 ppm
Product Code: A02F
Installation Manual Y110040-4
Page 2
E-2
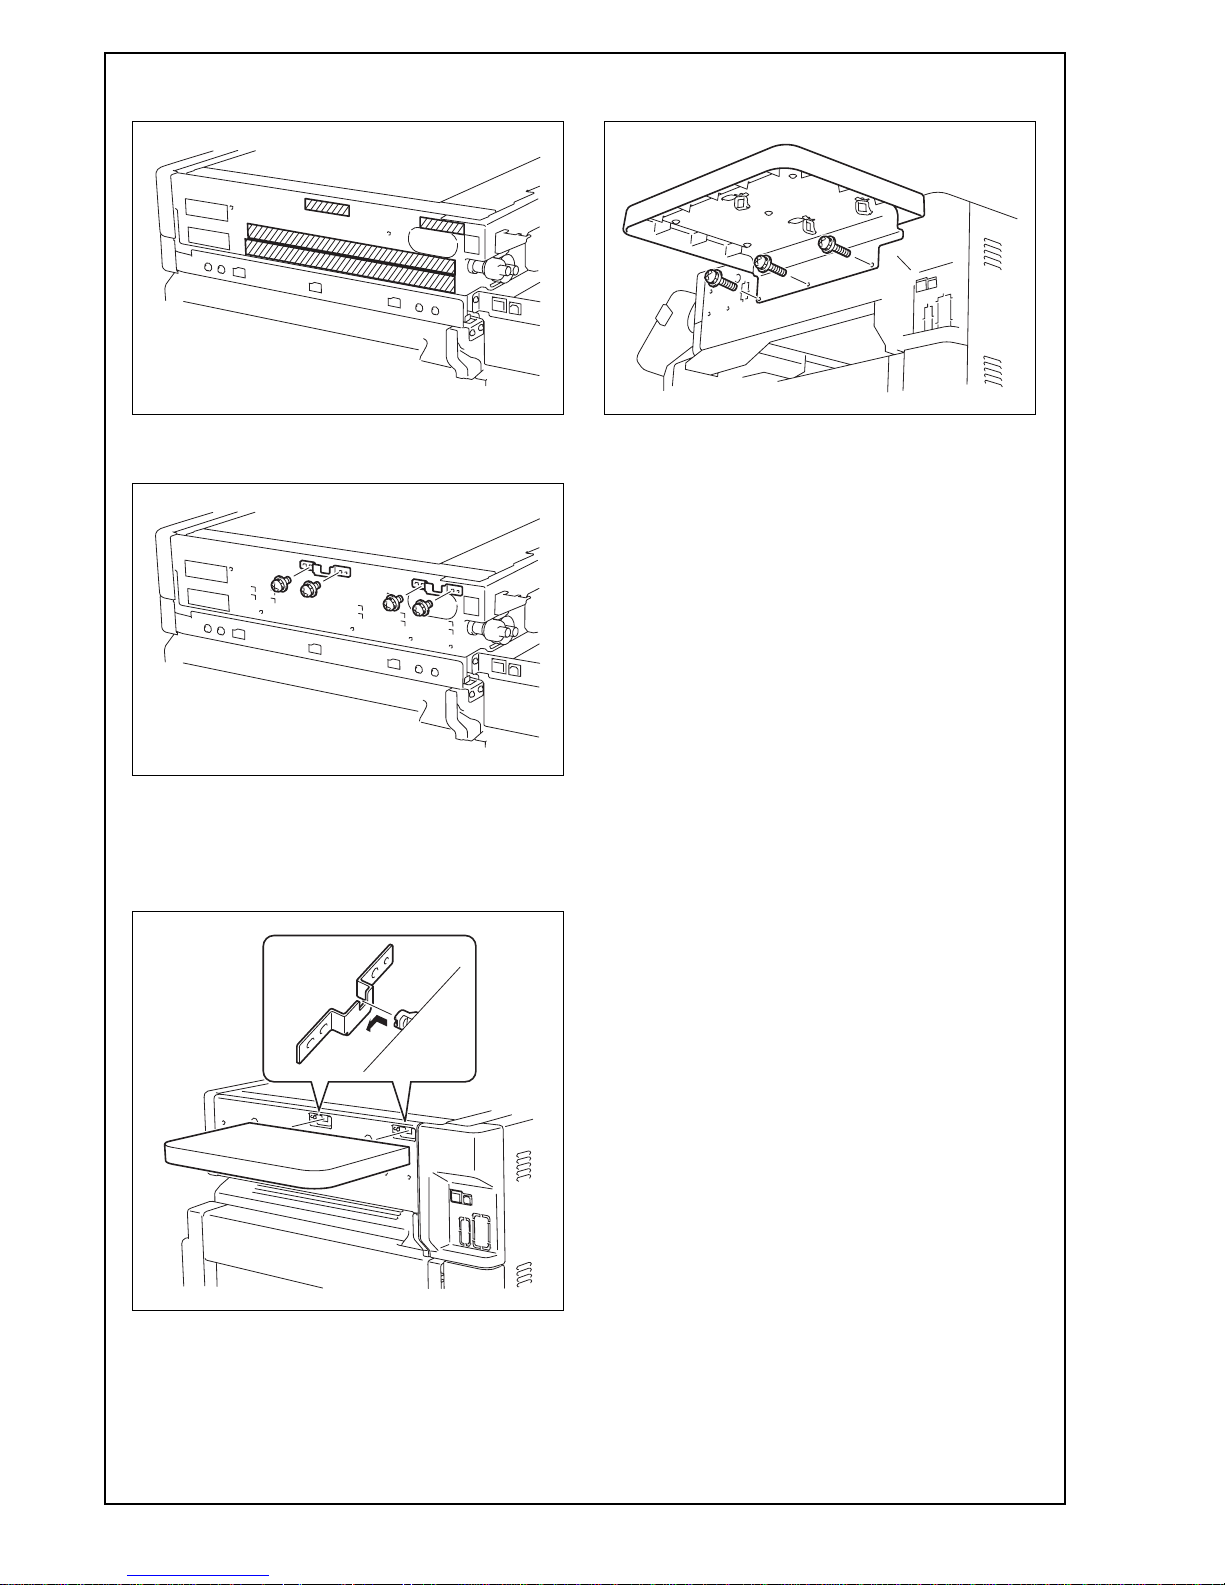
5. Remove the tape shown in the illustration (four
places).
6. Install the mounting bracket (two places) (two
screws A each furnished with the working table.)
7. Install the removed covers by the inverse procedures to removing them.
8. Insert the snaps of the working table (two places)
into the hole position of the mounting bracket and
slid it in the direction of an arrow.
9. Secure the working table (three screw B’s furnished with the working table).
A02FIXC026DB
A02FIXC027DB
A02FIXC100DA
A02FIXC028DB
Installation Manual Y110040-4
 Loading...