

Olin OM206 Quick Start And User Manual
quick start & user guide
OM206
Media Player
This manual contains information protected by copyright law. No part of this document may be used or reproduced in any form or by
any means, or stored in a database / retrieval system without prior written permission from Linophir International Pty Ltd. The
information of this manual is base on the current version of the product; we reserve the right for change without prior notice. All brand
names in this manual are the property of their respective owners.
01
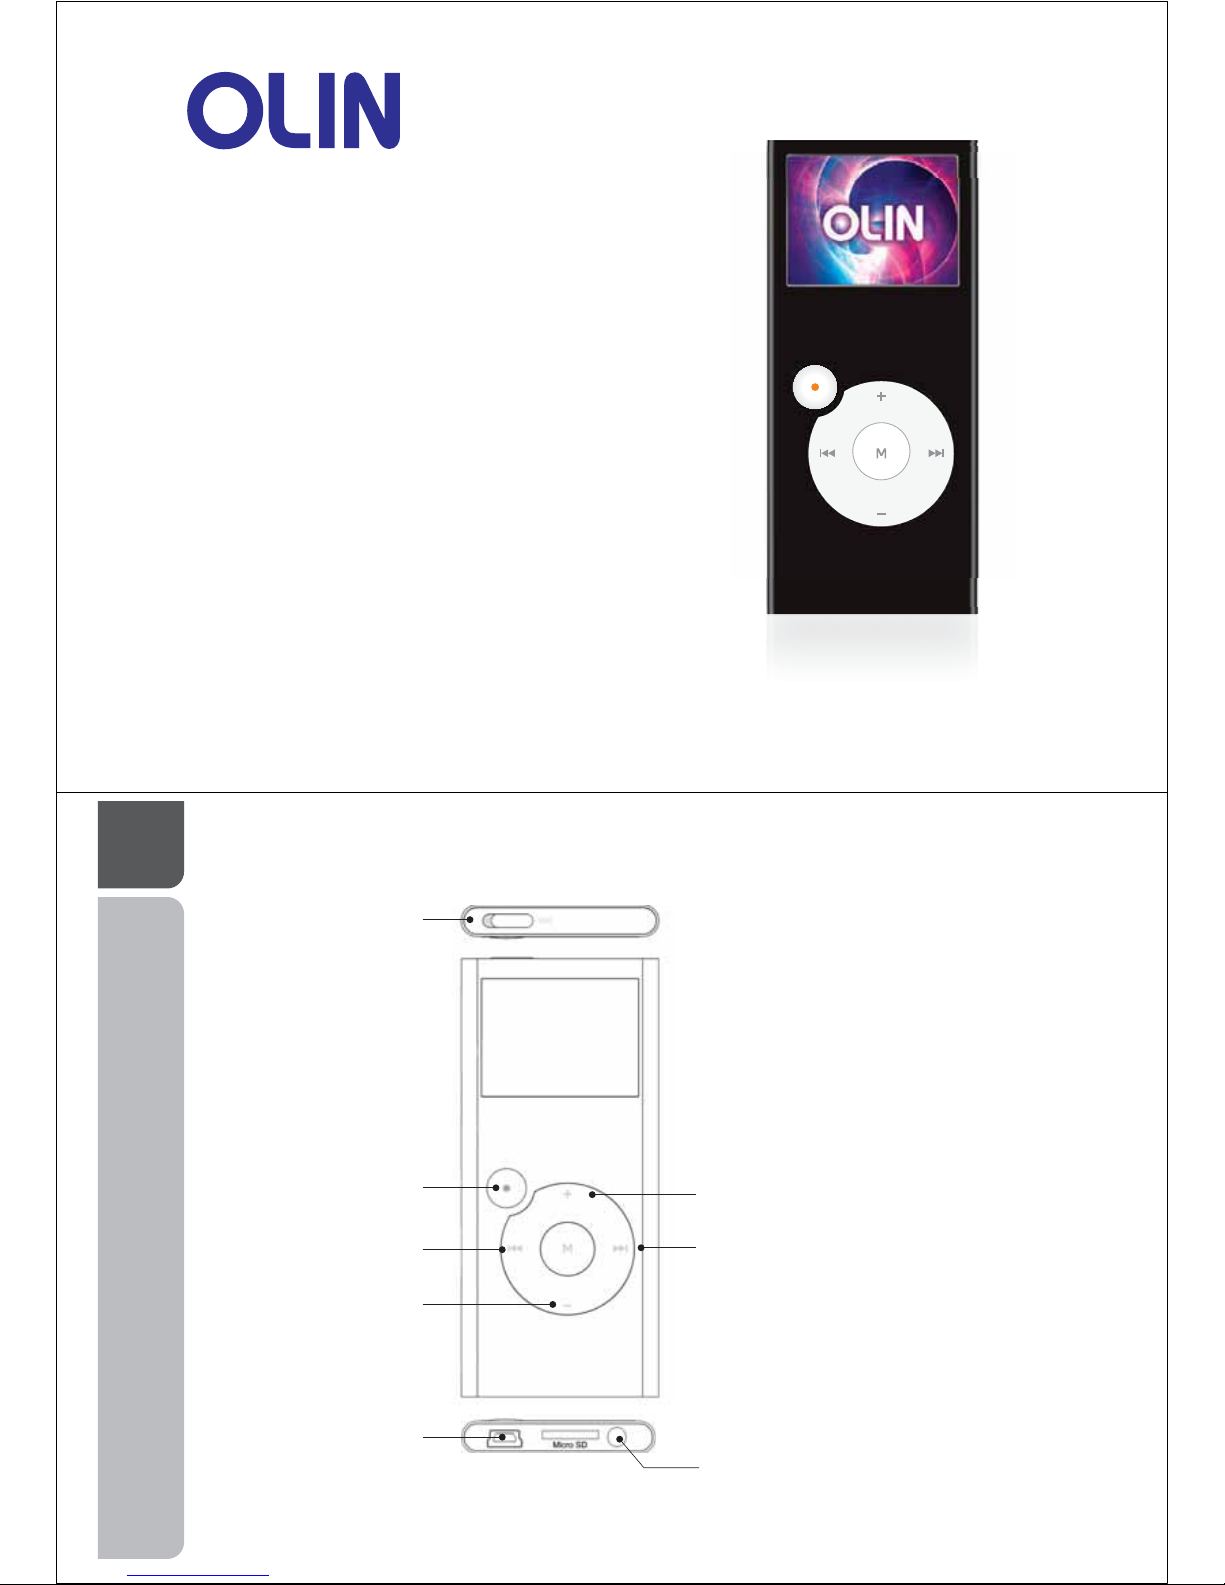
Top
Power
power off & on
Front
On/Off
turn the player on & off
Backward
menu & changing tracks
Down
volume & menu
Up
volume & menu
Forward
menu & changing track
Base
USB Input
connection to your PC
Headphone Input
connection for headphones
02
The OM206 Media Player works as an external hard drive or storage device via
the USB port on your computer. Windows XP and Vista users will find the
moment they connect the player via the USB cable, the computer recognises a
new device and following a few steps the OM206 is installed.
Unlike other media players, the OM206 will not limit how you interact with the
device by insisting on specific software to communicate with the player when it
is connected to the computer.
The OM206 easily interfaces with your operating system, allowing you to drag
and drop your pre-existing music and video collection into its folder. Just like a
USB memory stick or an external hard drive, once the data has been placed in
the OM206 folder, the player can be disconnected from the USB port and your
portable music, video and file experience begins.
"
"
03
04
6.5mm thick media player with polished aluminium alloy casing.
External T-Flash / Micro-SD memory card compatibility up to 2GB.
Music playback.
Playback of MPEG 1/2/2.5 Layer I/II/III and WMA music files.
Video playback
Playback of MPEG4 (AVI) videos trans-coded from AVI, DAT, MPEG, RM, RMVB and
VOB formats.
Digital voice recording and playback.
Recording via a built-in microphone saved as WAV format stored on the player.
JPEG photo browsing.
E-book with background music playback. Bookmark function supported.
Built-in mini-game with background music playback.
Multi-lingual graphic user interface.
Preset equalizer effects (EQ) and 5-band user-defined graphic equalizer.
USB mass storage.
1.5 high resolution (176x132) high contrast TFT display."
05
Quickstart for Windows XP page 7
Quickstart for Windows Vista page 9
Quickstart for Windows 98 page 11
Charging the media player page 12
Adding files to the media player page 14
Playing an Mp3 page 16
Display Lyrics page 18
Display Photos page 19
Display a photo slide show page 20
Play a movie page 22
Record voice and sound page 24
Play voice and sound recording page 25
Reading an e-book page 27
Bookmark an e-book page 29
Loading a bookmark page 30
Playing the mini game page 31
Keylocking the player page 32
Deleting a file page 34
Installing the .avi converter page 36
06
Using the .avi converter page 42
Repeat mode settings page 49
Play mode settings page 52
EQ select page 54
User EQ select page 56
Changing the recording quality page 58
Change the recording volume page 60
Change text auto browse speed page 62
Change photo auto browse speed page 64
Change background light off time page 66
Change screen luminance page 68
Change background light mode page 70
Reset to default settings page 72
Power off time select page 74
Expanding the memory page 75
Troubleshooting page 78
Firmware upgrade page 79
Safety precautions page 79
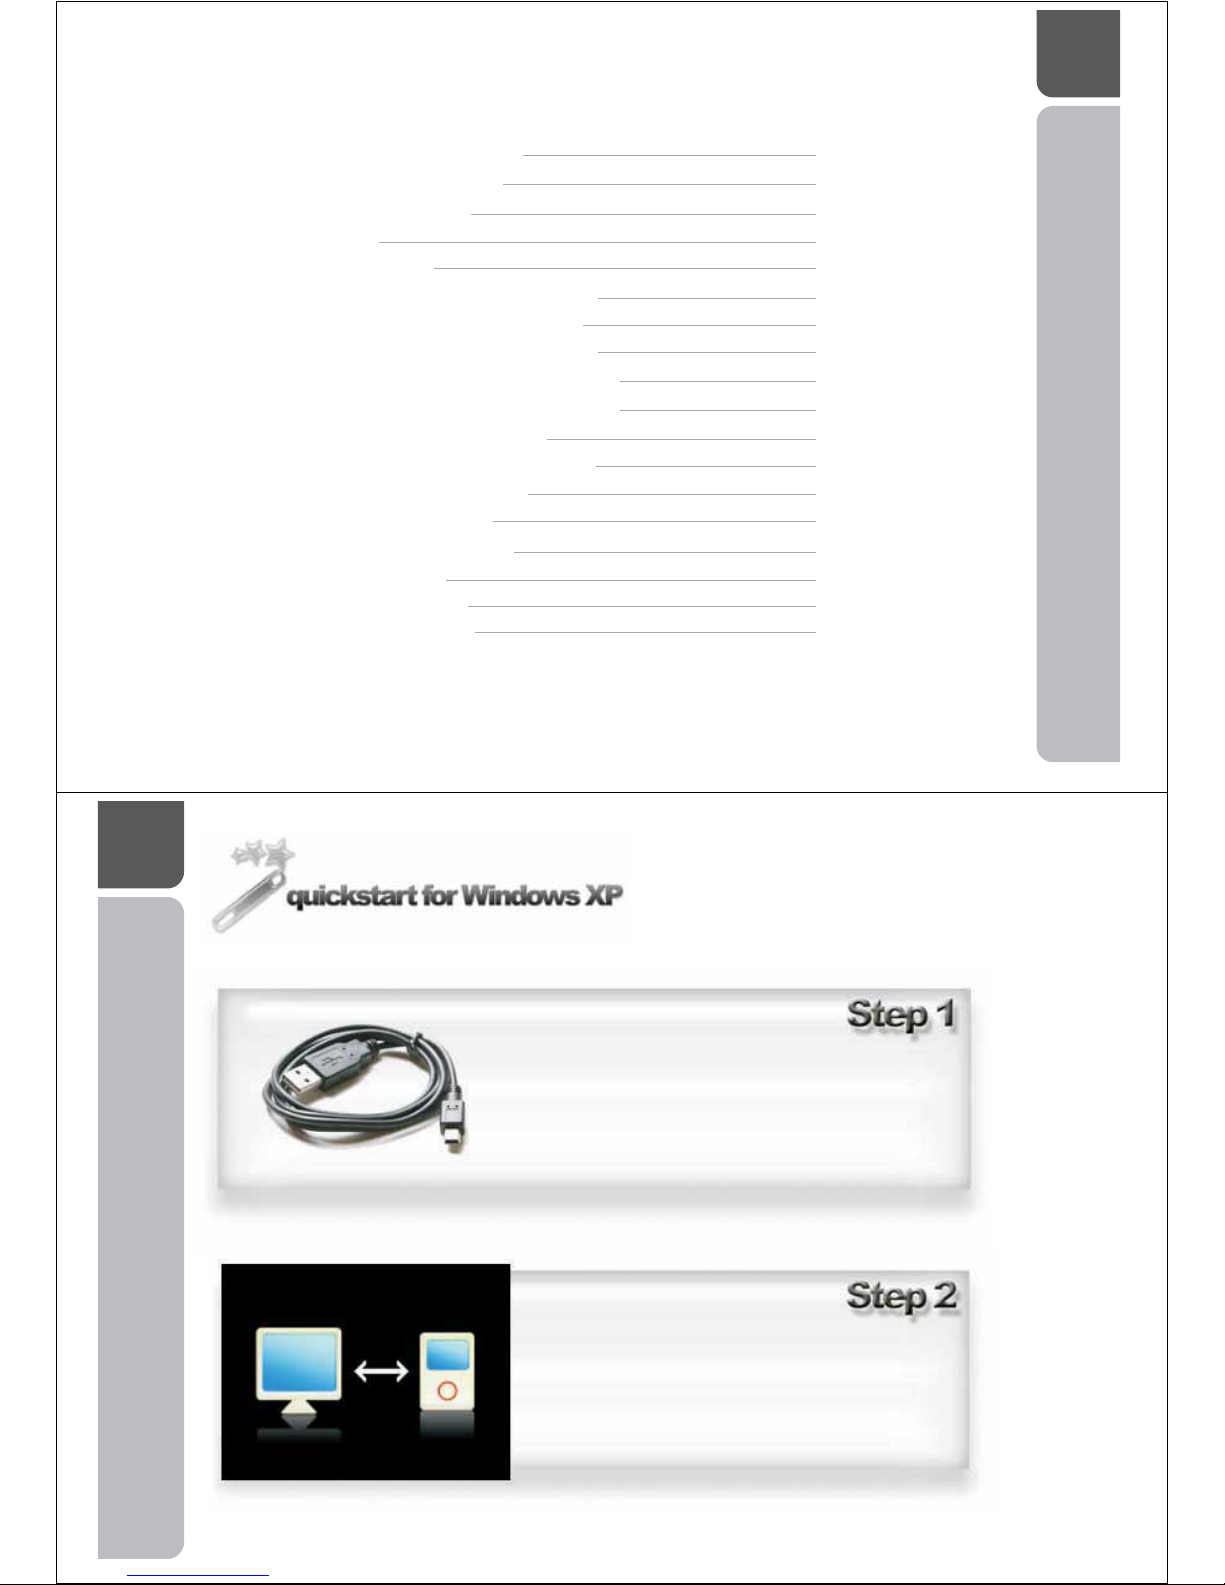
A guide to installing your OM206
Media Player on a computer running
Windows XP.
Connect the USB cable from the bottom of
the OM206 Media Player into the USB
portonyourcomputer
The OM206 Media Player will identify the
connection with the computer by displaying
this screen.
07
08
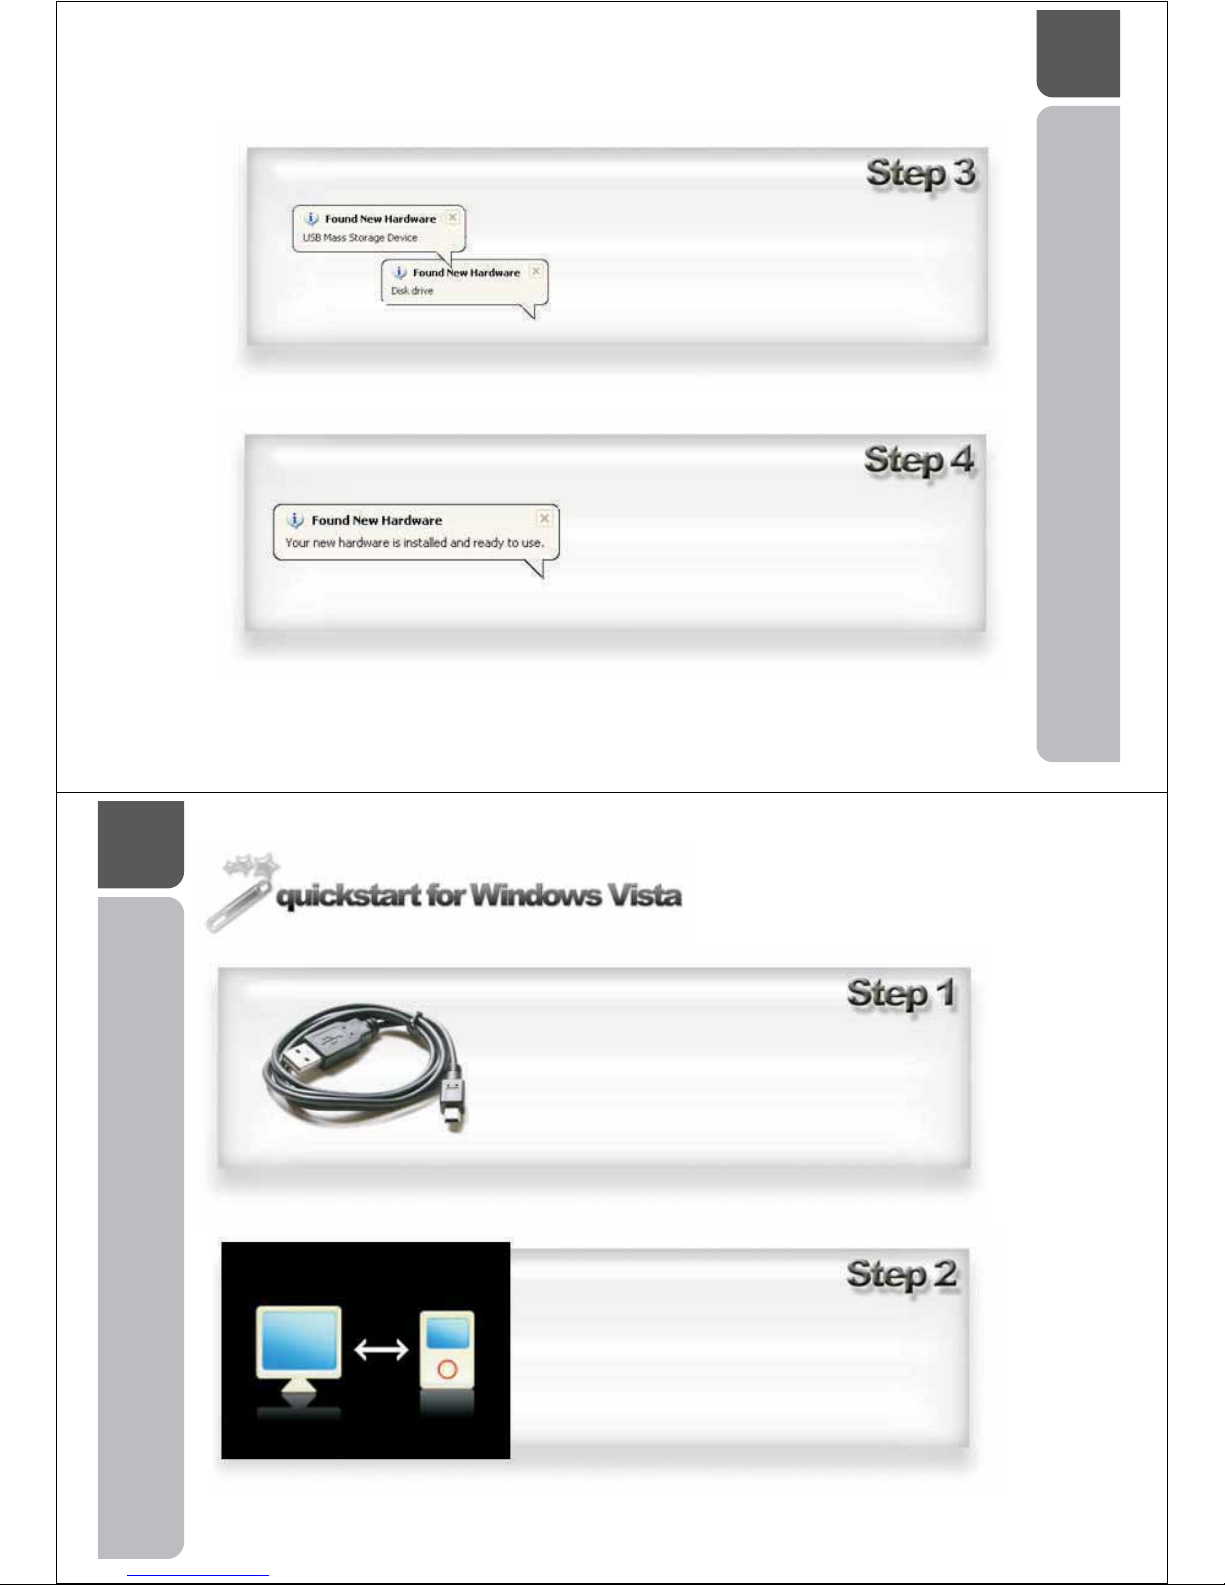
Windows XP will display a series of
messages at the bottom your computer
screen. This will continue until Windows
XP displays "Your new hardware is
installed and ready to use"
Your Om206 Media Player is now installed
09
A guide to installing your OM206
Media Player on a computer
running Windows Vista.
Connect the USB cable from the bottom of
the OM206 Media Player into the USB
portonyourcomputer
The OM206 Media Player will identify the
connection with the computer by displaying
this screen.

10
Windows vista will display a series of
messages at the bottom your computer
screen. This will continue until Windows
XP displays "Your new hardware is
installed and ready to use"
Your Om206 Media Player is now installed
11
A guide to installing your OM206
Media Player on a computer
running Windows 98.
Customers who use Window 98 Operating System, please contact
Linophir support team for further instruction and driver download.
12
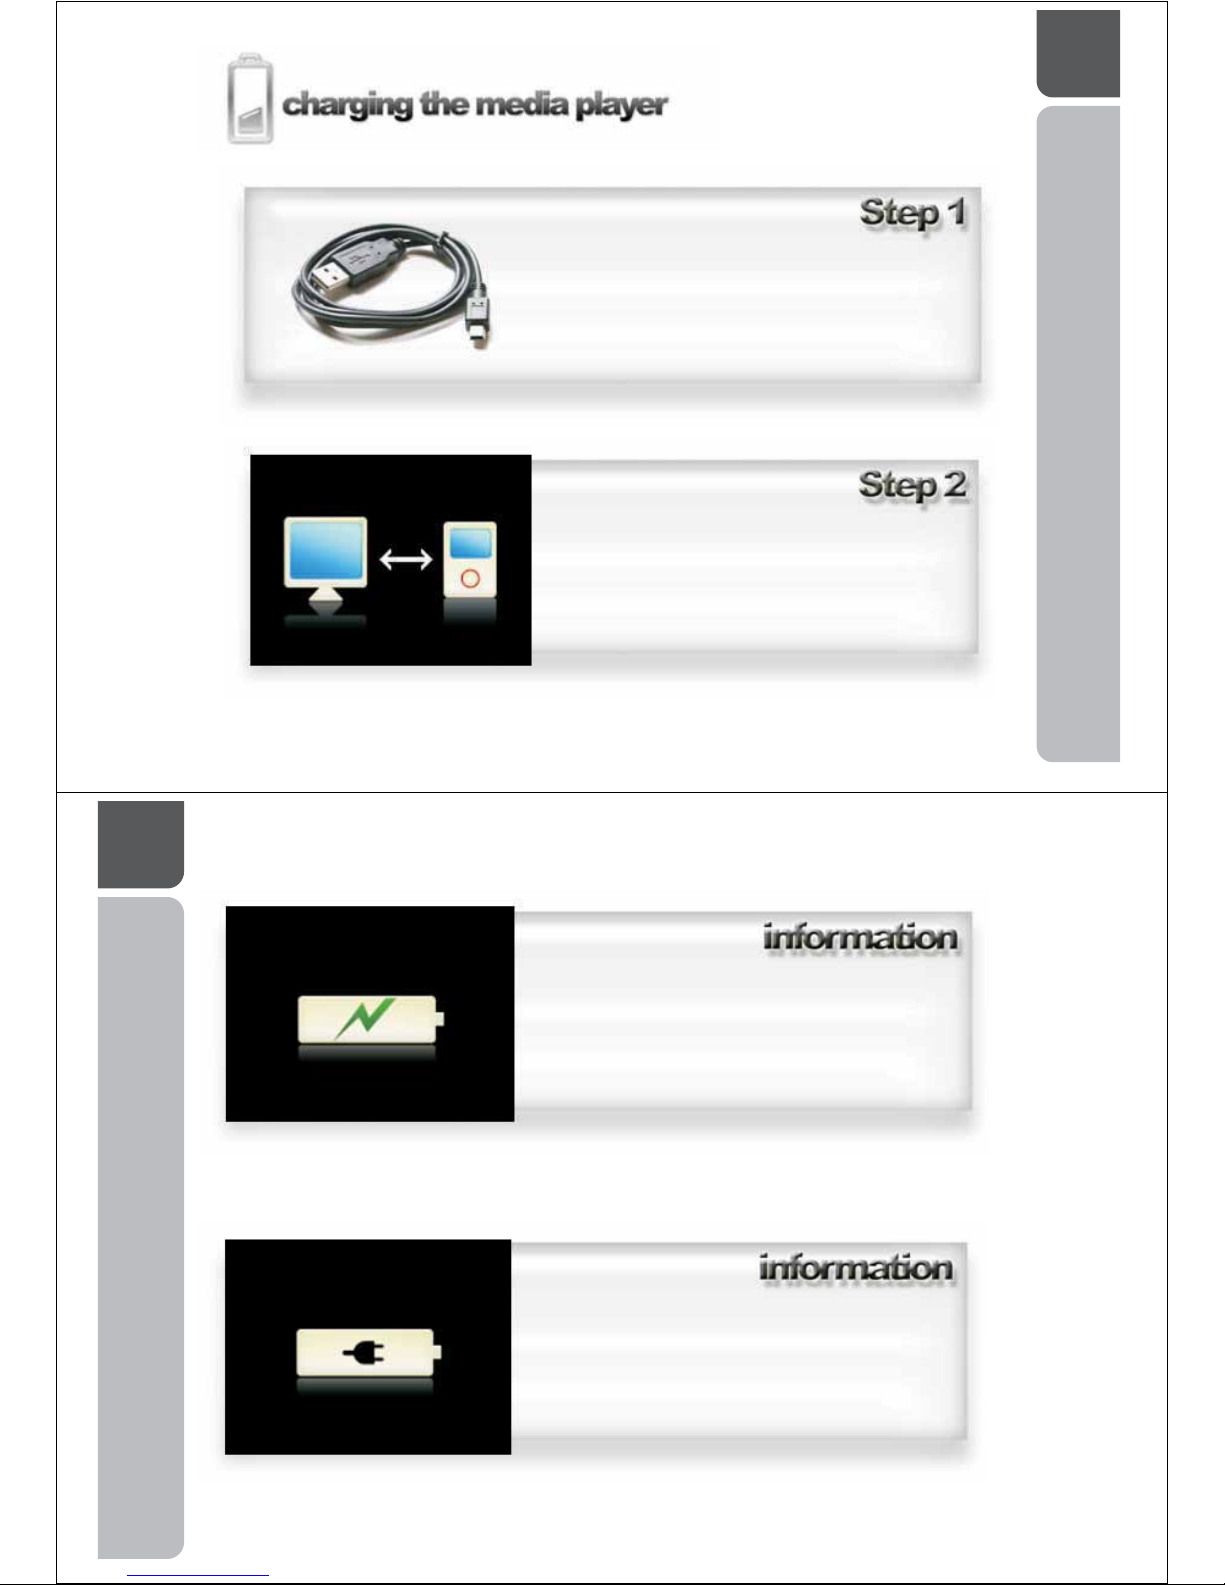
A guide in how to charge the
OM206 Media Player.
Connect the USB cable from the bottom of the
OM206 Media Player and into the USB port on
your computer.
The OM206 Media Player will identify it has
been plugged into a computer by displaying
this picture on its screen. Whilst your player is
connected to your computer, it will charge the
battery.
13
TheOM206canbechargedfromanyUSB
port without prior installation on the
computers operating system. This screen
will show when the OM206 Media Player is
charging in this manner.
The OM206 Media Player will display this
screen when the battery is fully charged.
14
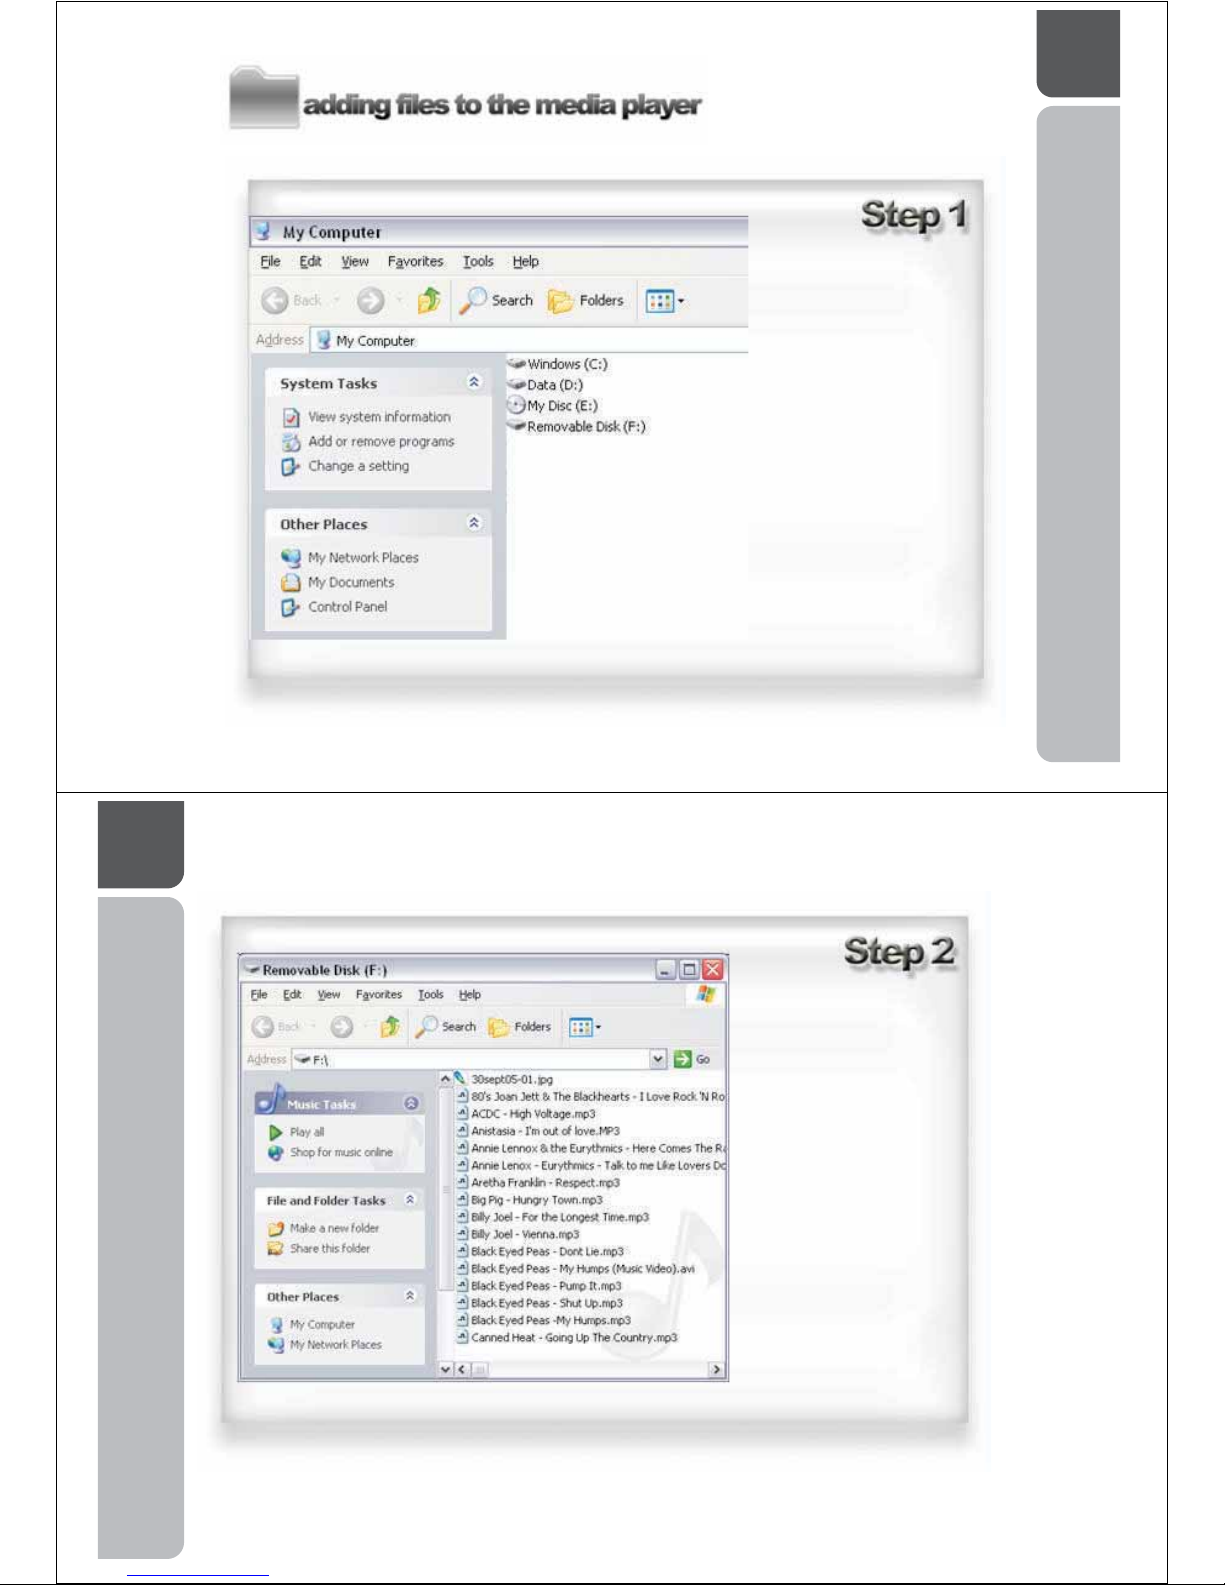
A guide in adding files to the
OM206 Media Player.
The OM206 Media Player
will be displayed within My
Computer . It will appear
as a . To open the
OM206 folder, double click
on the removable disc icon.
"
"
"Om206 "
15
Drag and drop the files
youwishtostoreonthe
OM206 Media Player
into this folder. You can
also copy and paste
these files using the
keyboard shortcut, Ctrl
C(copy)CtrlV(paste)
16
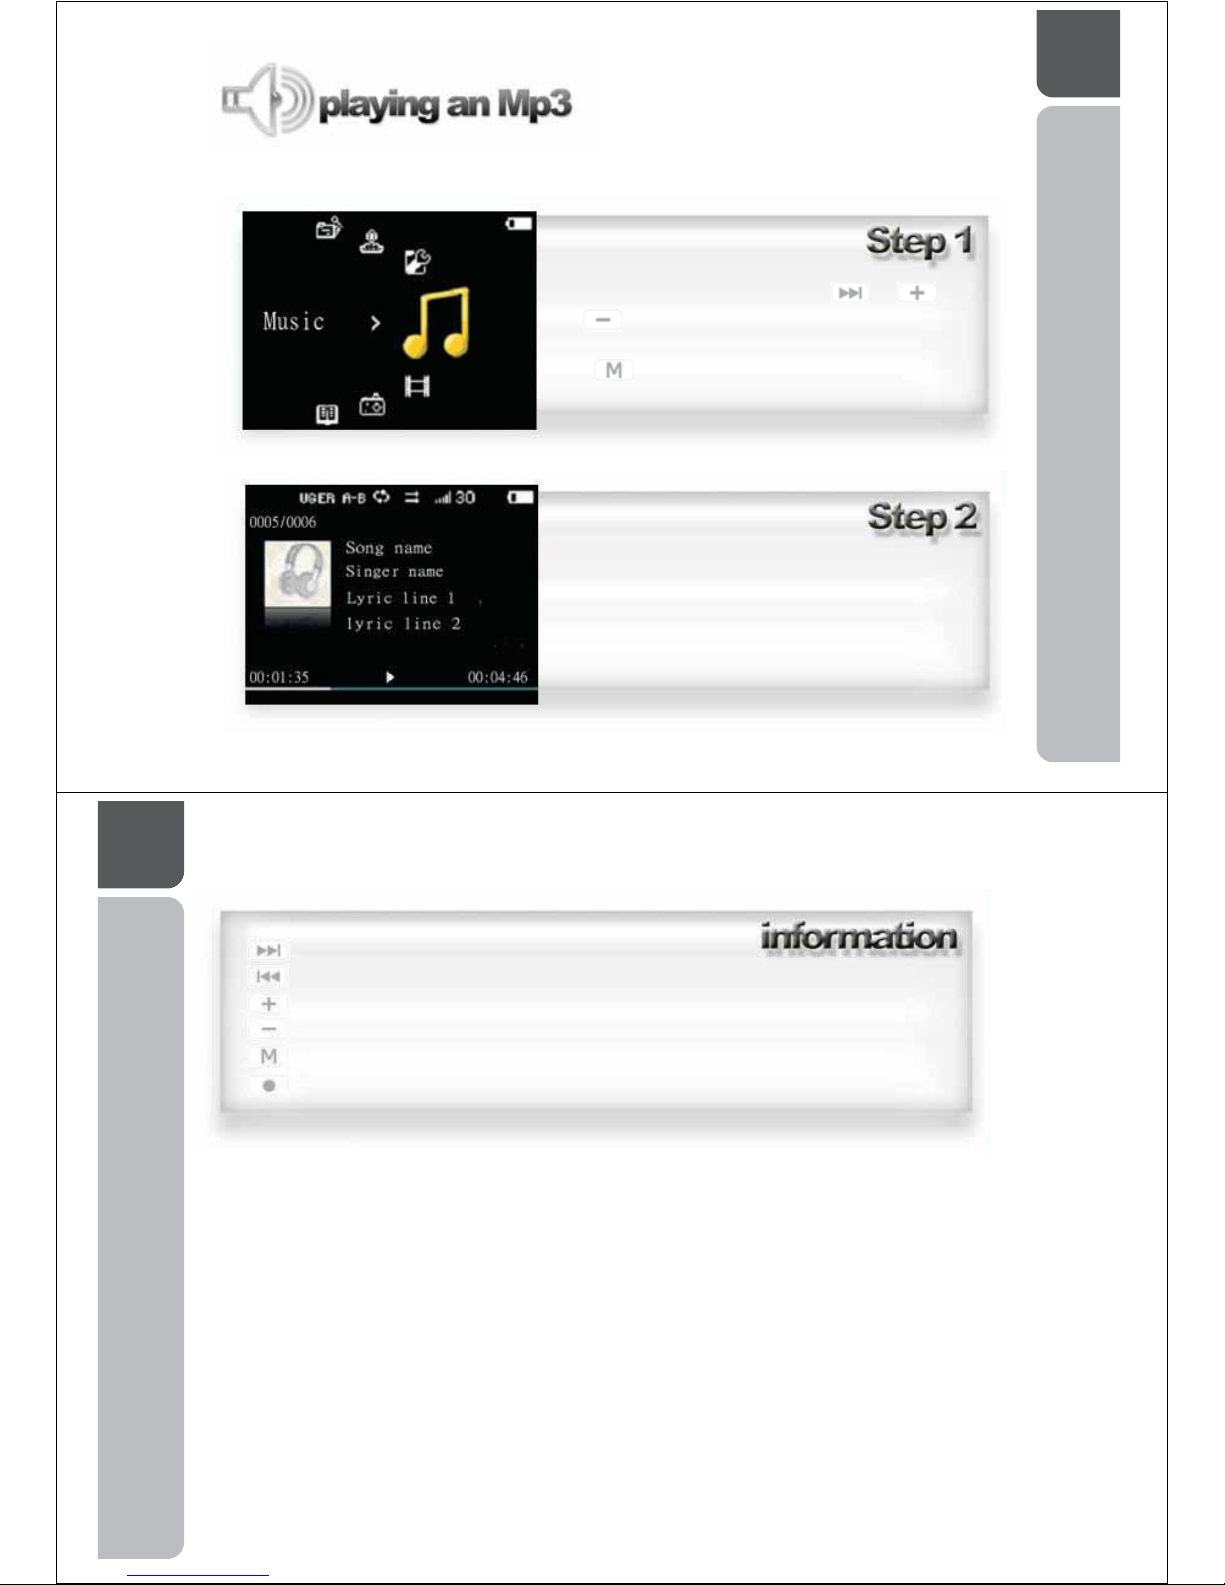
A guide in how to play an Mp3 file on the
OM206 media player
Within the main menu, use the or
or . . on the OM206 keypad. Once the
Music icon appears on the screen, press
the button.
The OM206 Media Player will begin to play the
first song stored within the OM206 Media
Player folder.
17
Forward -gotothenextMp3track
Backward go to the previous Mp3 track-
Volume Up turn the volume of the track up-
Volume Down turn the volume of the track down-
Return to menu hold down to return to music menu-
Pause / Play - pause music by pressing, resume by pressing again
Whilst an Mp3 file is playing, you can use the OM206 Media Player keypad to
navigate through your music collection.

18
A guide in how to display lyrics on the
screen of the OM206 Media Player
whilst an Mp3 file is playing.
The OM206 Media Player can display lyrics
whilst an Mp3 is playing.
Lyrics will appear on Lyric Line 1 and 2
shown here.
""
To enable the lyric feature on your OM206 Media Player, an .lrc
file containing the lyrics needs to be saved within the player
folder with the exact file name as the corresponding Mp3 file.
We recommend this feature to advanced users. To learn more
about this feature visit
www.en.wikipedia.org/wiki/LRC_(file_format)
19
A guide in how to display your .jpg photo
images on the screen of the OM206
Media Player
Using the keypad, scroll to the Photo icon
using then press
Use the keypad to select a photo with the
or the buttons. Once your selection
has been made press the to display the photo
on the screen.

20
Whilst the photo is displayed on the screen, you can
display the next saved photo instantly by pressing
the or buttons
A guide in scrolling your photo
album in a slide show on the
screen of your OM206 Media
Player
Using the keypad, scroll to the Photo icon
using then press
21
On the keypad to select a photo file using
Or the Once your selection is made press
the to display the photo.
Whilst the photo is displayed on the screen, press the
to begin a slide show of all images within the
OM206 folder.
To stop the slide show press
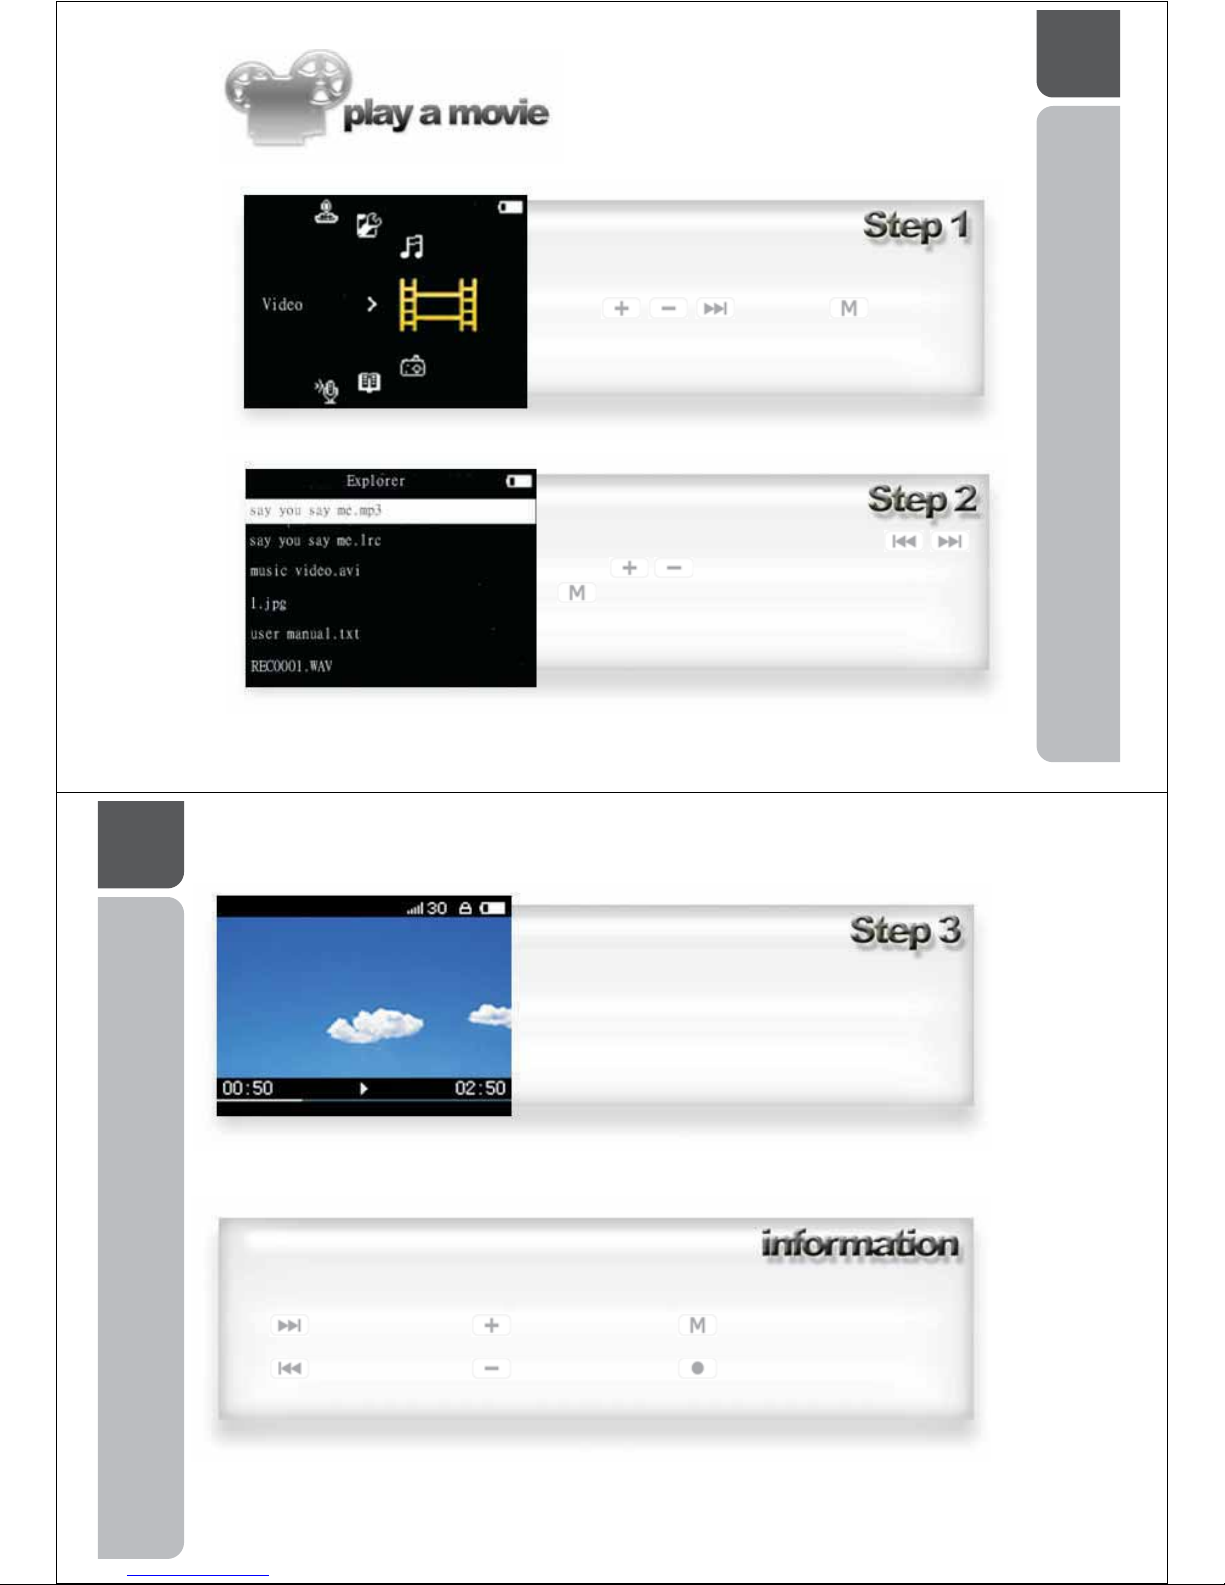
22
A guide in playing .avi format video files on your
OM206 Media Player.
Note: It is recommended that users of this feature
have an understanding of video file size conversion
and understand that .avi format is supported on this
Media Player.
Using the keypad, scroll to the Video icon
using then press
Use the keypad to select a video with the
Or the Once your selection is made press
on the keypad.
23
The selected video will now play on the screen
Whilst your selected video is playing the following controls are available
Fast Forward Volume Down Return to video menu
Rewind Volume Up
Play / Pause

24
A guide in recording sound and
your voice on the hard drive of the
OM206 Media Player
Using the keypad, scroll to the Record icon
using then press
Using the keypad,
Press to commence recording
Press to pause and restart recording
Hold down for 3 seconds to stop recording
To return to the main menu, hold down
after the recording has stopped.
25
The microphone is located on the bottom of the
player beside the USB input. For best recording
results, do not speak directly into the microphone as
the sound may distort. The OM206 Media Player
microphone is designed to capture all types of sound
with the best possible quality.
A guide in playing back
aprerecorded.wavfile
Using the keypad, scroll to the music icon using
Then press the
 Loading...