

Page 1
PIC-P40-USB development boar d
User's Manual
Rev.B, July 2013
Copyright(c) 2007, OLIMEX Ltd, All rights reserved
Page 2

INTRODUCTION:
PIC-P40-USB board was designed in mind to create board which to allow easy interface for
your embedded projects to computers with USB. It’s based around the popular FTDI chips
FT232.
Some of you will say: wait a minute why to use additional expensive chip to interface my
PIC to USB when I have seen on Microchip’s web site that there are PICs with buid-in USB
controller as peripheral?
Here is the catch: USB (Universal Serial Bus) was created by the big boys: Microsoft, Intel,
NXP, HP, NEC (you can find more info at www.usb.org) and it’s really great way to add
peripherals to PC computers as it carry both data signals and power supply, but as it’s
universal the programming of USB device is not easy job. The USB interface is simple hostdevice interface. On the PC there is HOST controller which provide the power and make the
communication, but because on the USB there are so many type of peripherals which are
supported like: Human interface devices – like mouse, joysticks, tablets etc, Communication
Devices like modems, links, routers etc., Image devices – like scanners, web cameras, etc,
Mass storage devices like hard drives, flash memories etc, Audio devices like microphones,
and speakers, you can imagine that writing the USB host controller software is not easy job
and there are several programming layers for the USB stack i.e. host your application code
will have the access to the different peripherals. So one USB host stack may consist of many
tenths of thousands for high level language code.
At the USB device side the code is not so complicated as at least you implement not all
communication protocols for the devices mentioned above, but only your device code, but
it’s still not small code, and why you should spend your time to write 1000 lines of code
when you want to make simple old good RS232 send and receive byte??? No much sense I
guess, but wait there is another catch when you plug the USB device the host assign it an
number which is used later to distinguish it from the other USB devices connected to the
computer. To make the driver installation easier every USB product manufacturer should
have his own assigned VENDOR-CODE so far so good, this means when you plug your
Genius web camera Windows know which driver to install. The bad for you is that to get
this VENDOR-CODE you have to pay US $1500.00 to USB.ORG guys, not bad business at
all huh? To sell numbers? If you decide to make thousands of USB devices it’s good idea to
have such vendor code, but what if you want to make one small prototype which you want to
connect to USB?
Now after reading all above you should not be surprised that FTDI Inc. who created USB to
RS232 chip FT232 is very popular – they give you simple solution to connect to USB
without knowing all the stuff behind it, without paying upfront for USB vendor code and
using the good old fashioned RS232 way to program in your PIC. On their web there are
drivers for Windows version XYZ, Linux, Mac OS etc., so you can interface your project to
machines running all these operating systems with small piece of code in the PIC.
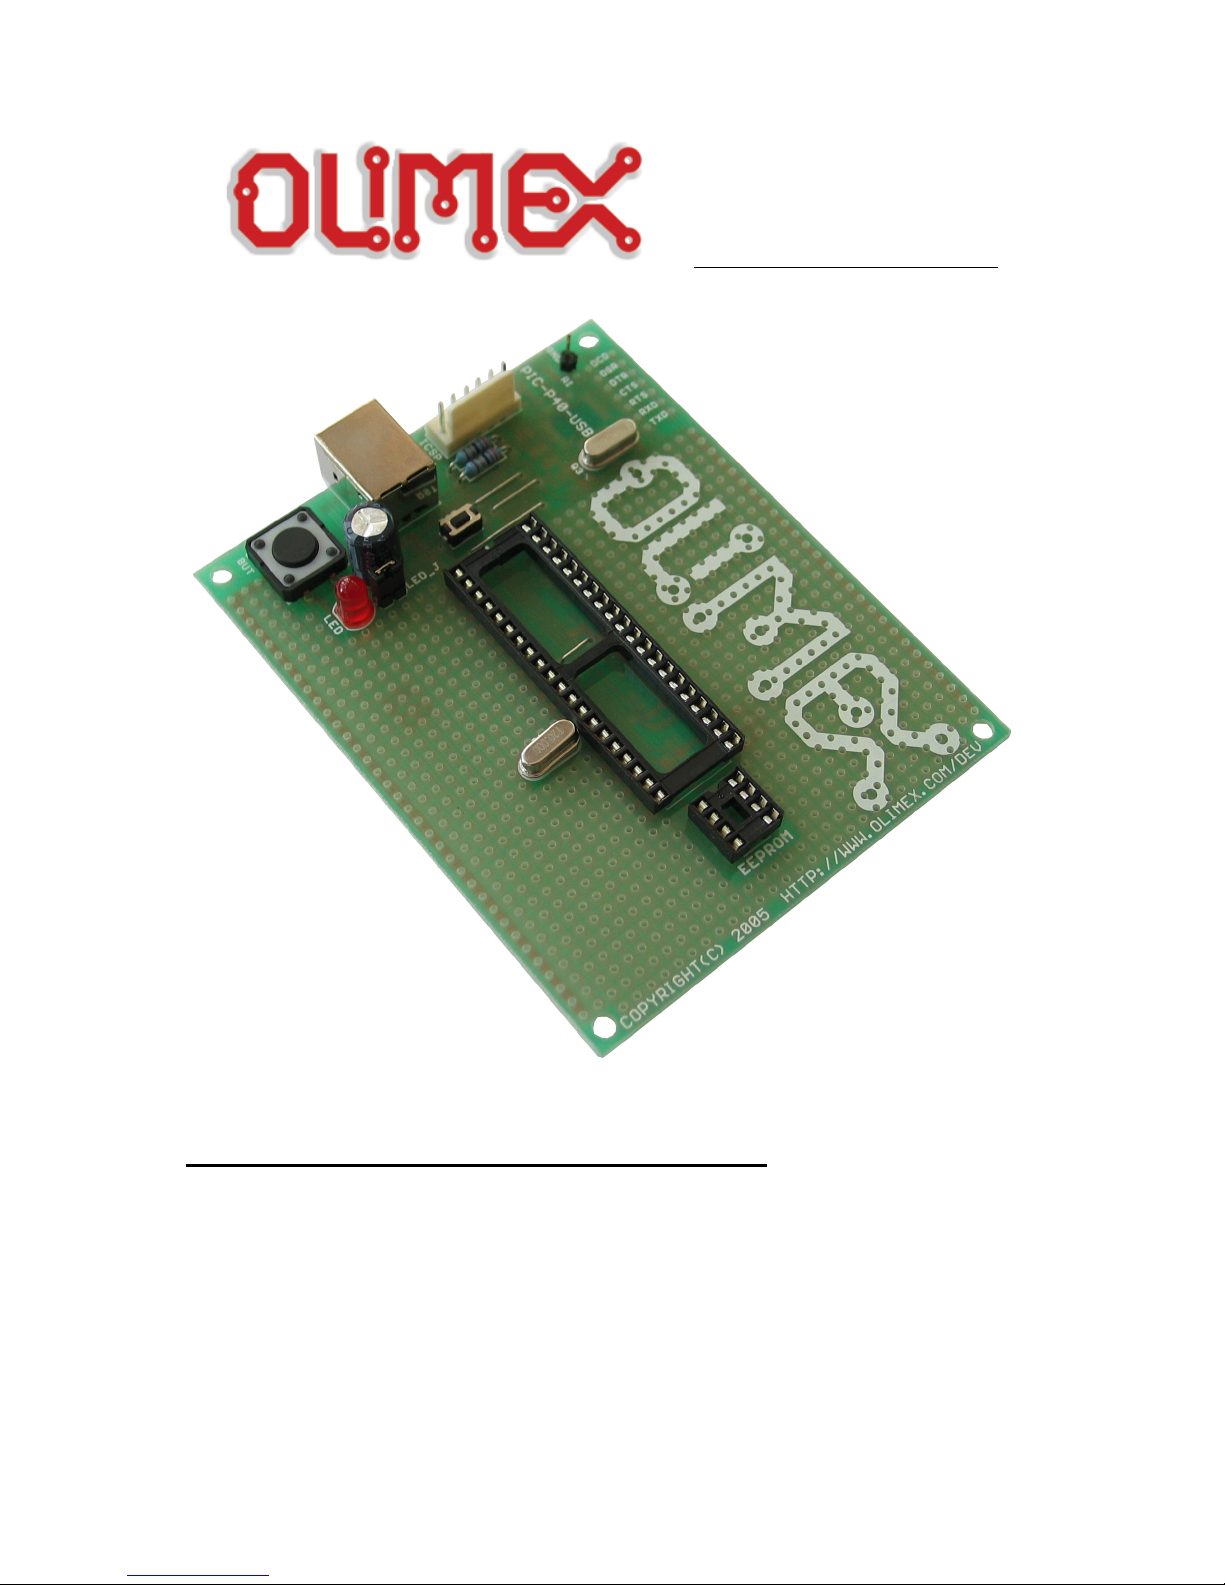
PIC-P40-USB have FT232 USB-to-RS232 converter IC on board.
The power is taken from the USB so no need for external power supply adapter. Note that
when you plug your USB cable there is process of USB enumeration and the power supply
to PIC is supplied only when USB host successfully enumerate your PIC-P40-USB so power
to PIC come with 1-2 seconds delay
The on-board ICSP connector allow you to program the PIC on the board without pulling it
of the socket, by ICSP programmer like PIC-MCP, PIC-MCP-USB, PIC-PG1, PIC-PG2,
PIC-PG3, PIC-PG4 or to program and debug it with PIC-ICD2, PIC-ICD2-POCKET or PICICD2-TINY. IMPORTANT: all programmers provide power supply through ICSP
connector during the programming PIC-P40-USB should not be connected to USB. Of
course PIC-ICD2 have option to not power the target circuit and this option should be used
when you debug your application while connected to USB.
The oscillator circuit is made with 20 Mhz crystal oscillator, so you can run your PIC at
maximum performance.
Page 3

The RESET circuit is made with simple RC circuit. Note that RESET button should not be
pressed while you program or debug the PIC!
PIC-P40-USB have user button for user input connected to PIC microcontroller’s RE2 port.
When RE2 port is initialized as INPUT you will read “0” when the button is pressed and “1”
when it is depressed.
Status LED is connected via jumper to PIC microcontroller’s RE1 port. When your RE1 port
is initialized as OUTPUT and set to “0” LED will go ON, when RE1 port is set to “1” LED
will go OFF.
PIC-P40-USB have handy GND pin for connection to oscilloscope.
All modem signals from FT232 are provided and could be used.
PIC-P40-USB have socket for I2C EEPROM which are connected to RC4-SDA and RC3SCL
On the schematic you will see PGM_SEL jumper, this is necessary because some PICs use
RB3 for ICSP-PGM signal others RB5, this is done by smd jumper on the back side of the
board which is soldered in position RB3 by default (PIC18F877 which is used for the demo
code), if your PIC use RB5 you should connect this jumper properly.
Page 4

FEATURES:
Note that:
1) There is a GND line at the bottom row of pins of the board (under button
BUT).
2) There is a +5V line at the bottom row of pins of the board (above the quartz
crystal)
ICSP/ICD connector for programming and debugging
FT232 USB-to-RS232 converter
DIL40 microcontroller socket
DIL8 EEPROM socket
Quartz crystal 20Mhz
LED to RE1 through jumper
user Button to RE2
Reset button and circuit
USB type B connector
Extension slot on every uC pin
Gird 100 mils
GND bus
Vcc bus
Four mounting holes 3,3 mm (0,13")
FR-4, 1.5 mm (0,062"), green soldermask, white silkscreen component print
Dimensions 100x80 mm (3,9x3,15")
Page 5

HARDWARE:
Page 6

SOFTWARE:
The software might be downloaded from the device's web page.
DEMO1: PIC16F877-I/P BLINK LED
This is demo code which blinks the LED on PIC-P40-USB board.
Note:LED jumper should be closed!
DEMO2: PIC16F877-I/P BUTTON read
This is demo code which show how to read BUTTON status and to switch the LED ON
when button is pressed and LED off when the button is depressed.
DEMO3: PIC16F877-I/P RS232 send / receive routines
This is demo code, which show how to use the USART to send and receive characters from
host PC via USB cable.
You must program the HEX code to PIC16F877 and run the code.
If you programmed the PIC correctly when you plug USB cable on your computer will
appear “virtual” COM port. When you open Hyperterminal on your host PC computer with
9600 bps, 8 data bit, 1 stop bit, No flow control the PIC-P40-USB every character you type
on the hyperterminal will be printed back with “*” i.e. if you type “abc” you will receive
“a*b*c*”.
DEMO4: PIC16F877-I/P EEPROM read / write routines
This is demo code, which show how to use the EEPROM to read and write data. Note: you
must put 24LC16 EEPROM in the DIL8 socket.
Page 7

ORDER CODE:
PIC-P40-USB – assembled and tested (no kit, no soldering required)
PIC-P40-USB/PCB – blank PCBs only
How to order?
You can order to us directly or by any of our distributors.
Check our web https://www.olimex.com for more info.
Revision history:
REV.A – June 2007
REV.B – July 2013 – added new schematic and updated the manual with current links and more
information
Page 8

Disclaimer:
© 2007 Olimex Ltd. All rights reserved. Olimex®, logo and combinations thereof, are registered trademarks of
Olimex Ltd. Other terms and product names may be trademarks of others.
The information in this document is provided in connection with Olimex products. No license, express or implied
or otherwise, to any intellectual property right is granted by this document or in connection with the sale of Olimex
products.
Neither the whole nor any part of the information contained in or the product described in this document may be
adapted or reproduced in any material from except with the prior written permission of the copyright holder.
The product described in this document is subject to continuous development and improvements. All particulars of
the product and its use contained in this document are given by OLIMEX in good faith. However all warranties
implied or expressed including but not limited to implied warranties of merchantability or fitness for purpose are
excluded.
This document is intended only to assist the reader in the use of the product. OLIMEX Ltd. shall not be liable for
any loss or damage arising from the use of any information in this document or any error or omission in such
information or any incorrect use of the product.
Page 9

Mouser Electronics
Authorized Distributor
Click to View Pricing, Inventory, Delivery & Lifecycle Information:
Olimex Ltd.:
PIC-P40-USB
 Loading...