

OLG PLANTATION, Round Tables 600D, Round Tables 900D, Round Tables 1050D, Round Tables 1200D Assembly Instructions Manual
...
PLANTATION
Assembly Instructions
Plantation Assembly Instructions
1
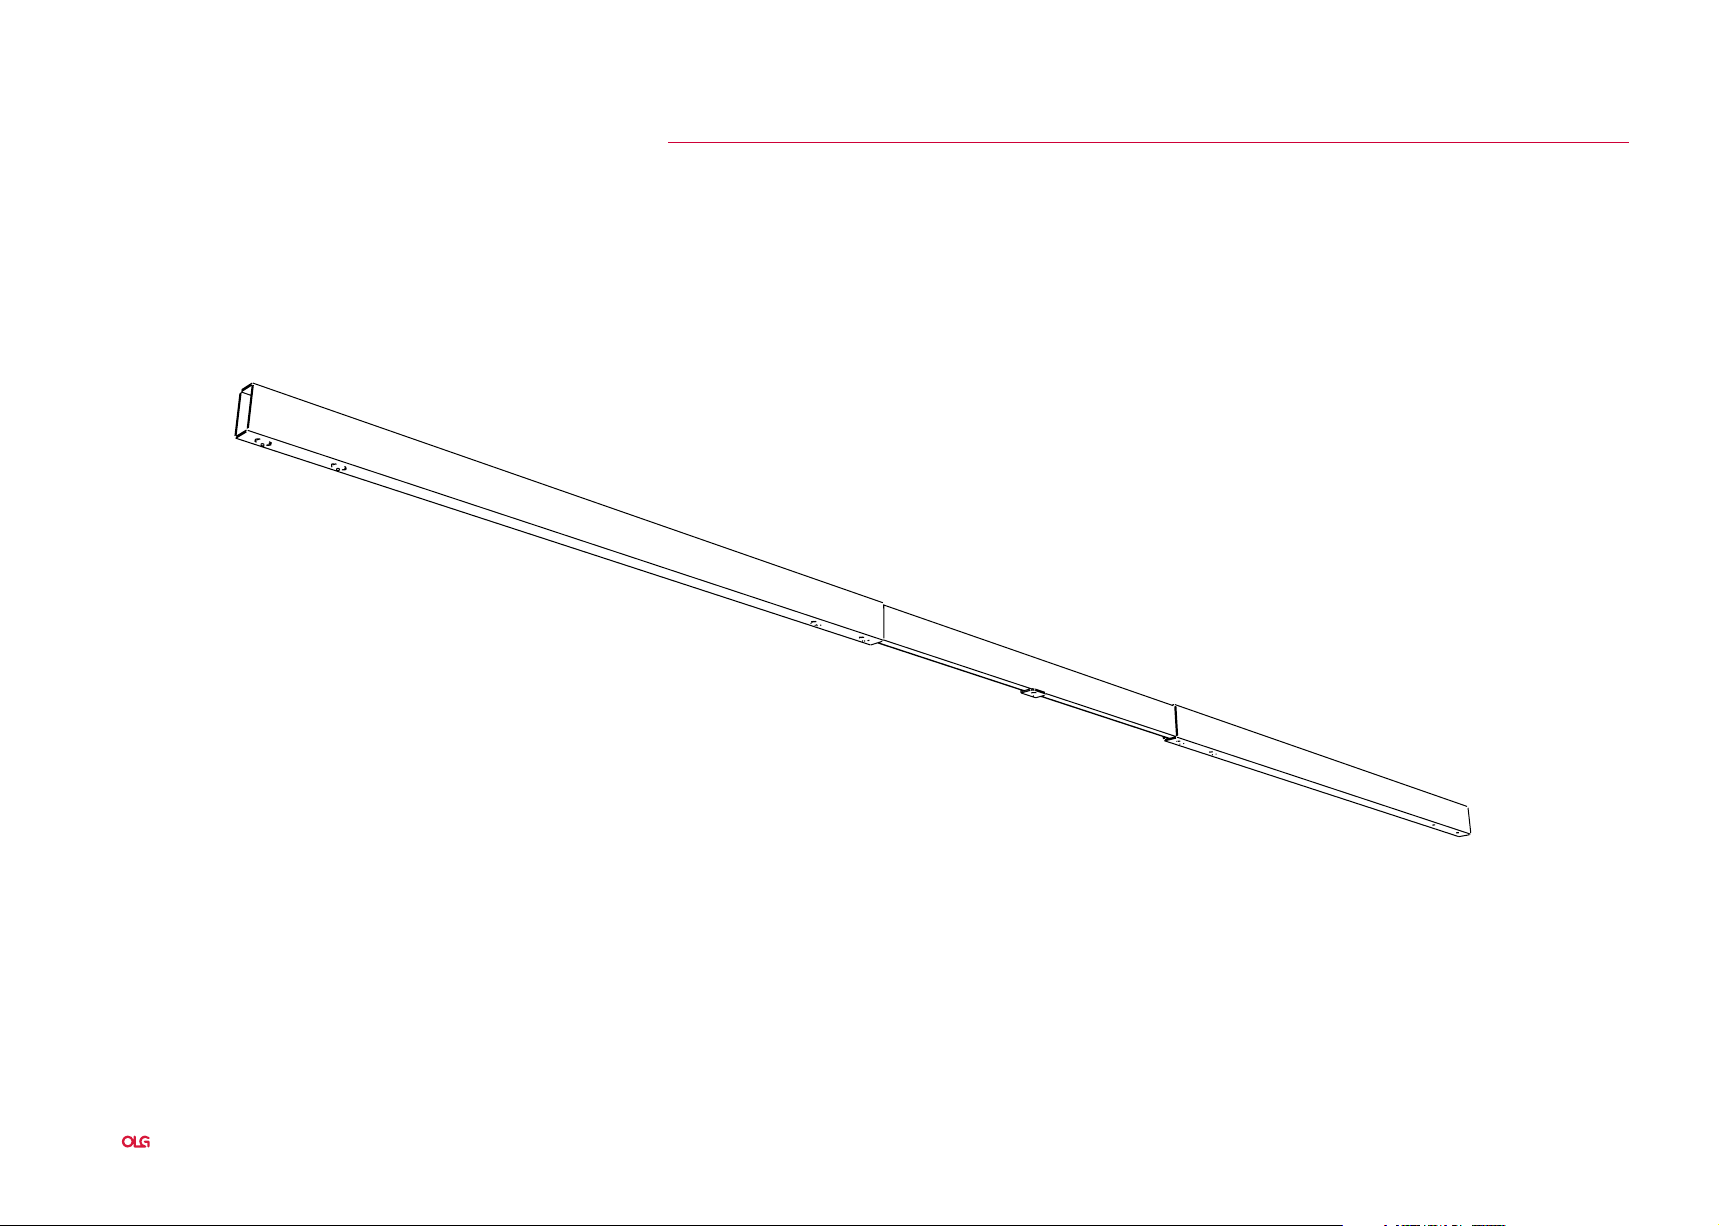
Plantation
Extendable Rails
2
Plantation Assembly Instructions
Plantation
Extendable Rails
1/2
1/2
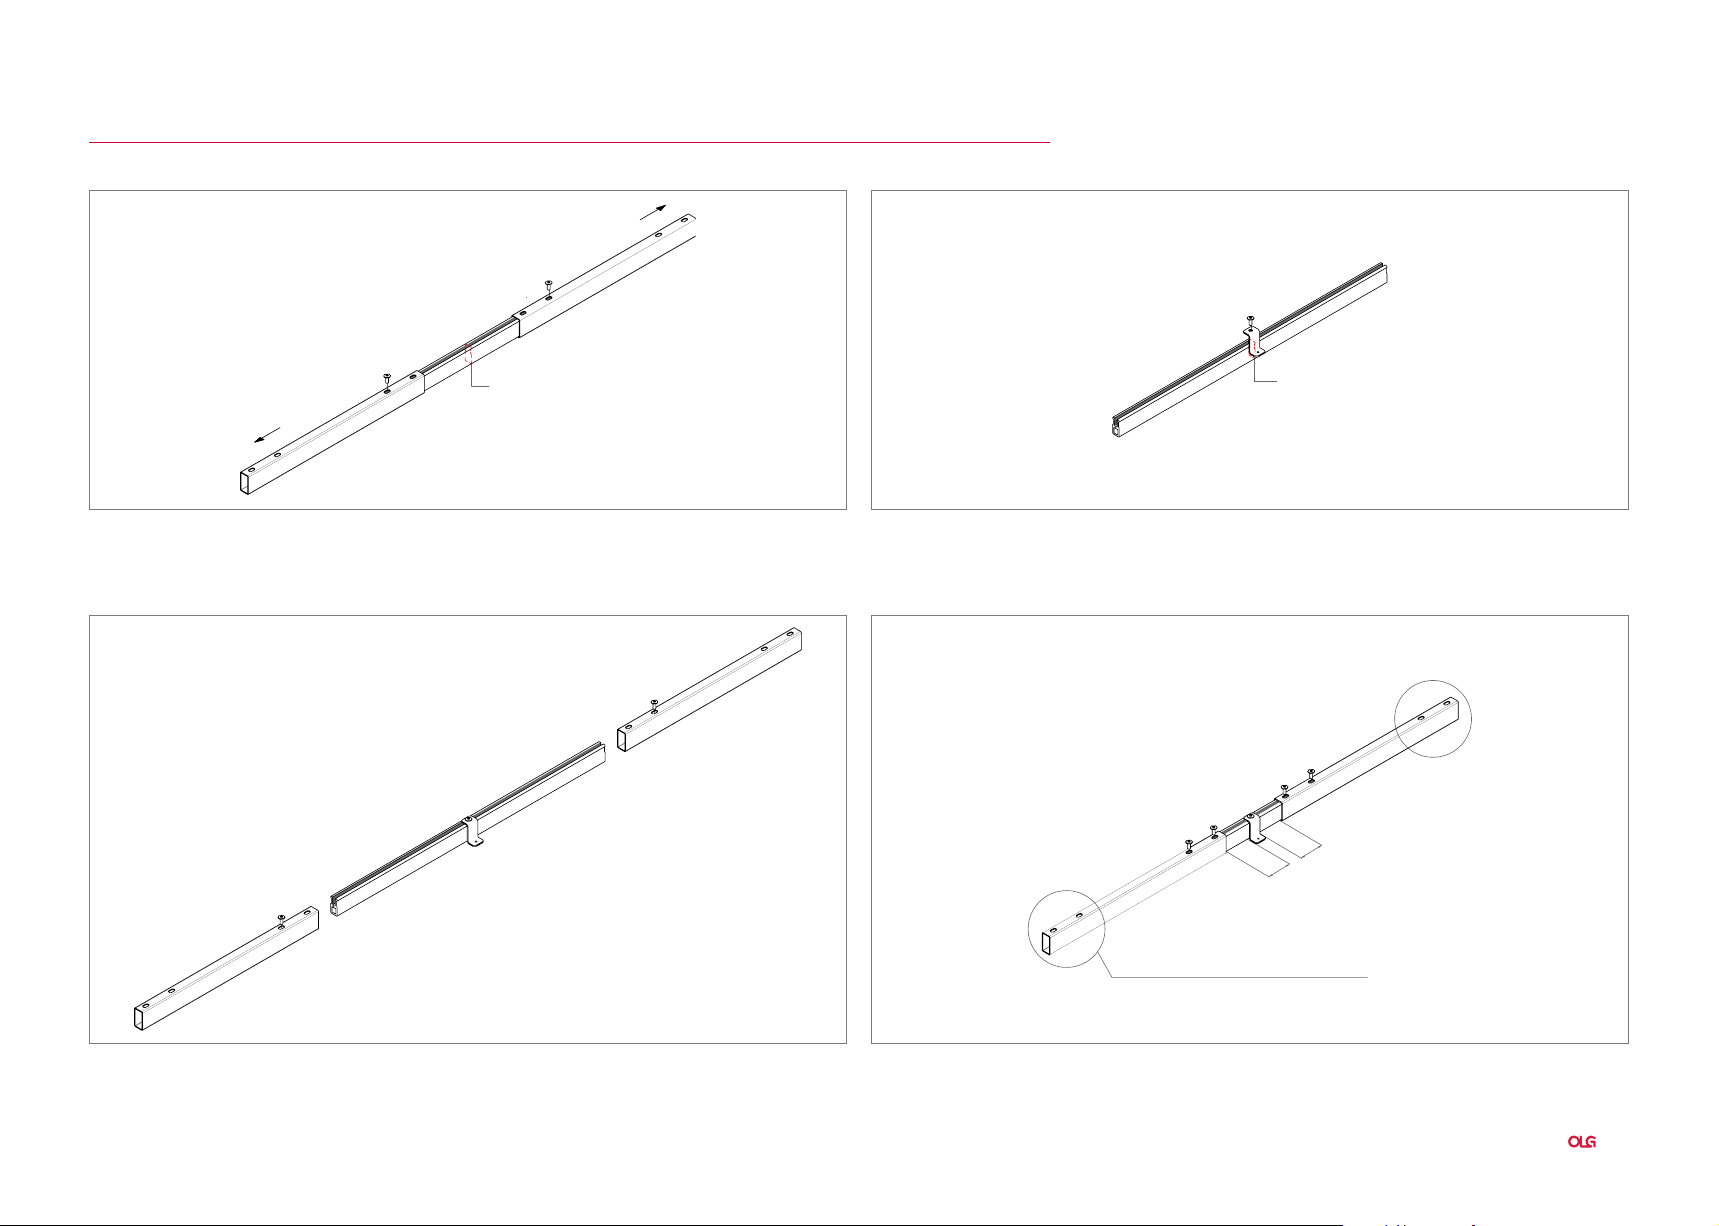
STEP 1: Unscrew end rails and remove. STEP 2: Find the middle point of the center rail and screw the bracket.
Screw to the structure spigots.
STEP 3: Use the center as reference to position both ends back into the center rail
symmetrically.
STEP 4: Screw the end rails to the center rail once achieved the desired length.
Plantation Assembly Instructions
3

Plantation
Assembly Instructions - Round Tables 600D
4
Plantation Assembly Instructions
Plantation
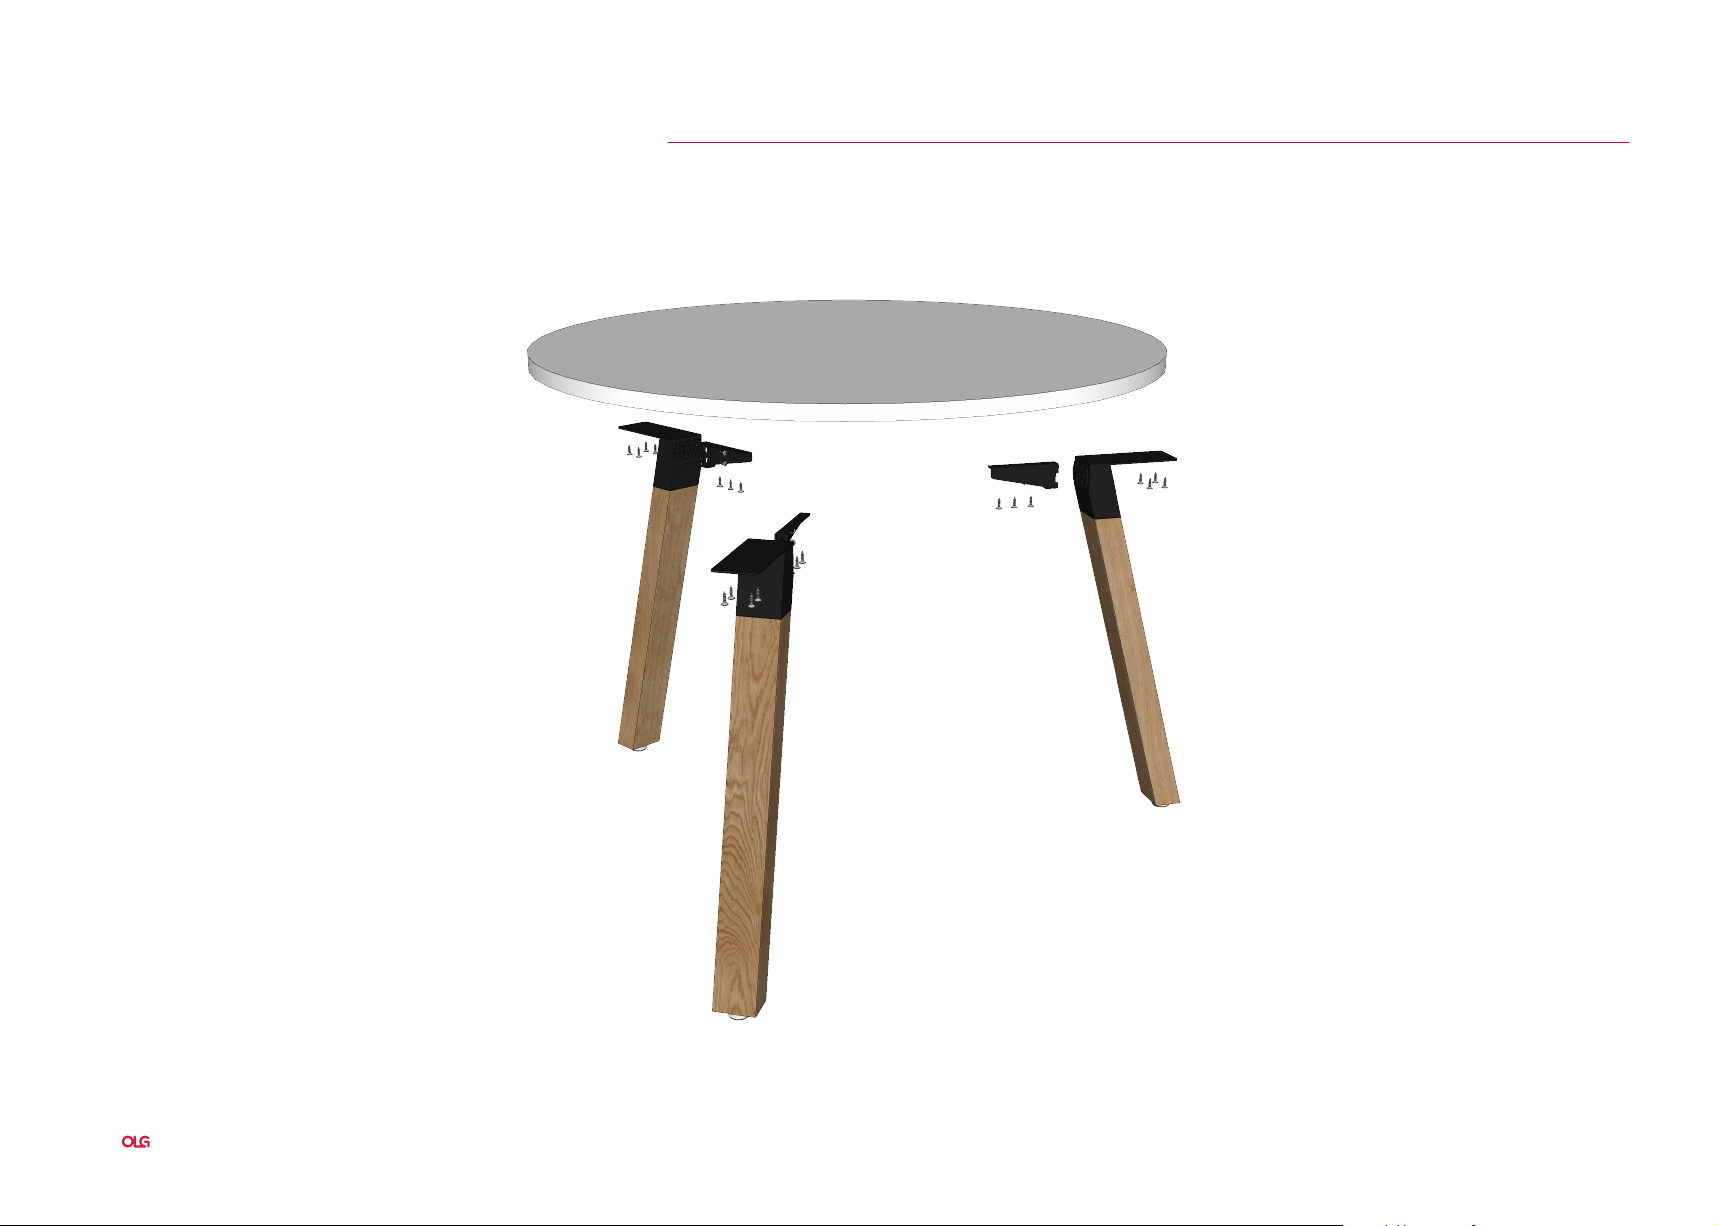
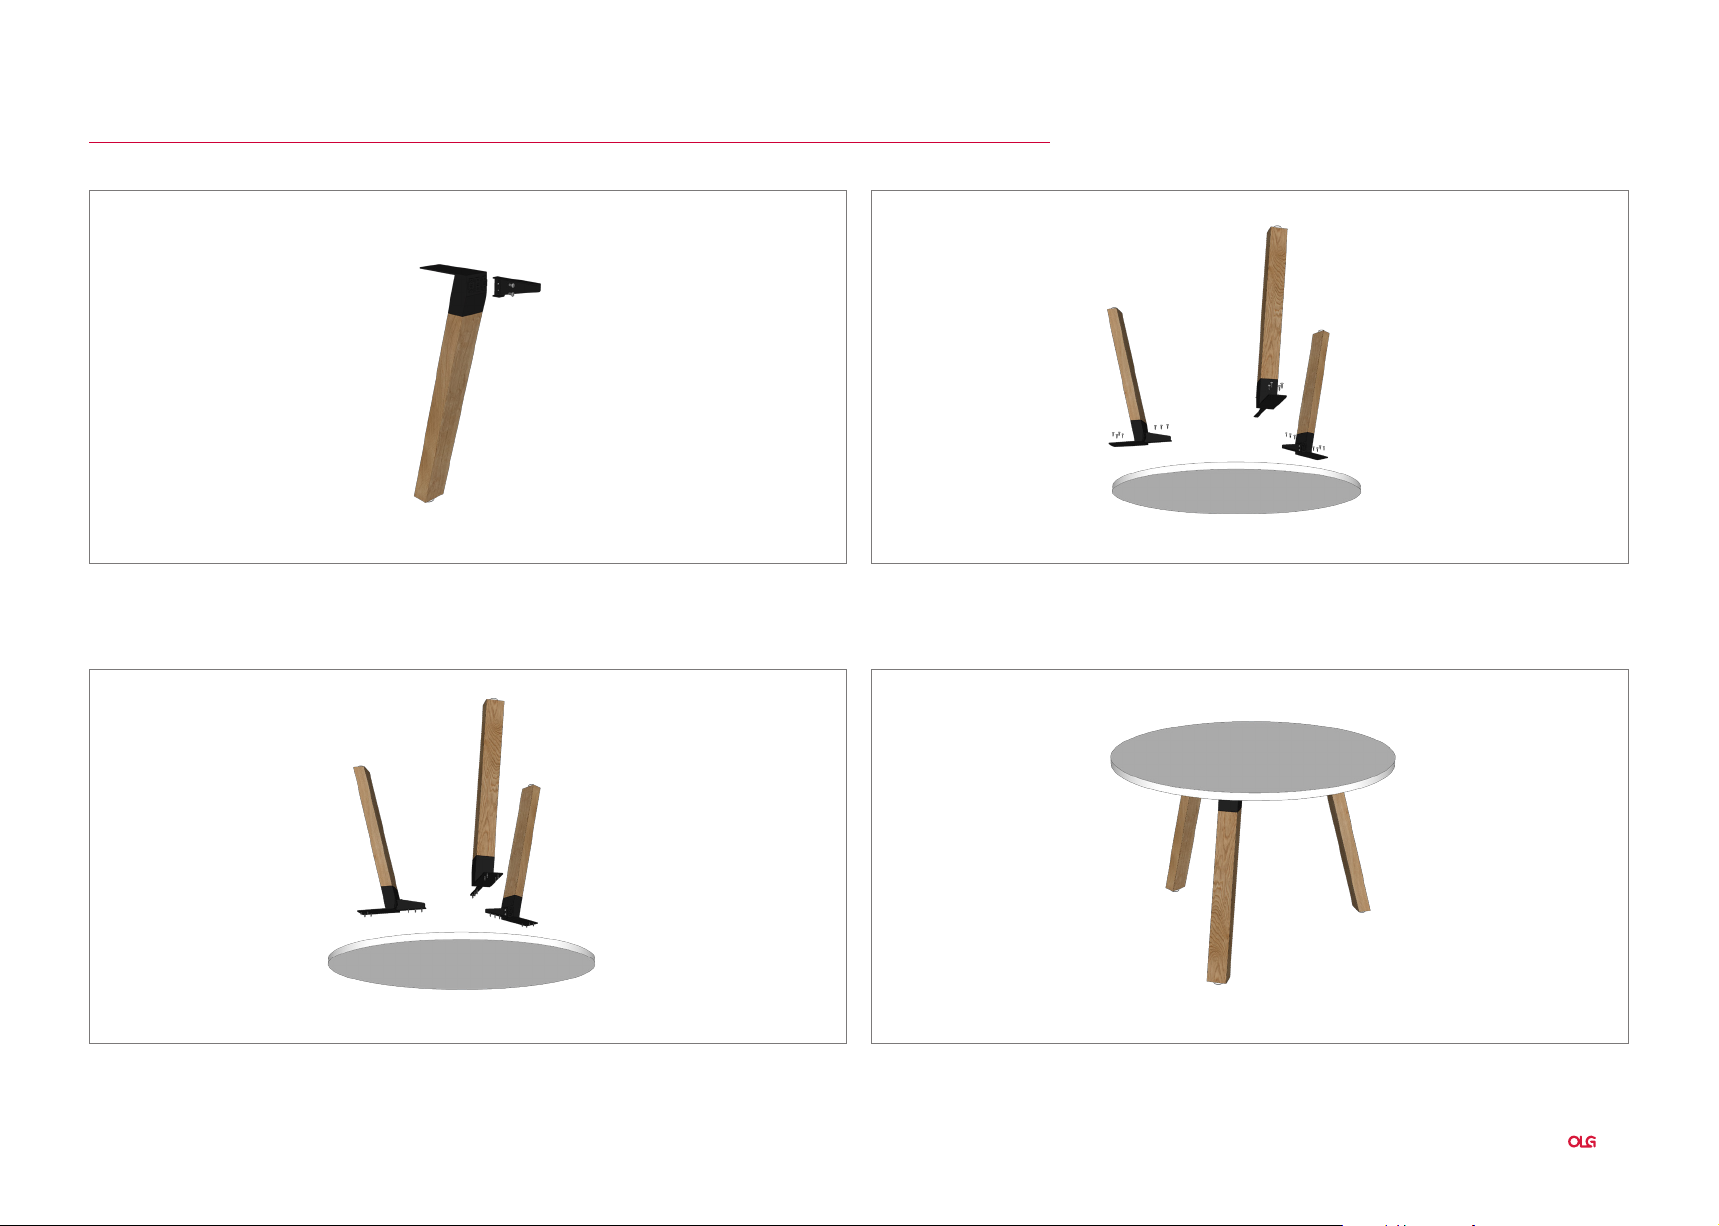
Assembly Instructions - Round Tables 600D
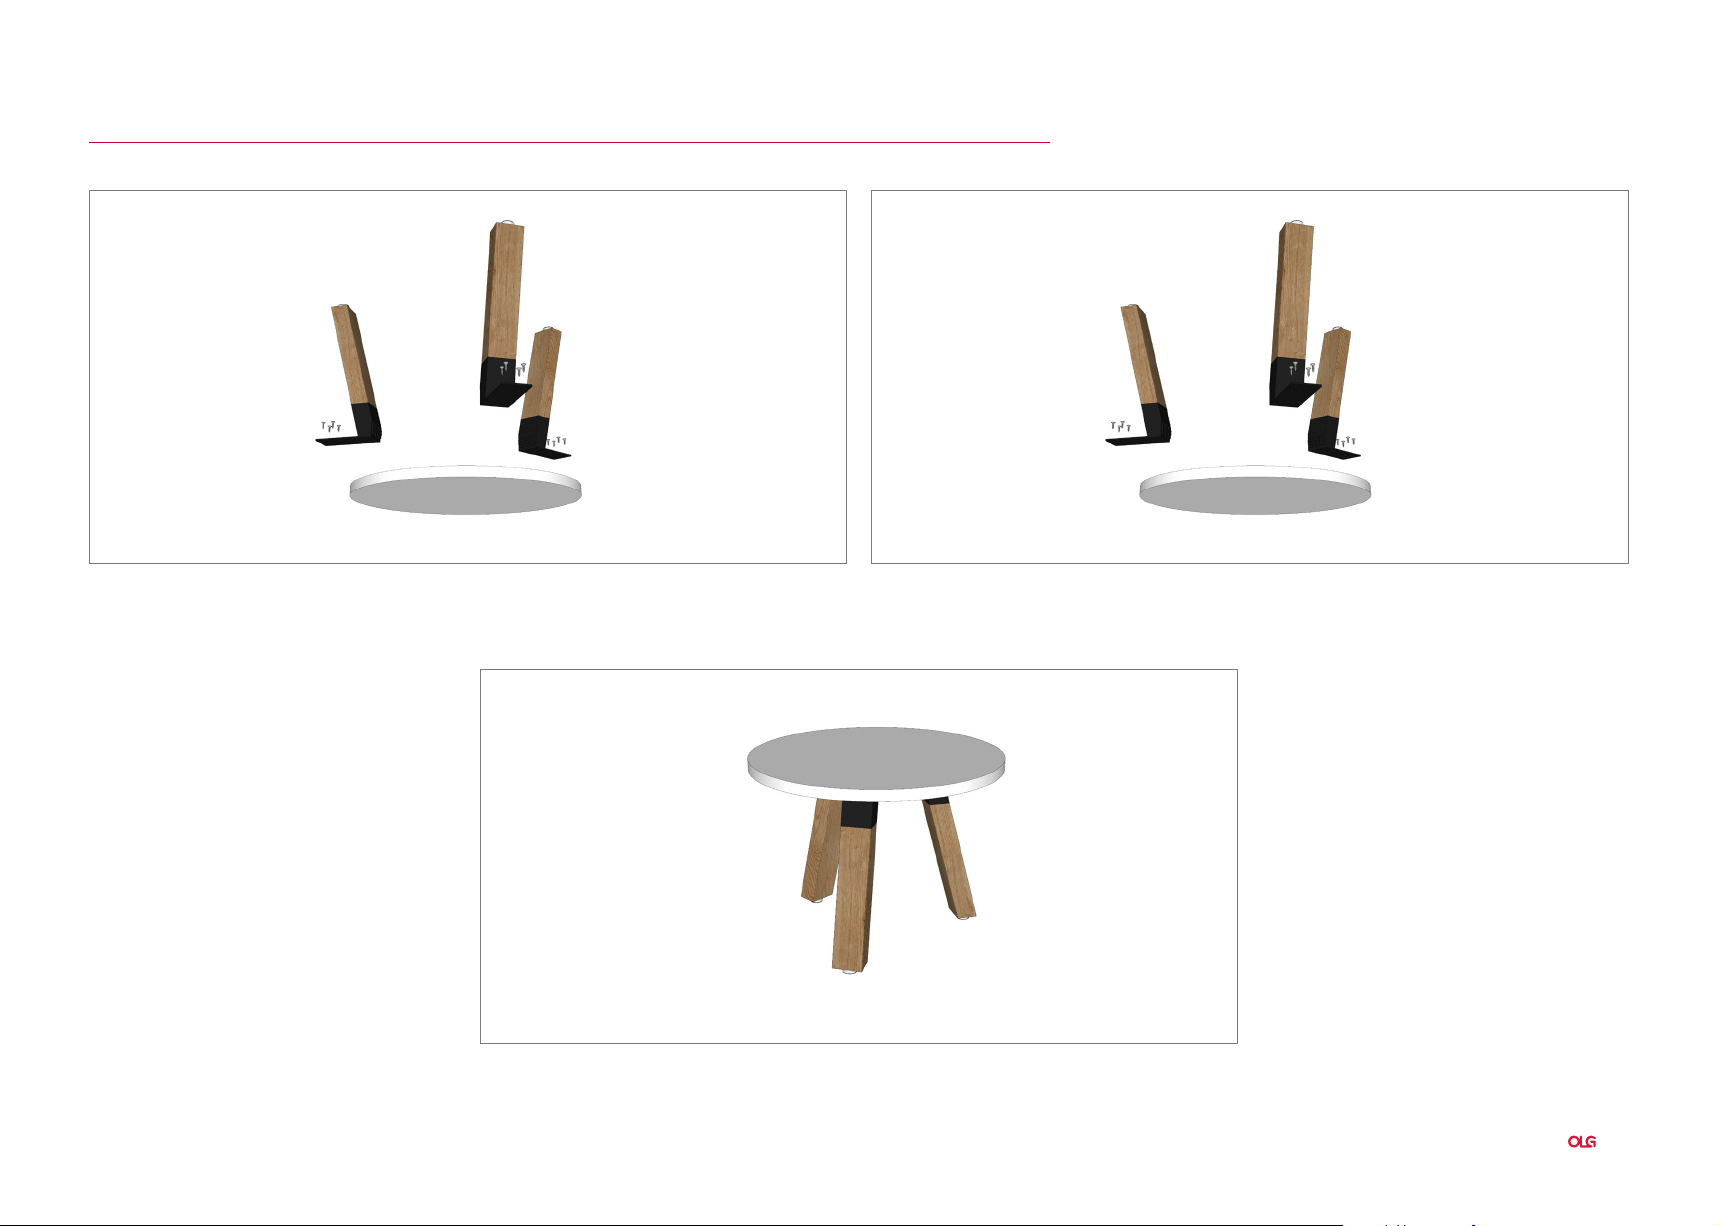
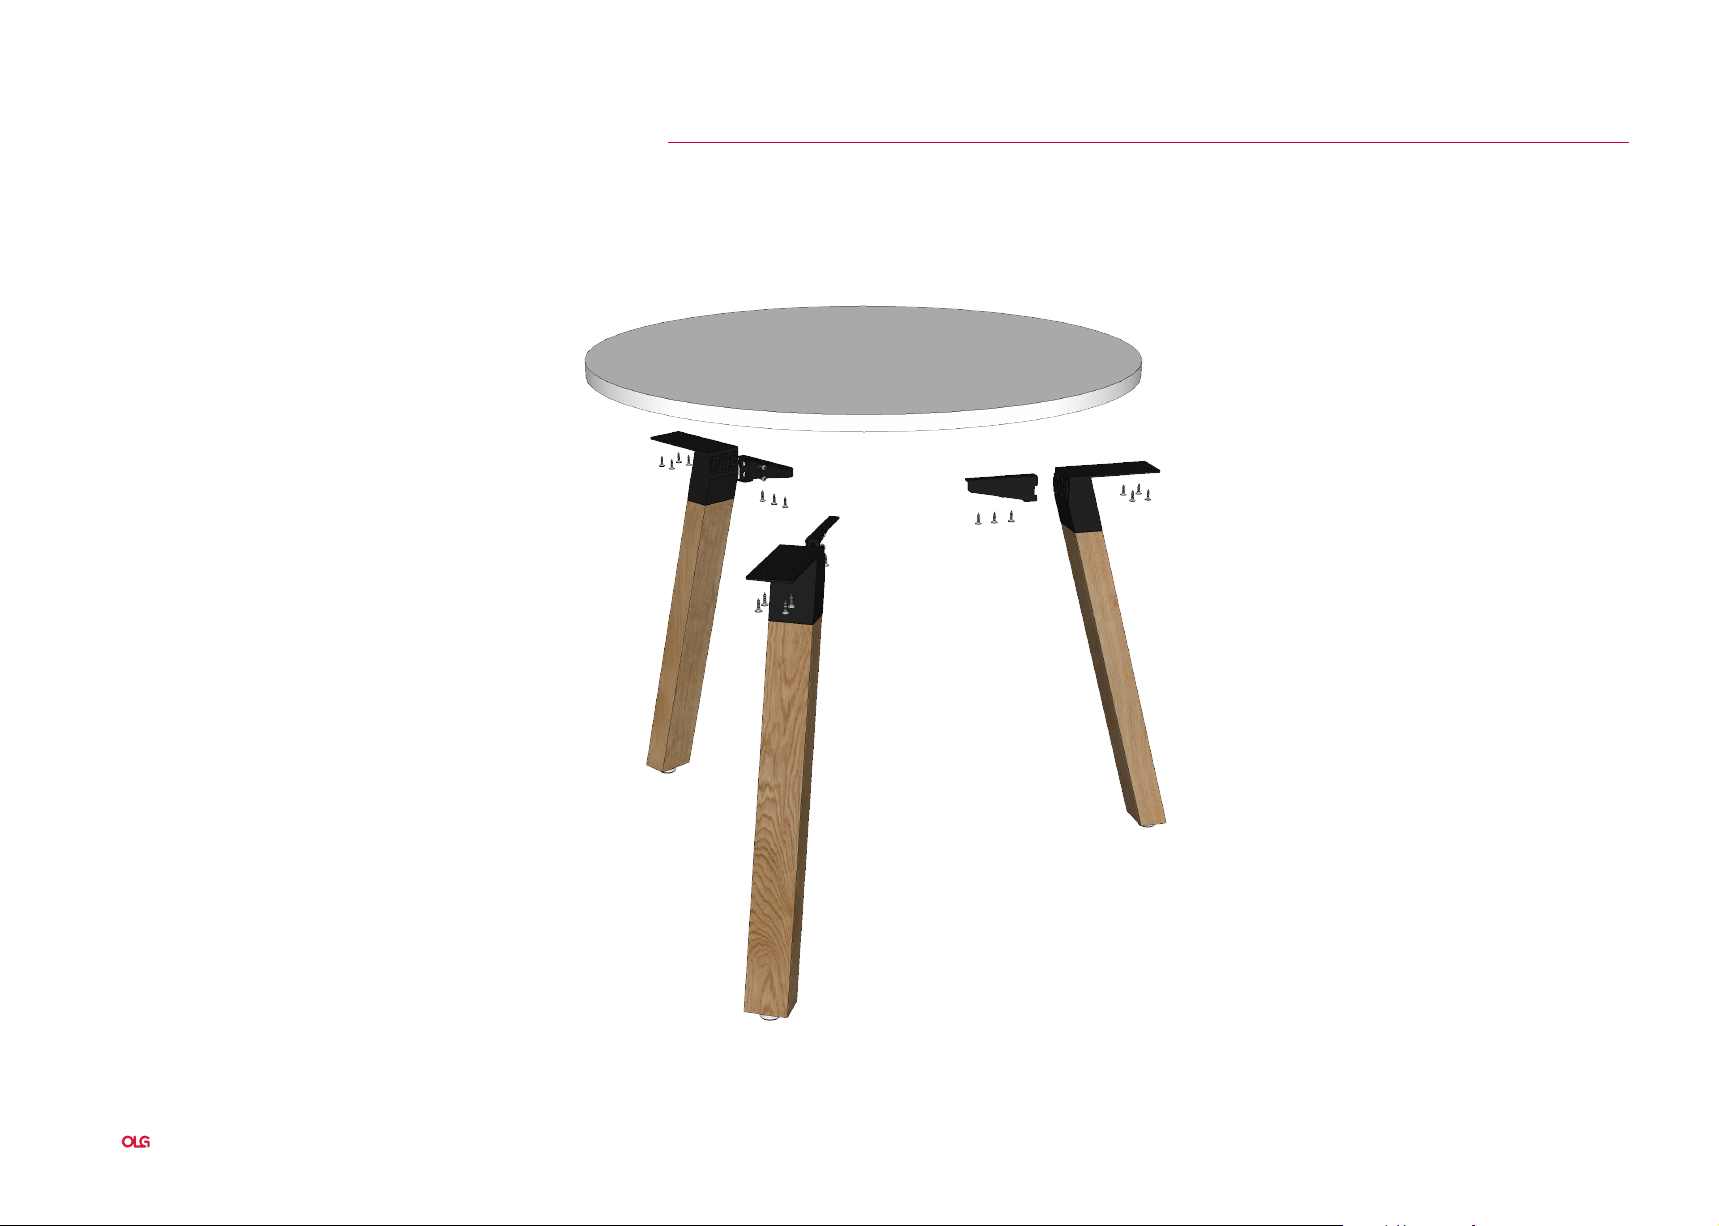
STEP 1: Align the legs at even spacing on the worktop, with the top plate being no
closer than 5 mm from the edge of worktop. Mark each leg location for easy
fixing in step 2.
STEP 3: Turn the table over.
STEP 2: Fix the leg to the worktop using 4 x 23 mm self-tapping screws per leg.
Plantation Assembly Instructions
5
Plantation
Assembly Instructions - Round Tables 900D
6
Plantation Assembly Instructions

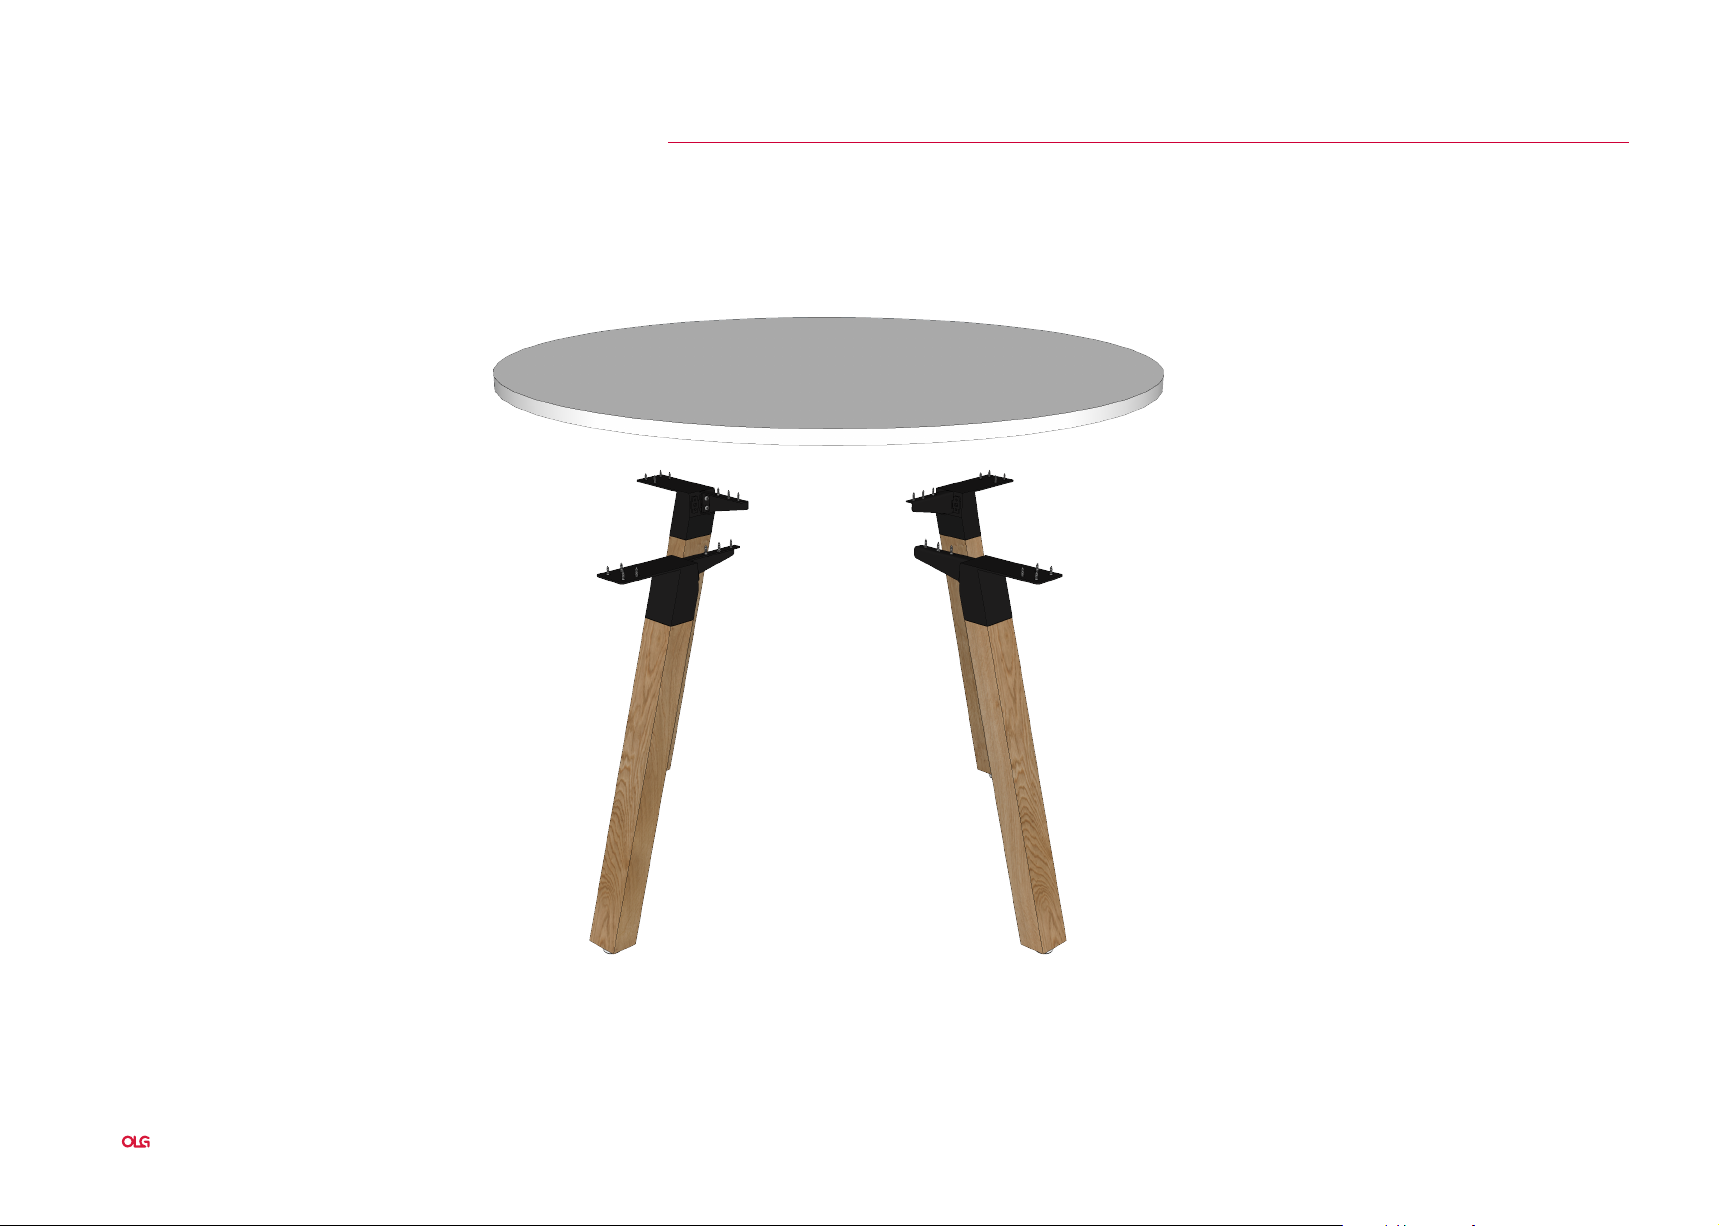
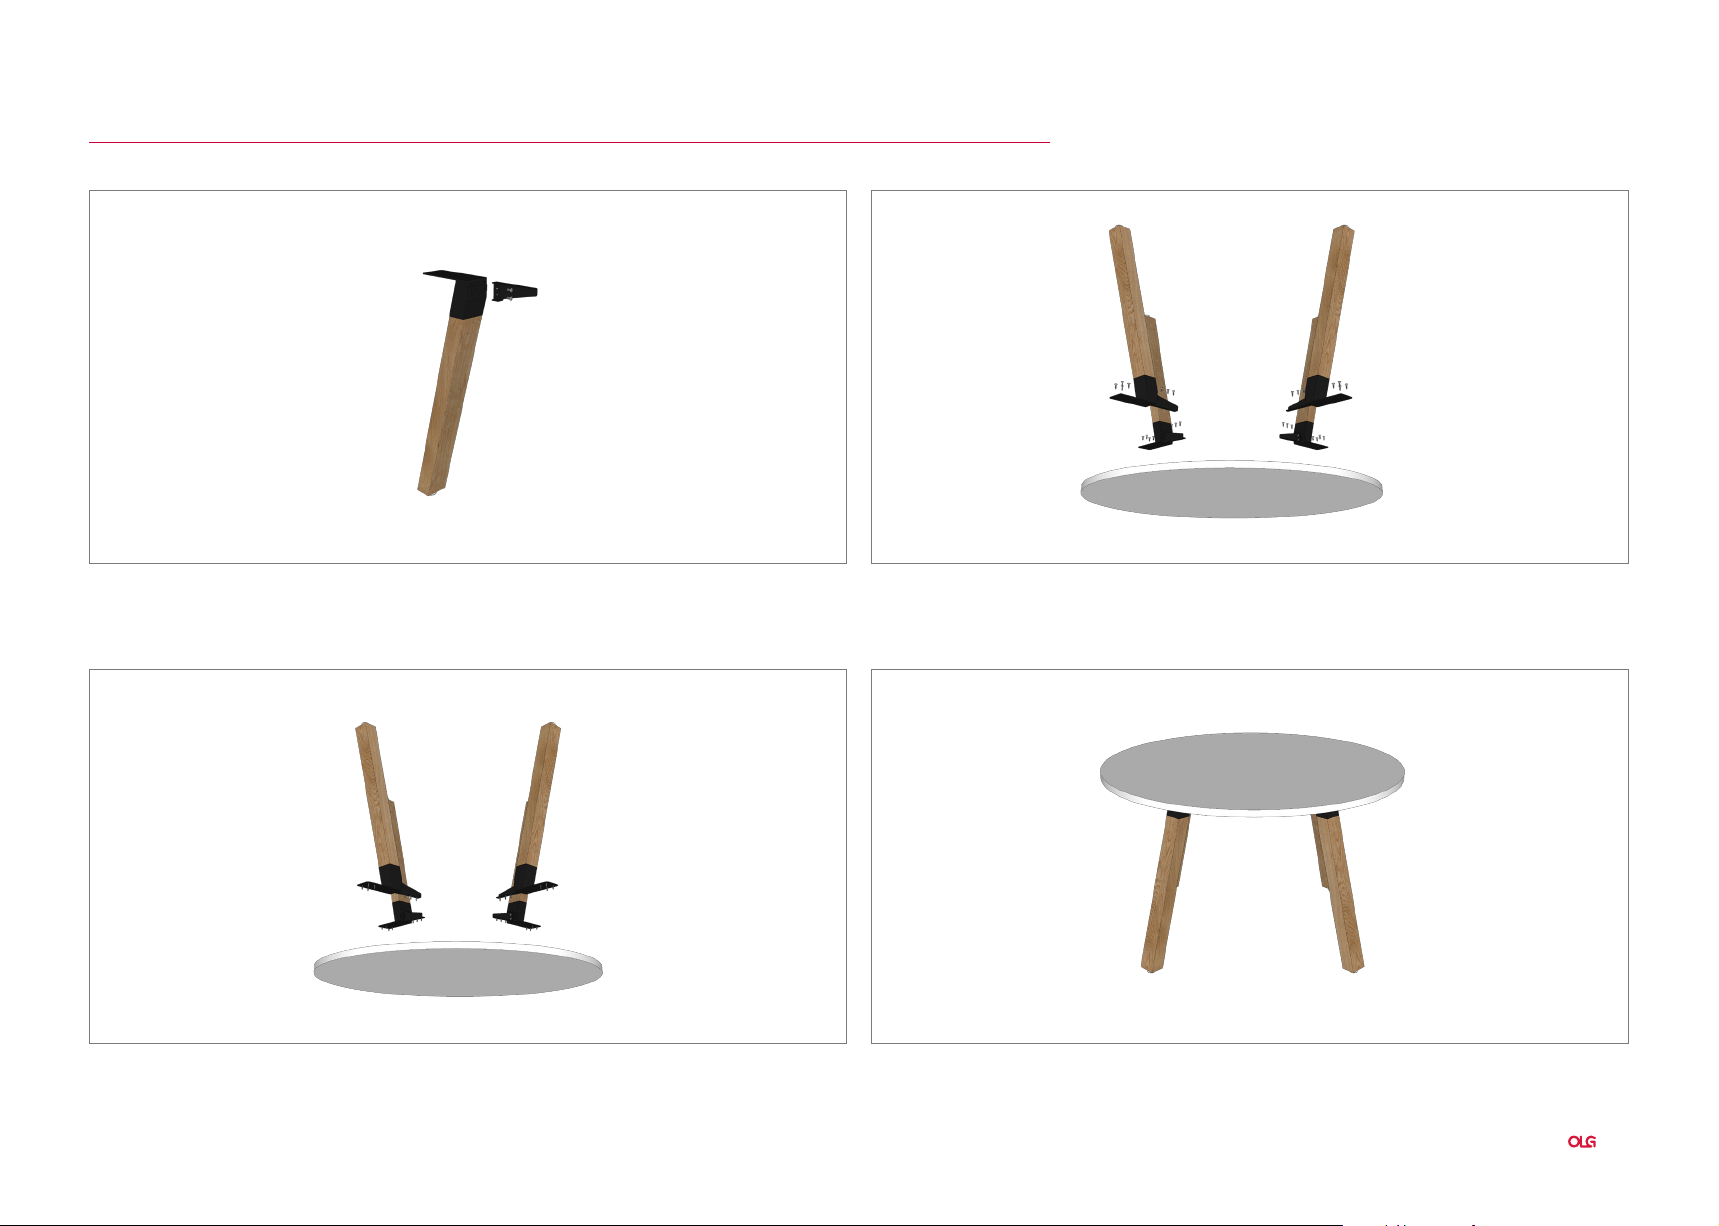
Plantation
Assembly Instructions - Round Tables 900D
STEP 1: Fix 1x angle brack to each leg using 2 x M12 bolts. STEP 2: Align the legs at even spacing on the worktop, with the top plate being no
closer than 5 mm from the edge of worktop. Mark each leg location for easy
fixing in step 3.
STEP 3: Fix the leg to the worktop using 4 x 23 mm self-tapping screws per leg.
STEP 4: Turn the table over.
Plantation Assembly Instructions
7
Plantation
Assembly Instructions - Round Tables 1050D
8
Plantation Assembly Instructions
Plantation
Assembly Instructions - Round Tables 1050D
STEP 1: Fix 1x angle brack to each leg using 2 x M12 bolts. STEP 2: Align the legs at even spacing on the worktop, with the top plate being no
closer than 5 mm from the edge of worktop. Mark each leg location for easy
fixing in step 3.
STEP 3: Fix the leg to the worktop using 4 x 23 mm self-tapping screws per leg.
STEP 4: Turn the table over.
Plantation Assembly Instructions
9
Plantation
Assembly Instructions - Round Tables 1200D
10
Plantation Assembly Instructions
Plantation
Assembly Instructions - Round Tables 1200D
STEP 1: Fix 1x angle brack to each leg using 2 x M12 bolts. STEP 2: Align the legs at even spacing on the worktop, with the top plate being no
closer than 5 mm from the edge of worktop. Mark each leg location for easy
fixing in step 3.
STEP 3: Fix the leg to the worktop using 4 x 23 mm self-tapping screws per leg.
STEP 4: Turn the table over.
Plantation Assembly Instructions
11
 Loading...